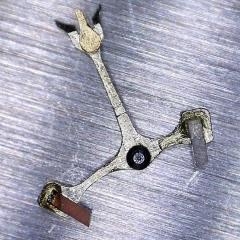
Jump to content

Recommended Posts

Posted

Not sure if anyone has had difficulty working on bent hairsprings but I thought I should share my idea...

My problem is with the Bergeon 30105 tool - I've found that the hole for the collet (3.5 or 4.5mm) is too large and that it doesn't allow the hairspring to lay flat on the glass with the stud attached. Plus, it's way too expensive for what it is (I'm a big fan of their tools normally)!

I've drilled a few hole in an old petri dish and I think I'm close to making a tool that is better suited to wristwatches, the balance in the photo is from a Landeron 48.

The holes are a bit rough on the underside of the glass but it doesn't affect the hairspring which lies flat on the surface.

IMG_0192.JPG

IMG_0195.JPG

IMG_0196.JPG

  • Thanks 2
Posted

Brilliant. Off to kitchen to find something to copy your idea.

I am not sure if anyone hasn't had difficulty working on a hairspring he bent.馃


  • Thanks 1
Posted

Forgot to mention that with the extra hole for the stud, you can work on the spring from either side.

I used a 1mm diamond core drill bit (Eternal Tools) for the initial hole and then a Dremel 7134 diamond bit to widen the holes.

Both bits are about 拢7 so still a lot cheaper than the Bergeon tool.

Posted
  On 6/12/2021 at 4:40 PM, watchweasol said:

Good idea, the same could be done using clear. plexiglas or thick polycarbonate, easier to drill than glass.

Expand  

Won't there be some 'give' even with hard plastics? The glass is surprisingly easy to drill through. It just needed water to cool it down. I just used a Dremel with a not very sturdy pillar drill attachment.

Posted

Hi It all depends on the the thickness of the polycarb/plexiglass, I have used some 1/4"thick no flex at all over a 2" square.  Glass is always the best option because of its clarity its just another option

  • Thanks 1
Posted

Intrigued...but I have only tried to bend one hairspring and it was just a slight adjustment. 

So the idea behind the bergeon and your tool is simply to have a hole for the stud so that the hairspring can lie flat?  Why does it need to be clear?  Why is flexing an issue because I cannot imagine any pressure on the plate since you are tweaking a hairspring with the finest amount of force. 

Anxious to understand this!

Posted

Hi My understanding is this, clarity of the base over a white card enhances the definition of the spring, flexation I would have thought was not a problem on a solid base. I have done this with just a thick white card but the idea of the drilled dish is sound as its weight wiill make it stable and not prone to moving as you work.

  • Like 1
Posted
  On 6/12/2021 at 8:07 PM, LittleWatchShop said:

Intrigued...but I have only tried to bend one hairspring and it was just a slight adjustment. 

So the idea behind the bergeon and your tool is simply to have a hole for the stud so that the hairspring can lie flat?  Why does it need to be clear?  Why is flexing an issue because I cannot imagine any pressure on the plate since you are tweaking a hairspring with the finest amount of force. 

Anxious to understand this!

Expand  

Getting the hairspring round is tricky but keeping it flat at the same time is even more of a pain. 

My problem with the Bergeon tool is that the hole is way too large for a wristwatch collet so the hairspring just droops at it's centre. Also, with no hollow for the stud, the spring itself isn't lying properly flat. With the extra hole for the stud, the spring can now be adjusted from either side. 

I think the glass is for clarity and stability as watchweasel explains above... I have to use a microscope when trying to adjust a hairspring, the glass (or very clear plastic) gives an unhindered image of the hairspring. 

I have one shot of correcting a Valjoux 92 hairspring or having to adapt another balance and hairspring to fit... either way I need all the help I can get! 

I'm also trying to adapt some old tweezers to have right angled tips so I can properly see what I'm adjusting when using the microscope. 

Posted

These pictures might better show what I mean... I'm practicing on whatever spare hairspring I can find so I have to add more holes. This is a balance from a 12 ligne Oris.

IMG_0191.JPG

IMG_0193.JPG

  • Like 1
  • 4 weeks later...
Posted
  On 6/12/2021 at 8:07 PM, LittleWatchShop said:

Intrigued...but I have only tried to bend one hairspring and it was just a slight adjustment. 

So the idea behind the bergeon and your tool is simply to have a hole for the stud so that the hairspring can lie flat?  Why does it need to be clear?  Why is flexing an issue because I cannot imagine any pressure on the plate since you are tweaking a hairspring with the finest amount of force. 

Anxious to understand this!

Expand  

I think the reason is to reduce friction between the surface and the hairspring+tweezers? I worked on my first hairspring on a matt and the feedback sensation from my tweezers was not great as it rubs the surface. I imagine glass would feel so much better.

  • Like 1
Posted

The reason there is only one hole in the tool from the beginning is because when getting the hairspring in shape you work on it without the stud on it. Taking the stud away gives you greater control to work on the hairspring and gives you a better chance to get it really flat and nice.
The glass/plastic surface makes it easier to rotate it while working. Having a white paper underneath gives you a better contrast so you can see how the hairspring should be turned/bent. With the stud still in I think makes it harder to get a perfect shape on the hairspring.

If you are afraid of losing the stud when you take it away you always could invest in an assortment of them (to the right in the picture).


Hairspring.png

  • Like 2
Posted
  On 7/10/2021 at 6:19 PM, HSL said:

The reason there is only one hole in the tool from the beginning is because when getting the hairspring in shape you work on it without the stud on it.

Expand  

Still quite a large hole though, 3.5mm or 4.5mm for the Bergeon tool. Surprised they haven't made a smaller version.

Join the conversation

You can post now and register later. If you have an account, sign in now to post with your account.
Note: Your post will require moderator approval before it will be visible.

Guest
Reply to this topic...

  Pasted as rich text.   Restore formatting

  Only 75 emoji are allowed.

  Your link has been automatically embedded.   Display as a link instead

  Your previous content has been restored.   Clear editor

  You cannot paste images directly. Upload or insert images from URL.

  • Recently Browsing

    • No registered users viewing this page.
  • Topics

  • Posts

    • Thanks again for your help.  I have cleaned everything, apart from the mainsprings and barrels, and it's all nice and shiny.  I have cleaned the holes with dry peg wood sticks.  I haven't oiled anything yet.  I have temporarily reassembled the going train and am very pleased to say that for the past 2 hours it has been ticking nicely.  The replacement hourwheel which I referred to in my original post fits very loosely but nonetheless seems to engage and travel round perfectly well.  So now I need to reassemble the strike train.  Is there a set of diagrams which I can refer to for this?  The strike wheels have dots marked on them which must be designed to help but I don't know which one aligns with which.
    • I filed a Seiko regulator wrench out of a screwdriver.
    • It's a so-called split stem. I'm guessing the spring is for the screw-down crown operation. I don't think I've ever seen both features together before, but it looks complete. If I'm right, the crown will have an inner thread and the tube a matching external thread. Replace the seals if you want it to be watertight. If you can compress the spring far enough, slide the two parts of the stem together sideways. If that doesn't work, you should be able to push them back together end to end, the opposite of how you pulled them apart. 
    • I have purchased some lume to redo the hands. Luckily I have another watch with the incorrect hands lume that I can practice on first. The colour change is also matching the same colour so I can use these hands to validate the colour is correct before I remove the lume from the Omega hands. I purchased from Nocti Lumina after seeing Marshall use them on WWR and they were great. Not only did they help me pick the perfect colour but they also very kindly gave me some different coloured lume so I can tweak the colour I have if I need, but they are confident the standard colouris going to do the job.
    • Welcome to the forum Michael. I hope you have a large workspace, or this phase: will be over very quickly.
  • Create New...