Jump to content

Hello From Québec


SeikoWatch

Recommended Posts

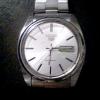
well, I'm from Québec and i'm addictted to the watches and clocks since about 5 years.. However I love Seiko brand and Bulova...I also collect old bicycles...I'm sure if I need a secret,  what ever, i'll find what I need here.. :thumbsu: You'll see that is missing an insert :(

post-93-0-37359300-1392592117_thumb.jpg

Link to comment
Share on other sites

Thank you Ianmedium for your nice comment   yes I live in Québec and i'm a newbie. However, I already repaired some watches and 3 clocks at this day... as you will see. the English is not my main language but I speak french and I don't use a translator....

What I have: 2 Seikos from 1974 and the other  ( my avatar ) is 80 but i'm not sure..., 2 Bulova from the 50'S... I have a LIP quartz, ...many others :)..

Link to comment
Share on other sites

Hello & welcome to the forum. If you want to date your Seiko go here http://www.csce.uark.edu/~jgauch/photos/seiko/ it woks well. Seiko movement parts & crystals are quite easy to find, case parts less so. As for the dials, unless its a diver, chrono or bellmatic spares are very rare.

  • Like 1
Link to comment
Share on other sites

Black lab: when I use the link that you gave me, I can date my Watch Under different year with the numbers i have on the back of my Seiko. If I click ' decade ' .. one says ' 1988 ' , 1978 , 1968  I don't understand...


My Seiko is :

Seiko 5


8D7545


7009-821A


This is the information from my automatic Seiko

Since the early 1960's Seiko have used a date system within their serial number.


The first digit is the year made


The second digit is the month made

1 - Jan

2 - Feb

3 - Mar

4 - Apr

5 - May

6 - Jun

7 - Jul

8 - Aug

9 - Sep

O - Oct

N - Nov

D - Dec


The remaining digits are the serial number


The only thing you have to know is what decade the watch was made. The 7009A movement was one the most numerous, unfortunately the date calculator is not that good on this movement. From the information I can find I believe it was introduced in 1980 and was superseded by the 7S26 in the late 1980's, early 1990’s.


Movement:7009 Case:821A Serial No:8D7545

Year made 1988.

Month made December.

  • Like 1
Link to comment
Share on other sites

Join the conversation

You can post now and register later. If you have an account, sign in now to post with your account.
Note: Your post will require moderator approval before it will be visible.

Guest
Reply to this topic...

×   Pasted as rich text.   Restore formatting

  Only 75 emoji are allowed.

×   Your link has been automatically embedded.   Display as a link instead

×   Your previous content has been restored.   Clear editor

×   You cannot paste images directly. Upload or insert images from URL.


  • Recently Browsing

    • No registered users viewing this page.
  • Topics

  • Posts

    • Why cut the paper, cut a square around the image and grind to it. 
    • I did try that last time Rich , i traced the image from the Bestfit book which is the actual size. But its more difficut to cut the shape from paper than it is to grind the steel to shape. This way is pretty easy and the final shaping is done when fitting the part. There are a couple of things i will do differently next time, clamping the 2 pieces together with a drill press will help to hold while scribing the shape in. This was a bit tricky having only one hole, if using the pins and cork the drill size needs to match the pin diameter so there is no movement at all from the template. This movement hasn't finished frying me yet, damaged thread in the plate crown wheel hole and two rubbed in cracked jewels, thats gonna be much more fun.
    • 👍 Whats not to follow OH ?  You're every inch a pro and a true gent, i always enjoy reading your answers even some of the clock stuff that i dont have a clue about. 
    • Could you print the image either enlarged or reduced to the same size as the actual part and then glue it to the steel. 
    • Next is to drill the screwhole this then provides an anchor point so the bridge doesnt slip around while scribing the shape. A cork lid, a pin and a piece of gaffer tape ( 😅 ) keeps it all in place. The hole is measured from the broken part using a hand measuring gauge. Mark the hole, punch it and drill it off to size. The awkward bit is working out where the jumper should be and the detent positions.  I remember watching a youtuber a while back do this with dividers, so i dug out my old school compasses and improvised a little. This bridge only has one hole and to find the detent positions you need two points of reference, so i just worked the second point from one of the corners, hopefully its near enough. Then scribe in the jumper using the two detent positions ( wind and time set ) that were marked and a big picture of the complete spring to look at that helps to give you a feel of where the jumper should be.   
×
×
  • Create New...