Jump to content

Acrylic Crystal help


Recommended Posts

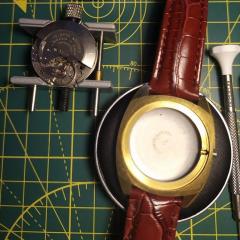
I have a watch that I cant find the right acrylic for.

It has 30mm Diameter but I have tried an Inner Height of 3.7mm but it just causes friction. Can anyone point me into the right direction on what I need and where to find it? 

I have looked on cousins and the highest inside height i can find is 3.7.

Link to comment
Share on other sites

Can you find by how much the pinion impinges on the crystal? What about a thin wire round on crystal base to raise it a bit, once you apply cement it should stay put and invisible.

Link to comment
Share on other sites

6 minutes ago, jdm said:

Can you find by how much the pinion impinges on the crystal? What about a thin wire round on crystal base to raise it a bit, once you apply cement it should stay put and invisible.

Very good idea but only issue is that the movement is removed from the front. I will look into this idea though, I only believe that there needs to be only a slight increase (preferably 0.3mm to start testing). 


also anywhere i can get a brass 30mm gasket? (If there is such a thing )

Link to comment
Share on other sites

Probably not applicable to this particular use case, but I thought I'd post this here anyway.

A trick for making thin metal washers (superglue, acetone, some skill, and a drill press, or more preferably a lathe required).

Cut squares of sheet  metal of the desired thickness, and the size of the outside diameter (plus a little extra). 
Superglue the squares together to form a block of reasonable thickness. Clamp them, using a couple of squares of baking sheet  or plastic on the outside, while waiting for the superglue to set up. This will ensure a secure bond, so they don't simply fly apart during the subsequent operations. The baking sheet will ensure you don't glue them to the clamp.

The more washers you make, the thicker the block, and the easier it is to turn/finish. To make one washer, you may need to make 20, simply to make the process easier.

File the block roughly round, allowing some material to let you finish to your desired diameter.

You can of course file to some other shape, or add tabs or notches if you have a need for odd shaped washers.

If making circular washers, finish the roughly round stock down to the desire diameter in the lathe, or using the drill press (much more tricky).

Drill/cut out the centre to leave the washer, and finish the block by hand. If you need internal features, like a square centre hole, or internal notches, this is the time to add them.

 
Soak the finished ring of stacked washers in acetone to break the washer block down into individual washers. This may take some time, as the acetone needs to dissolve the cyanoacrylate (superglue), so patience is required. Pop the whole thing in a small jar, screw on the lid, and come back in the morning. Warming the acetone may help, but remember it is a major fire risk.

This is not an easy task to get right, and would be particularly tricky when making a washer where the inside and outside diameters are relatively close to each other. Making a 30mm OD and a 28.5mm ID would be a challenge. It is also tricky when the washers are relatively thin.

There is a reason why industrial manufacturers don't mess about like this, but instead stamp these out of sheet metal with steel stamping dies. :P

You can also etch washers from sheet metal (brass, copper etc), but that is a whole 'nuther story. :D

Edited by AndyHull
Link to comment
Share on other sites

Why not try a teflon gasket? Or even a shim cut from transparency film(or multiple if more height required)? You can probably cut one out yourself and it would really be invisible.

Edited by CaptCalvin
Link to comment
Share on other sites

4 minutes ago, CaptCalvin said:

Why not try a teflon gasket?

That is a good idea. Plastic sheet can be cut with a compass style circle cutter.

s-l1600.jpg

These are available in craft shops and on ebay. Cut out the inside diameter first.

Link to comment
Share on other sites


  • Recently Browsing

    • No registered users viewing this page.
  • Topics

  • Posts

    • Thanks everyone for the replies. It seems setting the hand is a bit of a guessing game, and I thought there would be a very specific way to do it. Since the reserve indicator hand moves clockwise as the spring is wound, I tried setting it right at the start of the black side. But setting it there doesn't really make sense, because by the time the spring is halfway wound, the hand is only at the end of the red side... In my head halfway wound shouldn't mean the hand is still "in the red."
    • Lovely part of the country! I spend most of my days driving along the A64 for work in and around York. I'll be sure to drop plenty of questions soon! I've actually got a couple of watches on the way that I'm pretty sure I'll need some help with! They look pretty beat up from the pics but I love a challenge and an excuse to buy more tools 🤣
    • I have two of these in my home. You need to remove the movement from the case, take off the hands and remove the dial and take a few good photos of the front plate so I can see what the problem is. The round nut unscrews and the hands pull off pull them off from the center and not the tips as you could break them. 
    • I asked the question of one of the sellers. Its for removing the pins and making the holes in motorbike drive belts. God knows why they were both in two seperate joblots of watchmaking tool, thats bizarre. I haven't posted your setting lever steel yet mike, been busy with my mum past few days and had a locked myself in at home lazy watch repair day today 🙂 but I'm out tomorrow so i will get it off to you then. 
    • Hi everyone, I tried looking for answers on this online but came up with nothing, so I'm hoping some of you knowledgeable people might be able to help. I have an Elliot clock that has been in my family for at least 4 generations. I recently enherited it, and I'm trying to get it to run properly again, as it's been neglected a bit.  Here,s the problem. These clocks have a silencer mechanism, which is supposed to stop it from chiming between 11PM and 7AM but for some reason mine is silent between 1AM and 9AM. I have tried figuring out how to adjust it but have not managed. Does anyone have any idea on how to correct this? Please find attached some pictures of the clock. Thank you!
×
×
  • Create New...