Search the Community
Showing results for tags 'Service'.
-
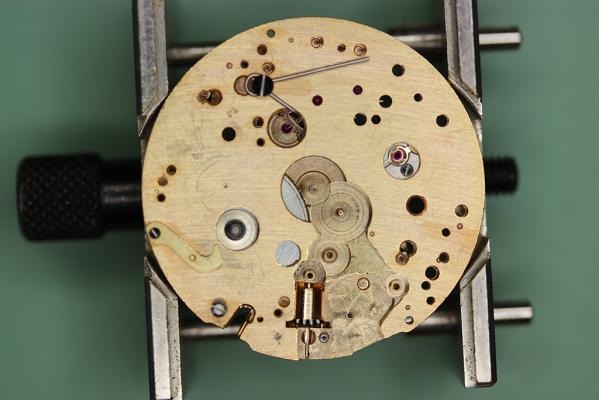
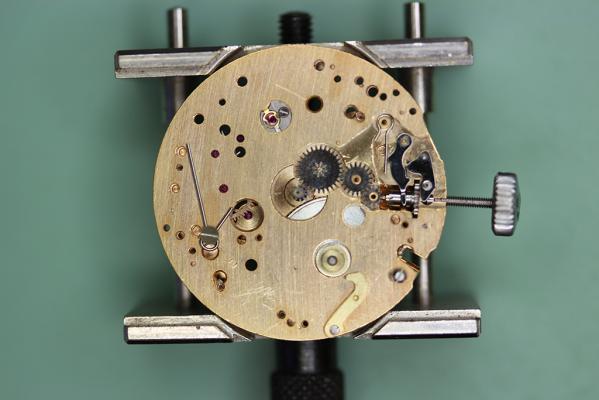
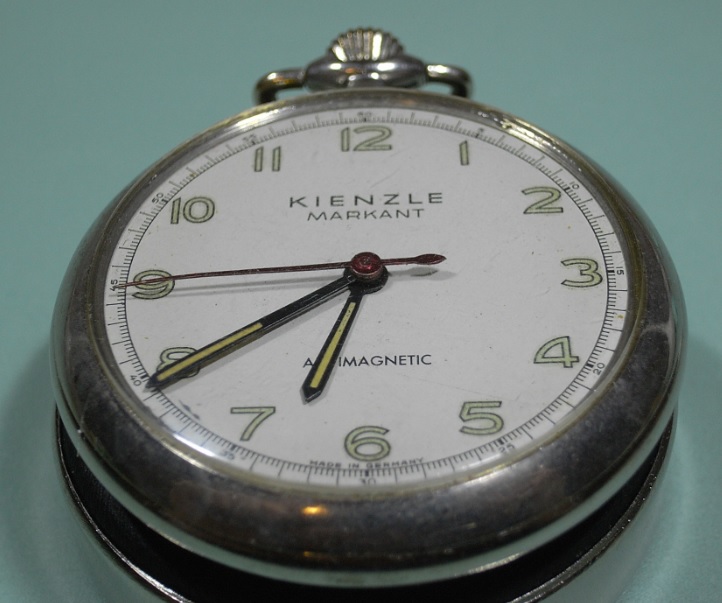
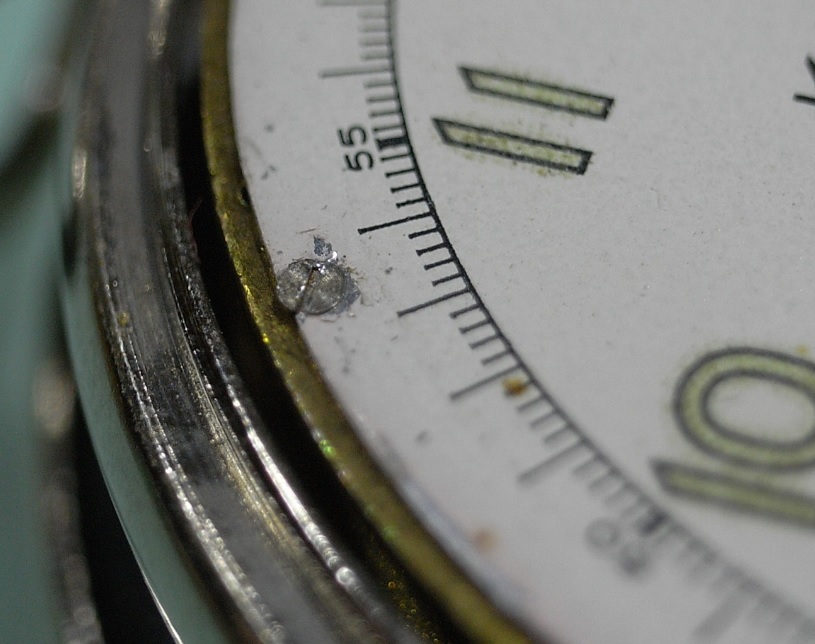
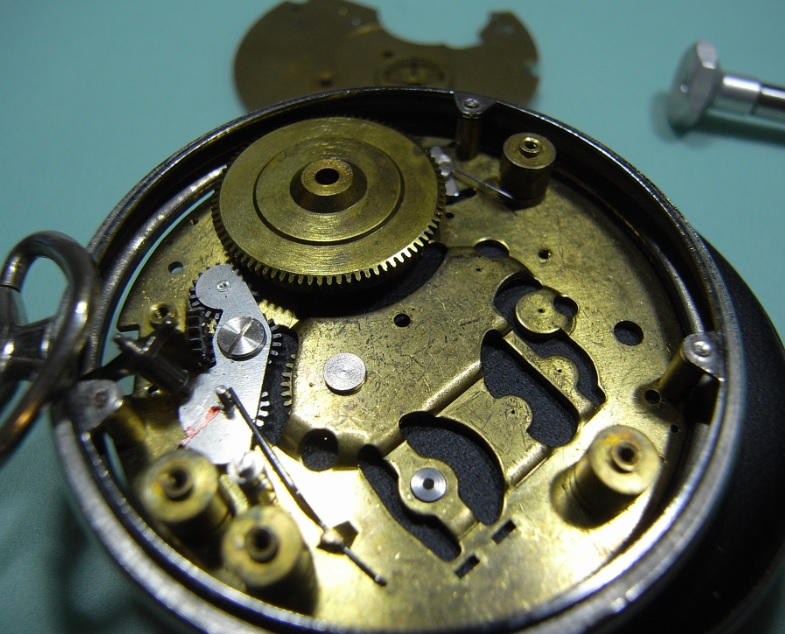
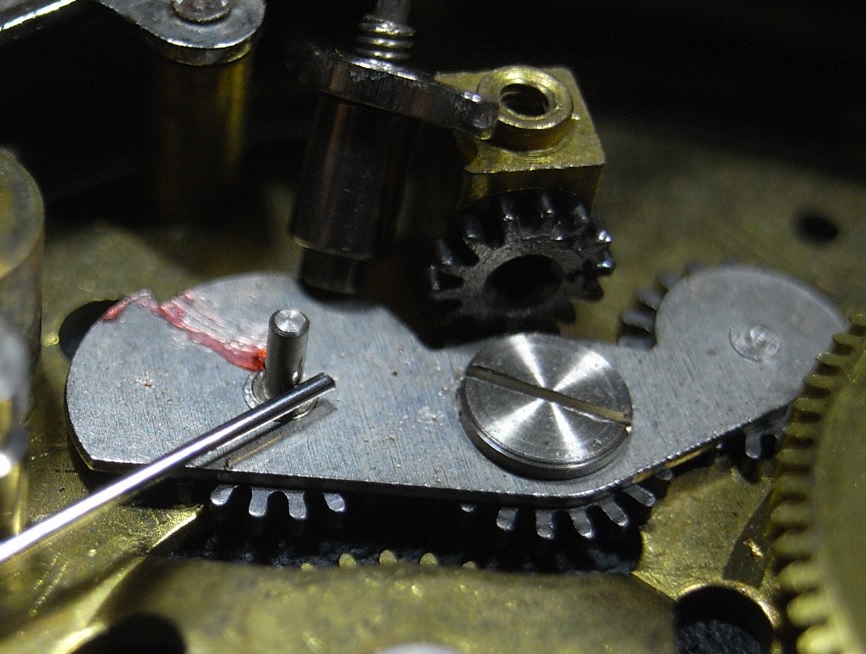
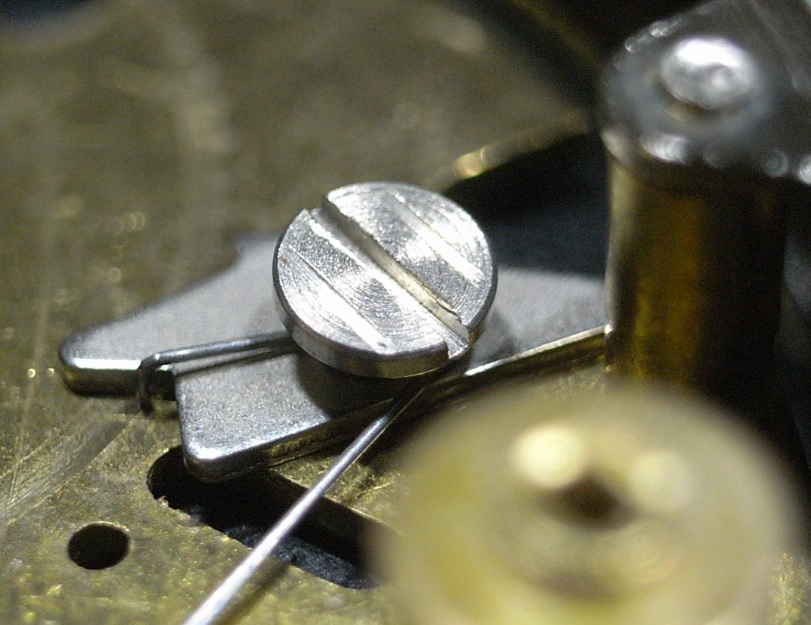
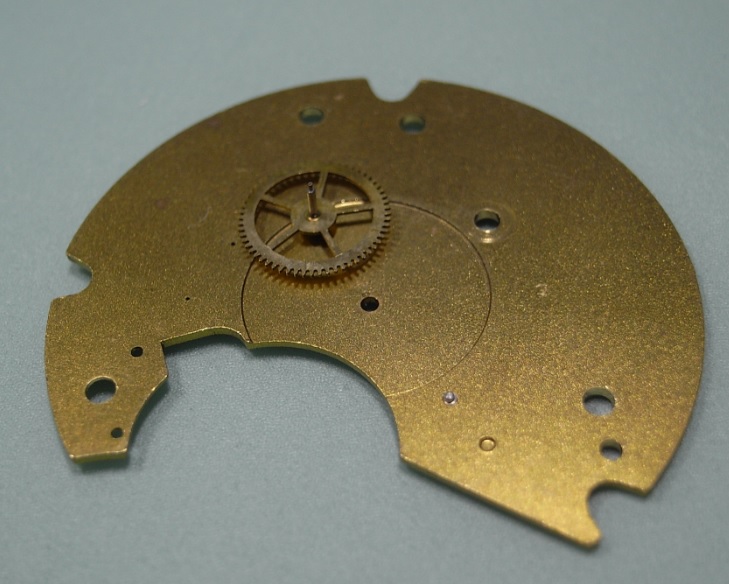
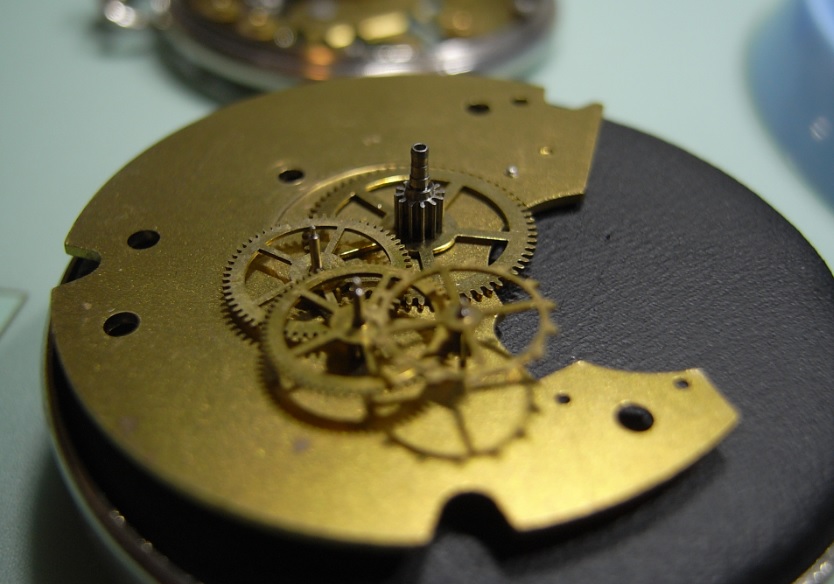
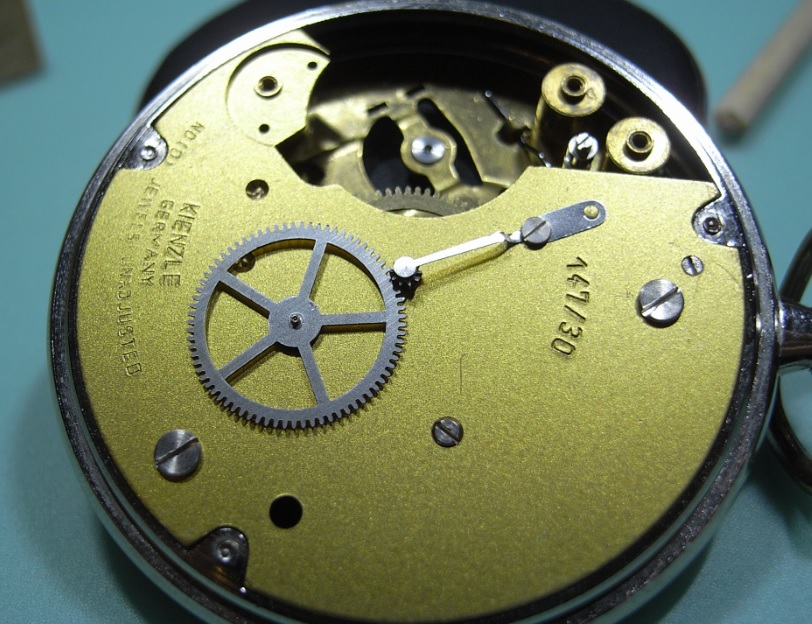
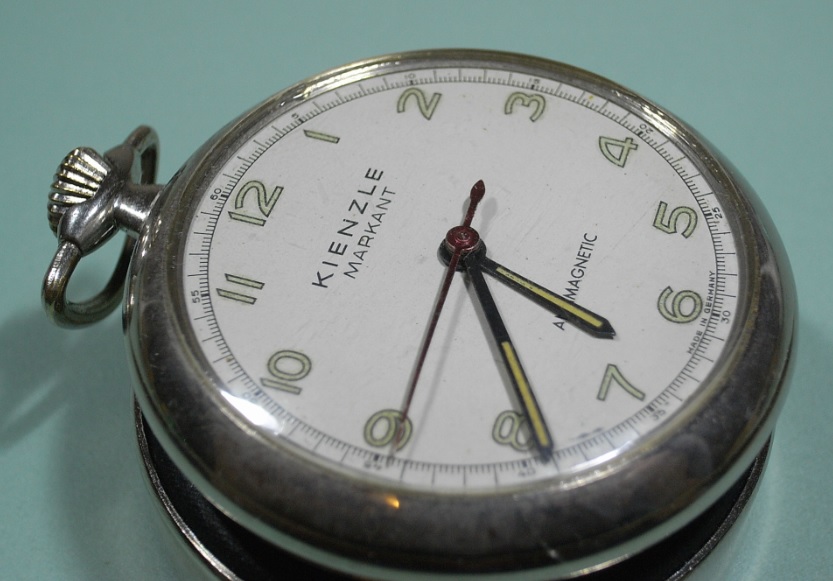
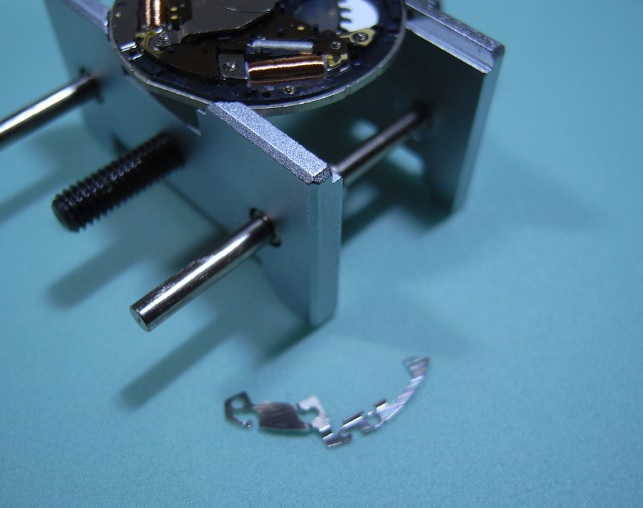
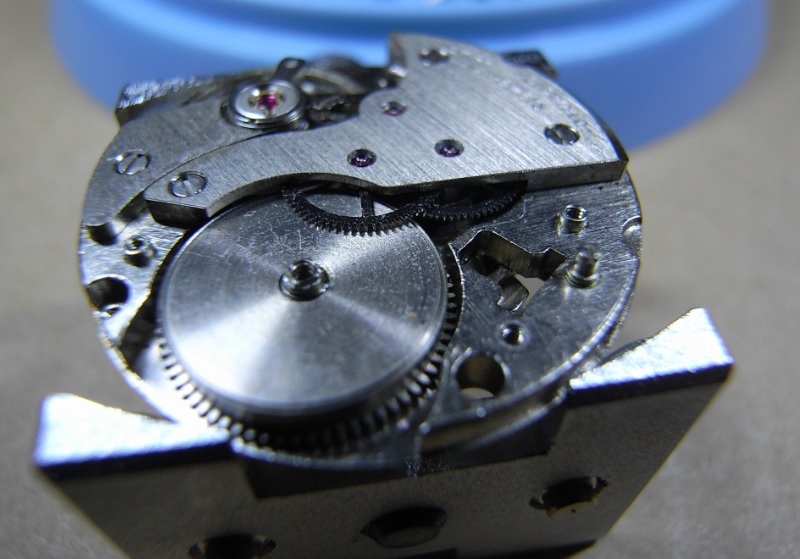
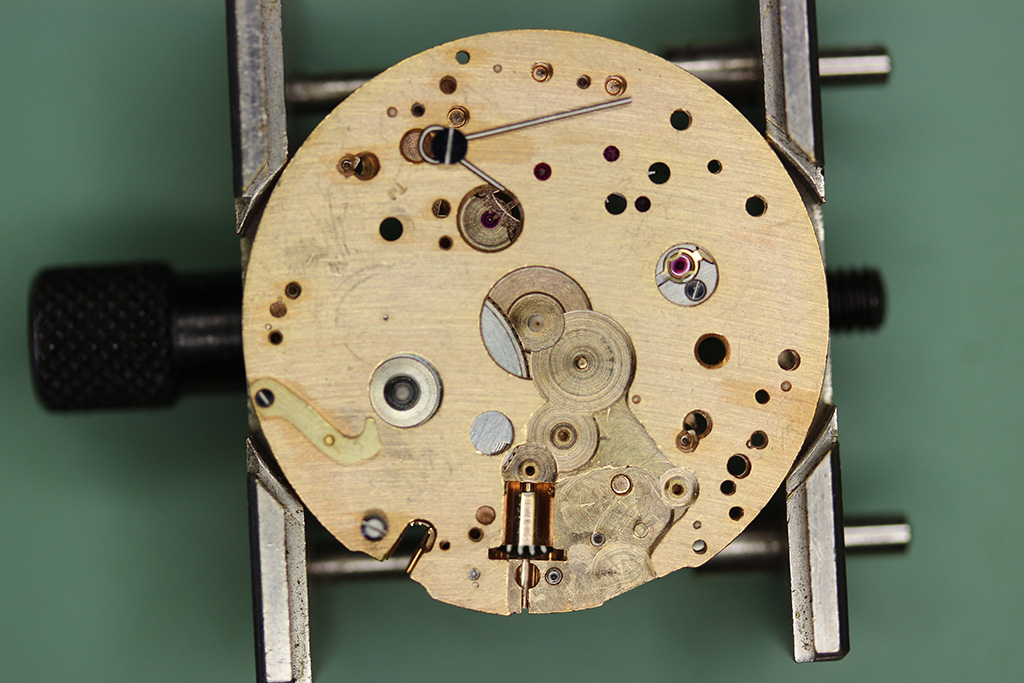
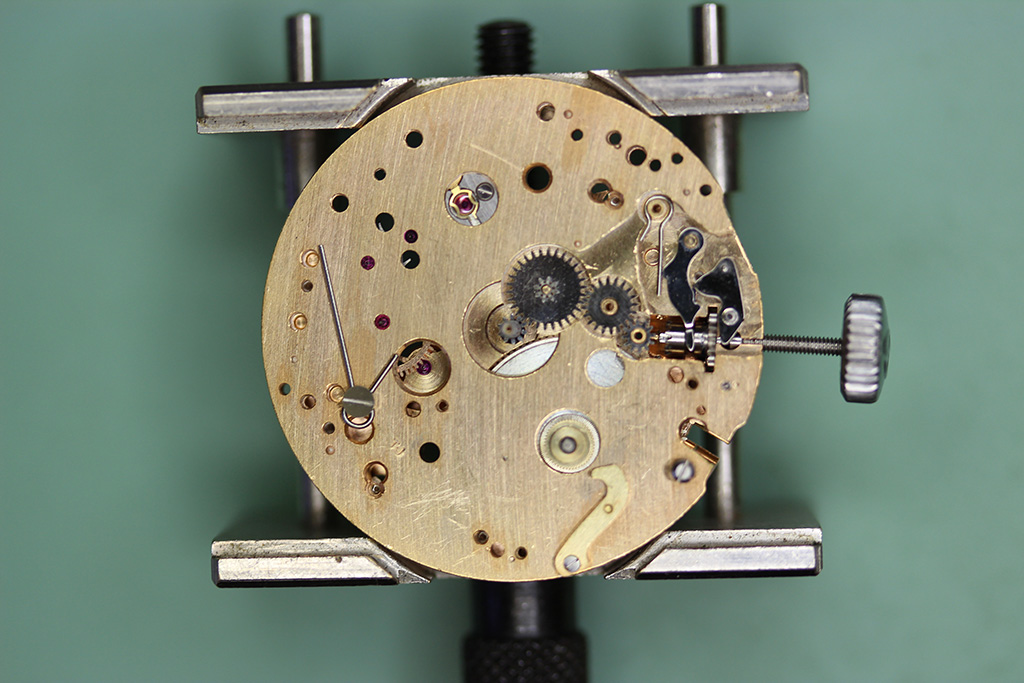
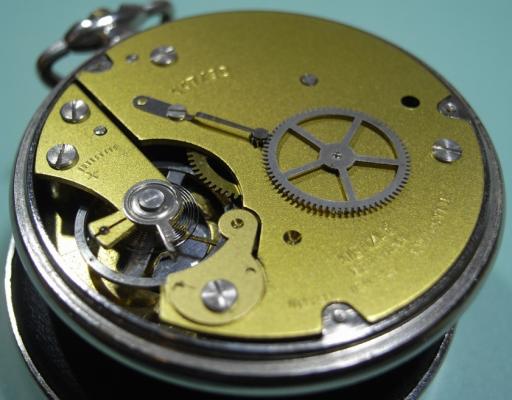
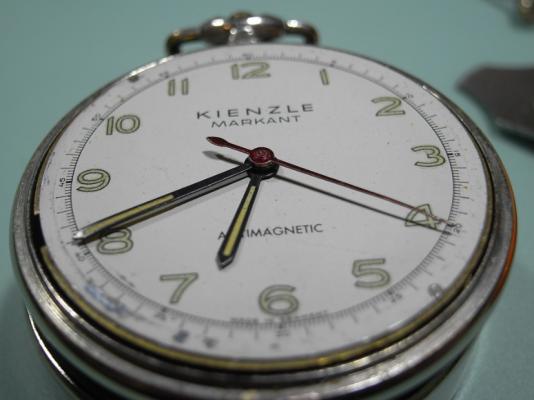
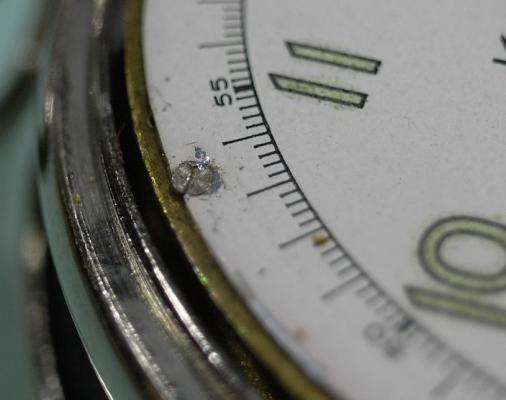
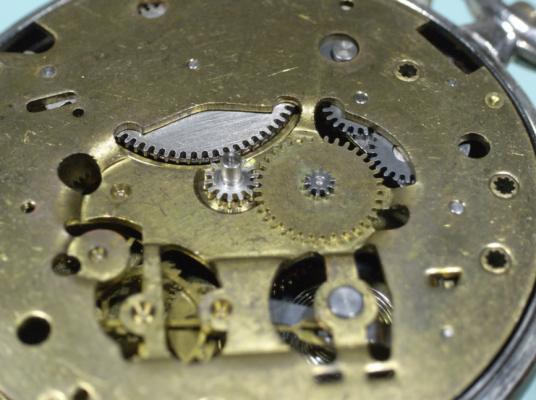
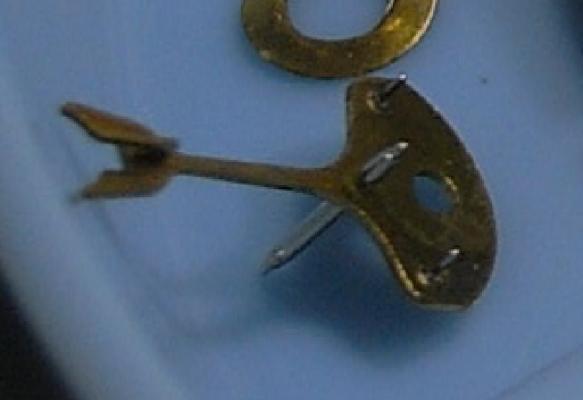
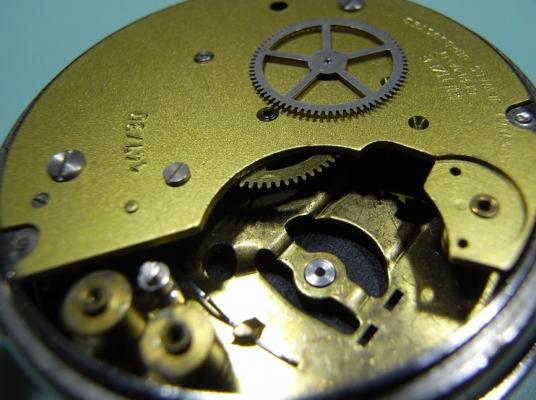
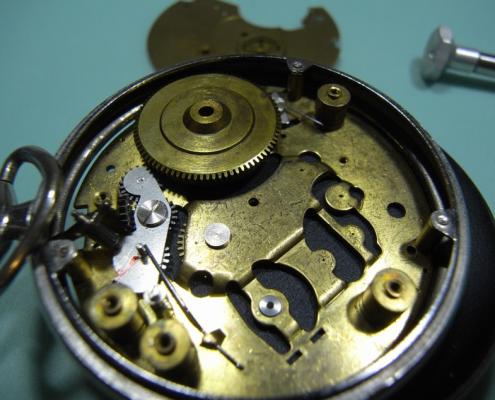
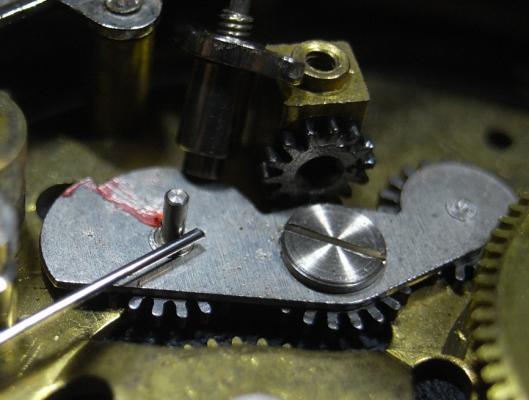
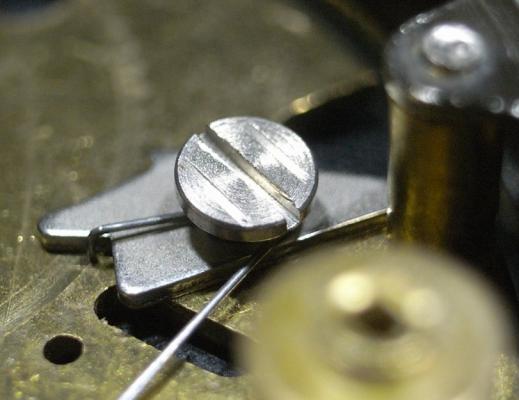
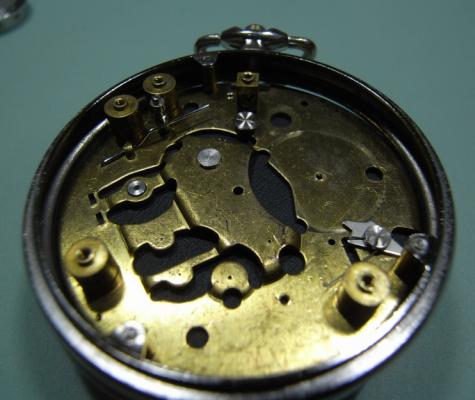
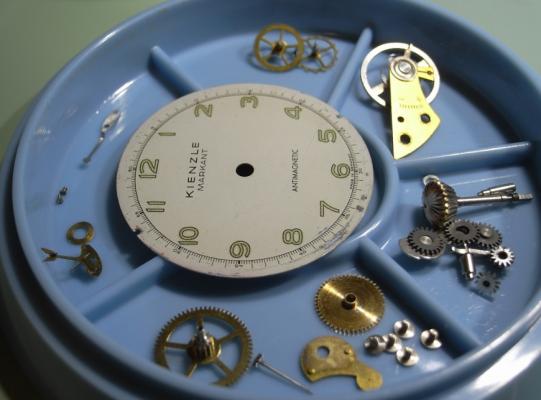
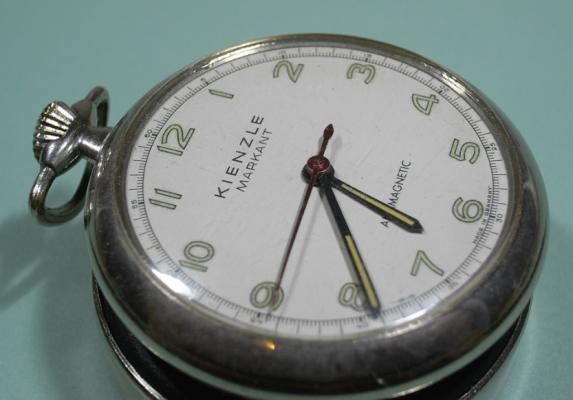
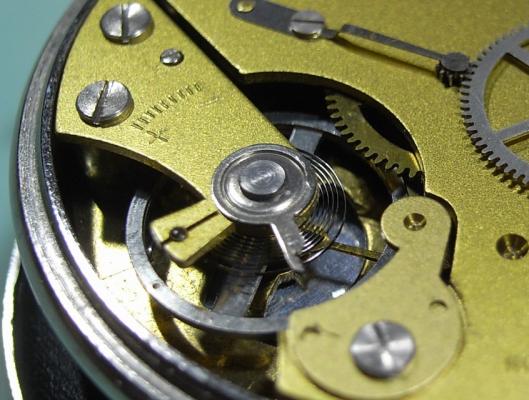
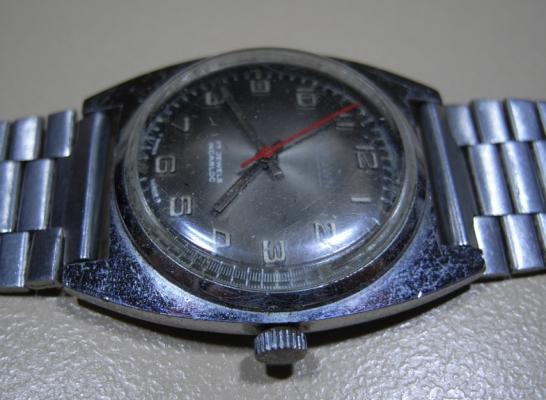
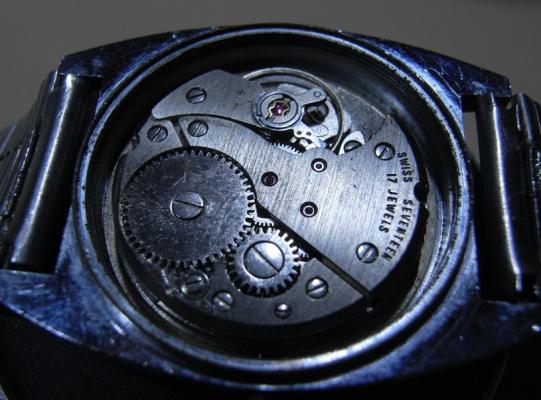
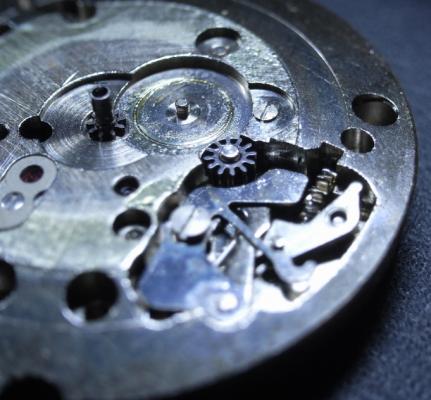
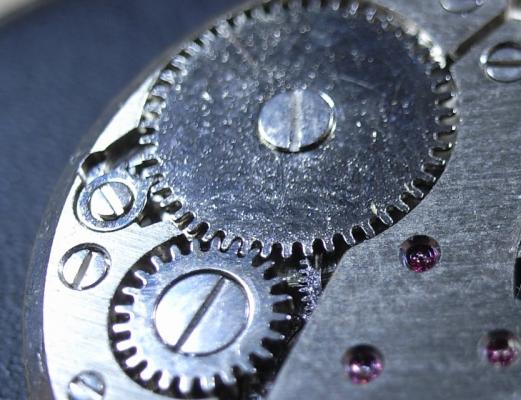
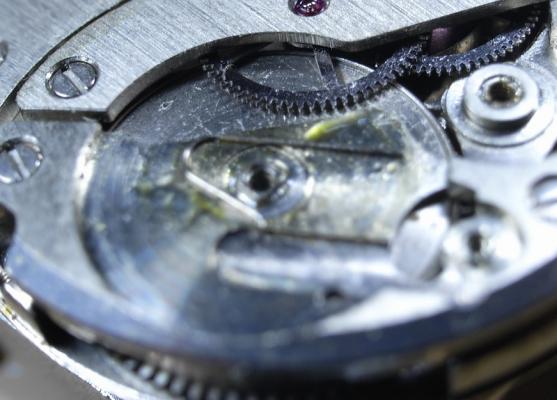
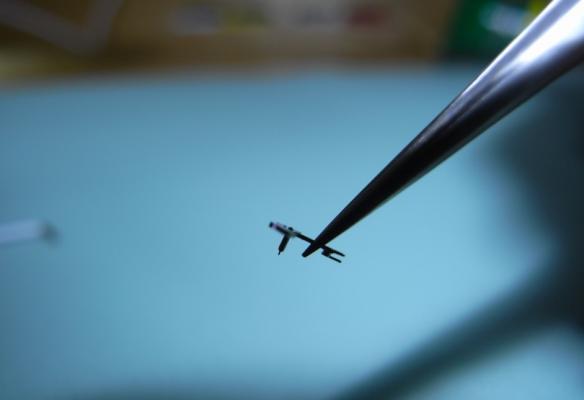
Kienzle Markant Pocketwatch Service One of my Mum's friends dropped off a pocket watch for me to service. It was her father's watch, and she used it all through her nursing career: so it held quite some sentimental value to her. She told my Mum that it did run; but only for a few minutes and then stopped, unless the crown was moved. It's a German made Kienzie Markant. I popped the back off and the movement and saw that it was VERY dry, but in good condition. First thing I notice was the stamping .... Zero (0) Jewels - Unadjusted. So this thing is no RR Standard Hamilton; but none the less a nice little project, and one that will make my Mum's friend happy :) The front was also removable via a case blade, and since the Main Plate was riveted to the case is required to be removed in order to service this movement. With the hands removed, the dial was next. It is secured by two screws on the face. Motion Work is a very basic setup. So I removed the Cannon Pinion and moved to the back of the movement. While inspecting this movement carefully, as this is my first attempt at a pocket watch, I noticed a few things that I'd never seen before... Firstly, the timing adjustment is done by a sort of jack screw arrangement. (Note: The two large screws for securing the Balance, and a smaller "Jacking Screw" to adjust the timing.) Secondly, the Fork arrangement was also something new to me. Posts instead of Pallets to engage the escapement. Here's another view the Fork removed. So I removed the tension from the Mainspring, and removed the Balance and Fork. I was a little nervous removing the Bridge, as it's a 3/4 Bridge and I couldn't see the layout of this movement, and since this is a very new style of movement to me I wanted to take reference photos. Well my nervousness was justified, and EVERYTHING lifted out with the Bridge!! ACk!! :startle: Again, something new to me was the layout of the Keyless Work. It's a rather clever rocking pinion system. Rock one way and the Mainspring is wound, rock the other and you engage the Motion Work. Thankfully the Click Screw was marked as a left-hand thread ... Note the extra stripes either side of the Driver Slot. Movement is fully stripped and ready for a bath :) Here's that nasty 3/4 Bridge that stopped me taking reference photos of the Gear Train Layout. Once all the parts were clean, it's time to get this thing back together .... Gulp! :lolu: My Heavenly Father has gifted me with skill and cunning when working with watches, and I thank and praise him for it!! To assemble the Gear Train, I placed them upside down on the 3/4 Bridge, and then lowered the Main Plate on top of them. This made the alignment of the train and pivots a breeze. I then flipped it back over, and with a few gentle wiggles and very slight pressure on the Bridge, everything was in place. I replaced the Second Wheel, and the Spring Keeper. Refitted the Motion Work and Cannon Pinion. Then the Fork and Balance. Adjusted, fitted the Dial and Hands, and Re-Cased. The Kienzie Markant is now running smoothly and continuously. It was great fun to work on, and I hope you enjoyed the walkthrough. PS. when held to the ear, the ticking sounds like an old grandfather clock :P Gotta love dem pocket watches!! Click here to view the article


-
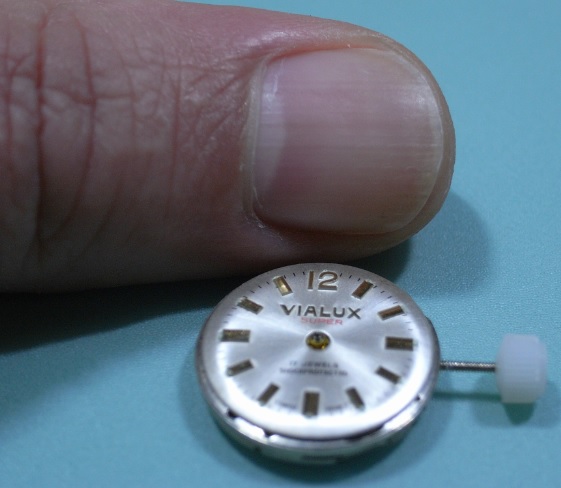
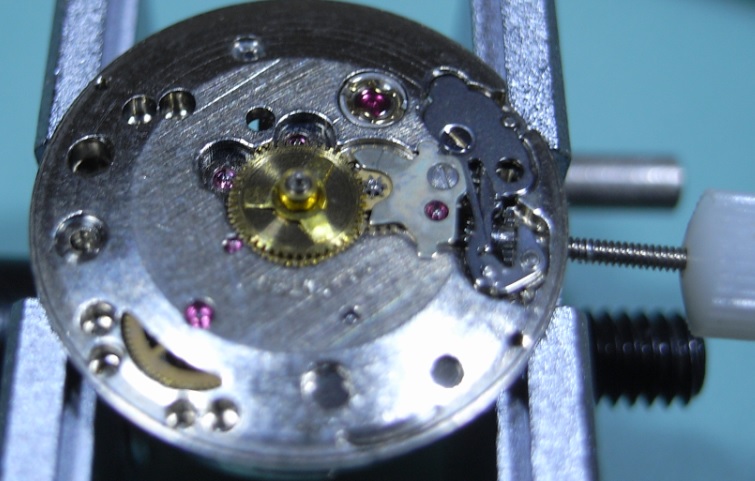
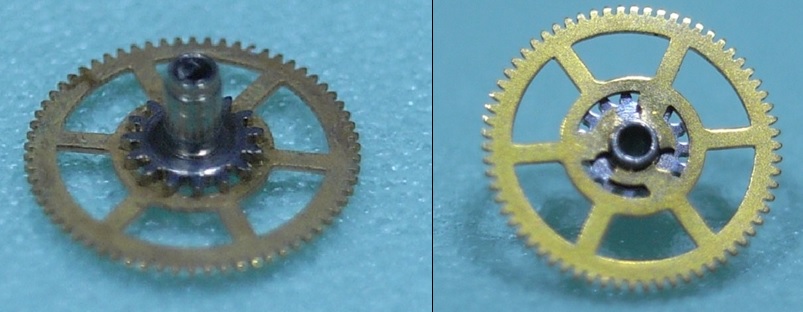
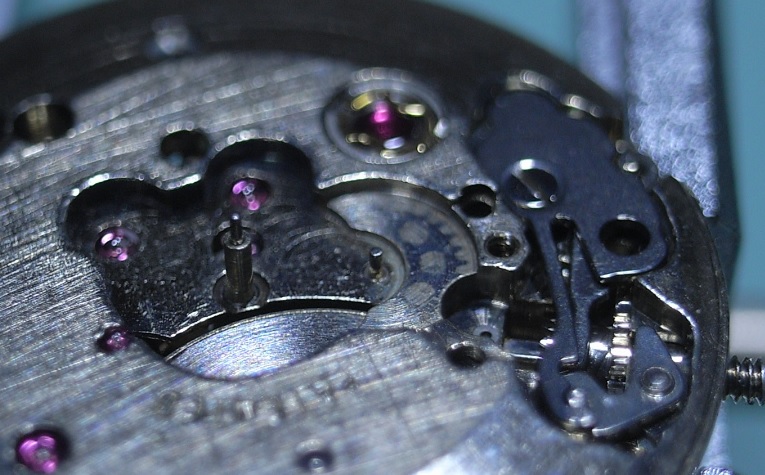
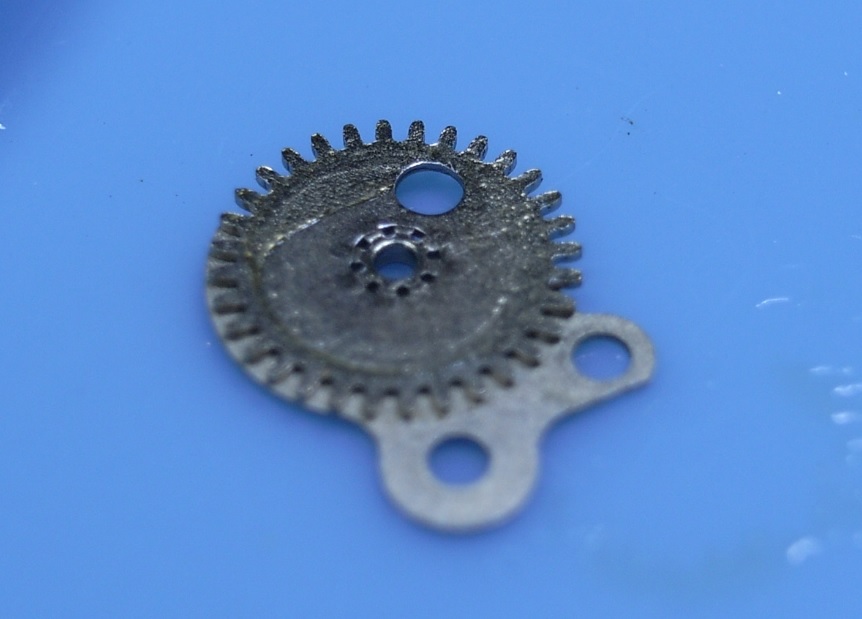
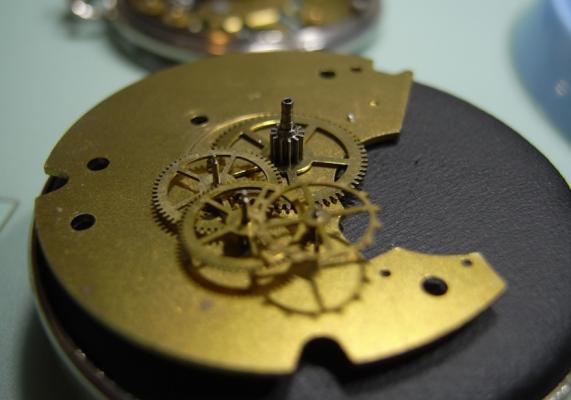
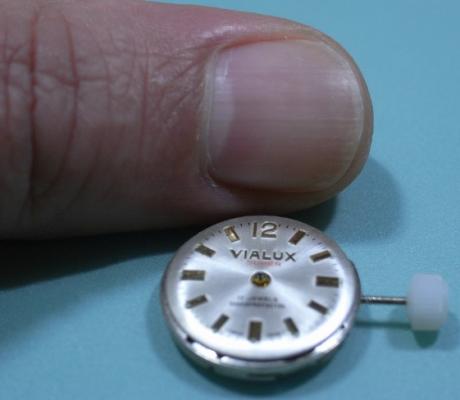
 ETA Caliber 2540 Complete Service Walkthrough Looking for more movements that would expand my training scope. I found this one on the Fleabay: an ETA 2540. It's a "New Old Stock (NOS)" replacement movement, therefore it's not cased, and came with no hands. As there are many ladies watches, especially vintage ones, that are very small, this was my next obvious choice of movement to work on. As you can see next to my thumb nail, it's quite a small and compact movement indeed. Disassembly First remove the Hour Wheel, and leave the tension spring in place. Remove the Minute Wheel, Canon Pinion with Drive Wheel, and the Winding Pinion. The Canon Pinion on this movement isn't the standard fiction fit, it is a "Circlip" type fitting with the Driving Wheel. Therefore no pinion puller is required on this movement. Below is a reference photo. The motion work is now removed, so it's time to turn the movement over. With the Movement turned over, release all tension from the Mainspring. Remove the Balance. Remove the Pallet Cock and Fork. Remove the Crown Wheel and Ratchet. Remove the Click and Click Spring, then the Barrel Bridge. Here is a reference Photo of the Click Spring. Remove the Train Bridge. Remove the Second Wheel, Third Wheel, Intermediate Wheel, Escape Wheel and lastly the Barrel. Finally turn the movement back over, and complete the disassembly by removing the Keyless Work. Remove the Setting Lever Spring. Remove the Yoke Spring and then the Yoke. Then remove the flip the movement over and unscrew the Setting Lever Screw. Pull the Stem out and the Clutch Wheel and Winding Pinion will fall out. Here is a reference photo of the Yoke Spring. Disassembly is now complete.


-
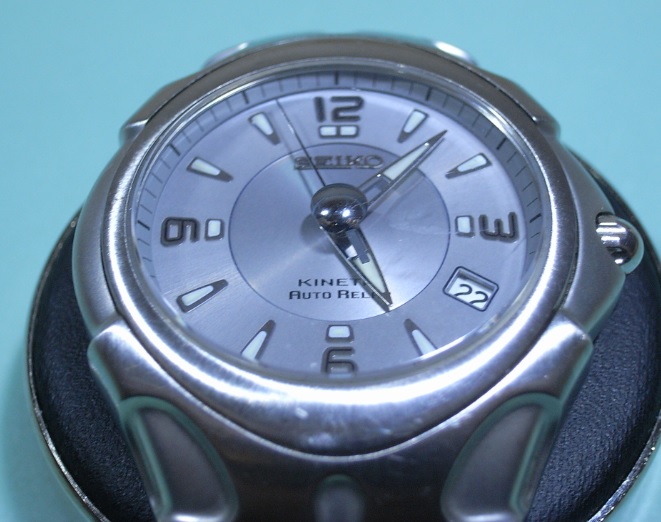
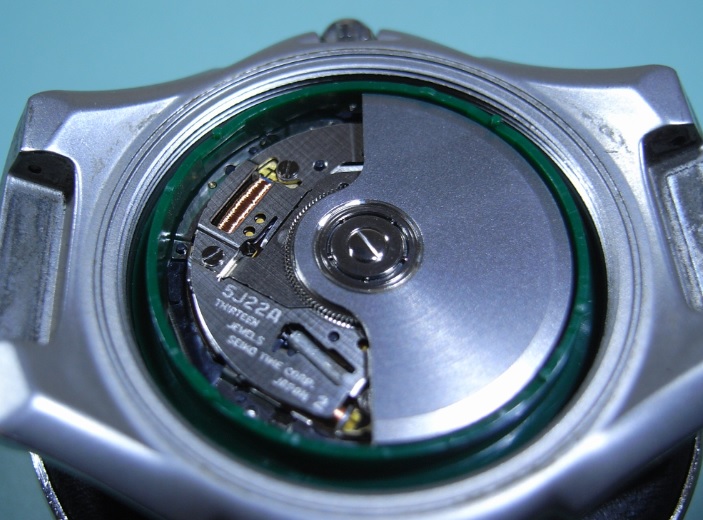
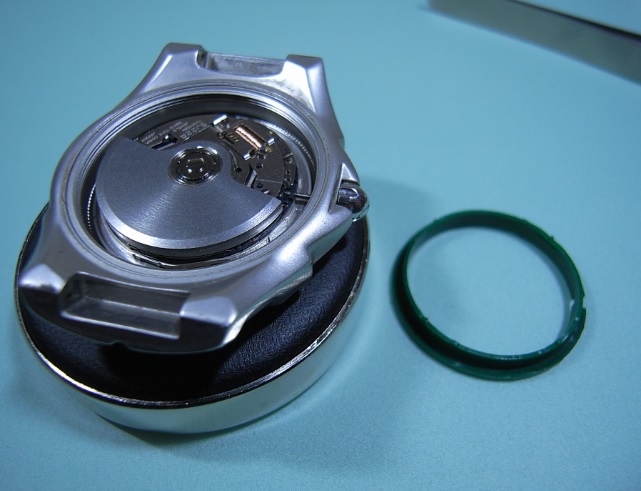
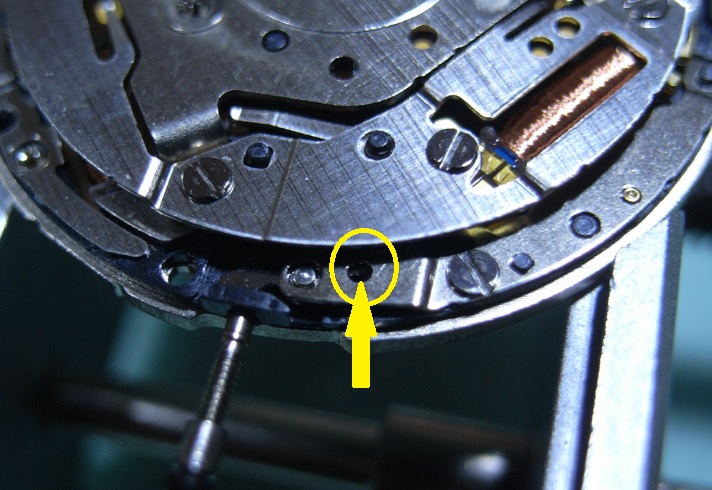
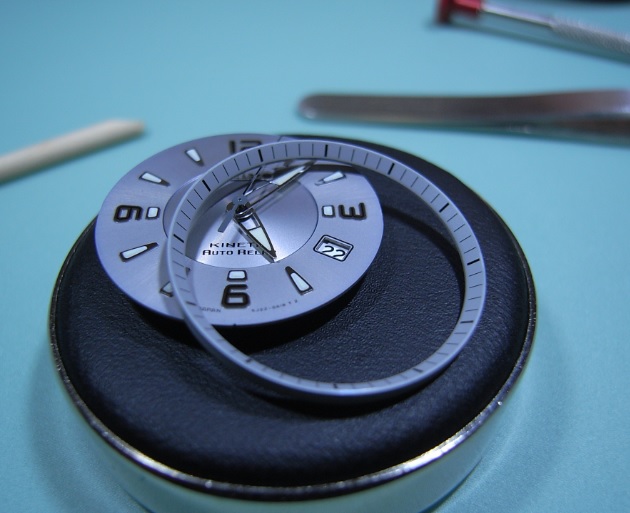
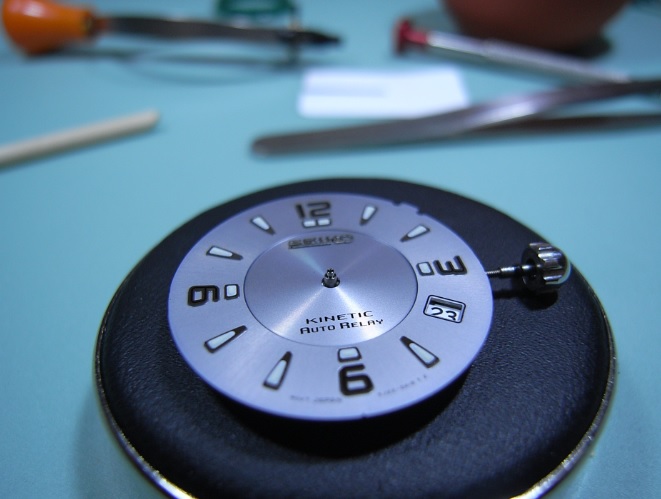
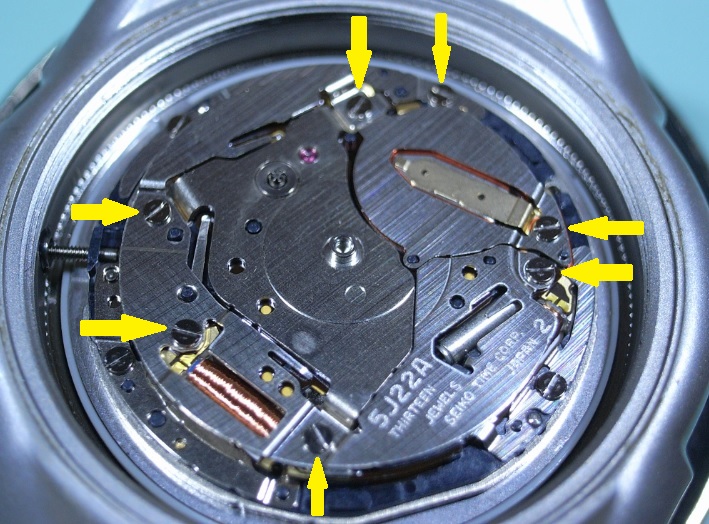
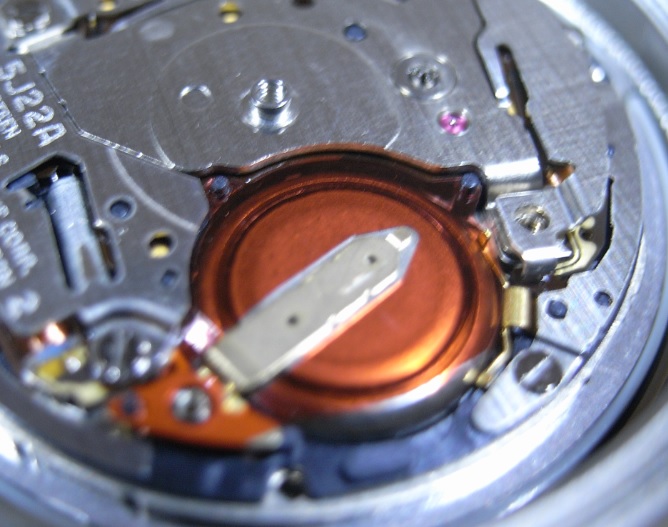
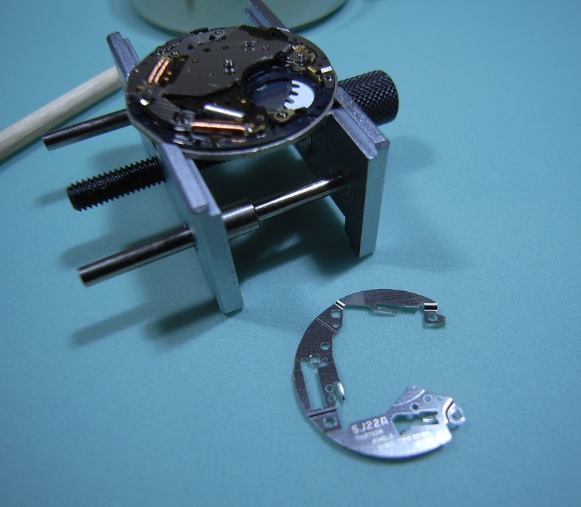
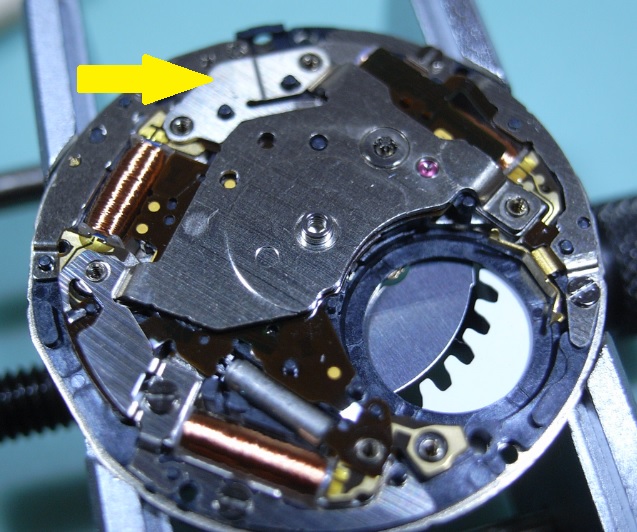
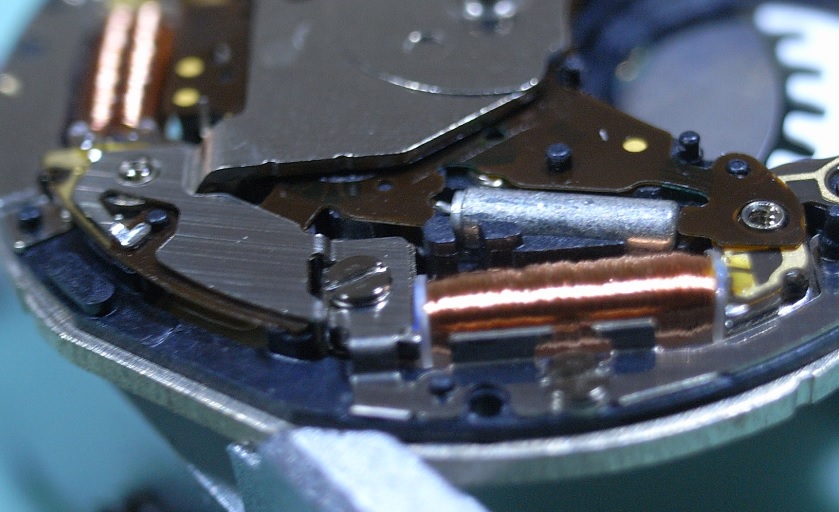
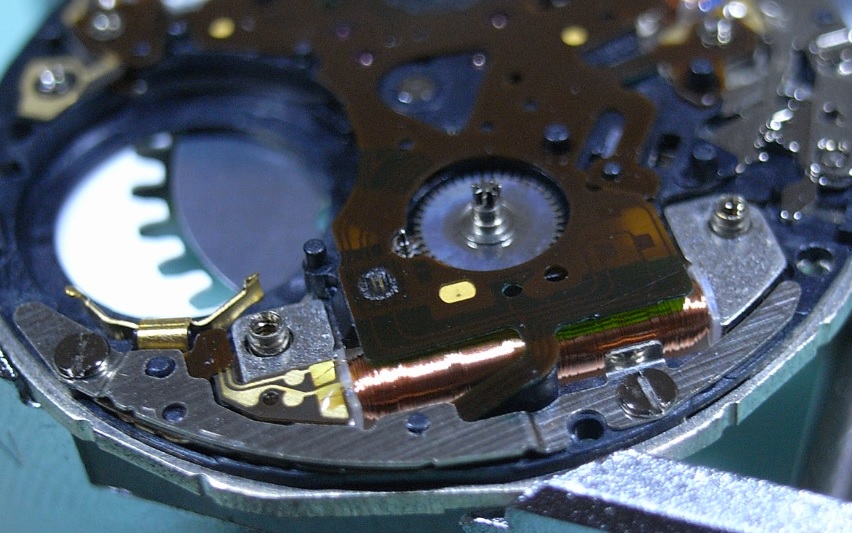
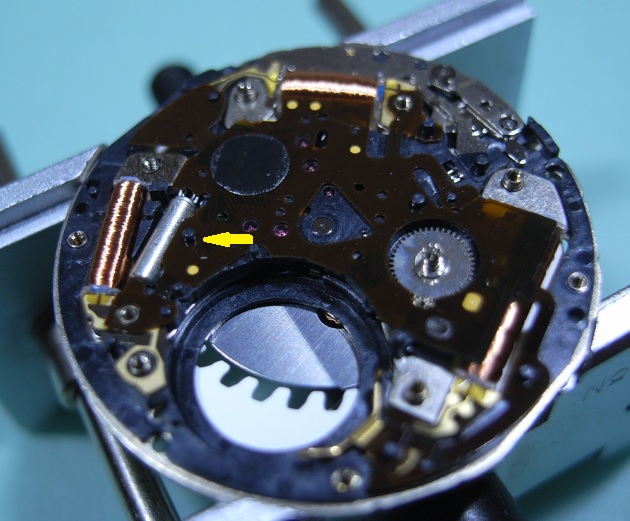
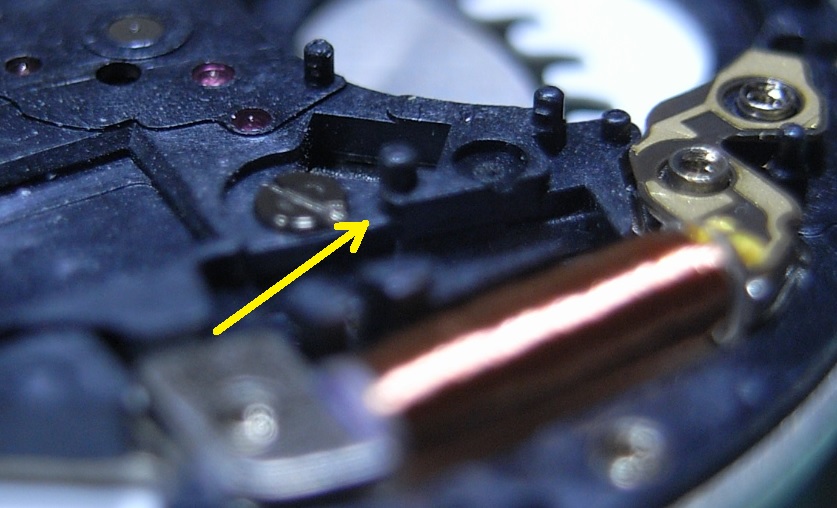
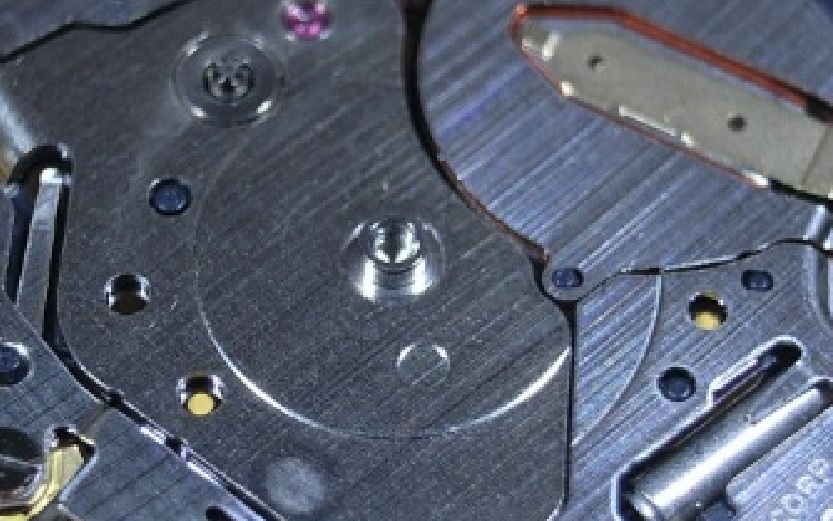
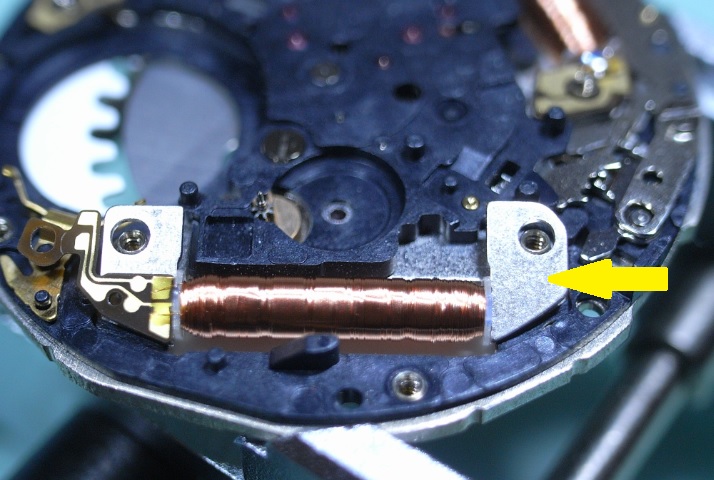
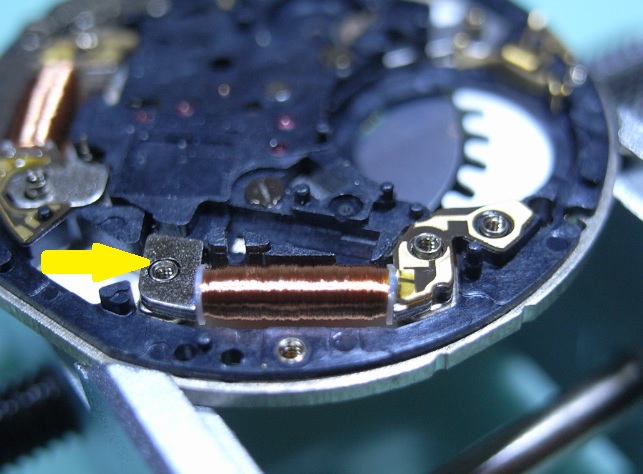
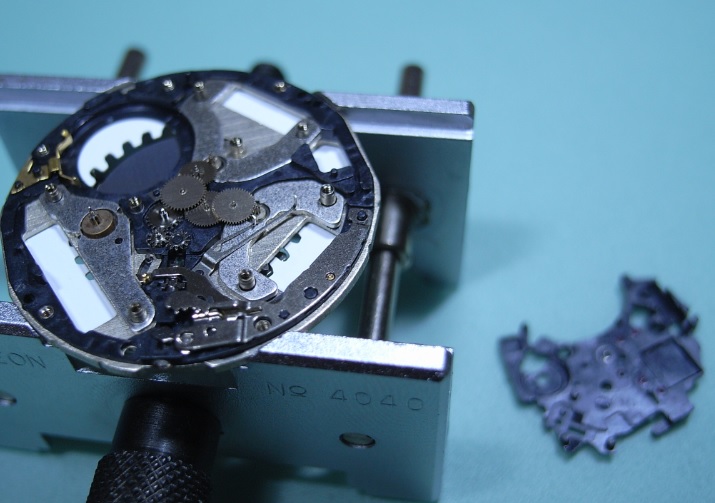
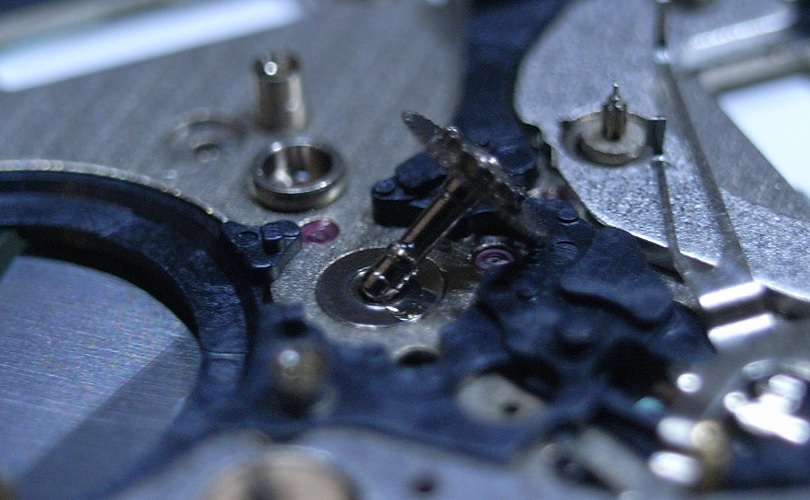
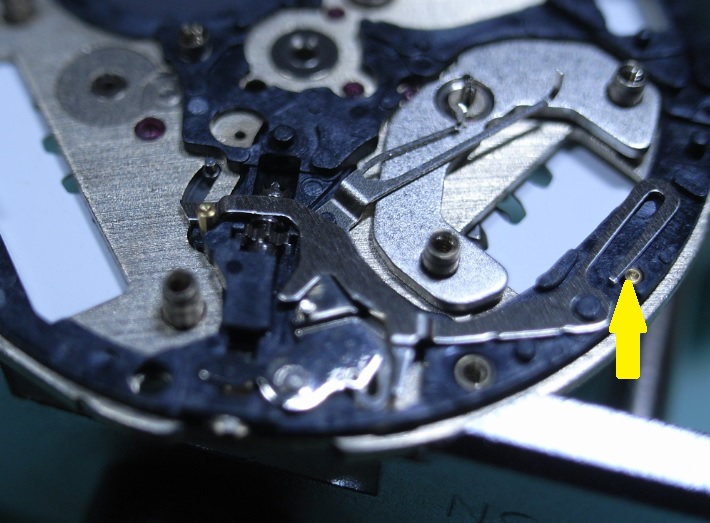
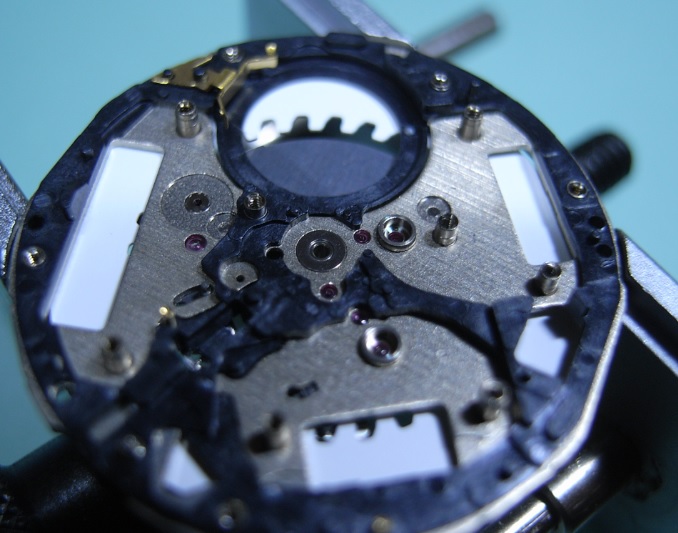
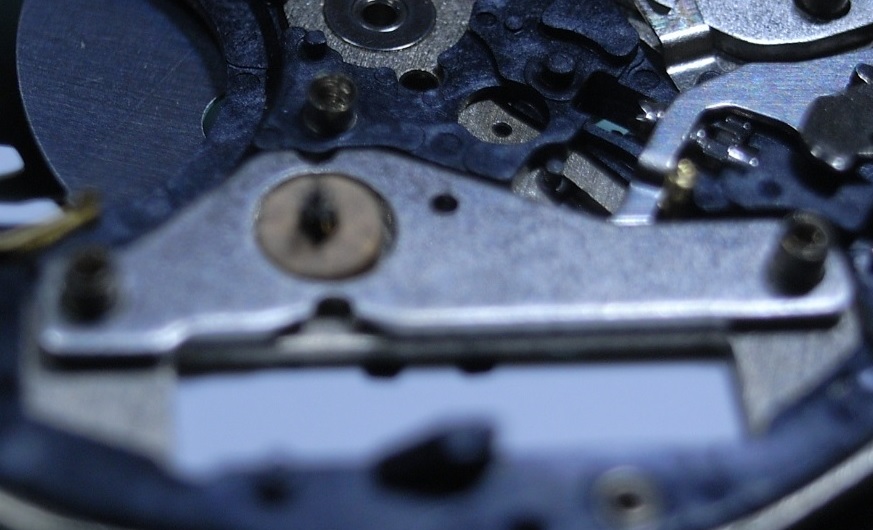
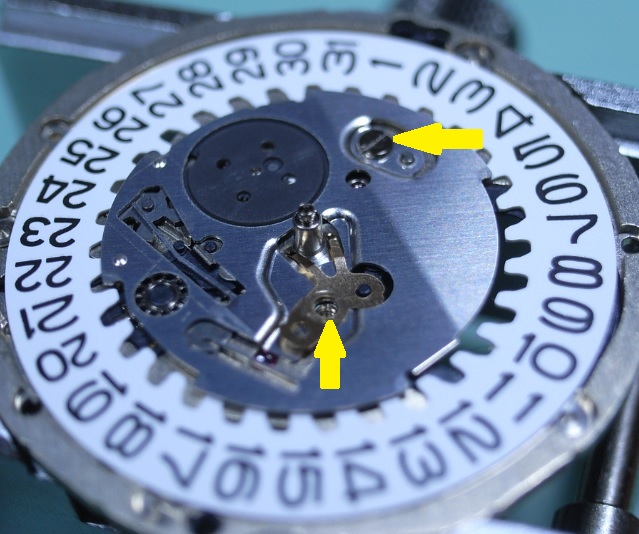
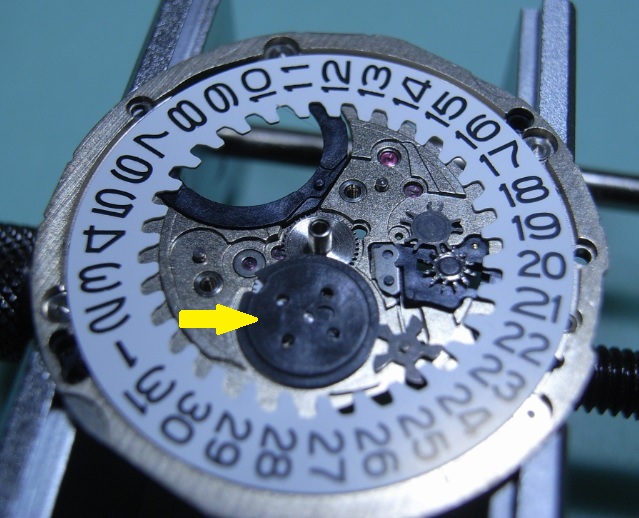
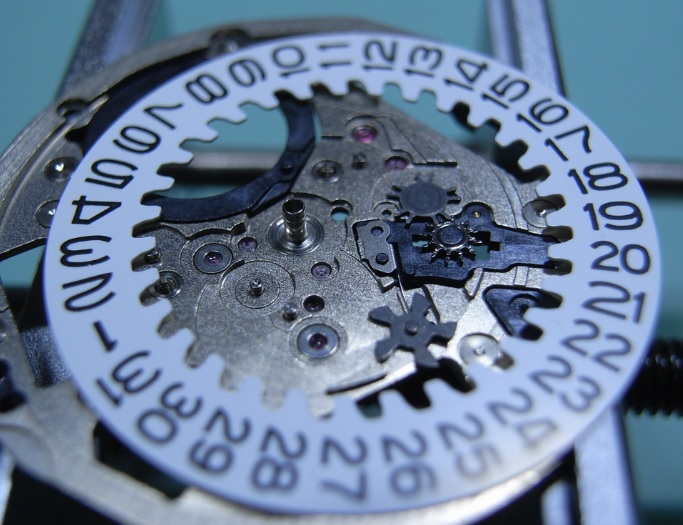
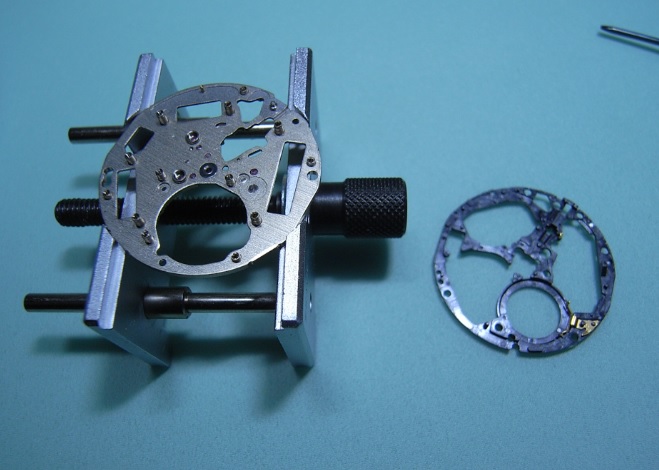
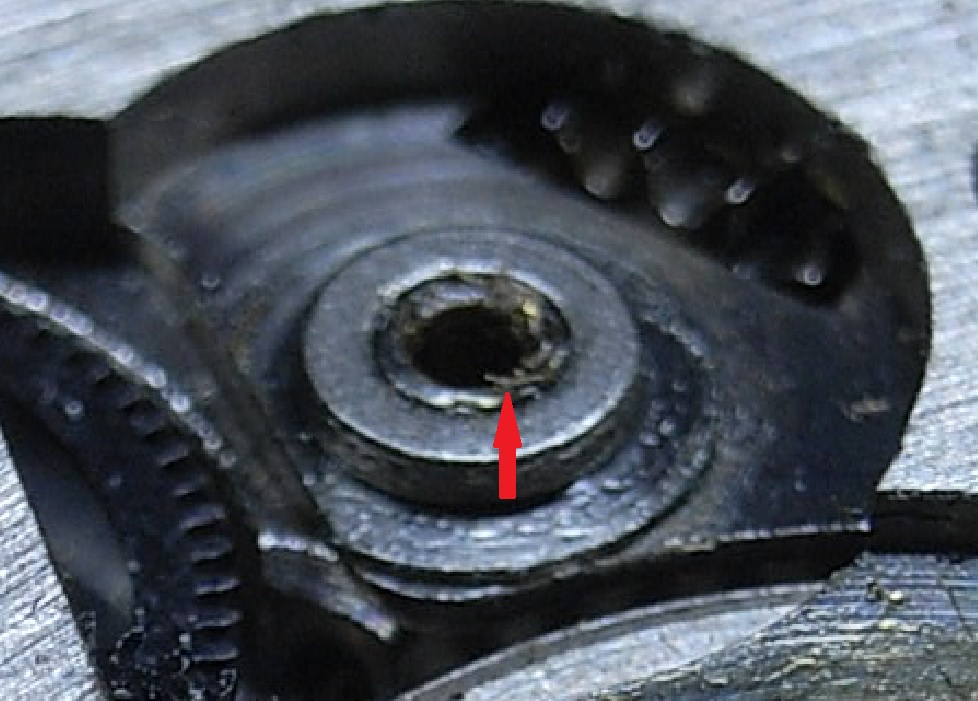
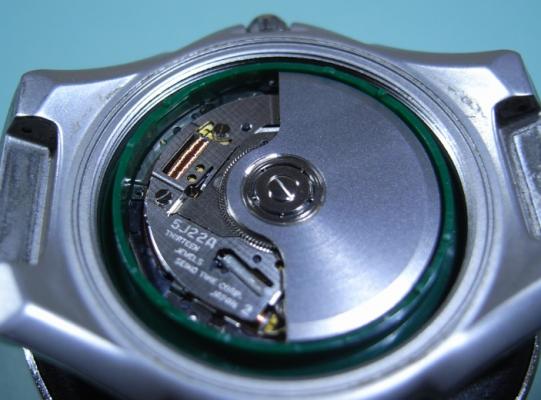
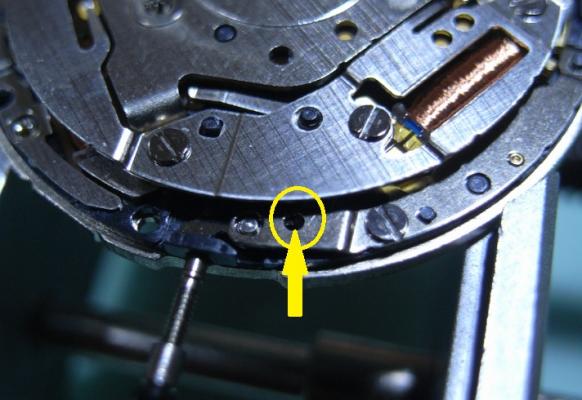
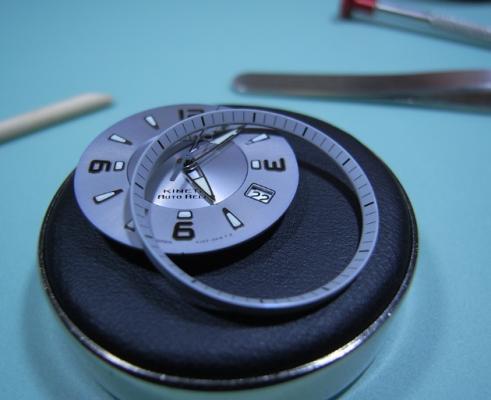
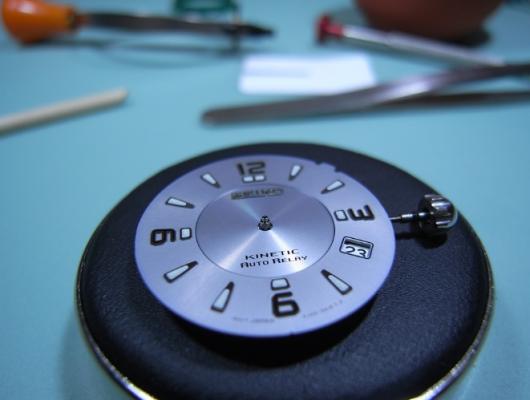
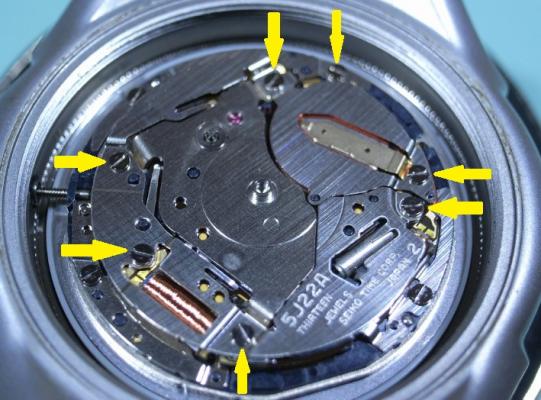
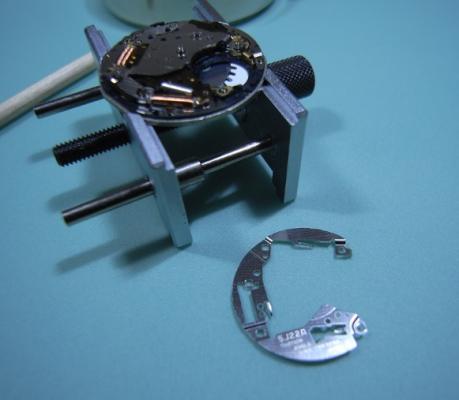
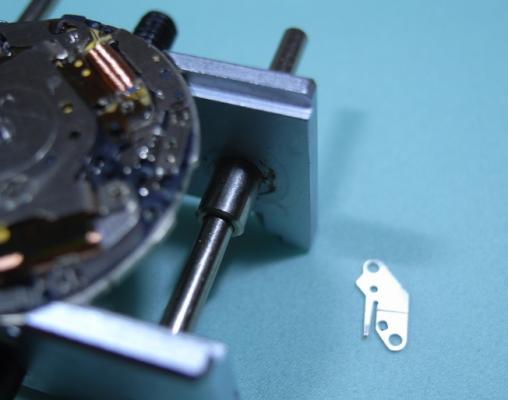
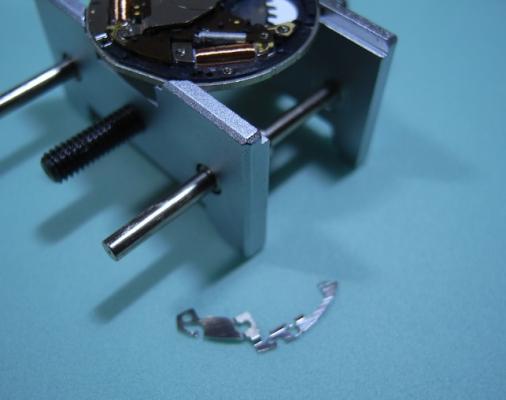
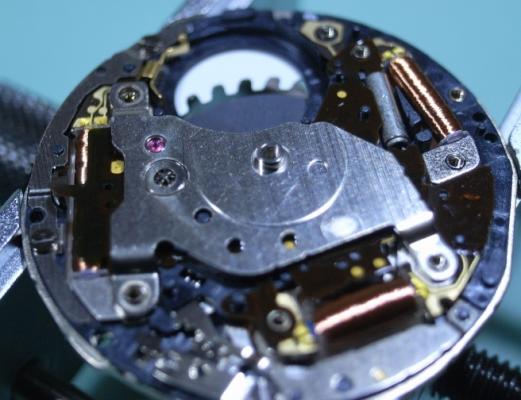
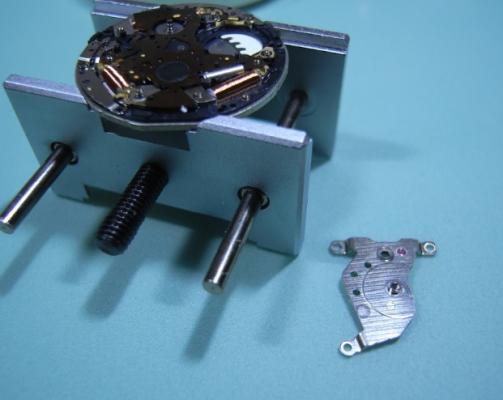
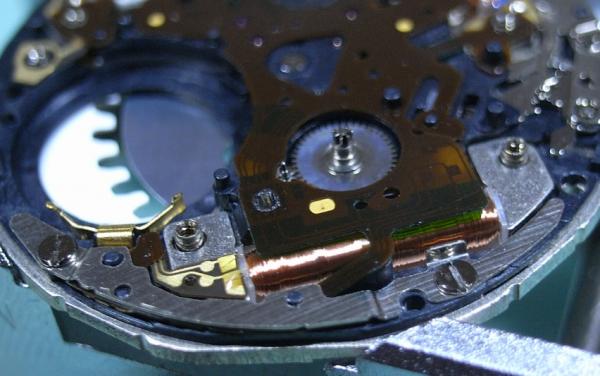
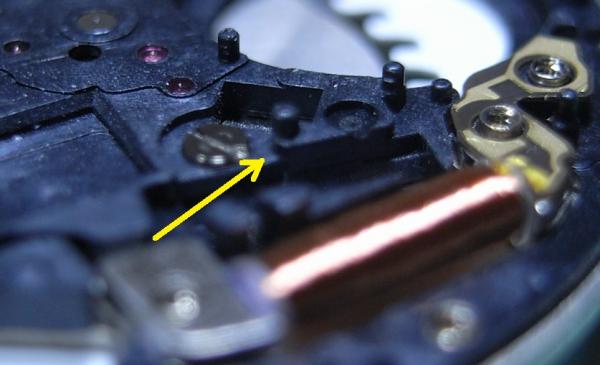
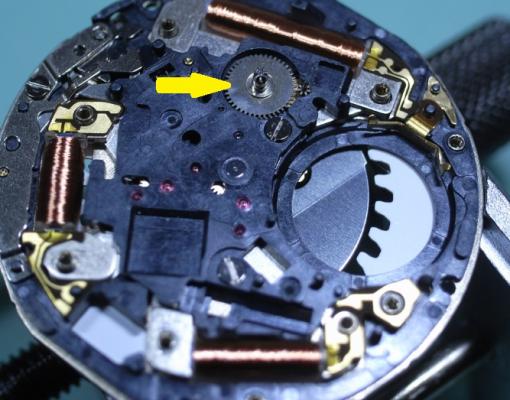
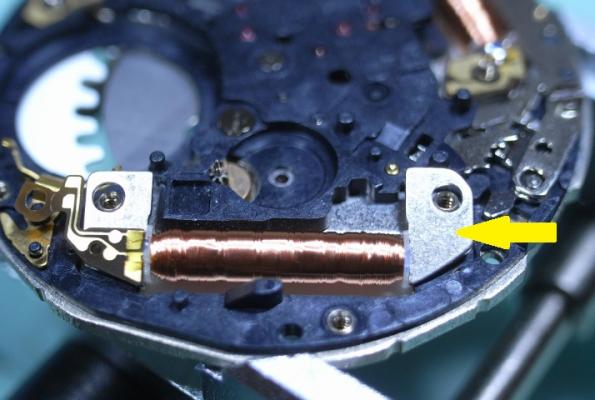
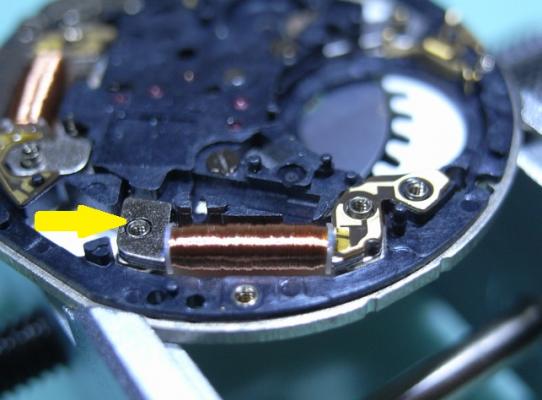
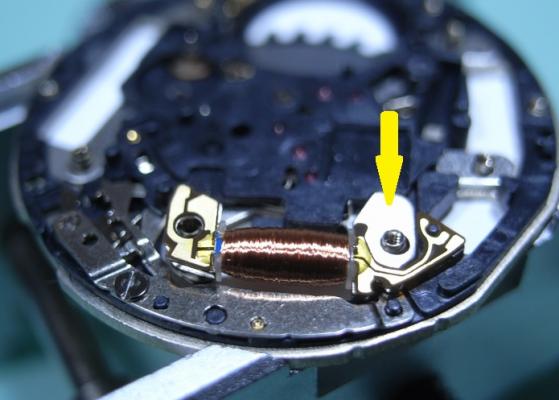
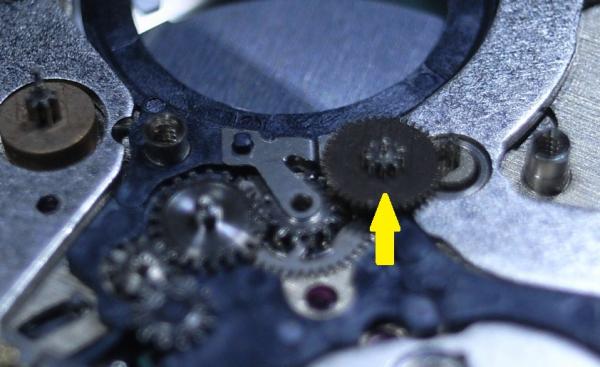
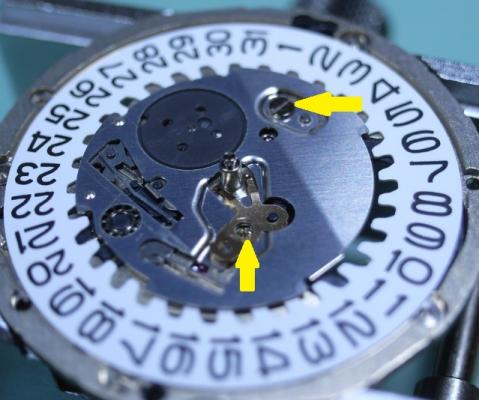
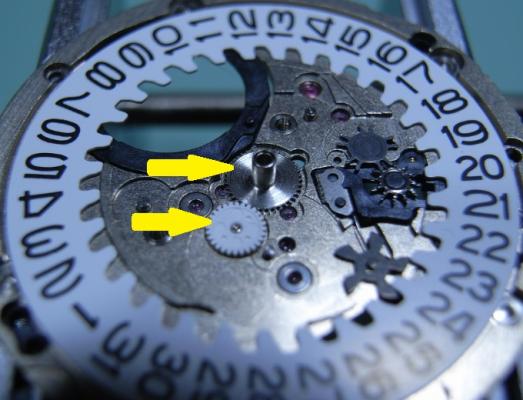
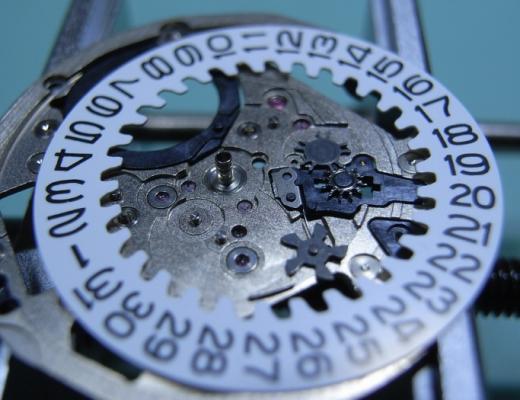
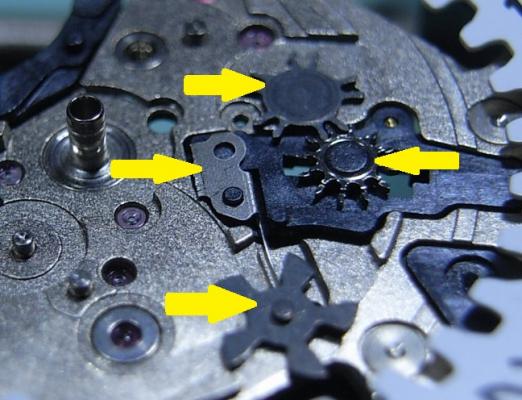
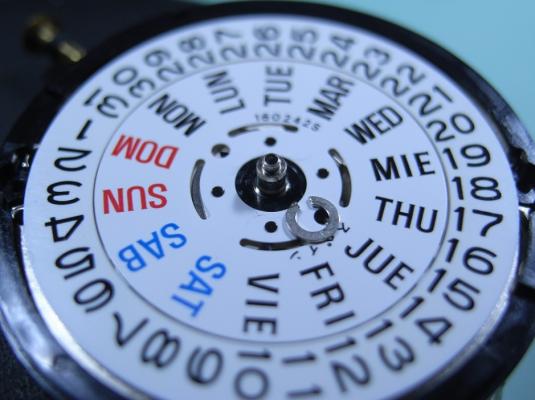
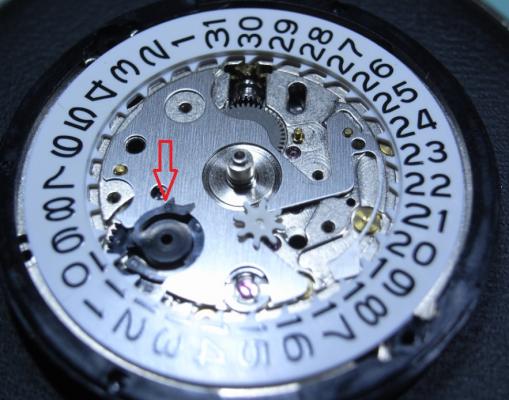
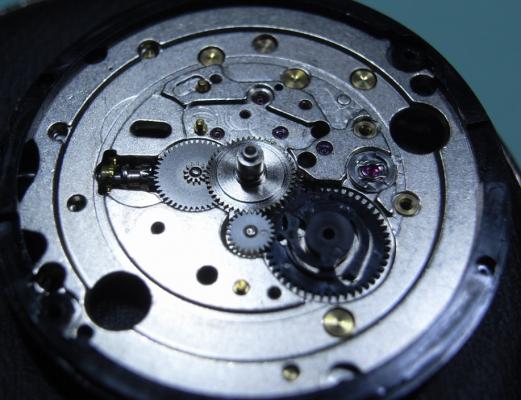
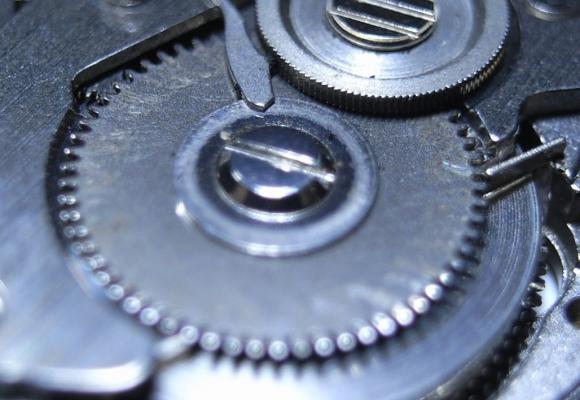
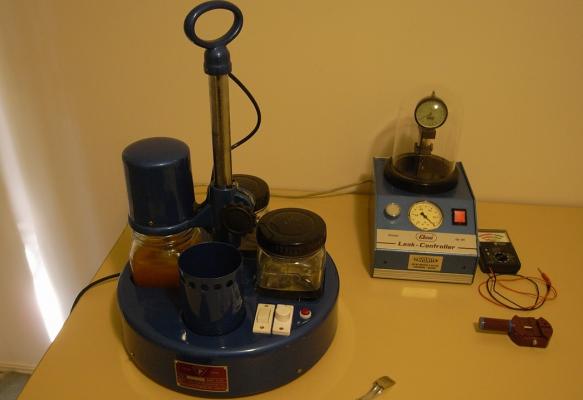
Seiko 5J22A Complete Service Hunting through my cupboards I found my old Seiko Kentic "Auto Relay" that I purchased sometime in the 90s, when this was the latest cutting edge Quartz Watch on the market offered by Seiko. It's been sitting for over a decade without use, and I decided to really push myself and, with the Lord's assistance, completely strip and service this watch. So I tracked down the Tech Specs, and if you are thinking of embarking on servicing the 5J22 YOU WILL NEED THEM!! :) So here they are: 5J22A.pdf I will be using the part names from this document for this walkthrough, so download and print it out for you own sanity. The parts in this movement are incredibly small, so much so that my camera had trouble focusing on them ... so part names will help you as much as the visuals aids for this service. Once again, I've had no one to guide me on this, so this is the way "I" stripped the movement down, the correct factory procedure may, and probably does, differ from my way ... so I give a warning here: CONTINUE AT YOUR OWN RISK. Disassembly Unscrew the back cover and store the rubber gasket away safely. With a 2.0mm Screwdriver, pry the Location Ring out with the slots provided in the plastic ring. Remove the Oscillating Weight with a 1.20mm Screwdriver ... and this will be the driver you use on all further screws. To remove the Stem, you need to have the Stem push all the way home, to move the Yoke into the correct position so you can depress the lever (Location shown in picture after I removed the movement to make it easier to see the spot where you push) The movement should now come out of the case along with the internal Bezel Ring. Remove the Hands Remove the 7 screws for the Circuit Block Cover A, and the Rechargeable Battery Clamp (Sorry referred to an older pic to so you the location of screws) Remove the Insulator for Rechargeable Battery, and then the Battery itself. Remove Circuit Block Cover A Remove Circuit Block Cover D Reference picture of Circuit Block Cover D Remove Circuit Block Cover B Reference picture of Circuit Block Cover B Remove Oscillating Weight Bridge Reference picture of Oscillating Weight Bridge Remove Circuit Block Cover C Reference picture of Circuit Block Cover C Remove Circuit Block NOTE: The pin with the yellow arrow pointing to it holds onto the Circuit Block very firmly. Be CAREFULLY and GENTLE, as the Circuit Block can be easily damaged. This is the angle of attack that I recommend. Coming in on an angle just in front of the Crystal Unit, and gently push upwards ... and I mean GENTLY. Patience wins the day! Remove the Intermediate Wheel for the Generating Rotor Remove the Generating Coil Block (grasp with tweezers where indicated with yellow arrow) Remove the Second Coil Block (grasp with tweezers where indicated with yellow arrow) Remove the Hour and Minute Coil Block (grasp with tweezers where indicated with yellow arrow) Remove the Train Wheel Bridge Remove the Second Wheel and Pinion, the Third and Fourth Wheel Remove the Intermediate Second Wheel TIP: Next is this first of three sets of Stators and Rotors that make up this Quartz Movement. Be sure to place all the Stators and Rotors into a piece of Rodico for safe keeping. As shown below: THESE PARTS ARE MAGNETIC AND WILL ATTRACT PARTICLES, SO DO NOT PUT INTO THE BASKET FOR CLEANING Remove the Second Stator and Second Rotor Remove the Minute Wheel and Pinion, Intermediate Minute Wheel, and Setting Wheel Remove the Center Wheel and Pinion Remove the Generating Stator and Generating Rotor Remove the Setting Lever Spring Remove the Yoke and Setting Lever Note: Release tension on the Yoke Spring FIRST Remove the Clutch Wheel and the First Intermediate Wheel for Calendar Corrector Remove the Hour and Minute Stator and Hour and Minute Rotor This side of the Main Plate is now finished ... time to flip it over and start on the Calendar Works Remove the two screws indicated and remove the Hour Wheel Guard Spring, and the Date Dial Guard Remove the Intermediate Date Driving Wheel Remove the Intermediate Hour Wheel, and Hour Wheel Remove the Date Dial Remove the Day-Date Corrector Wheel, Second Intermediate Wheel for Calendar Corrector, Date Driving Wheel and Spring Note the position of tension of the Date Driving Wheel Spring (bottom of page 9 in the Tech Specs) Remove the Circuit Block Spacer ... and the disassembly is complete! I started work on this rather late at night and took my time and studied each part before removing, making sure to document everything carefully. So I'll clean the parts and begin reassembly fresh tomorrow. I can see this one is really going to push my abilities, and I'm looking forward to tackling it and uploading the reassembly steps.


-
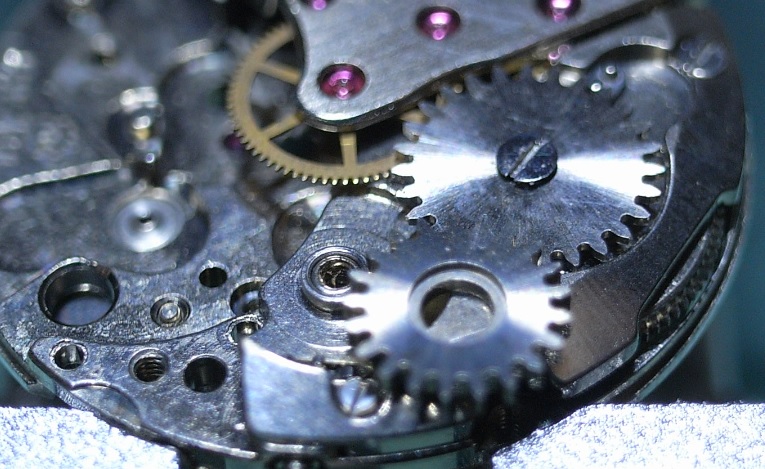
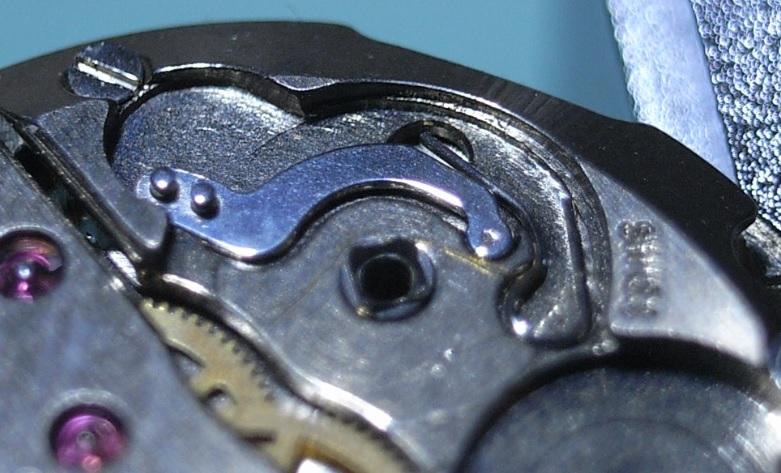
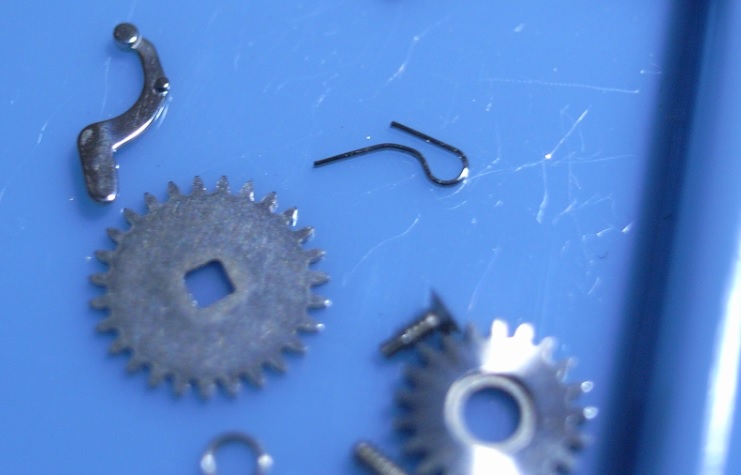
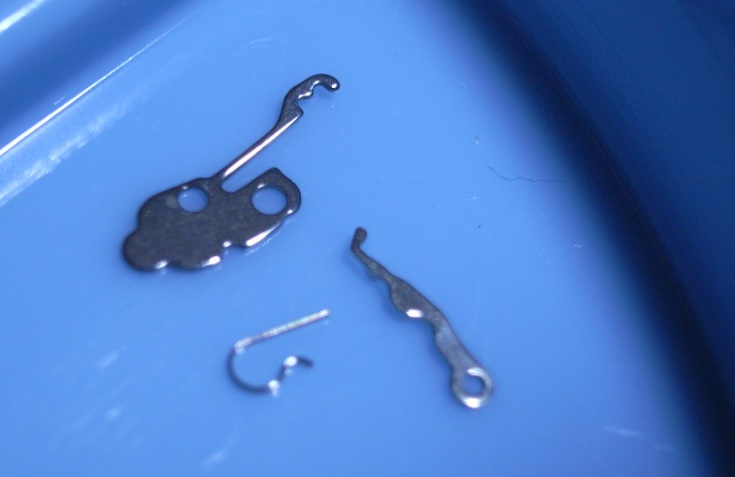
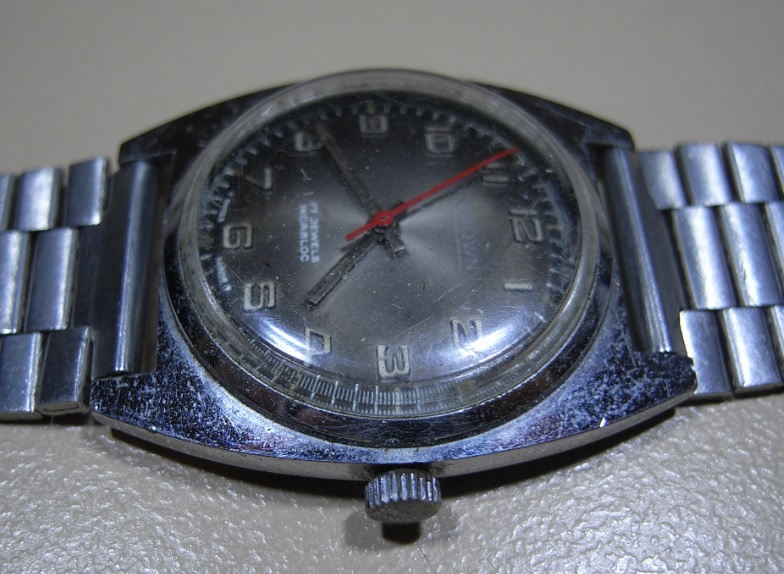
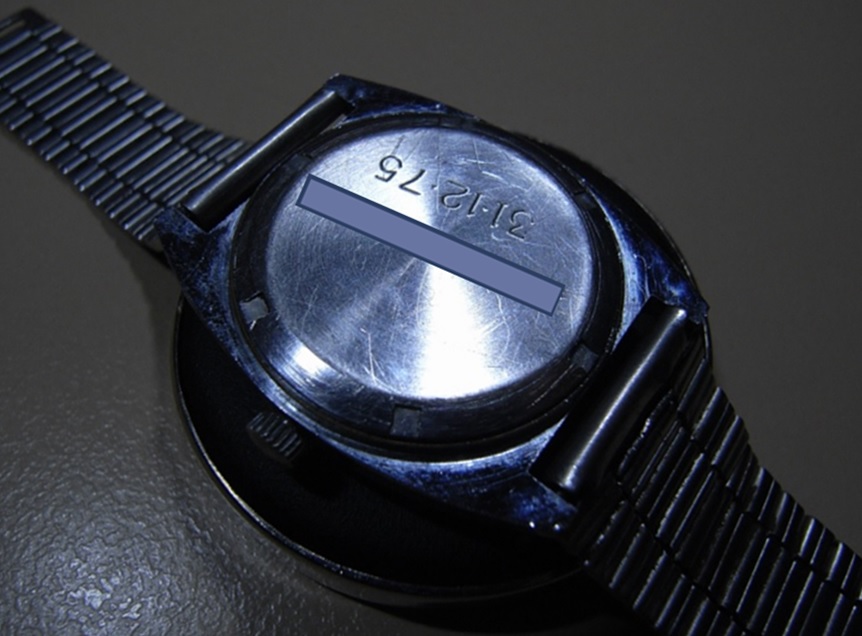
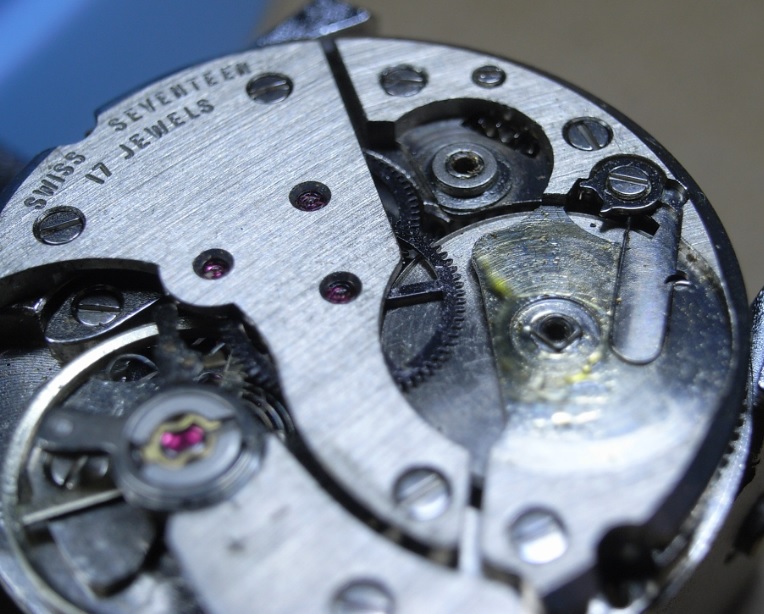
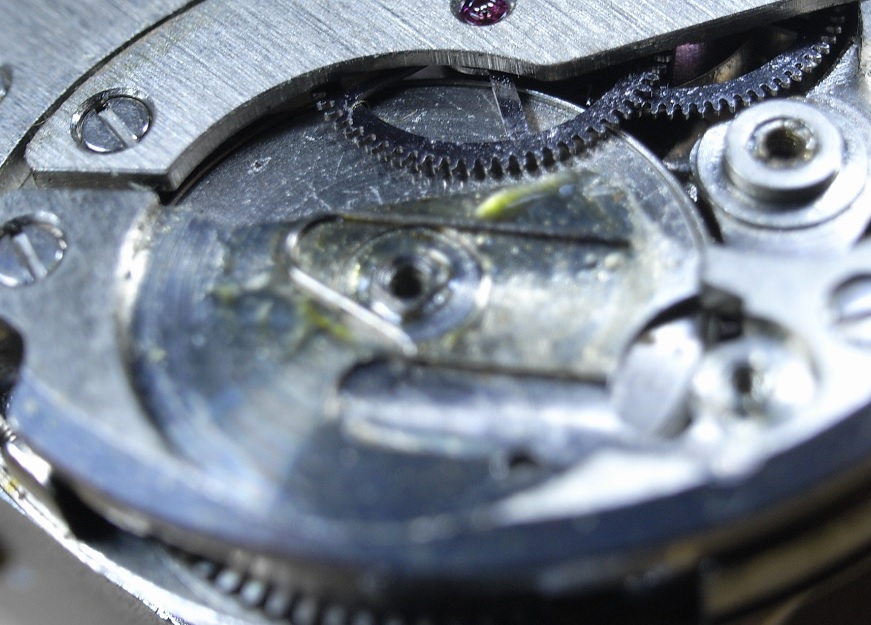
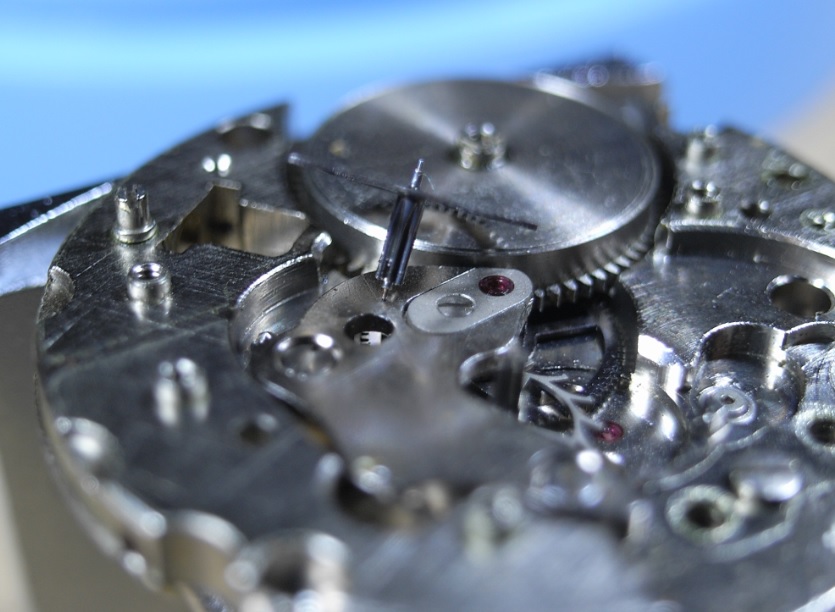
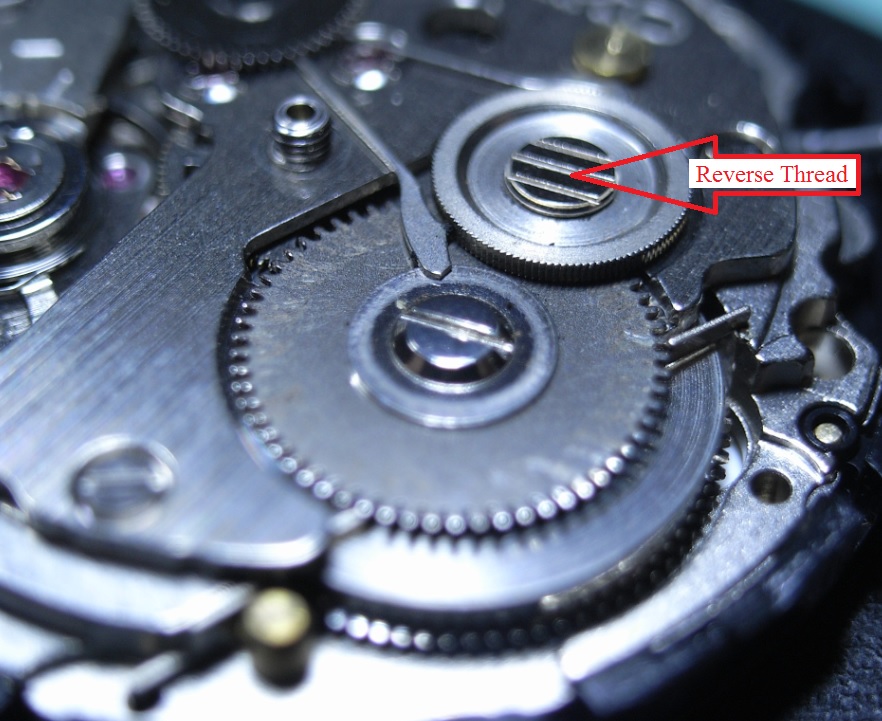
ST96 Restoration Walkthrough I got a new project to start on: restoration of my brother's watch he got for his 9th birthday. This is not an expensive watch in dollar terms; but the memories and history are priceless, and one I really want to restore to excellent condition. It stopped running decades ago, but he has still kept this watch for nearly 40 years, how many of us can say the same about their first watch?! My brother has placed a lot of trusted in me to restore this watch, and I want to repay that trust by restoring this watch to the best of my ability. Note his name (blocked out) and date it was given to him are engraved on the back plate. After opening the back I was pleasantly surprised to see it was a 17 Jewel movement ... so for it's day it was a proper watch; and not a cheap throw-away item you buy at a service station. This would have been purchased at a professional jewelers back in 1975. Unfortunately, the first issue was discovered. The locating ring is missing, and the only thing holding the movement in place is the stem ... not good. So the disassembly begins. Once removed from the case, the hands and dial were removed to get to the movement. Then the first of the motion work is to be removed. Remove the Hour Wheel Then the Minute Wheel pinion and it's Guard Plate. Next remove the intermediate pinion for the Minute Wheel. Also notice the over oiling of this movement, someone got very enthusiastic with their oiler! Again oil everywhere! Here's is the Minute Wheel glued to the Guard Plate with oil. Pull the Cannon Pinion and remove the Endstone. Release the spring tension from the Mainspring. Remove the Ratchet Wheel and Crown Wheel Look at the flood of oil over the bridge! Second issue with this movement. The thread for the Crown Wheel Screw is stripped. It looks like someone has been inside this watch, many years ago, to try and see why it stopped running, and unscrewed this anti-clockwise; not knowing that it's a reverse threaded screw, and stripped the thread :( Continuing with the dismantling ... remove the Click and Click Spring. Note the orientation of the spring. Remove the Barrel Bridge Remove the Balance, Pallet Fork Cock, and the Fork. Remove the Centre Wheel and Third Wheel. Remove the Escape Wheel and the Mainspring Barrel. Remove the Endstone from the Centre Wheel Bridge, and then remove the bridge itself. Remove the Centre Wheel Whatever lubricates were used on this movement it has crystalized into a nasty mess. I tried to capture it on this photo, but it didn't really comes out as I'd hoped .... but notice all the white specs. To finish off, remove the Keyless Work. Start with removing the Setting Lever Spring. Next unscrew the Setting Lever, remove tension from the Yoke Spring, and then remove the Yoke. Note: more evidence of over oiling it present here. Note the orientation of the Yoke Spring. Lastly, remove the Endstone from the Main Plate, and you are complete. After fully dismantling the movement, I opened up the Mainspring Barrel and found what the original issue must have been ... a broken Mainspring. This is the third issue that needs to be addressed to restore this movement. Probably broken by a young boy over winding his watch :) Note: The break in the spring, and how it doesn't attach to the Barrel Arbor any more. So with a missing Locating Ring, stripped Crown Wheel thread in the Barrel Bridge, and a broken Mainspring: I need some spares!! .... off to the Fleabay .... Being a movement in an obscure brand of boys watch, I wasn't exactly hopefully in finding spares readily available ... but praise the Lord Jesus Christ, they were there in abundance! It seems India has cornered the market on ST96 Movements :P They had it least 10 to choose from. I ended up choosing a "Rare" Tressa model in "Excellent" condition, that was a "MUST SEE" I placed an offer for AU$28 on this rare collectable (including shipping) and won it **chuckle** Regardless of the hype, it is guaranteed to work for 12months, and is the movement I require to secure the parts I need. Including that all important Locating Ring. With free shipping comes a long wait for delivery to Australia ... 12-22 days. So while I'm waiting for the watch parts to arrive, I'll clean up the case and bracelet. ... to be continued


-
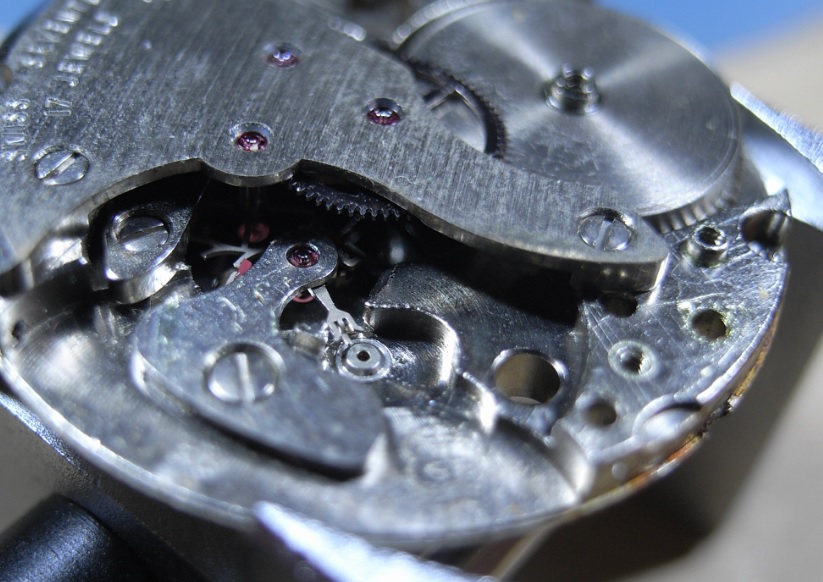
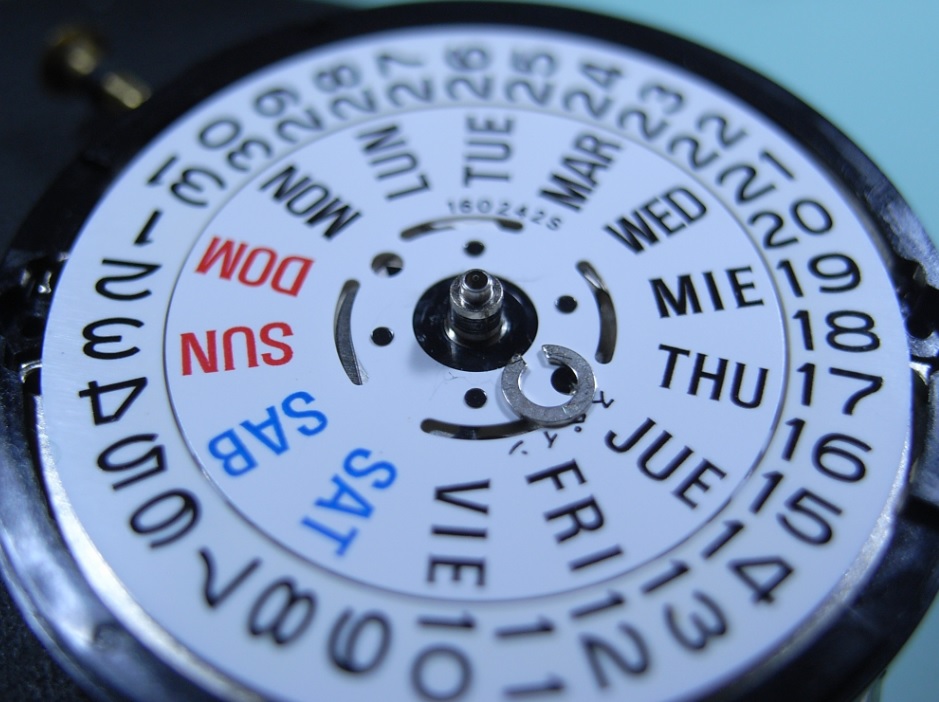
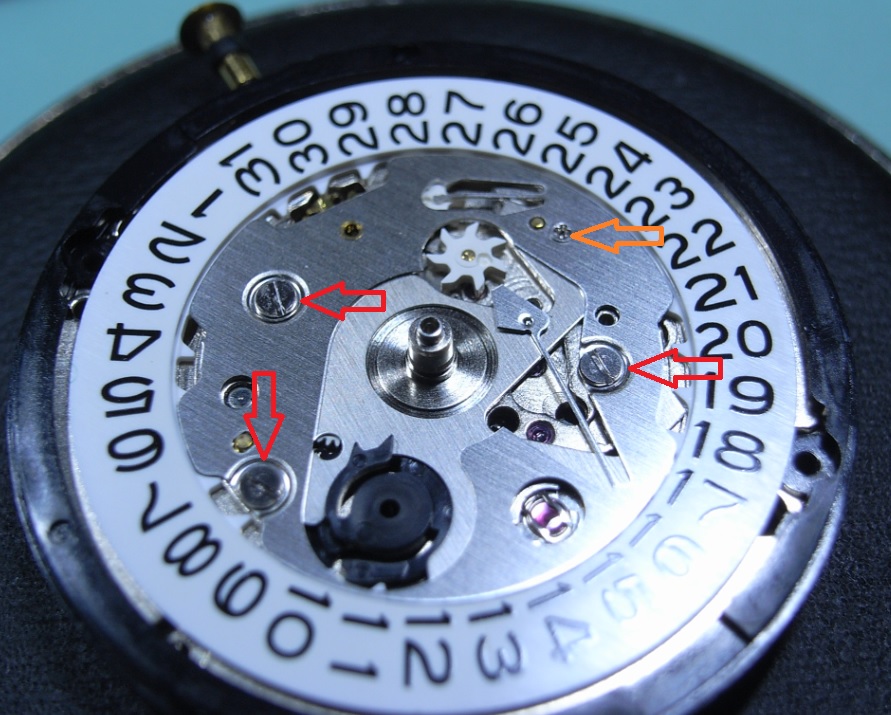
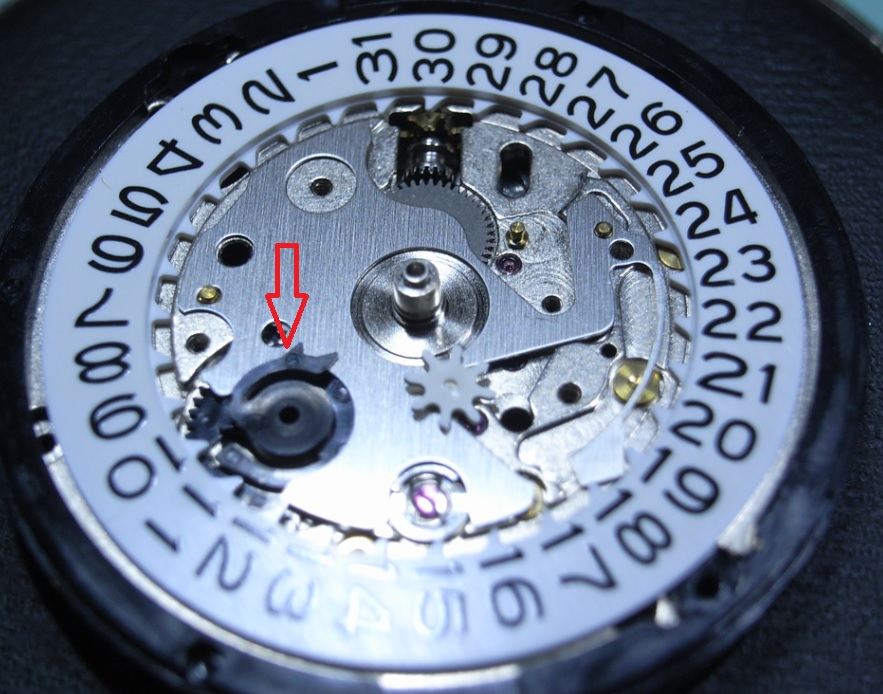
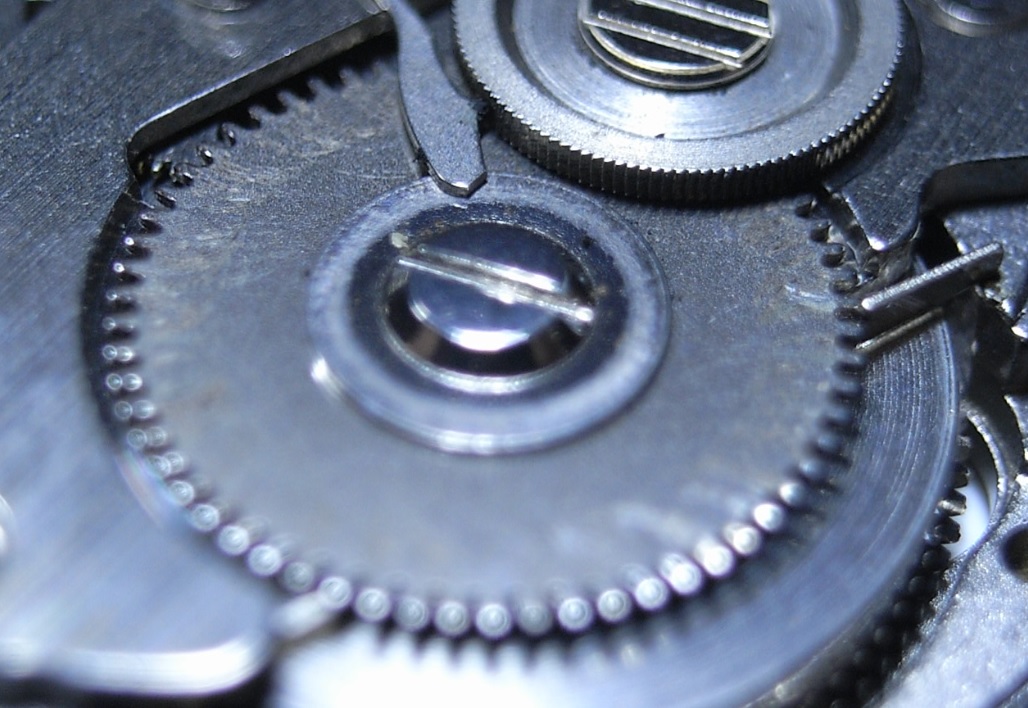
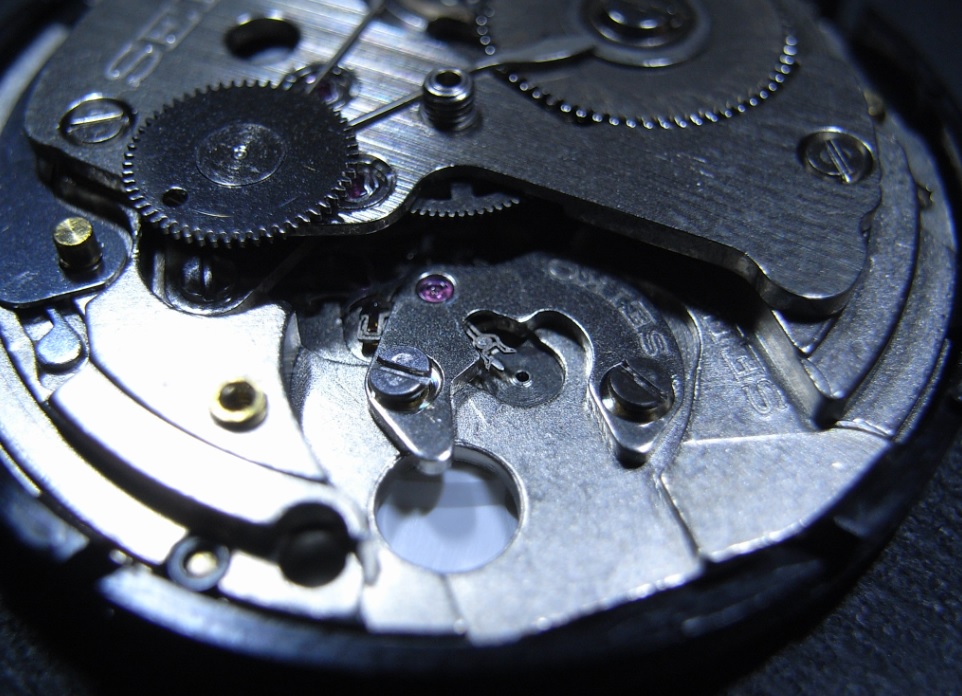
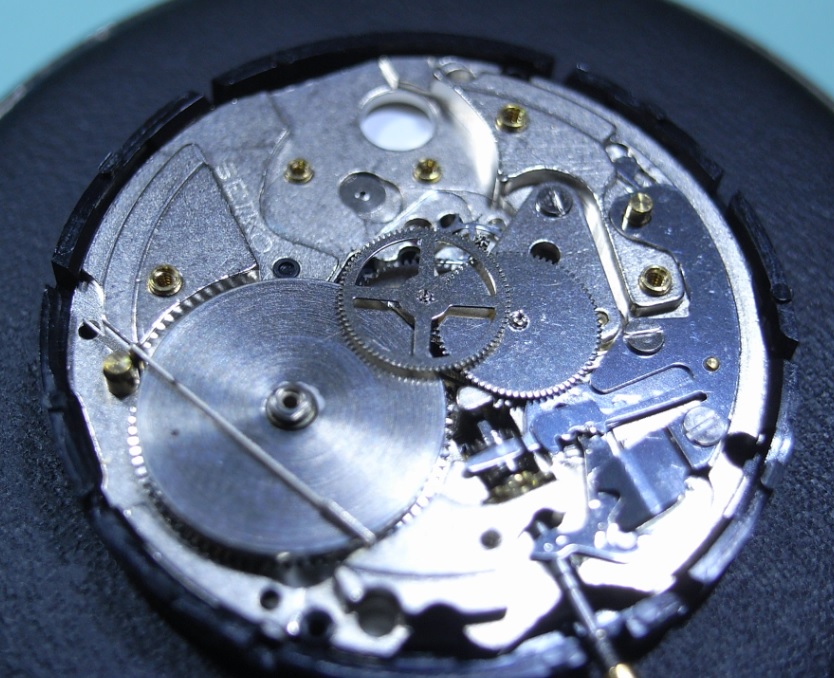
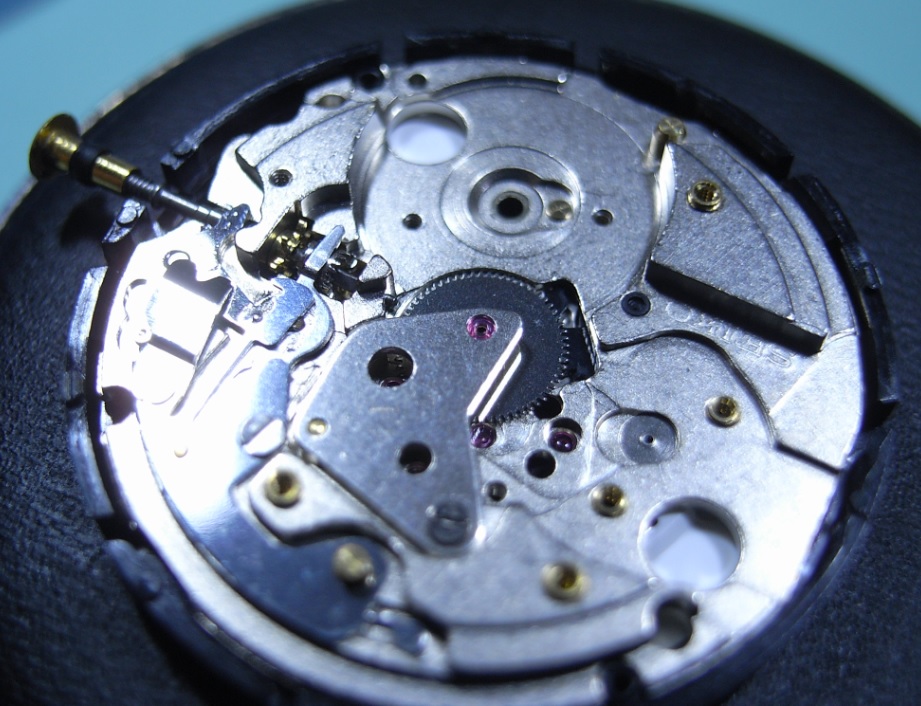
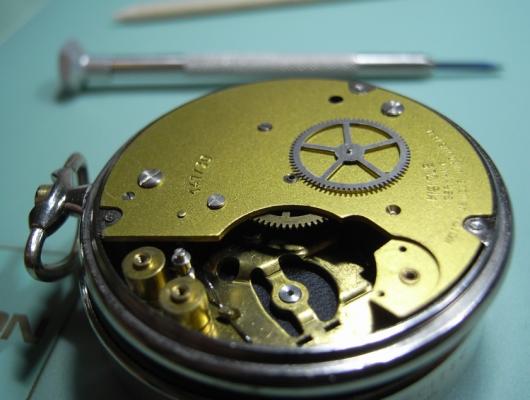
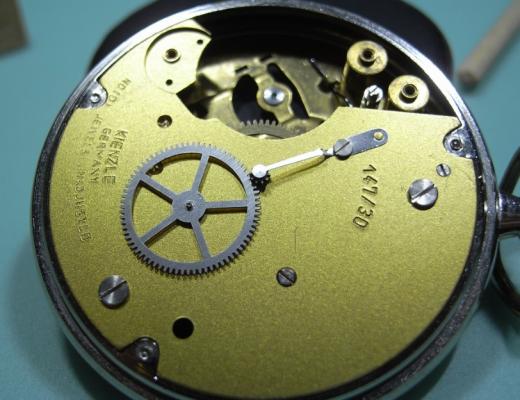
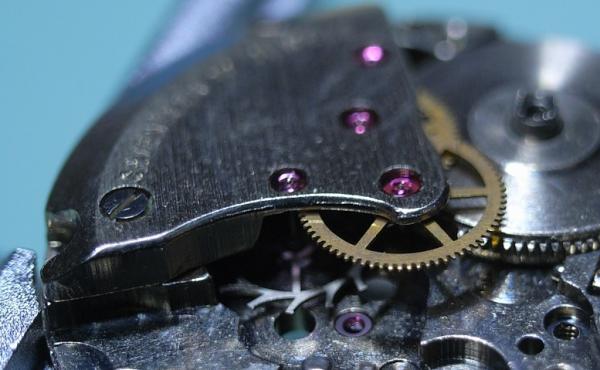
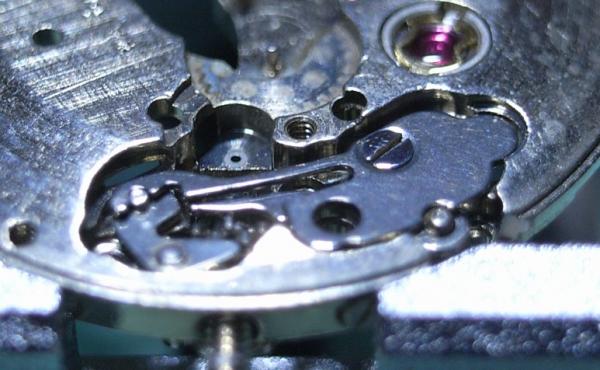
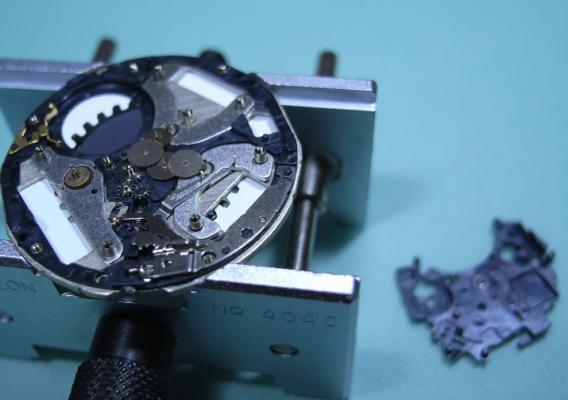
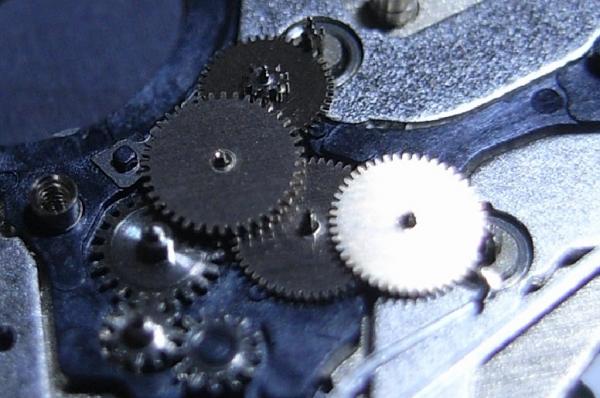
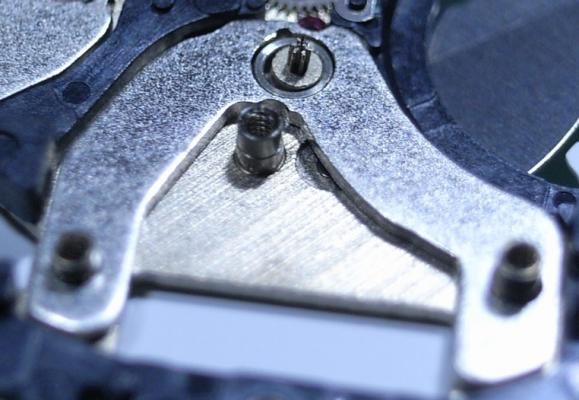
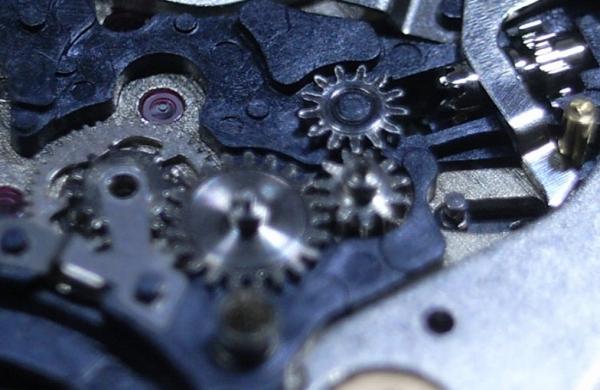
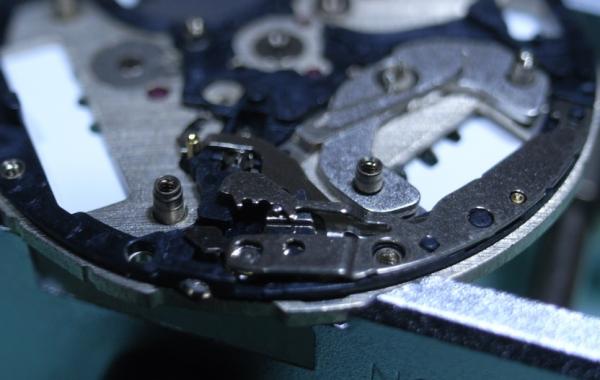
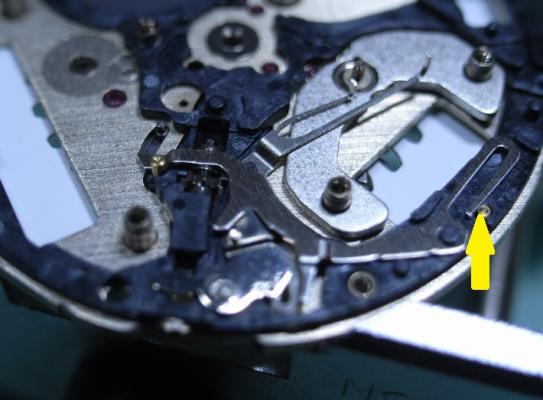
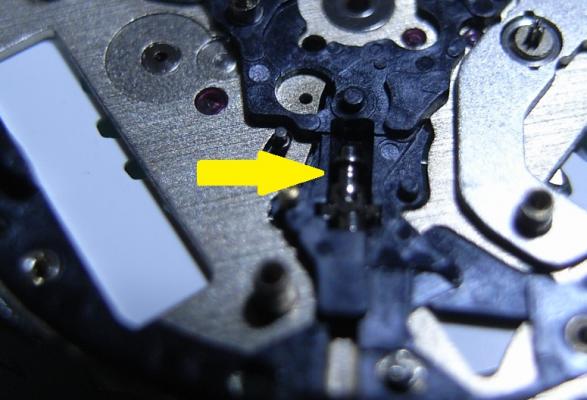
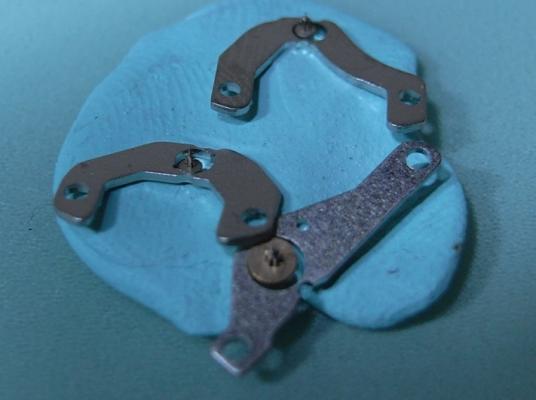
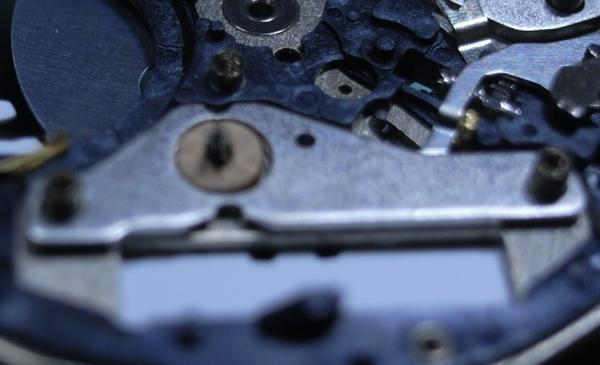
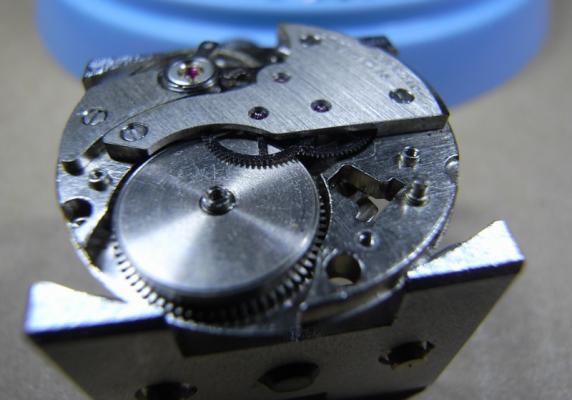
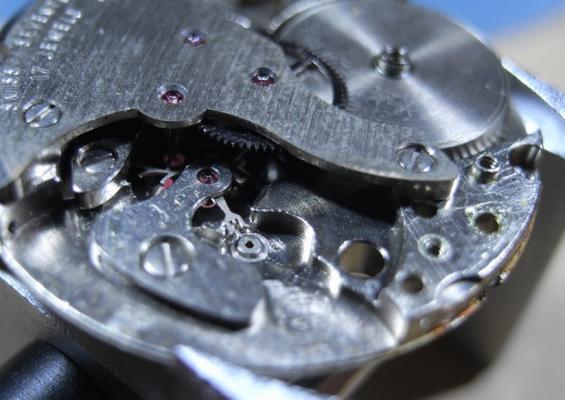
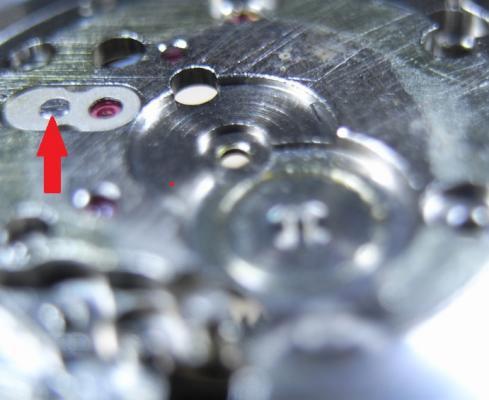
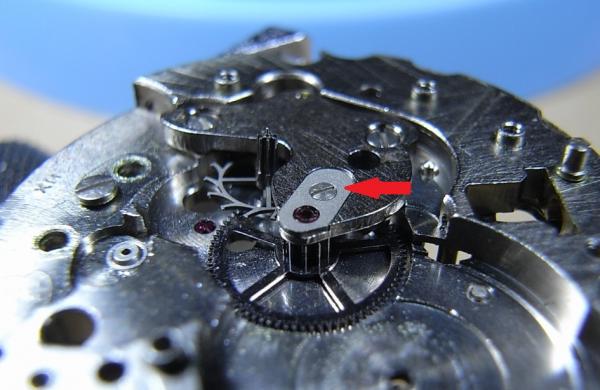
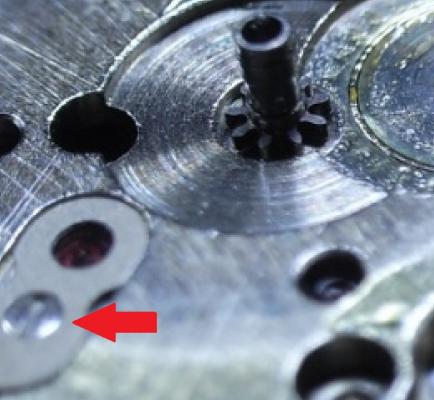
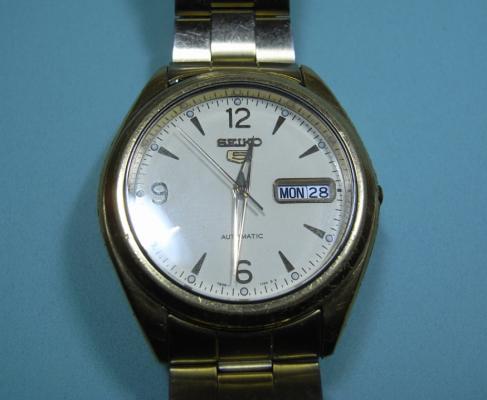
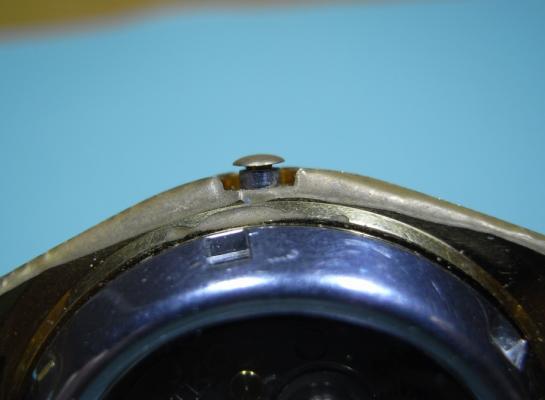
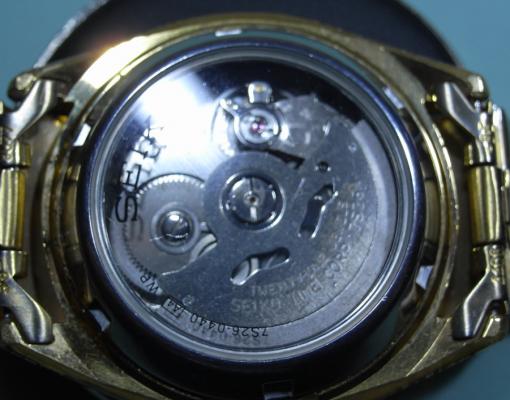
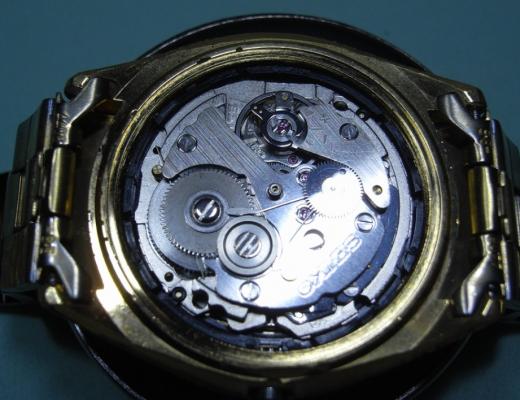
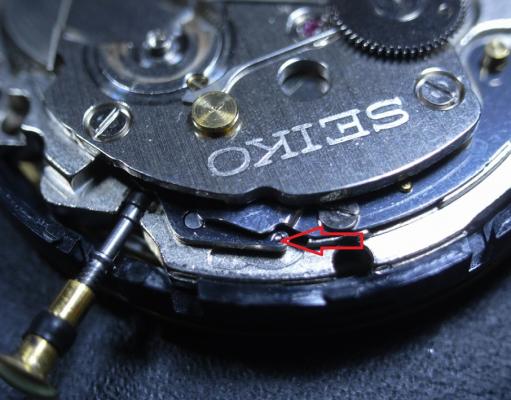
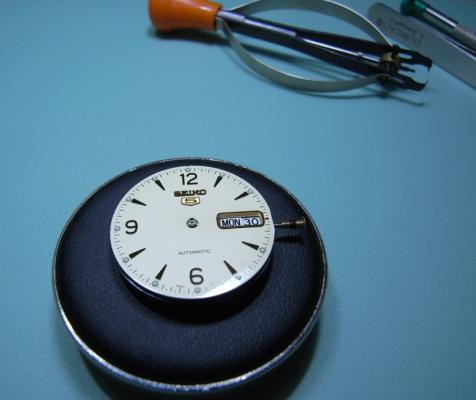
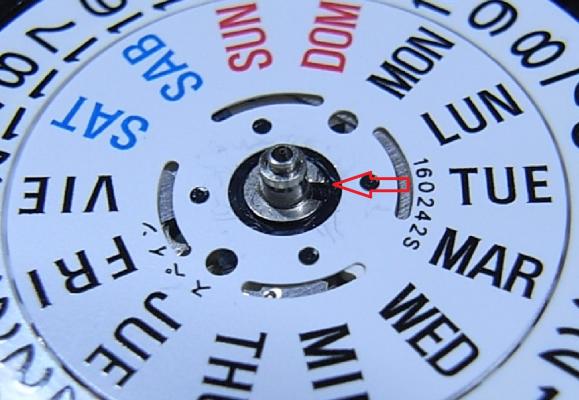
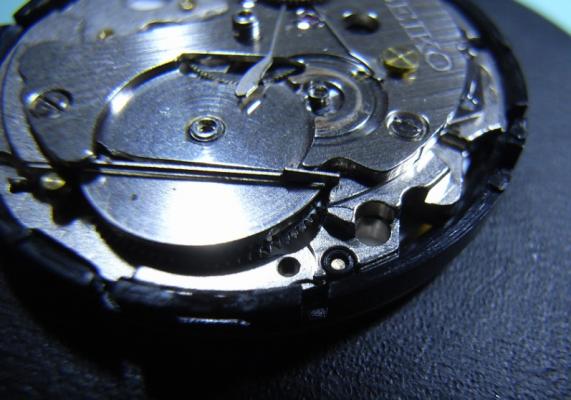
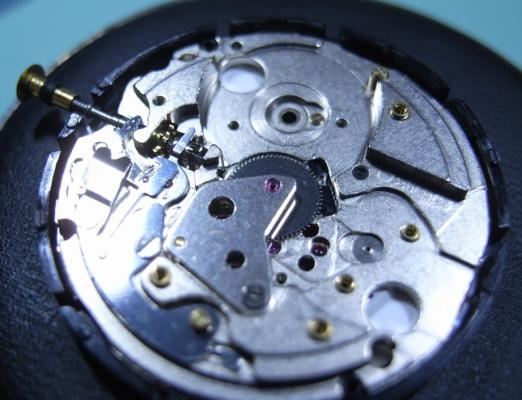
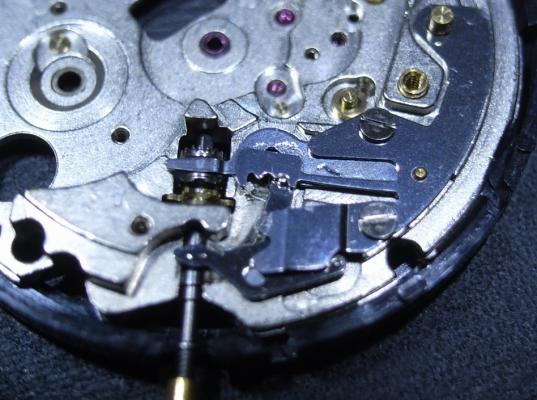
Seiko 7S26A Complete Service Background I have a good friend, a brother in Christ Jesus, who I've known for many years. He knows I've embarked on retraining myself for a new career in Watchmaking, and seen my first two restored watches. He told me that his old faithful Seiko 5, which he's worn everyday for 12 years, has recently had issues. Occasionally it will advance rapidly in time (up to an hour in a few seconds) and then just keep ticking away normally. I told him I'd be happy to take a look at it, and put it on my ACEtimer Timegrapher. The pattern on the screen looked like a B-52 drop in Nam (stupid me forgot to take a photo), and I told him that his watch definitely needed an inspection and service. So started my research on what the problem might be. After reading a "Practical Watchmaking", and the many forums that I've read, I was pretty sure it was the Pallet Fork ... either very dirty or damaged stones, or a broken/damaged fork pivot. So onward to the service... Disassembly One unusual aspect of this watch is the crown ... or lack there of, more to the point. I suppose since this is an automatic watch, they thought it didn't need to be wound. This watch also has a display back, so extra special care not to mark any of the plates, or damage screw heads! The first issue you'll face when working on a 7S26A Movement, is how to get the stem out! It isn't obvious at all, and there is a little trick. The crown needs to be pushed all the way in to expose the push plate (it is hidden in the other crown positions). I took this photo once the movement was out to best illustrate where to push. Remove the Hands, Dial and Oscillating Weight (2.0mm Screwdriver). Gently lever up one end of the circlip and carefully work your way around. You then should be able to raise the circlip up the length of the shaft without it pinging off. Remove the Day Wheel and the four screws holding the Date Dial Guard. (Use a 1.40mm Screwdriver, and this driver is good of all the screws from now on; bar one.) NOTE ORANGE ARROW: Seiko Special Tool needed for the 0.98mm Philipshead Screw (Part Number: S-921) I had to journey down to my nearest Seiko Distributor and grab one ... cost was AU$24.00 Here's a closer look at the troublesome screw. Remove Date Jumper, and note that the Date Drivewheel lips over the top of the plate. Remove all the motion work, and pull the Cannon Pinion Remove the tension from the Mainspring. Remove the Ratchet Wheel and the Second Reduction Wheel and Pinion. (remember the Reduction Wheel has a reverse thread) Unscrew the Balance Cock and remove the Balance. Also unscrew the Pellet Cock and remove the Pellet Fork. BINGO! Found the problem with my friends watch. The top pivot on the fork is broken. Easy fix with a replacement fork :) Remove the Barrel/Train Wheel Bridge Remove the Click, then the Barrel. Remove the Fourth Wheel, Third Wheel and Escapement. Unscrew the Centre Wheel Bridge and remove the Centre Wheel Now to the Keyless Work. Remove the Setting Lever Spring Remove the Yoke and the Setting Lever Pull the Stem out, and the Clutch and Intermediate Wheel will fall away. Lastly, pull the black plastic location ring off. ... and now it's bath time!!! I hope this has been of help to you guys. I'll post the Assembly steps in this thread tomorrow morning.


- 94 replies
-
- 12
-

-
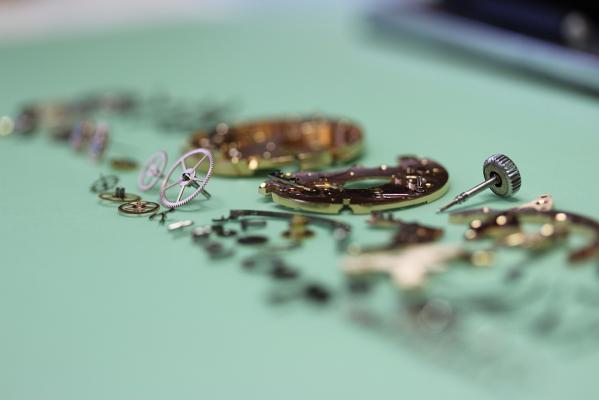
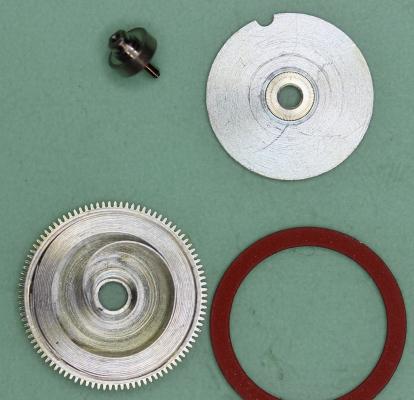
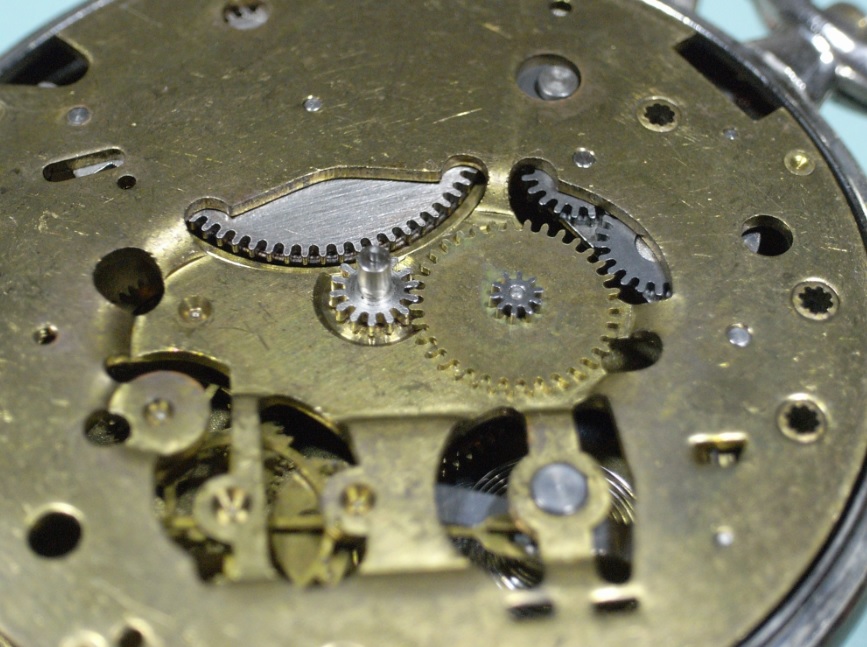
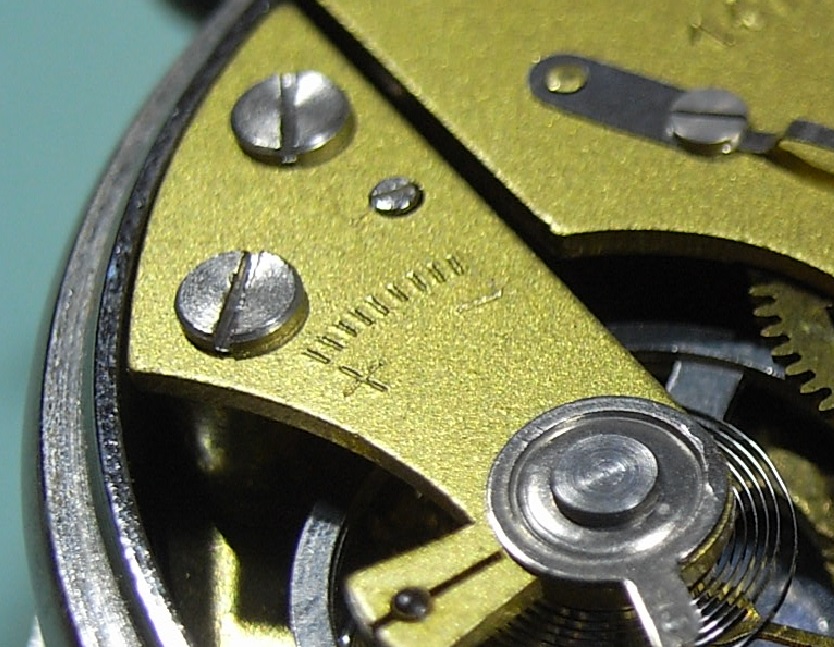
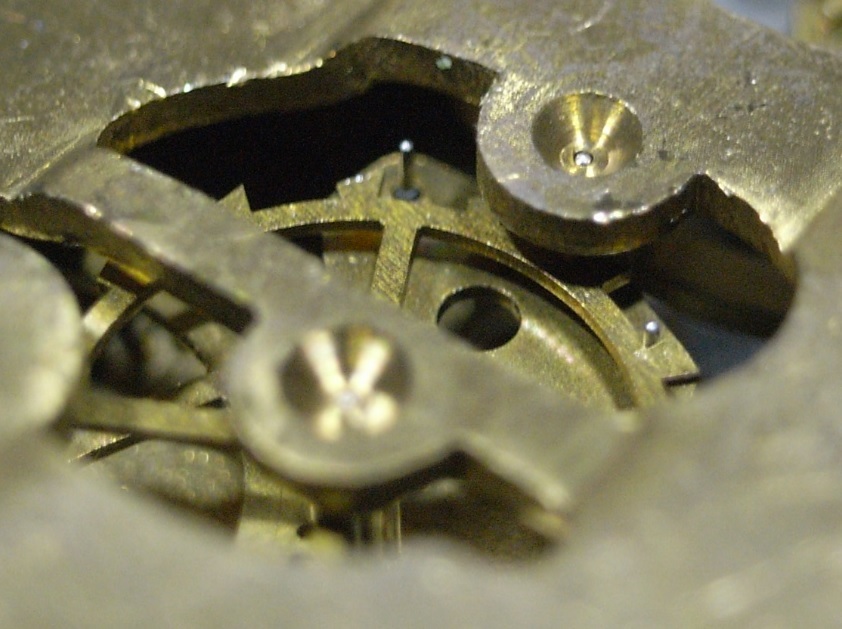
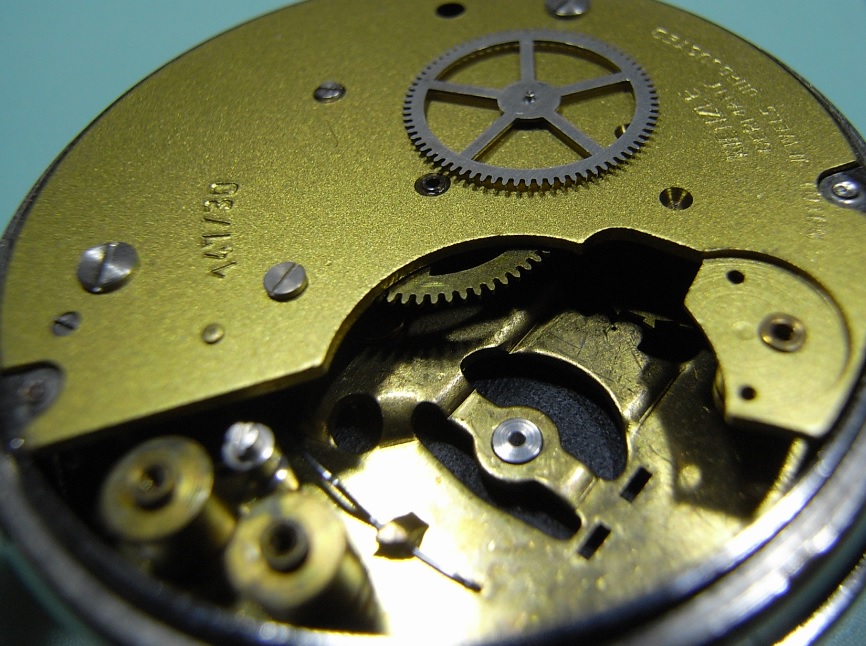
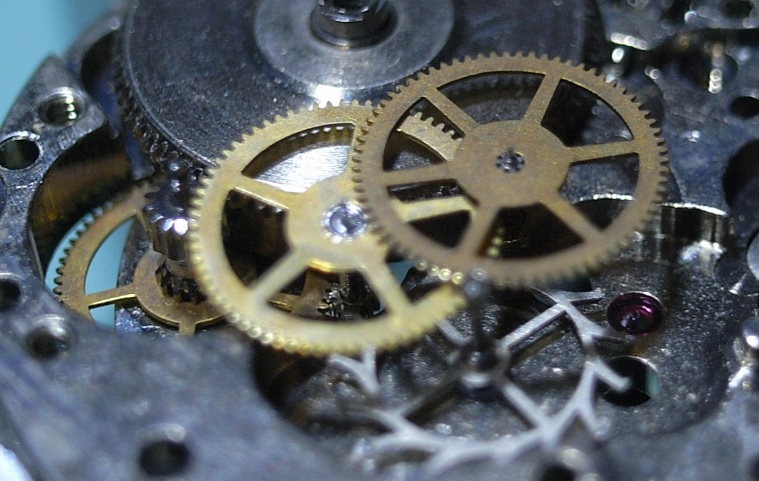
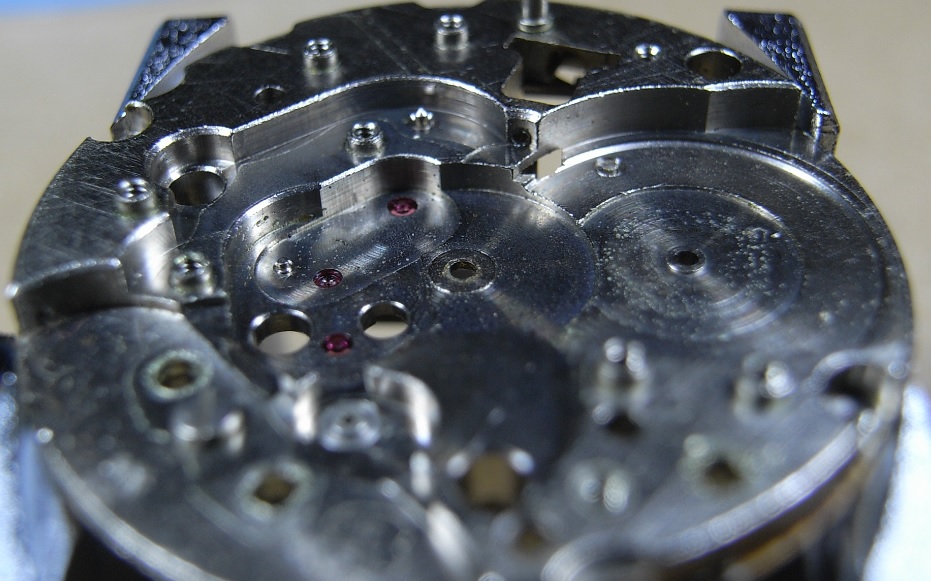
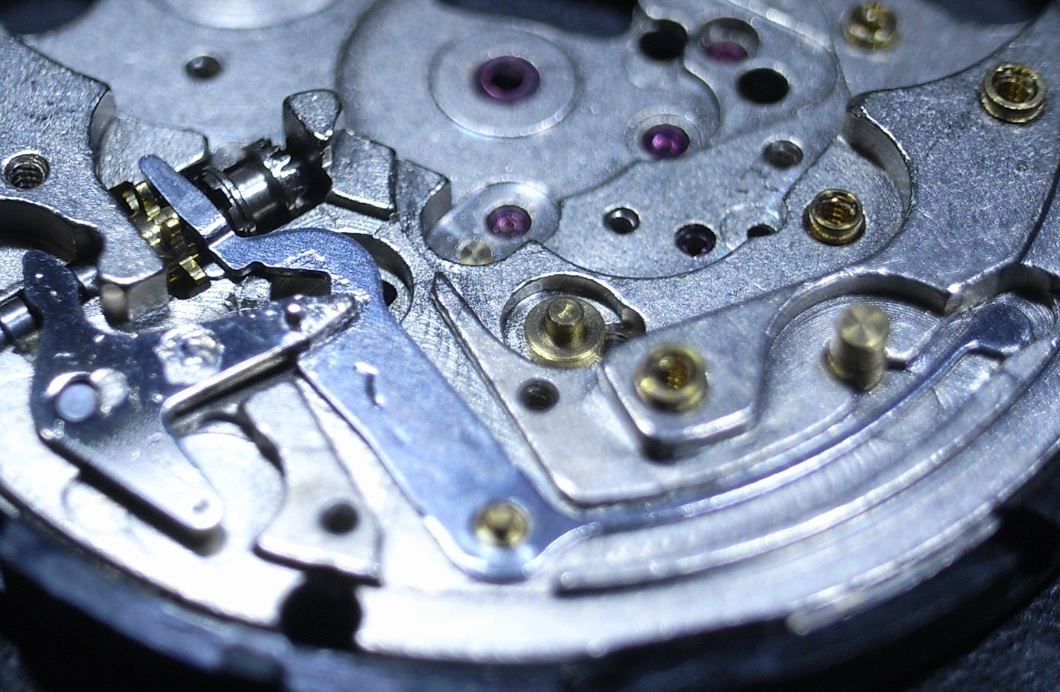
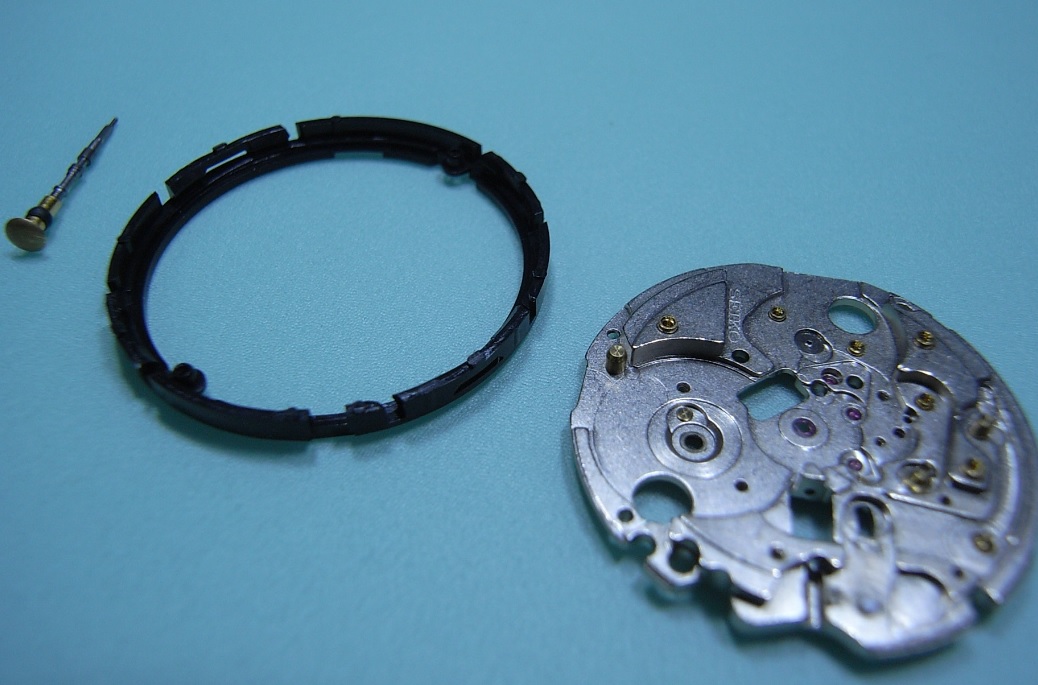
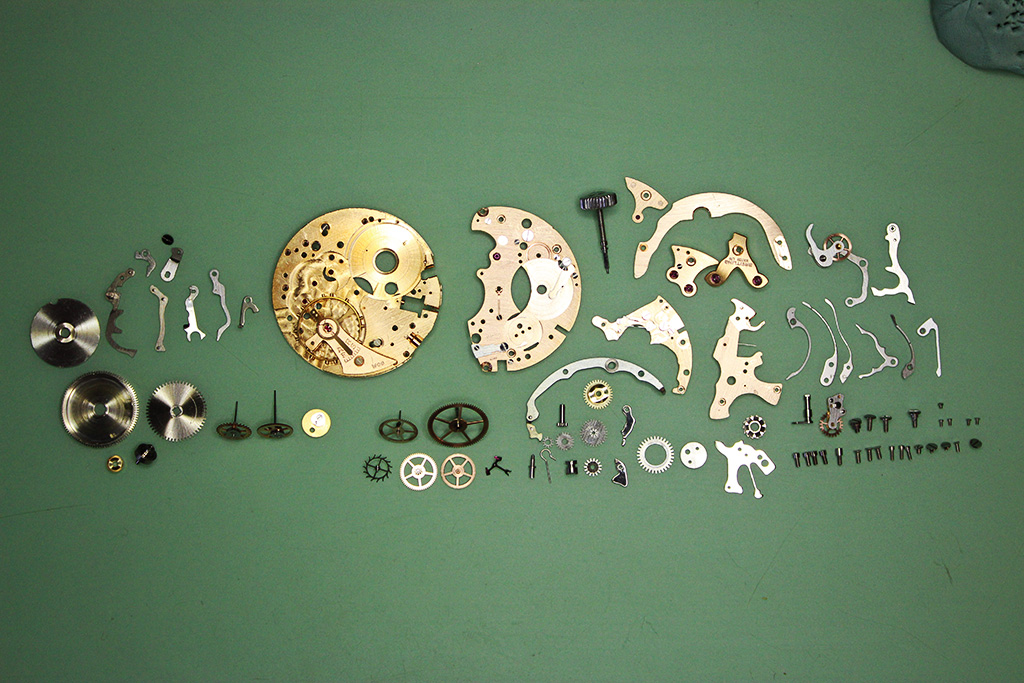
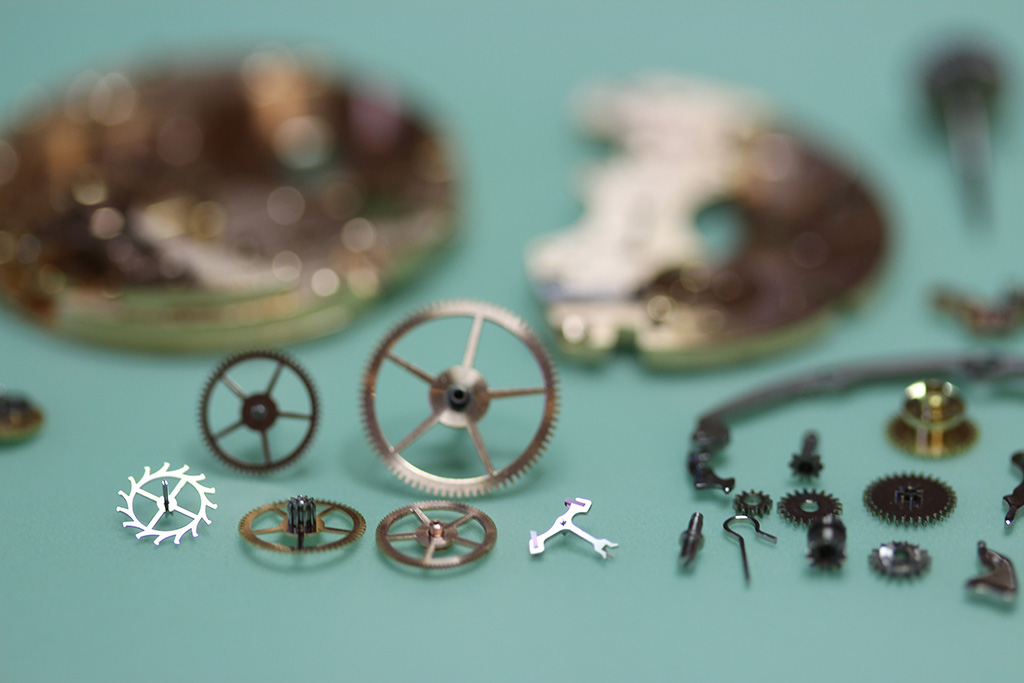
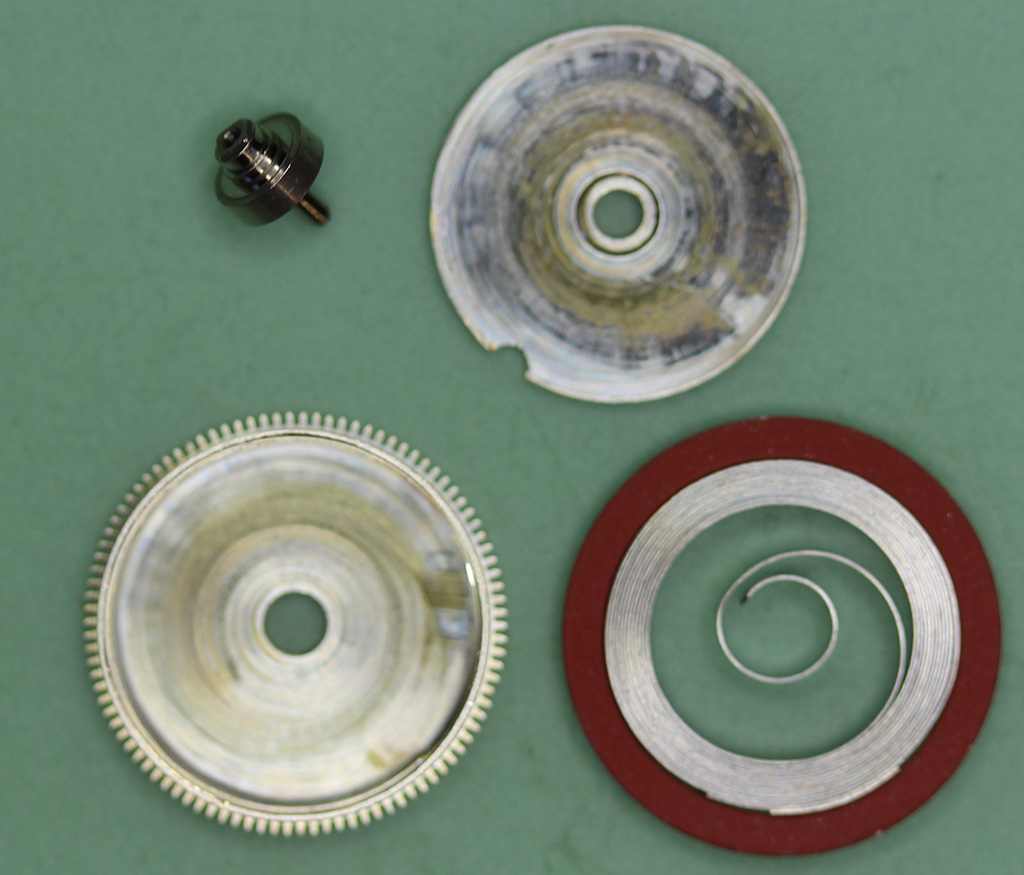
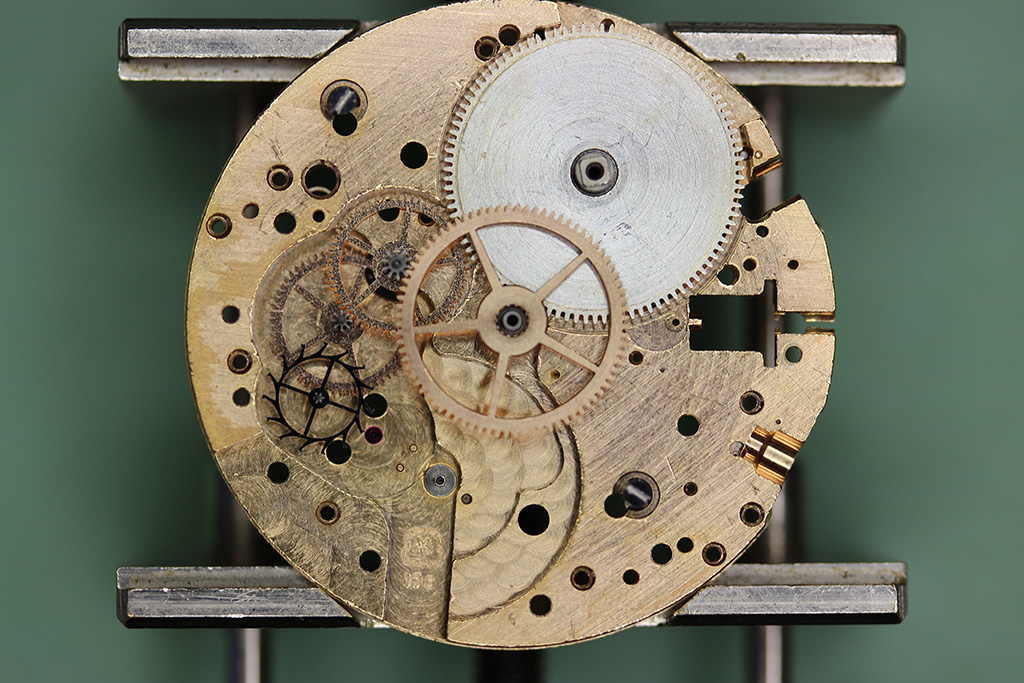
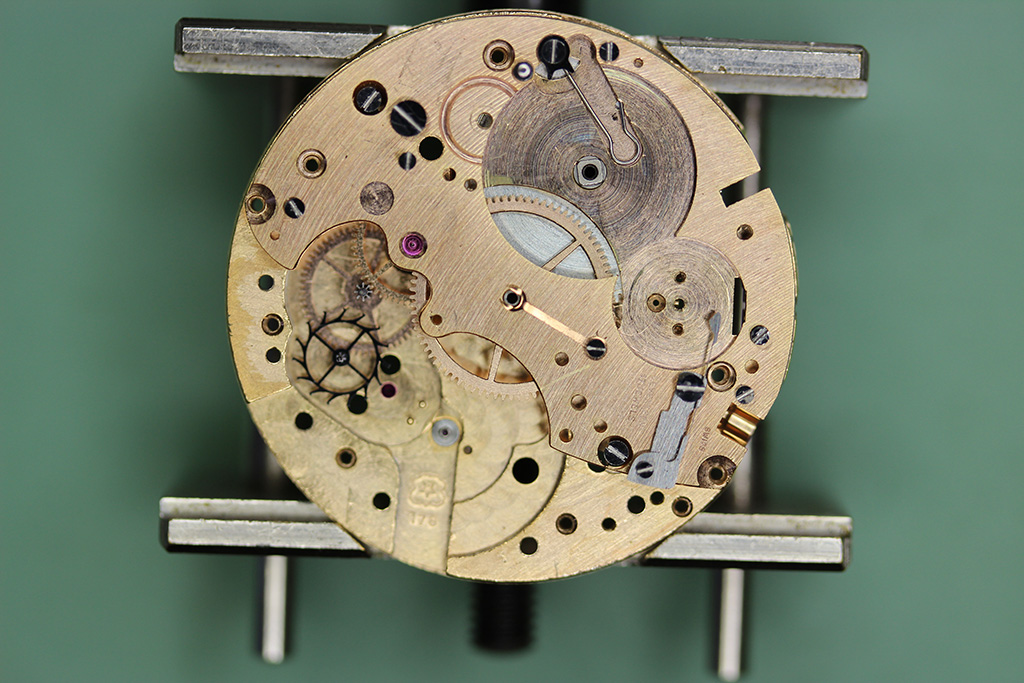
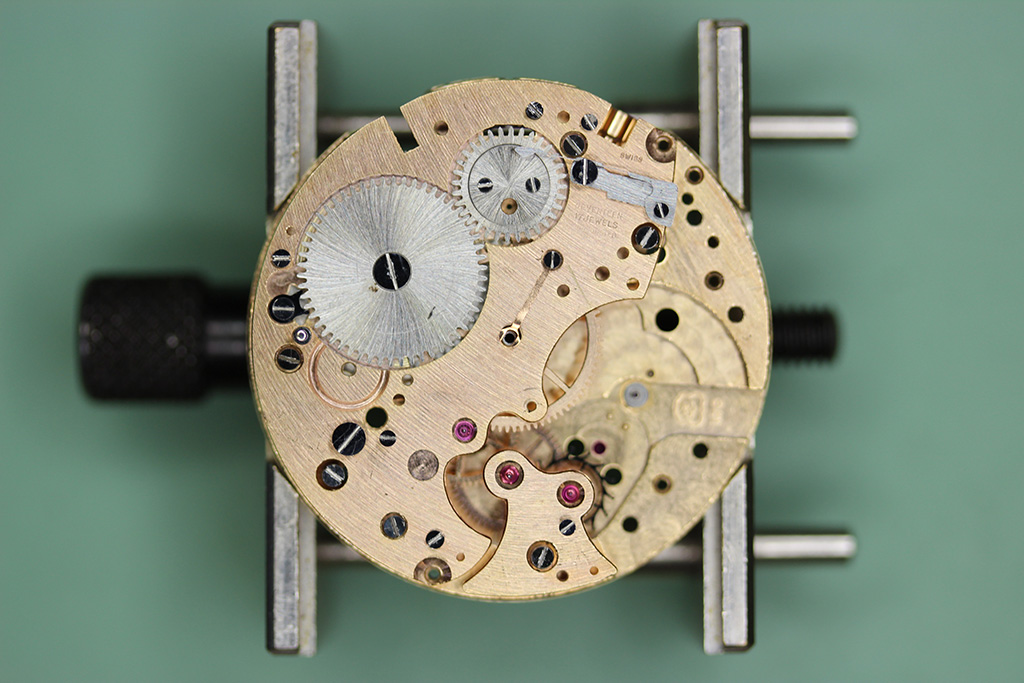
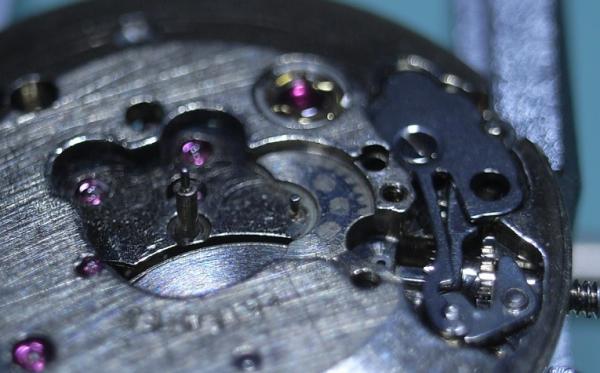
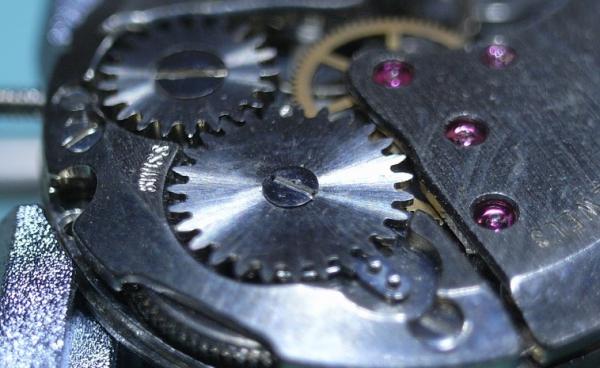
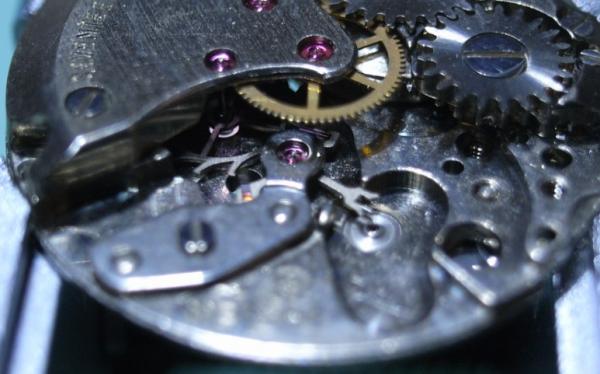
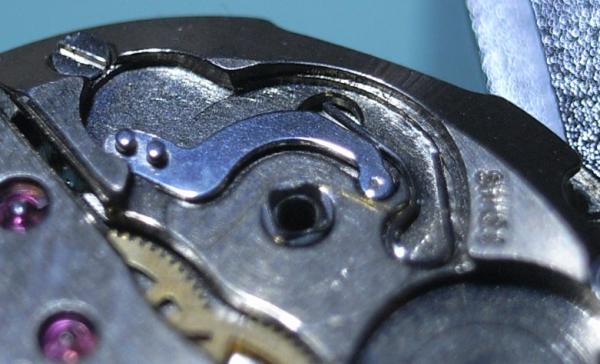
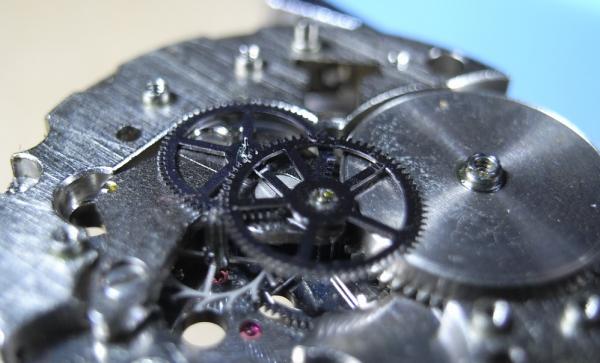
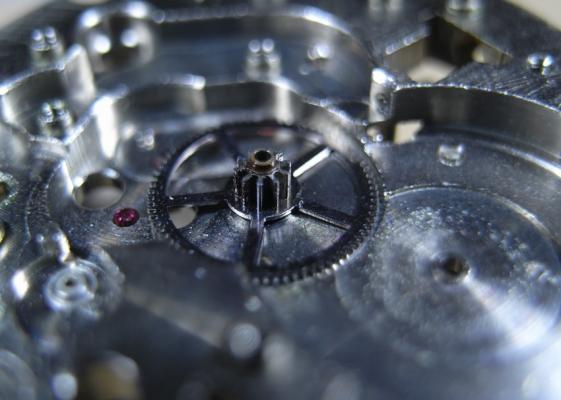
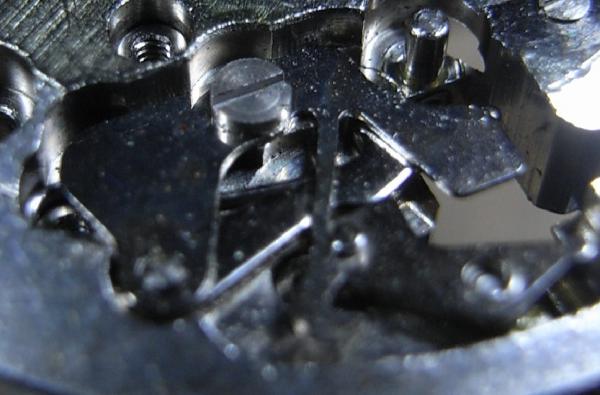
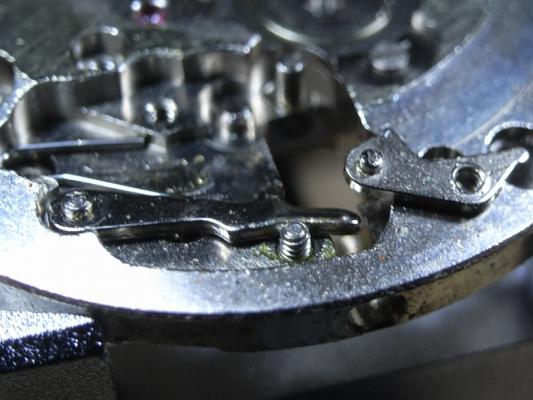
 Here we have some pictures of the Venus 178 chronograph movement which is on a vintage Breitling Navitimer. This watch had a broken mainspring and required a full strip-down and rebuild in order to fit it. Enjoy :)