Search the Community
Showing results for tags 'Kienzle'.
Found 2 results
-
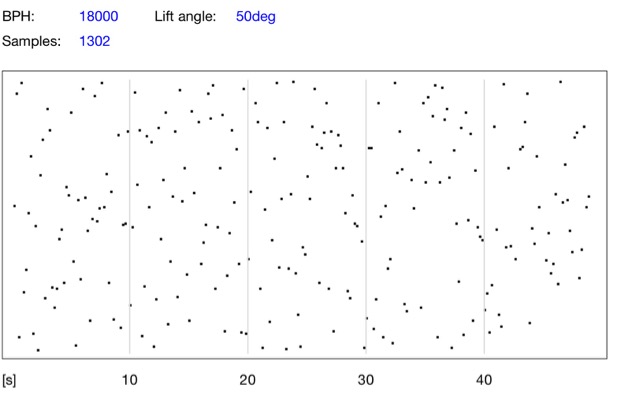
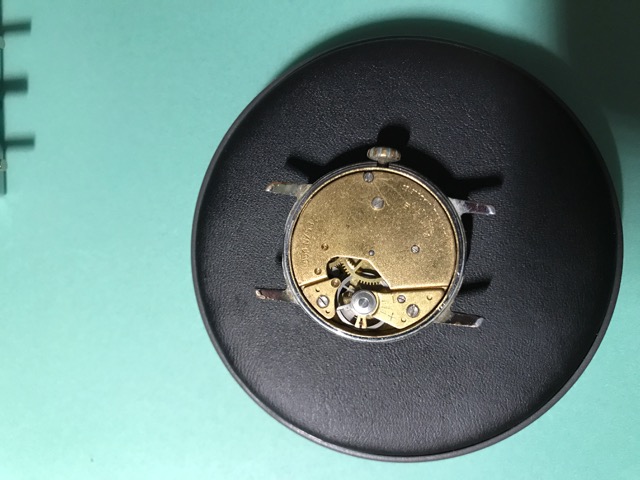
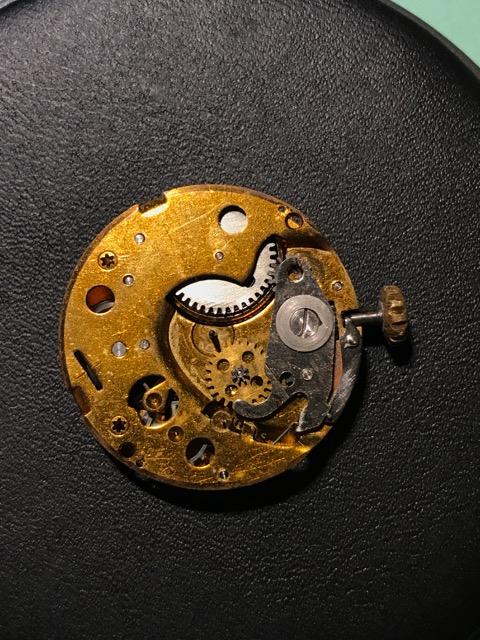
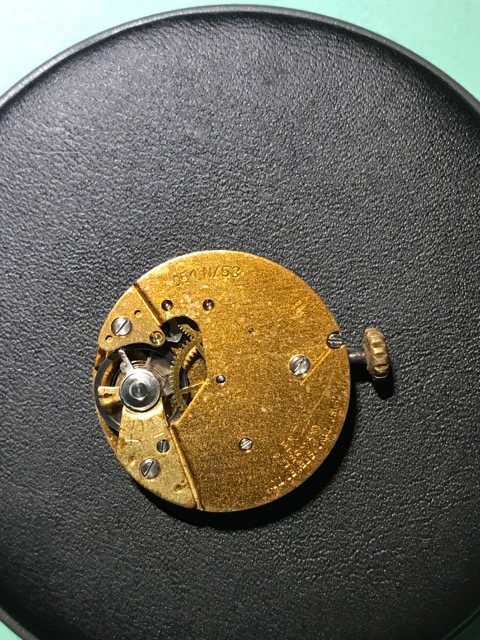
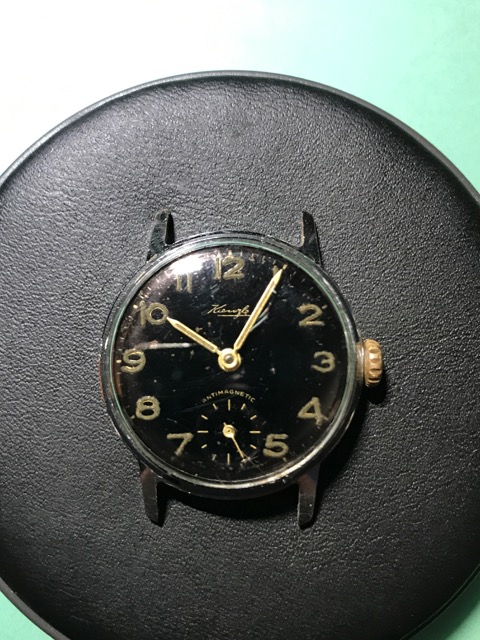
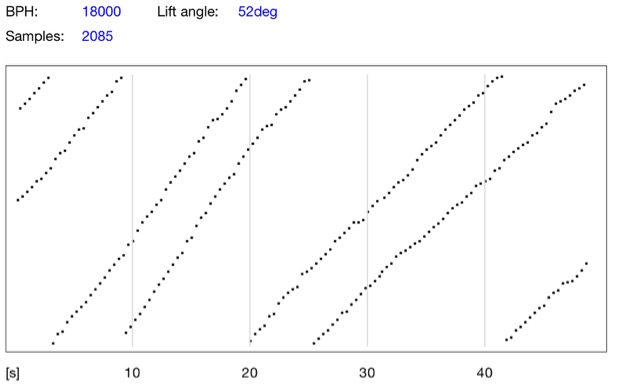
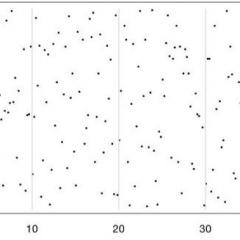 Hello there, I thought this would be a better place to post, since it not really is a walkthrough, more like a stumble through. I dissembled two other watches before and it kept me going, ie. buying beginner equipment for dissembling, cleaning and reassembling. The watch this post is about is a Kienzle with a 051N/53 movement (for more info see: Movement @ ranfft.de). Probably a very basic, robust an cheap movement with NO (sic!) jewels. I got it from an ebay auction in search of watches I can play with. It came in a lot of four watches and the lot cost me EUR 20 in total. Since I understood that a timegrapher ist quiet essential to estimate the quality of a watch but didn't want to spend the money - yet - for a hardware version I bought the watchtuner timegrapher app. It gets some data out of the watch but I don't know how well estimated it is in your community. Disassembly First a couple of pictures. I will begin with two timegrapher results before disassembling, yet it ist probably unfair since I took only 1302 samples (ie. klicks). And I couldn't find anything about the lift angle. This is the "pallet" fork. In my rookie-opinion there is quiet some wear on the rocker bar: Cleaning As a beginner I searched for an affordable cleaning setup. So I bought a cheap US-Cleaner at Amazon, as for the ammonia based cleaning solution I bought Elma 1:9 concentrate, and for the rinse I got Elma Suprol pro. I have two laboratory-quality glasses, one for the Elma 1:9 and one for the Suprol pro. I put the watch parts in a tea mesh and this mesh first into the glass with 1:9 and then into the glass with Suprol pro. I let the US-Cleaner run for four minutes respectively. After that I let the parts dry on paper. Reassembly As for the oiling I am fully aware that there are Moebius Oils and Greases. Yet to get a feel without spending to much at first I opted for Dr Tillwich Etsyntha Sorte 1-3 as the oil and Dr Tillwich B52 as grease. I did so because in a German watch repair book I saw this table (in German). In the following pictures you will get an impression of the cleaned parts and the reassembly in general. The last screenshots are from the timegrapher app AFTER the reassembly and oiling, movement out of the case, dial up position. "Regulating" (hope this is the right term) I found quiet difficult, since it was hard to move the regulating pin in a precise manner. I made about five attempts and stopped when I got by far the best results compared to those before. - I personally was rather satisfied with the results for my "first time". Oh, I should add that I had the reassembled movement on a demagnetizer (one of those blue cheap Chinese ones with the red button). Therefore I cannot say wether the improvement is mainly by demagnetizing. Those staines on the main bridge (picture above) have NOT been there before. Questions So if any of you would like to comment on something shown or described - I'd be glad. Also I have come across some questions and if anyone would like to comment on those I would also greatly appreciate. Dial: I left it alone but wondered whether I could do anything besides some Rodico to get rid of at least some of those stains. Stains after cleaning: As mentioned I wondered what I could have done wrong with the cleaning that resulted in these stains. Should I have rinsed it one more time in Suprol Pro? Or where do these stains come from. You may also note, that the balance and pallet fork cocks have changed color. Mainspring: While I disassembled the mainspring barrel (the mainspring was attached to the ratchet wheel and there was no such thing as a barrel arbor), I didn't put the mainspring in the cleaning machine but wiped it once with a paper tissue. Would you US-clean the mainspring too in general? Does it depend on the movement? - And is there any lubrication recommended for manual wind mainsprings? I didn't lubricate there at all. Rocker bar: Whilst it is certainly not worthwhile with such a watch, could this wear of the rocker bar be repaired (e.g. by use of a staking set or by putting in a bearing)? Oil and Grease: If I stick to this hobby I will certainly buy appropriate and recommended Moebius products. In the meantime: Do you think I will cause damage by applying the products above? In my ebay lot there was also a nice ETA movement (optima branded), and even with this movement here I got somehow attached, meaning I wouldn't want to - knowingly - destroy something. So this is it for my first post. Hope you felt at least little entertained reading it. BabySchimmerlos


-
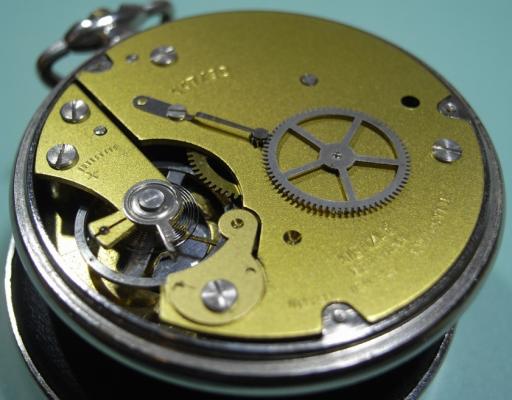
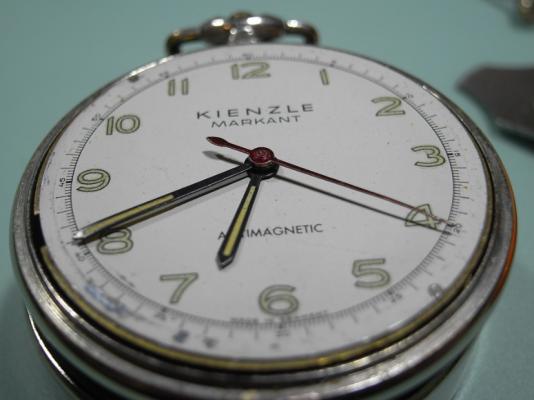
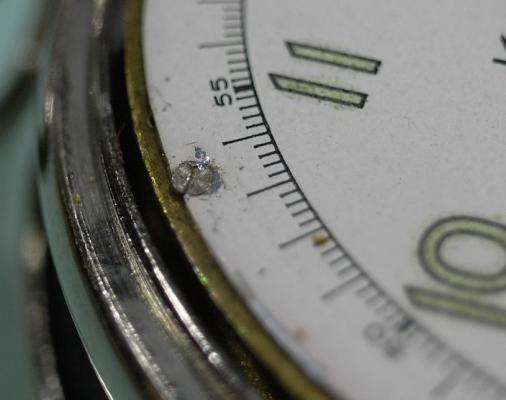
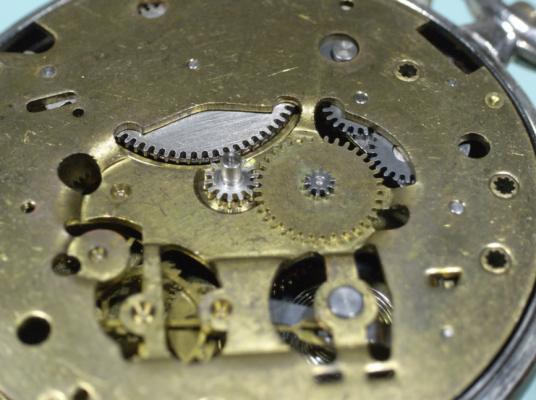
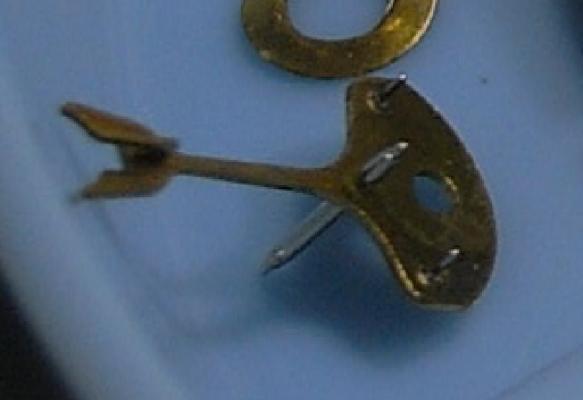
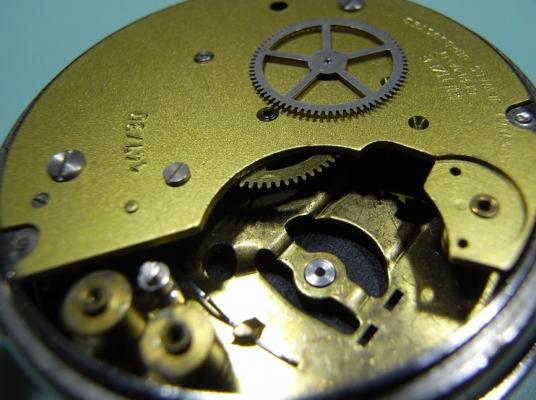
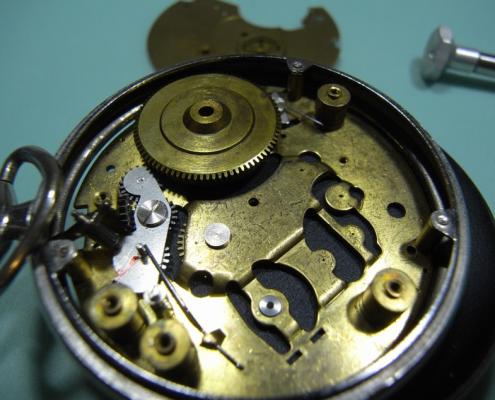
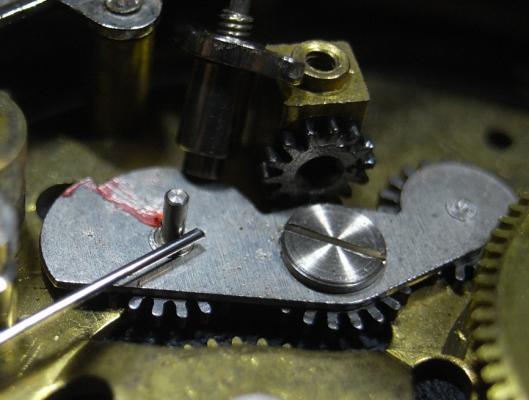
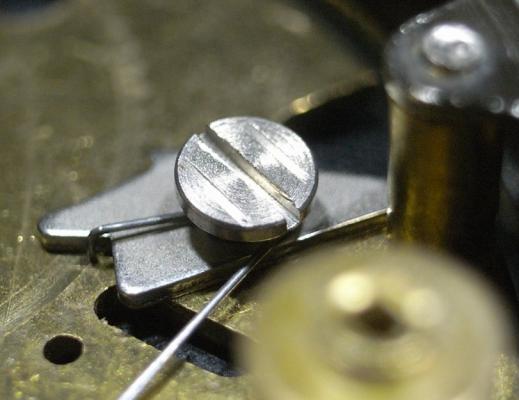
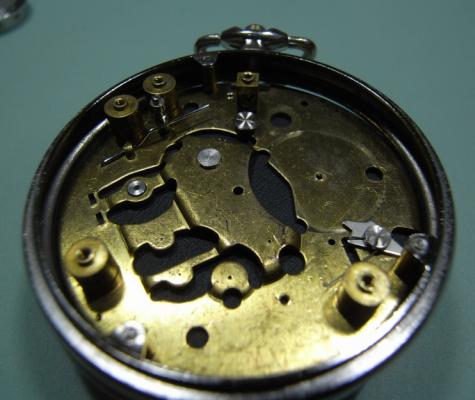
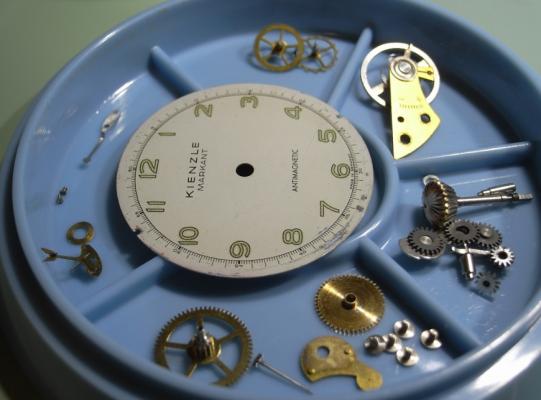
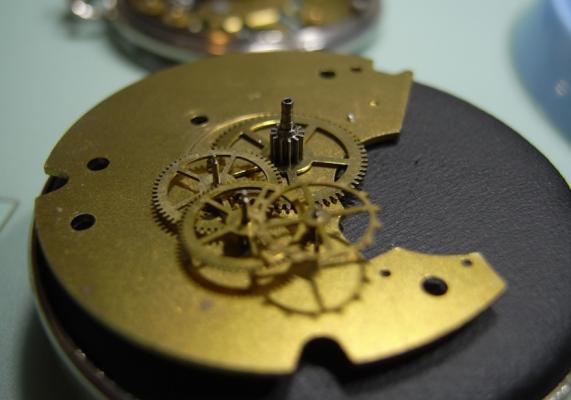
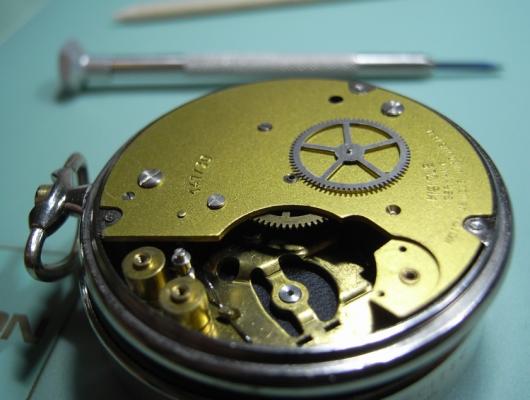
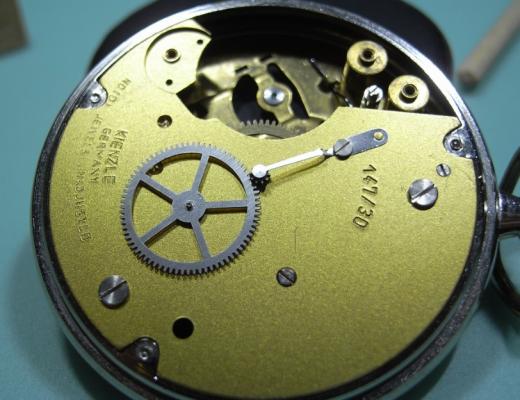
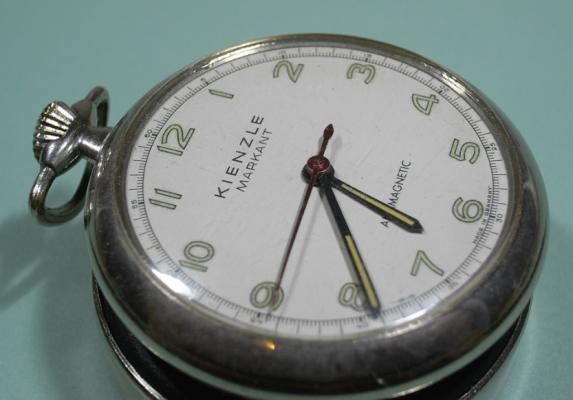
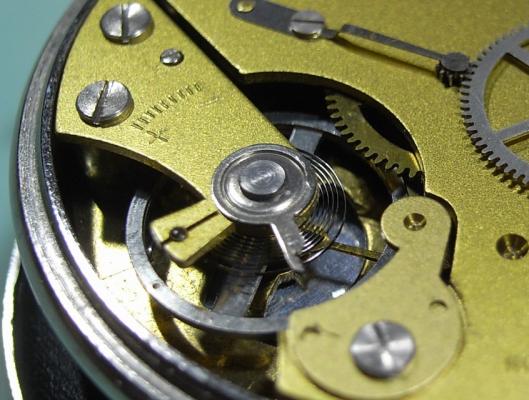
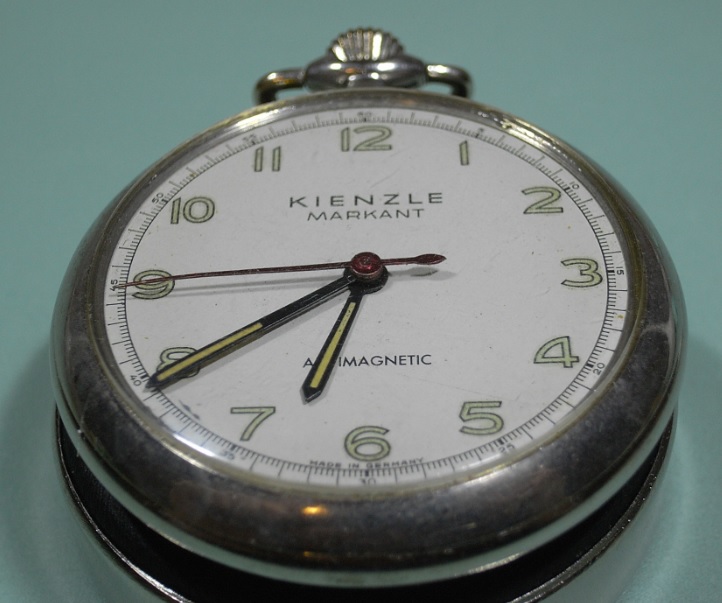
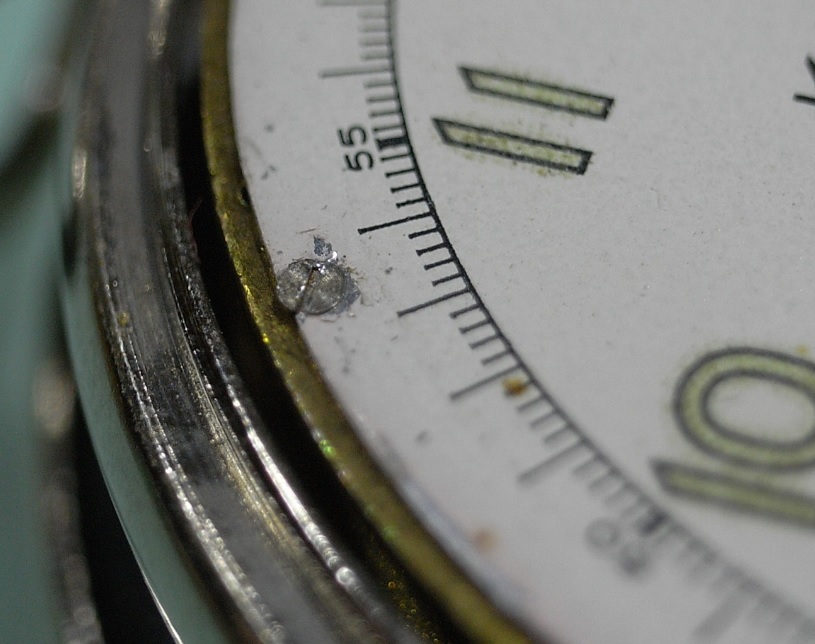
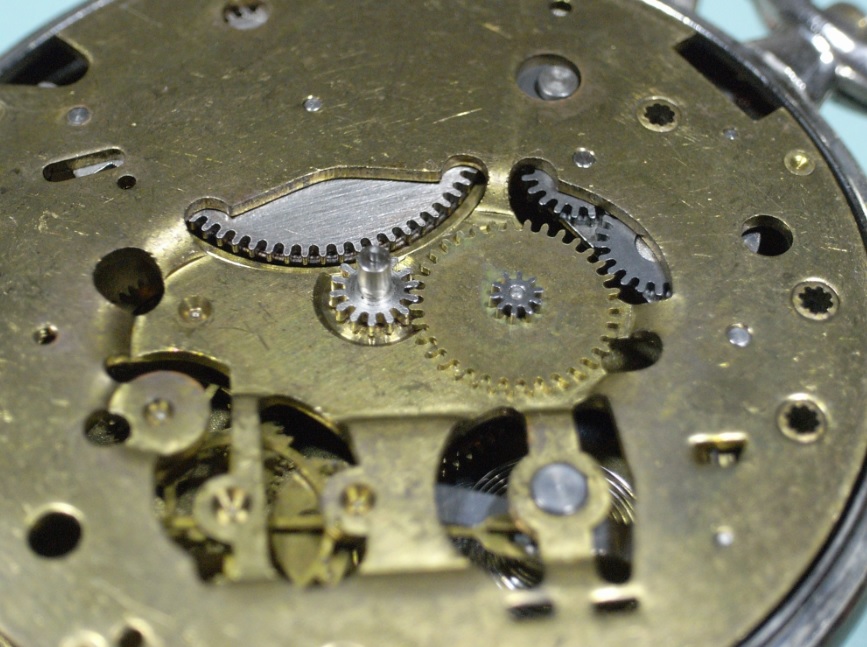
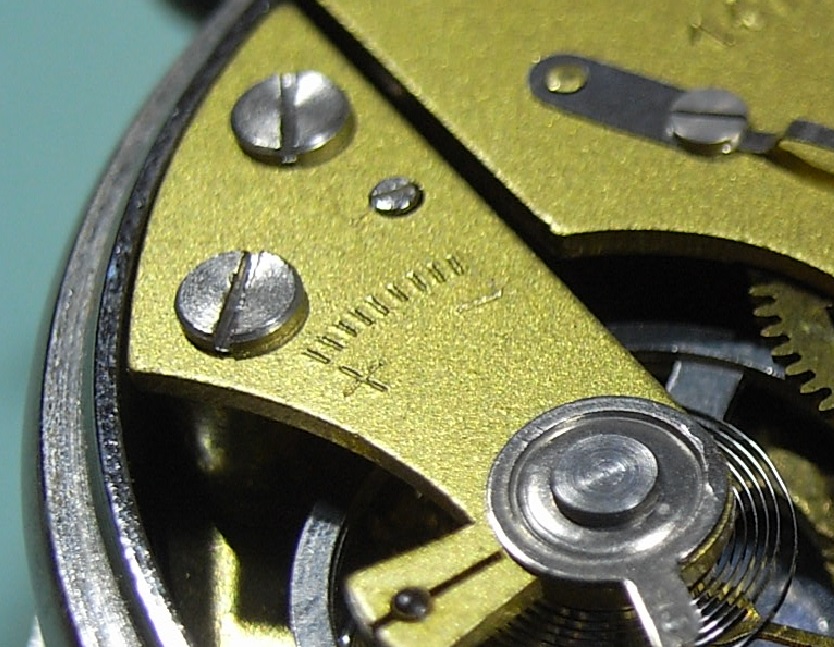
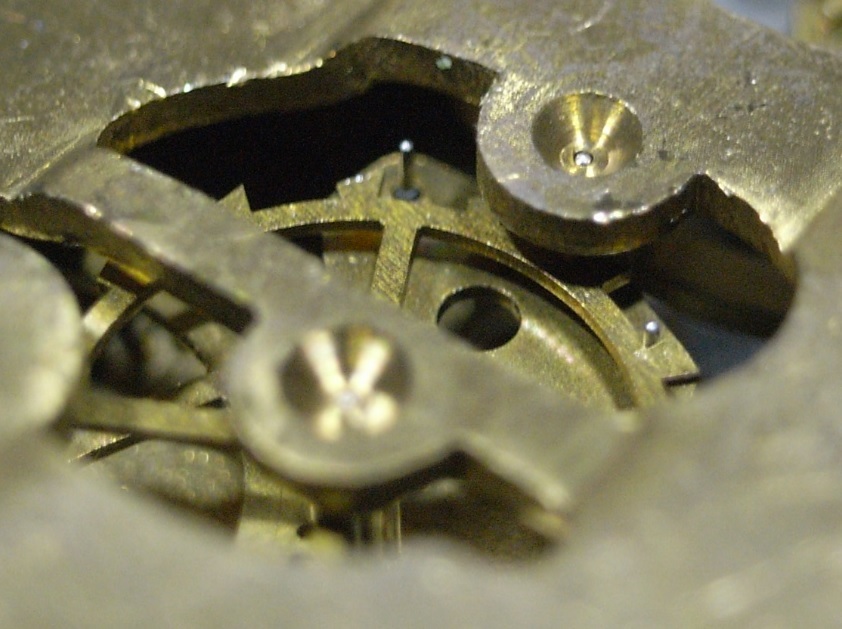
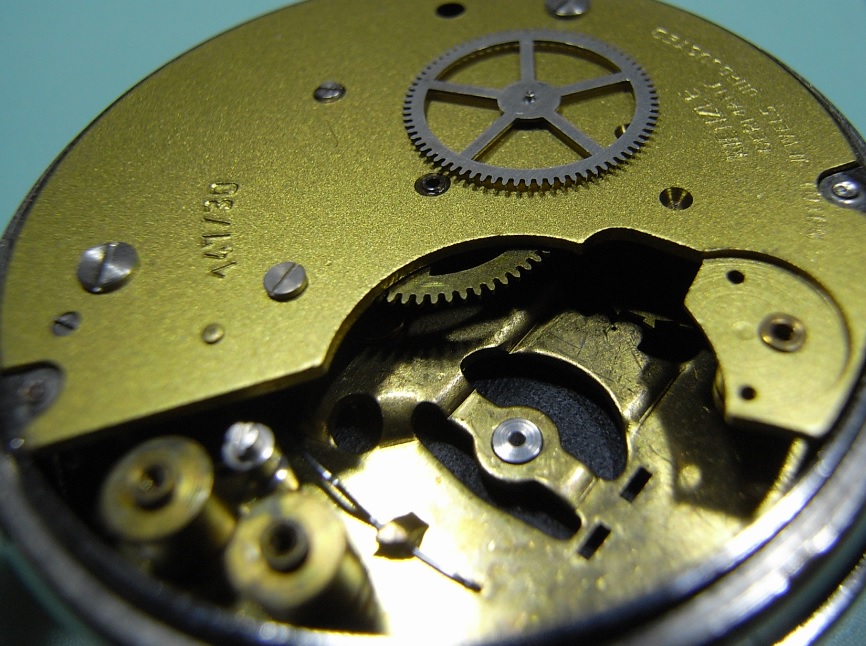
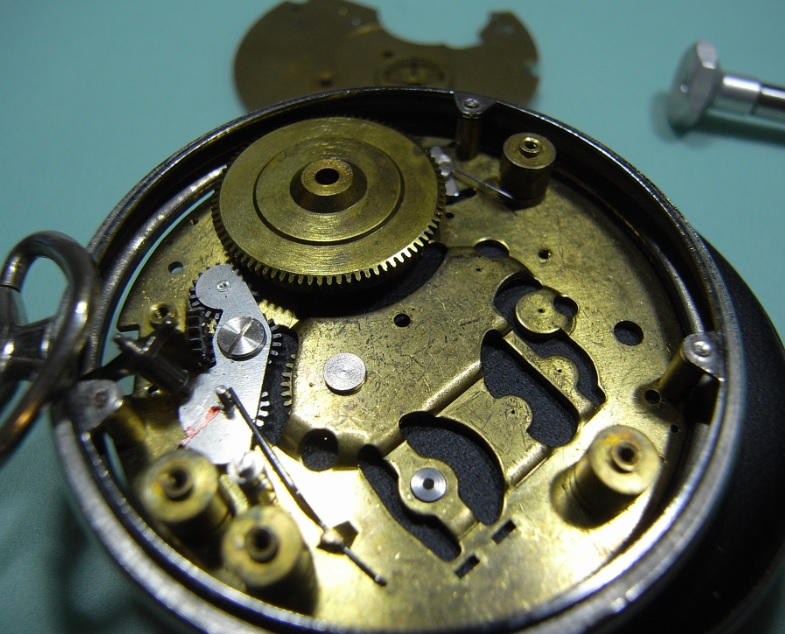
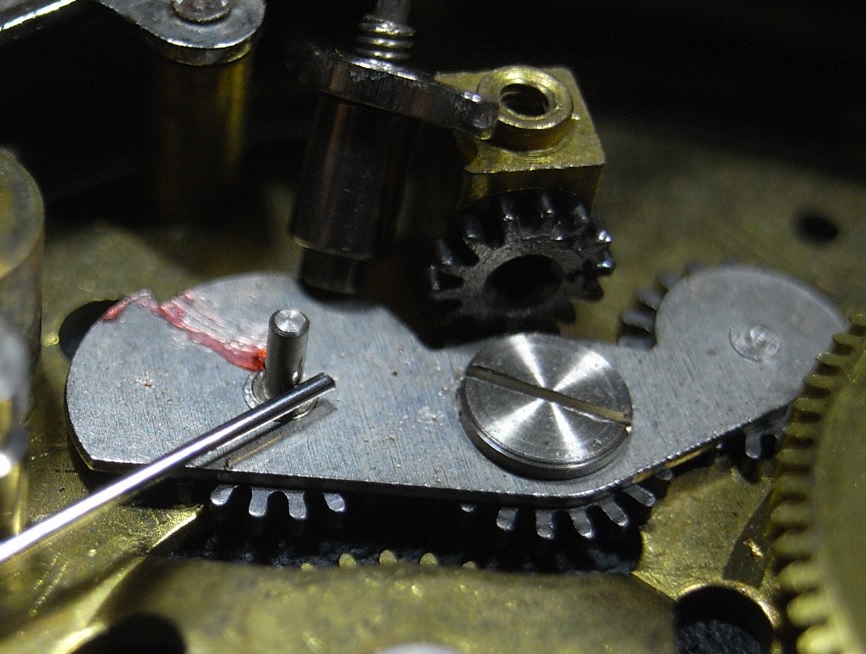
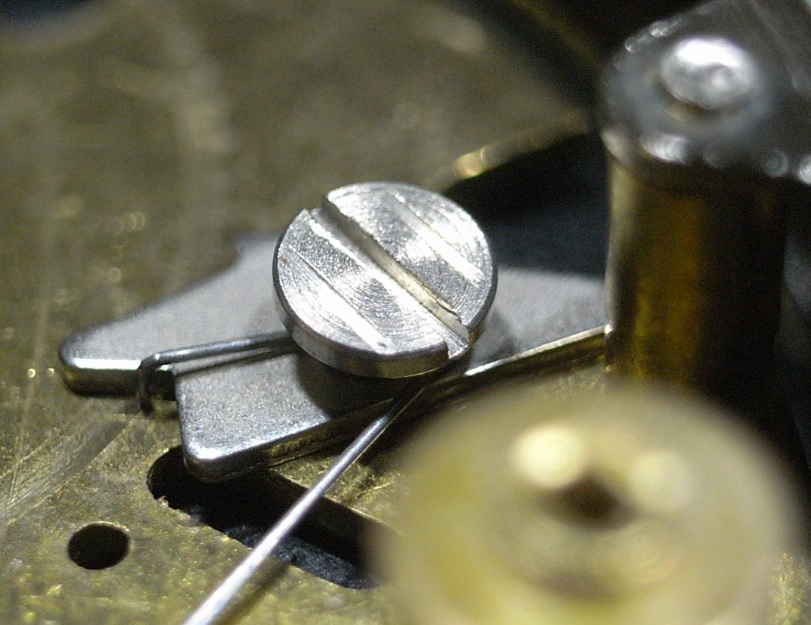
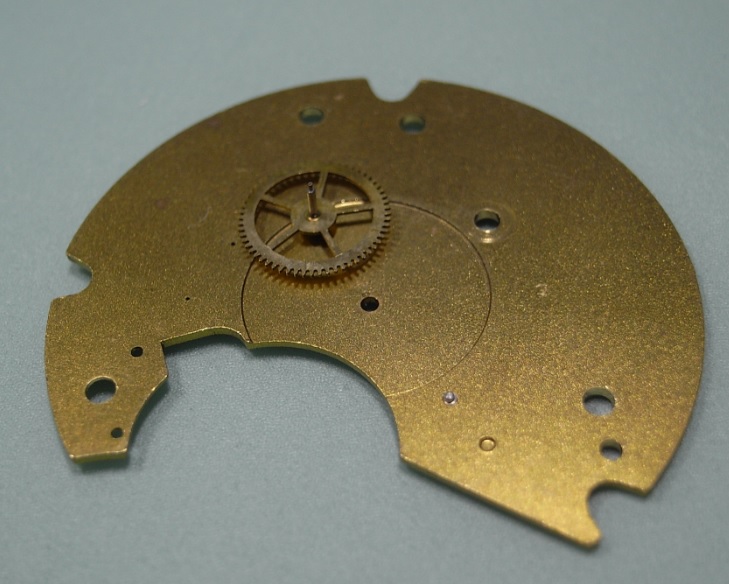
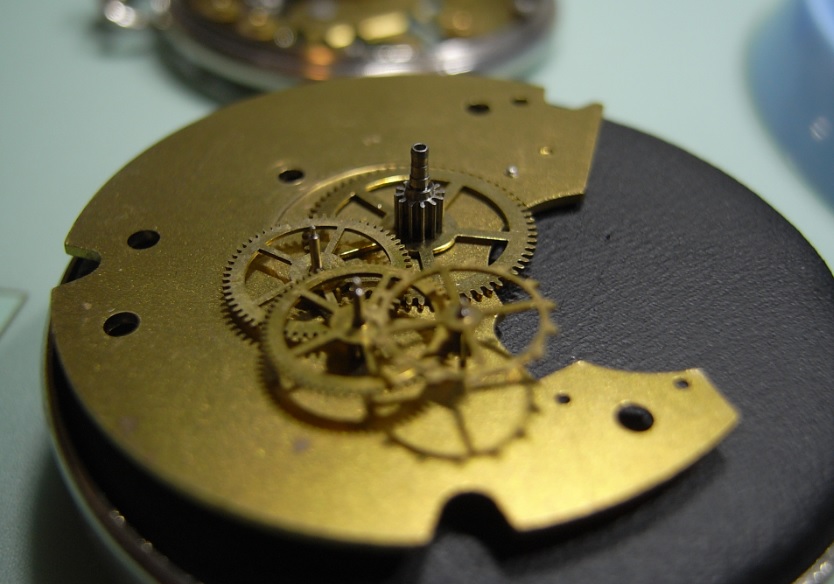
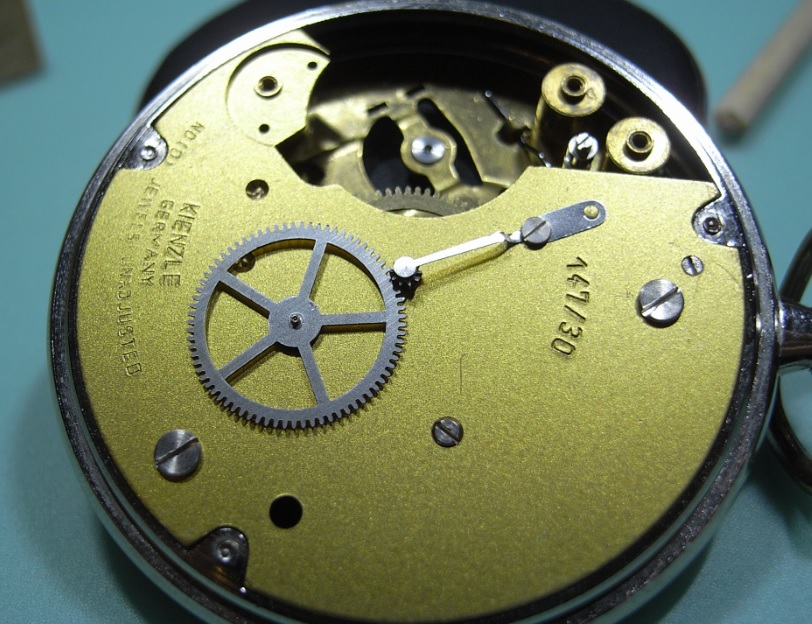
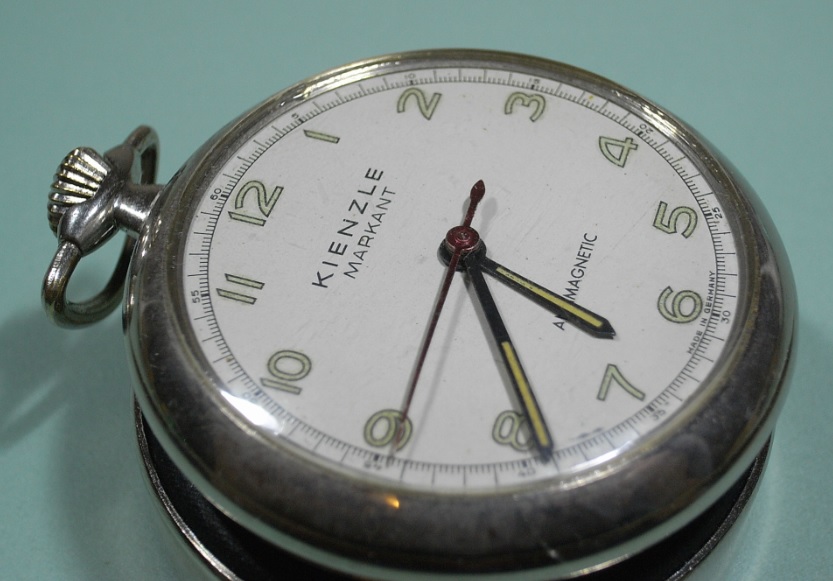
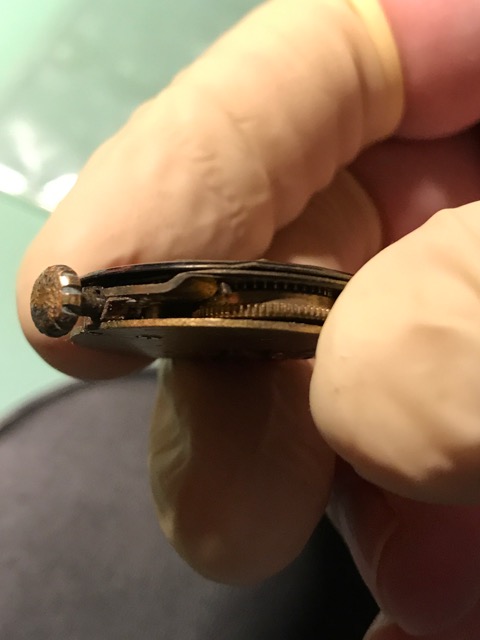
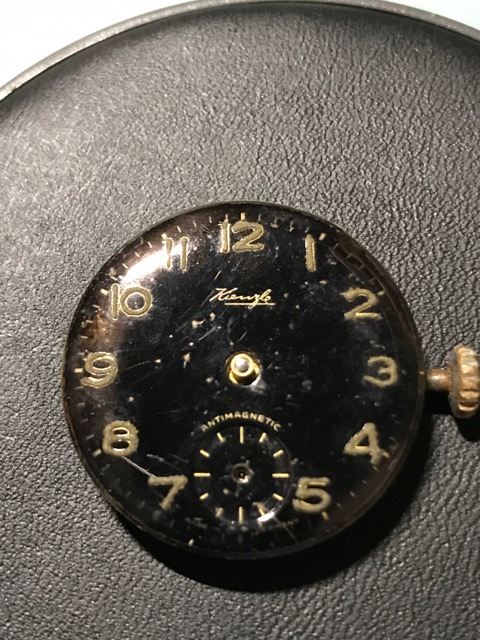
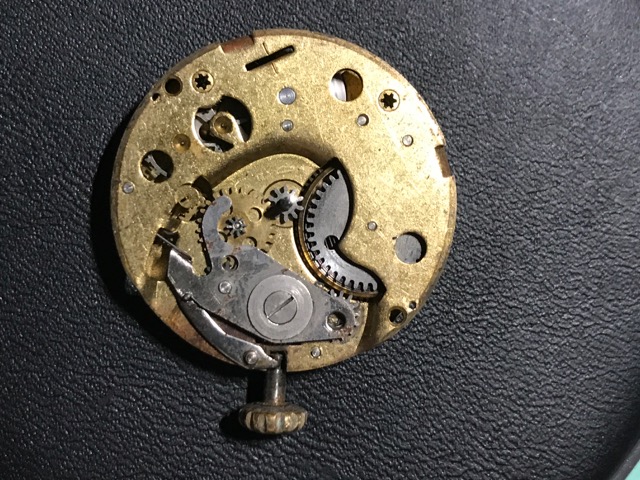
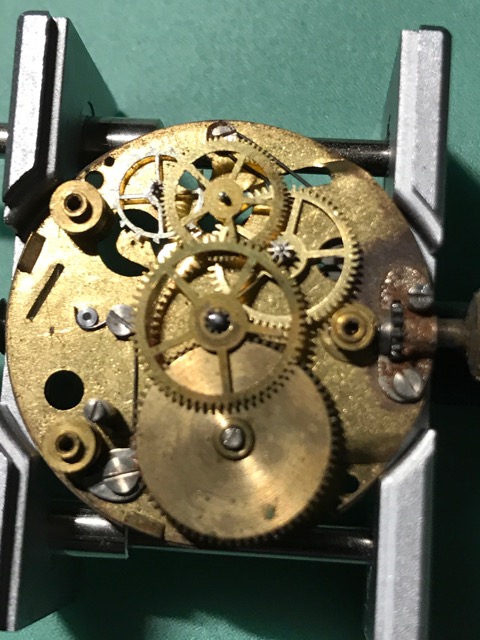
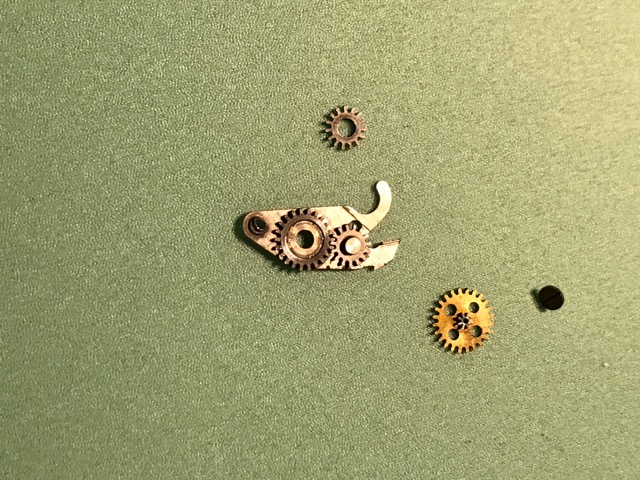
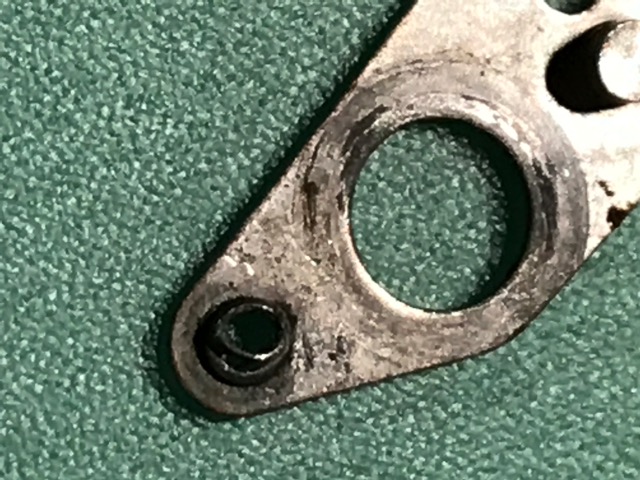
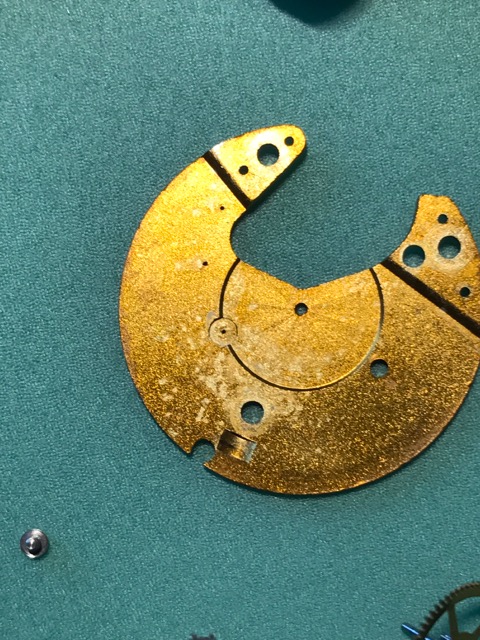
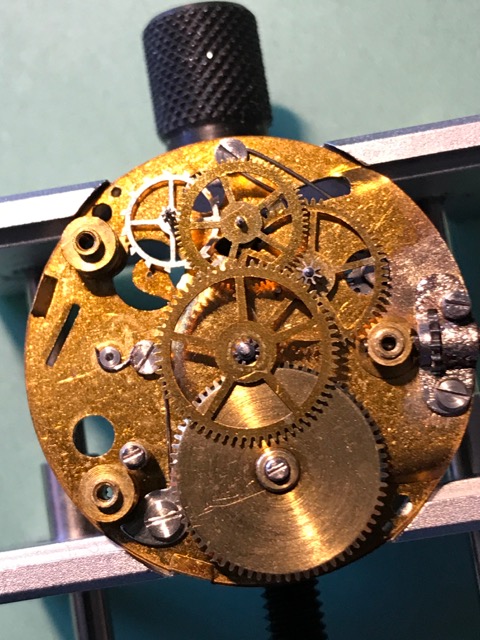
Kienzle Markant Pocketwatch Service One of my Mum's friends dropped off a pocket watch for me to service. It was her father's watch, and she used it all through her nursing career: so it held quite some sentimental value to her. She told my Mum that it did run; but only for a few minutes and then stopped, unless the crown was moved. It's a German made Kienzie Markant. I popped the back off and the movement and saw that it was VERY dry, but in good condition. First thing I notice was the stamping .... Zero (0) Jewels - Unadjusted. So this thing is no RR Standard Hamilton; but none the less a nice little project, and one that will make my Mum's friend happy :) The front was also removable via a case blade, and since the Main Plate was riveted to the case is required to be removed in order to service this movement. With the hands removed, the dial was next. It is secured by two screws on the face. Motion Work is a very basic setup. So I removed the Cannon Pinion and moved to the back of the movement. While inspecting this movement carefully, as this is my first attempt at a pocket watch, I noticed a few things that I'd never seen before... Firstly, the timing adjustment is done by a sort of jack screw arrangement. (Note: The two large screws for securing the Balance, and a smaller "Jacking Screw" to adjust the timing.) Secondly, the Fork arrangement was also something new to me. Posts instead of Pallets to engage the escapement. Here's another view the Fork removed. So I removed the tension from the Mainspring, and removed the Balance and Fork. I was a little nervous removing the Bridge, as it's a 3/4 Bridge and I couldn't see the layout of this movement, and since this is a very new style of movement to me I wanted to take reference photos. Well my nervousness was justified, and EVERYTHING lifted out with the Bridge!! ACk!! :startle: Again, something new to me was the layout of the Keyless Work. It's a rather clever rocking pinion system. Rock one way and the Mainspring is wound, rock the other and you engage the Motion Work. Thankfully the Click Screw was marked as a left-hand thread ... Note the extra stripes either side of the Driver Slot. Movement is fully stripped and ready for a bath :) Here's that nasty 3/4 Bridge that stopped me taking reference photos of the Gear Train Layout. Once all the parts were clean, it's time to get this thing back together .... Gulp! :lolu: My Heavenly Father has gifted me with skill and cunning when working with watches, and I thank and praise him for it!! To assemble the Gear Train, I placed them upside down on the 3/4 Bridge, and then lowered the Main Plate on top of them. This made the alignment of the train and pivots a breeze. I then flipped it back over, and with a few gentle wiggles and very slight pressure on the Bridge, everything was in place. I replaced the Second Wheel, and the Spring Keeper. Refitted the Motion Work and Cannon Pinion. Then the Fork and Balance. Adjusted, fitted the Dial and Hands, and Re-Cased. The Kienzie Markant is now running smoothly and continuously. It was great fun to work on, and I hope you enjoyed the walkthrough. PS. when held to the ear, the ticking sounds like an old grandfather clock :P Gotta love dem pocket watches!! Click here to view the article