Leaderboard


Popular Content
Showing content with the highest reputation on 02/05/24 in all areas
-
I just got around to changing my original, now nearly 3 year old, oilers and decided to treat myself and get a Bergeon set (regular not the ergonomic) rather than a like-for-like replacement the cheap(er) generic ones I have been using to date. I must say that I much prefer the tip design on these new ones over the ones I have been using. However, the colour of the oilers is different, meaning that they no longer match the oil pots (which I just re-filled of course?!?), so now not only do I have to remember that the blue oiler is now my HP1300 and not the black one, but I also have to remember that it goes in the hole behind the black pot holder not the blue one. And the same for the yellow and red and .... No question, just needed to vent! Just FYI, I have gone back to the pin type oilers after trying to use auto-oilers for almost a year, I found the auto oilers rather clumsy and difficult to apply the correct amount of lubrication, you end up with a uniform slug of oil which most of the time is either too much or too little. You can calibrate them, but then what do you calibrate them to, you could calibrate for one watch, but then on your next watch you will inevitably need a little more here or a little less there, so they are never calibrated for the movement you are working on at the time and you end up having to try and do half a stroke, which is an art in itself. I am sure that there is a lot of user error, but for me the advantages do not outweigh the additional work in using and setting them up.5 points
-
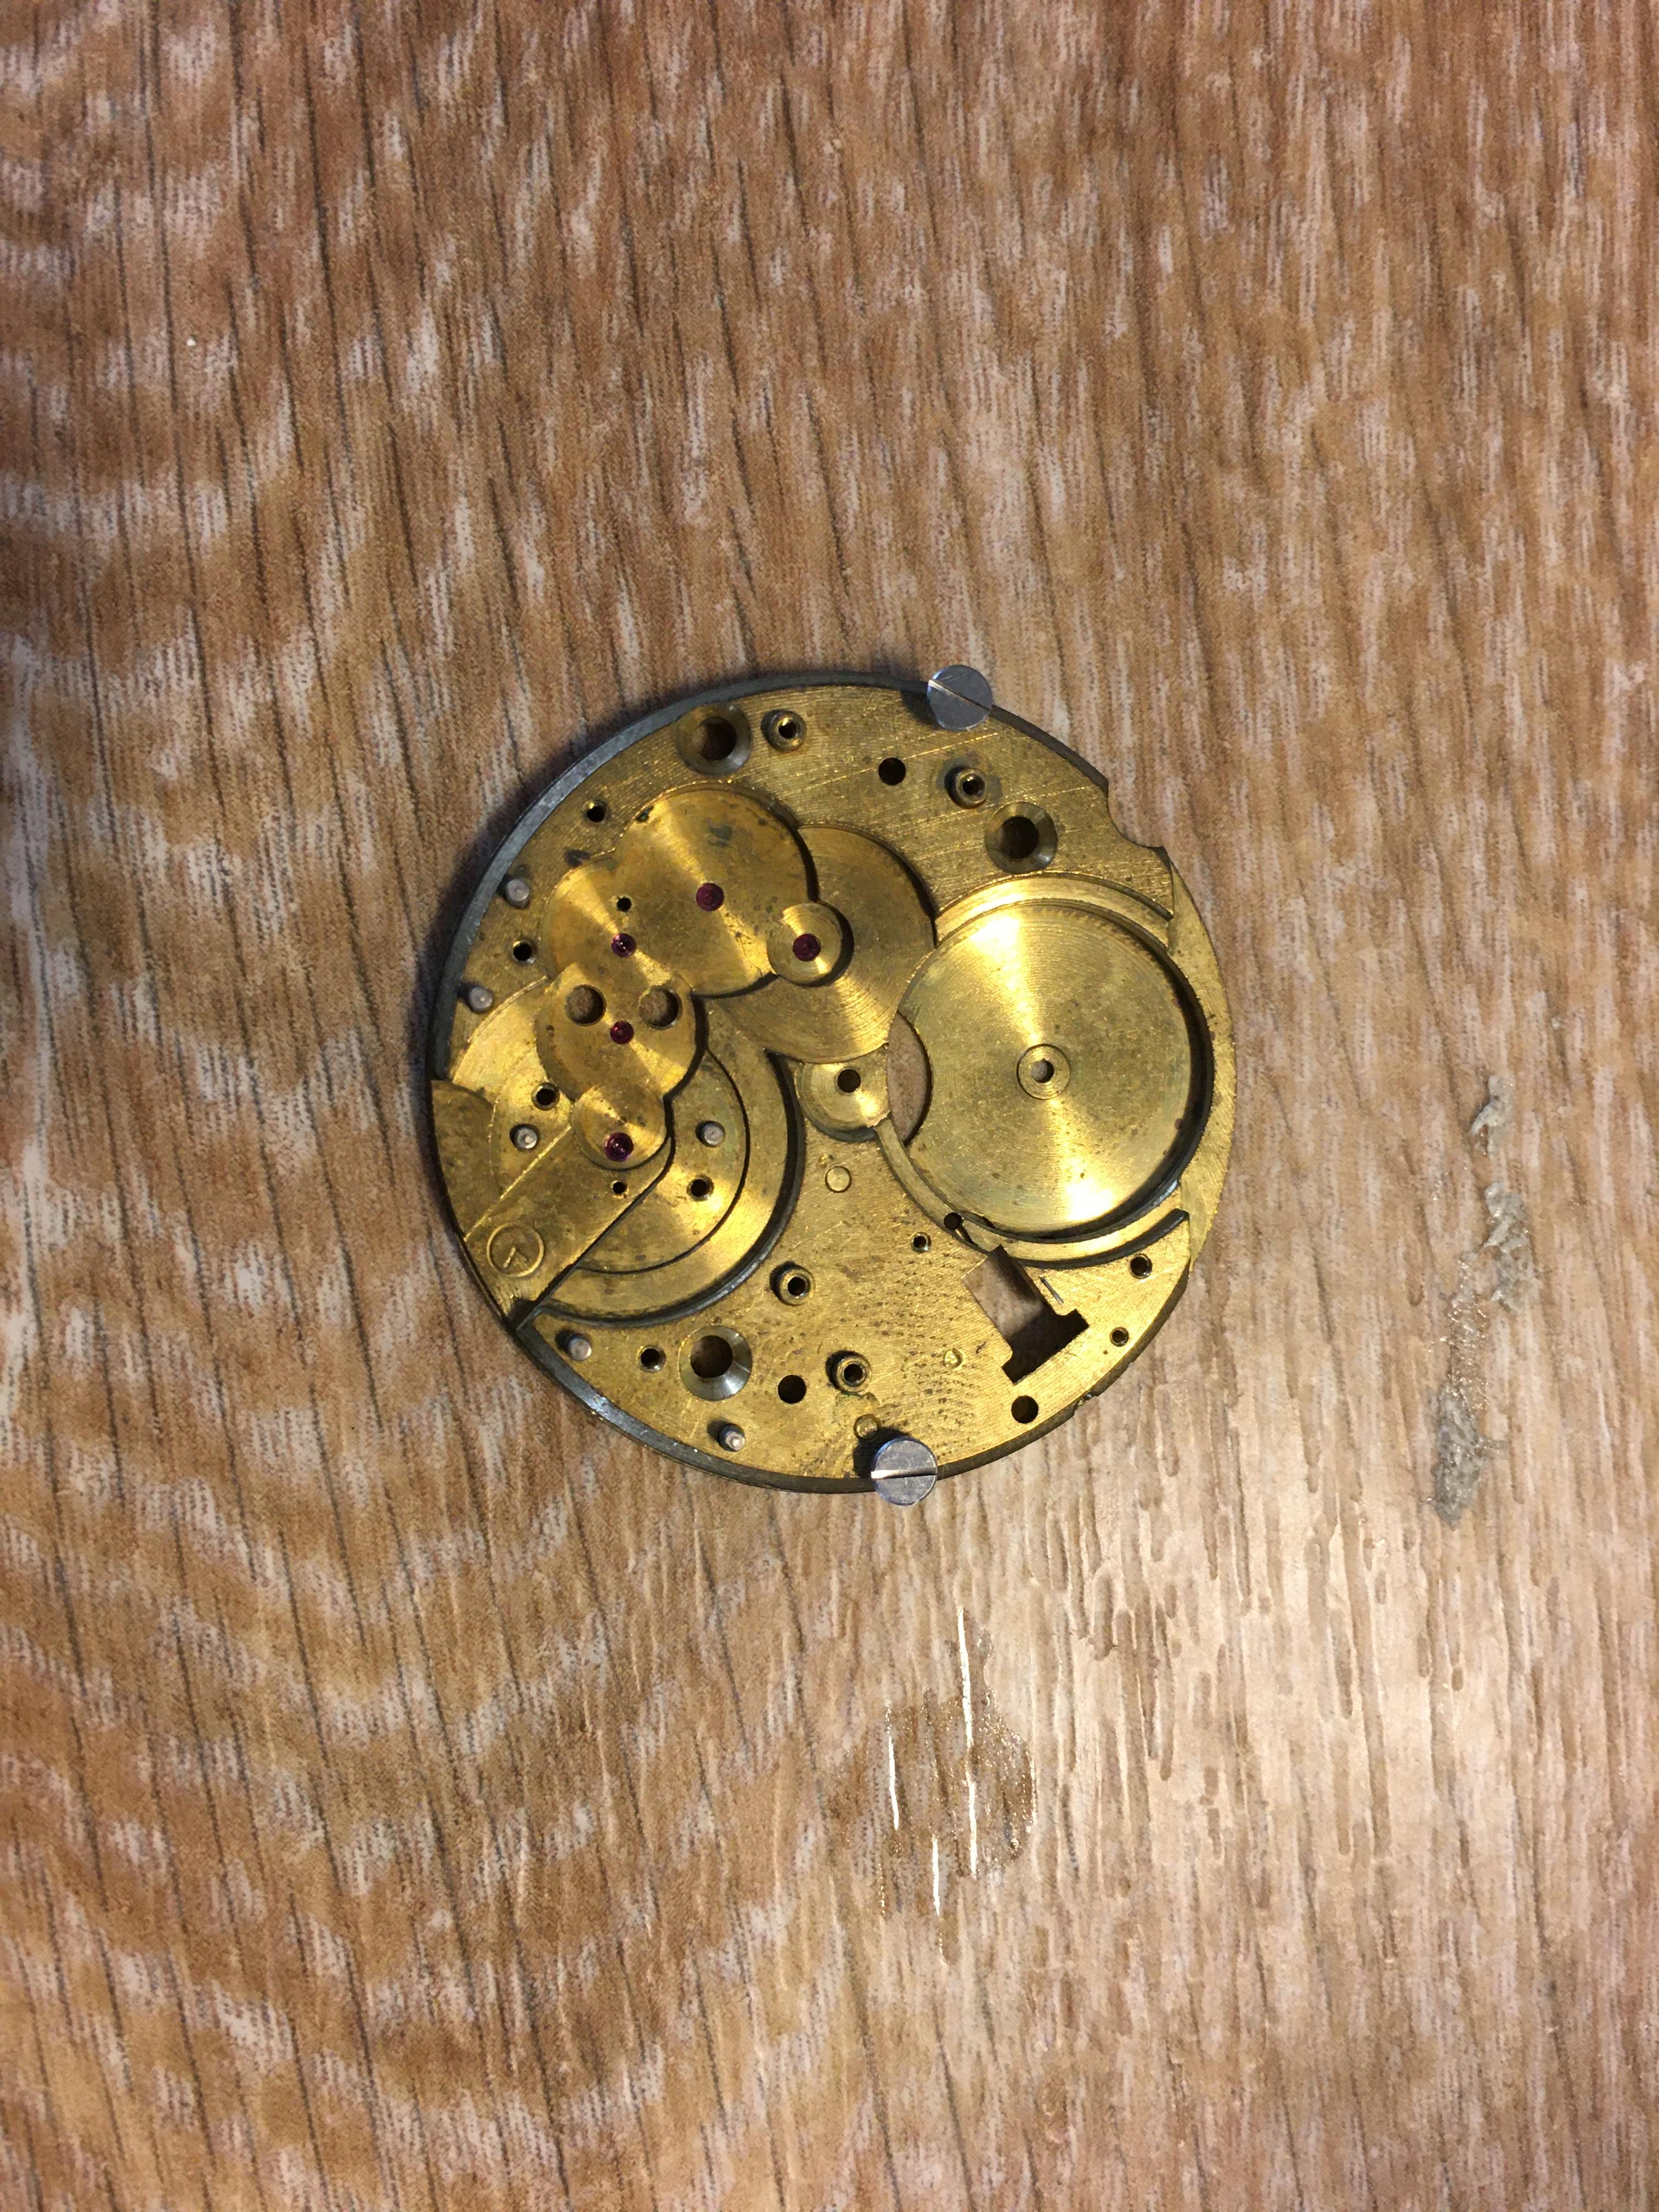
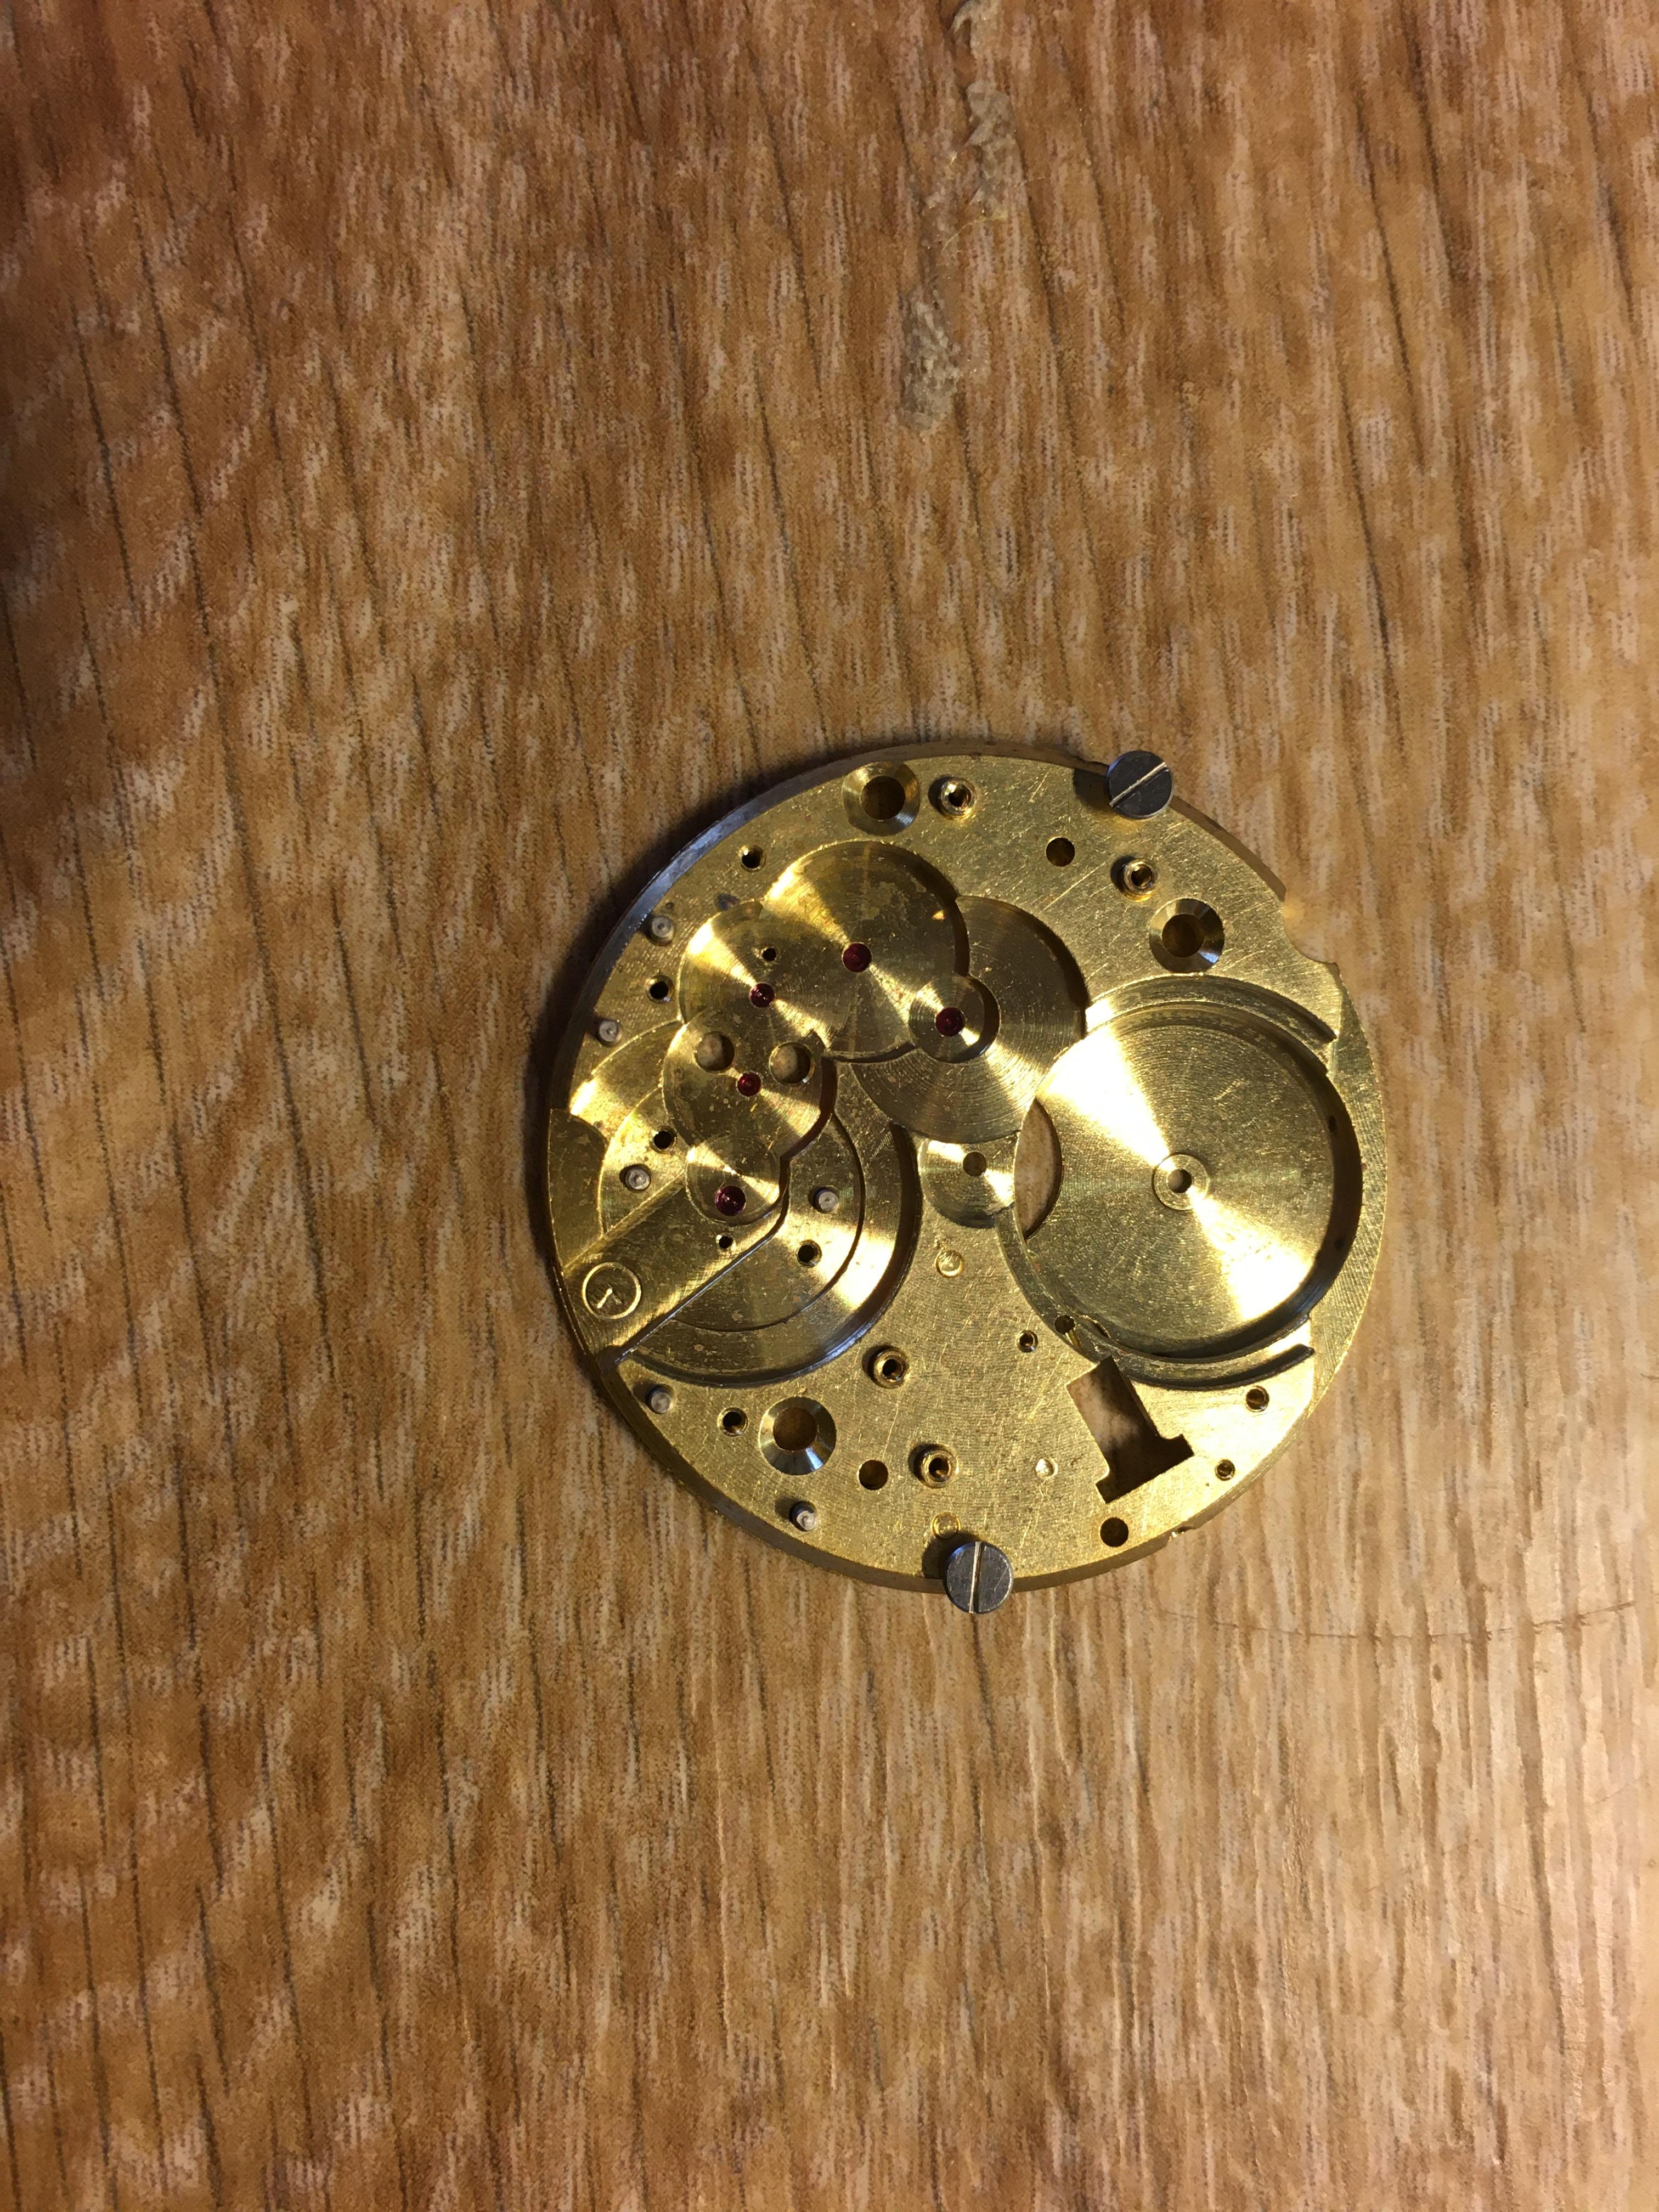
Well, don't be shy and show a picture of hte movement - somebody may recognize it. You can cut a slot in the remain of the screw thru the arbor. You can cut to where the square part of the arbor ends and bearing pivot begins, this will not make harm to the arbor. Now that the head is broken, the screw is not tightened any more and should unscrew with ease.4 points
-
Absolutely Tom, i fly by the seat of my pants in most things i do, this game more so, there is so much to learn. I willingly take on board anything from someone who i think knows more than me on any given subject. But always do i question and like to varify something for myself, thats just the way I'm made. Its funny I've been in construction for almost 40 years now, there isn't an aspect of building and refurbishment i dont understand. New ideas pop up all the time, some work some dont, the old ideas almost always work. I'm also in a builder's forum, some of the advice given there to diyers is absolutely shocking some of it is just downright abuse and insults. When I'm not imparting my hard earned wisdom I'm pulling a bully's pants down, forum etiquette is atrocious in that industry. Watchmaking communities seem to have much more respect for each other, respect each other's thoughts and ideas whether they are agreed upon or not. We all have to find our own way and if thats different then its different as long as it gets us there.3 points
-
I grinned at the way the story started " lets say............. Some how the missus got involved and disaster strikes, sounds not in the least suspicious.3 points
-
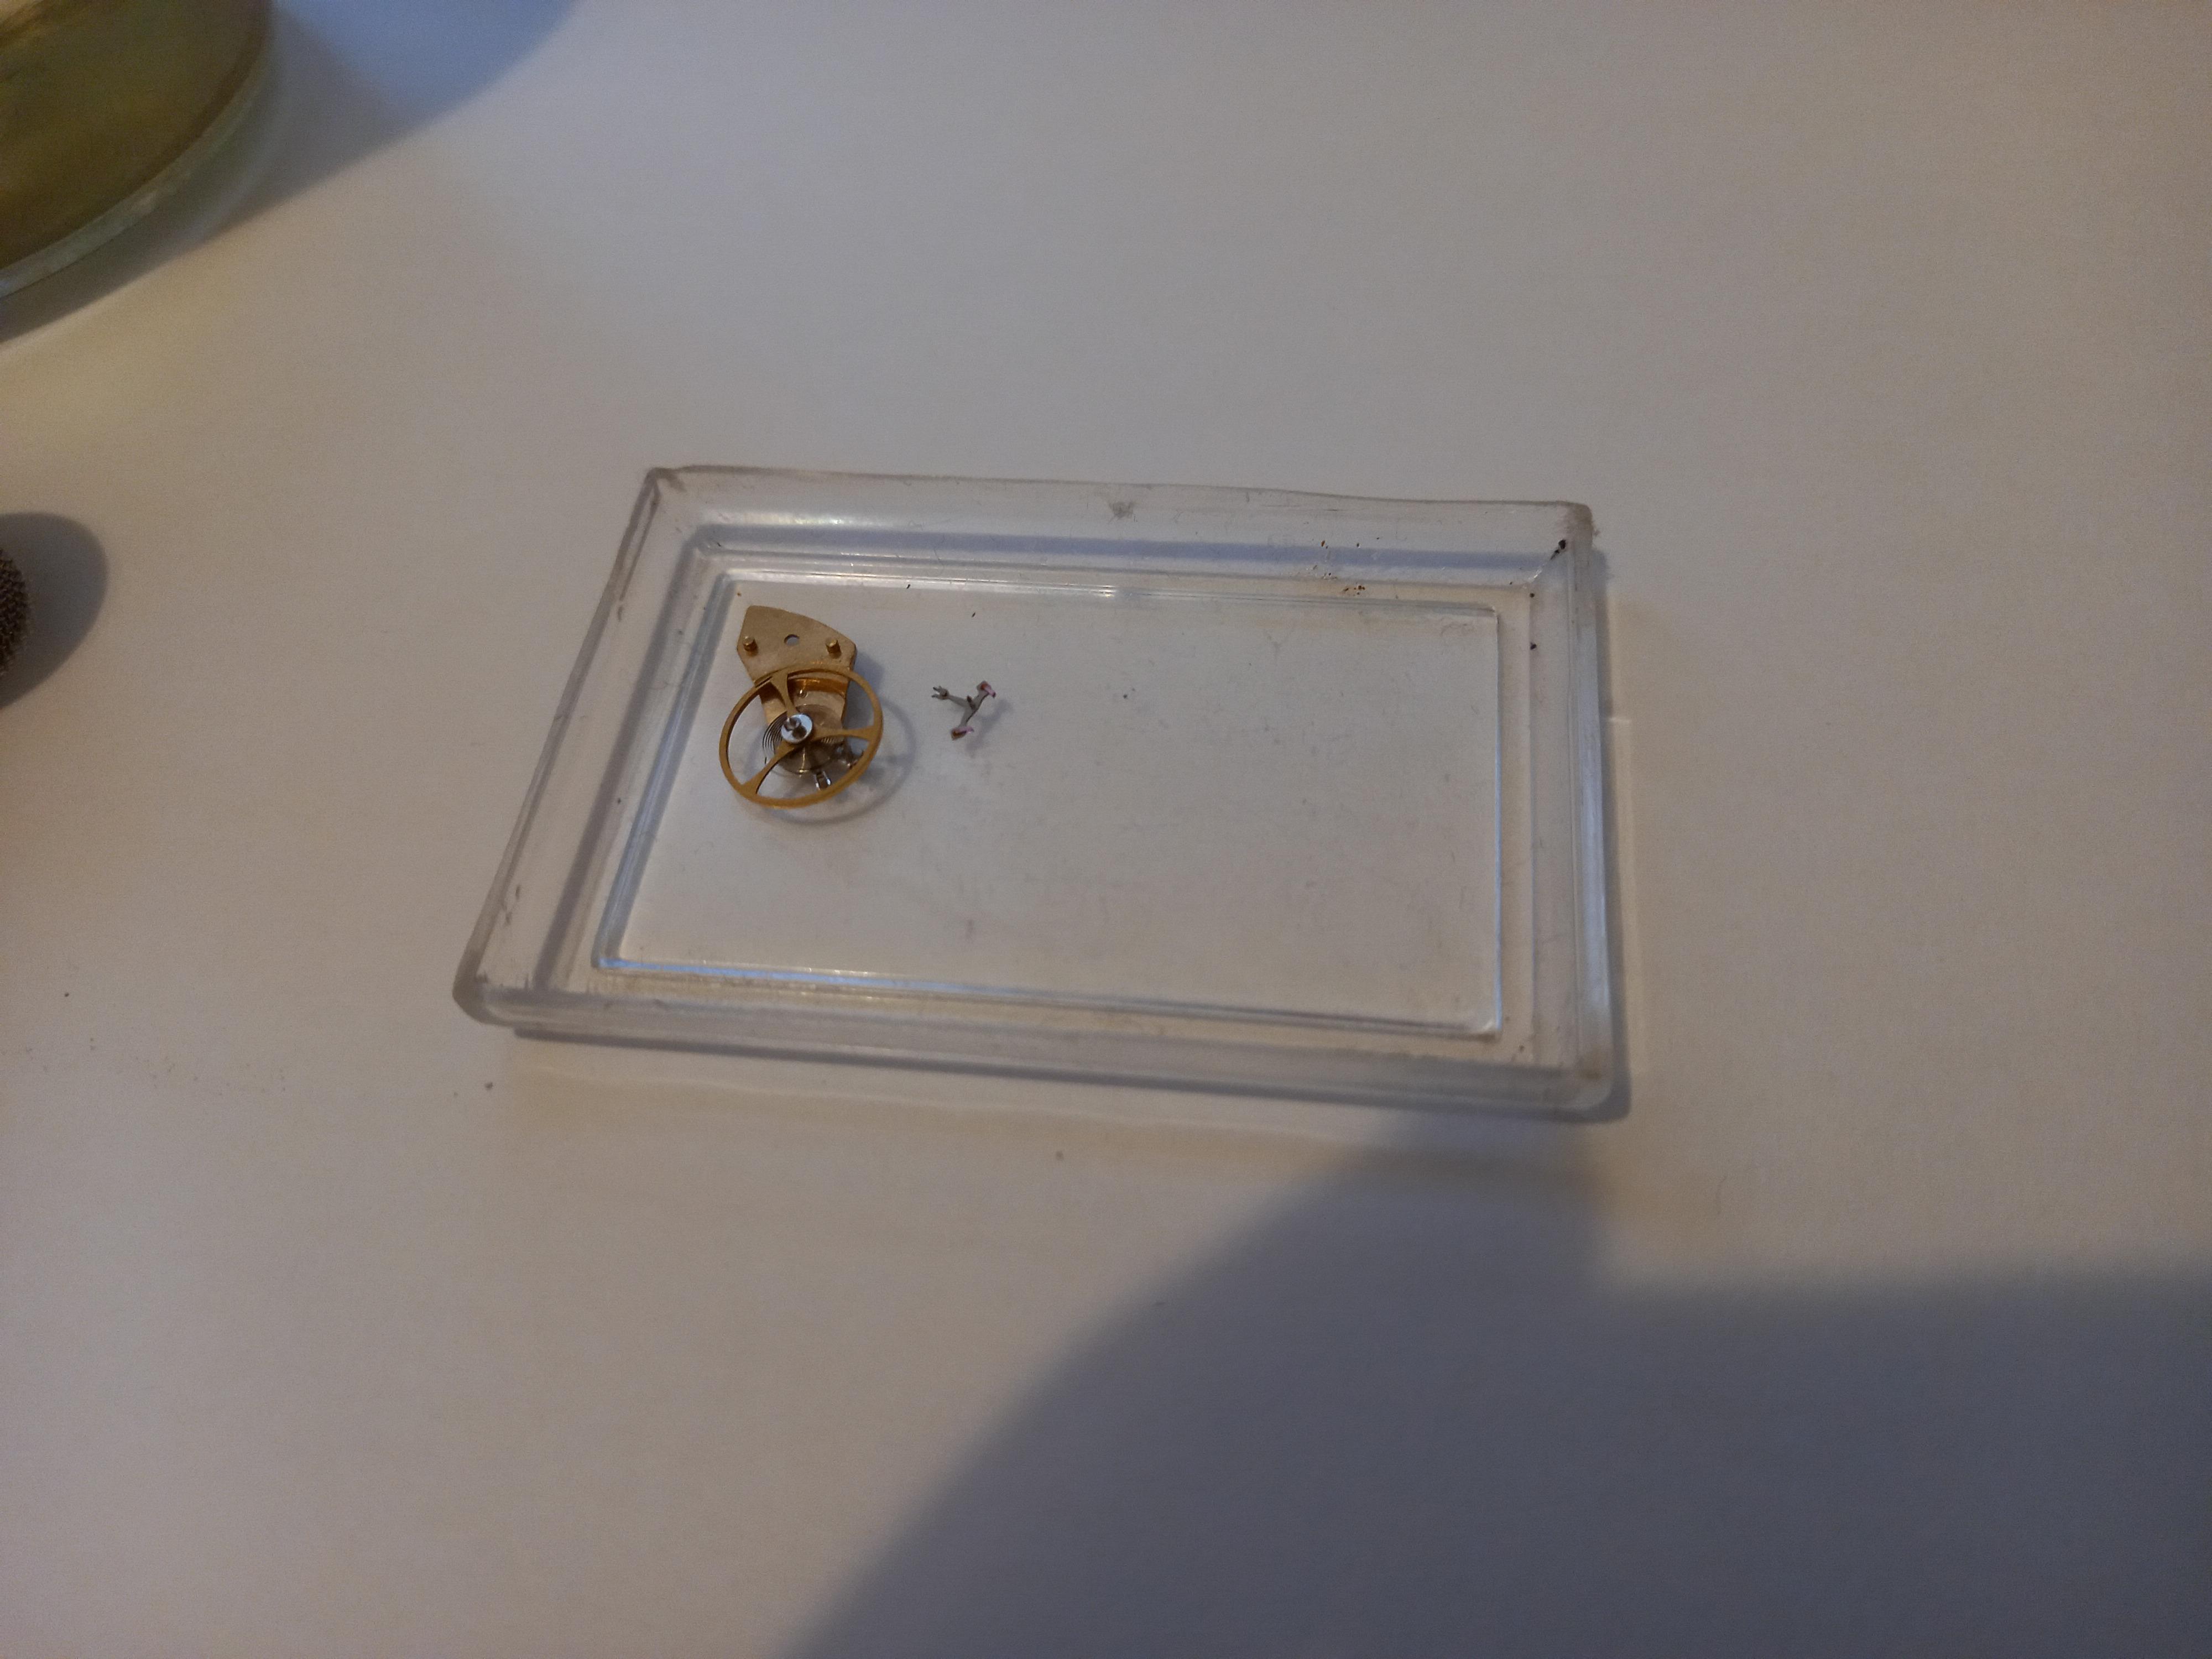
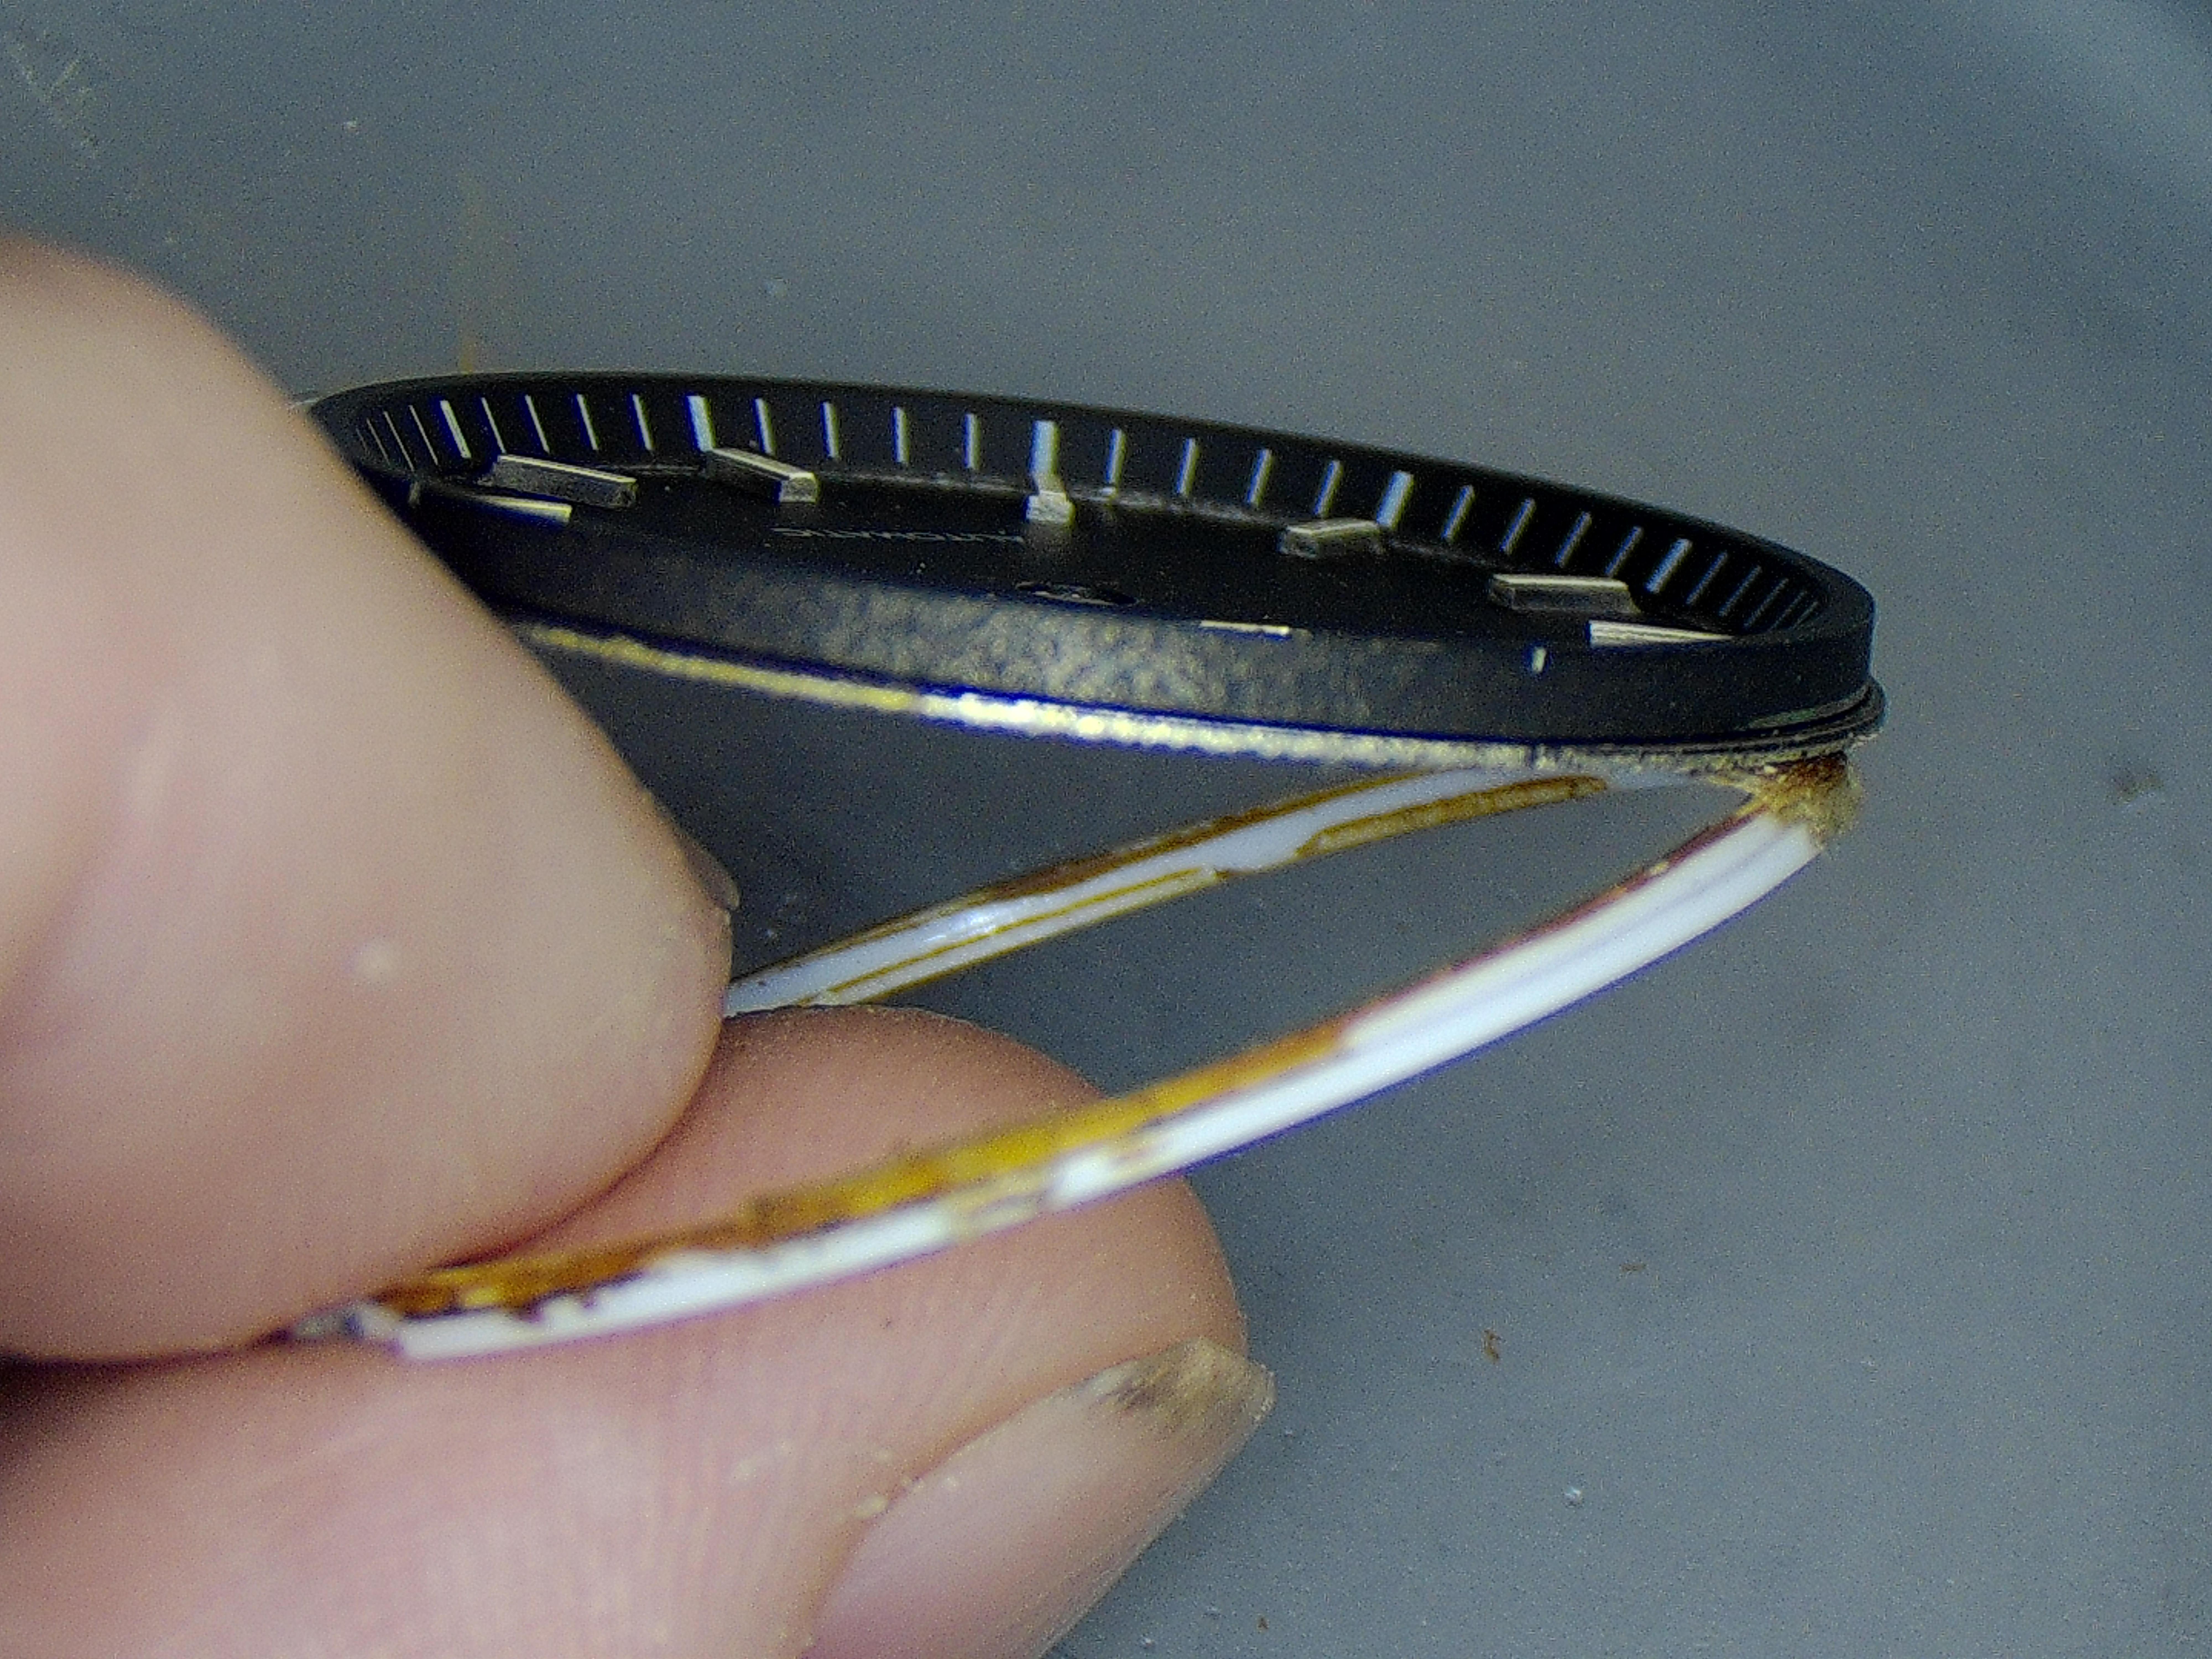
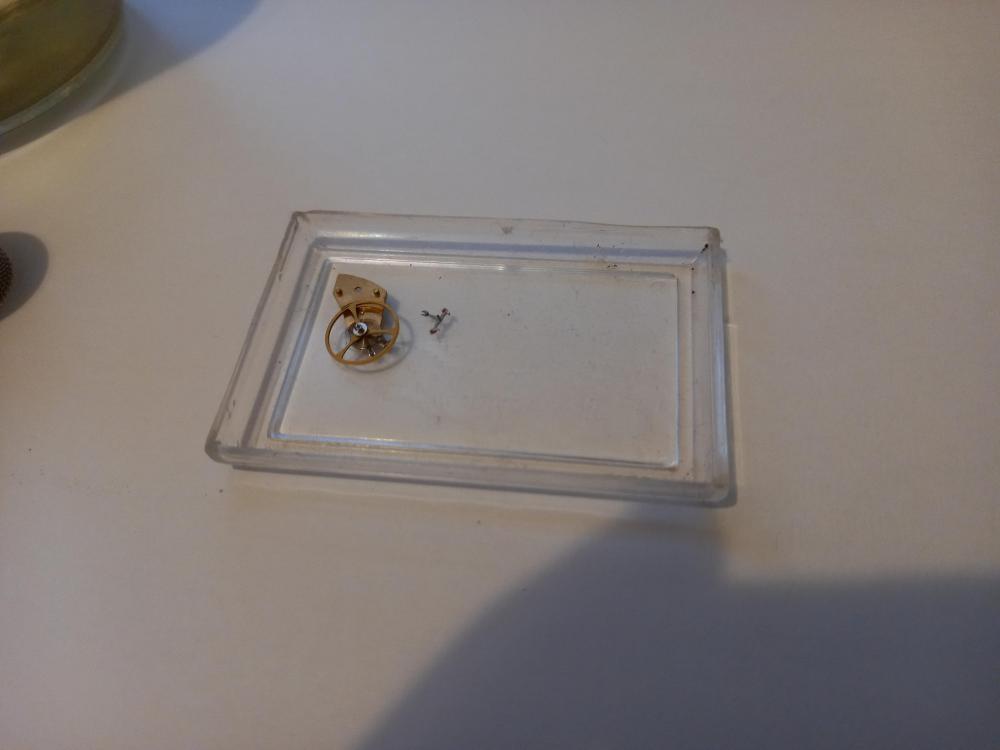
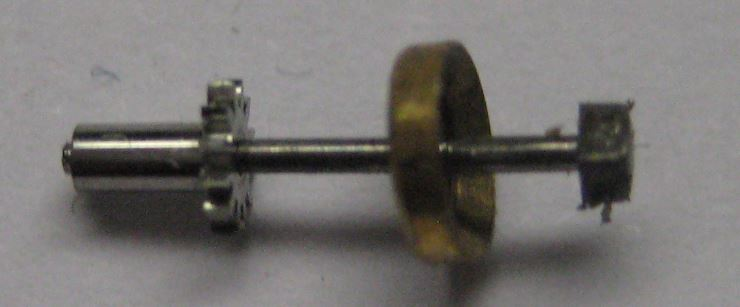
Cleaning a movement and getting used to cleaning procedures with my new Ultra-sonic, this time I decided to take both the anti-shock jewels out their settings and place them (Chaton + cap-stone) in separate small baskets. I thought they would get a throughout clean. This turned out not to be the case. One of the Chaton had picked up a small dirt part and wasn't as sparkling clean as I had hoped for. Investigating the Chaton under the microscope, I thought I could blow, with my rubber hand bellow blower, the small dirt part out of it. Holding the Chaton with a pair of tweezers on top of a microscope base is a delicate matter. Holding it too tight, it may jump. Holding it too loose and it may blow away Carefully blowing, the Chaton was suddenly gone I knew, it couldn't have gone that far, as I was very gentle. Searching my desk and the microscope surroundings again, again and again ...... nothing! I just didn't understand. Searched the floor, nothing. In the end, the idea came to me to check the bellow. I pulled the bellow nozzle and there it was, inside the bellow. The bellow must have sucked the Chaton in !! One learns every day ...... these blowers do suck !
 3 points
 -
Never used an auto oiler but that has confirmed what i was thinking about them. I know we are supposed to try different ideas but to spend money on something and then have it left in a drawer unused happens way too often with watch equipment ( what have we bought that we never use now ? ) Maybe more suited to a pro using one every day. I think the efficiency and convenience of deep, shallow, fast, slow dipping ( accurate oil pick up is an art in itself )of a couple of different sized hand oilers works well for most of us3 points
-
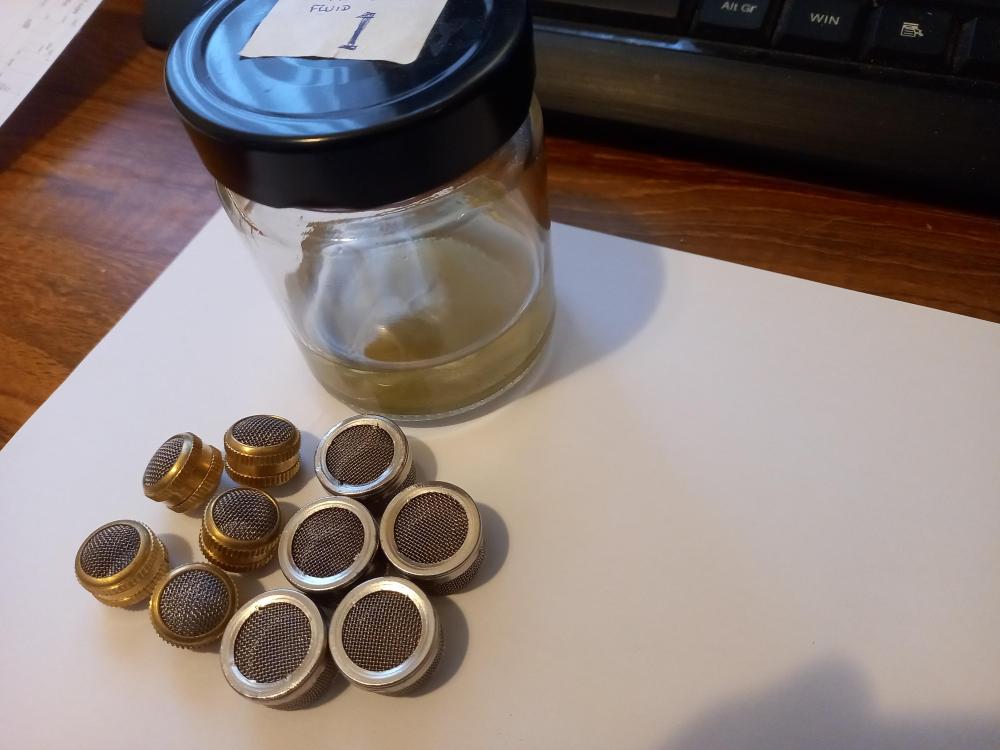
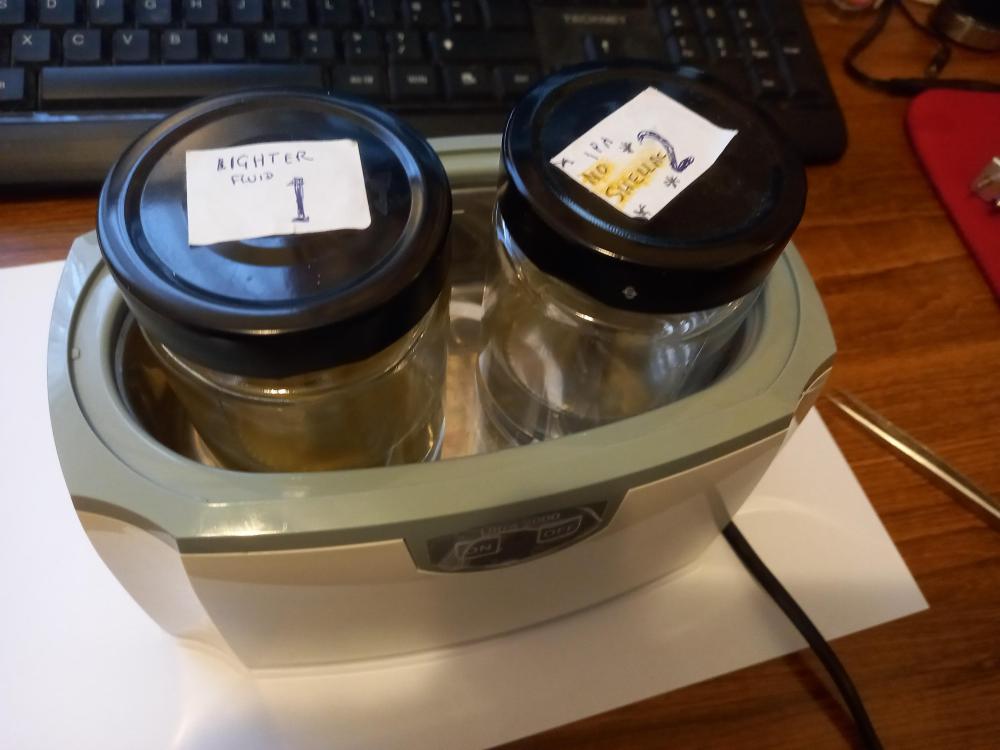
Cleaning procedure Since I began I have learned how important it is to clean the watch parts. I can't afford a cleaning machine. I have made my own variation. My system on disassembly. Pegwood and fibre brush if needed. Large items into base of lighter fluid holder (No. 1 jar). Place all items into baskets then add them into the lighter fluid jar. Ultrasonic for 6 minutes. Remove shellac items and dip into Isopropyl alcohol for 30 seconds and blow dry. Place all other items into isopropyl alcohol fluid jar (No. 2 jar) Ultrasonic for 6 minutes Remove all baskets and items and blow dry in warm air from nail drier for up to 10 minutes Place all item back into parts holder and check items individually. Reassemble

 2 points
 -
Thank you folks. It seems to me that to alter my own system would cause me more problems that I would want. The only down side of mine, is that, after the Lighter fluid clean, I need to remove the balance from the plate and the pallet fork out. On two occasions I forgot and did the final rinse for 1 ultrasonic cycle in Isopropyl before I realised. Fortunately nothing happened to the balance or forks. As can be seen from my photographs, I now have a mark on my No. 2 jar saying 'No shellac'. I note the costings. I have enough for the next 3 years.2 points
-
I agree with Ross 100%, there is no one way pretty much in anything, only what works for us. I would encourage anyone to learn from as many sources as you can and make your own approach and standards for what you are doing. Tom2 points
-
I agree on ditching the alternative chemicals and going with the "real stuff". Horror stories of ammonia stink kept me away from them for too long. I use L&R 566 and it is pretty apartment friendly. Non-ammoniated but there is a little ammonia like smell. I rinse with L&R #3 rinse and both are shellac safe. Finally a quick and harmless rinse in IPA.2 points
-
Hi Ross. A sound method for cleaning and drying, the nail dryer is an ideal solution to careful drying process.as the heat is gentle not over powerful. Well done. Who needs a machine. Eh.2 points
-
Don't think it's right to be criticized. The course information, is just that, information. We interpret various items in our own way and adapt them for ourselves. I certainly have. I have taken on board others members and Youtuber's ideas. Some good, some bad. But hey, it's my choice.2 points
-
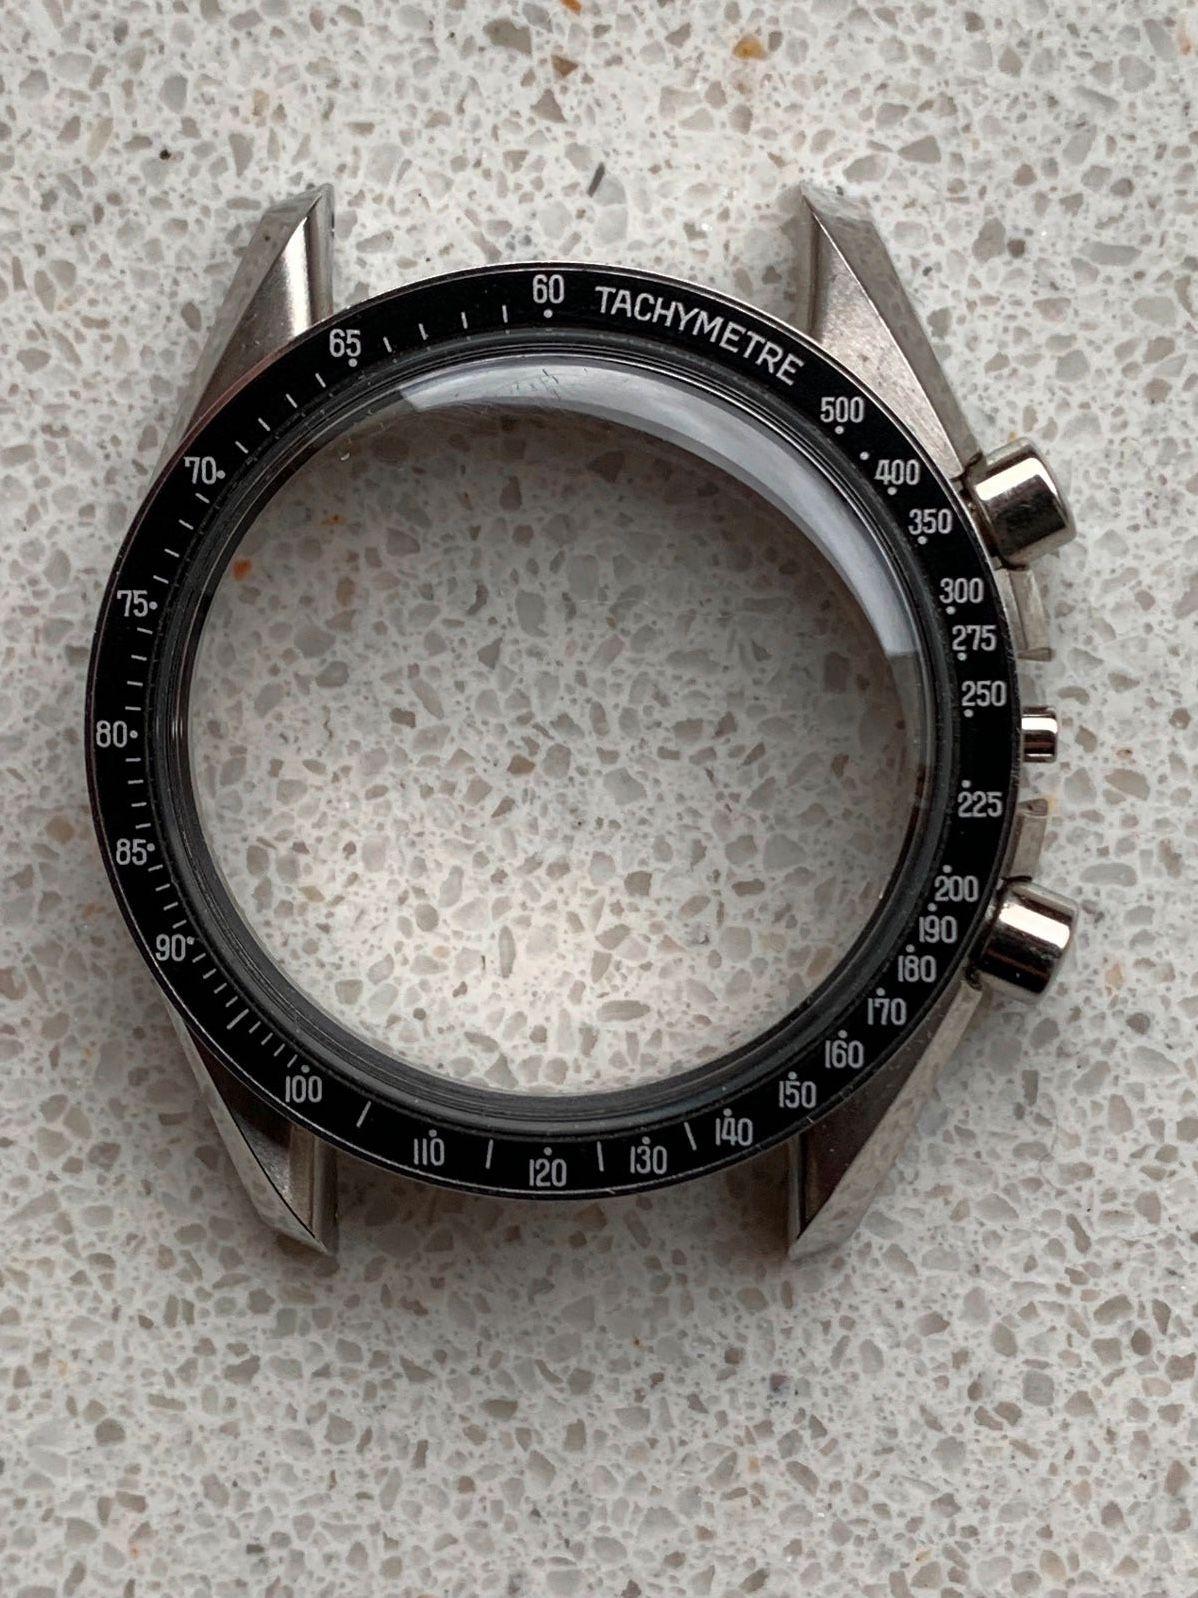
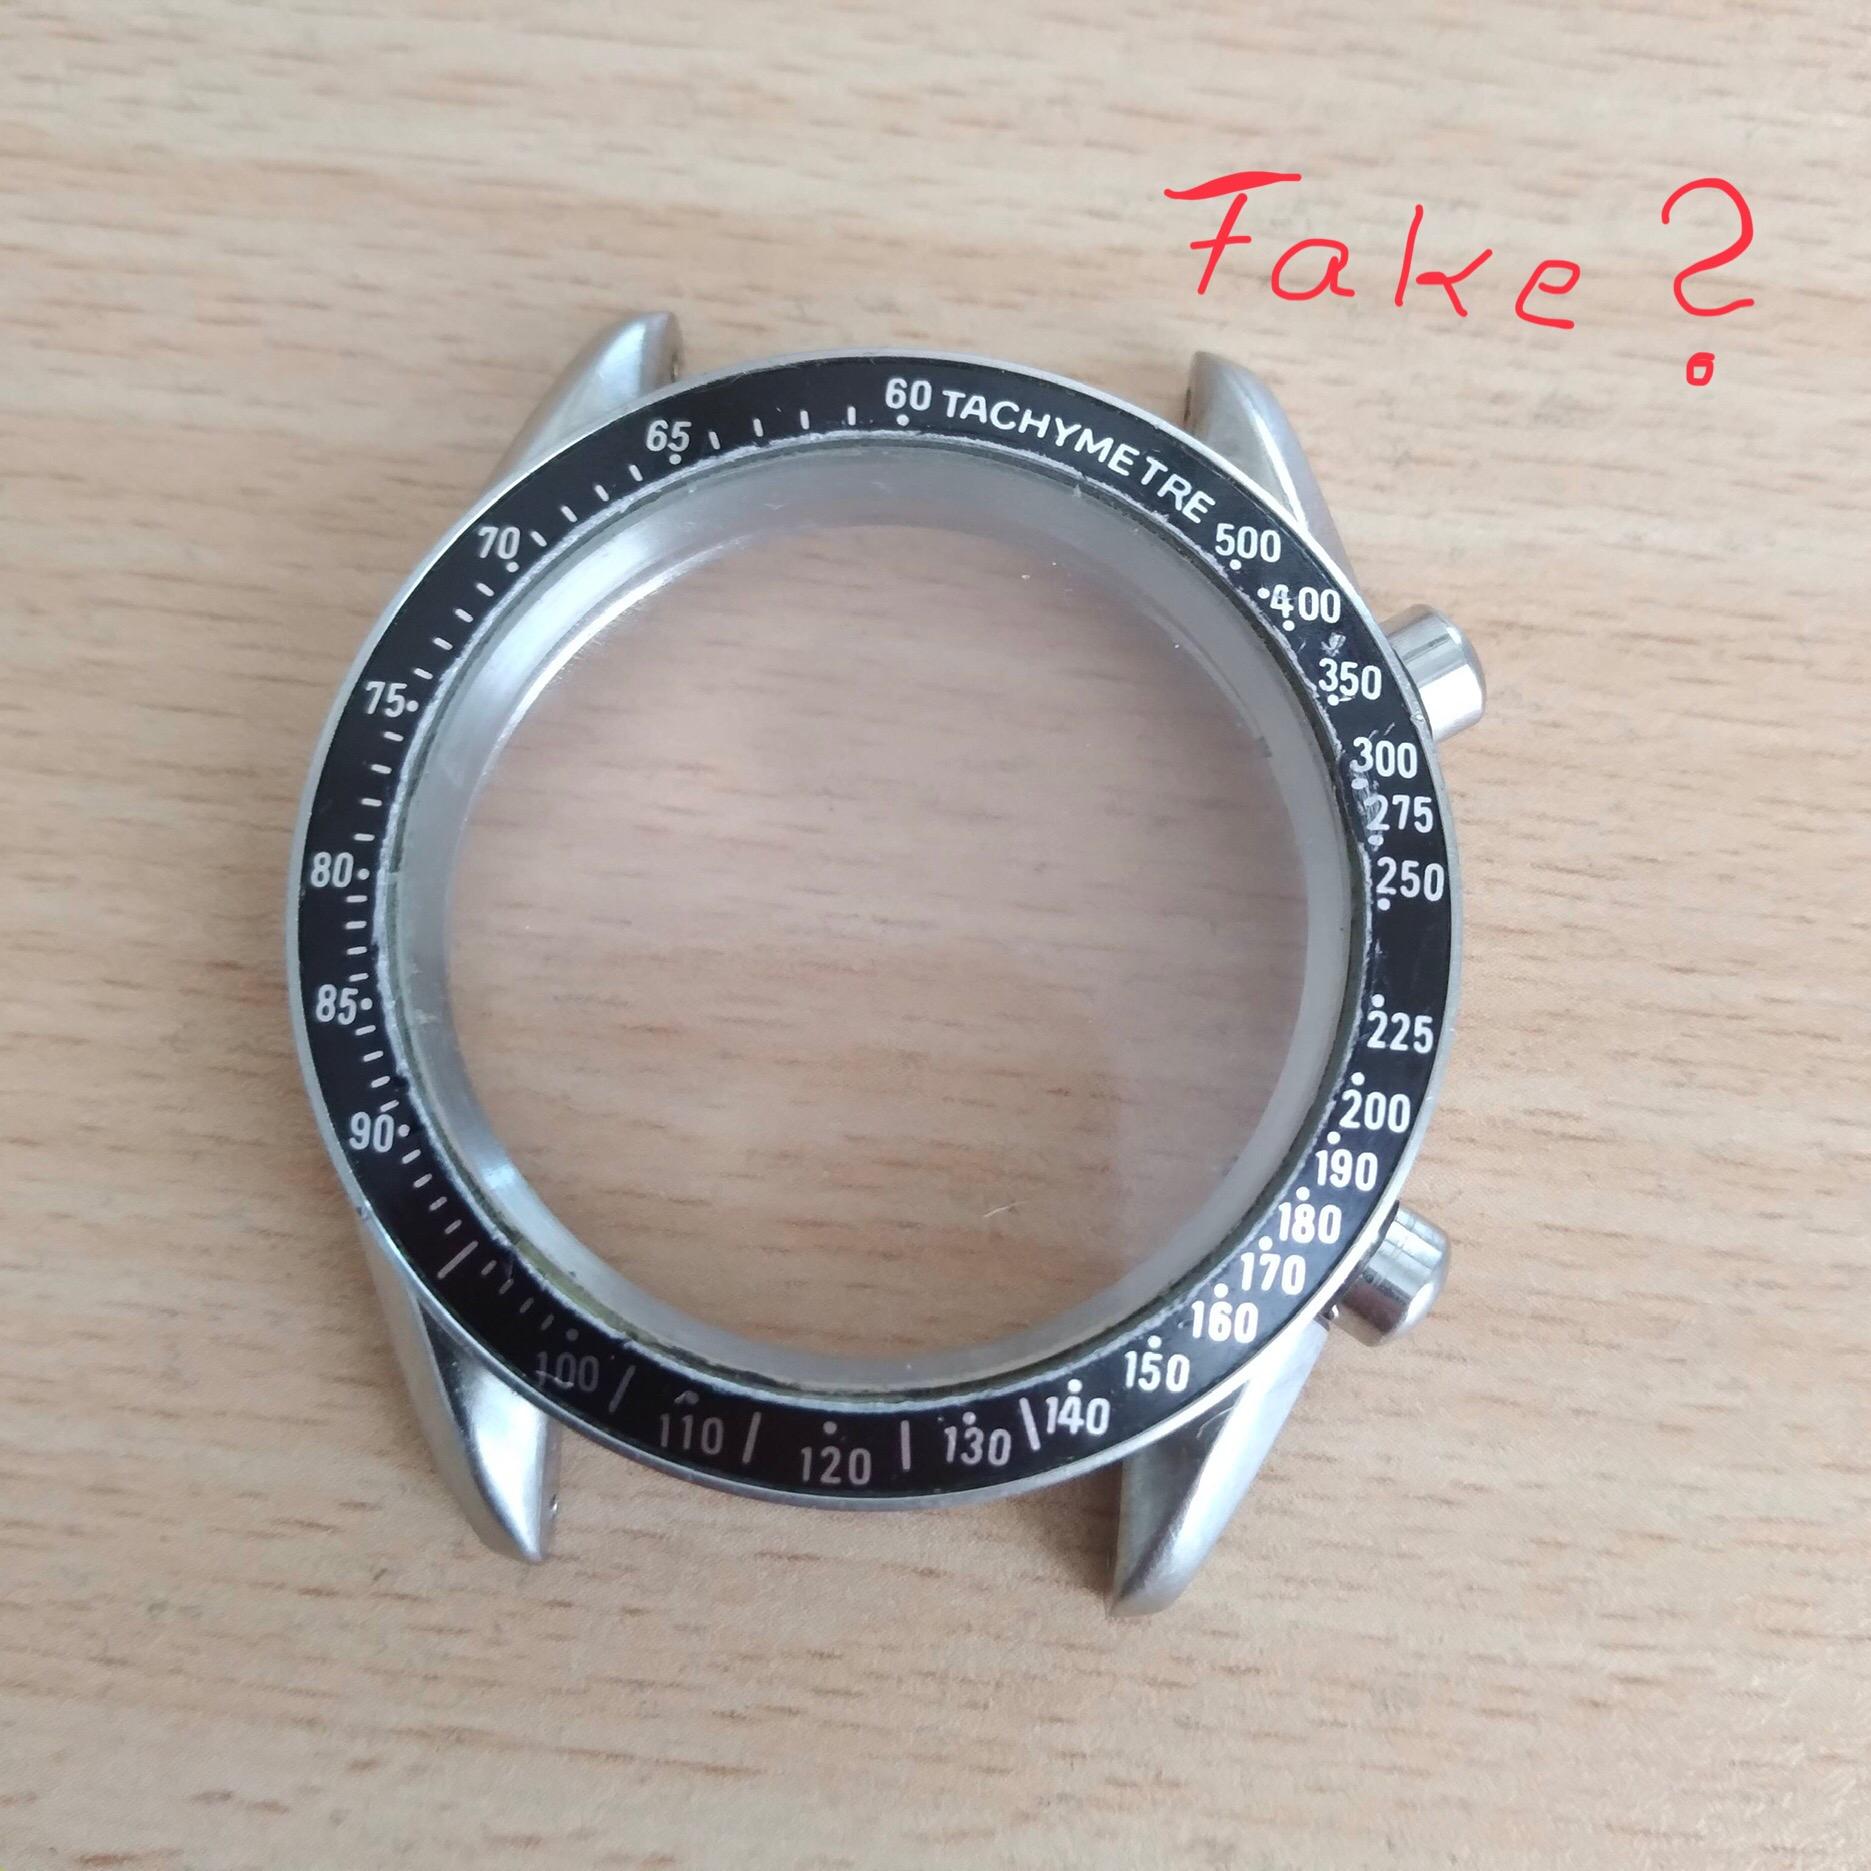
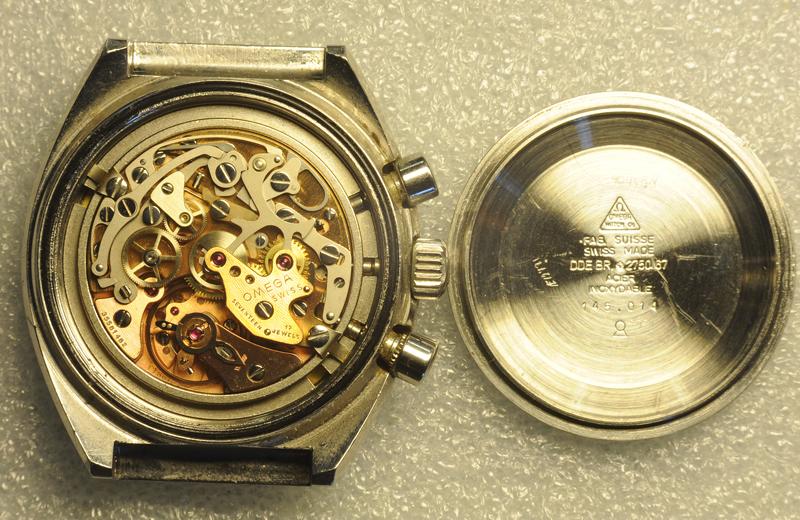
I found some more pictures to look at and the history brings up a little problem. You look at the history this watch was made for quite a number of years and apparently came in variations. It makes a little harder to compare one to another it's a shame it didn't have the back. https://www.fratellowatches.com/buying-guide-omega-speedmaster-professional-145-022/ Well we can rule out it being a later generation one because if it was as the link above shows they started putting the serial numbers on the case and I don't see the serial number. Then as wondering if this picture would tell us anything? I'm not sure entirely why but this picture is making me feel happy the push buttons don't quite look like the ones found on the website above. I went looking to see if we can find in the other pictures of the backside here's one Found another one. One of the things that's noticeably different between your case in these two is where exactly does the gasket go on your case? It should be a nice big groove for the O-ring and I'm not seeing it? Plus the buttons are just bothering me especially the lower but then your picture it just looks wrong looks too big for the two bits on you look at the Omega ones they look like if it is really nice which is what you would expect. I was just looking at the inside or how the button was sitting on the tube and yes they don't quite look the same do they.

 2 points
 -
The pushers don't look the same either. Next to that, the ≈"45" degrees side-edges on the original have a mirror-finish, not so clear to see, if at all, on the first picture. If in doubt, don't do it !2 points
-
Likely a fake 145.022 imho. Here you see some pics of originals. Look at the space between number „60“ and the word „TACHYMETRE“. The edges look very rounded too.
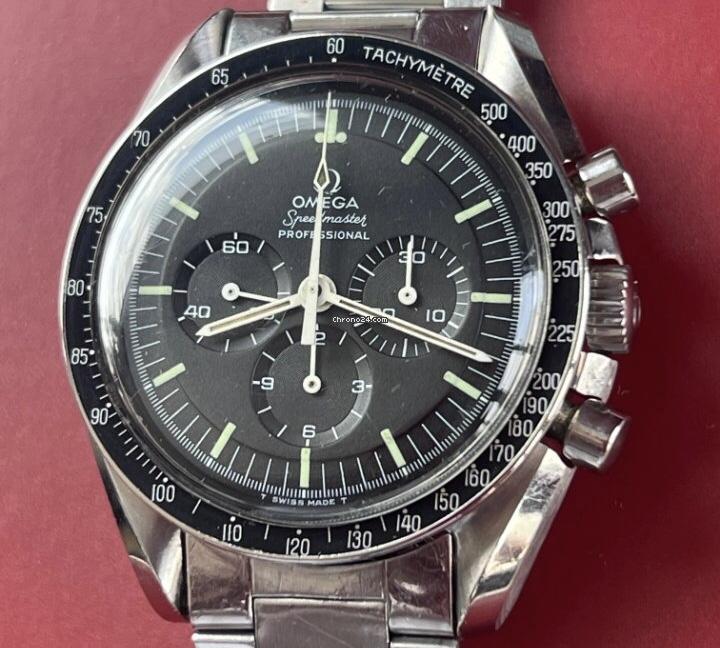
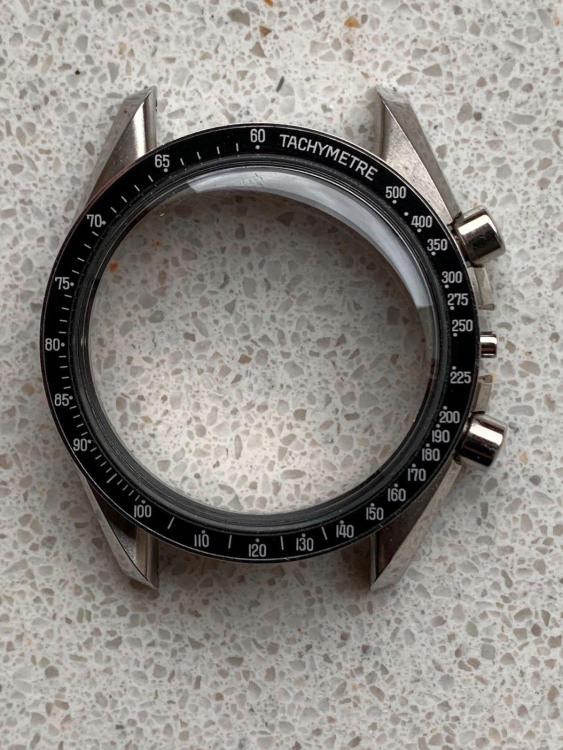
 2 points
 -
I like the auto oilers for shock settings. It’s a time saver for me since I’m not happy with my do over rate with manual technique. I do test for volume on a piece of paper before proceeding every time but always one and done. …if you were to try and use the auto for pivots and such- If you did not know the volume can be adjusted…well, adjust so you have the smallest amount and you can give it a few pumps…2 points
-
Hello all. Been falling down this watch repair rabbit hole for several months now. All started after I bought myself a Rollie as an investment, and watched a service video. Then got hooked on all these videos - Wristwatch Revival, French Watch Collector, Nekkid Watchmaker... - and fancied having a go myself. And I've been collecting more watches too. I bought a Rotate watches kit, and managed to disassemble the included movements, and reassemble 2 out of 3 successfully (I broke the escape wheel pivots on one of them). Since then I've been accumulating tools, buying old watches off ebay and doing my best to fix them up, with some success. Am thinking of doing servicing as a part-time hobby/career once I retire from my day-job in a few years, and in the meantime will get more tools, more experience, complete the courses, and get my confidence up with servicing some of my own watches before taking on customers.1 point
-
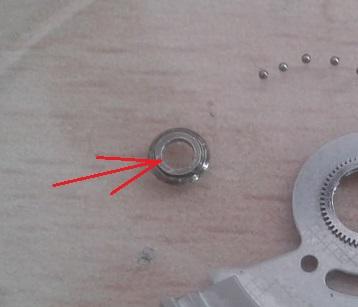
Are you sure they are rubies? can be plastic bushings.1 point
-
So far so good with using the hand presser. I use this holder with it. It is really just a platform to set the movement on and fits perfectly into the cup of the hand presser. It does have an adjustable central pin to support the center jewel. Though, you have to adjust it from under the holder, which isn't ideal. It would have been better if you could spin the top of the holder and that would adjust how much the pin protrudes. I thought about modifying it to do so, but had not gotten around to it.
 1 point
 -
Yes Ross, i use a seperate chemical called perc for the shellaced items. Elma pro wf for cleaning and ipa for rinsing everything else. The only thing i would say i was getting a residue left over from the lighter fluid, different brands might vary. Even with the elma wf pro I've had this happen in jewel holes, its usually when i fail with the inbetween drying phases. I sometimes buff up the odd jewel if it needs it or a quick brush of ipa and a blow dry. If your methods are working getting everything clean then there is no real need to change other to speed things up. I'm not convinced with the perc chemical yet, it has yet to tackle a really sticky hairspring.1 point
-
Hello and welcome from Leeds.1 point
-
Same with the Elma WF pro, there is an ammonia smell, but it's not that one has to open all the doors and windows ........ far from it I'm also glad that I made the switch to the "real stuff"1 point
-
As far as I'm aware, both fluids are shellac "save". That's to say, I do no more than 5 min per ultra-sonic cycle. I have one (165ml) jar with cleaning fluid (Elma WF pro) and two (165ml) jars with Elma Suprol rinse. I give a basket filled with parts 5 minutes in the cleaning fluid (WF pro), blow the basket clean, then the basket goes 5 min in the first Rinse. After 5 min, I blow the basket clean and it goes in the (optional) 2nd rinse. Once that's all done, I hand-dip the basket in the IPA and quickly (especially with the pallet-fork and the balance) take the parts out of the basket and blow them dry. How to do the balance is still a bit of a question mark? I left the balance in situ c/w the anti-shock jewels, I also cleaned the balance separately and I left the balance in situ without the anti-shock jewels. All options went fine, but I'm not sure which of the three options is the best? With the anti-shock jewels separate, I experience this: https://www.watchrepairtalk.com/topic/28547-these-rubber-bellow-hand-blowers-do-suck-/#comment-240948 It seems, and to make sure that the anti-shocks are 100% clean, that one has to do the anti-shock jewels (by hand) separately in IPA. To me the Elma WF pro (cleaning fluid) seems to be the most "aggressive", but that may also be due to the ammonia smell. The Elma Suprol is to flush the Elma WF pro out, and to make sure, I use two rinses in two separated jars; Rinse 1 and Rinse 2. The 2nd rinse seems optional, but I do it anyway, just to make sure. I don't think that any of both Elma chemicals are directly "decremental" to shellac, or at least not so as IPA is. But as I understood from others, you don't want to leave any of the watch parts in the WF pro too long either. Up to 5 minutes cycles seem to be safe. Also these two Elma chemicals are non-water based. One has to make sure that there is no cross-contamination between the water in the ultra-sonic tank and the fluids in the jars. Perhaps other members may have different idea's or other cleaning procedures? I'm a bit experimenting too what's the best procedure. However, from what I've done so far, the results with these chemicals are very good ! Before; After; and the same results I get with the wheel-train, screws etc. Everything comes out sparkling clean If WF Pro was not suitable for ultra-sonic, why do they sell it in shops specialized in ultra-sonic? Perhaps, it is not a good idea in the ultra-sonic tank directly. That would be, due to the volume needed, quite costly too. But in jars .... ? I bought my chemicals by SKsonic in Germany: https://www.sksonic.de/ I do hope that your German is up to spec

 1 point
 -
Does this mean that you don't put those items in the lighter fluid. Sorry to question, but I don't understand the process you use.1 point
-
Hello and welcome 5o the forum. Enjoy.1 point
-
Tbh ross the cost of the cleaning fluid is probably close to the cost of your lighter fluid. If i remember lighter fluid works out around £12 / litre when bought in numerous small tins, the cleaner is maybe a little more expensive. The rinse I'm not sure about, i like isopropyl, i think i paid £18 for 5 litres. For balance and pallet i went with the b dip equivalent which has been suggested is tetrachloroethylene or perc drycleaning fluid.1 point
-
Hey Ross, the cleaning fluid is the equivalent of your lighter fluid and the rinse is the equivalent of your isopropyl. Tom1 point
-
A huge amount depends on what you’re working on. Many, especially vintage or antique movements will have no technical information whatsoever. I’m afraid at best it’ll be a guess/suck it and see situation. Tom1 point
-
For years I've been using Zippo lighter fluid. I recently bought a 2nd hand Elma S15H ultra-sonic and purchased Elma WF Pro cleaning fluid and Elma Suprol Rinse. https://www.cousinsuk.com/product/elma-wf-pro-cleaner?code=R37683 https://www.cousinsuk.com/product/elma-suprol-rinse What a world of difference these Elma chemicals make. My big regret is that I've should have purchased these products years ago1 point
-
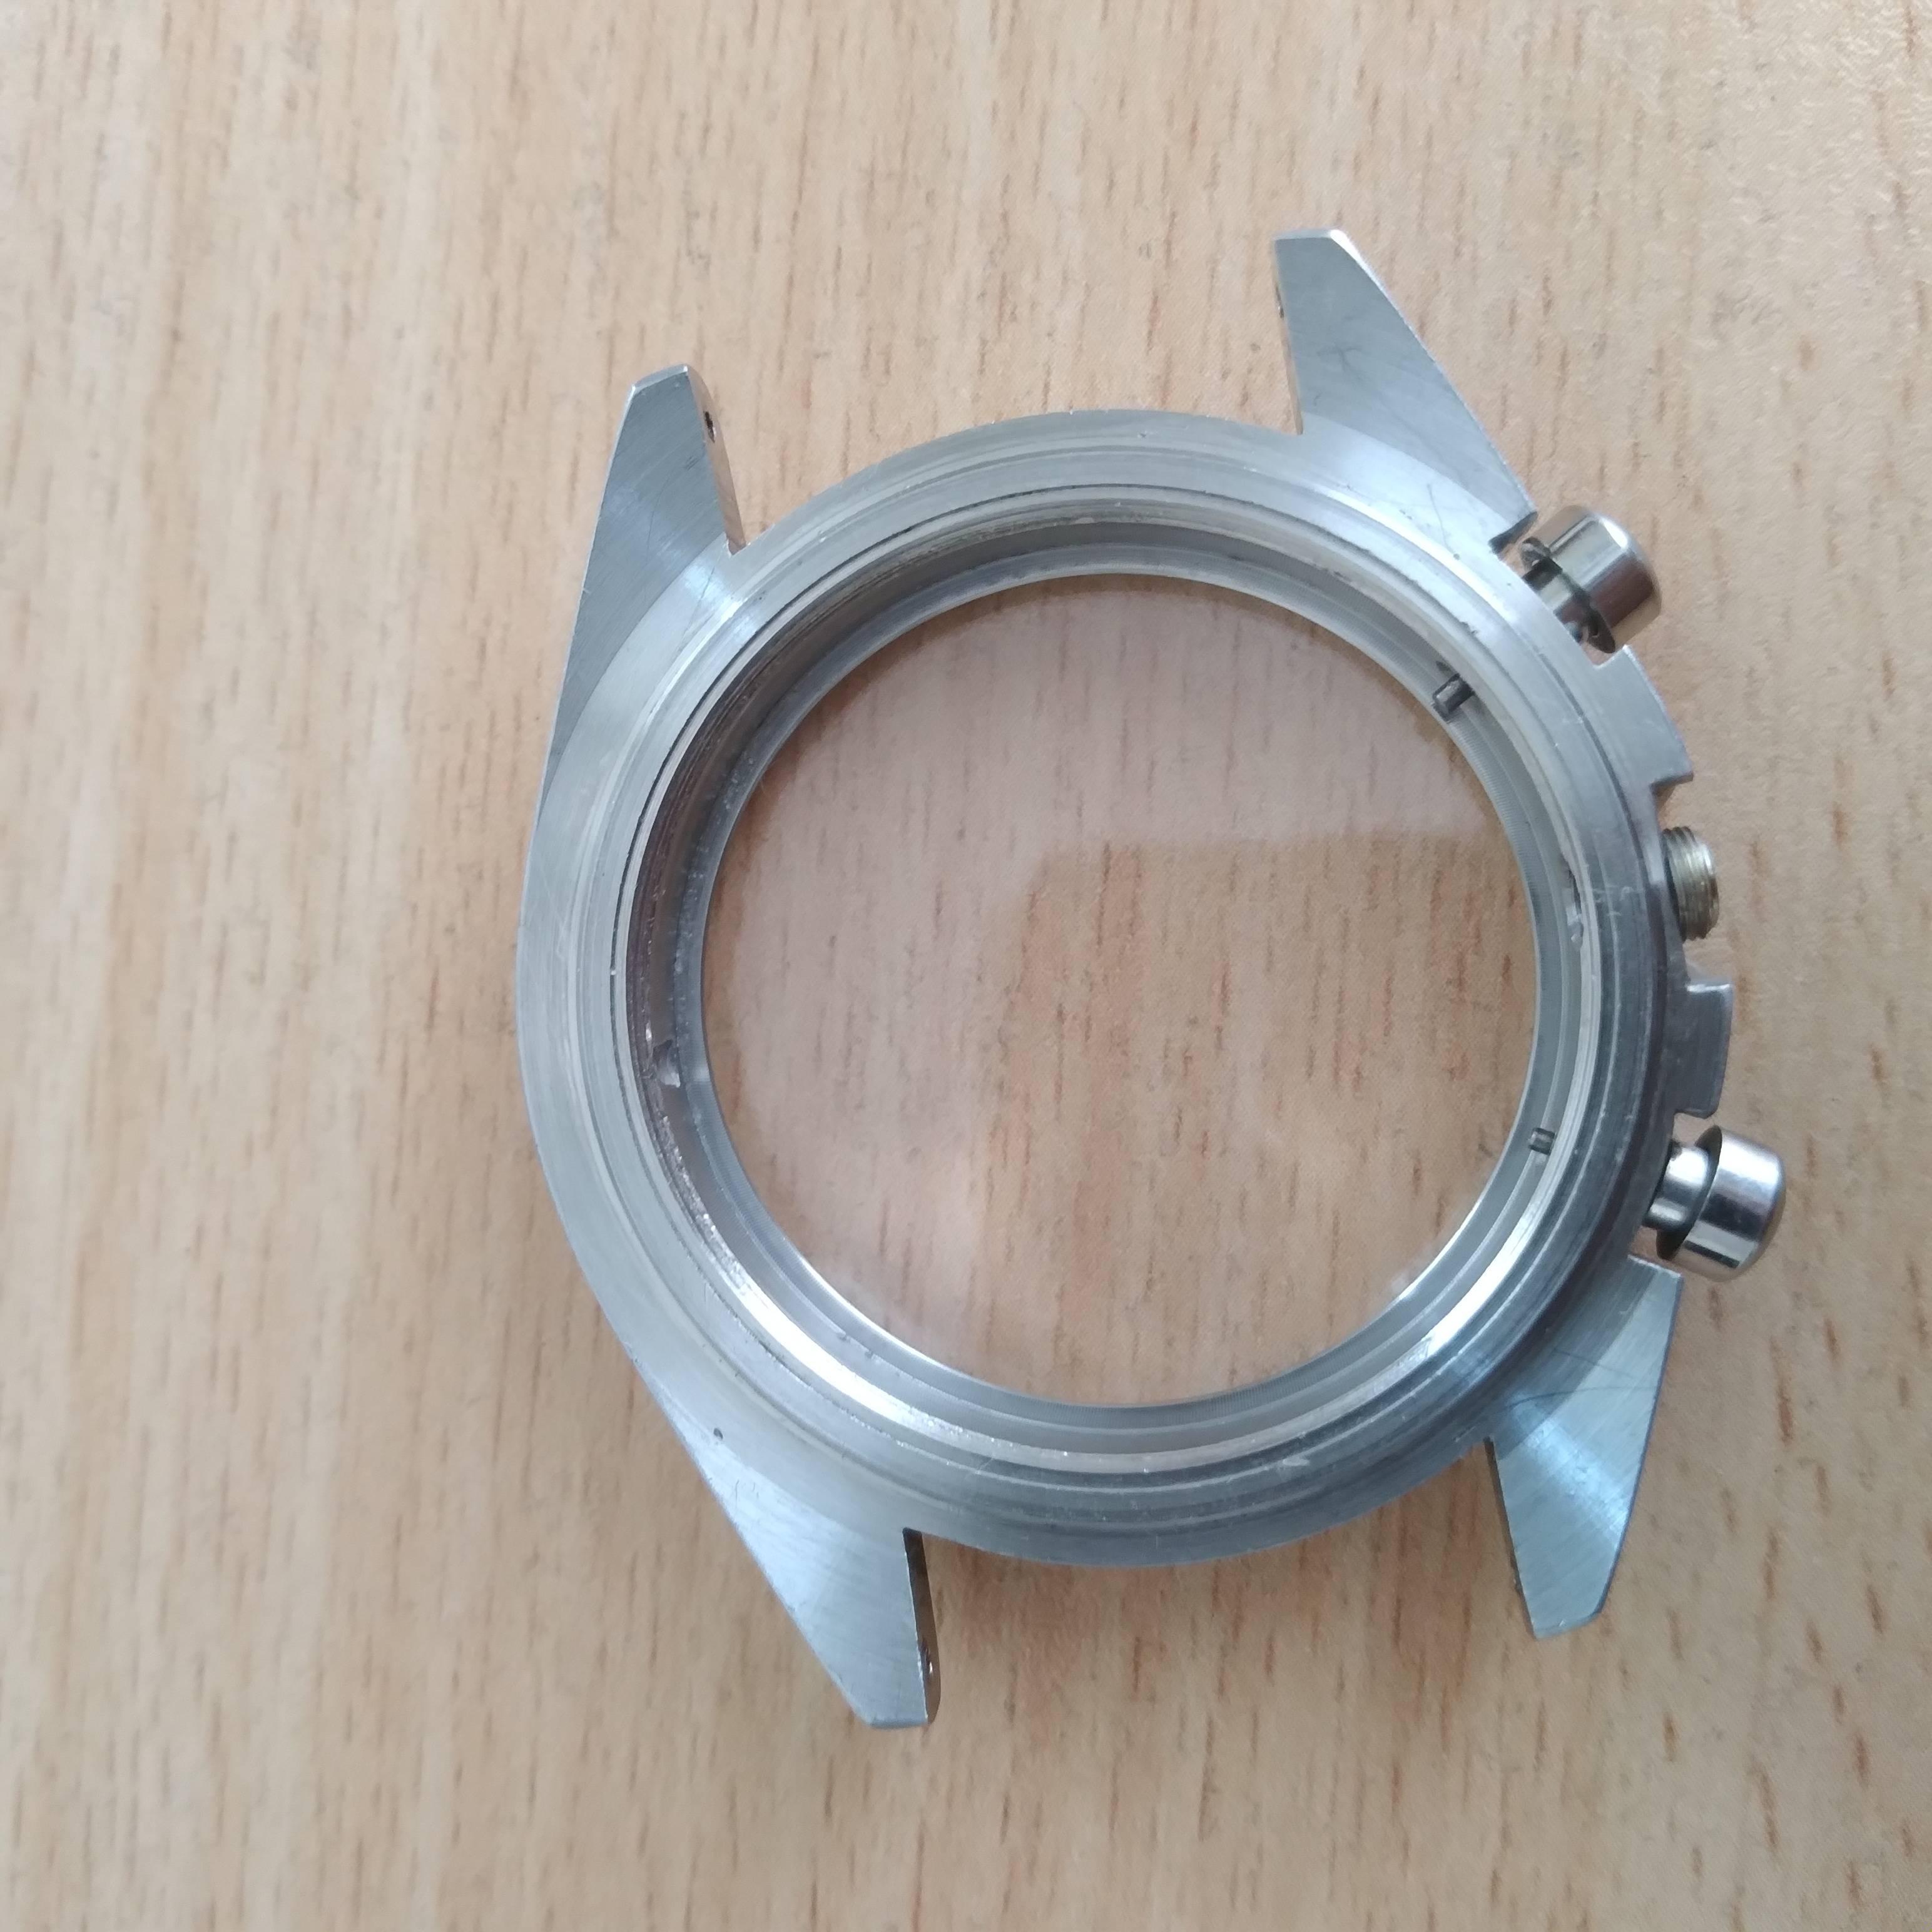
Looks like a screw-down crown as well ......
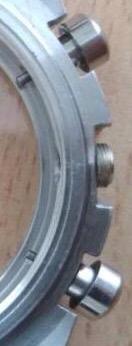 1 point
 -
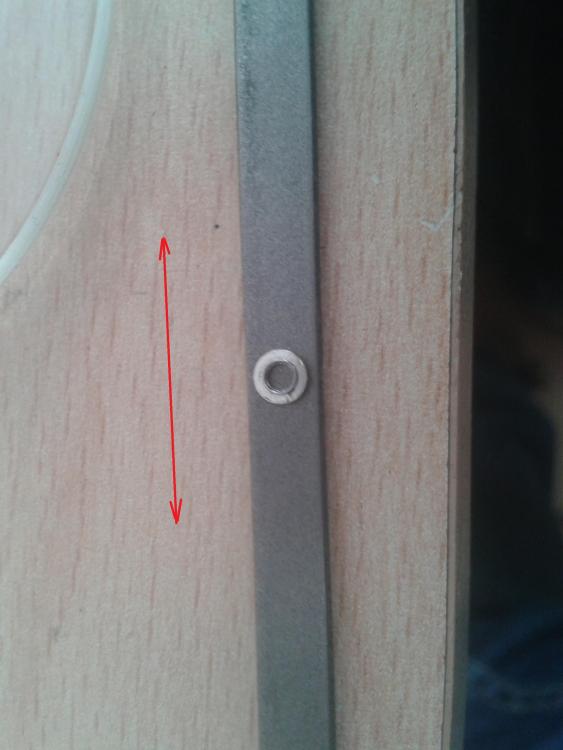
It measures up at 23.5 diameter and 4.5 depth. Thanks for the input! This is the closest match that I have seen1 point
-
Different case, but here the pushers and build up of my 1975 Speedmaster Mark II; There is a big chance that Omega used the same pushers for their Speedmasters (?).
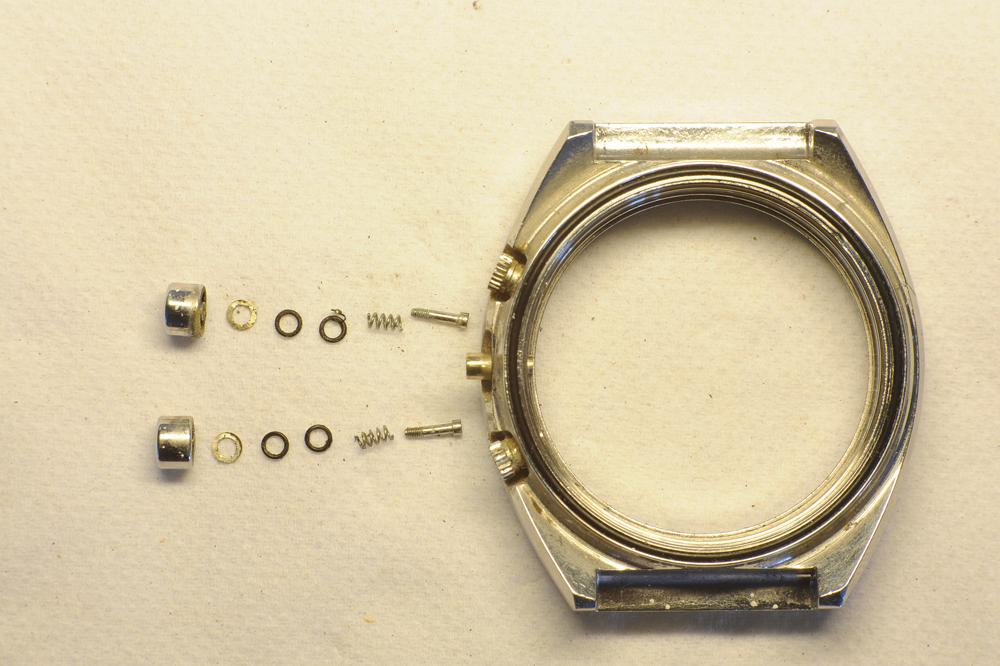 1 point
 -
You forgot the photos or link.1 point
-
Washer looks interesting? Here is an image of what you're dealing with there is a center pin that goes in the back to the front. You get the minute hand off there is the protruding pin and you just have to tap on that and then the pin itself will come out of the hollow center wheel.
 1 point
 -
I have found that half strokes are frowned upon in most situations.1 point
-
To echo the advice above, it all depends how brave you are, the more experienced on this forum will tell you not to mess with it... a living example of the saying "fools rush in where angels fear to tread". In reality a lot of the damage resides under the lacquer/varnish coting on the dial, mainly due to water or oil getting under it and causing it to blister/corrode. As this damage is under a clear coating, no matter how much cleaning you do you cannot fix it, and will inevitably do more damage than good. The limit of what I will do is to blow any loose debris off with an air blower, then dab (never rub) any stubborn marks with rodeco. If the dial is older I may try plain water (no detergent), using a rolling action with a cotton bud (as mentioned by @RichardHarris123 chronoglide has a video showing how to do this). But stay well clear of any text or other printed marks on the dial as the water can lift these before you realise it, been there and got the t-shirt. Newer dials tend to be less robust, older ones are made with the expectation that the watch will be regularly serviced and may include cleaning the dial and are therefore more resilient. However, newer dials are not built to be cleaned (throw away philosophy?) so tend not react well when you try. Getting the dial repaired by a professional dial restorer is very expensive (often several times more than the watch is worth) so only go down this road for a very expensive watch or one with great sentimental value. Replacement dials tend to be difficult to find and expensive and it's a minefield finding one that is real instead of a straight-out fake or 'aftermarket' one - some sellers are less honest in their descriptions than others. The best option I have found is to look for a donor movement which is being sold with a good quality dial as this can be a fraction of the cost of a stand alone dial (strange but true).1 point
-
Apologies if this has already been covered, but I couldn't spot it. The BHI offers 2 DL courses Technician Grade Combined Intermediate and Final Grade Do you have to do them in sequence i.e. you can't start Combined Intermediate and Final Grade until you have first completed Technician Grade? If you can do them separately, what is the main difference, why would you choose one and not the other? As a little background, I have completed Marks courses, and I want to have the option (although I may not exercise it) to start watchmaking as a career in the future and a certificate will add credibility, additionally the course will provide a structured foundation of learning and knowledge rather than the organic knowledge I have accrued at my current level of experience and will hopefully identify and fill any gaps in my knowledge and skill set. PS As many of the others in this thread have stated the distance learning aspect of this course is attractive as I am not in a position to take a career break and go back to school. I am quite comfortable doing DL as I recently completed my Masters degree and Doctorate all (apart from the odd week here or there) distance learning.1 point
-
Unfortunately probably not a lot. Google dial cleaning or something like that and Kalle does an excellent video explaining the difficulties.1 point
-
Because I was so bad with co-ordination is one of the reasons that I persevered. Don't like to admit defeat without giving something a good try. Already envious of your skill Anyway, lets not change the direction of the post. I want to see how Mattwatch gets on. Would be nice to give assistance, to give something back to match the advice and help I received.1 point
-
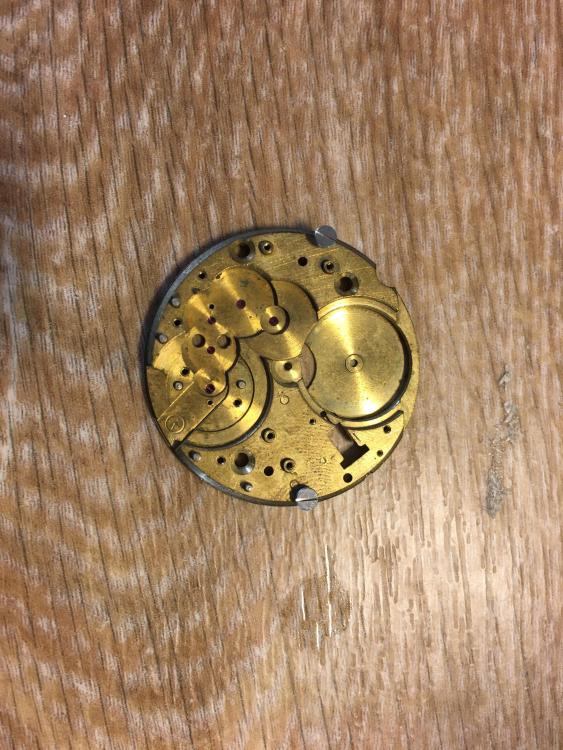
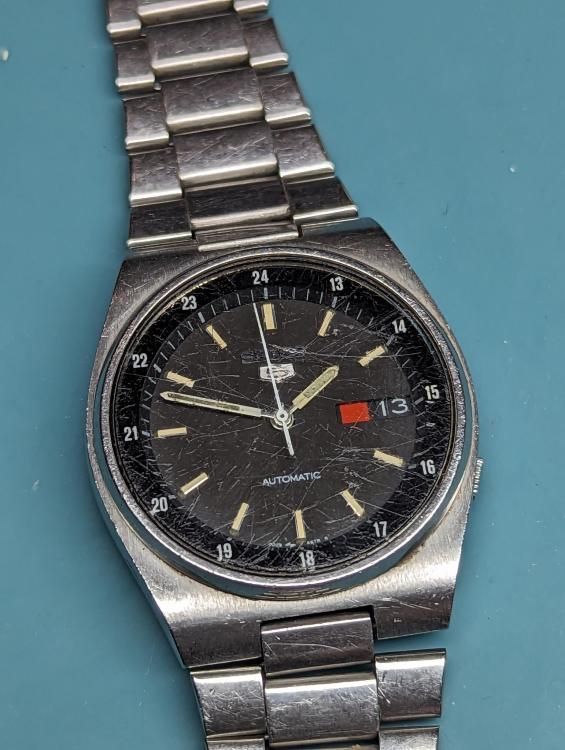
It could be a watch from Nissen Holdings Co. which operates mail order companies, it tells what movement it is under the balance, I see it but can not read it all....looks to be an ETA make1 point
-
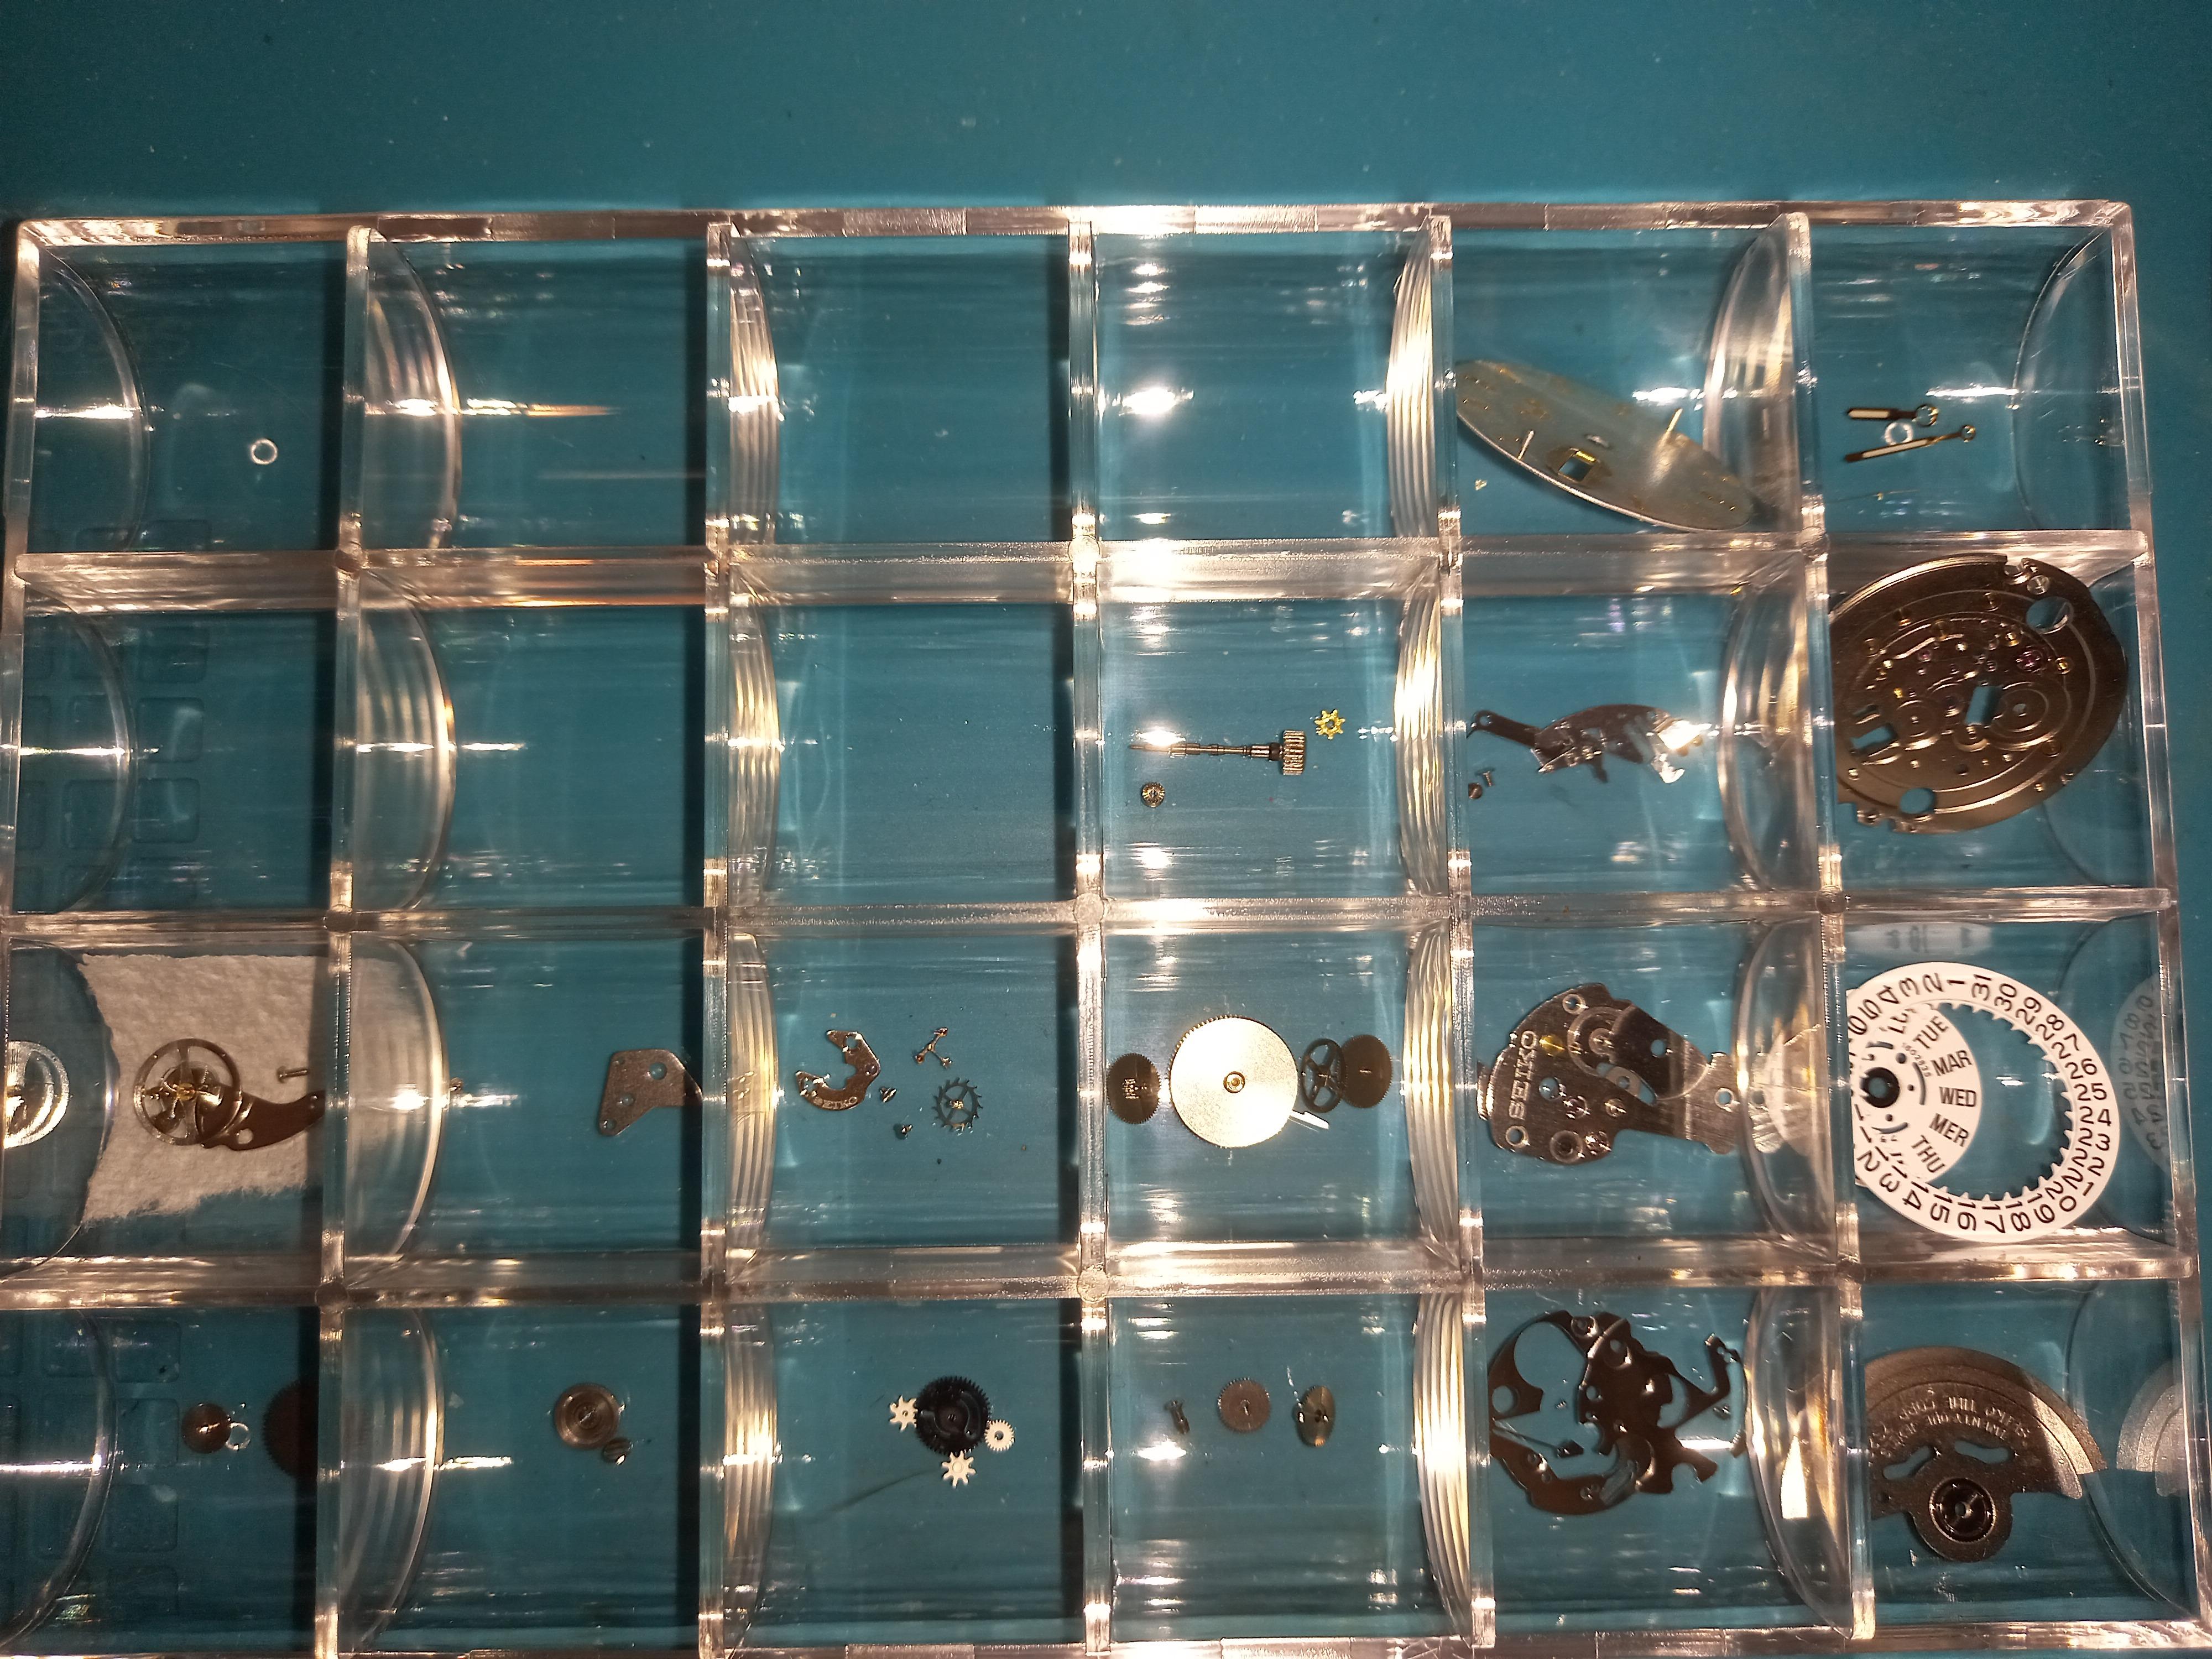
As @rossjackson01 says, all parts in separate compartments, then in mini cleaning baskets, and the baskets in a cheap plastic holder (you can get 4 or 5 in )which nicely fits a jam jar.
 1 point
 -
Like you. I've had trouble with screws. My fault I may add. All parts into different areas. only used 4 sections. Screws became mixed when after cleaning replaced them into an area. Learned my lesson. I now use box which has top and bottom compartments. 6 Bottom for case and strap. 24 Top for all others. It does mean that I put each section into a differnet cleaning basket. It's worth it. Now I know what screw goes with what part.

 1 point
 -
Hi John, I am late to this topic but hope your journey is going well. I have the same 8mm Boley lathe as you and refurbished it. In 2021 I took Marks courses and found them very worthwhile and perfect for my learning plan. I had read Henry Fried's book, and seeing Mark demonstrate the proper steps with clearly articulated instructions gave me a better understanding. In 2022 I enrolled in the BHI Distance Learning Course (DLC). About a year later I added the tutor option which motivated me to complete the work faster, and finished the level 3 material. It was worthwhile in the feedback received on both the theory and practical pieces I submitted for evaluation to help find where I was weak on knowledge or technique and need to circle back. Previously posts mentioned concerns about a lack of information about mechanical watches in the DLC, but that was not my experience (perhaps I recieved a newer course format). Sections 11 and 12 were very focused on the details of servicing mechanical watches. The clock and quartz material was extensive and very useful even though I too was more interested in mechanical watch movements. The intermediate BHI Level 4 DLC material covers topics like Calendar complications along with Automatic and Chronograph watch movements. I don't have a local mentor and can't take time to attend a two year full-time watchmaking course, which is why the BHI DLC appealed to me. I am also taking classes at AWCI a few weeks each year. The combination of information from BHI, AWCI, Books, help from people on forums like this, and online videos have shown me a variety of things to consider and approaches for repairs. BHI may present information on a particular topic differently from AWCI which helps, since one format or the other makes more sense to me at different times. Having the accreditation from BHI and AWCI may or may not open doors for me professionally, but I feel I am working with a broader perspective and striving for higher standards than I may have otherwise. And I totally agree with others that spending bench time learning to be a practitioner by turning knowledge into wisdom is the path we must all go if we want to improve. Good luck with your training. Terry1 point
-
Got there in the end, with some lessons learnt : 1. Copper plating is a great base layer to fill defects. It requires a lower temperature than nickel, and is easy to do (but you must use the proper PDO copper anodes). 2. Don't be too vigorous with polishing the nickel ! I put on about 20 microns, but still managed to go through on an edge when trying to polish out a defect. I ended up re-plating the nickel which I wasn't sure would stick, but if you activate it with acid correctly, there's no problem. I'm happy with the results. To the naked eye it looks good, with defects only really visible under magnification. I'm still getting a few micro holes, I'm not sure why. Before After (it's really hard to take pics of curved shiny surfaces) Now to fix a VERY embarrassing and expensive error I made when servicing my Breitling Aerospace
 1 point
 -
Yes, the old like 7009 are just pressed and and only pushing of the downside part thru the hole of top part, untill the rotor is supported above proper hole is needed. The newer are riveted, so first some drilling of the riveted part is needed. No riveting is needed after all is done, as the screw holds the both parts together well pressed1 point
-
I will try again, for the last time. To restore the bearing, You first have to dismantle it, like this. Then, one must grind this surface a little, in order to allow two cones of the internal ring to come closer to each other The grinding is done this way, pressing the ring by finger and moving it on grinding surface - in this case a diamond file Then assembling the bearing and test of the free play, if needed - repeat untill free play gets minimal. No adjustment only by pressing is possible, this is a silly thought.

 1 point
 -
Then the best solution is screw head to be turned on lathe in order to ensure some free play of the finger when the screw is tightened1 point
-
Just to clarify, this is not the hammer time video, this video is specifically referring to the repair of rotor bearings and he uses a completely different technique. It's worth a try before investing time and effort in a new part as you have nothing to lose.1 point
-
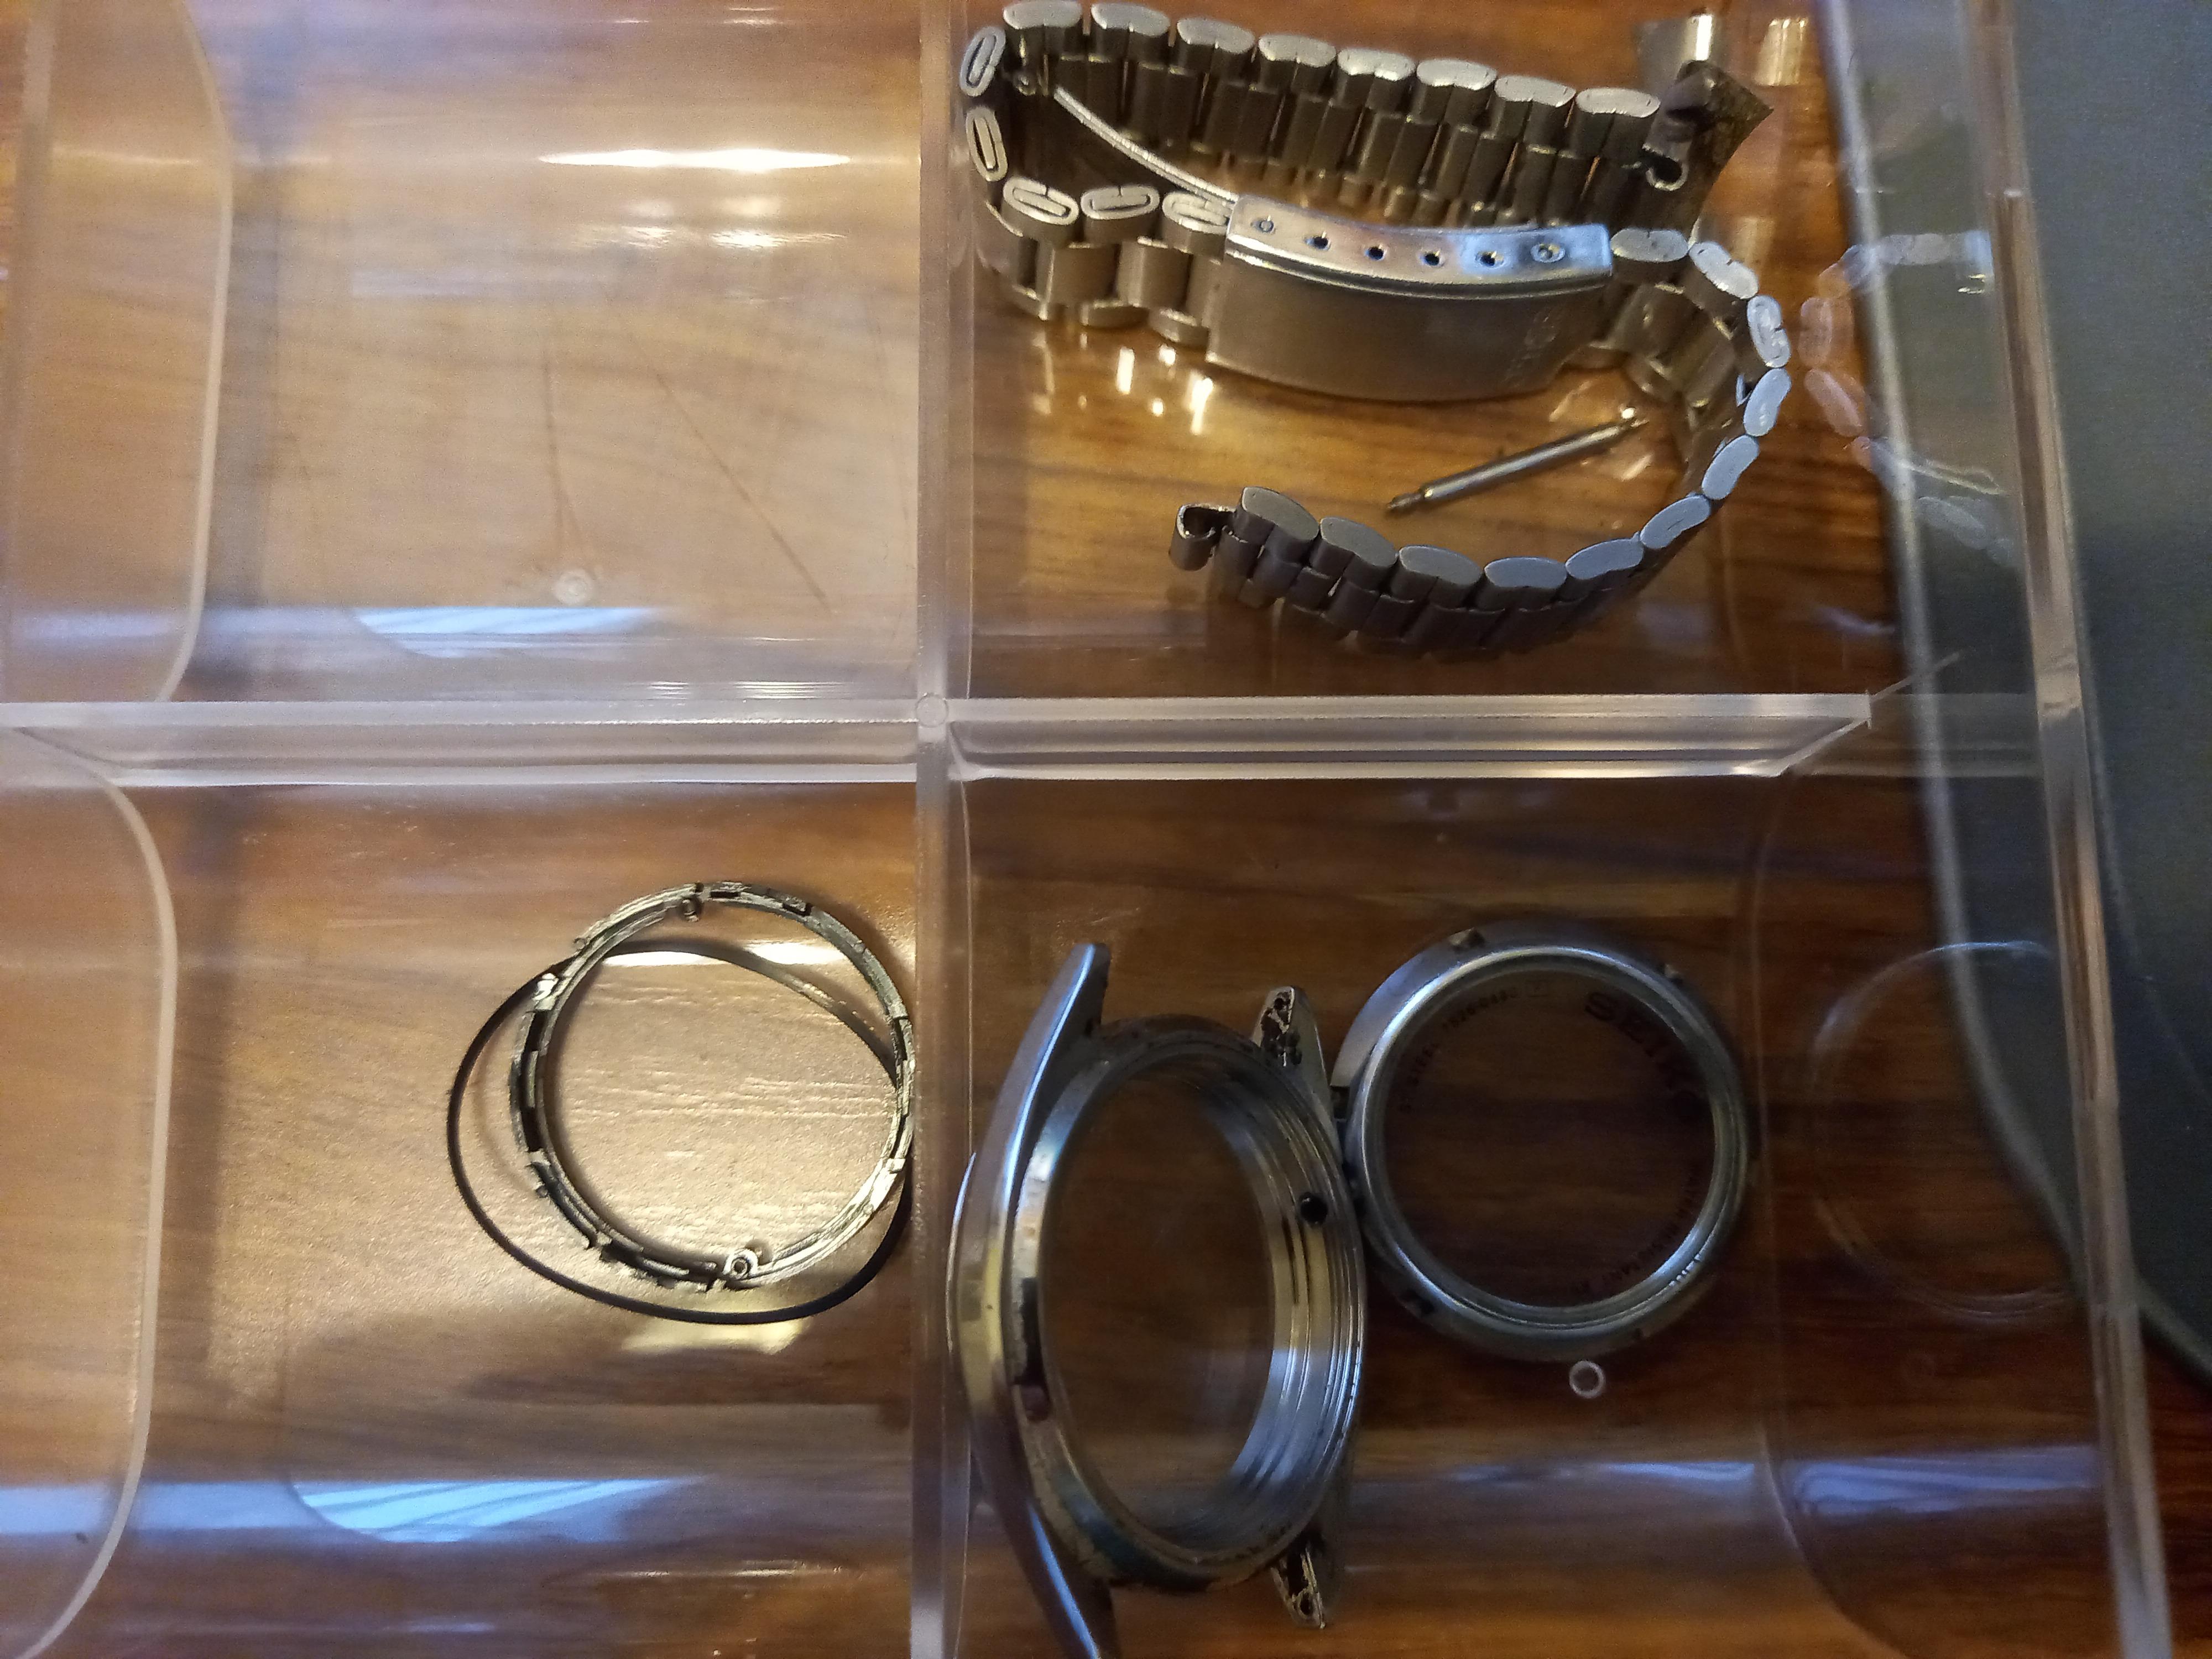
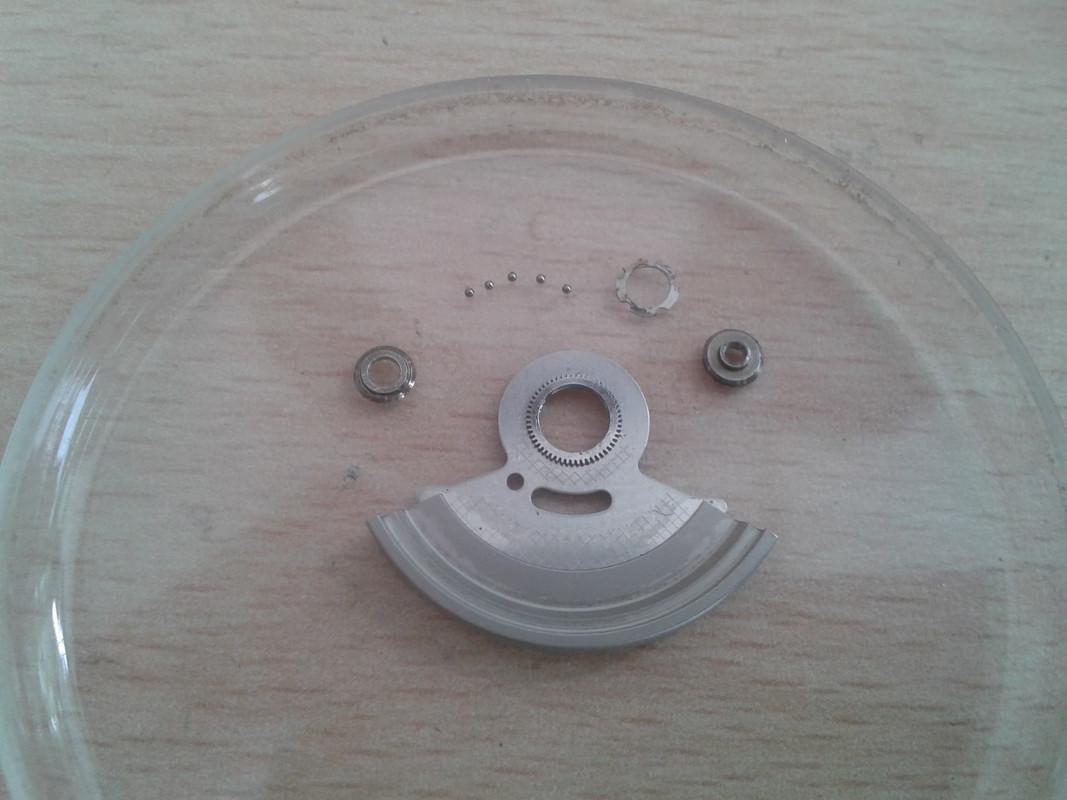
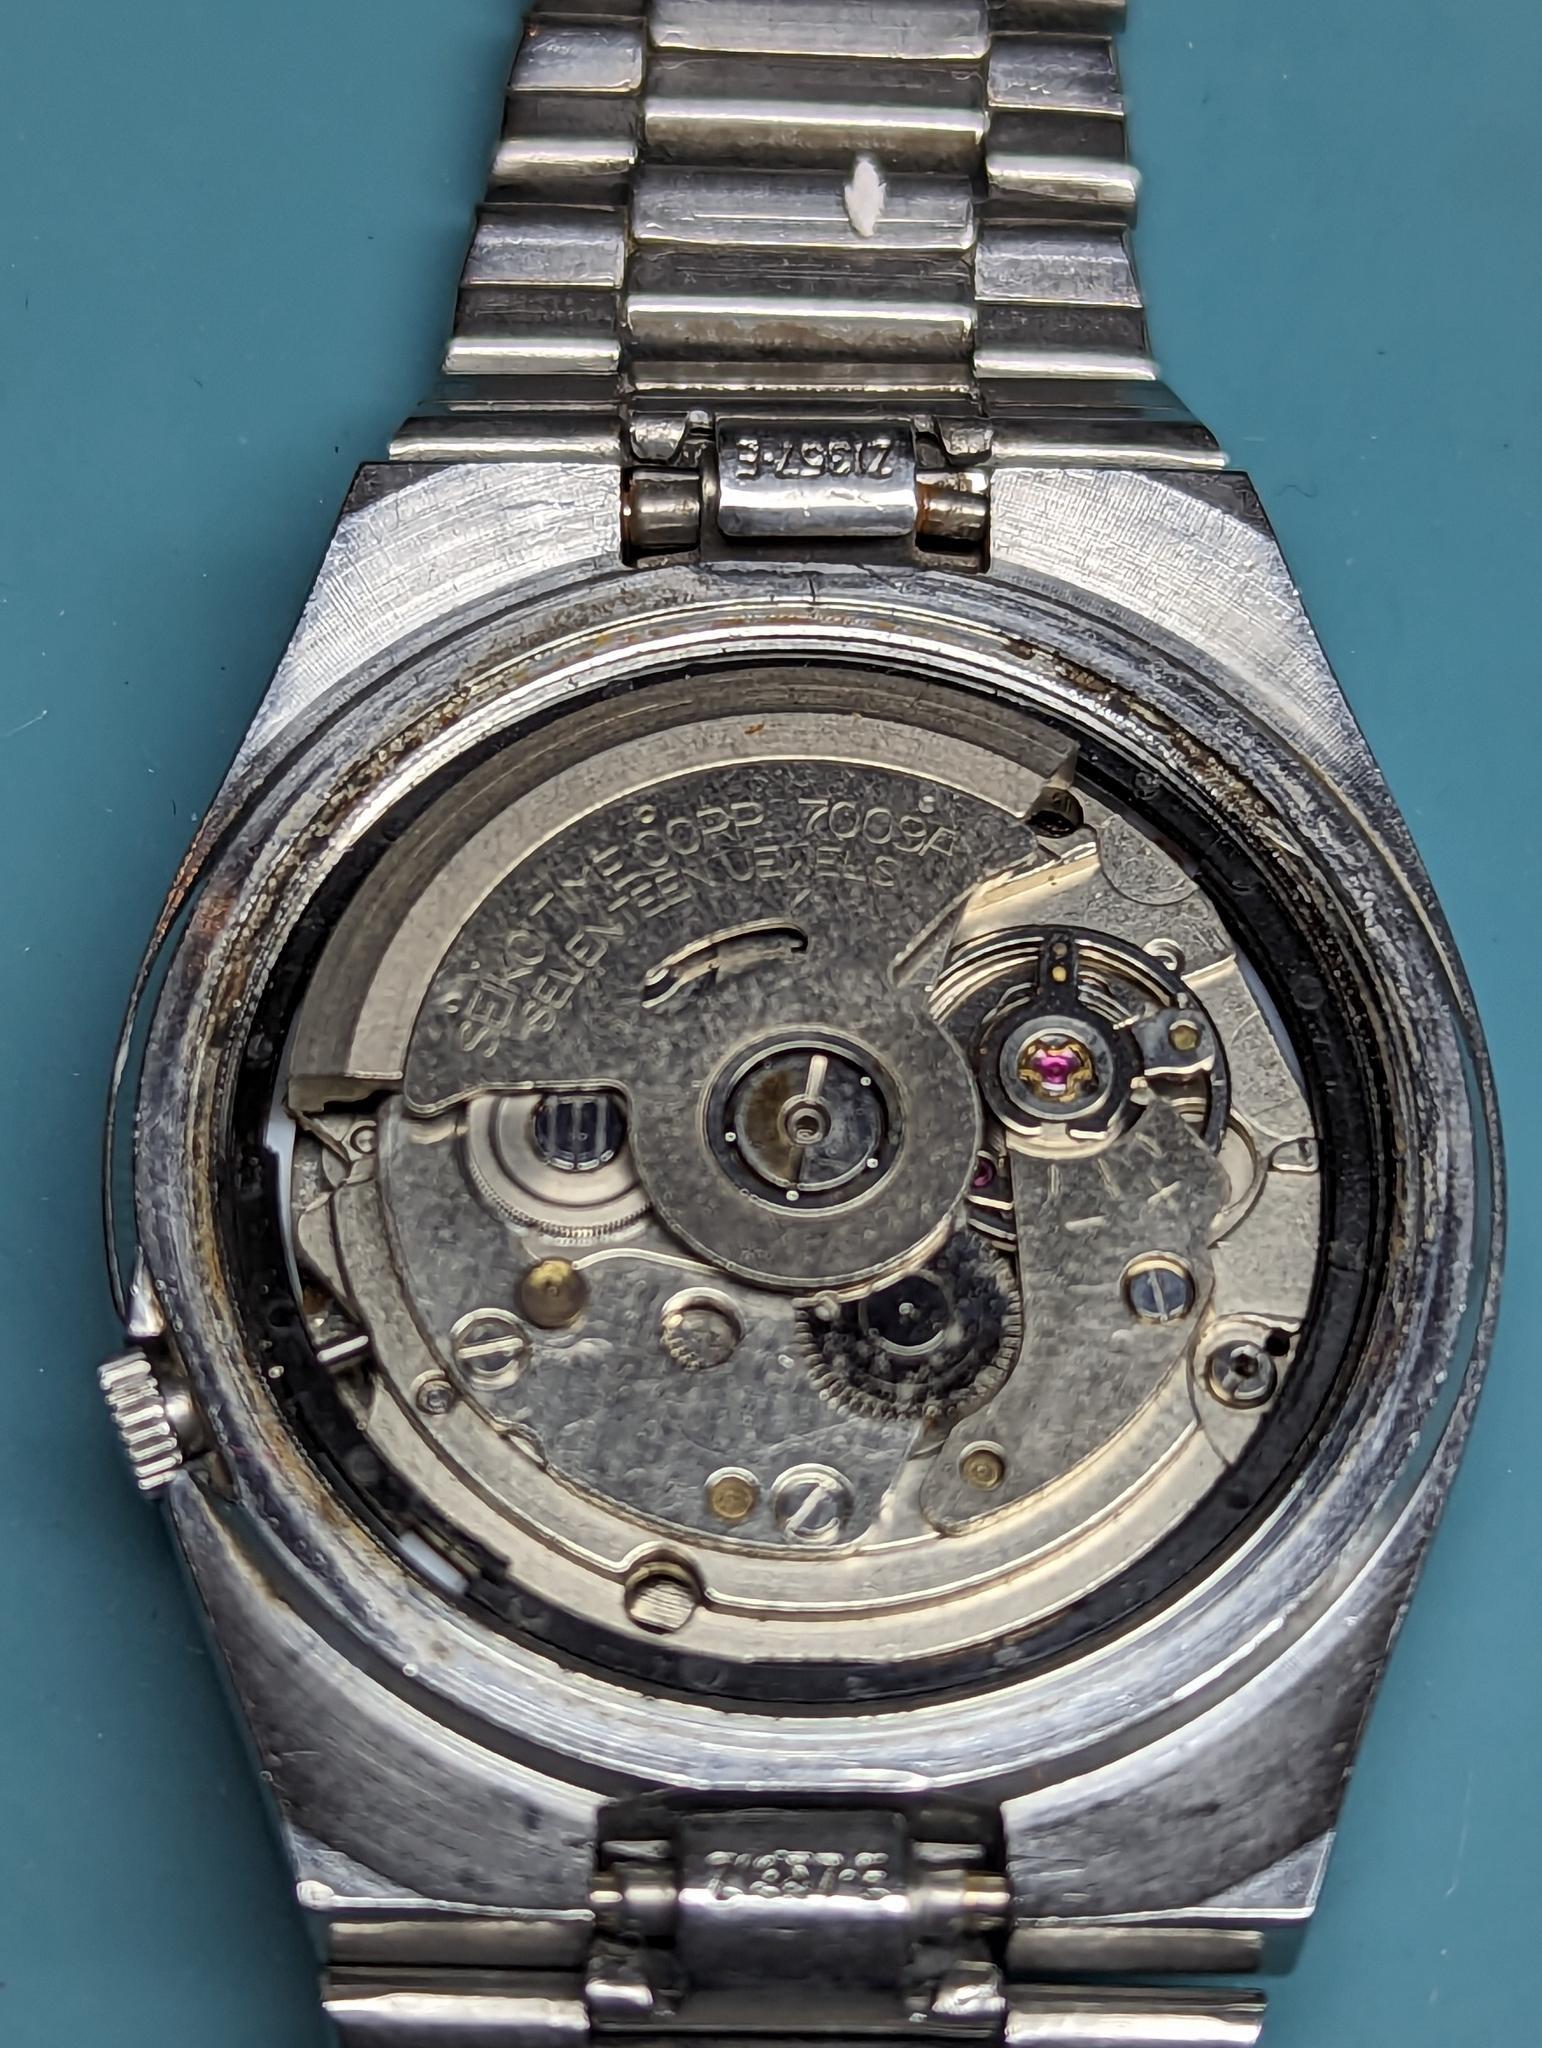
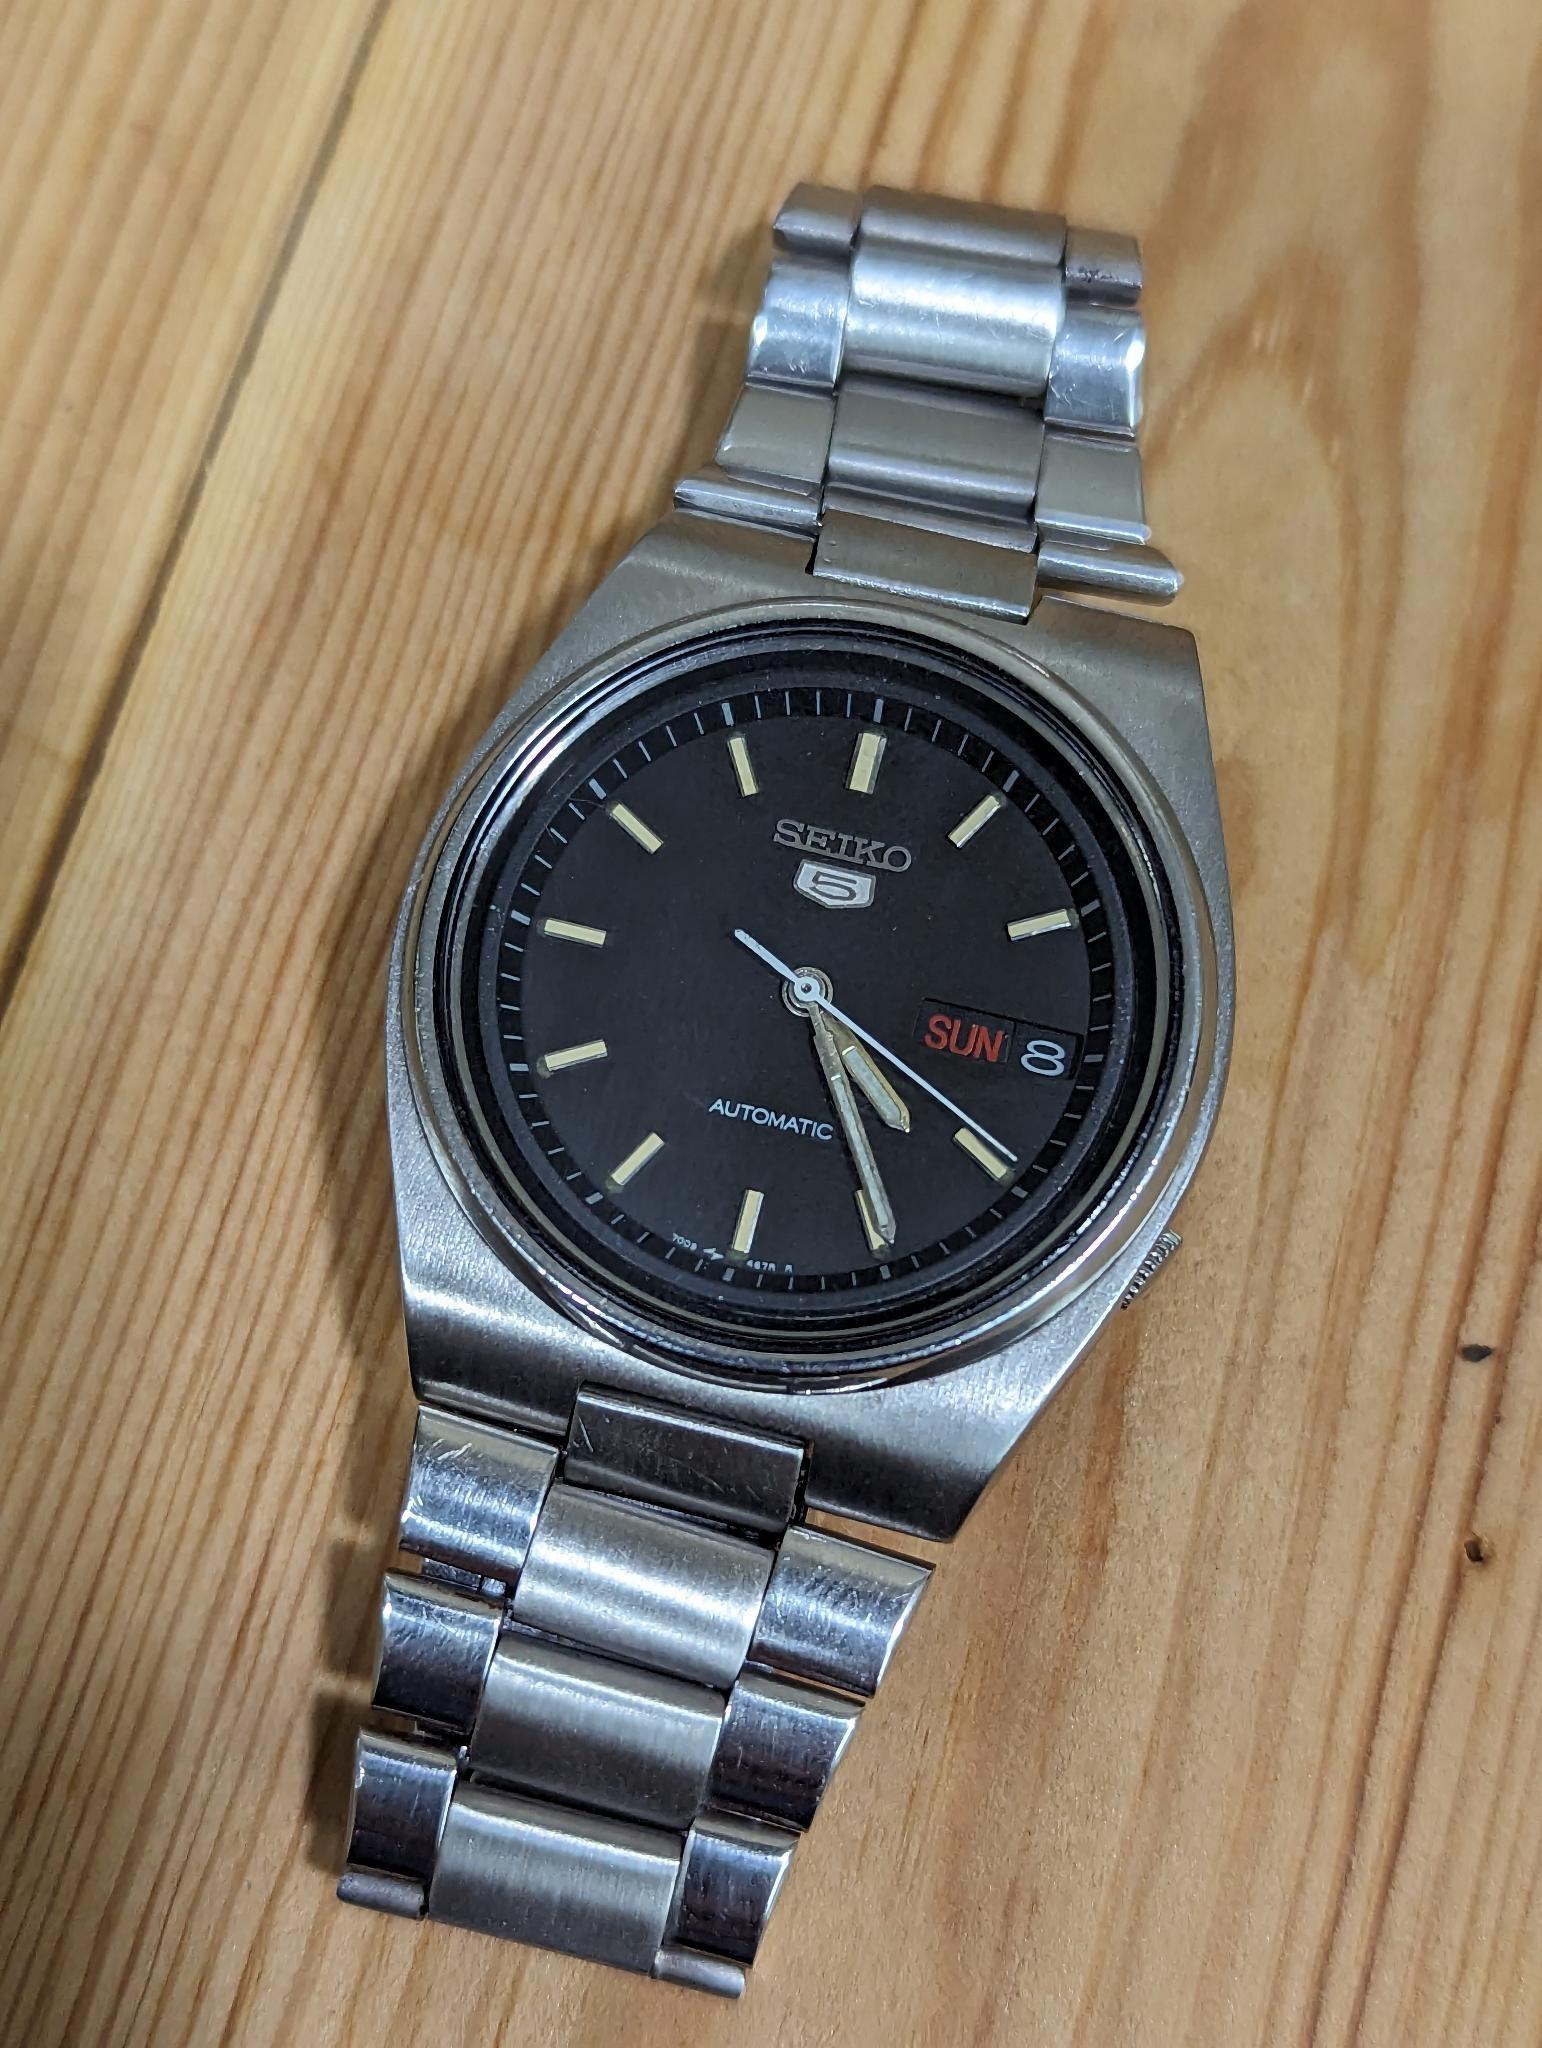
Another productive weekend, I fixed my Orient which suddenly stopped, on inspection I found a blue fibre wrapped around the escape wheel... no idea how it got there. I then decided to do a Seiko 7009 from 1985 that I purchased recently from speedtimerkollektion. On reassembly I noticed that the centerwheel was cracked around the inner diameter where the pinion is fitted... very strange (sorry forgot to take a picture). The crystal broke when I took it out (of course!) so I had to replace, hence the missing 24 hour numbers which were painted onto the original crystal. Everything else is original including the bracelet. Before and after pictures: Here is the movement: Our old friend Mr Glue! - no dial feet: I replaced the dial feet using my new mini soldering gas gun and low temperature solder paste, worked a treat, and here is the finished watch, complete with fingerprints (Doh!): Let me know what you think I gave it a rough calibration, but will wait 24-48 hours to do the final calibration.


 1 point
 -
When I started to learn Television was not available to the masses and the books were hard to locate and expensive too, and living in the sticks didnt help. So it was a case if you want to learn do what you could from the books you could find in the second hand bookshops. The problen with formalised training is that you follow the trend and to some degree stifles origional thaught. In other words you become intitutionalised and think like your teachers. You do it that way because thats how you were taught even though there may be otherways of doing it . There are out there some watchmakers who were apprenticed and learned practicaly , who are capeable of thinking out side the box and are brilliant at what they do. So in essence I am with jdm on this one. I have seen people with letters after their name I wouldnt let work on a pram, they know the theory but because they think in a straight line It takes a long time before they have worked through the theory by that time you have fixed it. JohnC If you are serious in following the dream, head down and focus all the training and titles will not make you a Great watchmaker/restorer determination and skill will do the job. I wish you all the best in your endeavour.1 point