Leaderboard


Popular Content
Showing content with the highest reputation on 04/02/15 in all areas
-
The top pivot will be broken off or the top jewel has severe problems which is unlikely. :(2 points
-
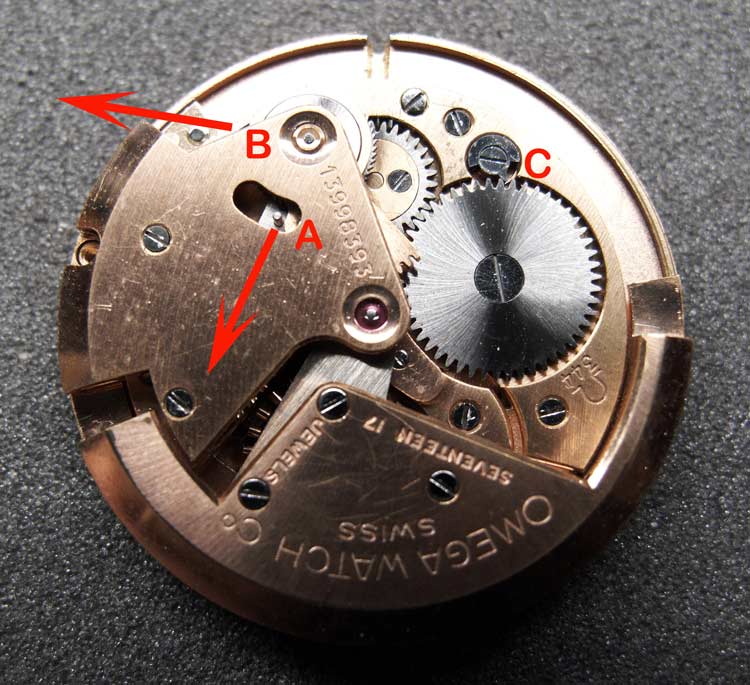
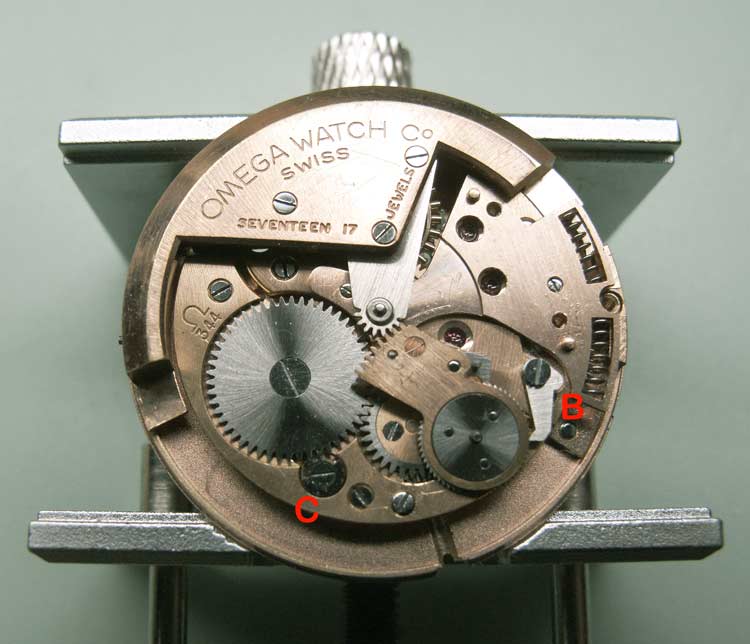
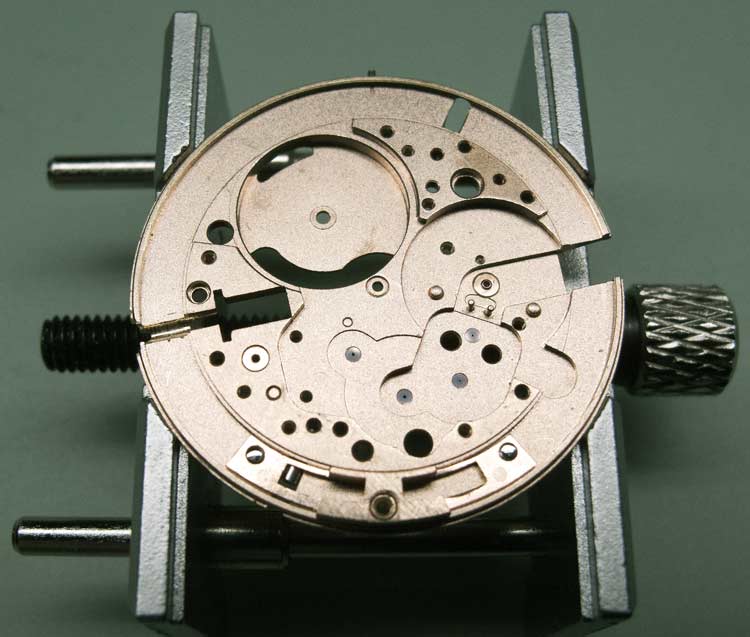
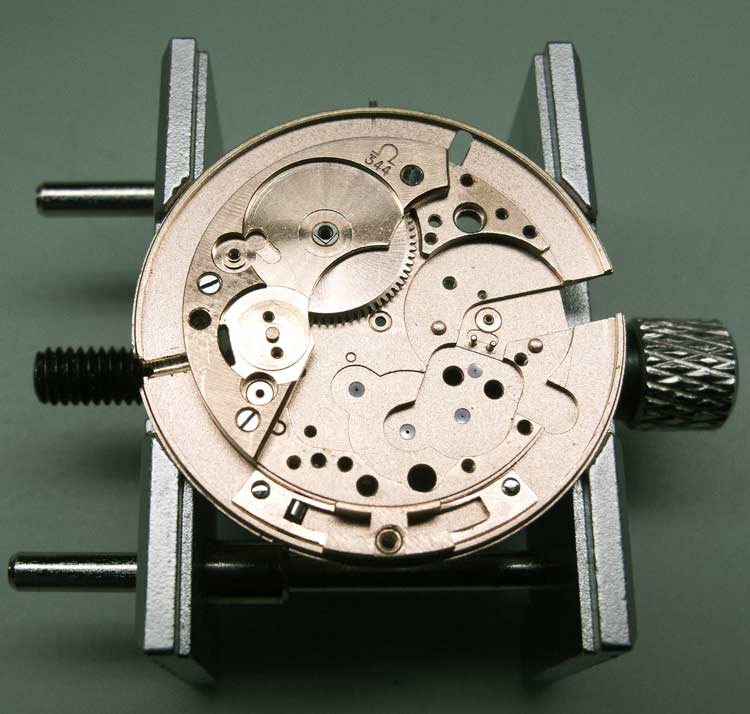
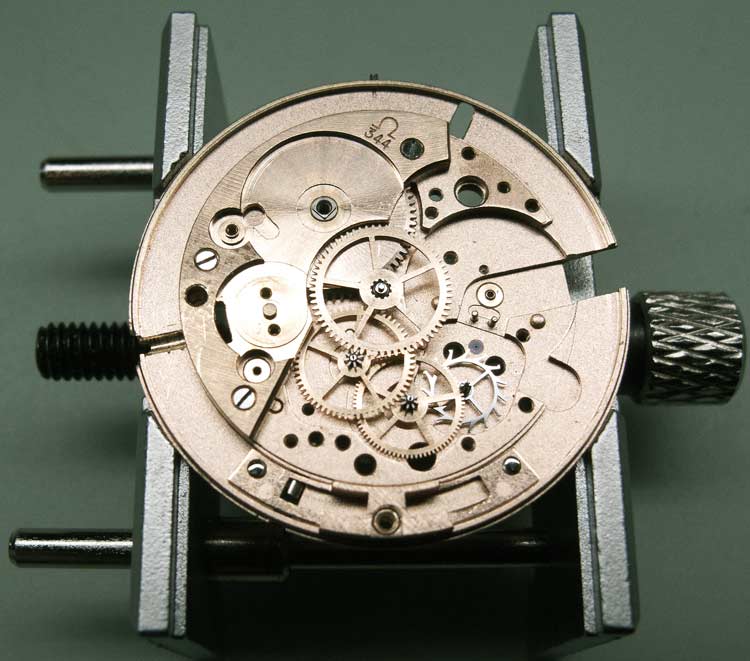
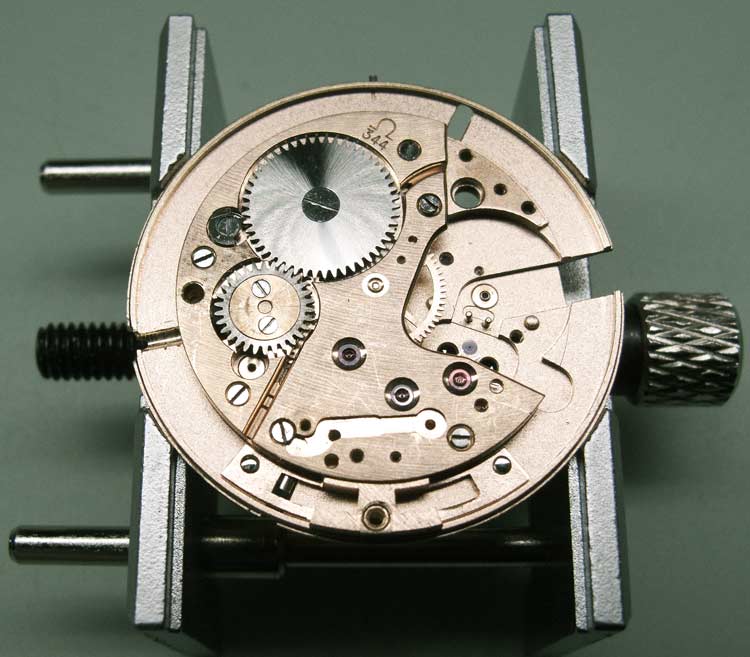
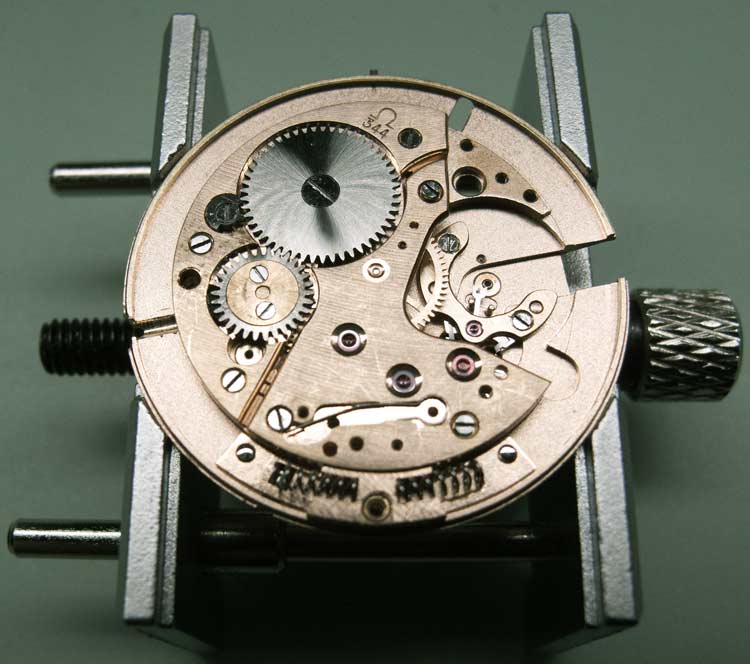
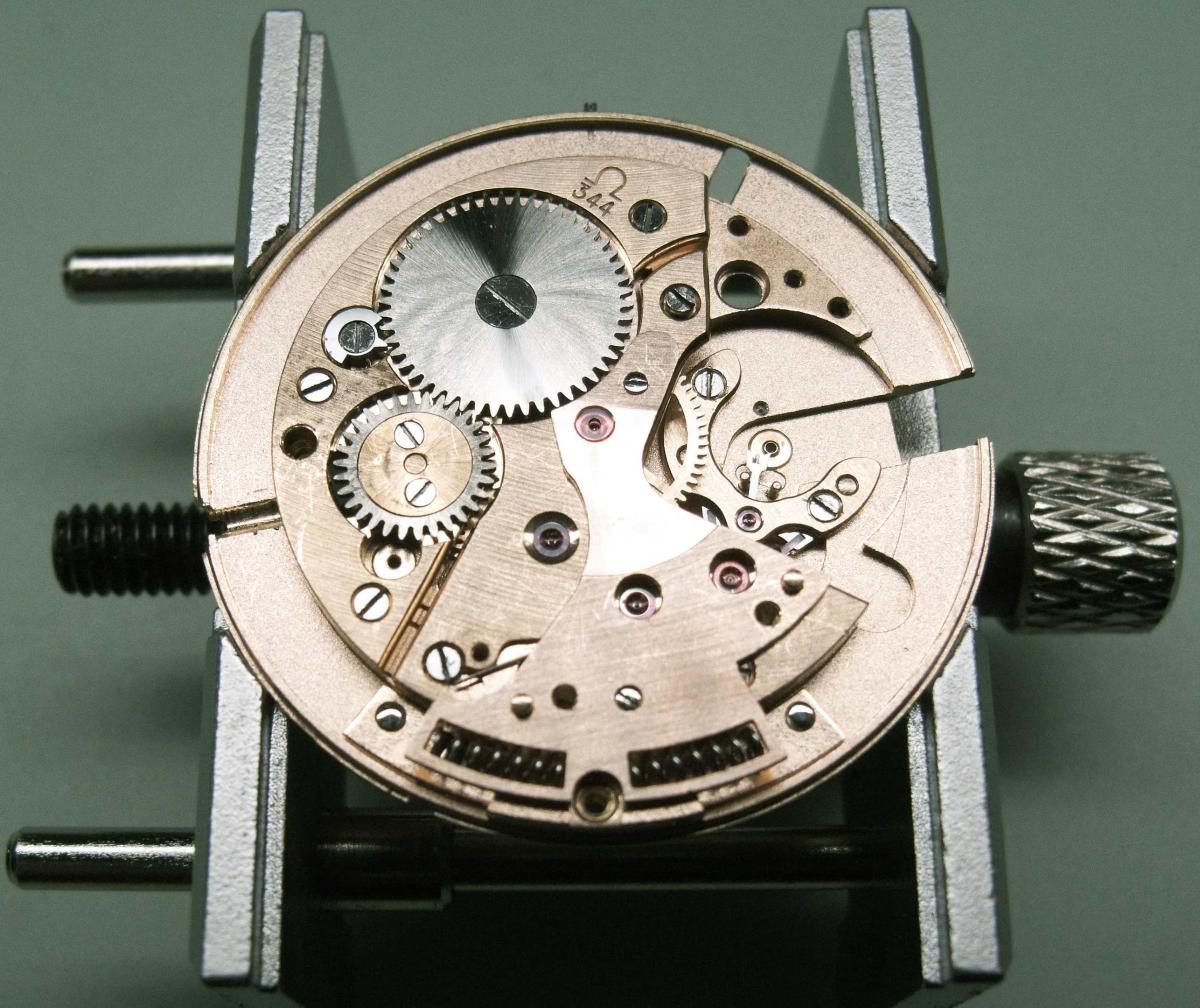
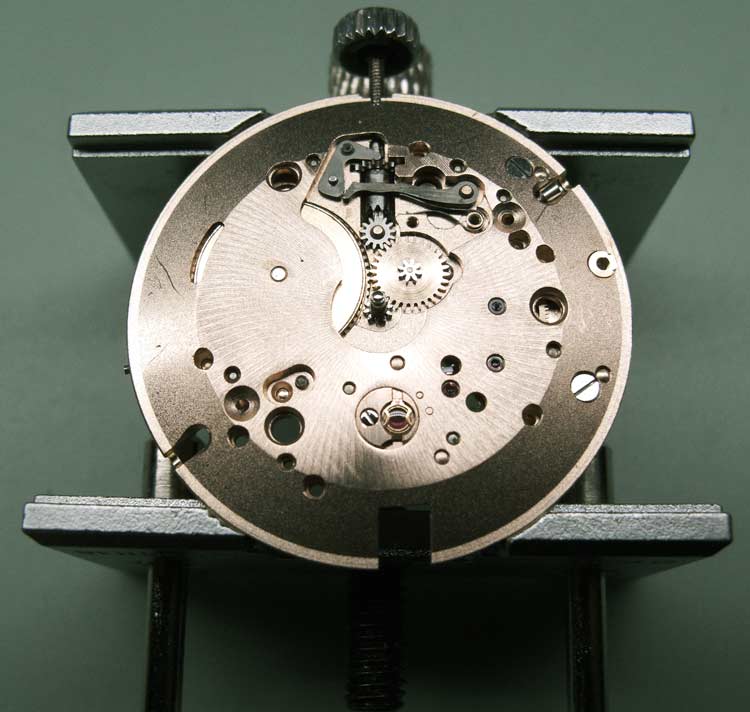
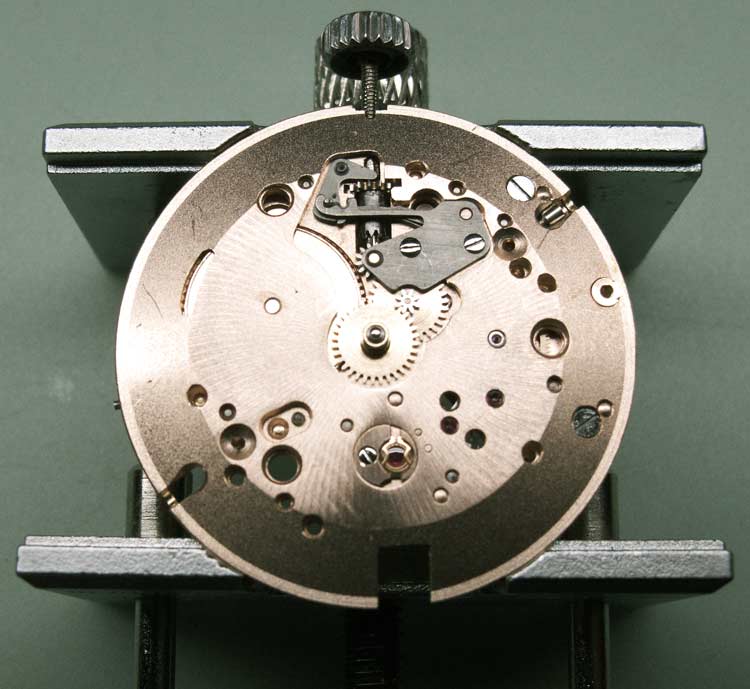
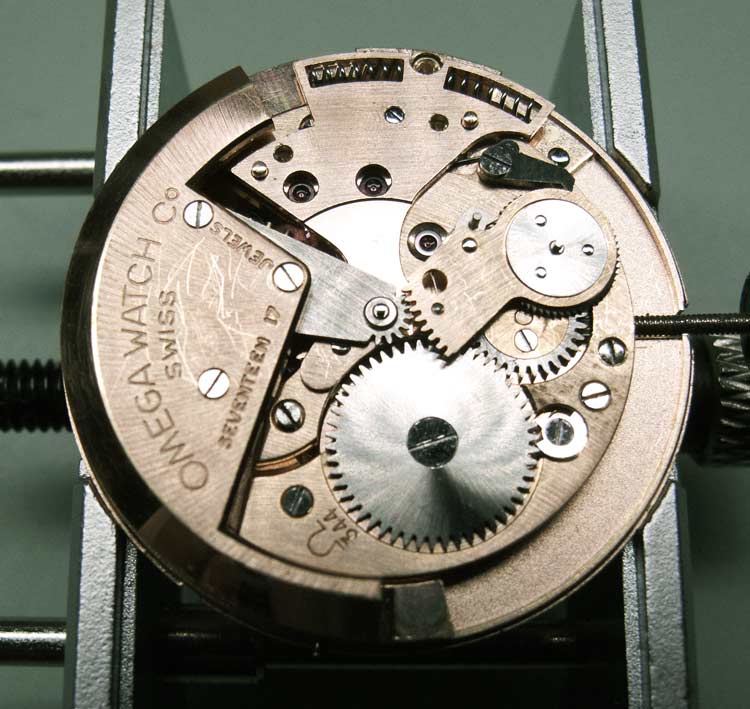
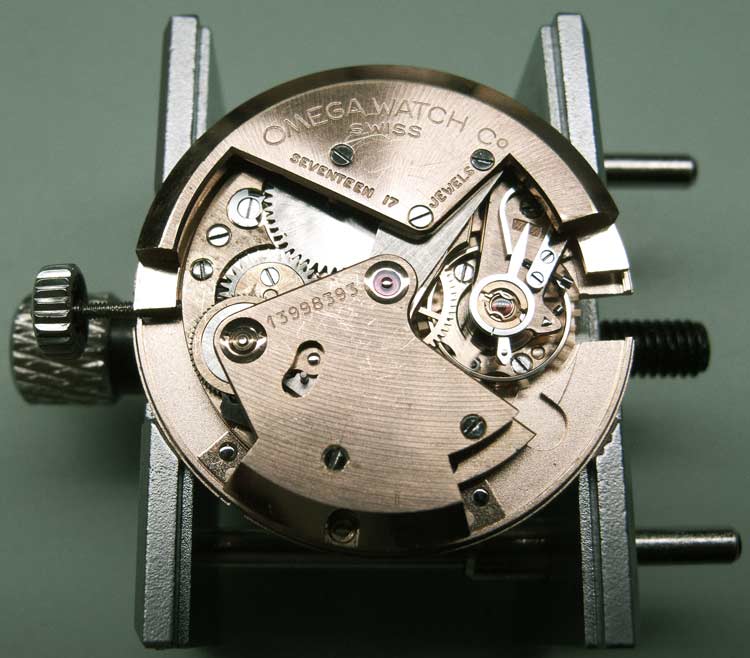
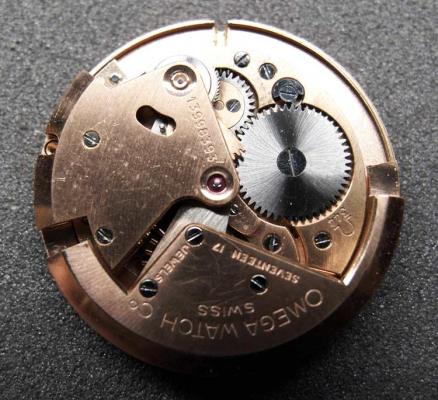
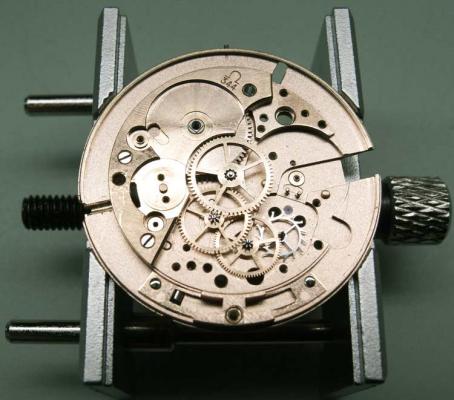
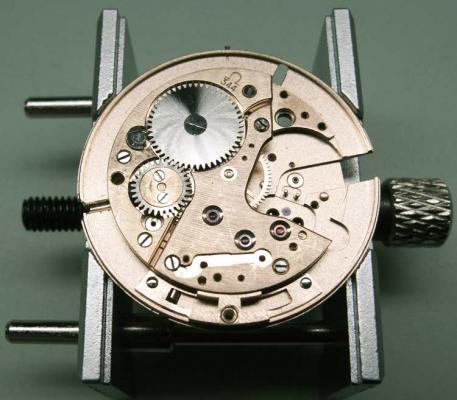
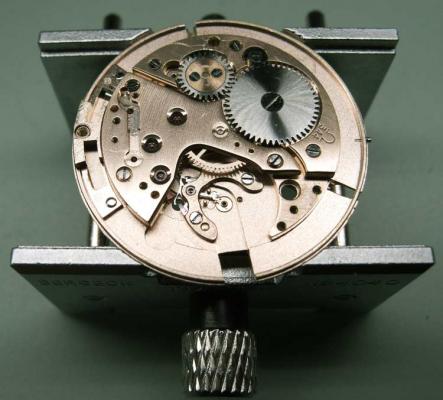
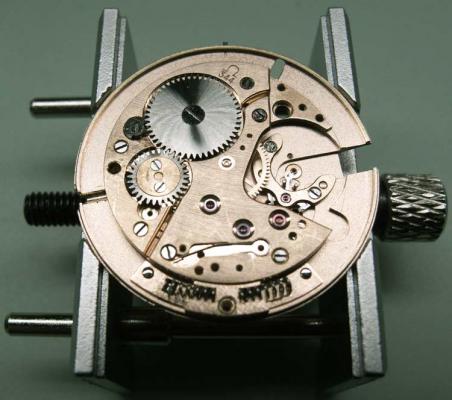
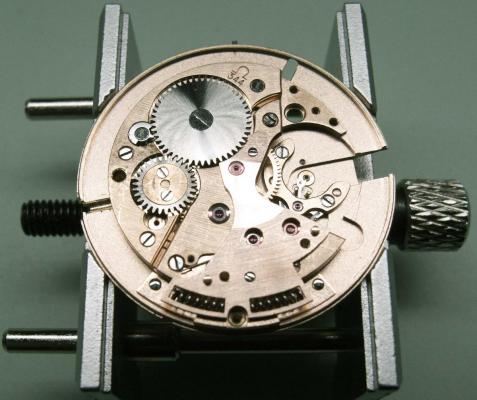
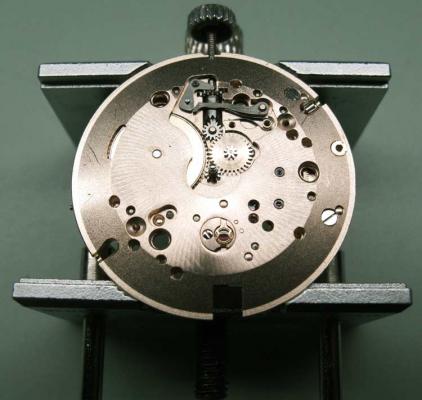
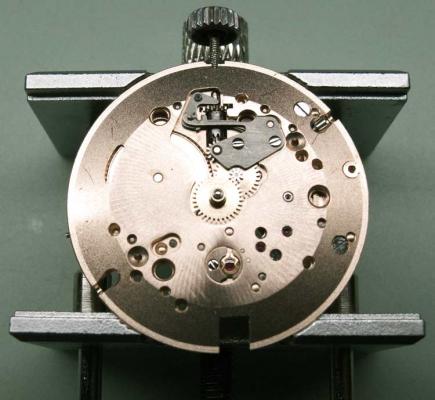
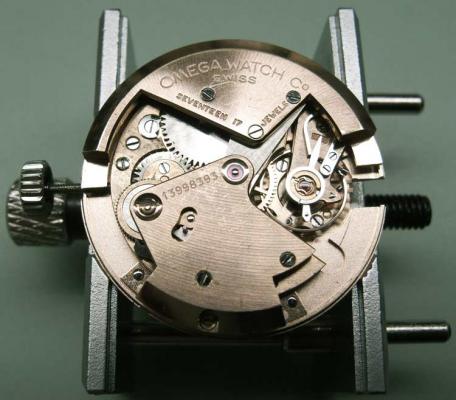
Here is an insight into the rebuilding of an Omega Seamaster bumper automatic 344 calibre movement from 1952. I am not going to give a step by step dismantling procedure. Apart from the auto-wind mechanism, the dismantling is fairly standard. I will however give a couple of tips on how to safely remove the auto-wind mechanism, before showing assembly of the cleaned movement. The Omega bumper mechanism has three clicks A, B & C. The first A is mounted on the ratchet lever and transmits force to the ratchet gear during winding. It also allows the ratchet gear it to index in one direction only. The driving force is produced by the oscillating weight and transmits force to the lever via a curved rack on the end of the lever. The second B is mounted on the Train Bridge and ensures the ratchet gear is held stationary when the ratchet lever moves anti-clockwise to the starting position of its clockwise winding stroke. Click B is holding the force of the mainspring during normal use. The third C is the barrel ratchet click. This is only really required to hold mainspring pressure when the auto mechanism is removed during disassembly. Disassembly Procedure When dismantling the watch movement the mainspring pressure must first be removed from the auto mechanism. Once this is done the auto bridge can be safely removed. To do this release both click A and click B to remove all mainspring force from the auto mechanism. This is done by pulling the clicks clear of engagement in the direction of the red arrows. The mainspring pressure will now be held by click C. Once this has been done the auto-wind bridge can safely be removed. This reveals the lever and ratchet assembly that can now be lifted from the movement. At this stage the mainspring pressure can now be completely released in the normal way. Use a screwdriver to control the rate of barrel rotation while holding click C clear of the ratchet wheel. Dismantling from here on is much the same as any other manual wind watch. Reassembly Attach the Bumper Spring Retaining Plate (at bottom of picture). Fit barrel and Barrel Bridge. Fit the Gear Train and Bridge. Blow the perifery of the escape wheel toensure free running of gear train. Fit the Crown Wheel & Ratchet Wheel. Fit the Escapement lever and Bridge Fit Bumper Springs and Retaining Bridge. Fit Keyless Work. Fit Auto-wind Mechanism. Ensure that the automatic lever is engaged to allow full travel of the rotor. The rotor should bounce of each spring at the end of its travel. If it doesn't, damage will result. Finally fit Auto-wind Bridge and Balance Assembly That’s all folks! PS. The new LED light from Cousins has greatly improved my pictures. Now shooing at handheld at 200ASA instead of 800ASA.


 1 point
 -
Sounds like the escape wheel has a broken pivot. It may have snapped and the wheel is now dislodged jamming the gears!1 point
-
Good advise Lawson. By the way, where have you been? Cheers, Bob1 point
-
Hi Mark, Just a note on using the old crown. If it's a plated crown, be sure that no part of it is worn down to the base metal, as moisture can be absorbed through some base metal castings, leading to corrosion of the stem (I've seen this many times). Always best to replace the crown when replacing a movement if the part is still available ... they aren't too expensive, and it's added piece of mind.1 point
-
Hi Bob, I don't want to sound negative, but sometimes it's better to politely decline if you are that unsure. If it goes wrong, then you will probably end up feeling worse than your friend and you will feel obliged to pay to get it sorted. A fairly safe way to try to remove the hinge pin, is to get an automatic centre punch and grind down the punch to slightly less than the diameter of the pin you are trying to remove, and remove the point. If you have a lathe you could make a dedicated replacement pin driver for the punch. Being a self contained impact hammer, you can safely hold the watch in your hand while using the punch. Finally, you could always polish the crystal without removing it, not as easy as polishing plastic, but it can be done using a Dremel and cerium oxide or diamond paste. Here are a couple of videos showing how it's done. https://m.youtube.com/watch?v=qxkCV_UksrU1 point
-
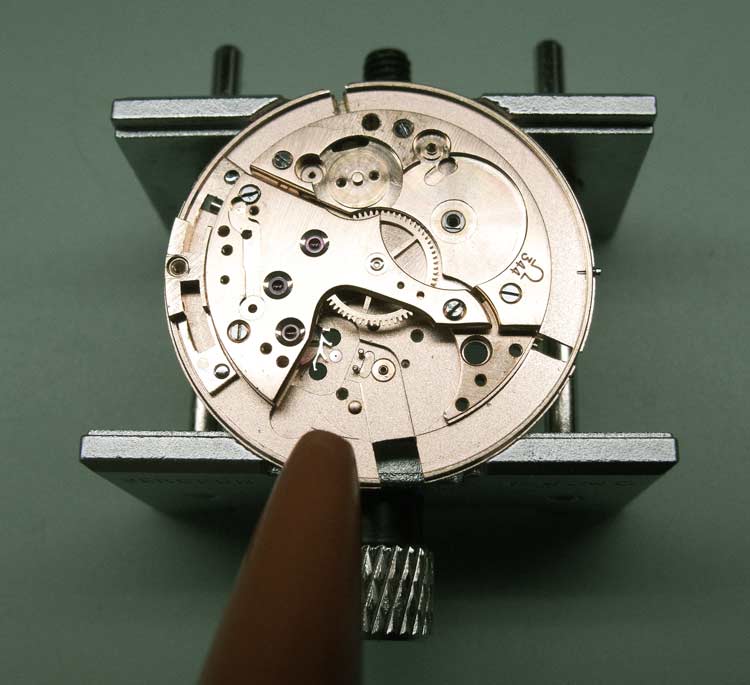
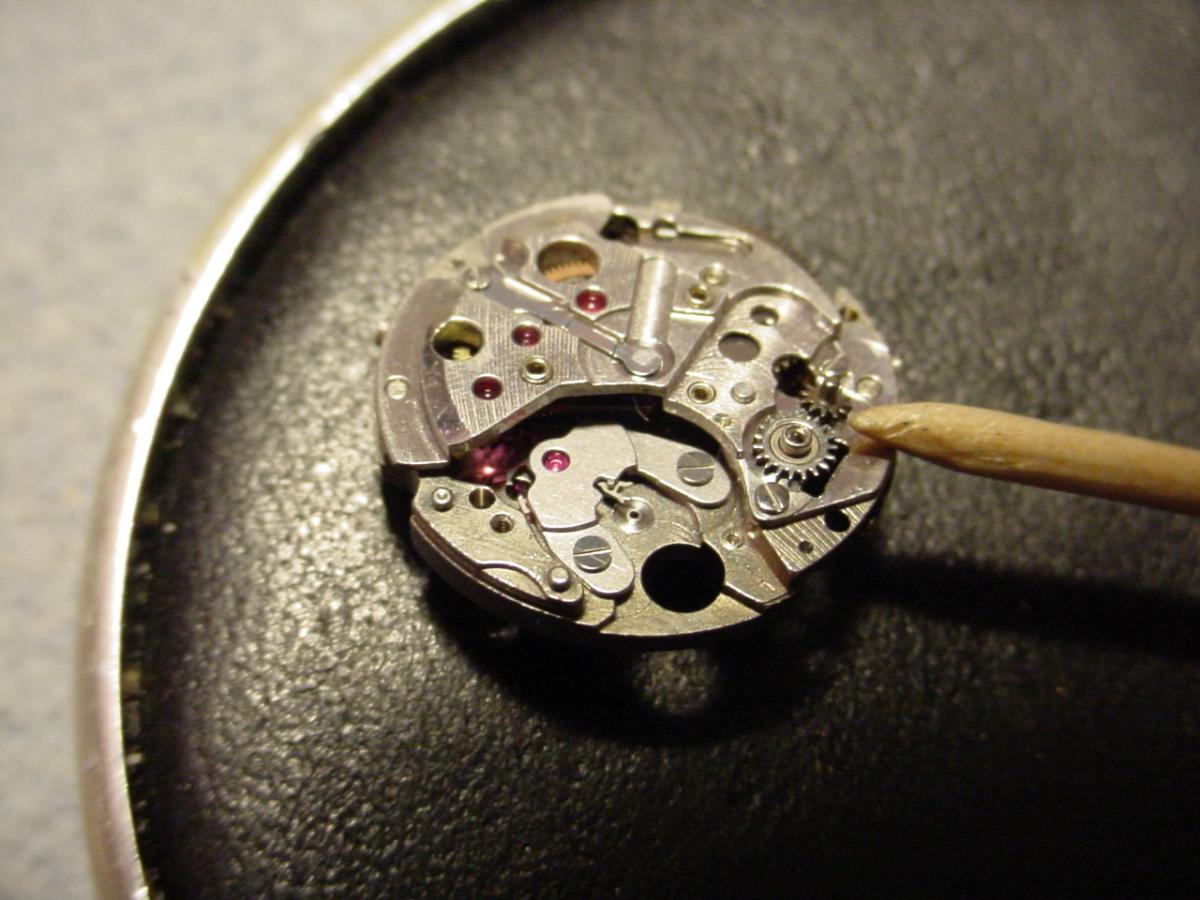
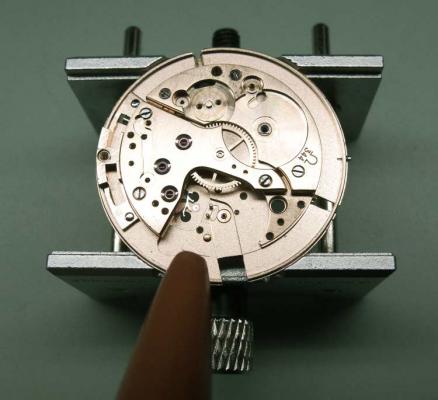
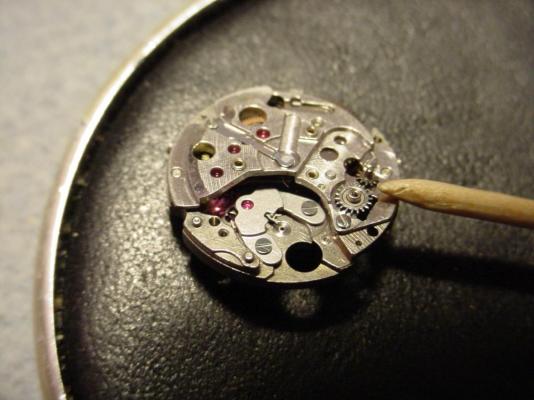
I sometimes use cheap plastic ice trays I get at wal-mart and keep parts and matching screws together. I also take pics as I dissemble the watch...you can't take too many . Also as my attachment illustrates , when I get to a situation that I particularly want to remember I will use a pointer in my pic...It's kinda like tying a string around your finger so you don't forget...association or trigger symbol if you will .
 1 point
 -
Completed with worktop mat and Ikea lamp, will get a better rectangular watchmaker lamp if I can get it here at reasonable price. Now I can do more hours on it. Affnan1 point
-
Show us one you made please?1 point
-
I agree! :) Although I think calling someone's work an "Abomination!!" borders on that. :) :) By the way, the decal paper produced much lower quality results than the photo paper. For one thing, the surface of the decal paper is not as uniformly absorbent as the photo paper, resulting in some ink pooling and some dry spots. To get around that, I applied two layers of decal, since it was unlikely the dry spots would would coincide. Unfortunately, the slightest misalignment (even 1/1000th of an inch) then results in fuzzy edges. I may attempt another "decal watch" with a light background, where hopefully I'll need only one layer of decal, and I also have another "photo paper watch" planned. Better cover your eyes! :)1 point