Jump to content

Recommended Posts

Posted

Hi everyone,

Previously in one of my other posts I mentioned I had made my own video camera for watch repairs. Well, I used it for the first time a few days ago just to get used to it and I'm sort of happy with the results. I've still got to tweak the sensor a bit, it needs a clean.

My first ever video is without voice over, but as I get used to doing videos I'll add voice overs as well.

The working distance from the lens to the bench was 45cm. I've got to make a decent daylight LED lamp which will improve the depth of field and focus. This video was made using ordinary warm LED room lighting.

Anyway, here's a link to the Video, I hope you like it:

https://www.youtube.com/watch?v=epkBJenwxzA


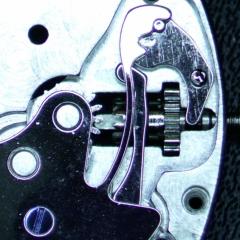
And here's a snapshot taken towards the end of the video.

7t32-6n10-1_-_Copy.thumb.png.9dd30afb07d94457a3f7b08d2af99dbd.png

  • Like 5
Posted

Great video - thanks. You got your first subscriber :).

So I hope for future videos. Really liked the explanatory text. And would have liked to watch how you "reblacked" the bezel. As beginner I learn a lot from such videos (e.g. taping the pusher button to prevent it from pinging around).

Posted (edited)
 

Great video - thanks. You got your first subscriber :).

So I hope for future videos. Really liked the explanatory text. And would have liked to watch how you "reblacked" the bezel. As beginner I learn a lot from such videos (e.g. taping the pusher button to prevent it from pinging around).

For the re-blacking some people use engravers wax, sometimes referred to as Elephant Black. Personally, I prefer to use a heat and waterproof solid paint stick such as Markal B or H. Clean all the old blacking away first then rub the stick over the legend. It'll be messy, but let it dry a few hours before wiping away the excess.

Edited by systeman
Added some more information.
  • Like 3
  • 1 year later...
Posted


For the re-blacking some people use engravers wax, sometimes referred to as Elephant Black. Personally, I prefer to use a heat and waterproof solid paint stick such as Markal B or H. Clean all the old blacking away first then rub the stick over the legend. It'll be messy, but let it dry a few hours before wiping away the excess.


Thanks. I'll be trying this on mine. Got it for £16 non working and it needs bezel gasket and a spare link.
IMG_20190528_154142~01.jpg
Posted

Engravers (Elephant Black) wax is gives a more robust finish, but when used in shallow engravings it's more dark blue than black. I prefer Merkal, letting it dry for a few days before buffing off the excess. I've also hand painted engravings with a thinned black enamel, then used very fine grade lapping paper to remove excess.

  • Like 1
Posted
Engravers (Elephant Black) wax is gives a more robust finish, but when used in shallow engravings it's more dark blue than black. I prefer Merkal, letting it dry for a few days before buffing off the excess. I've also hand painted engravings with a thinned black enamel, then used very fine grade lapping paper to remove excess.
Thanks. Ive always used thinned enamel but this bezel has very shallow engraving so I think I'll try and get some Merkal.
  • Recently Browsing

    • No registered users viewing this page.
  • Topics

  • Posts

    • A helpful way in aid of assembly is to place all the wheels in their respective places, place to plate on the top and fit a couple of the nuts onto the pillars. This stops all the wheels wobbling about as they are lightly held by the plate, you can manoeuvre the pivots into their holes, using a tool , usually home made or can be bought on eBay. I made my own. As the pivots align and fall into place screw the nuts down a bit to keep up the tension on the plate untill all wheels are in place then tighten down sufficiently to keep the plate in place whilst checking the end shake on ALL wheels and their location when all is good only then tighten down the plate.
    • I'd say my Pultra 10 lathe. It is just so well made and everything fits so tightly together.
    • Welcome to the forum, enjoy. 
    • Yes, the specific old tools do exist, but may be having one is not needed as they are not cheap, and also You will be able to do without it well enough. My advice will be to use regular depthing tool and adjust it for the exact distance between pallet fork and escape wheel bearings from the watch. Then remove the shellac from the pallet that now doesn't pass the ew teeth and move this pallet in. Then put the pallet fork and ew on the depthing tool and check how they lock. They should not lock when the pallet is in, but You will little by little move the pallet out and locking will appear. Then move just an idea out for reliable work and apply shellac, then check if things are still the same. You have to observe where the teeth fall on the pallets - it must be just a little below the edge between impulse and rest planes. Then You must check how everything behaves in the movement This Potence tool is so ingenious, but actually, the traditional way to do the things is much more simple. Arrange the parts not on the pillar plate, but on the cover plate. Only the central wheel will remain on the pillar plate, secured by the cannon pinion.
    • There is a tool that was made for setting up and adjusting escapements of full plate watches.  There were two styles, the picture below shows both of them.  The lower tool held a movement plate and the vertical pointed rods were adjusted to hold the unsupported pivots of the lever and escape wheel.  There was also a version of this tool that had 3 adjustable safety centres so that the balance pivot could be supported by the tool :  The other version I’m aware of is the Boynton’s Escapement Matching and Examining Tool came as a set of two or three clamps that gripped the watch plate and held the safety centres for the pivots : These do turn up on eBay from time to time.  For some escapement work, you can set up the parts in a regular depthing tool, with the centres set according to the distance between the corresponding pivot holes on the movement.  I hope this helps, Mark
×
×
  • Create New...