
Enfield Grandmother Clock Won't run with Anchor Engaged


-
Recently Browsing
- No registered users viewing this page.
-
Topics
-
-
Posts
-
 Did you have a look under the ballance? Often the movement maker/number is hidden there.
 -
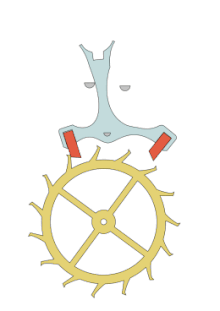
 I wonder if 9415 is based on a base oil of 941? it's interesting what questions bring and the tech sheet answers it's the viscosity of the base oil. Then the impact? There is something we're missing here for that which would have a big influence on all of the house image above is 9514 image below is 941.then always interesting when specifications do not exactly agree? They ledge above for 941 indicates 110 viscosity but the image off the spec sheet is slightly less but I guess close enough my understanding of the concern of too much 9415 is as we know the loss of amplitude. But why do we have a loss of amplitude? So impact it's basically oil should be very slippery. But what about non-impact? Like the edges of the escape wheel? Another thing that comes to play here is the shape of the escape wheel itself. Notice on the last a more vintage escape wheel with just a flat surface whereas the modern escape wheels usually made out of steel versus grass much much thinner their contact areas greatly been reduced and sometimes I think there even slightly curved. So is it conceivable at everything that isn't a flat surface on impact is going to be sticky? So this is where the shape of the escape wheel will have a big impact literally on how slippery things are. Oh and for all of you obsessed with worrying about too much 9415 I never worry about it because typically I'm doing pocket watches and it doesn't seem to be an issue at all. on the other hand I'm much more concerned about a watch that keeps time for 24 hours as opposed to the concern of the group of keeping amplitude for 24 hours. Then yes some pocket watches have steel escape wheels and do look like the escape wheel on the right.
 -
your balance wheel looks interesting in the watch and because it's at an angle it's changing things a little bit. in other words they hairspring is not centered between the regulator pin in the boot and I also noticed your terminal curve is lacking apparently by design? Because if you look in the second image you'll notice yes there's a terminal curve but not as aggressive a one as you normally see on watches at least most watches. then in all of your images it looks like the boot isn't quite back where it's supposed to be? out of curiosity how did you remove your balance complete and clear the regulator pin? then just in case you weren't aware it rotates out of the way so you can remove the balance complete without bending the pin. Then it's rotated back exactly 90° and yours looks like it's off by just a little bit in the original image and I'm assuming that you just been the pin out of the way? it's always interesting in horology is the variations in the things. Like the image I have above does have a terminal curve but not the most aggressive and yours is even less but that is the way the watch was made. Then the spacing between the regulator pin in the boot should be relatively small basically if you had two pieces of the thickness of your hairspring that's how much space should be there like in this image. But oftentimes watch manufacturers do not necessarily follow the rules
-

By Neverenoughwatches · Posted
Yep i can see where you're going with that one Rich. Sooo now that I've frightened the OP into submission 😁. Chief i do apologise for some reason unbeknown to myself I'm in a happy silly mood. So seriously to identify the movement lets have a look at the dial side, learning this part is straightforward, just need a little logic and something called the # BESTFIT BOOKS # . Or the other non American equivalents. -
 I can definitely see elephant and aardvark and possibly some sort of bird with a large beak 🤣 anyway I'll have a go of getting it flipped over tonight and send some pics
-


Recommended Posts
Join the conversation
You can post now and register later. If you have an account, sign in now to post with your account.
Note: Your post will require moderator approval before it will be visible.