Jump to content

Recommended Posts

Posted

Hi all,

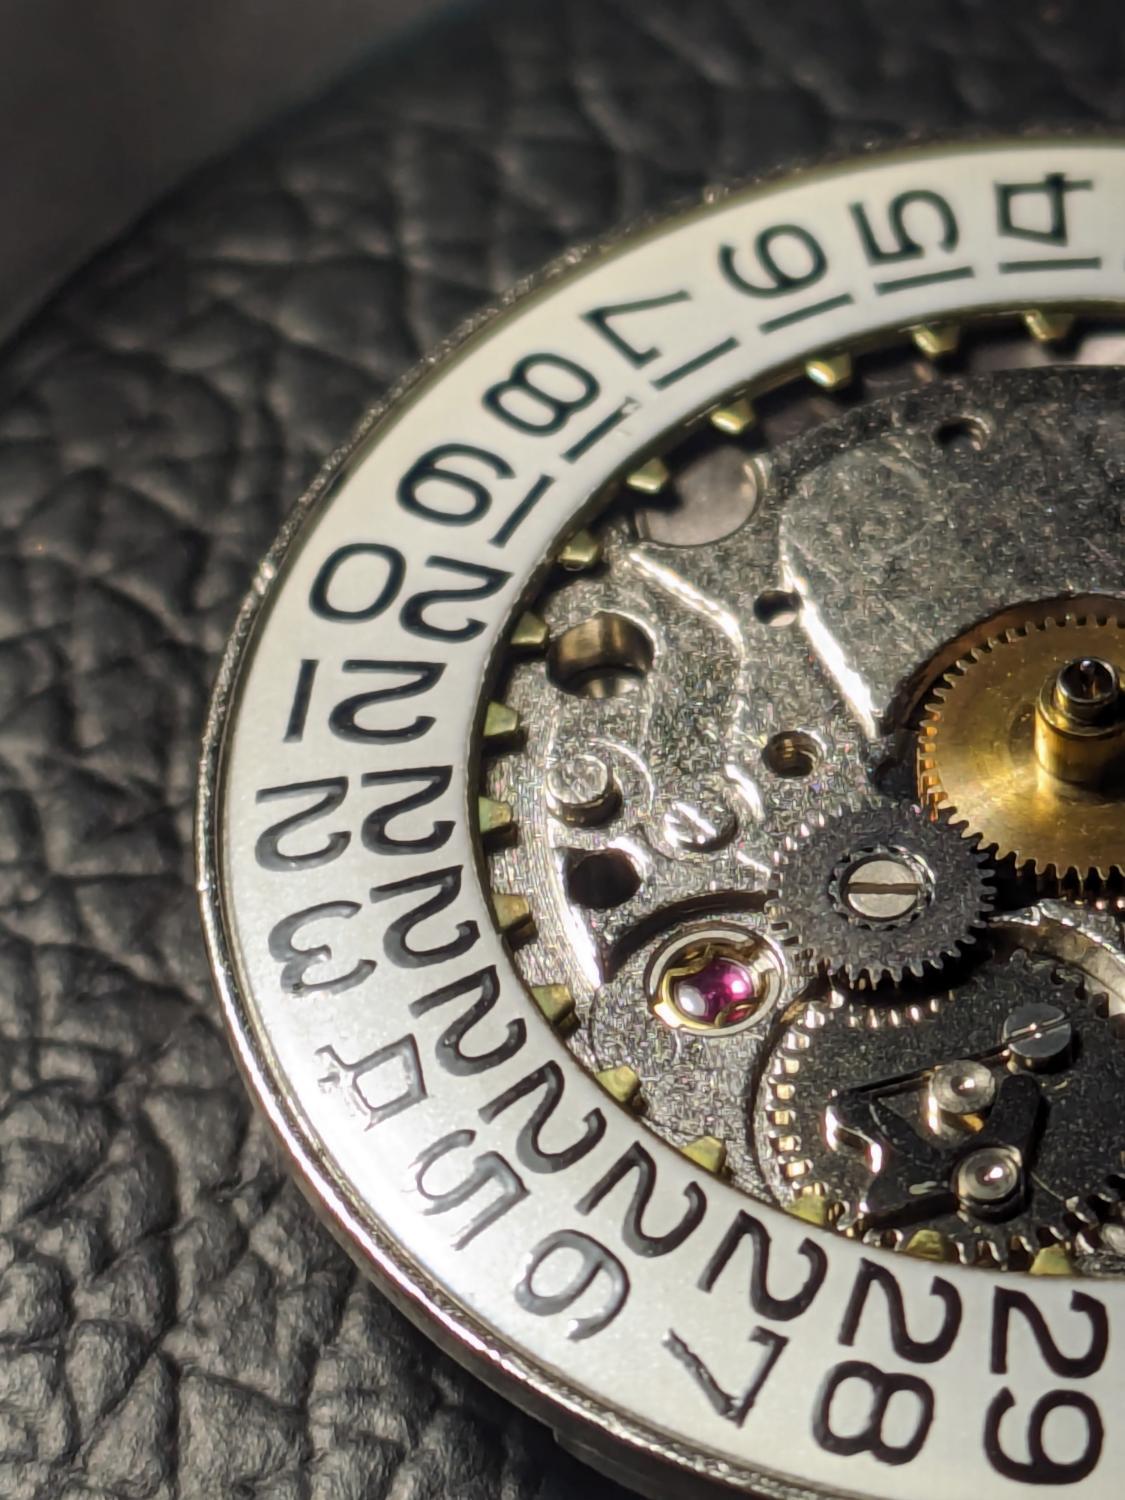
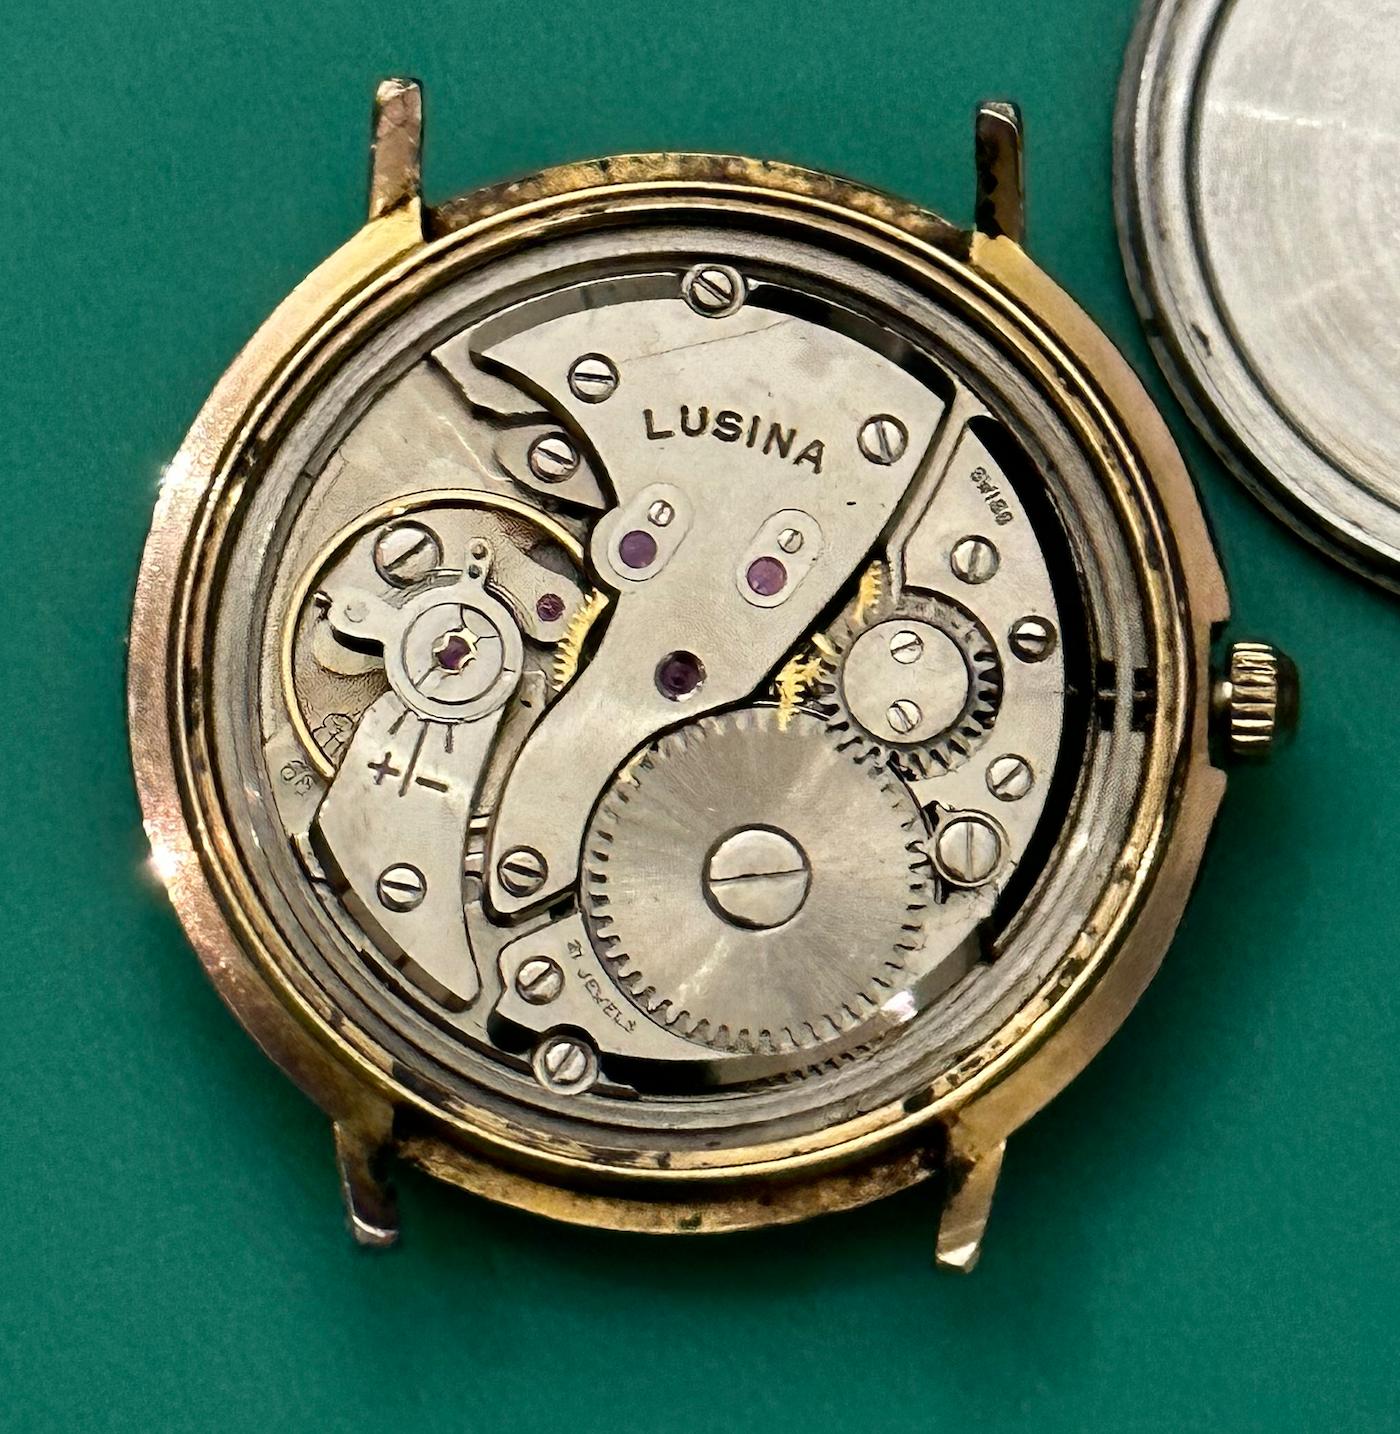
I'm about to put on a new Omega balance complete on this 752 balance assembly. The challenge I'm having is with the screw that gets turned once the balance complete is on the assembly with the hairspring fit between the two pins and the stud tightened in its place. It's hard to get any purchase on this screw from the top and I don't want to put too much force on it for fear of bending the arm (or having the arm pop off of the assembly). I have a balance tack, but once I get the hairspring between the two pins and put the balance assembly on the balance tack to turn the screw, I have to flip it over and the hairspring falls out from between the two pins. Any suggestions? 

Omega regulator screw.jpg

Omega regulator underside.jpg

Posted
24 minutes ago, DanB said:

Hi all,

I'm about to put on a new Omega balance complete on this 752 balance assembly. The challenge I'm having is with the screw that gets turned once the balance complete is on the assembly with the hairspring fit between the two pins and the stud tightened in its place. It's hard to get any purchase on this screw from the top and I don't want to put too much force on it for fear of bending the arm (or having the arm pop off of the assembly). I have a balance tack, but once I get the hairspring between the two pins and put the balance assembly on the balance tack to turn the screw, I have to flip it over and the hairspring falls out from between the two pins. Any suggestions? 

Omega regulator screw.jpg

Omega regulator underside.jpg

Are you not able to fully assemble the balance, place the hairspring between two pins and turn the boot before installing balance assembly?

o752 - Copy.PNG

  • Like 1
Posted

I can get the balance complete on the balance assembly and the hairspring between the two pins. I'm having trouble turning the screw (is that the "boot"?) so that it will cover the two pins. It's a little stubborn, and it's not easy to exert any force on it. On other movement balance assemblies, you can turn the screw from the same side as the balance complete, though it's not a "screw" in the usual sense, but it has a slot. If I can find a way to hold the balance assembly firmly so I can get some purchase on that screw head, I think I'd be in good shape. Am I making sense?

Posted (edited)
43 minutes ago, DanB said:

I can get the balance complete on the balance assembly and the hairspring between the two pins. I'm having trouble turning the screw (is that the "boot"?) so that it will cover the two pins. It's a little stubborn, and it's not easy to exert any force on it. On other movement balance assemblies, you can turn the screw from the same side as the balance complete, though it's not a "screw" in the usual sense, but it has a slot. If I can find a way to hold the balance assembly firmly so I can get some purchase on that screw head, I think I'd be in good shape. Am I making sense?

Right, you should be able to turn (lock) that boot with tweezers while balance assembly is still upside down, and hold it (boot) locked with tweezers, then turn balance vertically on its side (90 degree) and use another hand to tighten the screw with screwdriver.

Edited by Poljot
Posted (edited)

Or even the way you see it on the photo above: lock the boot and keep it in locked position with tweezers, and gently, without applying too much pressure and without any fanaticism - tighten the screw.

Edited by Poljot
Posted
1 hour ago, DanB said:

I'm having trouble turning the screw (is that the "boot"?) so that it will cover the two pins. It's a little stubborn, and it's not easy to exert any force on it.

Misshaps occur when you exert force. I put the balance aside, put a bit of oil on the boot ,turn a couple of times so it turns nicely, rinse.

You would then proceed with installing balance complete.

  • Like 2
Posted

Poljot, if I understand you correctly, the screw is actually what holds the boot tight. So if I loosen the screw, the boot will turn more easily, right? Then I can turn the boot with my tweezers so it's positioned over the two pins and the hairspring, then turn the assembly over and tighten the screw every so slightly.  

Originally I thought the screw is what turned the boot - that's how I moved it in the first place to remove the damaged balance complete - and I didn't think it tightened or loosened, just that it turned the boot.

Sound like I got it?

Posted
24 minutes ago, DanB said:

Poljot, if I understand you correctly, the screw is actually what holds the boot tight. So if I loosen the screw, the boot will turn more easily, right? Then I can turn the boot with my tweezers so it's positioned over the two pins and the hairspring, then turn the assembly over and tighten the screw every so slightly.  

Originally I thought the screw is what turned the boot - that's how I moved it in the first place to remove the damaged balance complete - and I didn't think it tightened or loosened, just that it turned the boot.

Sound like I got it?

Correct. Screw is going into threaded hole in the boot. You can remove the screw completely, clean, reinsert, move all the way - just to make sure it is going smoothly. Then, well - no need to repeat everything what was said above. Just take your time, no pressure, no force - tweezers and a small screwdriver 0.8mm or 1.00mm - that's all you need.

Posted

Clockboy, I'm pretty confident the screw is original. Cross threaded... not sure. I'm able to turn the screw a bit at a time, but the boot turns with it despite trying to hold it steady with a tweezers (not easy by the way). If the boot turns with the screw, then it's not loosening up. I'll keep working at it (with lots of breaks to avoid frustration and hopefully any mishaps). I'd like to avoid applying any kind of oil to the screw to try to loosen it for fear I'll make a mess and not really gain anything, though I suppose I could use a fine oiler and hope it penetrates.

Posted (edited)
28 minutes ago, DanB said:

Clockboy, I'm pretty confident the screw is original. Cross threaded... not sure. I'm able to turn the screw a bit at a time, but the boot turns with it despite trying to hold it steady with a tweezers (not easy by the way). If the boot turns with the screw, then it's not loosening up. I'll keep working at it (with lots of breaks to avoid frustration and hopefully any mishaps). I'd like to avoid applying any kind of oil to the screw to try to loosen it for fear I'll make a mess and not really gain anything, though I suppose I could use a fine oiler and hope it penetrates.

I hope you did not misunderstand: you were only suggested to remove / loosen up the screw if you were not able to rotate the boot at all. But if the boot turns with the screw - that's exactly what you need. Like i suggested before, place the hairspring between two pint, turn carefully the balance into vertical position so you could turn the screw and boot to lock the hairspring. That's all.


If you do not feel comfortable keeping the balance on its side, then leave it horizontally and simply use tweezers to rotate the boot into locked position. Forget about screw slot.

Edited by Poljot
Posted

When I use the tweezers to move the boot, where do I grab the boot? On its side or the top? I gingerly tried from the top, but it didn't turn and I don't want to force anything or change the shape of the top of the boot accidentally. 

Posted
1 hour ago, DanB said:

When I use the tweezers to move the boot, where do I grab the boot? On its side or the top? I gingerly tried from the top, but it didn't turn and I don't want to force anything or change the shape of the top of the boot accidentally. 

Your tweezers could be too slippery. You do NOT need much effort at all to move that boot 30 degrees counter-clockwise. Use small flat pliers (something appropriate for this task, not your automotive monster pliers) to rotate the boot. Just make sure you are not tilting it in any directions - just a smooth rotation in horizontal plane. 

Posted

I've got the balance complete installed using tweezers and by turning the boot from the top. When I put it back on the movement and then onto the time grapher, I have a lot of beat error, about 7ms, but I have straight lines. I'd like to get opinions about what ways you all use to correct for this beat error. Do you use Mark's method as on his video (below), or do you remove the balance complete from the balance assembly to then turn the collet? I've done the latter method before, but it's pretty time consuming, and I've used Mark's method once. Mark's method seems quicker, but my fear is in damaging the hairspring. I've practiced on a few spares from junk movements just to see how easily the collet turns (it turns easy).  Thoughts/suggestions would be appreciated. 


  • Recently Browsing

    • No registered users viewing this page.
  • Topics

  • Posts

    • Get well soon Old Hippy, torn muscles.,  not good
    • Id love to see how he has the output shaft mounted to this setup, as I have the same rotary stage and stepper in my build.
    • If you see at least one thread protruding, or even a half, then you may have a chance using this "tool", but don't squeeze hard. Lot's of patience, and if you notice any signs of loctite or other adhesives, then apply several drops of acetone on top of broken stem. Use heat (hair dryer) also. You should be able gradually turn it counterclockwise, just like i did on this broken Timex stem, which was glued with something like nail hardener. Then you can use an extender to save your broken stem. https://m.media-amazon.com/images/I/513DVvkfW5L.__AC_SX300_SY300_QL70_ML2_.jpg   You can also try cutting a small grove / slot on top of the broken stem to use 0.7mm flat screwdriver.   Depending on the Crown material and Stem material, you can try dissolving the stem. 
    • How long had it been without any wind before you first put it on the timegrapher?  Perhaps there was some debris / old lubricant that loosened up while you were waiting to do the 24 hour reading? I recently serviced a Seiko 6319 that immediately after service was absolutely horrible on the timegrapher - 24 hours later (without me doing anything) it was rock solid!  I was a little surprised by this (as I have seen improvements in amplitude after letting it run in but never a watch going from useless to great!). I was suspicious that some dirt must still be in there so I took it apart and cleaned and lubcricated it again and had exactly the same experience - snow storm that after some hours turned into a nice straigh line with good amplitude 🤷‍♂️
    • Yes, I know it was able to run before just enough that everything supposed to be affixed with shellac could fall out. I won't get back to work on this watch for several days at least, but one thing you mentioned about the banking pin adjustments being intended for fork horn clearance got me wondering.... The last adjustment I made to the entry stone yesterday did not solve the problem when the balance is installed. The escape teeth can't quite clear the stone when the balance swings. But I thought it was going to work because manually snapping the fork back and forth did allow the escape wheel to advance almost all the time. I wonder if there's another issue with the impulse jewel, that I have to shellac again anyway. I am going to measure the fork slot and the jewel because I am curious if it is the right size or possibly narrower than it should be. My thinking is if the horn clearance is too great maybe it is not getting enough impulse to clear the escape tooth. But pushing the fork with a tool can move it far enough to clear the escape wheel tooth.  I'll see later in the week. I didn't expect a big challenge from this watch because it ticked for 5 minutes before stopping without shellac. As always I was way wrong.
×
×
  • Create New...