Leaderboard


Popular Content
Showing content with the highest reputation on 04/26/24 in all areas
-
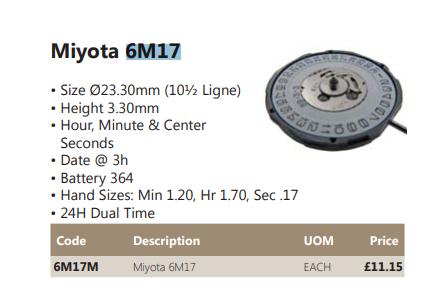
Cousins don't stock it any more, but this is from their site Then put the size and features in to their search function https://www.cousinsuk.com/category/filter/watch-movement-search-match-by-ligne-size you may be able to find a matching movement
 2 points
 -
The plate is OK, thanks. It seems the answer to my question is that this is a 'hack' & for me another reminder that in general, one won't be the first person to be tinkering with an old timepiece!. As you day, I've been fortunate to have gotten some good advice and, just as important, encouragement. I've been lucky then not to have the balance spring break as a result of my novice 'ministrations' - but I did remember to 'stroke' rather than bend per se. The clock is of sentimental value to the owner so I'm relieved to have now got it running to time with the support & encourage of forum members like yourself.2 points
-
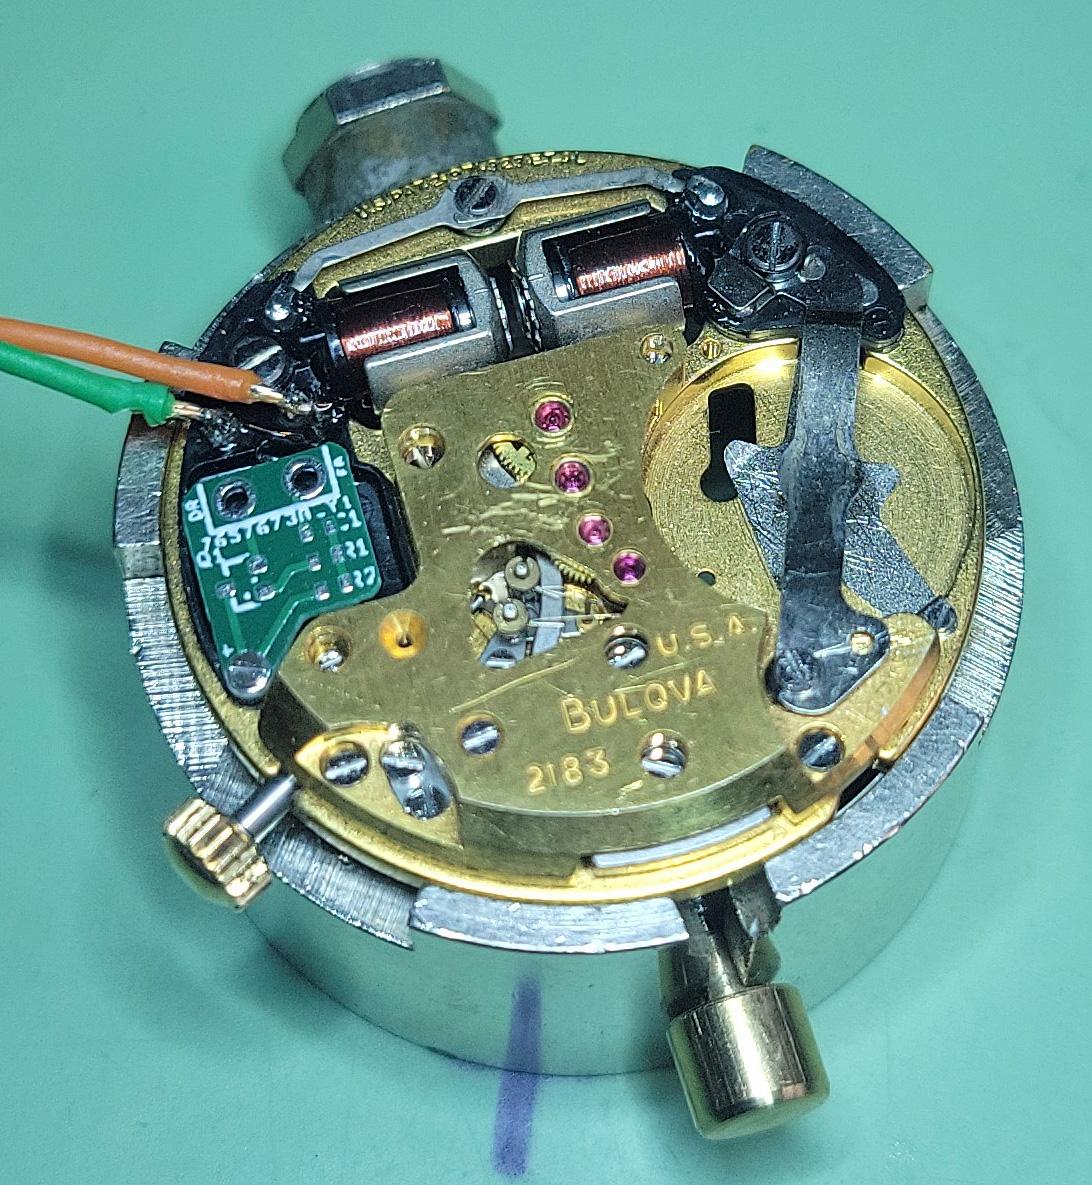
Hi. It’s always better to replace the coil but in the event of being unable to find one it’s nice to know that repairs can be effected. I prefer the conductive paint option because of the lack of heat and the chance of causing further damage.2 points
-
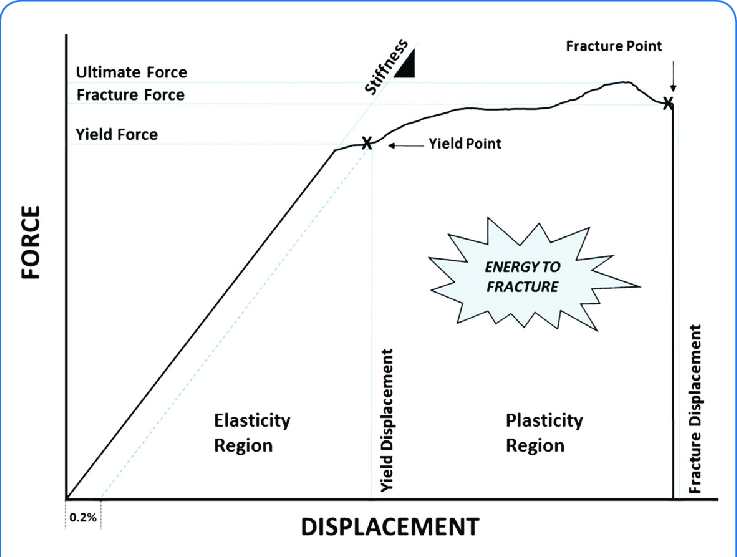
I would agree, in order to work harden something you need to exceed it's yield strength when it moves from the elastic zone to the plastic zone and you get permanent deformation and work hardening which is fairly close to its failure point, relatively speaking and dependent on the material/alloy of course. In theory you can load something constantly within its elastic range and not suffer work hardening issues.
 2 points
 -
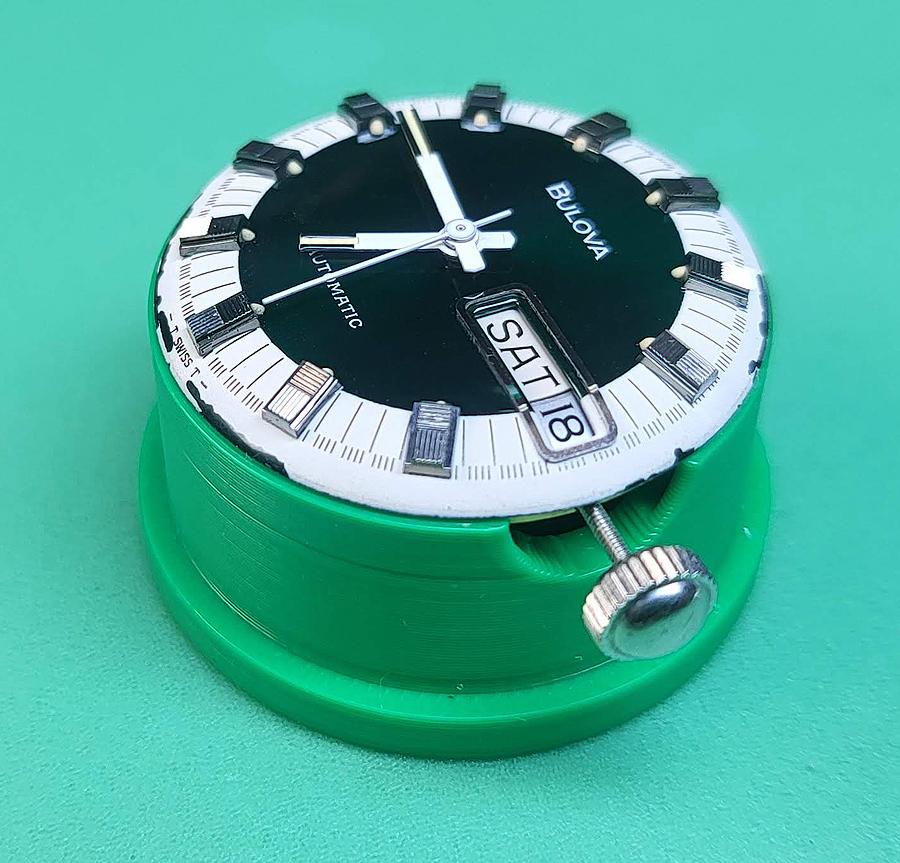
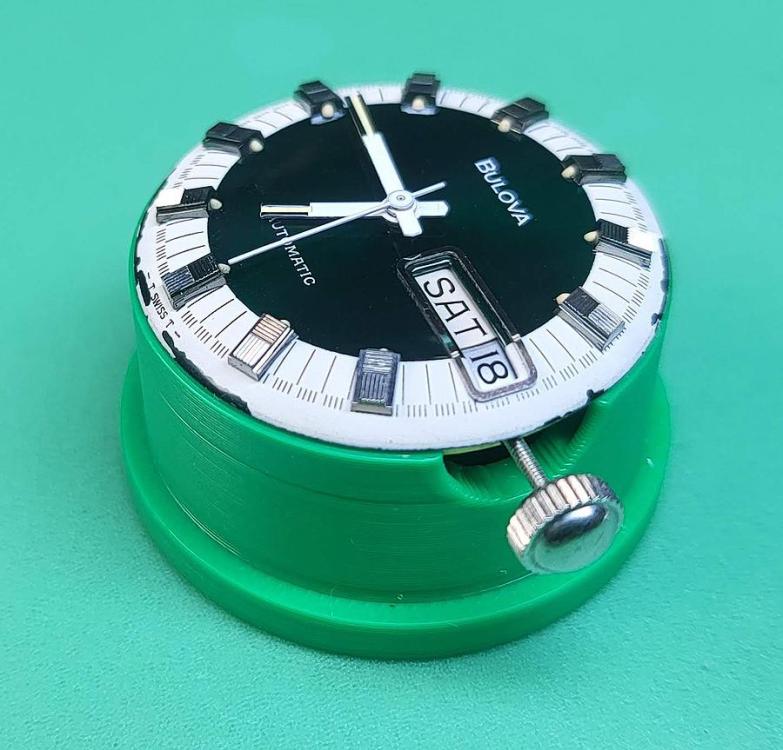
I missed this earlier. The dial isn't going into the holder, it should sit proud of it. This is what I am currently using which I print for each different movement.
 2 points
 -
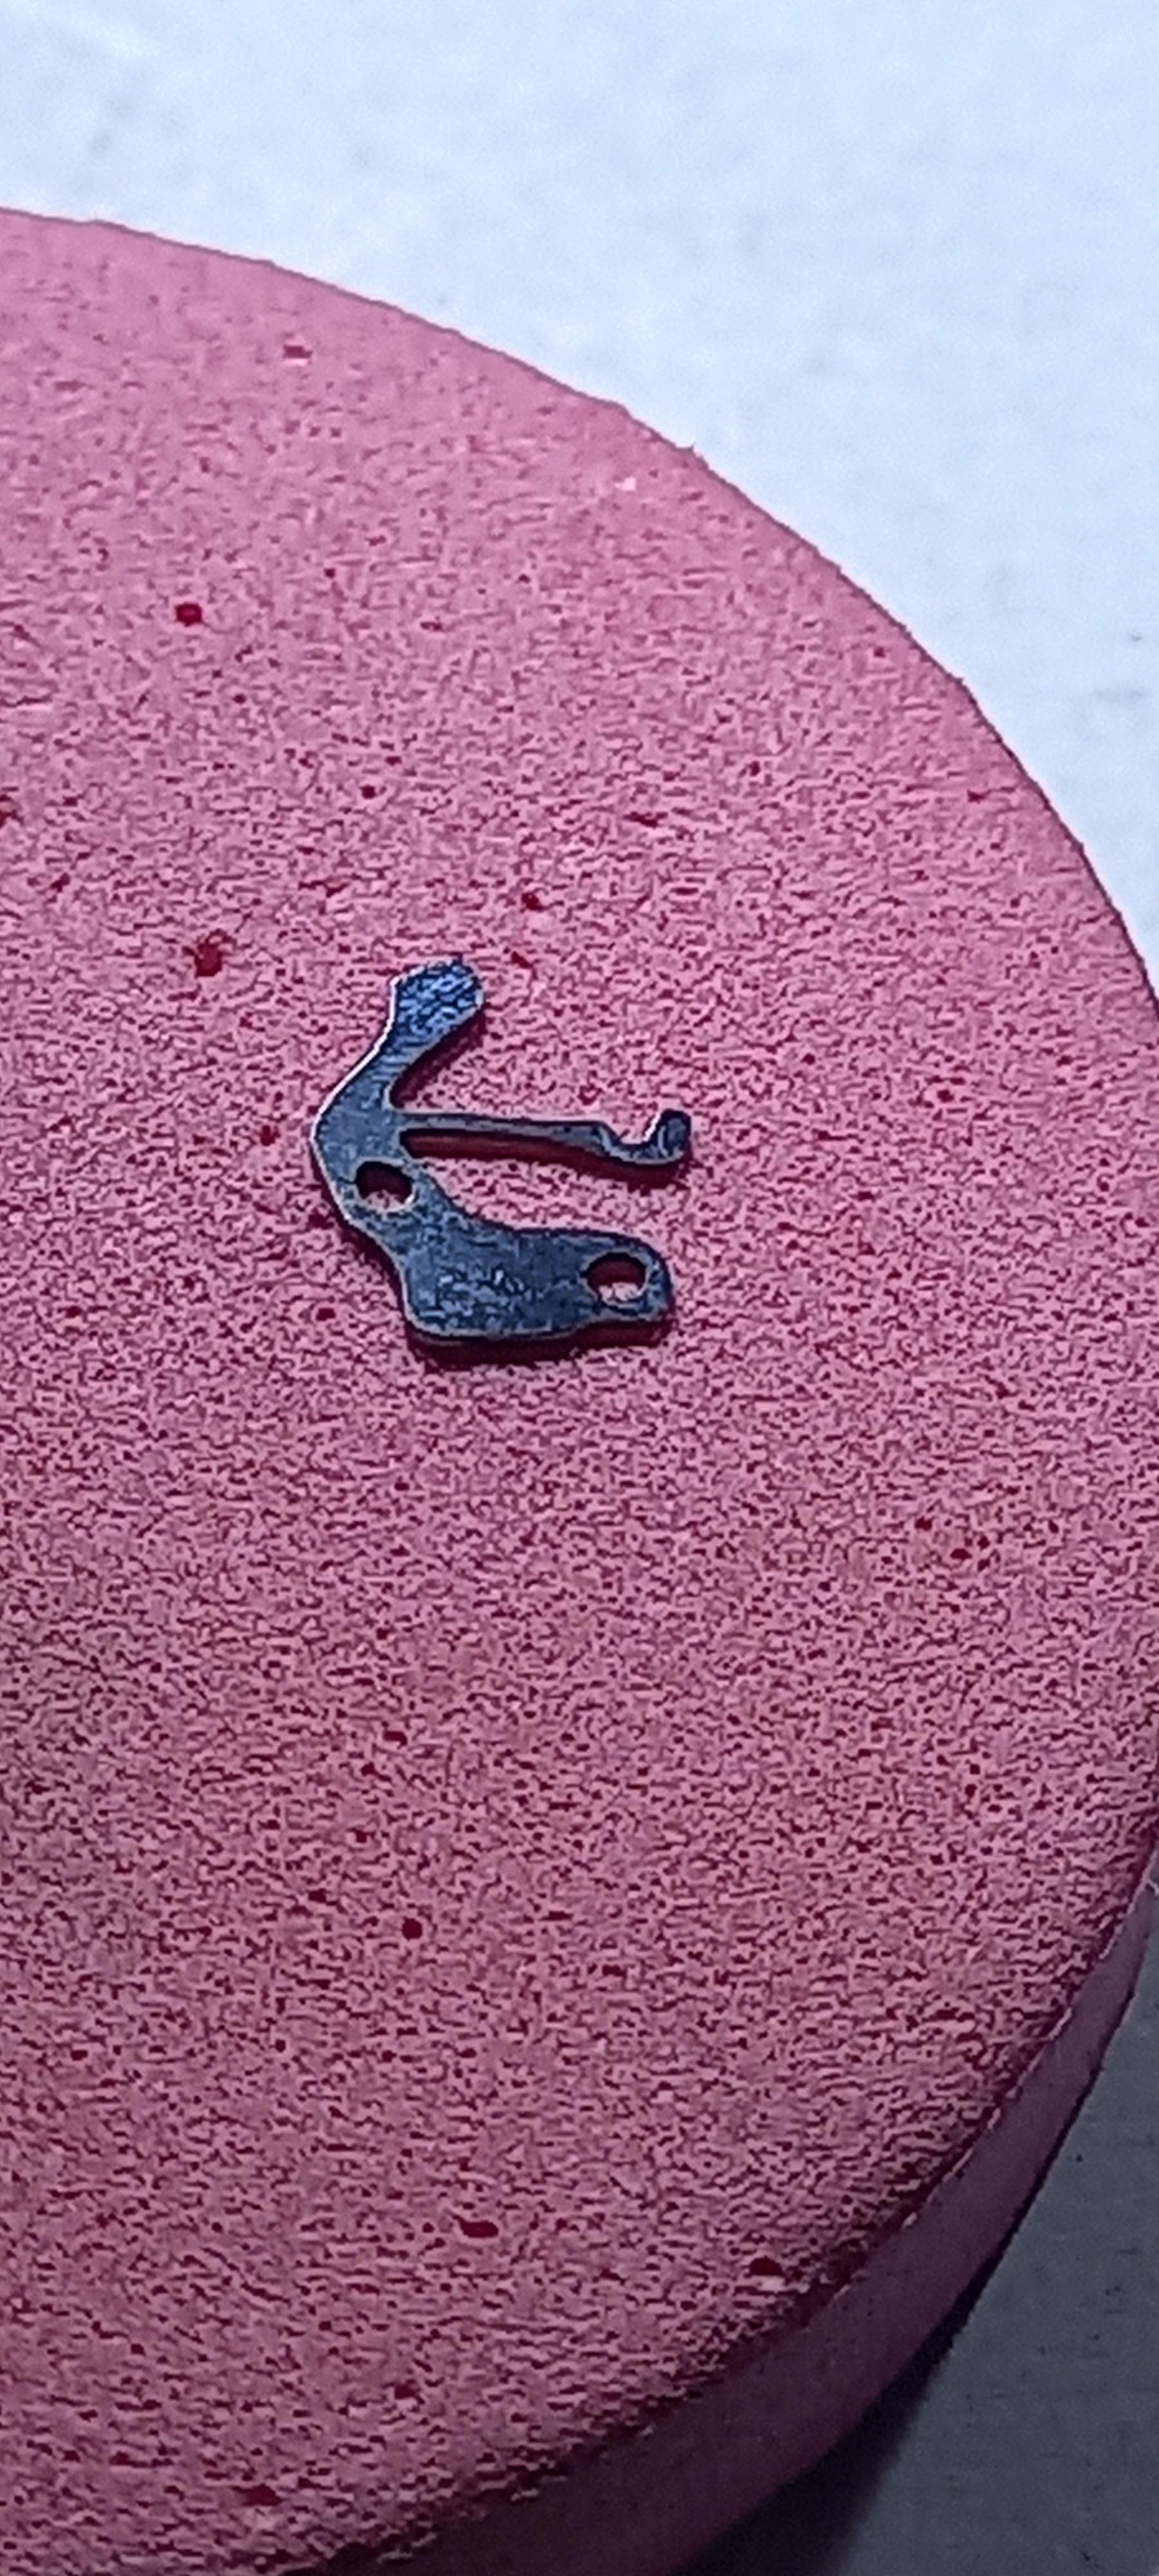
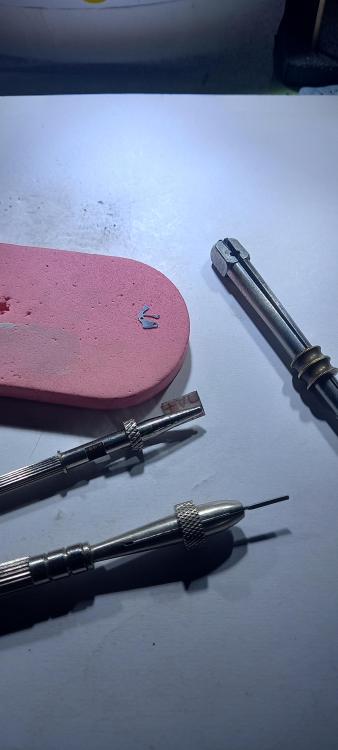
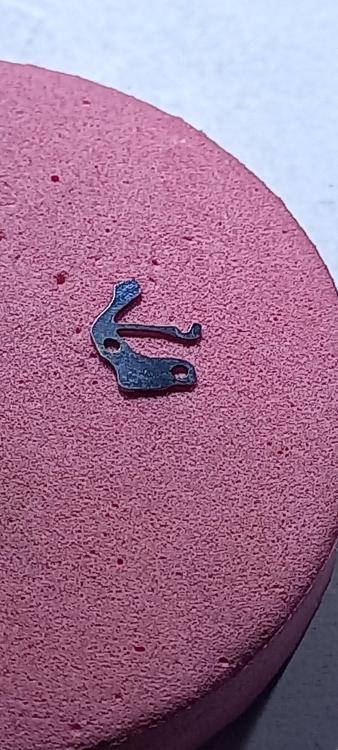
I didn't think pulling to set position would work harden the spring, in that position it is stressed where the arm starts. By work hardening i meant rapid polishing at that point, a bit like polishing a pivot work hardens as it compresses the steel. I doubt polishing by hand would achieve much in that respect though. Its finished, arm polished up mostly at the join to the bridge's main body. I'm ok with it, the screw holes aren't great as i had to open them up by redrilling and positioning it was difficult, I'm not much use with a loupe, opening up with a file might be a better option for me or i could just use the correct drill size . And the detent is way too deep, i had to guess that with the stem release out of position and sat on top, but i only took one measure and went for it, no slowly slowly catch your monkey . First go I'm happy , well sort of, it works and thats a big thing for me, next one will have a bit more finesse. Anyone thats interested, after filing, i used a 2000 grade home made diamond micro file and then 20 micron film, the film is much better than wet and dry, more stable to use and doesn't shed cheap grade grit everywhere , then auto polish on a sponge pad.
 2 points
 -
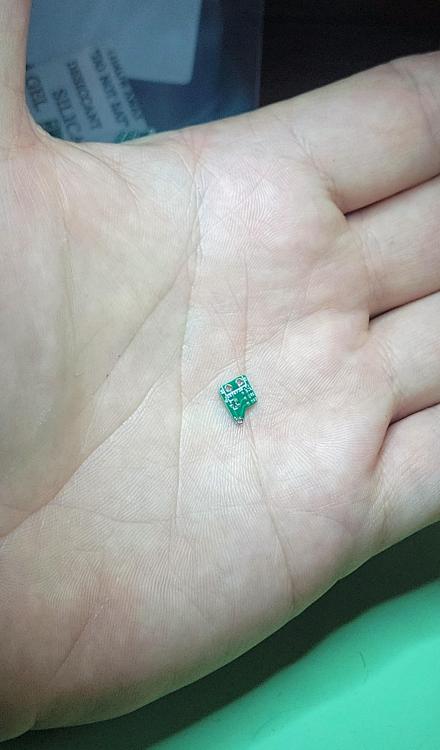
They showed up! It's a perfect fit. Can't wait to populate it and try it out.
 1 point
 -
So it runs and keeps good time even with that train wheel. You are lucky I would point out to the owner about the wheel, just in case at some point they take it to a different clock maker.1 point
-
Hi New. More of a get you out of a hole than a bodge. There is no substitute for a new coil.1 point
-
Thanks ww, its maybe not as much of a bodge trick that i thought it was.1 point
-
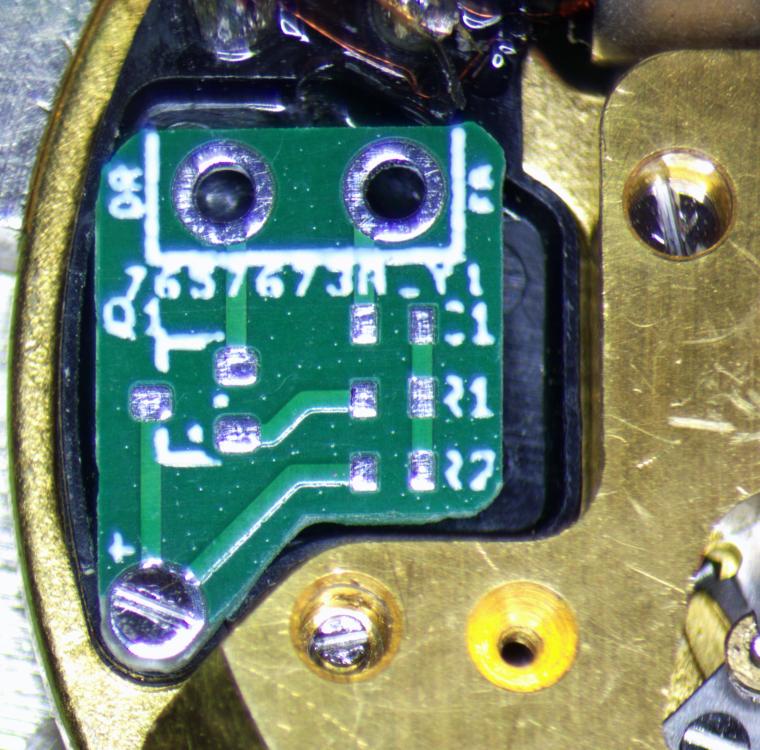
In think you are effectively shortening the coil by shorting out damaged tracks. In my case as long as the continuity was good and the resistance not too greatly affected it should be ok . One was on an era movement,1 point
-
Would the paint increase the resistance of the coil ? Effectively joining the wires that are painted. I imagine its important to only paint the smallest of areas to make the repair.1 point
-
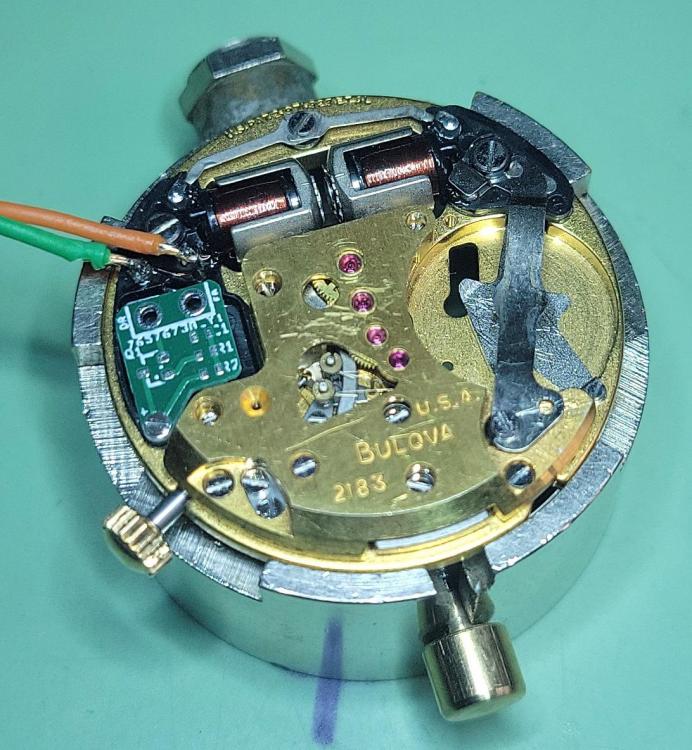
Hi, I am interested in classic watches and have a couple of Omega watches: a mechanical Seamaster, and an F300 Geneva. I'm new to watch repair and just bought a non running 1970 Bulova 11BLC as a project, I hope to learn how to fix it!1 point
-
Hi. In the picture not only does it depict that the wheel is bent but also the plate or is that due to th angle of the picture. Already received very good advise so I will butt out.1 point
-
There are some parts on Ebay for the seiko 6020A, it may just be a waiting game for someone to strip one down, NOS will be more scarce . K would strip your movement down to the module then start looking at other seiko movement to see if that coil is used, then seek out a seiko part dealer. Also Retrowatches youtube owner Mike may give you some advice try him on his site . He also hangs around amateur watchmaking groups.1 point
-
I discovered this last night when I printed my model, I'll try and tweak the design a little and re-post here1 point
-
That could work - two blunt pressure points would spread out the force required in order to reduce damage, and two small pins should fit slightly angled through the inner coil of the spring. I was thinking about this while working on other chores and had a crazy thought when I saw a can of expanding rigid sprayable foam, but who'd want to have to clean out the barrel and spring after that?1 point
-
That's very observant of you, Nev & that the 4th wheel is from another movement & has been dished to fit does seem a more likely explanation. Thanks for the education re calculating the rate & spring frequency. In the meantime, spurred by your earlier comnent, I risked a further tinker with the balance spring, cleaning it, fully un-kinking the last few cms (I'd been worried about breaking it first time round) & pinning it at the very end. The clock now seems to be running slow when the regulator is in that position so some progress at last.....Many thanks, once again!1 point
-
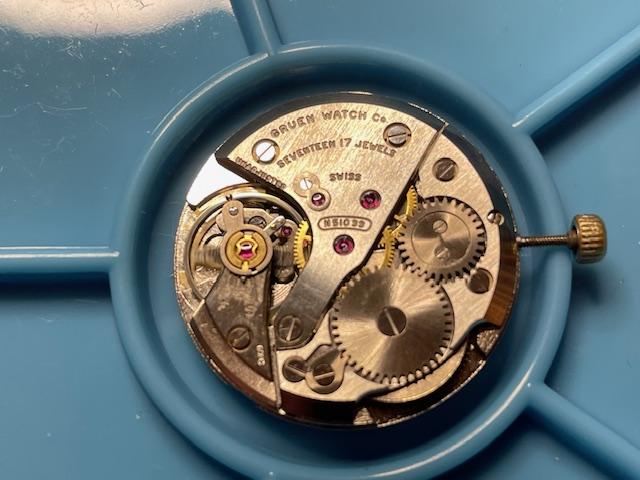
Snap! I recently finished my Gruen 510 movement - though the case for mine is in a rather sad state; I'm going to try re-plating it (in nickel, it's not a gold one). Re. the screws, I got a few of the one gram mixed batches from ebay. I've only needed a couple of screws for things so far, both rare, minuscule types - but both in the mix, after enough time sorting through them! The ones such as normal bridge screws are quite common in those lots.
 1 point
 -
That's a good idea - shrinking down the nut and wrench size from the old casebook trick!1 point
-
OK, welcome in the world of alarm clocks... I guess the 4th wheel is dished because it is from another movement. If it was not dishet, then it would not mesh with the pinion of the escape wheel, am I right? The marks of wear on the 4th wheel pinion doesn't corespond to the 3th wheel table position, at list this is what i see on the picts. Calculating the rate is easy - there is a formula - BR = T2 x T3 x T4 x T5 x 2 /(P3 x P4 x P5) where T2 - T5 are the counts of the teeth of the wheels tables, and P3 - P5 are the counts of the pinion leaves. Vibrating the balance is easy - grasp for the hairspring where it should stay in the regulator with tweasers, let the balance hang on the hairspring while the downside staff tip rests on glass surface. Then make the balance oscillate and use timer to measure the time for let say 50 oscillations, or count the oscillations for let say 30 seconds. You must do the free oscillations test to check the balance staff tips and the cone cup bearings for wear. This kind of staffs wear and need resharpening to restore the normal function of the balance.1 point
-
Glue a nut to the barrel lid, insert a bolt, pull, disolve the glue. Maybe someone will have a better answer.1 point
-
I printed the base and it is a bit too large to fit on the base of the hand setter. The ring bumps into the column so it is unable to full seat on the central ring. I'm going to try removing some of the materal and see if I can't get it to go down.1 point
-
I looked at it like this, I've built a lot of stuff in my time, building structures and furniture,those are my creations and they will still be here way way after I'm gone. Traditional watchmakers felt the need to pass their knowledge on, ideas that they created . I assume with them as it is with me, leaving their mark on the earth, a way of being remembered. This creation of Mark's has brought thousands of people together to pass their knowledge around, ideas that will continue to be used for lifetimes. Ideas that should continue to be procured. If for whatever reason the forum ceased to exist, not quite like Ranfft's, that didn't disappear but much less usable. Then that is sad, such a massive loss of communication between good people and a wealth of knowledge lost. There should be something in place for when that happens which could be next week, next year or in 10 years. Might not be a topical subject for a lot of folk or boardering on controversy, i did say i talk about stuff other people dont. But if you dont talk about it and something happens then you've lost it and you ain't gonna fix it .1 point
-
Welcome to the forum, enjoy. It’s highly unlikely you will be able to purchase a new bezel look on eBay for a pulsar watch for repair to find a bezel.1 point
-
the problem with vintage watches and yes quartz watches can be vintage is availability of parts will be a problem. I have a link below where we can cross reference the coil and I was hoping for more. Another problem for vintage parts are everyone on the group gets used to ordering from online. Conceivably the physical material houses that still exist out there might have the part and you'd have to reach out to them and see if anyone has one. this is because they don't list every single part that they have online with the exception of cousins where everything they do is online work just doesn't exist but the other material houses can have stuff not listed. Otherwise just set up a search on eBay and sooner or later it will possibly show up if you're lucky. http://cgi.julesborel.com/cgi-bin/matcgi2?ref=SEK_6020A1 point
-
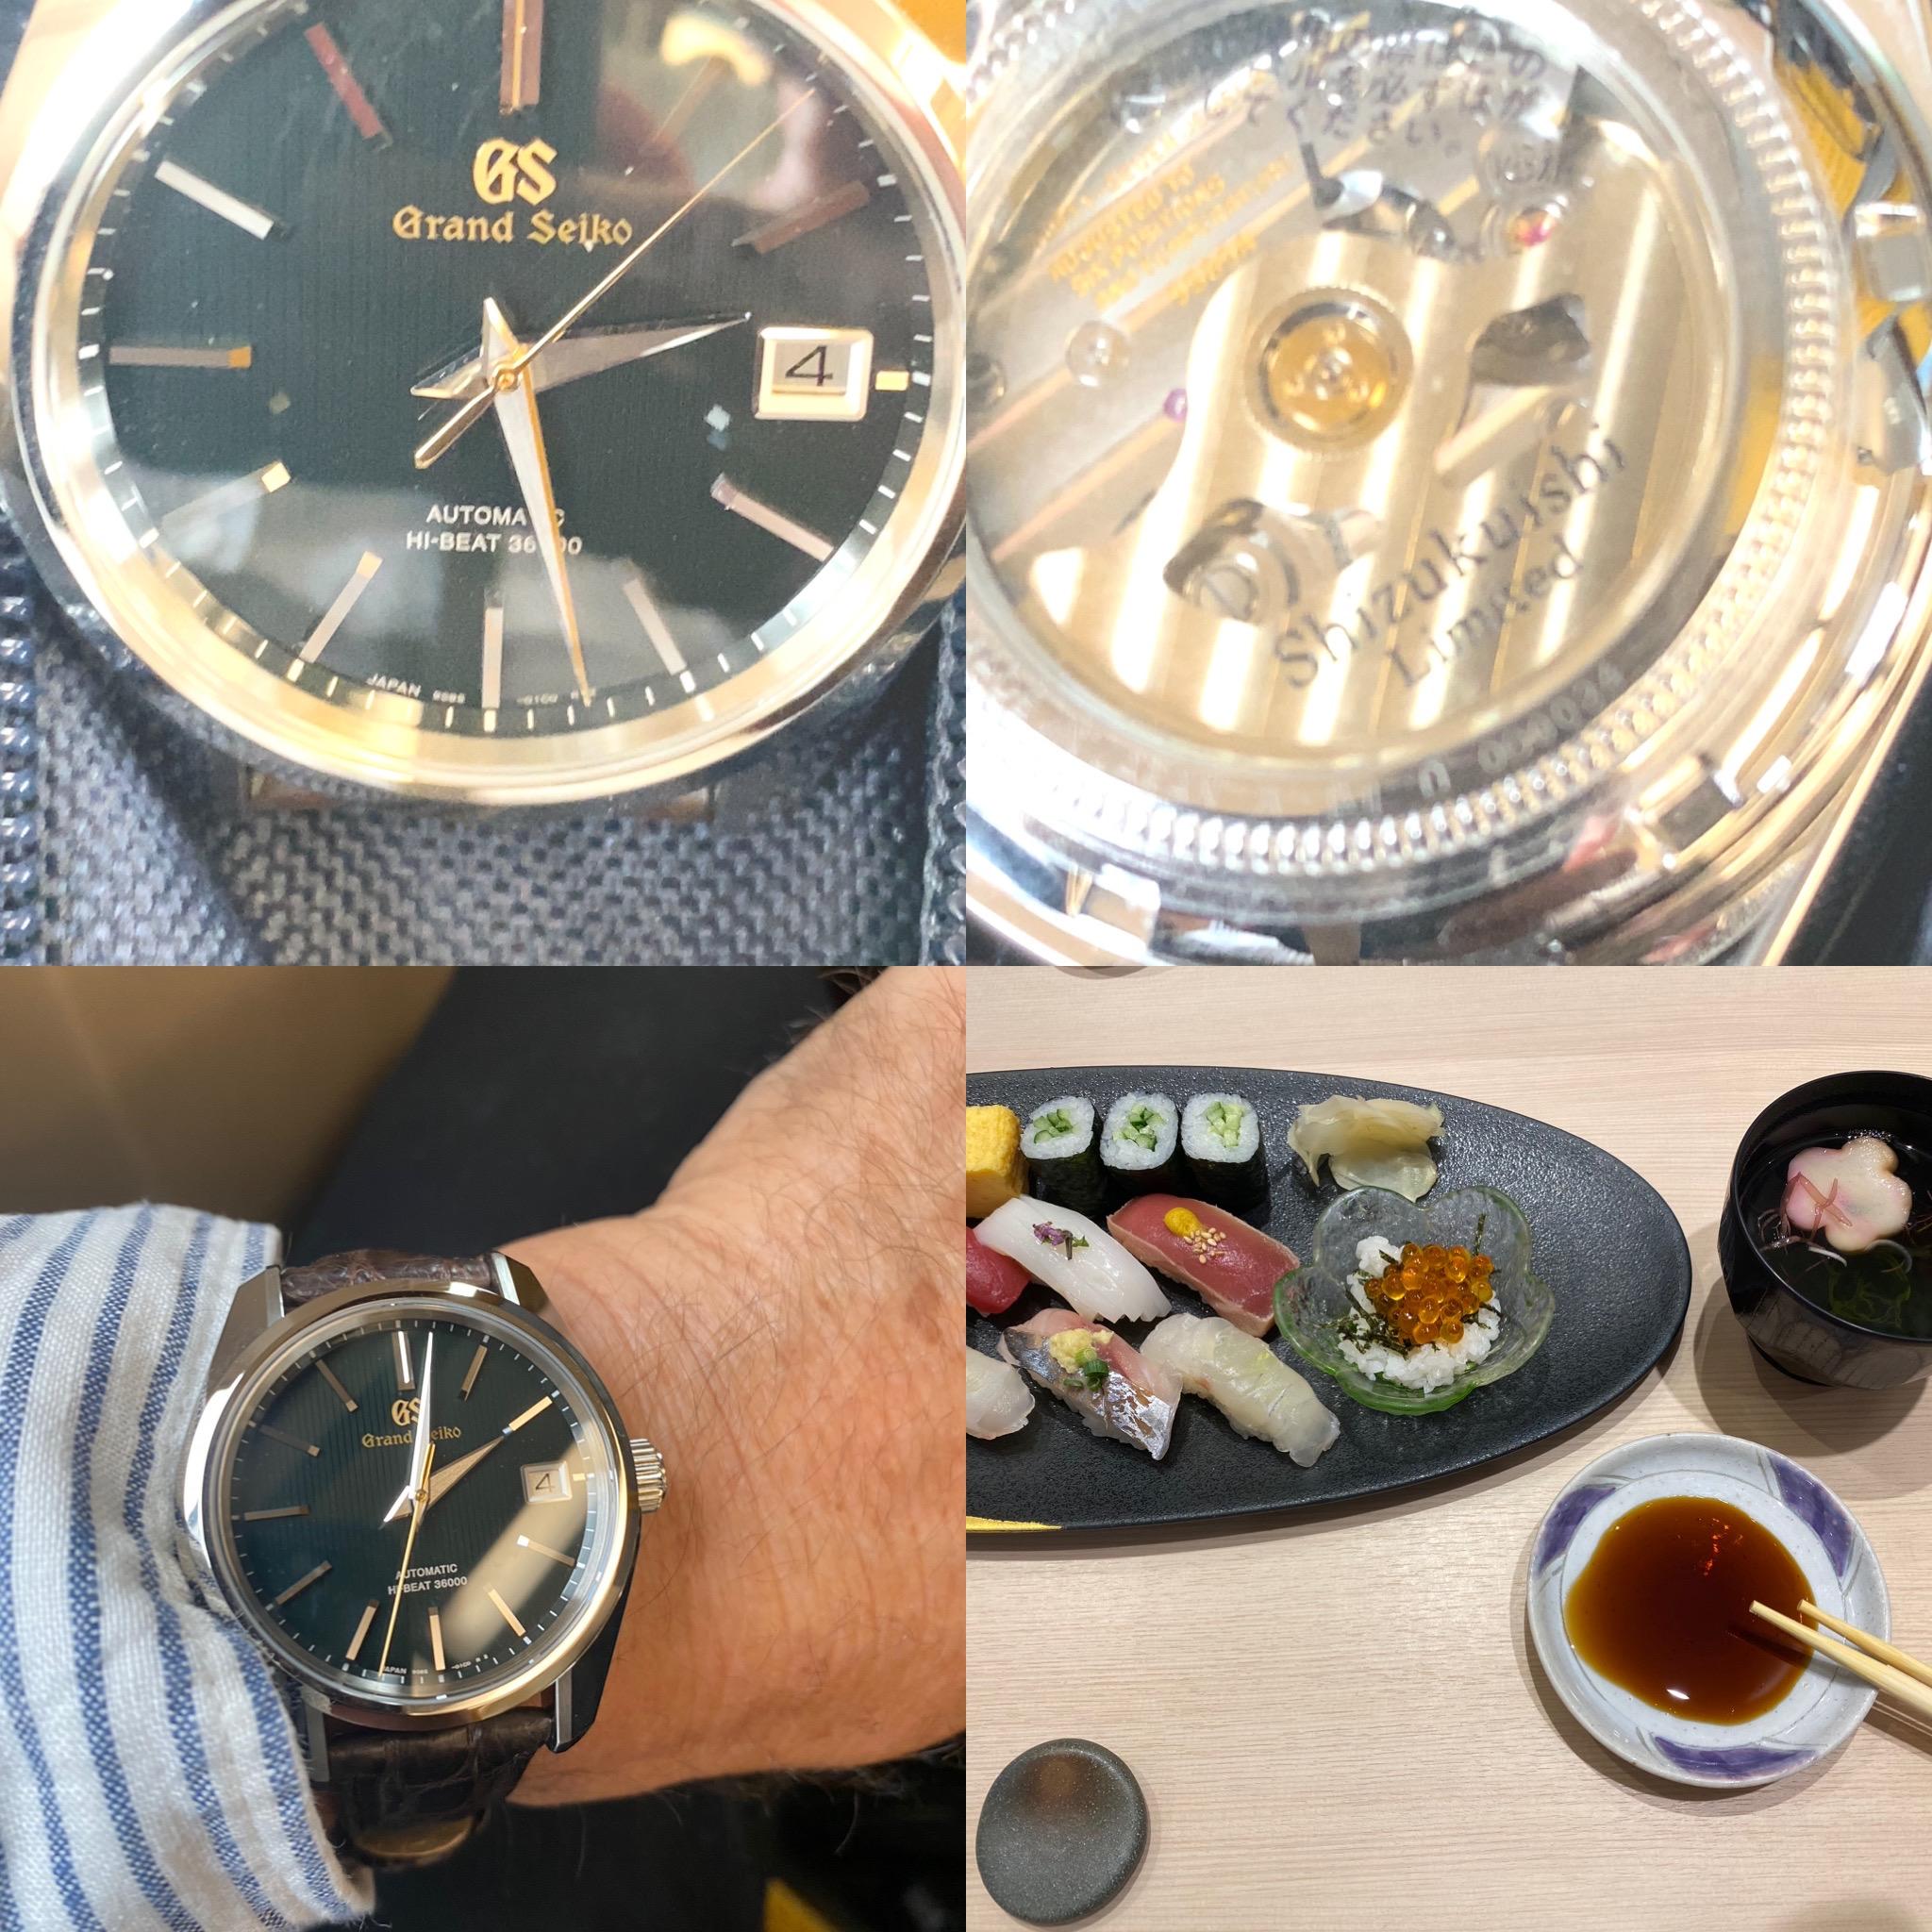
I am an Australian American living in the beautiful Gold Coast, Queensland Australia. I love Grand Seiko and Seiko watches, and recently came back from the Grand Seiko Shizukuishi Studio in northern Japan where I was blown away by the design artistry and technical excellence. More later on that (including photos, if interested!)

 1 point
 -
I agree, the bezel needs removing. If there isn't a gap between the case and bezel for removal, it's probably screw on. If so you need to grip the bezel itself.1 point
-
Thanks for the help guys! VWatchie I already found your thread but I'll check it again. Nice to know about acetone, I still have to get the shellac off since I made a little mess. I adjusted the jewel, put new shellac (the so called soldering technique, pallet tool too hot this time so the shellac "wire" melted in air before getting in contact with jewels or fork) rinsed the pallet fork and put it back dry. Amplitude is now in the 240-250 range that I expected in the first place. I guess there's enough oil in the escape wheel teeth already but I'll check that later. The mainspring was pretty beaten so a new one would probably boost the amplitude even further. Nice to learn new things. Now I have another thing to look for while disassembling. I wonder if the watch left the factory that way.1 point
-
Like losing Ranfft. That was a wake up call. We took his website for granted. Miss him terribly.1 point
-
I would like to share a check list made up by a master watchmaker. I take no credit for it, only think it would be helpful for us hobbyists. Here it is! CHECK LIST I decided to write up what is called a 16 point check that is meant to be a guide to steps required to service a watch this is slightly bias towards a wrist watch but very relevant to pocket watches also: This is a guide and not the definitive answer after going through it a few times add you own additional tests and observations. This is of course for a basic time only non-automatic or any with additional features, I also leave out things like demagnetizing, actual cleaning procedures, a good chunk of common sense needs to be applied also as I say its meant as a good starting point to a correct disciplined procedure, This is version 1 may add or edit/delete later. Check number 1 a Check the winding to see if the mainspring is broken. b Check to see if the setting bridge or sleeve is broken by pulling the stem out and testing the proper snap of stem. A broken setting bridge/sleeve is easily detected c. The balance wheel should be oscillated to see that it is true and the balance pivots should be checked by looking through the upper jewel to see that there is not a flash on the pivot. d. The hairspring should be checked to see that it is not damaged. e Check setting of hands f. The watch should be looked over in every respect, paying particular attention to any rust spots that may appear on any part of the movement. When rust is evident around the stem or setting mechanism, it is most important to remove the dial and hands in order to check this mechanism to see if the rust is very extensive. Check Number 2 a. Examine each part as it is being removed from the movement. b. Check for rust on every part. c. Check every pivot to see that it is not damaged or bent. d. Check the jewels in the watch, to see that there are no cracked jewels. e. Check pallet stones to see that they are not chipped or damaged. f. When removing barrel cap, make sure that it snaps off only after sufficient pressure has been applied to it. g. In the examination of each part, a close check is not made at this time as many of the parts will not be clean enough for that purpose. a much closer check will be made on the parts as each part is handled in the assembly of the watch Check Number 3 a. Upon completion of cleaning and parts removed from the basket into the assembly tray, each part should be checked over with the use of a watchmaker’s loupe special attention should be paid to the jewels, because if there is gum oil still remaining on the jewels, the cleaning job was not done satisfactory . It is also worthwhile at this time to examine the pivots. If the jewels are clean, and the pinion leaves are clean, it is almost certain that the cleaning operation was performed effectively. Check Number 4 a. Examine the condition of the mainspring. b. Check the width, strength and length of the mainspring. c.. If correct, replace mainspring using correct mainspring winding tool, not by hand d. Check the lubrication of the mainspring if required e. Check the fit of the mainspring around barrel arbor. f. check the mainspring end for proper shape to catch in barrel. g. Check the snap of the cap on barrel and replace in correct position h. Check the end shake and side shake of barrel arbor is it also sometime recommended to do this without mainspring fitted to test for free run and end shake i. Check the cleanliness of the barrel and barrel teeth. j. Check the oiling of the barrel arbor after the cap is on. k. Check the condition of the barrel teeth to see if they are bent or worn. Check Number 5 a. Jewel holes must be cleaned with peg wood if necessary. b. Jewels must be checked for chips or cracks. c. Check the train wheel pivots for rust, polish, cuts and straightness. d. Check the pinions for rust’, pits and polish. e. Check the pivots for pitting check that clean pith wood is being used. f. Check plates for tarnish, fingerprints, and polish jewel settings. g. Assemble time train and check end shake and side shake. h. Check wheels for trueness arid upright. i. Lift each wheel with tweezers to check for end shake and to see if each wheel is free enough to fall back to its original position. j. Spin train to see that is spins freely, in dial up, dial down and a vertical position. Check Number 6 a. Replace barrel and barrel bridge and check the oiling of the barrel arbor upper and lower bearing. b. Check oiling of crown wheel. c. Replace ratchet wheel. d. Note: do not oil remainder of movement until after kick-back is checked or cap jewels are present oil those now e. Wind watch slightly to check kick-back and recoil. This check should be made in dial up and dial down positions. If the watch does not have kick¬back, this indicates that the train is not as free as it should be. First, however, before checking into the train itself to determine if there is some frictional error, it would be worthwhile to examine the mainspring around the barrel arbor. Many times the loose fit of the mainspring around the arbor will prevent kick-back from occurring within the train. In such instances, the arbor is simply slipped in the mainspring instead of the train receiving the reversal torque, that normally occurs. If the barrel is found to be satisfactory, then the train. should be checked to see if the trouble can be located. first, the train should be examined carefully to see if each wheel is free, and if no trouble can be found, then it is advisable to remove the train wheels from the watch and replace each wheel in the watch individually and to check the spin of each wheel. If each wheel spins freely, this indicates that the pivots and the jewels are in good condition and that one need not look further for defects or faults in those areas. Next, place two wheels at a time in the watch and check the spin of the wheels. Thus, any error of improper depthing or a badly formed tooth on a wheel or pinion will be detected. It is simply a process of elimination in order to locate the particular trouble, and of course, proper corrective measures must be taken to correct an error when one is found. Check Number 7 a. Oil all the train jewels in the watch, and at this point it is advisable to oil also the balance jewels. b. Check to see that there is a ring of oil around each train pivot and that the jewels are not over-oiled or under-oiled. c. Check the jewels that have caps to see that the globule of oil has been formed properly between the flat cap and curved hole jewel and no keyhole shape if so remove re clean jewels and check seating the re oil and repeat check for perfect ring. Check Number 8 a. Oil stem properly. b. Oil friction parts of setting. c. Oil wolf teeth of clutch wheel and winding pinion. d. Oil clutch wheel groove. e. Oil points on setting lever that contact the setting bridge or the clutch lever. f. Never oil dial train. Note: ‘dial train means all wheels following center wheel staff. g. Seek expert advice on some types of intermediate wheels connecting clutch at setting positions that require oil. Check Number 9 a. Check condition of pallet arbor pivots. b. Check for chipped or loose stones, shellac or gummed oil on pallet stones. c. Check guard pin for straightness and proper shape. d. Check polish of pallet arbor, pivots and fork slot. e. Check end shake of pallet fork. f. Check height of pallet stones in conjunction with escape wheel teeth. g. Check matching stones. h Check drop lock i. Inside and outside drop. j. Draw. k. Hang-up of stones on escape wheel teeth. Check Number 10 a. Check tightness of roller jewel in roller table - uprightness of roller jewel. b. Check the height of the balance wheel in conjunction with the fork bridge and the center wheel. c. Check the clearances. d. Check the height of the guard pin in relation to safety roller. e. Check the proper length of roller jewel and fit of roller jewel to fork slot. f. Check the guard clearance. g. Check the corner clearance. h. Check the jewel pin shake. i. Check the guard test, j. Check the corner test. Check Number 11. a. Check the hairspring in-the-flat. b. Check the hairspring in-the-round. c. Check the quadrant of the hairspring to see that it is formed properly between the regulator pins and stud d. Check for beat of the watch by equalizing the force to receiving and discharge pallets. e. Check for the collet wobble. f. Check for trueness of the balance wheel, and for the flash of the balance pivots g. Check for trueness of roller table. Check Number 12 a. Place the watch on the timing machine and take a rate in the dial down position, then turn the movement over to dial up position and take a rate. There are three things that should be observed from the rate that was taken: 1. Dial up should indicate the same time as dial down. 2. Observe the closeness of the lines to determine if the watch is in perfect beat. 3. Observe how the watch is running in reference to the time error over a 24-hour period. b. Adjust the mean time rate of the watch so that the dial up and dial down positions will record on time. Do not move the regulator more than one degree in adjusting the mean time rate. Any other alteration must be made by adjusting mean time screws or by adding or removing weight from the balance wheel in such a manner as not to affect poise, static or dynamic,. c. If the rates in dial up arid dial down are found to be different from one another, then this indicates a mechanical error in the watch which must be traced out before proceeding. d. If the watch is found to be out-of-beat, then of course, it should be put r in proper beat at this time. We might emphasize that if the watch was put in proper beat in accordance with the proper procedure at the bench, then an out-of-beat condition or minimal amount would not be indicated on the timing machine. e. When the above conditions have been satisfied, the next step would be to take a rate in positions and errors corrected. If everything has proved to be satisfactory, the watch should be tested for isochronal test be made on the timing machine, which consists of re-testing at different winding levels and rate in the dial up position. Check Number 13 a. Check for proper lubrication of cannon pinion on center post. b. When replacing the cannon pinion, be sure that the leaves of the cannon pinion do not come down on top of the minute wheel teeth so as to bend the teeth of the minute wheel. c. Check tightness of. cannon pinion d. Check to see that cannon pinion does not ride up when watch is being set. and smooth consistent operation. Check Number 14 a Make sure that the hands are fitted securely to the parts to which they are attached b. Make sure that the hands are adjusted so that there is equal space between the hands and the hands are set as close to the dial as possible. c. Check to be sure that the hands are shaped to the contour of the dial. d. Check to see that\ the hands are positioned so that they are synchronized with one another. Check Number 15 a. If there is no case for the movement, simply disregard this check and proceed with the next check, number 16. b. Check for proper snap/screw back of the case. c. Check for the clearance of the hands under the crystal. d. Check the crystal to see that it is securely fitted into the case. e. Check to see that the crown is next to the stem and reasonably close to the case. f. Check for tightness of movement in case. g. Check the spring bars to see that proper spring bars are used for the particular type of case so that the band is held securely to the case. h. Check the lug holes to see that they have not been worn badly by the spring bars to a point where the hole may break through and allow the spring bar to come out of place. Check Number 16 a. Set the watch on time with a master clock. b. Let the watch run for a period of 24 hours and check the error in the time repeat in several positions. c. Allow the watch to run until it completely runs down and check the length of run. The watch should run a minimum of 30 hours, preferably 40 hours, if it is in “A. I have no answers to any of the steps since I didn't make this up. Maybe Mark might.1 point