Leaderboard


Popular Content
Showing content with the highest reputation on 09/03/15 in all areas
-
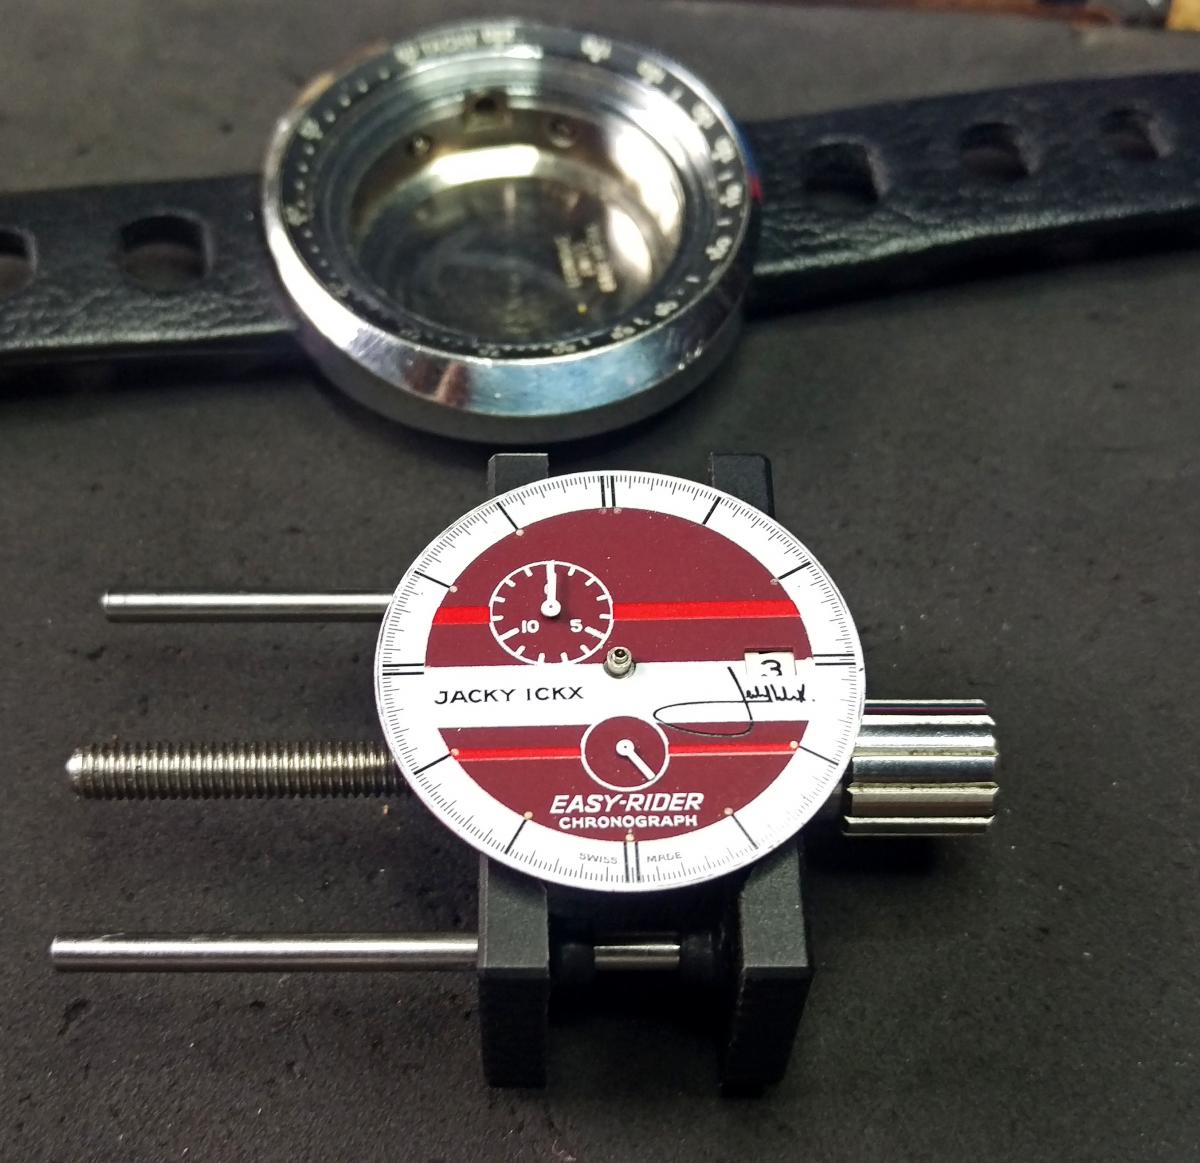
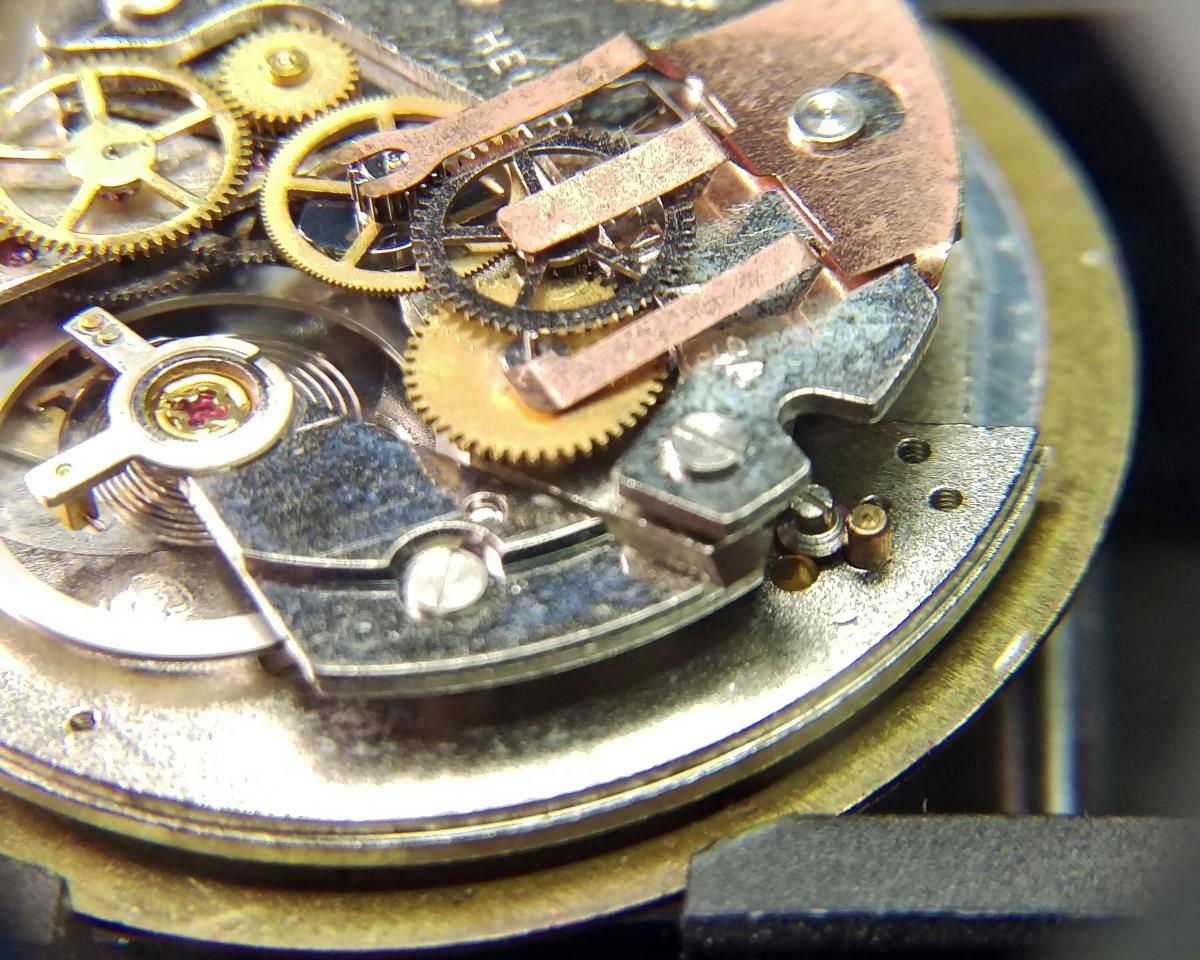
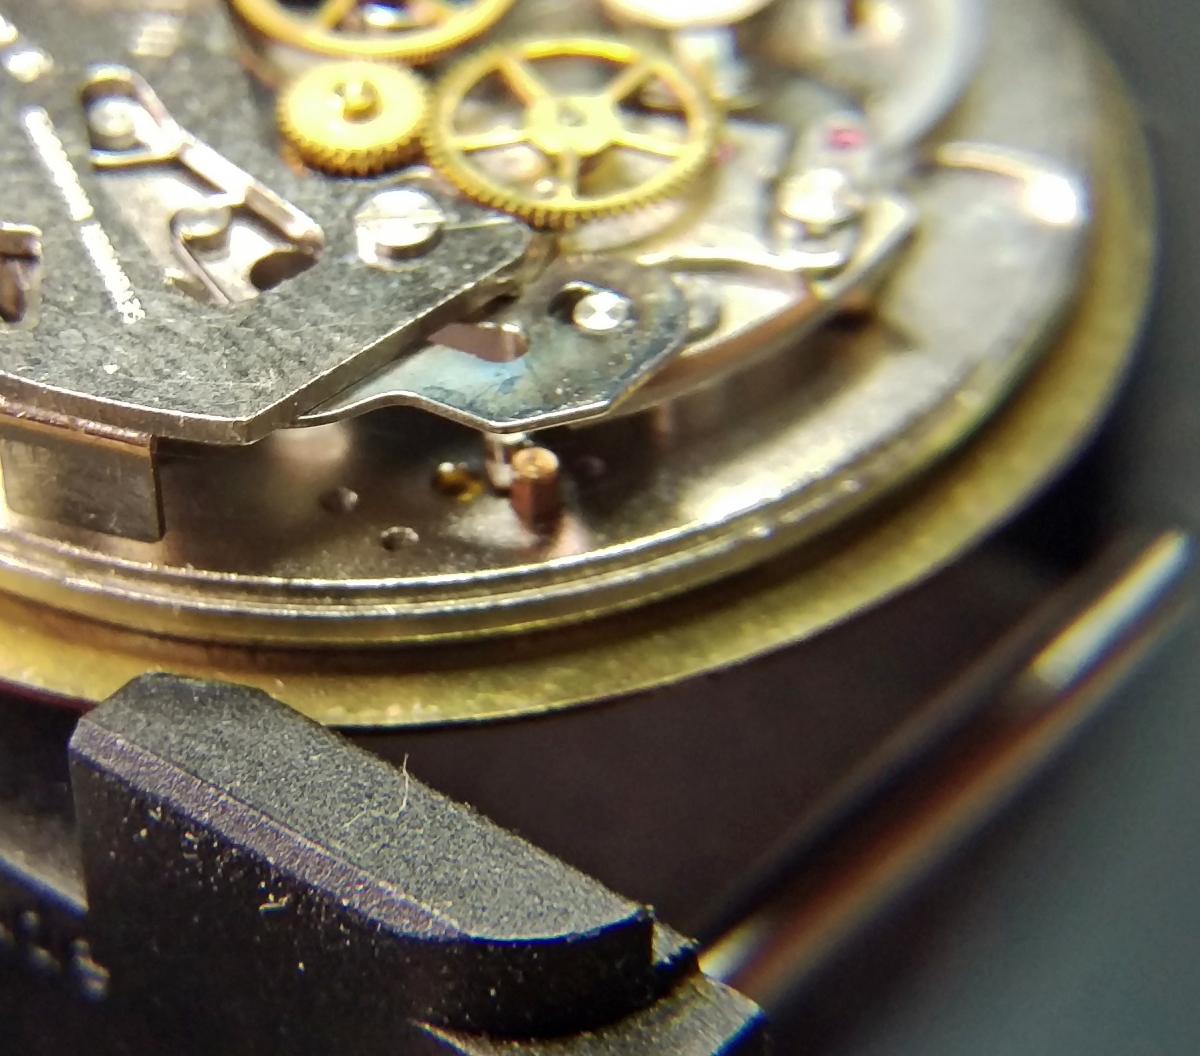
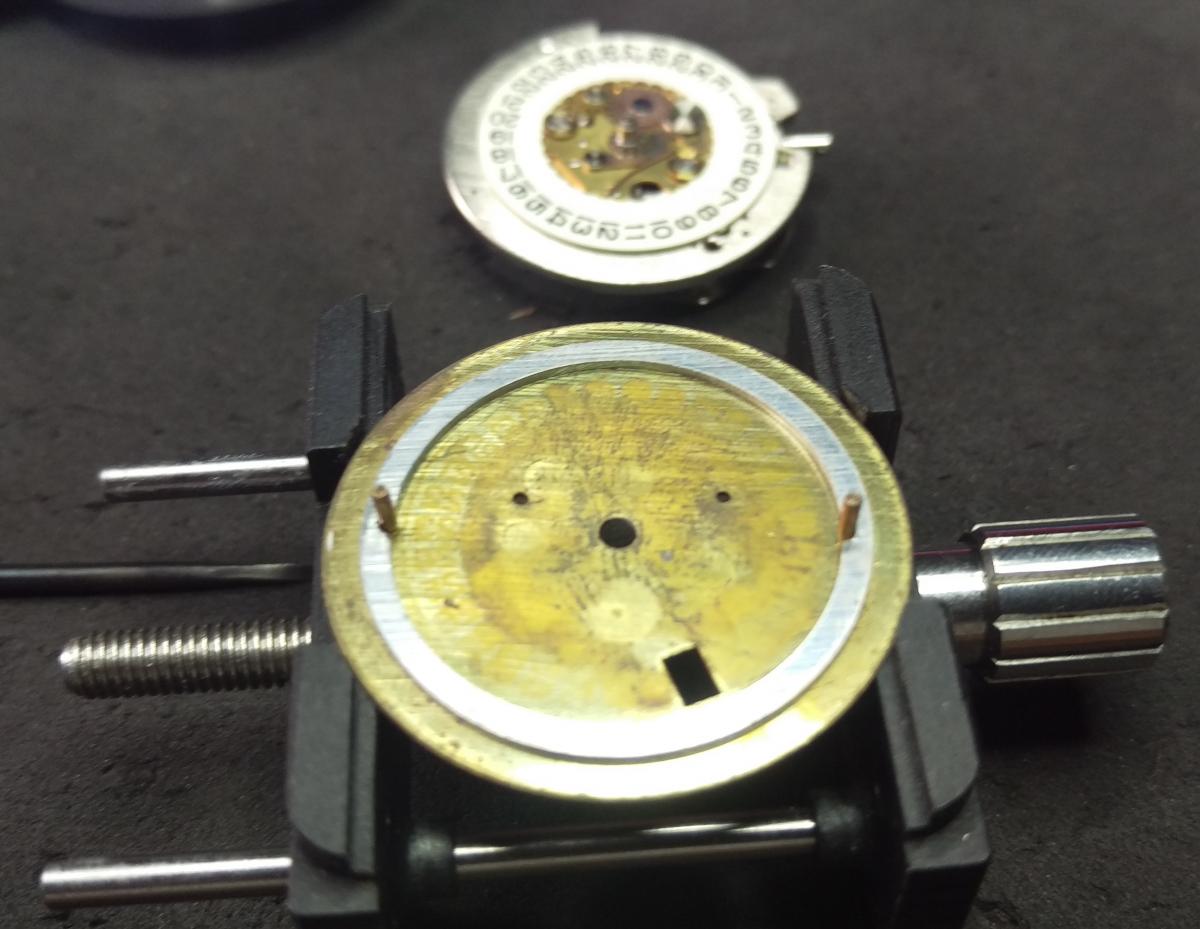
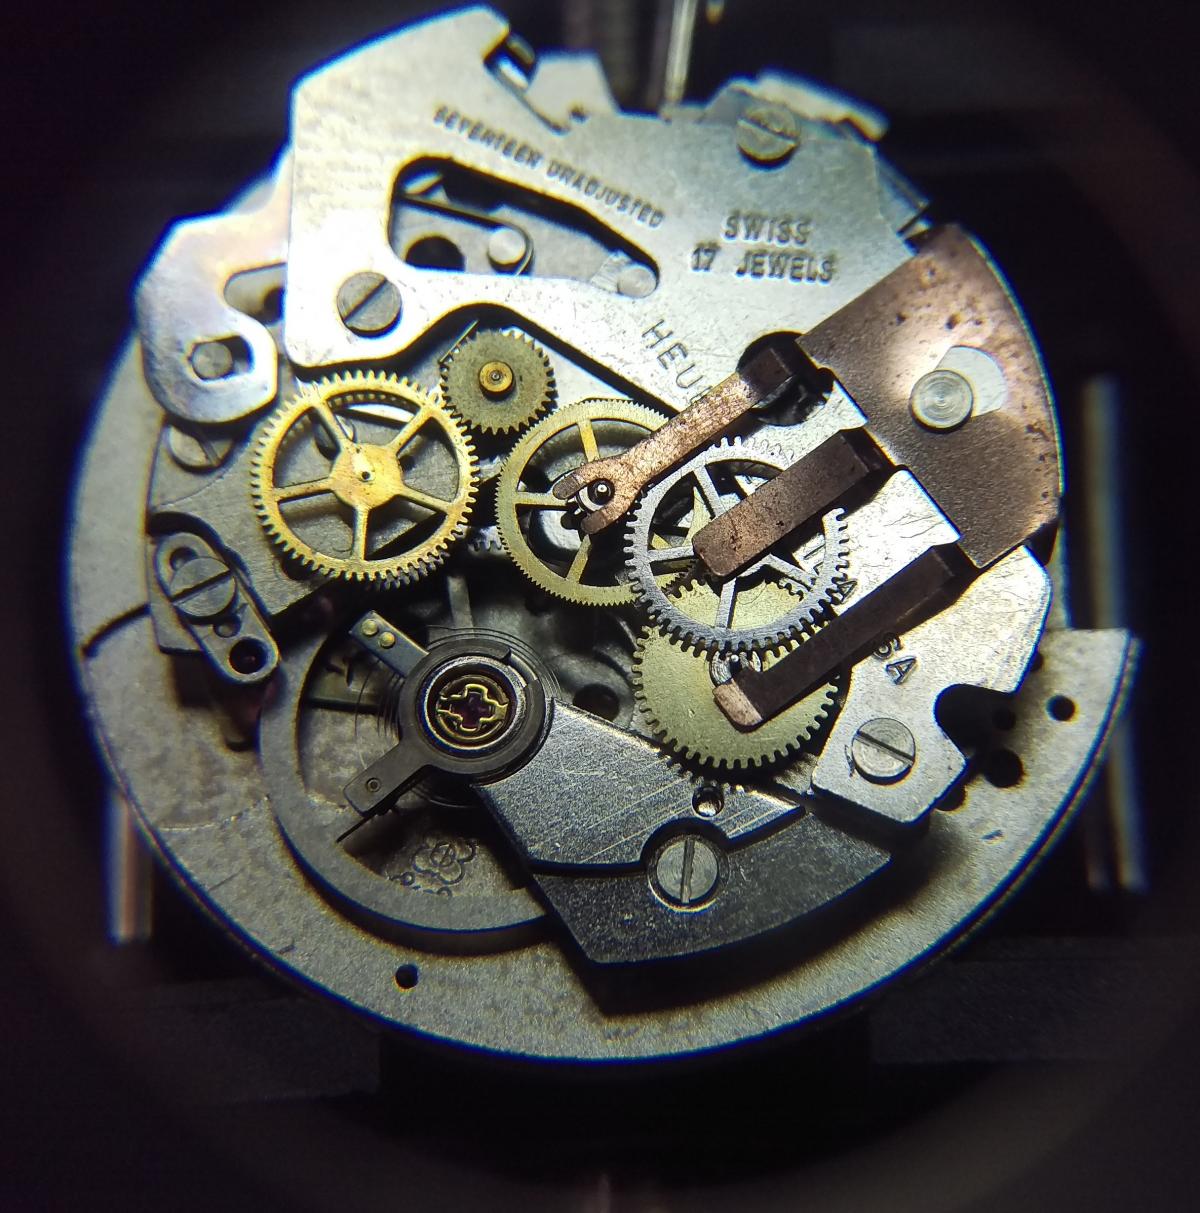
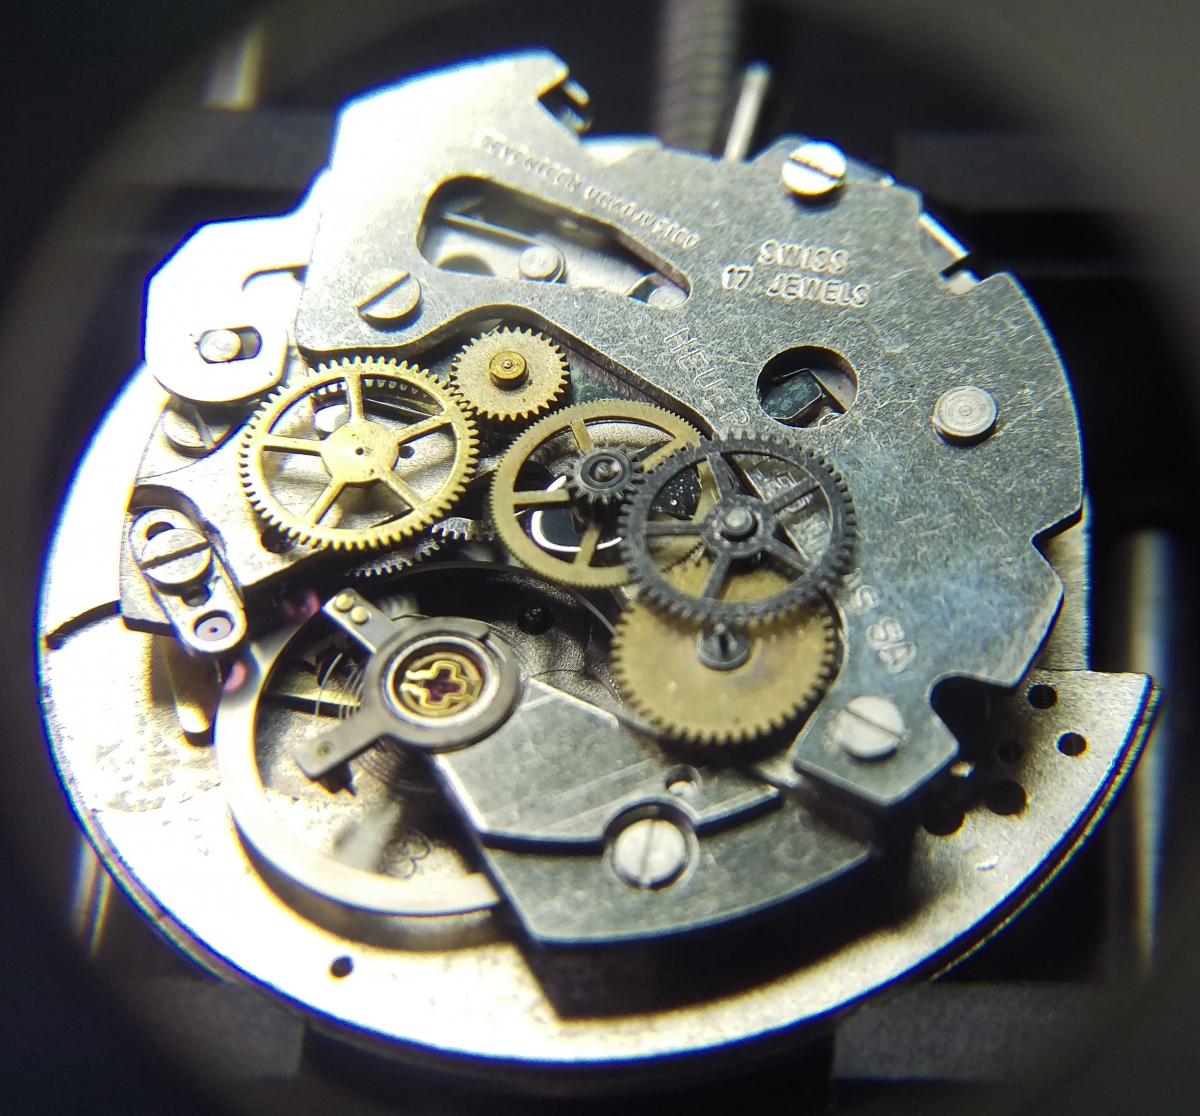
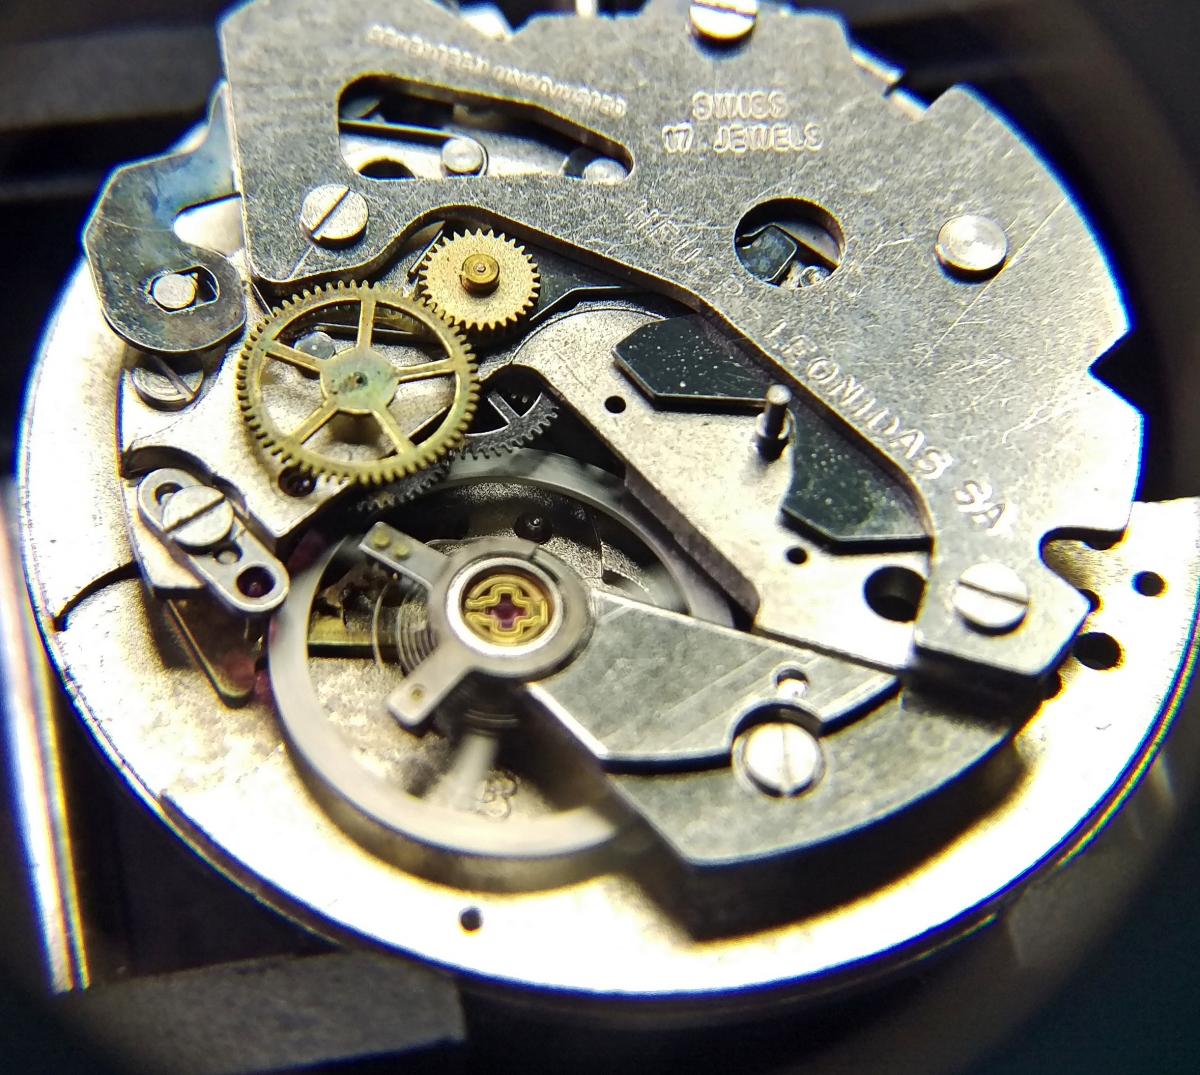
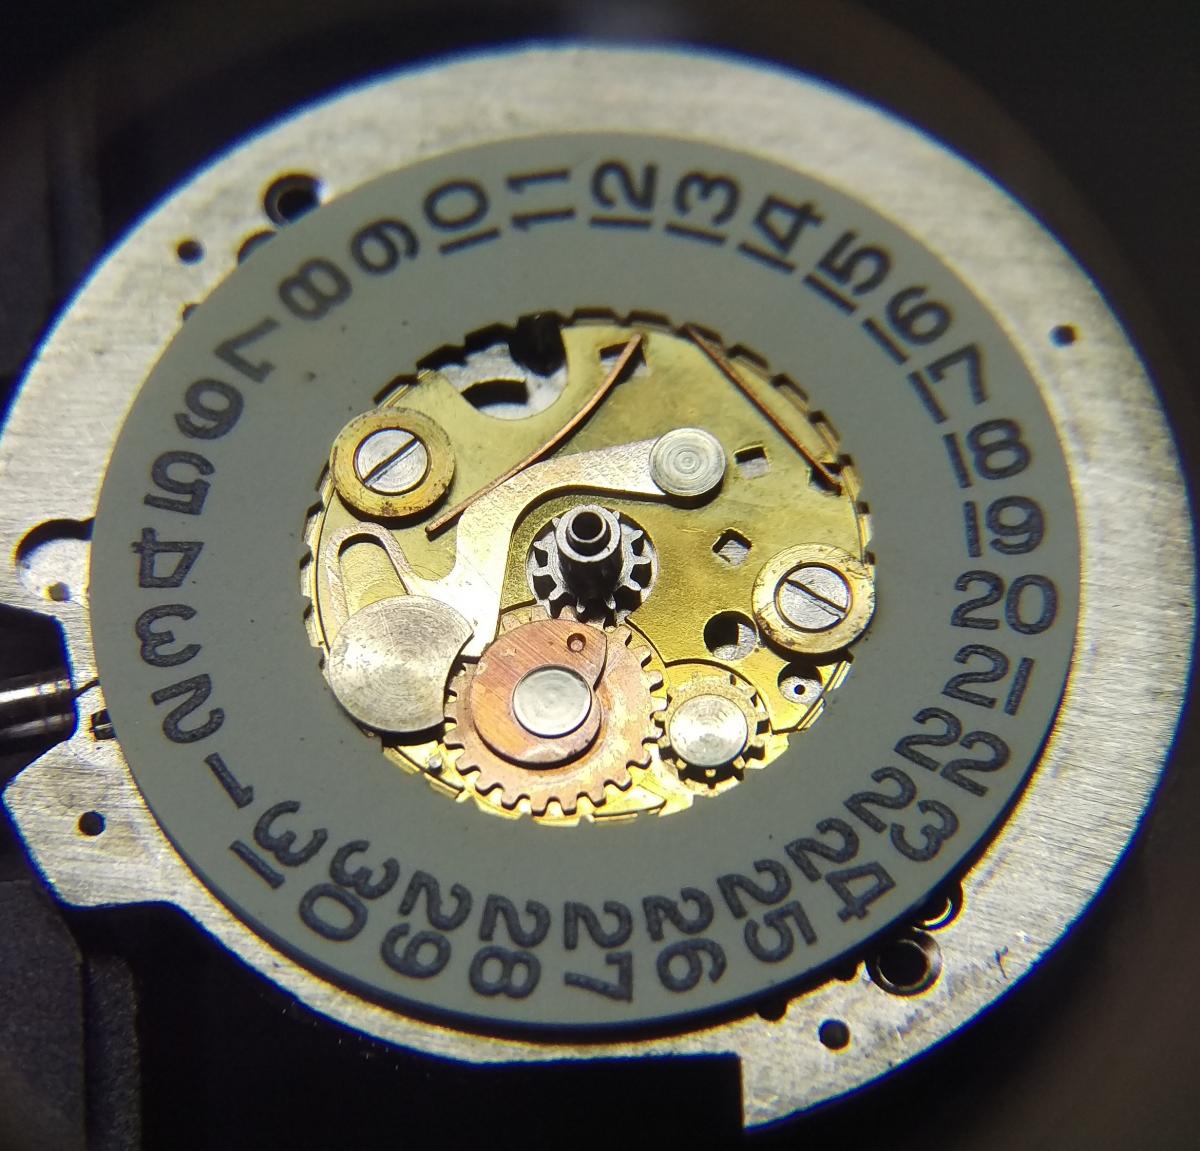
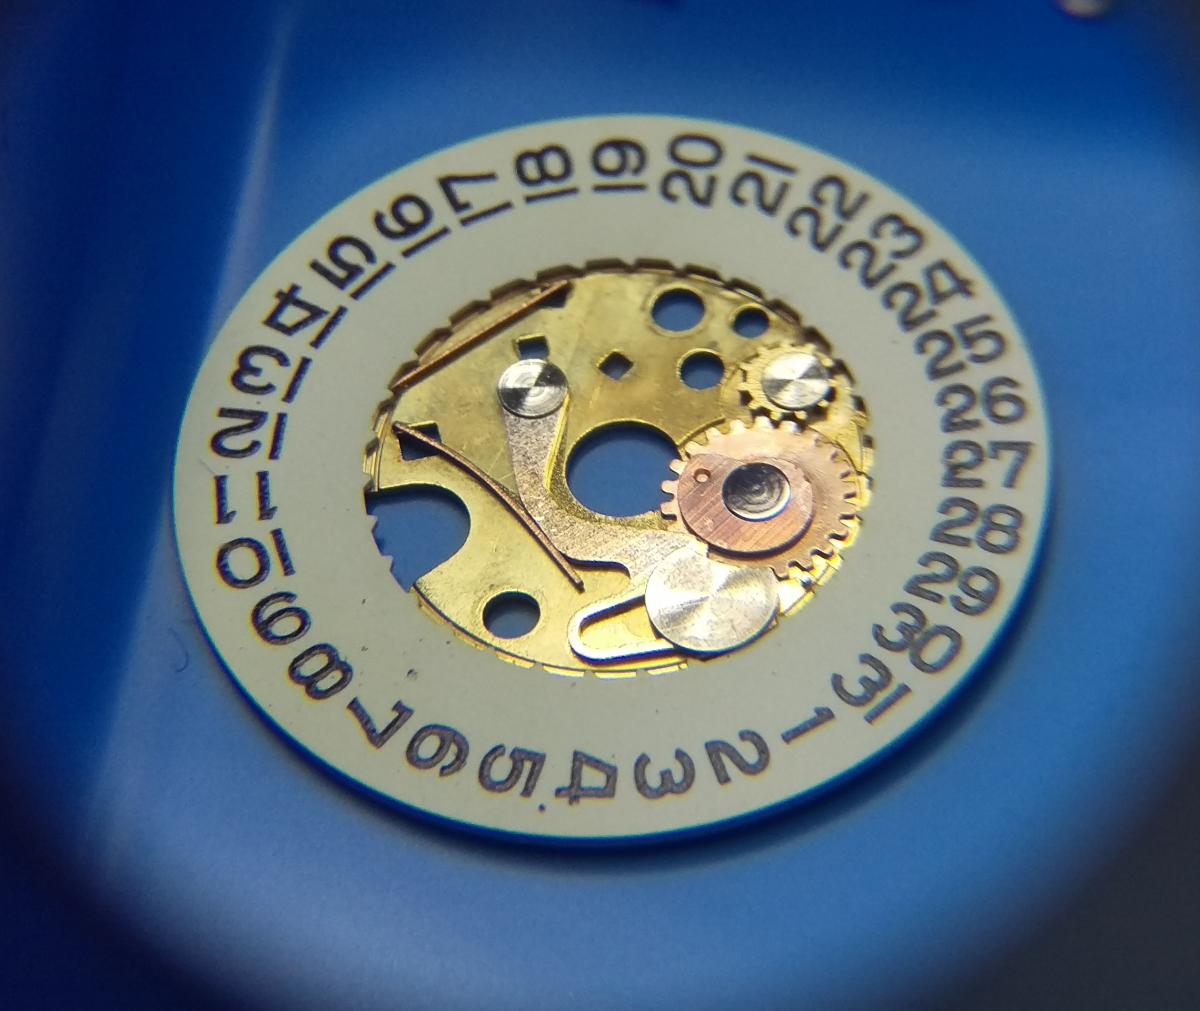
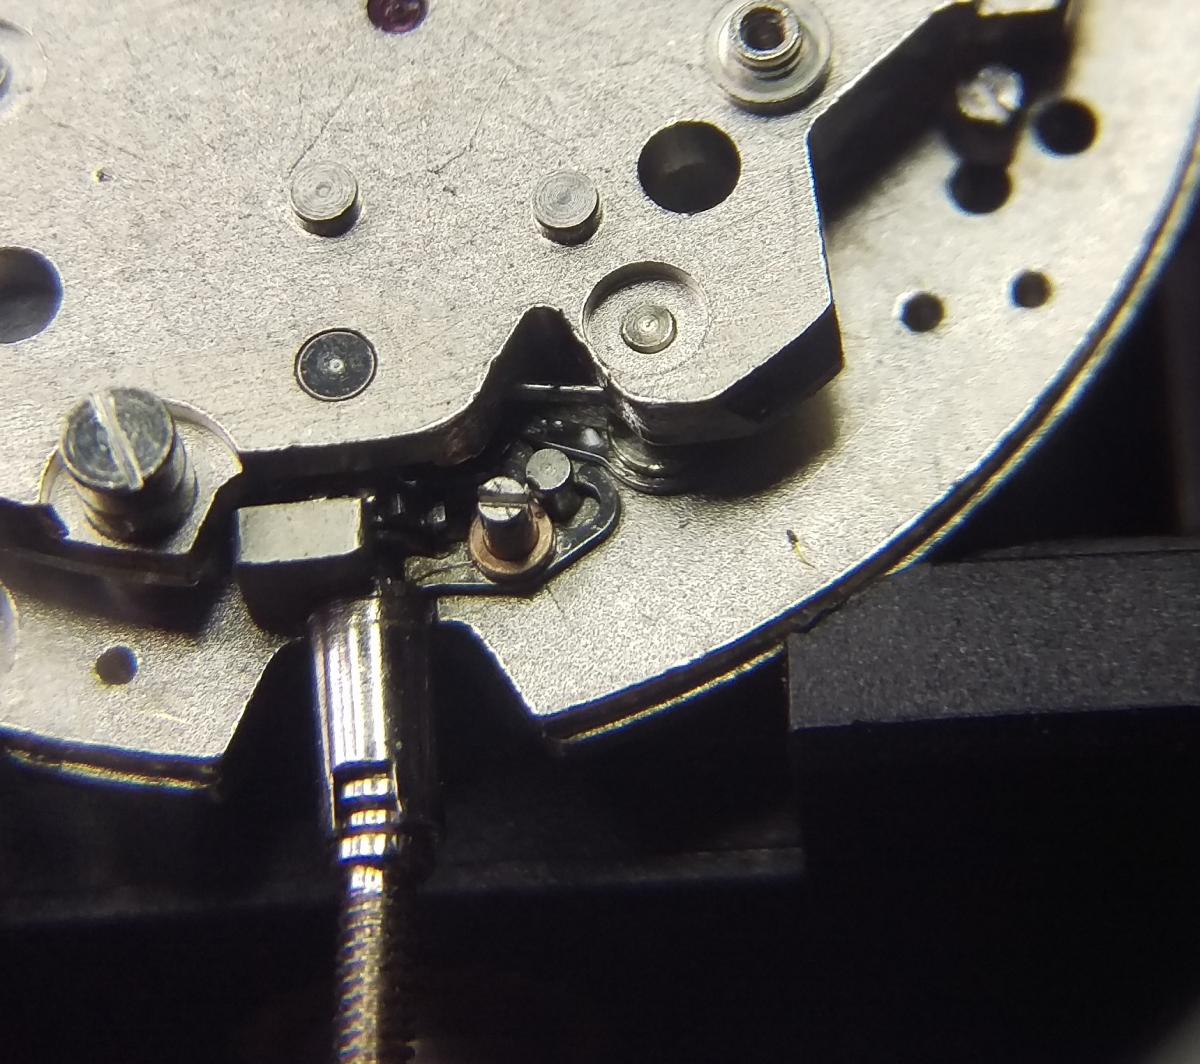
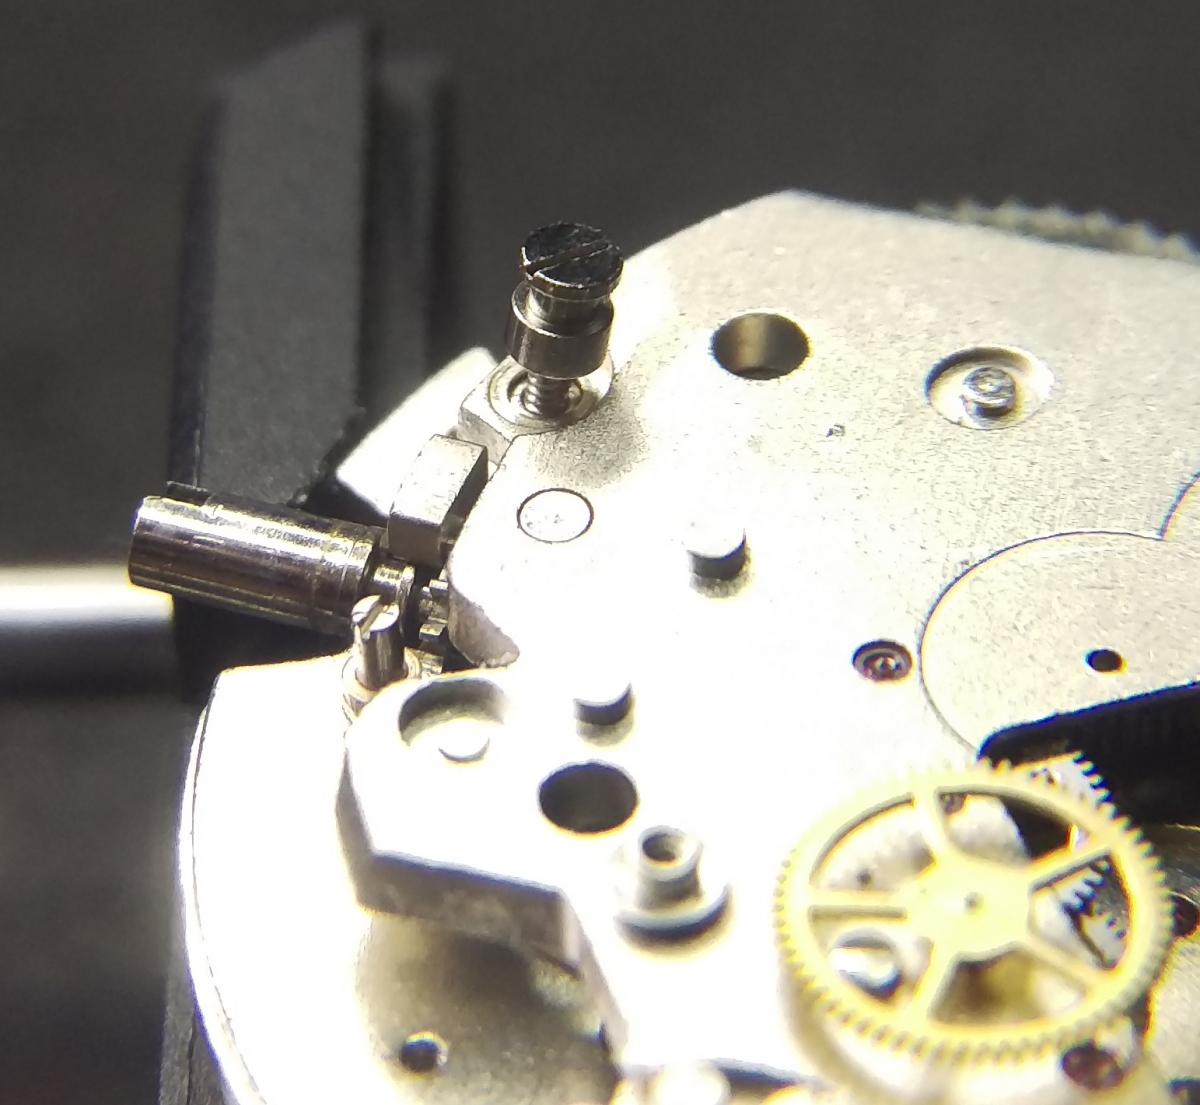
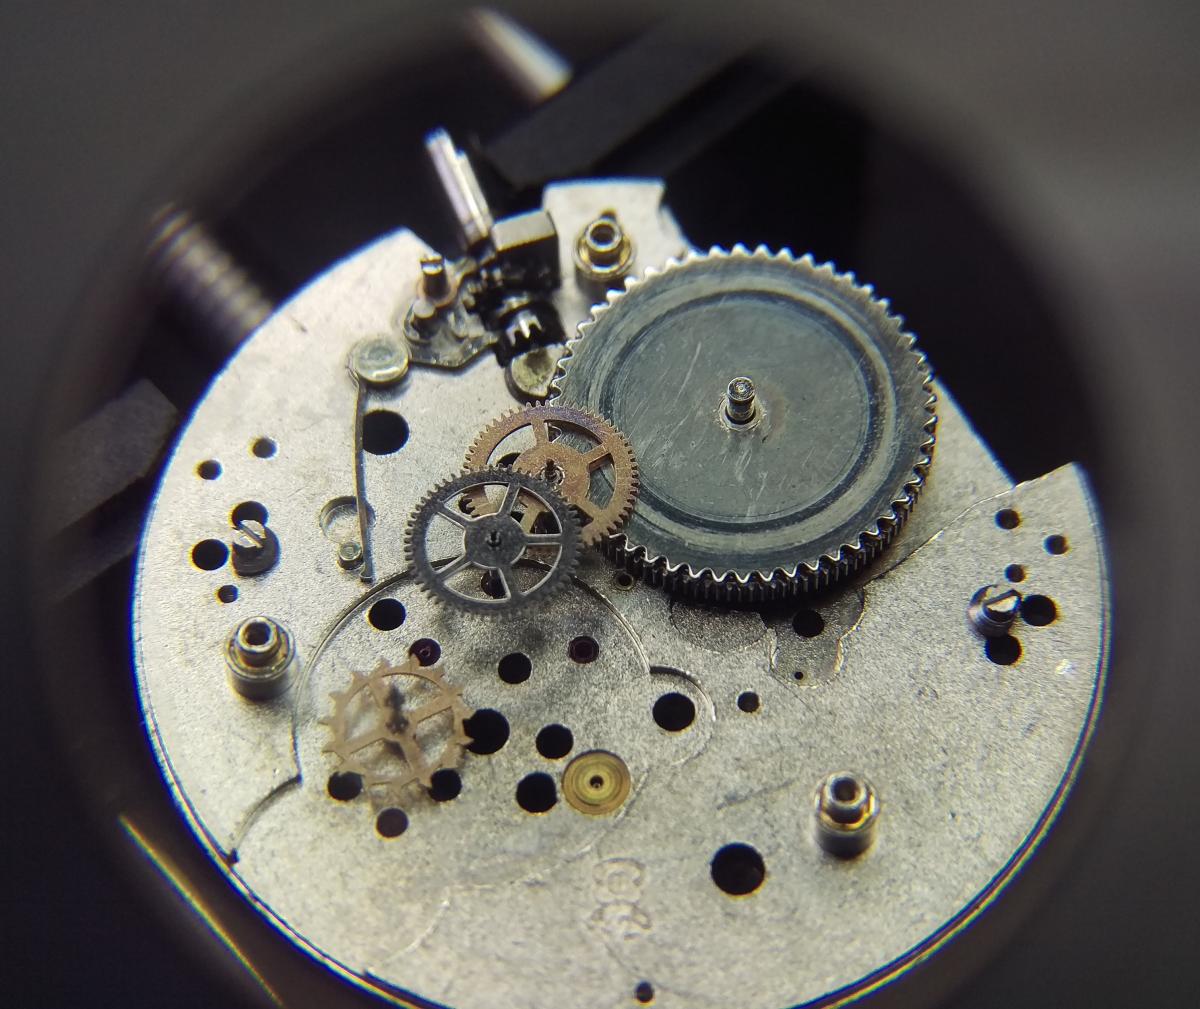
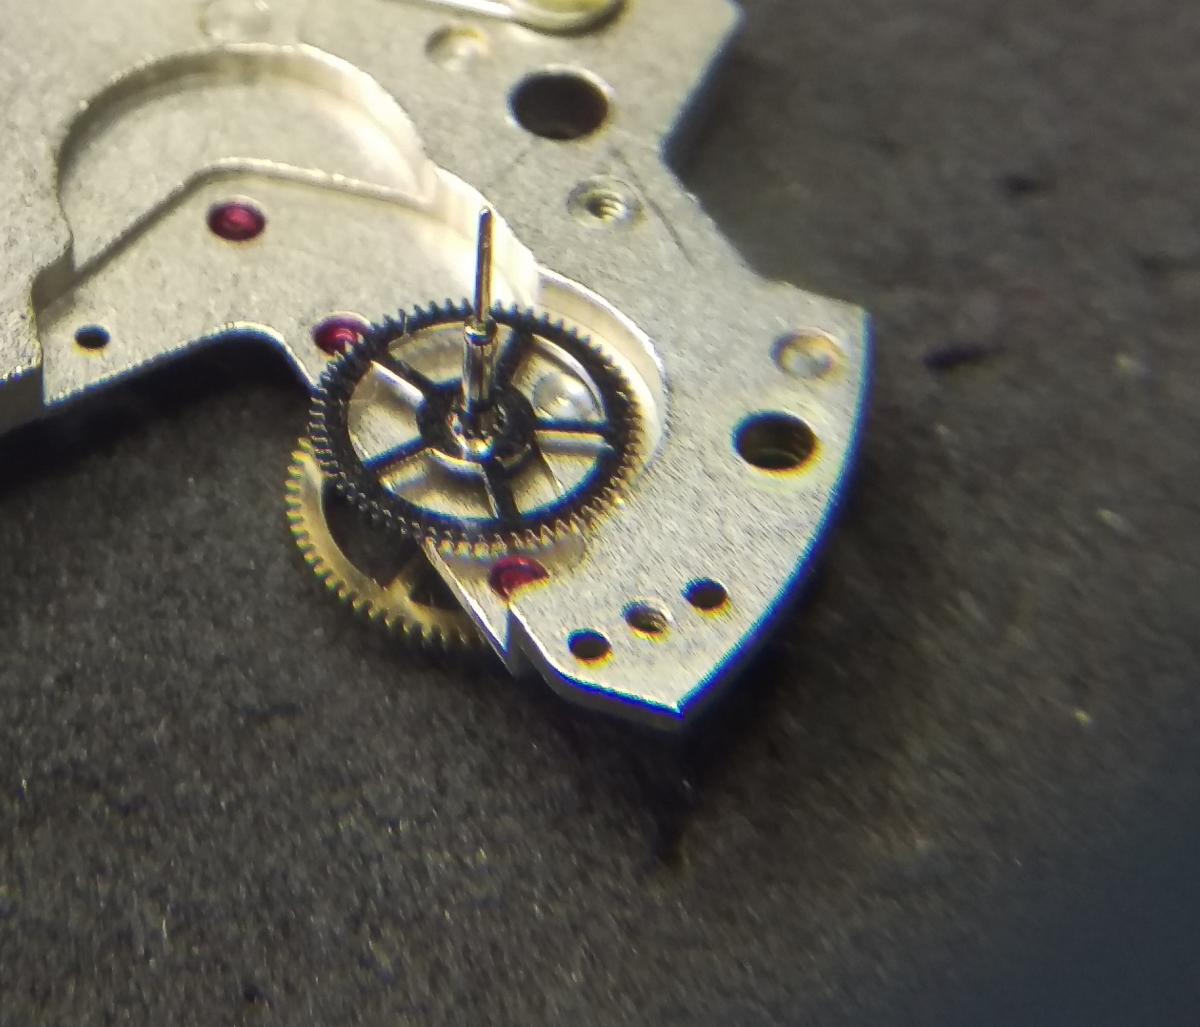
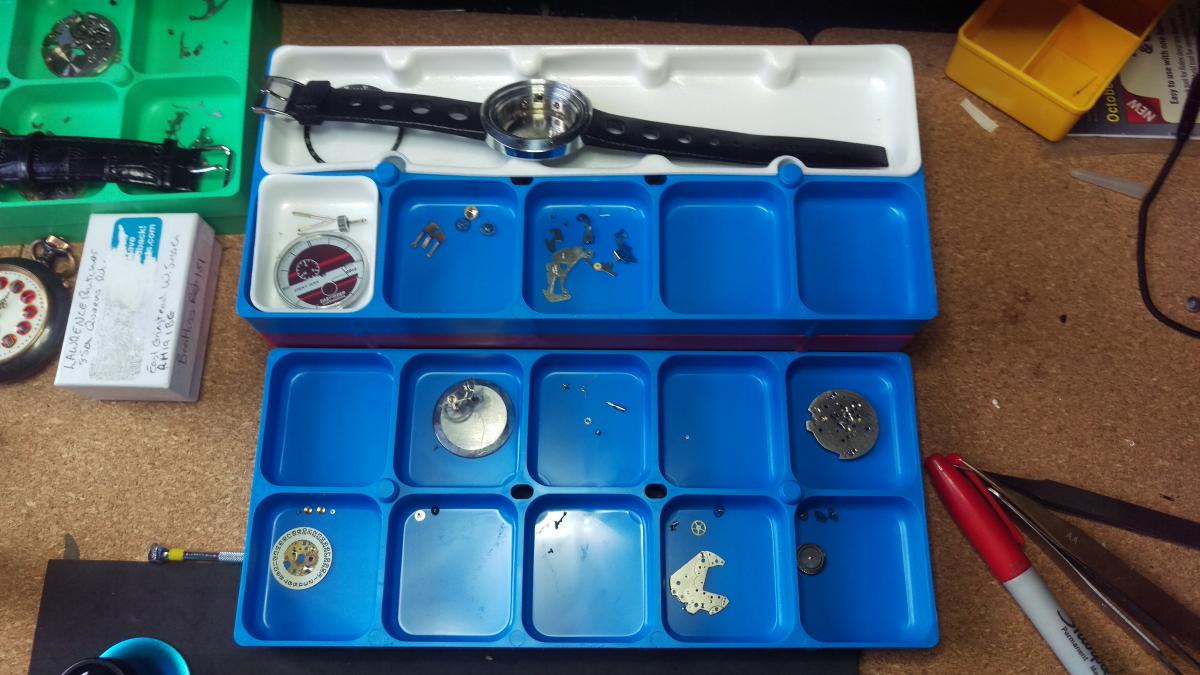
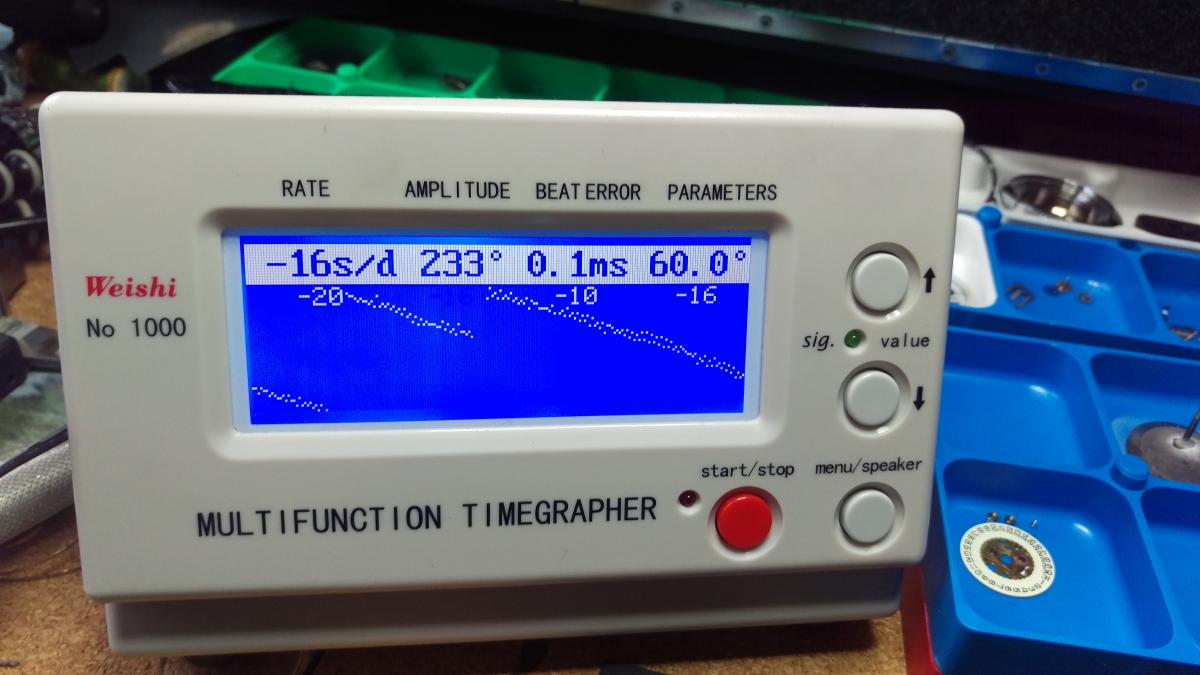
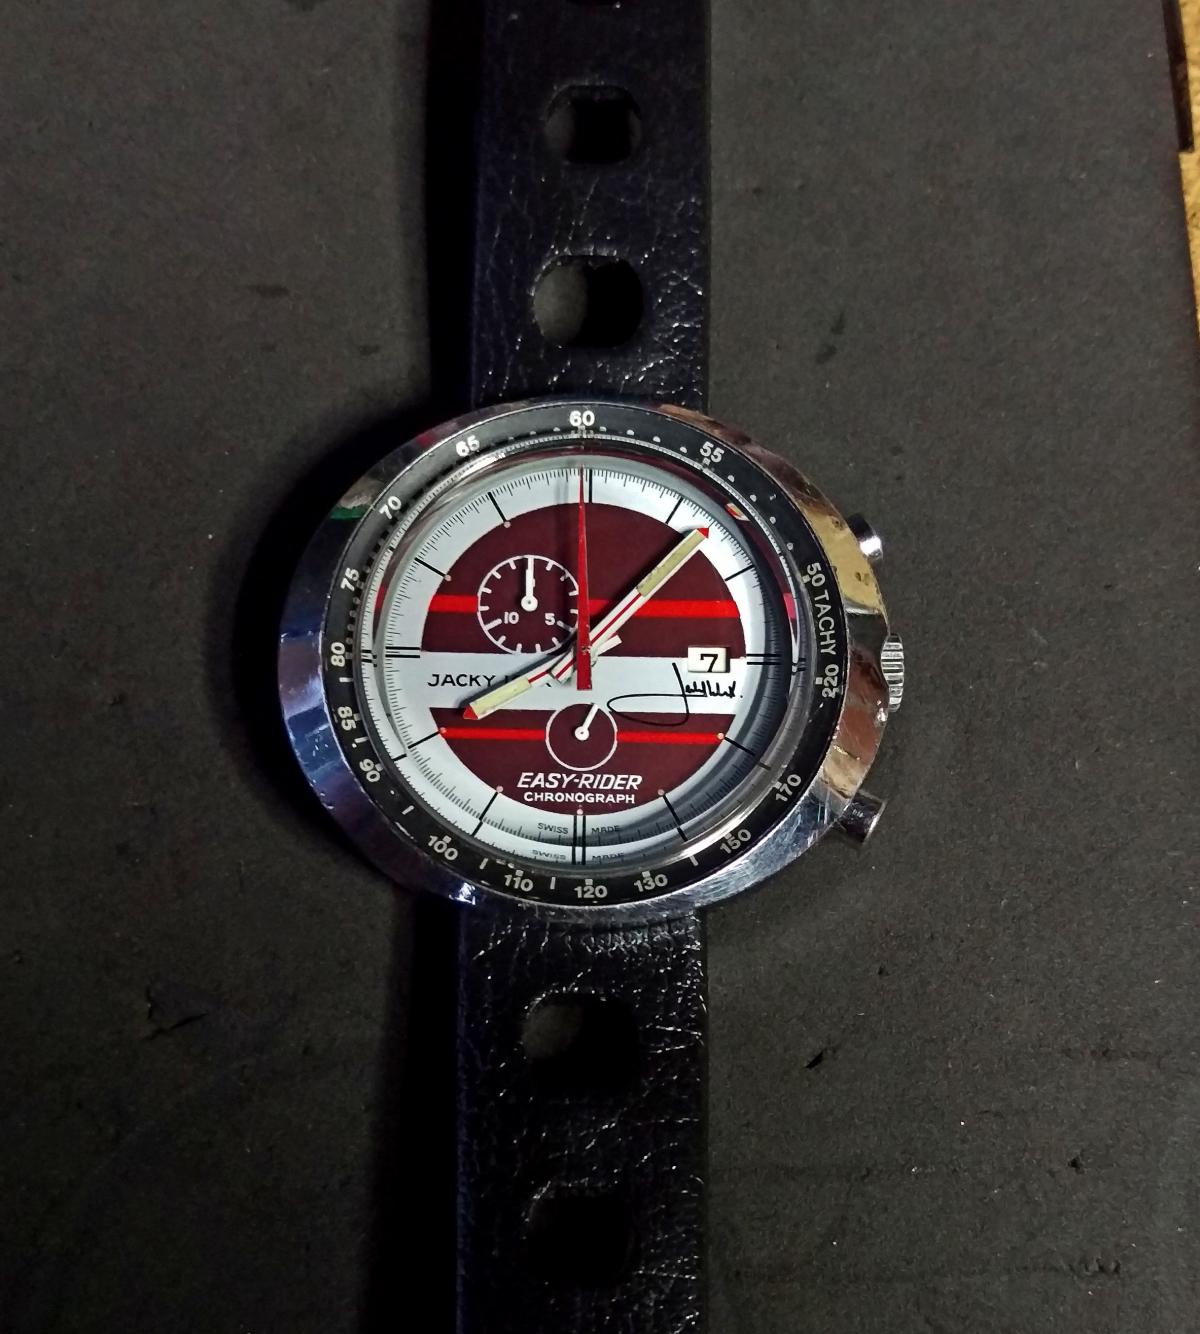
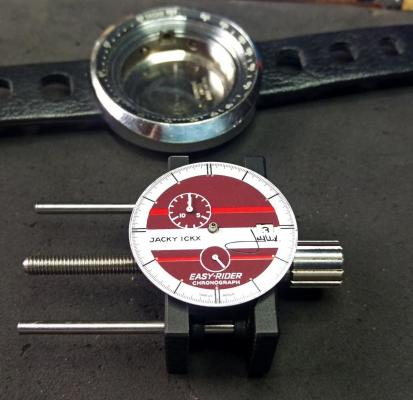
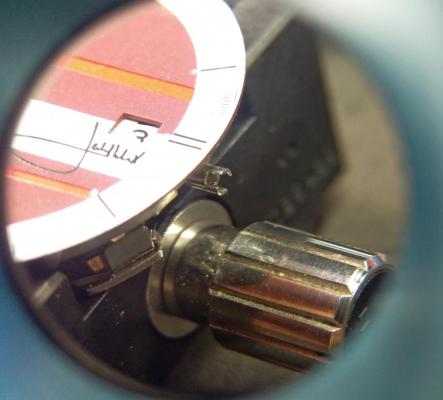
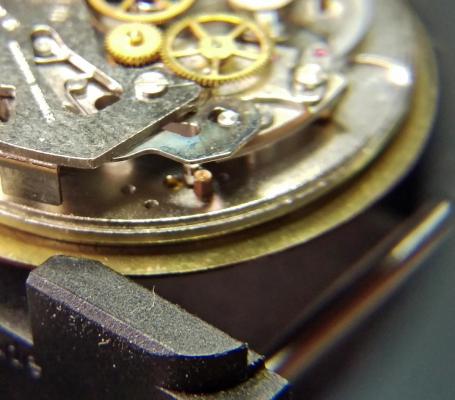
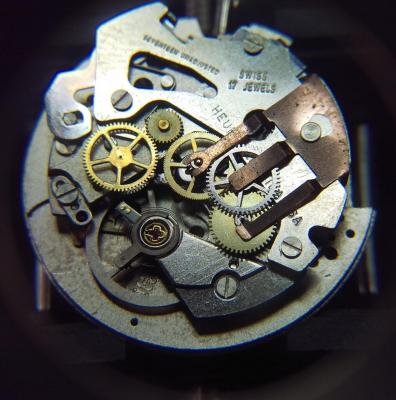
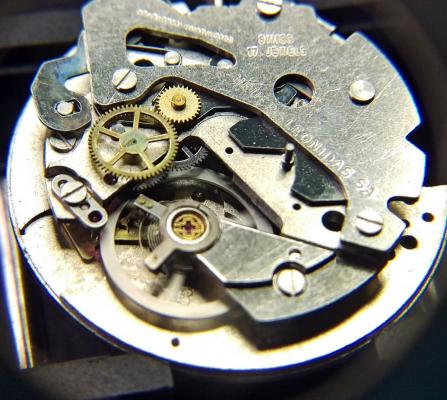
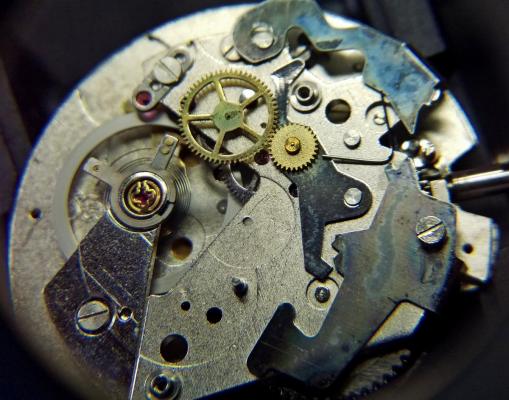
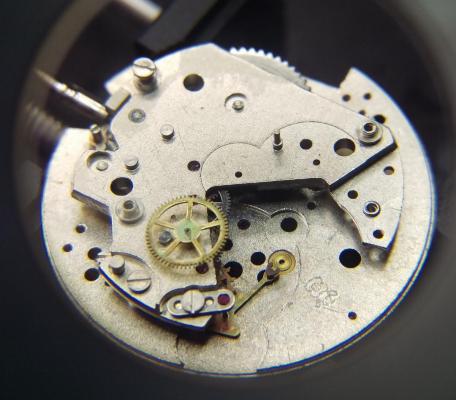
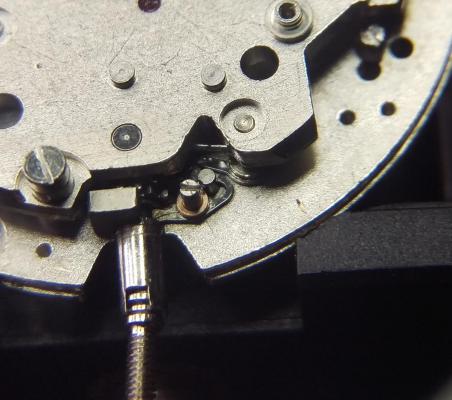
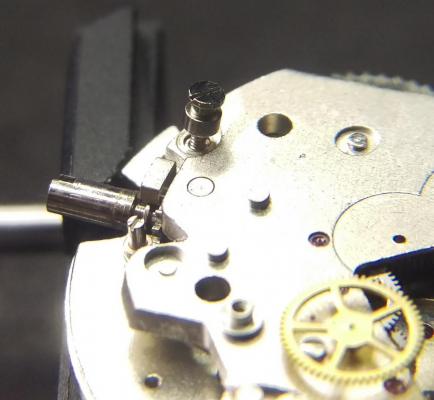
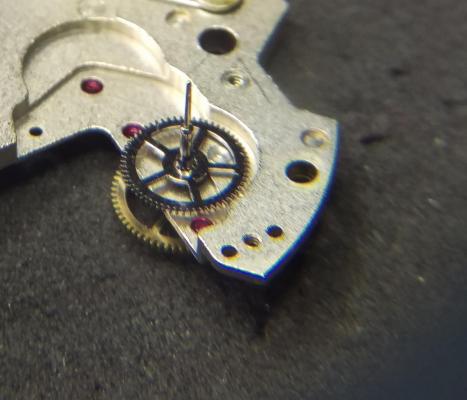
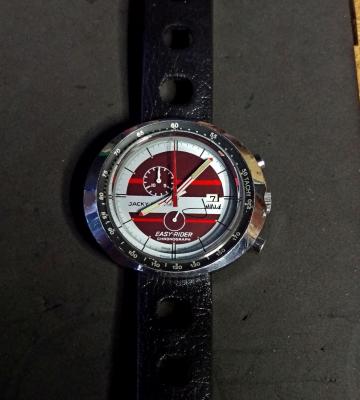
OK, so my first walkthrough here. More a picture reference for people, who like me, cannot remember for the life of me where things go. Not a particularly nice movement this, a pin pallet chrono, but one in need of a service none the less. Movement comes out through the front of the case. The split stem just needs a good tug to free it. A crystal lift would be needed to get the front of, but in this case it was poor fitting and just fell out. The split stem The dial screws, one is a little hidden under one of the chrono levers The dial comes off, with a little spacer ring Chrono wheels are held in place by this stamped spring plate. It simply slides backwards for removal. Note how the fingers locate on each staff. With plate removed, the wheels can be removed. With the top plate removed, the operating levers can be seen. The small V shaped spring top right is the only thing providing tension on any of the chrono levers. It pinged across the room while I was reassembling. Much swearing and searching ensued. Fortunately a found a subsitute that did the job. The date mechanism is modular, simply remove the two screws and it lifts out as one. I have to admit I only gave this a cursory clean rather than a full strip. With the balance out you can see the lovely pin pallet The click is just a small spring tucked away in here This plate screw is the location for one of the chrono levers so remember where it goes. The sub-second wheel needs to be removed from the drive wheel for the chrono The rest of the going train And finally the keyless works, which like the rest of the movement are pretty simple After cleaning, reassembly was pretty straight forward, though aligning all of the wheels under the one-piece plate was a bit tricky. (And the escapee incabloc spring, I have slotting them back in). One point to note is that, when re seating the chrono second hand, the spring plate needs to be braced agains something otherwise the pinion simply pushes out as you try to attach the hand. Once back together and oiled, time keeping was not too bacd. Not excellent, but then it is a 40 year old pin-pallet which was desinged to be disposable. I could not find a lift angle for the 8420, only the 8422, which I assume to be similar, which is a slightly unusual 60 degrees. The crappy crystal was replaced with a rather funky bevelled and armoured Seiko item, for reference Heuer Ickx's take a 33mm exactly crystal.


 1 point
 -
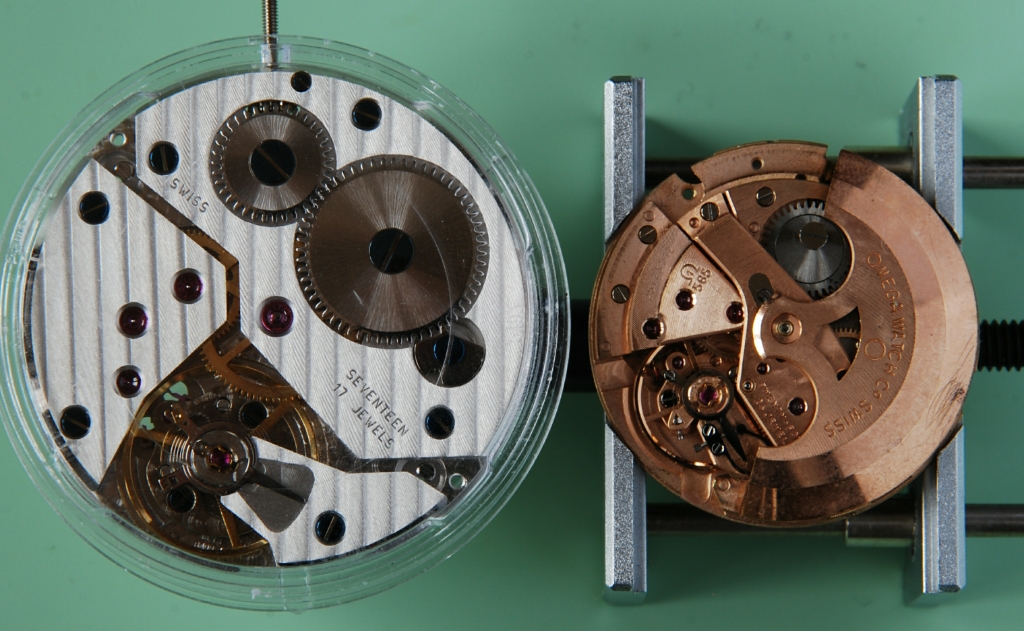
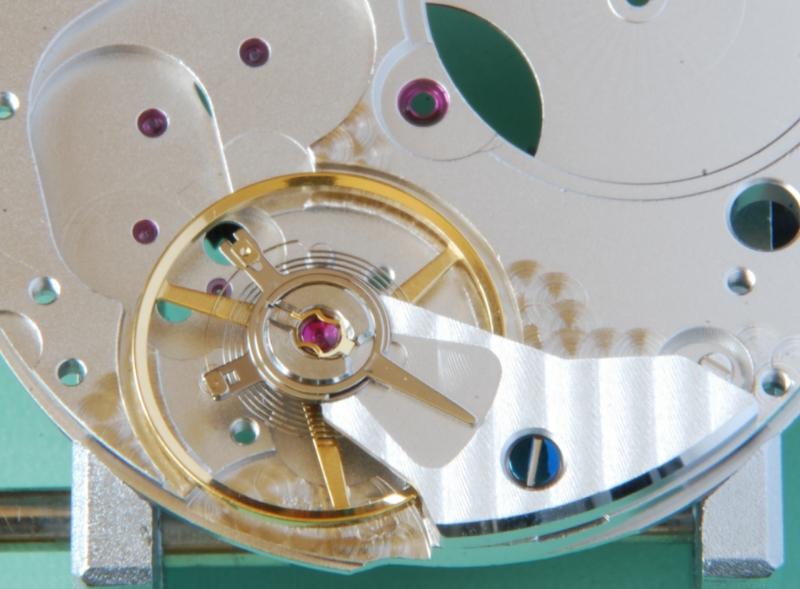
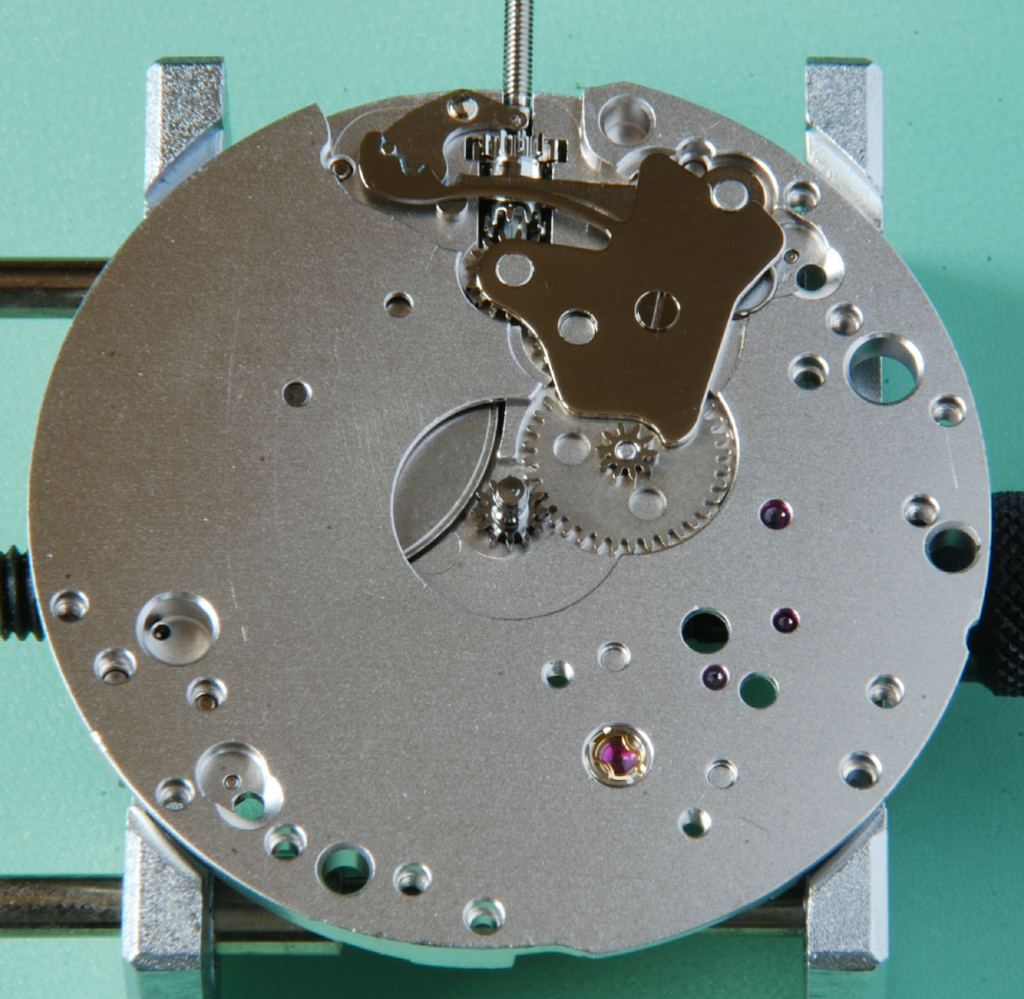
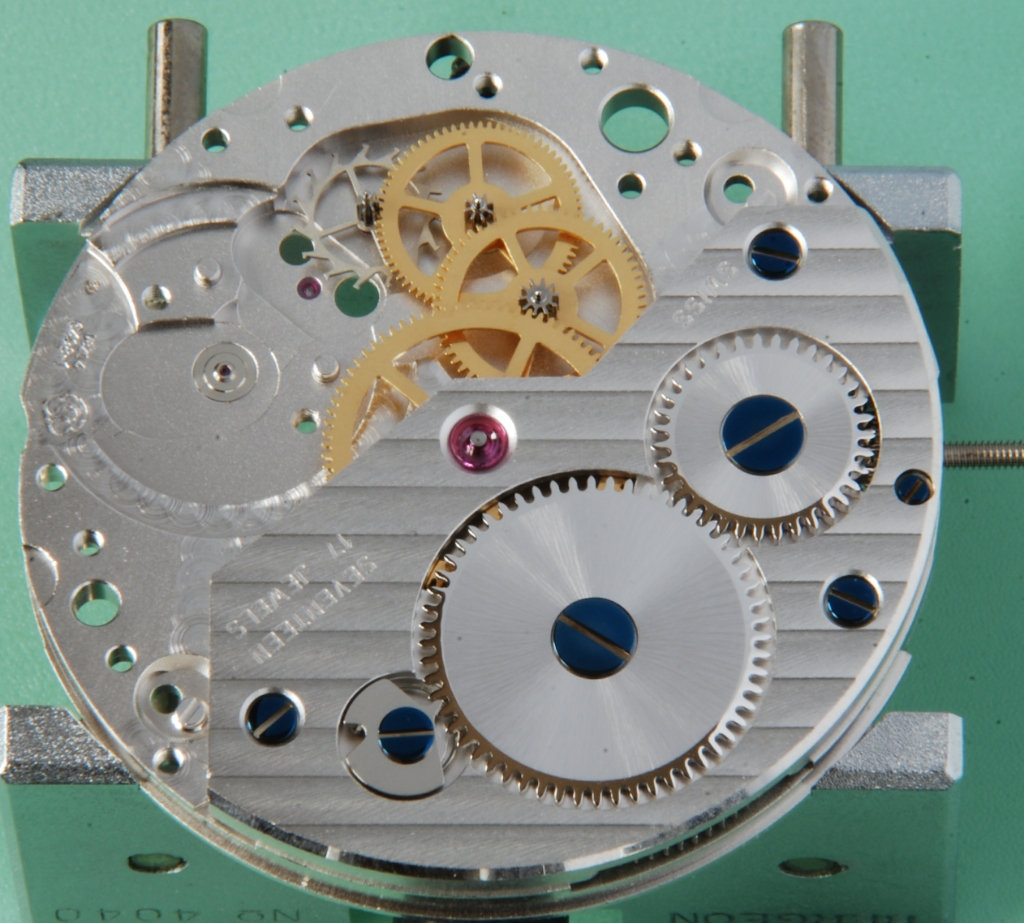
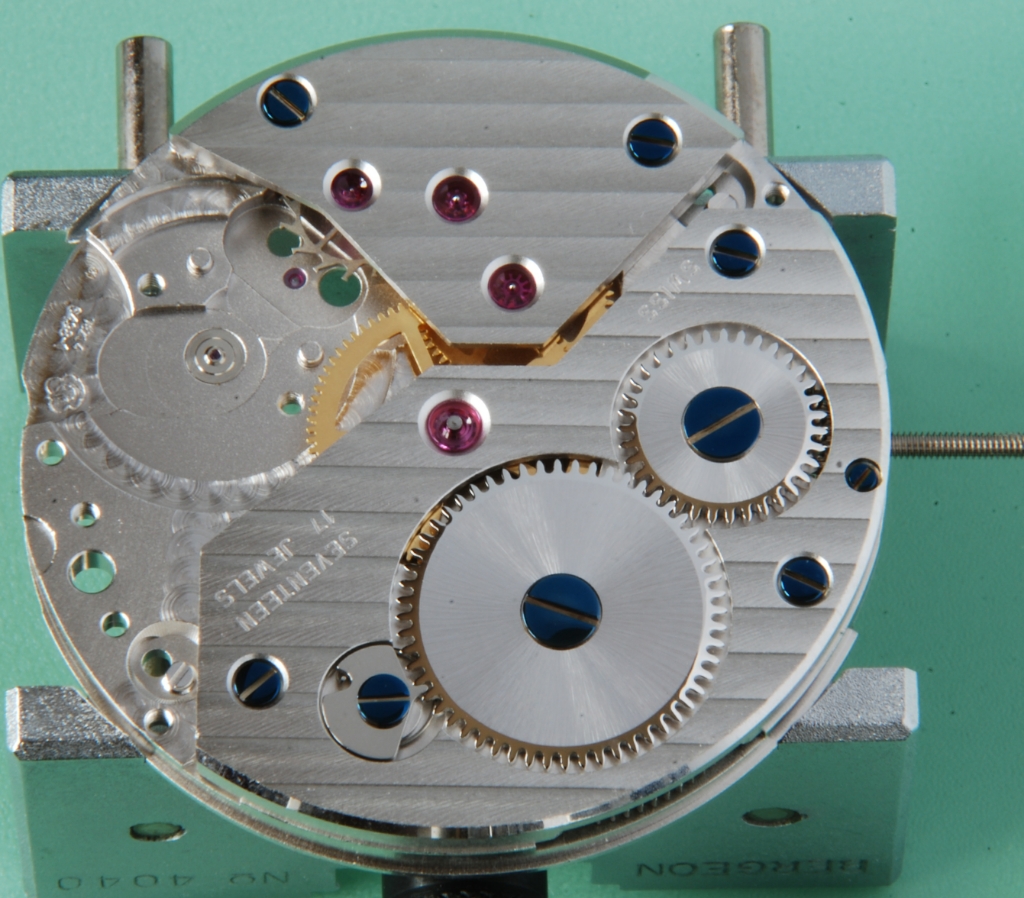
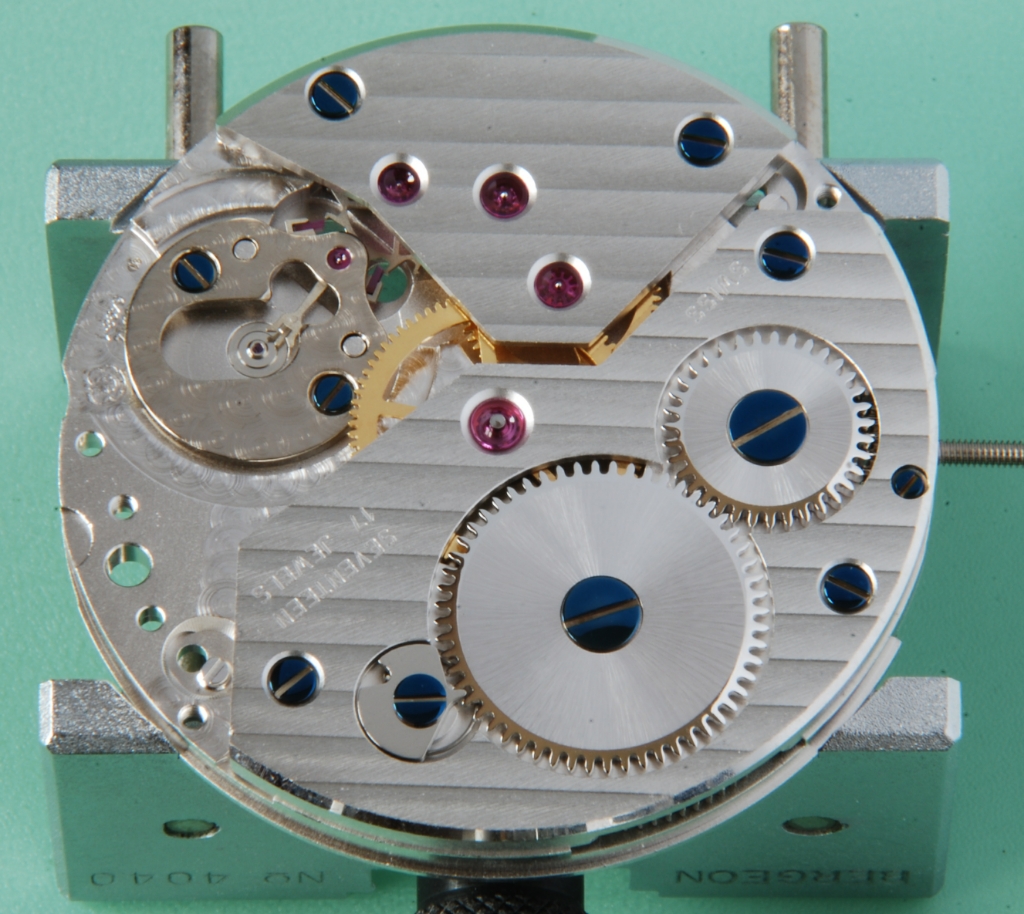
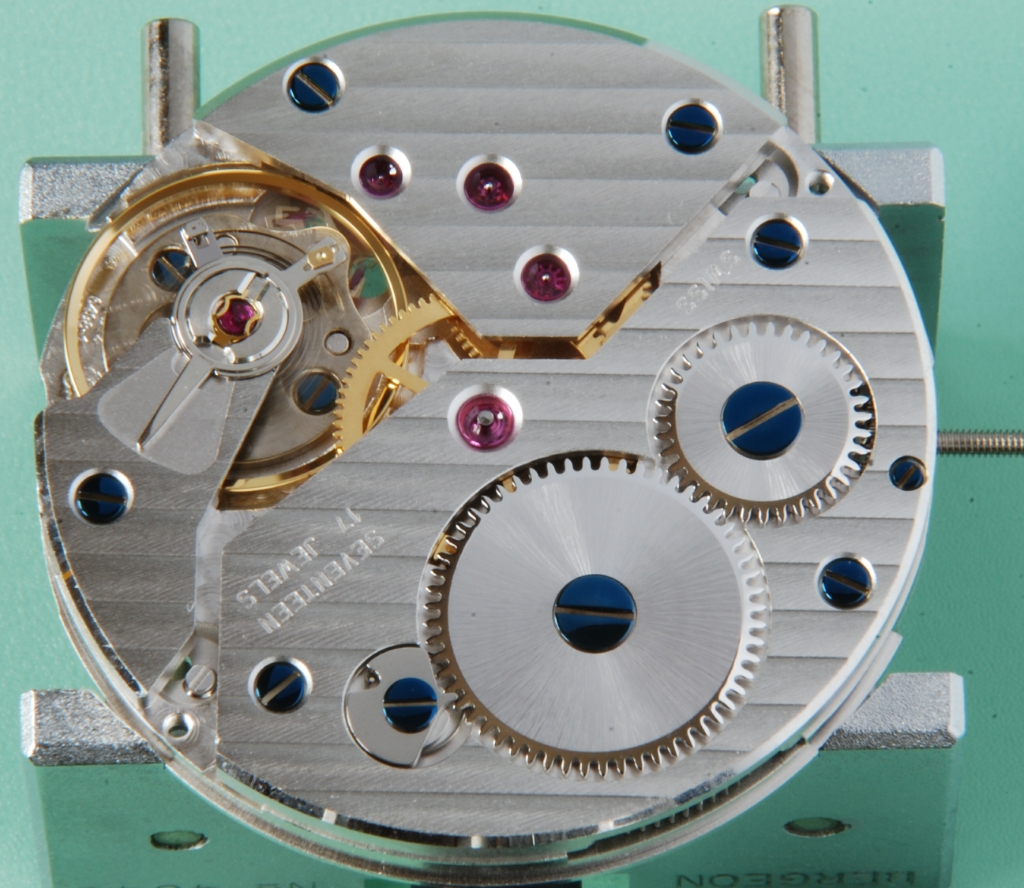
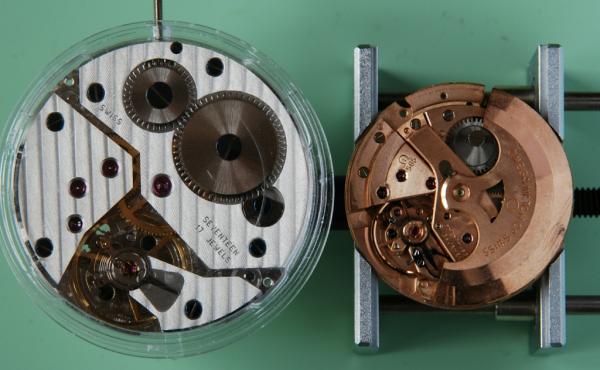
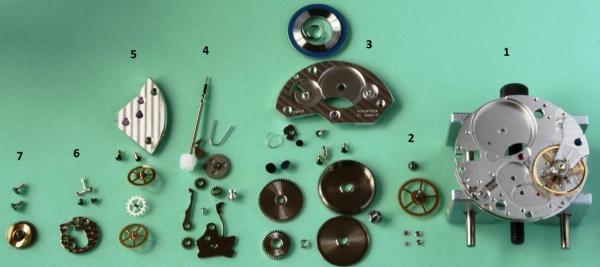
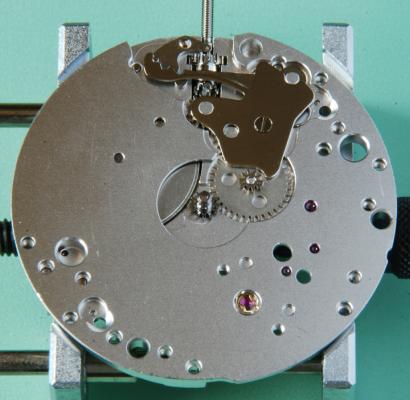
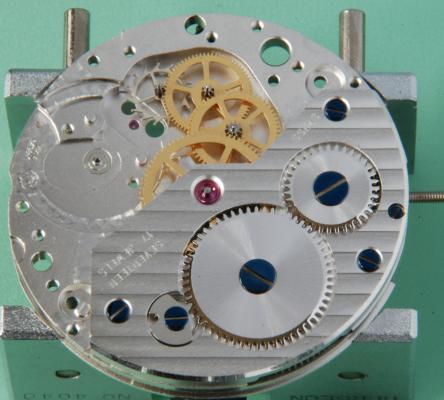
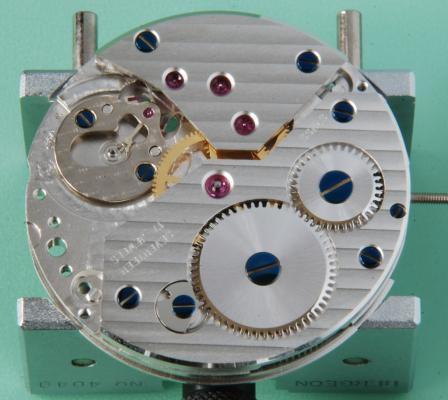
Hi I've just joined the forum so by way of an introduction and where I am in this hobby, I'm posting this build of a 6498. It's not a full walkthrough but this forum seems the best place for it. I usually work on older watches but have been meaning to have a go at one of these for some time and received a 20% discount offer from PayPal so I picked up an ETA6498-1, dial and hands on eBay. The case came from elsewhere. There are loads of people selling these as kits to build your own watch. This is just about the most basic movement you can buy, with no complications. There are two calibres in the family, the 6497 has the sub second counter opposite the crown so at 9 O’clock and the 6498 sub seconds is at 6 O’clock which I prefer but, the two calibres are very similar with many shared parts. Servicing one of these simple ETAs is probably not a bad way to start. I didn’t do that but, thought it might be nice to work with a new movement for a change and play with the Etachron system. To the best of my knowledge, these movements come in four grades: Standard; Elabore; Top and Chronometer. The lower two grades are easy to buy so that's what I have. The top two are not so readily available. It’s big at 36.6 mm diameter so, minimum case size must be 41-42 mm diameter as that’s a case wall of 2 mm only. People use these in cases much bigger than that but, I chose a 42 mm case as my wrist is only 6.75”. Here’s the spec for my grade and a bare movement picture (in its plastic case) next to a very dirty Omega 565 spares movement which is 28 mm diameter. Manual wind, 46 hour reserve 17 jewel and Incabloc shock protection with Etachron system. 18000 A/h (2.5 Hz) frequency It’s possible to buy these in a foil sealed pack (I think packed with an inert gas) and use straight from that pack but most, like mine, are sold ‘loose packed’ so should be serviced before use. I will do that and also see if I can improve a little on the way it runs straight out of the box. ETA publish a set of service instructions for this calibre with types of oils and an assembly sequence and the pdf is readily available. I more or less follow that assembly sequence. For the performance, to set a datum, I wound the movement, let it run for a day and then tested the 24H and 0H conditions. The CH, 6H and 9H are the only specified test positions for this calibre but, I tested over all six positions. Results as follows: Amplitude: max 290 degrees at 0H and min of 220 degrees at 24H. Six position delta: at both 0H and 24H of 18 seconds. Beat error under 0.4 milliseconds. These are pretty good and almost chronometer spec so I will try and get within that, being delta of 12 seconds at 0H and 15 seconds at 24H. On the older Omega movements such as the 5xx series, some are chronometer rated (e.g. 561) and some are not (e.g. 565). I remember looking at the parts commonality between these some time ago and I’m pretty sure that there were no differences in the critical parts so, those usually will come close to that spec. On this 6498, the balance and balance spring seem to be the major differences to guarantee chronometer spec for the better movements. Well, I have the cheaper one so, we’ll see. First is to line up all the big screwdrivers as these started as pocket watch calibres so, all the screws are big for me. Stripped and cleaned, the parts are these and this shows this is a simple movement. The parts are in seven groups working from the right. This is not a blow by blow account but I took some pictures to show how it goes together. These are all the pieces. 1. Plate with balance still mounted. 2. Incablocs and second wheel/cannon pinion. 3. Mainspring, barrel, ratchet wheel, crown wheel, click and barrel bridge. 4. Keyless works. 5. Train wheels and bridge. 6. Pallet fork and bridge. 7. Case clamp screws and hour wheel. First to go on are the Incablocs. I don’t know what reflection is being picked up on the machined parts of the plate but there is no discolouration at all in reality. For those in the know, I have the curb pins wide open as I am adjusting concentricity and centering of the hairspring between them. Really, for me to improve this movement performance, I can adjust the wheel shakes and try for the best configuration of the hairspring so, I spent a little time here. No poising of the balance at this time. Nice to have an adjustable stud carrier to set the beat error. This Etachron system is quite clever and it’s pretty new for me. It certainly reduces the amount of hairspring work which is not my favourite. I know it's not universally liked but it seems pretty neat to me. I end up with a very slight turn on the stud holder after some playing and am happy so, close up the curb pins again for final tweaking when it’s on the timing machine. Second wheel and cannon pinion fitted. Mainspring mounted in barrel and the complete barrel and barrel bridge mounted with its three screws, not forgetting to fit the setting lever screw first (!) which must go in before the bridge. Ratchet wheel, click and crown wheel fitted. It’s quite an attractive finish and the blued screws are a nice contrast. Turning over and the keyless works are fitted. I was a little generous with the grease here. This side of the plate is not so well finished but will be hidden under the dial so not so critical. Nice that there are holes in the minute wheel to allow the train oiling later. Here the rest of the train is shown, third, fourth and escape wheels. And now the train bridge mounted with its two screws. A little bit of wheel shake checking here but, it’s very good. Then the fork and bridge are fitted. That bridge is not the most attractive but it’s usually obscured by the balance. Checked the fork locking and so on here and no adjustment needed. Finally, the balance goes back in and the movement lives again. I let it run for 15 minutes and then removed the balance to oil the pallet jewels with 9415 (out of interest, I'm only using Fixodrop on the escape wheel and pallet jewels). This is an easy job on such a big movement but trickier for me on a very small ladies calibre. I have an Omega 684 in my wife's watch which is about 2/3 of the 565 size. After running for 24 hours again, I made some tweaks to the curb pins to equalize the horizontal and vertical running a bit better. Now, the six position delta is 10 seconds at both 0H and 24H so, I’m very happy with that. This really is a terrific movement for the money in my opinion. Bit more to follow later with (huge) case, dial etc. Hope some of this is of interest. Cheers, Chris


 1 point
 -
So all together. Had a problem that the balance kept stopping. I checked the pallet cock and it "flicked" nicely so I guess at the top jewel on the balance. Sure enough after an oil good to go. Small problem in that were losing around 30 seconds an hour. So need to have a go at that next. No timergraph so have to be trial and error :) James. Added the new bracelet which I think looks good and for the grand total of about 2.50 from cousins :) Sent from my HTC One using Tapatalk1 point
-
Hi George, I have an old set of baskets which came with my elma & I replaced with the blue set from cousins. They are just taking up room in a drawer. I'm currently in Turkey on holiday, but on my return I'll post some pics & your welcome to them for the cost of postage if they are any good to you. Sent from my GT-I9505 using Tapatalk1 point
-
What a super presentation, both script and photographs. This will be of great interest and help to many members and visitors to the forum. I'm looking forward to the next instalment already Chris. :)1 point
-
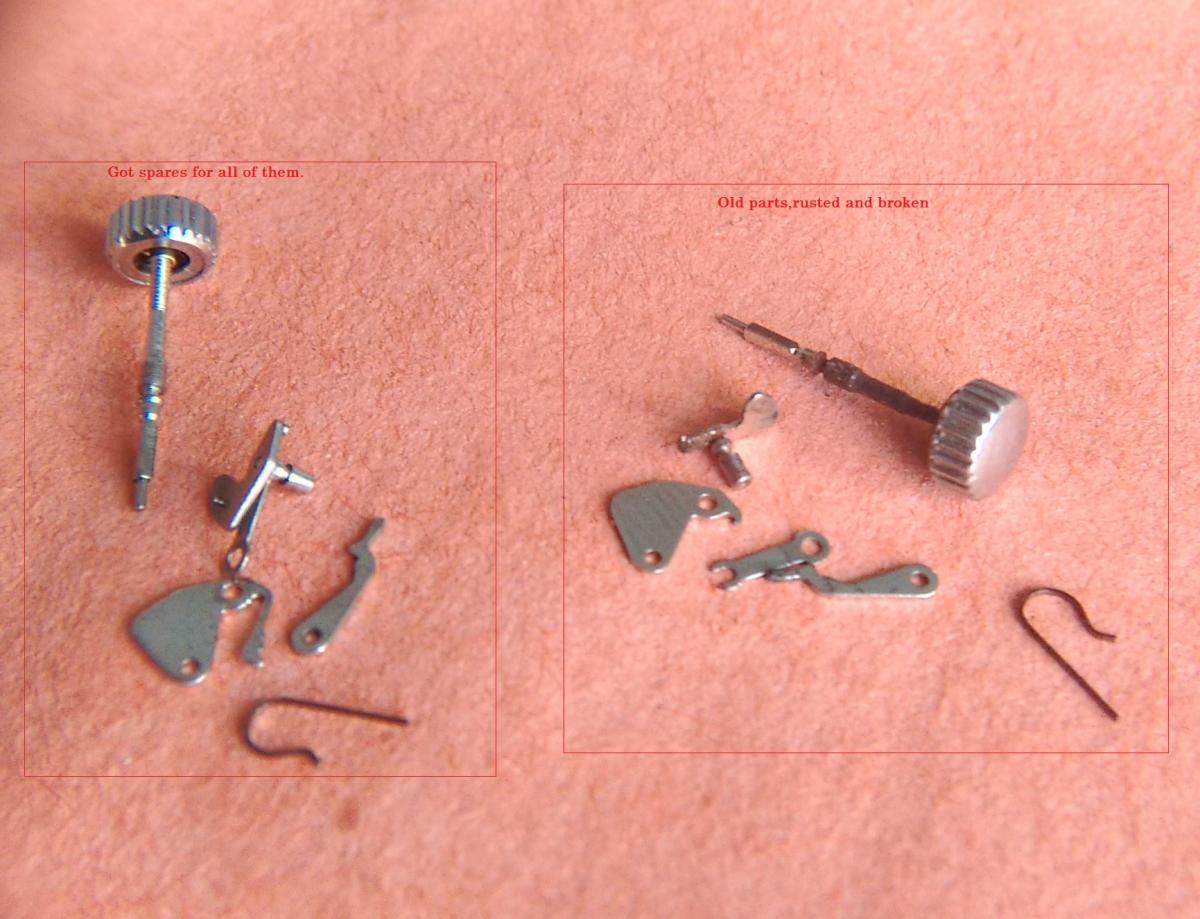
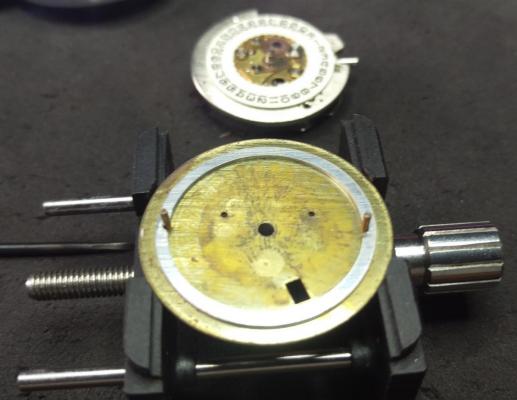
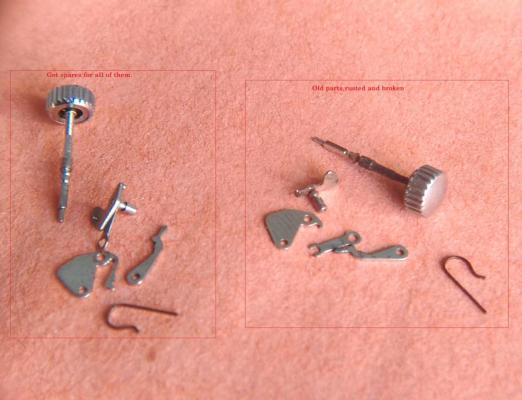
After many weeks i have got little time to spend to fix. Dial side full of rust and few parts are jammed Got spares for all of them.. Only job remains is, assemble back. :)
 1 point