Leaderboard


Popular Content
Showing content with the highest reputation on 04/06/15 in all areas
-
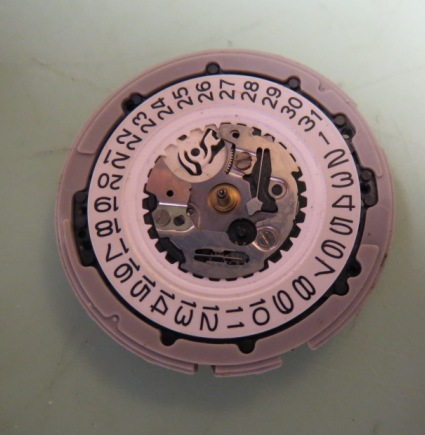
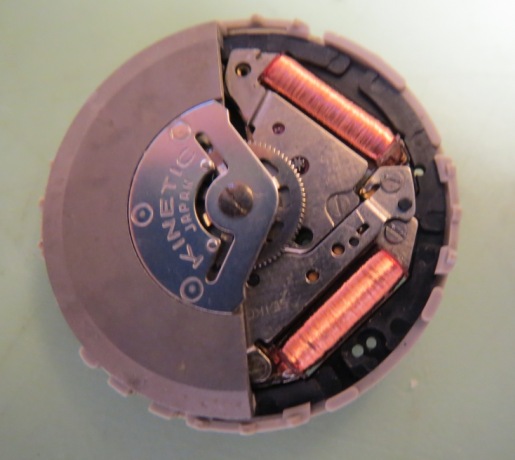
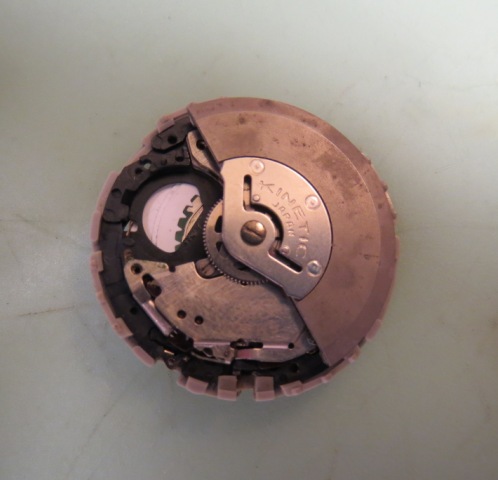
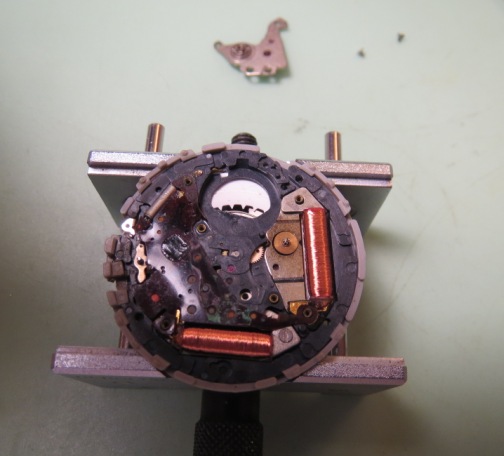
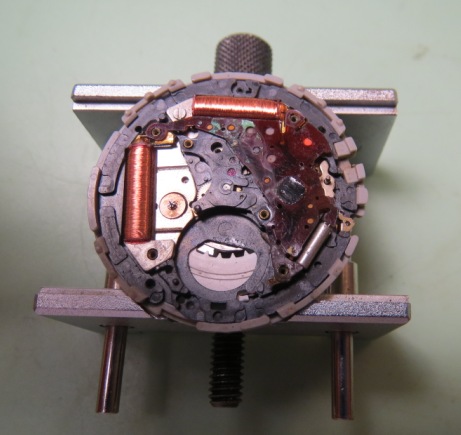
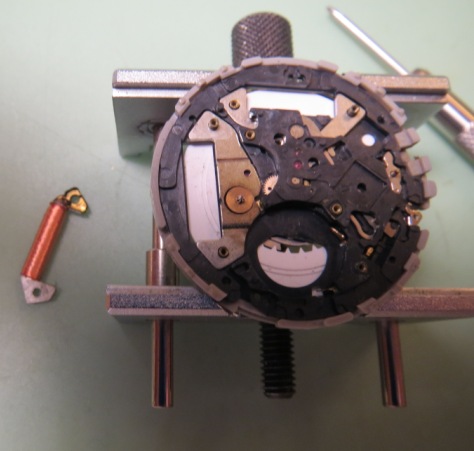
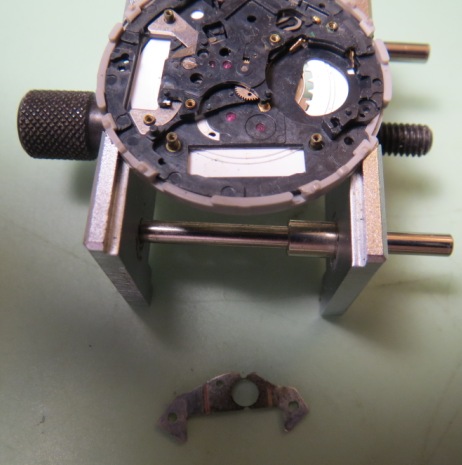
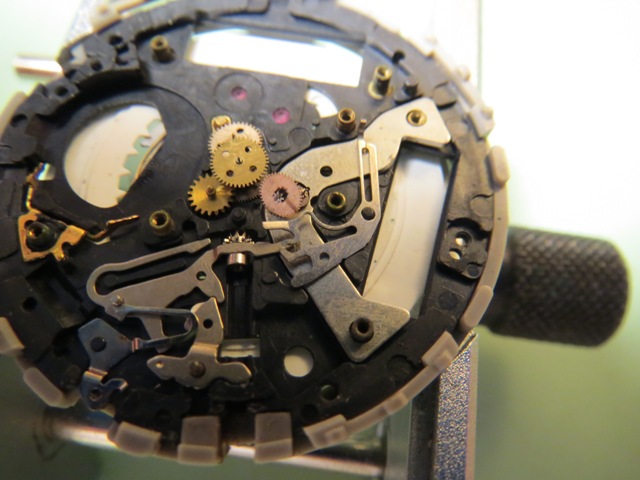
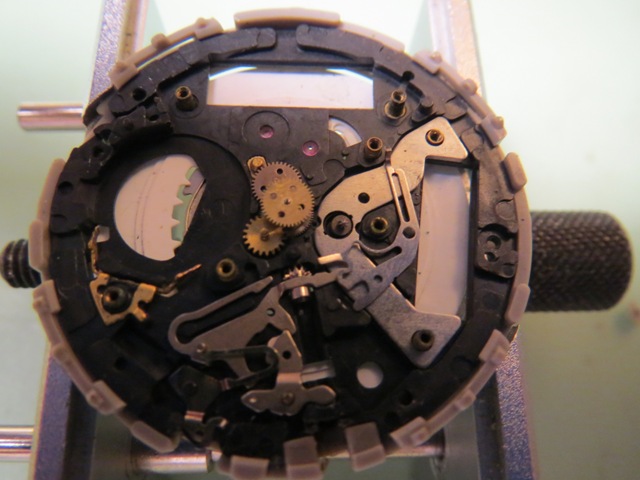
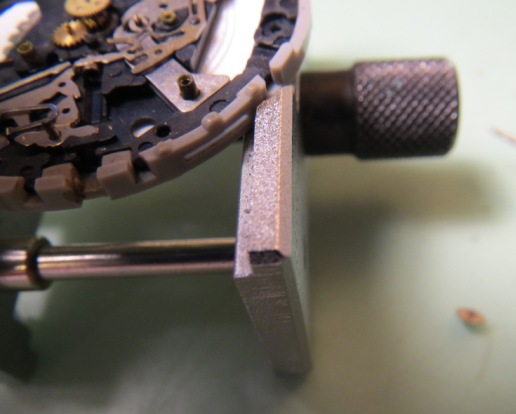
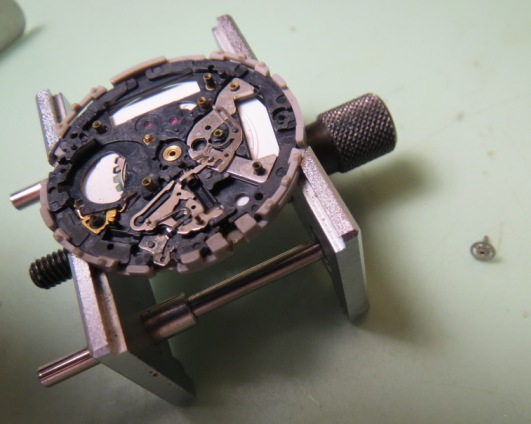
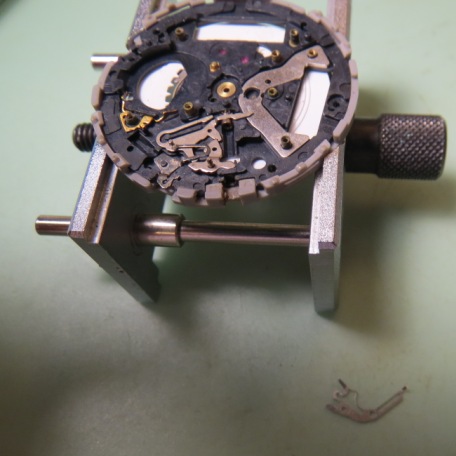
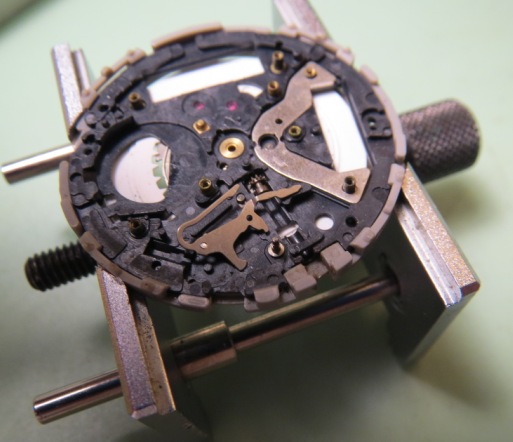
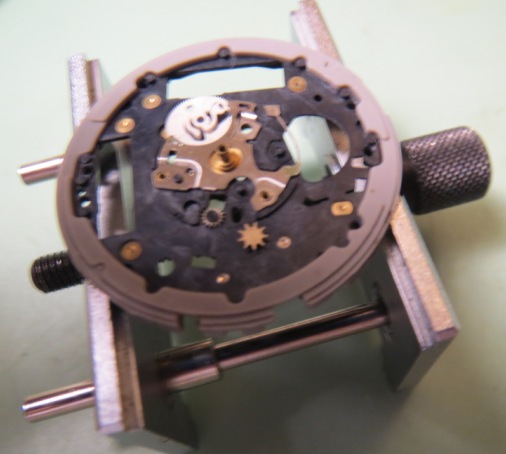
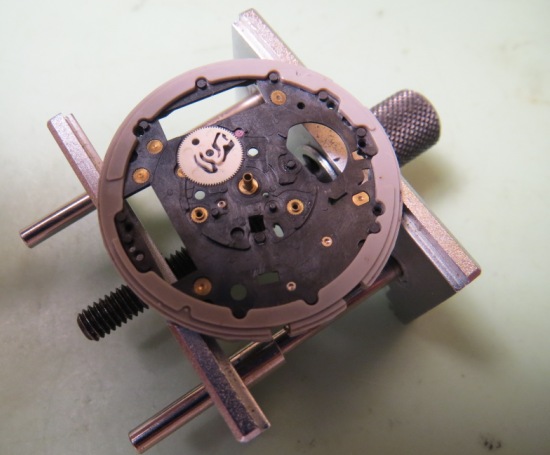
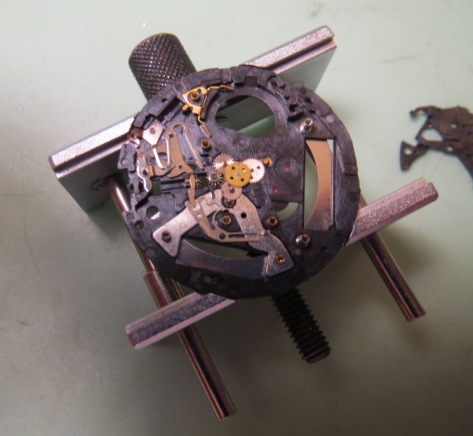
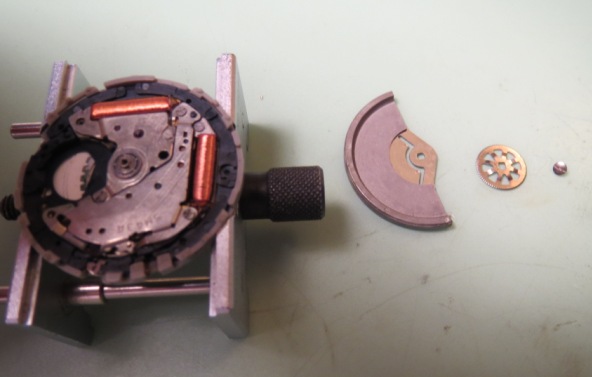
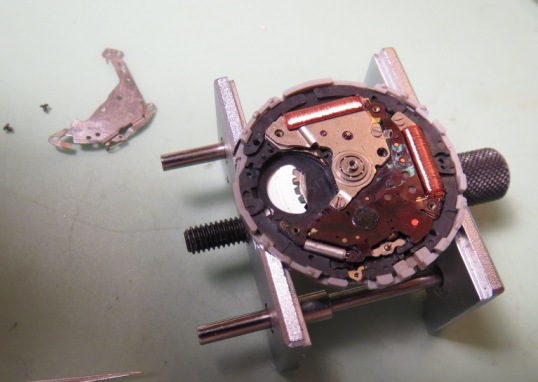
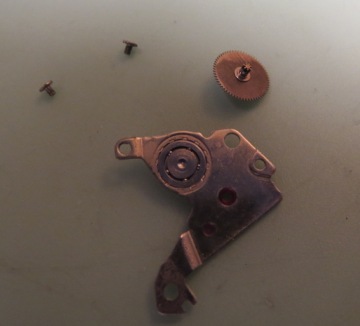
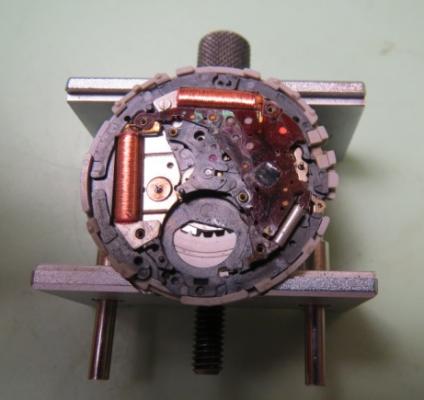
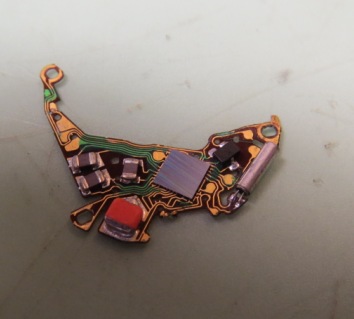
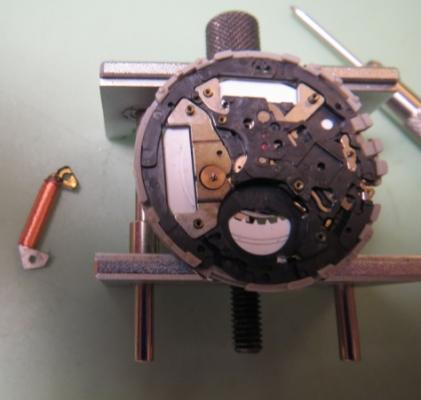
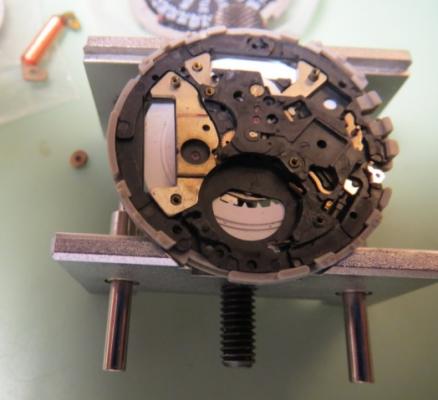
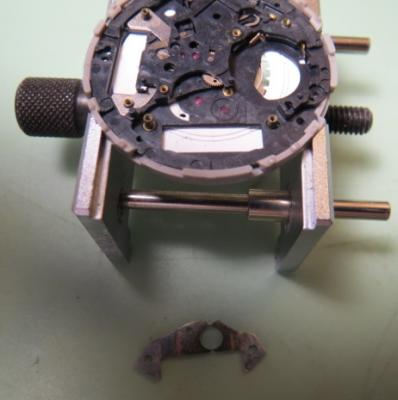
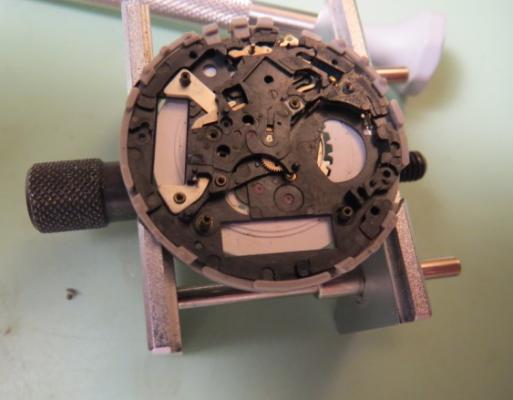
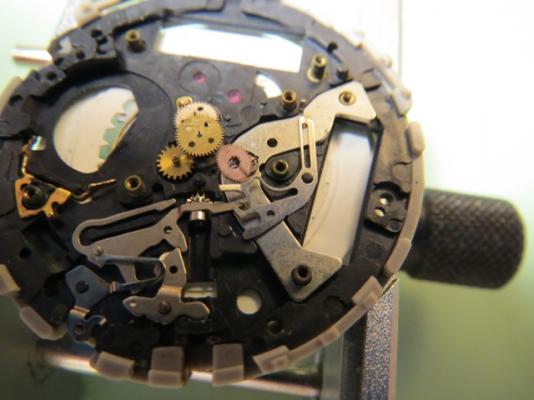
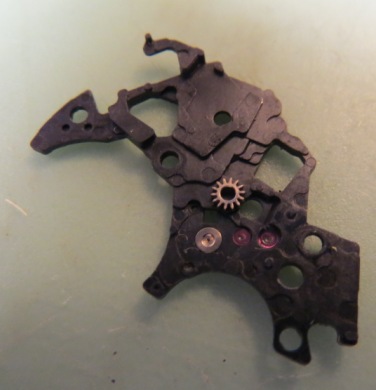
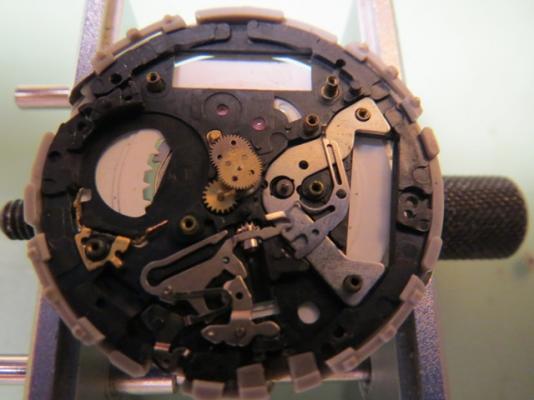
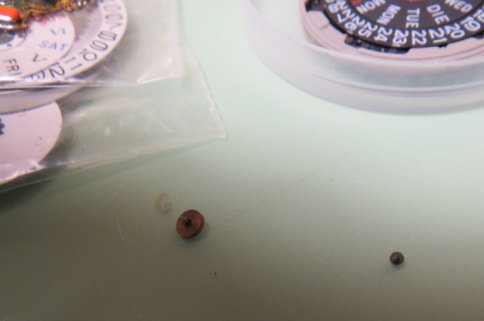
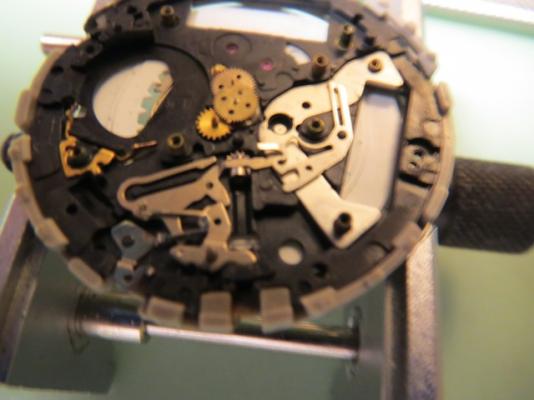
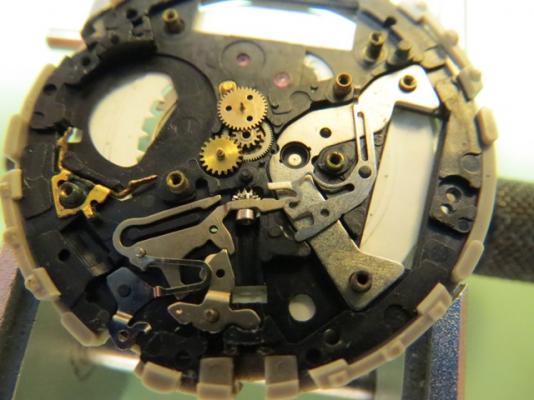
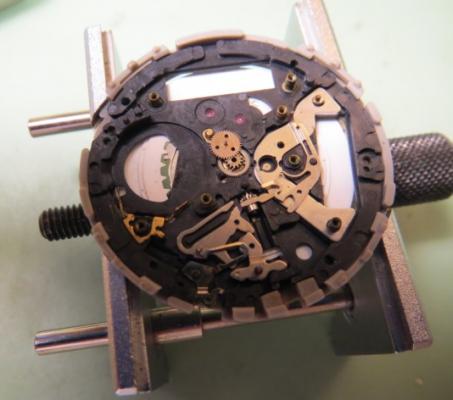
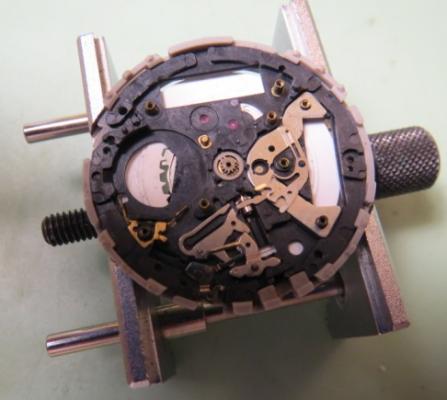
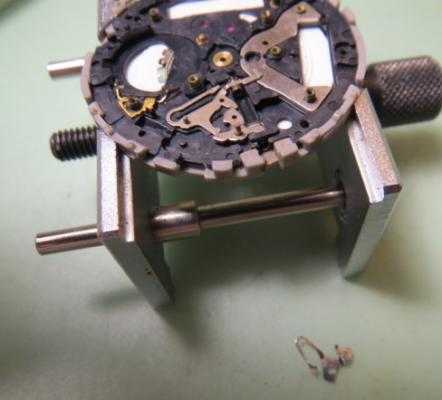
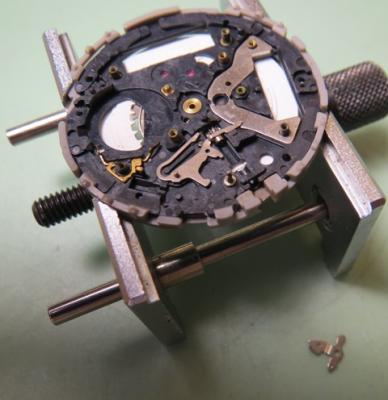
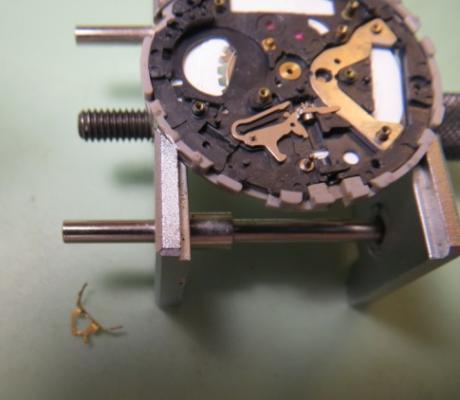
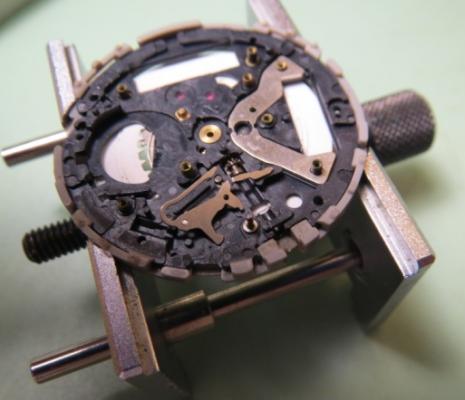
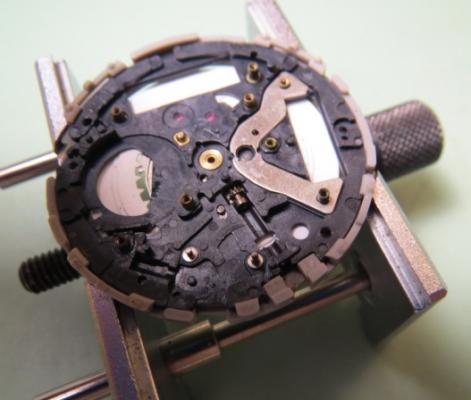
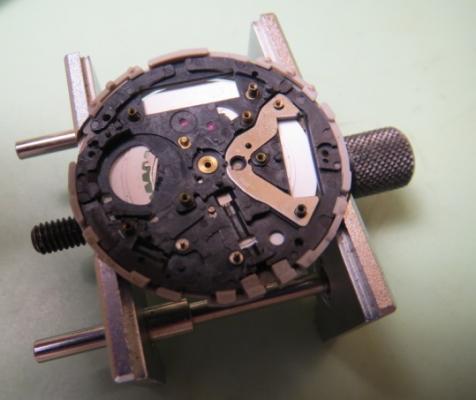
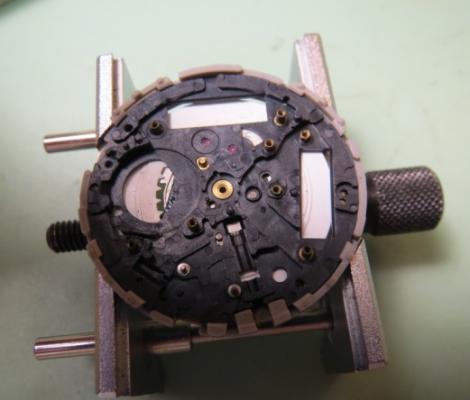
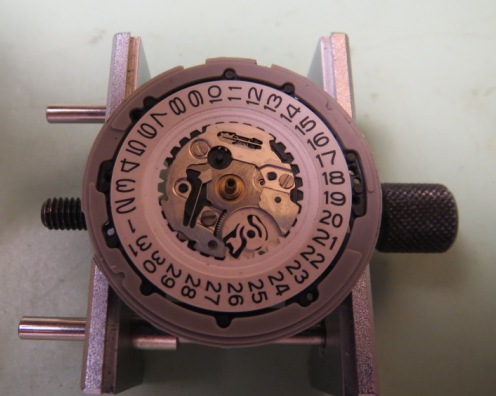
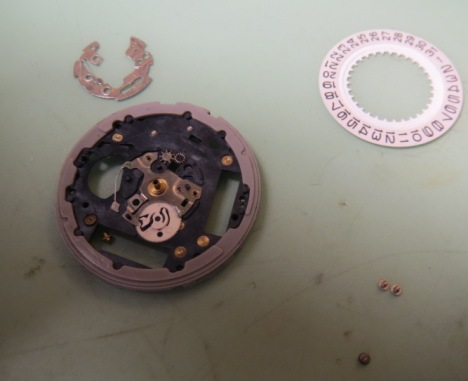
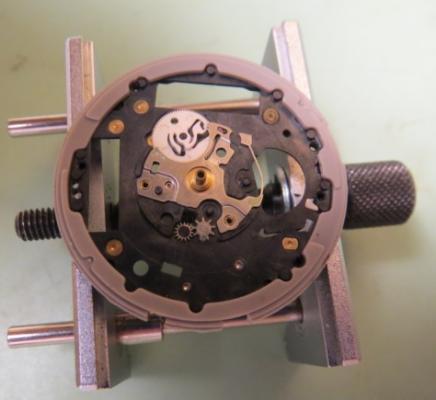
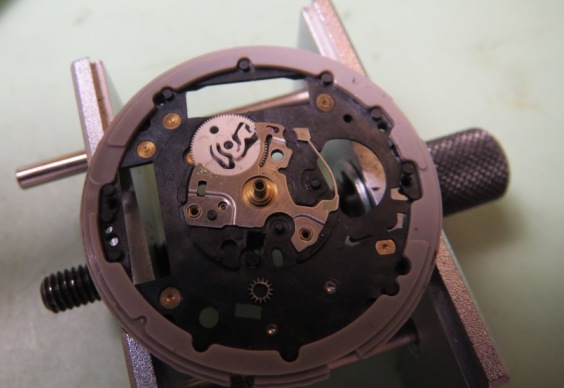
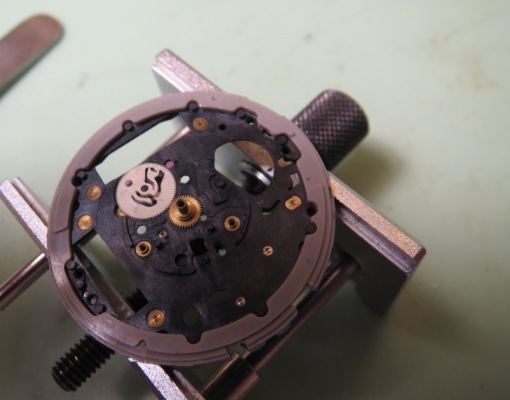
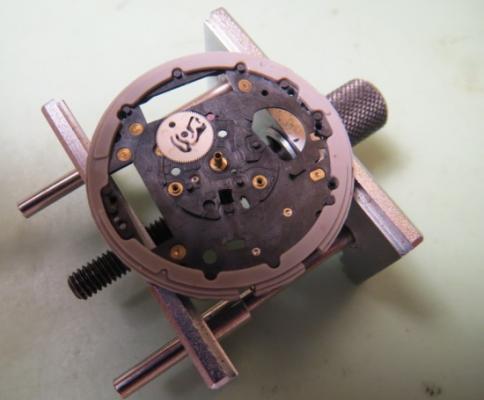
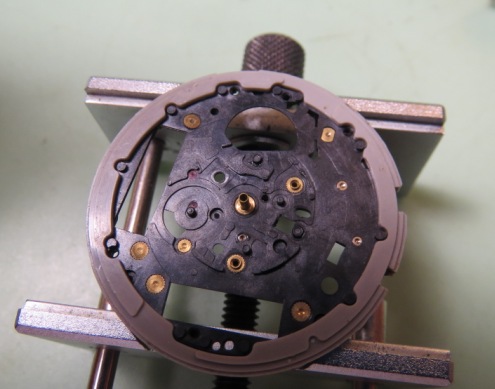
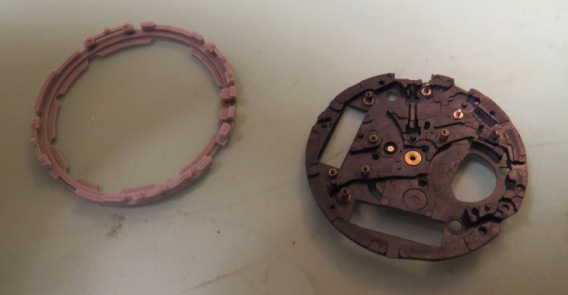
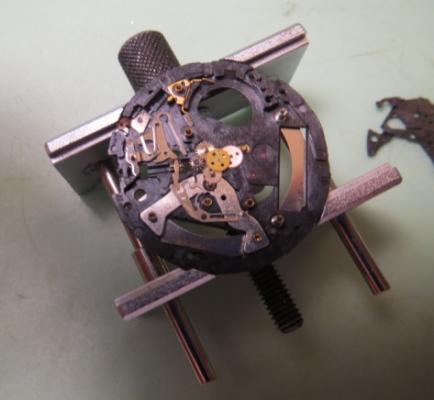
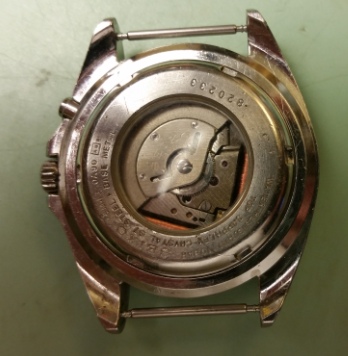
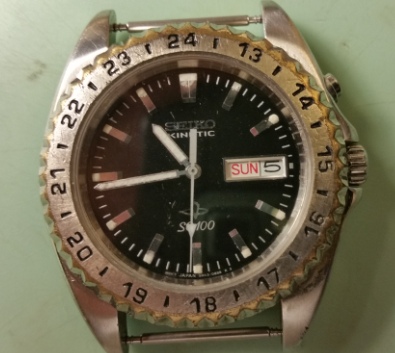
Hi all, I figure these movements were kind of popular and expensive (they are still available). So, since I just saved US$104, the price of them this side of the pond (take or leave a few dollars) I wanted to share my experiences. First off, the service data: 233_Seiko5M42A,5M43A.pdf Now for the disassembly: My order here is a little odd. The movement was in bad shape being an ebay non working watch, just for the exercise at hand. Therefore, sometimes in order not to damage a part, i.e. circuit or coil mainly, other parts are being taken out of the way first to facilitate the disassembly. In some pictures, there is another similar movement which also was used to eventually put together a working one between the 2. So, here is the 5M42, notice that the 5M43 only adds the day disc, a selector gear we'll mention later and a disc holding clip. Everything else is the same. The new capacitor kit that replaced the bugged original one is: 30235MZ which is also good for the following movements:5M62 and 5M63. There is no capacitor present in this movement... Notice that this movement can be disassembled each side without interfering with the other side. This means that we can remove all the parts from one side and then turn it and remove all the parts from the other side. Your choice which side you want to start first. I prefer to remove the rotor and keep going on that side (bottom) to ensure there is no damage to the rotor screw and bearings. As an added advantage, I'm also minding the coils and circuit. I would have removed the capacitor clamp, insulator and capacitor unit. This is only possible after the previous step and before the one being illustrated below. Removing the circuit block cover: I also removed the oscillator weight (rotor) bridge first since the circuit seemed kind of stuck and wanted more visual/elbow room to tackle it: A closer view of this bridge, notice the intermediate wheel for generating rotor: Now we have a full view of the electronics, in very delicate estate I may add. Luckily the circuit block is OK ( I used the one from the other movement which was in better shape ): Then, goes the short coil...and the long coil, the generating rotor and generating stator: We remove the only screw holding the train wheel bridge and look under the "hood": Here is the underside of the train bridge. You are seeing the setting wheel still stuck to the bridge: In the following pictures we remove the fifth wheel and pinion, fourth wheel and pinion, third wheel and pinion, step rotor, minute wheel, center wheel and pinion... Then we proceed to the keyless work et al. Removing the train wheel setting lever, switch lever (careful is under tension), setting lever, capacitor connection and yoke: We discover underneath the clutch wheel and remove it. Also the rotor stator is removed: At this point we turn over the movement...or what is left of it: As you see this one is the 5M42 version without the day disc feature. Normally for the 5M43 we pry, carefully with a small screwdriver, the snap for day star for dial disk, the day star with dial disc and the intermediate wheel for day correction. All those parts are similar in shape and location as to the 7S26 mechanical movement so there is no need to illustrate it at this point...if we had gotten it. Note that this movement uses a dial washer. So we skip the day star and start removing the date dial guard and date dial: Underneath is the familiar date jumper reminiscent of the Seiko mechanical movements, date driving wheel, intermediate wheel for calendar correction, date correction setting wheel, and hour wheel. I'm not sure about the plate present in this movement, it might have been one of those franken things, but this plate doesn't have the non-removable antimagnetic shield plate. I used the donor movement main plate since it had it. Here is a picture of the movement using the antimagnetic plate: So removing each mentioned part: And voila! The bare plate: Now we only need to remove the holding ring for dial and dunk everything in the cleaner...NOT everything! The generating rotors, both coils and circuit block DON'T go in the cleaner! Nor would go the capacitor if we had one in this case. Everything else is fair game. One note of caution, while assembling use plenty of rodico for each part since magnetism is an issue and can attract undesirable particles into the movement. Always check and recheck! From this point on and after cleaning the parts. Assembly is simply a reverse order. Follow the technical data for lubrication...I simply used moebius quartz oil and simplified everything...and maybe a little Seiko S6 here and there, mainly keyless works. One important data for those who don't have a multimeter and want to check the coils. You are measuring 2 different ranges of resistance/impedance, if your meter is not autoranging, make sure to change the range accordingly. Here is the final product in its case and with temporary hands...until I get something I really like and can refinish the case. I also forgot to say that this movement uses hands: 65/110/20...so far difficult to find in sport, luminic types...or so it seems from trawling the net! Hope all this helps! Enjoy! Cheers, Bob PS. Any insight, corrections, suggestions, etc is most appreciated!


 1 point
 -
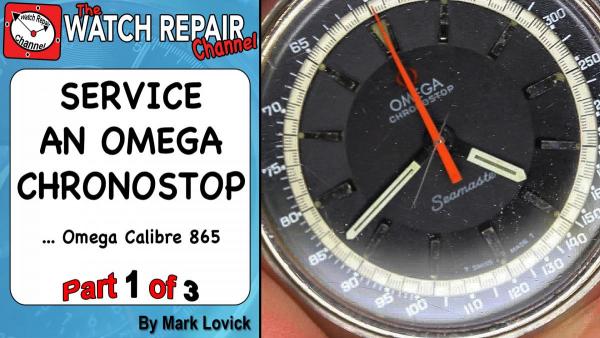
New three part video series detailing a walkthrough of the Omega chronostop calibre 865. https://www.youtube.com/playlist?list=PLwP8fNxqhOvNh2cUekaLIp6jtkM7D7ttD
 1 point
 -
Also, I was thinking that this watch was put together like a sideral and that the stem would just pull out. Problem is, I can only be wrong about that once!1 point
-
Hi there, I have restored several 467.2 caliber JLC's maybe i can help ? I don't have a parts list but i may be able to point you in the right direction. Below is one i have recently finished, i presume this is the watch you are referring to ?1 point
-
Well, joined not that long ago and figured I'd say hi. Plus post a pic of my latest addition. It's a "beater" for the wife made from left over parts from another project. The dial is of my own design (paper print for now), and completely original.1 point
-
Excellent Mark, I just watched the whole thing and I'm impressed! Thank you for this nice gift! Cheers, Bob1 point
-
That's correct icius, I believe that's the name for the same movement by Pulsar, a Seiko division. Thank you for the nice words! By the way I'm editing the above to add something I forgot! Cheers, Bob1 point
-
I agree with Michael. I'm sure there is room for all kinds of techniques here. As long as damage is not being caused people should do what works for them is my opinion. Don't go so soon Horlogerie.1 point
-
Hi Horlogerie, I hope you don't leave the forum. I like to look at your posts and your skilled work, and also you seem to be happy to give some of us novices some good advice. I certainly listen to what you say and I hope you still speak your mind on the forum. I find it very intriguing and interesting to hear you and Mark discussing horology1 point