

-
Recently Browsing
- No registered users viewing this page.
-
Topics
-
-
Posts
-

-
 I made some similar probes out of 3mm brass rod. Chucked short sections in an electric drill and did rough shaping against a file. Followed by an oil stone and them progressively finer emory cloth. Very useful tool for shock springs.
 -
 One available here, not too badly priced either https://www.ebay.com.au/itm/126925987414 Edit# sorry I see later that you have already this one in mind
 -
 Welcome! This forum is a much more helpful community than you will find anywhere else for watch repair.
 -

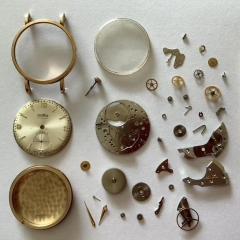
By Michalzeszen · Posted
Hi there! Do you guys think I'll have any luck finding this oscillating weight? I bought a second hand, water damaged Technos Star Chief from the 70's, and it came with a different, broken and bent rotor mechanism, as you can see in the pictures: Not only that, but I can see this is not the original set, because it states "17 jewels" with no reference to Technos, and I know that the original piece would look like the forth picture attached. I'm nearly setting for this one, but before making the purshase I'd like to hear your opinion. Another argument to be made is that, since this watch is not entirely worthless, perhaps keeping originality would be nice.
-


Recommended Posts
Join the conversation
You can post now and register later. If you have an account, sign in now to post with your account.
Note: Your post will require moderator approval before it will be visible.