Jump to content

Tissot 27B-21 guidance


Jin999

Recommended Posts

Hi everyone,

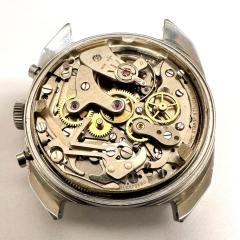
I am working on my first self servicing of vintage manual wind Tissot.

I am stuck and hoping the seniors here might be able to give me some guidance.

The issue is, i had no idea how to remove the drive wheel during disessembly and how it should be install back during assembly.

Much appreciated.


Kind regards

Jin

Link to comment
Share on other sites

You could use tools like Bergeon # 3 which will do the work most of the times like on this one.


image.png.2d0ffda999bc763ade1576904263af9c.png


If the pivot is slightly longer and thinner you would use a tool like the Bergeon 6016.

With this you put the thin small points under the wheel while pushing and at the same time twisting the handle.


image.png.ebddc5df122bc8a077d2ddc2f4abafcb.png


Then we have the less preferred style, put two screwdrivers underneath the wheel and twist them around.  If you choose  this method just remember toput something underneath so you don’t scratch and make a mess out of the movement.

  • Like 1
Link to comment
Share on other sites

just pay attention when you remove the wheel as there is a top and bottom so take a picture. Also note the sweep wheel removing tool will usually make a reference to the number of spokes.  you do need to get the right one for the right number of spokes. also look on eBay the price is considerably cheaper than purchase thing them new


http://www.ranfft.de/cgi-bin/bidfun-db.cgi?10&ranfft&0&2uswk&Tissot_27_121


Link to comment
Share on other sites

1 hour ago, HSL said:

You could use tools like Bergeon # 3 which will do the work most of the times like on this one.


image.png.2d0ffda999bc763ade1576904263af9c.png


If the pivot is slightly longer and thinner you would use a tool like the Bergeon 6016.

With this you put the thin small points under the wheel while pushing and at the same time twisting the handle.


image.png.ebddc5df122bc8a077d2ddc2f4abafcb.png


Then we have the less preferred style, put two screwdrivers underneath the wheel and twist them around.  If you choose  this method just remember toput something underneath so you don’t scratch and make a mess out of the movement.

Hi HSL, thank you for the kind advice and I will give the hand removal tool a try to remove the drive wheel.

As for installing back the drive wheel, do you think the hand installing tool would do the job? I am wondering if the press tool hole bigger than the pivot, it should be fine I guess.


Pls to hear.

Link to comment
Share on other sites

1 hour ago, JohnR725 said:

just pay attention when you remove the wheel as there is a top and bottom so take a picture. Also note the sweep wheel removing tool will usually make a reference to the number of spokes.  you do need to get the right one for the right number of spokes. also look on eBay the price is considerably cheaper than purchase thing them new


http://www.ranfft.de/cgi-bin/bidfun-db.cgi?10&ranfft&0&2uswk&Tissot_27_121


Hi John,

I believe I had never came across the tool that you mention, perhaps you could share a photo to have a better understanding.

:)

Link to comment
Share on other sites

I didn’t have a Tissot 27 on my bench, but this old Omega has almost the same type of 5 spoke wheel as yours.

This tool is for a 5 spoke wheel it has an automatic push and lift movement when you press on the springs. The small claws grip the wheel.

Tip.thumb.jpg.6206c98e1c197e82c43d97664b2e2cb6.jpg


Grip the wheel with the one spoke in between the side with two grippers and the single one ends up on the opposite side.

Grip.thumb.jpg.3dba922d992575ef98950cddb993125e.jpg


Keep the tool vertical and gently squeeze the blades and voilá the wheel pops out.


Lift.thumb.jpg.33f10bdaee547e3f5baa6932ff251796.jpg


When putting the wheel back I actually just use my peg-wood. Just push gently a little at the time and it will get in place nicely. Don’t push too hard!

Push.thumb.jpg.6c4b7413f4dc4b7c392aabba4b3b7148.jpg

And here we are back were we started

1383611661_BackinPlace.thumb.jpg.1b16c238e27af0504cc5bedd096e5078.jpg
 

  • Like 1
Link to comment
Share on other sites

The question of min drive wheel removal&replacement has previously been asked. Wheather or not OP knows or was concerned about the wheel staying put once reinstalled, facts are such Removal& replacement can easily create problems, the wheel is known to fall off the arbour within few months of operation. 

You should at least put some penetrating oil on pivot where the min drive wheel is to be mounted on, let it set over night.

Peen the upper end of the hole on drive wheel, lower end can remain unpeened, lastly arbour reinsertion into drive wheel hole best be done on staking set to insure the arbour wont get bent or jewel getting cracked.

Finally hope this drive wheel wont join the fallen off club.

My late watchmaker used to put bridge and all atched to it in a bath of hot oil, to minimized removal/loss of material from the hole as he pulled the wheel off the arbour.

Link to comment
Share on other sites

I guess I will leave the drive wheel attached to the bridge and clean separately from other parts to mitigate the risk and also lack of wheel removing tool (crazily expensive).

Thanks everyone for the kind input, highly appreciated.

Kind regards

Link to comment
Share on other sites

31 minutes ago, Jin999 said:

I guess I will leave the drive wheel attached to the bridge and clean separately from other parts to mitigate the risk and also lack of wheel removing tool (crazily expensive).

Thanks everyone for the kind input, highly appreciated.

Kind regards

Wise decision,  check if minute drive arbour shows excessive side shake by grabing the arbour with your tweezers and feel the side shake, if considerable you may have a worn/cracked  jewel hole or worn arbour in which case you have no choice but to pull out the minute drive wheel  in order to replace the worn parts.   Don't forget to lube the center arbour pivot facing retainer spring. 

Good luck.

Link to comment
Share on other sites

23 hours ago, Nucejoe said:

Wise decision,  check if minute drive arbour shows excessive side shake by grabing the arbour with your tweezers and feel the side shake, if considerable you may have a worn/cracked  jewel hole or worn arbour in which case you have no choice but to pull out the minute drive wheel  in order to replace the worn parts.   Don't forget to lube the center arbour pivot facing retainer spring. 

Good luck.

Thanks Nucejoe, will take note of it.

U are always welcome to share more info & guidance on this movement ;)

Link to comment
Share on other sites


  • Recently Browsing

    • No registered users viewing this page.
  • Topics

  • Posts

    • I'll go halves with them John , we can share it 😉
    • Besides locktite Nev, is there anything random that you use to fix in the pivot ?
    • Thanks Hector, I do think though that the problem I am experiencing is specific to Miyota movement in general and the 6T series in particular.  When you describe putting the bridge you are talking about the train wheels.  The problem here is that under that same bridge you have the 4 train wheel, the barrel, 2 extra winding related wheels and the center sweep pinion.  I can mostly put them in their holes but 2 of those (the 4th wheel and the second pinion are completely under the plate so I can't nudge them in the right position.   I managed it with a larger Miyota 8200 series but with the smaller 6T15 it is even worse. Anyway, I'll retry tomorrow evening or this week end.  This evening is going another rock climbing day (going from very light pressure on tweezers to much more force going through the fingers, although in climbing we also want to use the absolute minimum grip which won't make us fall to save the muscle and be able to climb longer routes). to add insults to injury, if you read this thread from the start, I initially messed up the disassembly as I couldn't detach the rotor.  I normally (and I think I did this time too) put all my parts in their individual compartments in the part tray and I am doing my best to be very careful about them.  But in the week and a half it took to figure out how to detach the rotor I somehow lost the screws from the bridge.  I have a few others which will be needed later.  I know they are reference 922-600 but I couldn't find what it means in general term so I don't know if I can buy replacements or an assortment of screws and replace those 2 by others.
    • Something that can happen with a lyre spring, the back of the arms can bind against the shoulders of the chaton cut out where the spring is fixed in when the spring is lifted out of the way. To stop the spring bending or breaking it needs pulling forward slightly before lifting so it clears the edge of the chaton.
    • One way is to file it by hand. Good file with sharp edge is needed. Another way is with the aid of milling attachment. There is one more way, thyat is really only on the lathe, but the arbor has to be attached perpendicular to the axis of the spindle. Will be easier to show pictures than to explain this. I must say 'Good night' as my wife is now awake and is roaring when I get closer to the computer...
×
×
  • Create New...