Jump to content

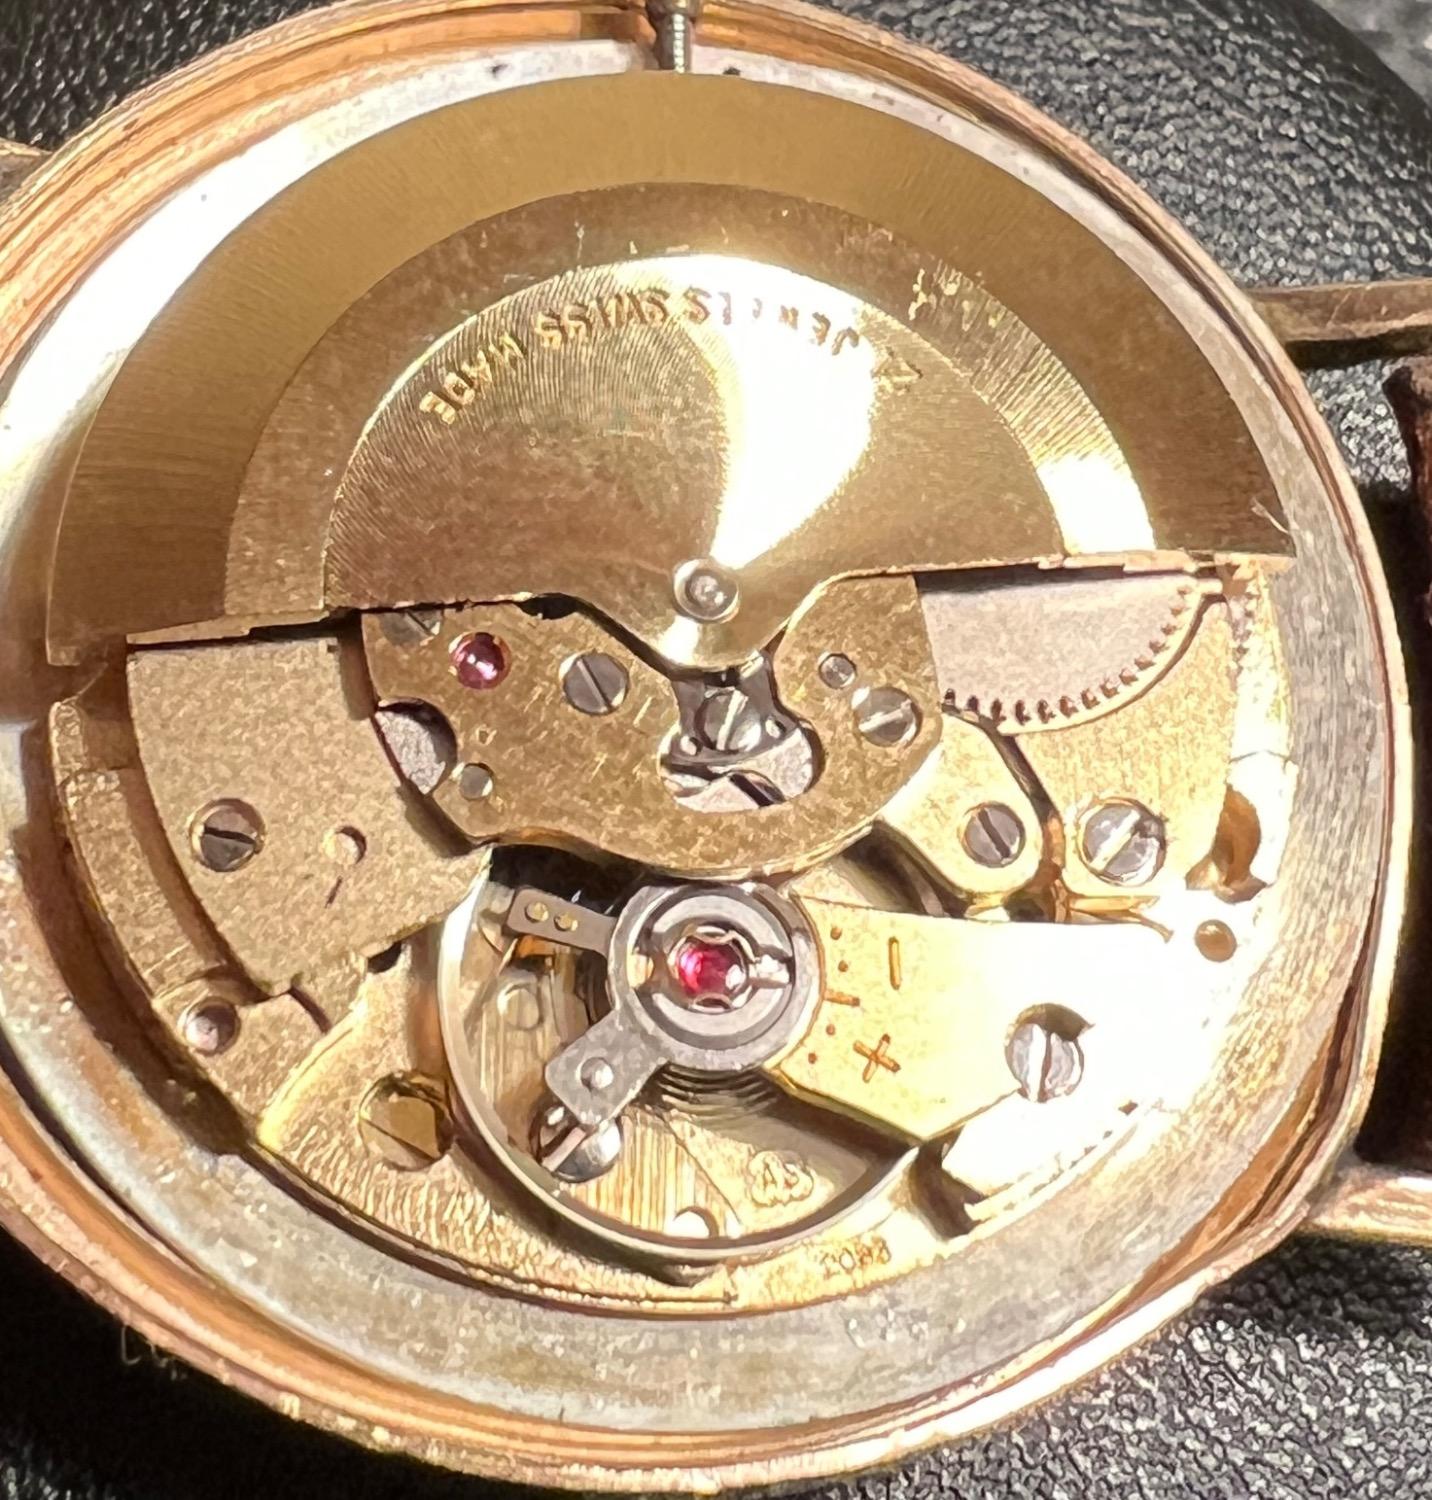
First attempt disassembling a Bulova Automatic


otteray

Recommended Posts

Actually, first attempt at any watch disassembly. 

My Bulova 23 selfwinder is  not running well at all. I've harvested another to practice with for just a few dollars, and it turns out it is worthy of servicing, as well.  So now I have two watches to get running on time again. So I bought a third broken watch and this time, it is really broken and unrepairable; but has lots of spare parts in case they are needed. I can see how this can become a bottomless rabbit hole.

Meanwhile, while searching for parts on flea bay, I came across a beautiful 1950s handwind Bulova at a very nice low price that I ended up buying... and it turns out the seller is a member here. So, I guess this must be a good forum for listening and learning. Wish me luck!

Ray


  • Like 5
Link to comment
Share on other sites

Welcome. This is great forum. All we need and get, is help from older members.

I started on an ETA 2789-1. Wished I hadn't. Too advanced for me a beginner. Broke pivots as I was too heavy on pressure.

Would like to work on a Bulova now. Ah well. Finances preclude. Would be interest to follow your trail if you post with photographs. 

Edited by rossjackson01
more information
Link to comment
Share on other sites

  • 3 weeks later...

Cleaned, oiled and after much fumbling and searching for launched  screws; it is assembled and keeping better time! 
Now on to the next one, hopefully with more attention payed to what screw goes where.  


  • Like 2
Link to comment
Share on other sites

12 hours ago, otteray said:

Cleaned, oiled and after much fumbling and searching for launched  screws; it is assembled and keeping better time! 
Now on to the next one, hopefully with more attention payed to what screw goes where.  

Take lots of pics when disassembling. Note if any screws are longer than others - sometimes in a bridge the screws can be different lengths.

I put the different component parts in to separate compartments in a tray - keyless work, gear train, auto mechanism, barrel + bridge etc.  That way the screws are kept with the correct parts. I clean them with each tray compartment to one cleaning pot. If the screws are especially tiny, I stick them in some Rodico in the tray.

20230426_101600.thumb.jpg.1677b42bef49750604236a1a93a610b8.jpg

  • Like 3
Link to comment
Share on other sites

I definitely need a tray like that. And a flat lid, not domed, for more compact storage. The little boxes i have with snapping lids seem to cause those small parts to escape when opened. I was storing a balance jewel in Rodico and it got swallowed up by the stuff. It is amazing how easily a jewel can hide in a blob of that green putty if it gets smooshed down too much!

Edited by otteray
Link to comment
Share on other sites

Join the conversation

You can post now and register later. If you have an account, sign in now to post with your account.
Note: Your post will require moderator approval before it will be visible.

Guest
Reply to this topic...

×   Pasted as rich text.   Restore formatting

  Only 75 emoji are allowed.

×   Your link has been automatically embedded.   Display as a link instead

×   Your previous content has been restored.   Clear editor

×   You cannot paste images directly. Upload or insert images from URL.


×
×
  • Create New...