


-
Recently Browsing
- No registered users viewing this page.
-
Topics
-
-
Posts
-
 So i work on these movements a lot and iv'e managed to fairly consistently get them running at like 50 degrees more amplitude than that with deltas in the 3 range and on the wrist deviations of sub 1 second a day. They ALWAYS require work to get there though. The main thing is shaping the regulator curve and this is really finnicky and definitely something you practice on a movement you don't care about when you're new (I'm still new) but if the hairspring is flat and evenly space and the regulator curve is properly shaped and it's pretty wild how accurate these movements can get. But, it does sound like your regulator curve needs a bit of shaping if you don't want to live with your current results but I"m not an expert, it's just speculation but there's a pretty easy way to check. This is a good video showing how to see if your terminal curve is properly shaped. He takes off the balance to shape it. I do it with the movement disassembled but the balance on the mainplate. I use a homemade tool from a sharpened dental pic to do the adjustments (Tiny tiny TINY adjustments) and i use the regulator pins themselves to sorta brace the spring against to bend it very tiny amounts and just keep checking it by moving the regulator arm down it. Taking off the balance wheel over and over again is a good way to slip and destroy your hairspring. I try to avoid it on these movements. Since these are mass manufactured and unadjusted the regulator curve is NEVER perfect but once you learn how to reshape them it's pretty easy to do and you can get REALLY low deltas with really low positional error and pretty remarkable accuracy. Definitely with it powered down and the balance on the movement with both balance jewels in place look across the spring to see if it's perfectly flat, then check the regulator curve how he does it in the video. I would bet money even if it's not your main issue the regulator curve is not ideal also.
 -
 So the stem is snapped and will need replacing but luckily there's enough left in the crown to unscrew without a problem. Will need to see photos of the movement to identify it.
 -
That is really concerning if there's chinese knockoffs that close floating around. iv'e seen speculation but never any proof beyond some VERY obvious knockoffs that were clearly copying the design of the nh movemetns but didn't even attempt to copy them cosmetically.
-
Doing the #6 arbor #7 winder mismatch absolutely is necessary as far as i'm concerned. This washer trick however is pretty damn genius! I actually had an idea for a homemade tool made out of sheet that could act as a retainer for these springs while you work the arbor out of the center coil.
-

By Embezelled · Posted
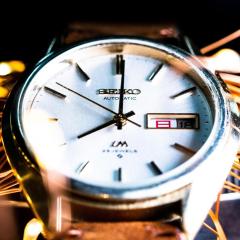
Sorry, beginner error. The inside is marked 3ADJ 59079. That's all I can see. I assume the caseback has the s/n, the only number there is 1307085. The 2.3 mm I mentioned is as measured from the underside of the cap to the end of the thread. So about 40% of that is the unthreaded part.
-


Recommended Posts
Join the conversation
You can post now and register later. If you have an account, sign in now to post with your account.
Note: Your post will require moderator approval before it will be visible.