Jump to content

Recommended Posts

Posted

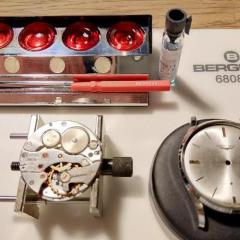
The Longines 6942 is quite straight forward to service but since it is equipped with the KIF-ultraflex shock absorber some might decide to just clean the whole balance in one-dip, oil it through the
jewel hole and leave it with that.
So here is a small walk through of how one might do to dismantle parts of the escapement to get this sorted out in a different way.

IMG_20190202_141225.jpg

Posted

When you look at the shock absorber through a Lupe you can se it has a wide and a narrow slot on the brass ring. On mine the narrower slot is positioned to the left.
With an oiler I push the spring on the narrow end downwards. the spring should pop up a bit so lift it up to the position you see in the picture.

IMG_20190202_142039.jpg

Posted

Cote a sharp peg wood with the Rodico and form a point. I think even Harry Potter would be envious at this magic wand!

IMG_20190202_142410.jpg

Posted

With this homemade precision tool pick up the jewel, sometimes you just get the cap first so you have to do this procedure twice.

IMG_20190202_142431.jpg

Posted


After cleaning put a small drop of oil on the flat side off the jewel. make sure it do not fill more than 40% of the surface area.

IMG_20190202_144132.jpg

Posted

Remove the balance bridge. 

Make it soak in the one-dip, even if it looks empty there is a fresh load of it in the jar. Cleanliness is a virtue ;)

IMG_20190202_145515.jpg

Posted

Take out the lower balance jewels in the same fashion as the top ones. This time the narrow slot was on the right side so one has to push upwards this time.

IMG_20190202_145706.jpg

Posted

Flip the movement, make sure no power is in the mainspring by lifting the click spring. Push the winding stem back in into the 
winding position. Gently wind an see if the train moves free. Make sure you clean the pallet fork jewel holes with a peg wood.

IMG_20190202_150903.jpg

Posted

Put back the pallet fork, apply some tension on the main spring and check the action on the escape with the peg wood. Move the pallet fork back and forth. Leave the pallet fork in the upper position.

IMG_20190202_151215.jpg

Posted

Put the balance bridge back, wind it up fully, it now should tick away like a Swedish viking on magic mushrooms.

IMG_20190202_151727.jpg

  • Haha 1
Posted (edited)
16 minutes ago, rogart63 said:

What use does the +- have on the beat error arm? 

Guess they just symbolize the direction to go when adjusting the beat error. It isn't like on the regulator where you make the spring length shorter or longer and by that increase or decrease the oscillation frequency. Should have been R & L since you center the impulse pin in relation to the pallet fork with it, 

Edited by HSL
  • Like 1
Posted
1 hour ago, HSL said:

It isn't like on the regulator where you make the spring length shorter or longer and by that increase or decrease the oscillation frequency.

Somehow statements like that comes back to bite you in the ass.
Even though this contraption is on the beat error arm it can be used to regulate the rate, python port regulator, hence the + and - .
It has a smal brass disk attached to the center of the small setting screw, it moves back and forth. Due to the friction between the brass disk and the regulator arm it moves it in micro steps. 
For some reason one always seen them but never given em a closer thought.
Here is a pic of a spare I had. Notice the easy studless hairspring attachment.
 

IMG_20190202_184817.jpg

  • Like 1
Posted
3 hours ago, HSL said:

Somehow statements like that comes back to bite you in the ass.
Even though this contraption is on the beat error arm it can be used to regulate the rate, python port regulator, hence the + and - .
It has a smal brass disk attached to the center of the small setting screw, it moves back and forth. Due to the friction between the brass disk and the regulator arm it moves it in micro steps. 
For some reason one always seen them but never given em a closer thought.
Here is a pic of a spare I had. Notice the easy studless hairspring attachment.
 

IMG_20190202_184817.jpg

i didn't see the screw. I thought it was a screw from the top. But it's a nice idea to be able to adjust the length of the spring. 

×
×
  • Create New...