Leaderboard


Popular Content
Showing content with the highest reputation on 01/26/15 in all areas
-
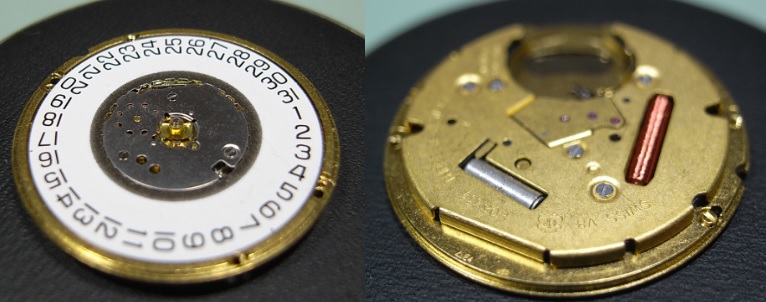
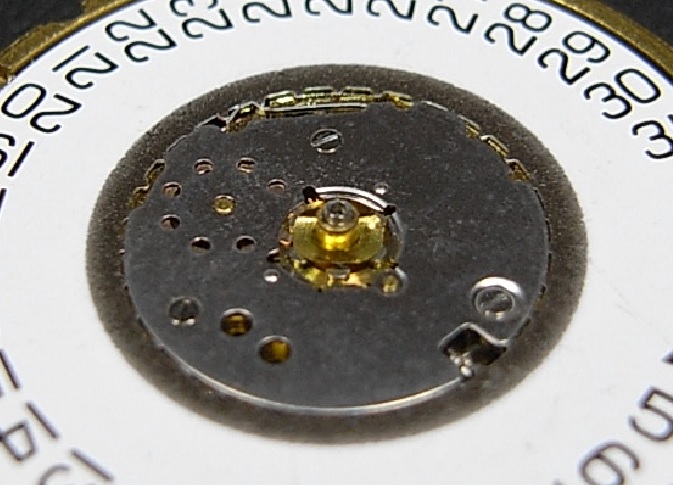
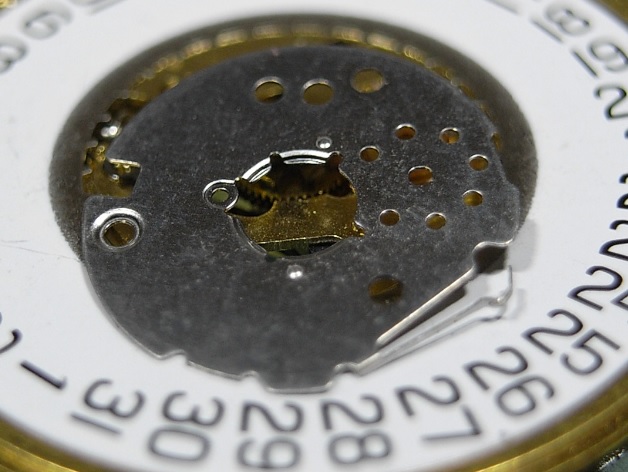
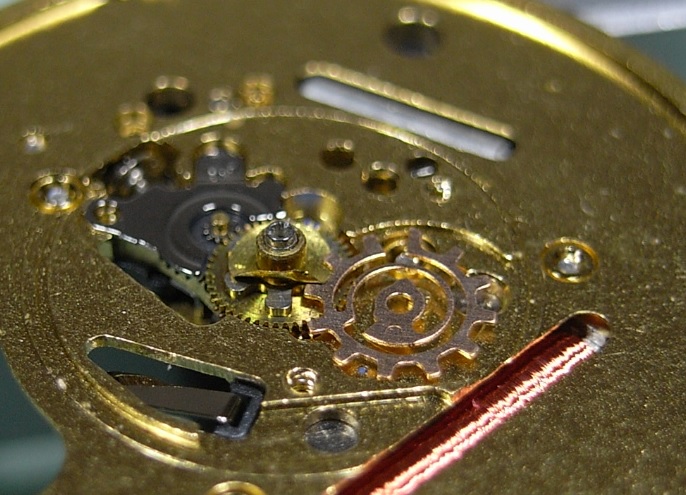
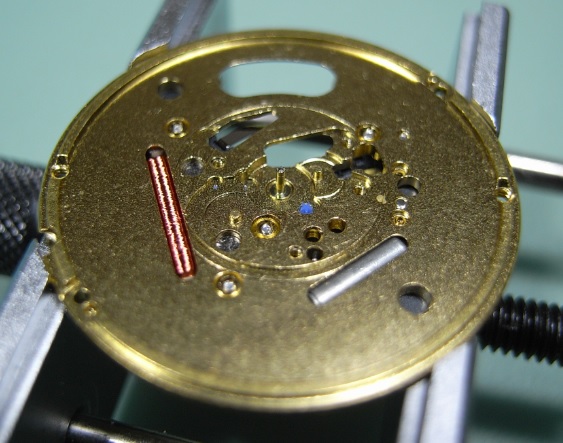
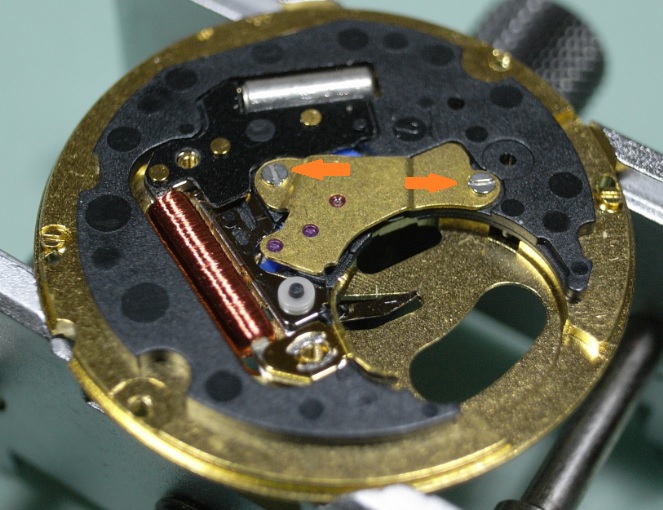
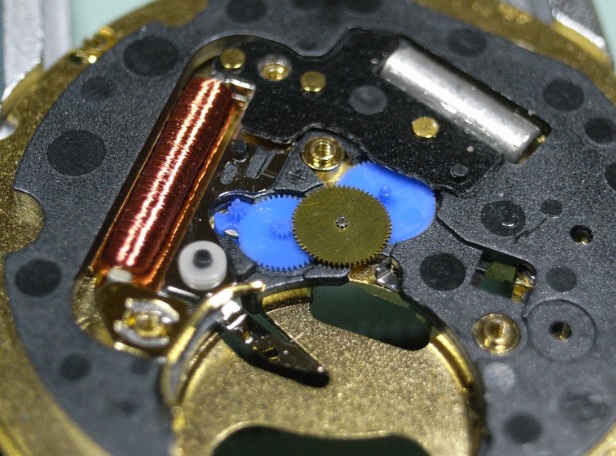
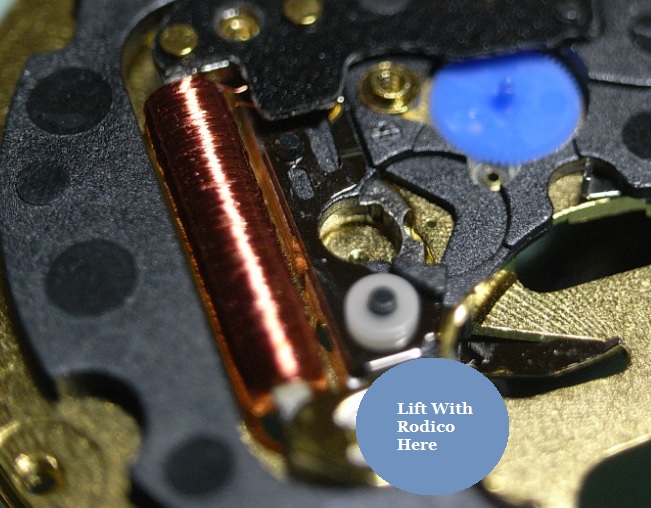
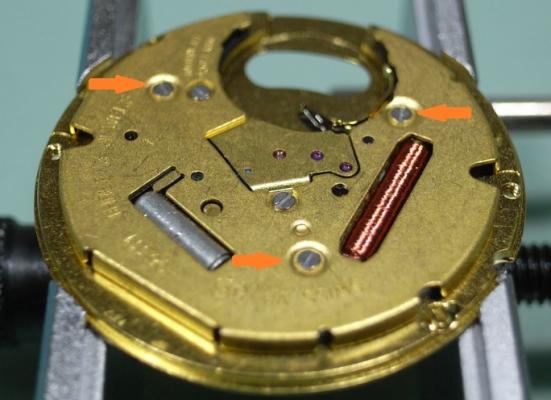
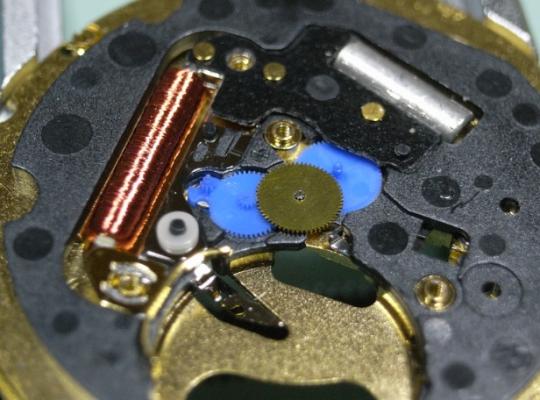
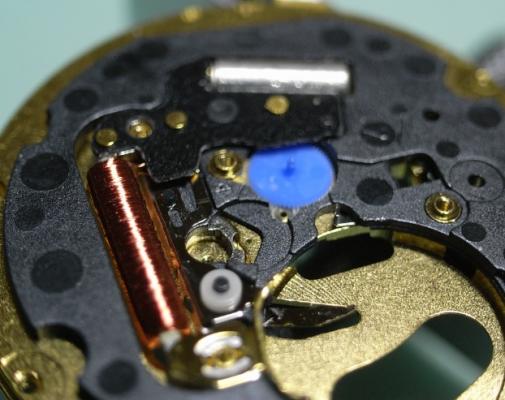
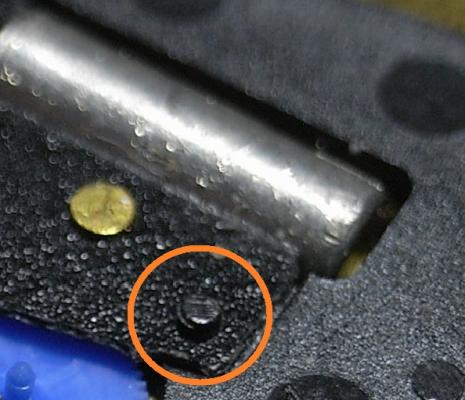
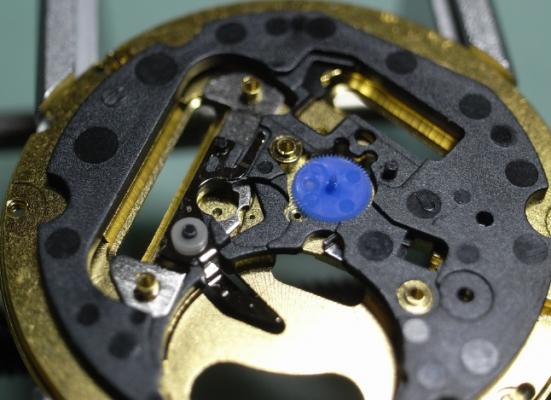
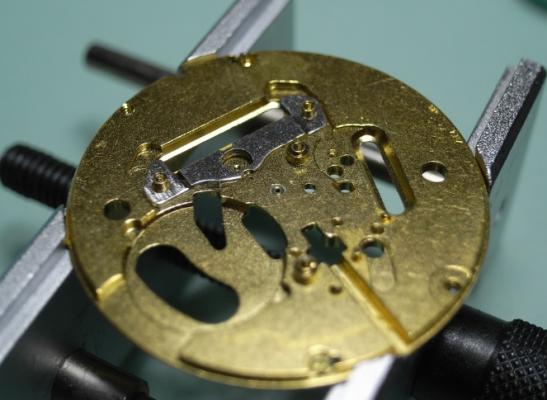
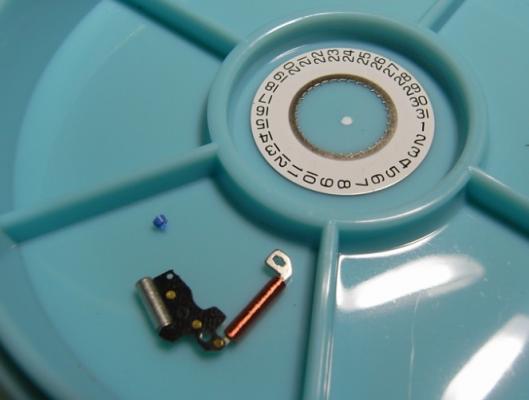
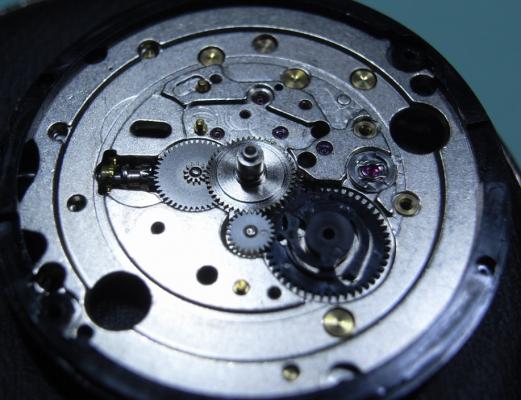
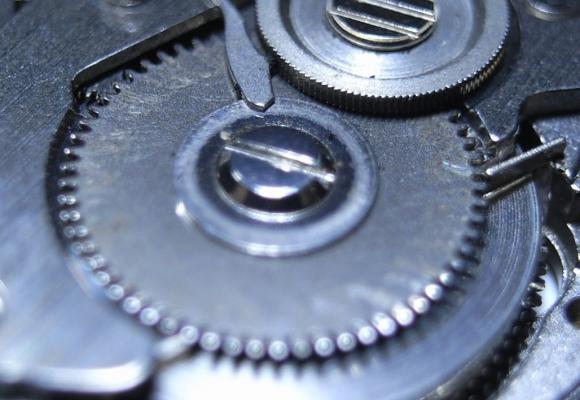
ETA F05-111 Service Walkthrough "The Workhorse Of Midrange Quartz" Moving on from the ETA 955.412 service, another common quartz movement, this time found in mid-range quartz watches, is the F05 111. It doesn't have the build quality of the 955/6 model; but it's still a very robust movement, and able to be serviced. In saying that, this movement is rarely serviced by a professional watchmaker due to the low cost of a replacement movement. Personally, I think it's sad we live in such a throw-away society, and are slowly loosing the skills and confidence to performance maintenance at home. So if you've got the tools and confidence to service this movement at home, do it, and save yourself $$$. Service Manual for the F05 111 Movement ETAF05.111.pdf We will first start with the Motion Work and Calendar Work. Remove the three screws holding the Cover Plate. You will see that this also has the Date Jumper Spring incorporated into it. Next remove the Hour Wheel, and the Date Indicator Driving Wheel. Note too that there is no quick date change on this movement. Remove the Minute Train Bridge, Minute Wheel, Canon Pinion and the Sliding Pinion And that's it for this basic movement on the dial side. Flip the movement over and we'll begin on the drive side Remove the three screws marked below and lift out the Electronic Module Cover. Next remove the two remaining screws that hold the Gear Train Bridge. As you can see with plastic wheels, this is not up to the same quality and finish as the 955/6 movement. Remove the Second Wheel, Intermediate Wheel, and the Rotor I would not recommend removing the Third Wheel at this time as the IC Board circuits are directly above it, and there is no point risking damage to it. To remove the IC Board, gentle lever up the where the location pin goes through the board just at the end of the Quartz Crystal housing. This pin is often firmly pegged to the board and must be lifted up first. This will loosen the board away from the Main Plate. Then gentle lift out the IC Board by sticking a piece of Rodico to the mark position below and lifting out. This will avoid any damage to the circuit or Coil. Now that the IC Board has been removed, access for removal of the Third Wheel is risk free. You can also remove the Insulating Block at this time. This is also the time to remove the Battery Insulator, but this being just a spare movement I own, it's been used elsewhere ... sorry :unsure: The Keyless Work is now exposed, and is a very basic setup, being held only with 1 shouldered screw. The movement is now completely stripped and ready for cleaning. All the parts can go in for cleaning EXCEPT the following Date Ring Rotor IC Board PLEASE NOTE: Due to most of the wheels being plastic, be careful when you come to the heating/drying stage if you are using an Elma/Pearl Parts Cleaner. Make sure the basket is high up in the drying cylinder and ONLY RUN FOR 11 MINUTES MAXIUM ... too much heat isn't good for those little plastic wheels. I hope this has been fun and edifying to read. I'll post the assembly procedures latter tonight after dinner ... my tummy is talking to me :)


 2 points
 -
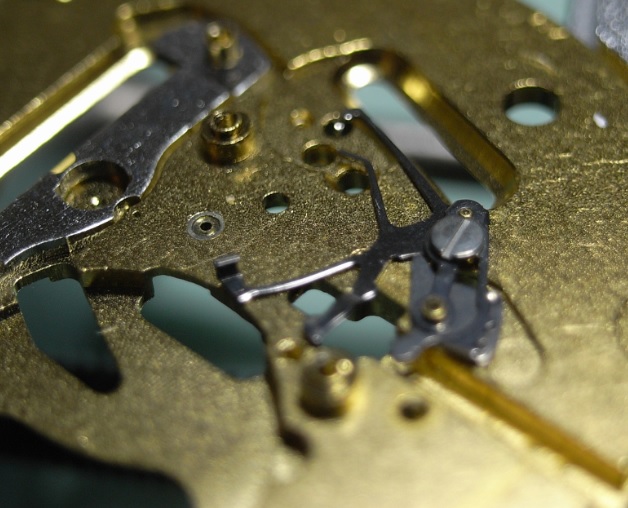
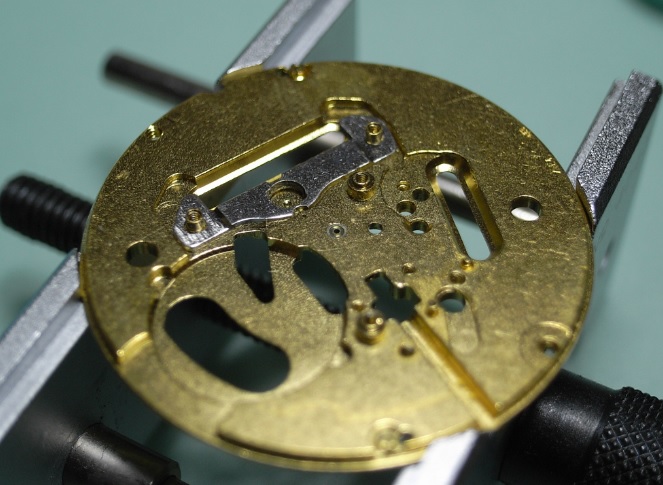
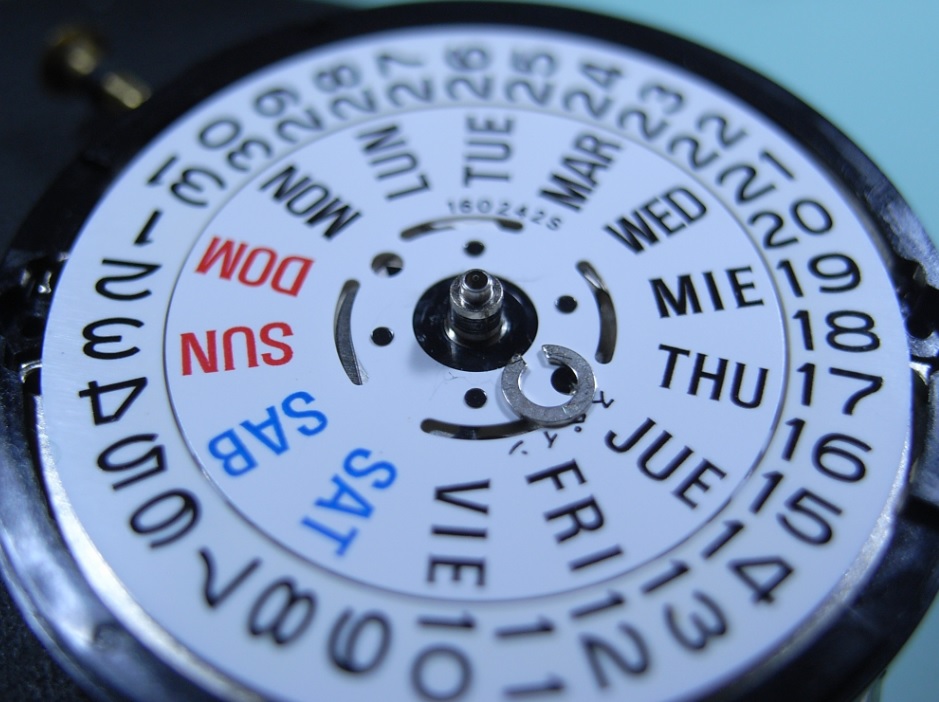
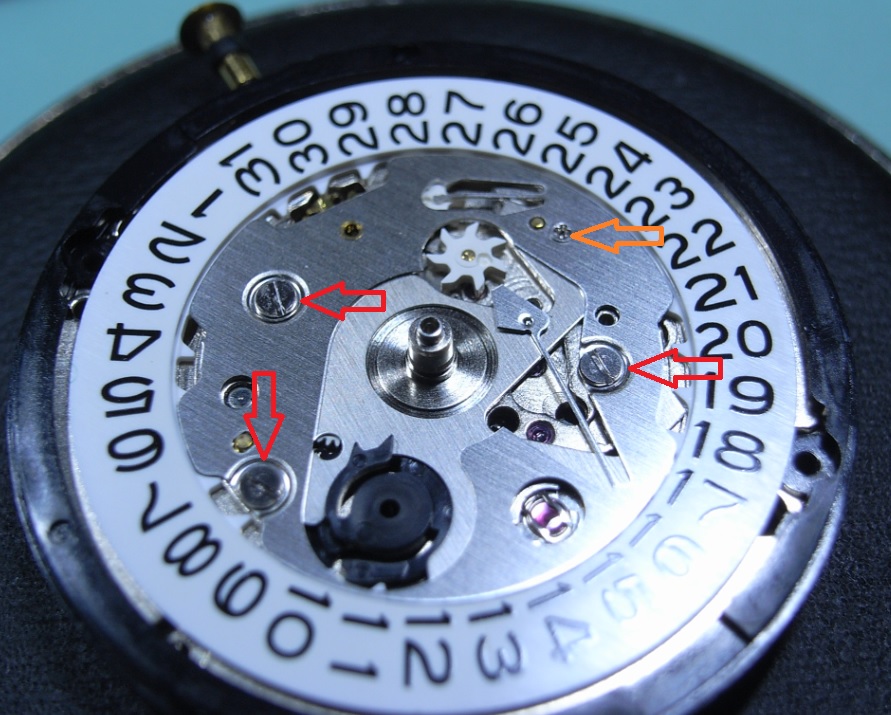
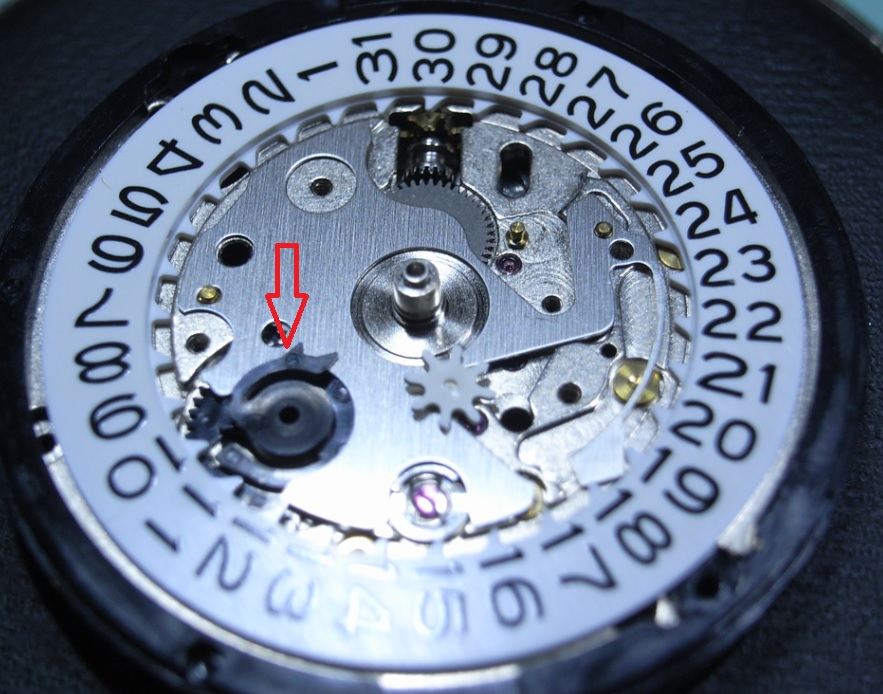
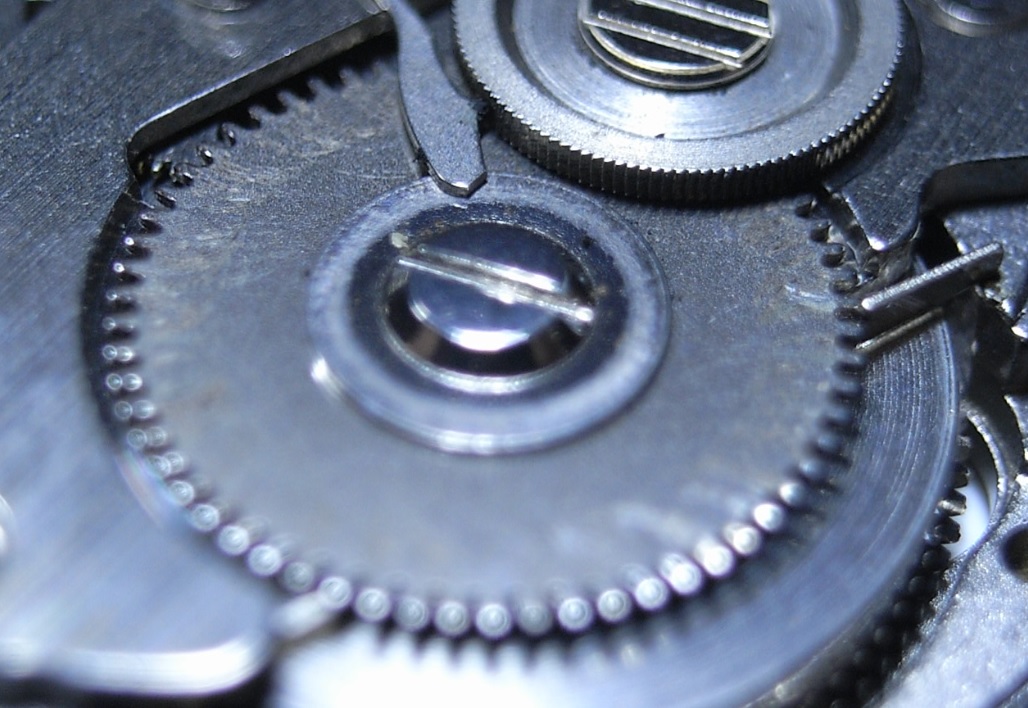
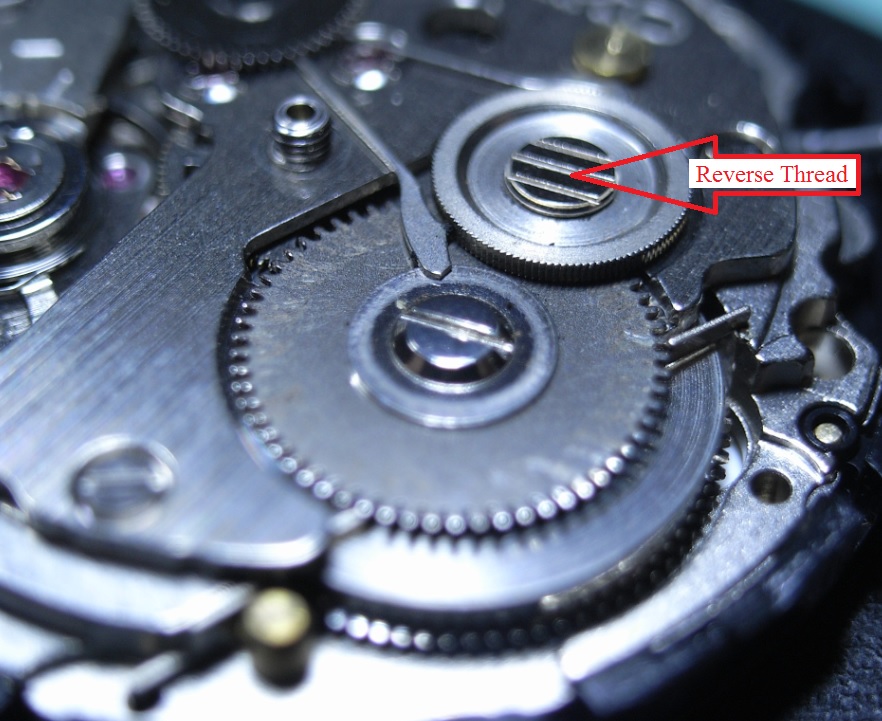
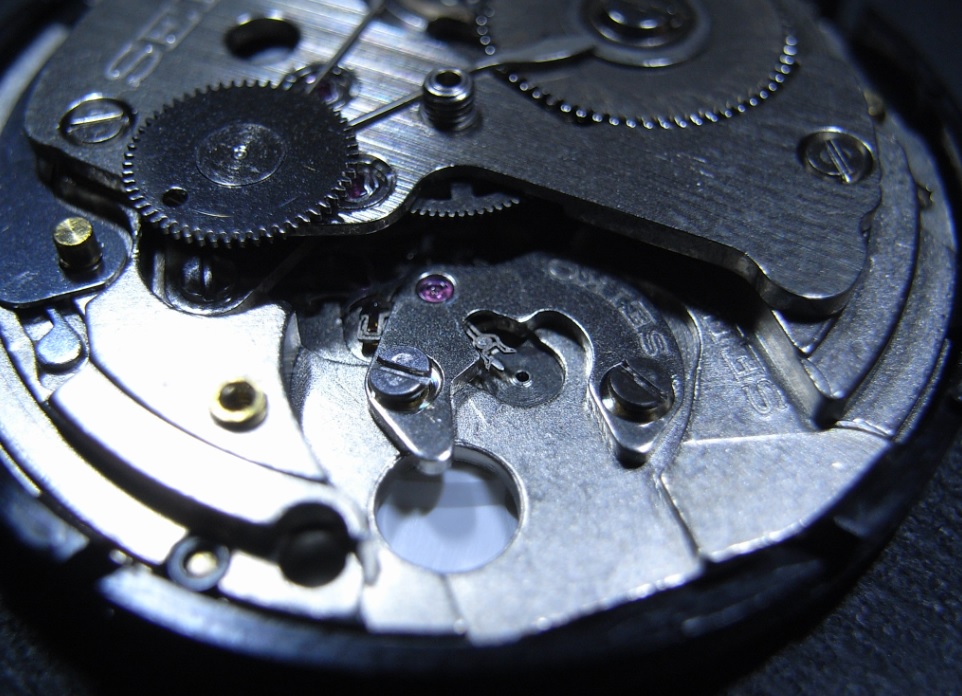
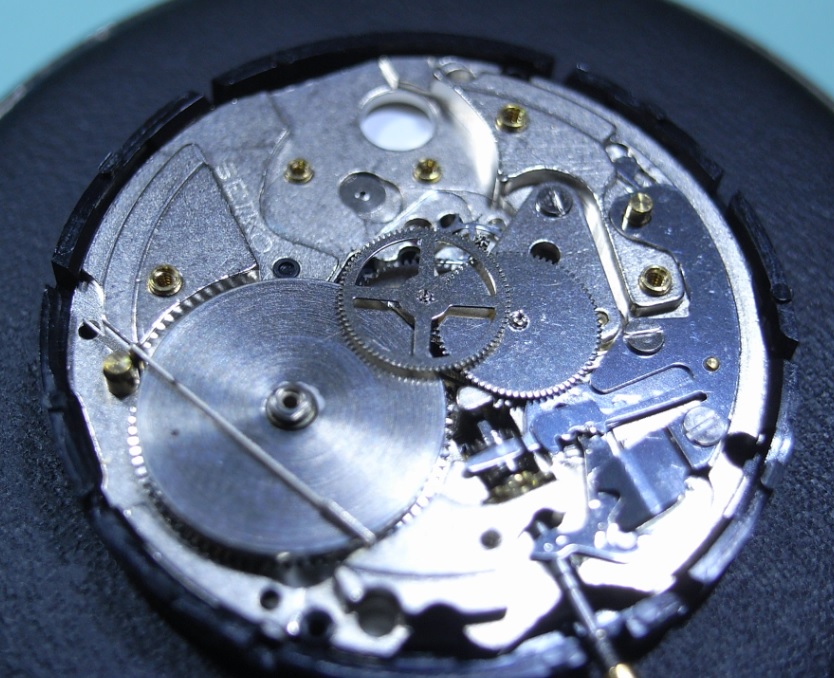
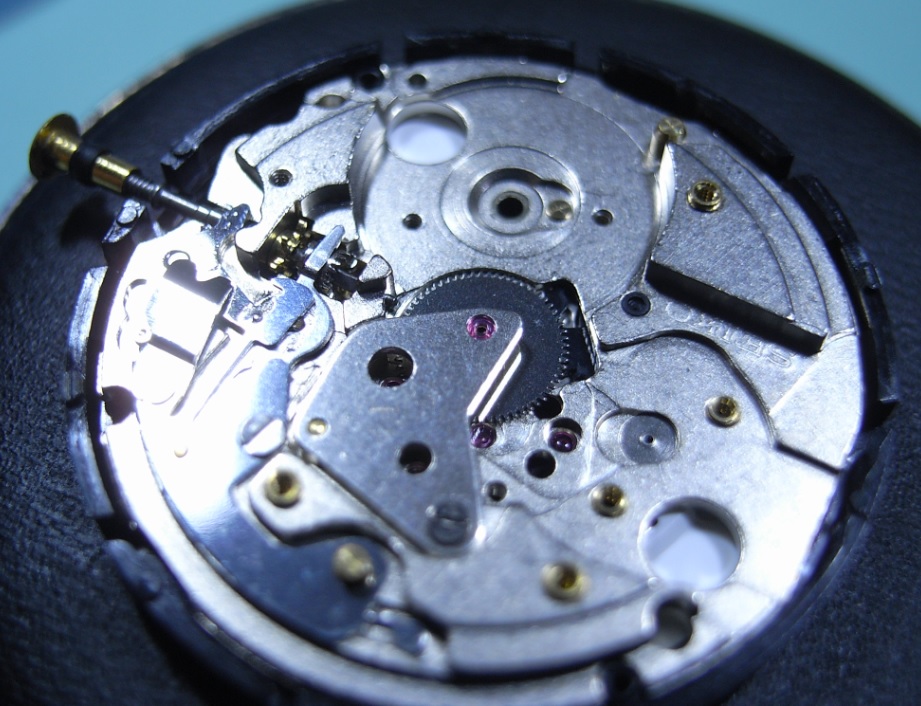
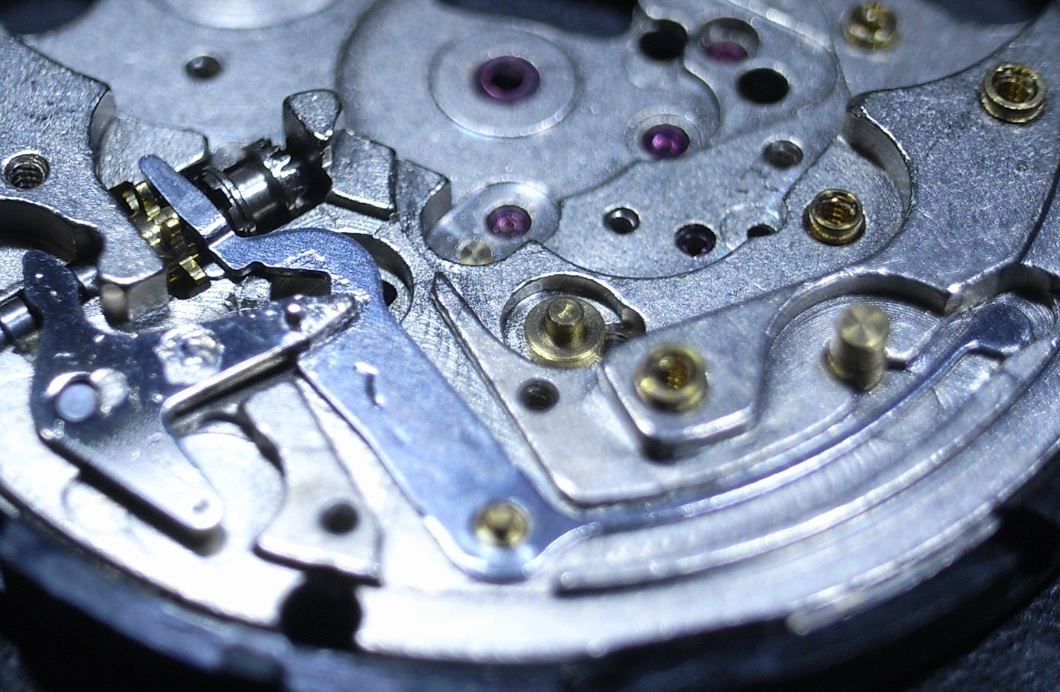
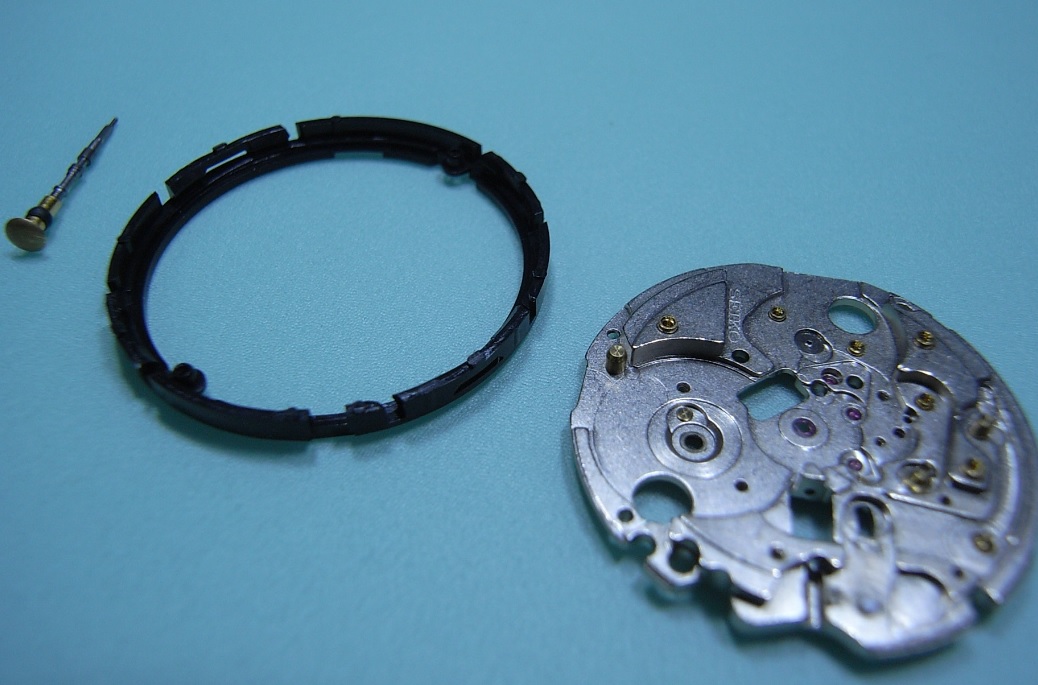
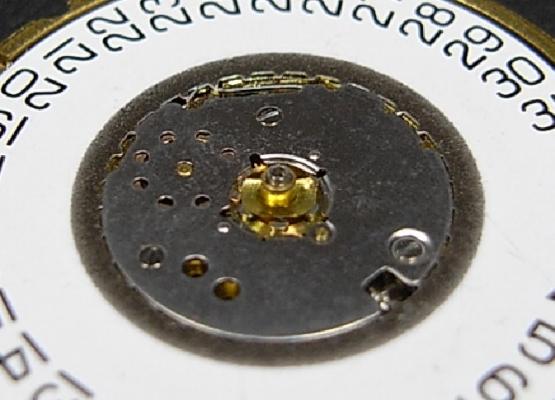
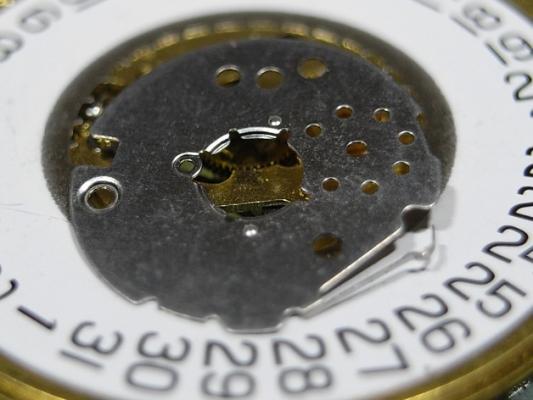
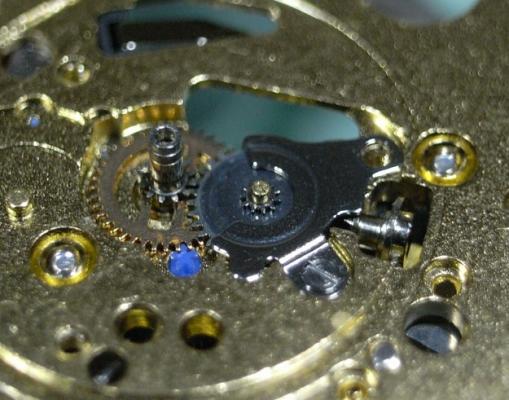
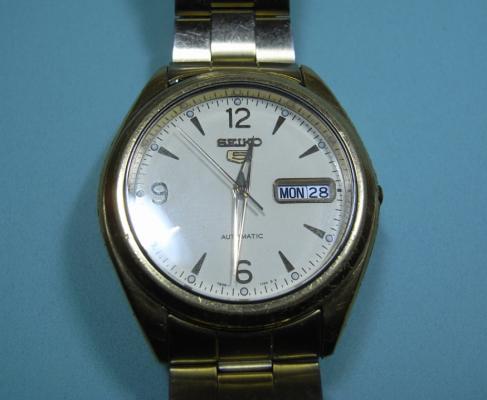
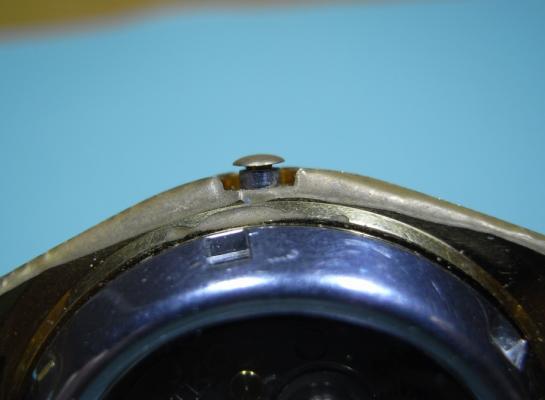
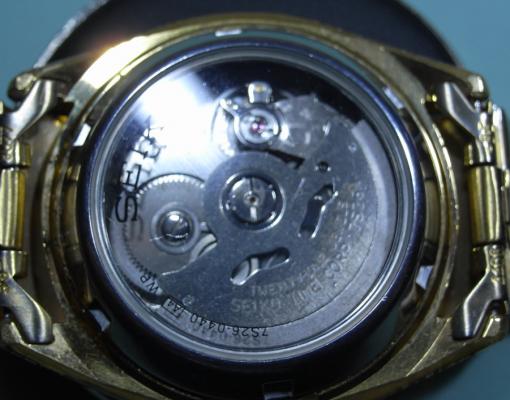
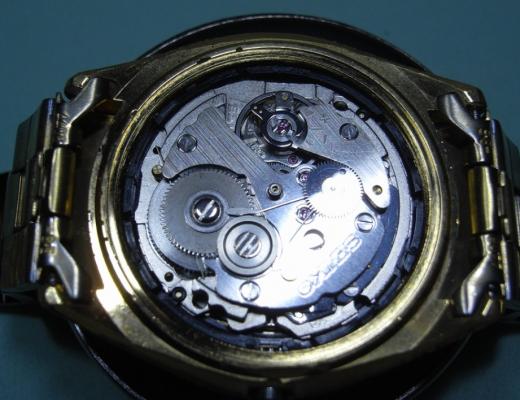
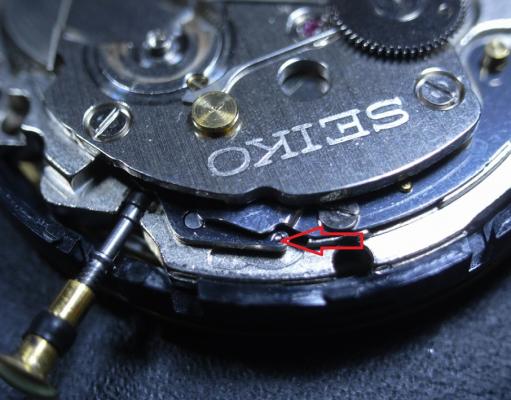
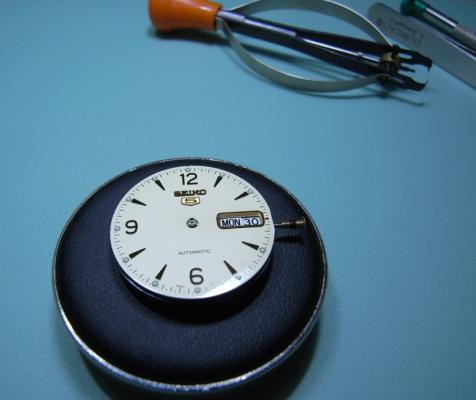
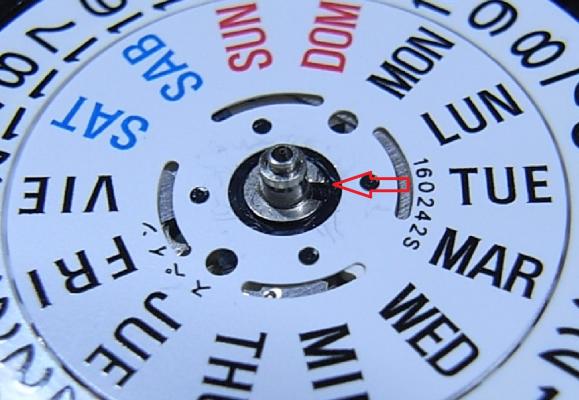
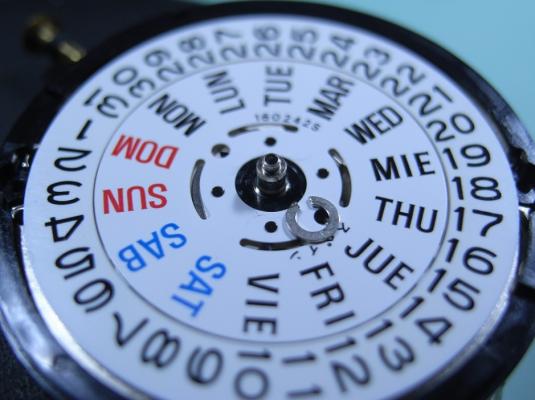
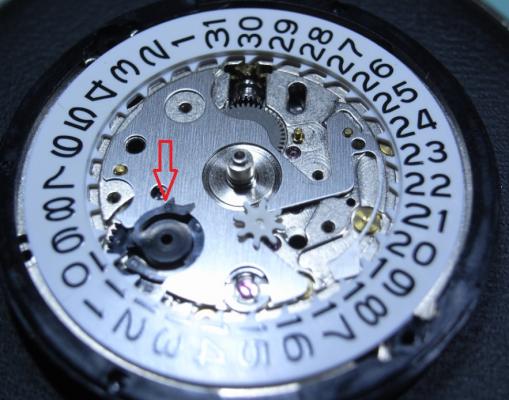
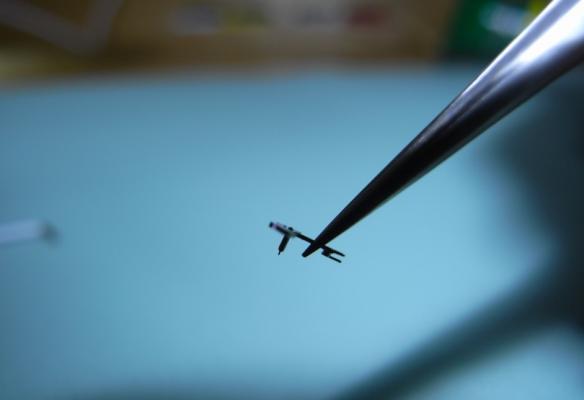
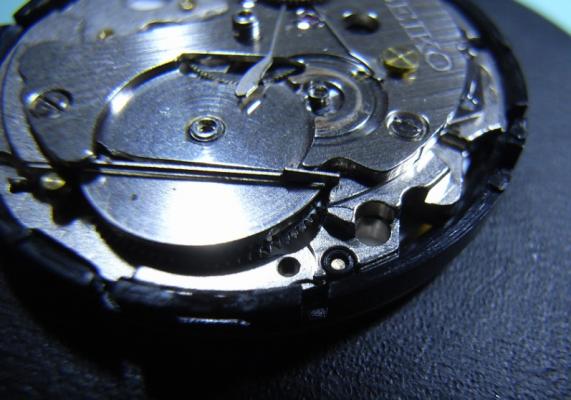
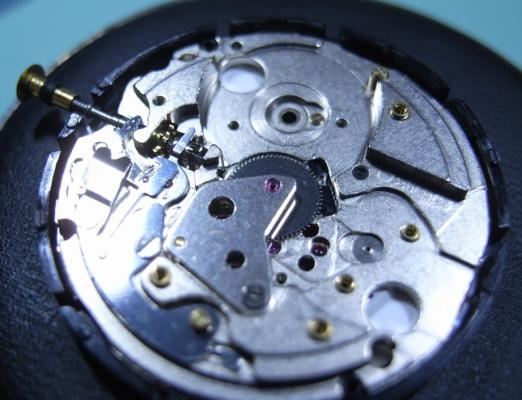
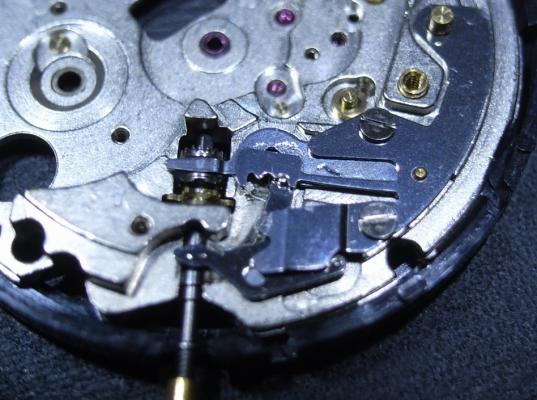
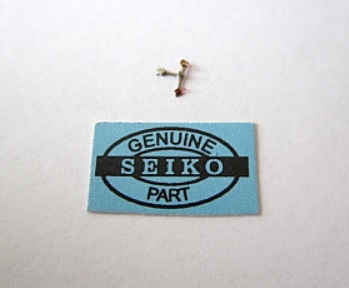
Seiko 7S26A Complete Service Background I have a good friend, a brother in Christ Jesus, who I've known for many years. He knows I've embarked on retraining myself for a new career in Watchmaking, and seen my first two restored watches. He told me that his old faithful Seiko 5, which he's worn everyday for 12 years, has recently had issues. Occasionally it will advance rapidly in time (up to an hour in a few seconds) and then just keep ticking away normally. I told him I'd be happy to take a look at it, and put it on my ACEtimer Timegrapher. The pattern on the screen looked like a B-52 drop in Nam (stupid me forgot to take a photo), and I told him that his watch definitely needed an inspection and service. So started my research on what the problem might be. After reading a "Practical Watchmaking", and the many forums that I've read, I was pretty sure it was the Pallet Fork ... either very dirty or damaged stones, or a broken/damaged fork pivot. So onward to the service... Disassembly One unusual aspect of this watch is the crown ... or lack there of, more to the point. I suppose since this is an automatic watch, they thought it didn't need to be wound. This watch also has a display back, so extra special care not to mark any of the plates, or damage screw heads! The first issue you'll face when working on a 7S26A Movement, is how to get the stem out! It isn't obvious at all, and there is a little trick. The crown needs to be pushed all the way in to expose the push plate (it is hidden in the other crown positions). I took this photo once the movement was out to best illustrate where to push. Remove the Hands, Dial and Oscillating Weight (2.0mm Screwdriver). Gently lever up one end of the circlip and carefully work your way around. You then should be able to raise the circlip up the length of the shaft without it pinging off. Remove the Day Wheel and the four screws holding the Date Dial Guard. (Use a 1.40mm Screwdriver, and this driver is good of all the screws from now on; bar one.) NOTE ORANGE ARROW: Seiko Special Tool needed for the 0.98mm Philipshead Screw (Part Number: S-921) I had to journey down to my nearest Seiko Distributor and grab one ... cost was AU$24.00 Here's a closer look at the troublesome screw. Remove Date Jumper, and note that the Date Drivewheel lips over the top of the plate. Remove all the motion work, and pull the Cannon Pinion Remove the tension from the Mainspring. Remove the Ratchet Wheel and the Second Reduction Wheel and Pinion. (remember the Reduction Wheel has a reverse thread) Unscrew the Balance Cock and remove the Balance. Also unscrew the Pellet Cock and remove the Pellet Fork. BINGO! Found the problem with my friends watch. The top pivot on the fork is broken. Easy fix with a replacement fork :) Remove the Barrel/Train Wheel Bridge Remove the Click, then the Barrel. Remove the Fourth Wheel, Third Wheel and Escapement. Unscrew the Centre Wheel Bridge and remove the Centre Wheel Now to the Keyless Work. Remove the Setting Lever Spring Remove the Yoke and the Setting Lever Pull the Stem out, and the Clutch and Intermediate Wheel will fall away. Lastly, pull the black plastic location ring off. ... and now it's bath time!!! I hope this has been of help to you guys. I'll post the Assembly steps in this thread tomorrow morning.


 1 point
 -
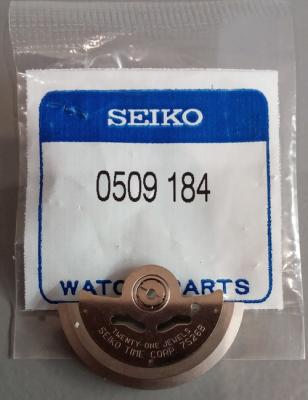
If it is a 7S26 movement and the rotor is rattling you will nee one of these: These will fit all 7S26 movements, the only problem being that they are normally stamped 7S26B. They also work in 7002 movements as well. Cousins stock them for £8.25 ex VAT & delivery.
 1 point
 -
I personally would and have done in the past , just tell them to send it back for a refund Sometimes the buyer is just trying it on snd will therefore not send it back as they were just trying it on to get a bit of money back , and when their bluff is called they get cold feet. But if they send it back give them a refund get your fees back and block him from bidding on anything else you might sell It not ideal I know but that's what I do1 point
-
This is what the forum is all about! :)1 point
-
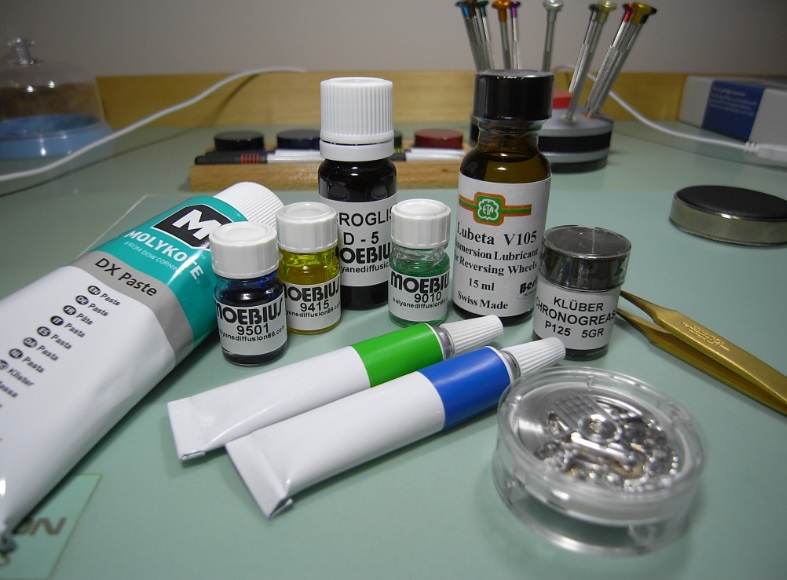
Another update to my **cough cough** "Christmas Project" ... yeah I know it's going to be a "Christmas in July" Project the way I'm going :P Anyhoooo ... I now have all the lubricants needed to properly service the 7750 exactly to factory specs. I can see why the service fee on these movements is quite high. The oils alone are a considerable investment to say the least. :unsure: Here they are Only one piece of the puzzle left to get ... the Horia Movement Holder
 1 point