Jump to content

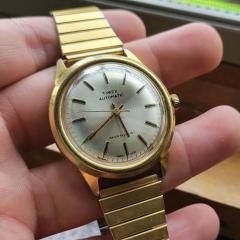
Making A Barrel Arbor From Raw Stock - Tissot Repair


Recommended Posts

Repair and restoration of a Tissot pocket watch


The watch arrived with a number of problems, the crown wheel was missing and so was the barrel arbor.


The barrel arbor is a difficult part to make, because it has so many things all contained in a very small space, so I think my first task is to make a new one. Here are some of the critical parts of a barrel arbor:


  • square boss has to have a hole drilled and tapped to accept the winding wheel screw

  • a hook needs to be made on the arbor to fit and hold the inner part of the mainspring allowing the spring to be positively secured and the required clearance to the coil so it doesn't touch the hook

  • there are numerous pivot surfaces, 2 to fit into the mainplate and barrel bridge, 2 to fit into the barrel

  • the dimensions of all the pivots and spacing is critical if the arbor is going to fit and work properly

  • the arbor needs to be hardened and tempered for strength and durability, and it's friction surfaces need a high polish and burnishing to reduce friction to the minimum

  •  

Whenever you are making a part from raw stock, you have to have a plan and logical approach. My first task was to drill and tap the hole for the screw. Once that was done, the next step was cutting the 4 faces that would secure the arbor to the winding wheel and allow the movement to be wound up. I made these with a very slight taper, so that as you tightened the screw the wheel would be held more securely.


2_zps69pgw4mp.jpg


Here is a view of the winding wheel being test fitted to the arbor.


3_zpslseb2gms.jpg


The next step was to fabricate all the various pivot surfaces and make sure that the heights were correct so that it fit into the barrel as well as between the mainplate and the barrel bridge. Here's the arbor ready to be parted off and the bottom pivot finished.


5_zpscywgklcx.jpg


Once the bottom pivot was finished, the arbor needs to be hardened, it is coated in boric acid to keep the oxygene away during heating, heated to a red heat and then quenched in water. Here it is after quenching.


6_zpsrgzthb7o.jpg


Next it gets a polish so that I can see the colour change as I temper it to a blue hue.


7_zpsuxibnumr.jpg


Now it needs another polish of all surfaces, and I burnished the pivot surfaces for durability.


9_zpsu2evqz8m.jpg[/url]


8_zpswliqll41.jpg


Now the big test, fittin it into the barrel and the mainspring, it fits perfectly.


10_zpslpgaqyzc.jpg


And next is the installation of the cover, which also is a perfect fit.


11_zpsjv4tyfun.jpg


Moving along the whole assembly gets installed into the movement, end and side shakes are checked and corrected if needed.


12_zpsjrps3pz2.jpg


And finally I am able to re-install the winding wheel and it fits perfect with the required clearance to the barrel bridge and no end play.

13_zpsilzq2czu.jpg


With that out of the way, my next task is the making of a new crown gear.

Edited by Horlogerie
  • Like 6
Link to comment
Share on other sites


×
×
  • Create New...