

-
Recently Browsing
- No registered users viewing this page.
-
Topics
-
-
Posts
-
By watchhammer · Posted
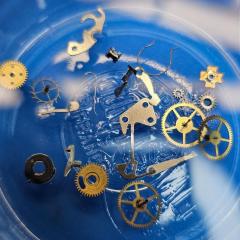
As a fellow newbie who's made a bunch of mistakes over the past year or 2 I'd like to offer my experience. I didn't start with a new practice movement, I started with 1970s Tissot that I loved. If I could do it over I would still use a vintage watch for my first movement. I wouldn't, however, chose one I cared about or that was expensive. It also had a calendar complication- dont do that. I learned a lot about part compatibility and movement families right away though! Emmy watch and Ranfft are great resources for this! I would start with the Benrus and go ahead and find a parts movement right away YOU WILL BREAK AND LOSE PARTS! Get good tweezers, it's much harder to handle tiny springs than YouTube would suggest. And be extra carful, pivots don't like to be forced into jewels - bridges are a real pain in the ass at the start. Don't be afraid to use your bare hands to hold parts/bridges and handle the movement. Finger cotts can come later. Be as carful as possible with hairsprings, this can ruin all the fun! Buy a cheap demagnitizer. For me, I think its fine to buy cheap tools in the beginning and replace as you go. But some things I wish I'd have spent more money on right of the bat - TWEEZERS and Rodico (don't get the fake stuff). There's a great thread here on Chinese tools. I used a cheap digital microscope for a long time. I got quite good at working under it even with no depth perception. It's probably better to just use loupes but I think it helped me be more mindful and it was great for inspection. I now have a stereo microscope and if you get really into this hobby, it's a must. I cleaned everything by hand in the beginning. This is great for getting familiar with each part and learning to inspect for faults. Peg your jewels! I still hand clean a lot of parts before the ultrasonic. I still use JUST Naptha and IPA and I think thats adequate for my hobby purposes but maybe I'll have moved up in another year. I swish the shellaced parts in IPA for a few seconds to rinse (don't tell anyone). I used to dry each part on a sheet of paper with a puffer. Again, this is good for getting to know each part. I now dry everything in a food dehydrator. Im not going to give any advice on oil because thats suicide. But... until very recently I used just mobius 8000 and Molycote DX for everything. I dont know if I would do it differently If I were to go back but its definitely cheap and it will teach you how to apply oil. Take a picture after every move even if it's just scratching yourself. Wind mainsprings by hand until you decide you like the hobby, spend that winder money on tweezers and parts movements. This place is great, there are a bunch of incredible KNOWLEDGEABLE guys willing to help you. Unfortunately, this is as much as I can help, as I'm nowhere near their level. Oh... and buy a big magnet. Still one of my favorite watches and it reminds me of all the broken pivots and pinged springs every time I put it on. worth every penny. -

-

By RichardHarris123 · Posted
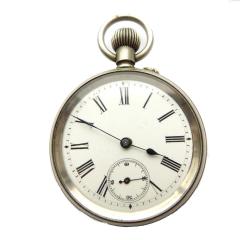
The most important watch repair ever. No not a long lost John Harrison or the like but my three year old granddaughter's. £2.99 but "Grandpa, my watch is broken, can you fix it. How could I say no? -
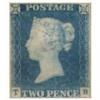
 I really don't want to come across as a nervous nelly, but am I right that any watch from 40s-60s with some lume paint is likely to be radium? Ww2-era ones splattered with paint are the obvious suspects, and I even started noticing ebay ads with radium burn on dials, but I see lots of designs where there's just a bit of paint on the hands and a few dots on the dial. Am I correct in thinking that i really don't want my kids to be licking and snorting the dotted ones either and I should just assume they are all guilty until proven innocent?
 -
-


Recommended Posts
Join the conversation
You can post now and register later. If you have an account, sign in now to post with your account.
Note: Your post will require moderator approval before it will be visible.