Jump to content

Seiko Starfish Kinetic 5M23-7A30 Band Removal


Recommended Posts

Hi all,

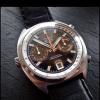
I've been looking for a Seiko Starfish Kinetic 5M23-7A30 for some time and finally was able to snag this off of the 'bay:

5M23-7A30_007.thumb.jpg.b6e15b9cfcbc43ac6bfe358f94fcb431.jpg

The challenge has been finding one with a large enough bracelet to fit my tree trunk arms.  Many of these watches were sold in Japan where evidently they have twig arms...

While this one wasn't quite the 8" in circumference that was advertised, it does fit me.  Yay!

The capacitor was deader than dead upon arrival, no surprise.  Luckily I happened to have a new replacement cap and that went in and it works beautifully. Getting the back unscrewed was a challenge. It took everything I had to loosen it.

With the back off, I noticed the watch was extremely dirty.  So I took the movement out and put the case, strap and back in my vibratory cleaner.

When I got the parts out, I noticed some crevice corrosion on the stainless back which was prolly why it was so difficult to unscrew.  Unfortunately this is the result of the dissimilar metals of the case as the shell is titanium and the back is stainless. I soaked the back in mineral oil, and lightly scraped all the corrosion off and it's fine.

Putting everything back together, I noticed that the strap "lugs/links" on the band have been bent outward a bit (I could have done this when unscrewing the back), so I want to take the strap off and close up the links. 

Trouble is I can't get the pins holding the strap on to move. I have a feeling they are corroded inside like the back was.

I've dripped some mineral oil in the pins and am letting it sit.  I really don't want to use anything more aggressive.

5M23-7A30_006.thumb.jpg.b86a4123c914e8b706f925a4b4e4e56f.jpg

Any thoughts for ideas on getting the posts out?

Thanks

Chris

Edited by Doobs
fat fingers
Link to comment
Share on other sites

Well,

It's becoming clear that the pins will be unusable once this is done. I've already split the end of one of them.

I've taken the movement out of the case and am thinking about soaking the entire case to help free up the pins enough to remove them.

What's the best thing to soak the case/band in?

I've got mineral oil and mineral spirits.  Either of those do, or is something else better?

Thanks

chris

Link to comment
Share on other sites

1 hour ago, Doobs said:

Yep. Although I've abused it trying to get these things out.  Might need to source another.

The spring bar removal tools you can buy are crap., even Bergeon ones. They will bend. They don't make them hard enough, as they want you to buy more. You need to make your own with tool steel, hardened and tempered, so it won't bend and will get the spring bar out after soaking in penetrating oil. Some spring bars can only be released from one side, so keep that in mind. Homemade tools are infinitely better than anything you can buy.

If you are still having this problem, DM me and I'll send you a homemade tempered and hardened spring bar tool you can mount in a screwdriver fitting.

Edited by Jon
  • Thanks 1
Link to comment
Share on other sites

Sigh,

No joy with the various oils.

So, I took the brute force method.

The links holding the band to the spring bars were already distorted, so I opened them up more so I could get them off the spring bars.

Once done, I cut through the bars with a pair of wire cutters and got them out. They were full of crud, so I doubt there would have been any other way of removing them.

Back in the vibrating cleaner for a thorough wash to get all the crude out of the remaining pieces.

PXL_20231230_172154176_MP.thumb.jpg.837c7606cc36a183d80026cd5e70d10f.jpg

PXL_20231230_172200452.thumb.jpg.c760f7139a057f80e405299d7bd8ecda.jpg

PXL_20231230_172203231.thumb.jpg.e6afb543334bd173a172c0d1d3265c33.jpg

I definitely need to buy some new fat spring bars and spring bar tool.

This project has been had on tools.  I killed the spring bar tool and a pair of wire cutters. 😒

Thanks for all the help.

I'll post pictures once it's all back together.

chris

Edited by Doobs
  • Like 1
Link to comment
Share on other sites

I use a screw driver when the ears of the spring bar get frozen, glad you got it apart though, your cleaner is called an ultra-sonic cleaner, put the band in it with some Parson's ammonia and that will clean it up....

Link to comment
Share on other sites

Thanks

Screw drivers did nothing other than tear the outer skin of the spring pins, and bugger up my screwdrivers.....

It's all clean and drying.

I've got some fat spring bars coming, although I think the ones I ordered are 2 long.

This site: EmmyWatch indicates the pins are 18mm, but I measured 19mm so that's what I ordered.

We shall see.

Happy New Years!

Link to comment
Share on other sites

  • 3 weeks later...

Geeze,

That was a pain.

I ordered the fat spring pins on January 1st from Uncle Quality Watch Straps which is in southern California.

They shipped them fairly quickly and then they went for a 10+ day USPS driven trip around Virginia. 

The pins arrived yesterday, some 15 days after being put in the mail..

Anywho, everything got reassembled, which included straightening the links I had to open to cut the original fat pins out and voila! here it is:

Thanks for the moral support!


final.jpg

  • Like 4
Link to comment
Share on other sites

If you look closely at spring bar types and the holes in the lugs of watch cases, you will come to realize that you need the right type of spring bar for the type of hole.

For blind end holes, like that of your Seiko, a double flanged spring bar is needed. Don't ever use a single shoulder or double shoulder type because once the pins go into the holes, it very difficult or in the case of the single shoulder type, impossible to get it out.

Single shoulder types are meant for the adjustable section of bracelets, where the pins protrude out from the holes and can be pushed in to release it.

Double shoulder types are for watch lugs with through-and-through holes, where again, a tool can be inserted to push the pin out.

It could be possible that a novice watchmaker disassembled the bracelet for cleaning and mixed up the spring bars during assembly. 

If you come across a single shoulder spring bar used in blind hole lugs, the only way to remove it is to cut it. I have come across a few and I used my dental highspeed drill with a tungsten carbide bur to cut it. But now that I've retired, that would be a difficult task. 😕 

Looks like I've to setup my compressor and highspeed drills in my workshop just in case. 🤣

  • Like 3
Link to comment
Share on other sites

Thanks,

What I got from  Uncle were indeed the double flange versions.

image.thumb.png.d58fda867f9125577d776f147d665815.png

It's funny as I've been looking for a Starfish for about 6 months and within a couple of days 3 appeared on the 'bay.

Oh well.


Link to comment
Share on other sites

Join the conversation

You can post now and register later. If you have an account, sign in now to post with your account.
Note: Your post will require moderator approval before it will be visible.

Guest
Reply to this topic...

×   Pasted as rich text.   Restore formatting

  Only 75 emoji are allowed.

×   Your link has been automatically embedded.   Display as a link instead

×   Your previous content has been restored.   Clear editor

×   You cannot paste images directly. Upload or insert images from URL.


  • Recently Browsing

    • No registered users viewing this page.
  • Topics

  • Posts

    • Last night's experiment coming up later today, i bought some Kerosene. Tested 6 fluids that are in common use for cleaning and a couple of interesting findings. 
    • Had a rethink on my tweezer use yesterday, i must have 3 dozen old Dumonts , Bergeons, precista and various other good and cheap tweezers. So decided to scrap using my current choices and am now down to just 2 non brand makes. A very cheap Cousins brass pair that i dressed and polished to 2mm wide tips and a pair of antimag steel that have wide sides that i found amongst the pile and dressed these to fairly sharp tips and polished the ends leaving the handle which should have some friction built in ( who has had some tweezers slip right  through their grasp and land right in the middle of a movement ? ). Working with them both yesterday on a Smiths diver was such a nice uncomplicated change, 95% of disassembly and reassemble is possible, the brass for turning the plate and fitting bridges plus some other concentrated gripping use and the steel for everything else. For repair adjustment and cleaning a few others take over, like a steel forked tweezer for pinning a stud, a thick tipped brass for turning a  boot reg pin, very thin 4mm wide steel for barrel and mainspring work and obviously hairspring tweezers. There should be "for you" just the right amount of tension between the 2 blades, too much and you drop stuff when you lose concentration for a moment, too little tension and you will notice your fingers tremble much more as you try to resist the closing up on fine work, your finger muscles are attempting to match the tweezers tension output at low levels of tension , which is quite difficult. 
    • My worry is that coffee or other "edible" pigments will be hydroscopic, and encourage mould and rust to form. This happens to some degree with older lume anyway, but I think small amounts of acrylic paint or pigment powders might be a safer option.
    • Ok, I'll admit that @JohnR725 has a point here. First and foremost, YOU decide. And YOU have to be comfortable doing it. It's also good advice to finish the automatic Seiko before going to the next watch.   In defense of the "encouragement" posted above: when I serviced the Tissot 783, it was actually my second automatic watch and it was only about one year ago. So I didn't forget how it feels being in your position.  Without a doubt, there is a learning curve. But I, personally (!!!), found it quite doable. It was a simpler auto system than some ETAs, Omegas and Rolexes that I worked on afterwards.  But very important: this is only gentle encouragement. Nobody here is "pushing you" to try.   And that said, I fully support your decision to...      
    • So, I did an experiment. Not a fair one, I'll warn already. I compared the performance of the automatic works with: a) old (but functioning) reversing wheel, cleaned and treated with V105 b) new ETA reversing wheel, taken as-is from the blister   Test 1: signs of rotor spinning when manual winding --> both performed fine, but the new wheel was better (super smooth) Test 2: With the automatic works fully assembled but not installed in the movement, held vertically, let the rotor swing from a 90° angle. --> new wheel the clear winner   As I said, not a fair comparison because I'm comparing an old wheel (functioning, but potentially with slight wear) with a brand new one.   But still, I think it's sufficient confirmation that the potentially-old ETA wheels sold by  CousinsUK are still in perfect condition despite their age and don't need new lubrication.
×
×
  • Create New...