Jump to content

Recommended Posts

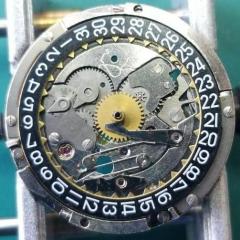
I've been looking for one of these for a very long time. I've just got my hands on a Seiko Macchina Sportiva from the 1990's, but this one is quite rare. It's the 7T32-6L20 Black ION with its original black rubber strap.

I've given it a full service but need to realign the date ring, that's not a problem. But what is a problem is the case back.

There's video I've made to show it off a bit.

The back on these was a silicone based black finish and this had deteriorated over time. Again, not too much of a problem, I'll completely strip back the back plate to bare metal and reapply a new decal to original spec.

59353a7e61fdc_Seiko7t32-6L20-1.thumb.jpg.22fd80f3820a8f1454a82a5cf77e1dbb.jpg


59353a8c49787_Seiko7t32-6L20-2.jpg.da23a5e8bb1d4d0ed4c447693ebb0ca3.jpg


59353a97a5fc4_Seiko7t32-6L20-3.jpg.07cb572afddcb08d6907edc1984ccc25.jpg

  • Like 4
Link to comment
Share on other sites

  • 2 months later...
23 hours ago, StuartBaker104 said:

How did you do that? It looks great!

I took a photograph of a few Macchina Sportiva case backs and took measurements of the text, the logo panel and diameter of the text relative to the panel and case back.

I then edited and recreated the Logo panel in Gimp.

I recreated the circular text using the same font as a layer.

Then I created a black background layer the same overall size of the case back.

The artwork was the laser printed onto a transfer film ready for transferring to the case back.

Obviously, printers do not print white text. Therefore, I used an acid etch primer on the case back before painting it with an off white background for the text.

The transfer was then applied and baked on. A few coats of matte lacquer was then applied to seal and finish it off.

This is not one for the faint hearted, it needs a lot of patience.

  • Like 3
Link to comment
Share on other sites

13 hours ago, systeman said:

I took a photograph of a few Macchina Sportiva case backs and took measurements of the text, the logo panel and diameter of the text relative to the panel and case back.

I then edited and recreated the Logo panel in Gimp.

I recreated the circular text using the same font as a layer.

Then I created a black background layer the same overall size of the case back.

The artwork was the laser printed onto a transfer film ready for transferring to the case back.

Obviously, printers do not print white text. Therefore, I used an acid etch primer on the case back before painting it with an off white background for the text.

The transfer was then applied and baked on. A few coats of matte lacquer was then applied to seal and finish it off.

This is not one for the faint hearted, it needs a lot of patience.

Great job and very creative!

Link to comment
Share on other sites

  • 2 weeks later...

I've now uploaded a video of the finished watch:

It was great fun getting involved with refurbishing the case back. After assembling and testing the functions, I did notice an improvement in the volume of the buzzer. This was probably because of baking the decal. The process must have improved the conductivity of the old adhesive.

  • Like 1
Link to comment
Share on other sites

Join the conversation

You can post now and register later. If you have an account, sign in now to post with your account.
Note: Your post will require moderator approval before it will be visible.

Guest
Reply to this topic...

×   Pasted as rich text.   Restore formatting

  Only 75 emoji are allowed.

×   Your link has been automatically embedded.   Display as a link instead

×   Your previous content has been restored.   Clear editor

×   You cannot paste images directly. Upload or insert images from URL.


  • Recently Browsing

    • No registered users viewing this page.
  • Topics

  • Posts

    • Unfortunately I'm not that lucky. I started on the train side and after I noticed the binding I pulled everything out except the driving wheel to rule everything else out. It still binds. I'm going to double check that the pinion is fully seated on the staff first, then if no joy I'll push the bridge jewel up a fraction of a mm. Fingers crossed!
    • Happy to have helped, great way to start the day with a win! 🥳
    • Thank you for the advise!! It worked. The setting screw was a lock/unlock to remove the rotor. 
    • I have that French tech sheet too, it is a little different than the English one (eg, it doesn't have the auto works diagram). BTW, it looks like you are looking up the case number in the 1979 ABC supplement. The 1974 ABC catalog does have the 3093 case. As you determined it takes the 1222-5 crystal.  When I serviced my President 'A' (which also takes that crystal), I was able to fit a 29.8 crystal from my DPA crystal assortment. Those are, in my opinion, a great deal. The assortment comes with 10 sizes each from 27.8mm to 32.4mm in 0.2 increments. I pretty much use them for any non-armored crystal that takes a high dome crystal. I think they no longer make them but Cousins has still has some in stock but when I bought them they were around $40 for the set and now they are around $100. Still, at 40 cents a crystal it's still a good deal. For the large driving wheel, I remember I once assembled the keyless/motion works first and when I placed the large driving wheel it was interfering with the setting wheel on the dial side as the teeth were not fully meshing and it wouldn't fully seat. If that isn't the issue I got nothing and am looking forward to see how you solve it 🙂
    • Not sure, but just looking at it, it seems like the screw on the right may be a fake? The one on the left may not be a screw in the regular sense at all, rather a 2 position device, I think you need to point the slot towards either of the 2 dots and one will secure and one will open. Like I said this is just my best guess looking at the pictures.
×
×
  • Create New...