Jump to content

Omega 1337 Quartz Movement Complete Service


Recommended Posts

Hello fellow watch freaks.

It's been a while since I've posted a service walkthrough, but I had an accident that destroyed my left shoulder and needed surgery.  It's been a rough 6 months for me, with a LOT of soul searching throughout my recovery period.  But I'm back on the bench ... at least at home anyway; work is a different matter, and my close friends on this forum know about that ... nuff said.

This watch is owned by one of my older brother's friends.  My older brother is one of the most selfless people I know, and has always been there for me.  So when he asked me to do this for him it became TOP priority.

It was the first item his friend purchased after he left school and began work: so there's a lot of good memories tied to this watch.

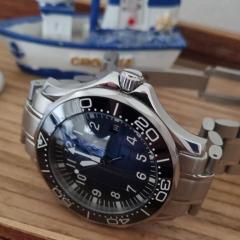
As you can see it's an older quartz Seamaster with an 1337 Movement.

Omega1337-1.jpg

On first inspection you can see water damage to the Dial @ 3 o'clock.  So I wasn't expecting to see a happy movement inside.

Omega1337-2.jpg

But when I got the Caseback off things didn't look too bad at all. Just a bit of corrosion from a cheap nasty Chinese battery. 

Omega1337-3.jpg

The movement still looked nice and shiny and the Stem only had a touch of rust up near the Crown. 
So this watch looks like one we can save :)

Omega1337-4.jpg

Disassembly

OK, lets begin.  Fist remove the Hands and Dial from the movement.

Omega1337-5.jpg

Again, absolutely no moisture damage under the Dial ... this made me VERY happy indeed.

Omega1337-6.jpg

So on to the Movement Holder it goes.
Remove the Battery Clamp and Insulator Ring.

Omega1337-7.jpg

Then remove the 4 screws that hold the Circuit Cover.

Omega1337-8.jpg

Note that there is an insulator under the cover.  It is very delicate, so great care should be taken when handling it.

Omega1337-9.jpg

Once the cover is removed the circuit is exposed; but before removing it, unscrew the 2 screws holding the Coil Protector and remove it.

Omega1337-10.jpg

Then unscrew the Coil, and remove the Circuit and Coil.

Omega1337-11.jpg

Place both the Circuit and Coil in a safe place to avoid damage, as this parts are obsolete, and if damaged you'll have to scour the internet for a donor movement ... good luck with that!!

Omega1337-12.jpg

Next remove the Train Bridge

Omega1337-13.jpg

Here is a reference photo of the train. As you can see, the Rotor is a very different looking animal to the modern ETA rotors.
Carefully remove all the wheels, and store the Rotor in a safe place AWAY from the rest of the parts to be cleaned ... as this has to be hand cleaned due to it being magnetic.

Omega1337-14.jpg

Please Note: There is a very small washer that fits between the minute wheel and the extended pivot of the Second Wheel. 
Be sure to identify it, and make sure it's put in the small parts container for cleaning.

Omega1337-23.jpg

Here's the complete train removed from the movement for reference.

Omega1337-24.jpg

Flip the movement over in the holder and remove the 3 screws of the cover that holds the Calendar Ring.

Omega1337-15.jpg

As you can see that Motion Work and Calendar Work are fairly complex on this movement.
Make sure you take good reference photos and study them carefully so they are not confused with wheels of the train.

Omega1337-16.jpg

Remove the Calendar Ring.

Omega1337-17.jpg

Remove the Motion Work and Calendar Work.

Omega1337-18.jpg

Here's the complete Motion Work and Calendar Work removed from the movement for reference.

Omega1337-19.jpg

The Crown and Clutch should now be able to be removed.

Omega1337-20.jpg

Flip the movement over once again to tackle the Keyless Work
Unscrew and remove the Setting Lever Spring.

Omega1337-21.jpg

Lastly unscrew and remove the Setting Lever, Intermediate Wheel and Yoke.

Omega1337-22.jpg

The Omega 1337 Movement is now completely disassembled and ready for cleaning.

I will post the assembly soon.
 

  • Like 8
Link to comment
Share on other sites

Thanks for all your kind words my friends :)

Now I've spent some quality time with the 1337, I have an addendum to add to the disassembly instructions; but unfortunately I can't go back and edit the original post.

There is a second magnetic part that MUST BE CLEAN BY HAND, AND NOT PUT IN THE CLEANING MACHINE.

The Omega 1337 movement uses 2 wheels magnetically coupled as the Cannon Pinion (Friction Point).  As I don't have the Omega Schematic at present I'm not sure of the correct terminology for this part.

Below is the location and an image of it pulled apart.  Make sure the surfaces between the wheels are spotless clean, as any contamination will great affect the function of time setting.

Omega1337-26.jpg

The movement is all back together, and I have LOTS of photos I have to edit and upload.  So please be patient and I'll have the assemble instruction up later today.

Link to comment
Share on other sites

Unfortunately I do not have an exploded diagram of this movement, with the correct terminology for the parts or the factory oiling procedures.  The following is my own procedure for assembly, and I will leave the oiling to your own discretion.  Personally I used Moebius Quartz Oil and Moebius 9501 for the Keyless Work.

If anyone has a copy of the 1337 Technical Document please upload it to assist others.

 Assembly

I started with the Keyless Work...

Lubricate the Stem and install the Sliding Pinion and Stem.  Also screw in the Setting Lever Screw.

Omega1337-27.jpg

Install the Yoke and place the arm into the slot in the Sliding Pinion, and replace the Setting Lever.

Omega1337-28.jpg

Install the Setting Wheel and fasten down.

Omega1337-29.jpg

The last part of the Keyless Work to be installed is the Setting Lever Spring.

Omega1337-30.jpg

Next install the train...

Install the Minute Wheel, being sure to replace the small washer.

Omega1337-23.jpg

Omega1337-31.jpg

Install the Intermediate Wheel and the Second Wheel Driving Pinion.

Omega1337-32.jpg

Next install the Second Wheel.

Omega1337-33.jpg

The lower jewel for Rotor is a blind pivot point, this needs to be lubricated BEFORE installing the Rotor.

Omega1337-34.jpg

Install the Rotor.

Omega1337-35.jpg

And lastly install the Third Wheel.

Omega1337-36.jpg

Carefully install the Train Bridge, be careful to check the free running of the train before tightening fully.

Omega1337-37.jpg

Next flip the movement over and proceed to install the Motion and Calendar Work.

Firstly make sure the Magnetic Friction Wheels (Cannon Pinion) are very clean.  Especially the flat plates between the wheels.

Omega1337-38.jpg

Install the Magnetic Friction Wheels (Cannon Pinion)

Omega1337-39.jpg

Then install the Calendar Setting Wheel.

Omega1337-40.jpg

Next install the Motion Work Setting Wheel.

Omega1337-41.jpg

Install the Intermediate Date Wheel.

Omega1337-42.jpg

Lastly is the Date Indicator Driving Wheel and the Hour Wheel.

Omega1337-43.jpg

Now all the wheels are installed you have to time the Calendar Setting Wheel, Intermediate Date Wheel, and Date Indicator Driving Wheel.  This will take some study to setup correctly without the documentation; but take your time and you'll find it will become obvious how these wheels interact with each other.

Once you have set the timing up, replace the Calendar Ring and Date Indicator Maintaining Plate.  Then gently hold the plate down with a piece of Pegwood, and with the Crown in the second position, work the wheels and test that the pivots are located in their jewels and the timing of the Calendar Work is correct.

Omega1337-44.jpg

Once you are completely satisfied that everything is working as intended, screw down the plate.

Omega1337-45.jpg

Flip the movement over again and replace the Battery Insulator.

Omega1337-46.jpg

Install the Coil.

Omega1337-47.jpg

Install the Circuit and Circuit Insulator.

Omega1337-48.jpg

Replace the Electronic Module Cover.

Omega1337-49.jpg

Next replace the Coil Protector.

Omega1337-50.jpg

Install the Battery Insulating Ring.

Omega1337-51.jpg

Install the Battery Clamp.

Please Note: The Battery for this movement is the 391/381.

Omega1337-52.jpg

Lastly install the Dial and Hands.

Omega1337-54.jpg

This completes the assembly of the Omega 1337 Movement.  I hope this walkthrough gives you the confidence, steps and reference photos to tackle this movement yourself.


Edited by Lawson
  • Like 7
Link to comment
Share on other sites

Hi Lawson,

Great pictures and amazing results but that was already known! Very, very good job! Thank you and more because I know how hard it must be for you going to all this trouble at this time. Much appreciated!

Cheers,

Bob

Link to comment
Share on other sites

Hi Lawson

I am very sorry to hear about your Accident, wish you all the best and a speedy recovery[emoji1303]

p.s. I finally bought a L&R Master watch cleaning machine, thanks for all the input and helping me decide on a cleaner. will post some pics soon.

Link to comment
Share on other sites

  • 7 months later...

Lawson - excellent article on the omega 1337.

Can I ask 2 questions please. Is the watch glass a press fit?

1. The watch has only sentimental value and having bought a new glass I am finding difficulty finding a jeweller in the Ruislip area who can fit the glass for me which leads me to think it is difficult and beyond my to fit it with a press.

2. The winder and spindle does not engage and comes off it my hand when I pull it out. I have looked at your walk through which shows how to access the levers. Is it straightforward to reset them?

Other than the above, the watch is keeping good time but obviously cant be worn without the glass.

I would appreciate your advice

regards

Chas G

Link to comment
Share on other sites

  • 11 months later...

Good article. Helped me a lot when i serviced my 1332. (nb: use non-magnetic tweezers!) In addition to the parts shown i also removed what's called the corrector and the lower magnetic screen to completely stip the main plate.

One important comment: the circuit insulator (the plastic cover for the electronic module shown in pic 21 in the assembly-post) goes below the electronic module, as the way it's cut out suggests.

Link to comment
Share on other sites

  • 3 months later...
  • 8 months later...

I know this is an old thread, but would anyone be able to give me some help on how I would fix this corrosion? I am just starting out in watch repair and I picked this omega up for a bargain price, and when I opened the back up the old dead battery had been left in it for ages.

picture attached. 

Ollie

F7EE4F9E-8F64-4D8E-B1C1-DC7C5ACF66F4.jpeg

Link to comment
Share on other sites

  • 4 weeks later...

Hi guys, sorry to necro this thread as my first act as a new member. I promise I'll introduce myself properly soon.

Thank you for putting this together [mention=246]lawson[/mention]. It's given me the confidence to attempt a strip down, clean, and service of a non-running 1337 I recently obtained in a job lot. Hopefully gummy oils and not a failed circuit (coil tests ok) are the problem.

Anyway, I've stripped it down and cleaned the plates and gear train in my ultrasonic (excluding the rotor). I noted the need to dry clean the magnetic rotor and canon pinion separately as discussed above. I also noted the suggestion to pay close attention to the small washer(s) between the second and centre wheels. However, I did clean them in the ultrasonic. I've just found a service guide for the practically identical 1332 movement and it recommends removing the two washer between these wheels and dry cleaning them. The guide mentions that they're magnetic and should be placed so as to repel each other (presumably in place of lubrication). I've added the guide here. I hope I'm not breaking any rules re the size of attachments to be hosted by the site.

Having cleaned them in my ultrasonic, am I likely to have demagnetised them? Were you using an ultrasonic or a proper rotary parts cleaner, [mention=246]Lawson[/mention] and how did you go?

IMG_0569.thumb.jpg.816a92c3295e3e3858ca25b52297639e.jpg

1332.pdf


Link to comment
Share on other sites

Hi guys, sorry to necro this thread as my first act as a new member. I promise I'll introduce myself properly soon.
Thank you for putting this together [mention=246]lawson[/mention]. It's given me the confidence to attempt a strip down, clean, and service of a non-running 1337 I recently obtained in a job lot. Hopefully gummy oils and not a failed circuit (coil tests ok) are the problem.
Anyway, I've stripped it down and cleaned the plates and gear train in my ultrasonic (excluding the rotor). I noted the need to dry clean the magnetic rotor and canon pinion separately as discussed above. I also noted the suggestion to pay close attention to the small washer(s) between the second and centre wheels. However, I did clean them in the ultrasonic. I've just found a service guide for the practically identical 1332 movement and it recommends removing the two washer between these wheels and dry cleaning them. The guide mentions that they're magnetic and should be placed so as to repel each other (presumably in place of lubrication). I've added the guide here. I hope I'm not breaking any rules re the size of attachments to be hosted by the site.
Having cleaned them in my ultrasonic, am I likely to have demagnetised them? Were you using an ultrasonic or a proper rotary parts cleaner, [mention=246]Lawson[/mention] and how did you go?
IMG_0569.thumb.jpg.816a92c3295e3e3858ca25b52297639e.jpg
1332.pdf


Hello matey!
I’m interested in why / how US cleaning would demagnetise these washers? Firing cavitated micro bubbles at something would be fine I would think, although I’m not up on physics to a particularly high level. Have you found that they are demagged or tested them?


Sent from my iPhone using Tapatalk
Link to comment
Share on other sites


Hello matey!
I’m interested in why / how US cleaning would demagnetise these washers? Firing cavitated micro bubbles at something would be fine I would think, although I’m not up on physics to a particularly high level. Have you found that they are demagged or tested them?


Sent from my iPhone using Tapatalk

G'day Pip.
Well my thought was that if you drop a magnet you upset the highly regular polarisation of the elements and it loses its magnetism (sorry if I'm a bit vague on that, high school science was a long time ago).
If the transducer is vibrating the sides of the unltrasonic (again, my assumption which may not be the way it works) and the parts are sitting inside a jar likewise being vibrated, might that vibration not transfer to the parts, having the same effect as dropping a magnet - messing up the ordered polarisation of the elements?
I haven't had a chance yet to have another look at the parts yet - will have to wait until the weekend - to see what's going on magnetism wise.


Sent from my iPhone using Tapatalk
  • Like 1
Link to comment
Share on other sites


  • Similar Content

  • Recently Browsing

    • No registered users viewing this page.
  • Topics

  • Posts

    • This forum is a big part of my life. When I retired from horology many years ago due to poor health I missed what I had trained for. On here I can still do my bit in helping and advising others and have a little fun as well.  
    • First thing this morning, make coffee, second, check the forum.  I would really miss the forum, not on any social media, not interested in telling the world what I had for breakfast!!! I do consider most of the regulars friends and would wonder what had happened if they stopped posting. 
    • Hi all Thought I'd show my small and trying to keep under control watch collection! Apart from the Enicar all were under £12! At least if I destroy them in the process then I won't be too worse off. A few pics to start off with First of all my first attempt. A Thuya pocket watch. It was only running face down and would stop when vertical. So now it still works face down and only slows down when vertical so at least an improvement! 😄  I only have a generic watch oil at the mo so that won't help but I'm hoping to get some more appropriate oils in a couple of months for my birthday. I did have to get a crystal for it since it didn't come with one. It didn't look as though it would friction fit (and I don't have a crystal press in any case) so I glued it to the case with PVA. So far so good. Next up above are a sekonda and citizen automatic. Both non runners. Both with broken balance wheels amongst other things. I'm hopeful the citizen will start when I get the new one I ordered but the sekonda is being kept for spares and trial of new techniques. And finally the Enicar and the timemaster. Both running when I got them. I wanted to get running watches so that at least I stood a fighting chance of still having a running watch after the service! It was all going well on the Enicar until I dropped the balance wheel during reassembly...😔. Unfortunately they are quite expensive to get so for now I'll won't do anything with it but I would like to fix it at one point. The timemaster is still running (yeah!) but I managed to break a dial foot during the deassembly. First repair attempt failed so now I am looking at soldering it back on... So there we go. My initial foray into this great hobby. Thanks for sticking with this tale so far.  I'm hoping that once the balance wheel arrives for the citizen I will be able to say I bought a non runner and fixed it! So fingers crossed. Thanks for looking, Nick
    • Like losing Ranfft. That was a wake up call. We took his website for granted. Miss him terribly.  
    • Its 4 o'clock in the morning here in the Uk, i cant sleep, i dont sleep, not much ever really. My brain never shuts off to rest, I'm just a constant thinker, i have to be very tired to be able to sleep,  i guess eventually it will be my undoing and my health will suffer because of it I'm sure. But while I'm here i want to get as much out of life as i can, and give as much as i can, to help,maybe to make a difference to someone's life if that is within my capability,recent events have made that need even more clear to me. I'm not sure where I'm going with this or why i bring it up , or if its relevant to want i want to talk about its just in my head right now. What i do want to talk about is something thats been on my mind for ages. I like to be prepared,  I'm not fond of surprises because surprises take control away and i am a bit of a control freak at times. This forum, Our Forum if i can call it that, is here because of two reasons. The guy that created it and keeps it funded and the people that joined it.  Without either, it would not exist, and lets face it one day it won't ( I'm a realist and i talk about things others dont or who are afraid to in other words folk that dont particularly prepare for the inevitable). How many of us visit here regularly ?  How many among us almost depend on the forum as a way of socialising because they are stuck at home and how many of us has it become part of a daily routine to check in and see if they can offer advice or get help with something they are working on or just to have a chat and engage in some banter. The members here are in the thousands and thousands have disappeared over the years many had just a fleeting visit. But there are a good few of us that know each other quite well and visit regularly. I dont know about you but i wouldnt want to lose that communication with you all, in all honesty it has become an important part of that side of my life and helps to feed my passion for all things watches. Some of you may think differently and thats ok, some of may stop and think # what would i do " Without Our Forum " # 
×
×
  • Create New...