Jump to content

Identifying clock


MechanicMike

Recommended Posts

11 hours ago, MechanicMike said:

No but I'm beginning to think I'm going to invest in a couple more lol. I'm going to try shimming the columns first. Trimming the spring will be last. 

Stay tuned...

Hi MechanicMike i went through 4 springs before i got it right, ?and still running fast ? i have bought another pack next size up to see if that solves the problem its cost me more in springs then it did for the clock at least you got it on first go well done hope that gives you some encouragement and you solve your problem?

  • Like 1
Link to comment
Share on other sites

4 hours ago, Willow said:

Hi MechanicMike i went through 4 springs before i got it right, ?and still running fast ? i have bought another pack next size up to see if that solves the problem its cost me more in springs then it did for the clock at least you got it on first go well done hope that gives you some encouragement and you solve your problem?

Mike the length of the spring does not alter the speed of the clock with these movements if it is running too fast it is the strength of the spring is wrong.

  • Like 2
Link to comment
Share on other sites

2 hours ago, clockboy said:

Mike the length of the spring does not alter the speed of the clock with these movements if it is running too fast it is the strength of the spring is wrong.

Hi clockboy i don't think MachanicMiike is saying it's running fast that was me and i did mean slow so my apologise if i gave that impression, if i understand him right it's the length of the spring and the pendulum is touching the bottom of the cup.

  • Like 1
Link to comment
Share on other sites

yup that is correct the pendulum is touching the bottom of the cup. I just logged on, I just picked up a handful of brass washers and slid two in under each column at the base. Hippy is that what you're talking about as opposed to under the upper plate? or should I forego that and trim the spring? I think I'm ordering more springs just in case.

Link to comment
Share on other sites

11 hours ago, clockboy said:

Mike the length of the spring does not alter the speed of the clock with these movements if it is running too fast it is the strength of the spring is wrong.

no worries-its the pendulum thats hitting the cup is my problem. I'm trying to figure out if I should shim the columns at the bottom or just go ahead and trim the spring.

Link to comment
Share on other sites

On 2/6/2021 at 2:39 AM, Michael1962 said:

OK. I found it on Cousins so I know what it is now, but I don't know how it would be used?

Methinks I have much learning to do.

did you see the pic I posted? I left the tool attached to the saddle for you to view.

Edited by MechanicMike
Link to comment
Share on other sites

Yes, that's my poising tool at the bottom-I needed a bubble level and that popped in my head. It worked. So, you can see I added one washer to each column and it brought the pendulum off the cup, but it's now leaning off center. Is that ok? Also, how tight should the fork be on the anchor pin? Mine is pretty snug.

20210210_202344.jpg

20210210_202442.jpg

20210210_202545.jpg

20210210_205841.jpg

20210210_201823.jpg

Link to comment
Share on other sites

I am not sure if your poising tool will work as you intend here.

The bubble in it is for getting IT level. You cannot guarantee that you have the three legs in a plane parallel to the plane of the bubble when sitting it on the clock base.

You can not be guaranteed that it will be showing you the level of the base. For that you would need a proper bubble level.

This would work if you sat the clock base on the poising tool straight edges, but for the price that would cost in damage, go and buy a round bubble level at your local hardware store.

  • Thanks 1
Link to comment
Share on other sites

If the case has adjustable feet at the bottom you get the level by adjusting them is not you should move it to a place which is level. If the pendulum when attached to the suspension spring is touching the cup the spring needs to be shortened by a tiny amount, make sure the pendulum adjustment is back about half way, this gives you plenty of adjustment to play with. Sorry to say but it looks like its is going to be a trial and error repair so it could take a long time before you get it right. A tiny sprit level  is what you need not a poising tool. 

  • Thanks 1
Link to comment
Share on other sites

Question 1 "How tight should the fork be on the anchor pin?"

My answer, a piece of copier paper should slide between the pin and fork. (with the pin vertical)

Question 2 "How level does the clock need to be"

My answer, The pendulum base needs to be within the cup, but not touching the base of the cup, 2-3mm clearance is fine.  Use the leveling screws under the base to centre the pendulum in the cup.  No bubble needed, except to check the shelf that the clock will eventually be on.

Question 3, "How long should the suspension spring be?"

My answer, adjust the spring length via the top block, leaving the excess sticking out of the top, the spring is not cut to length till the clock is running well.  Adjust the fork hight as necessary for proper running.


Bod

  • Like 1
  • Thanks 1
Link to comment
Share on other sites

The fork height should be the same as the diagram in the book, if not it can cause what is called fluttering which can upset the running of the clock, a tiny drop of oil between the fork where metal touches the brass will also help the clock so when it escapes it doesn't jitter. 

  • Like 2
  • Thanks 1
Link to comment
Share on other sites

1 hour ago, clockboy said:

As far as levelling is concerned I have always just adjusted the case feet until it is centred in the cup. The length of the spring is not that critical it just must not rub on the bottom of the cup. 

Sorry to disagree clockboy but the length is critical it has to be a certain length in order for the locking mechanism to work correctly.  

  • Thanks 1
Link to comment
Share on other sites

8 hours ago, Michael1962 said:

I am not sure if your poising tool will work as you intend here.

The bubble in it is for getting IT level. You cannot guarantee that you have the three legs in a plane parallel to the plane of the bubble when sitting it on the clock base.

You can not be guaranteed that it will be showing you the level of the base. For that you would need a proper bubble level.

This would work if you sat the clock base on the poising tool straight edges, but for the price that would cost in damage, go and buy a round bubble level at your local hardware store.

That makes sense and yeah I didn't have a bubble but I need to go get one for sure. I did level it tho on an inspection stone so, it is close. Need to get a bubble today.

Link to comment
Share on other sites

5 hours ago, oldhippy said:

If the case has adjustable feet at the bottom you get the level by adjusting them is not you should move it to a place which is level. If the pendulum when attached to the suspension spring is touching the cup the spring needs to be shortened by a tiny amount, make sure the pendulum adjustment is back about half way, this gives you plenty of adjustment to play with. Sorry to say but it looks like its is going to be a trial and error repair so it could take a long time before you get it right. A tiny sprit level  is what you need not a poising tool. 

Got it. Unfortunately, this one has no feet at all, and is just the columns attached to the base. The pendulum timing dial is a good tip and I'll make sure. Yeah I thought I was being suave and wise with the poising tool lol seems not! Getting a proper level today. Lol yes I'm prepared for a bit of a long haul on this one but I'm enjoying every minute.

Link to comment
Share on other sites

2 hours ago, oldhippy said:

Sorry to disagree clockboy but the length is critical it has to be a certain length in order for the locking mechanism to work correctly.  

Perhaps I have been lucky I was just not aware of that. I have not had that issue but have had issues where even after fitting the correct spring it has proved to be too strong and I have had to thin the spring. In my experience with the 400 day clocks everything has to be spot on or it stalls after a day or two. 

  • Like 1
Link to comment
Share on other sites

I find it a bit strange that the clock has no leveling feet, as I have six of these clocks all of which have screw adjustable feet. These clocks rely on being perfectly level to work and the feet give you that adjustment.  I have never had to alter the length of the springs either All from Horolovar.  I would check the underside of the base for the feet they may just be screwed right up into the base and not be apparent.

Link to comment
Share on other sites

Join the conversation

You can post now and register later. If you have an account, sign in now to post with your account.
Note: Your post will require moderator approval before it will be visible.

Guest
Reply to this topic...

×   Pasted as rich text.   Restore formatting

  Only 75 emoji are allowed.

×   Your link has been automatically embedded.   Display as a link instead

×   Your previous content has been restored.   Clear editor

×   You cannot paste images directly. Upload or insert images from URL.


  • Recently Browsing

    • No registered users viewing this page.
  • Topics

  • Posts

    • The entry jewel's not as bad but seems still too much lock. I do epilame the escape wheel and pallet jewels, then run dry for about 15 minutes, then put 9415 in exit jewel very little at a time and check with backlight how the oil's distributed.  Another question is about capped escape wheels. Should I somehow wear the epilame off the pivots before installing the wheel? I normally let the escape wheel run dry for that said 15 minutes when there's no cap jewel.
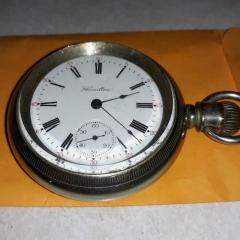
    • Sometimes there's a certain place under the bezel where the case knife is supposed to be placed. In this borrowed pic there's a small crack at 3 o'clock. 
    • Hi my fellow forum addicts, I'm writing this as I seem to have a hole in my knowledge (probably one of many!) I seem to have a horrible time removing bezels from watches. I am talking about the rotating type on sports/diving watches. I see many videos where the guy on screen barely inserts the case knife under the bezel and with no effort it pops off easily, then at the end it clicks back into place by hand with no effort. I am sure that part of this is due to skillful video editing, but I seem to wrestle with them, I have tried case knives and  even when using the tool below, I tighten it up in several positions and nothing happens. On a many occasions I have even warped the bezel in my attempts to remove it. Similarly, I have issues replacing bezels after cleaning etc. and often they have to be replaced using a press tool and inevitably are far too tight and will not rotate or loose to the point where they fall off or loose their click (perhaps due to micro warping when I tried to remove??). It is now to the point where I am actually avoiding watches with bezels as my success rate with them is terrible......please help!! In short I am asking: What am I doing wrong? What is the best method for removing bezels - how do you do it? What is the best method for replacing bezels - how do you do it? Any tips or tricks? Thanks  
    • Amplitude still seems low, but I'm going to let it run in a bit and revisit. Meanwhile, got the first layer of the calendar works together and made sure the date ring snaps to both in quickset and regular setting. The mechanism is pretty cool, so I took a video.  
    • This is the part that need replaced if anyone can point me in the right direction. 
×
×
  • Create New...