-
Recently Browsing
- No registered users viewing this page.
-
Topics
-
Posts
-
Got another one today! It took 10 weeks, but finally arrived. Fairly complete but I added the pivot guage. The burnisher and bow came with the tool. The case is a bit rough and the tool pretty dirty, but trying to decide how much I want to restore.
-
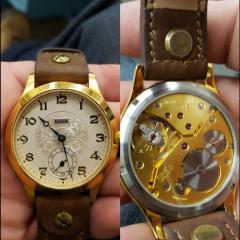
OK, so long story short, I'm working my way through Mark's courses using a "Sea-gul ST36" (or ST3600 from some vendors) AKA an ETA 6497 clone. as a practice piece. I've had it fully appart and cleaned it, and have had it fully back together an "running", but only briefly as my oil hadn't arrived at the time. In the course of that work, I saw no markings on the movement that would tell me if it was a true Sea-gul or just a clone of their clone of the original ETA movement. Well, fast forward to this weekend, when my oils arrived in my mailbox and I sat down to try my hand at oiling. Everything was going swimmingly until I got to the shock setting on the top of the balance cock. I was able to open the lyre spring without issue, but in attempting to swing the open to access the cap jewel and chaton, I apparently accidentally pressed the launch button as I sent the lyre spring into low earth orbit. Like most things that make into such orbits it came back down at a place not too far from where it started, but of course that also means that it is no longer in the setting. So my task is now to get said spring back into setting. What I have read so far tells me that I seem to have two options: Another thread here seems to indicate that the spring came out without taking the balance cock apart, therefore it should go back without the need for that procedure. That seems a bit pie in the sky for me, but the posts in said thread also gave some high level information about how to get the spring back in (putting it at an angle to the channel cut in the cock and canted so that the tabs fit in the slots, followed by some "wiggling" to get it turned around the right direction.) I've tried this a couple of times, which have lead to more trips to low earth orbit, but with successful recovery of the orbital vehicle after each trip. This thread also suggests that what I did to cause the initial launch was to push the spring "back" with more pressure on one side than the other, which put it under tension and caused it to deform out the slot either on one side or at the end (where there is apparently no "back stop".) The other option appears to be varying degrees of disassembly of the balance cock. Some things I've read suggest that the whole shock setting needs to come out, while other threads here suggest that I only need to remove the regulator arm and the arm carrying the balance stud. After the last trip the spring made, this is seeming like a better option, but I'm super short on details on how to do what needs to be done. if I am following correctly: I need to loose the balance spring stud screw so the stud is not held in the arm. I need to somehow disengage the balance spring from the regulator (all the regulators I've seen in videos look nothing like what I see on the balance cock I have.) What I've seen on the interwebs is a couple of "pins" that the spring passes through. What I see on my assembly is something that looks more like a single pin with a "V" shaped notch cut in the bottom of it. The spring is secured in that notch with something that I guessed was glue, Posts here suggest that on some of these movements glue is in fact used. So I'm trying to figure out how to tell, how to soften dissolve it (I'm guessing IPA or acetone) and how to put it back when I'm done (superglue? UV glue?) With the spring detached from the cock, I've read that the regulator and stud carrier are basically glorified C clamps around the shock setting and that one removes them by slipping a razor blade under one side of each and prizing them up. I assume that they go back in the reverse manner like another C clamp, but that again is only a guess. The place I got this information from seemed to leave that bit out. Once I have one or both arms off the shock setting the above mentioned post seemed to indicate that I could just slide the spring back in the slot, though again, I'm interpolating between the lines I read. The alternative that I've seen demonstrated on high end movements on Youtube is to remove the entire shock setting and to replace the spring from "underneath" rotating the setting so that spring basically falls into place. I'm not anxious to try this method, as I don't have a jeweling tool to put the shock setting back into place. That not to mention that the professional watch maker who did the demonstration described "fiddly work." So at the end of the day I'm looking for a little guidance on which pathway to follow, or if I've missed something obvious, a new direction to follow. If this is a repair that just need to wait until my skills improve I'm totally good with that, I can get another of these movements in relatively short order, I just don't want to treat this one as disposable, and I do want to make an honest effort at fixing it and learning from this experience. Thank you in advance for reading my ramblings and for any suggestions that you might have!
-
All the best, family always comes first, and I believe you have made the right call that you mother deserves your full attention. However, when you need a little outside distraction the guys here will always be available for some banter or a heated discussion on lubrication 🤣.
-


Recommended Posts