Jump to content

Carriage Clock Repair


Vich

Recommended Posts

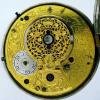
I mentioned in another part of the forum that My Brother in Law gave me a carriage clock to repair, his wife was winding it and lost concentration and felt a click through the key but it stopped working. I have had some valuable general advice already but here are some photo's. one of which seems to confirm that the spring has gone.


post-197-0-62508200-1421069939_thumb.jpg


post-197-0-14026600-1421069980_thumb.jpg


This is an 8 day, 2 Jewel unadjusted clock by Aug. Schatz & Sohne (Germany).  There is a 59 in a circle on the clock back and also a 5 and a 75.  Clockboy has kindly given me some advice on the origin, date and worth of the clock.


As you can see from the barrel where I have marked, it appears that the spring has broken, the location of the small piece is beside what looks like a rivet on the outside of the barrel and the end of the main part of the spring is loose.


I think I shall take it to my diy work bench and put on the safety stuff before trying to remove it as there seems to be quite a bit of tension in it.


Can anyone advise whether it is just a case of getting the old spring out and measuring the length and diameter and width or thickness and getting a generic spring.  Or is the fact that it is an 8 day clock enough to identify what I want.  I am going to look on the Cousins site but if there is anything to look out for or useful tips I would be grateful.


Cheers,


Vic

Link to comment
Share on other sites

Can anyone advise whether it is just a case of getting the old spring out and measuring the length and diameter and width or thickness and getting a generic spring. 


That is exactly what I would do if I worked on clocks.

Link to comment
Share on other sites

Cousins list 2 different main springs for a Schatz 59; 123234 & 123834. The middle two digits (32 & 38) refer to the spring thickness or strength.

All you need to measure is the thickness of the original and you should be good to go

Link to comment
Share on other sites

Thanks Mark and Marc,

Felt like a bit of a wimp with my safety glasses and gloves on but as clockboy intimated they proved necessary as when it came out it came out fast and uncoiling and the broken and sharp bit curved round into the back of my hand.  Thankfully no damage to my pinkies though.


post-197-0-72772300-1421076054_thumb.jpg


Measurements are 0.48 mm thick 11.9 mm wide and approx 950 mm long which does not quite add up to the schatz listing.  However rounding up to 12 mm by 950mm I think i have a match off the generics.  Will check further.


Thanks for the input .


Vic


Link to comment
Share on other sites

Might have guessed that it was all going a bit to well.  Cousins sell what is supposed to be the mainspring for the Schatz 59 but the measurements they quote are not the same as the spring that came out.  I went back and re-measured twice but I still get it to 0.48 x 11.9 x 950 which is probably going to actually be 0.45mm x 12mm x 950 mm.

Oh well the search is on.

Cheers,


Vic

Link to comment
Share on other sites

Have you tried Meadows & Passmores if my memory serves me right there is a calculator on their site on how to purchase the correct spring size. In my opinion their springs are superior to those supplied by Cousins as the mainsprings from Cousins seem too stiff. Providing the new spring is not to wide and rubbing on the barrel wall the slightly weaker spring will be fine. You could actually repair the broken spring if stuck. I have never done this but I have read that you can re-drill the retaining hole with a diamond drill.

I made my mainspring winder and there are vids on you-tube showing many mine is a copy of the wooden construction one shown. Not the best but it works. Fitting a new spring without a spring winder is going to be troublesome as the new springs come pre-wound and held together by wire. I presume you do not own one so you will have to do what I used to do. Put the new spring in a vice (length way) then unwind the retaining wire to release and then gradually unwind the vice very,very gradually to release the spring. WEAR SAFTEY GLASSES AND THICK GLOVES IF IT SLIPS IT **BLEEP** HURTS.


To re-fit he spring or fit the new spring I found this on the M&P site. 


If you removed the mainspring from a barrel, it must now be re-fitted. If you do not have access to a mainspring winder, you will need the strong leather gloves you should have used to remove it. Having thoroughly cleaned the spring of old lubricant, wipe the surface with a rag coated in mainspring grease. It is not critical to cover the whole surface, because as the spring winds and releases during use, lubrican will spread naturally. 

Insert the outer end of the spring onto the hook inside the barrel. When sure that it has engaged, start to turn the spring into the barrel and after each half turn, rotate it. If, after a turn or two you don't think your wrists are strong enough to finish the job, go back now. Once you are half way, you cannot let go and will need to finish the job somehow. Wind in the spring by hand until the centre coils pop in. Take great care with mainsprings as they contain a lot of energy when coiled.


Hope this helps

  • Like 1
Link to comment
Share on other sites

After some searching I found a spring on the bay that is 12 x 35 x 26 x 950 which is very similar to mine which is 12 x 45 x 33 x 950. After some research I think these measurements refer to width in mm x thickness (in hundredths of a mil) x Barrel Diameter in mm x length in mm.  This would mean that the new one should fit in the barrel and the main difference is 0.1 mm in the thickness. 

Don't really know what this would mean in real terms but I thought I would give it a try and if it does not work I will have a shot at cutting down a generic spring that I found which matches up in every respect except length - we shall see if I have managed to turn an 8 day clock into a 7.5 day clock (:-))

Cheers,


Vic

Link to comment
Share on other sites

I never mentioned before but my brother in law also gave me his wifes long dead 17 jewel Rotary which was a 21st birthday present its face is about 10mm by 10 mm and the minute hand is floating around loose and at the least it will require a full service.

In fact on one day he has given me the largest and smallest things I have ever worked on.  Thank heavens for the stereo microscope. 

You have to love this hobby, at once the most satisfying and frustrating practice.  Up to now I have not fallen flat on my face but the cliff edge keeps drawing closer.


Cheers,


Vic

Link to comment
Share on other sites

Here is an admission of stupidity:-


I watched the video about the mainspring with much interest and thanks to Al I now know I have knackered the original spring by bending it backwards so I can't re drill it - well have you ever tried measuring the length of a coiled clock mainspring ? Still it may be good to practise on.


Cheers,


Vic

Link to comment
Share on other sites

The 0.1mm difference in thickness will make no noticeable difference in performance. As I have stated in a previous post providing it is not to wide and rubbing on the barrel it will be fine. Obviously the shorter the spring the shorter the clock runs before a re-wind.

Edited by clockboy
Link to comment
Share on other sites

Good Job Vic,

I never accepted a Carriage Clock for repair because not many came in for repair and my friend George really loved doing them so I gave him that business

Now that I am in NYC I'll be doing them myself.


Al Takatsch

Link to comment
Share on other sites

  • 2 weeks later...

Hello Phil,


All the parts are cleaned and neatly set out on and covered on my workbench. 


My dressing was taken off today and all looks ok but I still have to be careful about moving my left arm so I will wait a little longer to put it together and post some pics.  I have decided to use Moebuius 941 on the jewels and 9020 on pinions plus a little Molycote Dx here and there where there is a need. Quite looking forward to it though.


Cheers,


Vic

Link to comment
Share on other sites

Hi Vic,


Hope you have a speedy recovery !


If you don't have a mainspring winder you can use one of those thick nylon cable ties wrapped around the circumference of the mainspring tightening it gradually as you wind up the spring this will stop it exploding.  It's also worth checking the hole in the spring barrel where the arbor passes through, if it's too worn & sloppy it won't power the clock vary well & should be changed, some suppliers sell a mainspring/barrel complete.  

As you say, it's not very easy or practical to measure a coiled spring, I measure ;  spring thickness x spring width x barrel diameter,

never had any probs ! .


Hope this helps,


Phil. 

post-31-0-45101700-1422562362_thumb.jpg

post-31-0-20446900-1422562465_thumb.jpg

Link to comment
Share on other sites

Hello Phil,


There seems to have been a second thread created when the clock forum was set up or perhaps I screwed up somewhere.  either way if you check out repair of a carriage clock a bit further down you will find some pics and whaere I am up to now.  My fault I think - apologies to all for double threading.


Cheers,


Vic

Link to comment
Share on other sites

Hello Phil,


There seems to have been a second thread created when the clock forum was set up or perhaps I screwed up somewhere.  either way if you check out repair of a carriage clock a bit further down you will find some pics and whaere I am up to now.  My fault I think - apologies to all for double threading.


Cheers,


Vic


Just found it !    well done Vic... good job   :)

Link to comment
Share on other sites

  • 8 years later...

I realize this is quite an old thread.  However wondering if you know where I could find a hairspring or even balance wheel with mainspring for my 8day Schatz carriage clock?  Or if generic, what specs?

Thx.

From the year 2023

Link to comment
Share on other sites

  • 5 months later...

Join the conversation

You can post now and register later. If you have an account, sign in now to post with your account.
Note: Your post will require moderator approval before it will be visible.

Guest
Reply to this topic...

×   Pasted as rich text.   Restore formatting

  Only 75 emoji are allowed.

×   Your link has been automatically embedded.   Display as a link instead

×   Your previous content has been restored.   Clear editor

×   You cannot paste images directly. Upload or insert images from URL.


  • Recently Browsing

    • No registered users viewing this page.
  • Topics

  • Posts

    • Have you ever seen grease spread?  I use Molykote DX on the keyless, cannon pinion, etc and cannot imagine it spreading. Similarly, HP1300 should not be a problem, as long as you don't splash too much about.  9010 does like to travel though. I've recently re-serviced a couple of my watches I first serviced about 5 years ago. I was a bit too liberal with the oil and grease back then, but it hasn't spread everywhere. I only epilame on balance cap stones, escape wheel and pallet stones (and auto wheels if they need it).   If you use it all over, the oil might bead-up and travel even further - think of using RainX on your car windows.
    • Polish it where the old part cracked as well. Get rid of the stress-raisers.
    • Sounds great! And yes, I would use grease for the keyless as well although treating the parts with epilame would make the grease less likely to spread in the long run. Not critical but won’t hurt. My current strategy is to epilame treat all parts getting in contact with oil or grease.
    • Hello everyone, for what it's worth, here is my approach: 1. Escape wheel submerged in Epilame, then dried quickly with a hairdryer. Then the final tip of the pivots are cleaned by poking into pithwood. The logic being that the Epilame is removed at the intended contact point (to avoid any residue that may mix with the oil), but remains in the areas where oil is not supposed to spread to (further down the pivot towards the wheel). The escape wheel teeth also benefit from having Epilame to keep the 9415 in place.  2. I use a syringe to treat only the pallet stones. I suspend the pallet fork with some Rodico so that the stones hang downwards. I notably use a rather thick needle where a drop WON'T form, but rather where the Epilame liquid stays in the needle tip, which I then dip into the pallet stones. It requires some practice to get the right amount of Epilame into the needle tip, but it works for me now. This way, no drop will "jump" onto the pallet fork and potentially go all the way to the pivots.  3. I let the movement run for a few minutes without lubricating the pallet stones... to scrape off the Epilame in the intended contact "channel". Then I remove the balance again and lubricate the exit pallet stone with 3-4 successive drops. See the "channel" that forms on the pallet stone in the picture -- not so easy to see, but it's visible.       I am conflicted about the use of Epliame in balance jewel settings. My impression is that the two jewels sufficiently suspend the oil (even 9010). Apparently Rolex recommends NOT to use Epliame there (heard from a former Rolex service center watchmaker), as it could cause additional wear. Apart from that, I follow specific instructions where I can find them. E.g. the infamous Rolex reverser wheels or sometimes (parts of) the seconds wheel. Exception: I'm currently servicing an Eta 2824 and will probably ignore the service sheet that recommends treating the whole keyless works with Epilame and then using HP1300... I'll skip the Epilame and use 9504 grease.        
    • I'm going to give this a try today/tomorrow on my UTC33/Seiko 66, thanks!
×
×
  • Create New...