Jump to content

Seiko 7015-8000 restoration project


Recommended Posts

Hello guys,
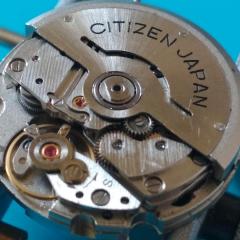
I want to show you my lately restoration project. This time it was a Seiko 7015-8000 with blue dial. Watch came to me in very poor condition. As you can see on photos the case was scratchty, crystal was totaly tarnished with deep scratches. Everywhere was dirt, gunk and mud...yuck. Movement was running and stopping with very low amplitude. After opened the caseback I wasn't suprised - it looked like as case - dirt and signs of wear. Rotor was loose and fall out the case. When I take off the crystall I saw dial which had faded Seiko logo, some scratches and hands which lost their lume.


IMG_20190923_155754.thumb.jpg.37c6a3397c05720516d34176811d7ec7.jpg

IMG_20190923_155806.thumb.jpg.4e4733d832527effc7586a3529a2c822.jpg

IMG_20190923_155815.thumb.jpg.a1b1d84d884cac594ed3d4e9408455c4.jpg

IMG_20190923_155828.thumb.jpg.3d24e7657a18d7238c505e441496d071.jpg

IMG_20190923_155837.thumb.jpg.9459014130828e72da97ce76deca1c67.jpg

IMG_20190923_155953.thumb.jpg.17e2e3e6fd69907da925ed0337560a0f.jpg

IMG_20190923_160148.thumb.jpg.9f8a4372b53216a8ae4be2ee07062ce0.jpg

IMG_20190923_160156.thumb.jpg.bce0696df15e04949953e47bb6e41444.jpg

IMG_20190923_160650.thumb.jpg.19bdd4220f7a07a9dca23b4e93711f23.jpg

IMG_20190923_160732.thumb.jpg.0acb087fb2aa4e58b568e33c9b0079ec.jpg

IMG_20190923_160735.thumb.jpg.faa1e3184bd1aa5163edb8bd151a4a25.jpg

IMG_20190923_160738.thumb.jpg.5cc9c15f44e0ffcb5d96face55330b2e.jpg

IMG_20190923_161050.thumb.jpg.05f2e14c9a414fb3f2de9f84c8d74c2f.jpg

IMG_20190923_161057.thumb.jpg.320a60553c8d677ff54a759d246a6aa5.jpg


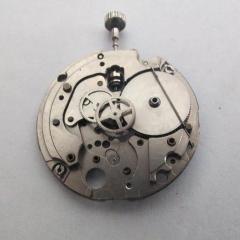
Next step was strip down the movement - everywhere dirt and dry old oil. Time to cleaning bath ;)

IMG_20190923_161511.thumb.jpg.1cdbbd5b9c82d09737b66b7d3e2780c9.jpg


IMG_20190923_162509.thumb.jpg.c0268e18402c823eef6792fa538ac542.jpg

IMG_20190923_162513.thumb.jpg.906a102ee9c2d4460d798247843ddce6.jpg

IMG_20190923_162606.thumb.jpg.51a81baea516e6d24368e907073b082d.jpg

IMG_20190923_162923.thumb.jpg.99481094f6aaffdf2687abe9828fcff8.jpg

IMG_20190923_163226.thumb.jpg.08ada5e4c7395aad1659e0a99e5c3156.jpg

IMG_20190923_195138.thumb.jpg.b323ee435d49cece41f0ff7fe31bb4b7.jpg

IMG_20190923_195151.thumb.jpg.ac8f3caf4181f24935d44009b3b95a29.jpg


Look at this - it's my temporary balance wheel stand - I suspect that from temporary it will be permanent. It does job well.


IMG_20190923_195215_HDR.thumb.jpg.64c6d7a0fe647a0de743924647abd5fb.jpg


After cleaning it's time to assembly movement. Now it looks better - maybe not pristine but clean and shiny. New oil here and there and movement starts to run. Now it's time for bench testing before install it to the case.


IMG_20190923_200533_HDR.thumb.jpg.6f788d74f8ab29d85a36eed4f309349d.jpg

IMG_20190923_200755_HDR.thumb.jpg.bdea86a4e1308eb0a40d846557a30a3f.jpg

IMG_20190923_201929_HDR.thumb.jpg.66283453d304c7018248ce7738702b61.jpg

IMG_20190923_212253.thumb.jpg.01f3fb0fade954fb891140fcae8c0b28.jpg

IMG_20190923_213824.thumb.jpg.e89d0f49917d6d9d80ba6886dc59285f.jpg


Meanwhile I took care of the case, dial and hands. Case got some polishing work - not to much cause I didn't want to loose the sharpness of edges. That is effect:


IMG_20190925_200113.thumb.jpg.8d8b5b143bc72bc4874a552a351b0303.jpg

IMG_20190925_200126.thumb.jpg.df9c33aab45b2d81330eab1a64b6277d.jpg

IMG_20190925_200307.thumb.jpg.709294ceb339d19ae455486ffc42884a.jpg

IMG_20190925_200356.thumb.jpg.dabeafd0e2ff508e63ba5737d158f749.jpg


Dial and hands got new lume - I am not perfect in this work but I still learn to do this. Additional the seconds hand was repainted to orange color. I didn't change the crystall but i just polished it with waterpaper and on the end polish paste. Effect suprissed me. Time for the  pleasant work - putting this all pieces together into the watch.


IMG_20190925_221238.thumb.jpg.fe6fda3e0af05c857e770d3d6eff5b7b.jpg

IMG_20190925_221345.thumb.jpg.f7f61048061cc78d833840018e5e04c9.jpg

IMG_20190925_221420_HHT.thumb.jpg.39cc67c9195f0079a3118ddc30a5c269.jpg

IMG_20190926_204955.thumb.jpg.8d228ee6ae96a33df62e8407a294edb0.jpg

IMG_20190926_205020.thumb.jpg.03a0723f945aee2ba68b570b1a74204a.jpg

IMG_20190926_220145.thumb.jpg.8b9366684a10123c11e7f04282e00974.jpg

IMG_20190926_220410.thumb.jpg.6faf9aae53e99b3656ff1e2d9e344d56.jpg


IMG_20190923_160650.jpg


Edited by jackie01
  • Like 3
  • Thanks 2
Link to comment
Share on other sites

Thank you guys for yopur positive feedback.

2 minutes ago, Tmuir said:

Well done, great job on the crystal!

Yes, crystal surprised me much

7 minutes ago, AndyHull said:

Great attention to detail, the crystal came up amazingly well, as did the case, and that orange second hand looks factory. Excellent.

I was looking for the best paint color, the closest to the original one
Few words about performance which is achieve - amplitude circa 220-230 degrees, but I still have to do some adjustment cause the beat error is something about 0,8-1,0ms. I suspect that I must align hairspring at the collet.

Link to comment
Share on other sites

16 minutes ago, jackie01 said:

, but I still have to do some adjustment cause the beat error is something about 0,8-1,0ms. I suspect that I must align hairspring at the collet.

That is absolutely fine and needs not further attention. I have seen brand new Seiko being shipped with as much B.E. and keep good time. Just wear it at least one week and do a final regulation if needed. 

Link to comment
Share on other sites

  • 10 months later...
10 minutes ago, Maxieboy said:

Hi, Where did you find a new Crystal for the watch?e. Siko 7015A-8000. Original Crystal should be 310V01GAS0

It has been written above:

I didn't change the crystall but i just polished it with waterpaper and on the end polish paste.

Many topics on this subject also exist here. 

Edited by jdm
Link to comment
Share on other sites


  • Similar Content

  • Recently Browsing

    • No registered users viewing this page.
  • Topics

  • Posts

    • I'd be grateful for recommendations of good sources of advice on getting clocks with balance spring - as opposed to pendulum - escapements 'in beat'.....
    • Well I am in a bit of a quandary. I can't find the correct colour for the dial. I even wrote to Hettich a while back hoping they would give me the colour code for the dial. The reply that I received was "We don't make those anymore." I am thinking now to silver the dial and use a water transfer decal to put minute markers and the HETTICH logo (which is the very font that this forum uses) and the Made in Germany down the bottom. Not sure of the success rate of the water transfer method, but I have no other solution for the markers and logo. Handpainting is just not an option. In trying to get the top piece of the clock polished, it has progressively lost its sharp edges. My stupid hamfisted effort. I am thinking of purchasing a replacement piece of brass and drilling new holes in it for the corner posts. Why I attempted to repolish using wet & dry and not simply using a paint remover to remove the old lacquer from the brass, I don't know. You whistle and I'll point at the idiot. I also need to purchase some sheet spring steel as the two small ratchet springs that arrest the wheel that supports the weight after it is lifted by the electromagnet are worn. The two from the donor clock that I purchased are worse. I am hoping that I will be able to manufacture new springs without having to fiddle about with tempering etc to the steel. I have some ideas on that front. How many things until the clock is no longer the original? Like an axe. Heard a woodchopper on tv once saying that he had replaced the head on his axe twice and the handle three times, but it was the same axe that he began woodchopping with. 😉
    • I use the exact OD and it fits in with a little force and a pleasing 'click' so it's snug and wont rotate within the holder, but that depends on how you have set up and calibrated your printer so you may need to play with the settings/dimensions a little to allow for any discrepancies in your printer calibration. PS I just finished (2 days ago) a new revision which automatically prints the movement OD on the bottom of the holder, I'll see if I can upload it here Here is rev 4 remember to change the .pdf to .FCStd so it will open in FreeCAD - also you may need to install the LiberationSansBold font and tell FreeCAD where it lives on your PC, or change the font to something you already have on your system. Para Movement Holder V4.pdf Examples below:
    • Only someone on this forum would ever understand the Oooooo I just did
    • Hi, guys I'm very interested in printing out this design as I've seen the orignals used on many occasions and I'm fed up with my movements popping out the standard Bergeon type so want to give this type a go 😀  As I've never used this type before should the movement be a snug fit in the holder? Once you've measured the diameter of the movement do you put this exact value in the spreadsheet or increase it a little 🤔 Comments would be appreciated 👍  
×
×
  • Create New...