Jump to content

Matte finishing Ratchet and Crown wheels


Recommended Posts

Hello All,

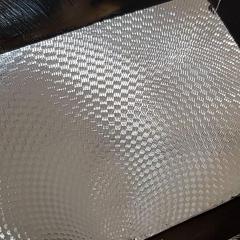
This is my first post so I thought I would show a little finishing technique I learnt a while back. It basically turns the ratchet or crown wheel into a matte/ frosted finish. It was popular back in the day with some high end companies and still looks good in my opinion. I'll run through how it's done and try answer your questions as best as possible.

What you need:

1. glass plate

2. Micron paper in various grits. 20 and 12 will do.

3. Tetrabor 800 grit/ mesh 

4. Ultrasonic or cleaning machine

5. rodico


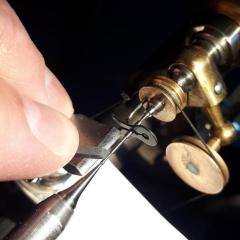
First thing first, you have to flatten your ratchet wheel. To do this I use some lapping paper on glass. I start on a 20 micron and rub the ratchet wheel with my finger in a figure 8 pattern or circular or however I feel. (we arent trying to achieve black polishing flatness) If you are worried you can set up a jig to hold the ratchet wheel. but I often find using your finger will suffice. 

Once happy, move onto a 12 or 9 micron and do the same. At this point it is imperative to clean the wheel so that you remove all the grit from the paper that may be stuck between the teeth. So chuck it in an ultrasonic or your cleaning machine.

Next place some tetrabor onto your plate, no need to add oil or water. place wheel onto plate and start rubbing it in. Generally it doesn't take to long no longer than a min or so. Doesn't hurt to check the piece to see how the finish is developing. if you want to check you can dab it with rodico, very carefully to remove the tetrabor. Do NOT wipe with a tissue or anything, this finish scratches so easy its crazy!! you can always chuck it through the ultrasonic (carefully) to see how the pattern is going. Its the checking and chasing that one last scratch which takes up the most time.

The slightest bit of dust or dirt on the glass plate will scratch the wheel. You can always blue the wheel after, it comes out with an interesting tone when blued with this finish.  This technique is fairly hard and does take some time to get good at, because it's just so easy to scratch and because of this scratches stand out against the matte surface.

I'll try answer questions as best as possible. I try and post interesting stuff on Instagram regularly at least 3 to 4 times a week. obr_horology is my account on insta. its just time consuming to post (slow at typing) I plan on doing a youtube video in the coming weeks to better explain it. I learnt this from Henrick Korpela. Check him out if you haven't heard of him. He also writes in the AWCI and gives away a lot of info.

Thanks

O


20190504_124633.jpg

20190428_182150.jpg

20190428_181906.jpg

20190427_101739.jpg

20190427_102440.jpg

20190427_112958.jpg

  • Like 8
Link to comment
Share on other sites

  • 1 month later...

Thanks for this topic @OBRHorology, I just happen to be restoring a chronograph that has matte finishing on some of the steel parts and had suffered water damage. I'm trying to salvage as many parts as possible and was just about to start researching how to achieve a matte finish when you posted!

I went out and picked up some Tetrabor immediately. I scored many different grits through a sale on eBay and went to work on it this evening.  I'll need a bit of practice but within just a few minutes I had what I consider passable results.  Awesome tip.  I'll post some pictures tomorrow. :thumbsu:

  • Like 1
Link to comment
Share on other sites

Here's my results so far. I needed to make a jig to even out the finish on the crown and ratchet wheel as I was getting a really nice matte finish in the center of the wheel but having trouble getting it even all the way to the edge of the teeth. I cut a slightly concave disc out of brash on the lathe and have begun polishing the wheels in the disk. This ensures the edges of the wheel are always in contact with the paste. It's not perfect but it's getting better.


IMG_0150.thumb.JPG.d0ced45584b83751ddf12b6ee6e77daa.JPGIMG_0154.thumb.JPG.014fd96b79397965bba3c6786e75ef74.JPGIMG_0153.thumb.JPG.e1a7a3e6b4d95a83627c0df4b9f1983b.JPG


  • Like 4
Link to comment
Share on other sites

  • 3 weeks later...


  • Recently Browsing

    • No registered users viewing this page.
  • Topics

  • Posts

    • Welcome to the group Stirky. You can search for just about every subject in the craft here. Don't be afraid to ask if you can't find the answer that may have already been covered ( some ad nauseum LOL ). You don't have to buy Bergeon to get good quality. There are many decent mid-range tools available that will last you a lifetime. Cousins would be a good place to start . Cheers from across the pond ! Randy
    • I picked up a similar amount of these jewels some years ago in a watch and clock fair. Every now and then they come in handy. This week I've got a rubbed in bombe jewel in the balance cock that is cracked and needs replacing. Very handy to have a vintage assortment of these type of jewels!
    • Great diagram with the teeth and pinion count. Simple way to reduce the speed of the hour wheel by the 12:1 minute wheel. Genius and yet so simple. Always good to reinforce the principal by what you have done in your drawing. Keep doing that. I had a drawing on my wall for years showing me this which is very similar to the drawing you have done. Here's a formula to work out the beats per hour of a watch movement. The movement's BPH is dictated by the wheel teeth and pinion count and the hairspring being vibrated to the correct BPH by finding the pinning up point on the hairspring using a vibrating tool.  The reason in the formula there is X2 on the top line is because there are two pallet stones.
    • So I just wanted to say "thank you" again.  The angle is the key bit it seems and yes, it did basically just fall, or float, back into position when I got it lined up just right. I had meant to add that now that I see how it goes in, I totally see how it came out in the first place, and that whomever cloned the original movement didn't pay much attention to the fine details around the setting or how it interfaces with the balance cock or the "rings" on the regulator and/or stud carrier arms.
×
×
  • Create New...