Jump to content

Matte finishing Ratchet and Crown wheels


Recommended Posts

Hello All,

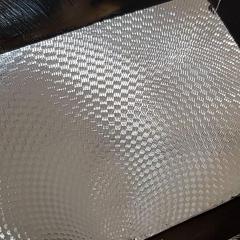
This is my first post so I thought I would show a little finishing technique I learnt a while back. It basically turns the ratchet or crown wheel into a matte/ frosted finish. It was popular back in the day with some high end companies and still looks good in my opinion. I'll run through how it's done and try answer your questions as best as possible.

What you need:

1. glass plate

2. Micron paper in various grits. 20 and 12 will do.

3. Tetrabor 800 grit/ mesh 

4. Ultrasonic or cleaning machine

5. rodico


First thing first, you have to flatten your ratchet wheel. To do this I use some lapping paper on glass. I start on a 20 micron and rub the ratchet wheel with my finger in a figure 8 pattern or circular or however I feel. (we arent trying to achieve black polishing flatness) If you are worried you can set up a jig to hold the ratchet wheel. but I often find using your finger will suffice. 

Once happy, move onto a 12 or 9 micron and do the same. At this point it is imperative to clean the wheel so that you remove all the grit from the paper that may be stuck between the teeth. So chuck it in an ultrasonic or your cleaning machine.

Next place some tetrabor onto your plate, no need to add oil or water. place wheel onto plate and start rubbing it in. Generally it doesn't take to long no longer than a min or so. Doesn't hurt to check the piece to see how the finish is developing. if you want to check you can dab it with rodico, very carefully to remove the tetrabor. Do NOT wipe with a tissue or anything, this finish scratches so easy its crazy!! you can always chuck it through the ultrasonic (carefully) to see how the pattern is going. Its the checking and chasing that one last scratch which takes up the most time.

The slightest bit of dust or dirt on the glass plate will scratch the wheel. You can always blue the wheel after, it comes out with an interesting tone when blued with this finish.  This technique is fairly hard and does take some time to get good at, because it's just so easy to scratch and because of this scratches stand out against the matte surface.

I'll try answer questions as best as possible. I try and post interesting stuff on Instagram regularly at least 3 to 4 times a week. obr_horology is my account on insta. its just time consuming to post (slow at typing) I plan on doing a youtube video in the coming weeks to better explain it. I learnt this from Henrick Korpela. Check him out if you haven't heard of him. He also writes in the AWCI and gives away a lot of info.

Thanks

O


20190504_124633.jpg

20190428_182150.jpg

20190428_181906.jpg

20190427_101739.jpg

20190427_102440.jpg

20190427_112958.jpg

  • Like 8
Link to comment
Share on other sites

  • 1 month later...

Thanks for this topic @OBRHorology, I just happen to be restoring a chronograph that has matte finishing on some of the steel parts and had suffered water damage. I'm trying to salvage as many parts as possible and was just about to start researching how to achieve a matte finish when you posted!

I went out and picked up some Tetrabor immediately. I scored many different grits through a sale on eBay and went to work on it this evening.  I'll need a bit of practice but within just a few minutes I had what I consider passable results.  Awesome tip.  I'll post some pictures tomorrow. :thumbsu:

  • Like 1
Link to comment
Share on other sites

Here's my results so far. I needed to make a jig to even out the finish on the crown and ratchet wheel as I was getting a really nice matte finish in the center of the wheel but having trouble getting it even all the way to the edge of the teeth. I cut a slightly concave disc out of brash on the lathe and have begun polishing the wheels in the disk. This ensures the edges of the wheel are always in contact with the paste. It's not perfect but it's getting better.


IMG_0150.thumb.JPG.d0ced45584b83751ddf12b6ee6e77daa.JPGIMG_0154.thumb.JPG.014fd96b79397965bba3c6786e75ef74.JPGIMG_0153.thumb.JPG.e1a7a3e6b4d95a83627c0df4b9f1983b.JPG


  • Like 4
Link to comment
Share on other sites

  • 3 weeks later...


  • Recently Browsing

    • No registered users viewing this page.
  • Topics

  • Posts

    • Thank you so much, Hector and CJ. I appreciate the tech sheet and the video. Gasp, I think I will make the attempt. What's the worst that can happen? I think there may be a new balance complete in my future, though.  I'll update the post and let you know the result. R, Frank  
    • So here is the new base (v 2.1), I made it so that the base will fit over and swallow the stump of the hand pusher tool (or at least my clone of the tool), I also reduced the OD of the bottom skirt a little as it looked/felt a little large, here are a few pictures and the fake .pdf file which you need to convert to .zip once downloaded.   The cut-out seen on the below image on the bottom of the base should swallow the OD (40 mm, +0.1 mm tolerance) of the stump and the height of the stump 9.5mm (measured to 9.1mm, but rounded to 9.5mm) - let me know if this works for your tool.   Note, I think you may need to print supports for the new internal shelf created? Here is the fake .pdf for just the FreeCAD base file and 3mf files Modular Movement Holder.pdf Here is the fake pdf for complete set of the new base and ring FreeCAD/3mf files: Modular Movement Holder base and ring v 2.1.pdf However, I'm wondering how often you could use this feature, adding the dial usually increases the OD of the movement, so you would need a new (larger) adapter ring tuned to the OD of the dial and I wouldn't like to grip the dial in any kind of movement holder if It could be avoided for fear of damaging it. Maybe I'm misunderstanding you?
    • Hi Frank, you have dived headlong into the deep end. Hairspring work has to be the scariest thing a newbie has to tackle. Your hairspring appears to be bent and just putting it back into the regulator would not allow the balance to work properly. It might start oscillating but the performance would not be good. The proper thing to do is to unstud the hairspring, remove the hairspring from the balance, reinstall the hairspring on the stud carrier, reshape the endcurve and centre the collet to the balance jewel hole. This challenge would either make you or break you. Hope that you will be able to fix your watch. Welcome to the world of watchmaking.  Watch this video. It think it'll give you an idea of the task ahead. From your 1st photo, I think you have a etachron type stud. Let me see if I can find a video on how to remove it from the arm.
    • Have read of the Tech Sheet attached on the balance section page 12. It may be bent but until you reposition it back in the regulator pins you'll never know. Cheers CJ 4R35B_4R36A.pdf
    • Aloha All, My Seiko 4R35B movement stopped working today. Upon closer inspection, it looks like the balance spring came out of the regulator pin. This is my first time working on a balance. Any advice on how to get this spring repositioned (back to normal)? I'm pretty sure that while adjusting the beat error on this movement, I must have turned the stud (I didn't even know they turned), and the spring eventually fell out.  Will the spring go back to even spacing when it's back in the pin, or does it look bent? Thanks, Frank  
×
×
  • Create New...