Jump to content

Omega with plastic case back


LiamB

Recommended Posts

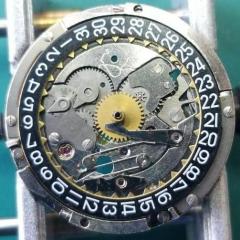
I have an omega with a plastic case back. I am fairly sure that it's not original and that ithe acrylic glass was added at some point and has cracked around the edges. Does anyone know how to remove this so the watch can be serviced? 

Thanks

IMG_1112.JPG

IMG_1113.JPG

Link to comment
Share on other sites

  • 6 months later...
2 hours ago, marcoskaiser said:

Hello Liam! Please let us know how did it work. I have a venus 170 missing the case back, and started to consider this option.

On the basis that the cost being minimal, and you do no damage by using glue, why not give it a go? I have successfully used acrylic crystals as case backs on several watches that would otherwise have been scrapped. 

Phil

Link to comment
Share on other sites

1 hour ago, philipk5 said:

On the basis that the cost being minimal, and you do no damage by using glue, why not give it a go? I have successfully used acrylic crystals as case backs on several watches that would otherwise have been scrapped. 

Phil

That’s encouraging. I will do so. Thanks for the push!

Link to comment
Share on other sites

I could not resist and started to make a case back to eventually fit a sapphire glass. I took an old orient case as raw material.

On the lathe, I gave up mesuring and only listened to the cutting to get hairs off the internal diameter of the stainless ring. Got a fit, but also a question: those of you who made the thing for real, what quality/hardness stainless steel should be used? And is there an optimal angle for the fittings of these click-on backs? 

Thanks!

marcos

7D3016AC-6F56-4DC6-B85A-4082B27AEC14.jpeg

537CA103-5280-466C-867D-122929CB5EB7.jpeg

Edited by marcoskaiser
Accuracy
Link to comment
Share on other sites

316L is the standard stainless for watch cases. Around 3-4 degrees for the angles, you don't want a sharp lip though, there will be a cylindrical land. Fitting is of course a bit of trial and error so a good fixture that allows removing and replacing on the lathe without introducing eccentricity is a must

  • Like 1
Link to comment
Share on other sites

4 minutes ago, nickelsilver said:

316L is the standard stainless for watch cases. Around 3-4 degrees for the angles, you don't want a sharp lip though, there will be a cylindrical land. Fitting is of course a bit of trial and error so a good fixture that allows removing and replacing on the lathe without introducing eccentricity is a must

Thanks nickelsilver! I turned a brass holder and left it on the chuck until the end. Only trouble was securing the steel. I used cianoacrylate, and washed it with acetone to release the piece. But heat would melt the glue. Must research some glue for this purpose. Any thoughts?

Best,


Link to comment
Share on other sites

I use cyanoacrylate very often, it's super handy. For something like this case I might use a friction chuck, usually plastic (pvc or delrin), that the case fits onto. Typically a short spigot that friction fits an inside diameter and a square shoulder to butt up against. Of course it only holds for light cuts with sharp tooling.

There are fairly sophisticated chucks that can be used but friction chucks are the traditional method, in the past they were generally wood.

Link to comment
Share on other sites

4 hours ago, nickelsilver said:

I use cyanoacrylate very often, it's super handy. For something like this case I might use a friction chuck, usually plastic (pvc or delrin), that the case fits onto. Typically a short spigot that friction fits an inside diameter and a square shoulder to butt up against. Of course it only holds for light cuts with sharp tooling.

There are fairly sophisticated chucks that can be used but friction chucks are the traditional method, in the past they were generally wood.

Wood is surely more sustainable and cheap than brass...

I noticed that sometimes people like clickspring (makes videos on tooling and clockmaking) use some kind of superglue to hold metal together. 

At 6:54, if you get bored...


Link to comment
Share on other sites


  • Recently Browsing

    • No registered users viewing this page.
  • Topics

  • Posts

    • Unfortunately I'm not that lucky. I started on the train side and after I noticed the binding I pulled everything out except the driving wheel to rule everything else out. It still binds. I'm going to double check that the pinion is fully seated on the staff first, then if no joy I'll push the bridge jewel up a fraction of a mm. Fingers crossed!
    • Happy to have helped, great way to start the day with a win! 🥳
    • Thank you for the advise!! It worked. The setting screw was a lock/unlock to remove the rotor. 
    • I have that French tech sheet too, it is a little different than the English one (eg, it doesn't have the auto works diagram). BTW, it looks like you are looking up the case number in the 1979 ABC supplement. The 1974 ABC catalog does have the 3093 case. As you determined it takes the 1222-5 crystal.  When I serviced my President 'A' (which also takes that crystal), I was able to fit a 29.8 crystal from my DPA crystal assortment. Those are, in my opinion, a great deal. The assortment comes with 10 sizes each from 27.8mm to 32.4mm in 0.2 increments. I pretty much use them for any non-armored crystal that takes a high dome crystal. I think they no longer make them but Cousins has still has some in stock but when I bought them they were around $40 for the set and now they are around $100. Still, at 40 cents a crystal it's still a good deal. For the large driving wheel, I remember I once assembled the keyless/motion works first and when I placed the large driving wheel it was interfering with the setting wheel on the dial side as the teeth were not fully meshing and it wouldn't fully seat. If that isn't the issue I got nothing and am looking forward to see how you solve it 🙂
    • Not sure, but just looking at it, it seems like the screw on the right may be a fake? The one on the left may not be a screw in the regular sense at all, rather a 2 position device, I think you need to point the slot towards either of the 2 dots and one will secure and one will open. Like I said this is just my best guess looking at the pictures.
×
×
  • Create New...