Search the Community
Showing results for tags 'service walkthrough'.
Found 2 results
-
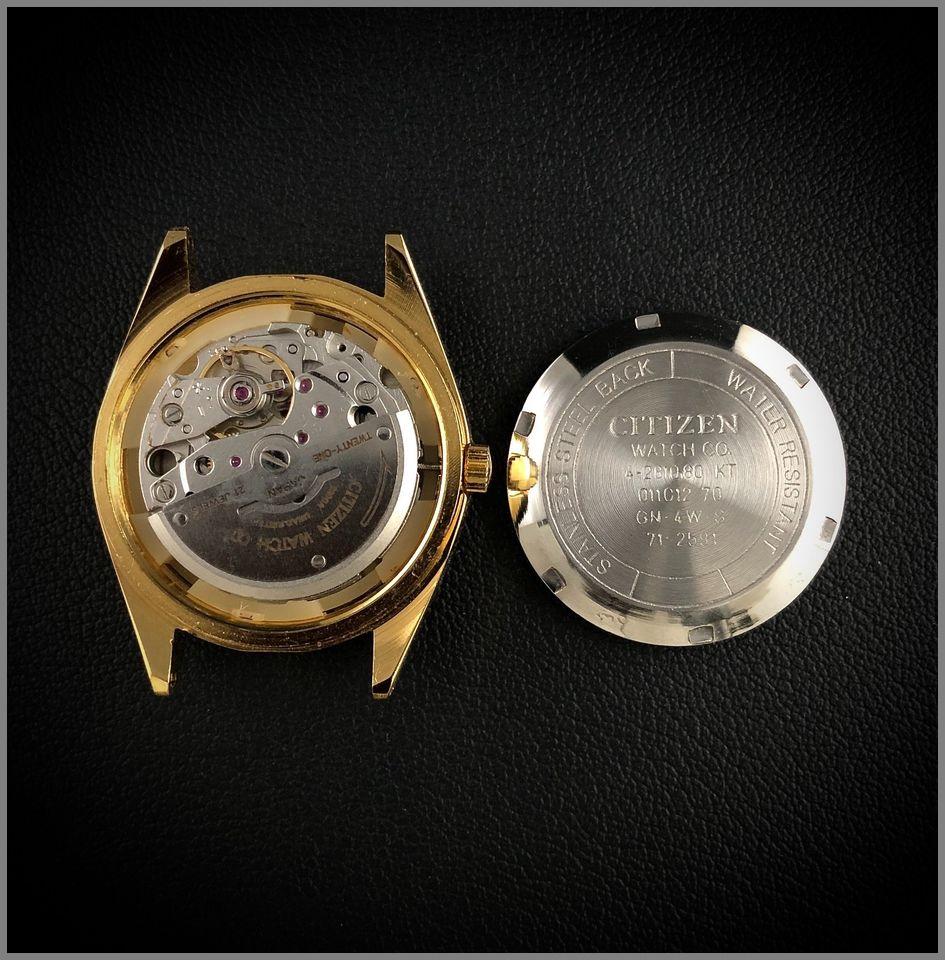
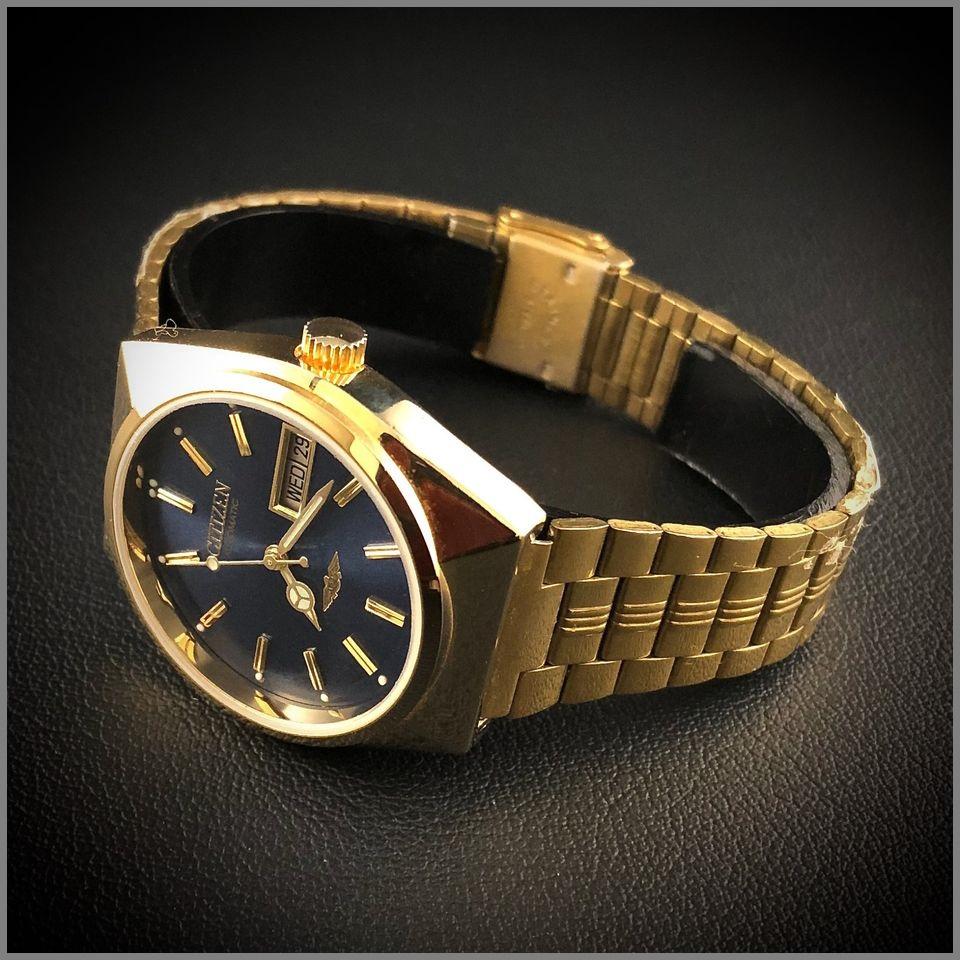
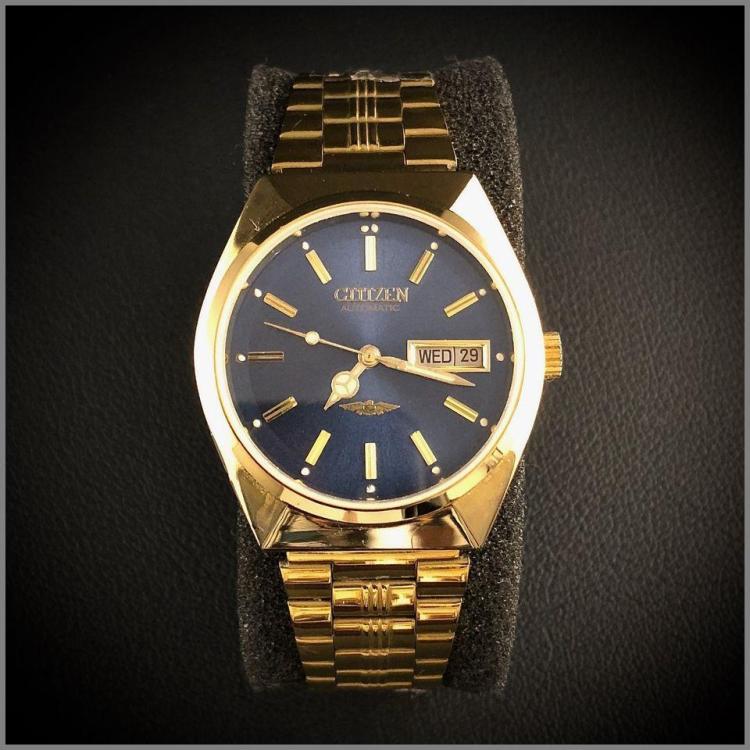
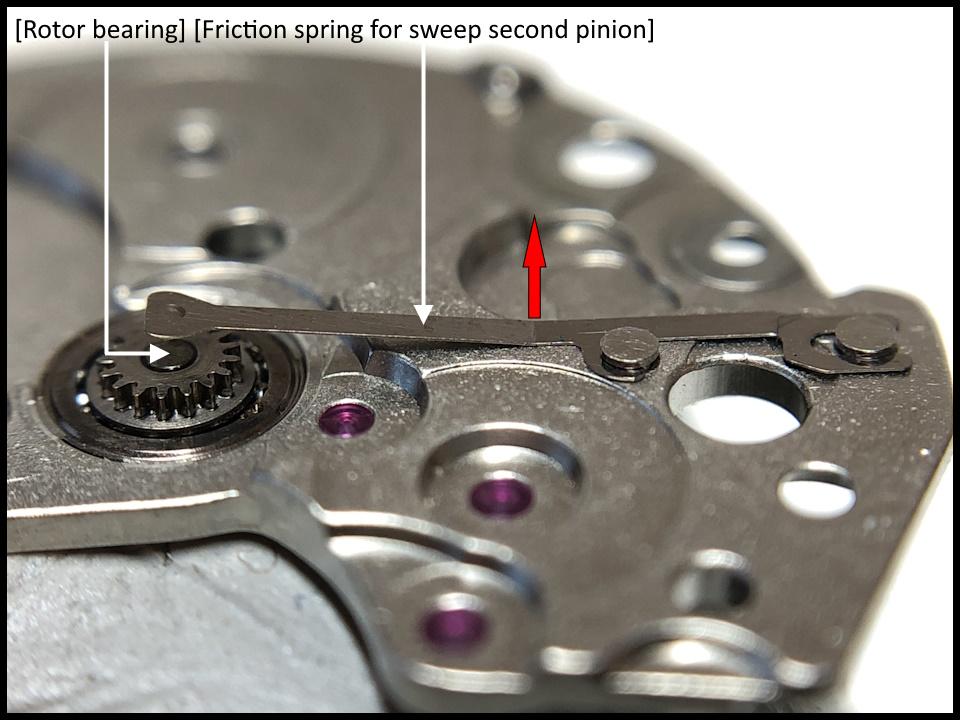
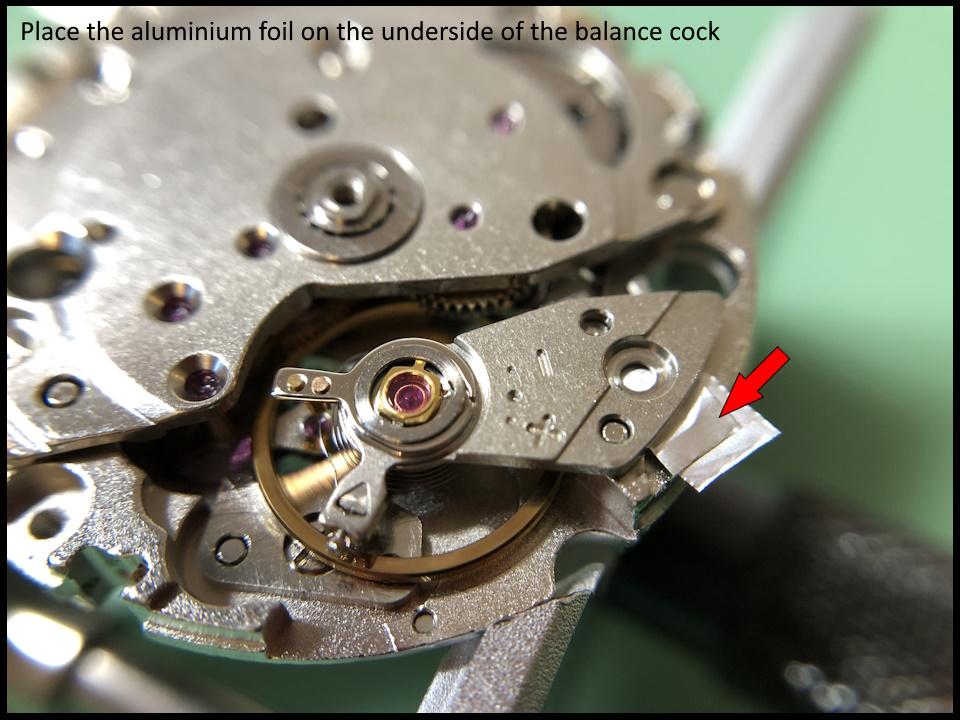
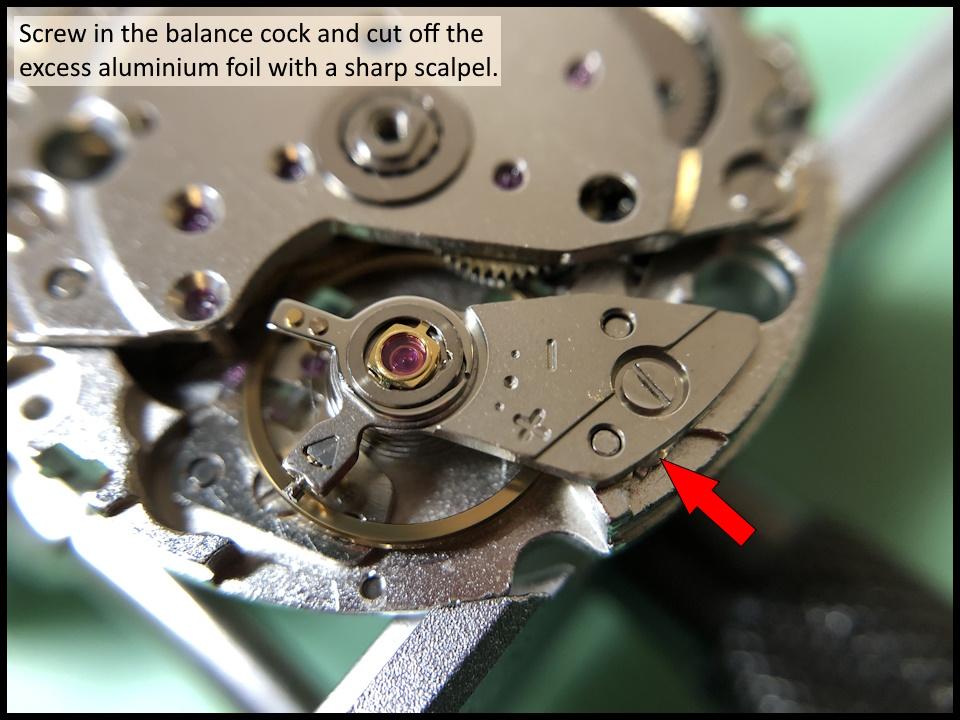
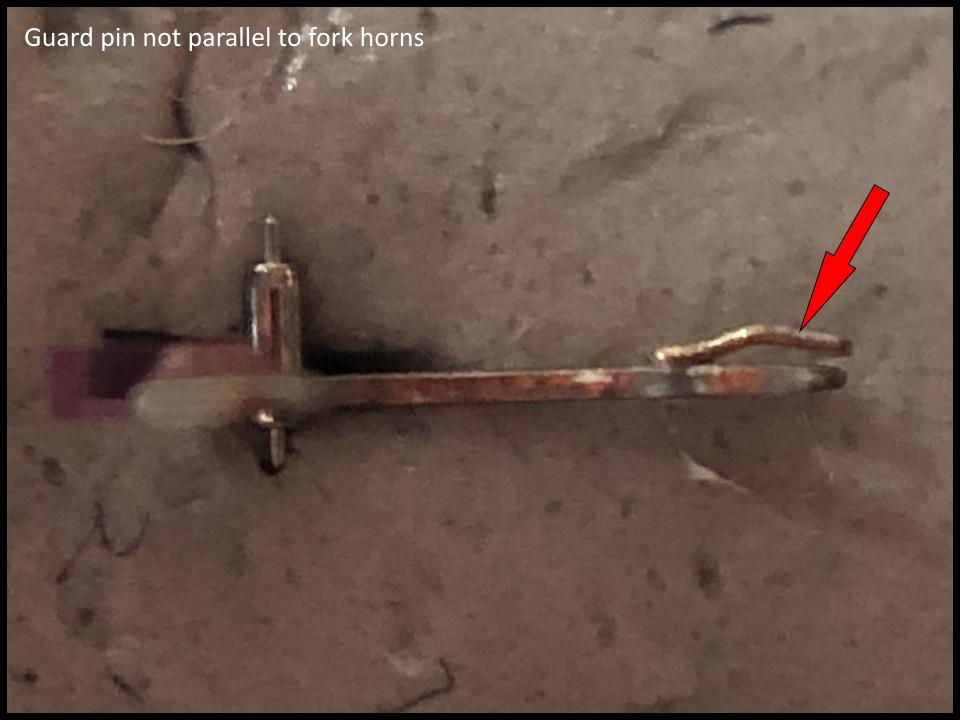
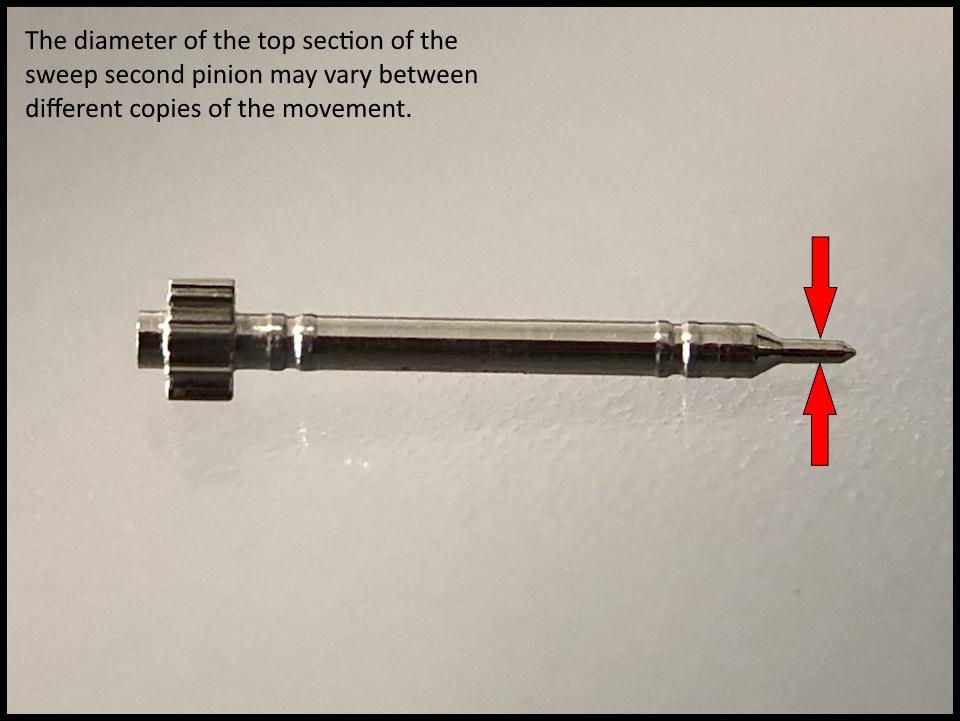
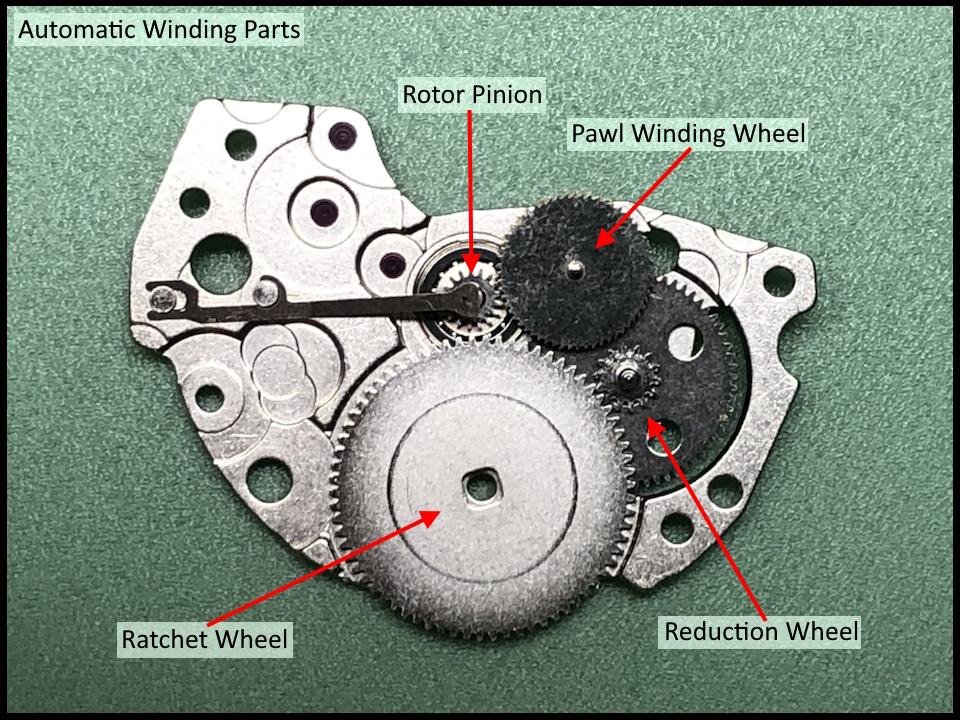
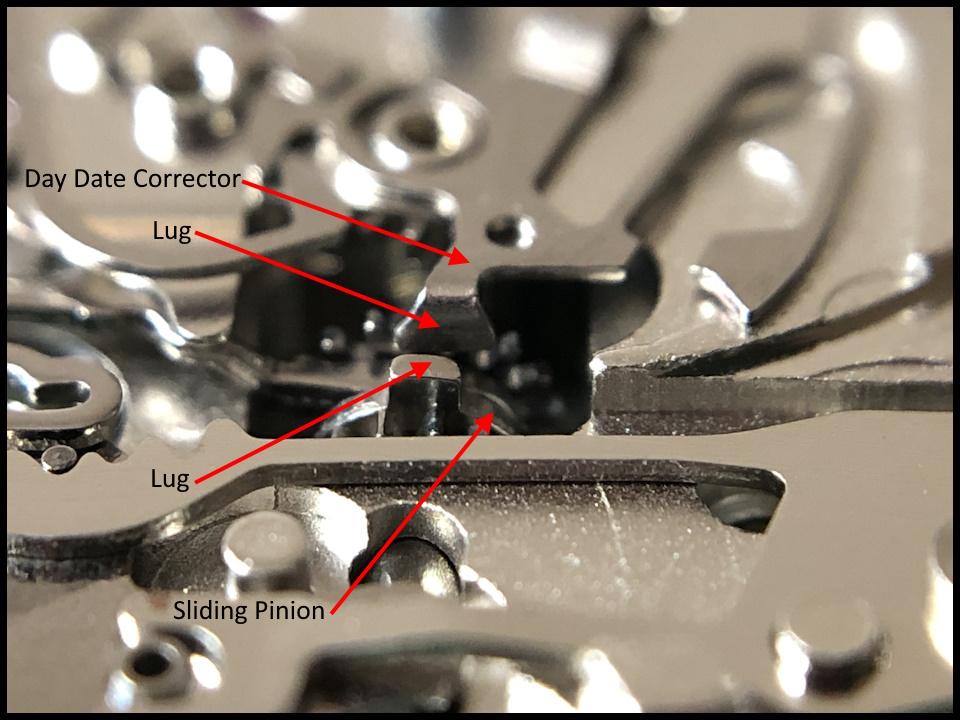
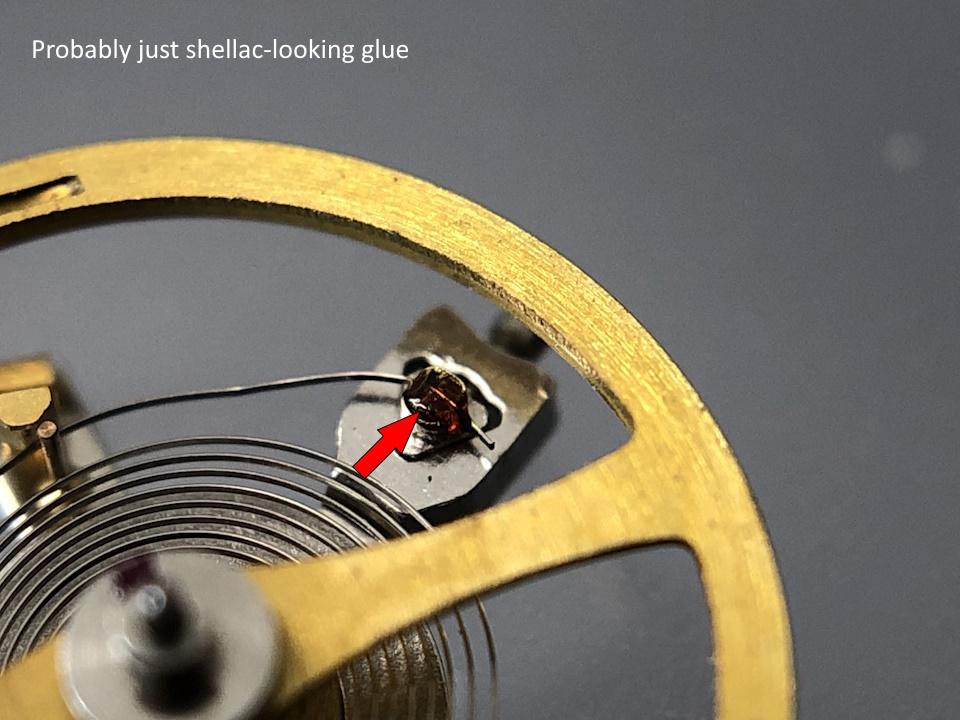
 Disassembly pictures here (Please sort the pictures by name in ascending order) Assembly pictures here (Please sort the pictures by name in ascending order) Introduction To make a long story short, I've got about 100 Indian Citizen watches in my possession. It is one of these 100 watches shown in the pictures above. There is no major fault with them other than that none of them work. We all know that Citizen is a Japanese brand, but these watches are manufactured by HMT in India under license, probably sometime in the 1980s or 1990s. So, what do you do if you have 100 fine new old stock Indian Citizen watches that don't work? Well, you service and repair them, and then you sell them for a reasonable amount of money. How hard can it be!? Selling them, once they work, has happily proved quite easy, but repairing them has proved more challenging. So far, every movement has been full of gremlins to defeat. As usual, I want to remind those of you who have no previous watch service experience that this service walkthrough should not be seen as a tutorial on how to service a movement. It takes a lot of tools, consumables, training and know-how to succeed. Fortunately, there are several excellent resources, like WRT, and watchmaking schools online, and believe me, after six years I still find it insanely interesting and fun! About the assembly and disassembly pictures Unlike the disassembly pictures, the assembly pictures document screws, lubrication, and tips and tricks. Regarding the lubrication, I have not found any specific documentation for this movement. Instead, I have used my judgment and experience. It took some experimenting with the lubrication of the date and day change mechanics to get to work smoothly, so I feel a little extra proud of that. About the Citizen 8200A / Miyota 8205 movement The movements in these watches are designated Citizen 8200A on the rotor. In practice, they are identical to Miyota's calibre 8205, and if I'm not misinformed the watch manufacturer Citizen owns the movement manufacturer Miyota so there's a natural explanation. I have previously created a service walkthrough for Miyota's calibre 9015 which is often found in more expensive micro brands. Miyota's 82XX series of movements, such as the 8205 are instead found in more affordable micro brands, but there is no doubt that it is fundamentally an excellent and reliable movement. So, what do you find when you open an Indian Citizen like this? You find a well-constructed, well-functioning, albeit simple movement. In my opinion, it has a minor construction flaw, but I will report back on that. I have no idea how Indian HMT operated, but my impression is that these movements were assembled in an unsuitable environment, to say the least, by people with low-quality tools and a lack of knowledge of what a movement is and how it works. However, the movement parts themselves generally seem to be of decent quality, but when you take the movements apart you find fingerprints, hair, fibres from clothing, glue, and sometimes what I guess could be food residue. I.e. you find everything found in a typical home, so maybe that's where they were put together. As for the lubrication, sometimes it's OK, sometimes it's missing, sometimes it's in the wrong places, and sometimes there's way too much. However, once repaired, serviced, demagnetized, and adjusted these Indian movements work very well, so well that I don't think you can tell them apart from their siblings that are manufactured and assembled in Miyota's factories in Japan. Following are some tips and tricks that I hope will be useful. Stuttering second hand As in many other movements, the second hand is driven indirectly via the teeth of the third wheel, and to prevent the second hand from stuttering around the dial in a jerky fashion, a friction spring is pressed against the short side of the sweep second pinion. If the friction spring is not tensioned enough, it will not do its job. If this is the case, which is quite common, then the distance between the tip of the friction spring and the rotor bearing can be slightly increased by prying the friction spring slightly in the direction of the red arrow away from the rotor bearing. Balance staff end-shake I have long wondered if it would be practical to increase the end-shake of a balance staff using ordinary aluminium foil of the type you usually have in your kitchen, and now I have had the opportunity to test it. I admit it's not a very elegant or perhaps even correct solution, but it seems to work unexpectedly well, at least with this calibre. The aluminium foil that I have in my kitchen is exactly 1/100mm and after I built up the balance cock with two layers the end-shake was perfect. Guard pin The metal that the pallet fork's guard pin is made of on this calibre is unusually soft and therefore easy to deform, above all in height, but therefore also easy to correct. Several of the copies I worked on had a deformed guard pin. Normally, the guard pin should run parallel to the fork horns. Why this problem seems to be so common is hard to answer, but maybe my Indian colleagues were a bit careless with their tweezers when handling the pallet fork, or it's a matter of poor QC. Who knows!? The tip of the sweep second pinion You might think that all the parts for a certain calibre would be identical, and they largely are, but one exception is the tip of the sweep second pinion whose diameter can vary between different copies of this calibre. It is therefore not certain that the second hand from one copy will fit on another. I have not discovered any more exceptions than this. The Automatic Winding The automatic winding on Miyota's movements, including their premium movements such as the 9015, is unidirectional. I've always thought that would mean it's half as efficient as bidirectional winding, but in practice, unidirectional winding seems to be about as efficient as bidirectional winding. As can be seen from the picture, which shows the underside of the barrel and train wheel bridge, not many parts are needed for the automatic winding. I think this simple and well-functioning solution is elegant! Glue or shellac? The first time I took this calibre apart I suspected that the balance spring was attached to the stud with shellac, but after cleaning the movement in my watch cleaning machine where the final rinse is 99% IPA, I no longer think so. Instead, I think it's glue that simply looks like shellac. A small construction flaw I have had a user of this movement break the winding stem and misalign the threads in the crown believing that he had to pull hard to get the movement into position to set the time. I don't blame him! This movement has what I would describe as a design flaw that makes it impossible to pull out the winding stem when it is in a certain position. When you pull out the crown, the sliding pinion moves inwards (upwards in the picture). If you are a little unlucky then the pin (lug) on the sliding pinion will be right opposite the pin on the day and date corrector (as in the picture) so that the two pins collide with each other. When this happens, it becomes impossible to pull out the winding stem to its extreme position to set the time. If you then use force to pull it out, one or a few parts of the keyless work will unfailingly break. Most likely, the stem will come off and the threads in the crown will become crooked. What one must do as a user of the watch to ensure that the pins do not collide with each other is to rotate the crown slightly while pulling out the stem. When you rotate the crown, you also rotate the sliding pinion, which means that the pin on the sliding pinion does not risk colliding with the pin on the day and date corrector. Other documentation I am attaching a couple of PDF documents for the movement and thank @JohnR725 for links to a couple of interesting articles about the collaboration between HMT and Citizen. That’s it! Thanks for reading! Citizen 8200,8210,8260,8270,8280.pdf Spare-parts-reference-for-the-Miyota-8205-8215-movement.pdf HMT Watches: The Rise and Fall of India’s Watchmaking Titan HMT Watches: A walk down the memory lane


- 10 replies
-
- 10
-

-

-
- citizen calibre 8200a
- miyota calibre 8205
- (and 1 more)
-
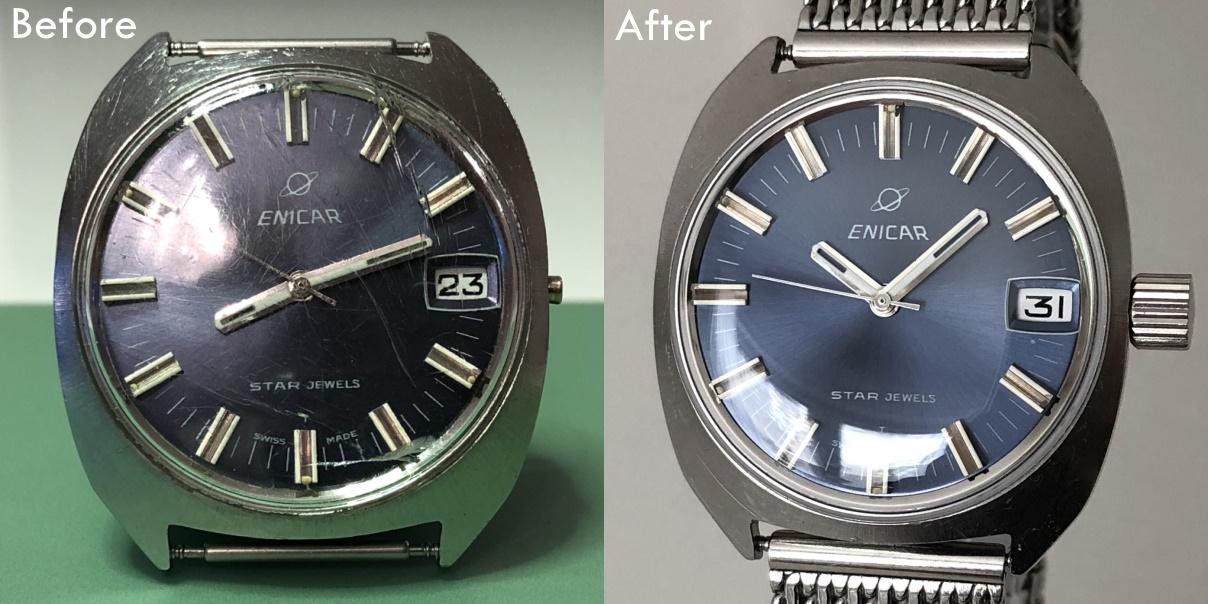
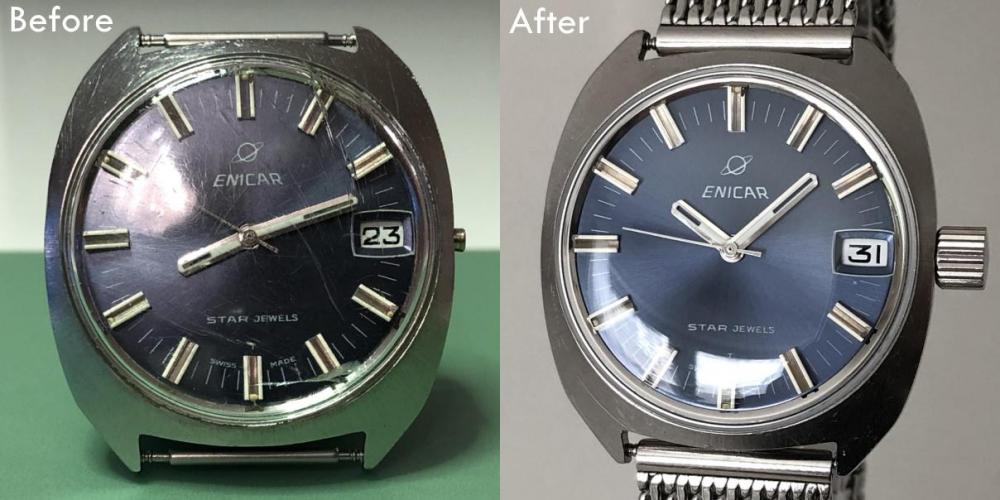
Disassembly sequence here (Please sort by name in ascending order) Assembly sequence here (Please sort by name in ascending order) The watch is an Enicar Star Jewels Ocean Pearl from the 1970s A bit of background I bought this watch on tradera.com (Swedish eBay) listed in the category "Klockor/Renoveringsobjekt" ("Watches / Renovation items"). It was listed as "working" despite lacking the winding stem. I bought it for three reasons. I wanted to try my hands on an inexpensive watch in visual need of renovation. I was curious of the Enicar brand and their in-house movements, and I thought the blue dial with its applied indices had potential. It was clear that the watch needed a new winding stem, crown, and armoured crystal. I found an original stem on eBay from Spain for less than €10 including shipping (a bit of a bargain I think). I bought a bunch of inexpensive waterproof crowns from CousinsUK.com so that I could select the most comfortable and at least somewhat nice looking. I also bought a couple of inexpensive Sternkreutz armoured glasses from CousinsUK.com Overall the movement looked pretty OK except for a third wheel pivot that was rusty. Removing the rust (using vinegar essence) the pivot became Coca Cola bottle shaped so I burnished it and in the process had to remove approx. 2 to 3/100 mm. This in turn created too much side-shake so I replaced the jewel as well. The mainspring looked pretty OK too so I kept it. The cannon pinion also needed a bit of tightening. I guess the friction between the centre wheel arbor and the cannon pinion really can't last forever when a watch is being used for many, many years, perhaps even for decades (looking at the case back of this watch it has seen massive use). Anyway, to tighten the cannon pinion I first tried with my Seitz jewelling pusher and stake for lanterning cannon pinions, but it feels like the edges of the pusher and stake are somehow too blunt or perhaps not designed for wrist watch movements?! So, I resorted to my cannon pinion tightening tool (Bergeon 4733) which is really a bit scary to use but works very well once you've destroyed your first two or three cannon pinions learning how to use it. The trick is not to alter the position of the screw (unscrew it) once it reaches the inside of the handle. As soon as the screw touches the inside of the handle it's time to press. That will usually tighten the cannon pinion the required 1-3/100 mm (I would guess). To give back some of the luster to the dial and hands I simply used a Dial & Hand Cleaning Pen from CousinsUK.com. It worked better than I had expected. The old lume was partly missing and what was left was completely crusty so I simply scratched the remains off and didn't bother to replace it (the blue colour shining through the hands looked pretty great and I don't care much for lume anyway) Despite throwing everything in my arsenal of collected knowledge and experience on the this watch I couldn't get it to run perfectly. The amplitude (as well as the rate) in the horizontal positions fluctuates between 260 and 280 degrees but mostly stays around 260 degrees. I did adjust the curb pin as the hairspring was pinched between the boot and the curb pin and made sure it bounced evenly between the two, but the effect was only marginal. I suspect that the hairspring touches the lower part of the boot. Anyway, I decided to wait with further investigations, put it together, wear it and enjoy it. Despite this shortcoming it performs very well as a daily wearer, only varying in rate between about +1 and -1 seconds per day.
- 13 replies
-
- 9
-
-
- star jewels
- ocean pearl
- (and 4 more)