Search the Community
Showing results for tags 'pierce 134'.
-
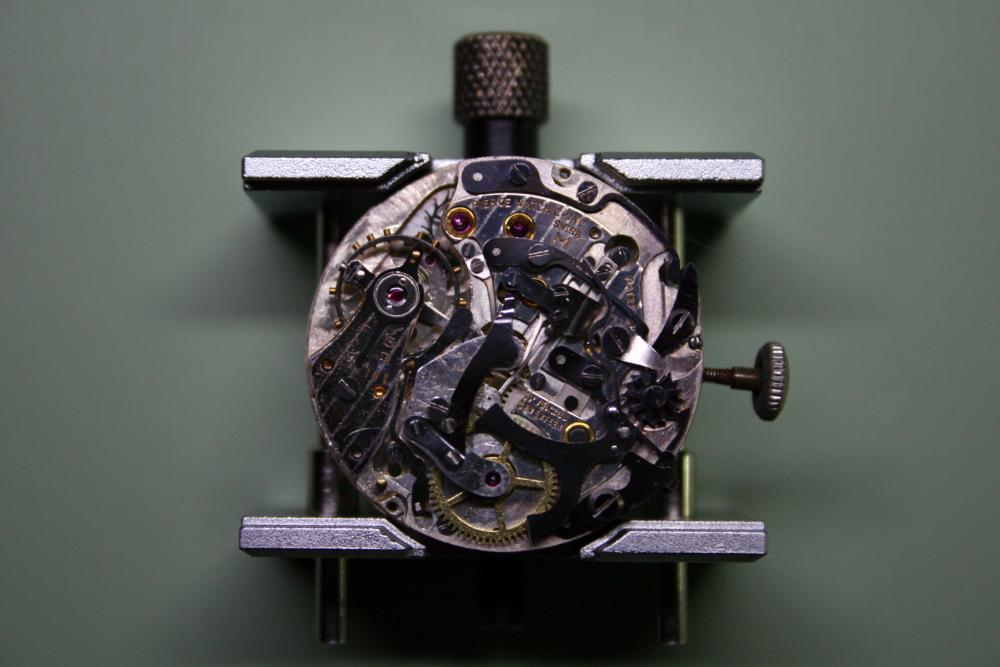
I've done a lot of Pierce Navigator repairs in the last year but this one was a bit special as it was the first I completed for someone other than myself. The watch is an heirloom and as such was received in much better condition than the those I've purchased off the bay. The bracelet was broken and would eventually be replaced and right off the bat I noticed that the sweep second hand was missing. The crown was also stuck in the setting position and therefore it was impossible to wind the watch. With the caseback off I could see that the chronograph staff and pinion had actually been removed sometime back. Also missing was the intermediate wheel which activates the minute recording wheel when the chronograph is engaged. My guess is that the rubber clutch for the chronograph had failed sometime in the past and the watchmaker simply removed the other bits as opposed to attempting a fix. I also noted a chip in the upper balance cap jewel. I've never seen a defect such as this before. With the dial removed, the normal accumulation of dirt and debris came to light. The setting lever snapped back into place smartly and with that I was able to check the timing. With the movement out I turned my attention to the case and pushers. The spacers for the pushers often become jammed inside the pusher button as the result of an accumulation of grime beneath the button cap. The springs, which sit between the spacer and the button, are made of stainless steel and generally hold up well over the years. I've discovered that a good soak in vinegar will usually free the spacers and springs from the buttons. With the pushers soaking I turned my attention back to the movement. As I said before, this Pierce 134 is in much better condition than those I've restored in the past. It's clear the owner has taken good care of the watch over the years. Generally I'll follow the Esembl-O-Graf (volume 15) in reverse order when disassembling a Pierce movement. I've done a few now and am getting used to the process. Looking the parts over I didn't find any that required immediate replacement so the only order placed was for a mainspring and crystal (in addition to the missing chronograph staff, pinion, and intermediate wheel). The old crystal was in fair shape but a little loose in the bezel so I opted for a new one. The damaged cap jew was chipped only on the topside and therefore I opted not to replace it. The parts were whisked off to the L&R cleaner and I turned my attention back to the pushers. The vinegar bath succeeded in freeing the spacers and springs from the buttons. I set the parts out for cataloging after cleaning and drying. At this point I'll also do any rust remediation. This movement was in fine shape but the levers for the chronograph did suffer from a bit of oxidation. The rusted bits were placed in a bath of vinegar for a good soak, then any pitting was smoothed using the Dremel tool or a rub on the Arkansas stone. The replacement chronograph staff, pinion, and intermediate wheel arrived in time for assembly. The staff needed a new clutch plate. In the past I've cut these out of nylon and although this is an adequate solution, it makes the final adjustment a lot more difficult since the nylon has so much less give than rubber. A while ago I began experimenting with rubber o-rings as a substitute. I use a rubber o-ring which had a thickness of 2mm. By sharpening an Exacto knife and lubricating it with a bit of watch oil I can cut through the o-ring with very little compression. This results in a disk that is thin enough and flat enough to use as a clutch plate for the chronograph. A punch I made on the lathe is used to place the center hole. Unfortunately since I made the o-rings before I began this service, I didn't have any images of the procedure. Assembly is straightforward provided all the gremlins have been discovered beforehand. The pallet, escape wheel, and cap jewels receive epilame treatment. The balance wheel is cleaned separately with One Dip. Put back together I noted a funky reading not the timegrapher. The culprit was a slightly bent pivot on the pallet. I replaced the pallet with one from my own stock and this resolved the problem straight away. I let the watch run overnight before beginning on the chronograph layer. It comes together a little slower as there are many more parts to lubricate and adjust. A missing sweep second hand can be a real problem with Pierce watches as the center post is 0.35mm (which is large). Fortunately I had a hand in my stock from a parts movement that would do- once I attached a post to it! I have some brass tubing that has an inside diameter of 0.35mm so I just needed to turn the outside diameter down on the lathe and rivet the post to the hand. Here I test the fit of the hand prior to painting. Once that was settled I discovered the post on the minute hand was loose also. A new post was turned on the lathe for it as well. Problems with the chronograph became apparent after fitting the hands. The culprit in this case turned out to be a damaged center jewel. This must have occurred during assembly as the jewel checked out after cleaning. Bad luck. The jewel is pressed in from the topside and so it must be removed by pressing from the bottom side (dial side). Unfortunately the jewel sits at the bottom of a long tube which required me to turn a special adaptor piece on the lathe for my Seitz tool. A replacement jewel was sourced from a donor movement and I was back in business. The owner decided on a replacement crown and a new strap and the watch finally came together. I have a bit of a thing for Pierce watches but at the same time I don't think it's much of a coincidence that the watches housing a Pierce 134 movement only seem to exist from the late 40's and early 50's as they can be a bear to get running right. In the end I was really pleased with this service though.
-
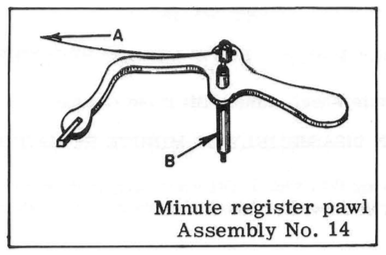
I thought I'd break this out as a separate narrative from the Pierce Navigator repair I posted here. Anyone who has done an old chronograph repair is aware of how delicate part 8270 (minute recording jumper) is. The Pierce 134 movement is put together quite a bit differently from your normal chronograph in that it has a vertical clutch arrangement as opposed to the laterally engaged coupling clutch found in the more common Venus and Valjoux chronograph movements. As a result of this uniqueness many parts, while functionally the same, are designed in a wholly different way. The Pierce minute recording jumper (pawl) is different from the typical jumper piece in that it is not a spring, but rather a pivoting lever which is held in tension by the thinest of wires. The wire needs to be manipulated in to put the jumper under just enough tension to hold the minute register wheel static until activated by the intermediate wheel. Too much tension will cause the watch to stop when the elapsed minutes are recorded, and too little tension will allow the minute register wheel to spin freely. Unfortunately it is not uncommon for the wire providing tension to fail after manipulation. Here I have a jumper in which the wire has broken and the jewel (well, actually it's just a cut piece of steel) has come lose. Initially I though it would be a simple fix to replace the broken wire. I used some 18 gauge electrical wire which was composed of several strands of thinner copper wire. Stripping the insulation off, I took a single strand of the copper wire and assumed it would suffice. Under the microscope it was evident that this approach wouldn't work. Even the smallest copper wire I could find was several times thicker than the wire I needed. Using the bench micrometer I measured the thickness of the broken wire at 0.05mm. To give an idea of how thin this is, I snapped a picture under the microscope of the wire next to a human hair. The wire is on top, the hair on the bottom. Armed with hard data I was ready to take a second shot at the challenge. Using the internets I found a company in the UK which could supply nickel wire in the same thickness. I placed an order, then added a couple spools of varying thickness just in case (and to make the product to shipping cost ratio a bit more reasonable). The wire arrived in due course and was exactly as described. I began my repair by knocking out the brass pin which secured the old broken wire to the pawl. A sewing needled was used to knock the pin out. The "jewel" was then replaced using a bit of shellac and a alcohol lamp. Now it was time to replace the spring wire. I cut a length from the spool and threaded it through the eye piece on the jumper. Naturally this was done under a microscope. A replacement pin was inserted to hold the wire in place and the excess was trimmed off using the scissors on my Swiss army knife (they seemed to be the perfect tool for this job). As you can see had two jumpers to repair: I'm very pleased to have been able to repair these parts as they can be quite expensive when purchased second hand; from personal experience I've seen the Valjoux and Venus jumpers cost between $30 and $120 USD which is quite a lot for a little bit of steel. Pierce parts can be hard to come by also. I currently have two Pierces in varying stages of repair so the jumpers will come in handy. On a side note I don't vape so I have no idea why tiny nickel wire is necessary for smokeless smoking.


.thumb.jpg.659e45086cdb83afb64c371dfb284dba.jpg)