Search the Community
Showing results for tags 'quartz'.
-
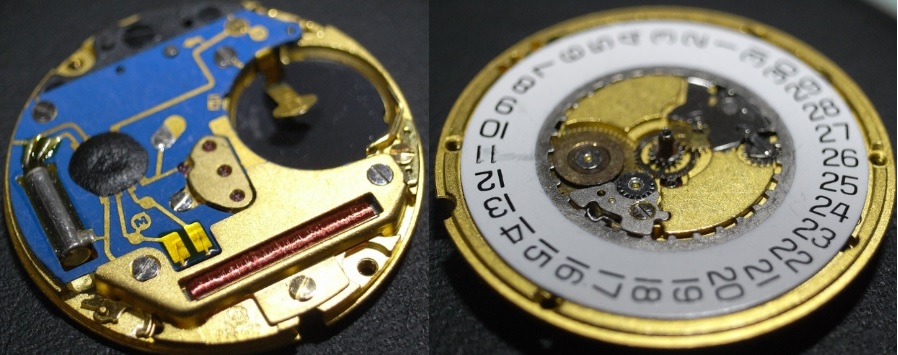
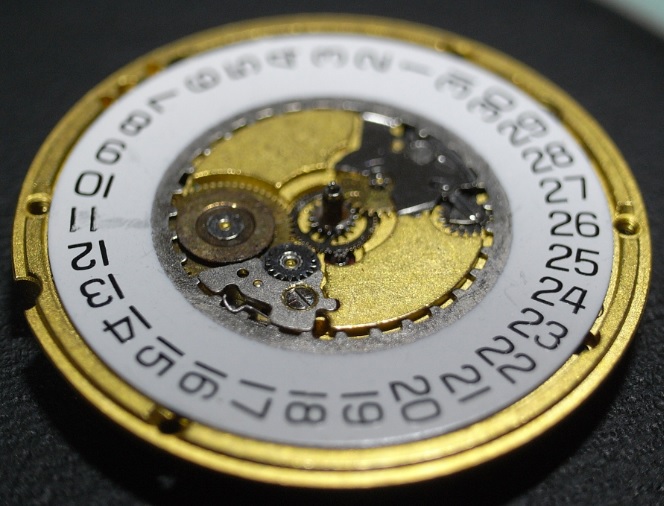
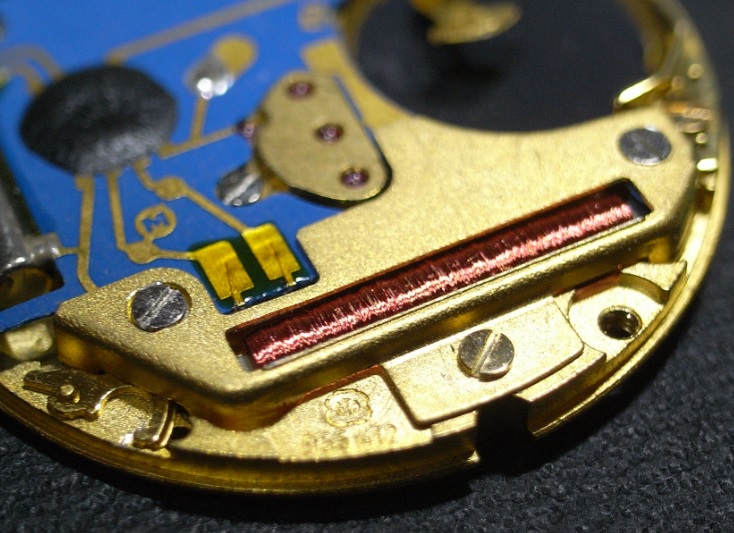
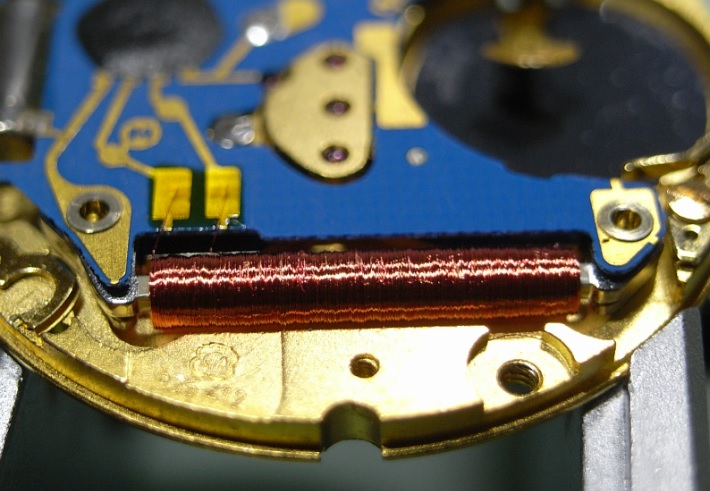
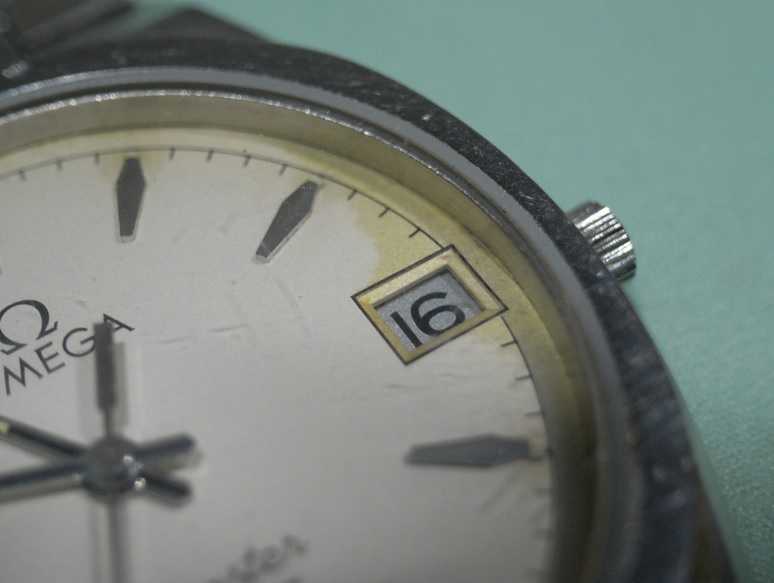
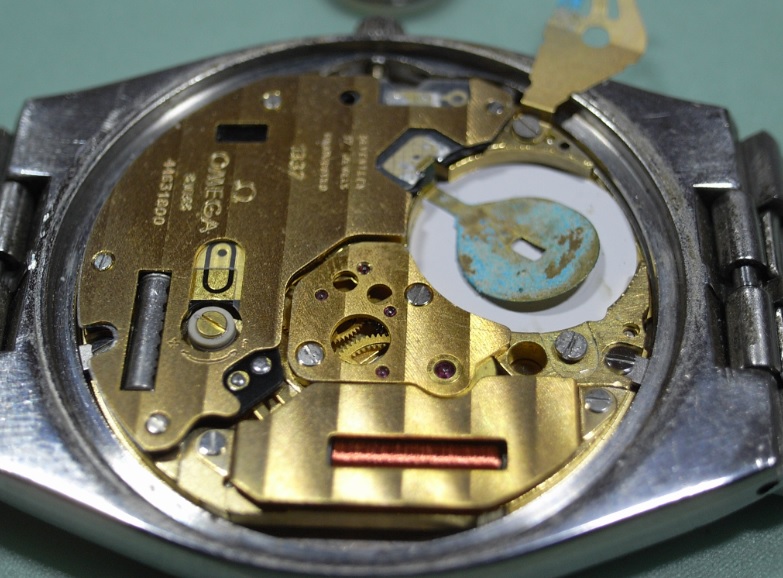
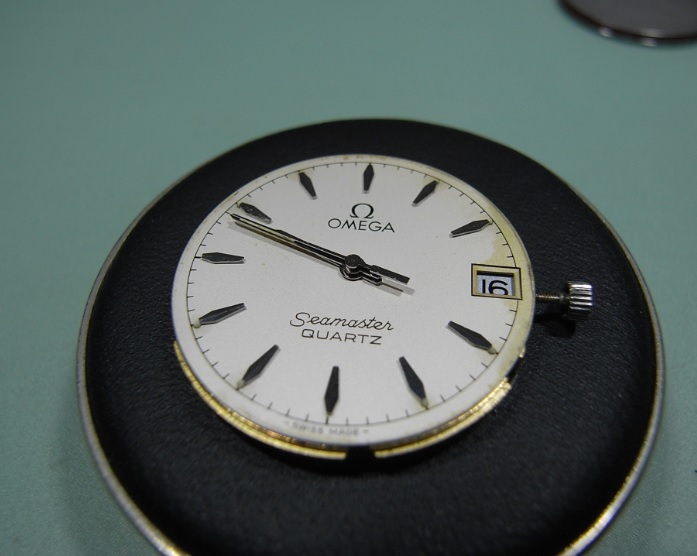
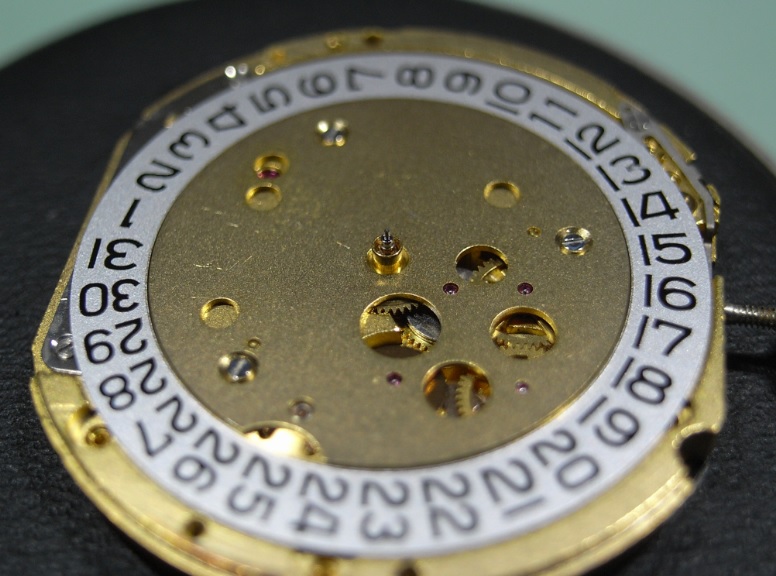
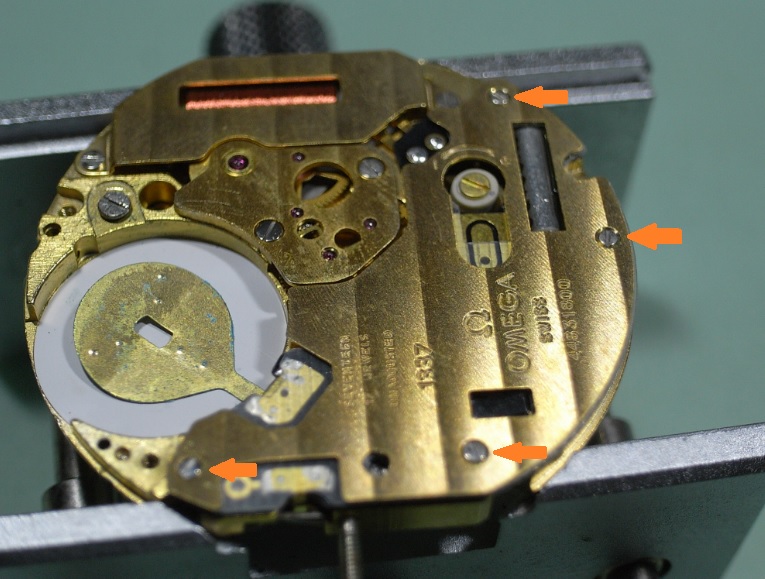
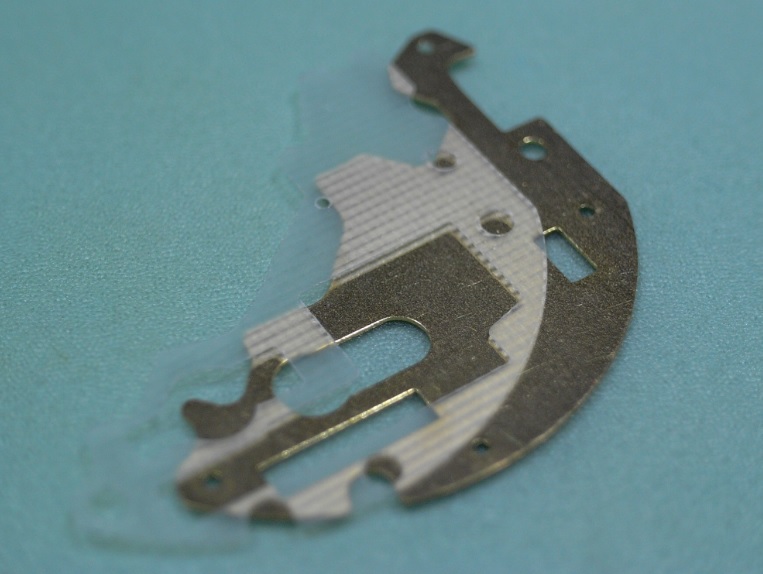
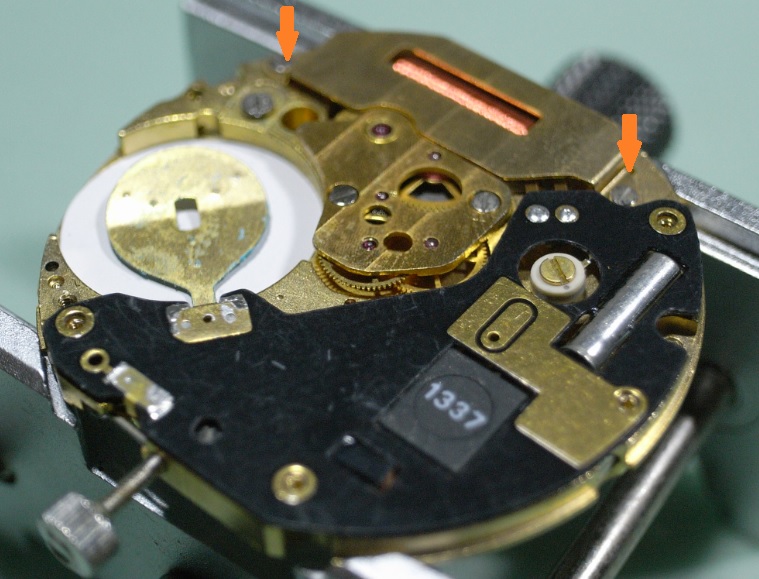
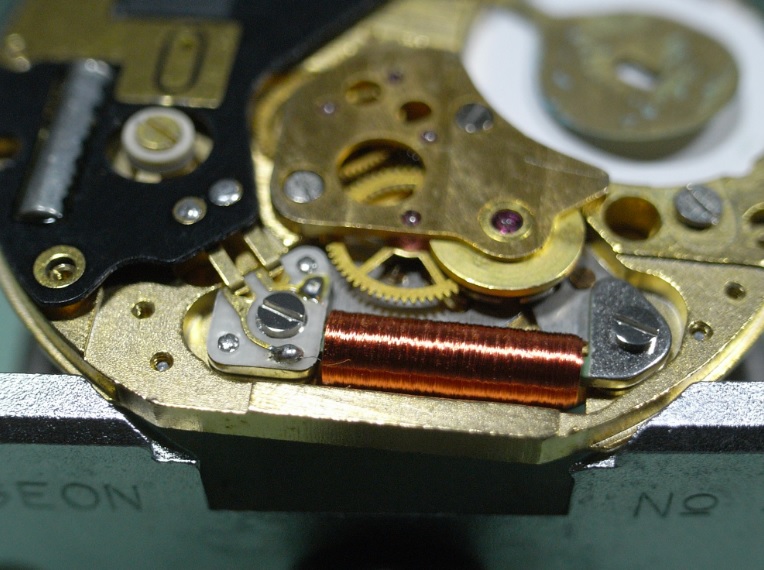
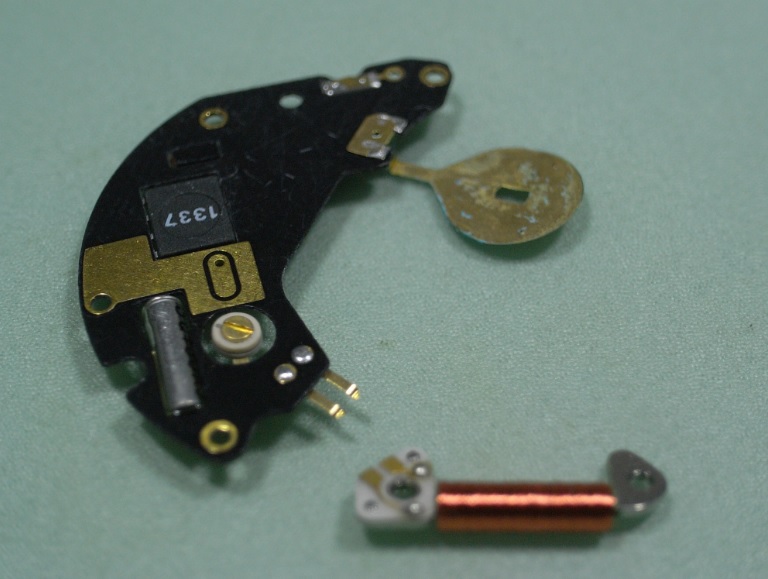
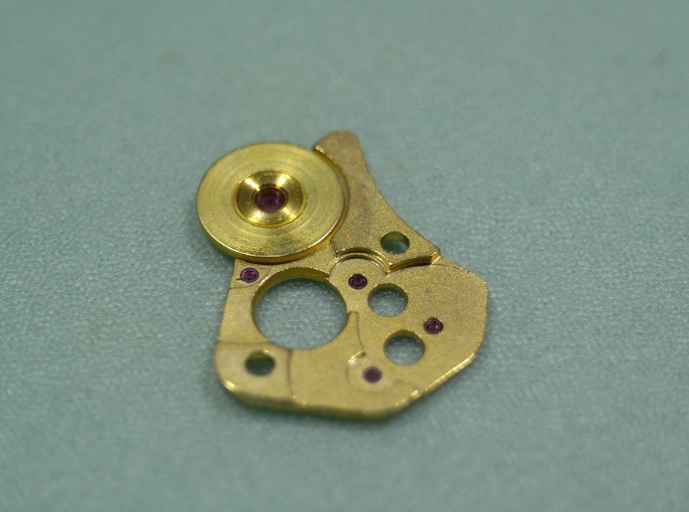
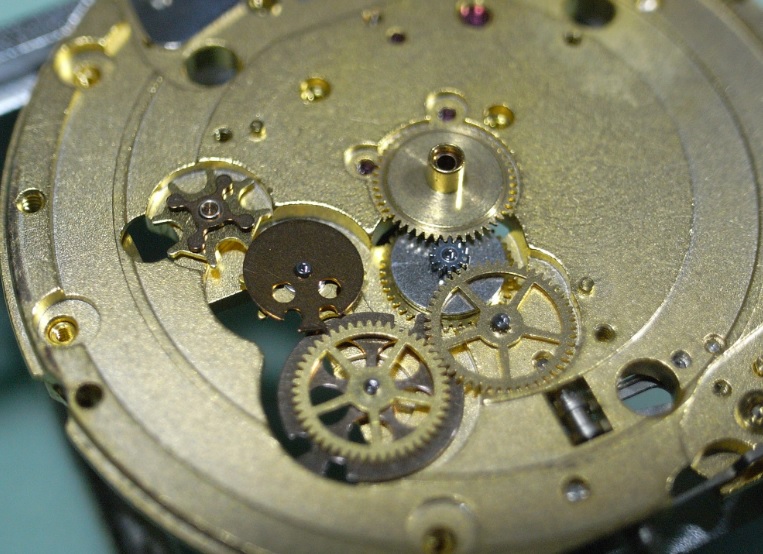
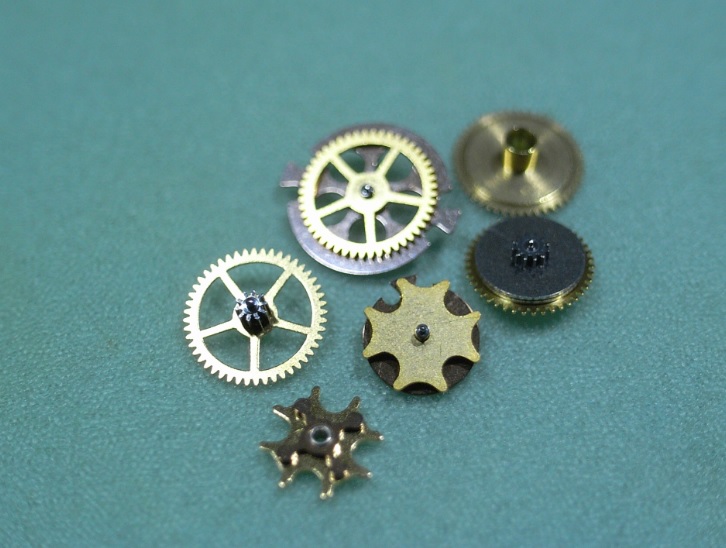
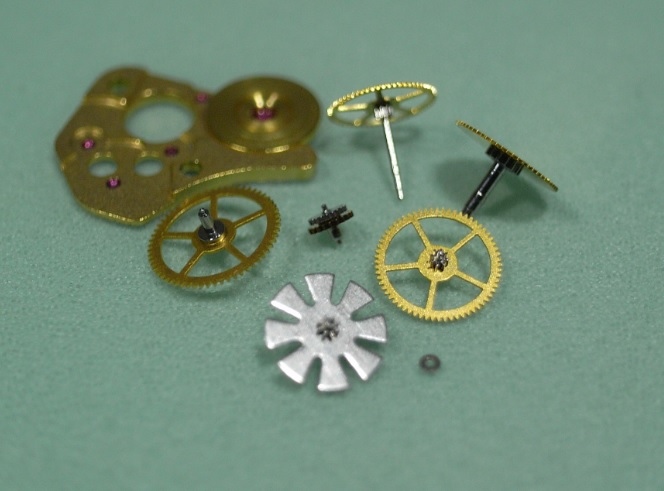
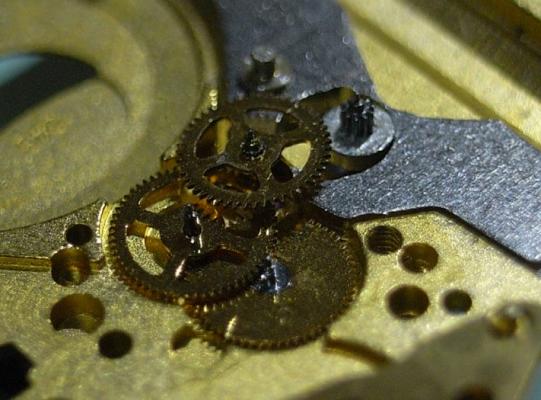
 Hello fellow watch freaks. It's been a while since I've posted a service walkthrough, but I had an accident that destroyed my left shoulder and needed surgery. It's been a rough 6 months for me, with a LOT of soul searching throughout my recovery period. But I'm back on the bench ... at least at home anyway; work is a different matter, and my close friends on this forum know about that ... nuff said. This watch is owned by one of my older brother's friends. My older brother is one of the most selfless people I know, and has always been there for me. So when he asked me to do this for him it became TOP priority. It was the first item his friend purchased after he left school and began work: so there's a lot of good memories tied to this watch. As you can see it's an older quartz Seamaster with an 1337 Movement. On first inspection you can see water damage to the Dial @ 3 o'clock. So I wasn't expecting to see a happy movement inside. But when I got the Caseback off things didn't look too bad at all. Just a bit of corrosion from a cheap nasty Chinese battery. The movement still looked nice and shiny and the Stem only had a touch of rust up near the Crown. So this watch looks like one we can save :) Disassembly OK, lets begin. Fist remove the Hands and Dial from the movement. Again, absolutely no moisture damage under the Dial ... this made me VERY happy indeed. So on to the Movement Holder it goes. Remove the Battery Clamp and Insulator Ring. Then remove the 4 screws that hold the Circuit Cover. Note that there is an insulator under the cover. It is very delicate, so great care should be taken when handling it. Once the cover is removed the circuit is exposed; but before removing it, unscrew the 2 screws holding the Coil Protector and remove it. Then unscrew the Coil, and remove the Circuit and Coil. Place both the Circuit and Coil in a safe place to avoid damage, as this parts are obsolete, and if damaged you'll have to scour the internet for a donor movement ... good luck with that!! Next remove the Train Bridge Here is a reference photo of the train. As you can see, the Rotor is a very different looking animal to the modern ETA rotors. Carefully remove all the wheels, and store the Rotor in a safe place AWAY from the rest of the parts to be cleaned ... as this has to be hand cleaned due to it being magnetic. Please Note: There is a very small washer that fits between the minute wheel and the extended pivot of the Second Wheel. Be sure to identify it, and make sure it's put in the small parts container for cleaning. Here's the complete train removed from the movement for reference. Flip the movement over in the holder and remove the 3 screws of the cover that holds the Calendar Ring. As you can see that Motion Work and Calendar Work are fairly complex on this movement. Make sure you take good reference photos and study them carefully so they are not confused with wheels of the train. Remove the Calendar Ring. Remove the Motion Work and Calendar Work. Here's the complete Motion Work and Calendar Work removed from the movement for reference. The Crown and Clutch should now be able to be removed. Flip the movement over once again to tackle the Keyless Work Unscrew and remove the Setting Lever Spring. Lastly unscrew and remove the Setting Lever, Intermediate Wheel and Yoke. The Omega 1337 Movement is now completely disassembled and ready for cleaning. I will post the assembly soon.
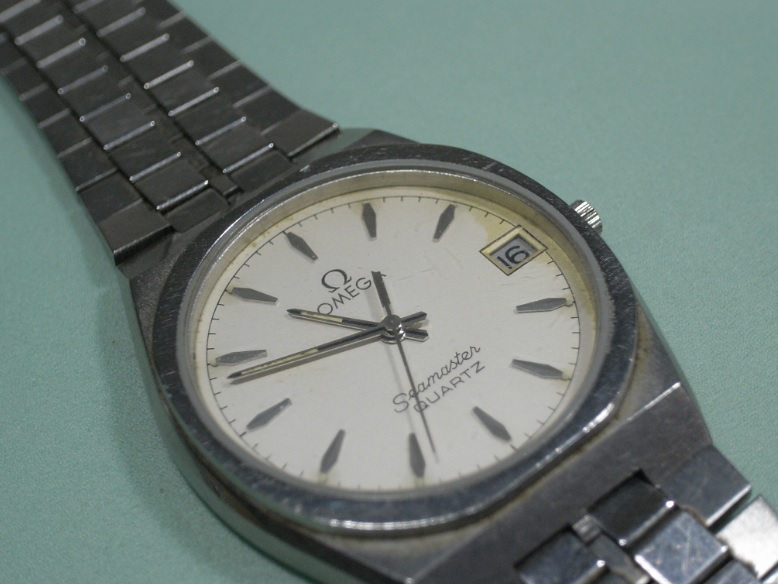


-
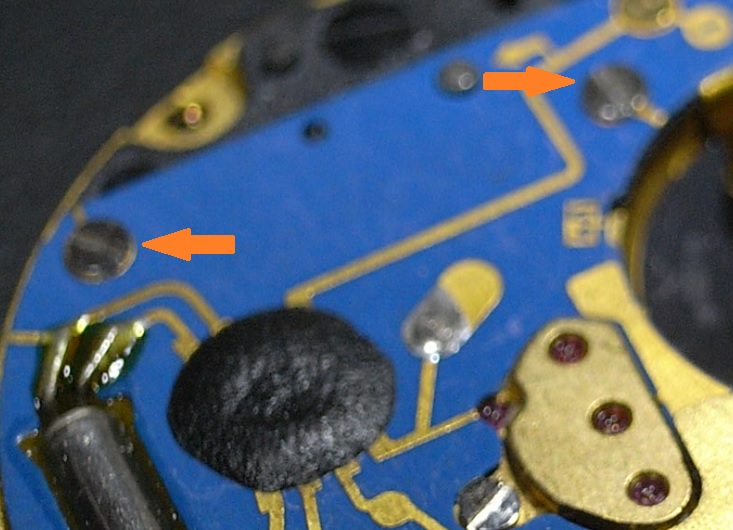
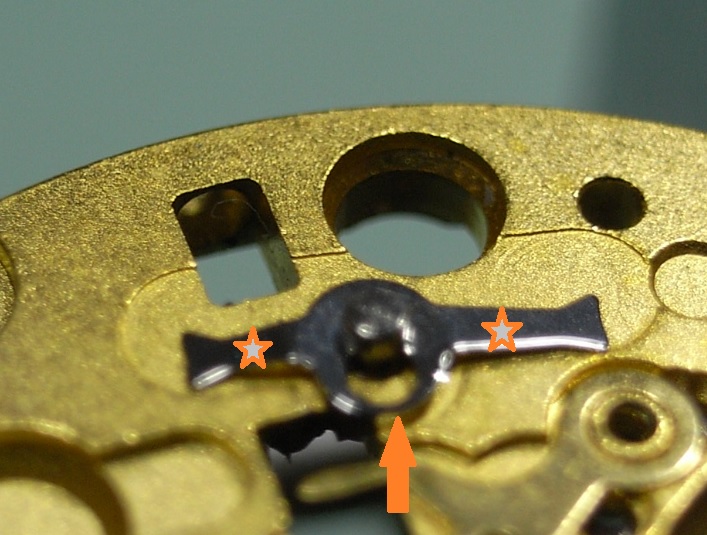
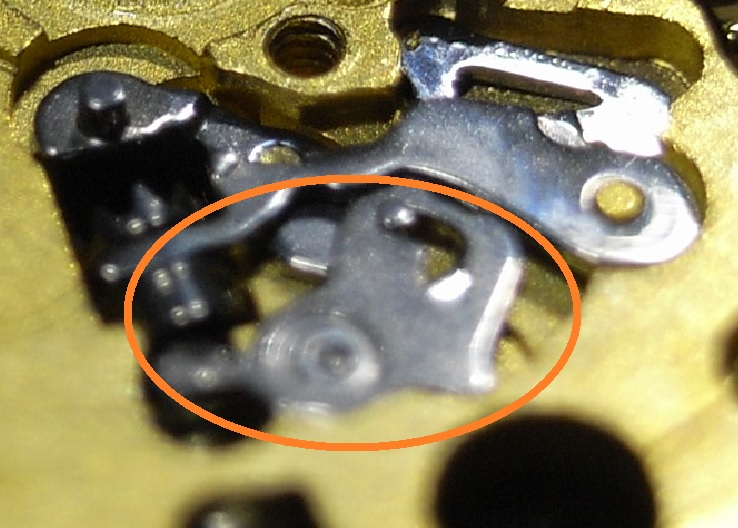
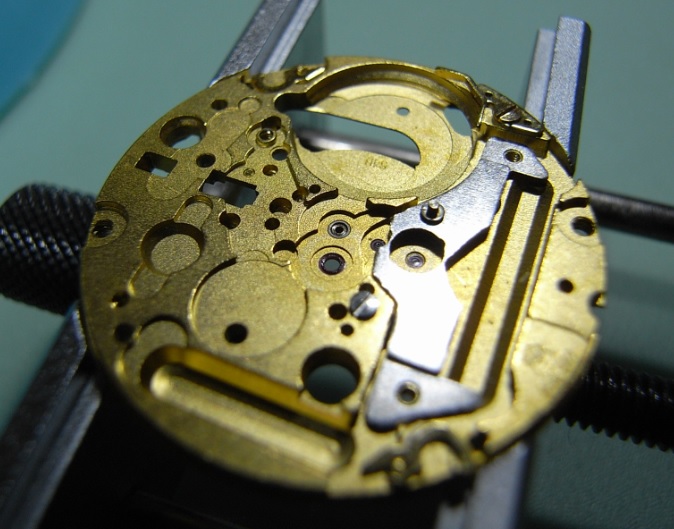
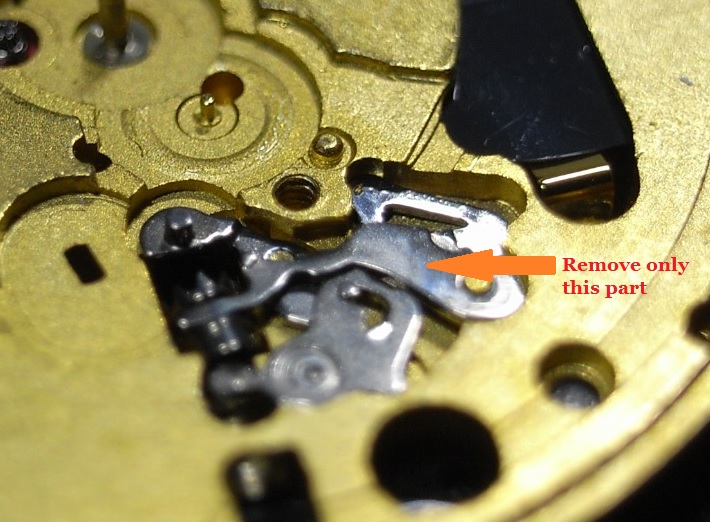
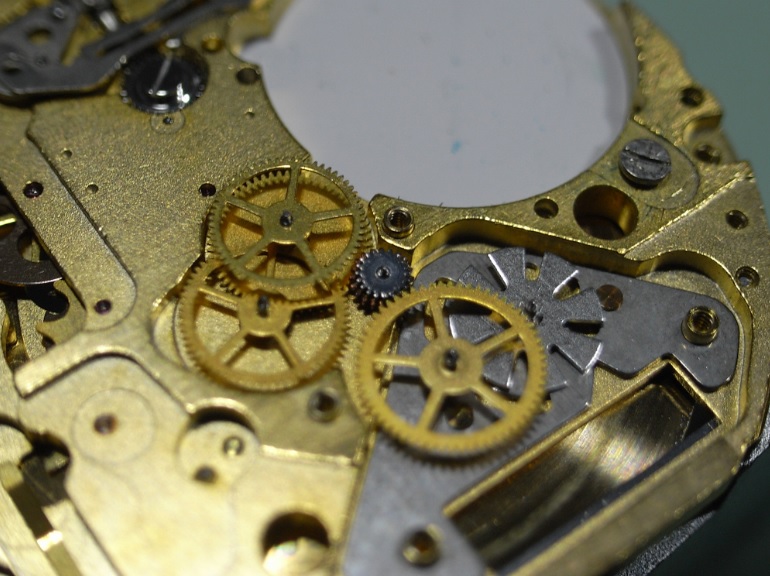
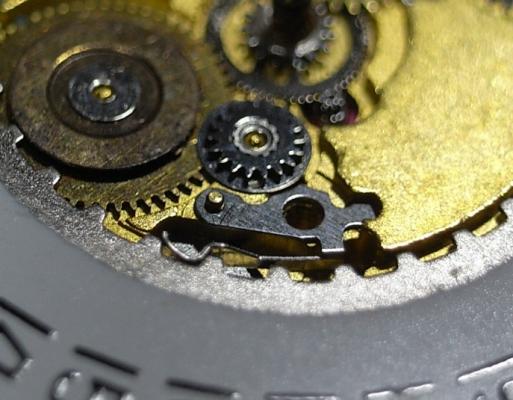
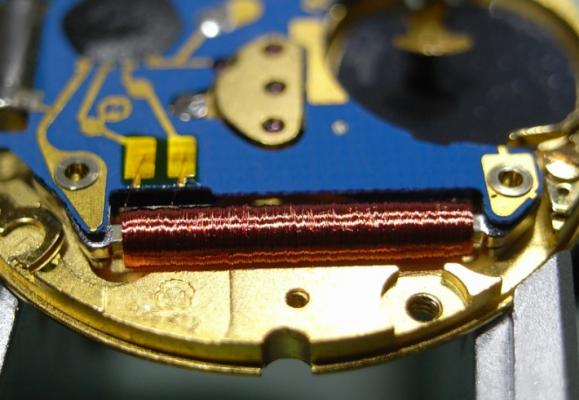
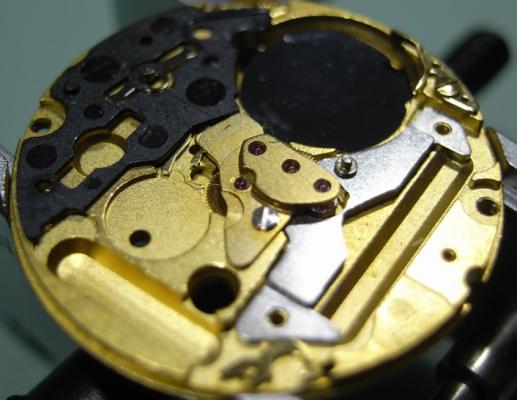
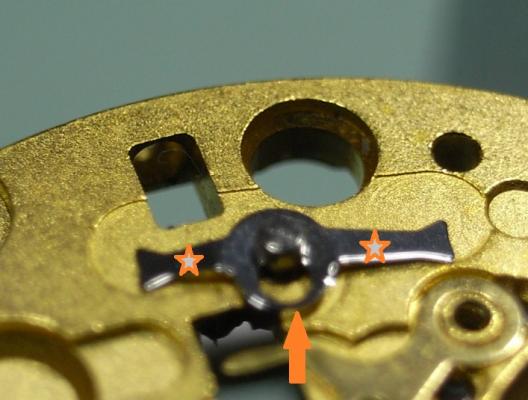
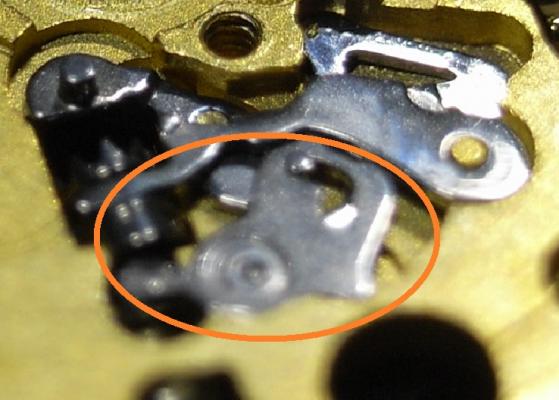
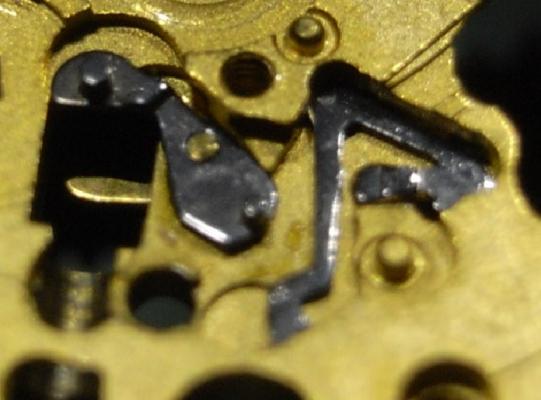
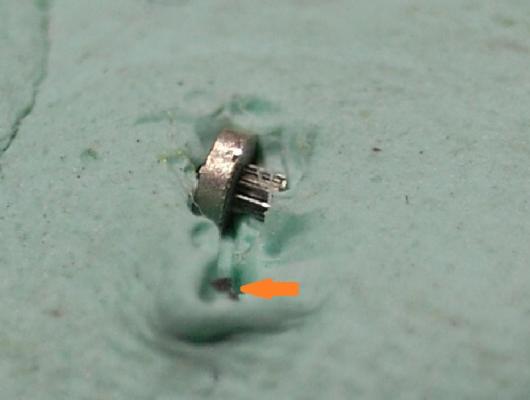
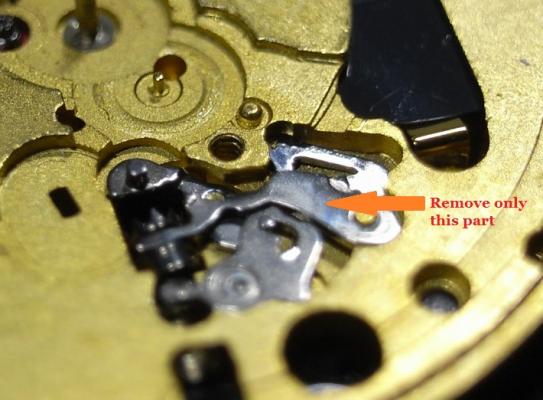
ETA 955 Service Walkthrough "The Workhorse of Highend Quartz" The ETA 955 and 956 Quartz Movements are the most commonly found movement in high-end quartz watches with three hands and a date feature. You will find them in Omega, Tag, and many other brands on the market. For this walkthrough I will be using an 955.412 Movement as my example; but the 956 is so similar to the 955, that this walkthrough will suffice for both. Please note that the numbers after the decimal place only relates to the factory in which the movement was made, so yours could read 955.112, or another factory number ... regardless, the parts are identical and interchangeable. As with all movements, quartz or mechanical, they have a service interval that should be adhered to for longevity of the movement. With quartz movements when the lubrication becomes dried out, or the movement becomes dirty, they will draw more and more current from the battery in order to maintain accurate time keeping. The ETA 955/6, when in optimum condition should draw around 800nA ~ 1.5uA, if the movement is drawing more power than this, a service is required. If a service is not performed, the battery life with decrease markedly, and can go as far as drawing more power from the battery than it was designed for, and damage the battery and cause it to leak and corrode your valuable time piece. Service Manual for the 955/6 Movement CT_956412_FDE_493024_06.pdf.PDF Disassembly Remove the two Date Wheel Keepers. I always start with the one holding the Date Jumper Spring in place. Sometimes the Date Jumper Spring can ping out of place, so be careful when removing the keeper plate above it. Here is a reference photo in case it moves before you see how it's properly seated. Next remove the Keepers and Date Wheel. Then remove the Date Jumper Spring, Motion and Calendar Work. This will leave only the Keyless Work; remove the Yoke and the Sliding Pinion only. We need to flip the movement over, and disassemble the IC Board before we can remove the rest of the Keyless Work. With the movement flipped over, remove the 3 screws holding the Coil Protector. Note for re-assembly the Gold Screw in the centre. Now that the Coil Protector is removed, GREAT care must be taken not to damage the exposed fine windings of the Coil. Then to remove the IC Board, simply remove the 2 remaining screws that hold it. Do this slowly and carefully, as you do not want to slip off the screw and damage this delicate circuit. The same level of care needs to be taken when removing the IC Board from the Main Plate. Take your time and carefully lift it off and store it immediately out of harms way. Next remove the black Insulator Block, and Battery Insulator. This will expose the Setting Lever Spring Clip, which will enable you to remove the rest of the Keyless Work. To remove the Setting Lever Spring Clip, place both points of your tweezers on the locations where I've placed the stars and gently push down on the spring. Then with a piece of Pegwood, push the spring in the direction of the arrow until it moves to the larger opening slot. This will now allow the Setting Lever to be removed, along with the rest of the Keyless Work. Next remove the Stop Lever and Switch, and remove the one screw holding the Train Bridge in place. Then carefully remove the Gear Train and the Rotor. The movement is now completely stripped and ready for inspection and cleaning. There are some parts that you do not place in the parts cleaner, they are as follows: Date Ring Rotor IC Board The rest should be demagnetized prior to cleaning to avoid any metal particles in your cleaning solution from sticking to your parts. When cleaning I also including the Insulator Block, and Battery Insulator in the basket, normal watch cleaning solutions do not harm these items and it is essential they are completely clean to provide the best insulation possible. The Rotor should be cleaned by use of Rodico. As you can see from the picture below, it's surprising the dirt and old oil this will remove ... and it is sufficient cleaning for the Rotor. I hope this has been a help to you, and I will post the assembly procedure later today, if time permits.


- 23 replies
-
- 12
-

-
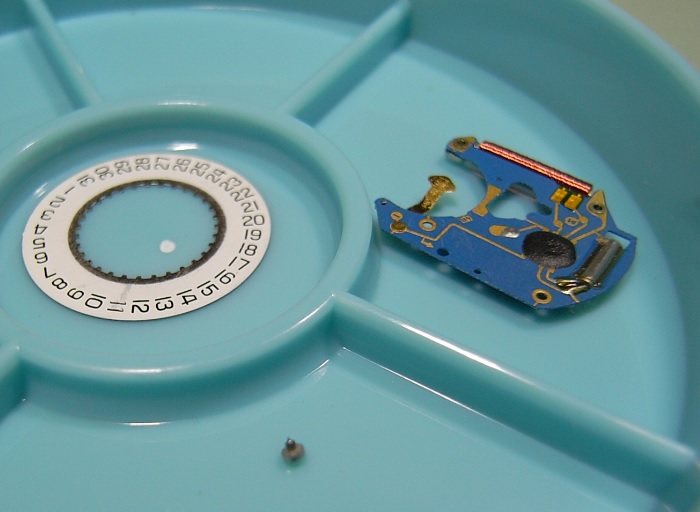
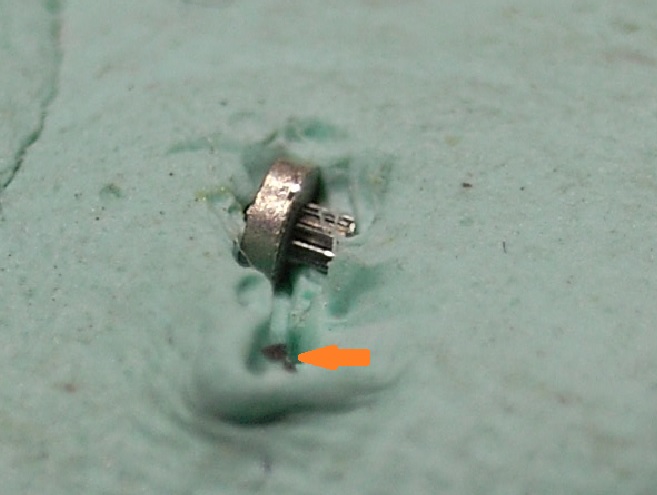
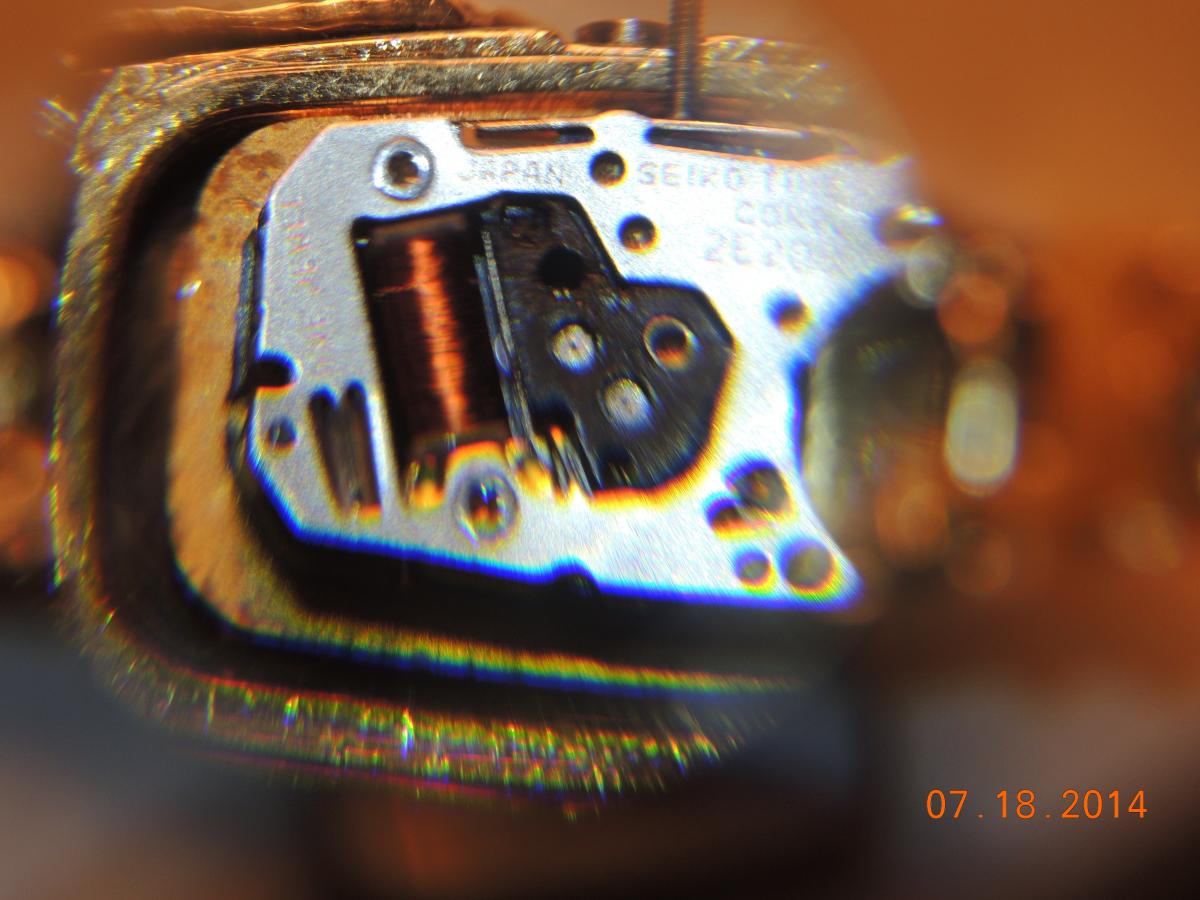
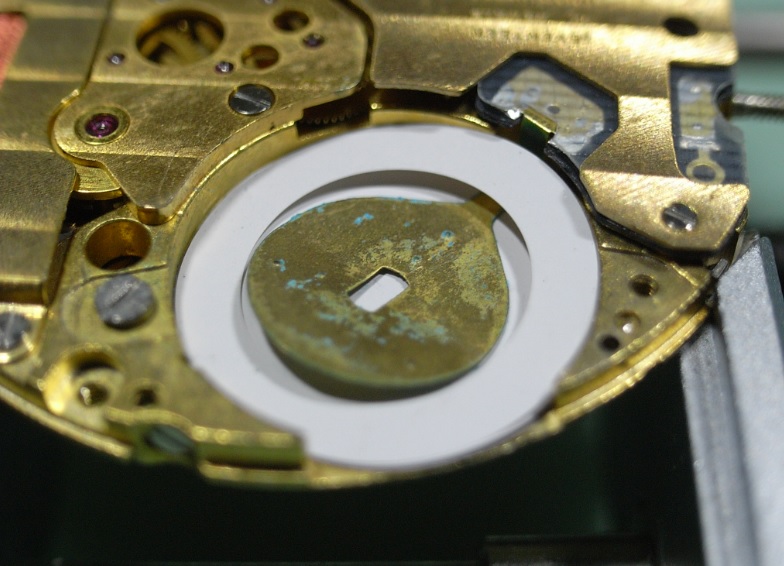
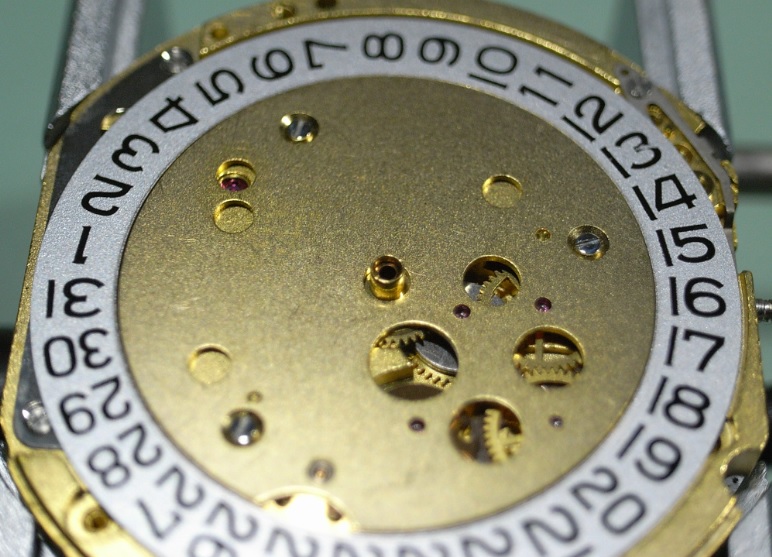
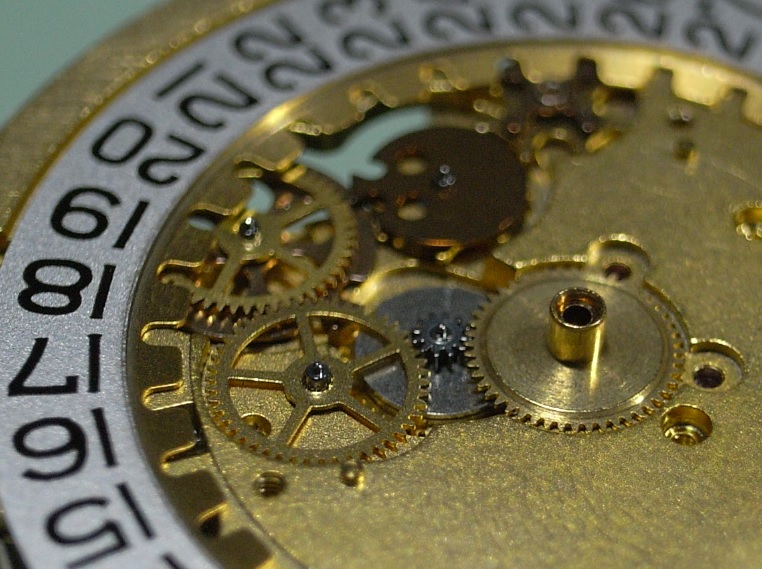
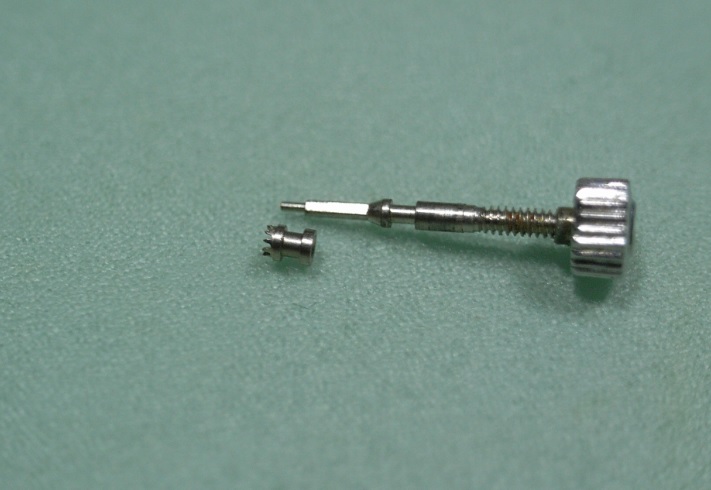
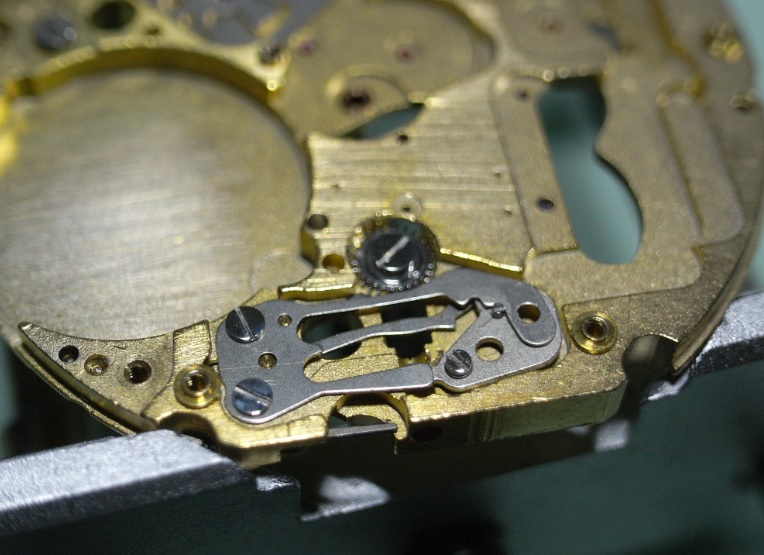
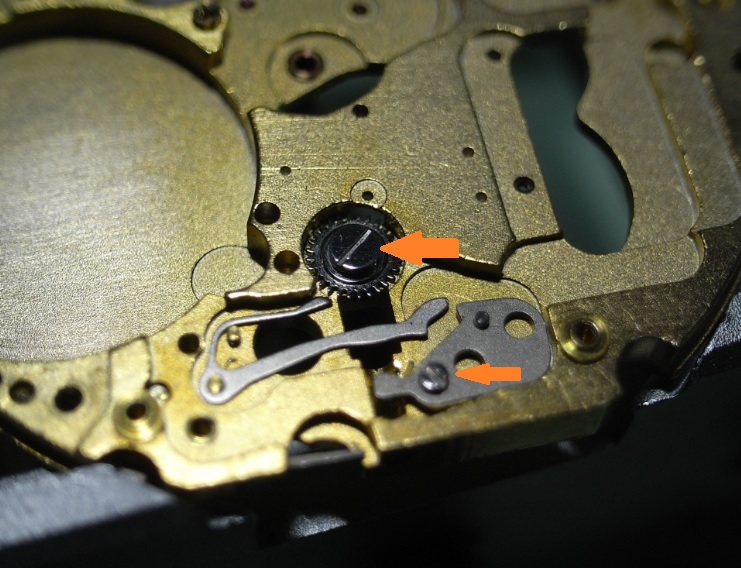
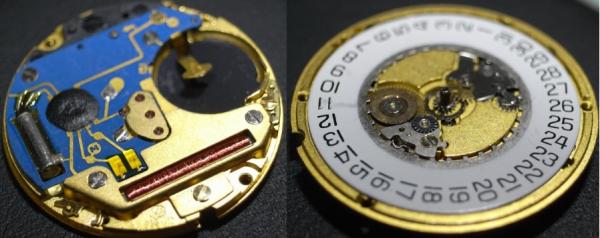
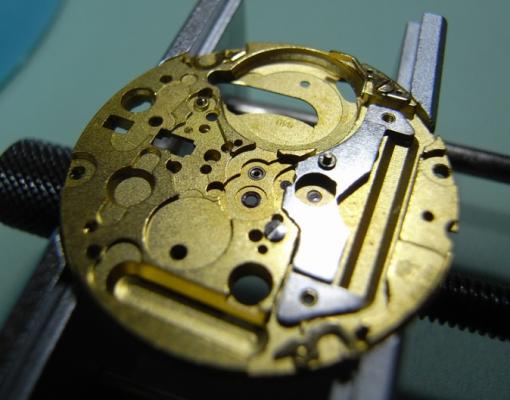
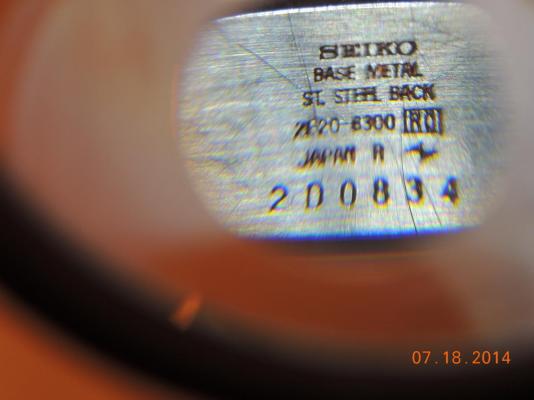
 I have an old small Seiko quartz watch with a case number 200834 and stem number 2E20-6300. Some time after a repair of the stem by a jewelry store, the stem began to malfunction again and the crown got loose and was lost. After watching a few of the repair videos on your website, I thought Seiko design should be just as straight-forward, and I might be able to do the repairs myself. So, I purchased a new stem and a new crown and tried to remove the stem after attaching the new crown by pushing on any of the holes or screw-looking spots or levers to unlock the catch. Unfortunately none of them seemed to budge. In the process of fiddling, the watch internal popped out of the casing with the seal now loose. I would appreciate any help that anybody could offer. I guess I may have to purchase some very small screw drivers if needed. FYI: I am attaching two pictures of the watch, one for the back side of the internal and one for the watch back cover. In the first picture, the watch internal is just resting on the watch casing. Thank you.
-
Hello to all, My name is Ash (from NZ). Im a watch enthusiast and trying to learn more about Horology. I have been picking odd watch repair jobs here and there and self-learning. Firstly, thanks a lot to Mark Lovick for uploading fantastic videos on youtube that are so simple to follow. Keep up the great work Question - is there a way to diagnose quartz watch circuit using those test probes (that have an LED inbuilt) or perhaps using a multi-meter? For some watch movements such as Myota 2035, it makes sense to replace the whole movement. In other cases, it make sense to repair it (if possible). Is there a way to narrow down the faults in quartz watch? For instance, if a watch is gaining/loosing time, it could be the quartz crystal out of freq etc. how can it be scanned appropriately? Im not sure if its even possible or not. Hopefully I could get some help here. Thanks a lot in advance Ash