Search the Community
Showing results for tags 'eta'.
-
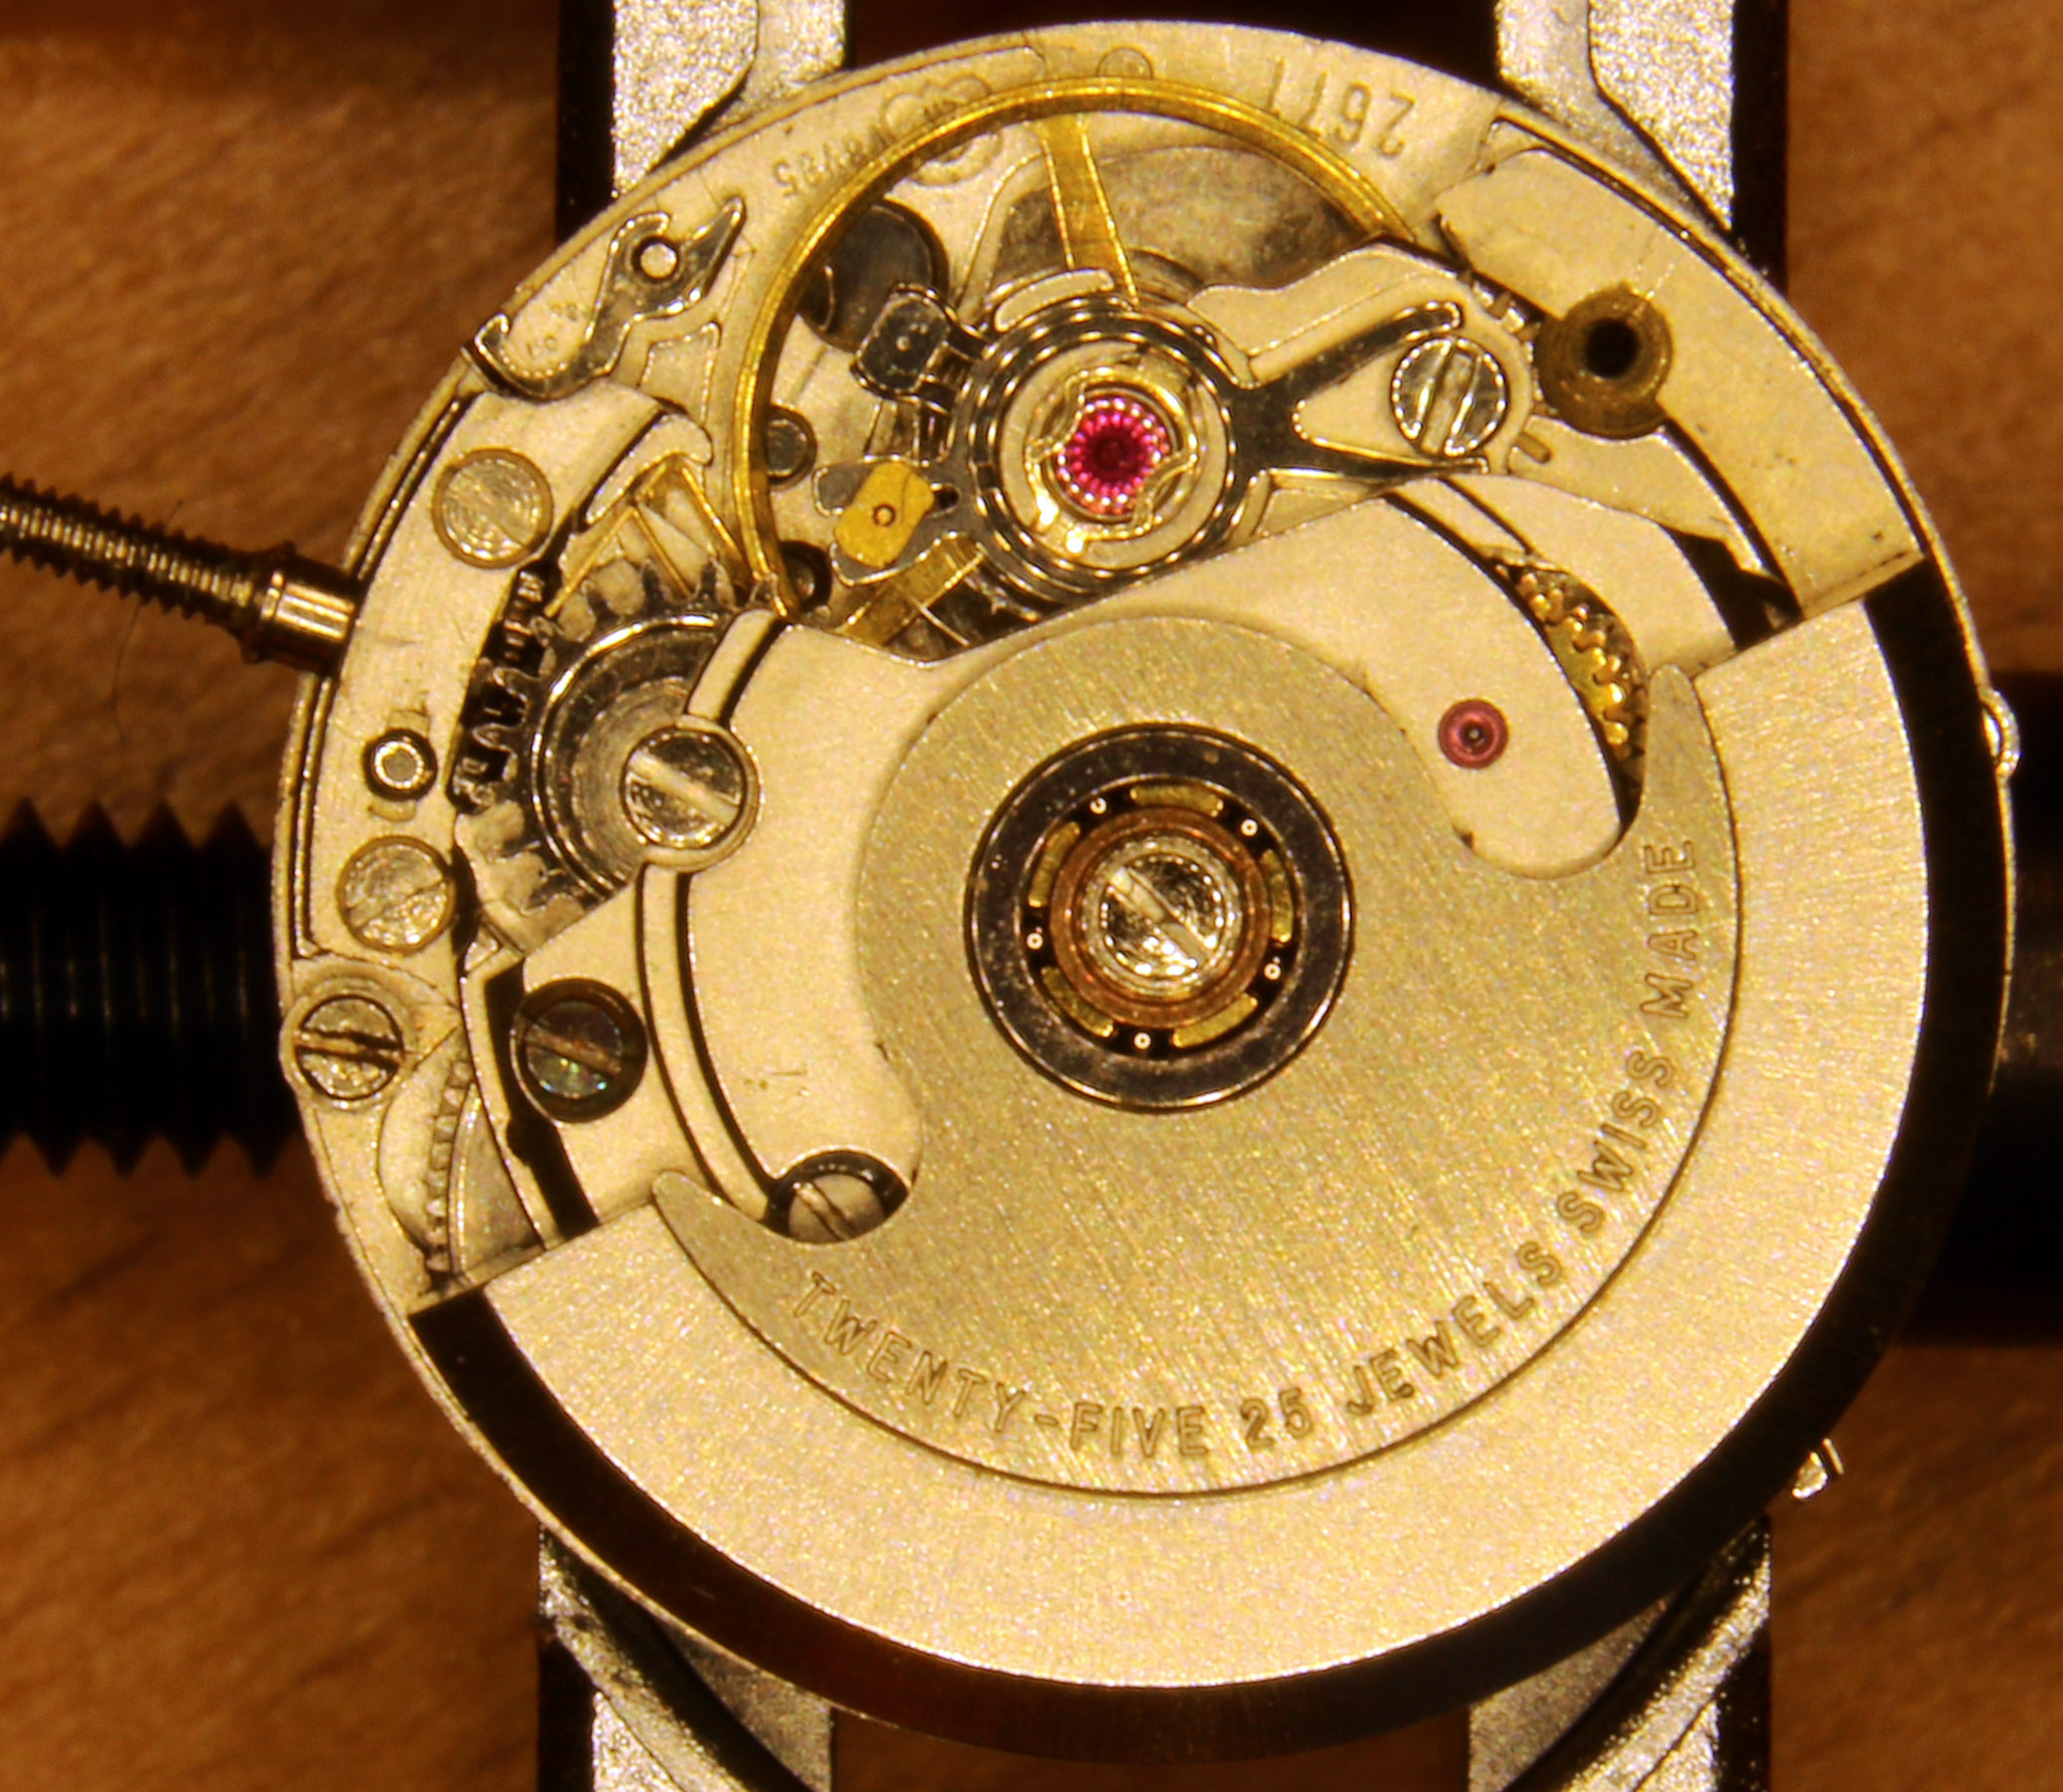
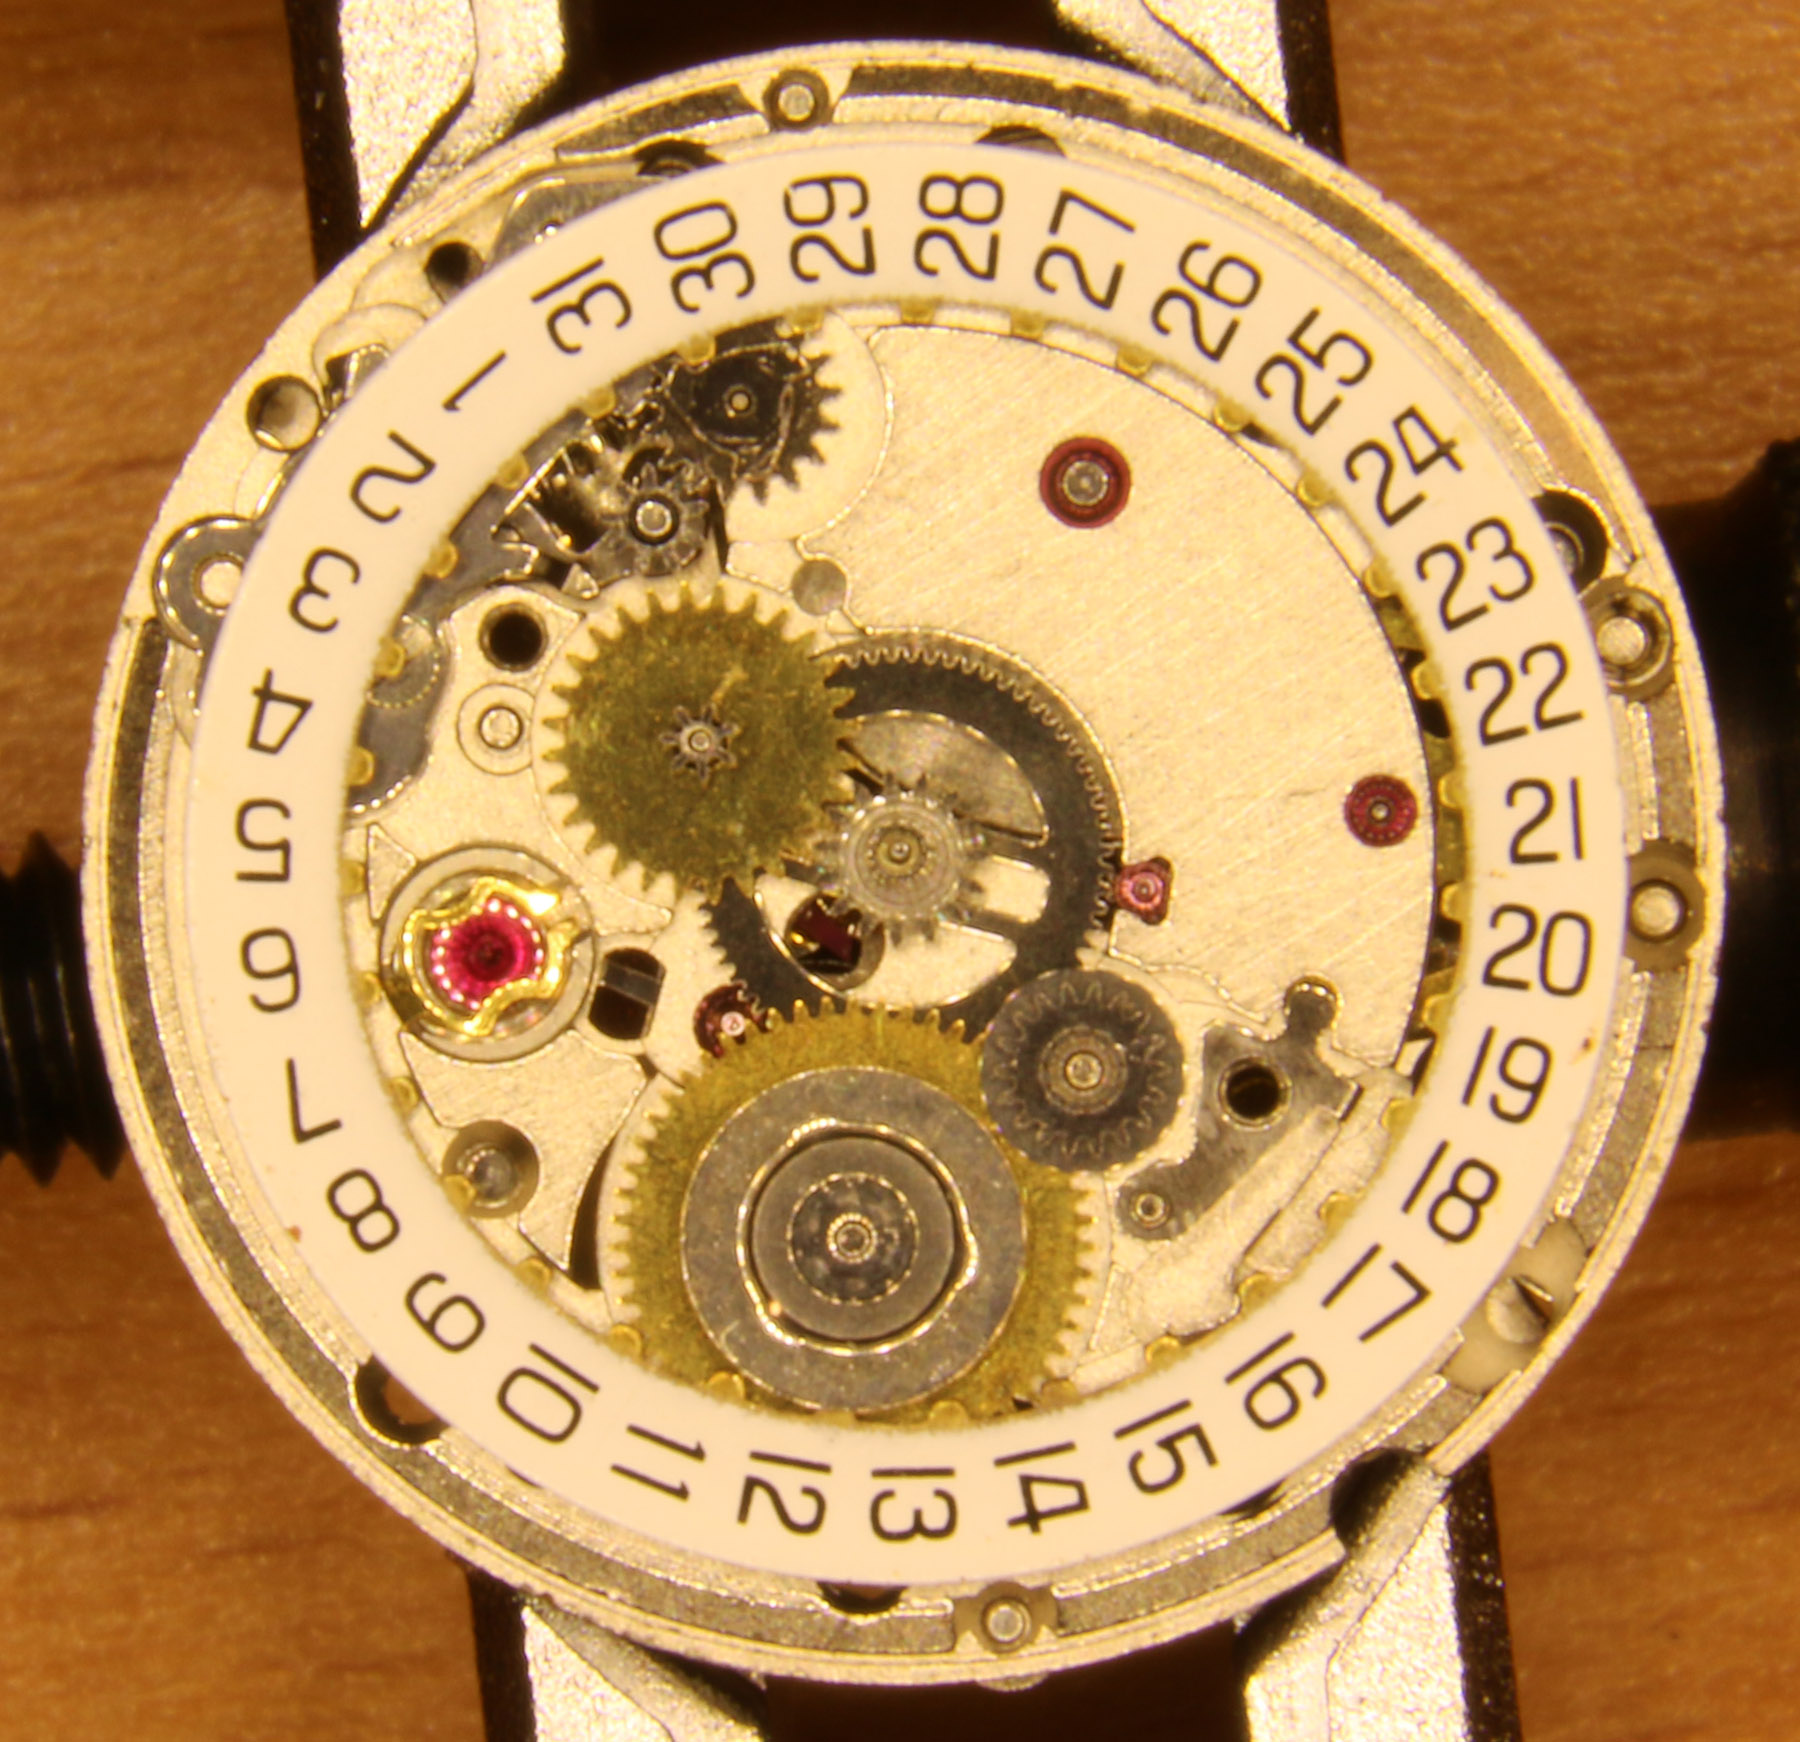
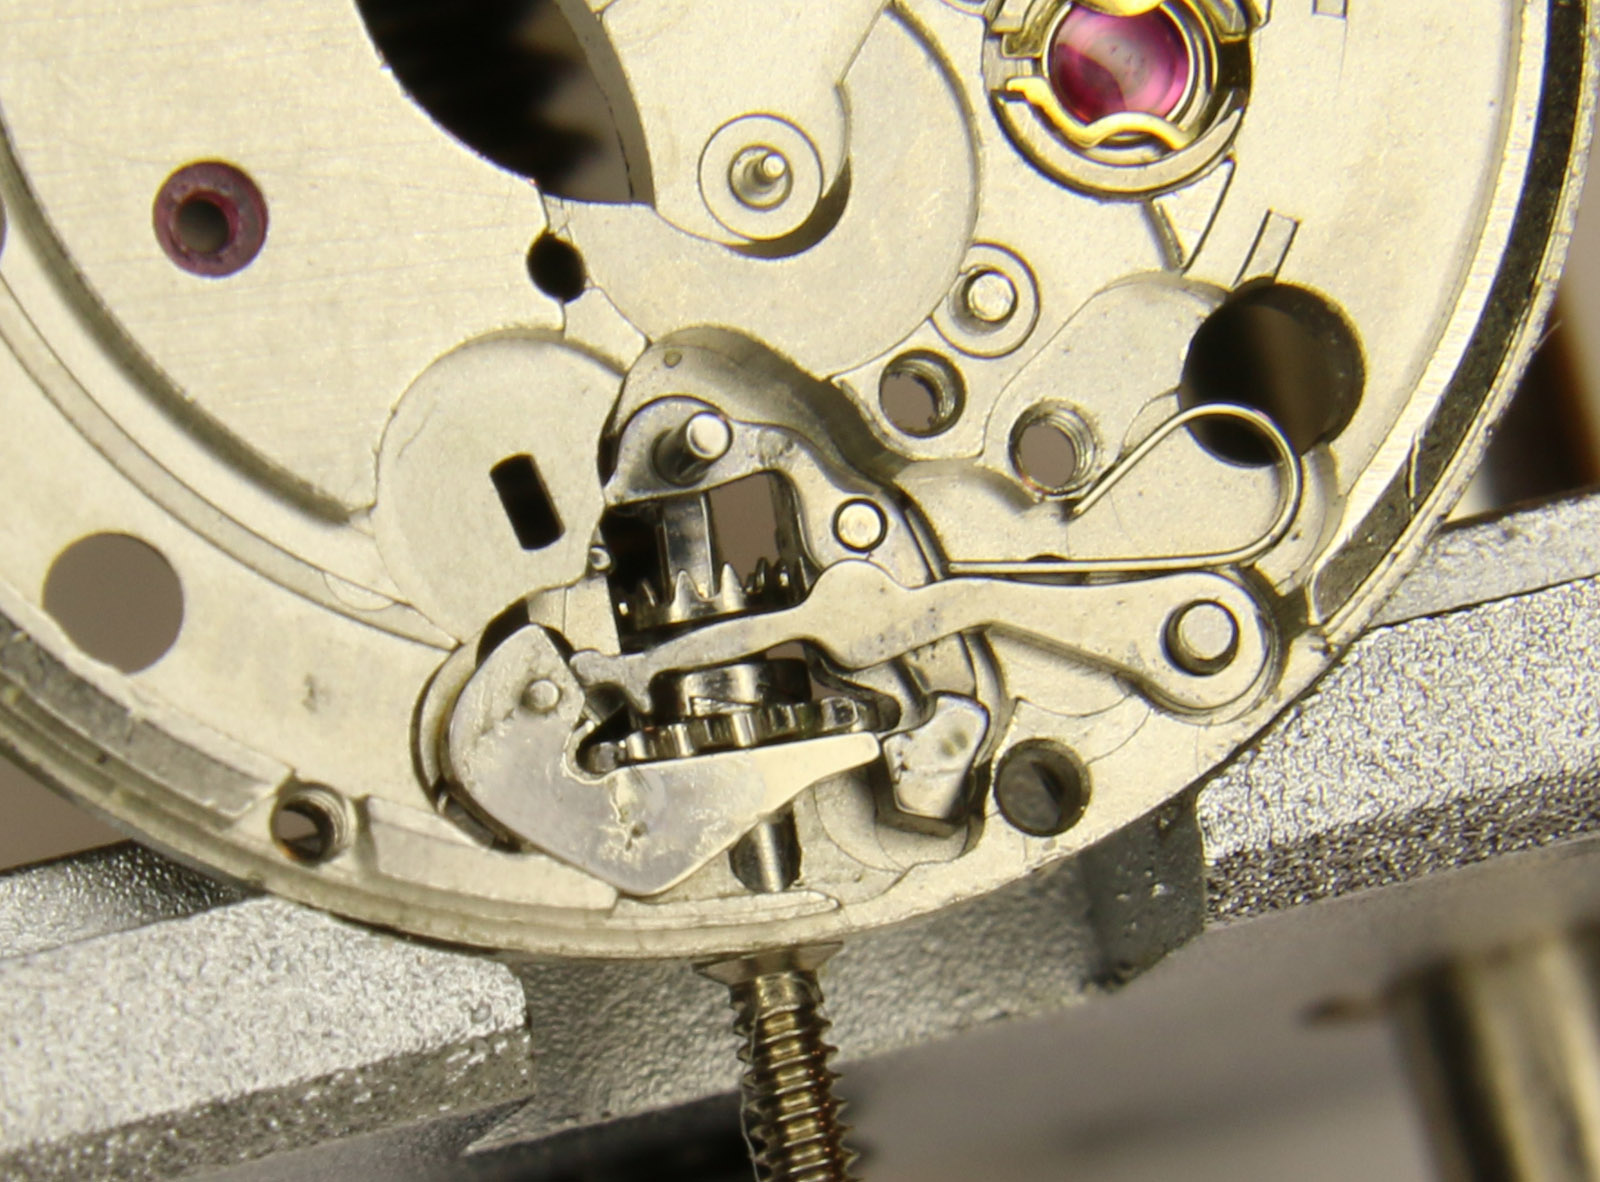
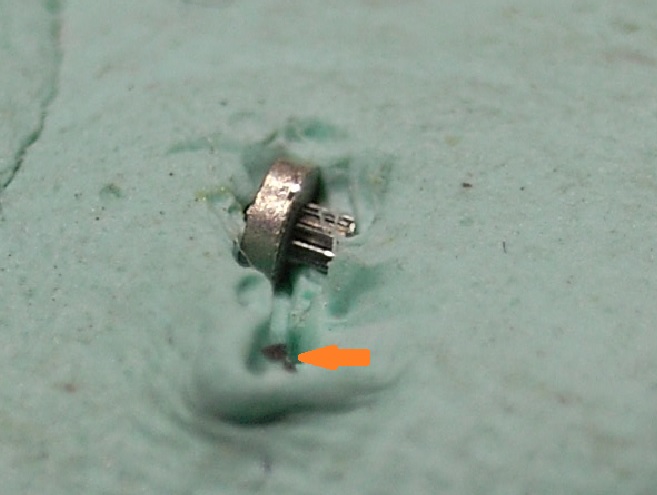
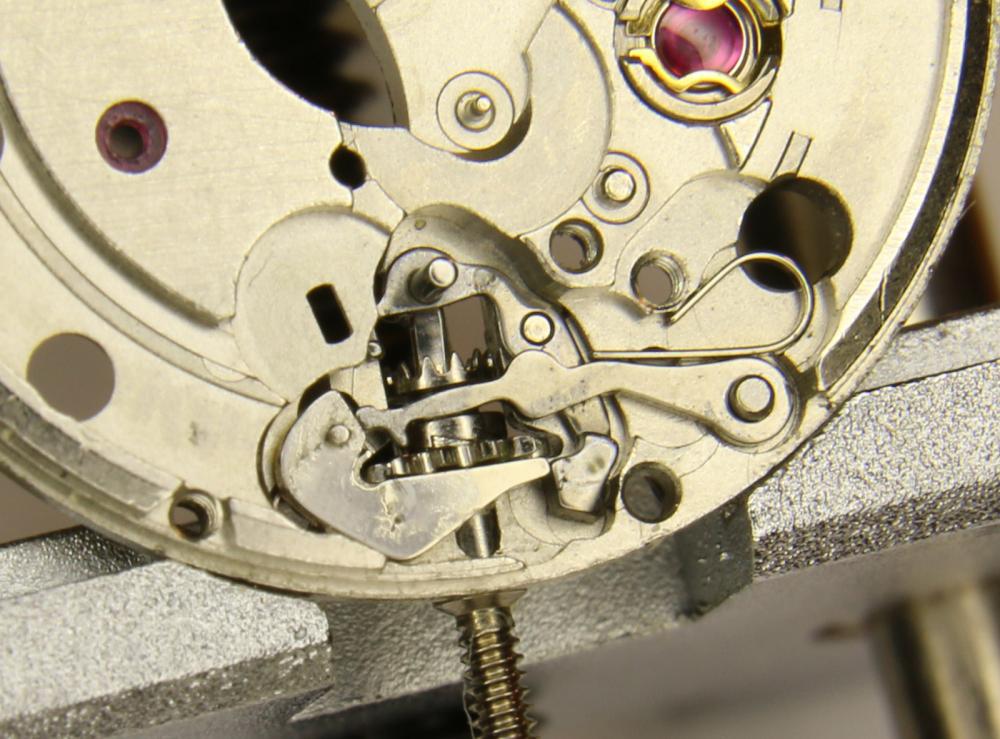
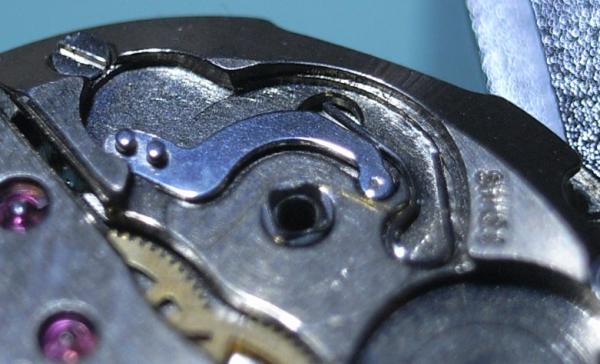
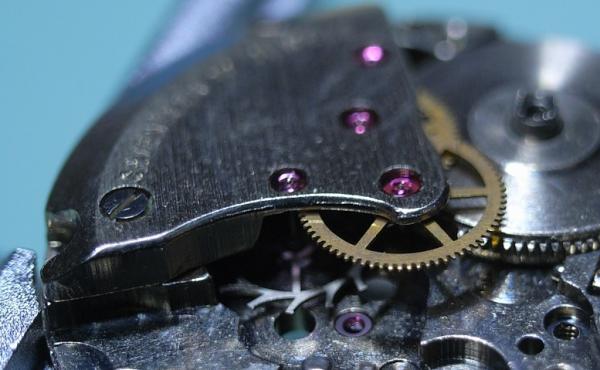
To gain more experience I will now reassemble an ETA 2671 movement. This movement is taken from the watch of my wife a couple of months ago, and I screwed it up: destroyed the hairspring and also destroyed the spring click (434), which is a very delicate part. Very different from other movements I saw before. The watch of my wife came back to life after I bought a used entire 2671 and just replaced it. Now I have all the spares, and want to reassemble it. The pictures were taken before I learned how to do that. The new ones will be much better. Here are not too many pictures of the disassembly. I will post all stages of assembly here, so that anyone who needs to service a 2761 can see the reverse disassembly order.


-
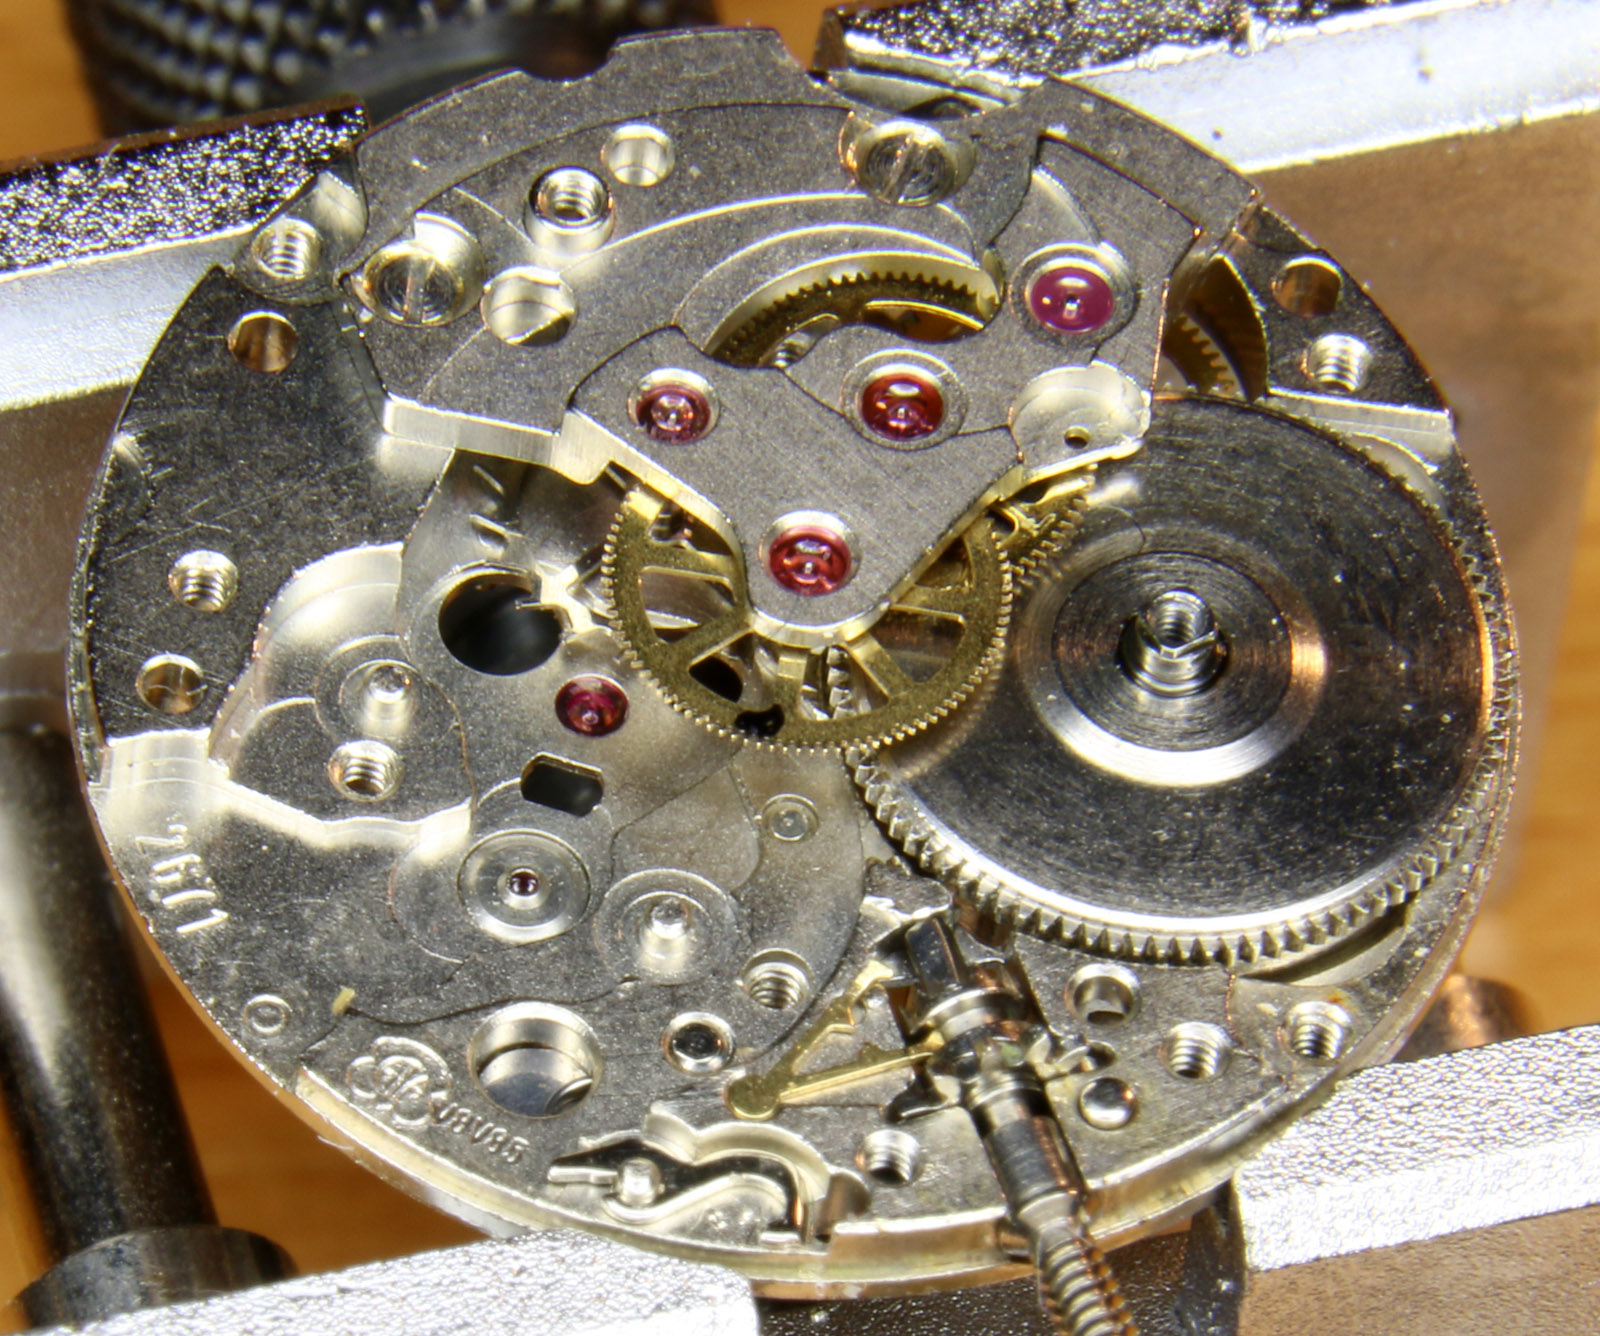
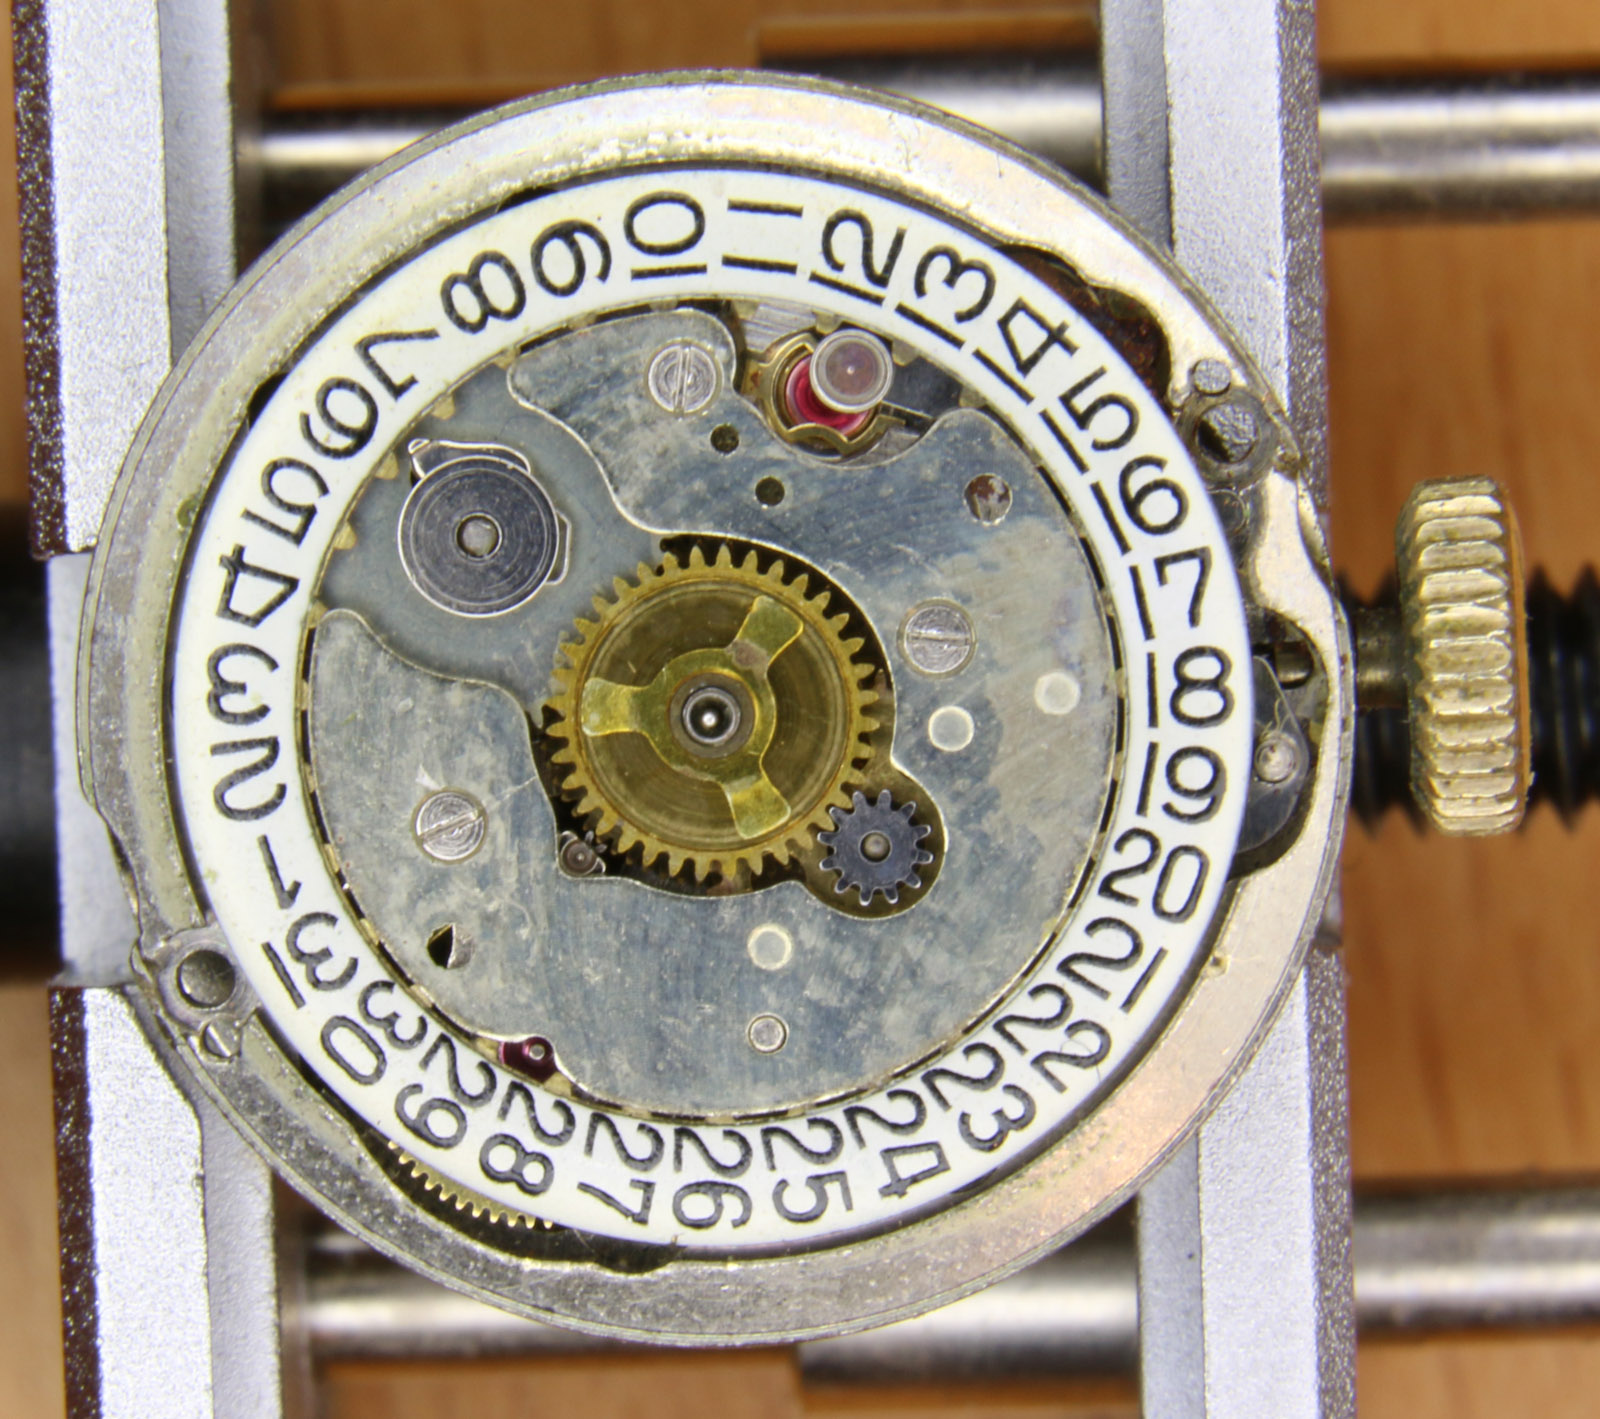
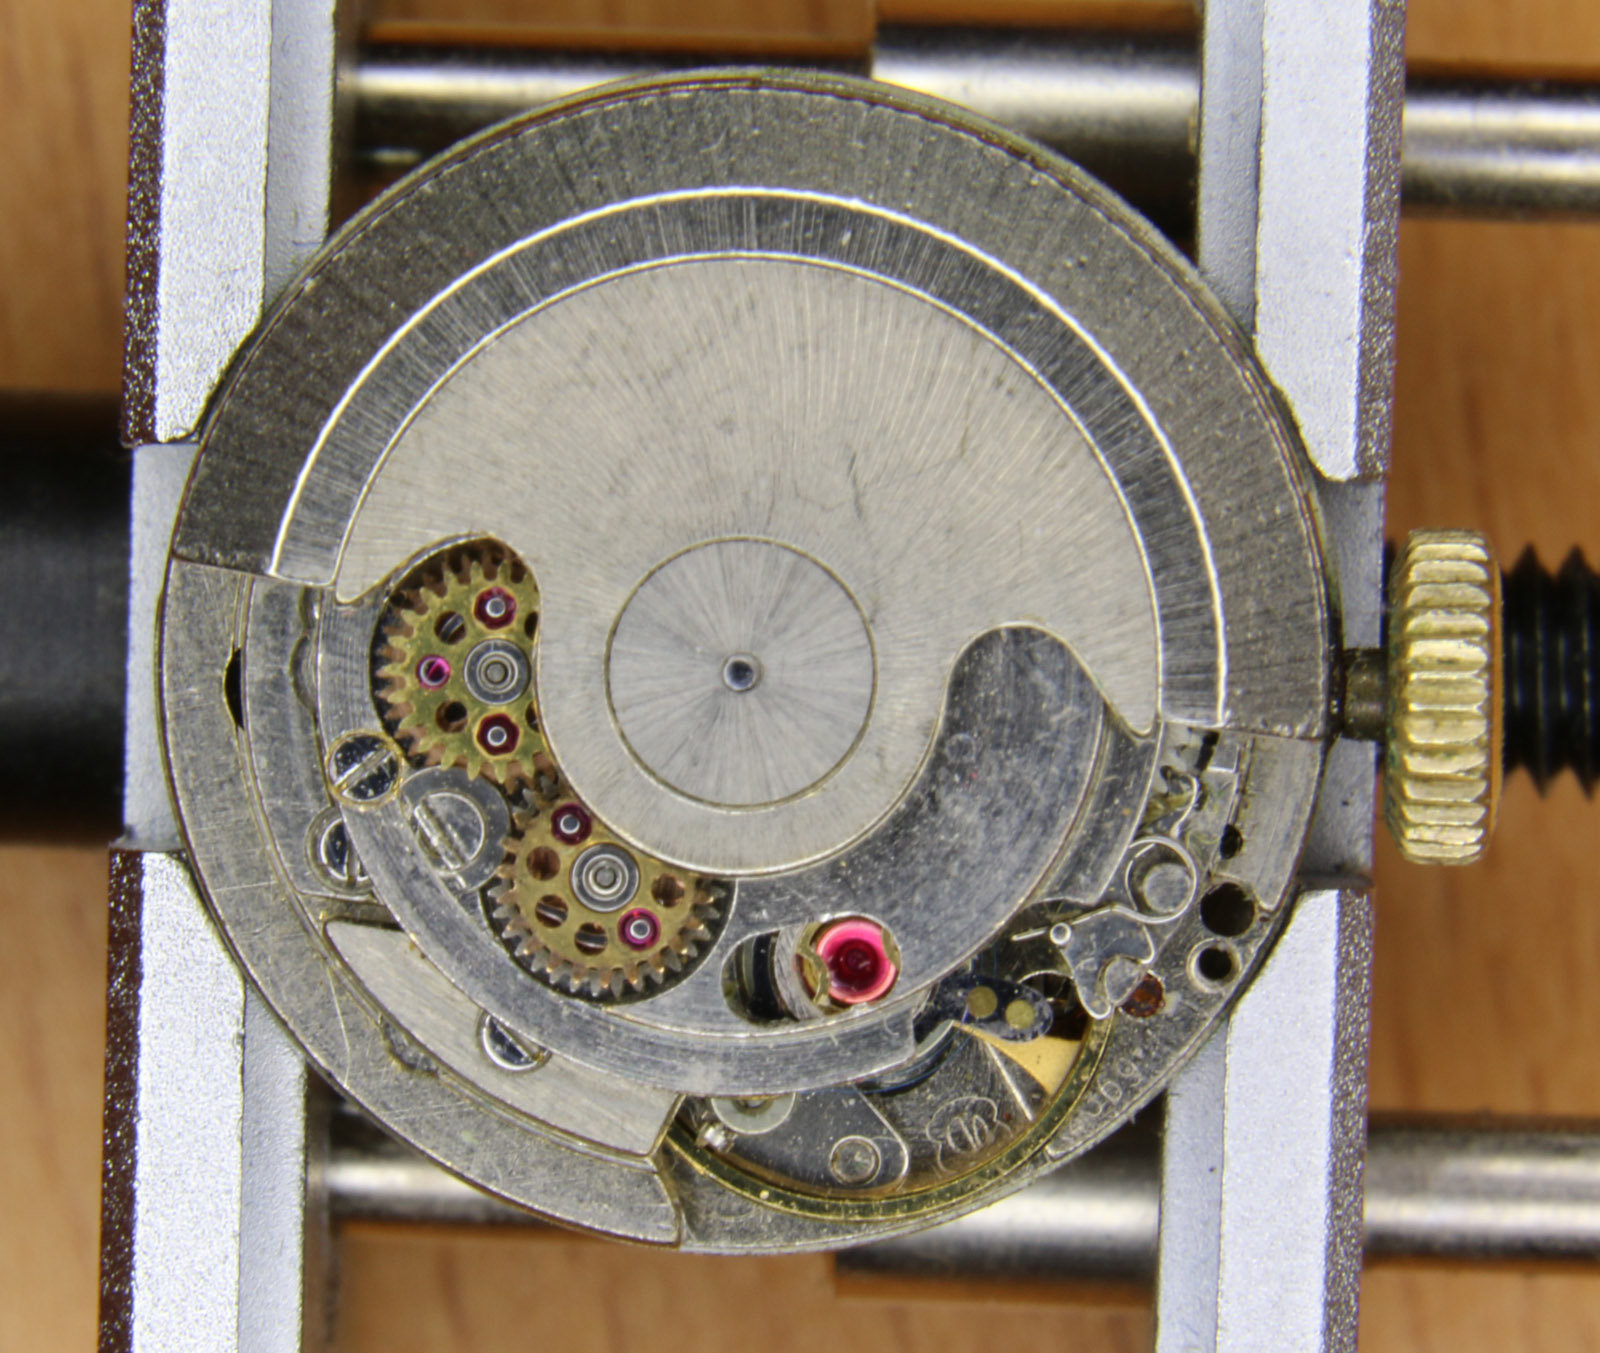
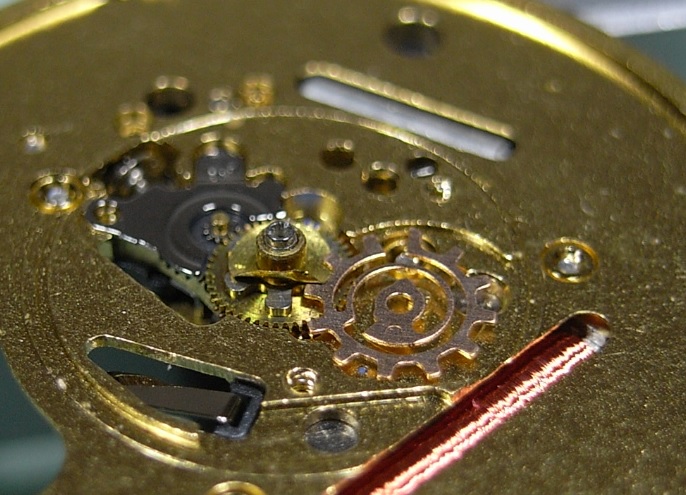
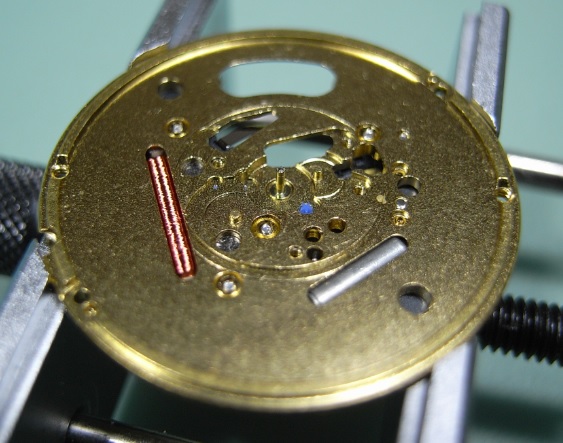
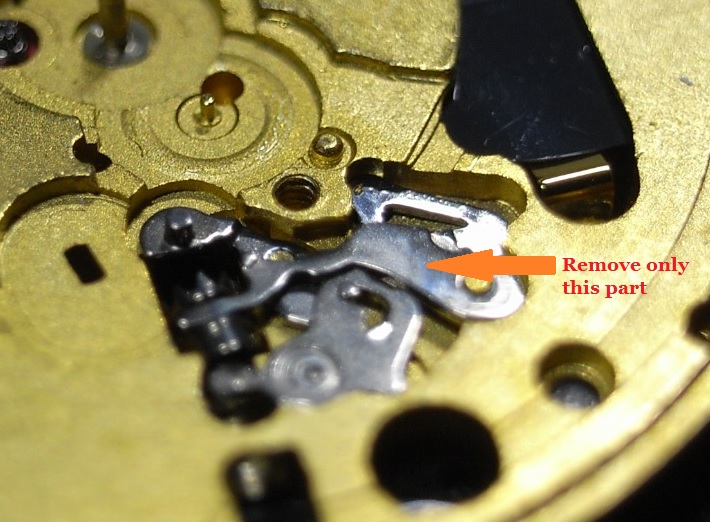
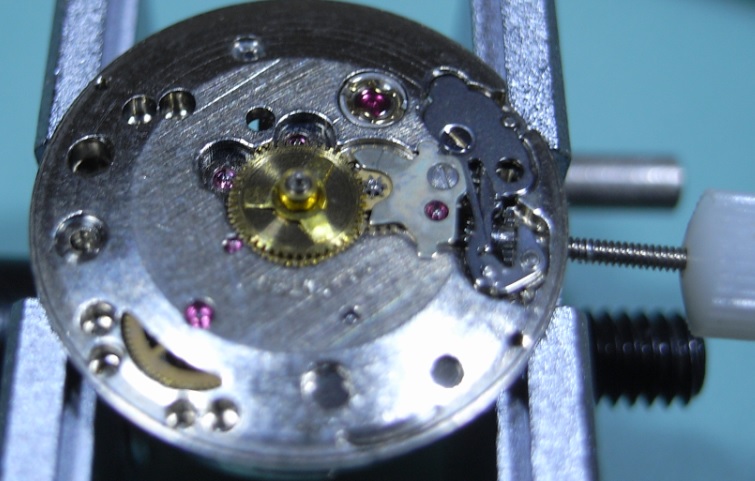
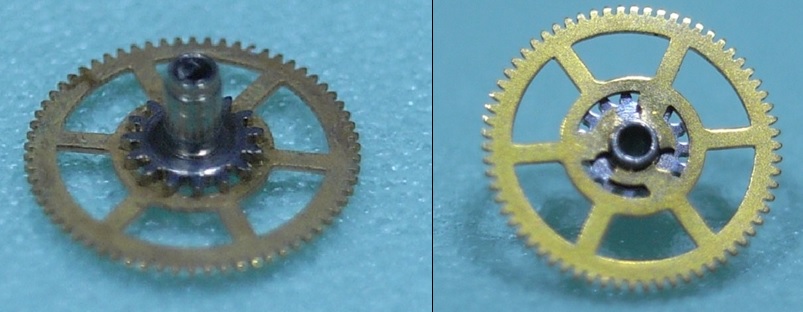
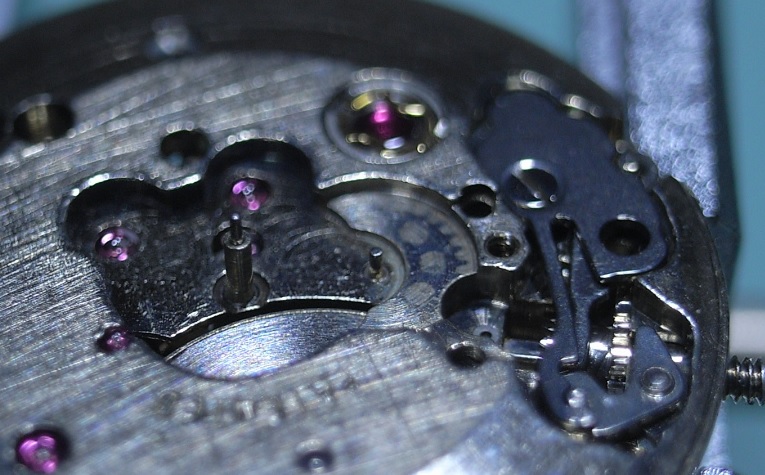
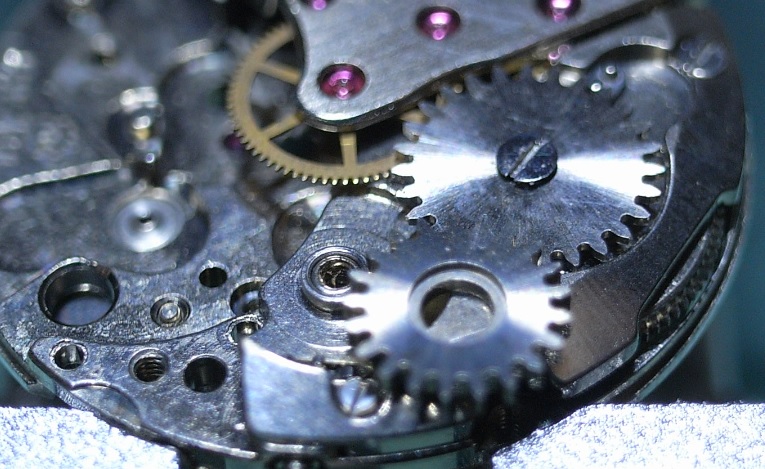
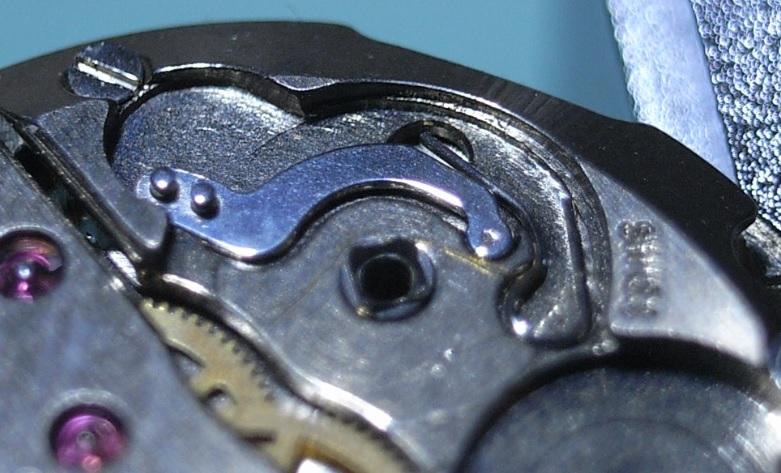
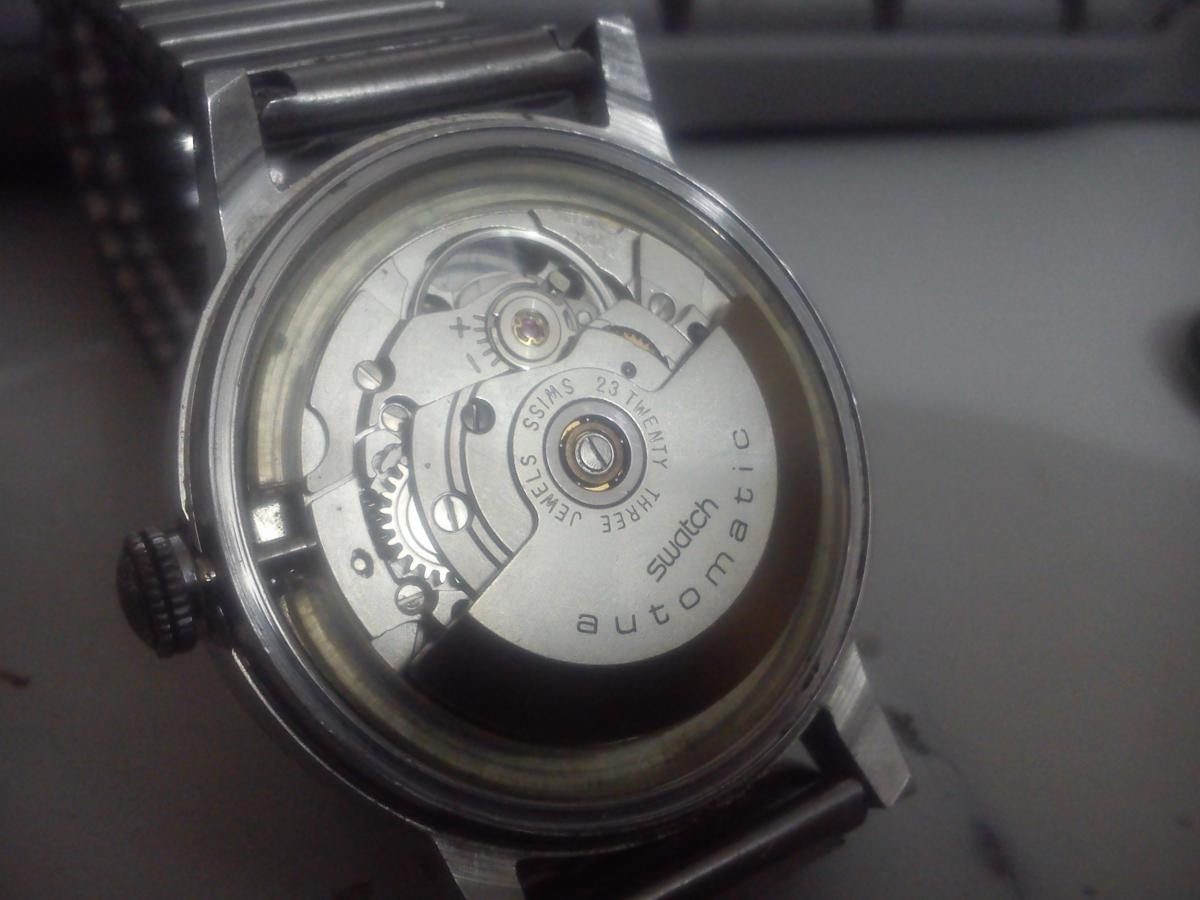
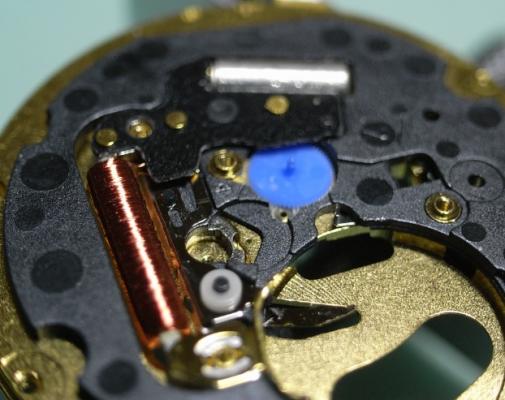
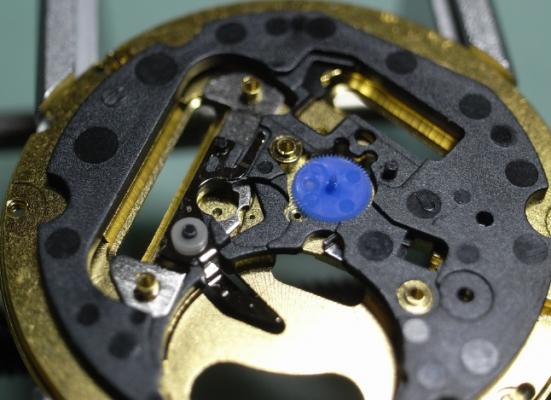
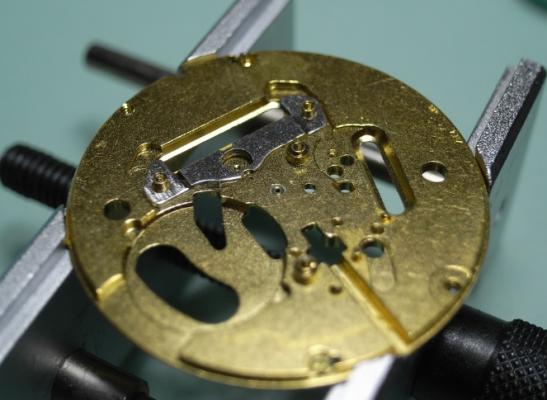
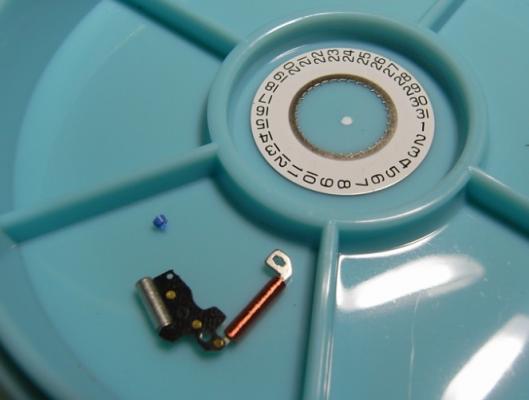
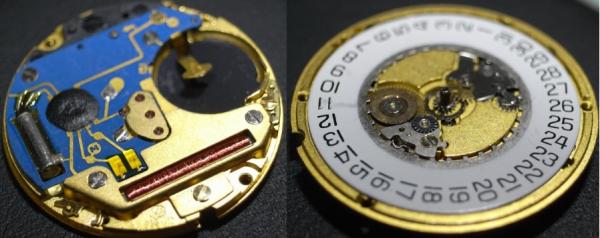
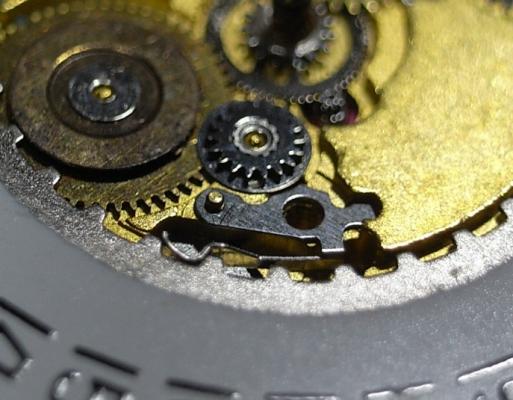
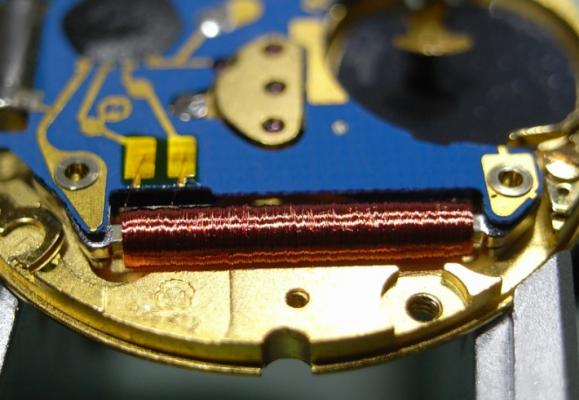
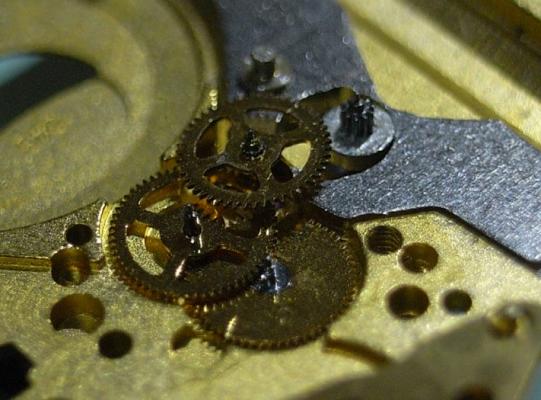
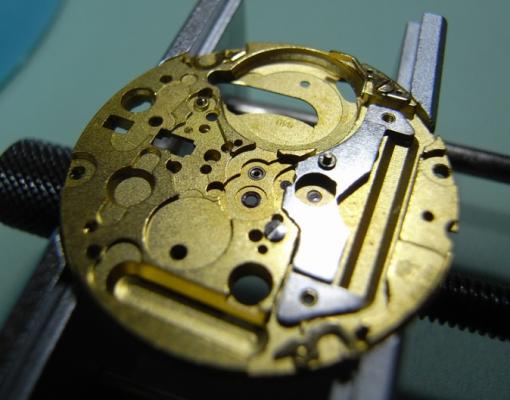
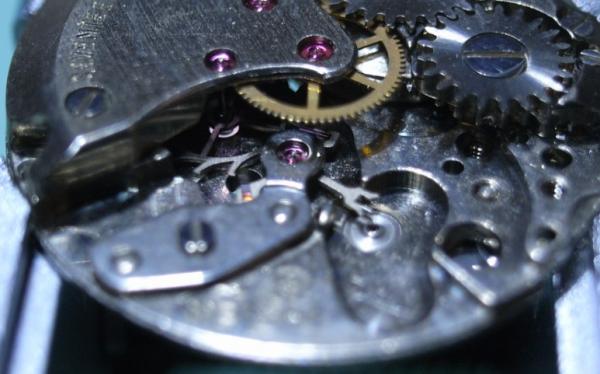
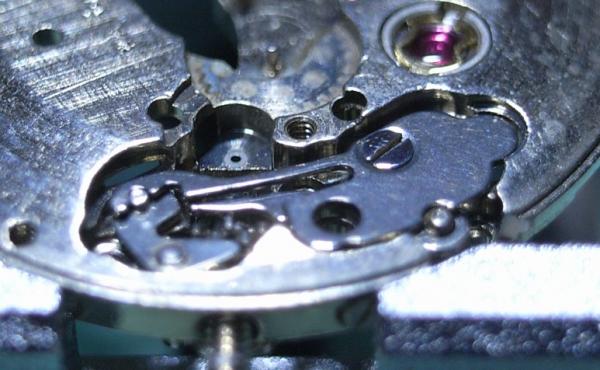
Hi, As I said I need more practice and I found an ETA 2369 in my collection of potential patients that is not running. This is what I found, before I took off the hands and dial (sorry, no photo of that state): The keyless work is strangely not functioning. I can pull the crown, it does "click" but it's stuck in setting mode (like if the crown was pulled) If I wind it by using the screw of the ratchet wheel it does not start ticking. The first thing I did was: Demagnetize Remove the hands and dial Take pictures of the movement from both sides I will continue in a fast pace now since I already disassembled everything and present the pictures now. Cheers Alexander


-
I've scoured the usual sources, including the ETA Customer Service site, but I can't seem to find a cross reference for the dial feet locations on an ETA 2783 compared with the 2824 or 2836 movements. Many aftermarket dials are advertised as fitting these latter movements and if I can determine whether the location and diameter of their dial holes match my 2783, then I'm sure to succeed with an aftermarket dial. The dial feet holes on the 2783 are at (eye-balling) 11 minutes and 41 minutes, and center-to-center diameter of 24.0mm. Any suggestions for a data source? Anyone have a 2824 or 2836 sitting on their bench and their calipers close at hand and bounce me a reply with a measurement as above? Thanks as always.
-
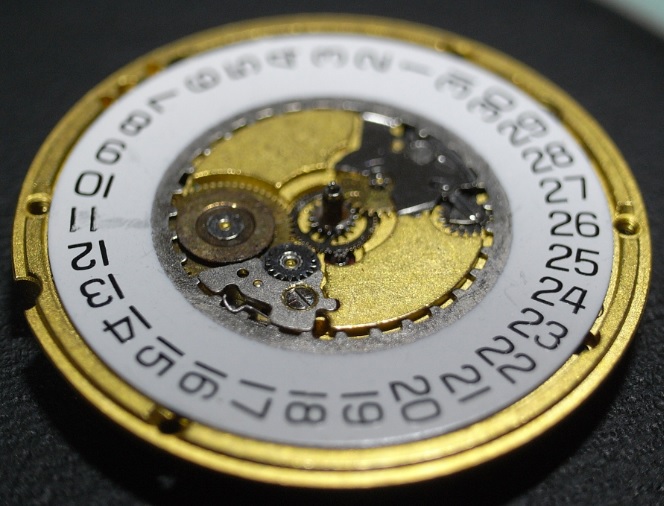
 Morning peeps, I have this watch where the month that does change automatically. it will quick change via the button. I believe the speciation's are as below. can anybody shed any light on the calendar module and if it actually should change automatically?? ETA 2824-2 base + a Jaquet 3105 calendar module Cheers always. James.
 -
Good Day Everyone, I am a new member to Watch Repair Talk and a new horological hobbyist tackling my own personal repairs as needed. I have been tinkering with watches for a few years on my free time starting with non-function pieces I picked up from swap meets, garage sales, estate sales, etc. with successes or understanding of complications and how they work together. Recently one of my personal time pieces (a prized possession of mine) was due for service, an Omega 1164 (ETA7750i) Calibre Seamaster Professional. After seeing the costs for servicing from various places, I subscribed to Mark's YouTube Channel and decided to tackle the task myself spending the equal money for a repair on "proper" tools and lubricants to complete the task and I DID IT (Thank you Mark for your amazing videos, I couldn't do it with you!)! After much pride and bragging among family and friends that cared to listen I kind of became the go to for battery replacements on quartz movements and band replacements. Recently a very good friend of mine came to me with a damaged timepiece that was more a user error issue and asked me if I would be willing to take on the task, and like a junkie or addict I jumped to the opportunity. The piece in question is a Bell & Ross Military Type 123 (ETA 2895-2). The time piece had a run in with a door jam and had the crown and stem pulled from the timepiece with such force that it firmly pulled the screw down attachment for the crown from the case (please forgive me if I am not using the appropriate terminology). My first thought was with that much force there must be damage within the movement, so I began the disassembly. I manged to get it apart and cleaned and started the assembly but immediately ran in to a problem. The gear train assembly is jamming when I put the movement together. I worked to gently tease the pinions in place and have had them seated in their bridge but they bind up? I have seen the videos for ETA 2892 that Mark has posted and understand the care of working with the second wheel, third wheel, and escapement. the trouble I am having is the moment I place the escapement pinion in place under the bridge the second and third wheel seize up. The second and third wheel will rotate freely but then they both stop when the escapement is in position. The movement itself is strange to me with the elongated pinion on the escapement that passes through the main plate to a jewel on the underside floating above the plate? I hope that this question makes sense to the more experienced and that they may be able to shine some light on my problem, I have checked the wheels and all of the pinions appear to be in tact. Thank you everyone for your feedback and support. I worked 2 days after work on it for a total of about 4 hours which is crazy for 3 gears and a small bridge...I am at a loss.
-
Hi All, I'm working on an old Heuer with a 555.115 movement in it. I am able to advance the calendar wheel when the crown is in position 2, but the calendars does not change automatically when the watch hits midnight (or ever). I've tried both letting the watch run for 48 hours, as well as just swinging the arms for a full 24 hour cycle with the crown. Does anyone have any insight on this issue? Thanks!
-
 Tissot T063.637.16.057 (ETA G15.561): It is possible to calibrate the date change moment? I've tested 3 watches, and they all had problem with date change moment: 1) 22:40, 2) 23:47, 3) 23:54. But other users report that they have date change exactly at 00:00, so may be it is possible to calibrate the moment when the date is changed?
 -
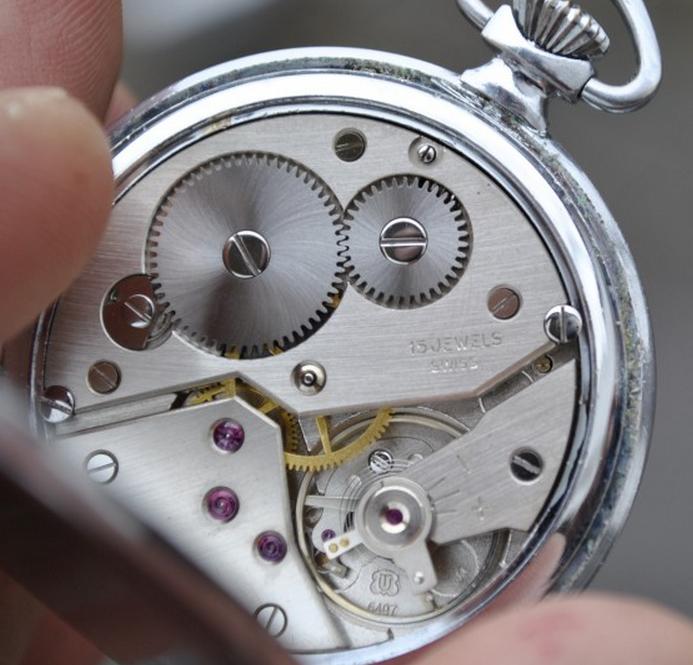
Hello all! I got my hands on a 15j Unitas 6497, and I would like to case it: Could you provide any sources of 41mm or less cases? I found something on Ofrei (http://www.ofrei.com/page1494.html), but I was wondering if there wouldn't be any smaller cases that would fit a 6497? Thank you, Bogdan
-
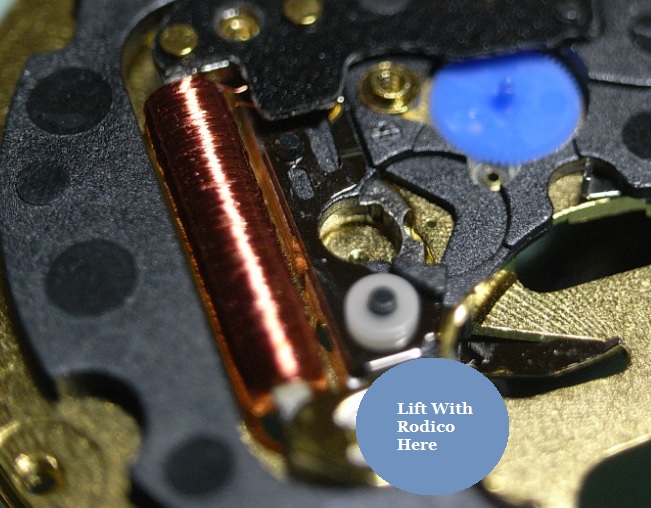
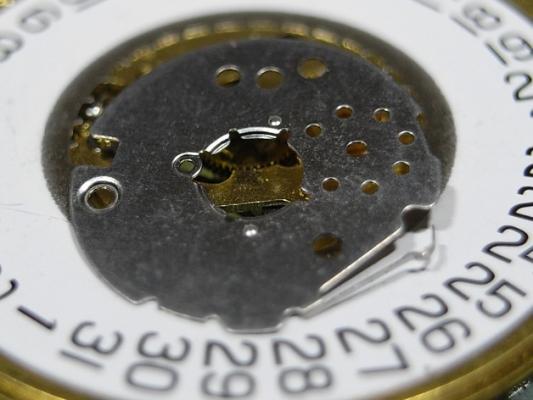
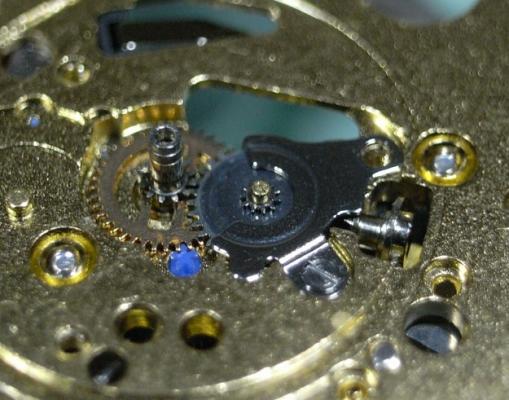
 ETA F05-111 Service Walkthrough "The Workhorse Of Midrange Quartz" Moving on from the ETA 955.412 service, another common quartz movement, this time found in mid-range quartz watches, is the F05 111. It doesn't have the build quality of the 955/6 model; but it's still a very robust movement, and able to be serviced. In saying that, this movement is rarely serviced by a professional watchmaker due to the low cost of a replacement movement. Personally, I think it's sad we live in such a throw-away society, and are slowly loosing the skills and confidence to performance maintenance at home. So if you've got the tools and confidence to service this movement at home, do it, and save yourself $$$. Service Manual for the F05 111 Movement ETAF05.111.pdf We will first start with the Motion Work and Calendar Work. Remove the three screws holding the Cover Plate. You will see that this also has the Date Jumper Spring incorporated into it. Next remove the Hour Wheel, and the Date Indicator Driving Wheel. Note too that there is no quick date change on this movement. Remove the Minute Train Bridge, Minute Wheel, Canon Pinion and the Sliding Pinion And that's it for this basic movement on the dial side. Flip the movement over and we'll begin on the drive side Remove the three screws marked below and lift out the Electronic Module Cover. Next remove the two remaining screws that hold the Gear Train Bridge. As you can see with plastic wheels, this is not up to the same quality and finish as the 955/6 movement. Remove the Second Wheel, Intermediate Wheel, and the Rotor I would not recommend removing the Third Wheel at this time as the IC Board circuits are directly above it, and there is no point risking damage to it. To remove the IC Board, gentle lever up the where the location pin goes through the board just at the end of the Quartz Crystal housing. This pin is often firmly pegged to the board and must be lifted up first. This will loosen the board away from the Main Plate. Then gentle lift out the IC Board by sticking a piece of Rodico to the mark position below and lifting out. This will avoid any damage to the circuit or Coil. Now that the IC Board has been removed, access for removal of the Third Wheel is risk free. You can also remove the Insulating Block at this time. This is also the time to remove the Battery Insulator, but this being just a spare movement I own, it's been used elsewhere ... sorry :unsure: The Keyless Work is now exposed, and is a very basic setup, being held only with 1 shouldered screw. The movement is now completely stripped and ready for cleaning. All the parts can go in for cleaning EXCEPT the following Date Ring Rotor IC Board PLEASE NOTE: Due to most of the wheels being plastic, be careful when you come to the heating/drying stage if you are using an Elma/Pearl Parts Cleaner. Make sure the basket is high up in the drying cylinder and ONLY RUN FOR 11 MINUTES MAXIUM ... too much heat isn't good for those little plastic wheels. I hope this has been fun and edifying to read. I'll post the assembly procedures latter tonight after dinner ... my tummy is talking to me :)


-
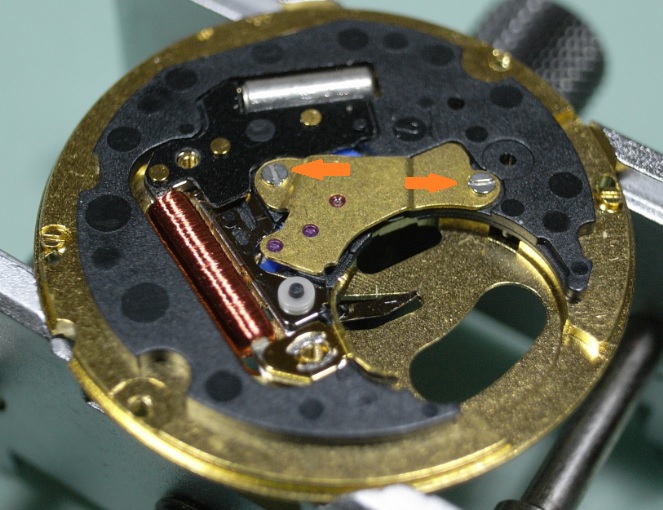
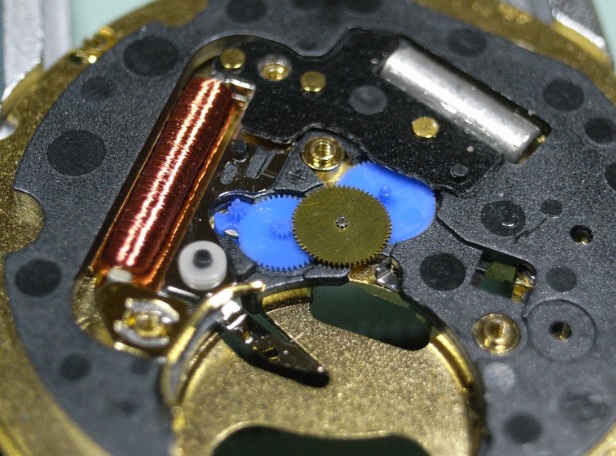
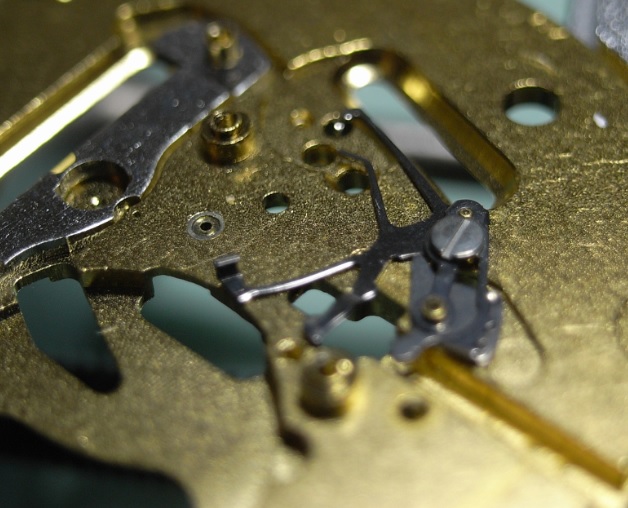
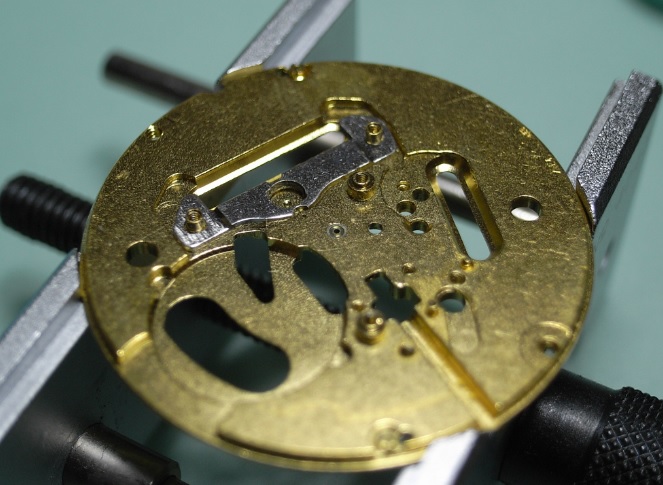
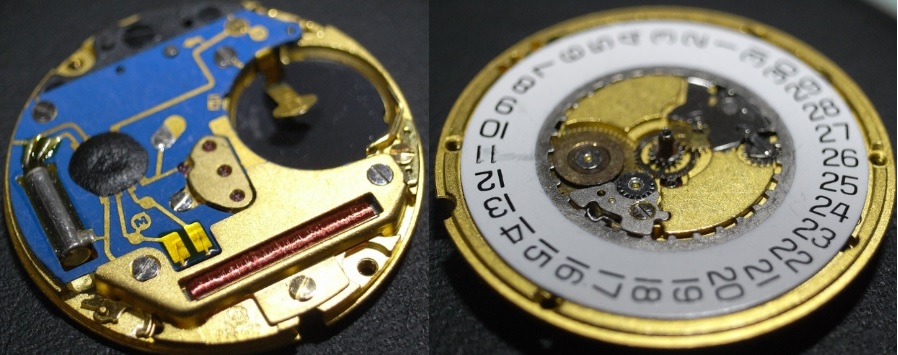
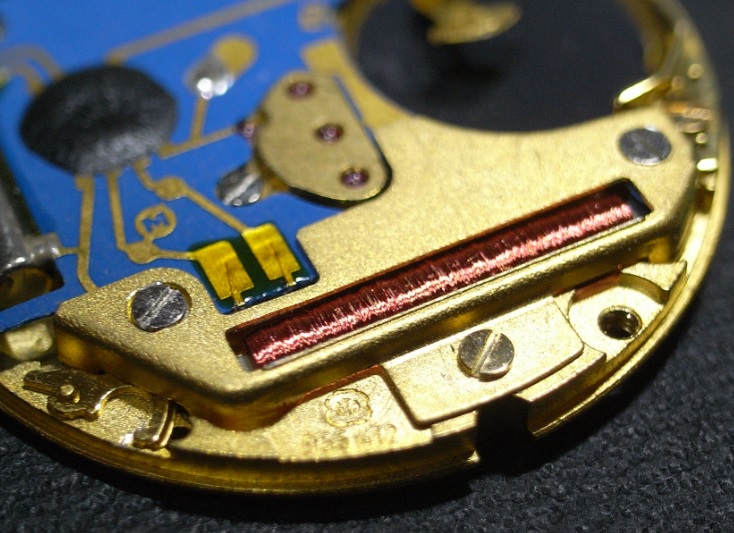
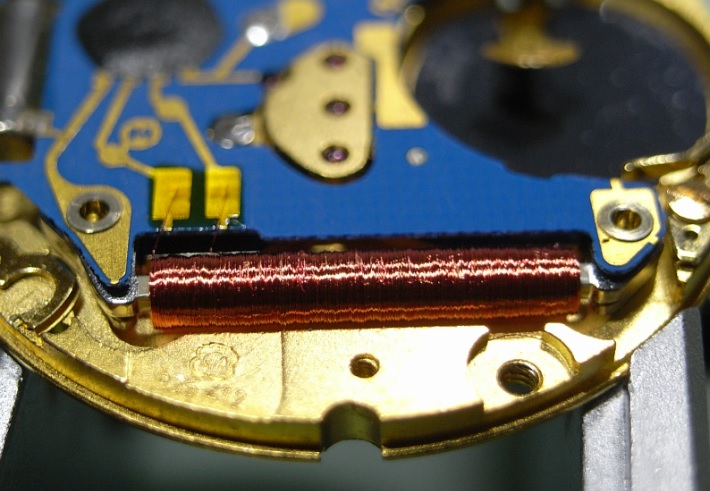
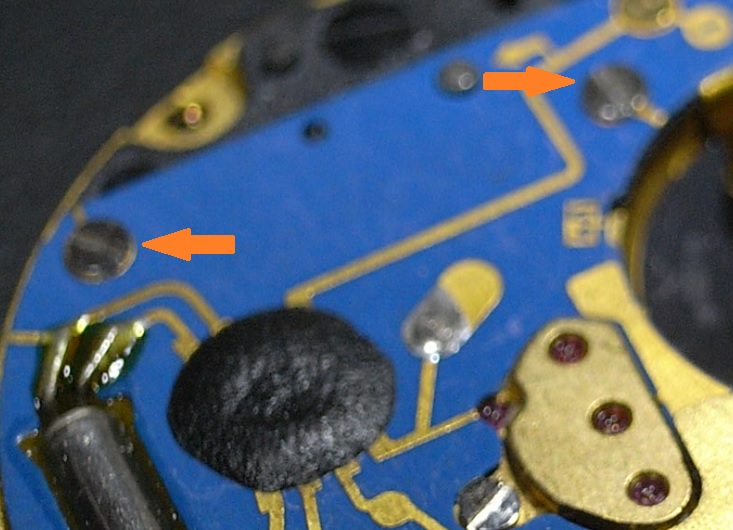
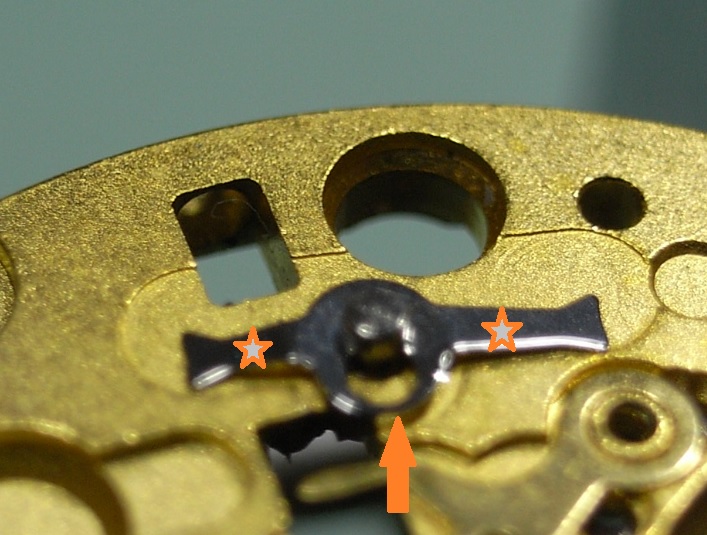
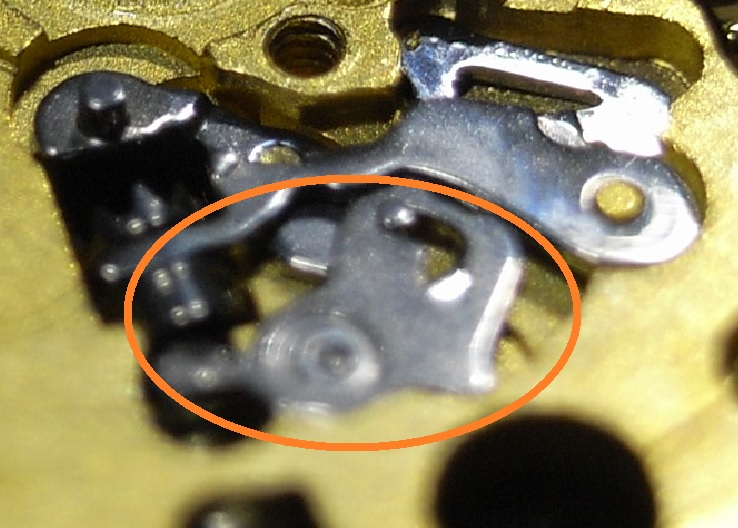
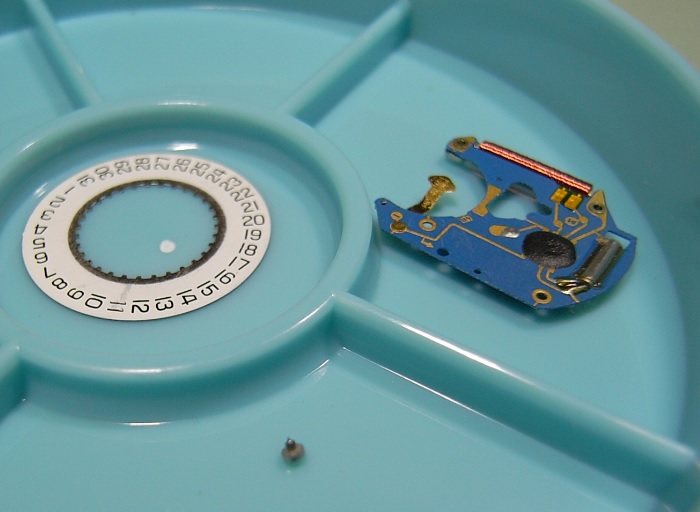
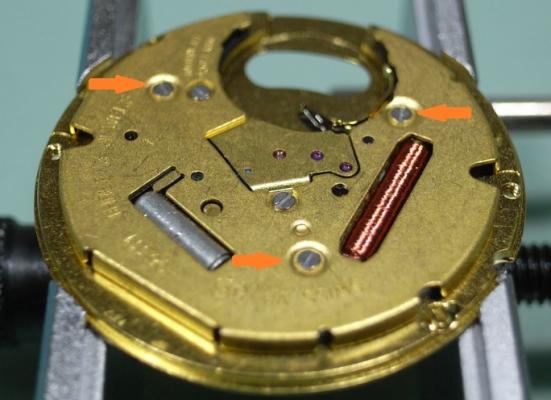
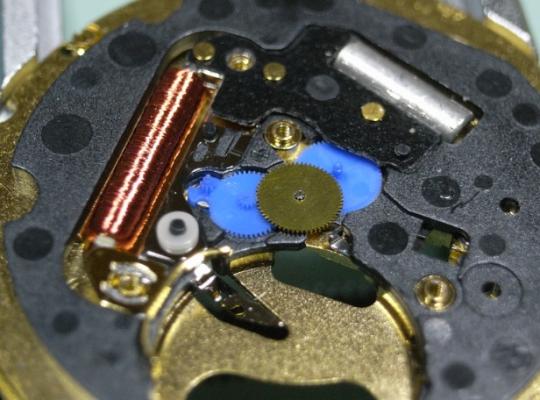
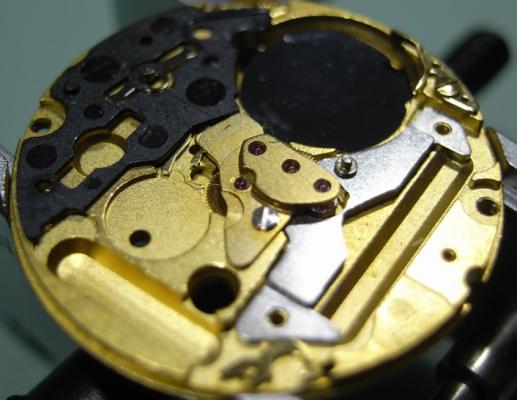
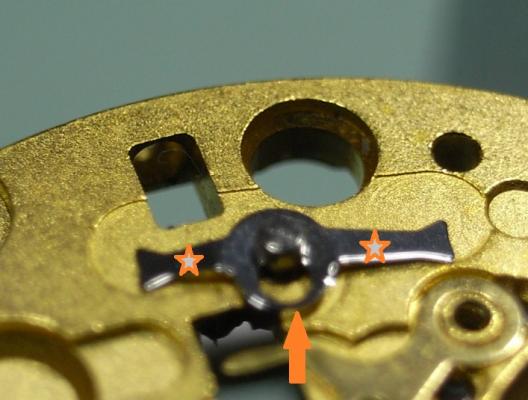
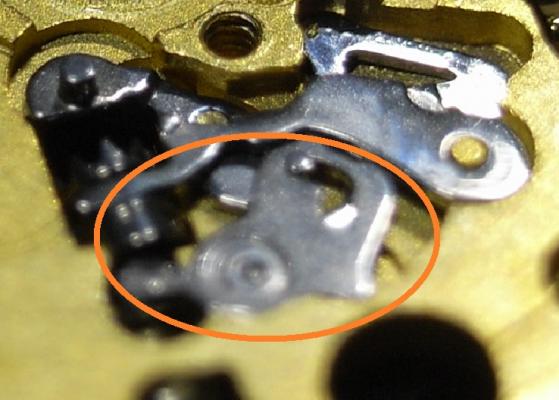
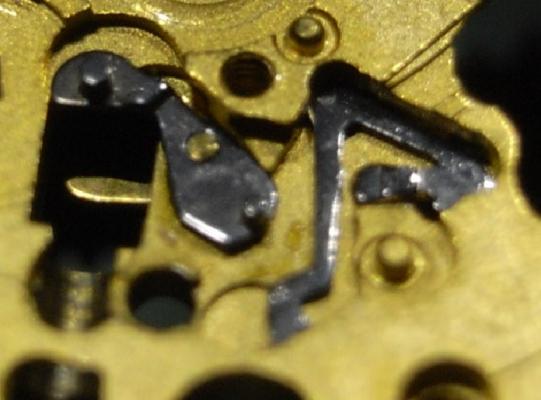
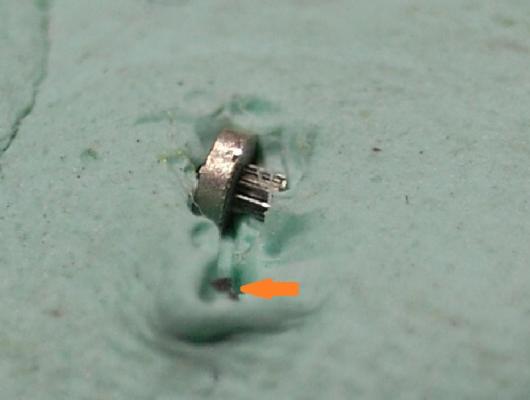
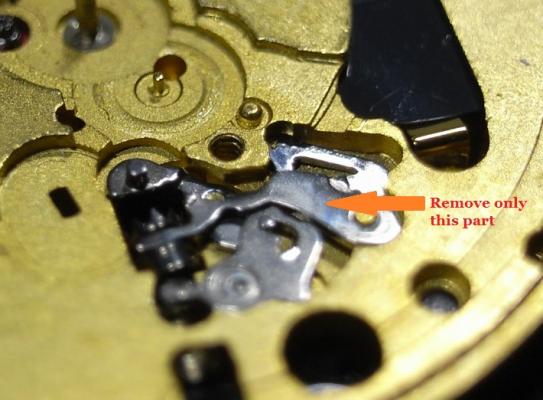
ETA 955 Service Walkthrough "The Workhorse of Highend Quartz" The ETA 955 and 956 Quartz Movements are the most commonly found movement in high-end quartz watches with three hands and a date feature. You will find them in Omega, Tag, and many other brands on the market. For this walkthrough I will be using an 955.412 Movement as my example; but the 956 is so similar to the 955, that this walkthrough will suffice for both. Please note that the numbers after the decimal place only relates to the factory in which the movement was made, so yours could read 955.112, or another factory number ... regardless, the parts are identical and interchangeable. As with all movements, quartz or mechanical, they have a service interval that should be adhered to for longevity of the movement. With quartz movements when the lubrication becomes dried out, or the movement becomes dirty, they will draw more and more current from the battery in order to maintain accurate time keeping. The ETA 955/6, when in optimum condition should draw around 800nA ~ 1.5uA, if the movement is drawing more power than this, a service is required. If a service is not performed, the battery life with decrease markedly, and can go as far as drawing more power from the battery than it was designed for, and damage the battery and cause it to leak and corrode your valuable time piece. Service Manual for the 955/6 Movement CT_956412_FDE_493024_06.pdf.PDF Disassembly Remove the two Date Wheel Keepers. I always start with the one holding the Date Jumper Spring in place. Sometimes the Date Jumper Spring can ping out of place, so be careful when removing the keeper plate above it. Here is a reference photo in case it moves before you see how it's properly seated. Next remove the Keepers and Date Wheel. Then remove the Date Jumper Spring, Motion and Calendar Work. This will leave only the Keyless Work; remove the Yoke and the Sliding Pinion only. We need to flip the movement over, and disassemble the IC Board before we can remove the rest of the Keyless Work. With the movement flipped over, remove the 3 screws holding the Coil Protector. Note for re-assembly the Gold Screw in the centre. Now that the Coil Protector is removed, GREAT care must be taken not to damage the exposed fine windings of the Coil. Then to remove the IC Board, simply remove the 2 remaining screws that hold it. Do this slowly and carefully, as you do not want to slip off the screw and damage this delicate circuit. The same level of care needs to be taken when removing the IC Board from the Main Plate. Take your time and carefully lift it off and store it immediately out of harms way. Next remove the black Insulator Block, and Battery Insulator. This will expose the Setting Lever Spring Clip, which will enable you to remove the rest of the Keyless Work. To remove the Setting Lever Spring Clip, place both points of your tweezers on the locations where I've placed the stars and gently push down on the spring. Then with a piece of Pegwood, push the spring in the direction of the arrow until it moves to the larger opening slot. This will now allow the Setting Lever to be removed, along with the rest of the Keyless Work. Next remove the Stop Lever and Switch, and remove the one screw holding the Train Bridge in place. Then carefully remove the Gear Train and the Rotor. The movement is now completely stripped and ready for inspection and cleaning. There are some parts that you do not place in the parts cleaner, they are as follows: Date Ring Rotor IC Board The rest should be demagnetized prior to cleaning to avoid any metal particles in your cleaning solution from sticking to your parts. When cleaning I also including the Insulator Block, and Battery Insulator in the basket, normal watch cleaning solutions do not harm these items and it is essential they are completely clean to provide the best insulation possible. The Rotor should be cleaned by use of Rodico. As you can see from the picture below, it's surprising the dirt and old oil this will remove ... and it is sufficient cleaning for the Rotor. I hope this has been a help to you, and I will post the assembly procedure later today, if time permits.


- 23 replies
-
- 12
-

-
Just wonderd what your views were on this? For anyone not knowing, ETA announced a while back they are stopping the sale of all spare parts on December 31st 2015. After this date only Authorised service centres will b able to get them, so once cousins, boley etc supplies have been exhausted we will no longer be able to get them, meaning the customer has to pay extortiate prices. What do you think?
-
 Just uploaded a new four part series on the Omega Seamaster Co-Axial (with a 2500 movement). This is about 1 hour long so I have split it into four parts. https://www.youtube.com/playlist?list=PLwP8fNxqhOvPfgwFF1qHaERl5DuZ-zXqA
- 14 replies
-
- 1
-
-
- omega co-axial
- 2500
- (and 2 more)
-
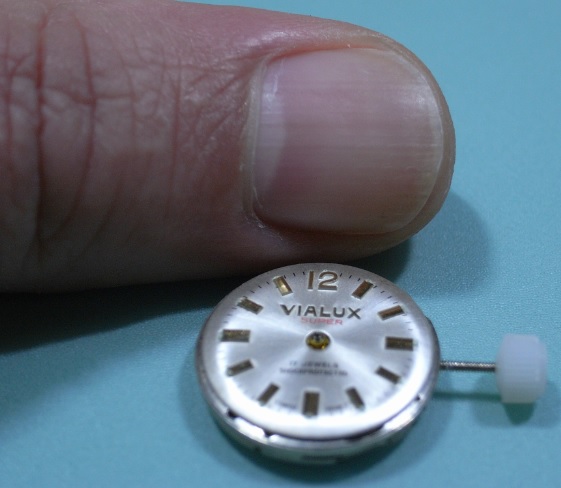
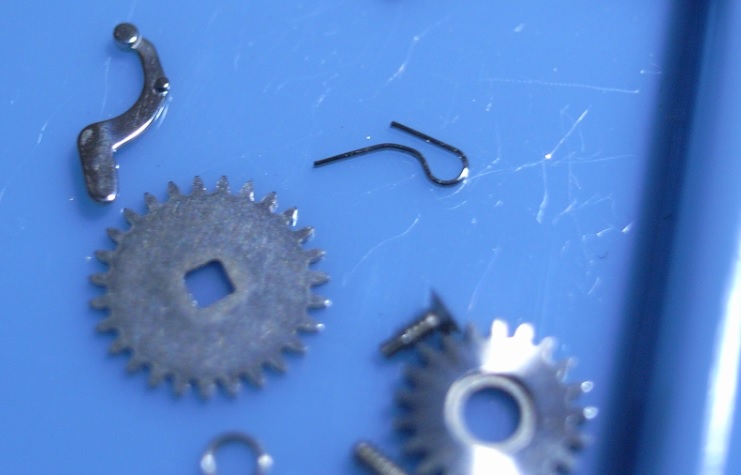
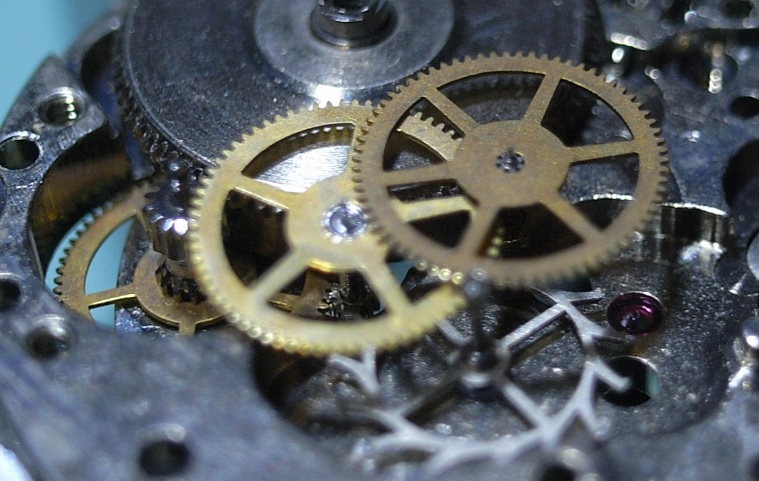
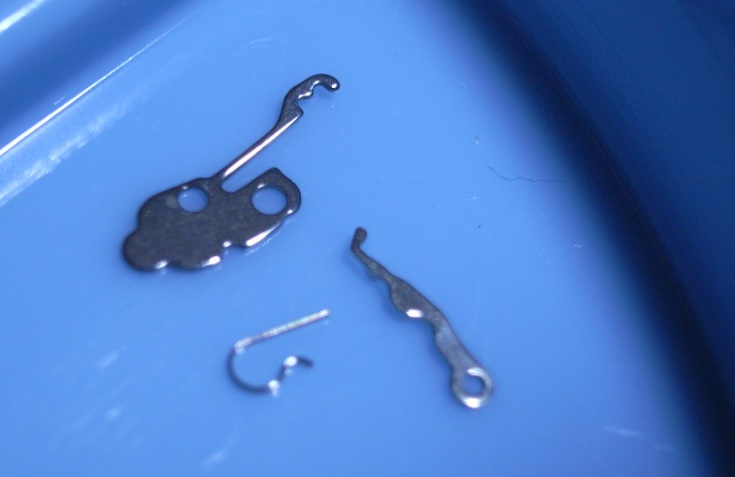
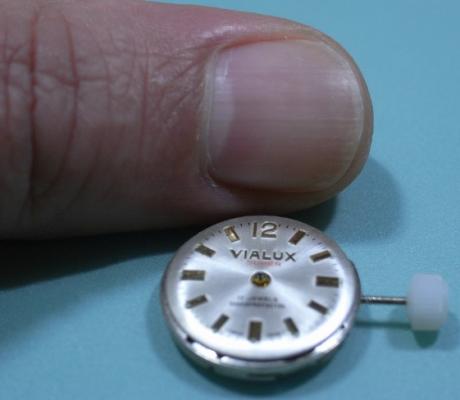
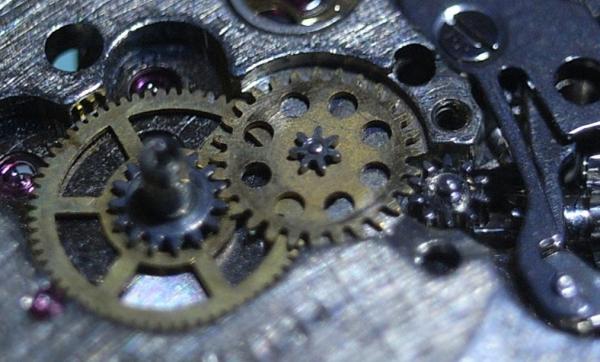
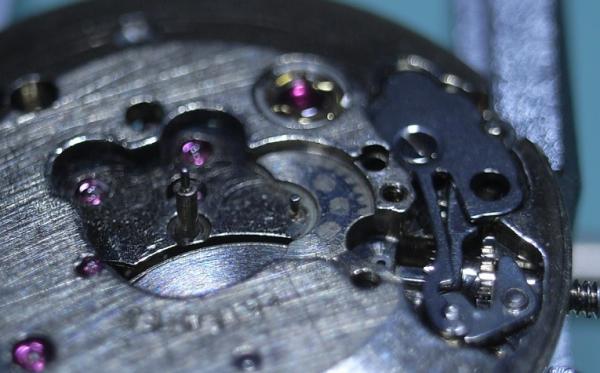
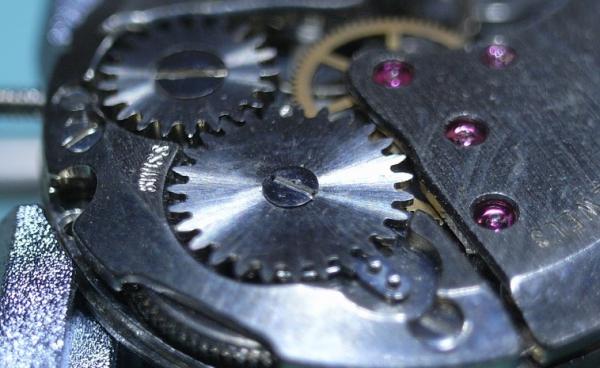
ETA Caliber 2540 Complete Service Walkthrough Looking for more movements that would expand my training scope. I found this one on the Fleabay: an ETA 2540. It's a "New Old Stock (NOS)" replacement movement, therefore it's not cased, and came with no hands. As there are many ladies watches, especially vintage ones, that are very small, this was my next obvious choice of movement to work on. As you can see next to my thumb nail, it's quite a small and compact movement indeed. Disassembly First remove the Hour Wheel, and leave the tension spring in place. Remove the Minute Wheel, Canon Pinion with Drive Wheel, and the Winding Pinion. The Canon Pinion on this movement isn't the standard fiction fit, it is a "Circlip" type fitting with the Driving Wheel. Therefore no pinion puller is required on this movement. Below is a reference photo. The motion work is now removed, so it's time to turn the movement over. With the Movement turned over, release all tension from the Mainspring. Remove the Balance. Remove the Pallet Cock and Fork. Remove the Crown Wheel and Ratchet. Remove the Click and Click Spring, then the Barrel Bridge. Here is a reference Photo of the Click Spring. Remove the Train Bridge. Remove the Second Wheel, Third Wheel, Intermediate Wheel, Escape Wheel and lastly the Barrel. Finally turn the movement back over, and complete the disassembly by removing the Keyless Work. Remove the Setting Lever Spring. Remove the Yoke Spring and then the Yoke. Then remove the flip the movement over and unscrew the Setting Lever Screw. Pull the Stem out and the Clutch Wheel and Winding Pinion will fall out. Here is a reference photo of the Yoke Spring. Disassembly is now complete.


-
I am looking to practice overhauling ETA2824. I am just wondering where could I source 2824 movement or its equivalent clone for practice? Thanks Ferdinand
-
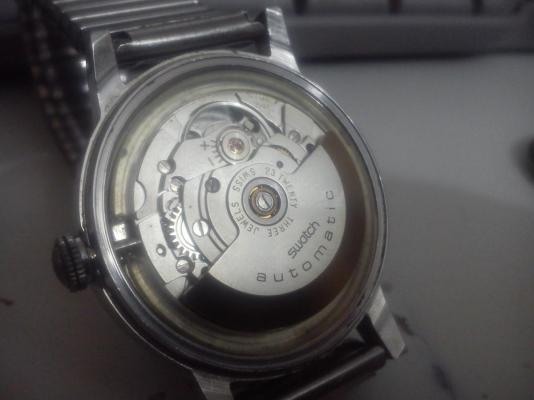
What do you think about ETA 2842 automatic movoment?Which are pros and cons?