Search the Community
Showing results for tags 'Service'.
-
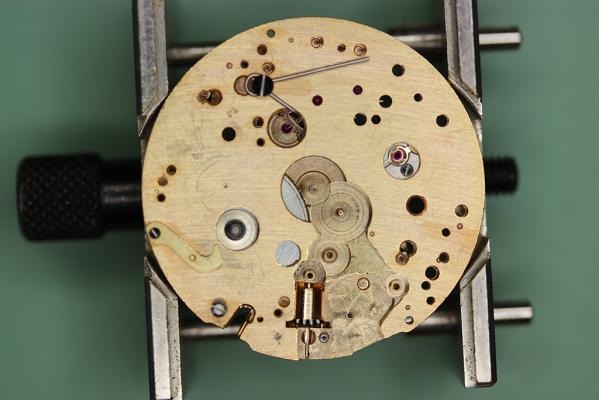
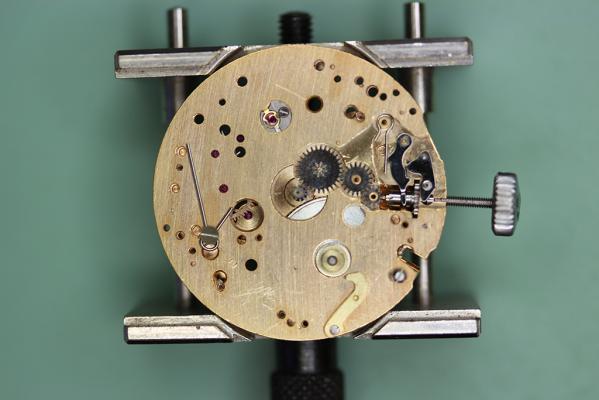
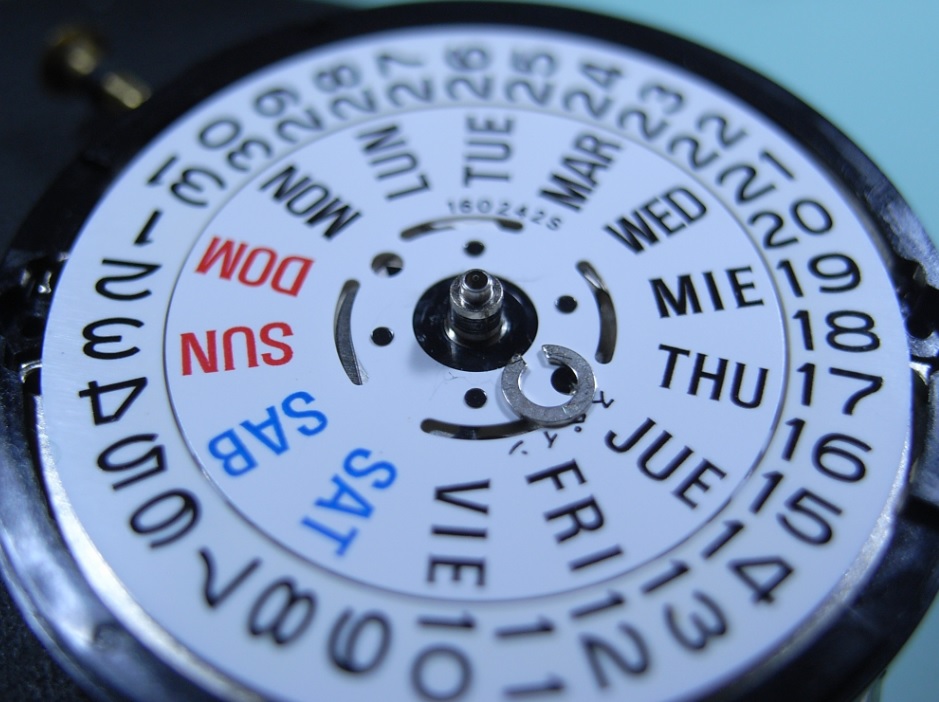
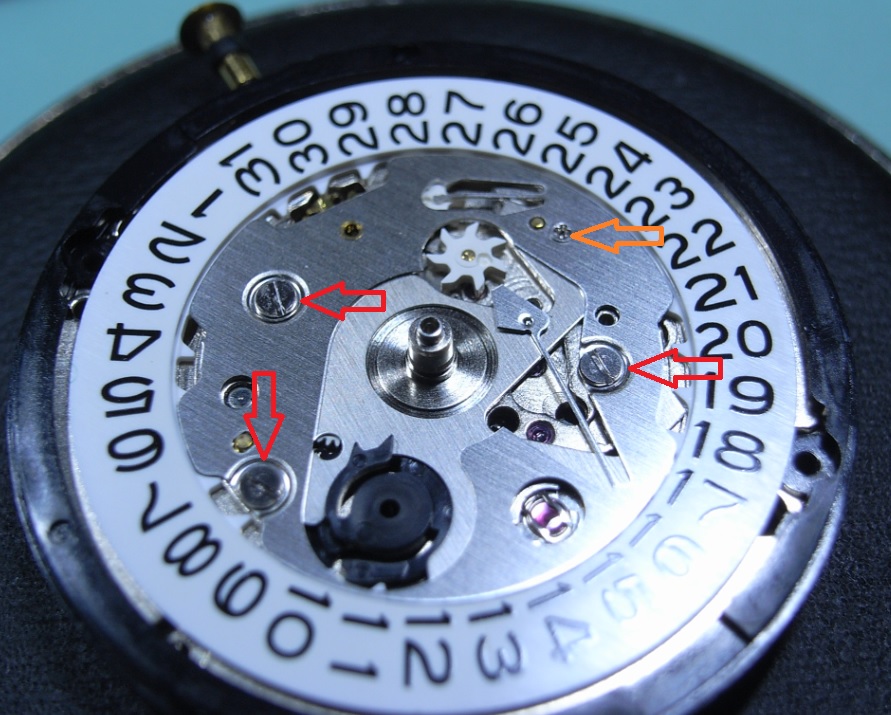
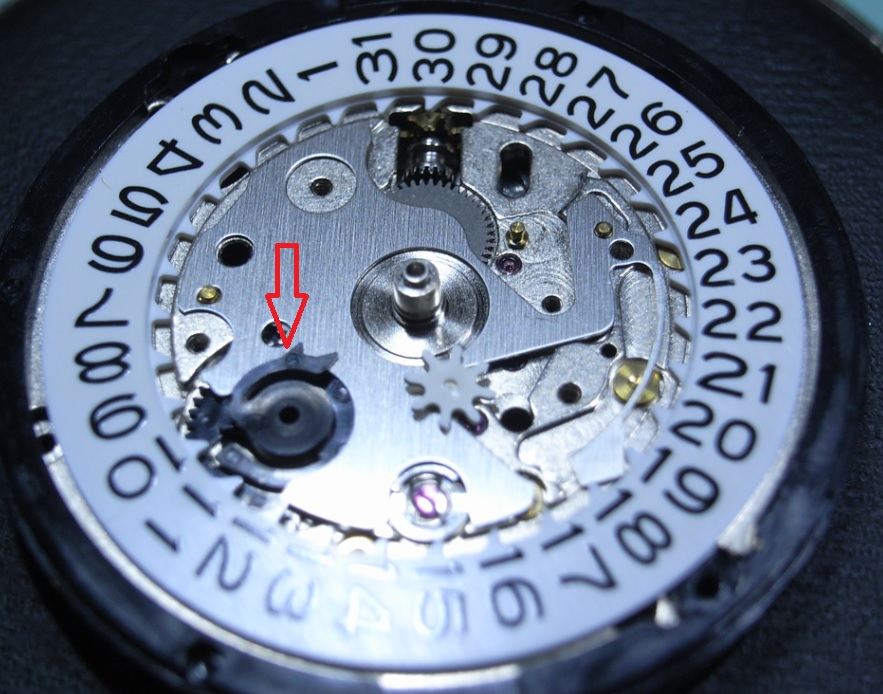
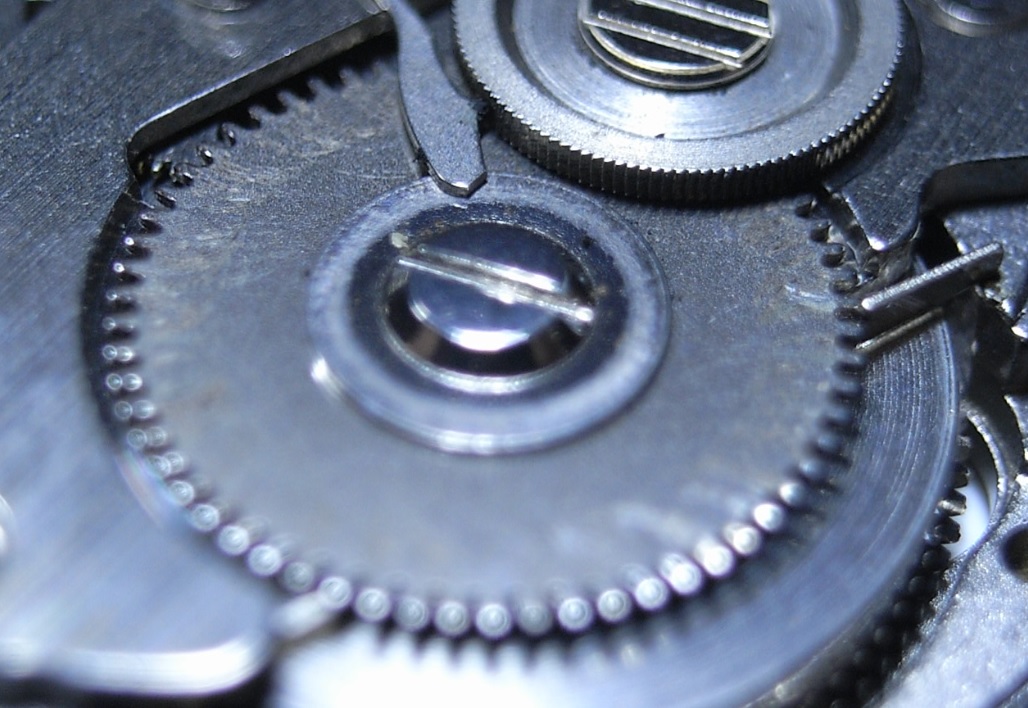
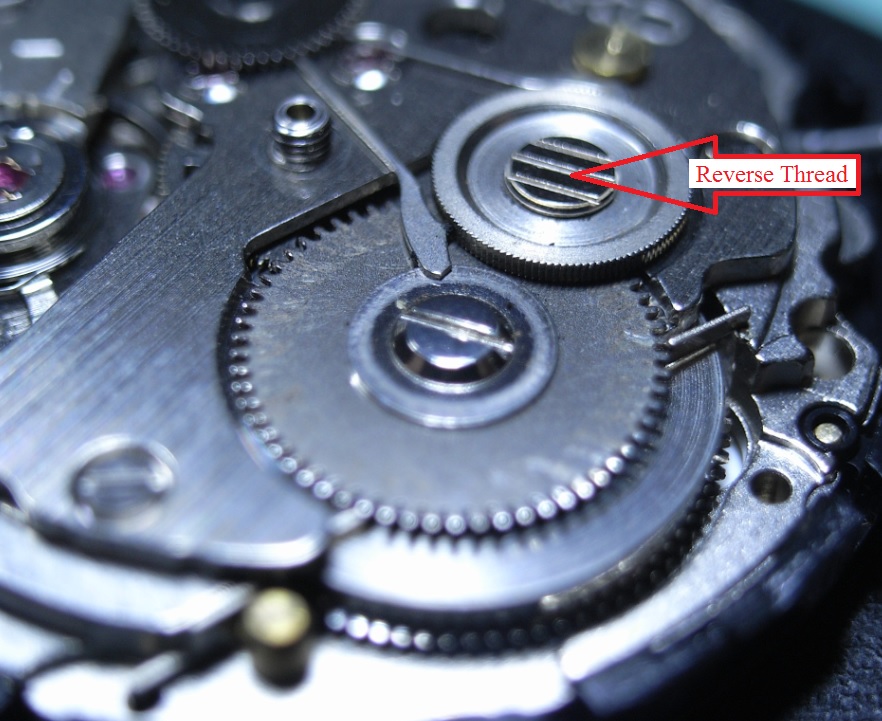
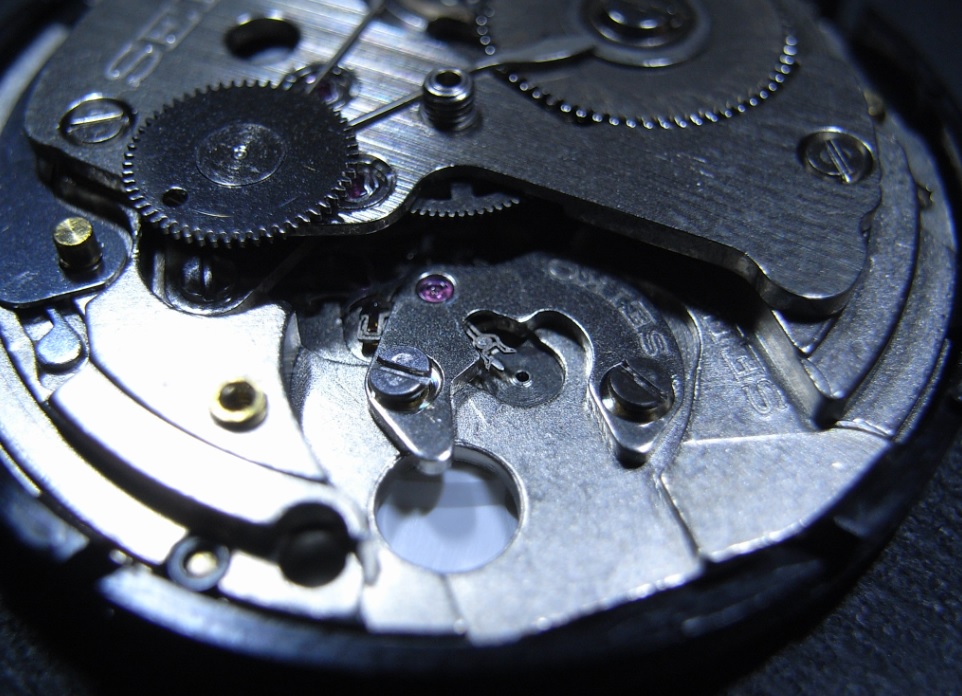
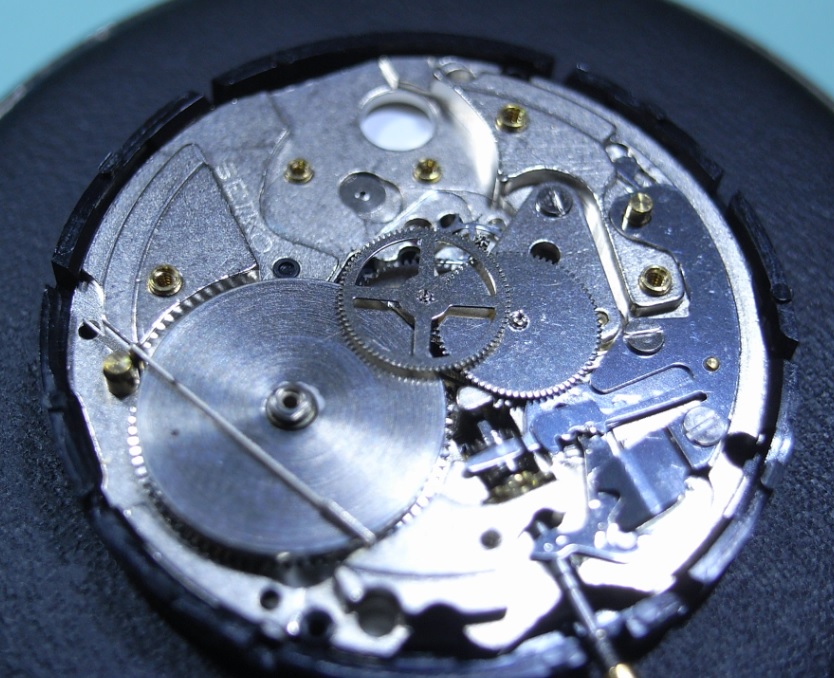
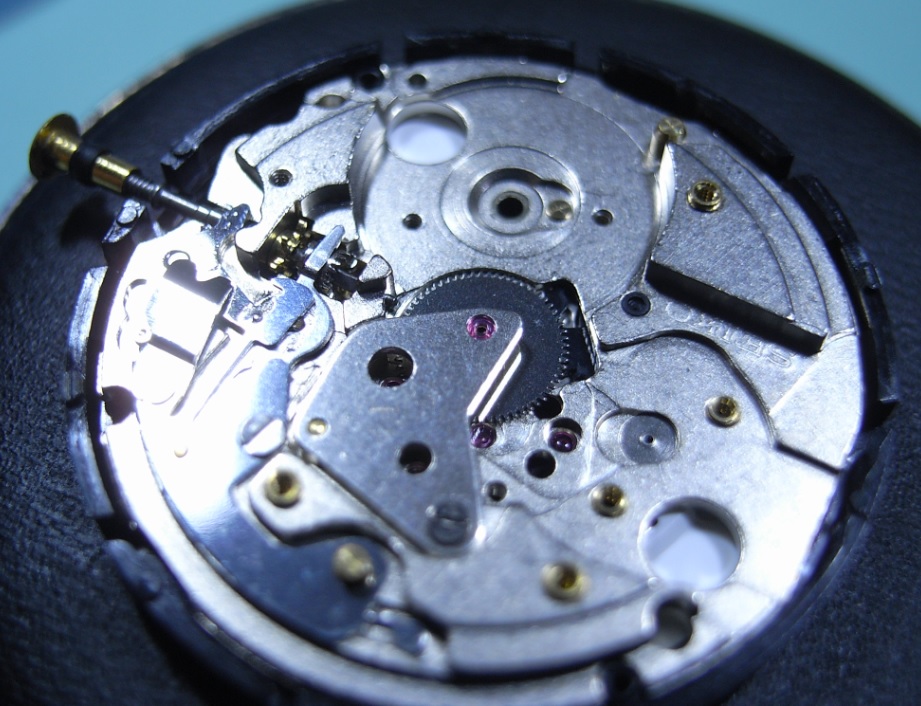
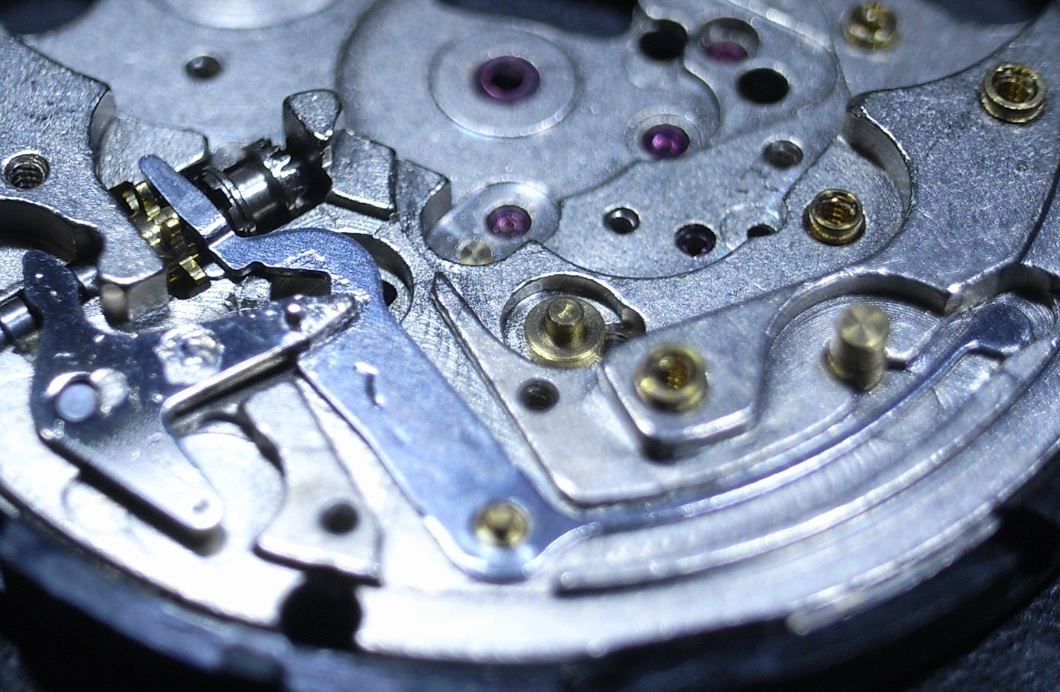
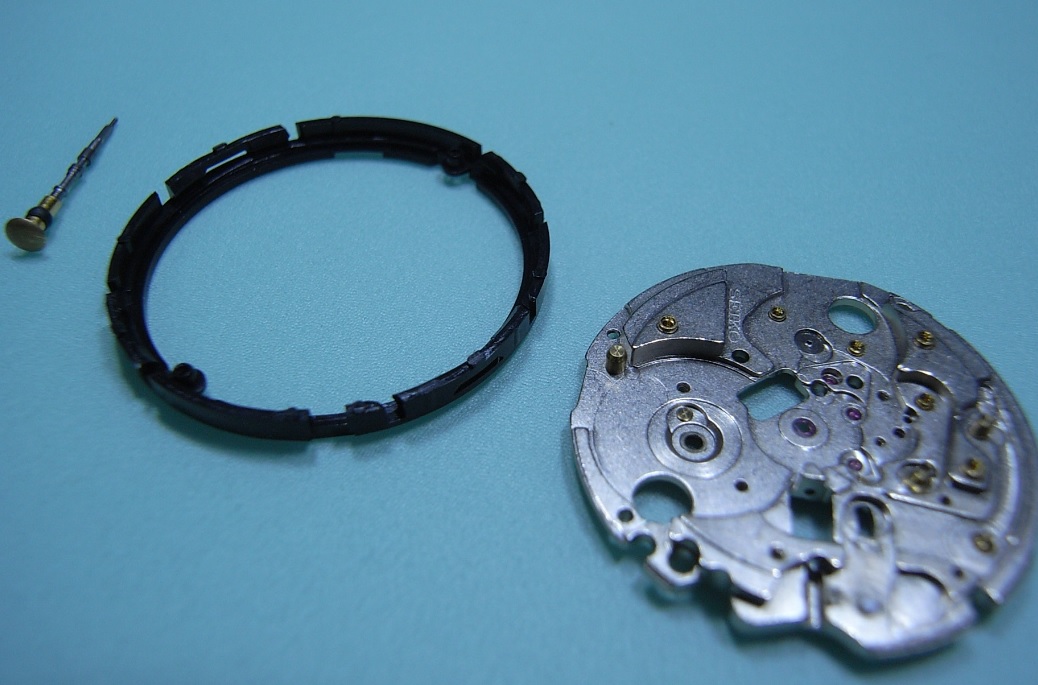
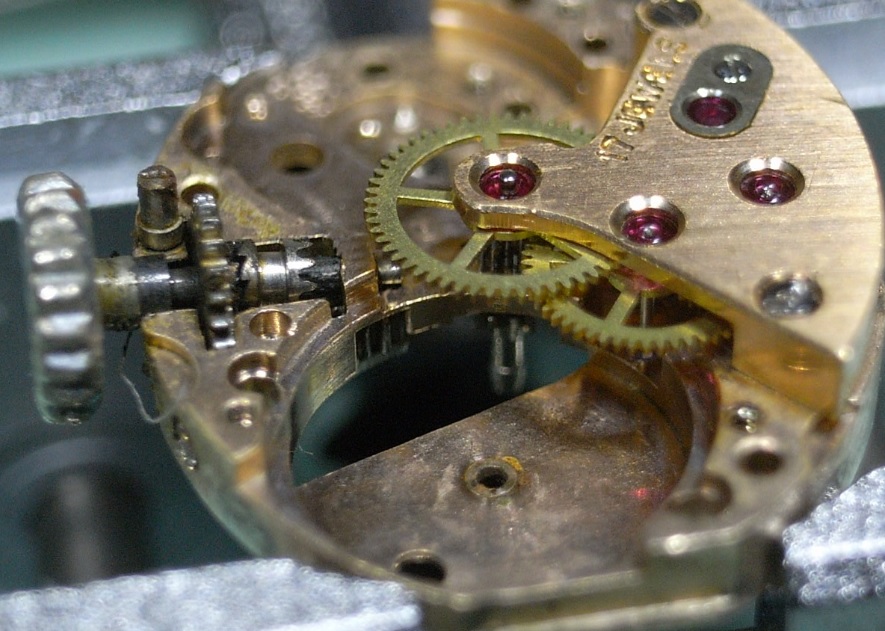
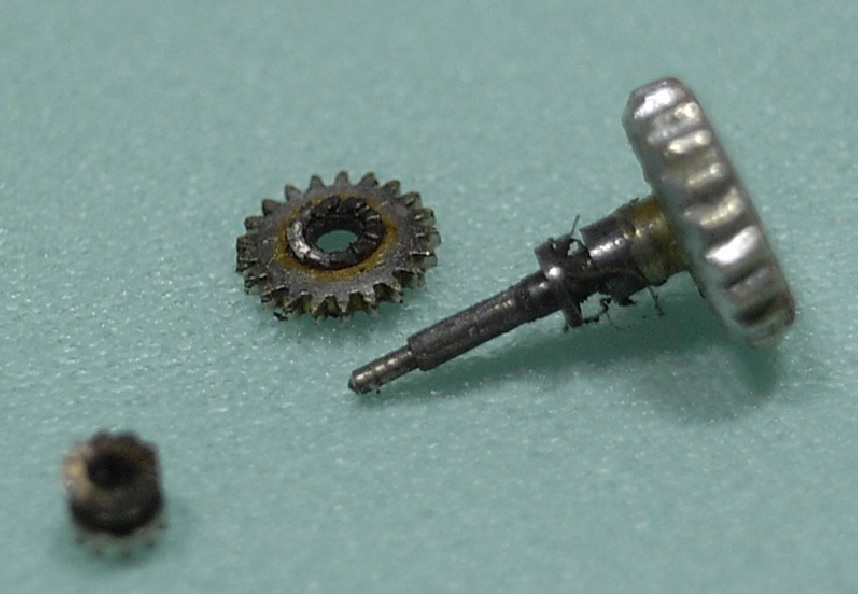
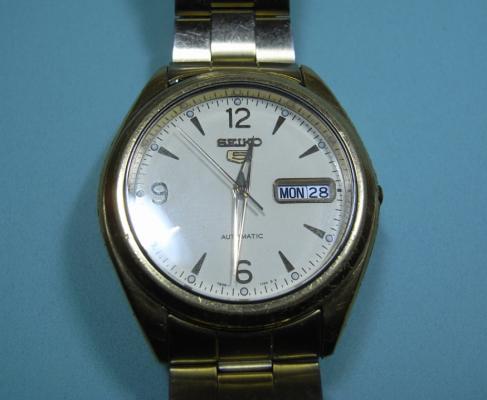
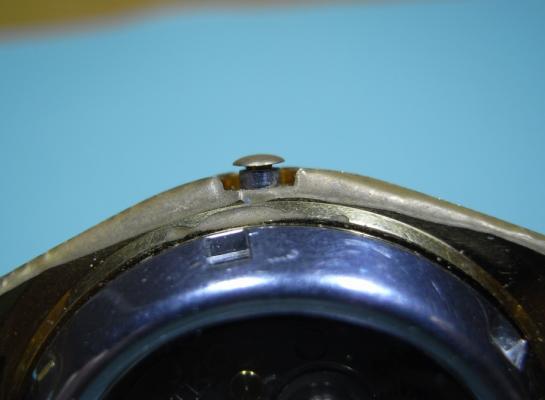
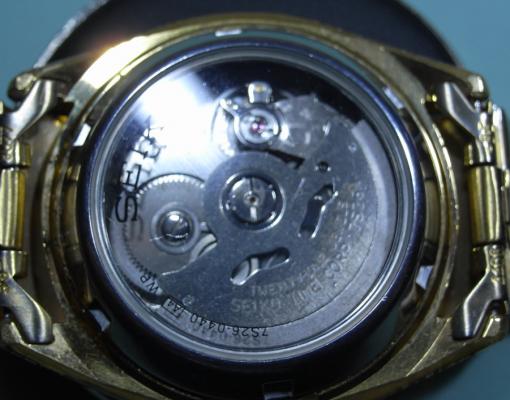
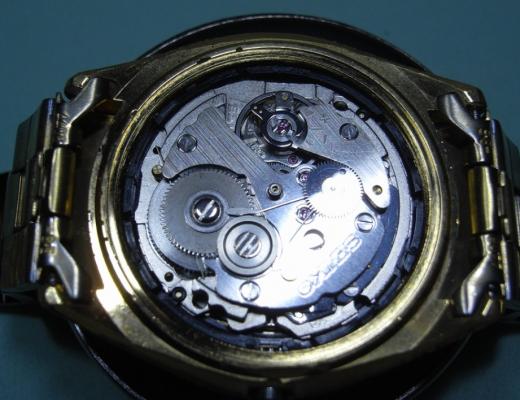
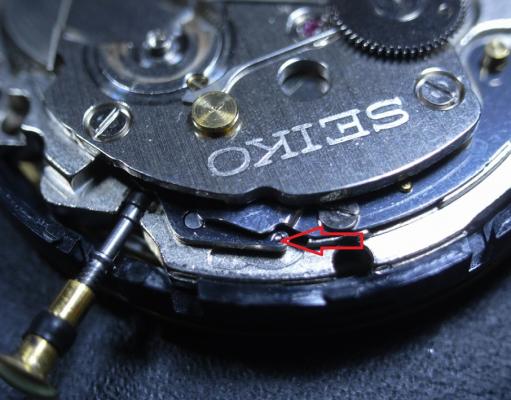
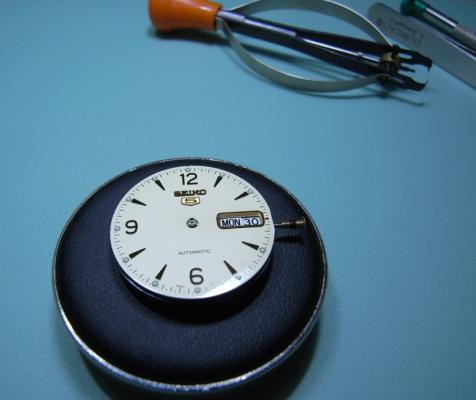
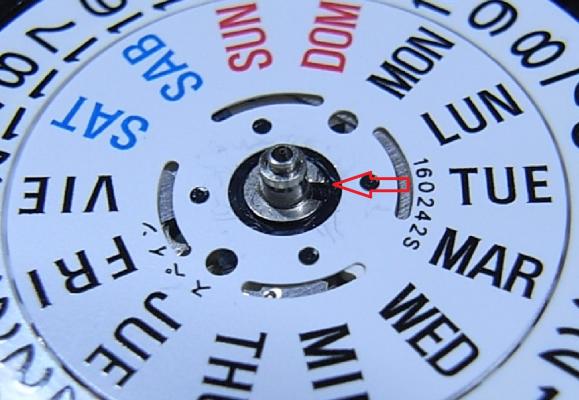
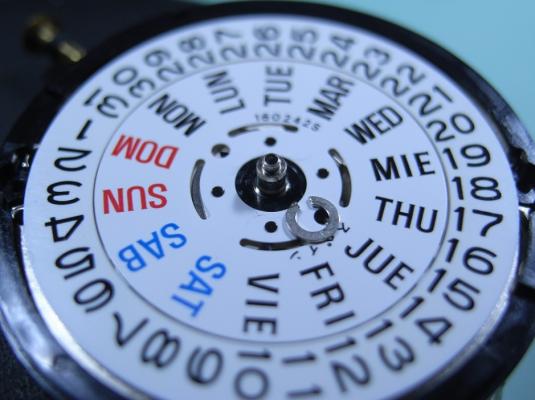
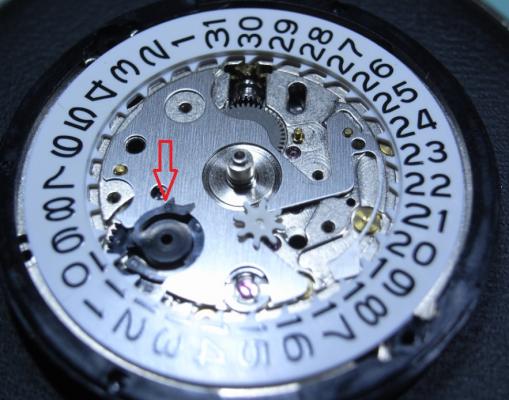
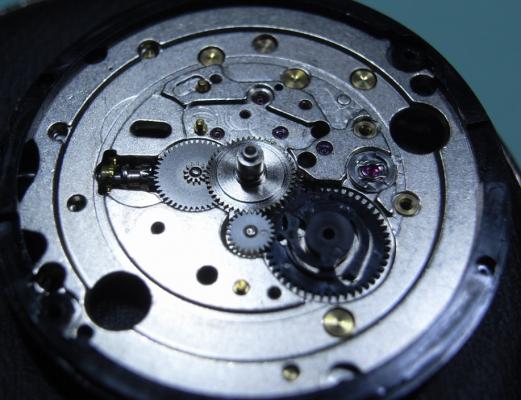
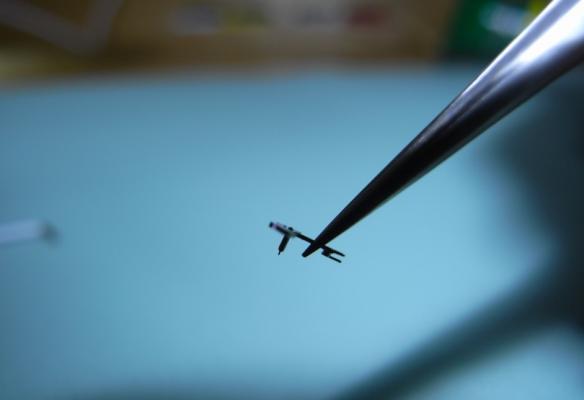
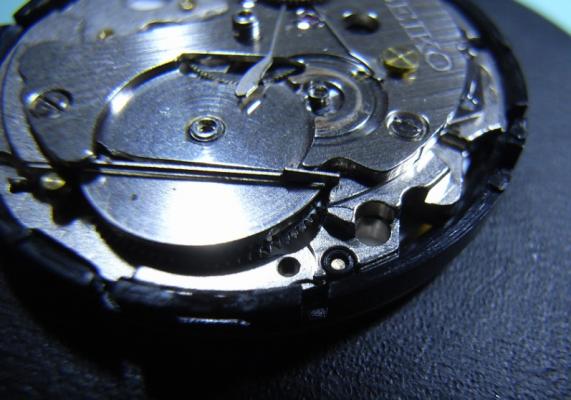
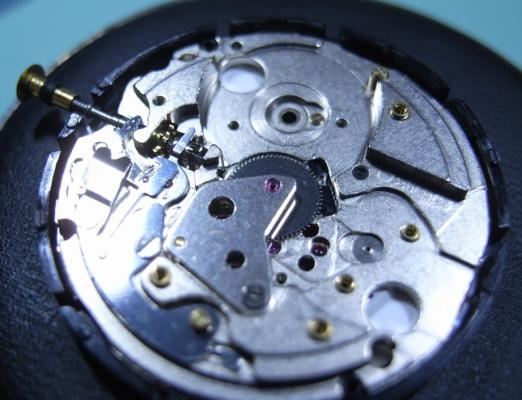
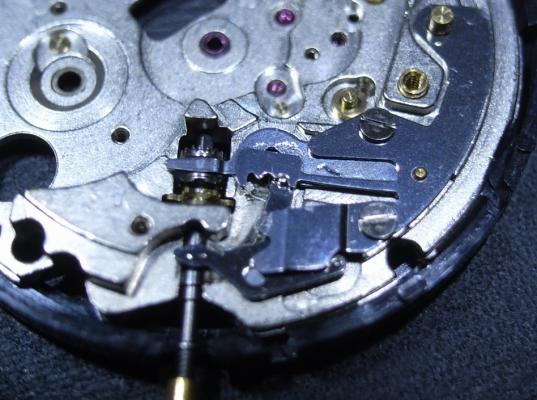
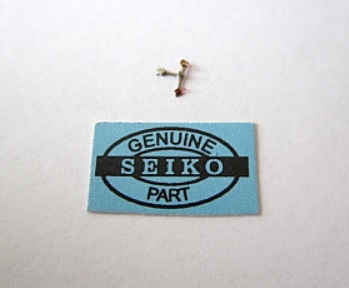
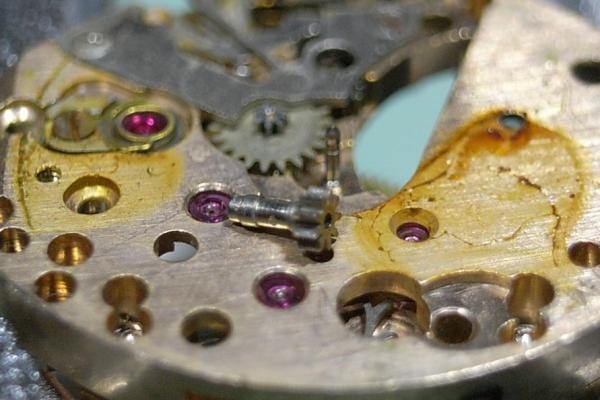
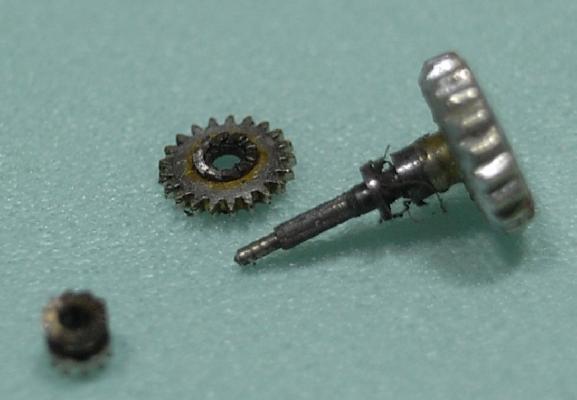
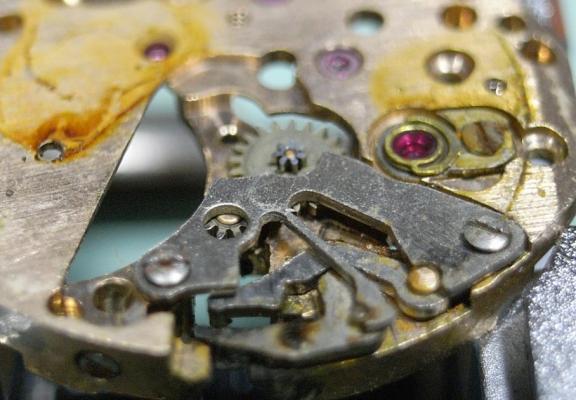
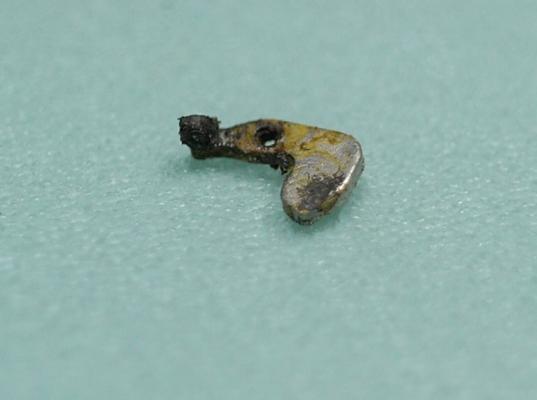
Seiko 7S26A Complete Service Background I have a good friend, a brother in Christ Jesus, who I've known for many years. He knows I've embarked on retraining myself for a new career in Watchmaking, and seen my first two restored watches. He told me that his old faithful Seiko 5, which he's worn everyday for 12 years, has recently had issues. Occasionally it will advance rapidly in time (up to an hour in a few seconds) and then just keep ticking away normally. I told him I'd be happy to take a look at it, and put it on my ACEtimer Timegrapher. The pattern on the screen looked like a B-52 drop in Nam (stupid me forgot to take a photo), and I told him that his watch definitely needed an inspection and service. So started my research on what the problem might be. After reading a "Practical Watchmaking", and the many forums that I've read, I was pretty sure it was the Pallet Fork ... either very dirty or damaged stones, or a broken/damaged fork pivot. So onward to the service... Disassembly One unusual aspect of this watch is the crown ... or lack there of, more to the point. I suppose since this is an automatic watch, they thought it didn't need to be wound. This watch also has a display back, so extra special care not to mark any of the plates, or damage screw heads! The first issue you'll face when working on a 7S26A Movement, is how to get the stem out! It isn't obvious at all, and there is a little trick. The crown needs to be pushed all the way in to expose the push plate (it is hidden in the other crown positions). I took this photo once the movement was out to best illustrate where to push. Remove the Hands, Dial and Oscillating Weight (2.0mm Screwdriver). Gently lever up one end of the circlip and carefully work your way around. You then should be able to raise the circlip up the length of the shaft without it pinging off. Remove the Day Wheel and the four screws holding the Date Dial Guard. (Use a 1.40mm Screwdriver, and this driver is good of all the screws from now on; bar one.) NOTE ORANGE ARROW: Seiko Special Tool needed for the 0.98mm Philipshead Screw (Part Number: S-921) I had to journey down to my nearest Seiko Distributor and grab one ... cost was AU$24.00 Here's a closer look at the troublesome screw. Remove Date Jumper, and note that the Date Drivewheel lips over the top of the plate. Remove all the motion work, and pull the Cannon Pinion Remove the tension from the Mainspring. Remove the Ratchet Wheel and the Second Reduction Wheel and Pinion. (remember the Reduction Wheel has a reverse thread) Unscrew the Balance Cock and remove the Balance. Also unscrew the Pellet Cock and remove the Pellet Fork. BINGO! Found the problem with my friends watch. The top pivot on the fork is broken. Easy fix with a replacement fork :) Remove the Barrel/Train Wheel Bridge Remove the Click, then the Barrel. Remove the Fourth Wheel, Third Wheel and Escapement. Unscrew the Centre Wheel Bridge and remove the Centre Wheel Now to the Keyless Work. Remove the Setting Lever Spring Remove the Yoke and the Setting Lever Pull the Stem out, and the Clutch and Intermediate Wheel will fall away. Lastly, pull the black plastic location ring off. ... and now it's bath time!!! I hope this has been of help to you guys. I'll post the Assembly steps in this thread tomorrow morning.


- 94 replies
-
- 12
-

-
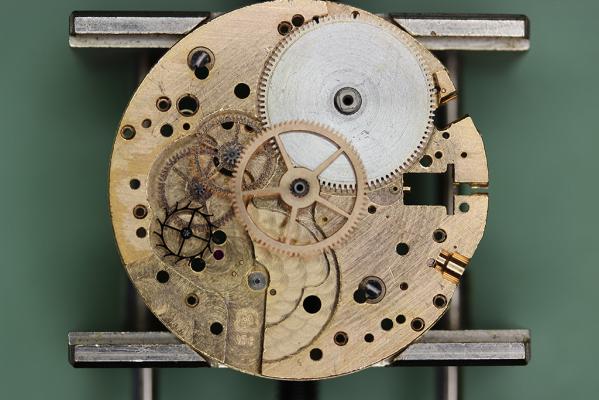
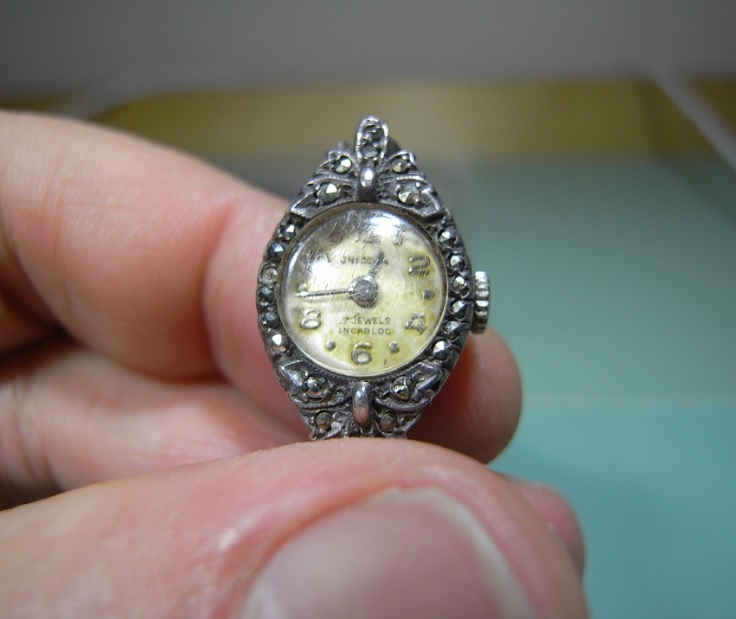
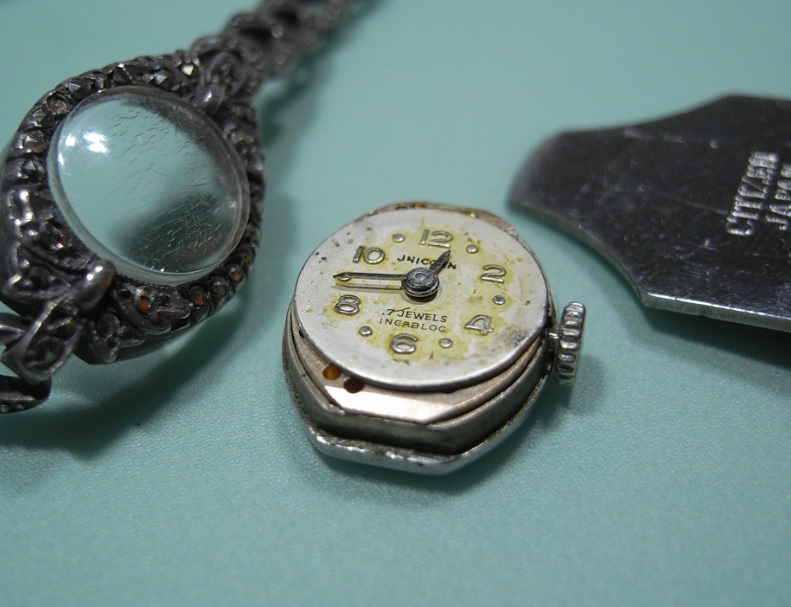
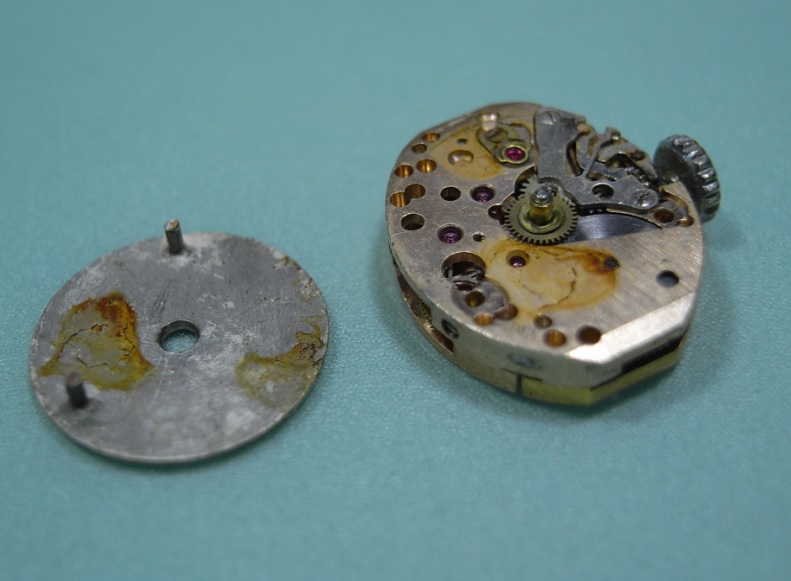
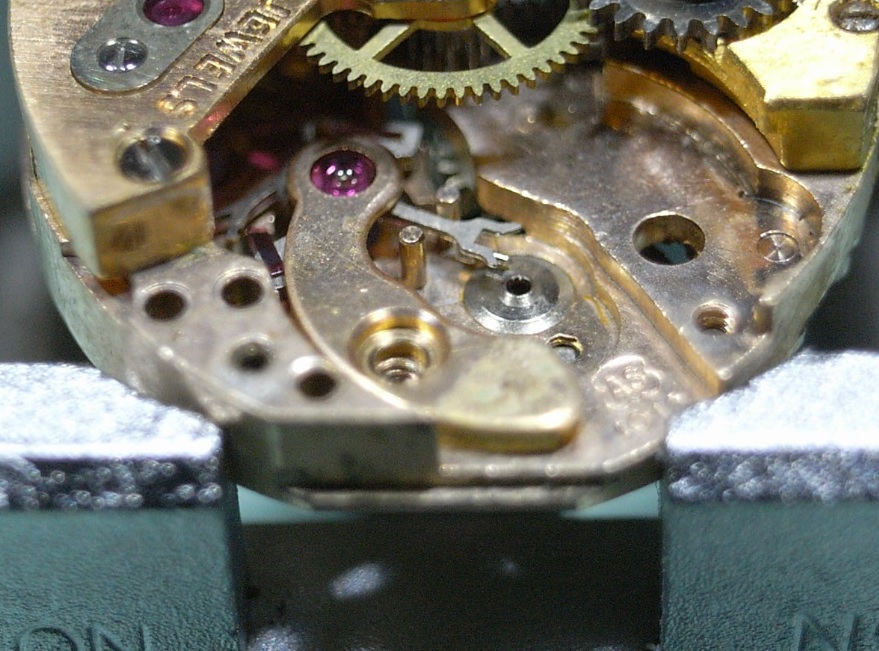
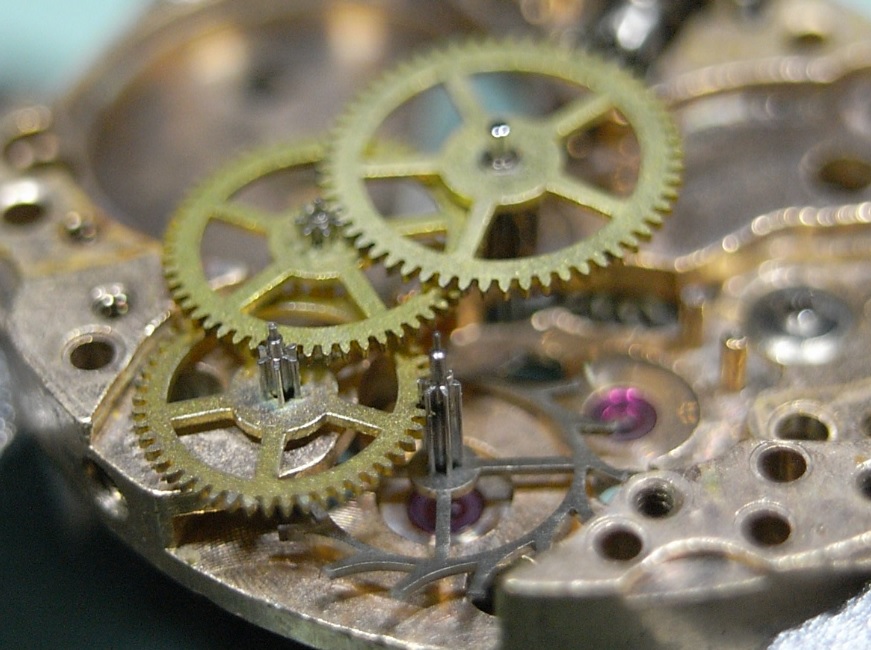
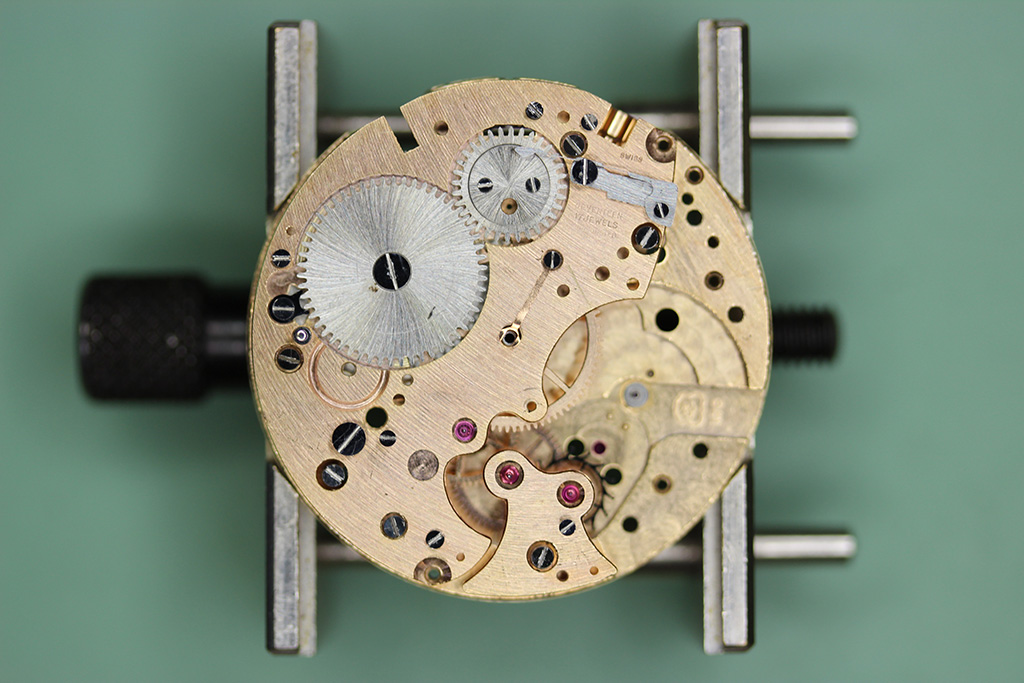
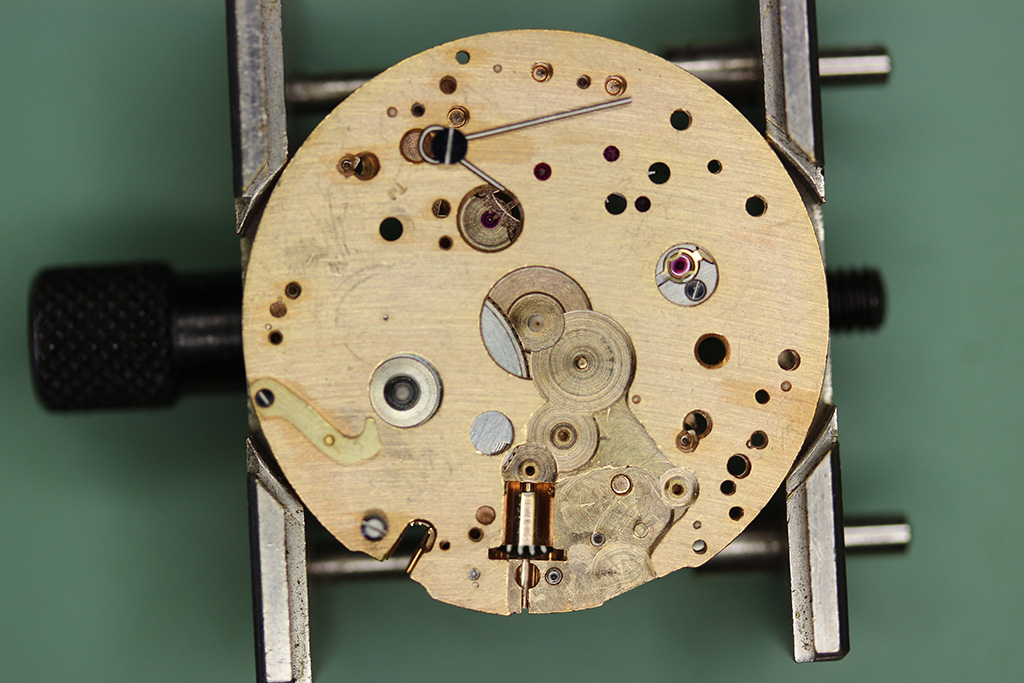
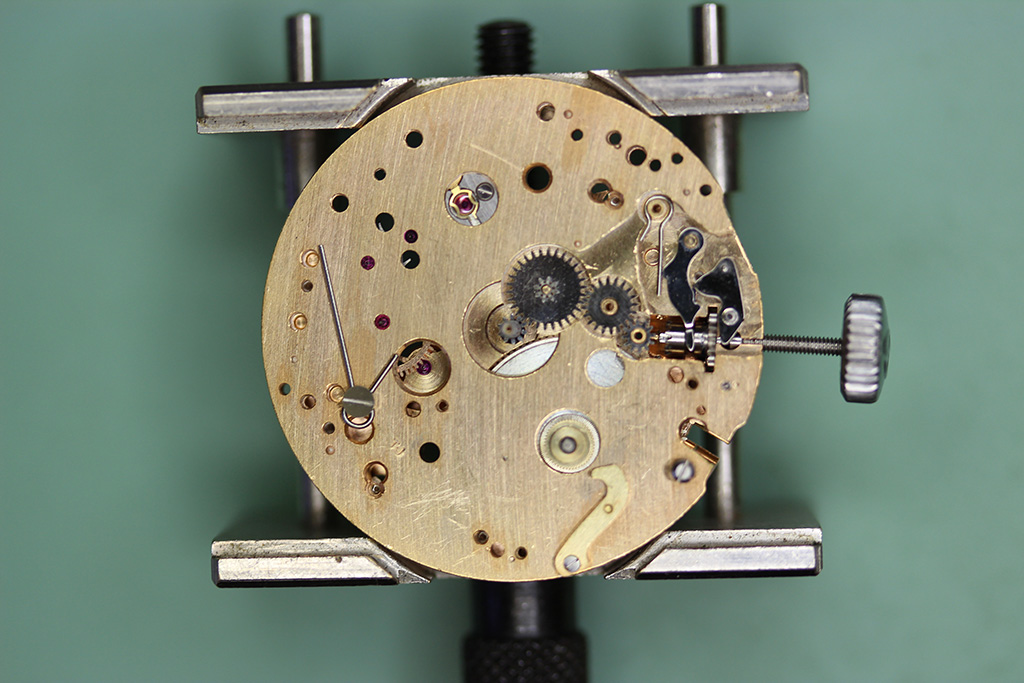
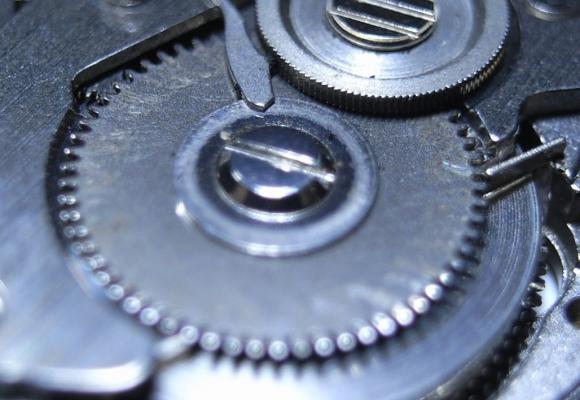
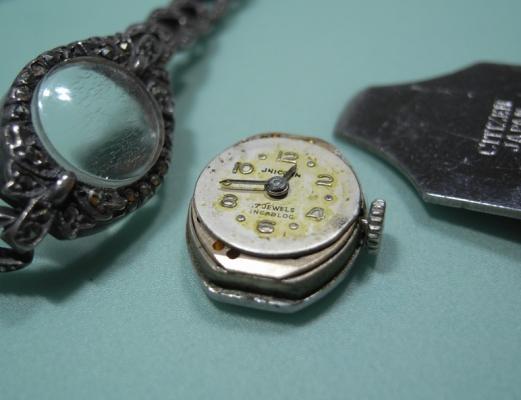
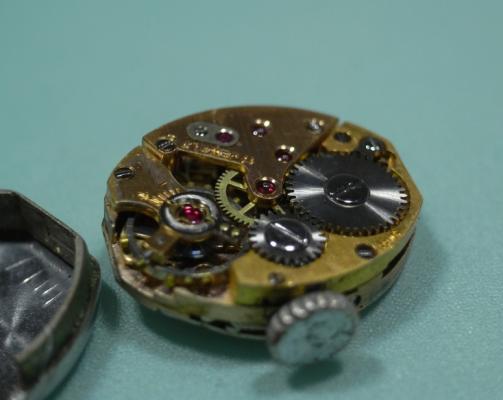
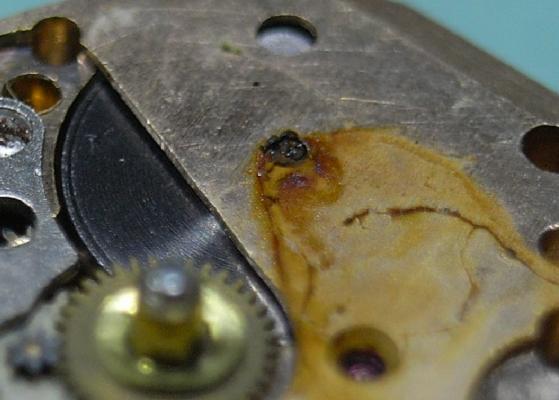
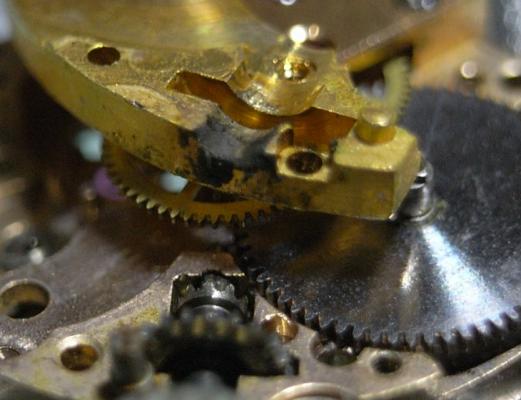
 Hi fellow watch friends, back again with another service for ya :) This one is a woman's bracelet watch that were popular 20-30 years ago ... your Mum probably had/has one of these. Now when I say this movement is small, I mean it's small ... I don't think I used a driver over 0.8mm on it. And being small doesn't mean they are more difficult, but you need good optics to make working on them enjoyable. ...yes, that's my thumb! I've worked on a few of these now, and they commonly are held in the Caseback as seen below. So be careful when removing them so as you don't damage the Dial or Hands. Once I had removed the movement from the Caseback, I saw my very first indication that this job wasn't going to be a quick service. Notice that Ratchet Screw? Here's a close-up of it. I see this way too much servicing watches, and it's become my pet hate. King Kong has worked on it before me, and has tighten every screw up to 50 foot/pound ... Arrghhh!! :growl: Needless to say, when it came to removing nearly all the screws, it was a battle; but the battle was lost with the Ratchet Screw and I was unable to undo it (even after applying some heat) and it seared off ... so 1x Barrel Abor and 1x Ratchet Screw to be ordered. My mentor and trainer is a 78 year old master watch maker, and the VERY first thing he impressed on me is not to over tighten screws. "We are not torqueing down head bolts on a V8, these threads are less an a millimeter across ... use a light touch son.", is what he told me. I'm sure some old hands here can also add their words on wisdom on this matter. Ok, end of rant :P Back to the service... Firstly, I removed the Hands and Dial, and as per normal with this style of watch, there was moisture ingress. These types of watches aren't very well sealed from the elements (no Caseback Seal, no Stem Seal), so you'll nearly always encounter some rust removal in the servicing. This looked fairly light corrosion, and I was hoping it hadn't gone further into the movement. Here's one of the reasons this watch stopped. Heavy corrosion around the lower Barrel Arbor pivot. Next, as always, I removed any tension from the Mainspring, and removed the Balance and Pallets. Next I removed the Ratchet (shearing the screw in the process), Crown Wheel, and then removed the Barrel Bridge. As you can see, very old, dry, and dirty grease. Main Plate looked in good shape, which saves a LOT of work ... if this thing is covered in rust you've got your work cut out for you. Pulled the Cannon Pinion, and happily it wasn't ceased, but also is still a good fiction fit. Here's a reference photo of the Gear Train setup once the Bridge is removed. Again all looks good and no damage to any of the pivots or jewels. Stem, Clutch, and Setting wheel are filthy and typical of a non-sealed movement of this age. On to the Keyless Work, and unfortunately rust had gotten in here too. The Yoke Spring was the worst of it, but with a little time and effort, it cleaned up fine. Setting Lever needed a little work too :unsure: So the parts are in the cleaner, having a bath for the first time in 20+ years. And I've emailed the good people at Old Swiss Watch to get a new Arbor and Ratchet Screw. I'll have the assembly post up as soon as the parts arrive, and get this little movement tickin like new! Thanks for reading my post, and I hope this helps and was informative. :)


-
I have an Omega Speedmaster Cal. 1861 purchased in 2007. I haven't yet had it serviced and I am starting to feel some guilt. However, the watch is keeping +2 over 24 hours so I am very happy with that and it gets about a months wrist time a year. I am concerned because I don't want to interrupt what is essentially a good thing right now - I know this can't go on forever. Anyway, Omega repairers say every 5 years and as long as 10 years for a co-axiel like the SMP or PO. Anyway can I get your thoughts on it.
-
So, I'm new and love disassembling things. I have an 18/0s ladies waltham watch I'm about to tear into to. So at what point do I just clean the assembled watch? This is a very small watch. I just don't want to be spinning my wheels trying to take apart and reassemble something even the pros don't do.
-
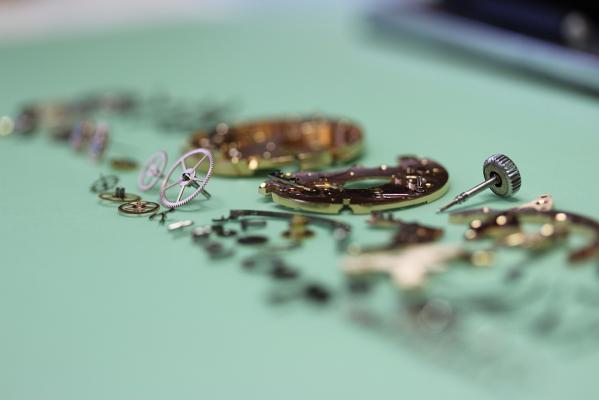
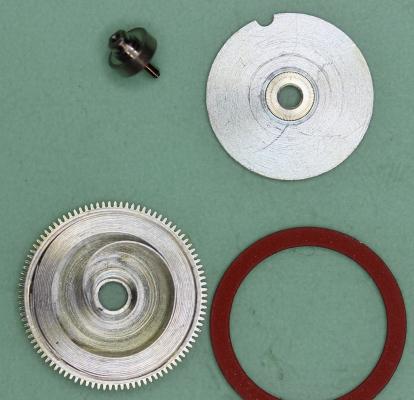
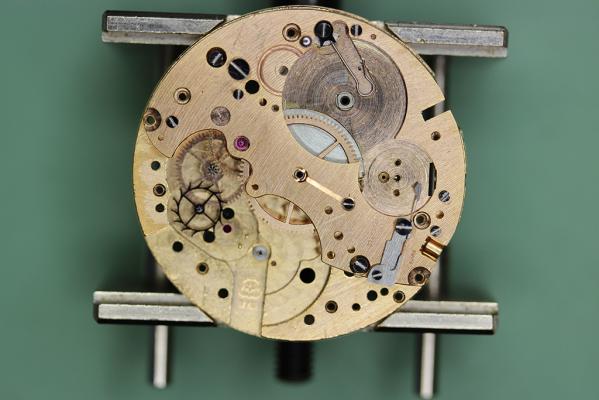
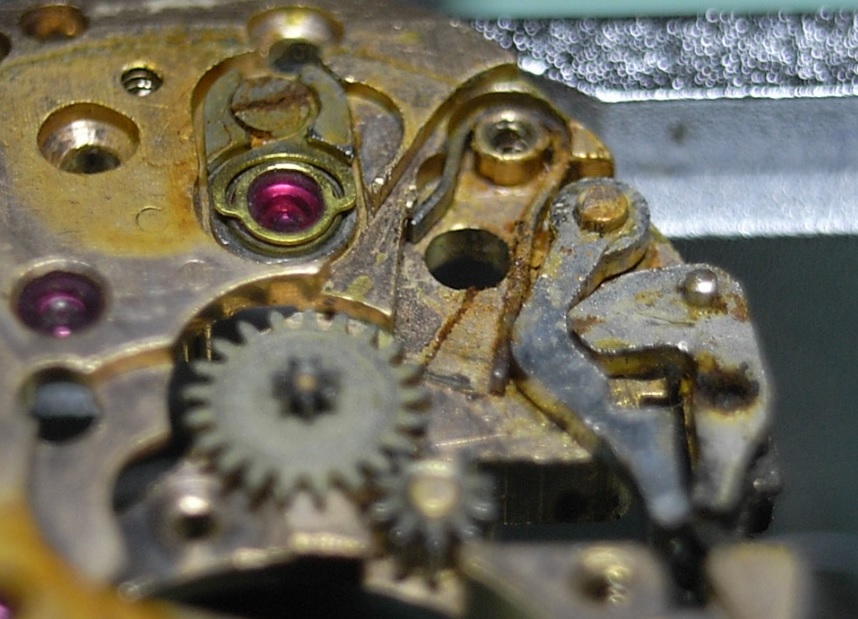
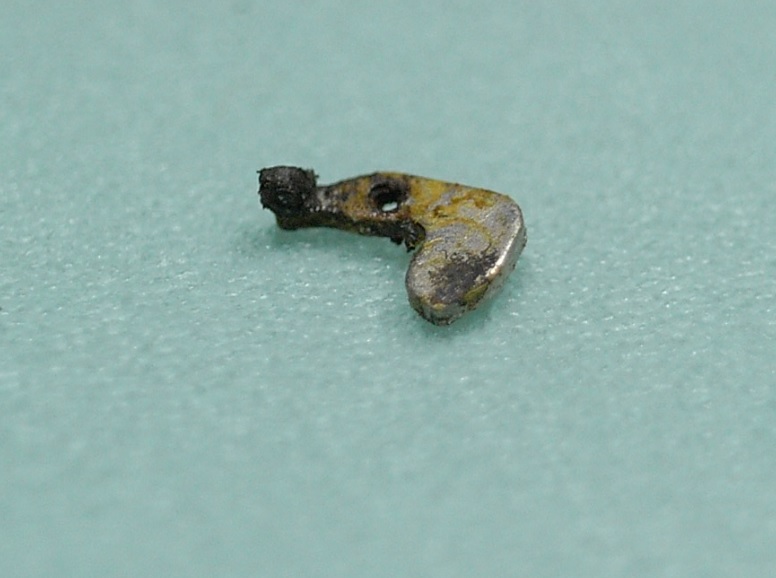
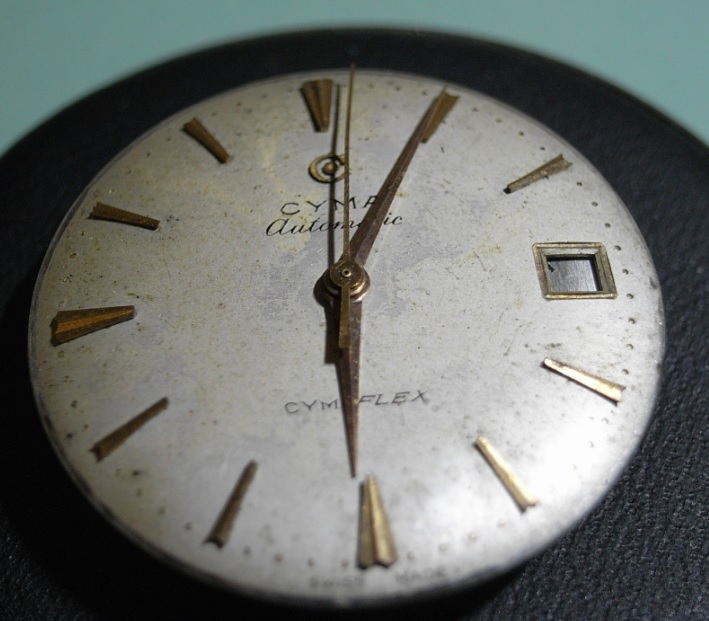
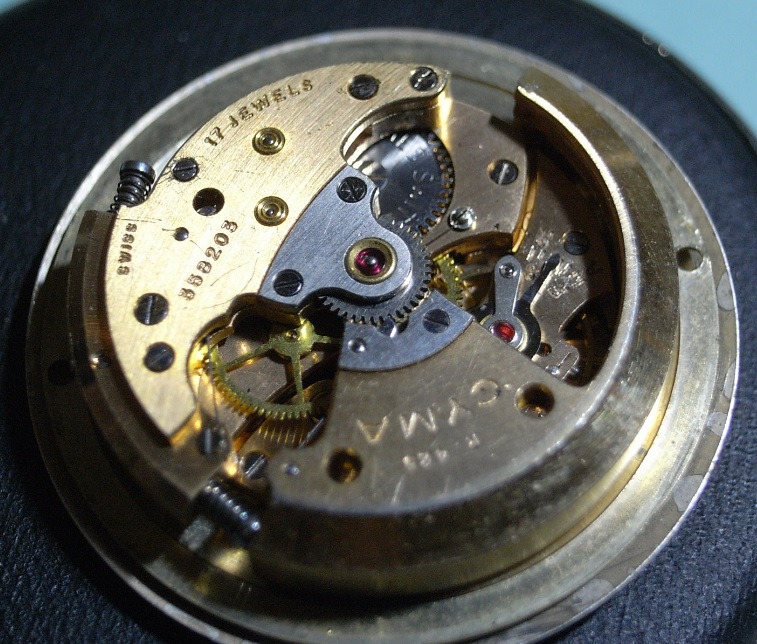
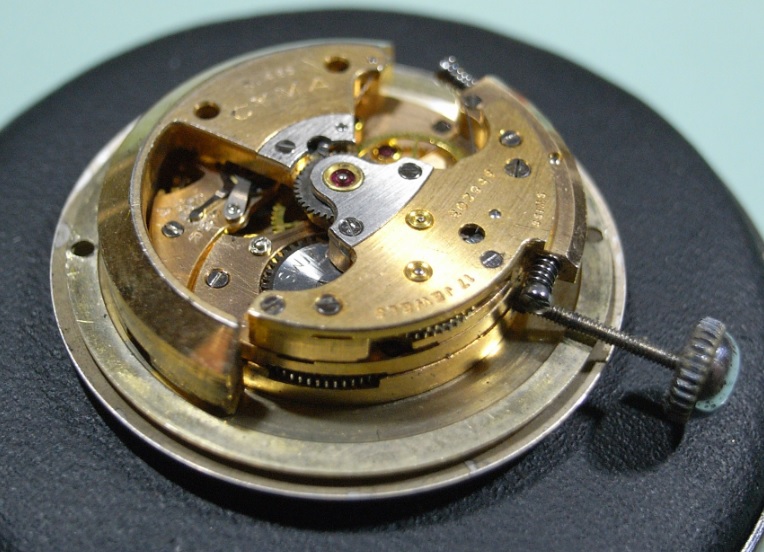
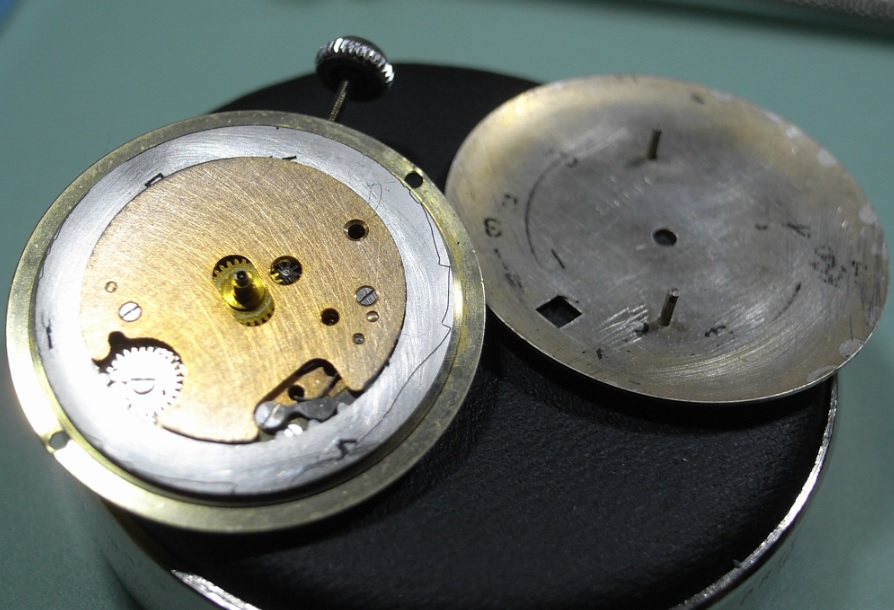
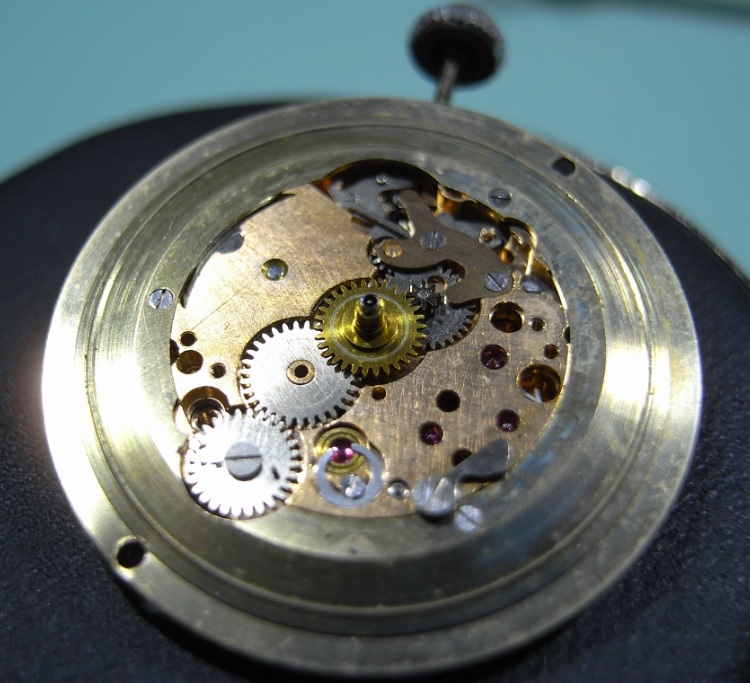
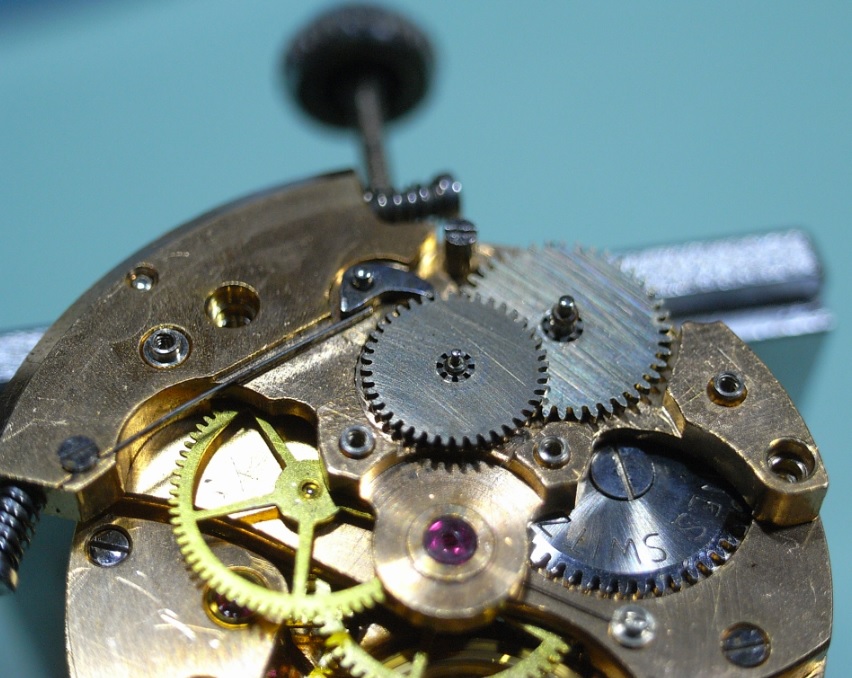
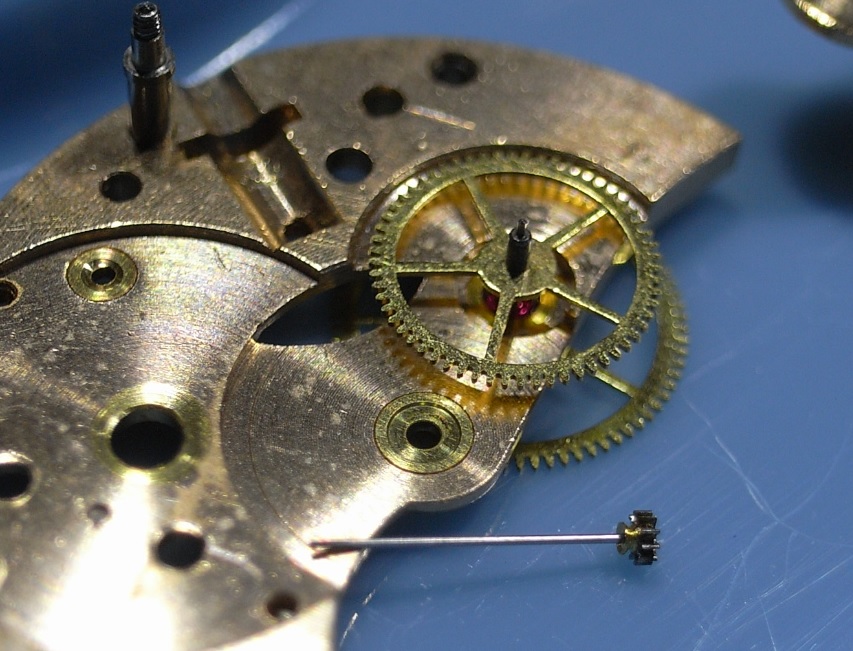
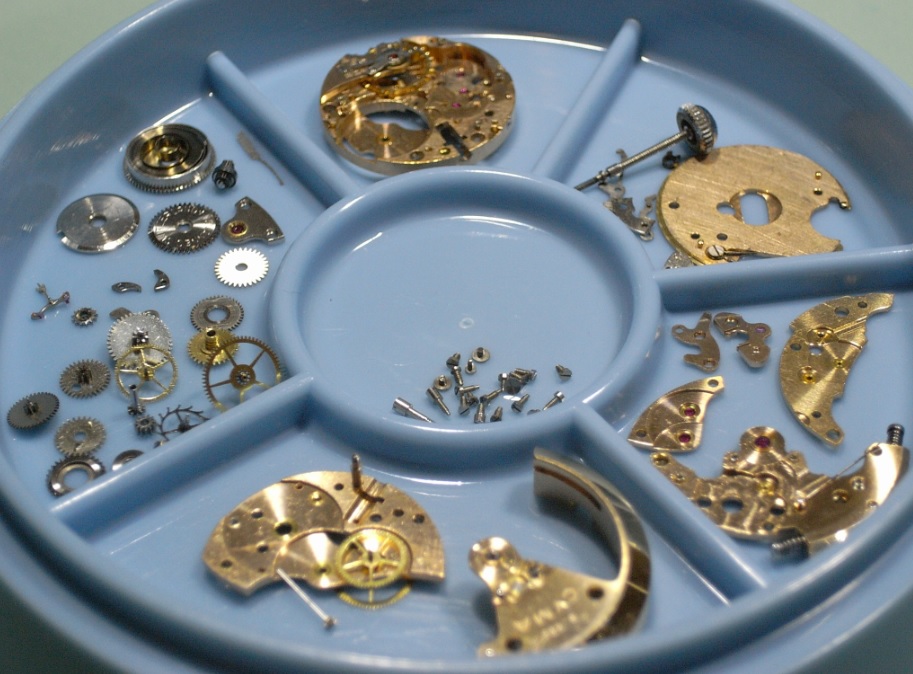
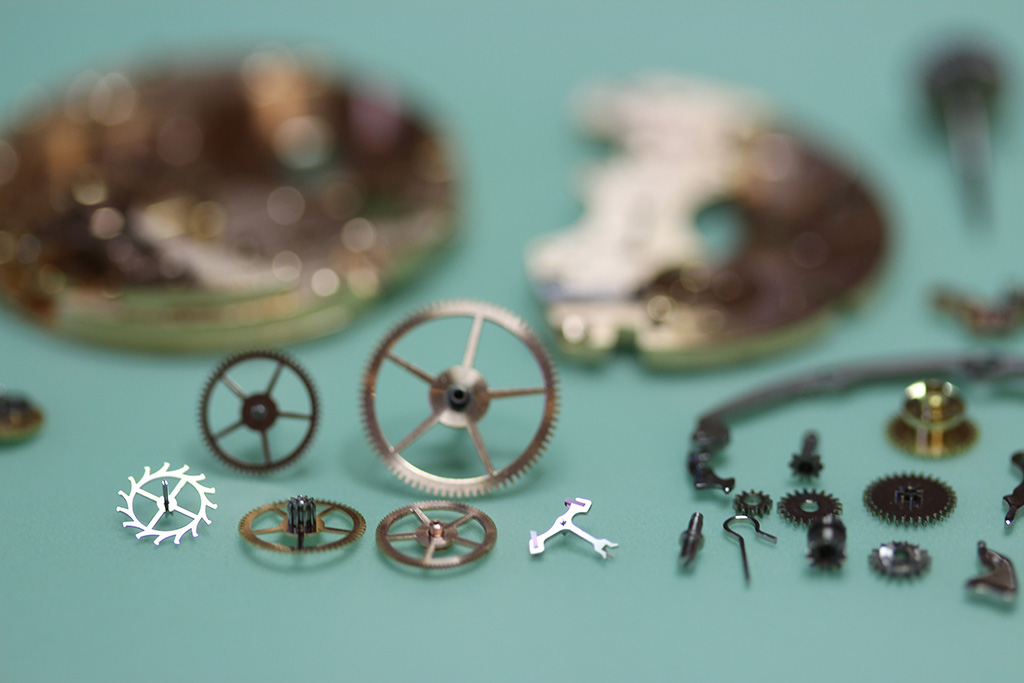
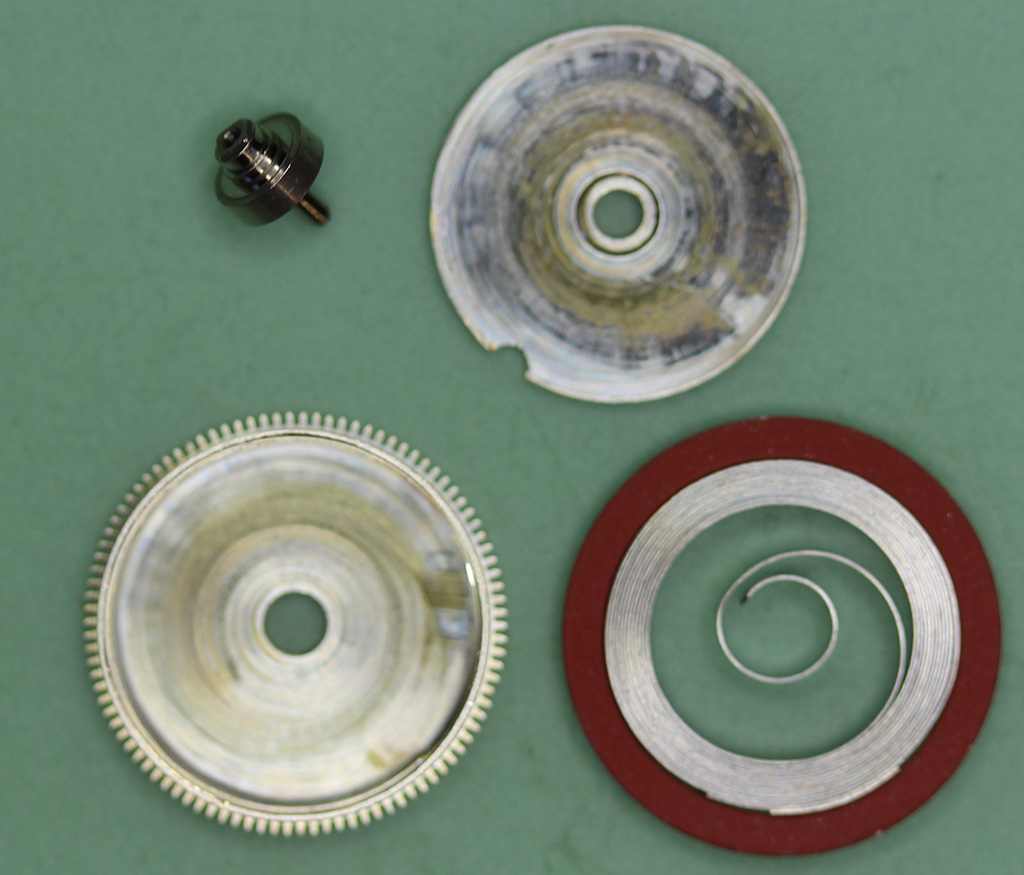
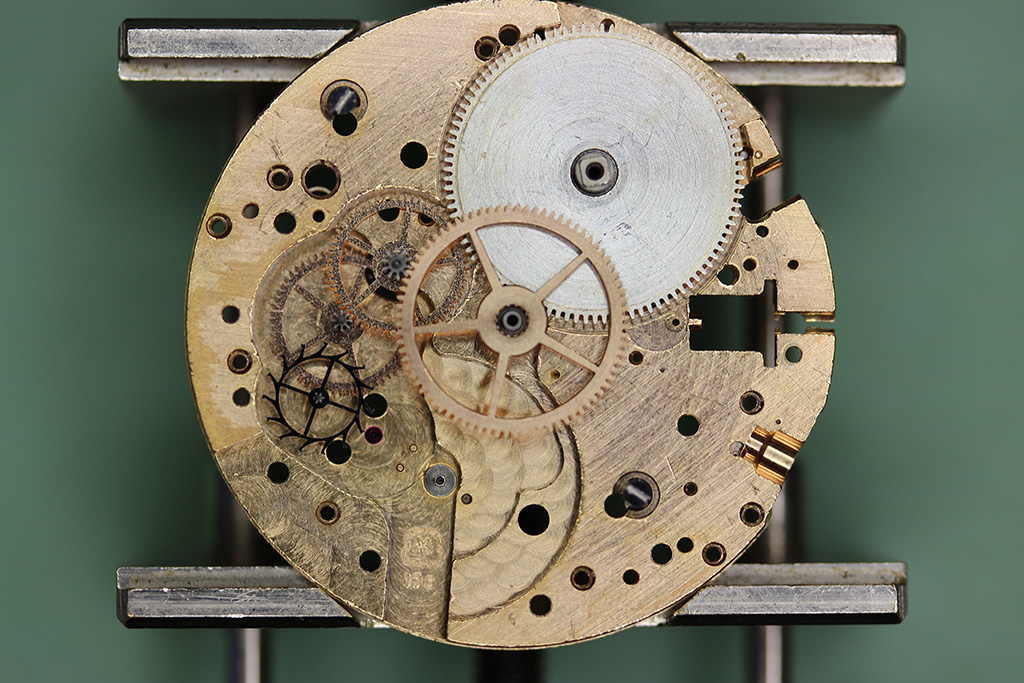
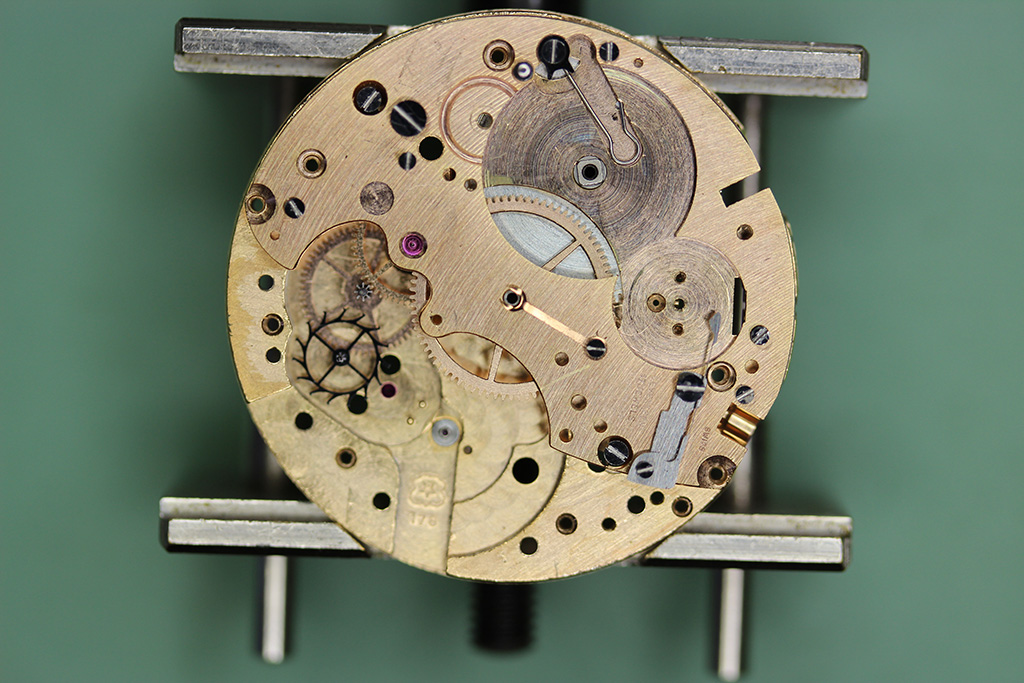
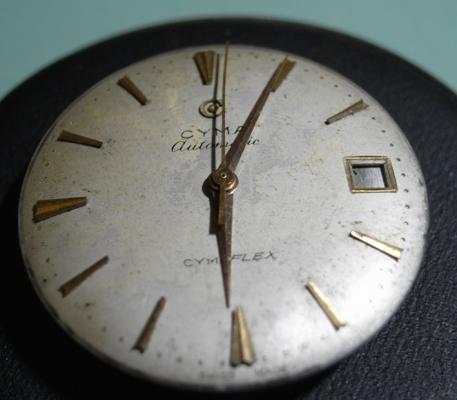
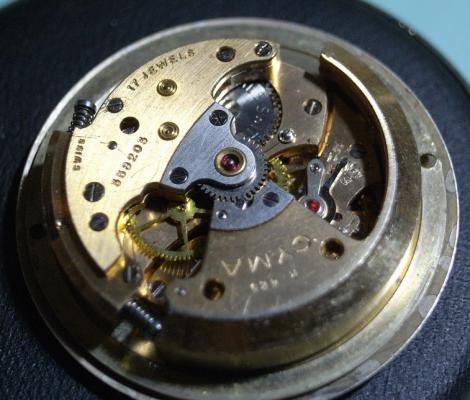
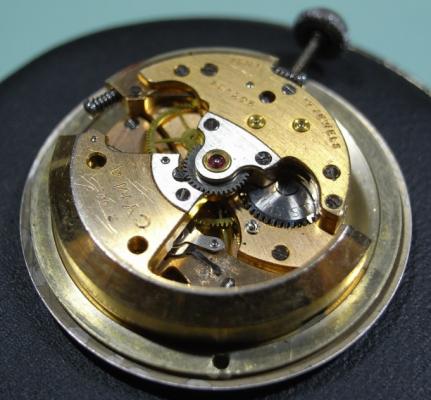
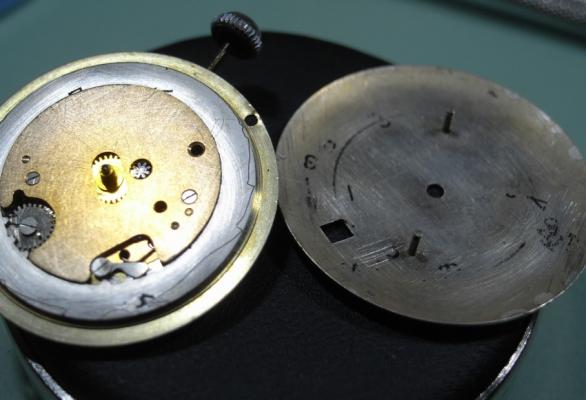
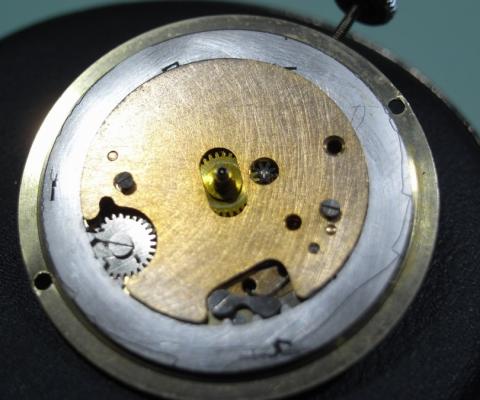
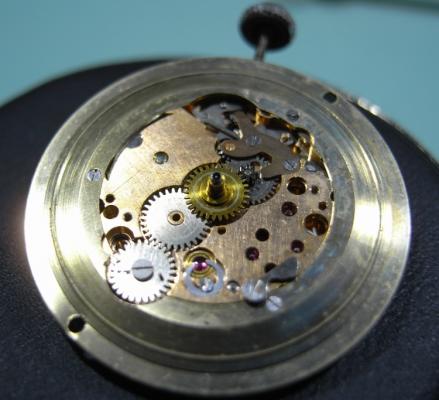
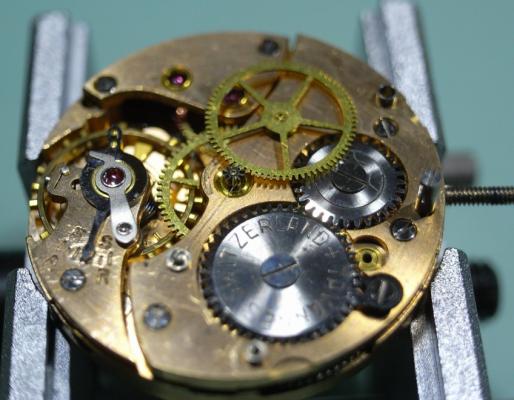
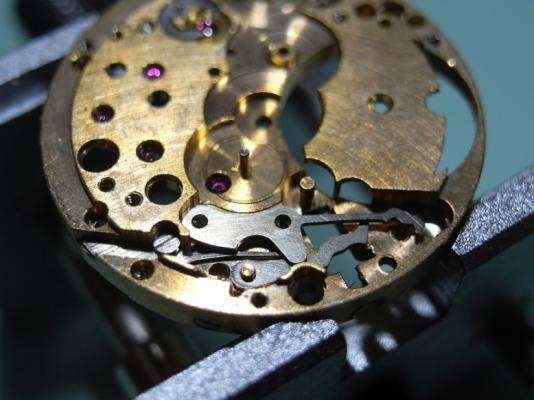
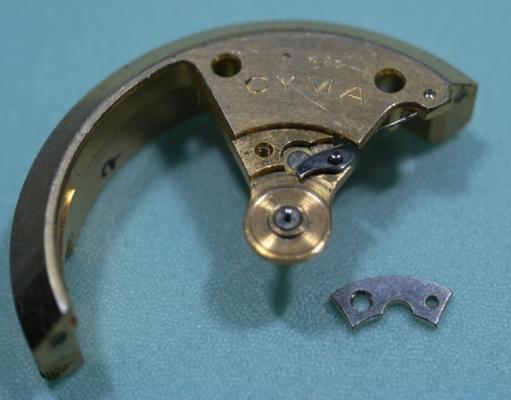
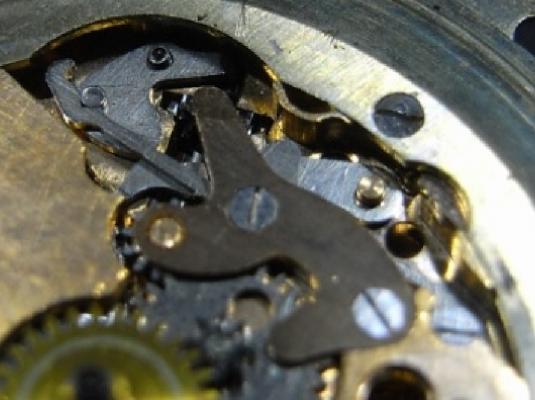
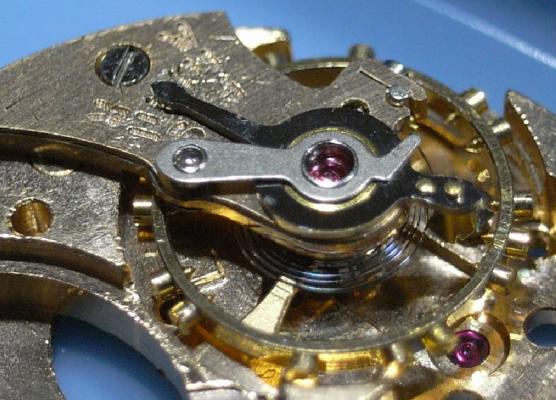
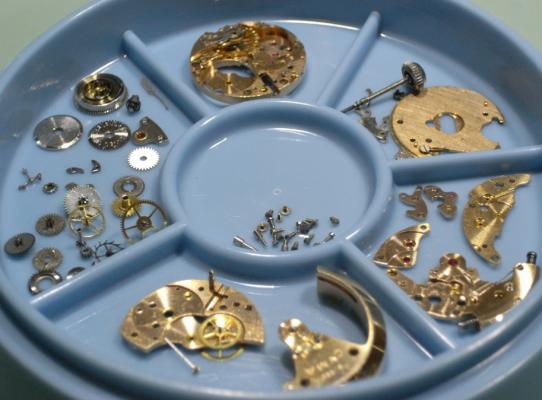
Cyma R-425 Service "Things that go bump in the night" Here's something a little different, that I hope you all find enjoyable to follow. A Bump Automatic by Cyma ... the R-425 Movement. This watch was purchased by my Uncle in Sierra Leone back in the 60's, in his wilder younger years. The automatic winding feature of this movement using a "Bump" system, which these days is a very rare method of winding the mainspring As you may have noticed in the first picture of the Dial, the numbers on the Date Wheel have been removed. Once I pulled off the Dial I could see that the number have peeled off the Date Wheel and adhered to the back of the Dial. I have no idea how this happened :wacko: One possible explanation is that the previous person who serviced this watch cleaned the Date Wheel with something that over time loosened the paint and glued it to the back of the Dial ... who knows :blink: As you can see, whatever they used completely stripped the painted ... absolutely nothing remained on the Date Wheel. Anyhooooo, on with the disassembly ... The plate that secures the Date Wheel on this movement is a full plate, held by 2 screws. Once removed we can see the Keyless Work and the Calendar Work. All very standard looking with no surprises. Here's a closer reference photo of the Keyless work. Once the Calendar and Keyless Work was removed I flipped the movement over and removed the Bump Weight. The Automatic Gear Train Bridge was the next to be removed. Once the bridge was removed the Automatic Work is revealed. Notice the fine spring system for the Ratchet Arm of the Automatic Work ... this same spring system is used throughout I removed the plate that holds the Auto Work revealing the next layer containing the Barrel Bridge and Gear Train Bridge. The Gear Train is your typical looking train except for the having the Second Wheel come up through the plate and running to a long fine pinion. Very interesting and you rarely see this type of complexity in your average movement these days. The shock system for the Balance is one I'm not familiar with and would appreciate some input from the old hands on how to clean and oil this correctly. And yes, the Balance is 18ct Gold ... very purrety B) Here are all the parts after cleaning ... LOTS of plates in this movement, they fill half the parts tray :P Stay tuned for the assembly!! And I may have a solution for the Date Wheel ... :ph34r:


-
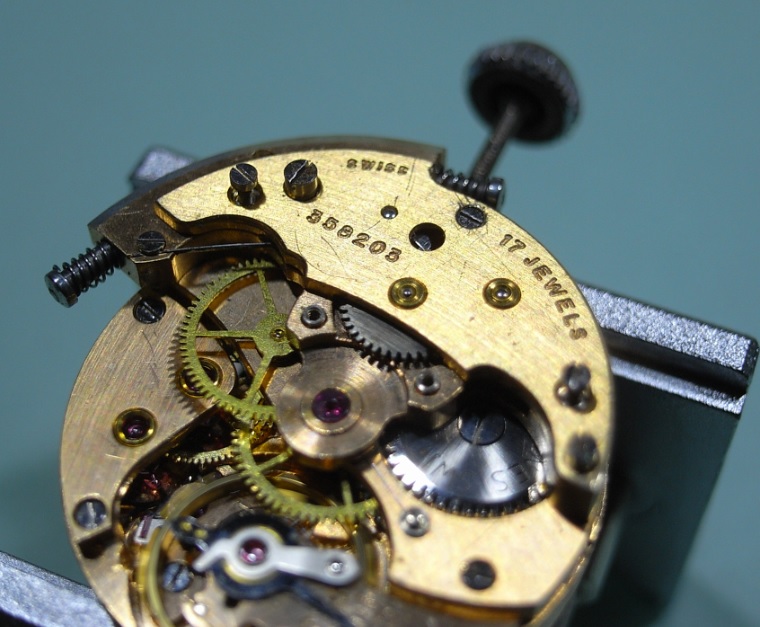
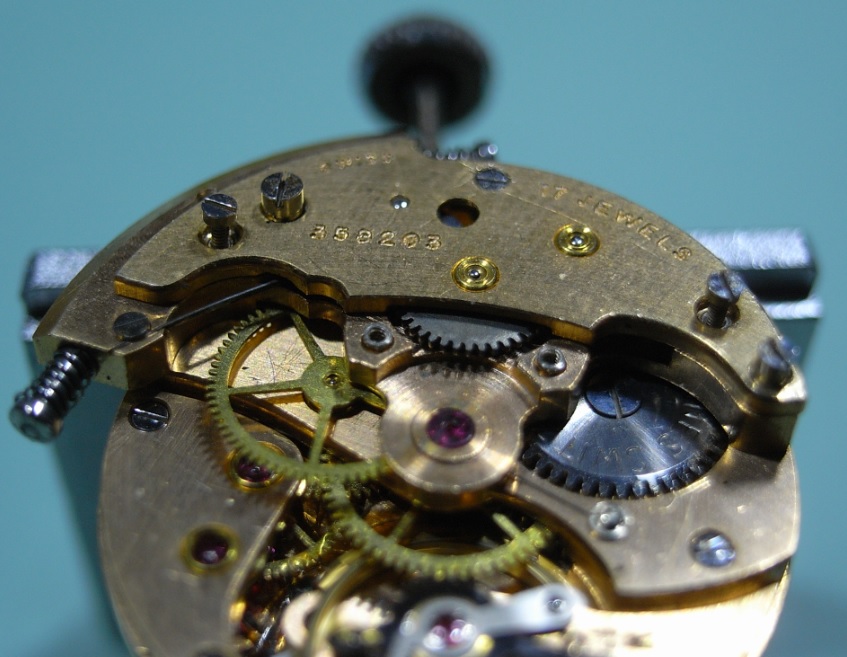
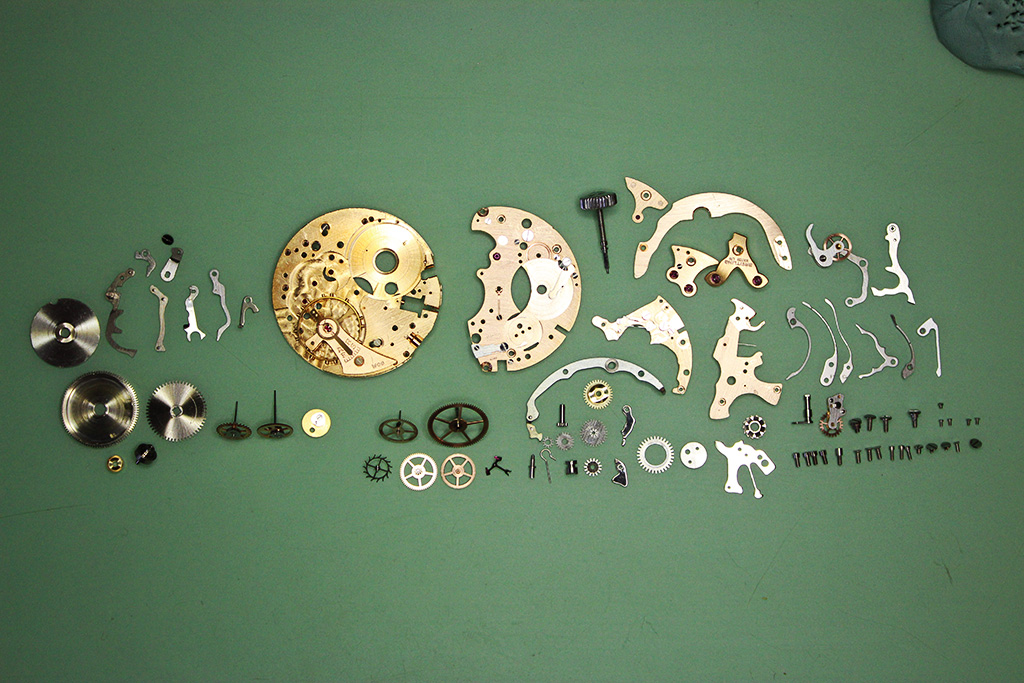
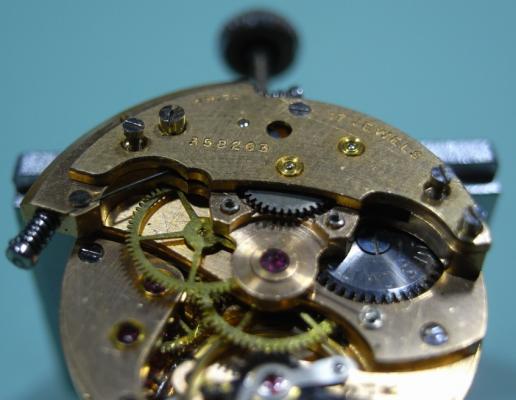
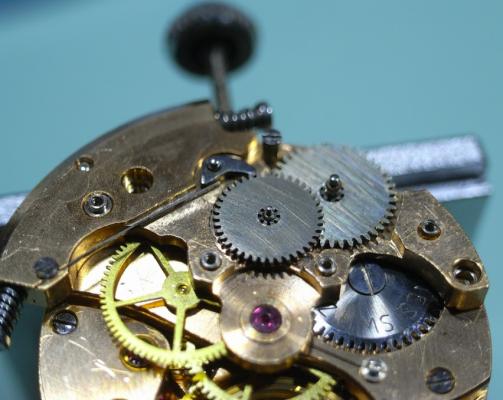
 Here we have some pictures of the Venus 178 chronograph movement which is on a vintage Breitling Navitimer. This watch had a broken mainspring and required a full strip-down and rebuild in order to fit it. Enjoy :)