Leaderboard


Popular Content
Showing content with the highest reputation on 04/25/24 in all areas
-
Good idea, working on it....2 points
-
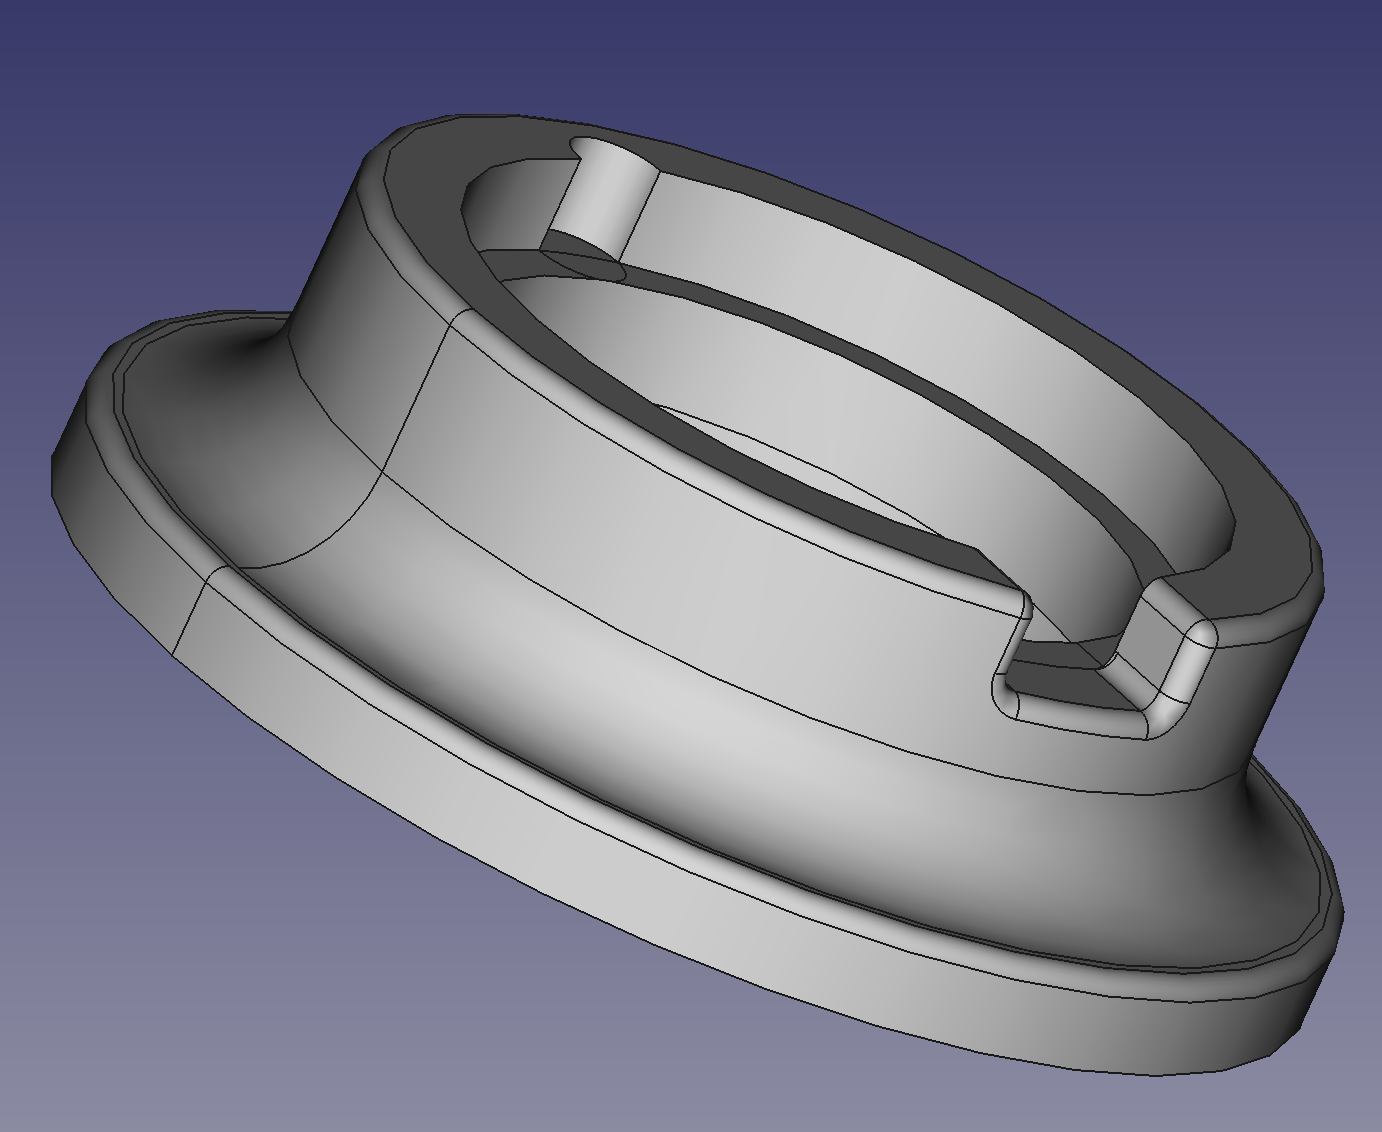
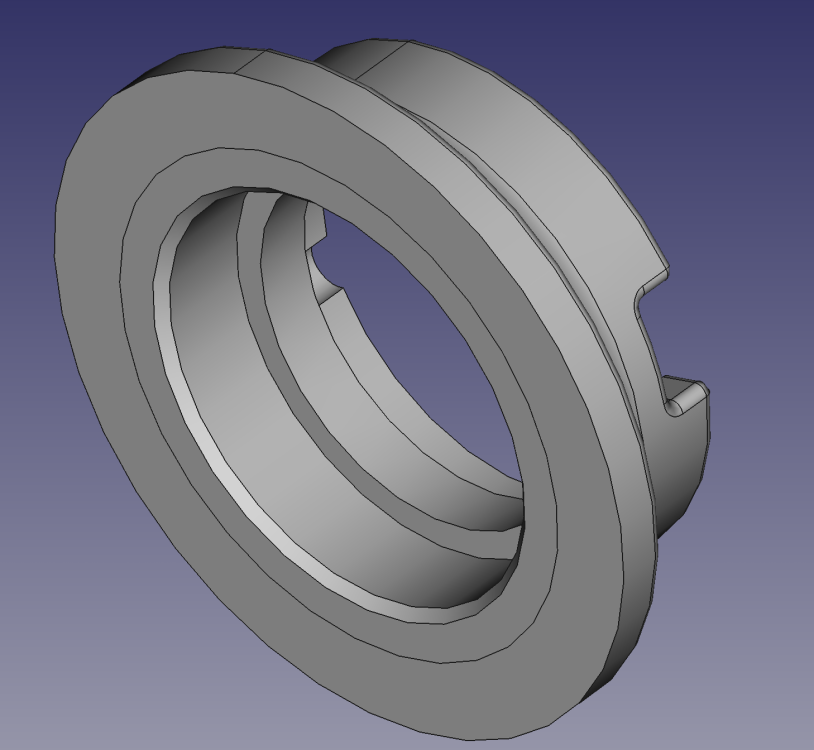
So here is the new base (v 2.1), I made it so that the base will fit over and swallow the stump of the hand pusher tool (or at least my clone of the tool), I also reduced the OD of the bottom skirt a little as it looked/felt a little large, here are a few pictures and the fake .pdf file which you need to convert to .zip once downloaded. The cut-out seen on the below image on the bottom of the base should swallow the OD (40 mm, +0.1 mm tolerance) of the stump and the height of the stump 9.5mm (measured to 9.1mm, but rounded to 9.5mm) - let me know if this works for your tool. Note, I think you may need to print supports for the new internal shelf created? Here is the fake .pdf for just the FreeCAD base file and 3mf files Modular Movement Holder.pdf Here is the fake pdf for complete set of the new base and ring FreeCAD/3mf files: Modular Movement Holder base and ring v 2.1.pdf However, I'm wondering how often you could use this feature, adding the dial usually increases the OD of the movement, so you would need a new (larger) adapter ring tuned to the OD of the dial and I wouldn't like to grip the dial in any kind of movement holder if It could be avoided for fear of damaging it. Maybe I'm misunderstanding you?

 1 point
 -
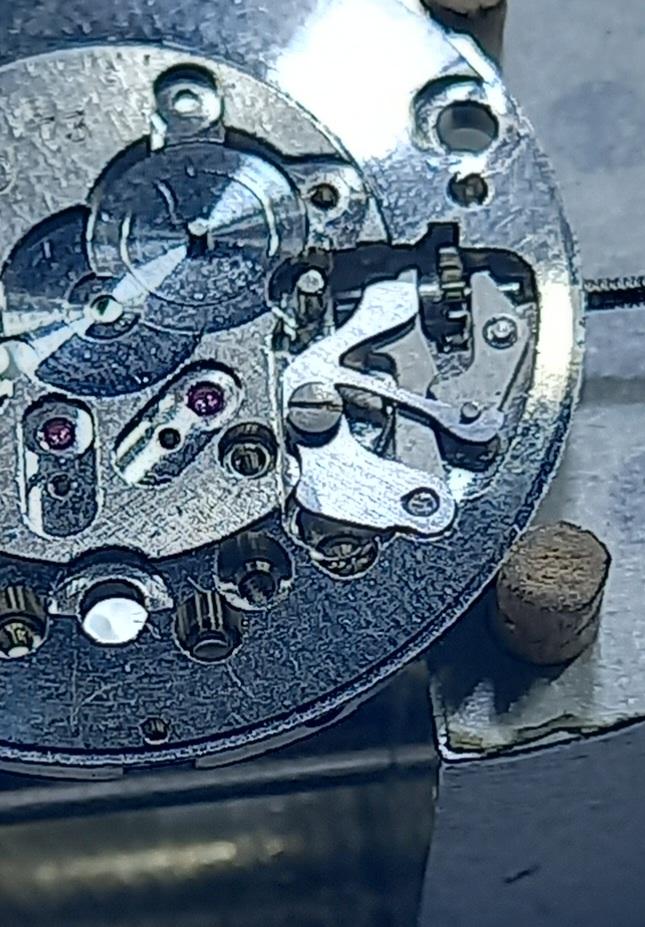
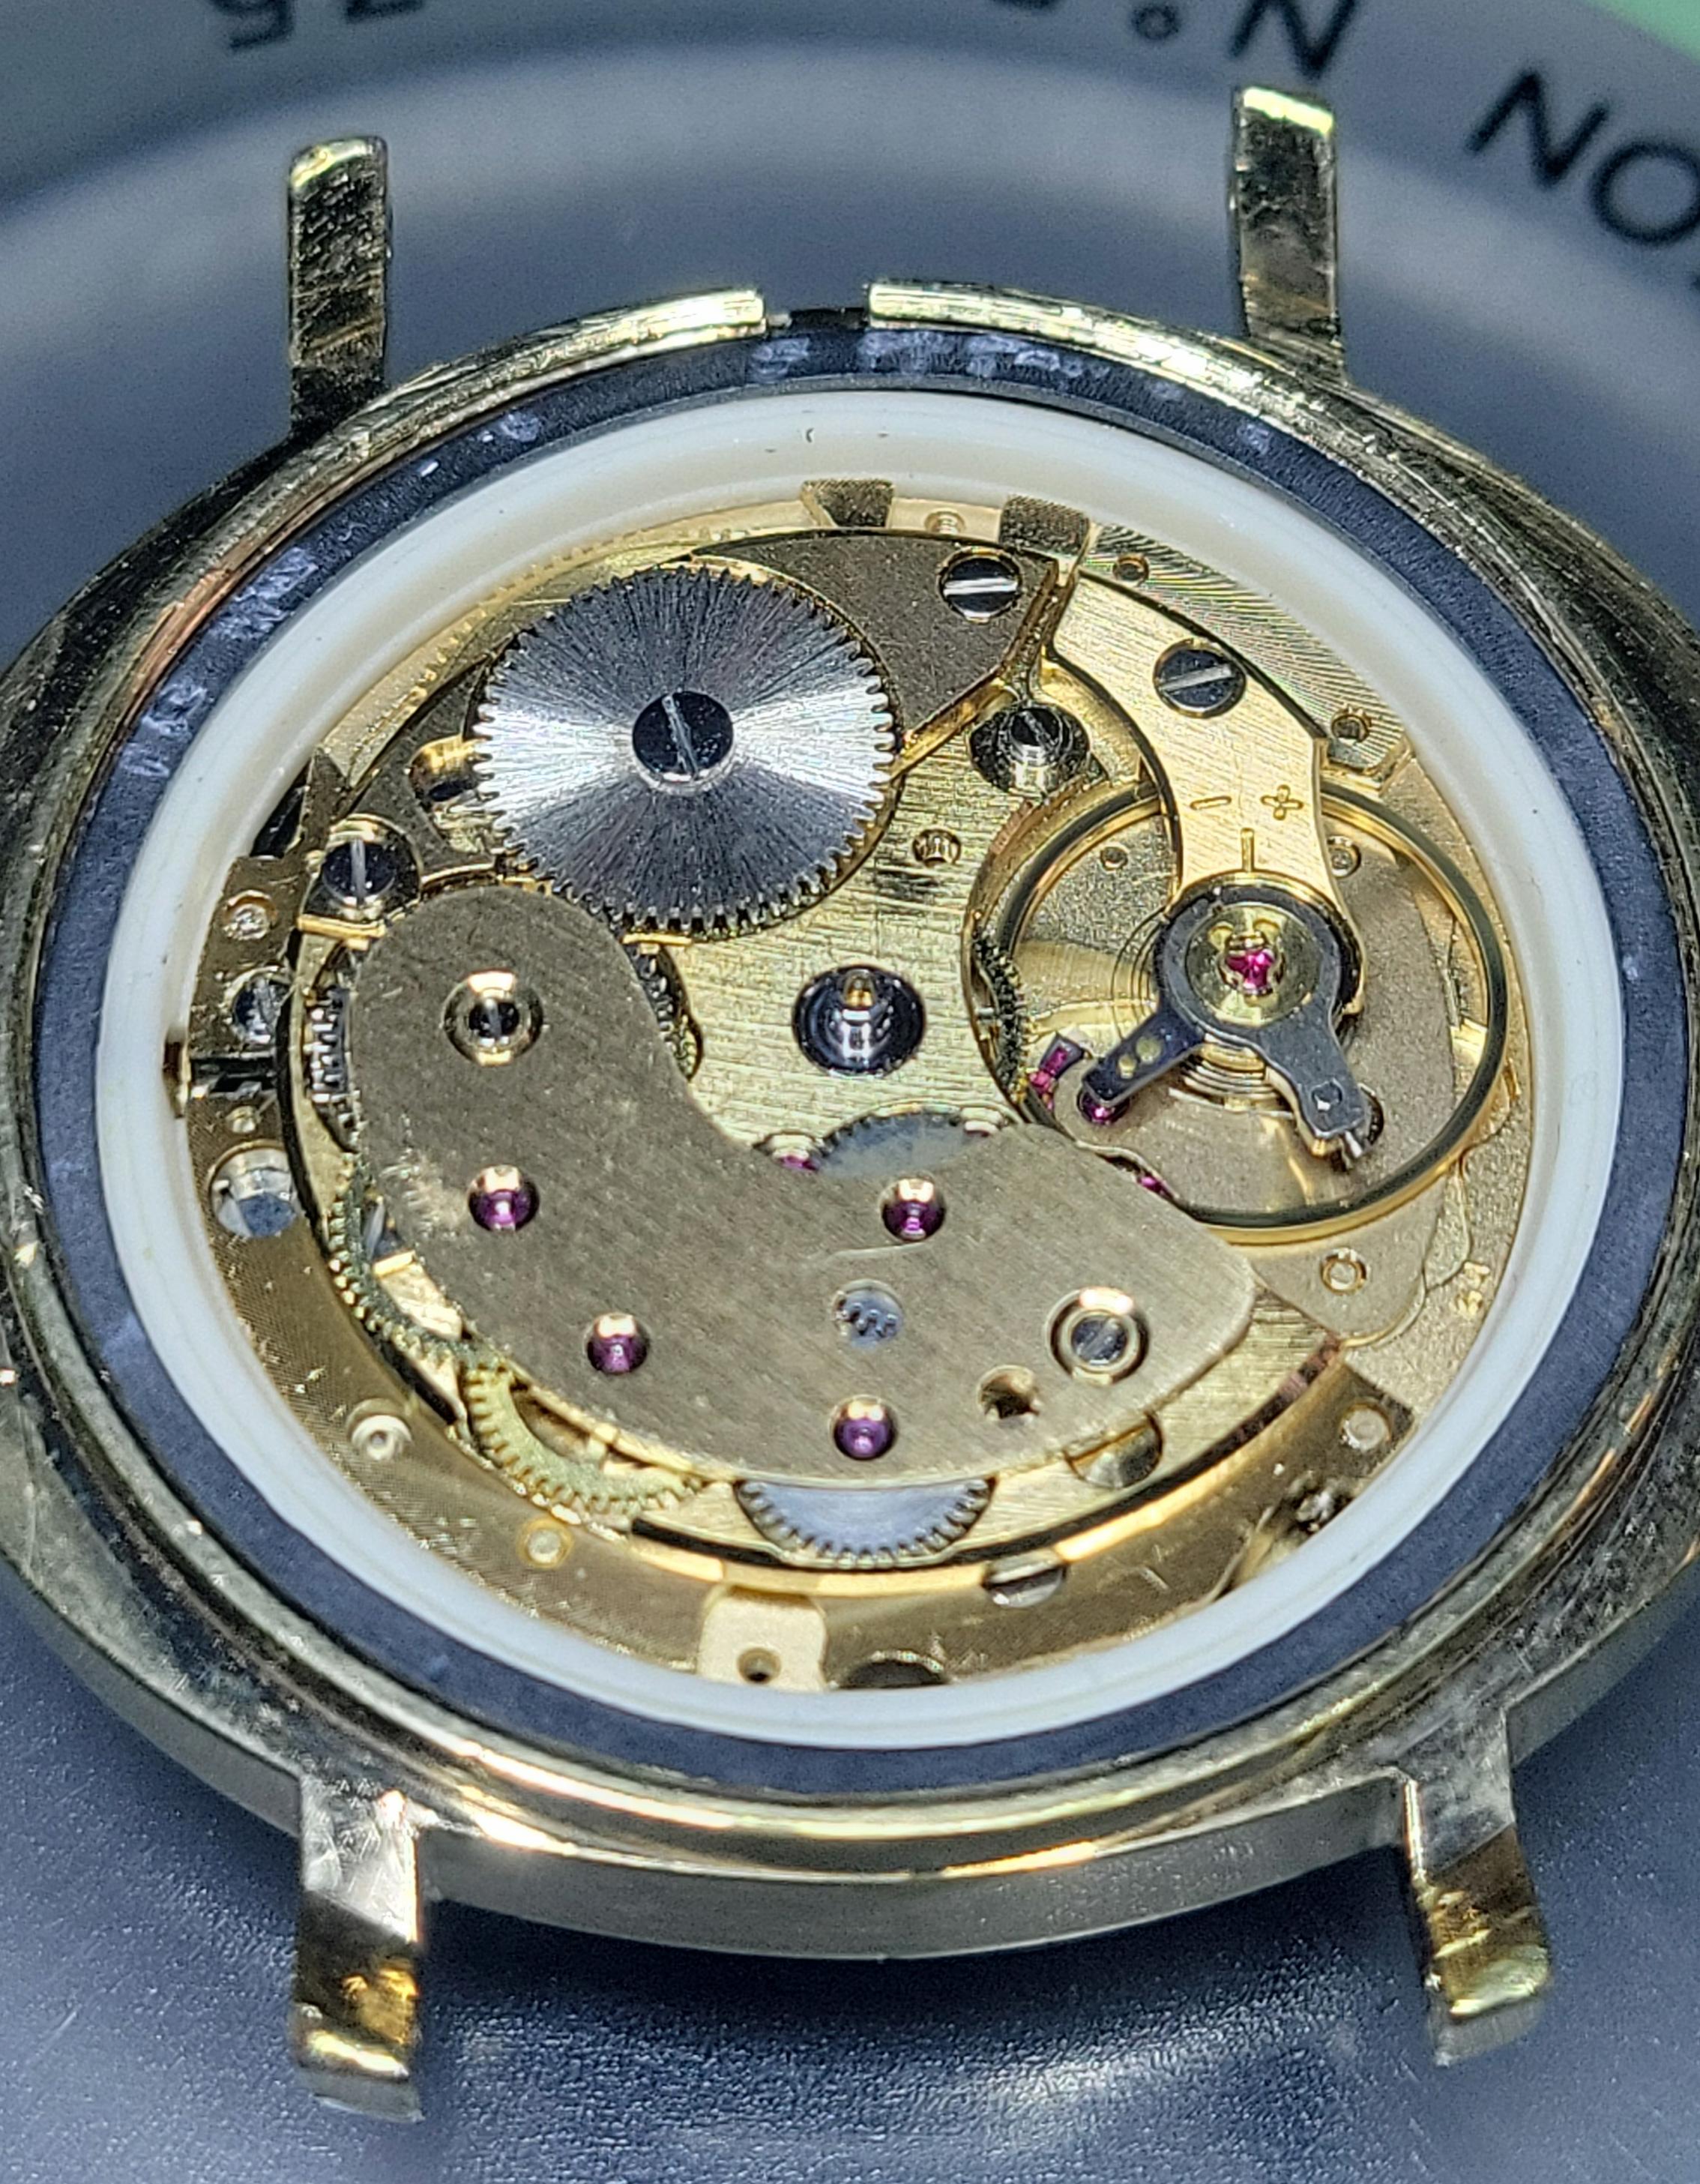
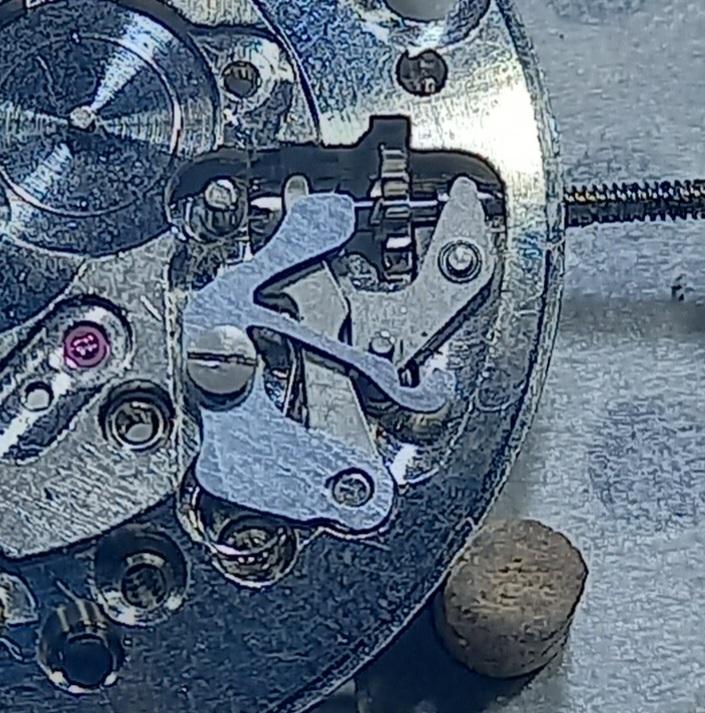
Hi Frank, you have dived headlong into the deep end. Hairspring work has to be the scariest thing a newbie has to tackle. Your hairspring appears to be bent and just putting it back into the regulator would not allow the balance to work properly. It might start oscillating but the performance would not be good. The proper thing to do is to unstud the hairspring, remove the hairspring from the balance, reinstall the hairspring on the stud carrier, reshape the endcurve and centre the collet to the balance jewel hole. This challenge would either make you or break you. Hope that you will be able to fix your watch. Welcome to the world of watchmaking. Watch this video. It think it'll give you an idea of the task ahead. From your 1st photo, I think you have a etachron type stud. Let me see if I can find a video on how to remove it from the arm.1 point
-
Have read of the Tech Sheet attached on the balance section page 12. It may be bent but until you reposition it back in the regulator pins you'll never know. Cheers CJ 4R35B_4R36A.pdf1 point
-
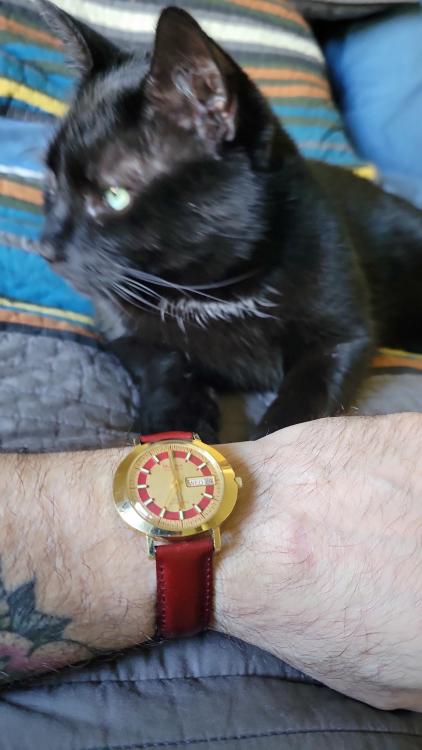
That is a stunning old Sea King you have! And a very cute little furry assistant also.1 point
-
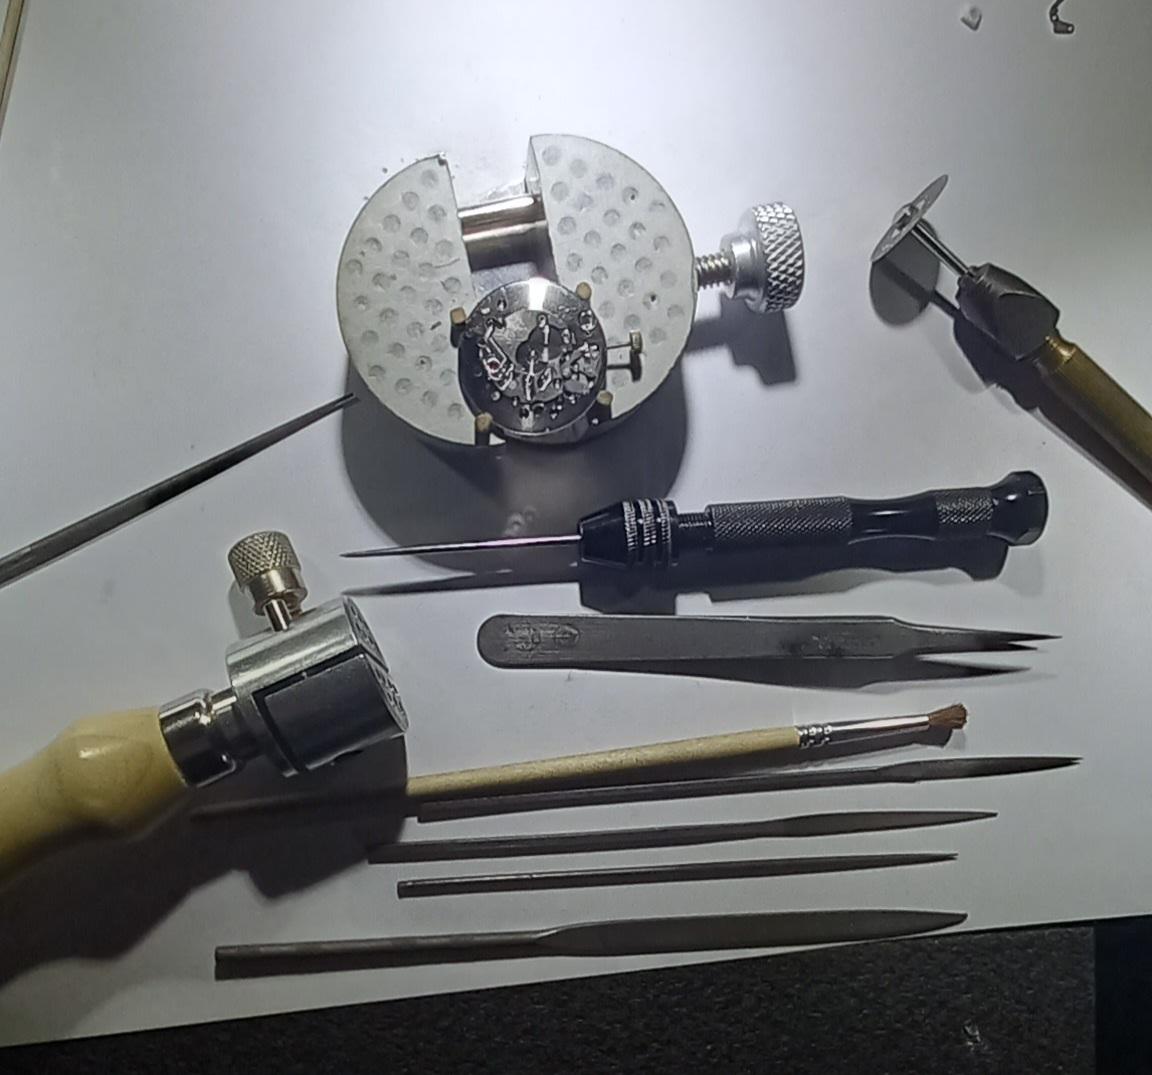
No problem with this steel breaking its a perfect working material, the difficult bit is figuring out where to put the detent on the spring. Yessss, at last not a watchmaker but a part maker. Its not perfect, i made 2 mistakes . I made a guess where to put the detent on the spring and i made it a bit too deep and the other was the drill bit caught a wobble on when i tried to open up the post hole 2 tenths. But it works perfectly with a solid click on crown set position so I'm well chuffed. Not sure what to do about harden and tempering it, seems to have a good spring action in its annealed state, do i leave it as is ?

 1 point
 -
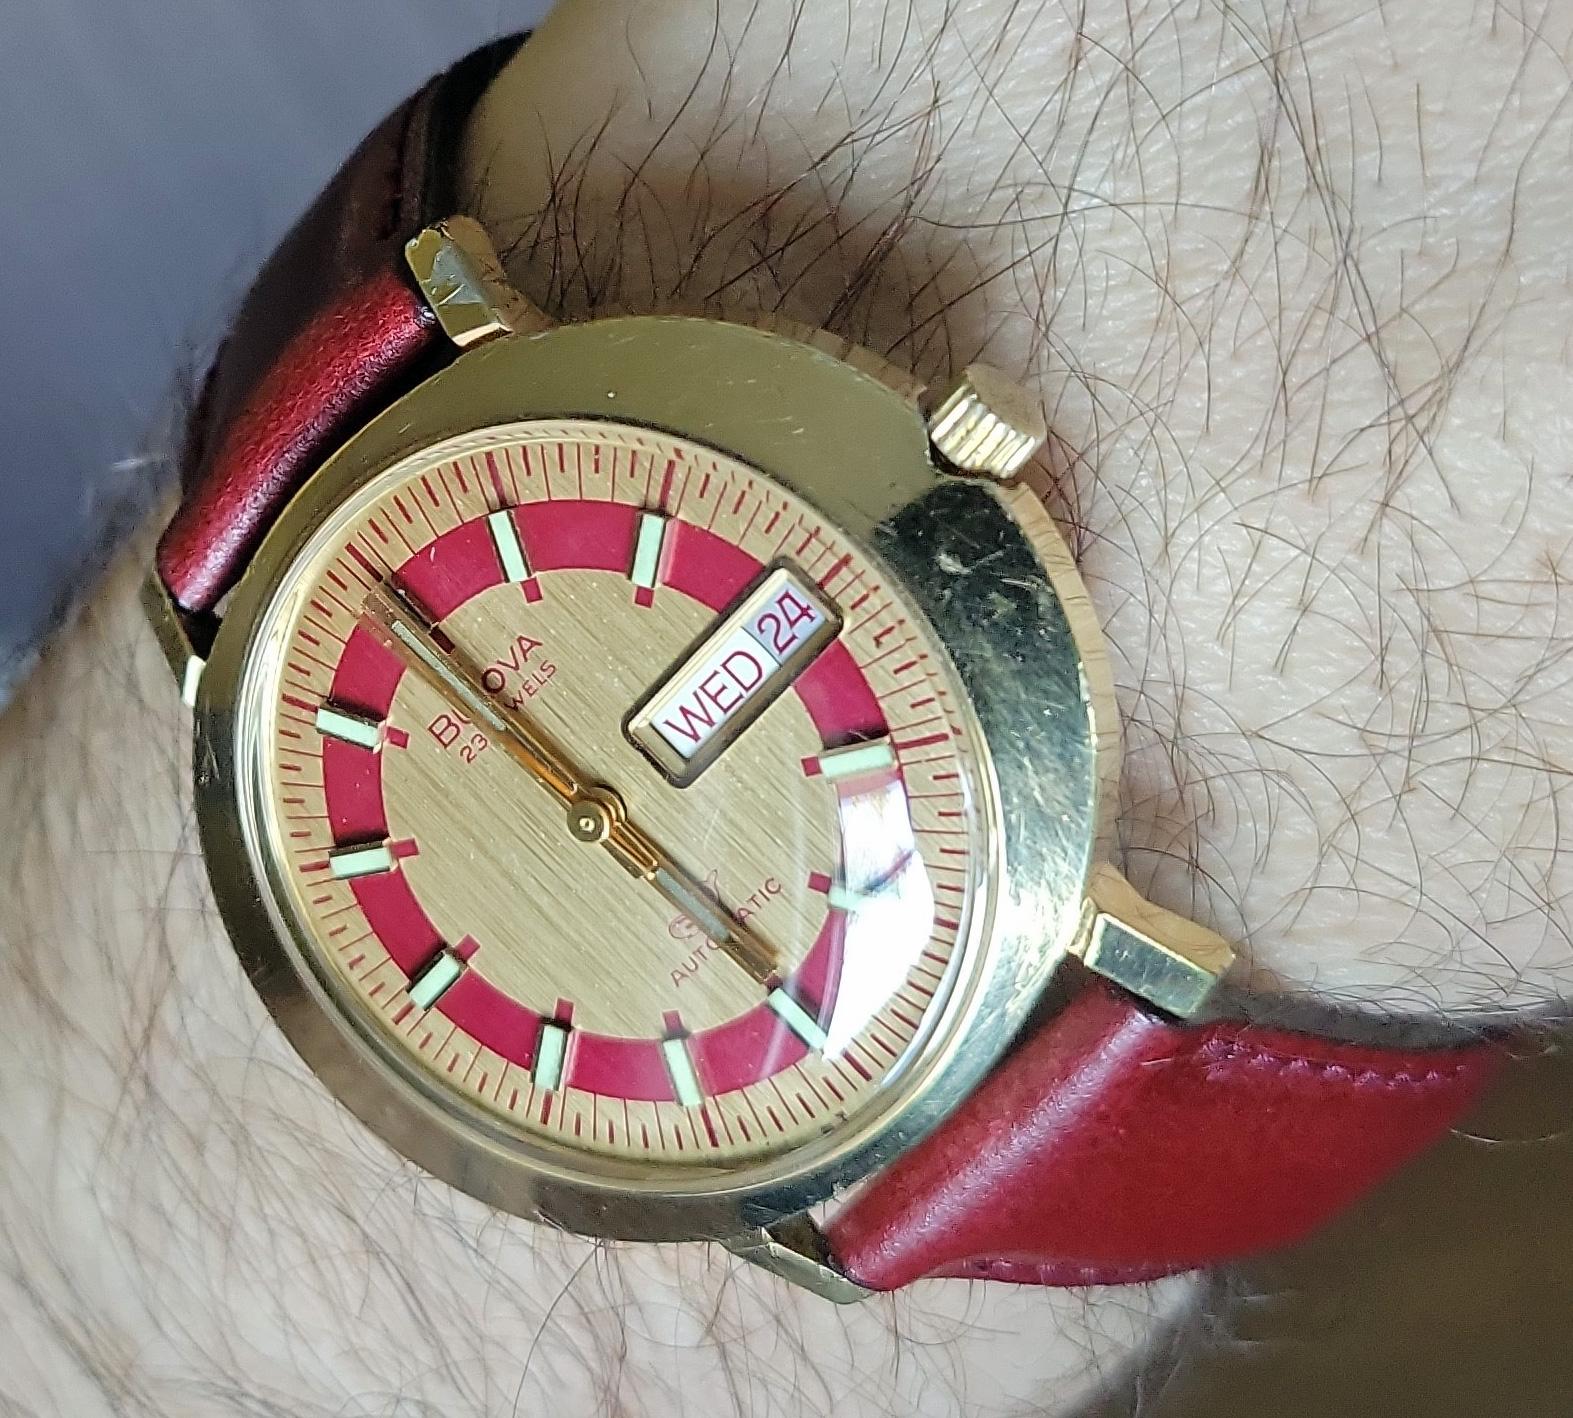
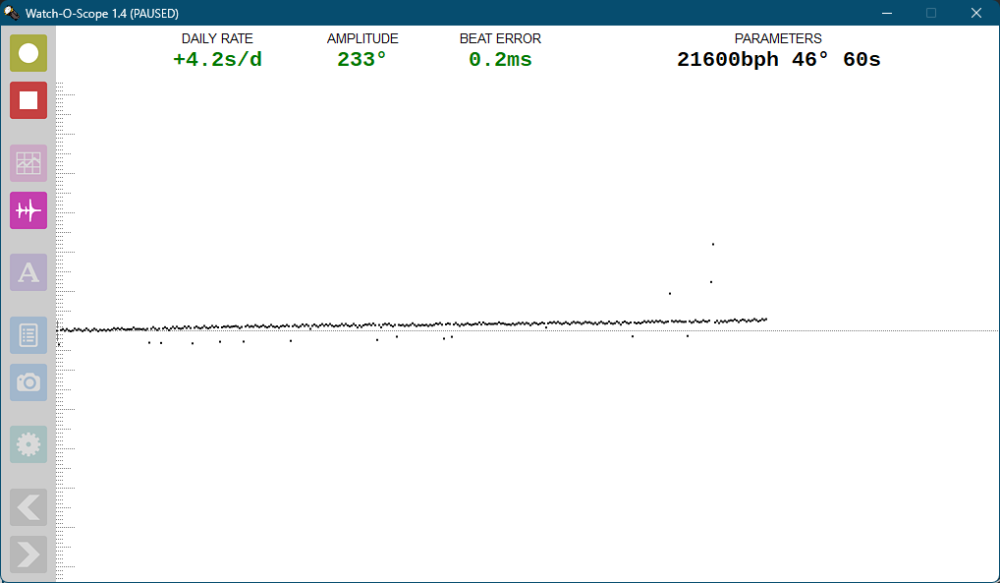
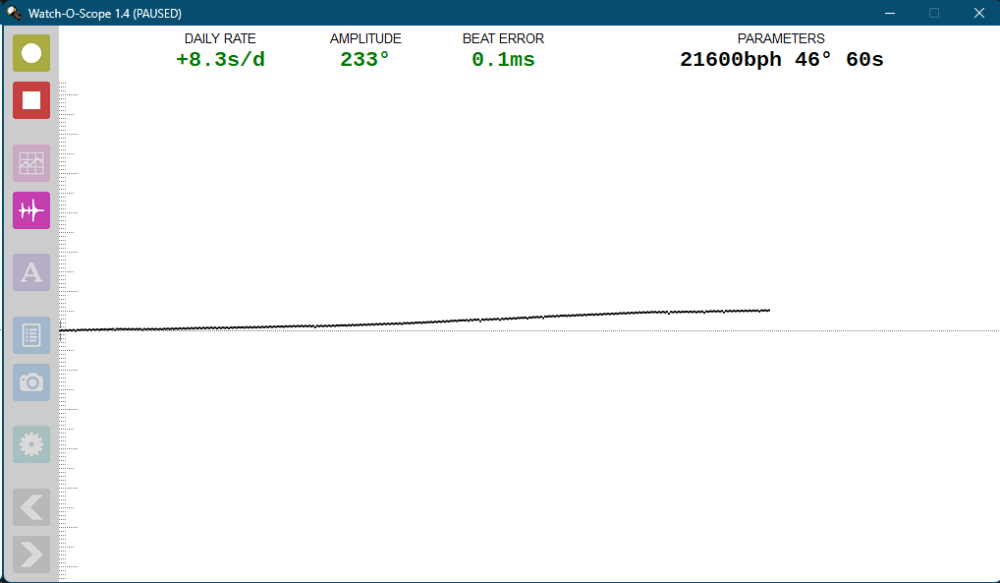
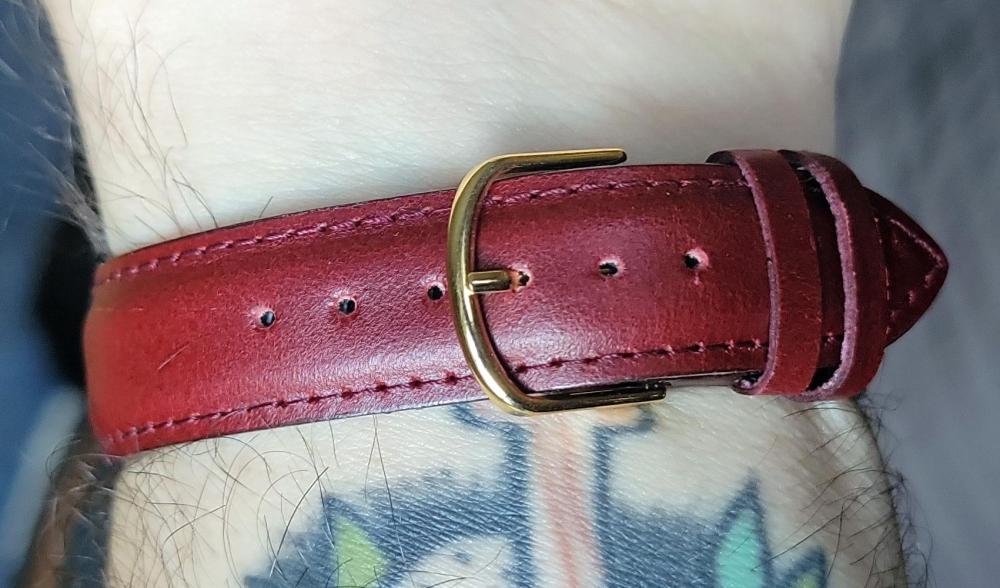
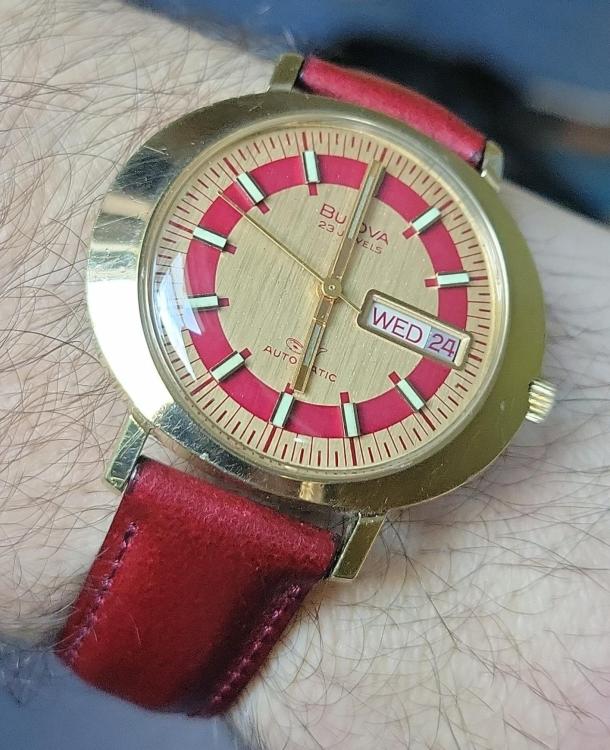
All right! Back together, cased up, and ready to rock and roll. Well, after I cased it and forgot the seconds hand. And then after I found a fitting back gasket. And then after I had to take it apart again because I forgot to put the automatic rotor back on. I did find a vintage Hadley Roma strap in red leather, as an homage to the original maroon strap. I'm super pleased with how it looks. Can I say chuffed as an American? I may polish the case at some point, but for now I'm just gonna wear it. And of course, pictures. First dial up, dial down, and on the wrist. Including the cat tax.


 1 point
 -
If the metal was twice as thick, it wouldn't snap so easily. The thickness is governed by the space available so you can't use thicker metal. If you glued two pieces together, the likelihood of snapping would be reduced. That's my theory anyway, could be wrong.1 point
-
Could you glue two pieces together for rigidity and separate after forming?1 point
-
I will advice to share the idea first here before doeing something to the movement1 point
-
I'm going to give that a go next time, thanks for a great idea @rossjackson01 One of my students uses this tool and swears by it https://www.cousinsuk.com/product/wheel-hand-roller-remover-bergeon?code=W1851 which is very like getting two sticks of pegwood under the wheel and rolling them in your fingers so they create a slight prying from underneath motion, I suppose. Maybe bind one end of the two sticks of pegwood so they are like tweezers.1 point
-
Take the measurements and go for which ever on you like. An assortment us under £11.1 point
-
Thanks for sharing! Valuable to know! Well deserved Ross!1 point
-
Yes, I was so chuffed when he acknowledged me. I'd heard him talk about it and I had tried it by gentle pressure under the wheel and rolling the Pegwood in my fingers. The wheel rose. His way was to rotate the whole wheel in reverse. Learn something every time from Kalle.1 point