Leaderboard


Popular Content
Showing content with the highest reputation on 01/16/23 in all areas
-
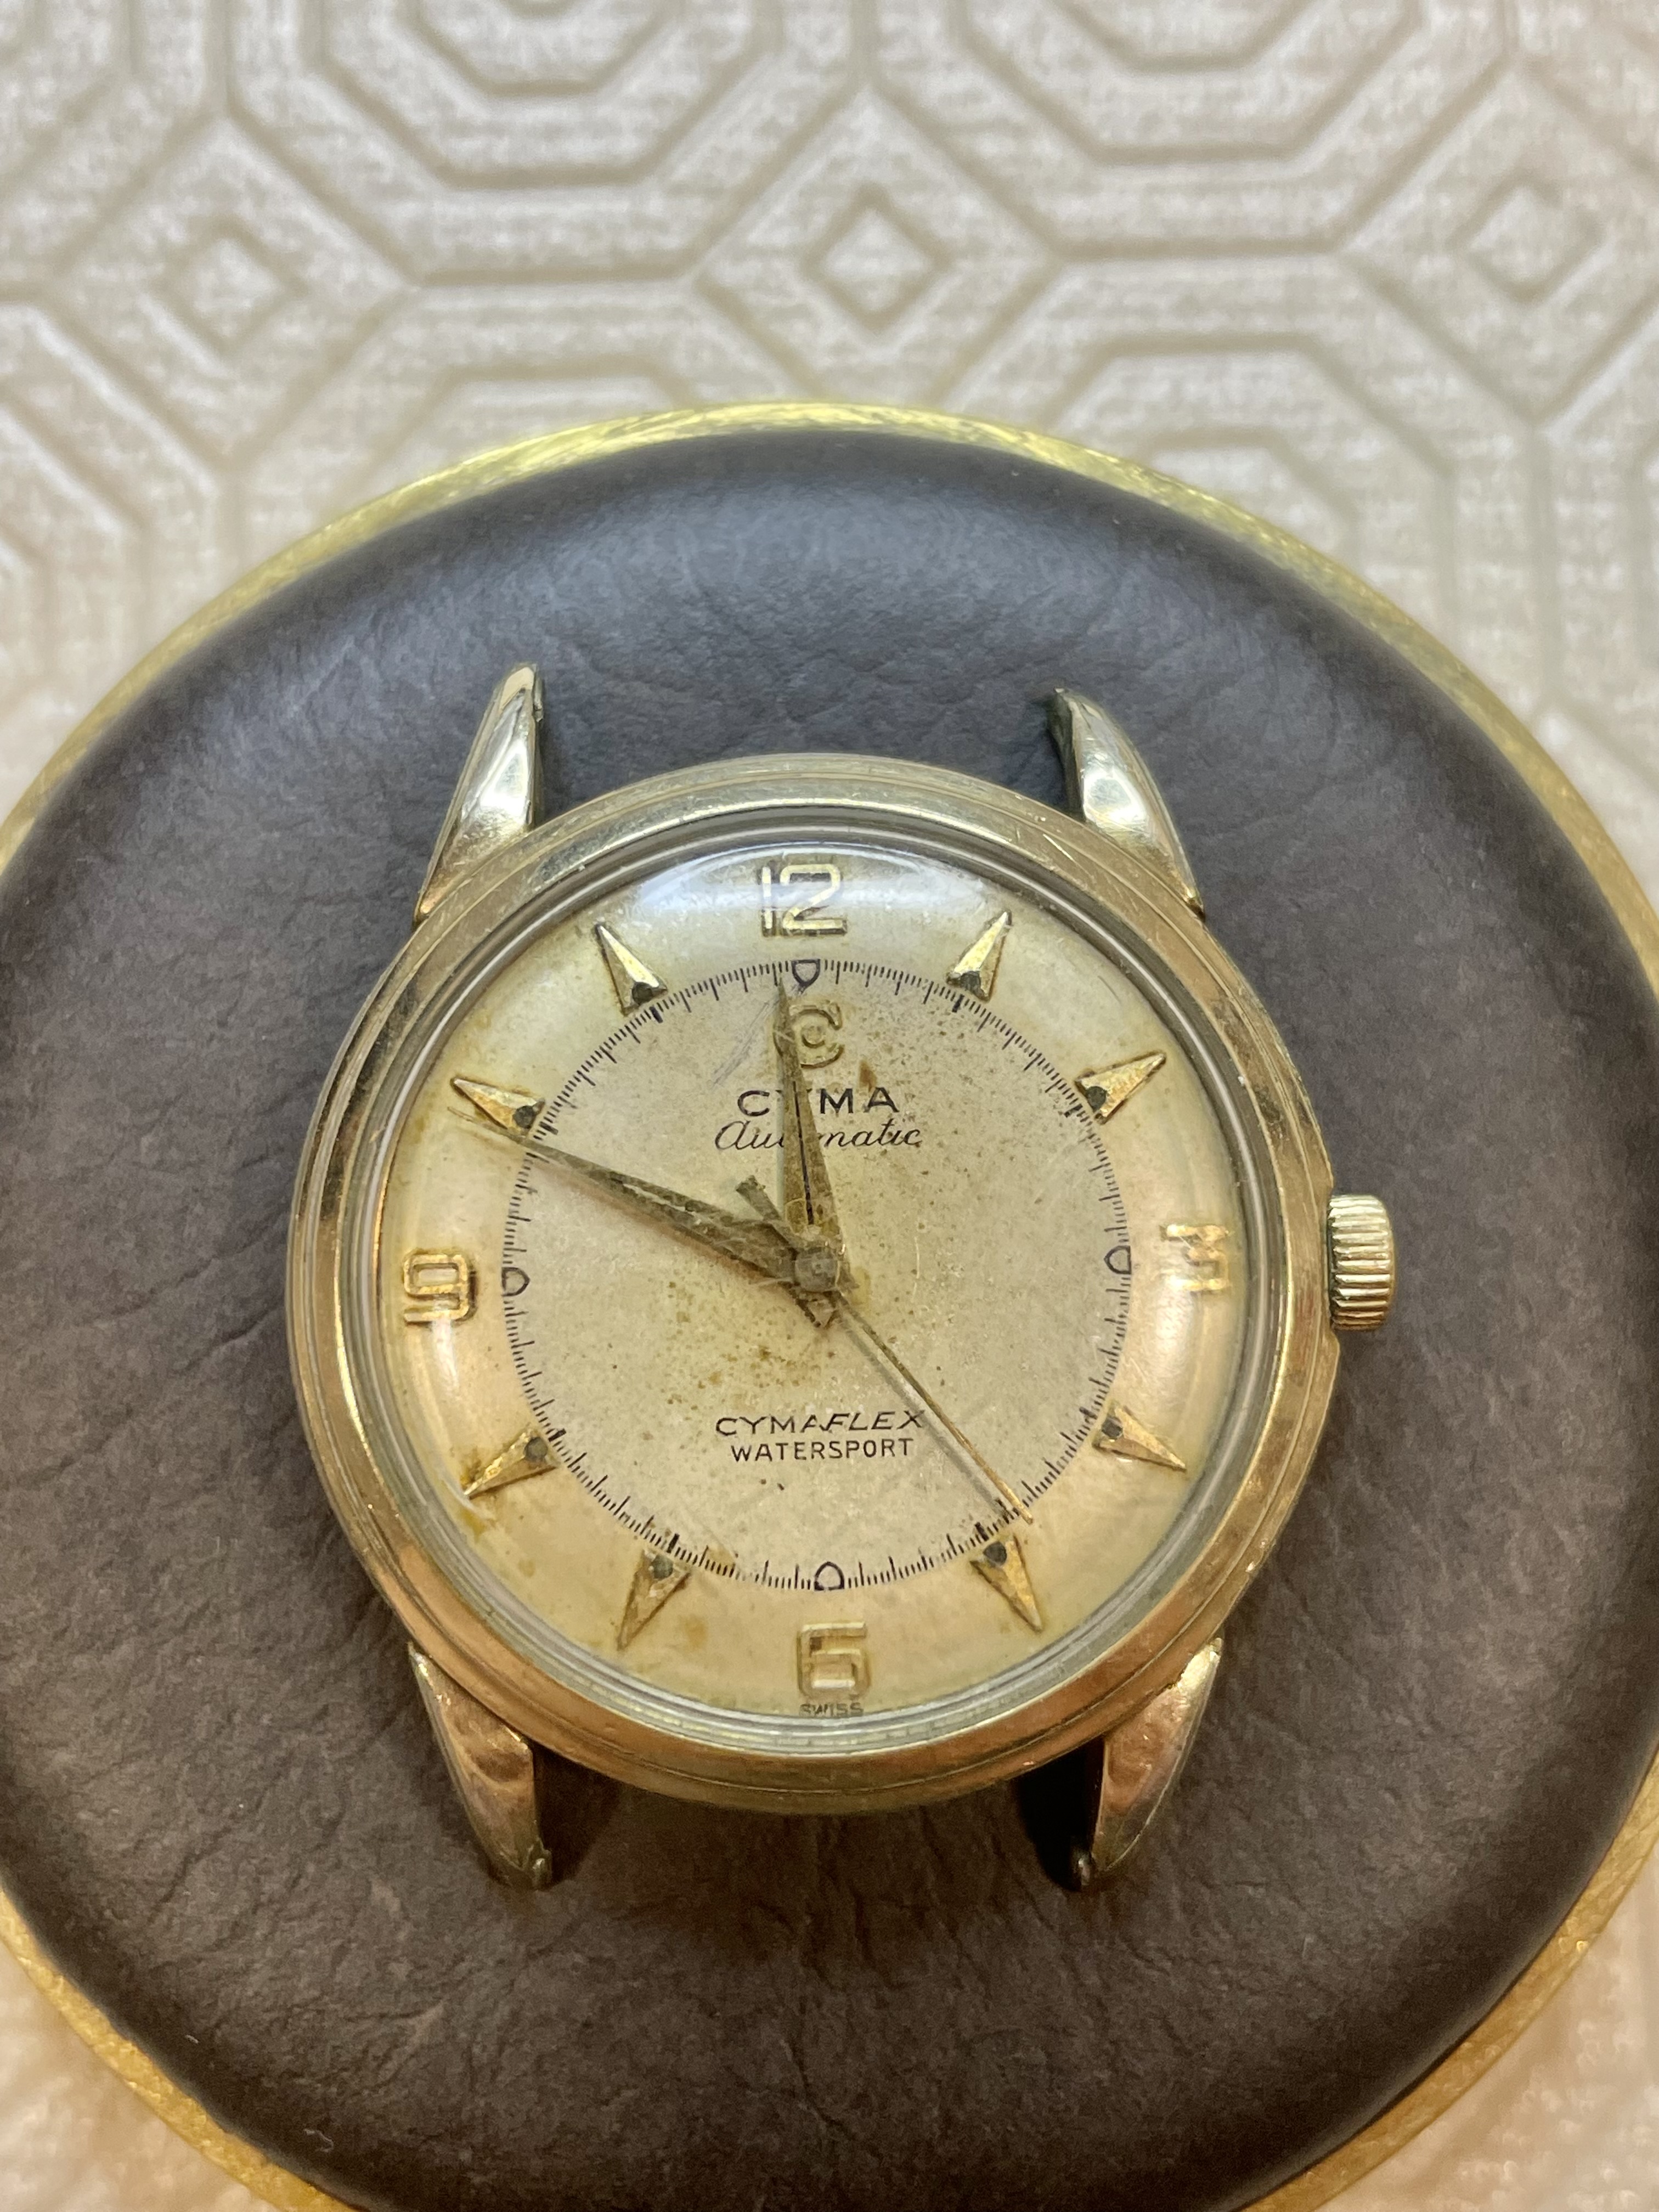
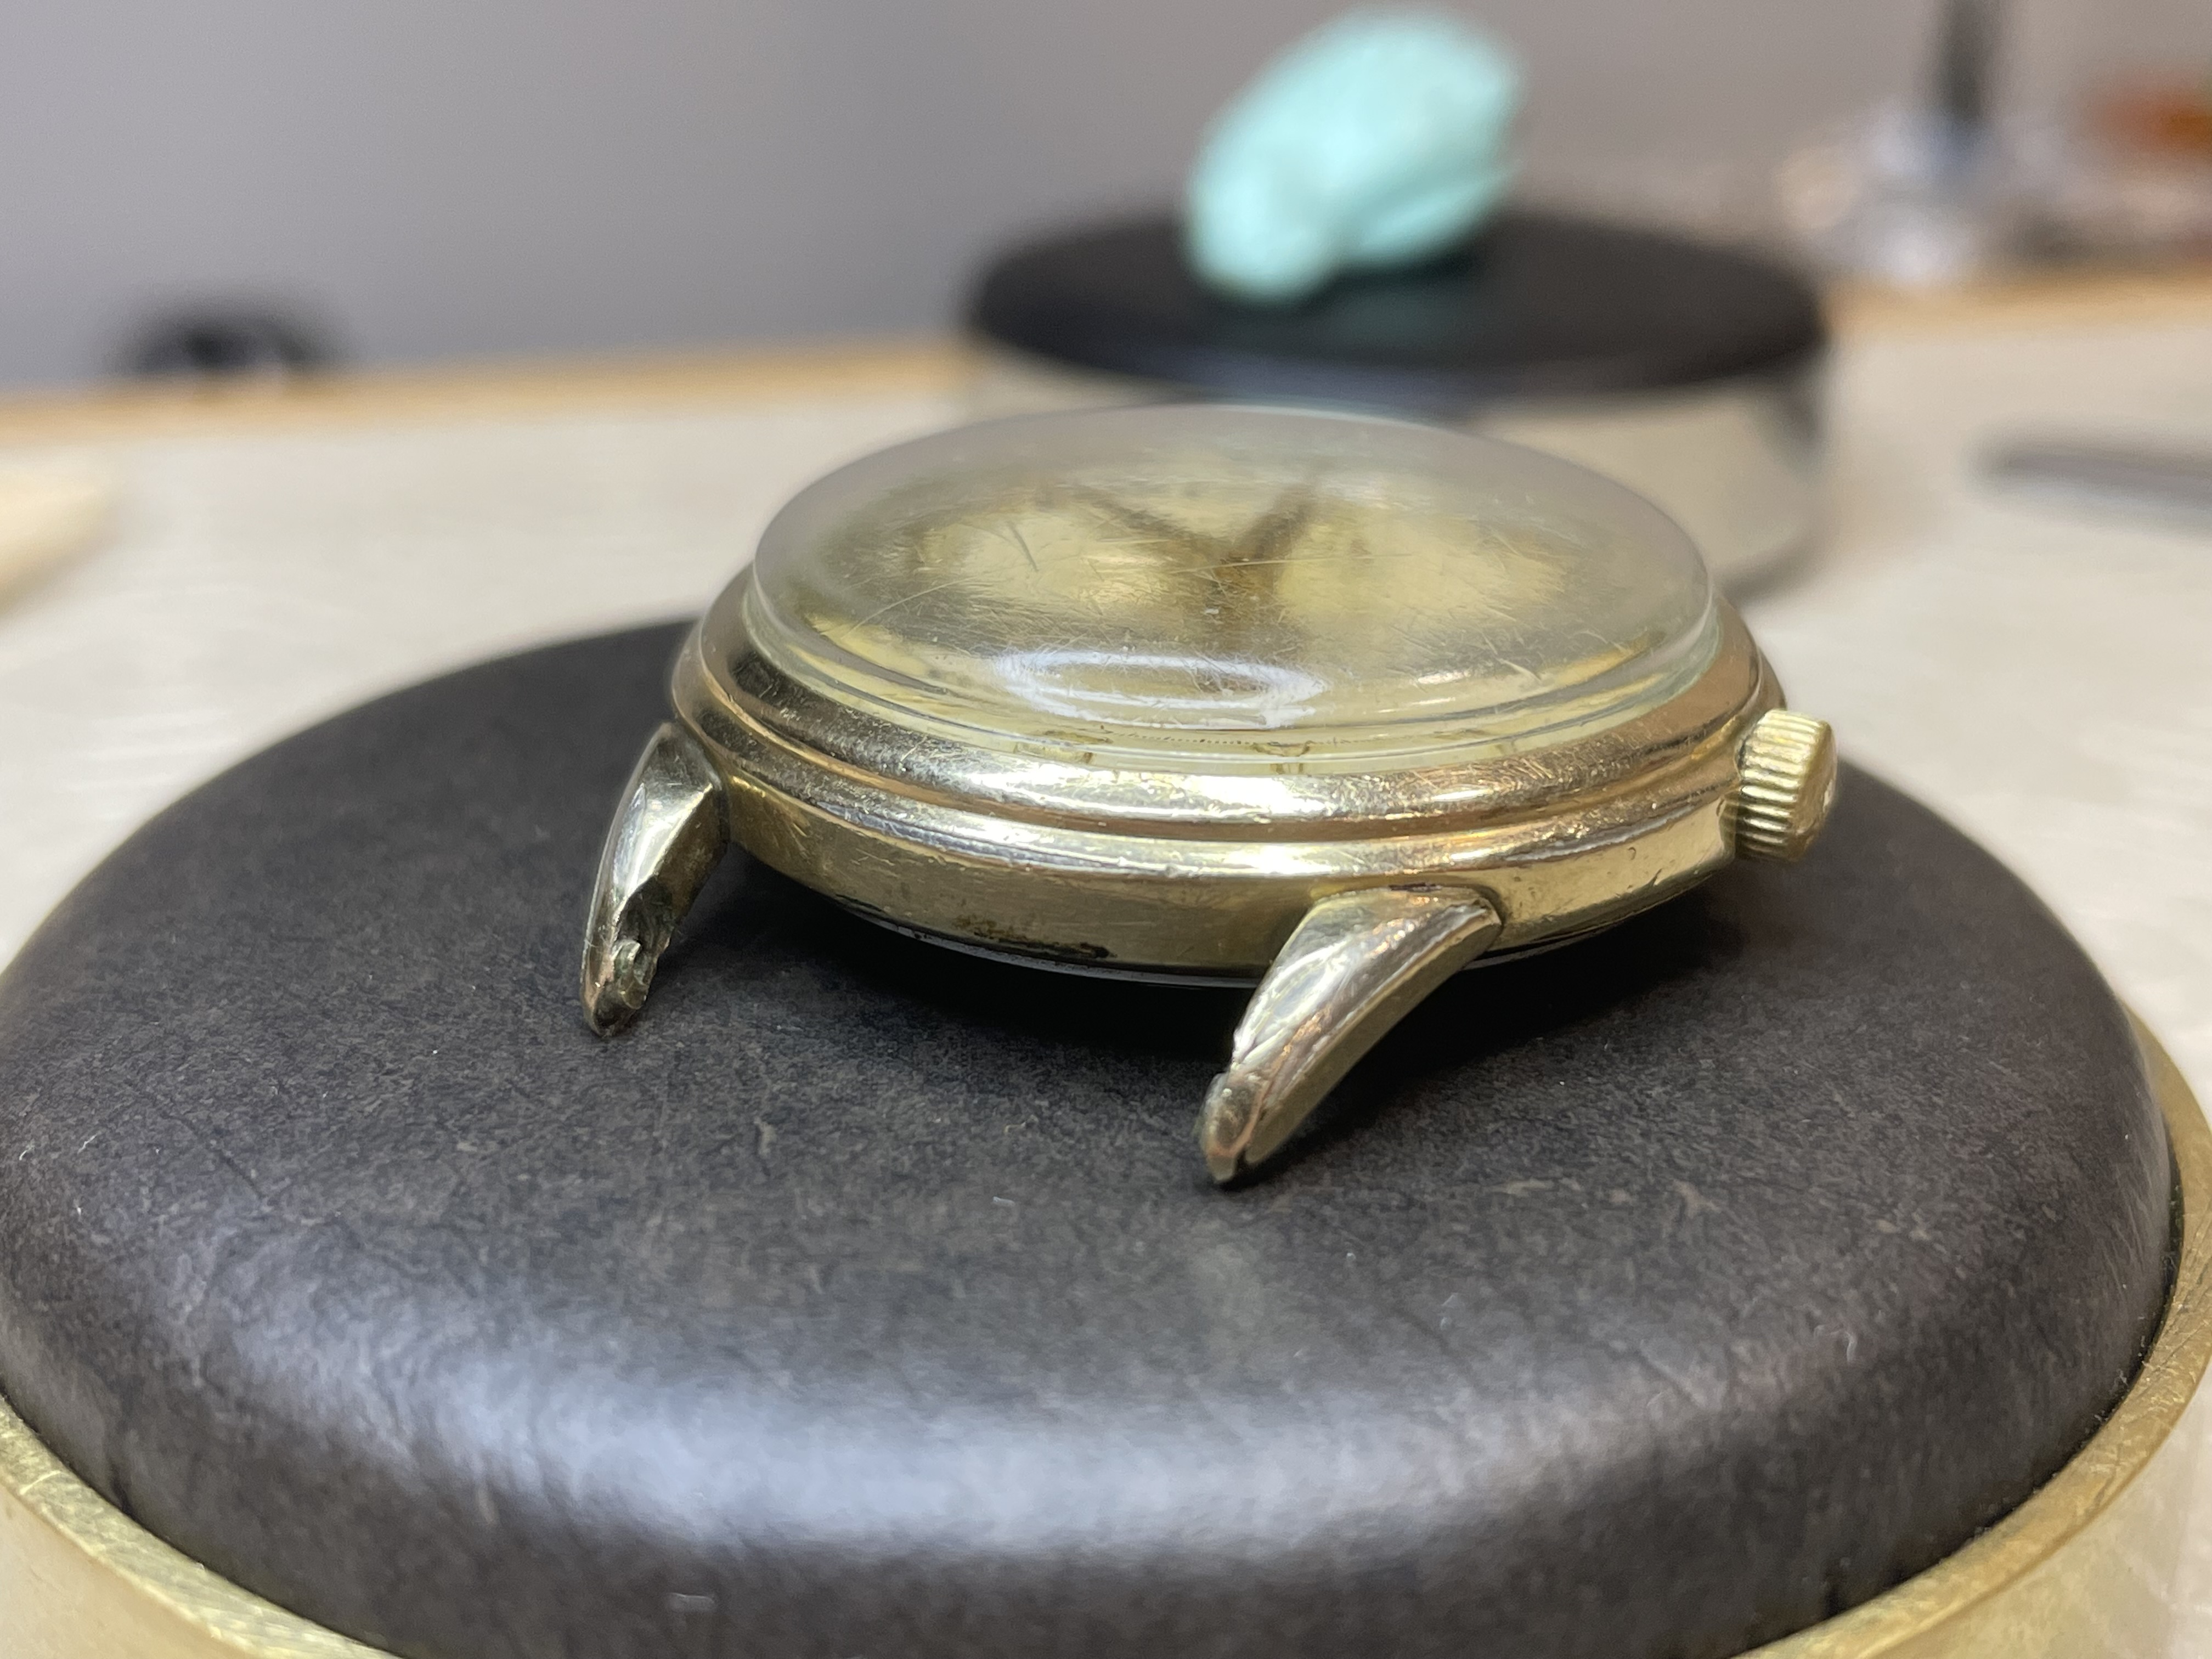
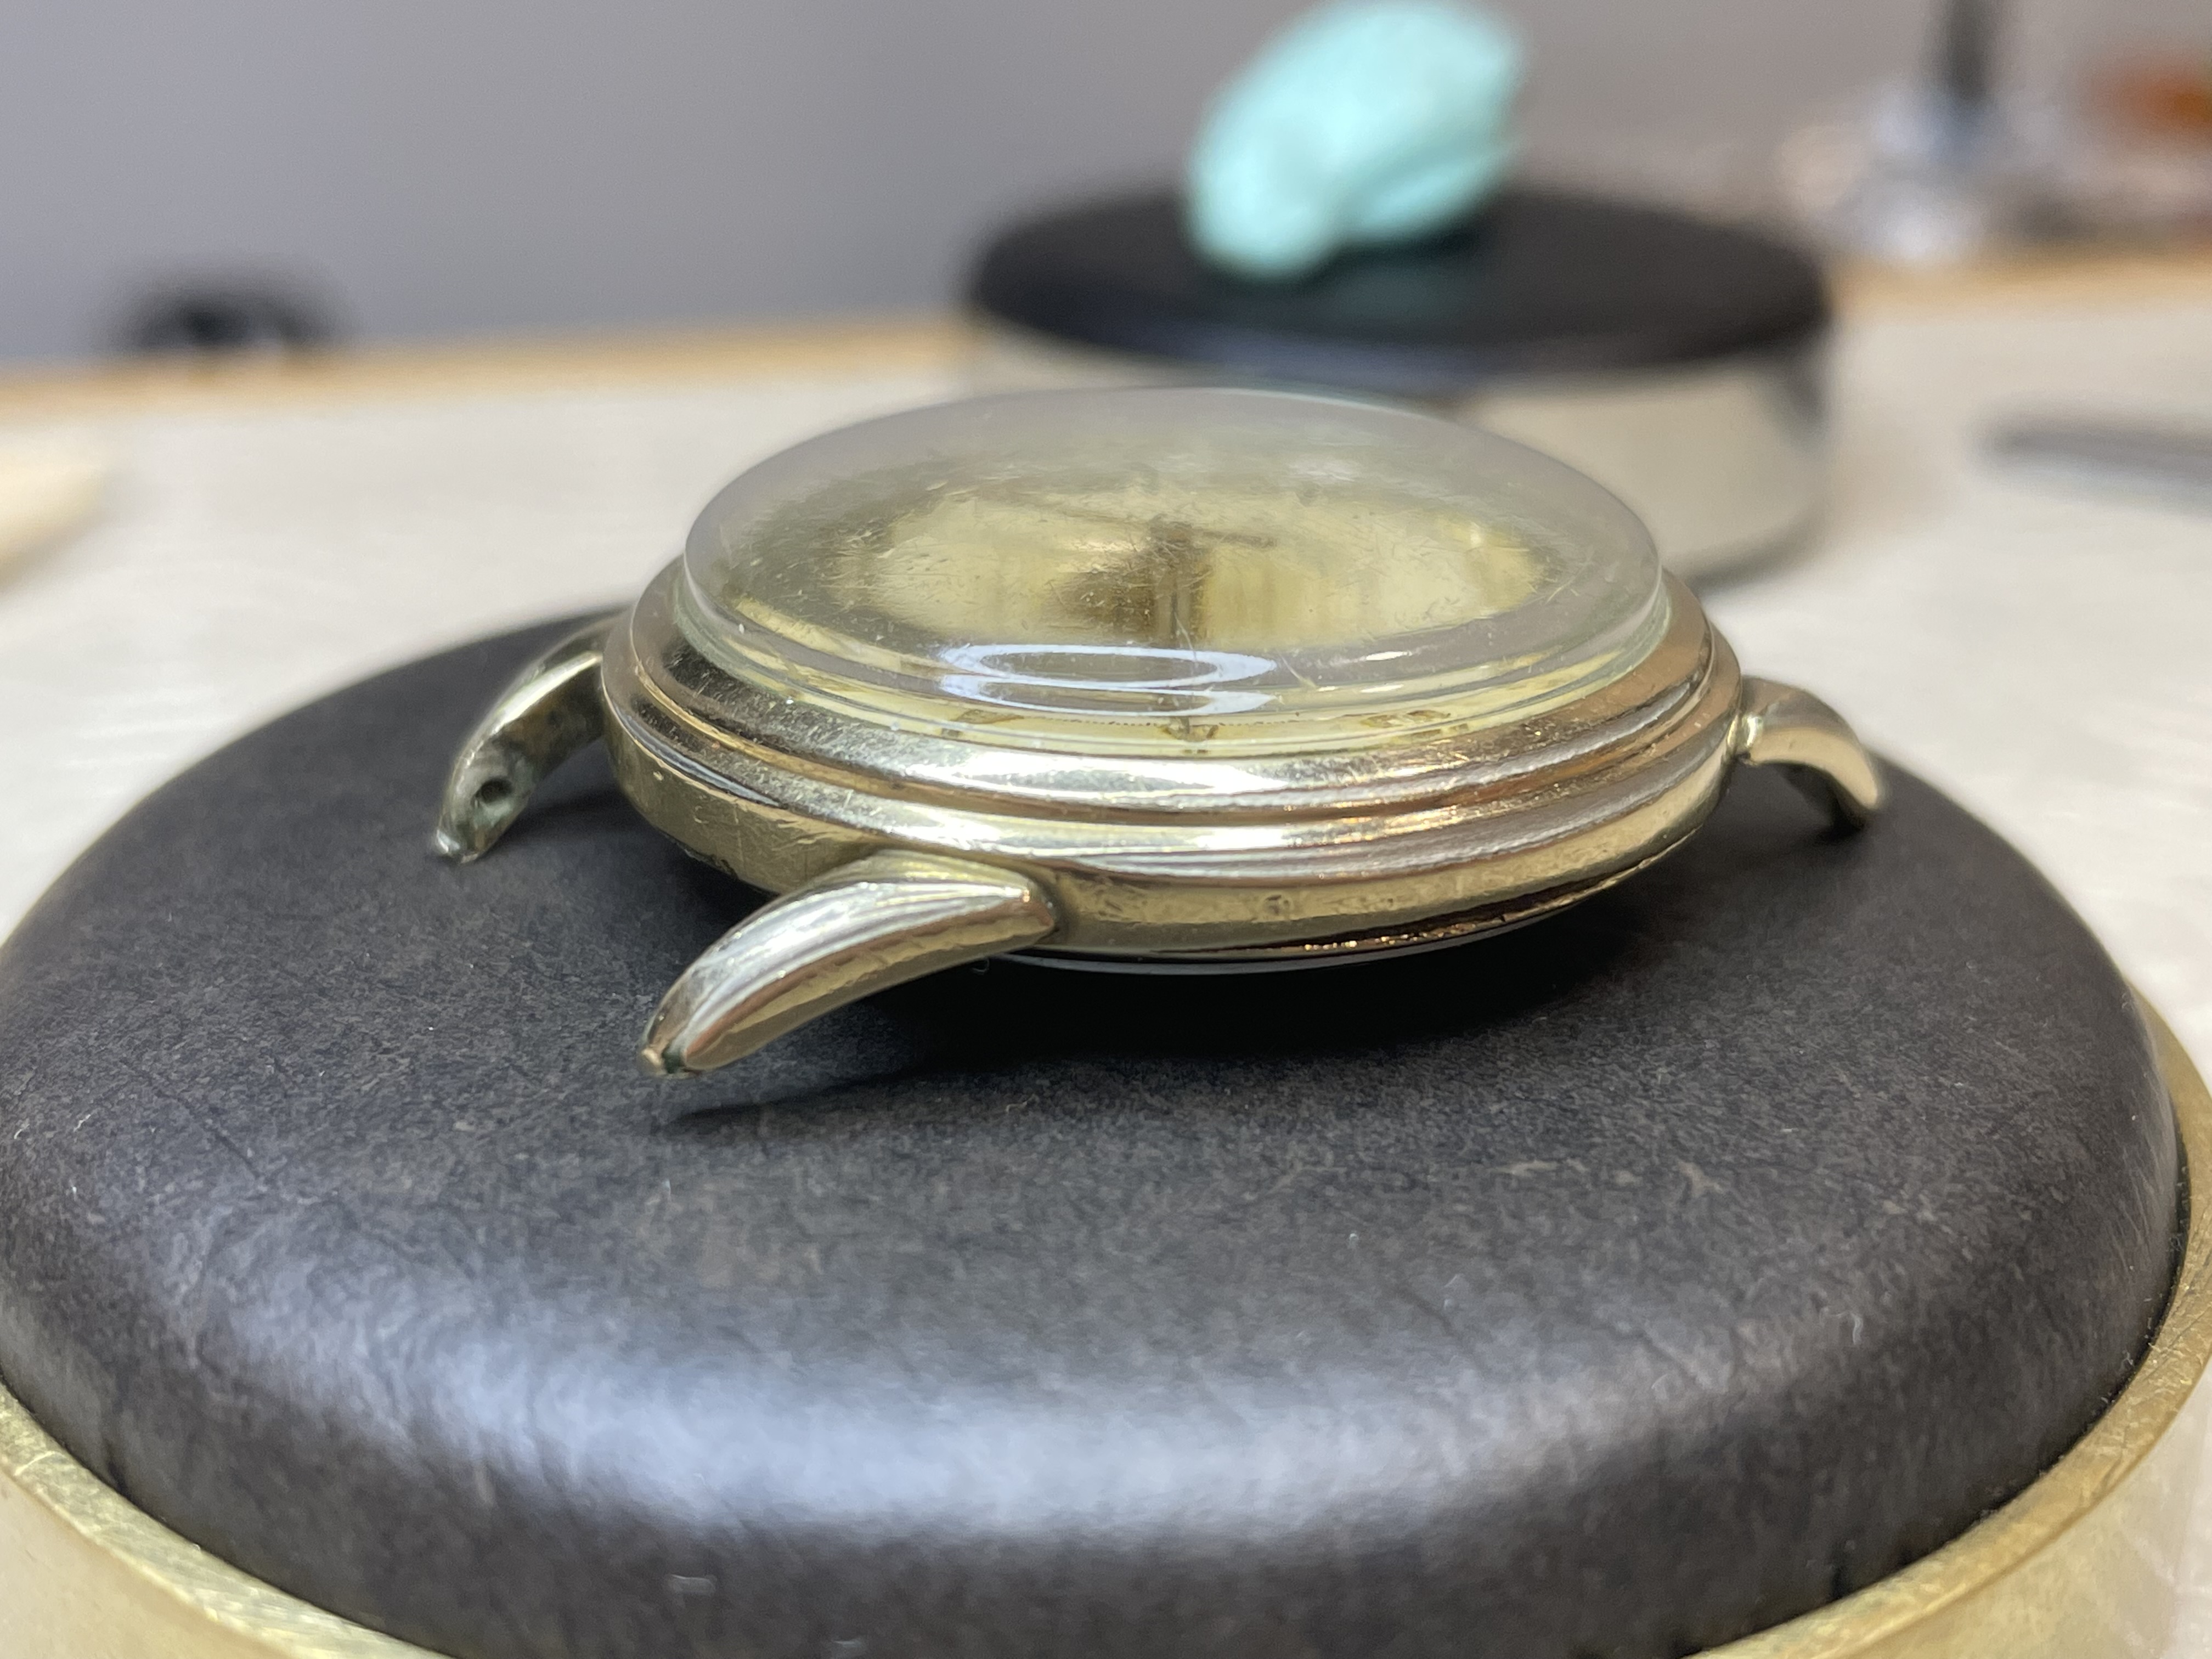
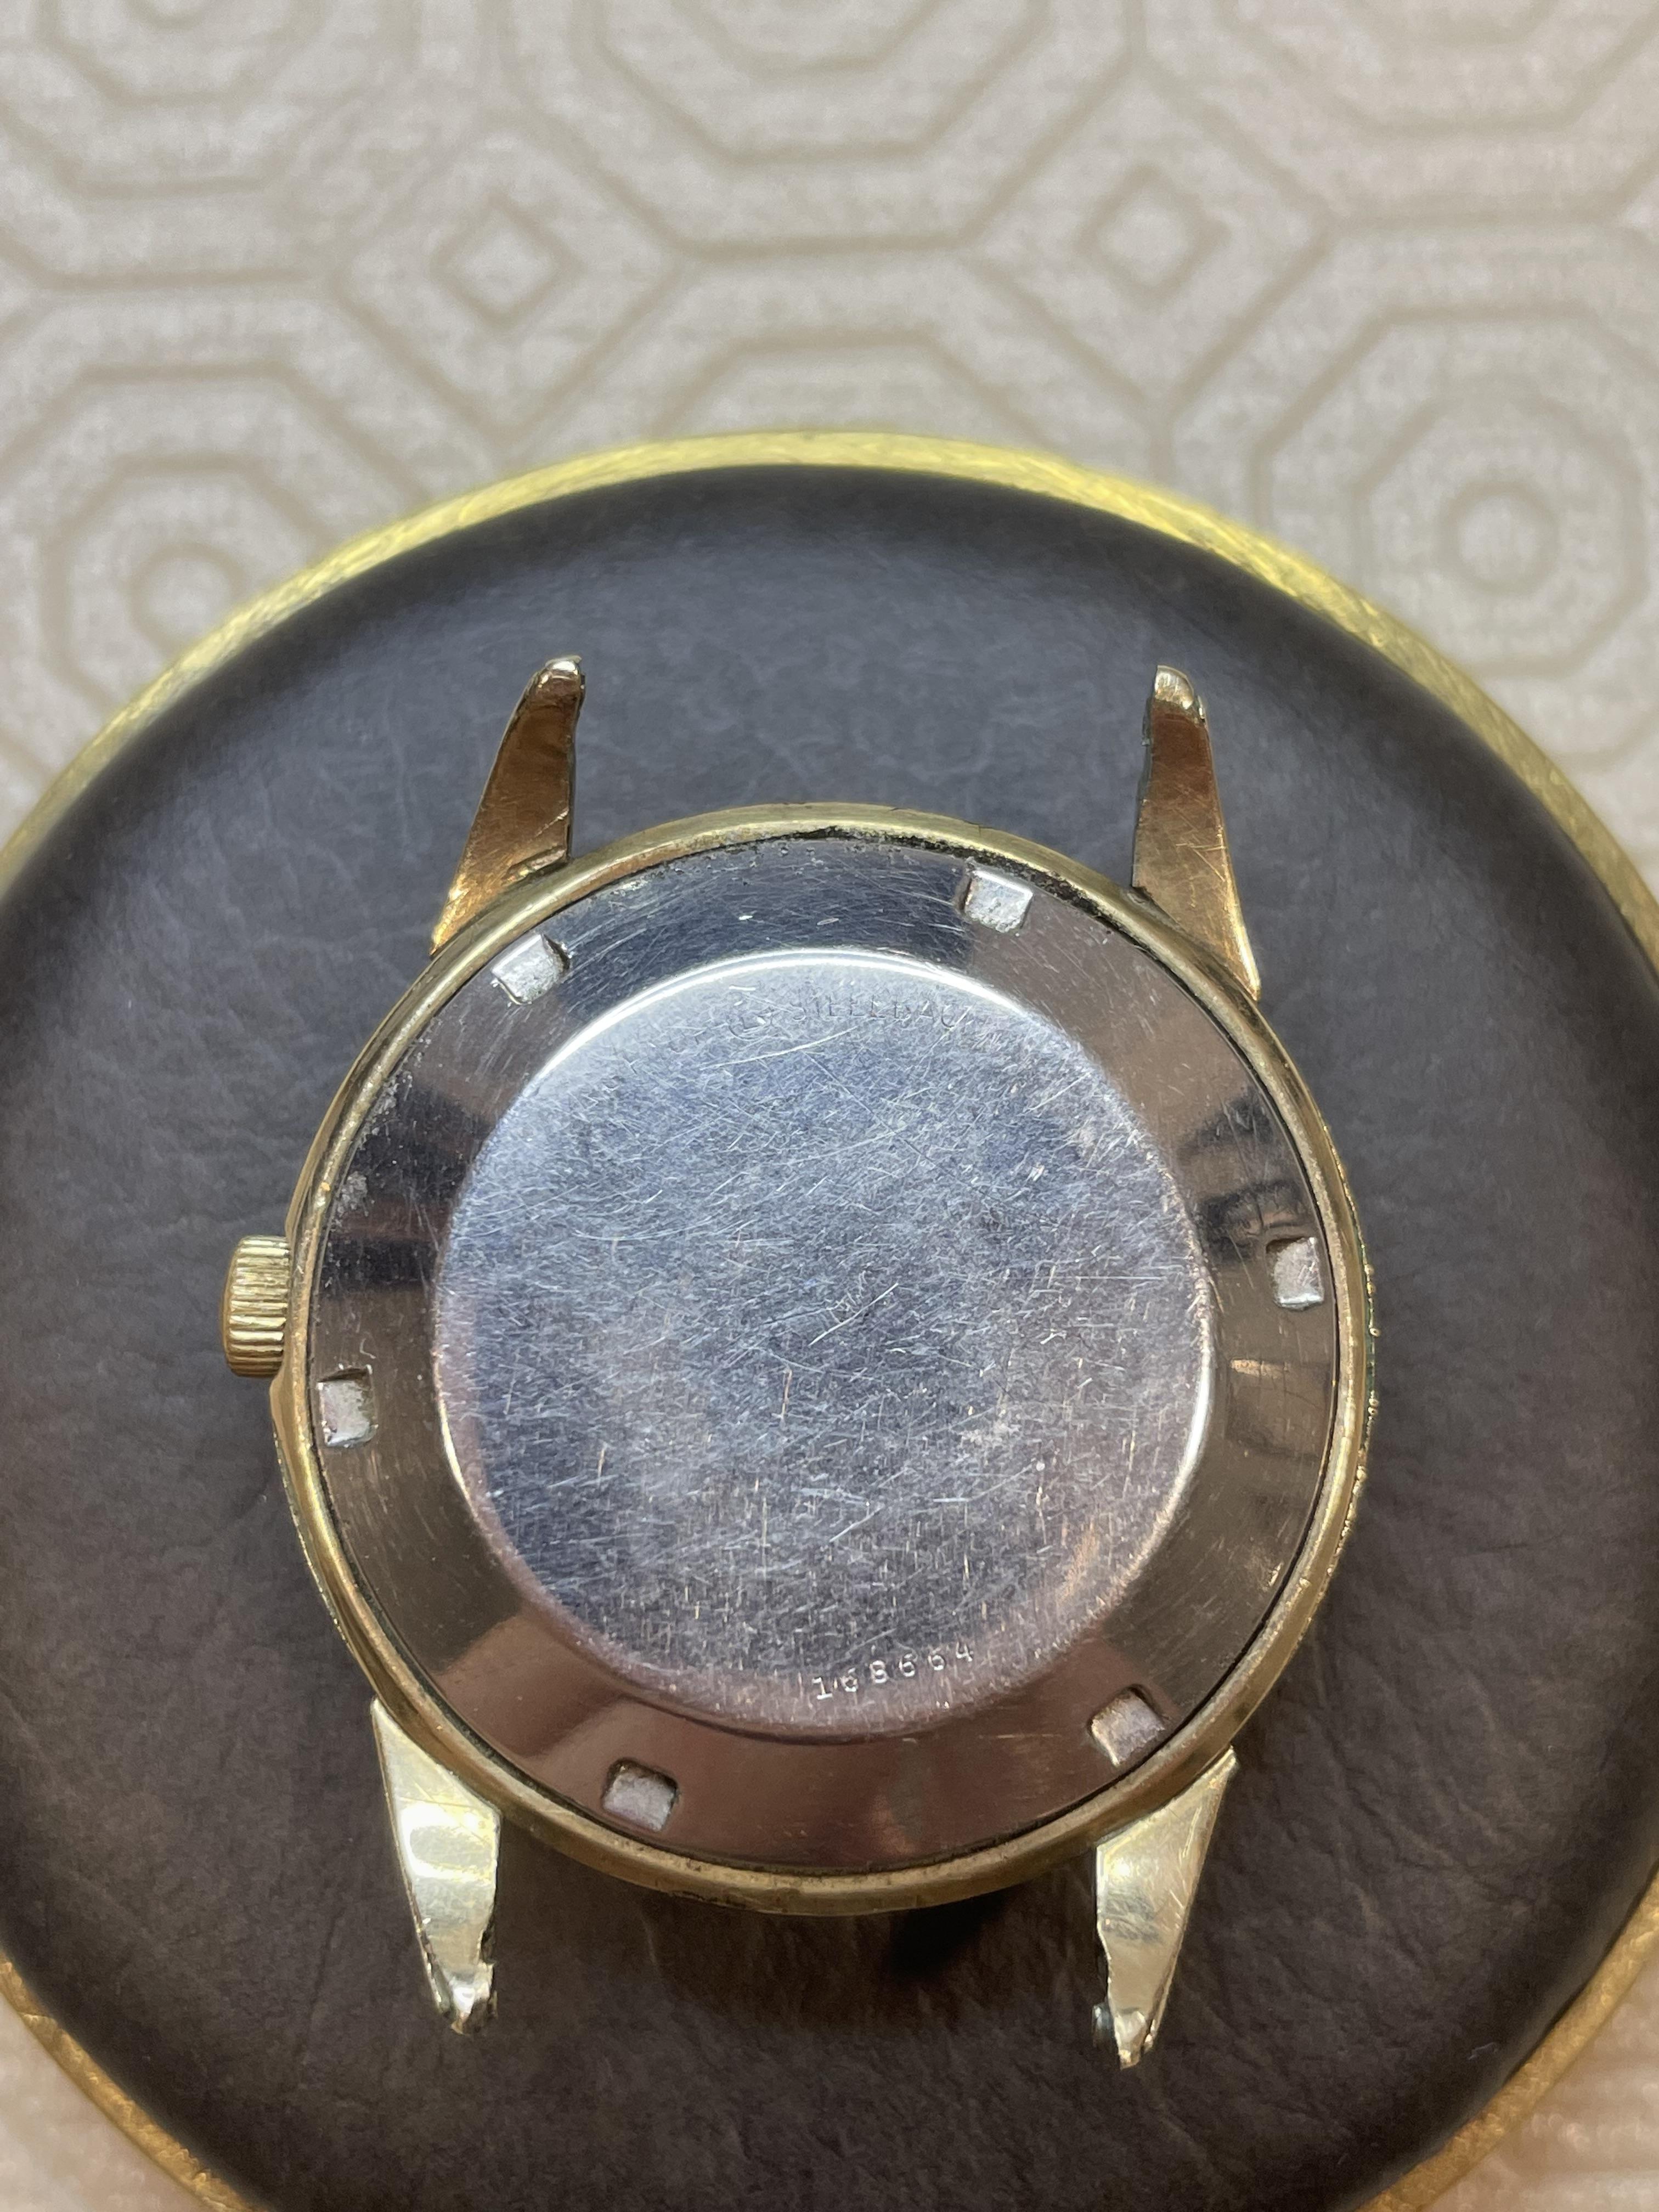
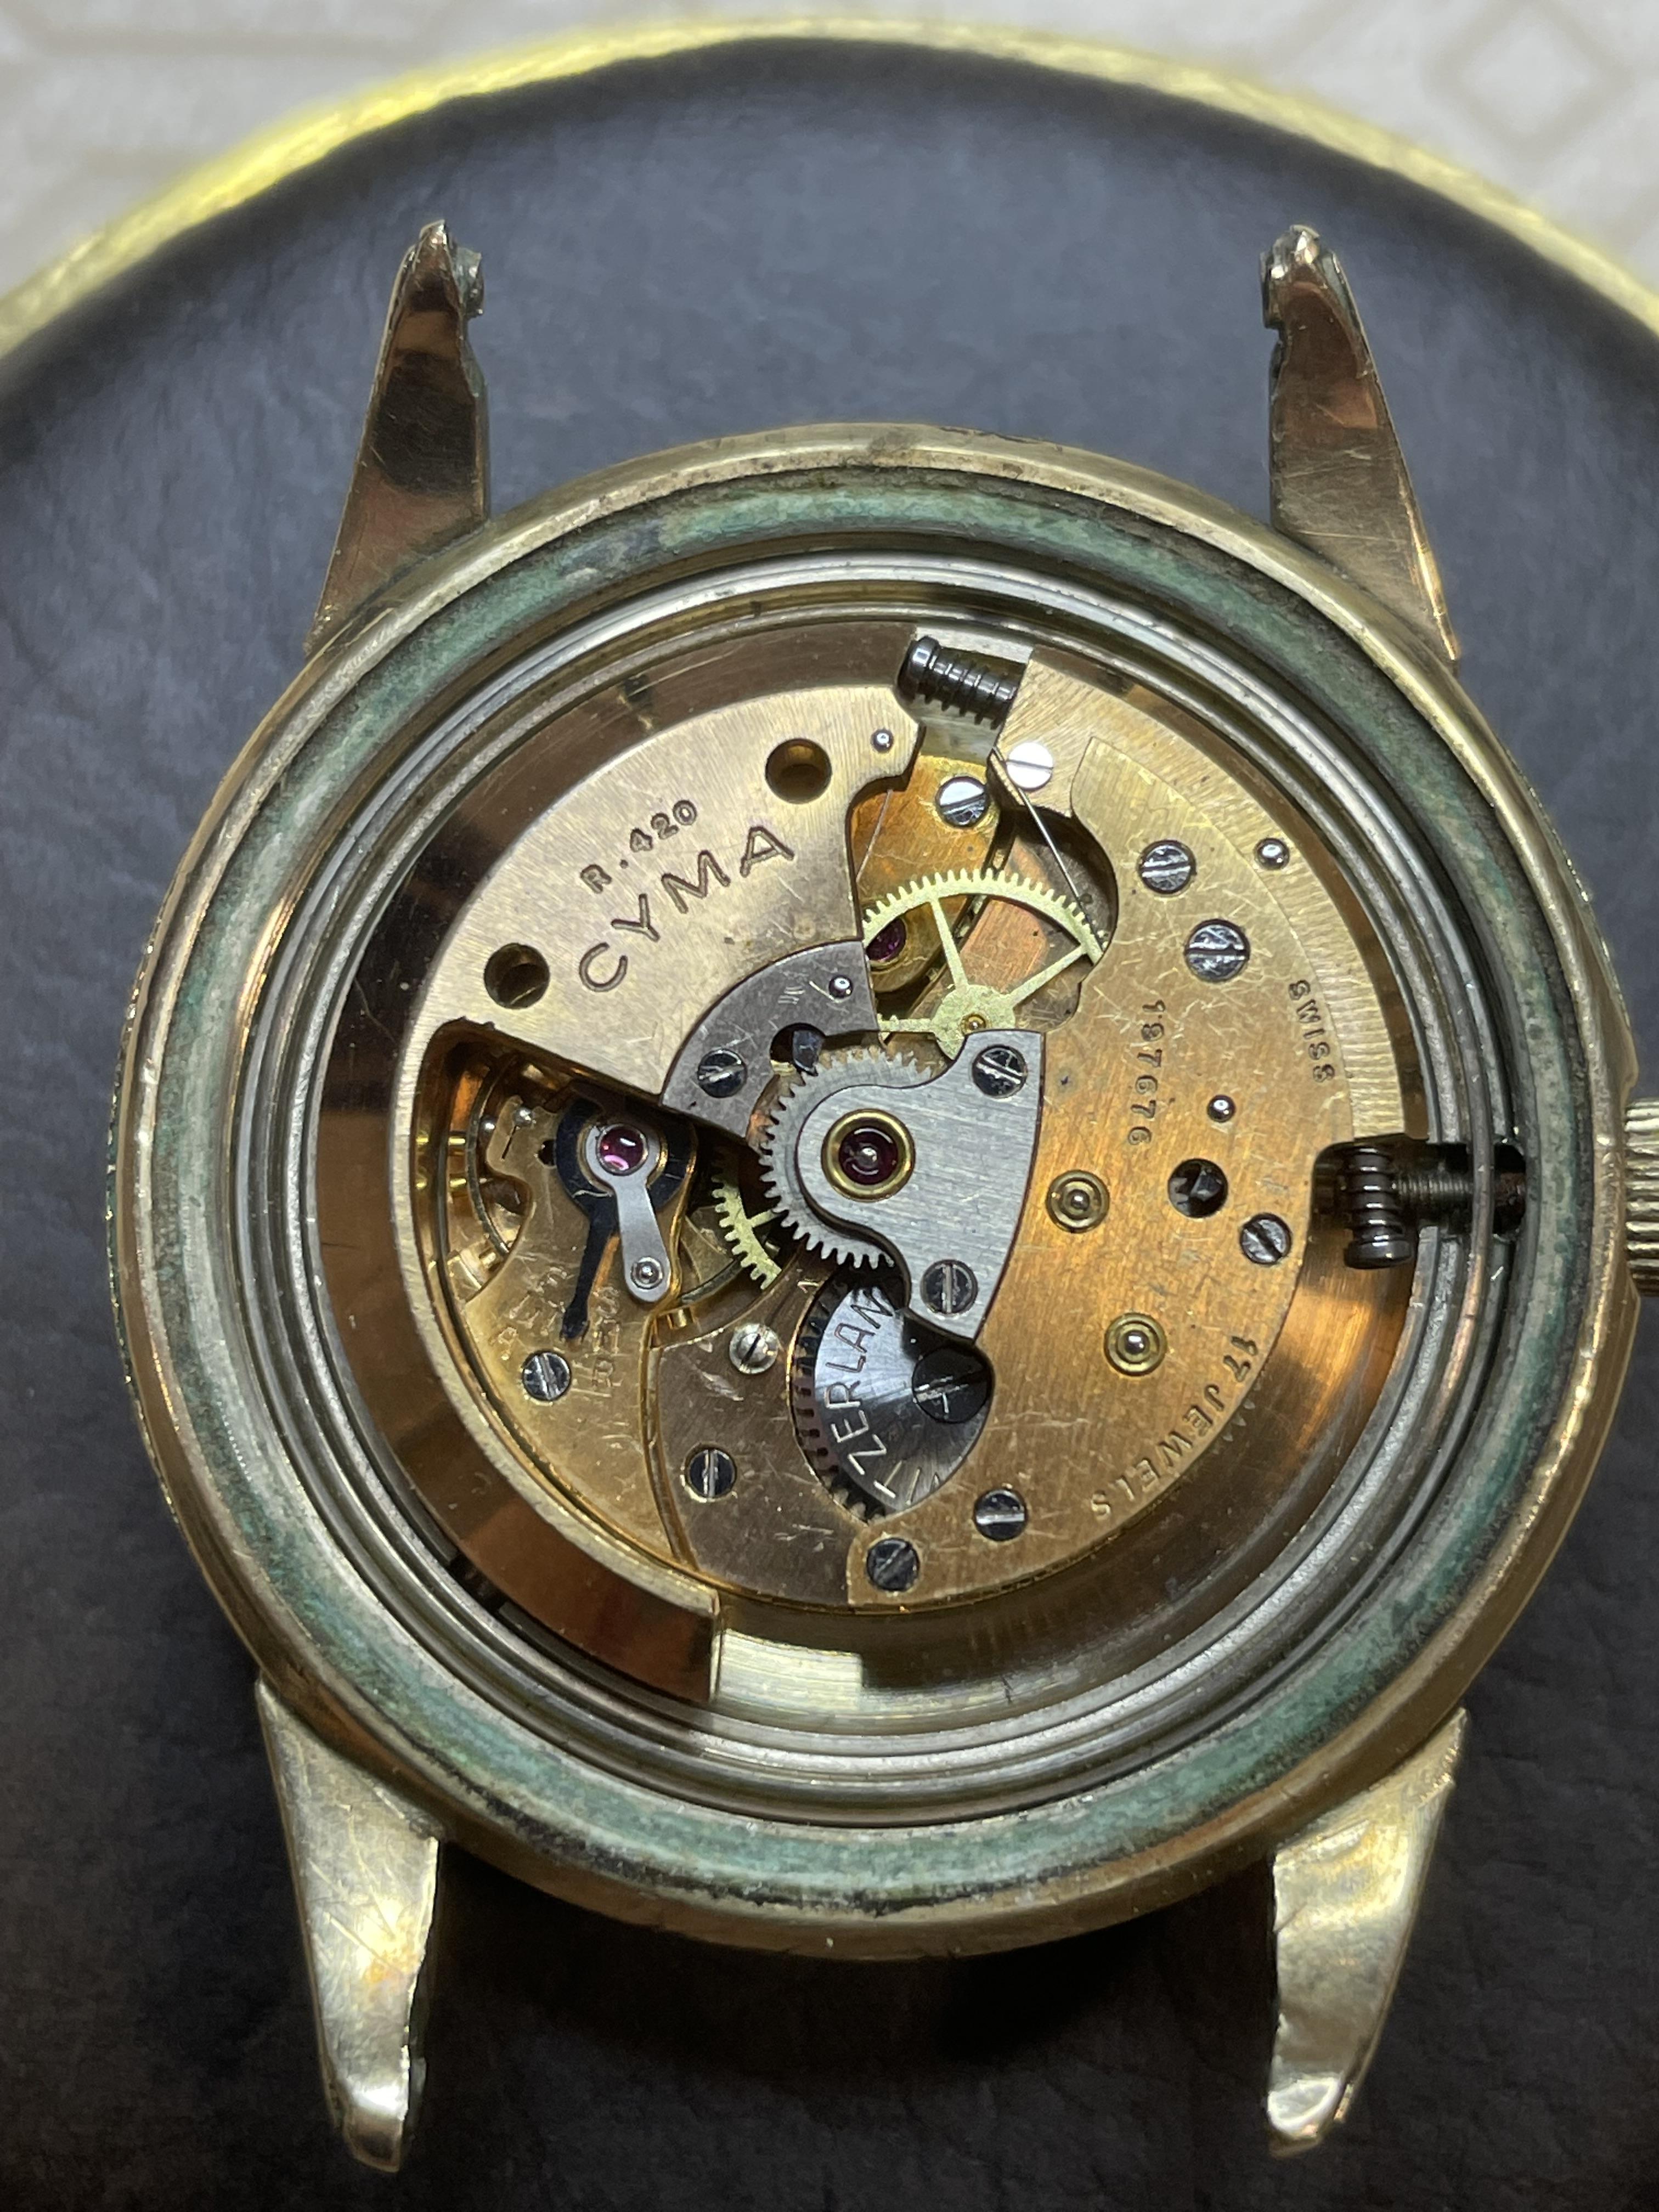
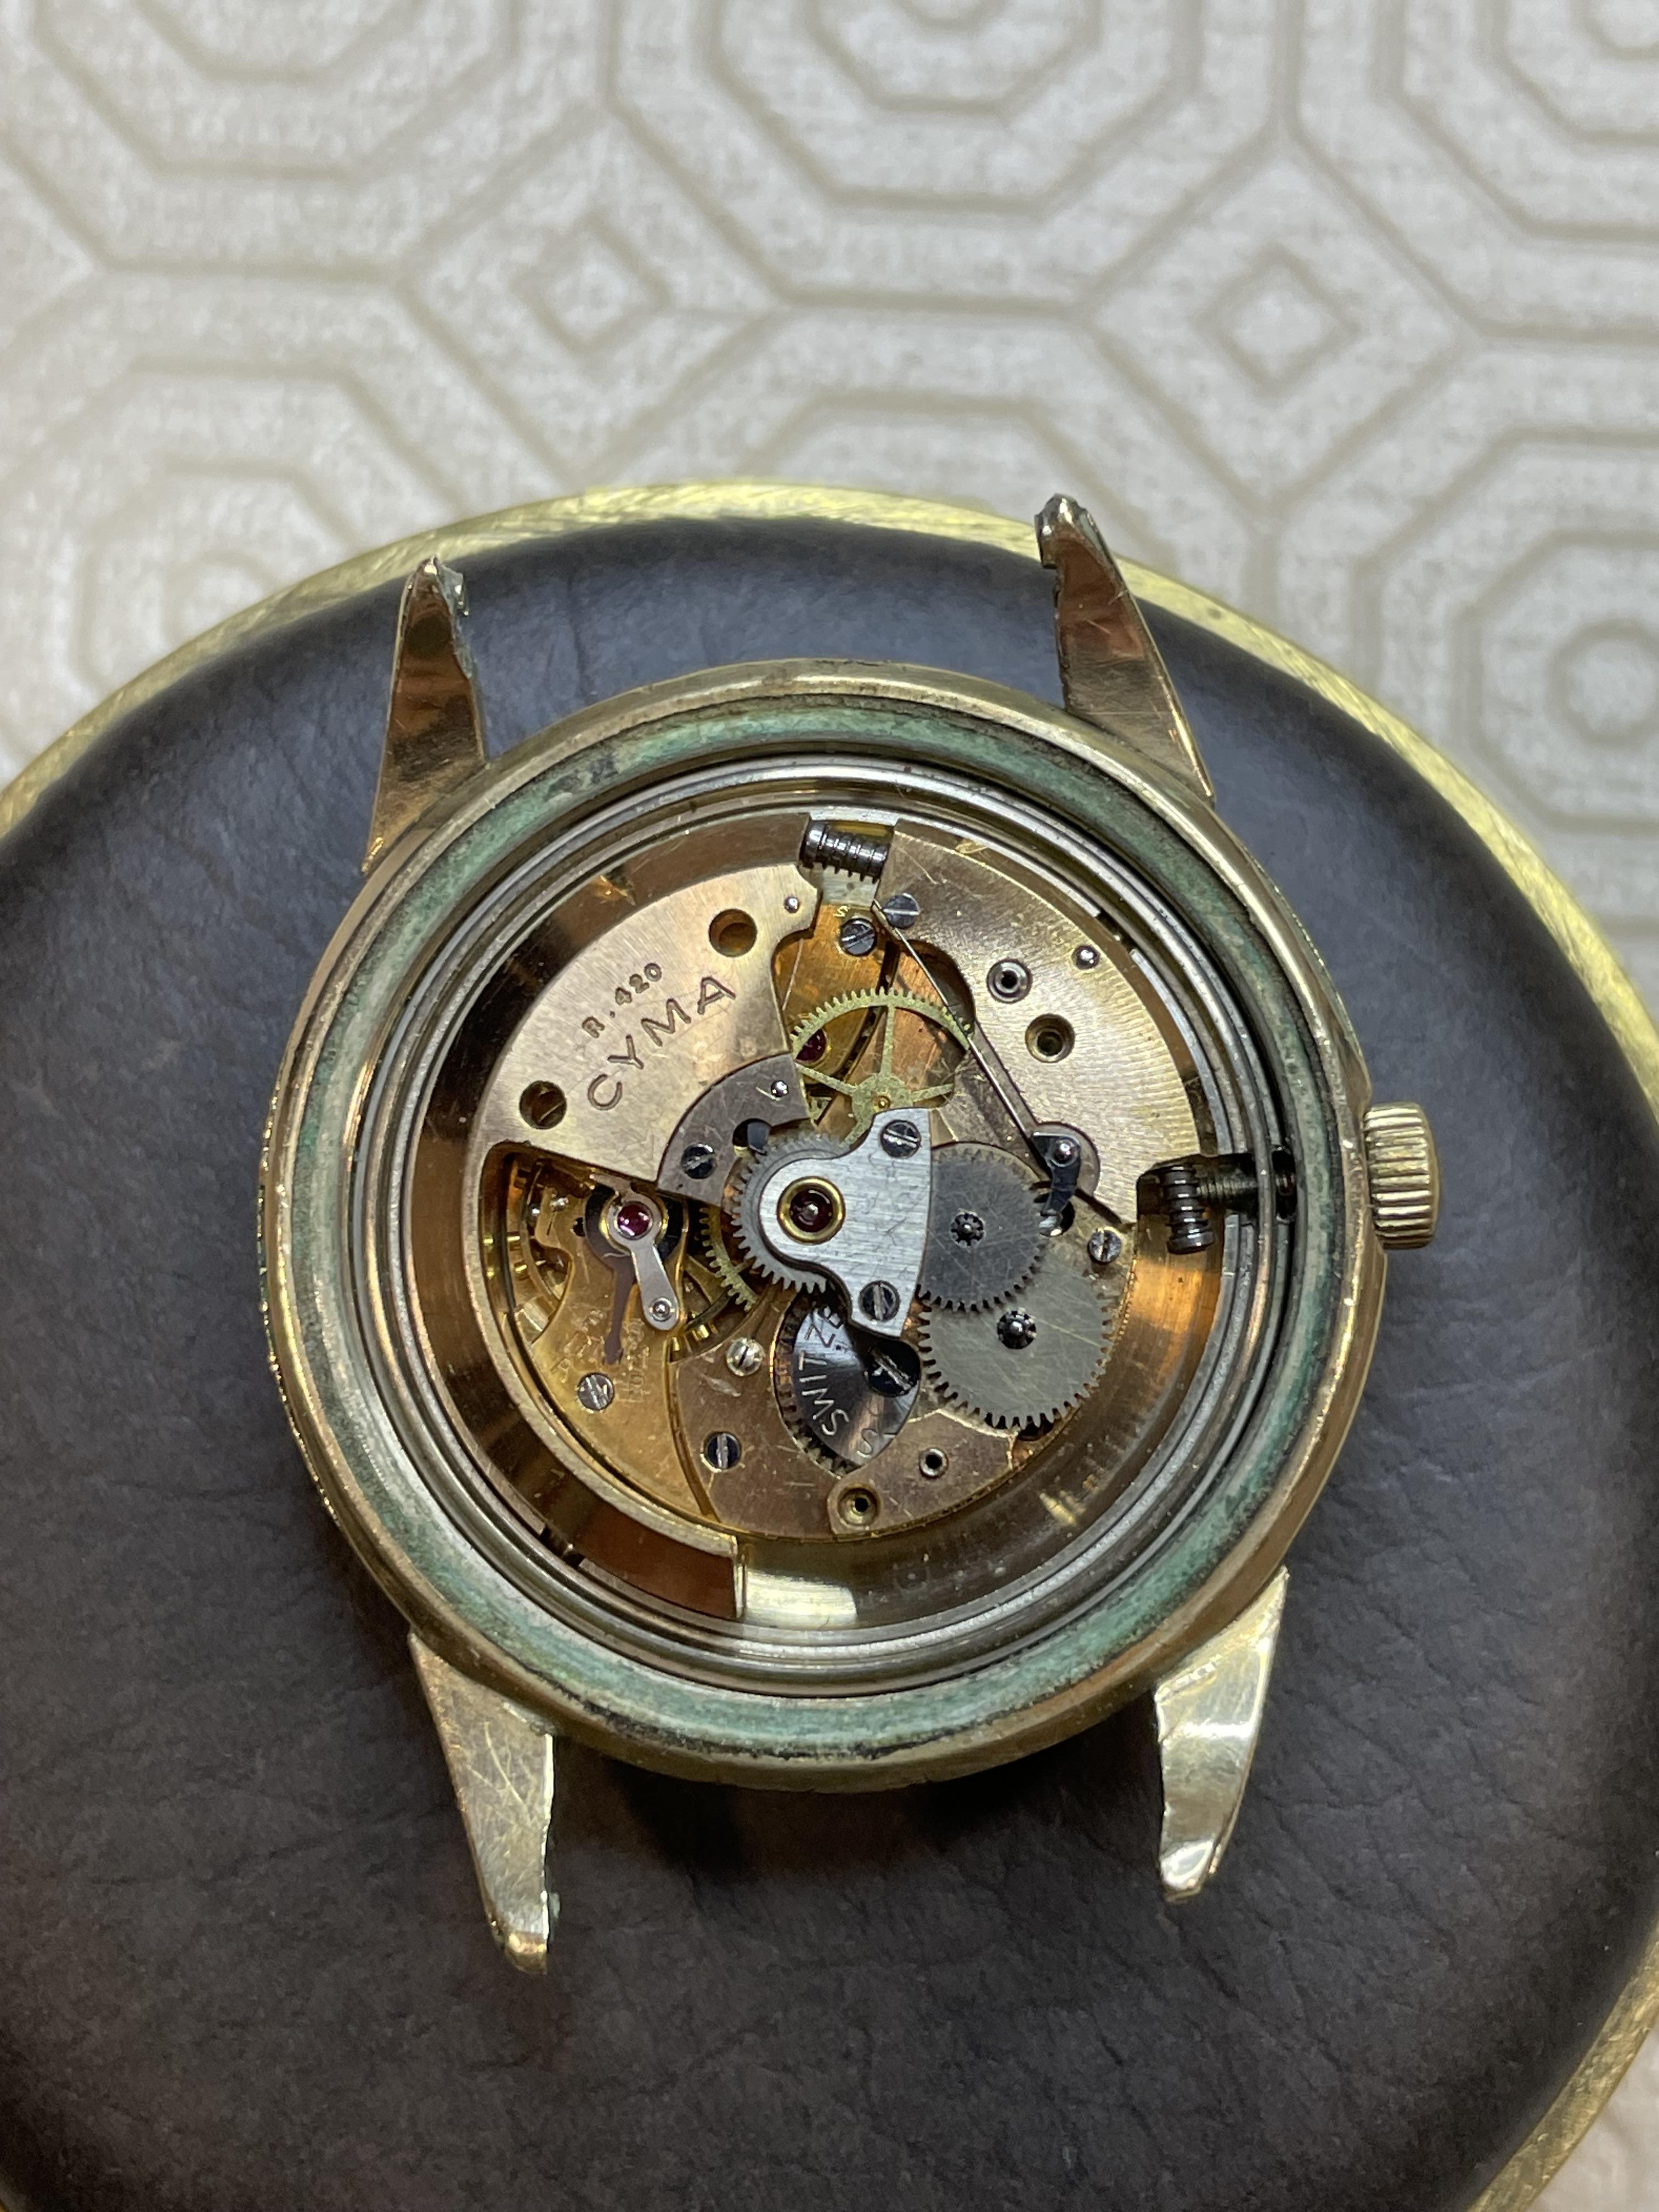
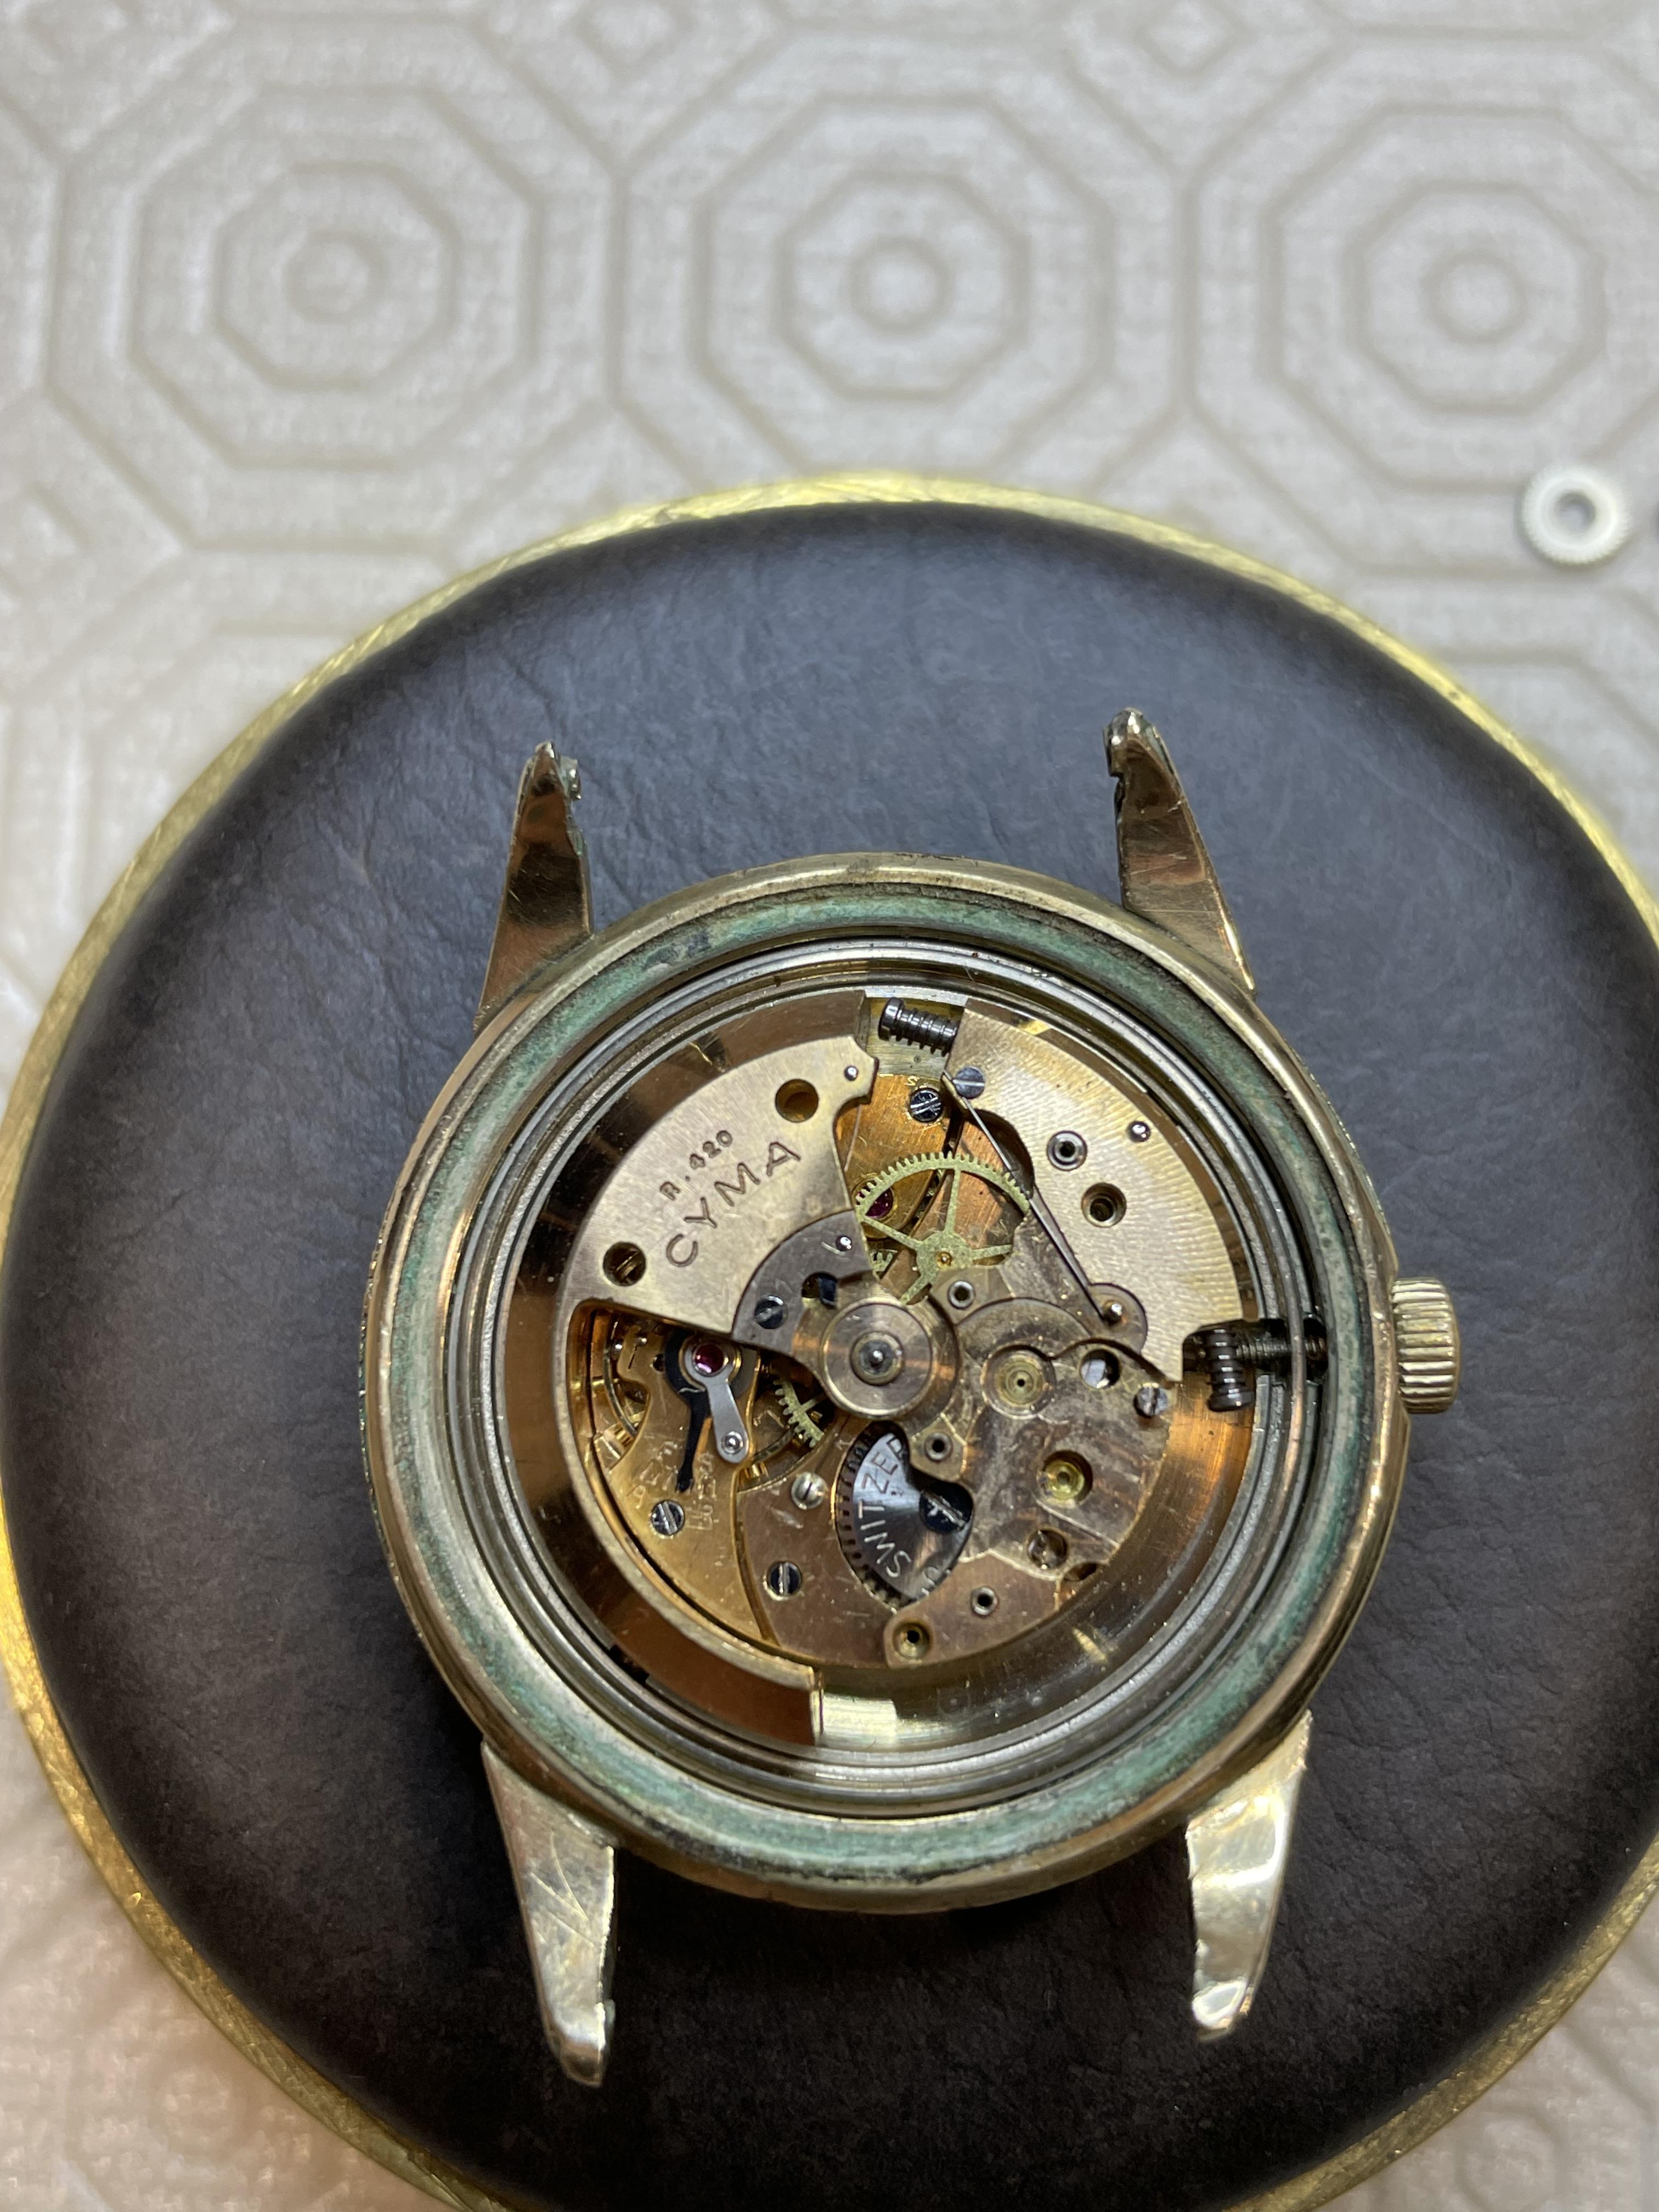
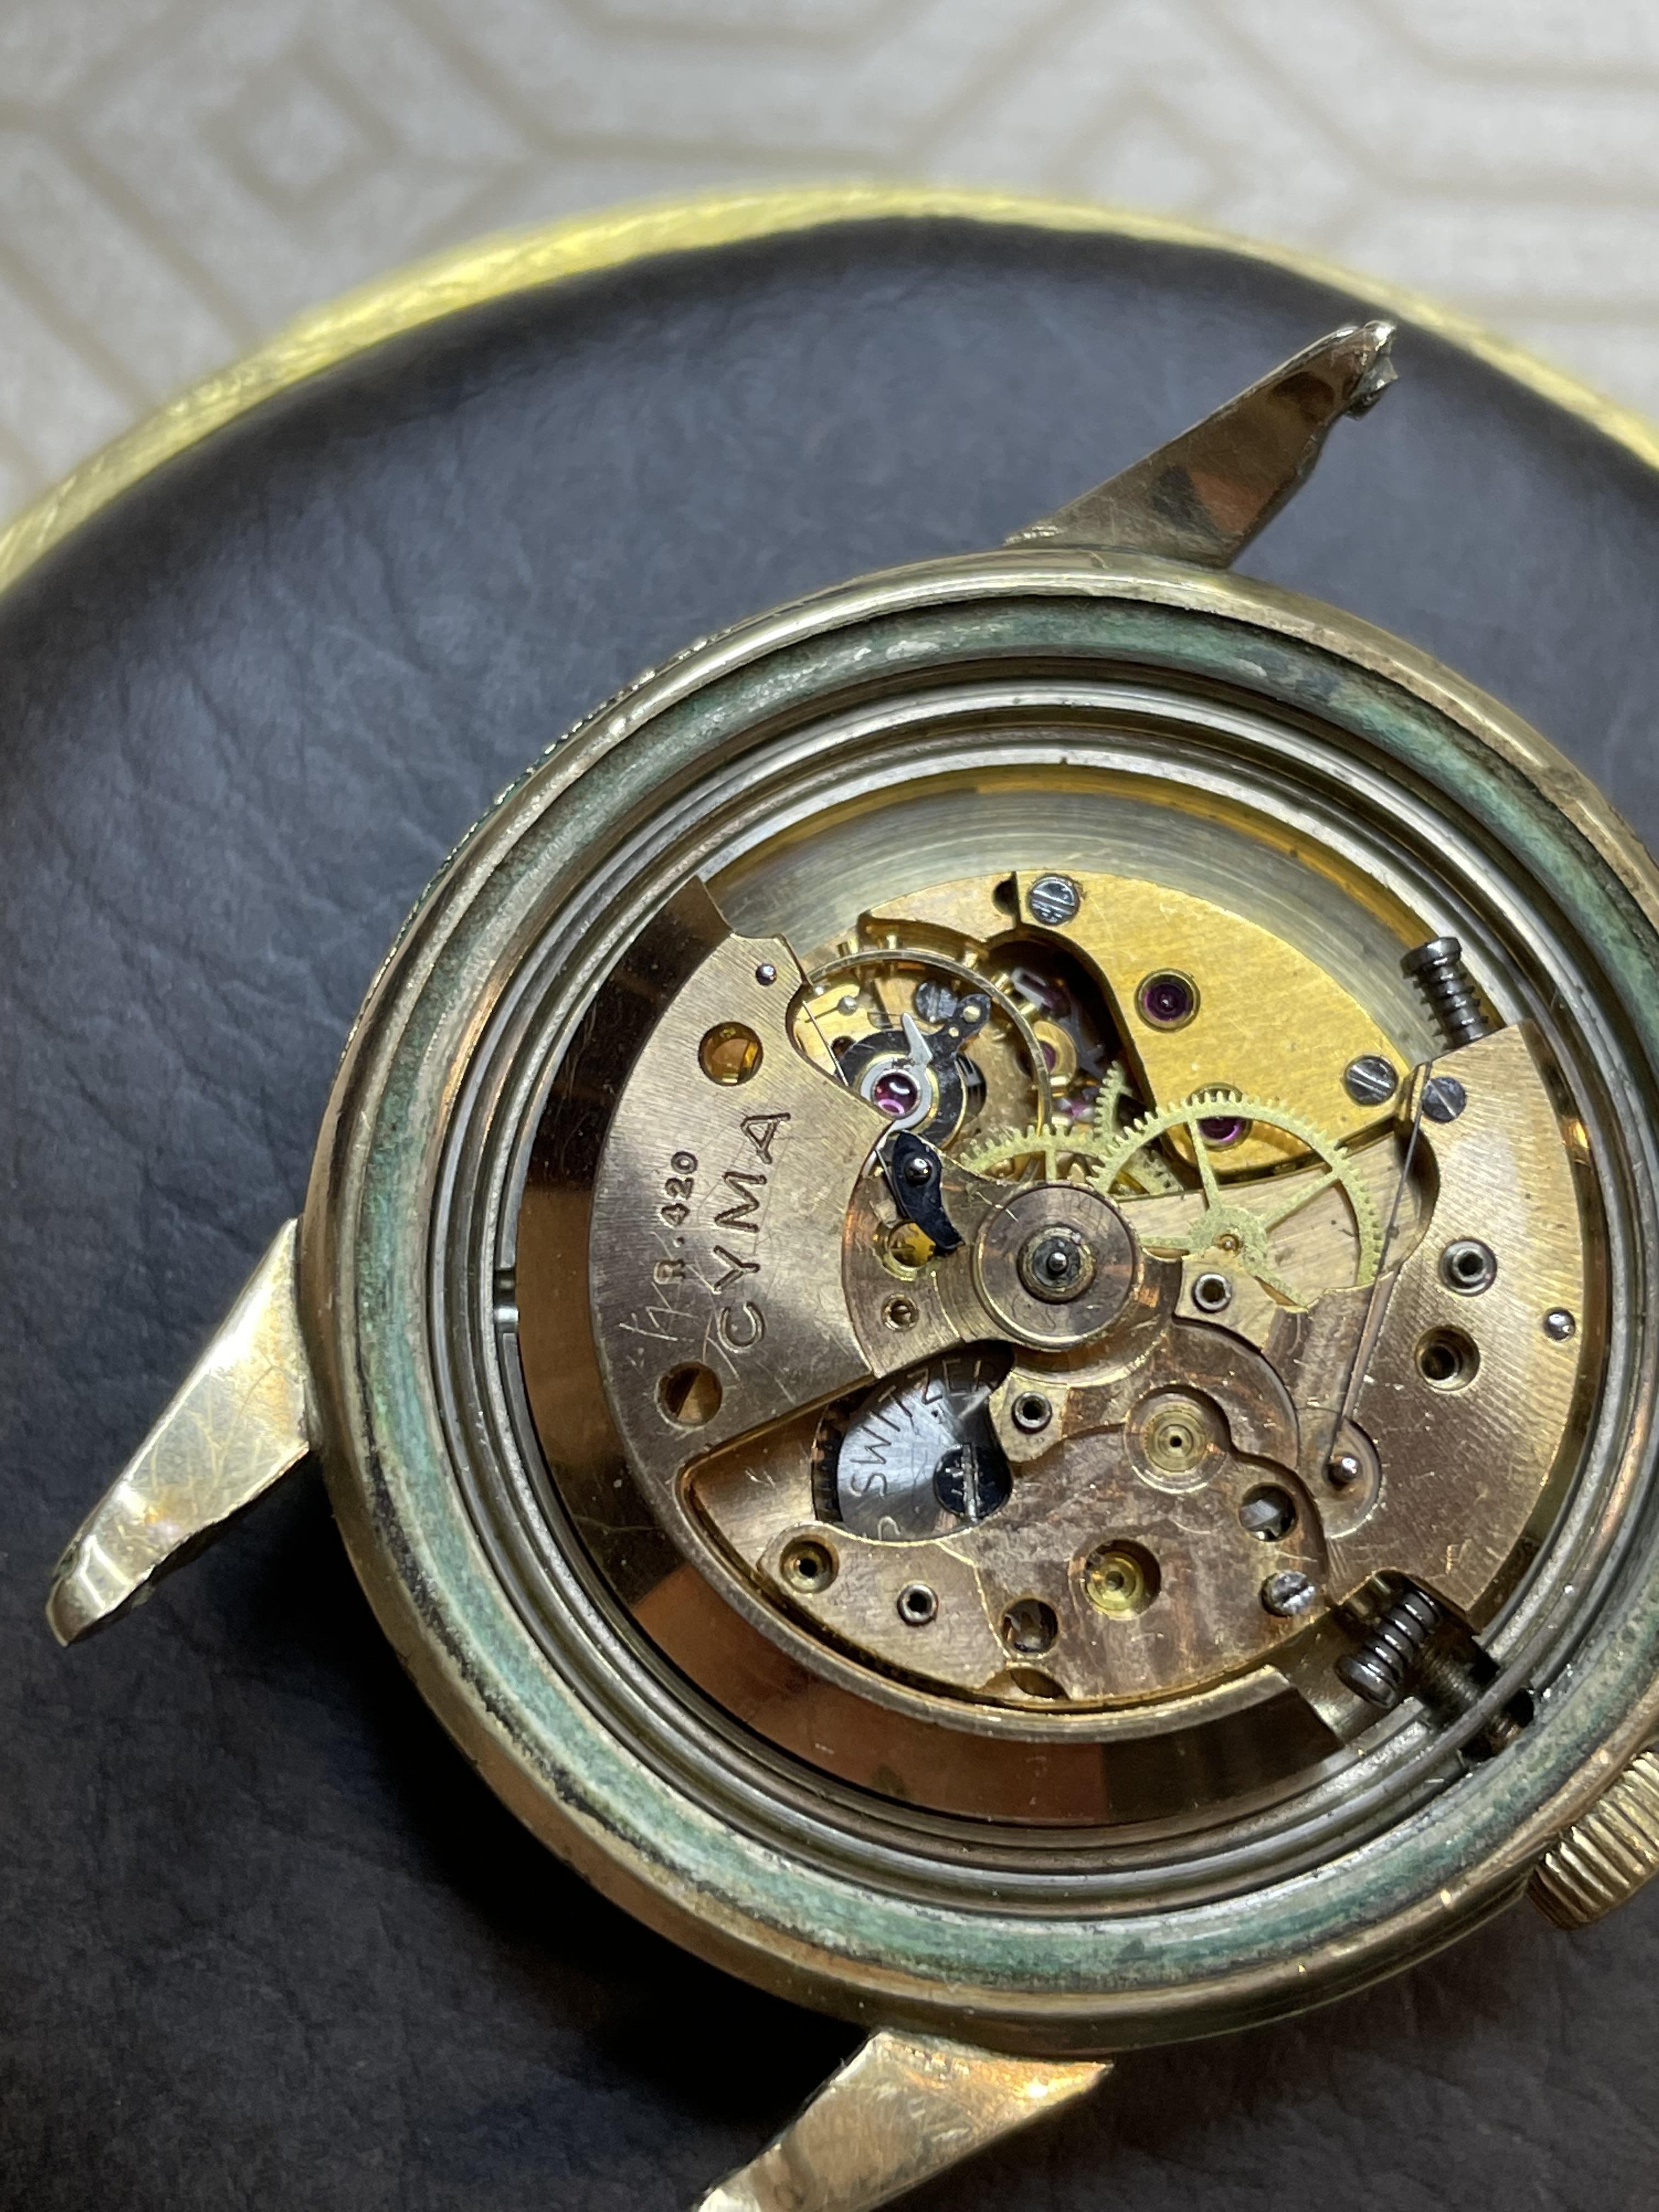
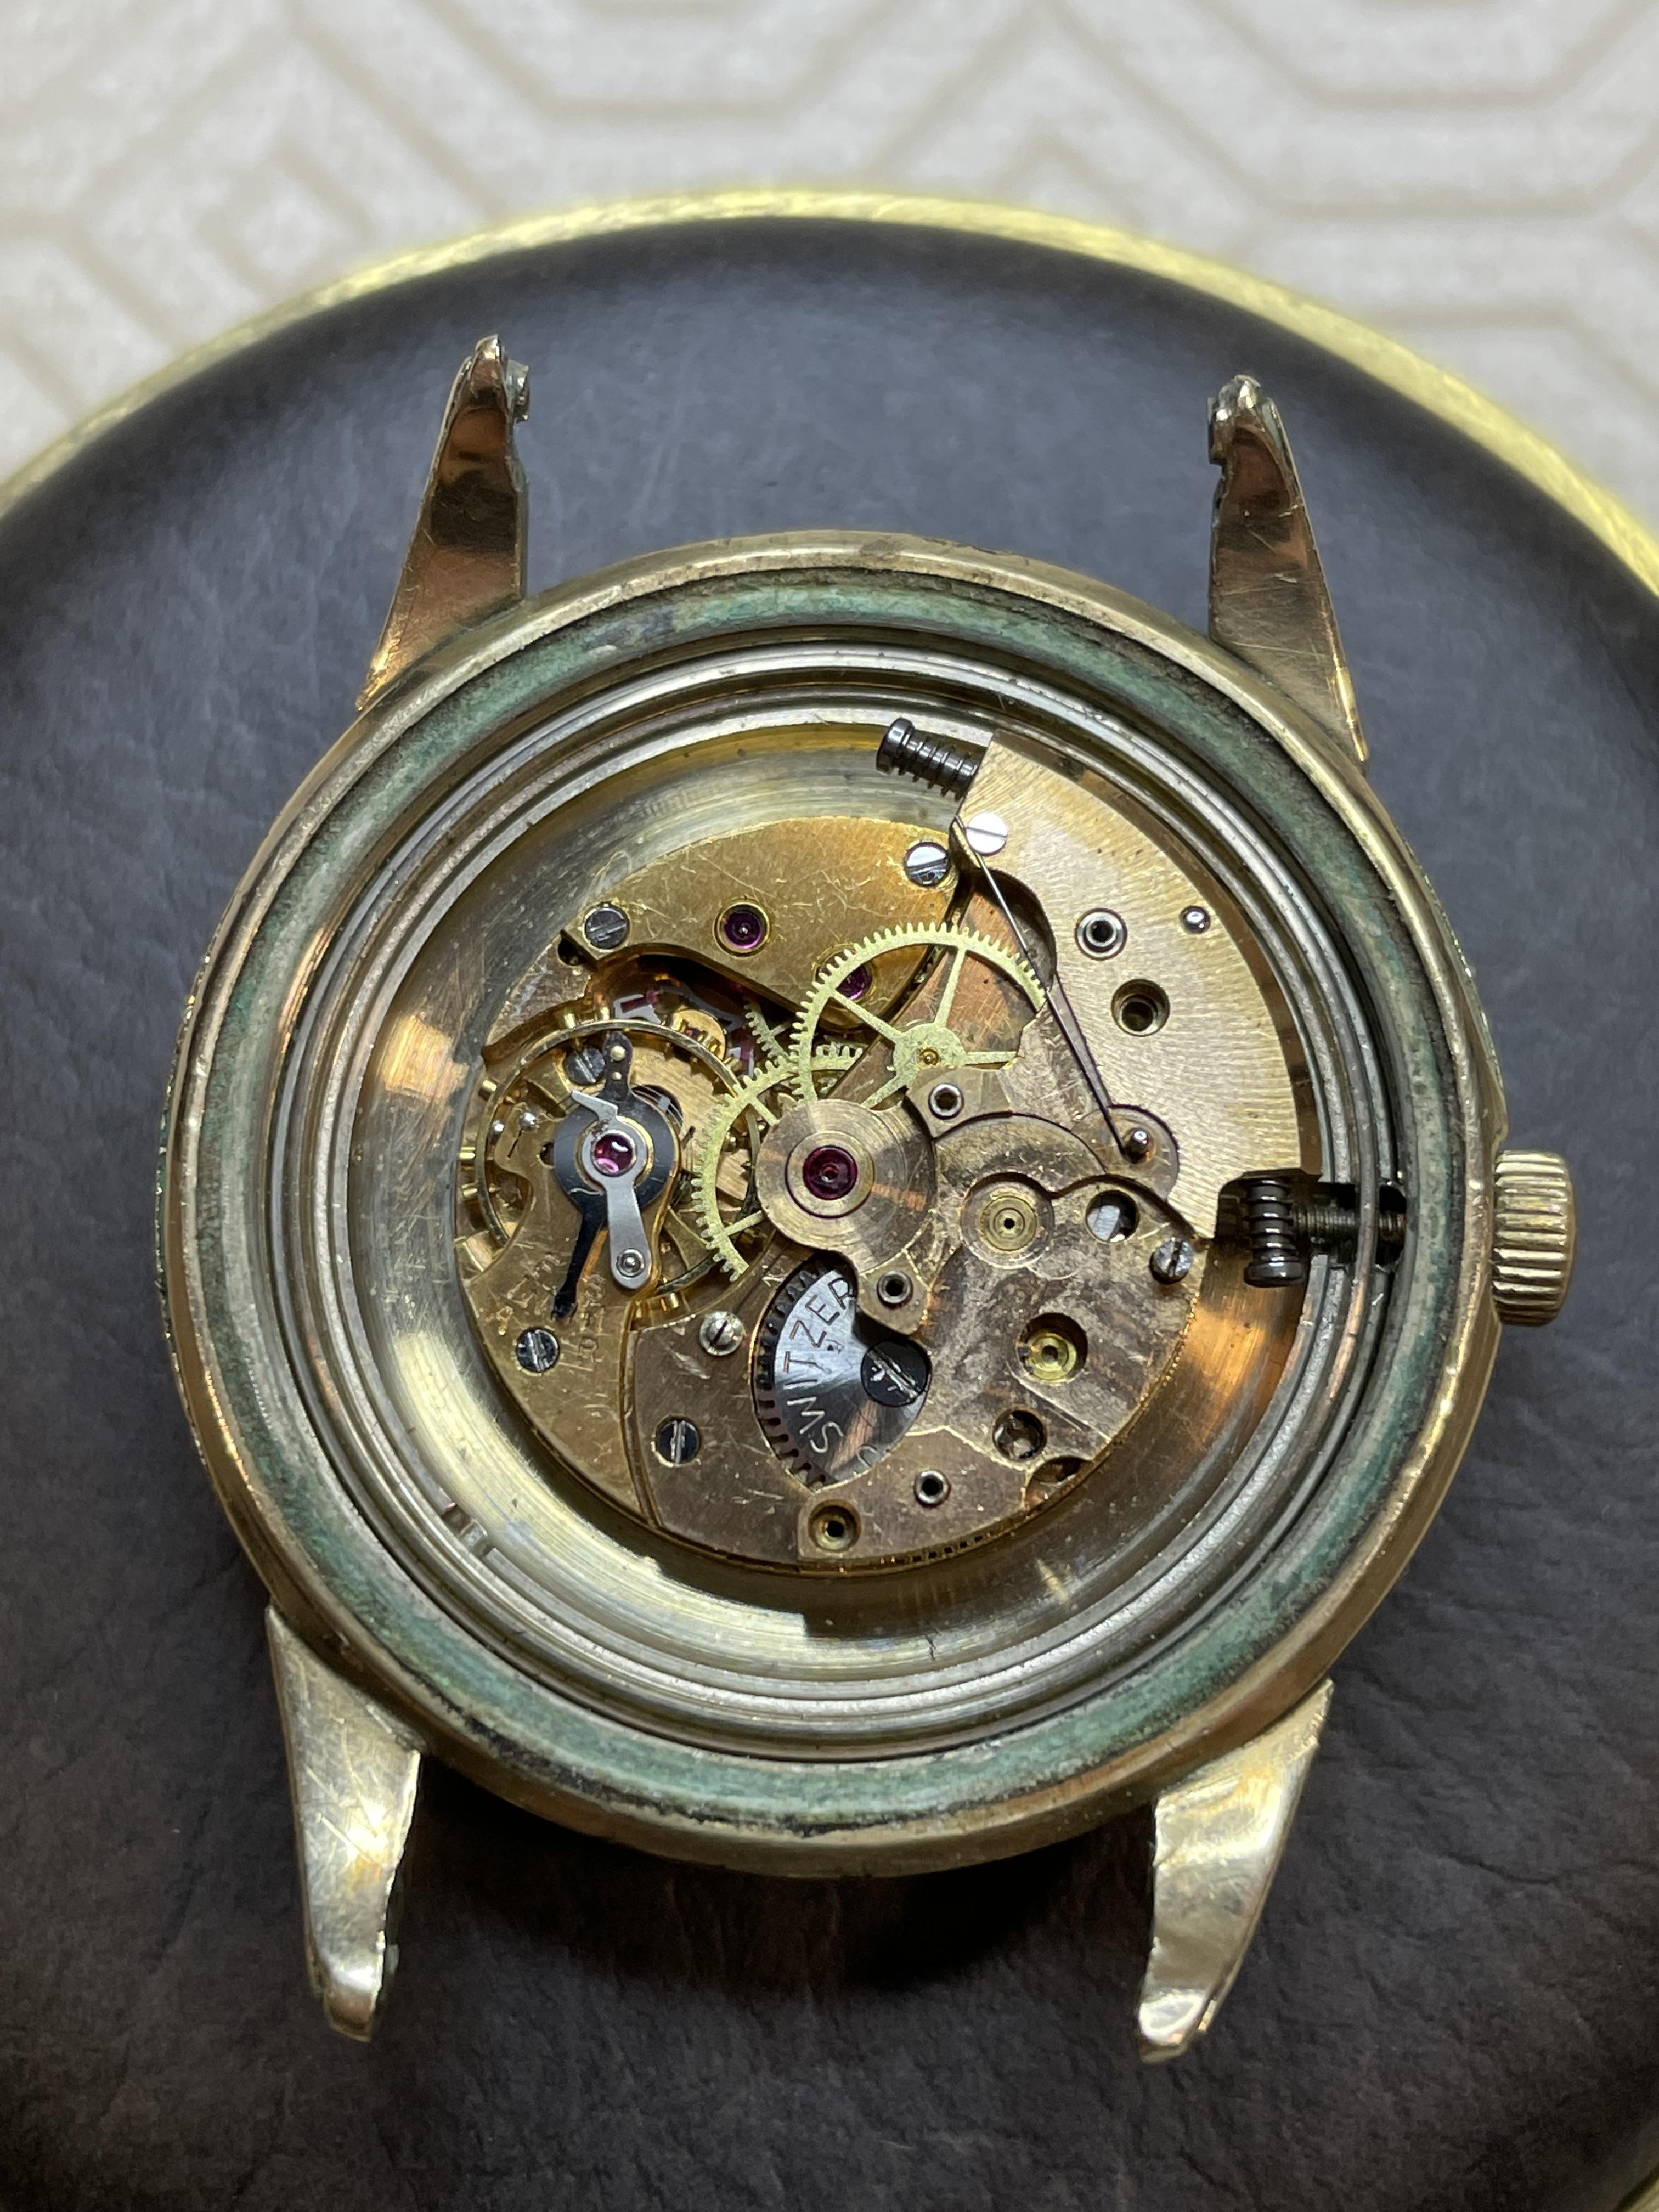
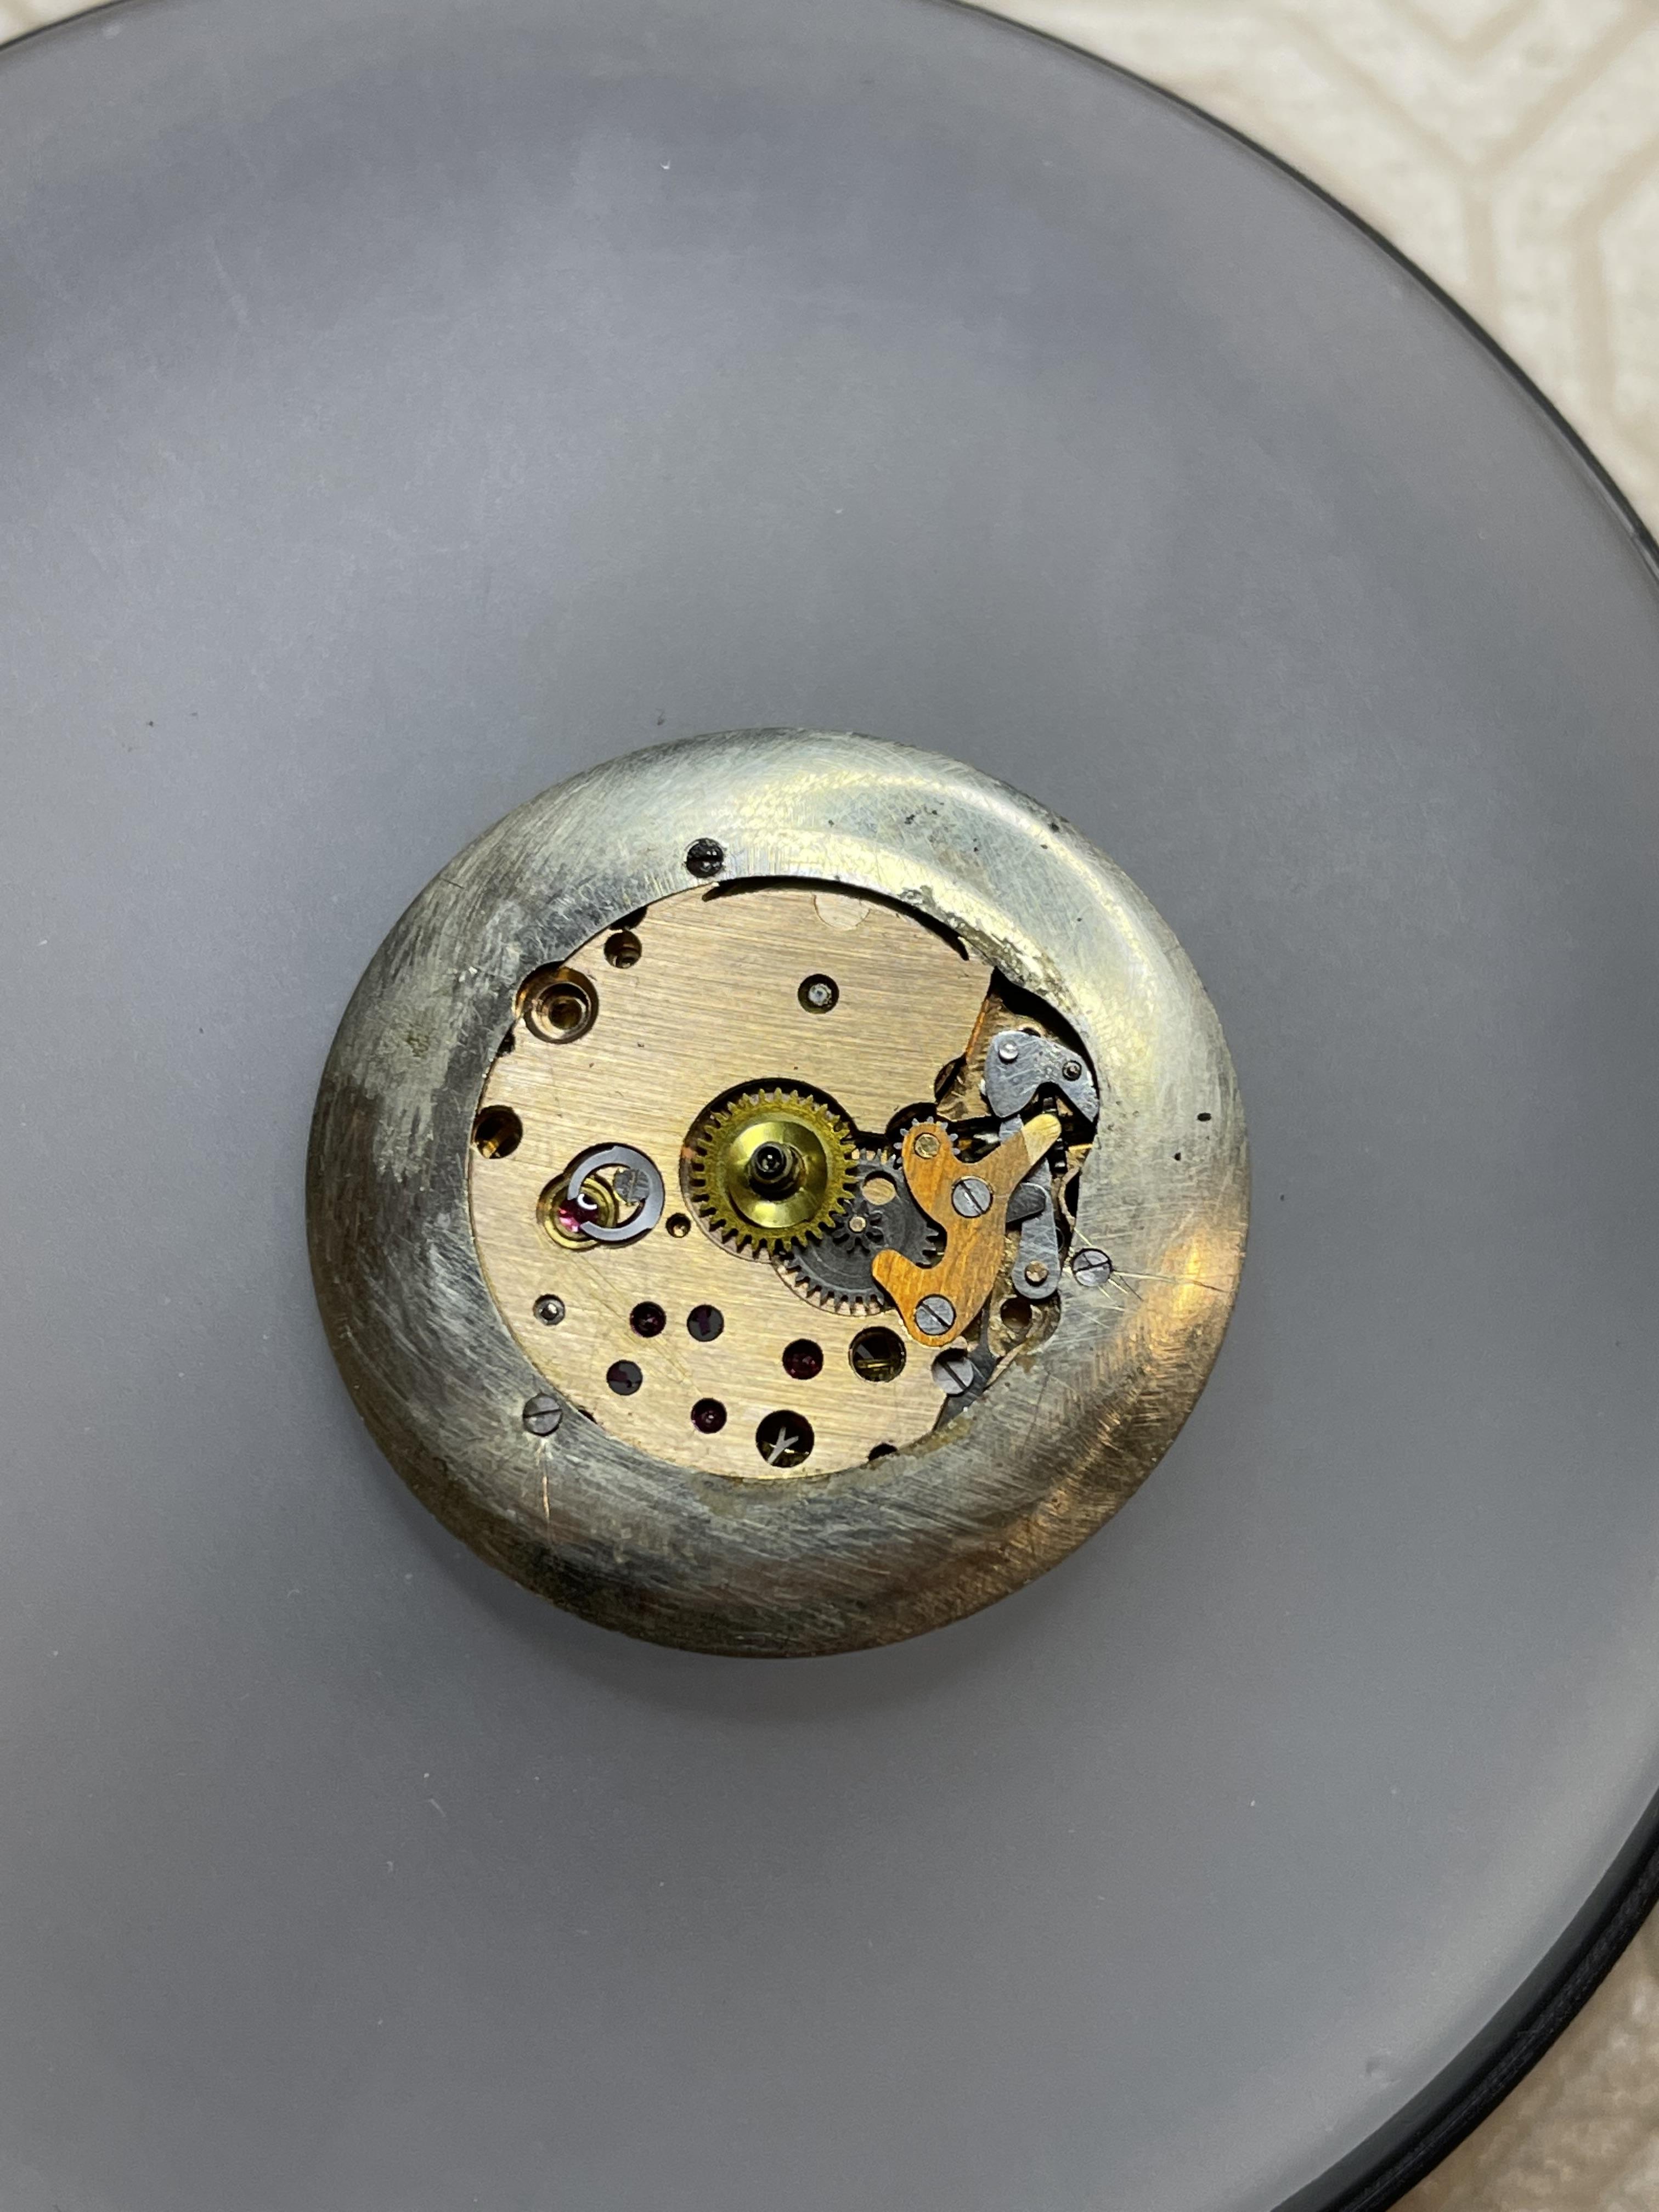
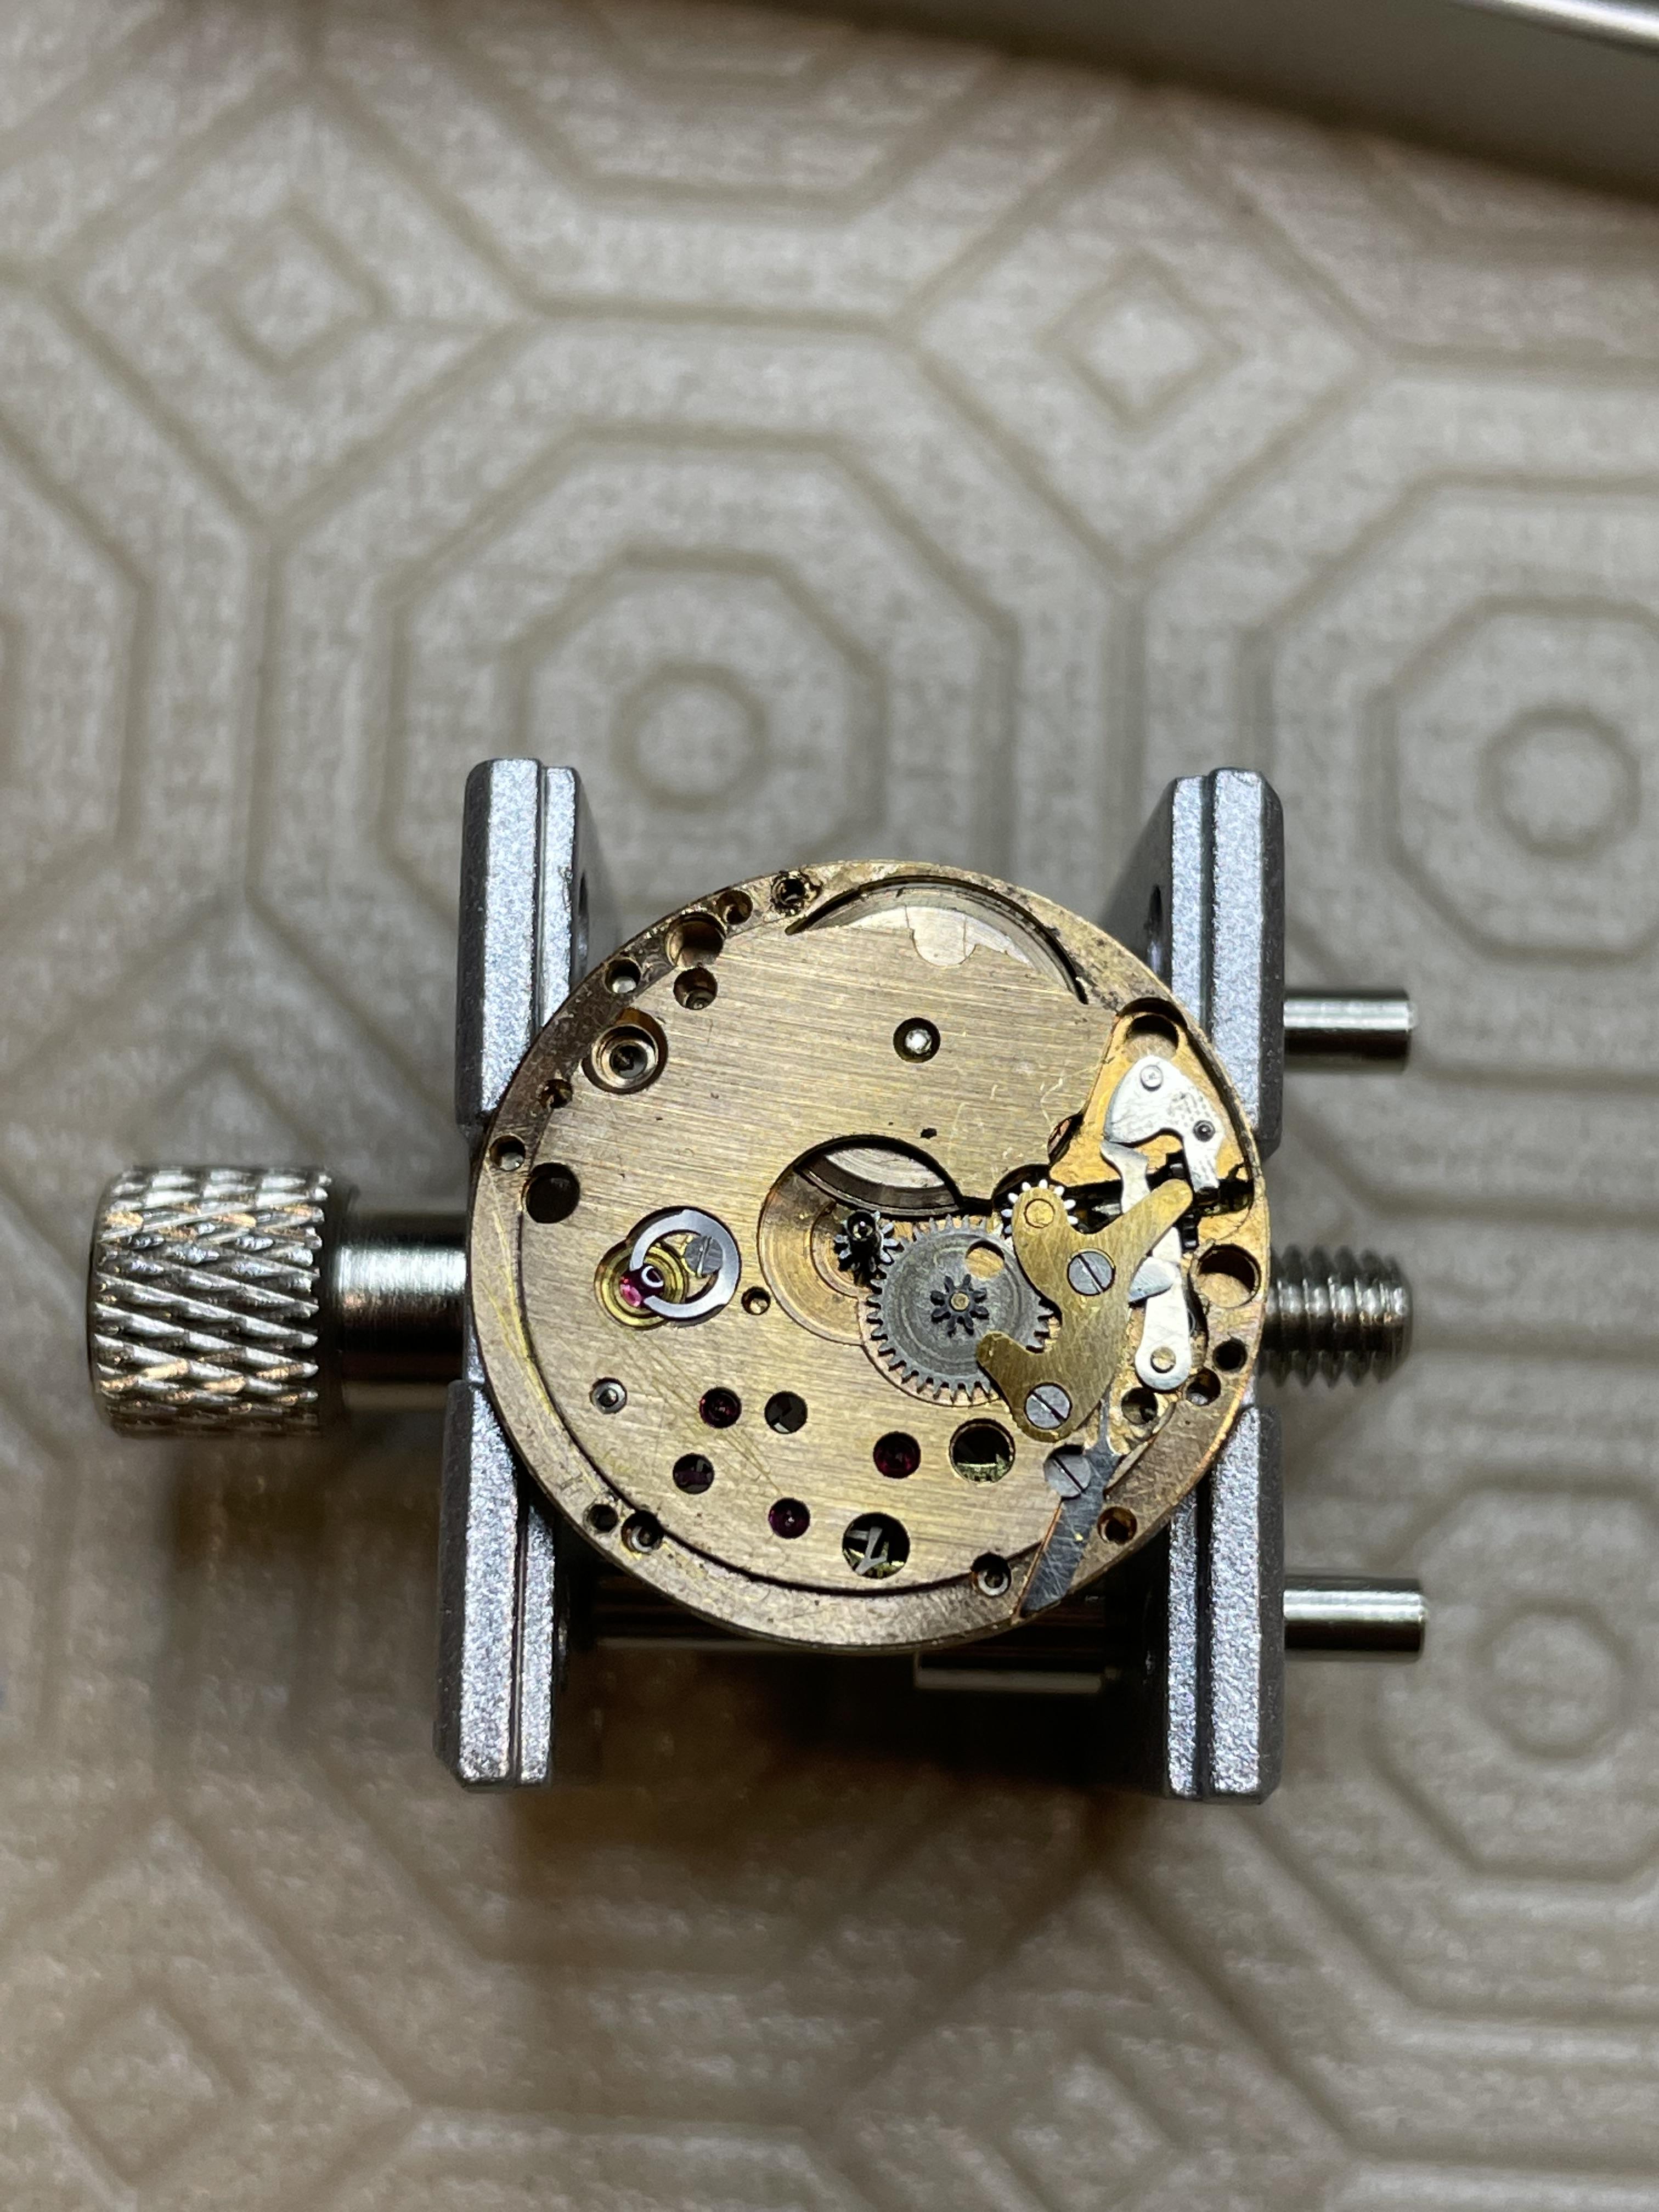
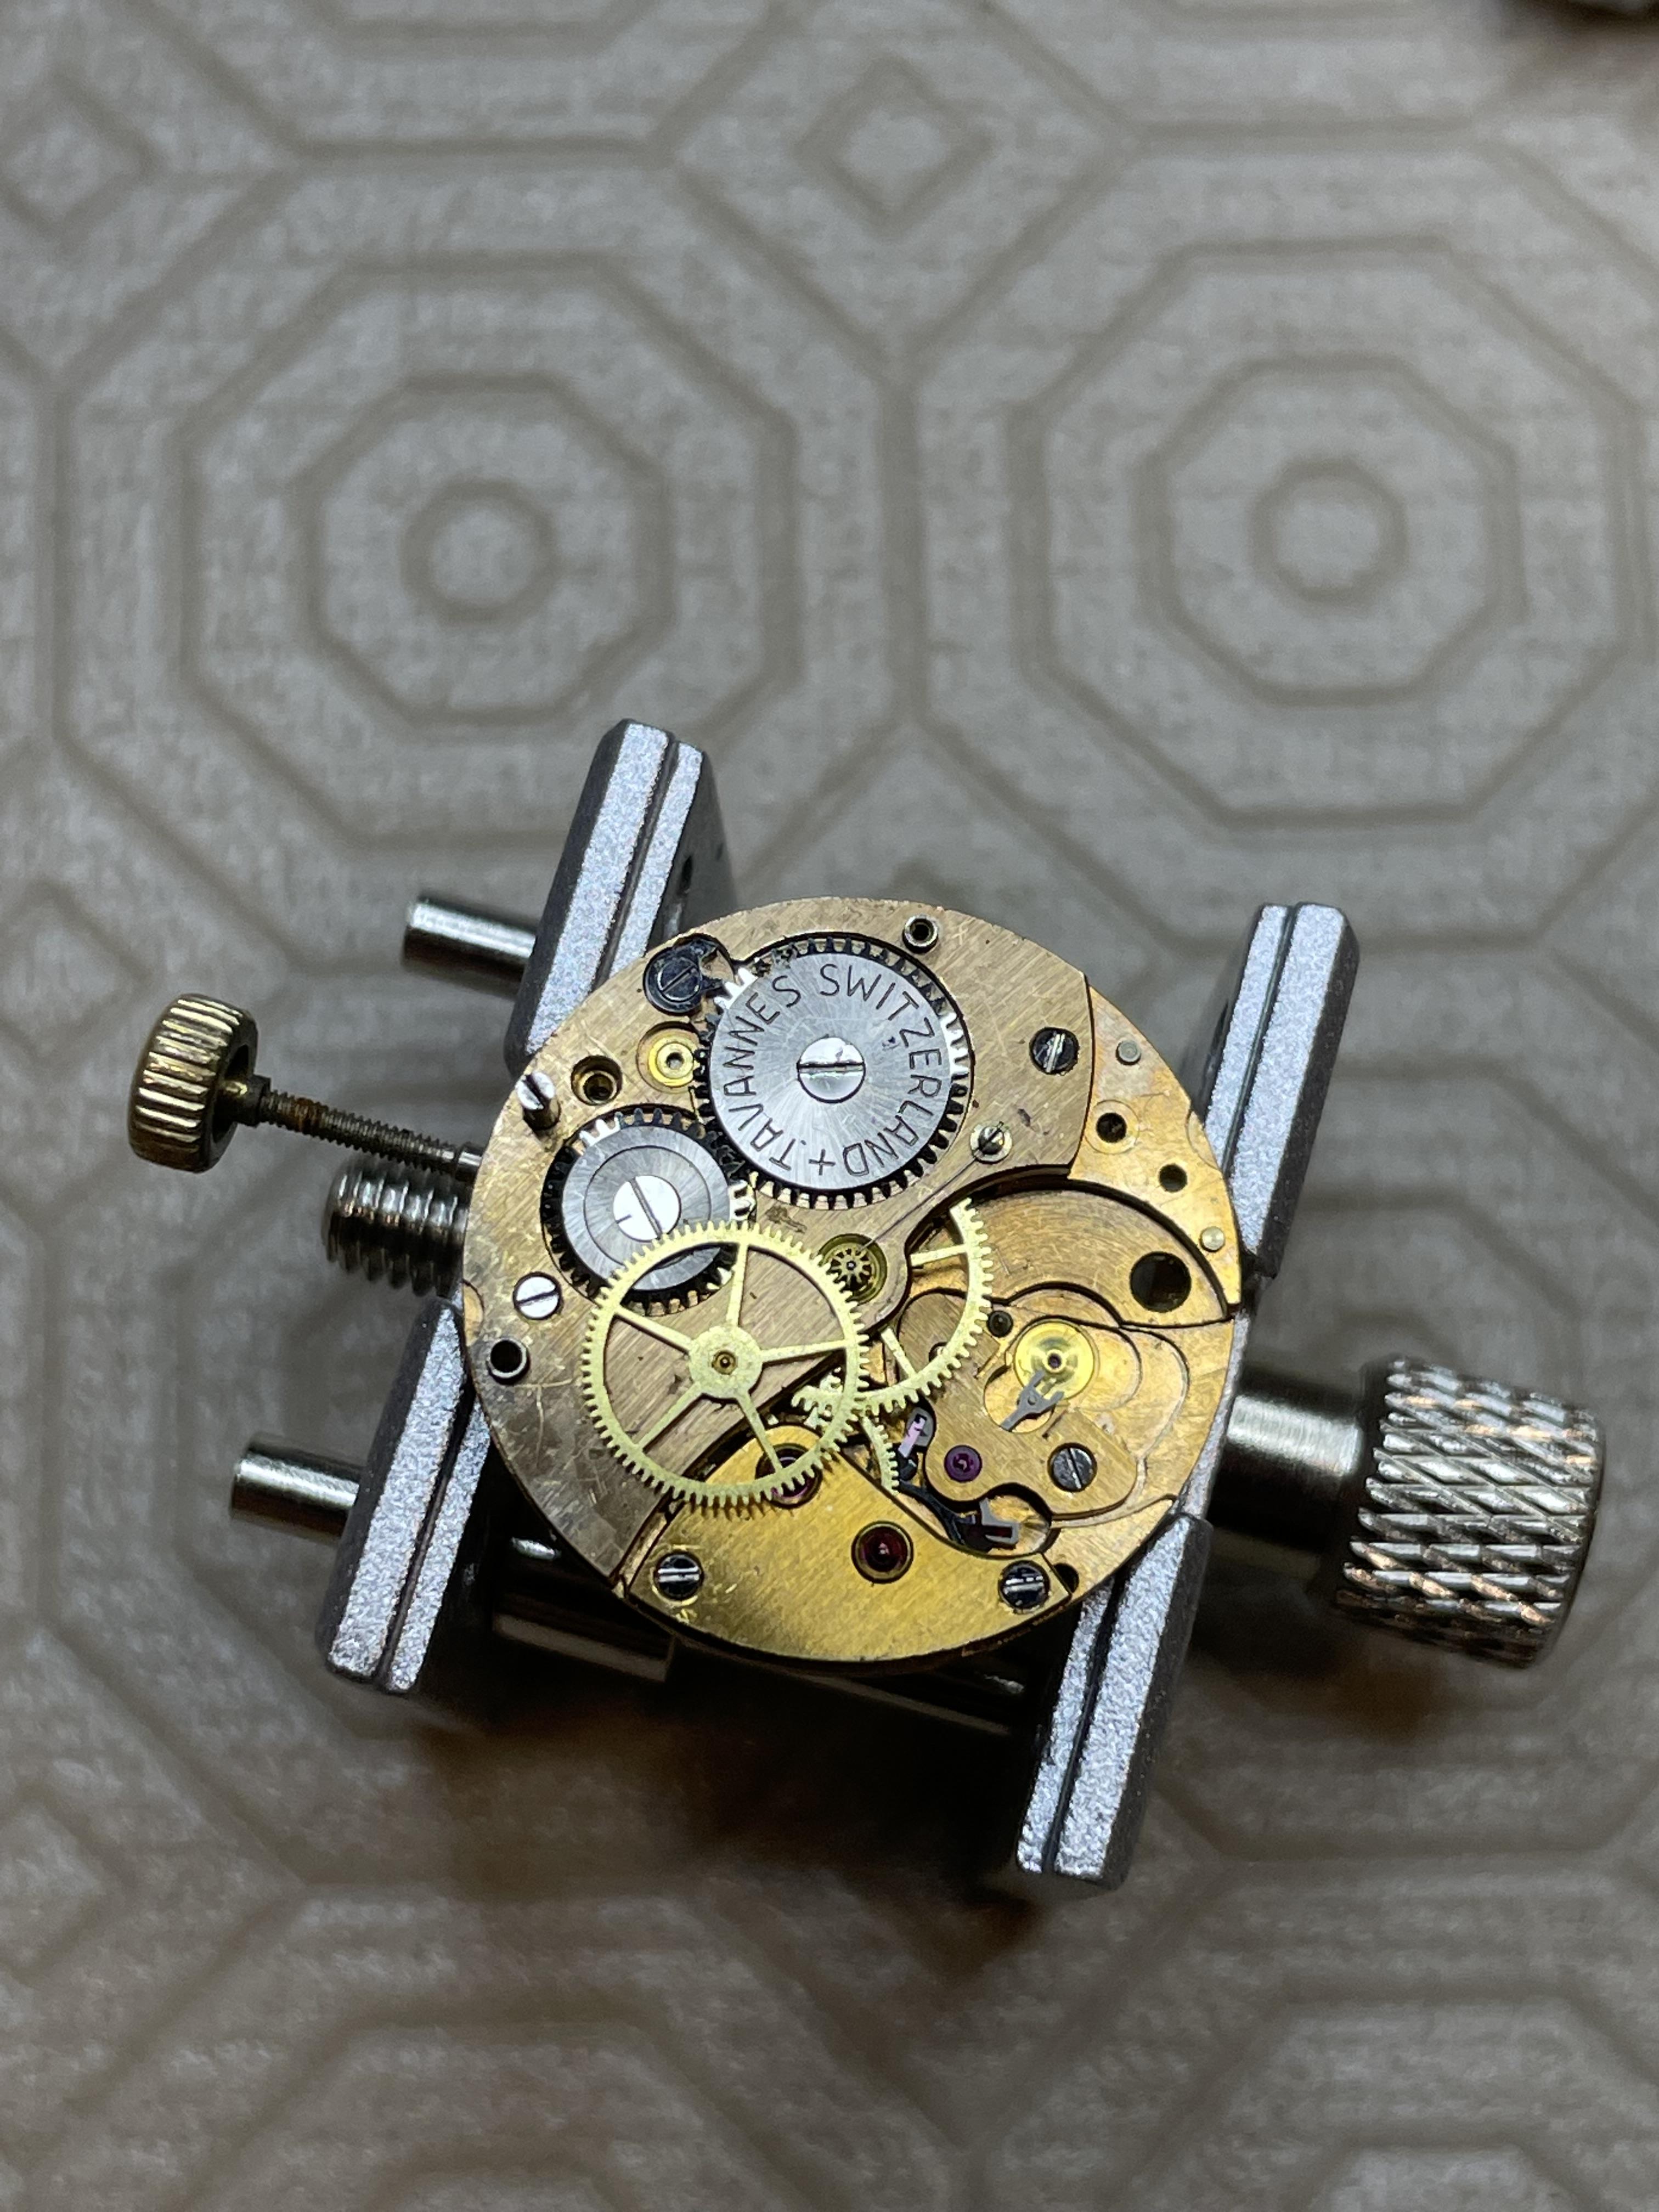
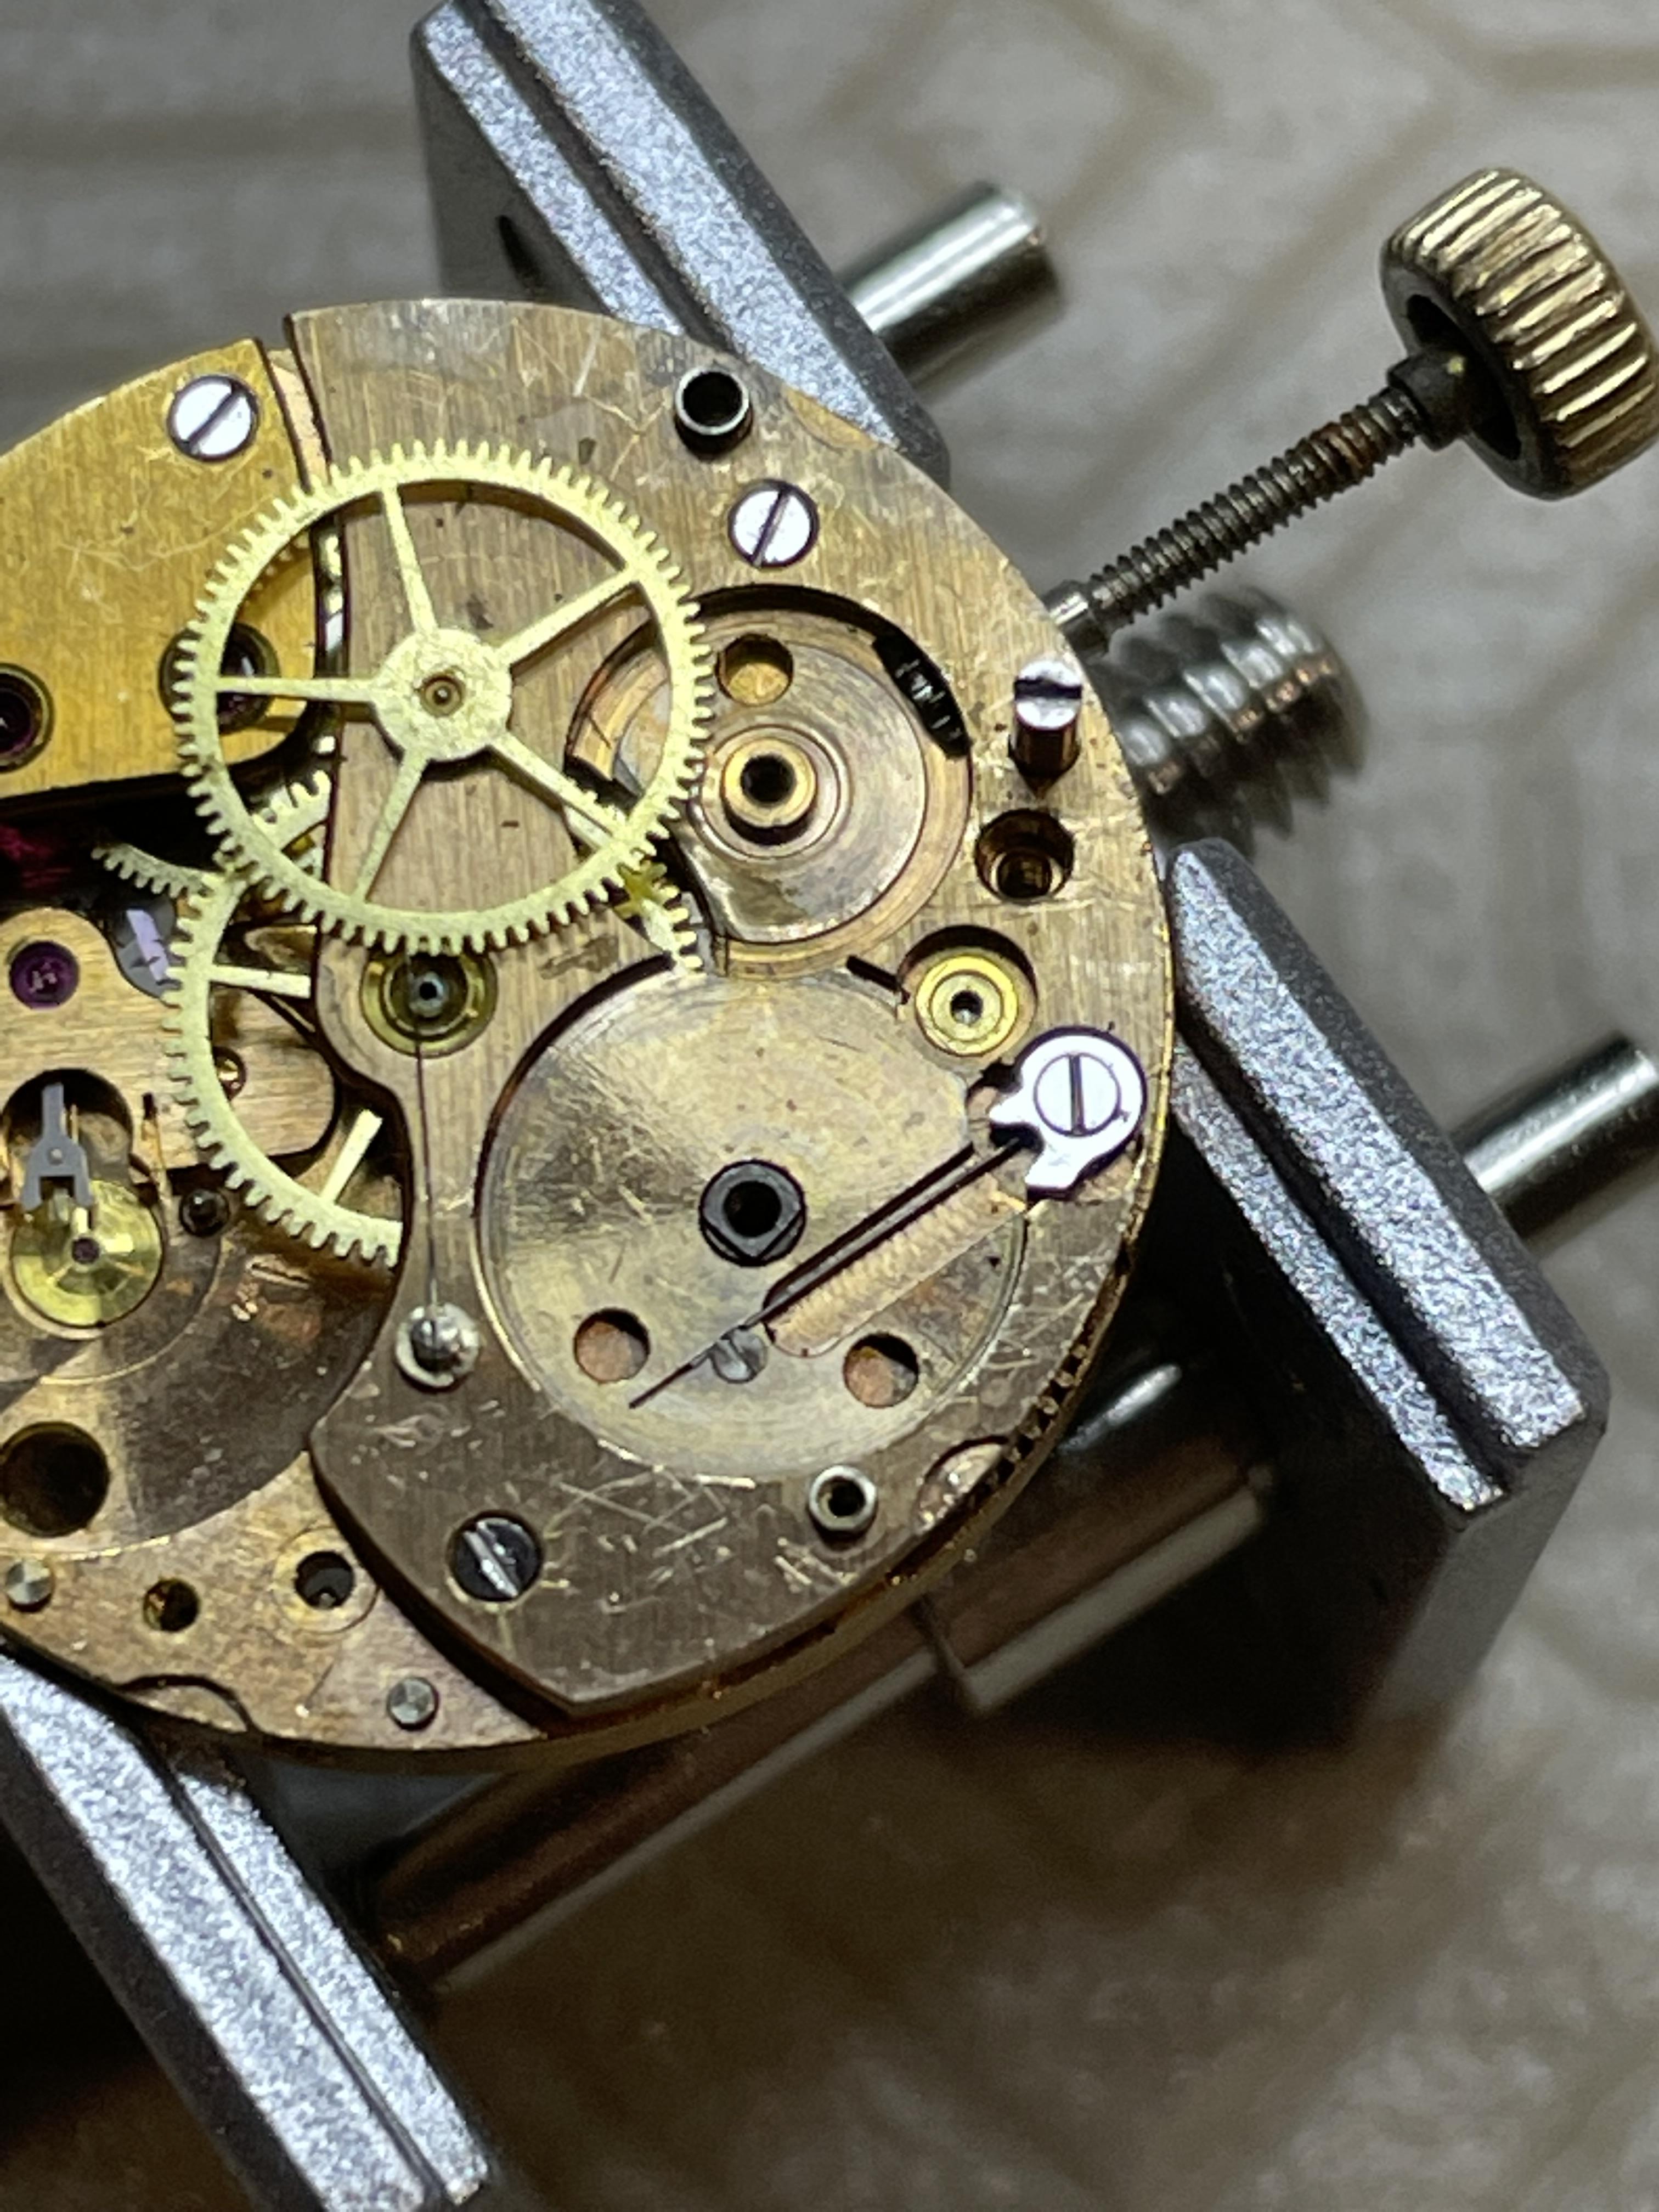
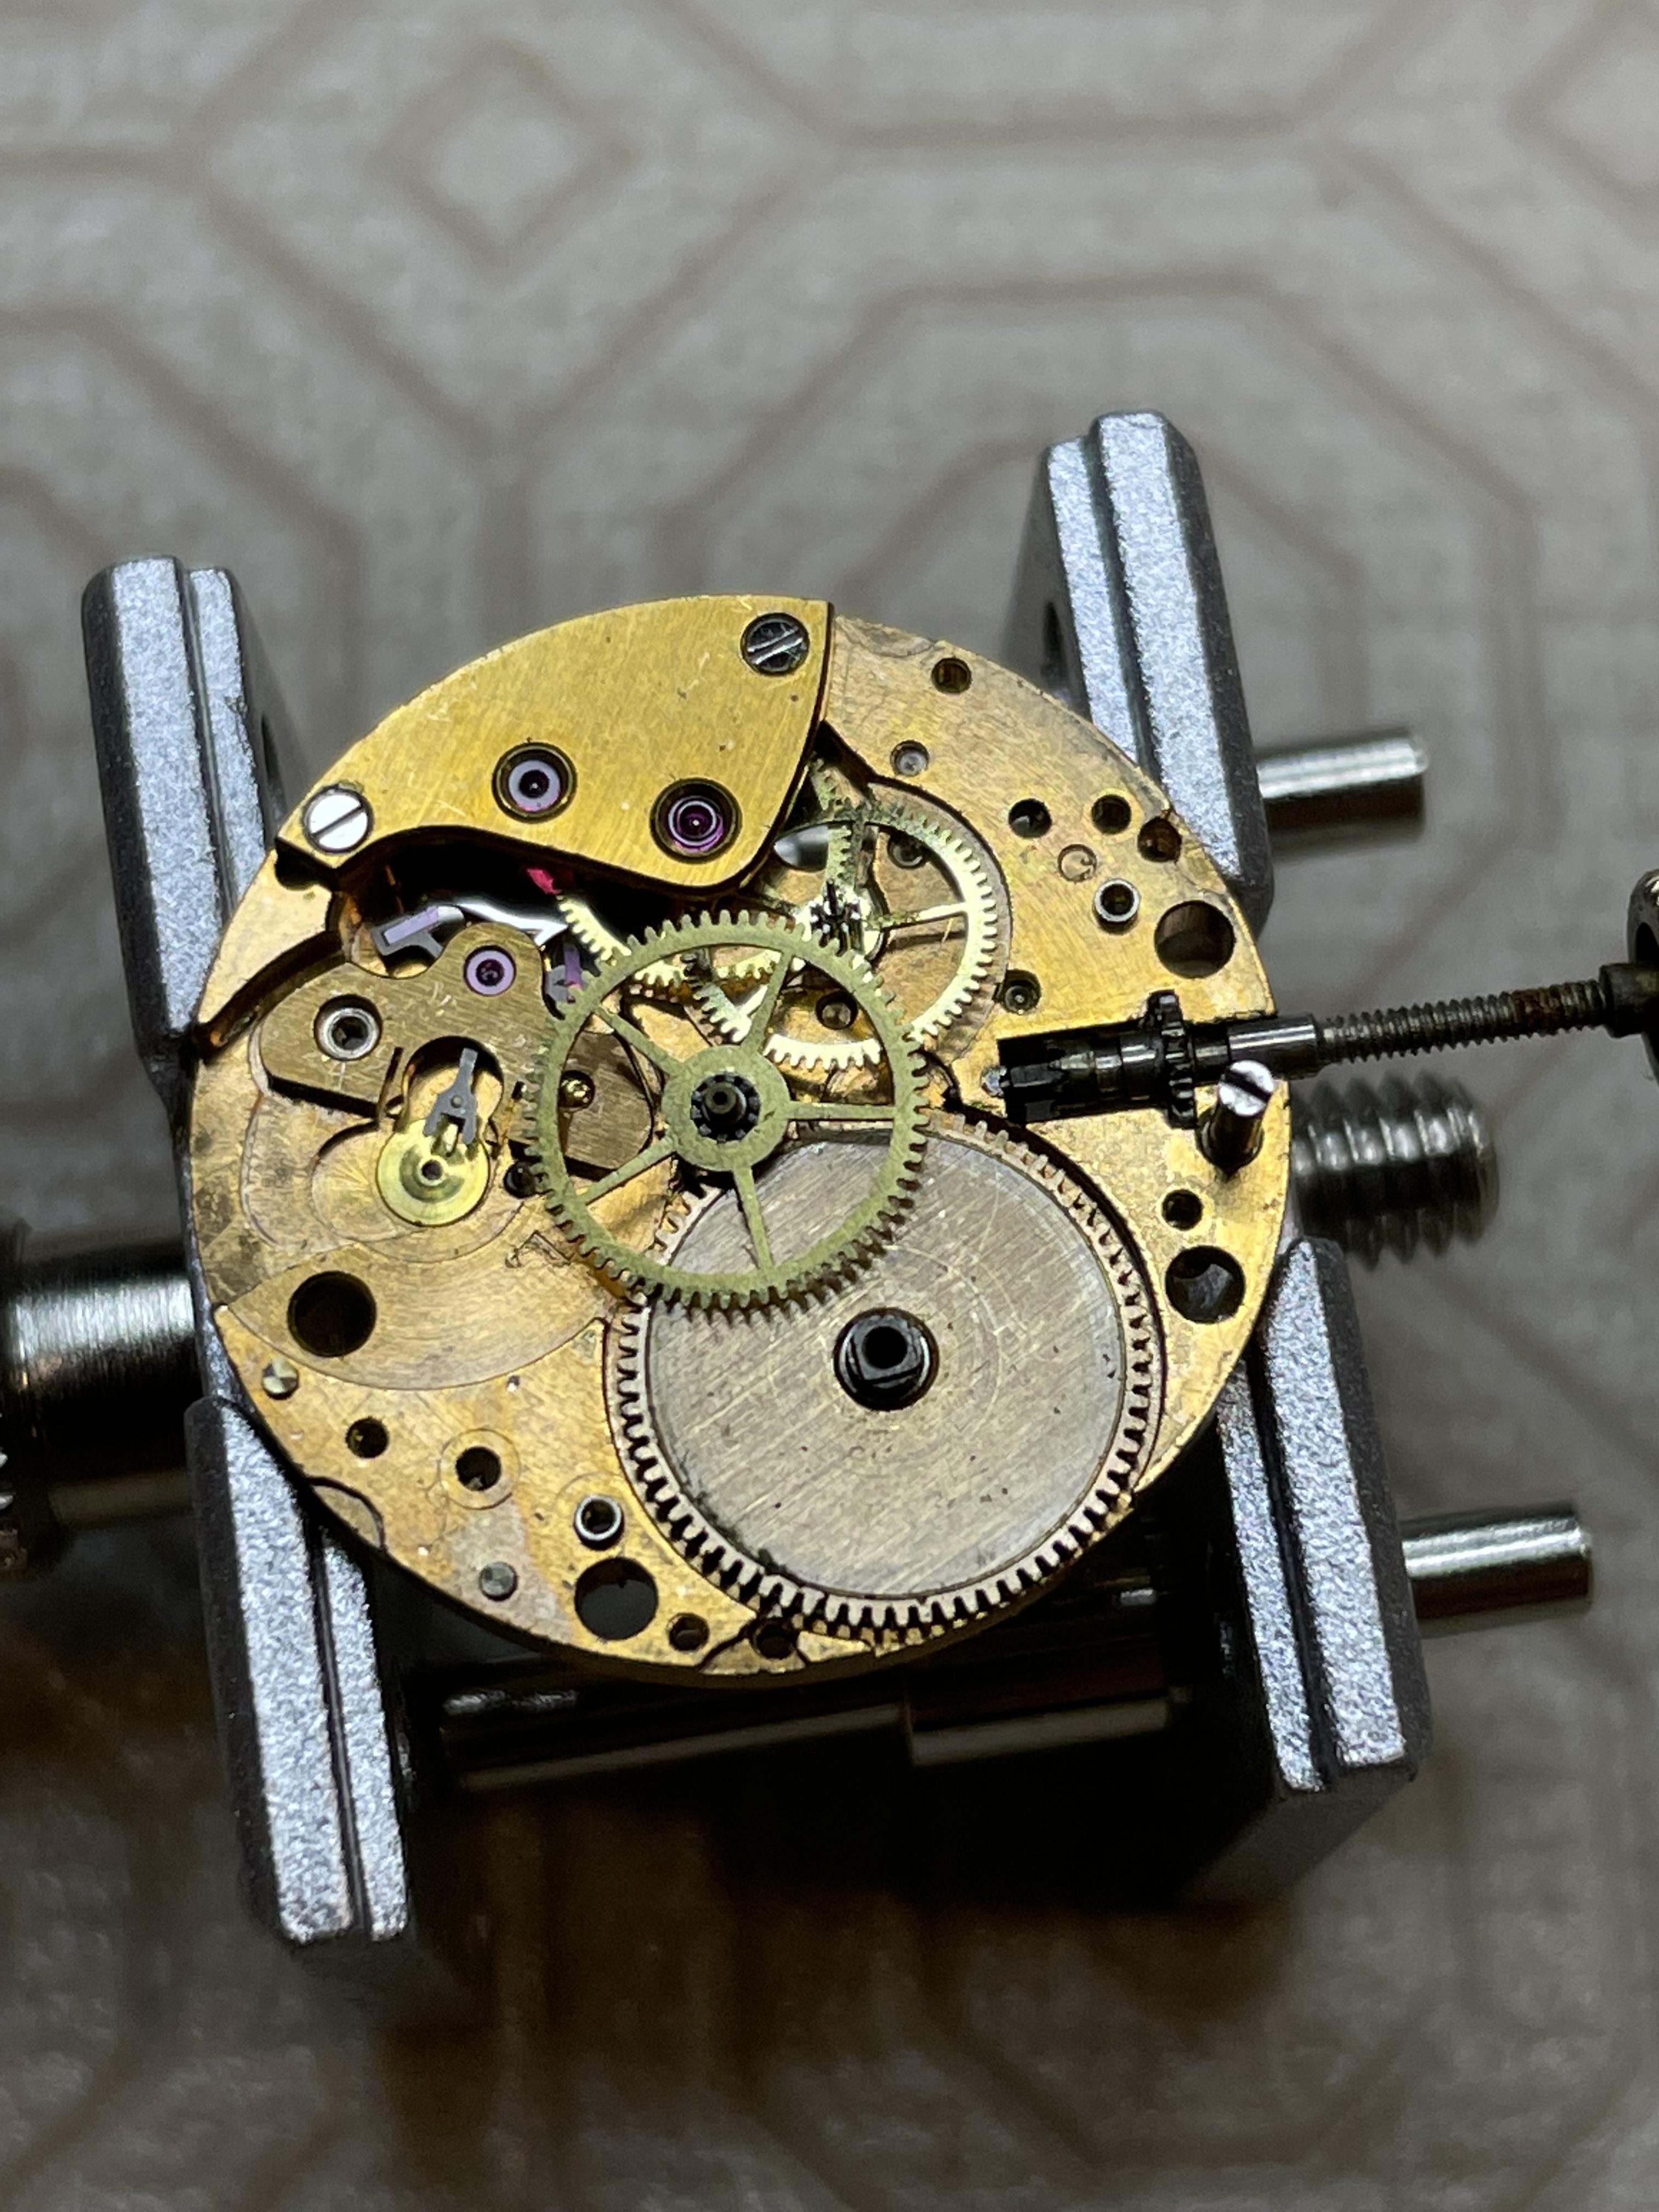
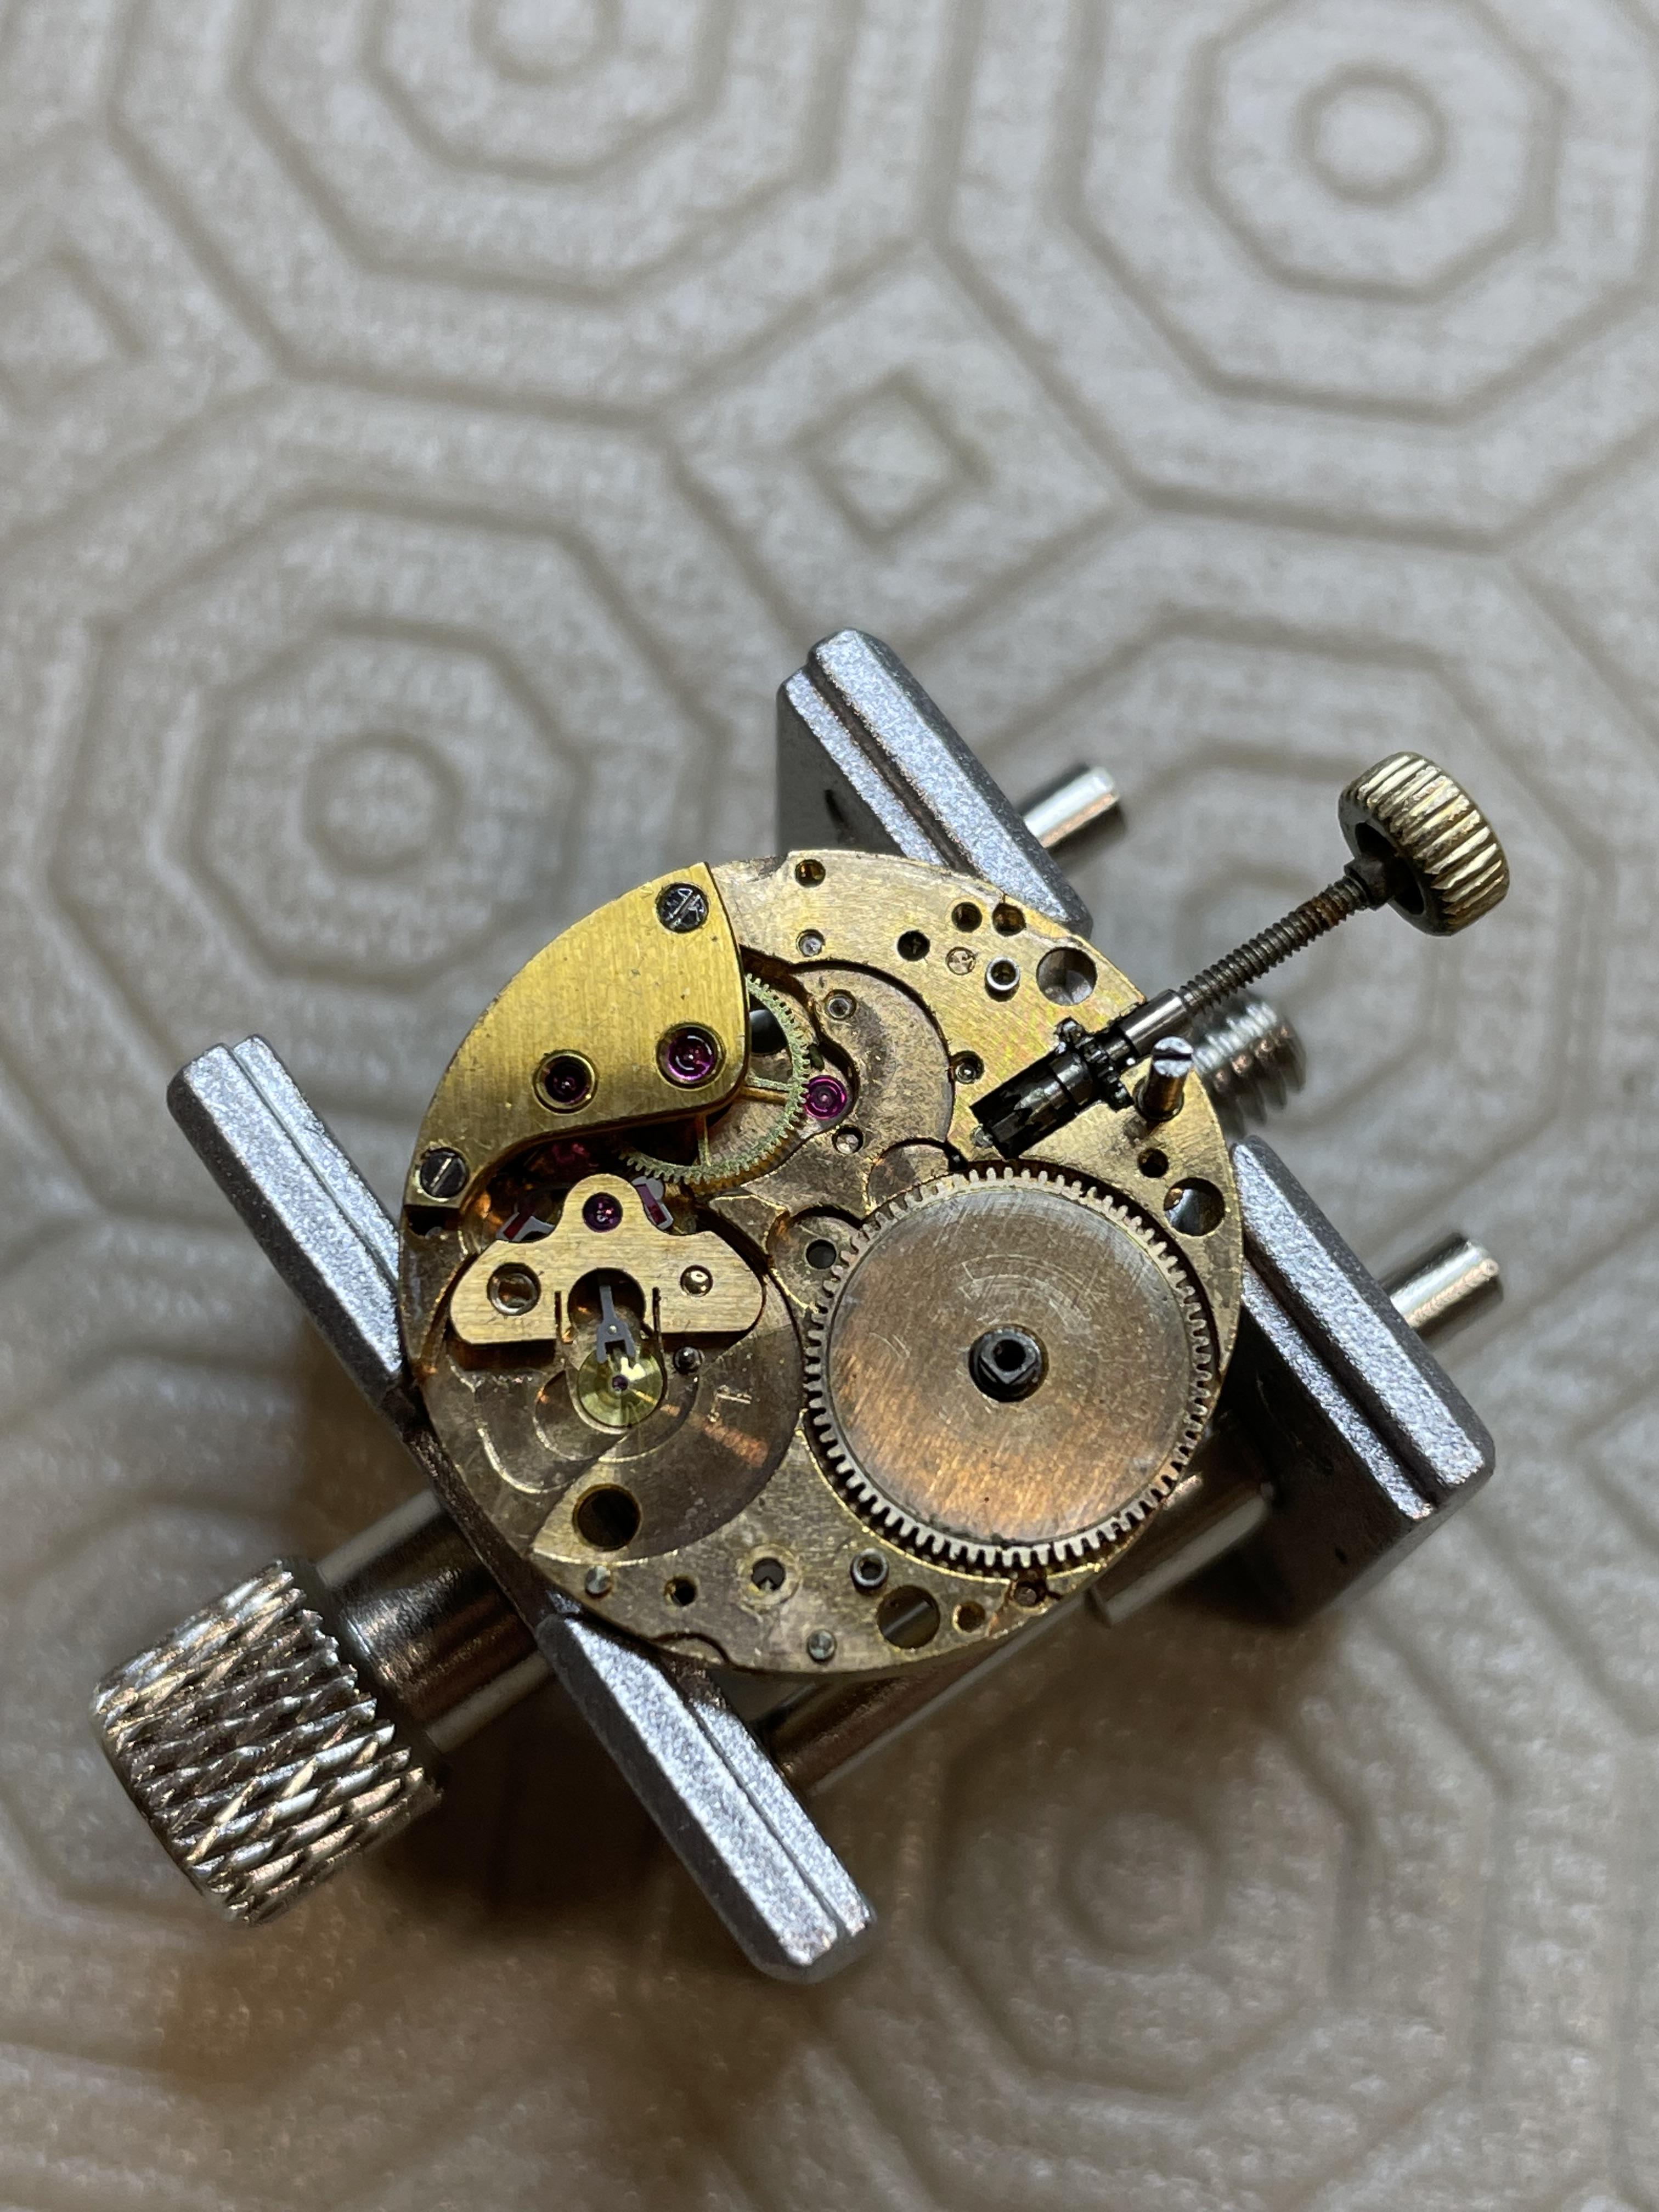
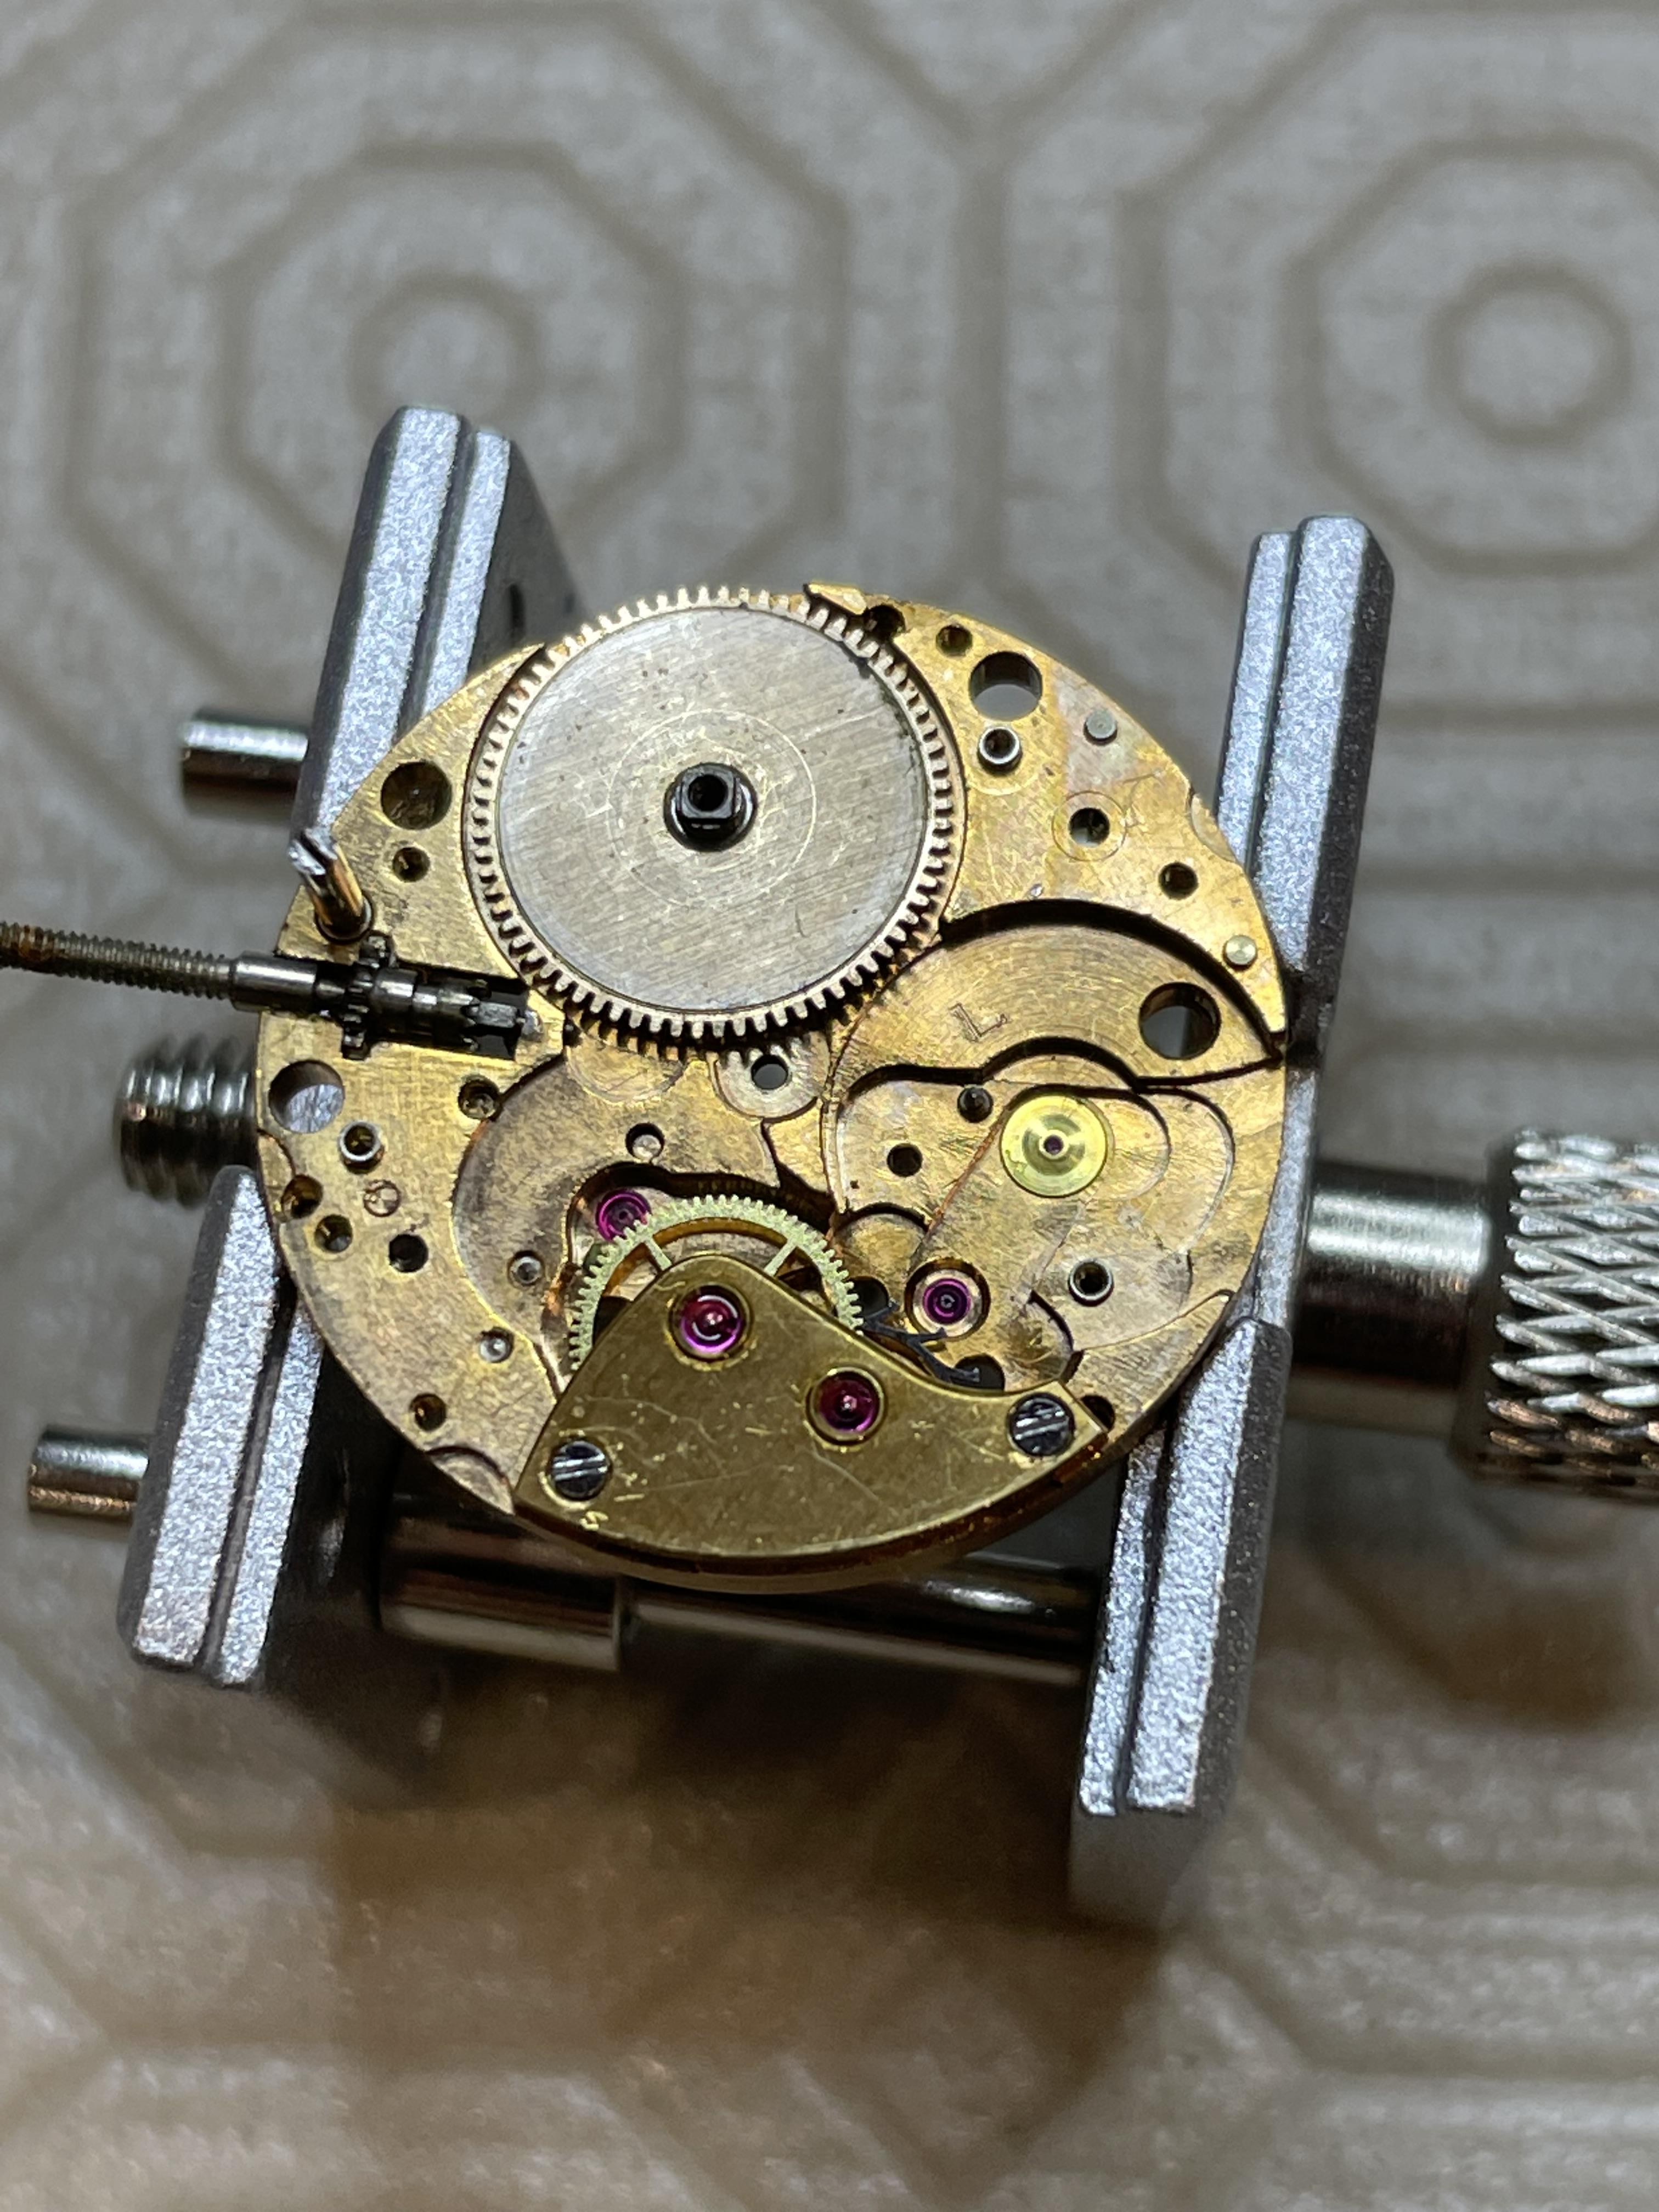
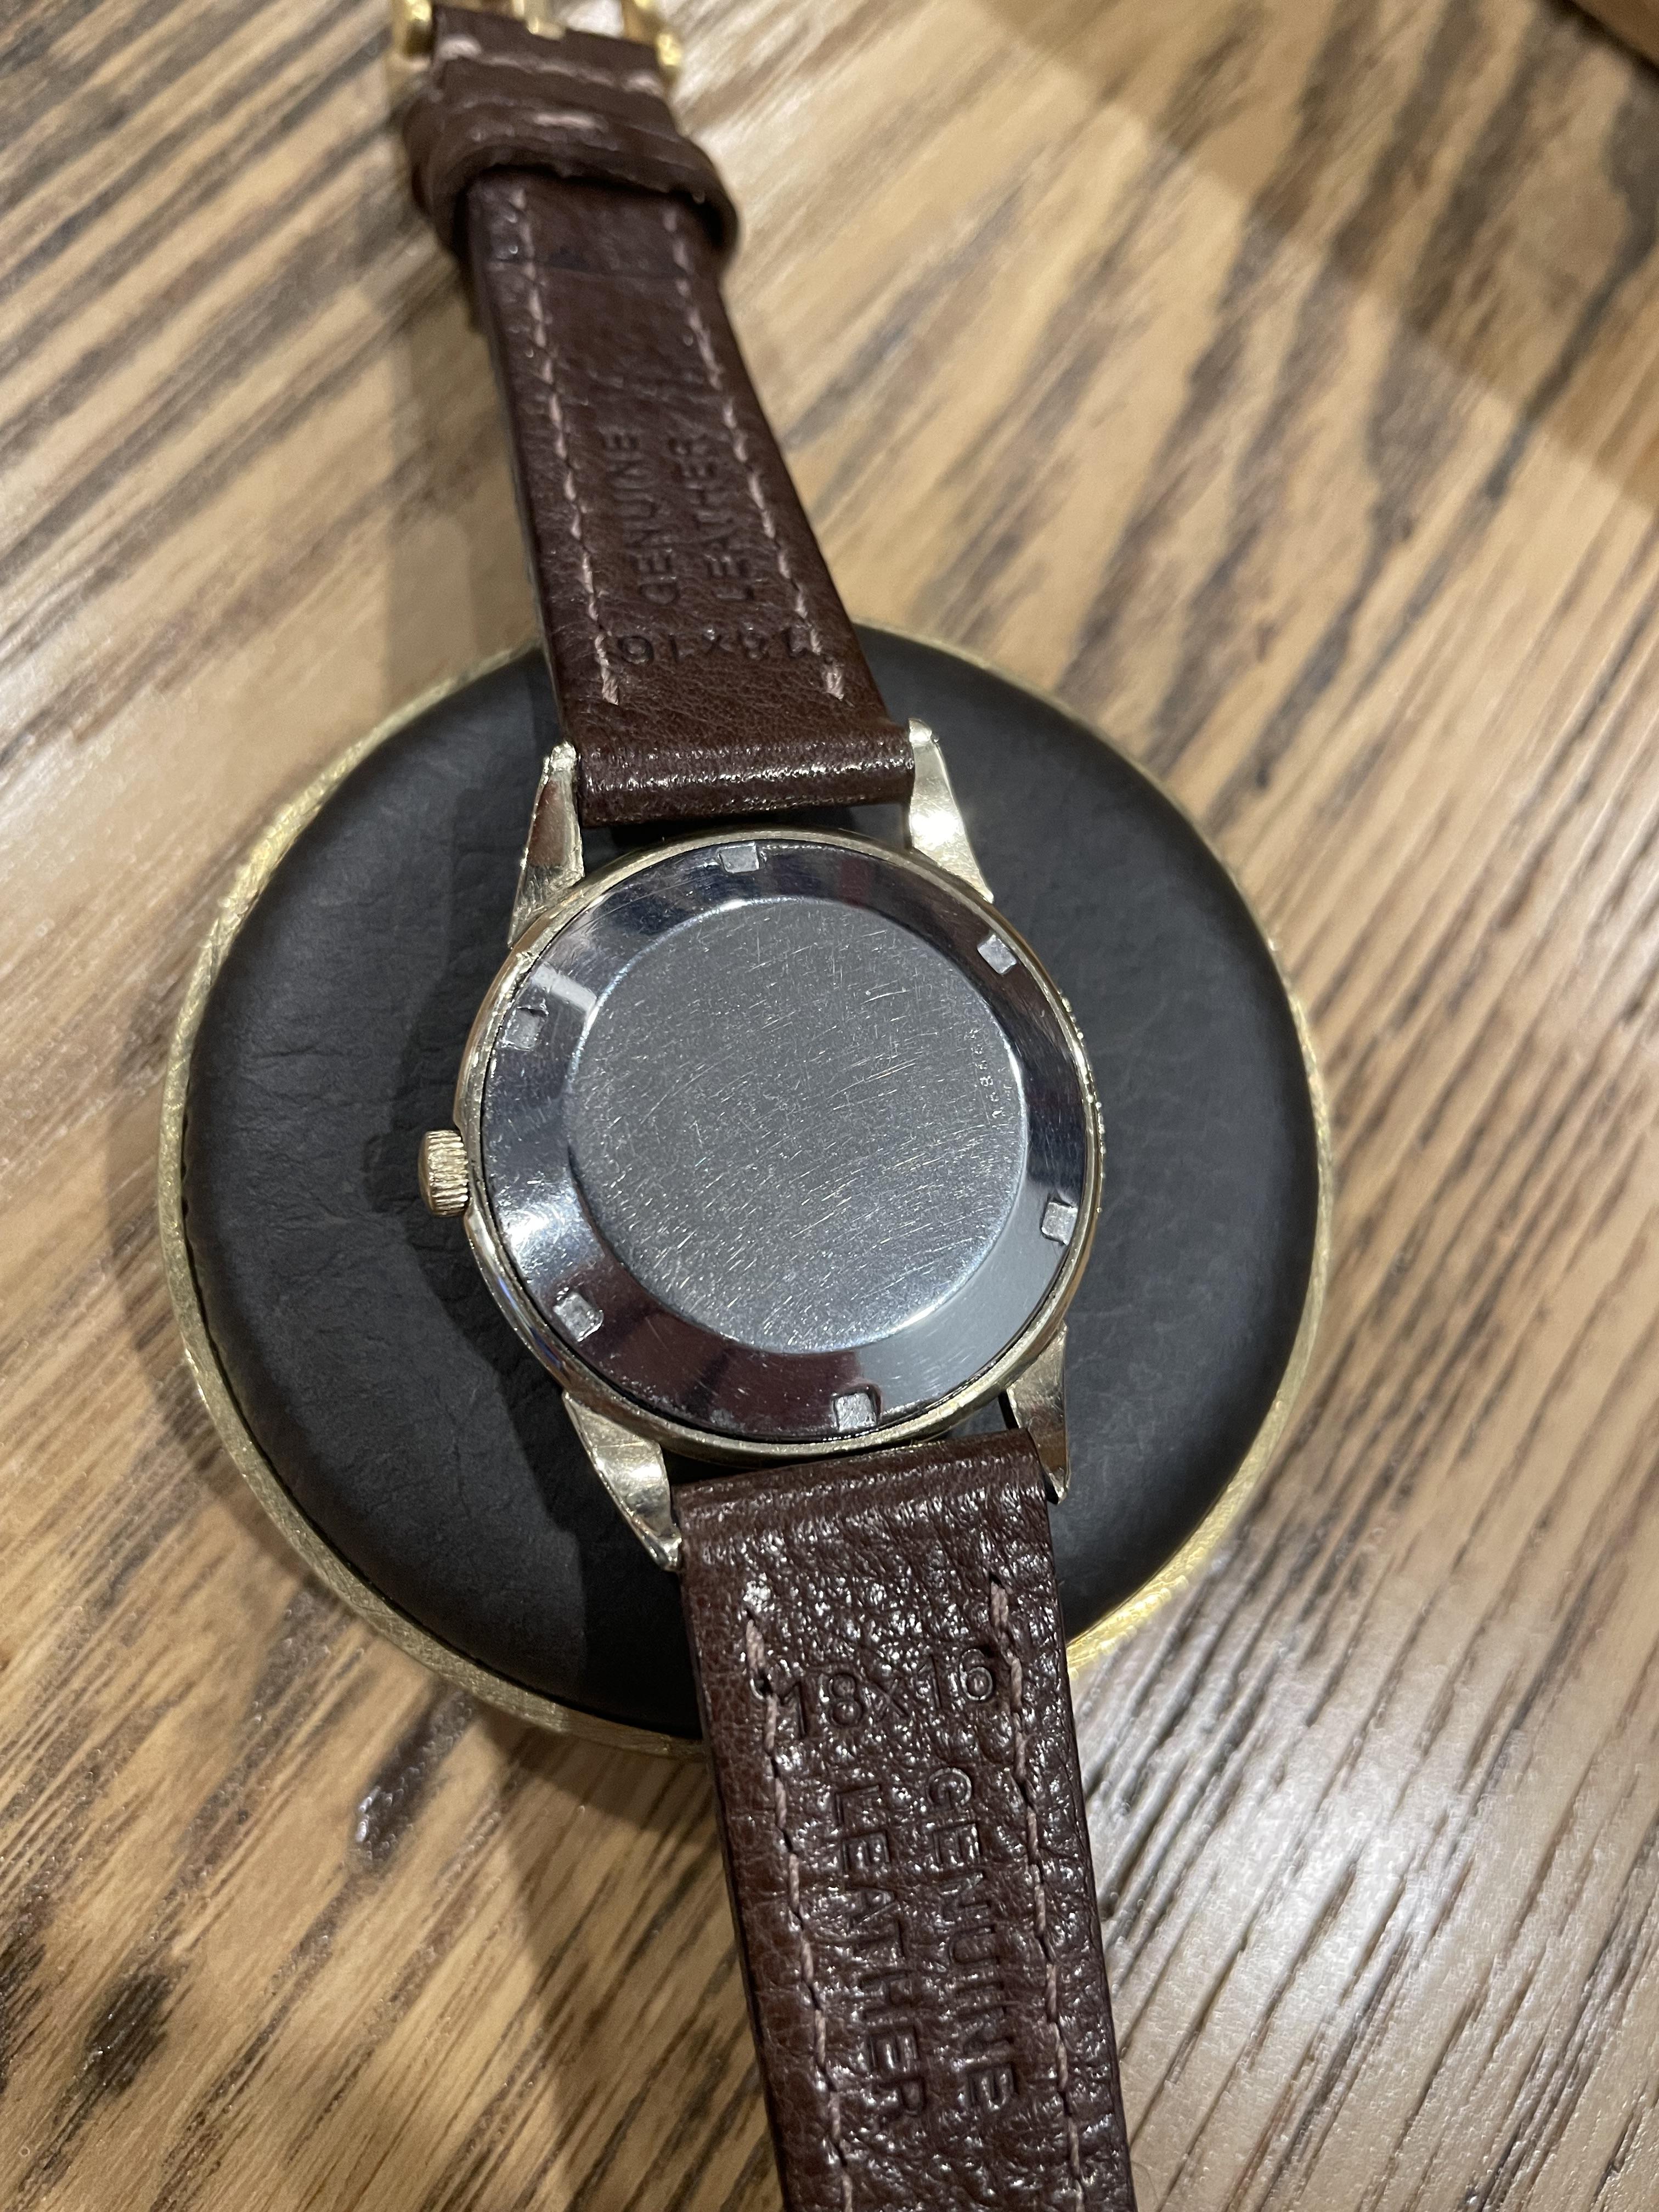
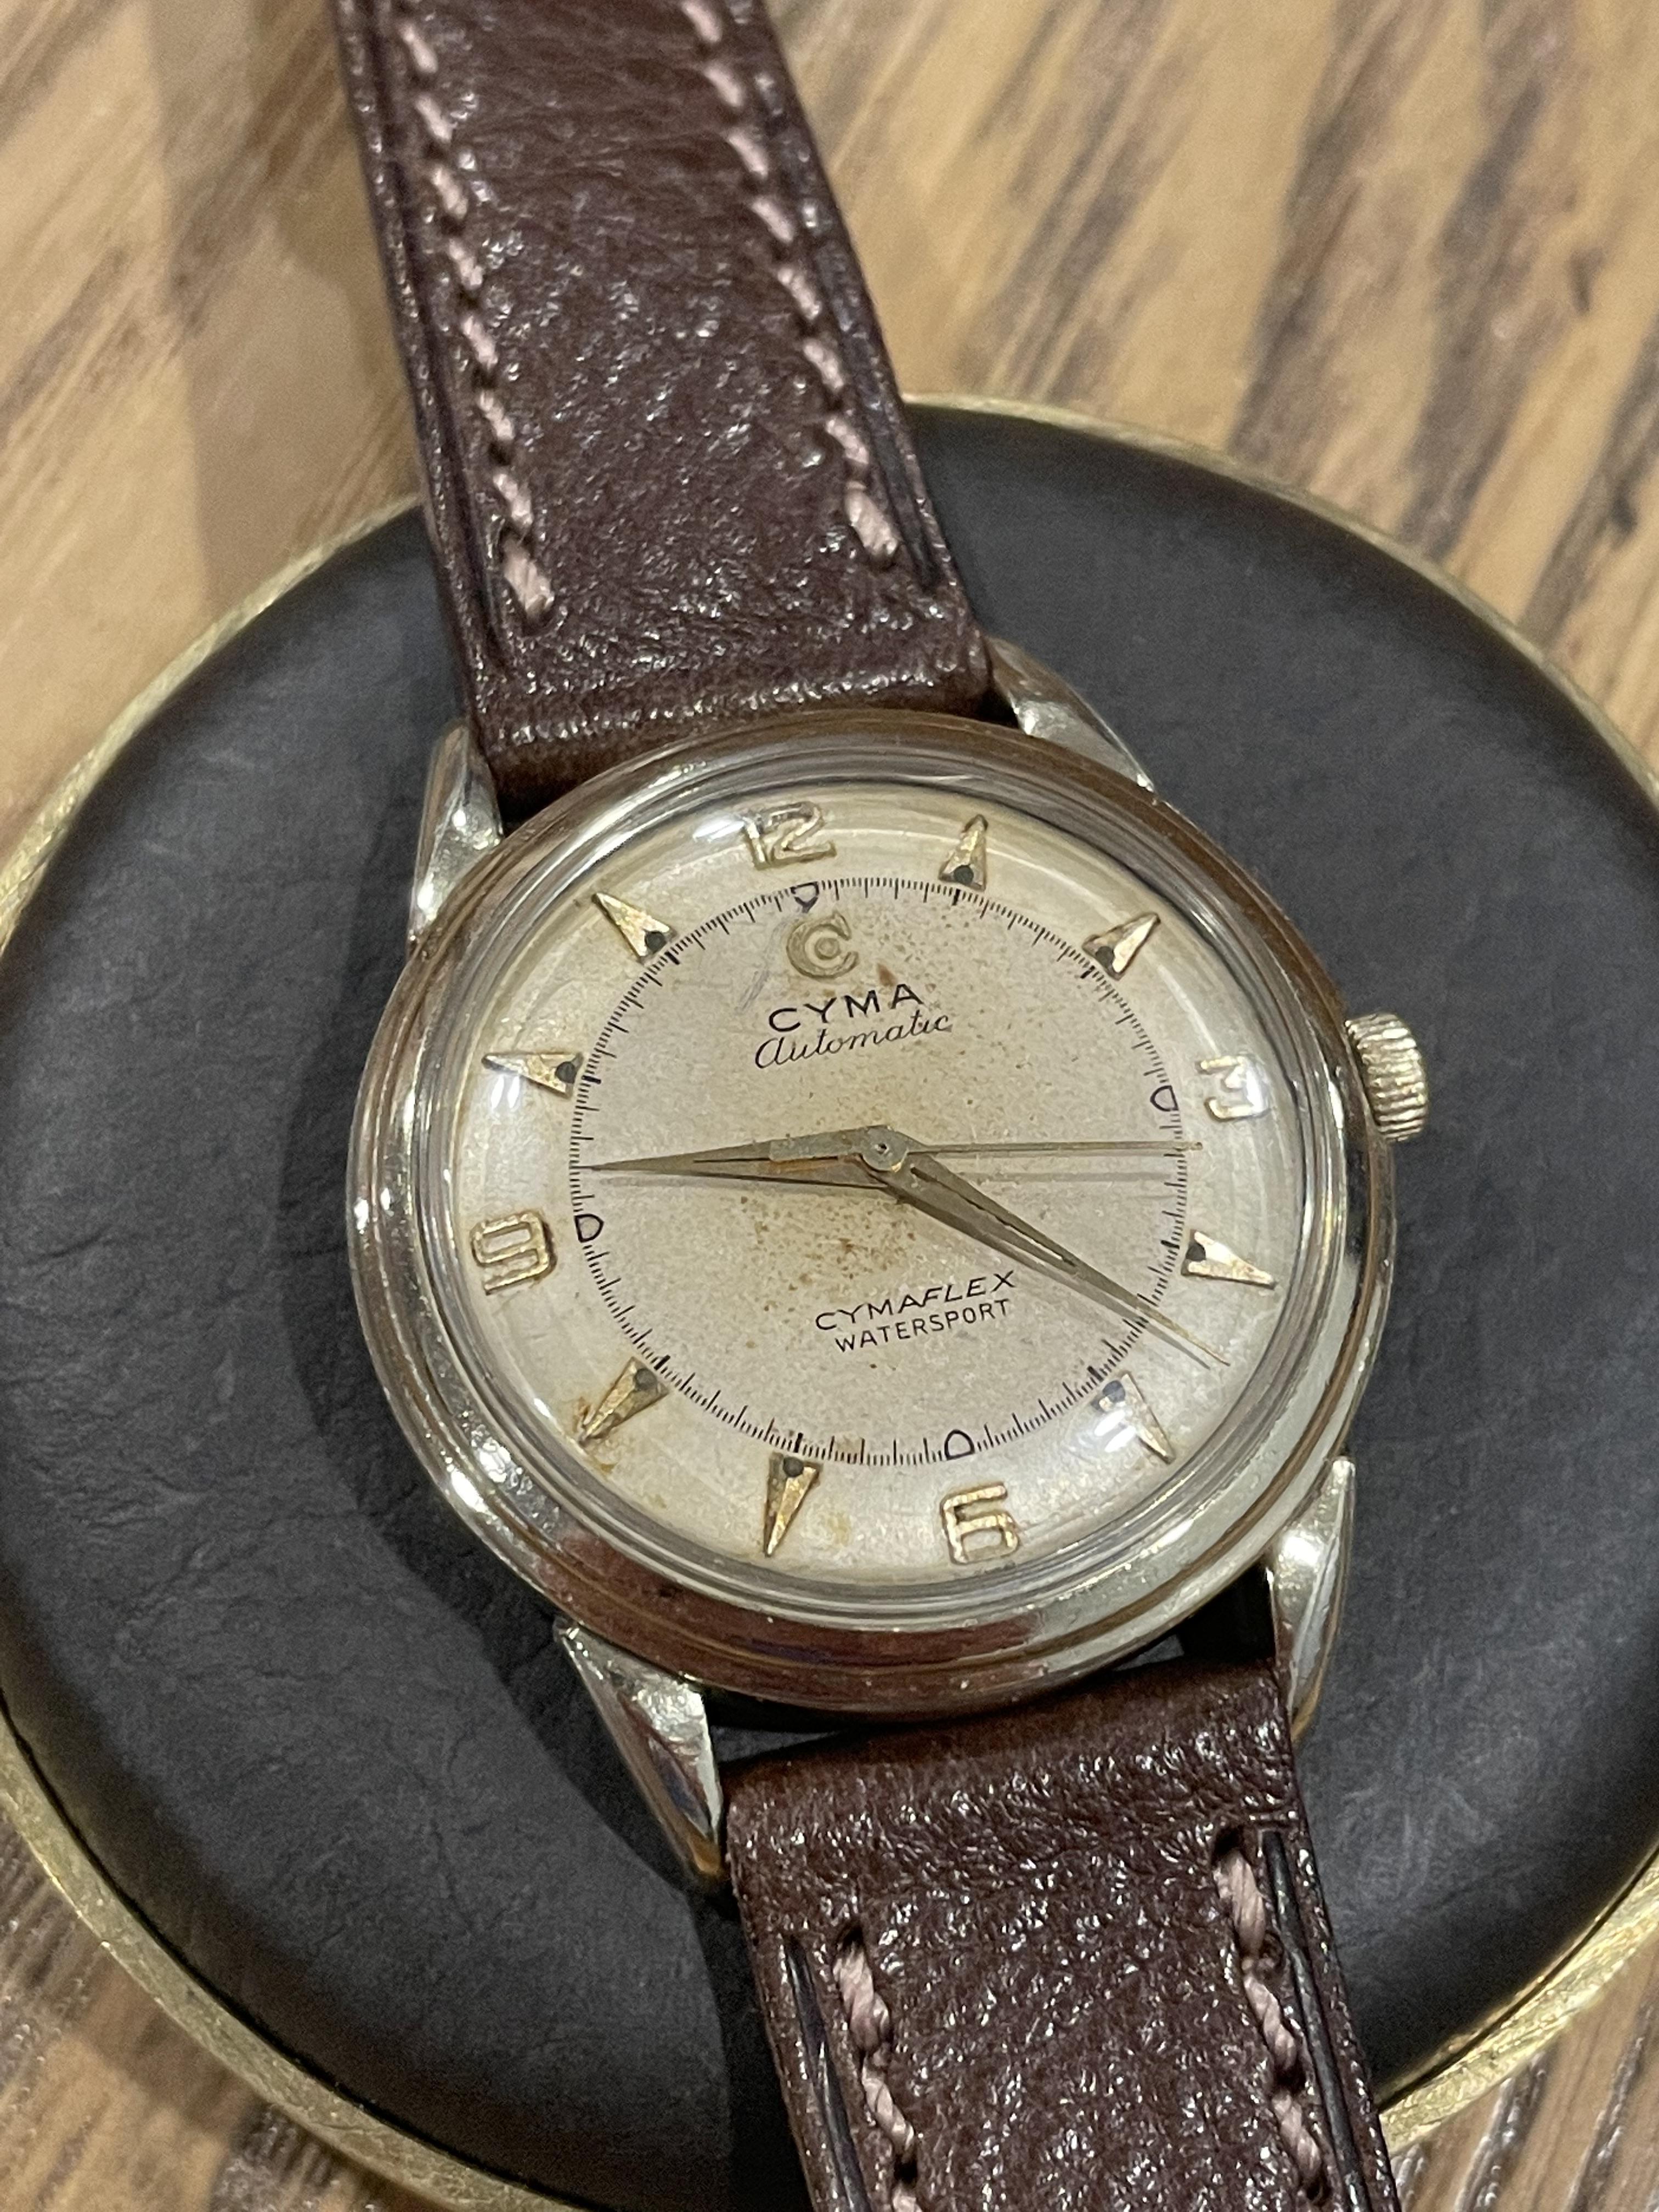
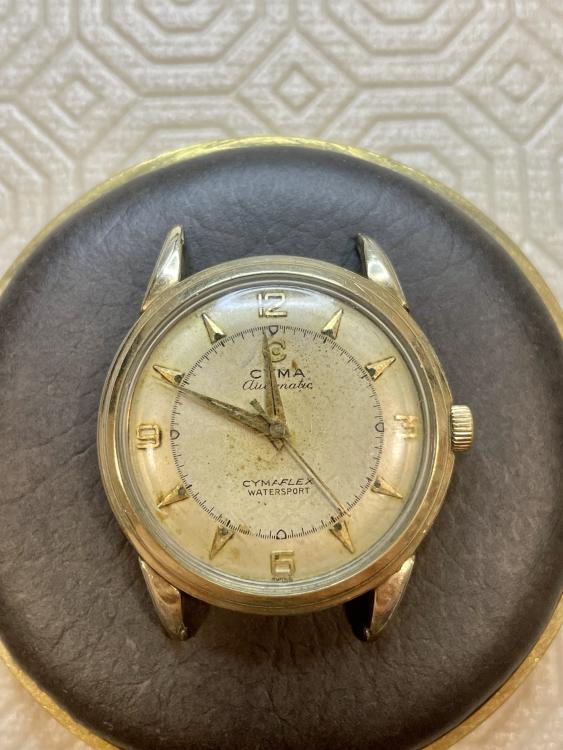
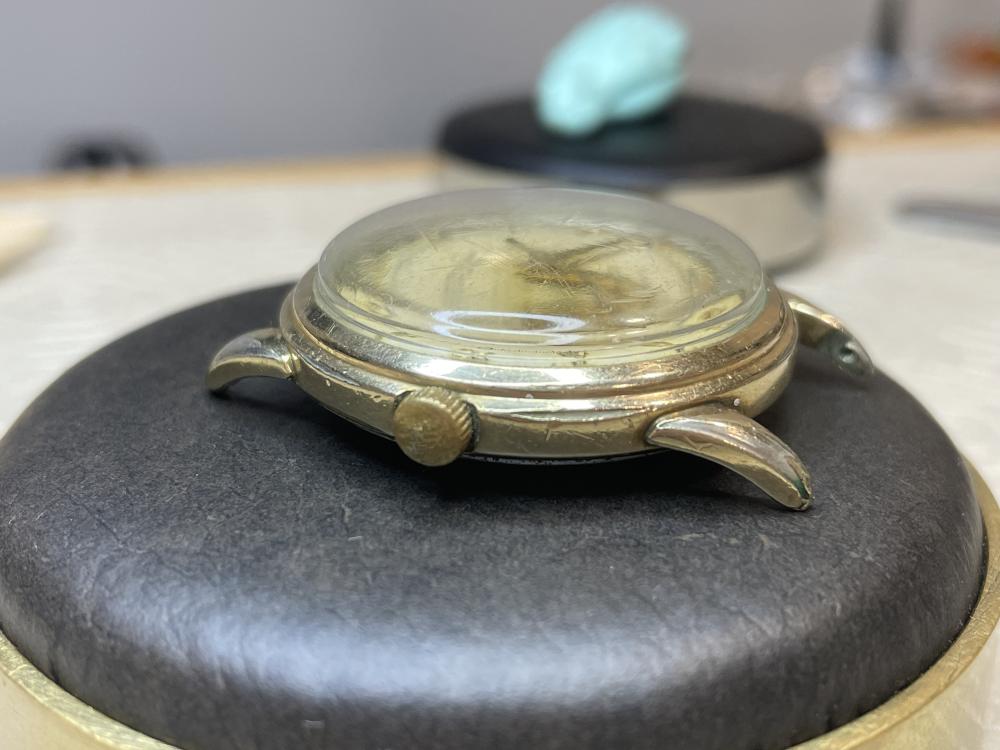
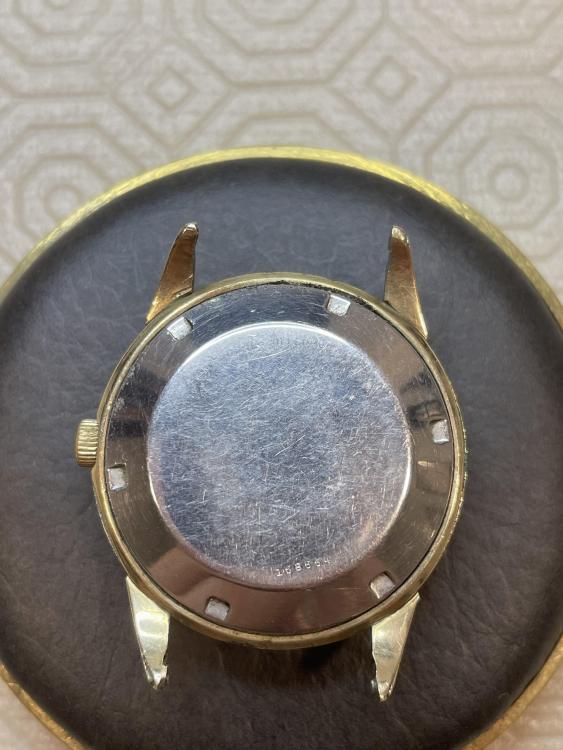
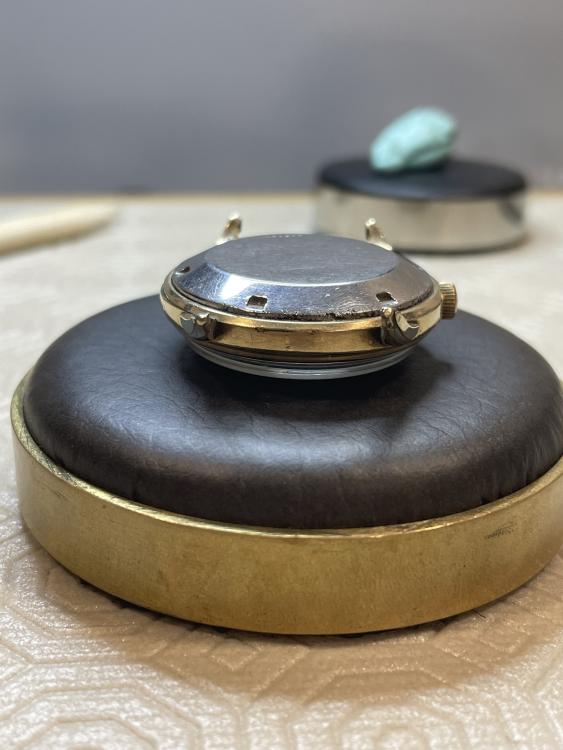
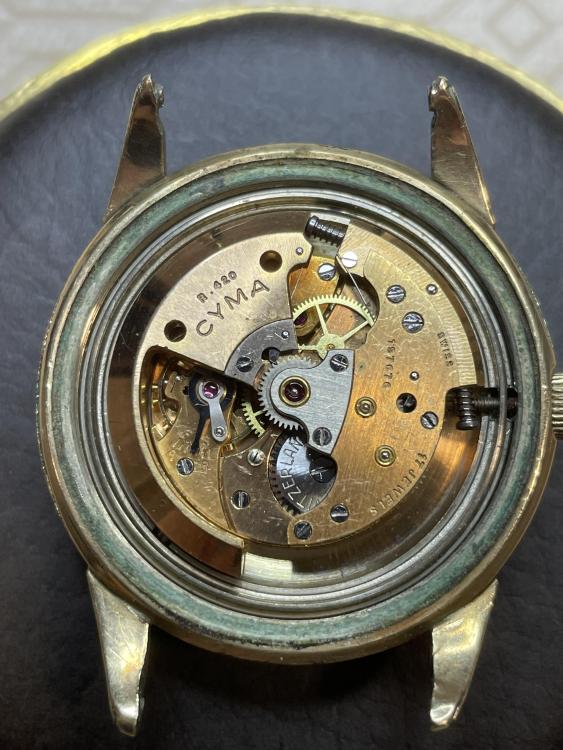
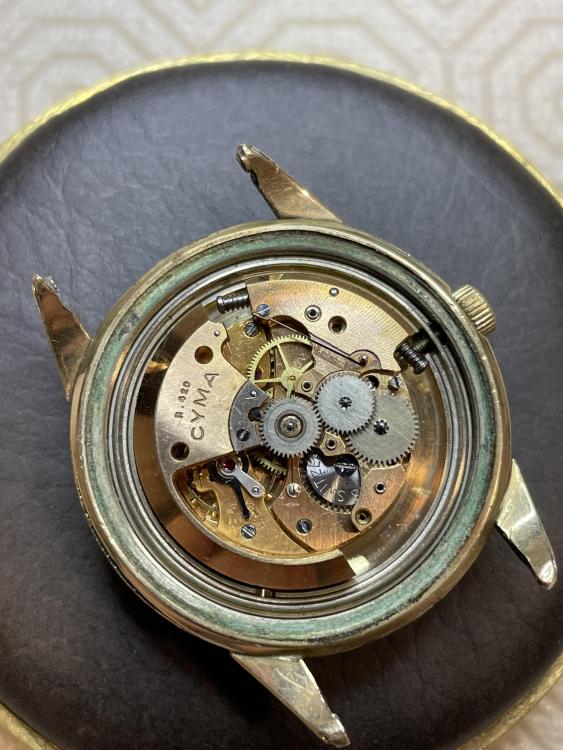
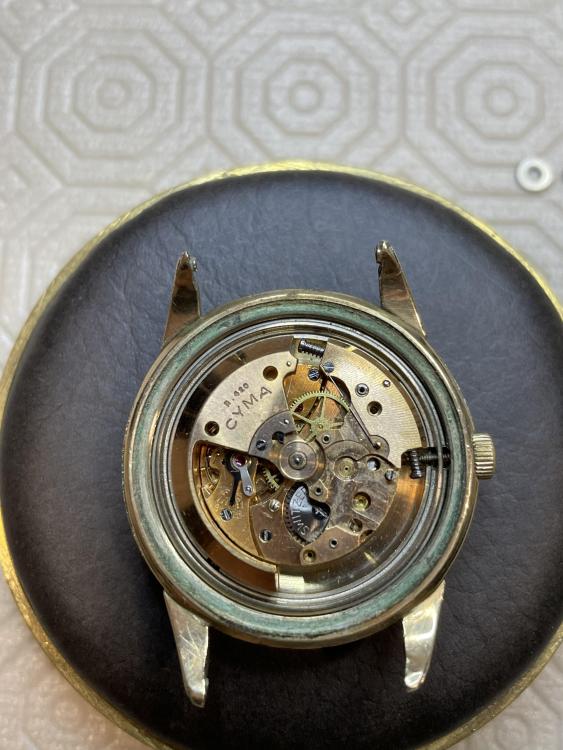
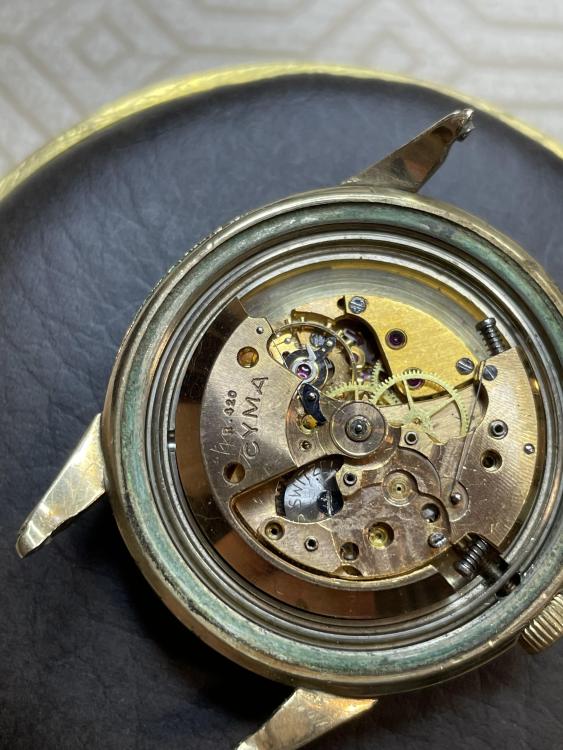
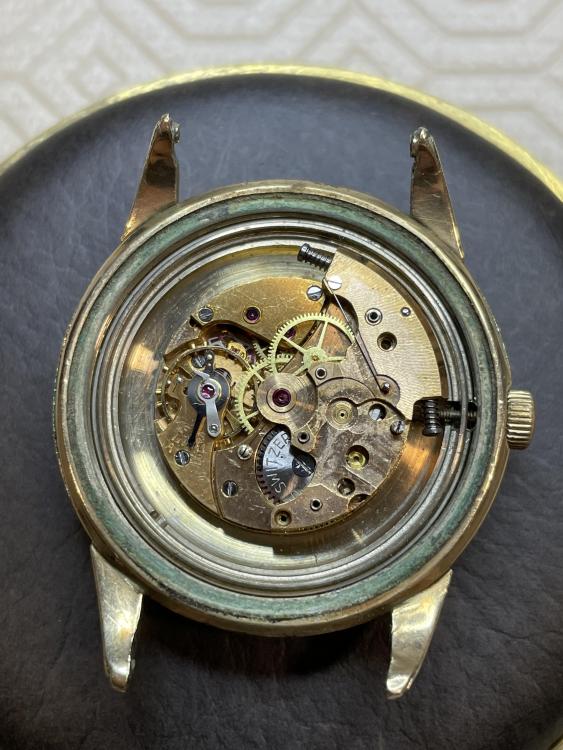
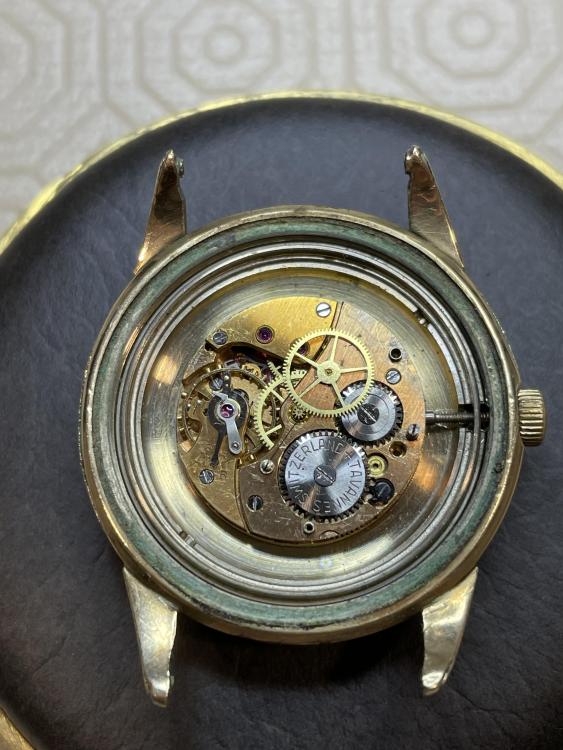
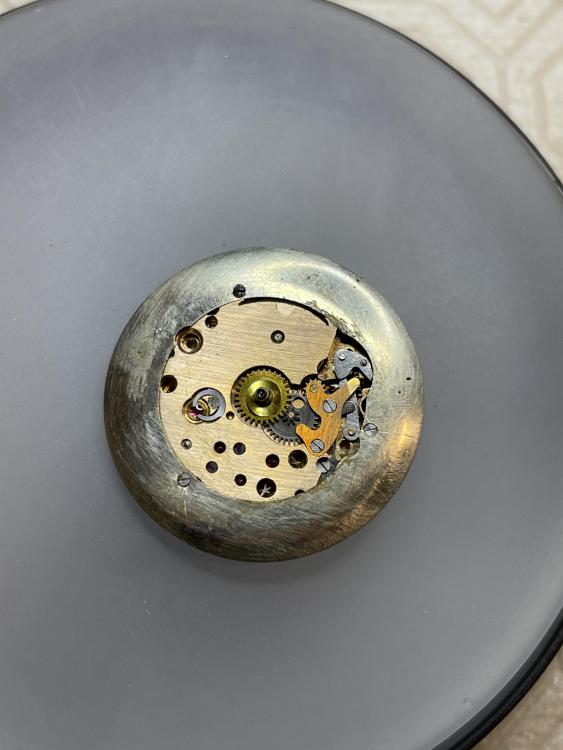
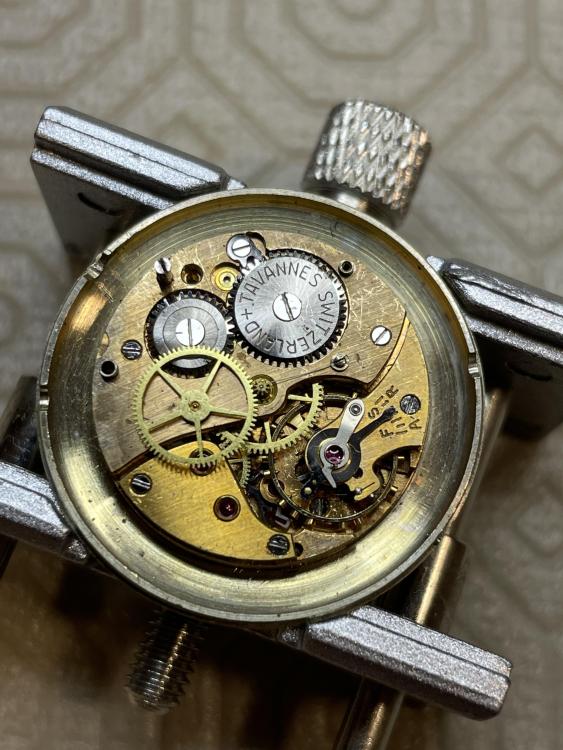
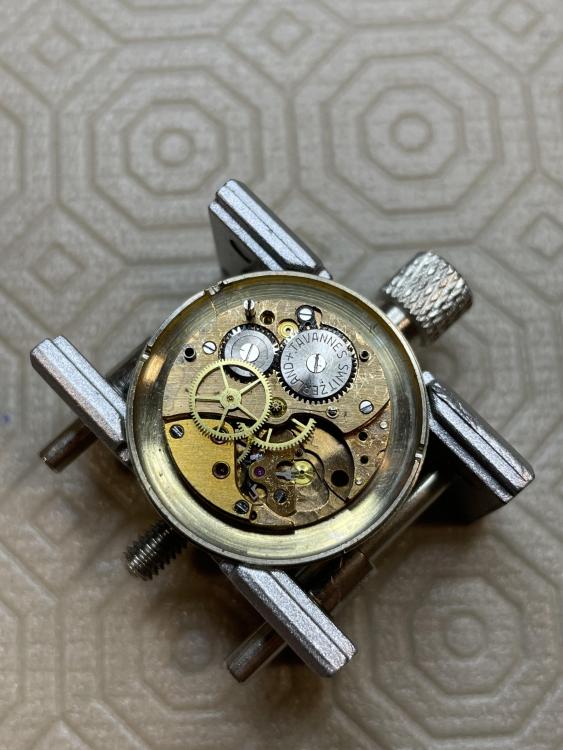
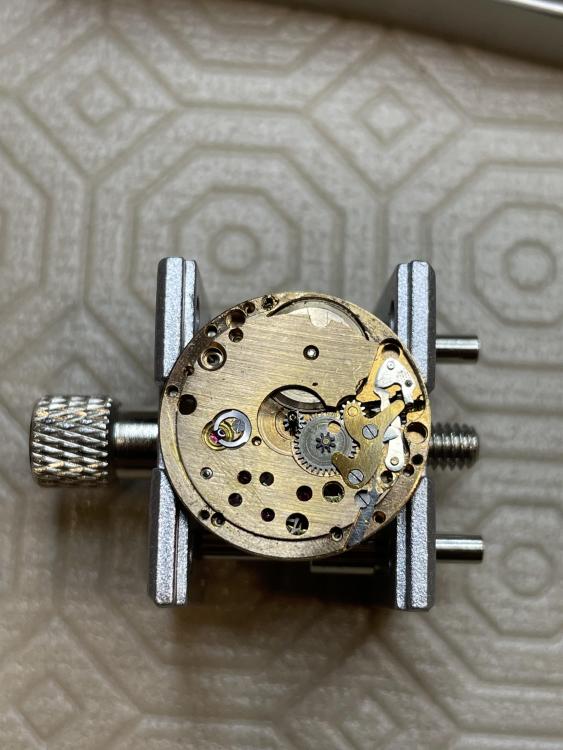
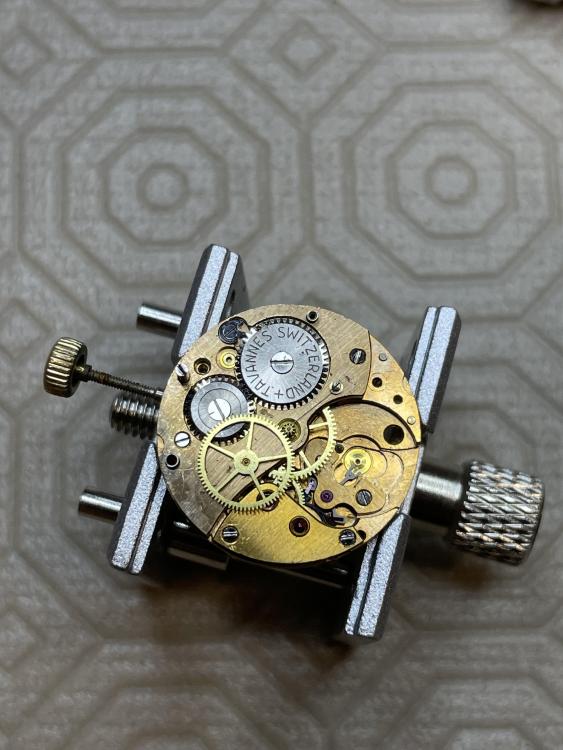
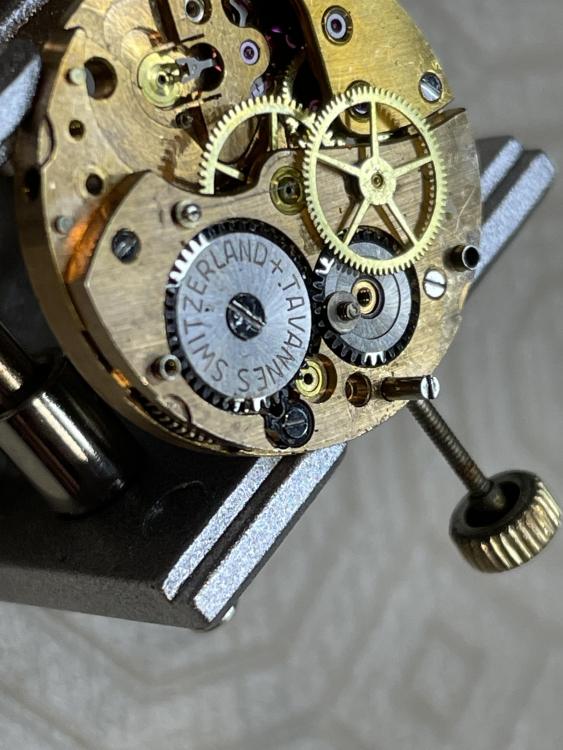
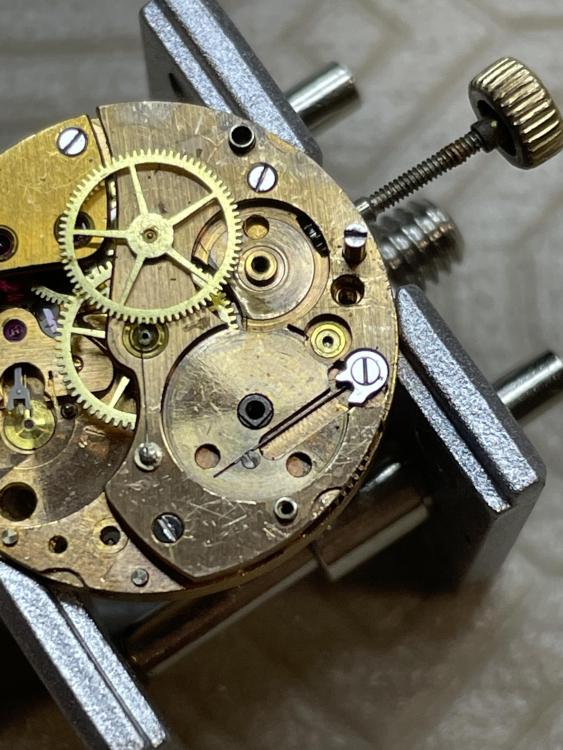
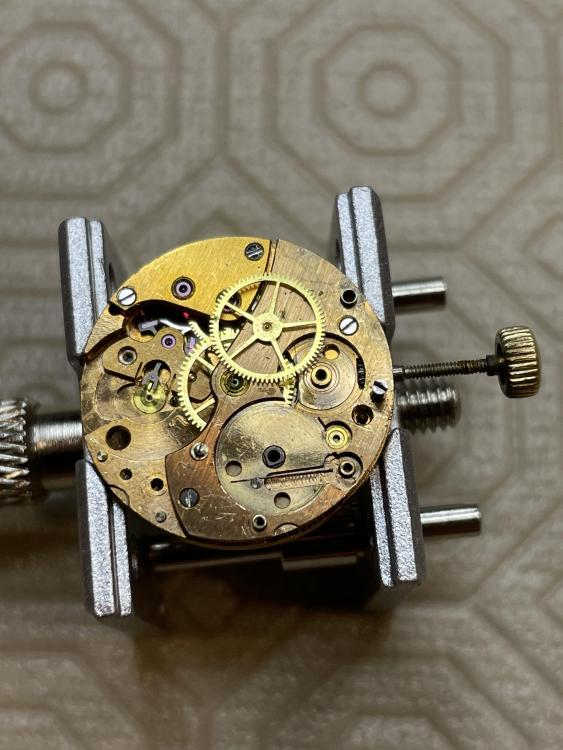
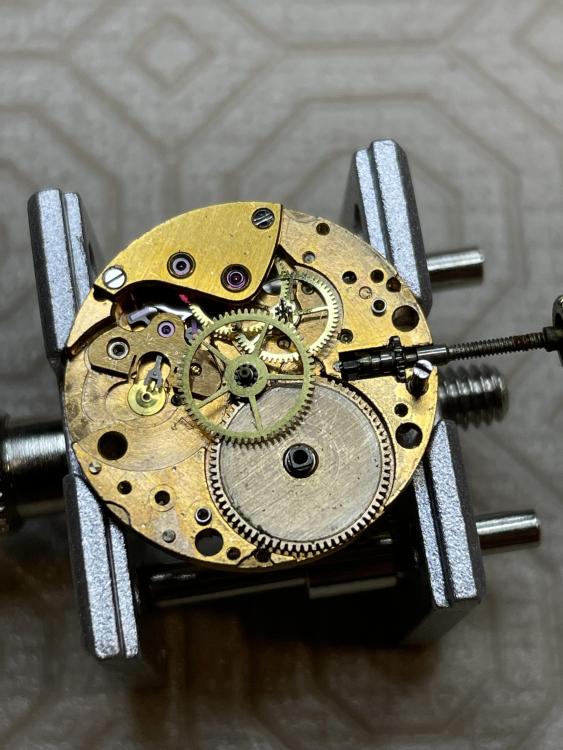
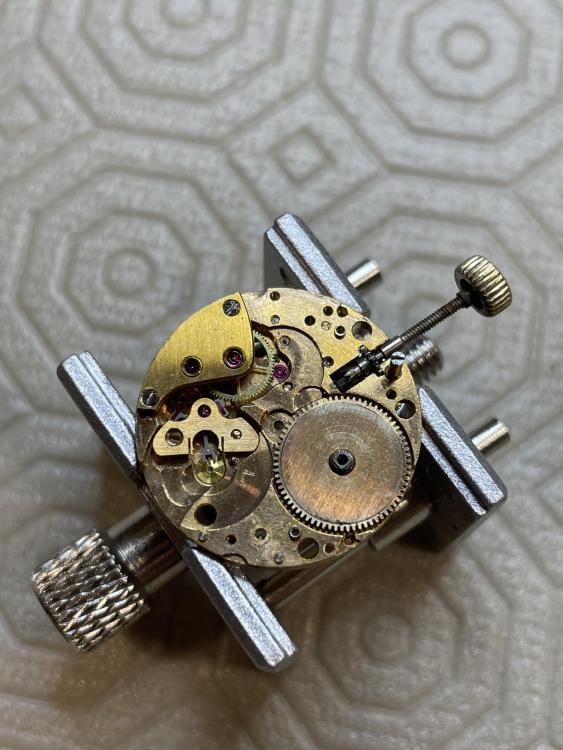
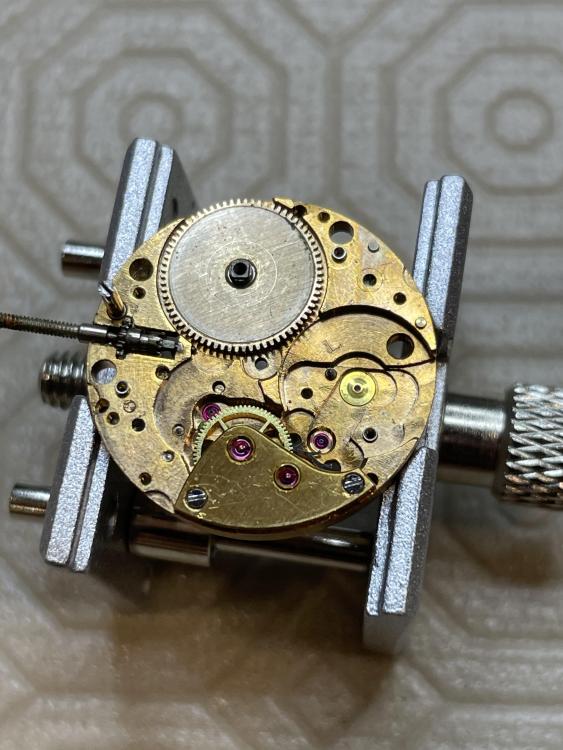
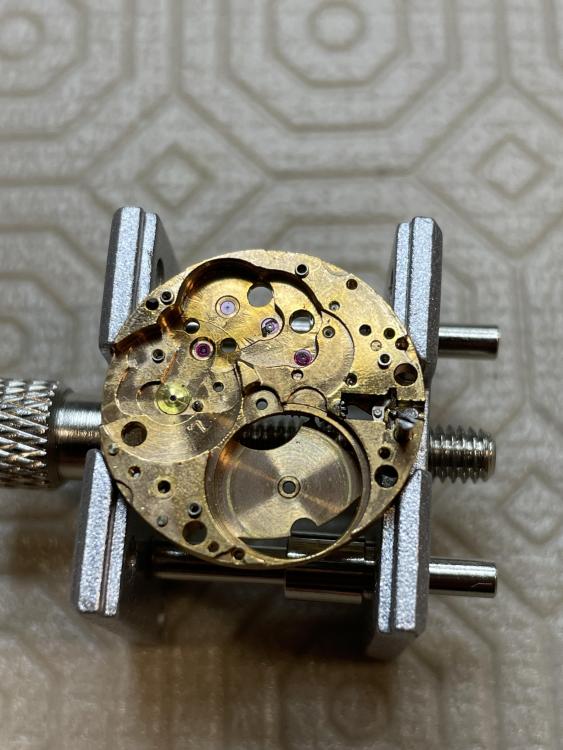
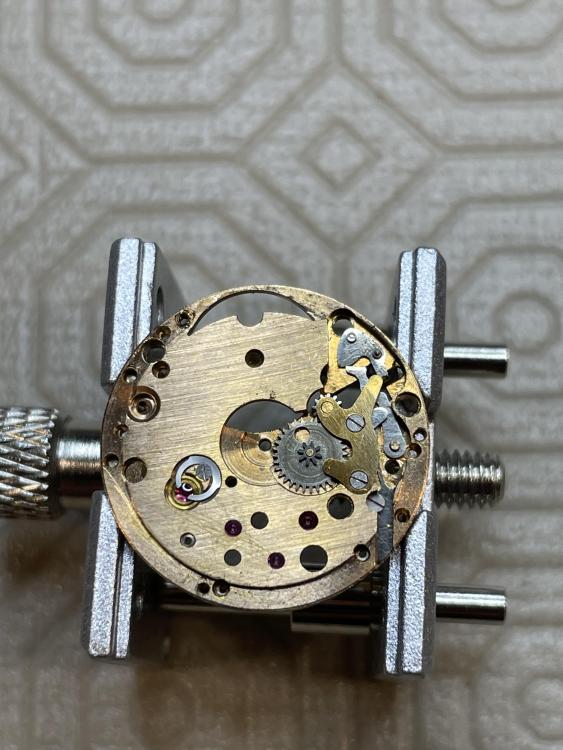
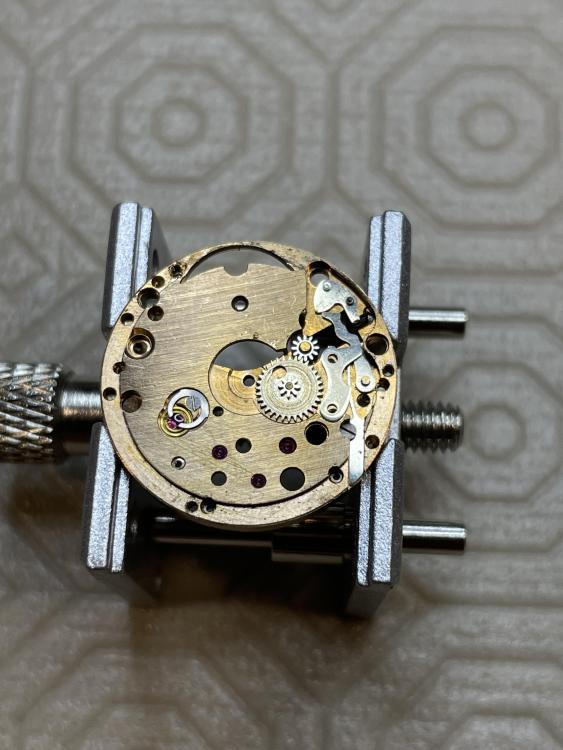
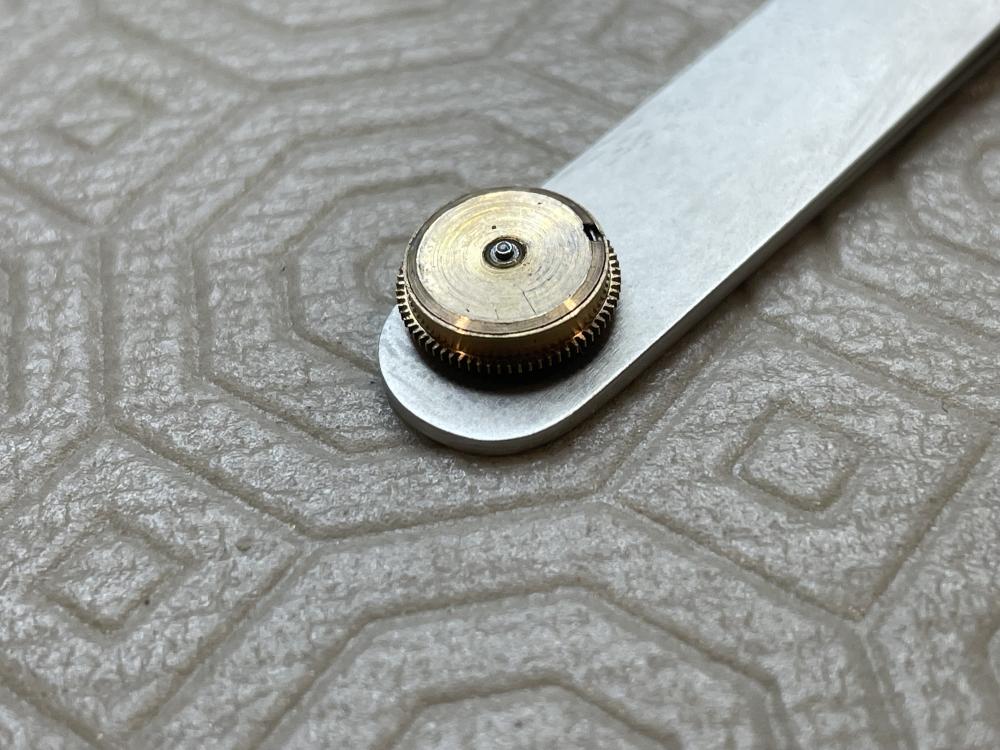
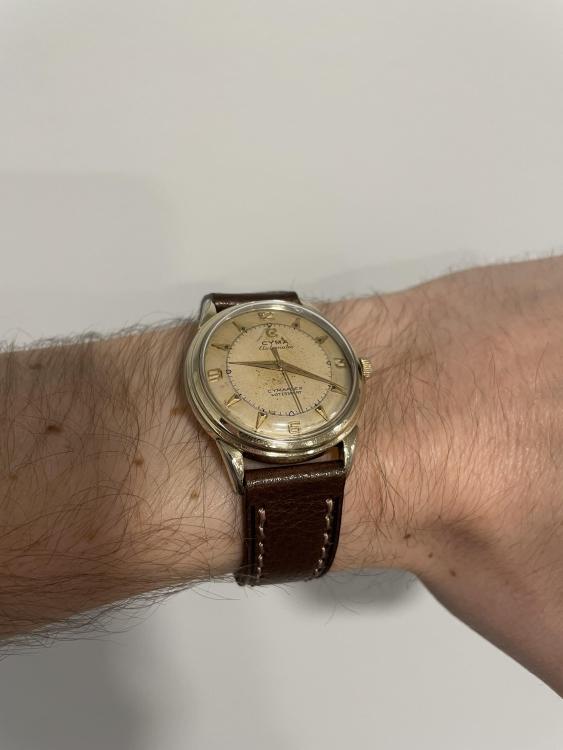
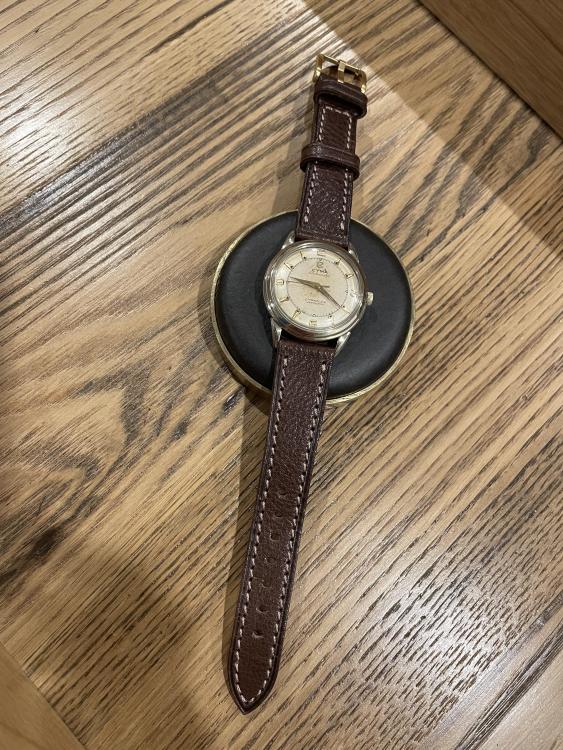
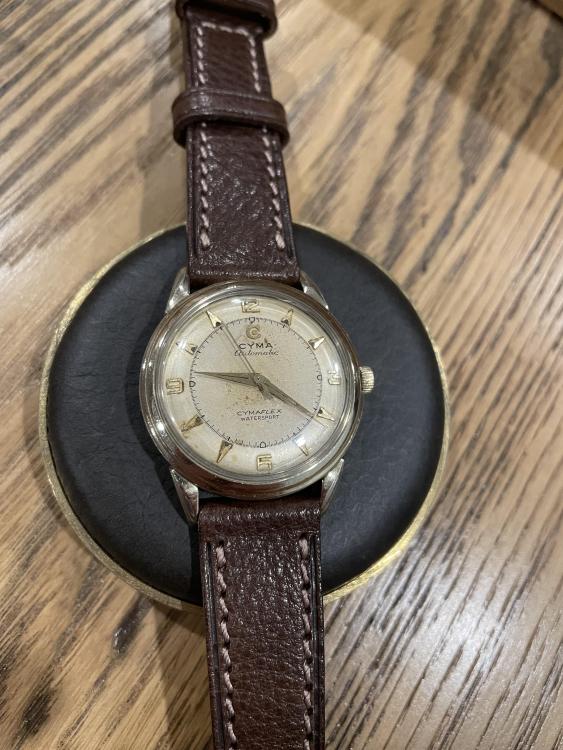
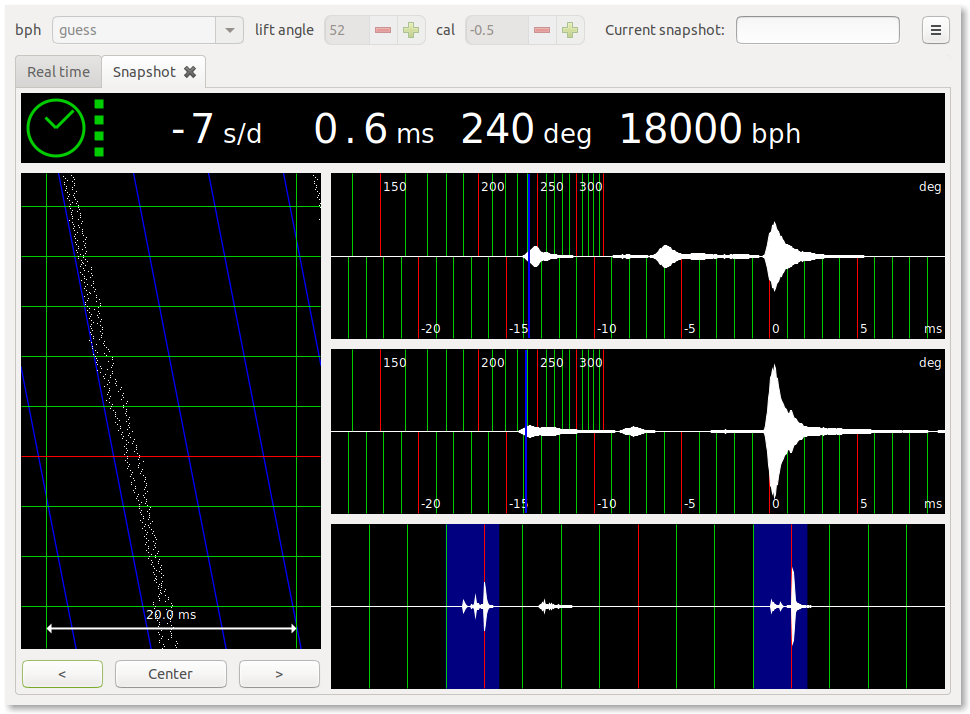
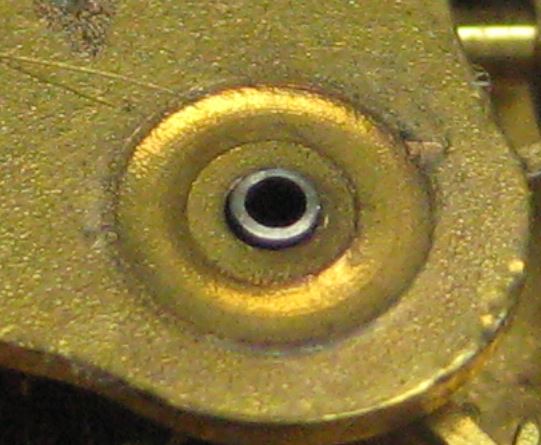
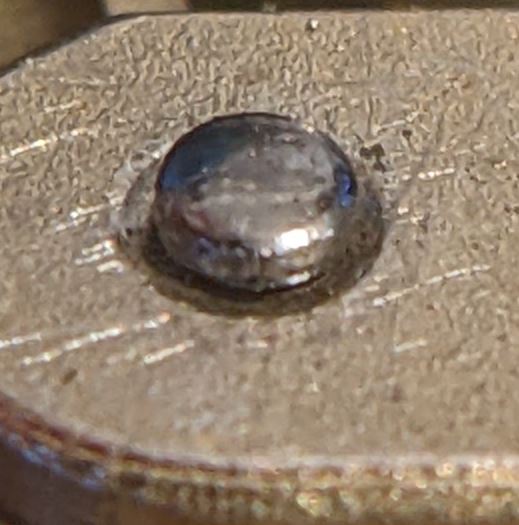
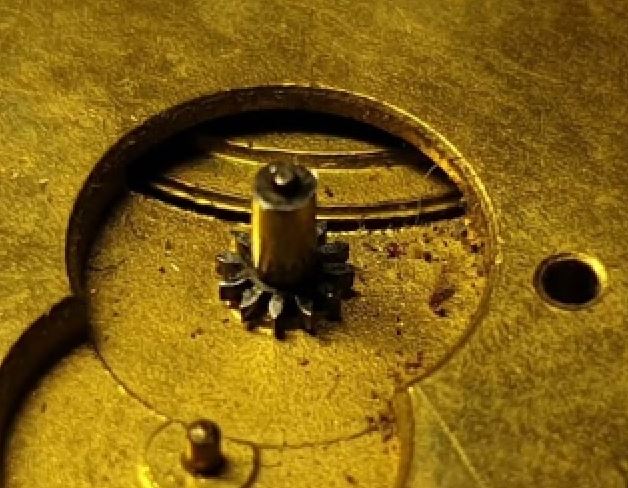
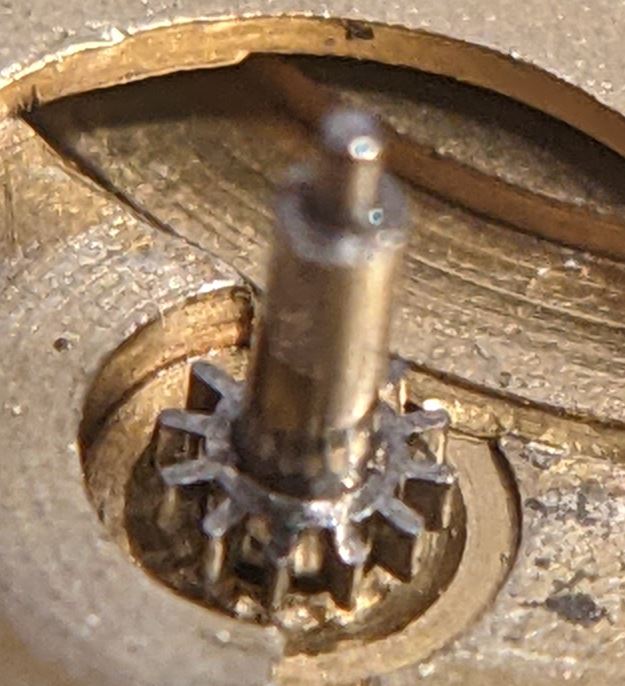
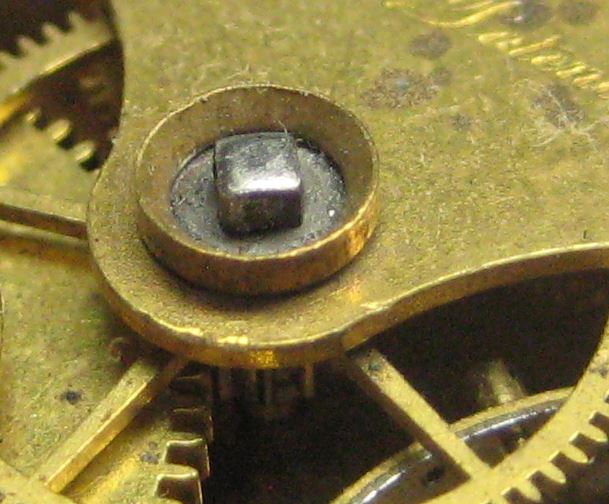
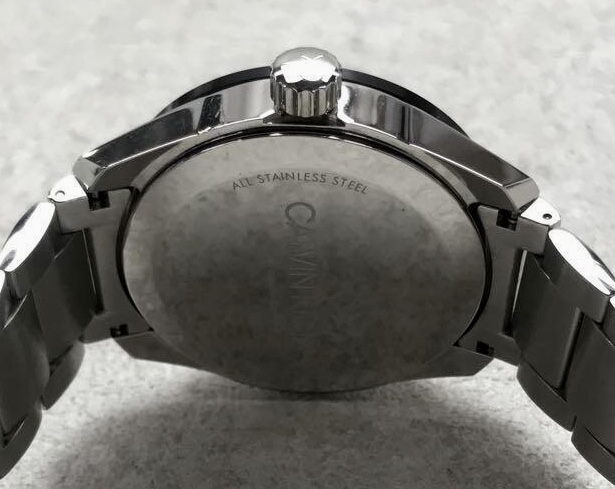
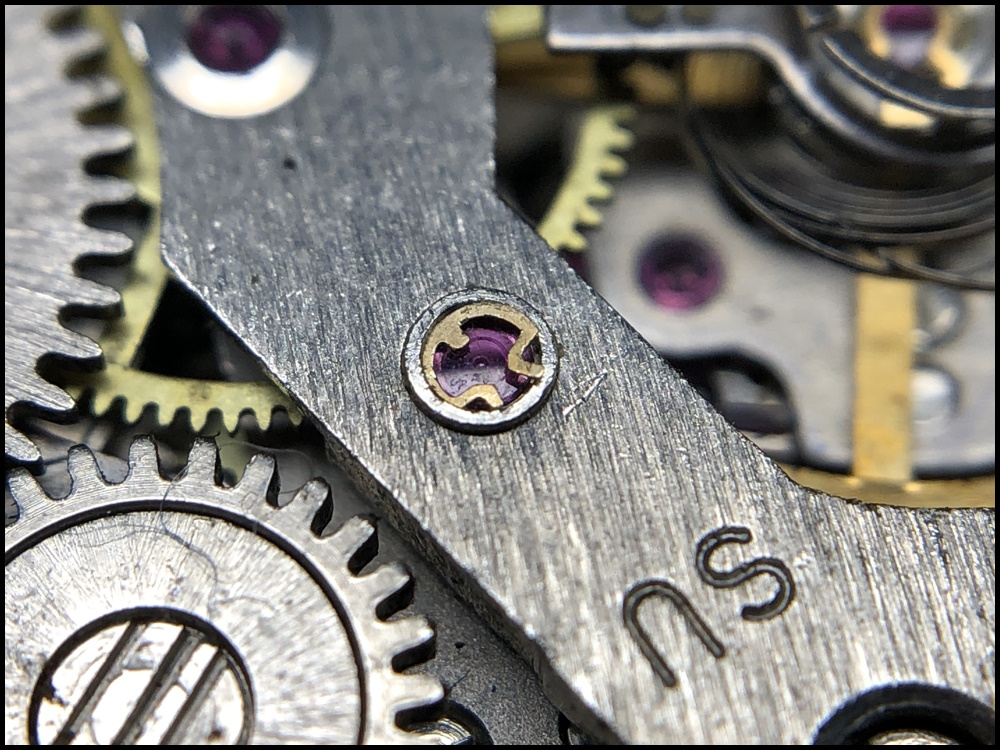
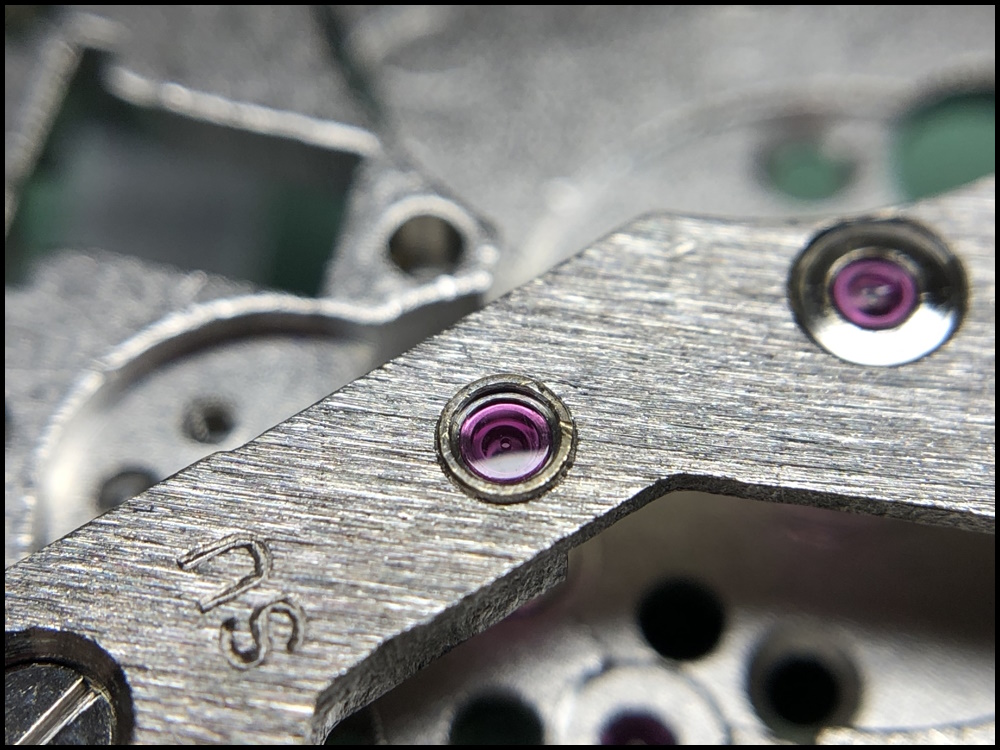
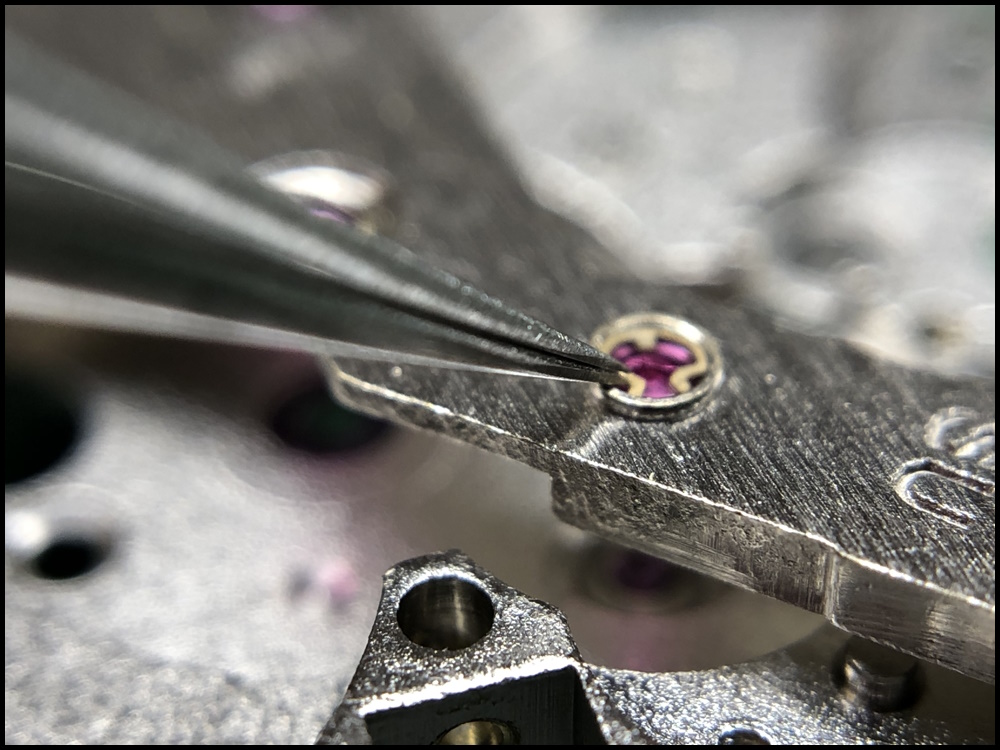
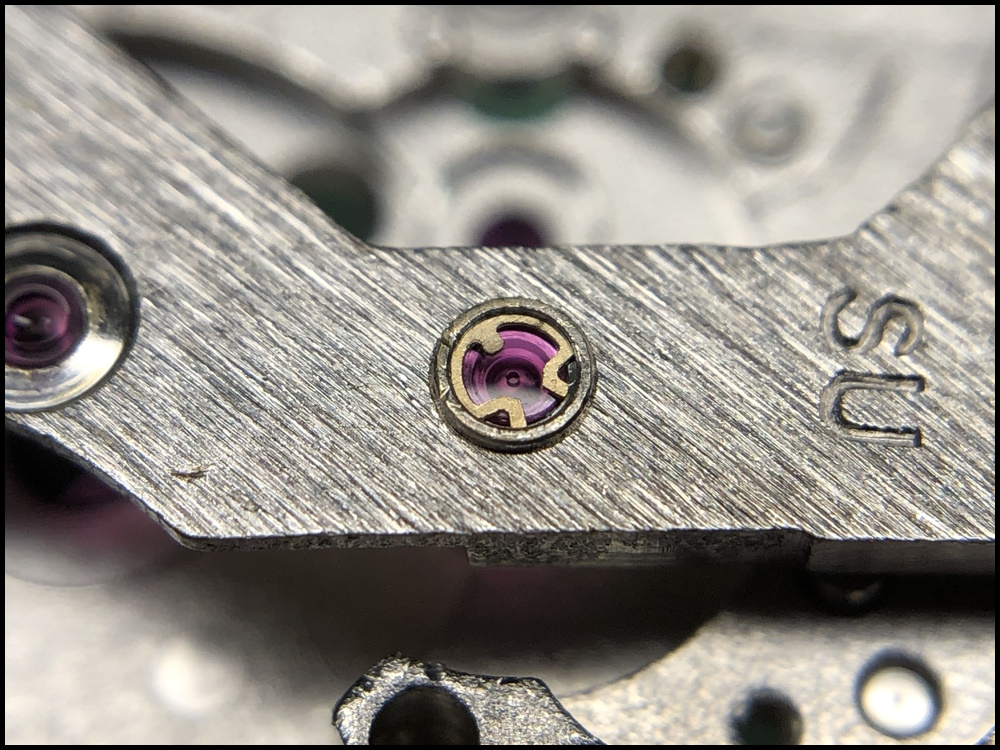
Hi all, hope all is well. Here is a little write-up with photos of my latest adventure in watchmaking as a beginner. This is the 5th watch I've worked on and I decided to step up from the base manual wind to an automatic movement. This one just happened to be a bumper movement. I think I likely overpaid for this watch given its condition ($100 CDN) but I was excited at time time to find it. I did not notice when buying it had a bent lug - I posted in the past here on how to possibly straighten this. The case is also quite beat up. which seems fairly common in my overall price range. I enjoy the wear and patina on the dial though and once polished it still looks good I think. Here are the before: You can see that the metal bracelet that must have been stock to the watch has really worn into the lugs. More on that later. This watch certainly seems like it earned its keep for its original owner(s). I've no idea how that deep groove formed on the non-crown side, near the bottom of the case. My first stop after un-casing was attempting to bend the horn back. I didn't want to go through the service if I was to just end up breaking the horn off of the case. I did not have an appetite to send this out to a professional for a real (expensive) fix with laser welding, etc. I don't know what this case is coated with, there are no markings for gold anywhere on it. Using gold as a guideline though, I looked up its melting temperature vs. the annealing temperature of brass. Brass can be annealed at a much lower temperature than gold melts, per google, so out to the garage I went. I used a small torch to apply heat to the bent horn and then careful crushed the horn in a vise (with jaw protectors) to attempt straightening. Heat, crush, repeat. I tried to be very careful. While not a 100% perfect result, it is much better than before. I probably got it about 85-90% good, I think. I chalked this up as a success and I was now able to move to the movement. While not really a real walkthrough, I am including the breakdown of the movement here in case it helps someone in the future. Just looks nice as well, I think. My process is to take a photos basically after removing every component, as my guide to putting back together. I had to start disassembly with the movement in the case as I could not get the crown and stem out. It also did not turn. It turned out that the part whose name I can't recall right now (on a pivot and sits in stem) was out of place and binding things up. Some notes about the servicing - this movement is the one I posted about as to how to remove that wheel that was pressed on (drives the seconds pinion). At first I ended up using the bridge underneath to pop it off. The method that ended up working best, having to add/remove the wheel I few times, was to hold the wheel underneath still while rotating this pressed on wheel, and it would rotate up and off. Thanks to another forum member for that tip. I also want to note what a pleasure it was to take out the balance jewels with the type of shock protection (cymaflex?) they had. I am sure it isn't the best and is from when different mfg's were trying different things, but on the balance side it was as simple as moving that arm over, and the dial side removing the screw and taking off that C shaped spring. Even more pleasant than incabloc, I thought! This mainspring was the smallest I have dealt with yet. I don't have mainspring winders but came up with a method of using two pegwoods to wind the spring back in, after I initially got it started with my fingers. I am not recalling anything else interesting about the taking apart of the movement at this time. edit - added this in after reviewing before hitting post - I noted the worn lugs up top from the original metal bracelet. What I ended up doing was filling the wear areas with jb-weld. You cannot notice it when the strap is on. I used the kwik-set version, which sets up in 6 minutes, vs. the very long set time of the original formula. It was very nice to apply actually, with a toothpick. I was poking at it too quickly, I think, after my first attempt and it all peeled fell off. It was still in a bendy state when I was checking adhesion. For my second attempt I sanded with 800 grid where I was going to apply, and then didn't touch it until the following day. Though the set time is quick, cure time is still 4-6 hours. So far so good, I think, time will tell how it stands up. The area around one spring bar hole especially needed something, I thought. This was the best solution I could come up with. Cleaning up the case after putting the movement back together, I found a flat plastic gasket on the case back that I had not previously seen. Was in fine condition once removed. Upon re-casing everything, I found that when I screwed the case back on, it must have been impacting with the stem as I could not wind or move the crown into time setting position. I posted another thread here asking if anyone had any input on if this style of watch had a rubber gasket to go with the plastic one (thinking the rubber one may have just dried up and been removed in the past by someone curious). No one replied to that thread, but, with this my only idea on how to keep the back from screwing on so far, I ordered a bag of rubber gaskets from amazon and added it in. It seems like a success, as far as I can tell. I also had some issues when re-casing with the crown. There must be a rubber gasket in there that dried up but I could not see for sure. The crown was extremely hard to turn and move in and out. After different attempts at lubricating (silicon, molykote dx grease, vaseline [maybe not the best option]) it moves nicely enough now. I am still getting used to the noise and feeling when manually winding an automatic, since the gear ratio on the automatic weight is so great. In my endeavors to keep costs down I sanded the crystal through successive grits, finally polishing with autosol as I have it on hand. There are two minor cracks I did not see when the crystal was all scratched up but they are at the edges and not noticeable unless you are looking for them. I was worried about the crystal shattering when pressing back in with my diy setup but was lucky. Though a crystal is about $10 CDN for me, I am not within driving distance of the supplier and shipping is at least $15. Finally, the end result: On the timegrapher I got good results in flat positions, face up and down, but performance suffered when the case was once its side, if that makes sense. I don't know what that means or how I could improve that, but as long as the watch keeps good time for a day I am happy as I change my watch every day. My next watch to work on is an Orient of unknown age - it is a manual-wind but will be the 1st watch I work on with a date complication. Take care all.


 4 points
 -
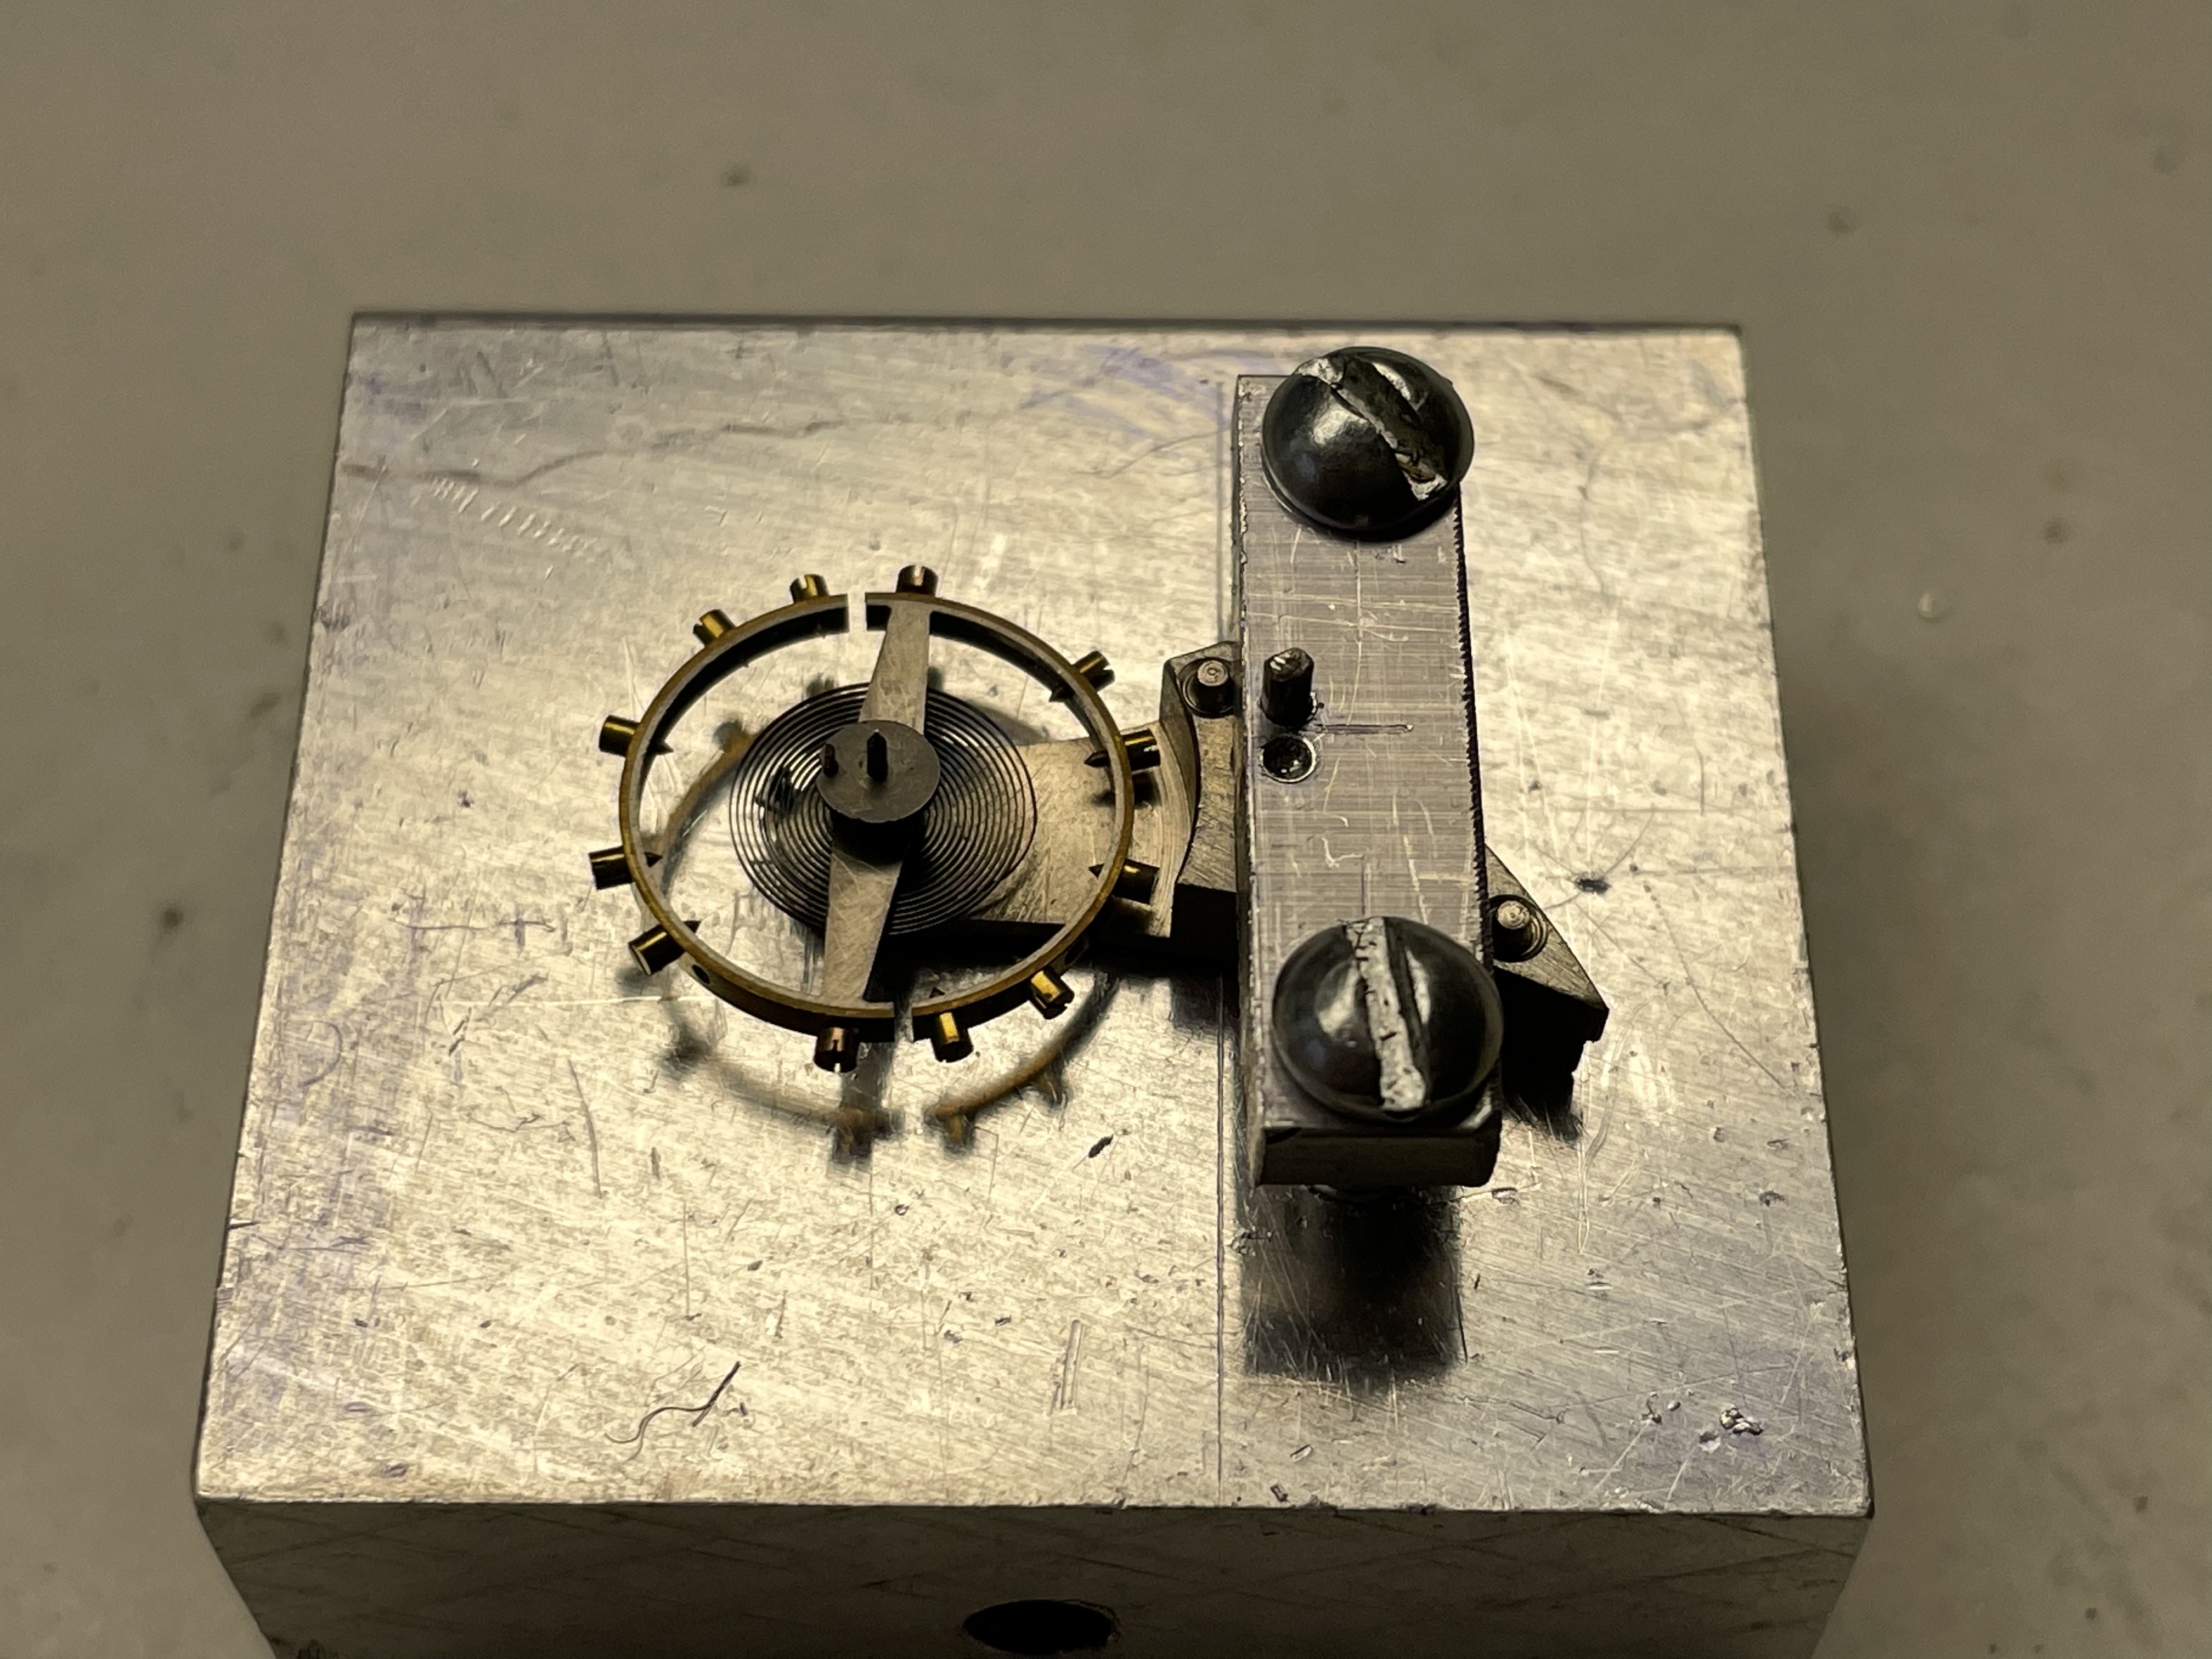
I made little holder for the balance bridge. Much easier to work on balance. On to removing spring.
 4 points
 -
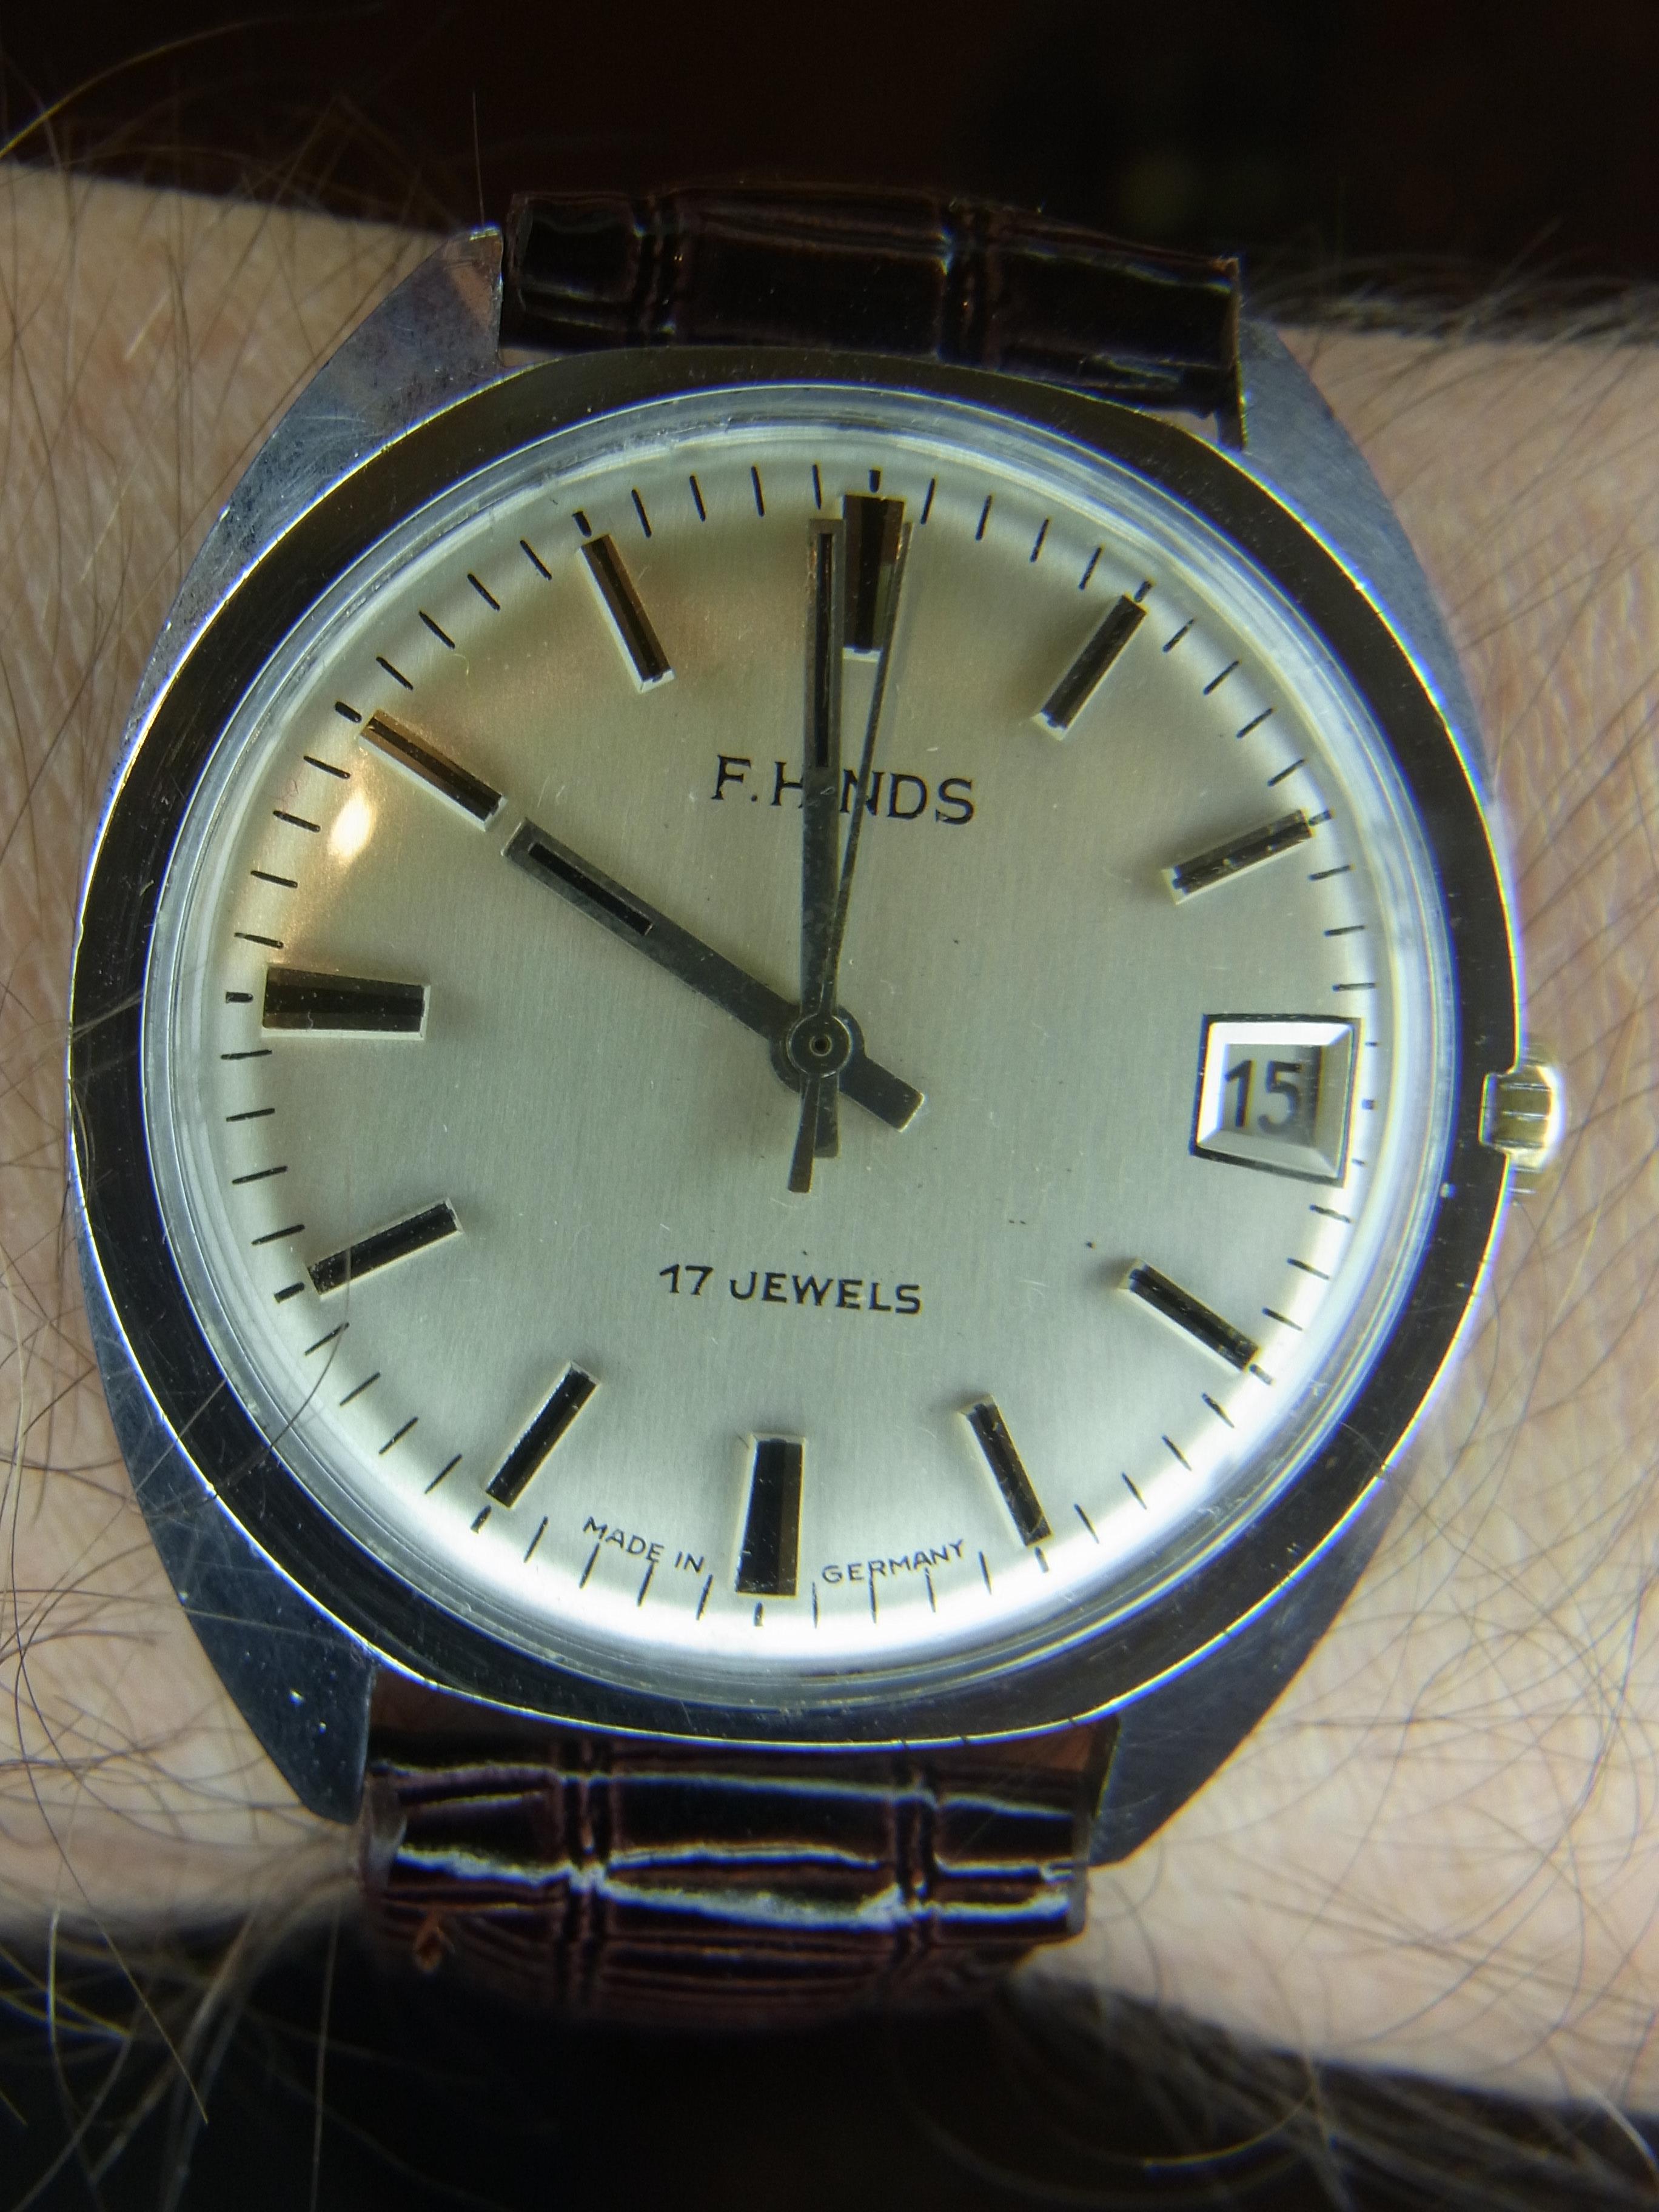
Following on from the PUW 681A,683A quartz alarm I posted about the other day, I have another German watch for you all. This time it is a 17 Jewel "F-Hinds" Bifora 115/1 which I picked up back in November of 2018. There is a short history of Bifora here -> http://www.ranfft.de/cgi-bin/bidfun-db.cgi?10&ranfft&&2uswk&Bifora_000 Since I hadn't worn it in a while, I decided it was due some more TLC and a bit of an outing. It was actually still running as well as it did after I serviced it back then, so I guess I must have made a reasonable job of it. Today, as well as another quick service, it also got a fresh crystal and a new band (those dust specs are on the outside of the new crystal, I assure you). The swing has picked up to a slightly more healthy 250 degrees or so this time, from the 180 degrees I had before.

 4 points
 -
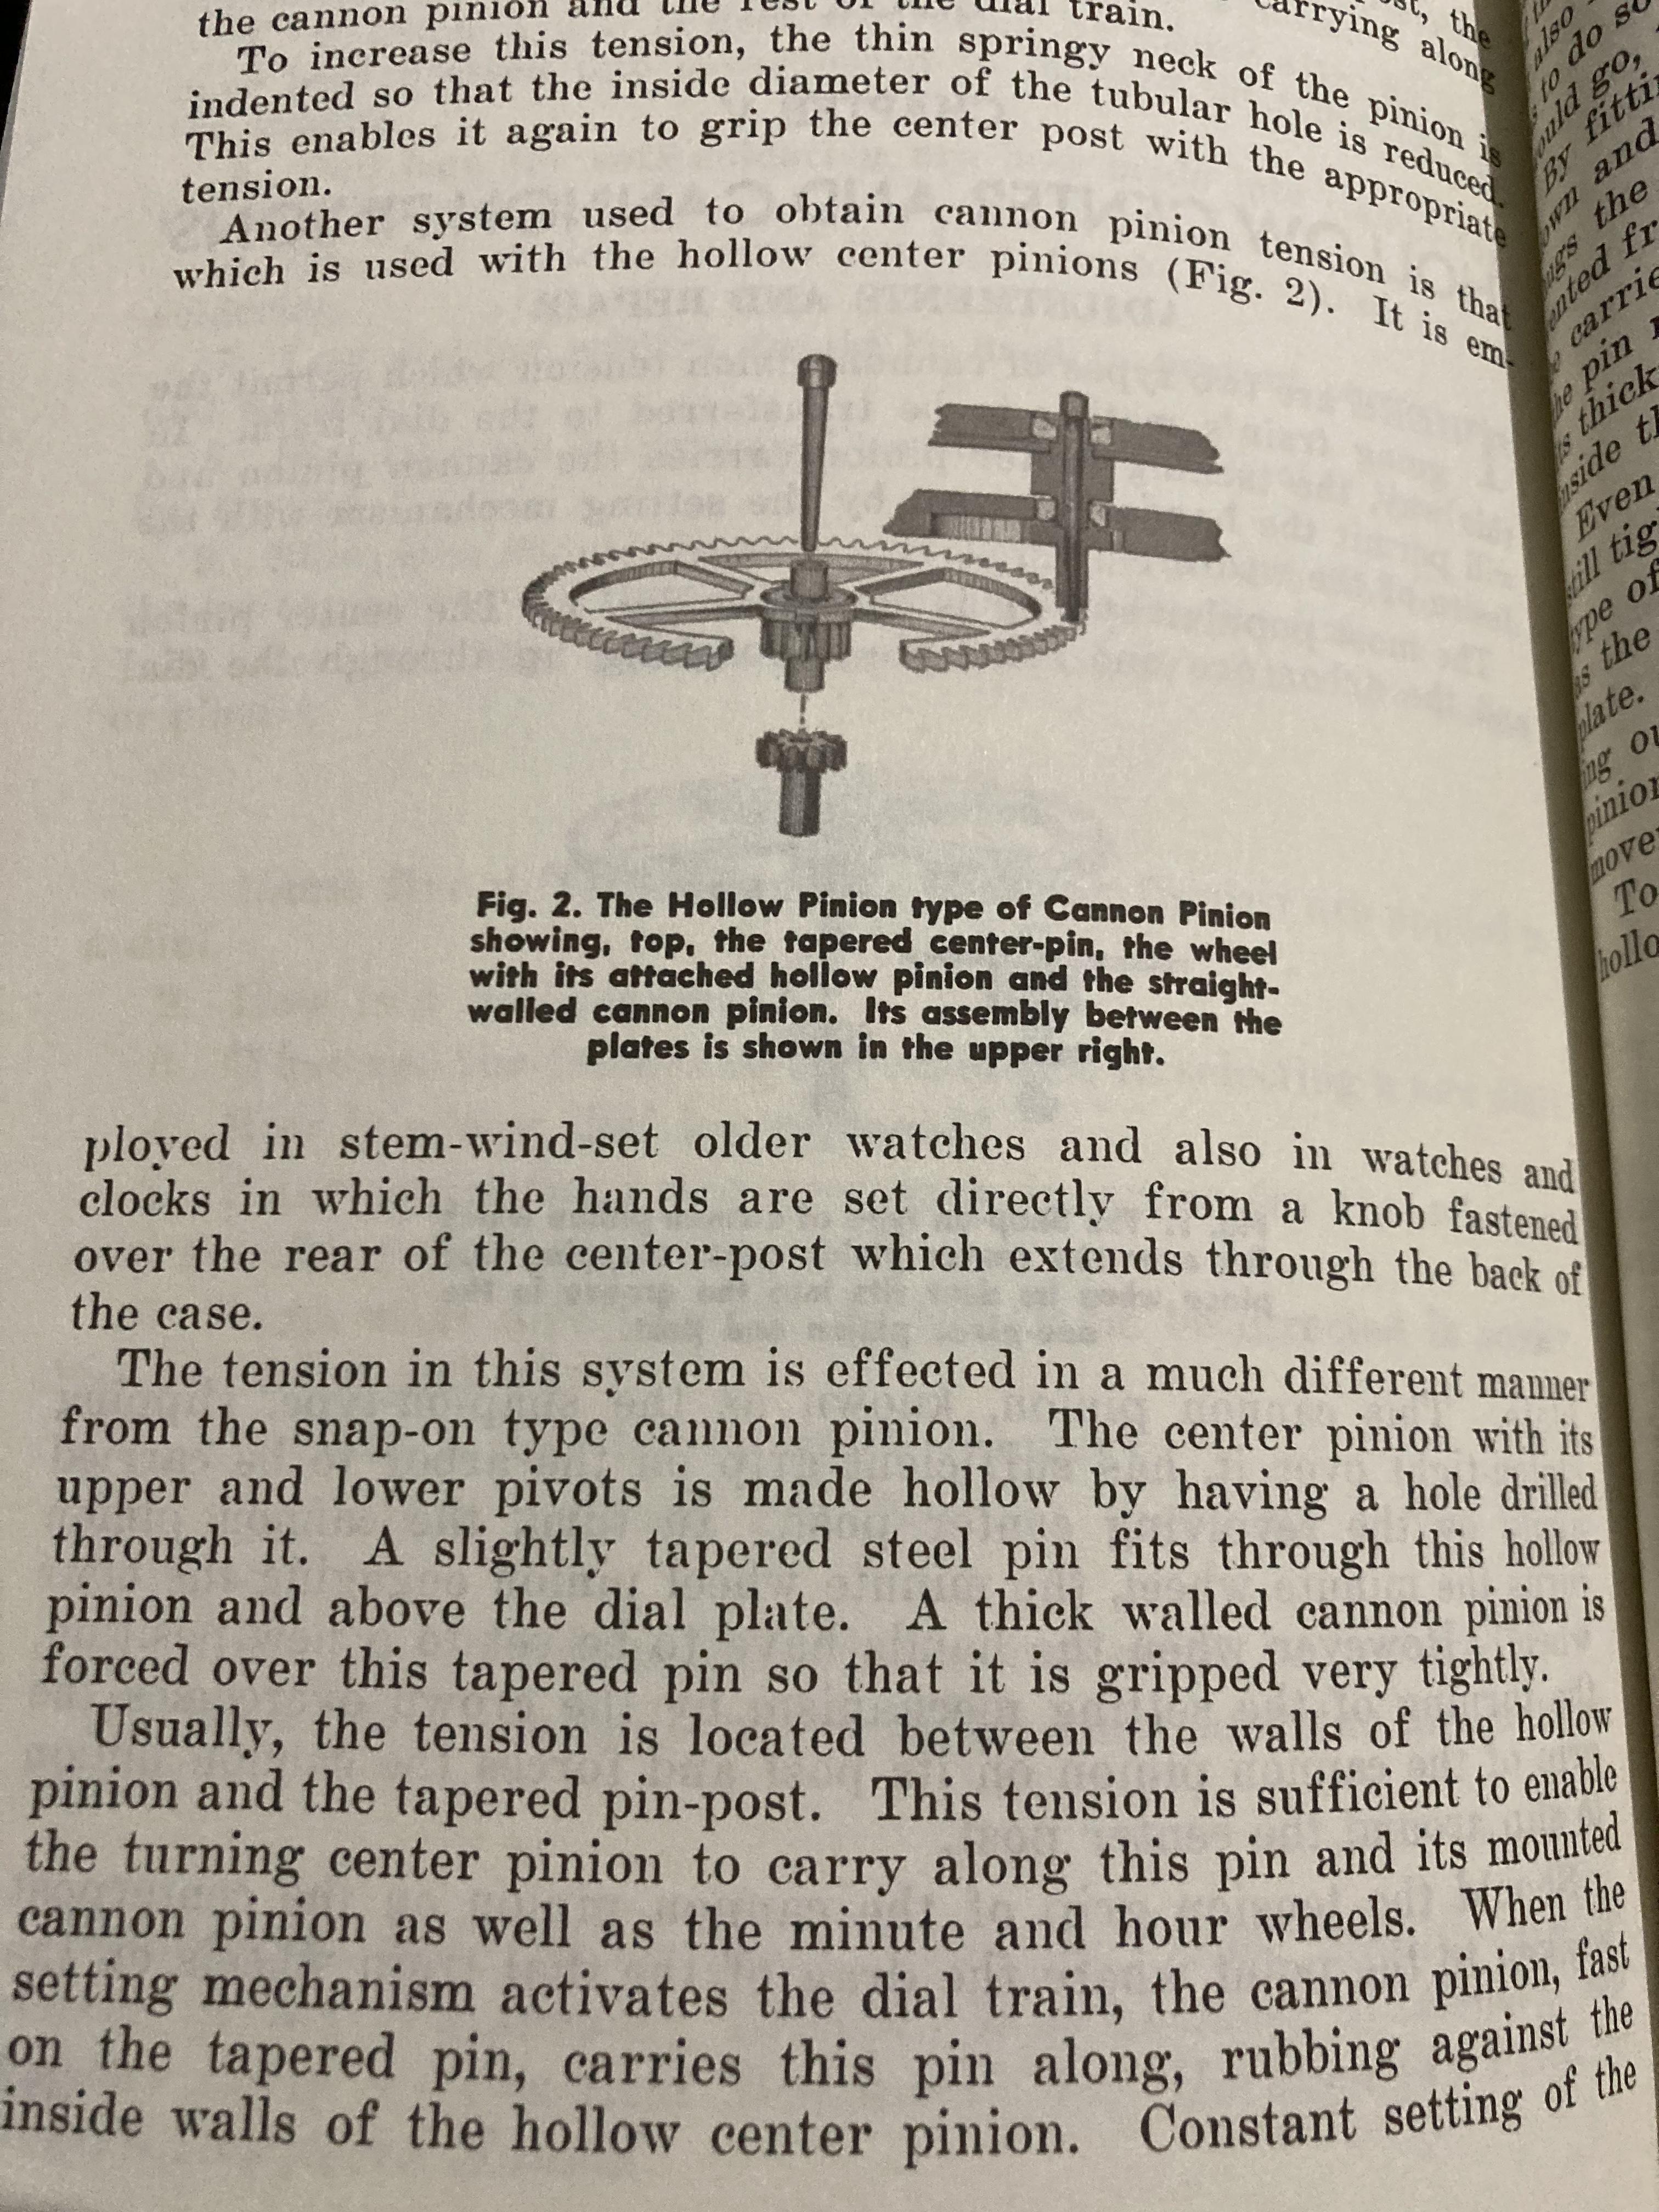
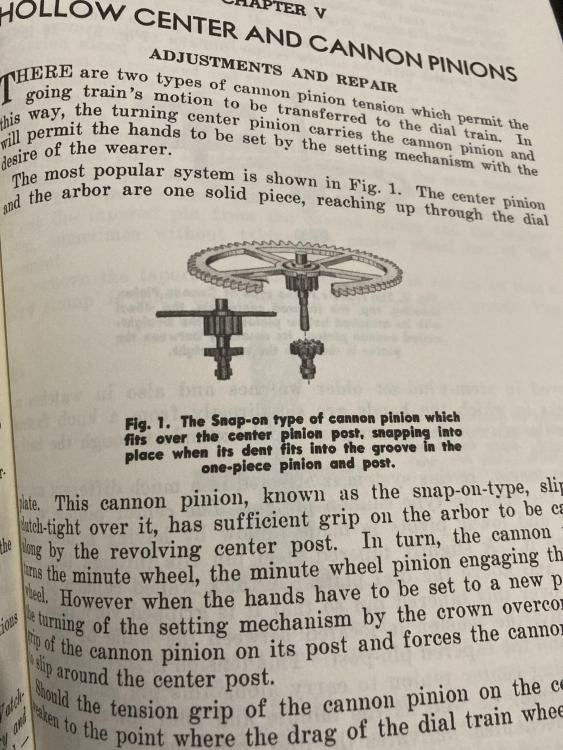
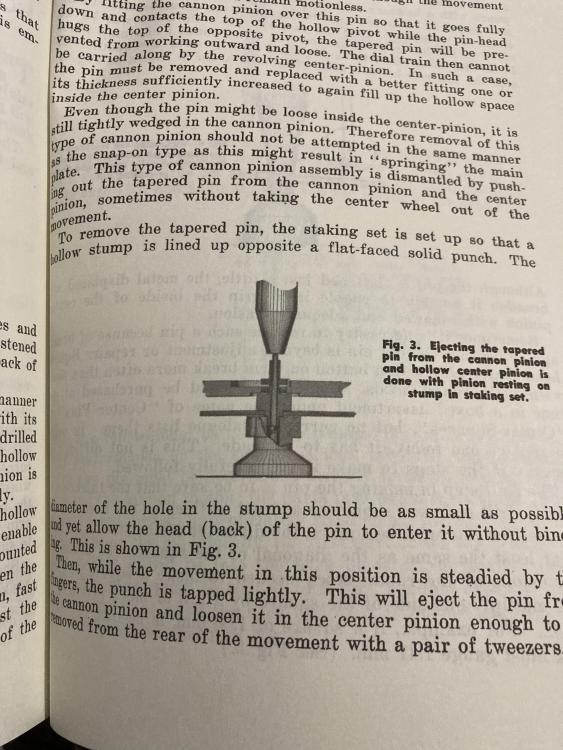
You don't need trial and error you look at it And instantaneously recognize it like I do. What are the clues? Notice the shape of the cannon pinion How solid it looks doesn't look like the normal kind and there's no place to grab it's very smooth. Then notice the protruding pin on the dial side that's your other clue that's the pin that you have to drive out. Then your images and good enough for the other side to see what we need to see. Then I would put the plate back on holding the center wheel before driving the pin out. That way you'll avoid damaging things. Then because this is a relatively common question I have pictures. The notice in my pictures I have two separate types. The easier to recognize because it has a squarehead it's a key set watch. The other one they just looks like the end of the standard large pivot kinda like yours. It's really hard to see where the actual head part is you should bill the CRs if you look really carefully.

 3 points
 -
After many years of never seeing a 7s36 three came along at once. All Pro Bono family watches which were in good nick and in danger of being thrown away. The first two were amusing and gave little trouble. I admire their simplicity and good balance design. The dumbed down balance jewel shock spring design takes some practice to manipulate but can be mastered. Sharp tweezers and thin pegwood in the other hand works - the more ingenious approach is to take a toothpick - and flat one end - use a 1.5 mm drill to create a concave hollow shape on that end. Lower carefully and trap the pesky spring - then twist it into place. Half the time it worked. Don't use 2mm pegwood - it's too hard and slippery - the slightly ragged bamboo of the toothpick helps to grip the flimsy metal. Watch No3 was cursed. Poor amplitude after re-assembly especially DD. Mmm. Tried all the usual free running checks - the pallet fork looked a bit lazy in one direction so I cursed myself for trying to cheap out by re-using the main spring. New spring - better but 140/190 deg consistent amplitude. Check it all again. The only thing I didn't like was the balance spring did not look central. Removed it from the cock and yes - not a nice final curve and not perfectly central. I hate reshaping but have got better over the years however it's dangerous work and there was a £7 pattern part on the internet... It came and apart from the stud attachment with the groove in the wrong place it looked reasonable. . So now 250 deg DD - Armageddon 140 deg DU . This clearly suggested the drive system was good and the problem lay with the balance. Yes the spring was flat and not rubbing when inverted. Got everything under the microscope and had a good look the especially check the balance cock jewel was not at fault. A few hours adjusting and reshaping failed to change matters. Tell friend to buy a new watch - these 7s36s can still be had for £100. He is reluctant. Two sleeps later we strip it right down again and find a huge lint ball at the top of the escape wheel. Hurrah - problem solved ? NO - Still runs horribly DU. Enough - Move onto a spare NH36 with a battered balance spring and spend a character building afternoon getting this straightened out. The task is really aggravated by the fact that the spring is hard pressed onto the arbor and clearly not meant to be removed - you are forced to work with the balance wheel on top and getting in the way. I liked the Etachron type fixings but sad my ETA style adjustment tool is too small to fit. They turn easily enough with a home made mini spanner. We win - first try - 250 deg and just 17 secs variation DU to PD - Good enough for a beater. So - What have we learnt ? 1. If the balance spring is not happy and central don't rush to blame the rest of the watch for strange amplitudes. 2. Cheap pattern parts can waste hours. 3. With new NH36 movements with manual winding and hacking available for less than £40 why are you bothering ? 4. The watches that drive you crazy will force your skills to improve. 5. Golf is not always the most frustrating pass time.. Still think this was mostly my blundering fault and the watch was not cursed ? As I tidied my tools away there was a faint click from my wrist - the new crystal spontaneously split. I laughed so hard....2 points
-
Hi as it is a fashion watch it’s more than likely a snap back, some of which can be very tight. Once you have changed the battery you then have the problem of replacing the back, you will need a press. There are tools on the eBay to open and close snap backs whose cost is not that great and handy to have if you are working on watches. Cheers2 points
-
Paul80 is right. The temper makes the shaft brittle. If you cannot find a donor movement with a donor part, the other possibility is to light a spirit lamp (or other heat source that would approximate it) and heat the ends of some small, flat-faced pliers. The intent is that the heat must transmit to the part as you use the heated tips to make very, VERY gradual bends to straighten it. Reheat the tips regularly. And in the end, it still may break. But some do not. Some people are better at doing this than I am, and I am jealous.2 points
-
Indeed John, thanks for sharing your knowledge! I did try D5 on the pallet fork pivots, and my quick test suggests that you'll lose around 30 degrees of amplitude compared to using no oil. That's even more significant than using D5 instead of 9010 on the balance endstones in my particular case. I let the movement run for a couple days in my drawer and found that yet another 10 degrees had gone astray at the end of it. I think the sweet spot for the movement in its current condition is D5 on the whole train + balance, pallet fork pivots dry. I've re-cleaned and done so, and I'll check back in a couple days. Luckily I'm doing this for fun so I've got all the time in the world to get this right, or if I can't, I'll learn a bunch! I'll re-test all positions when the movement has calmed down after today's adventure. Come to think of it, at some point I should disassemble, clean, assemble and oil a movement several times to ensure that I get the same results every time. If not, my methods need revising.1 point
-
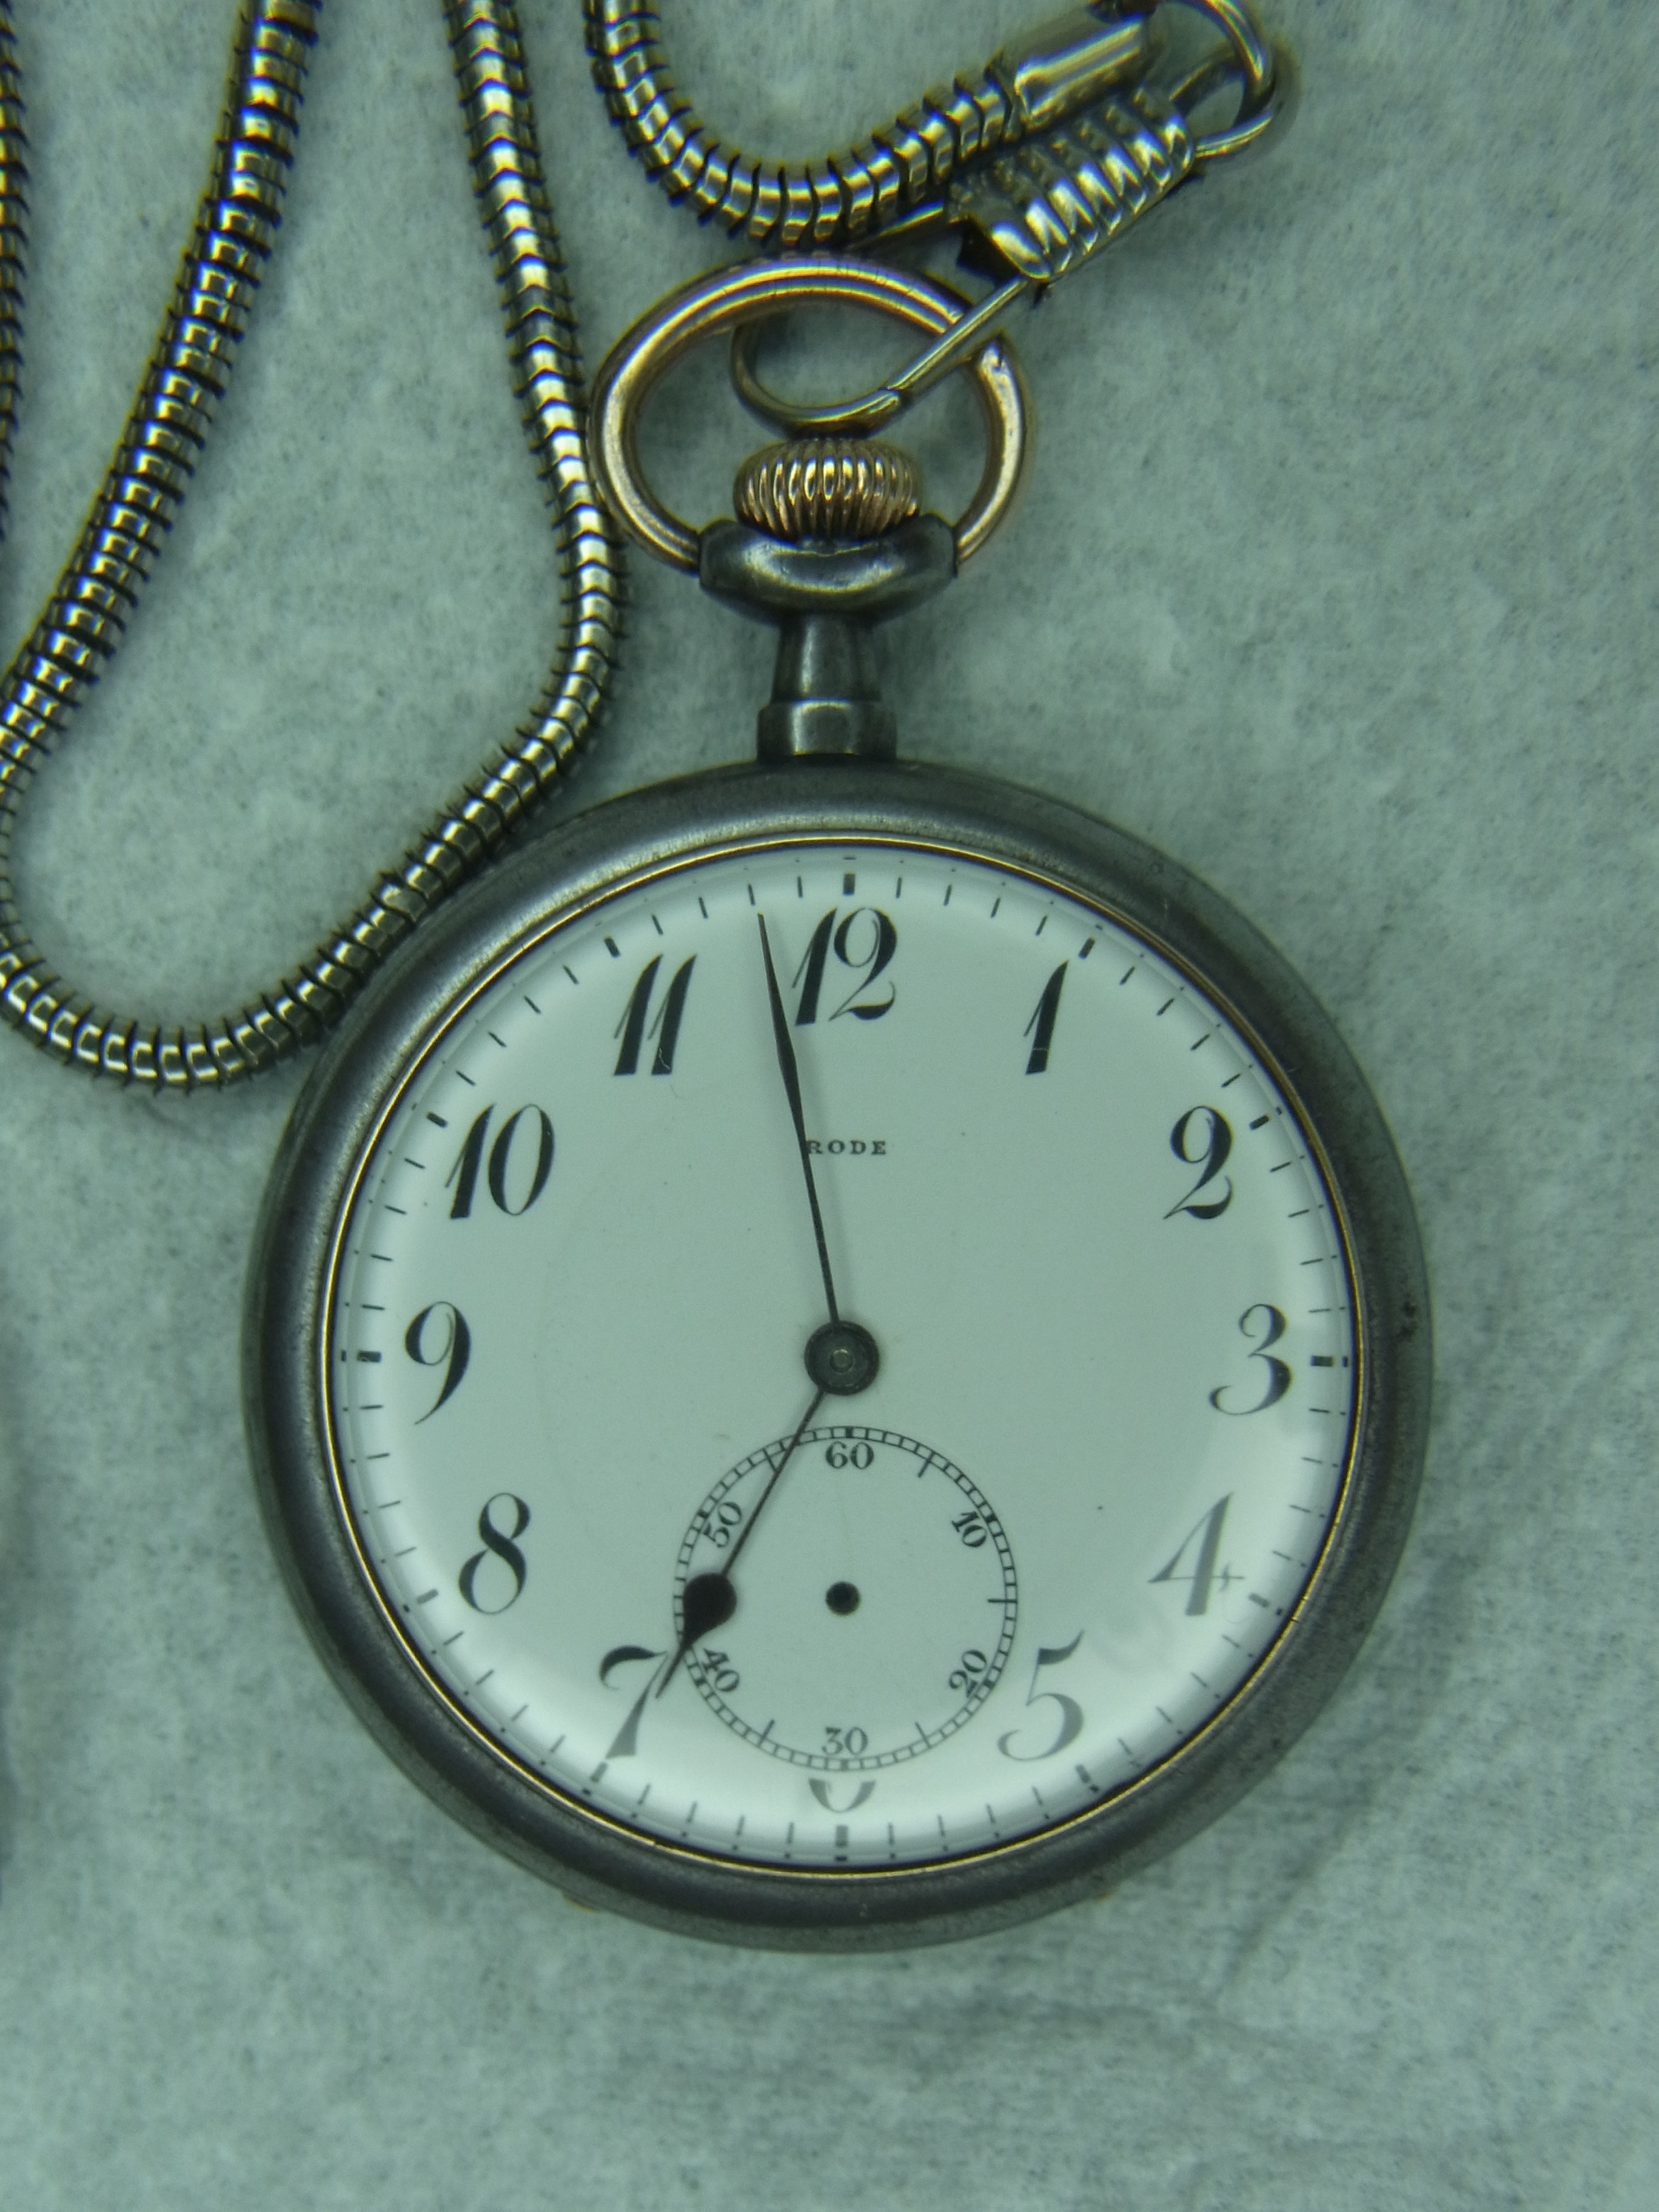
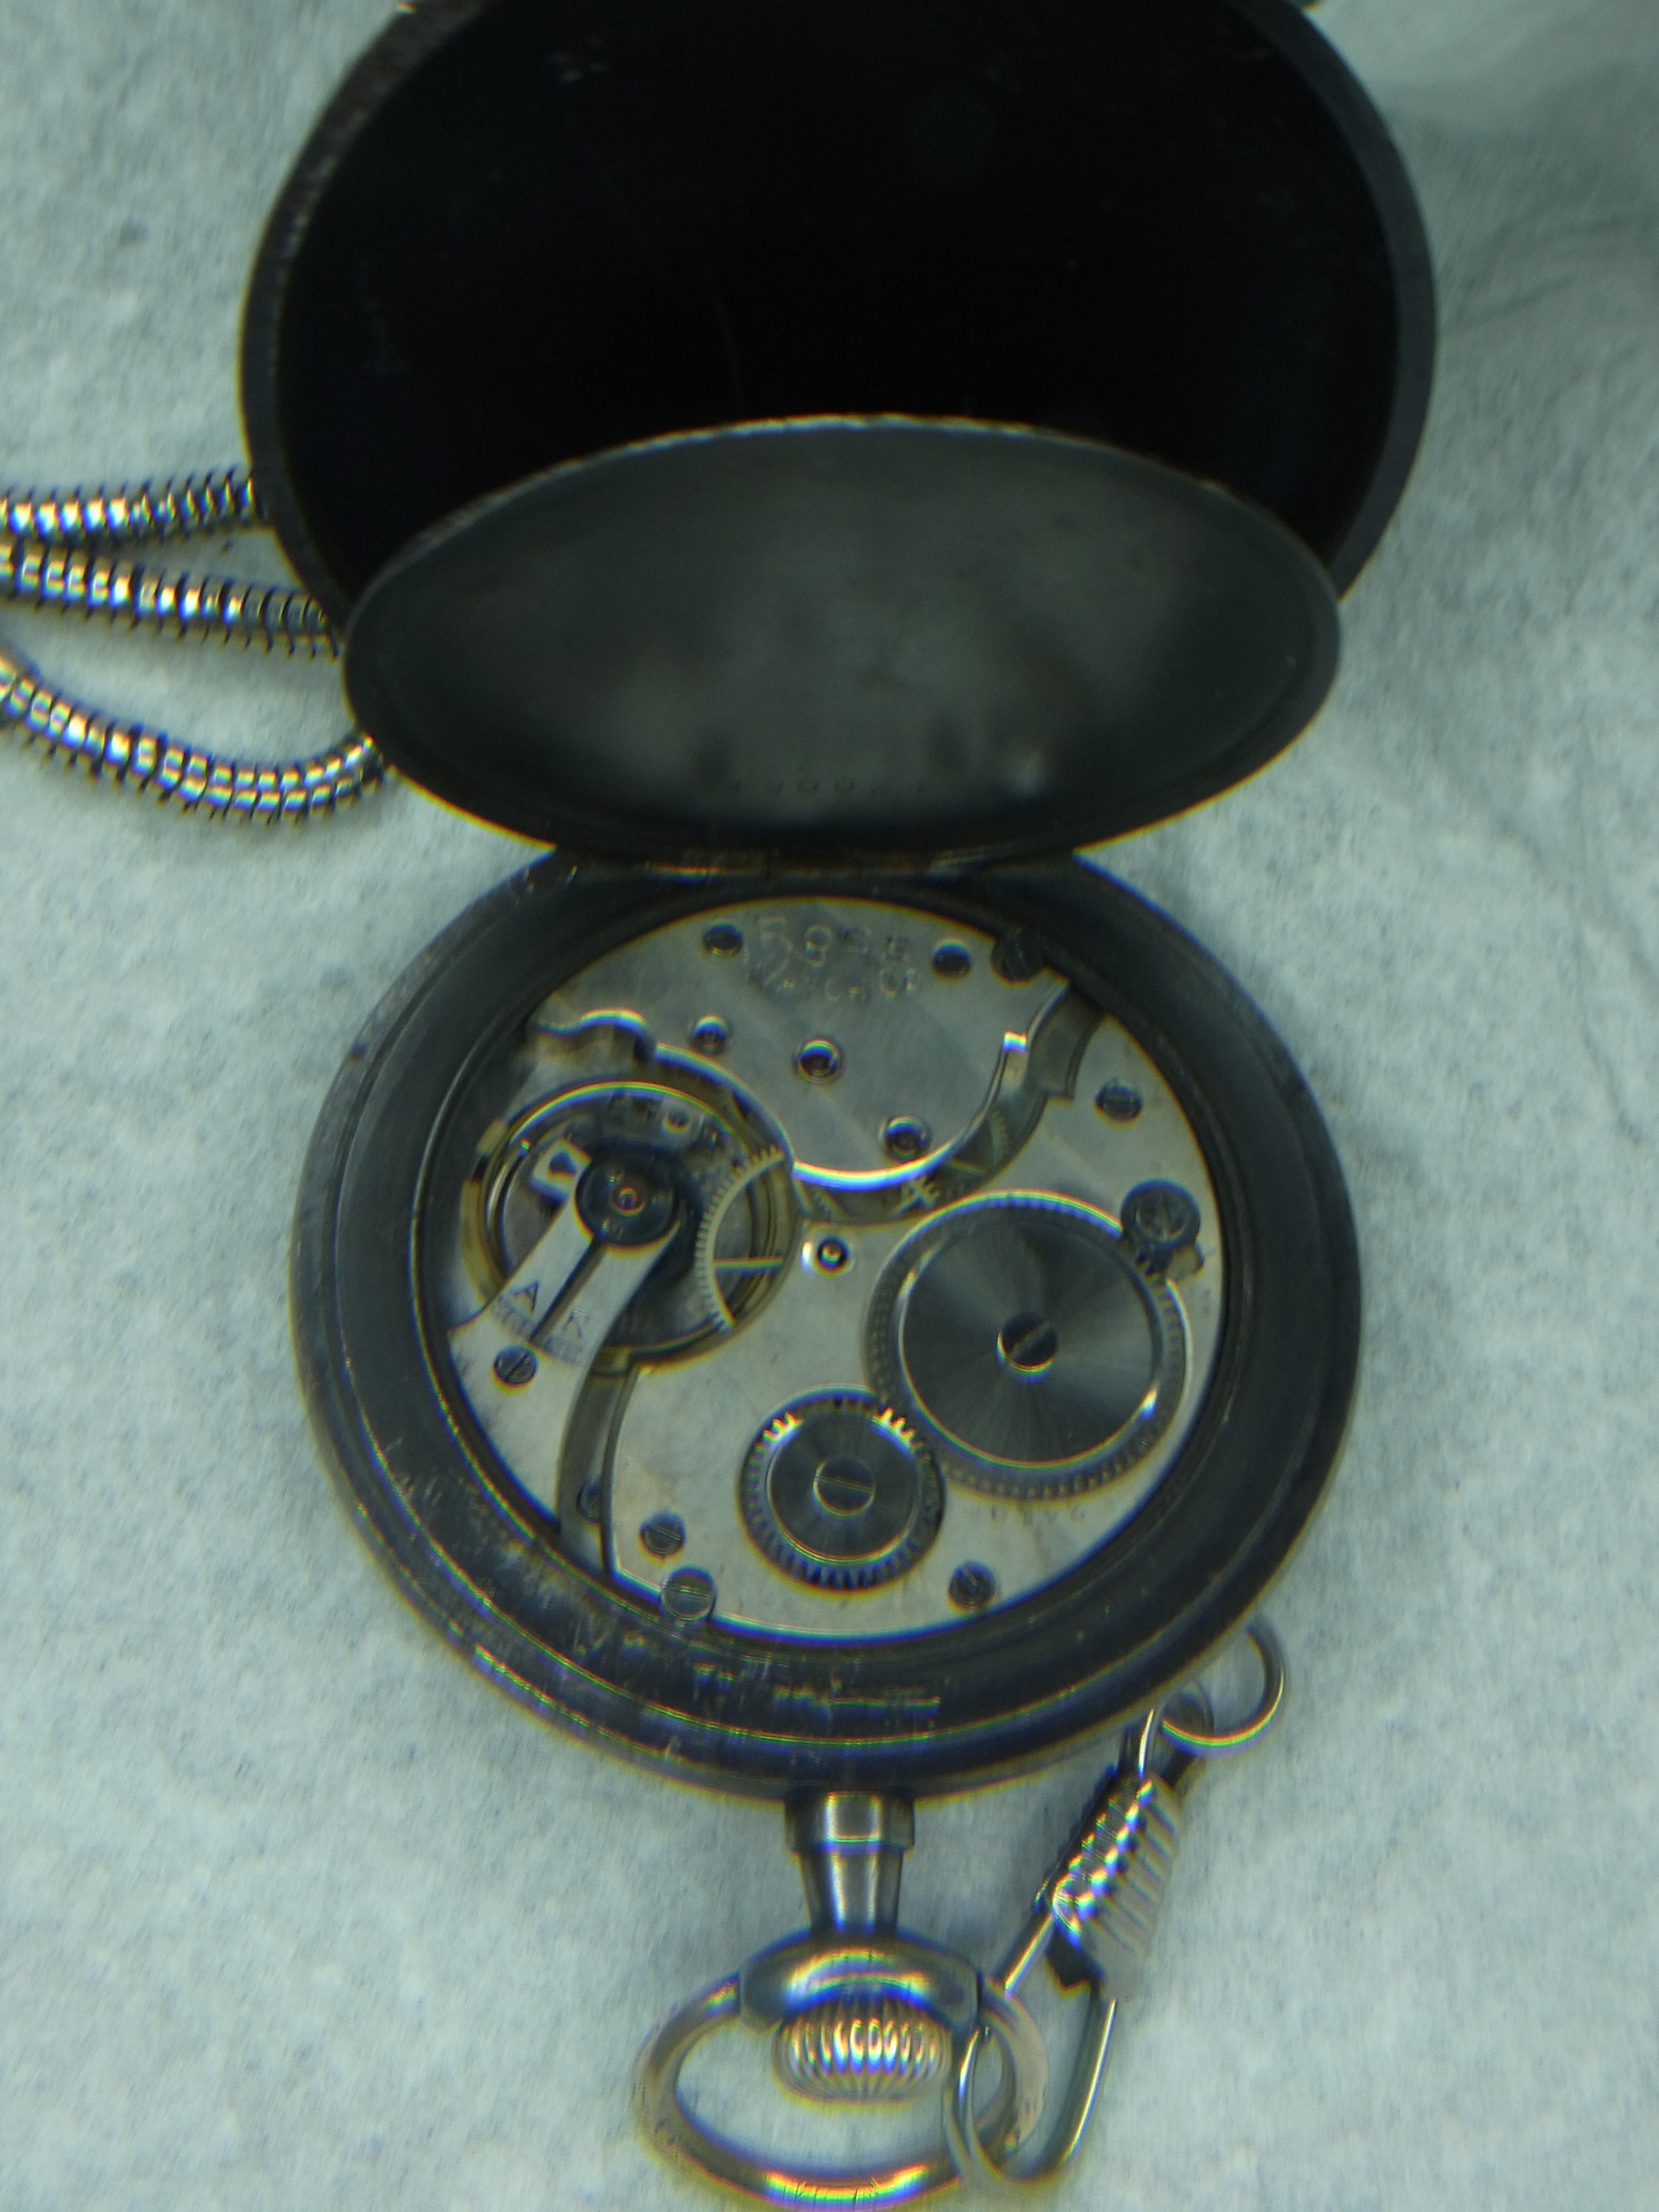
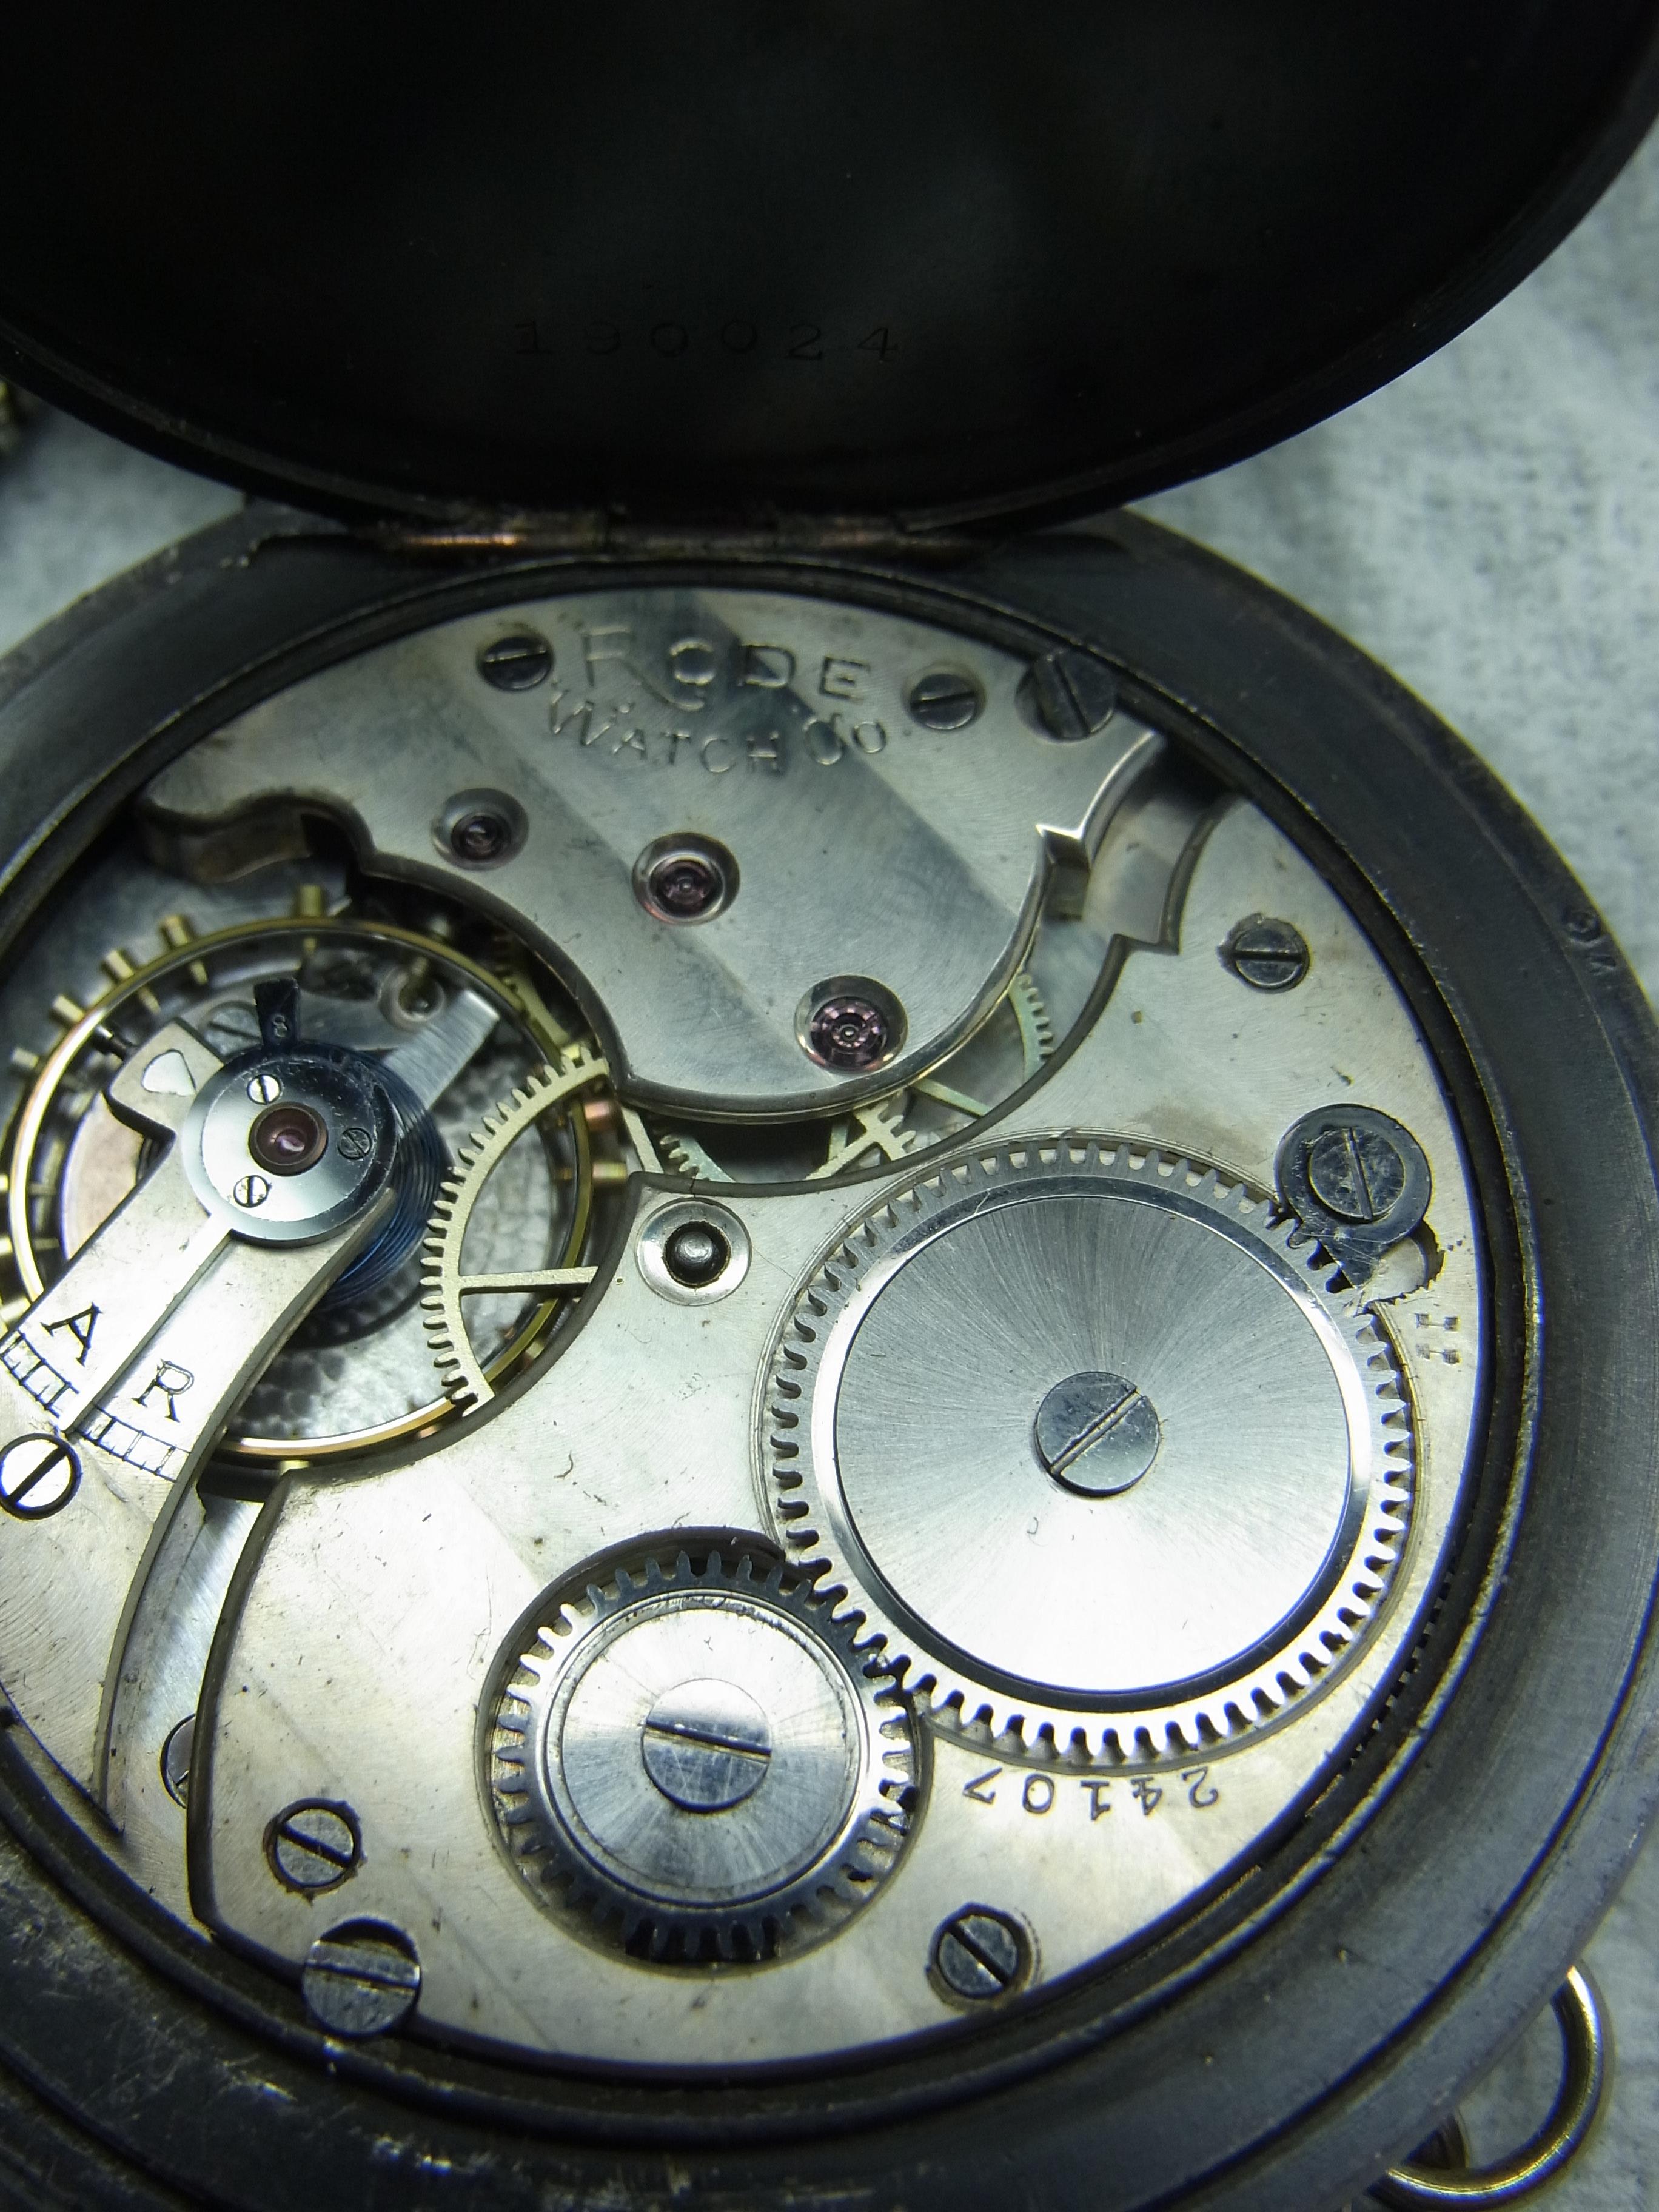
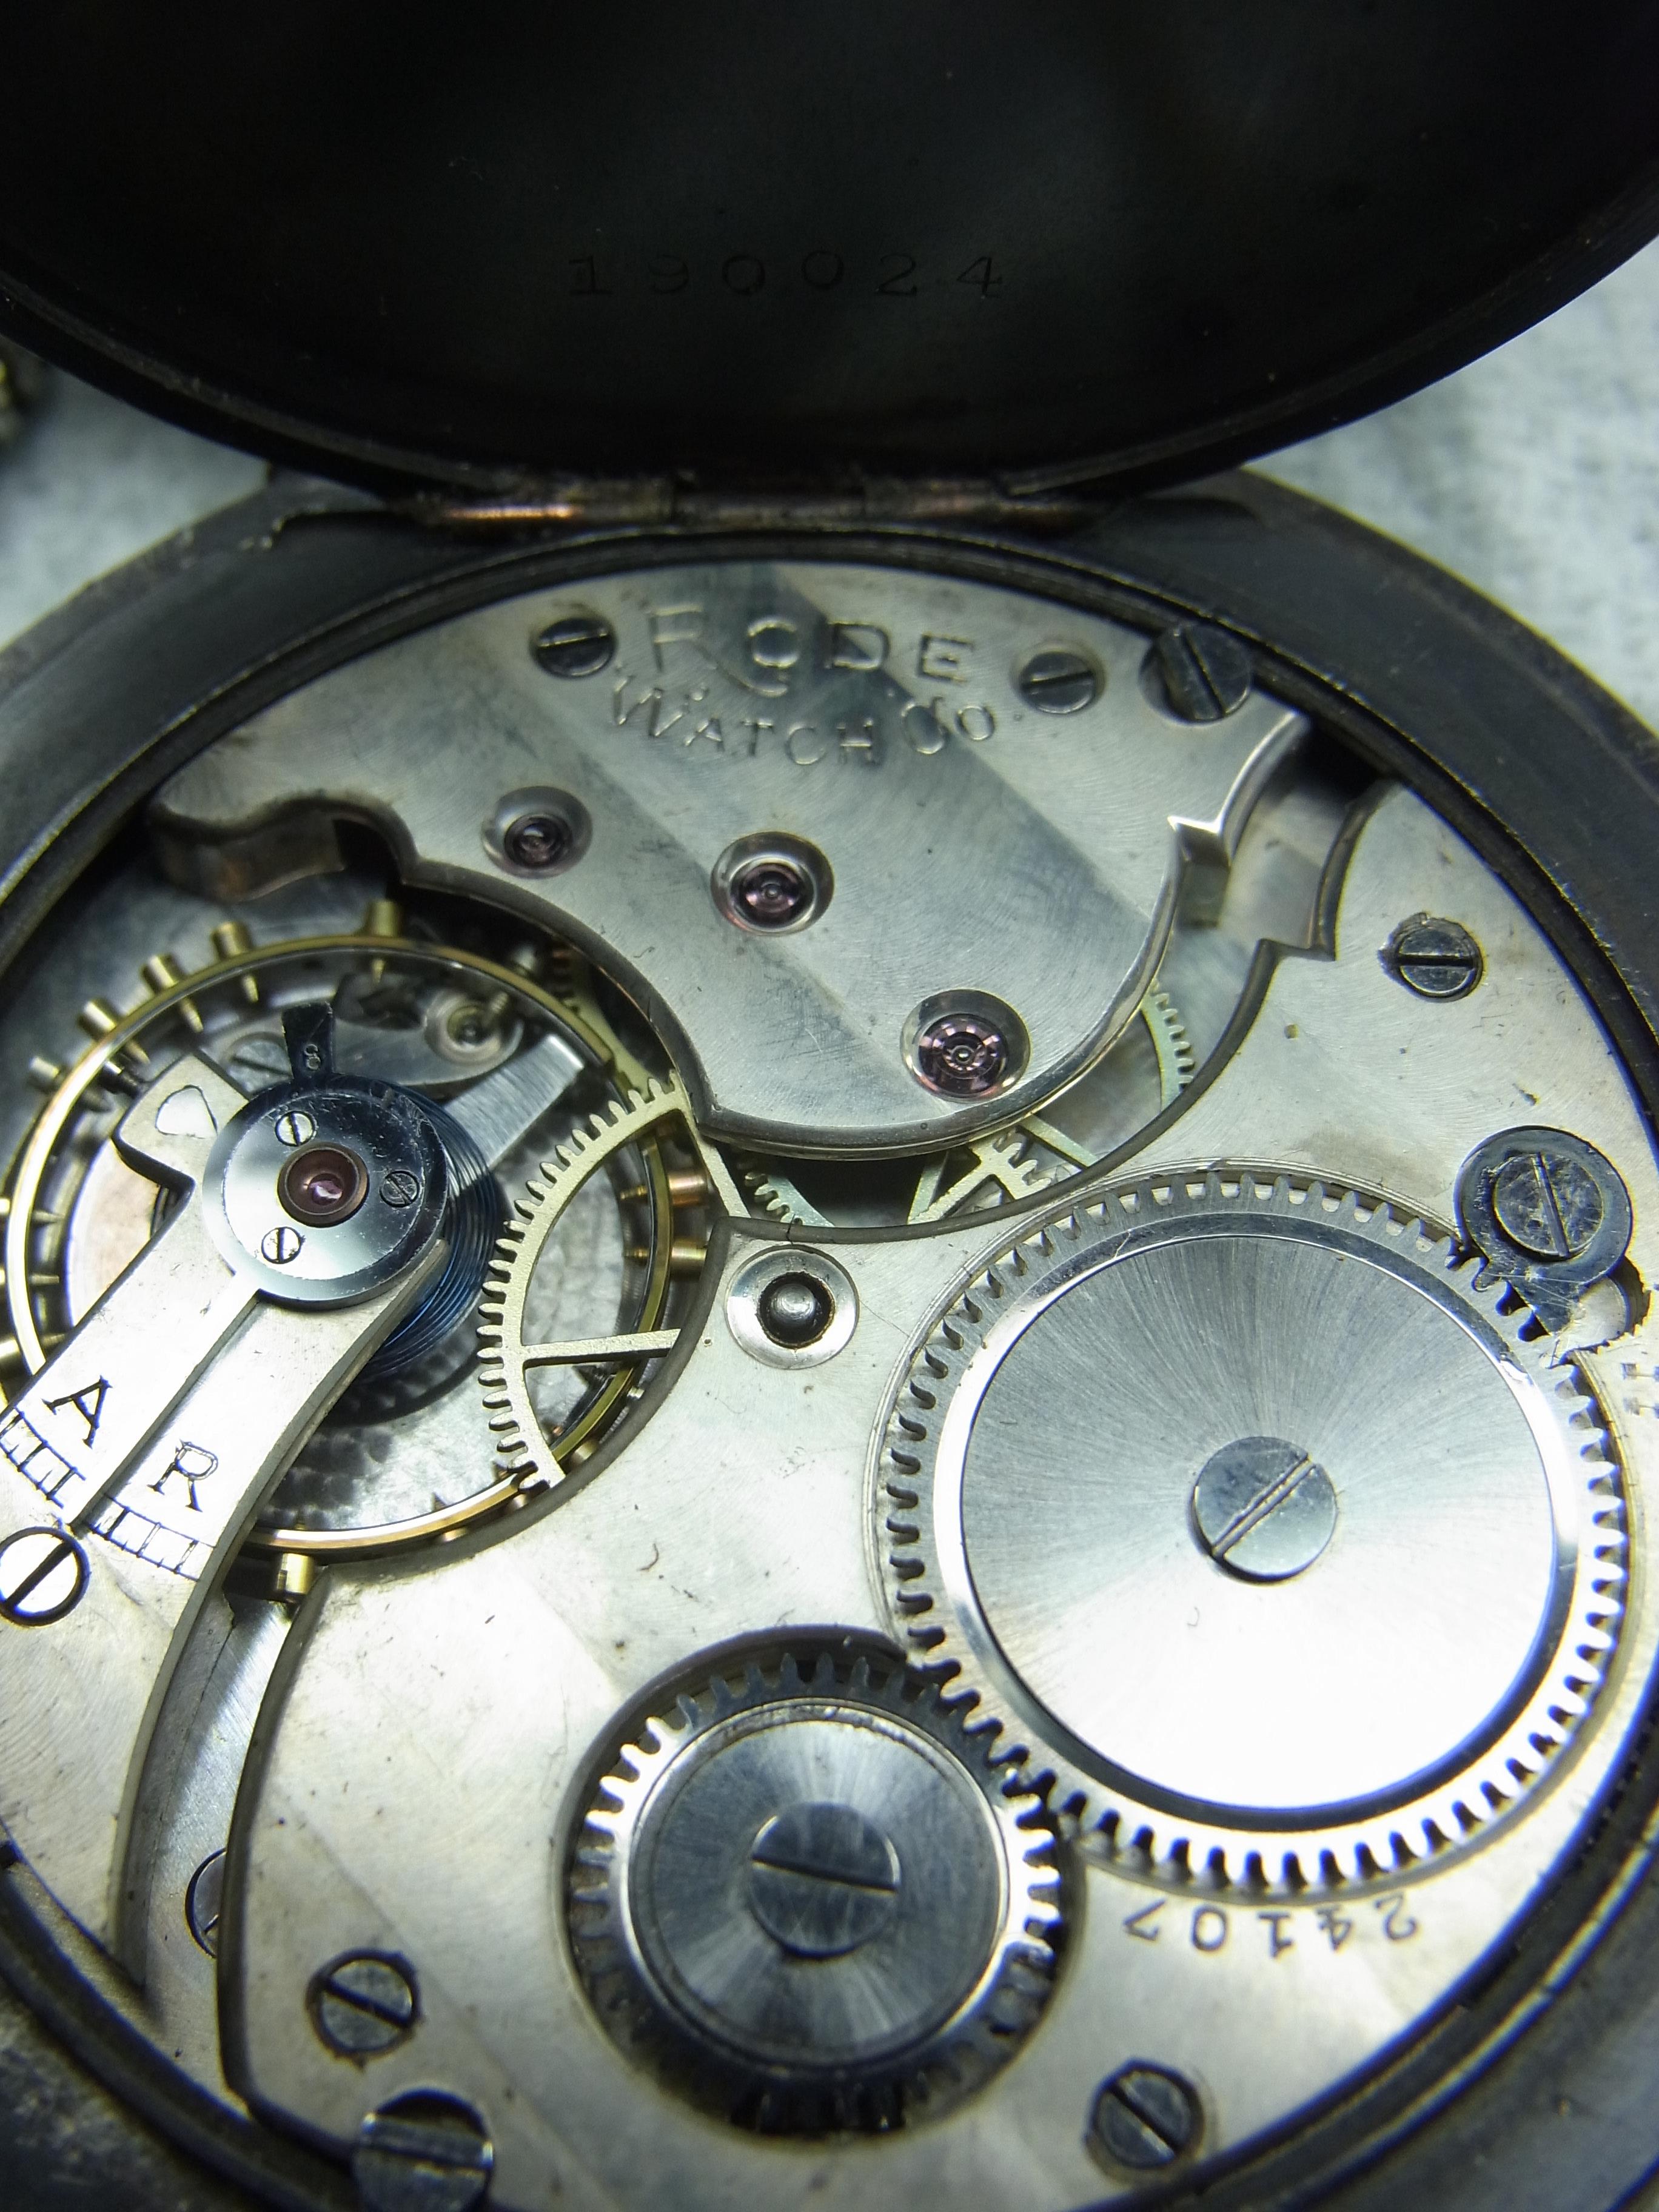
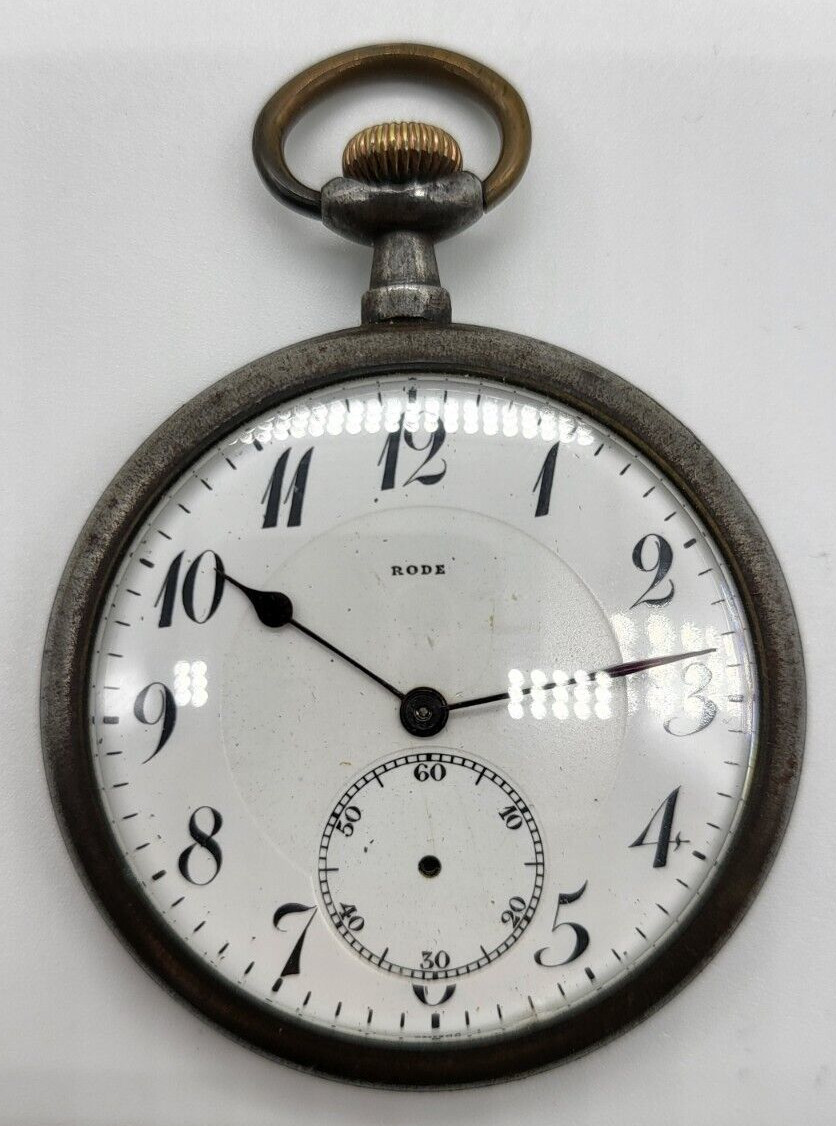
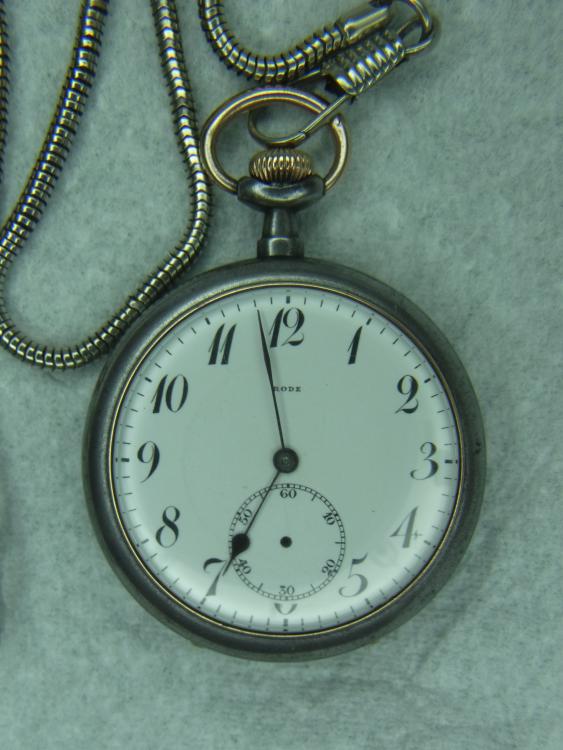
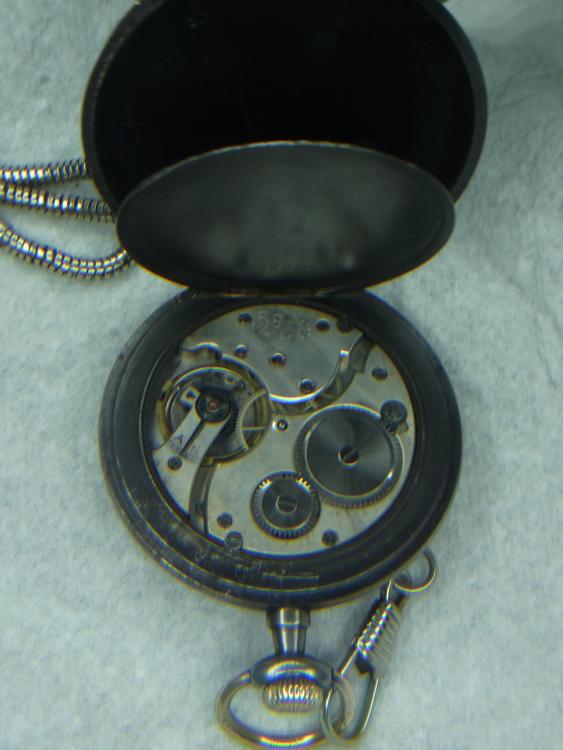
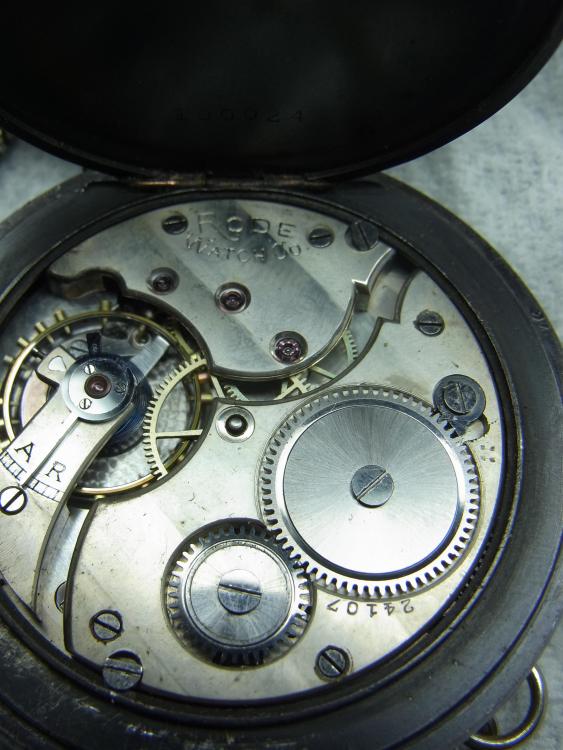
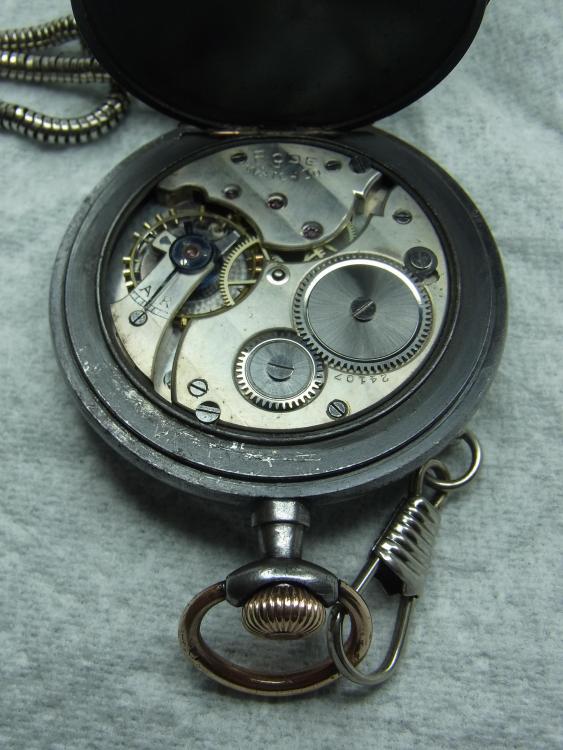
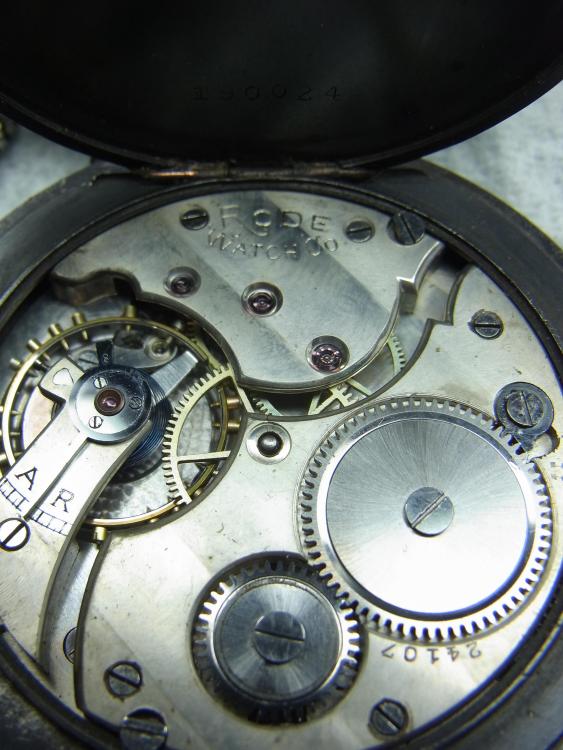
It was a little grubby and not running too well when it arrived. Sadly, as is all too often the case, the seconds pivot on this Rode pocket watch had been damaged. I guess I might be able to so something cunning with the pivot. Perhaps if I had a hand with a very long tube reach it might work, but as it currently stands it is handless. Other than that it is a very fine looking watch. Following a good clean and service it is also running very nicely, and considering how little I paid for it I'm pretty pleased with the result.
 1 point
 -
Snap-on for sure!
 1 point
 -
Hi what Karl is advocating is undoubtably the best option. The hot pliers gently anneal the tip allowing it to respond to treatment but again as Karl said be very careful and take it by degrees and do not rush. Cheers1 point
-
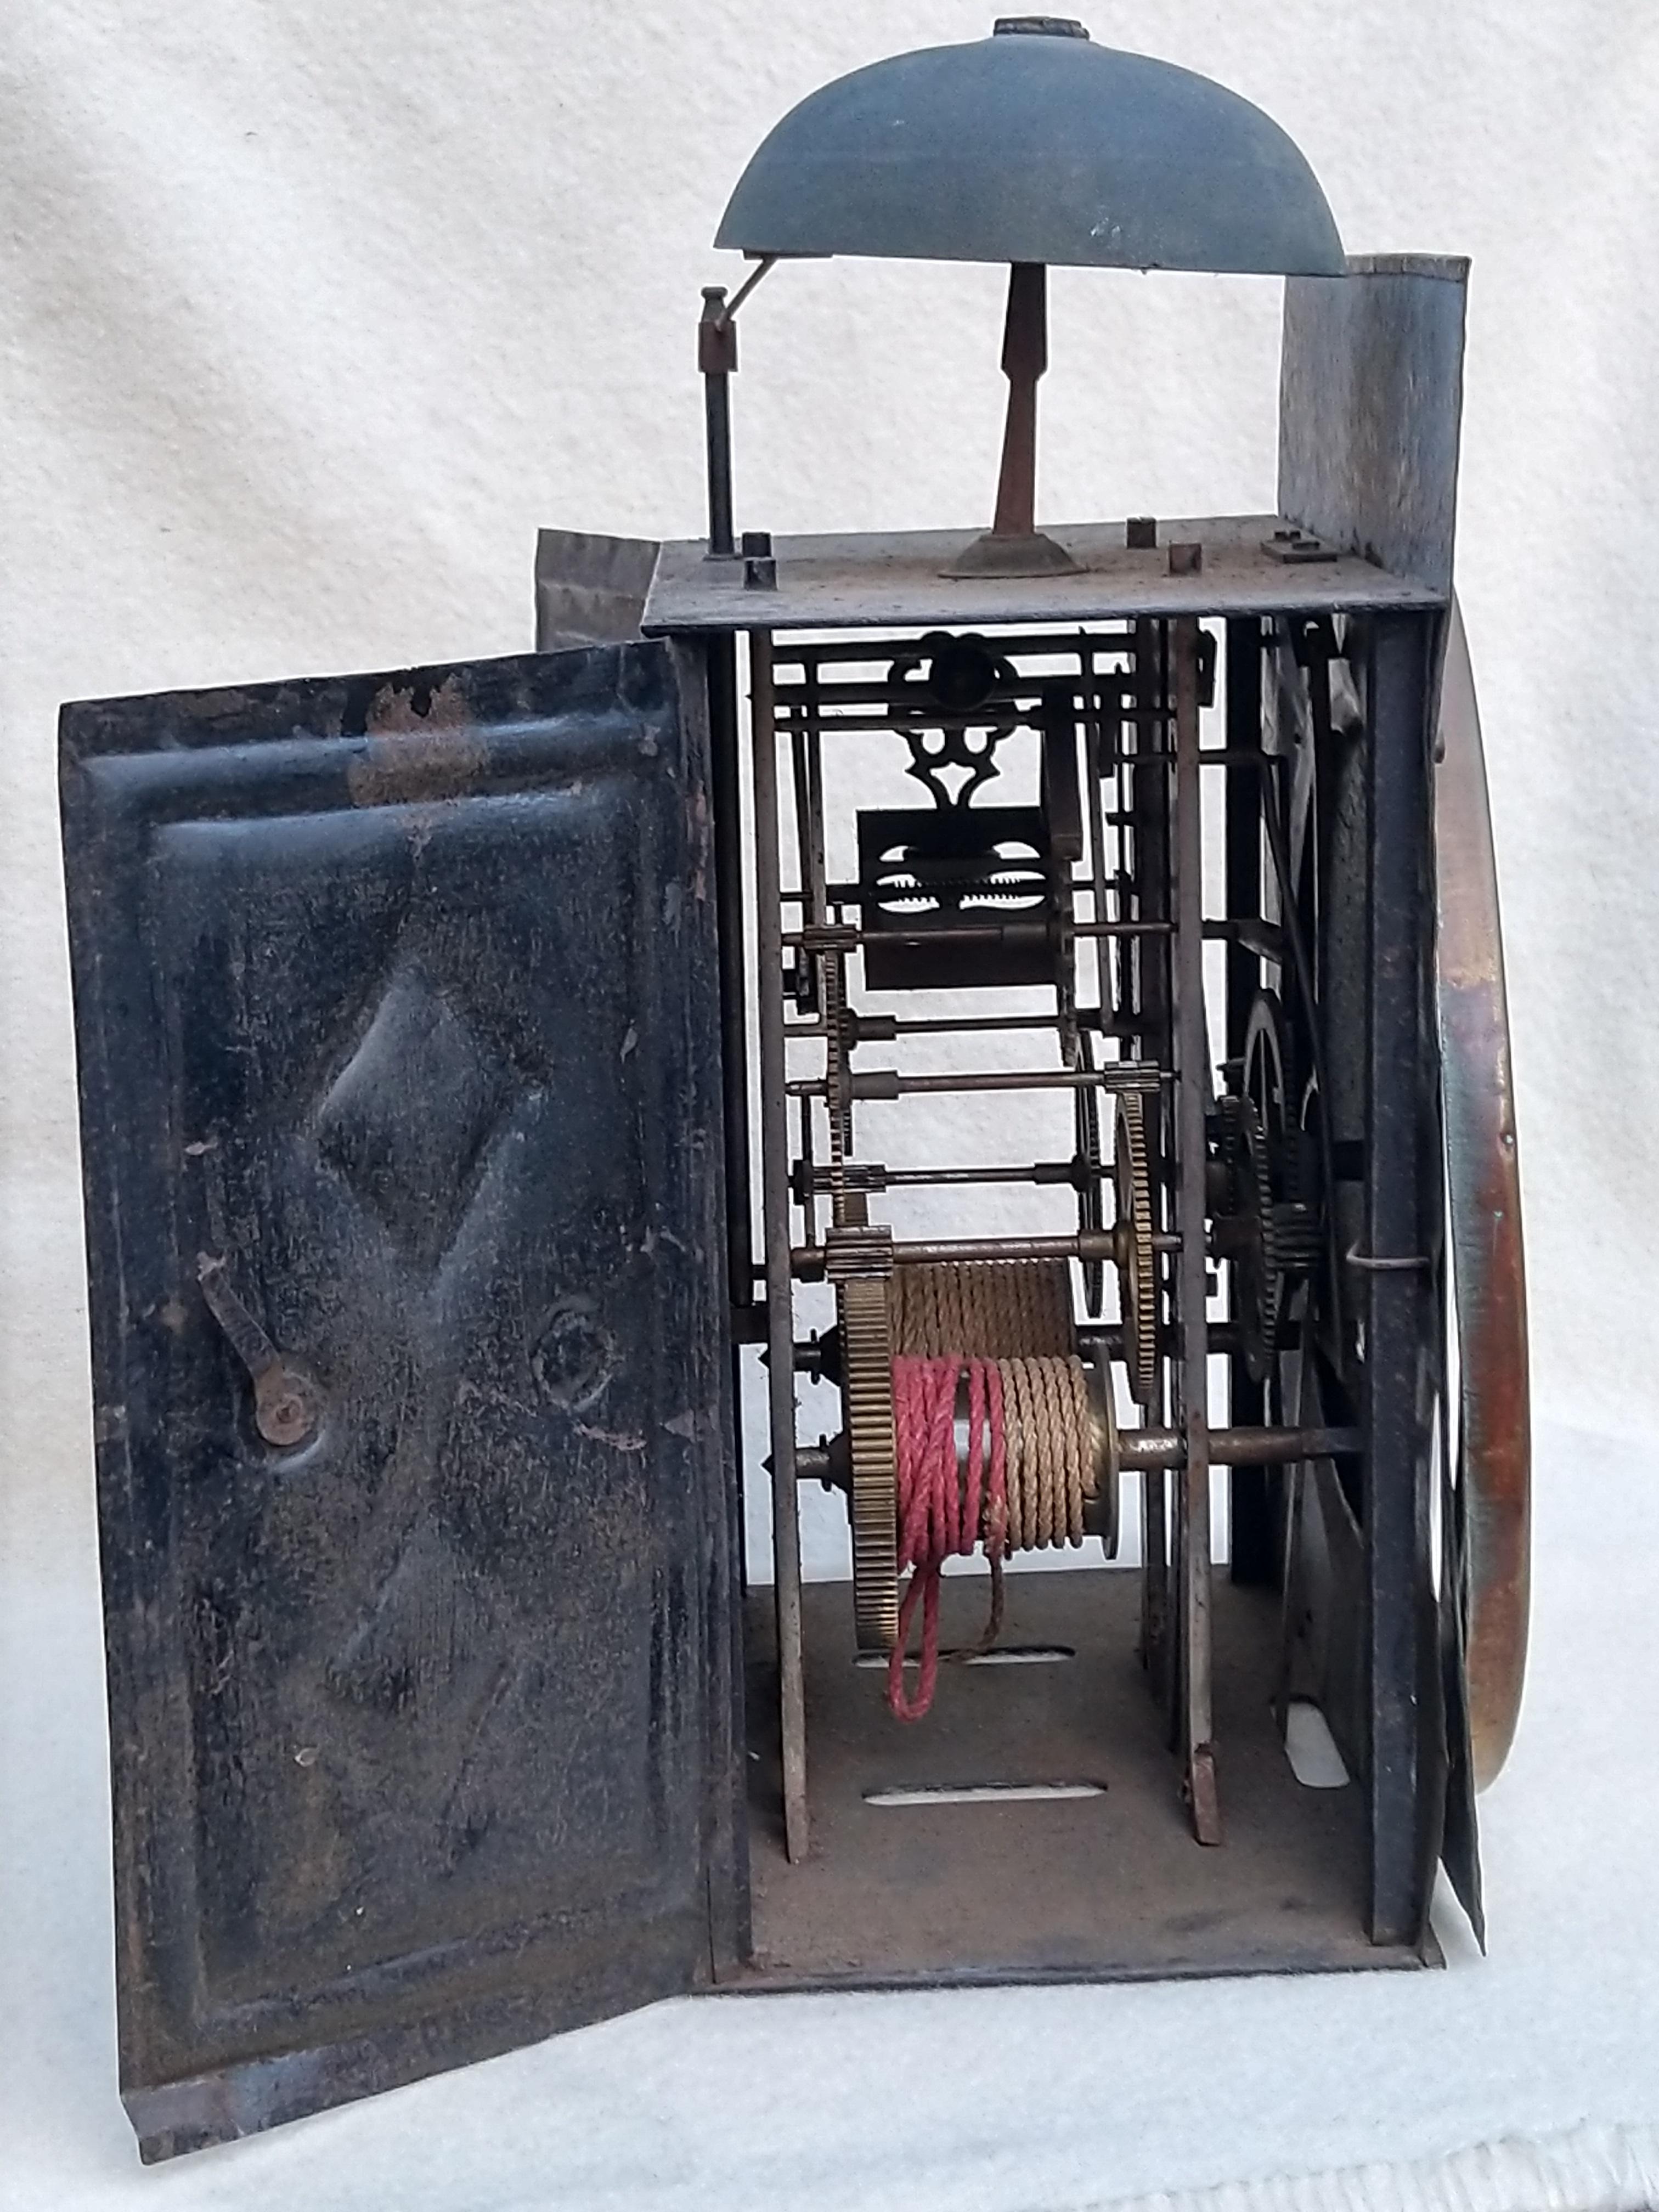
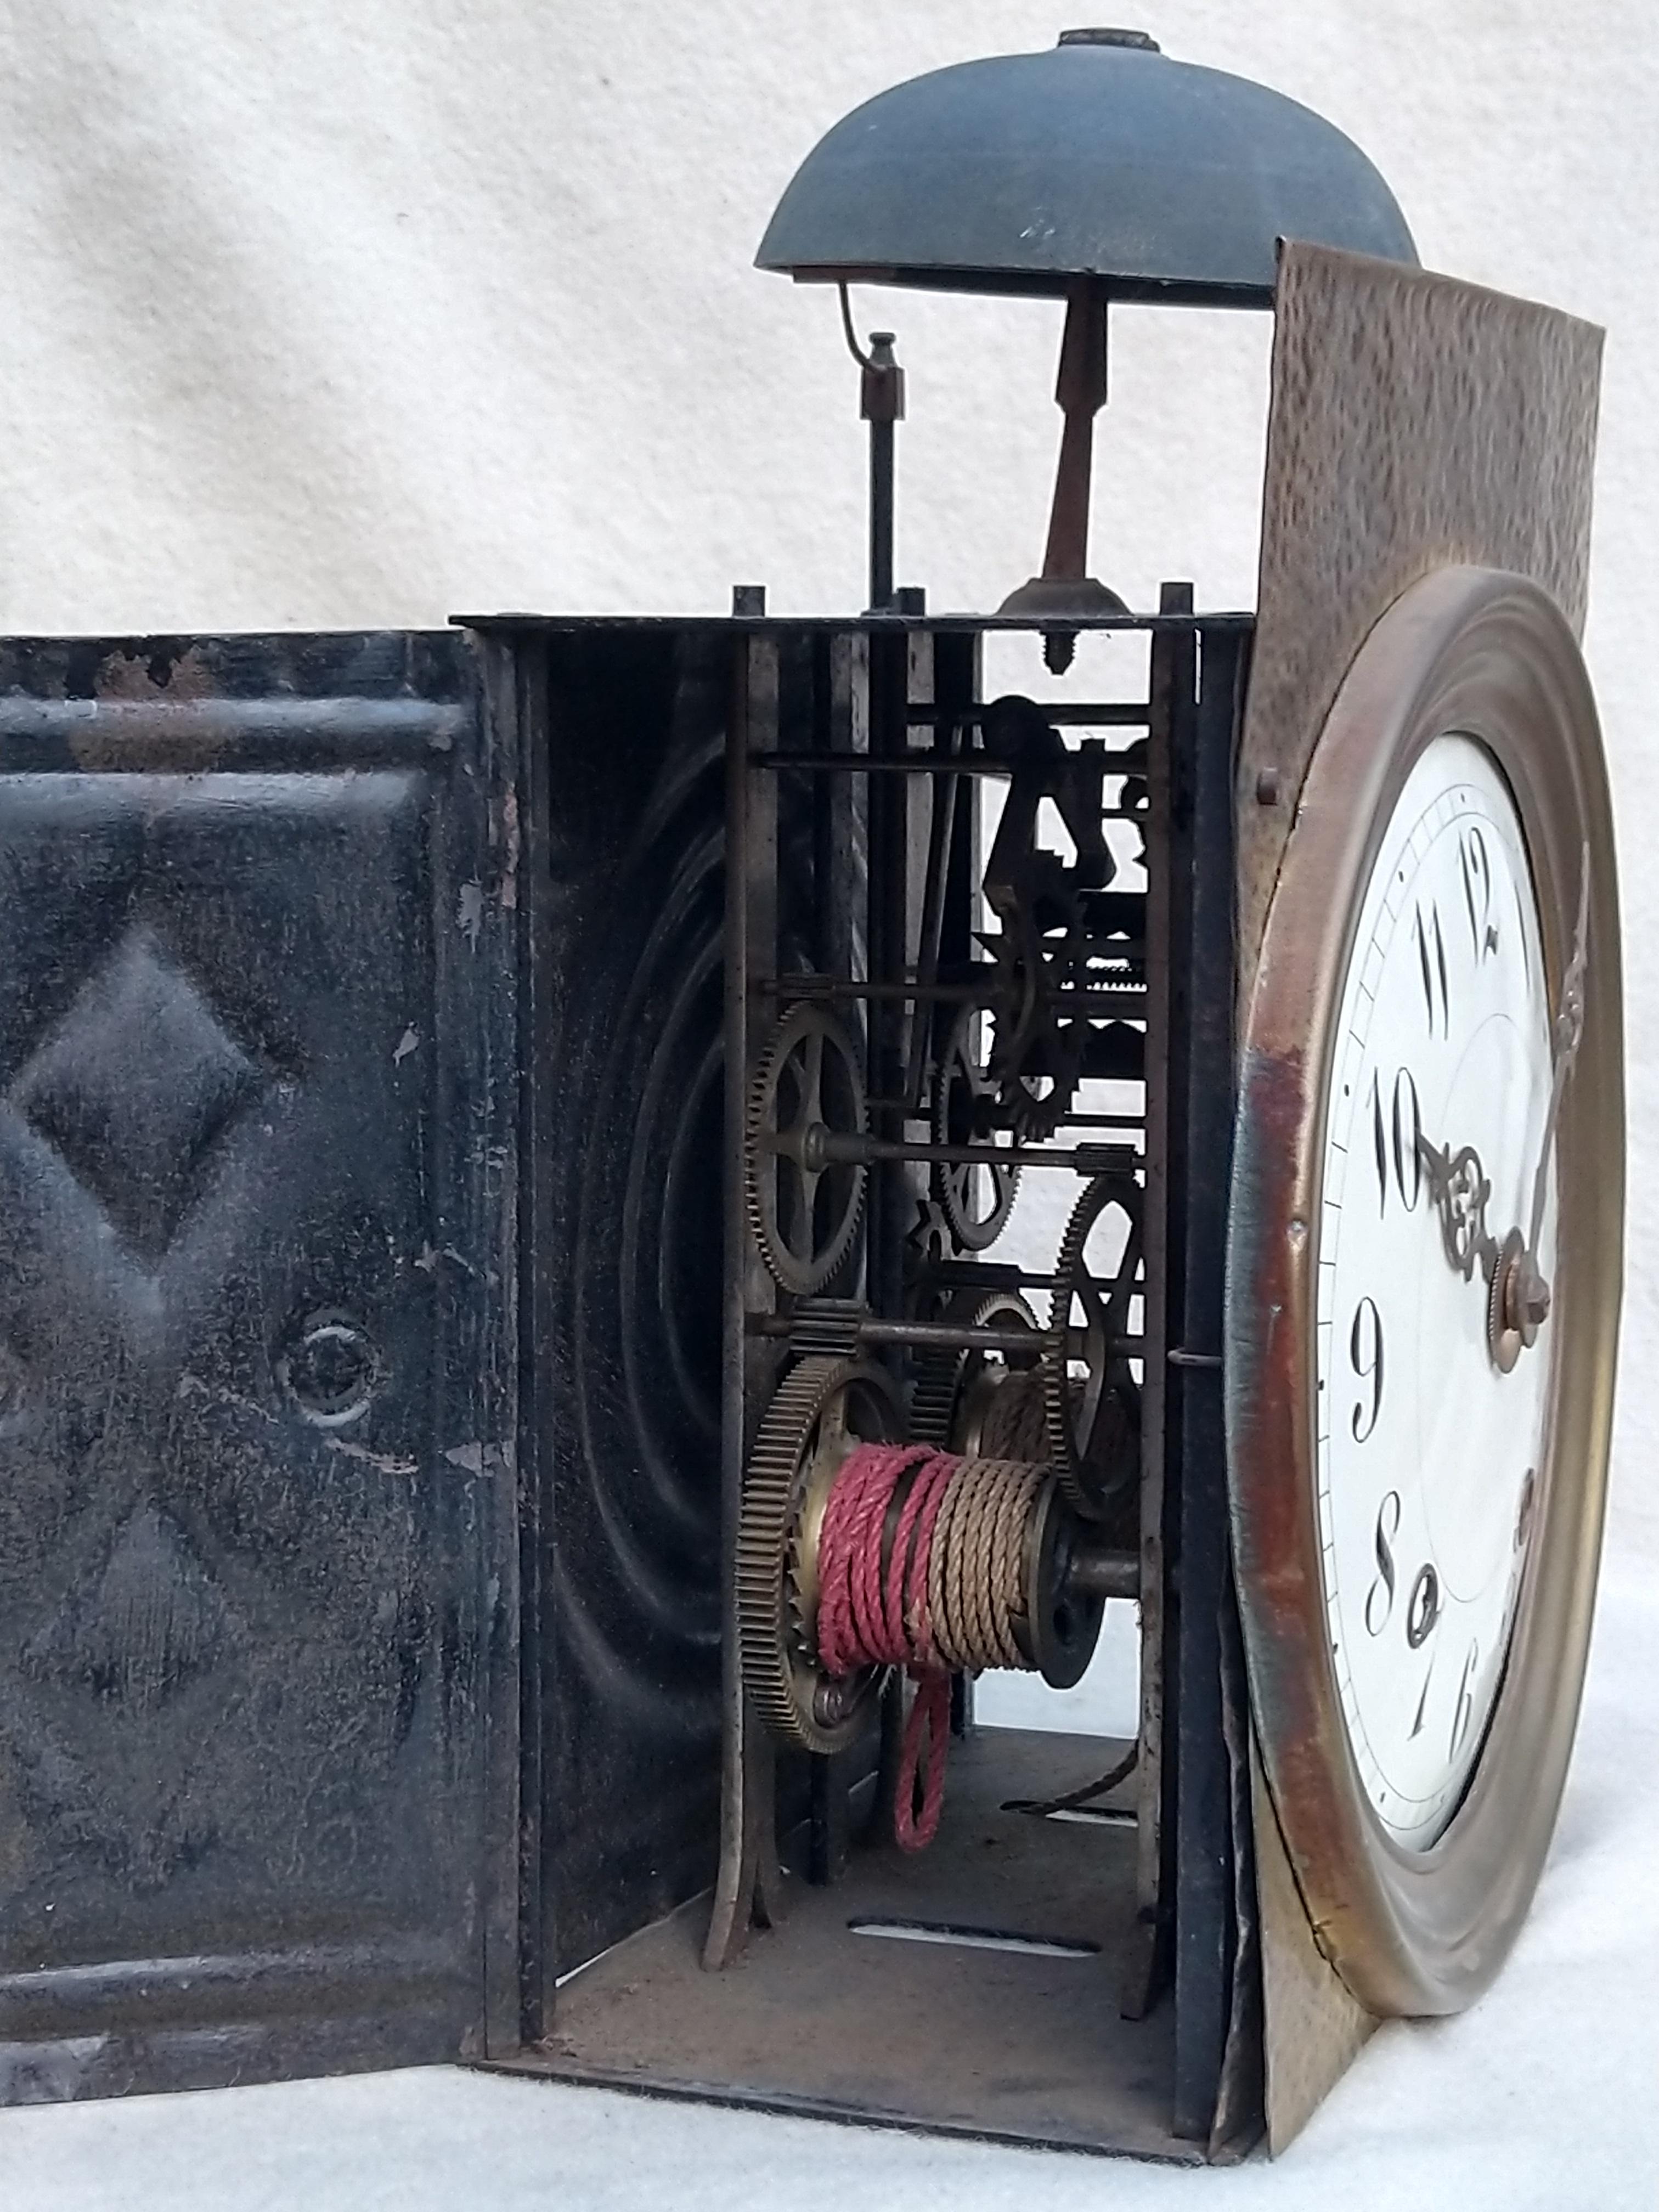
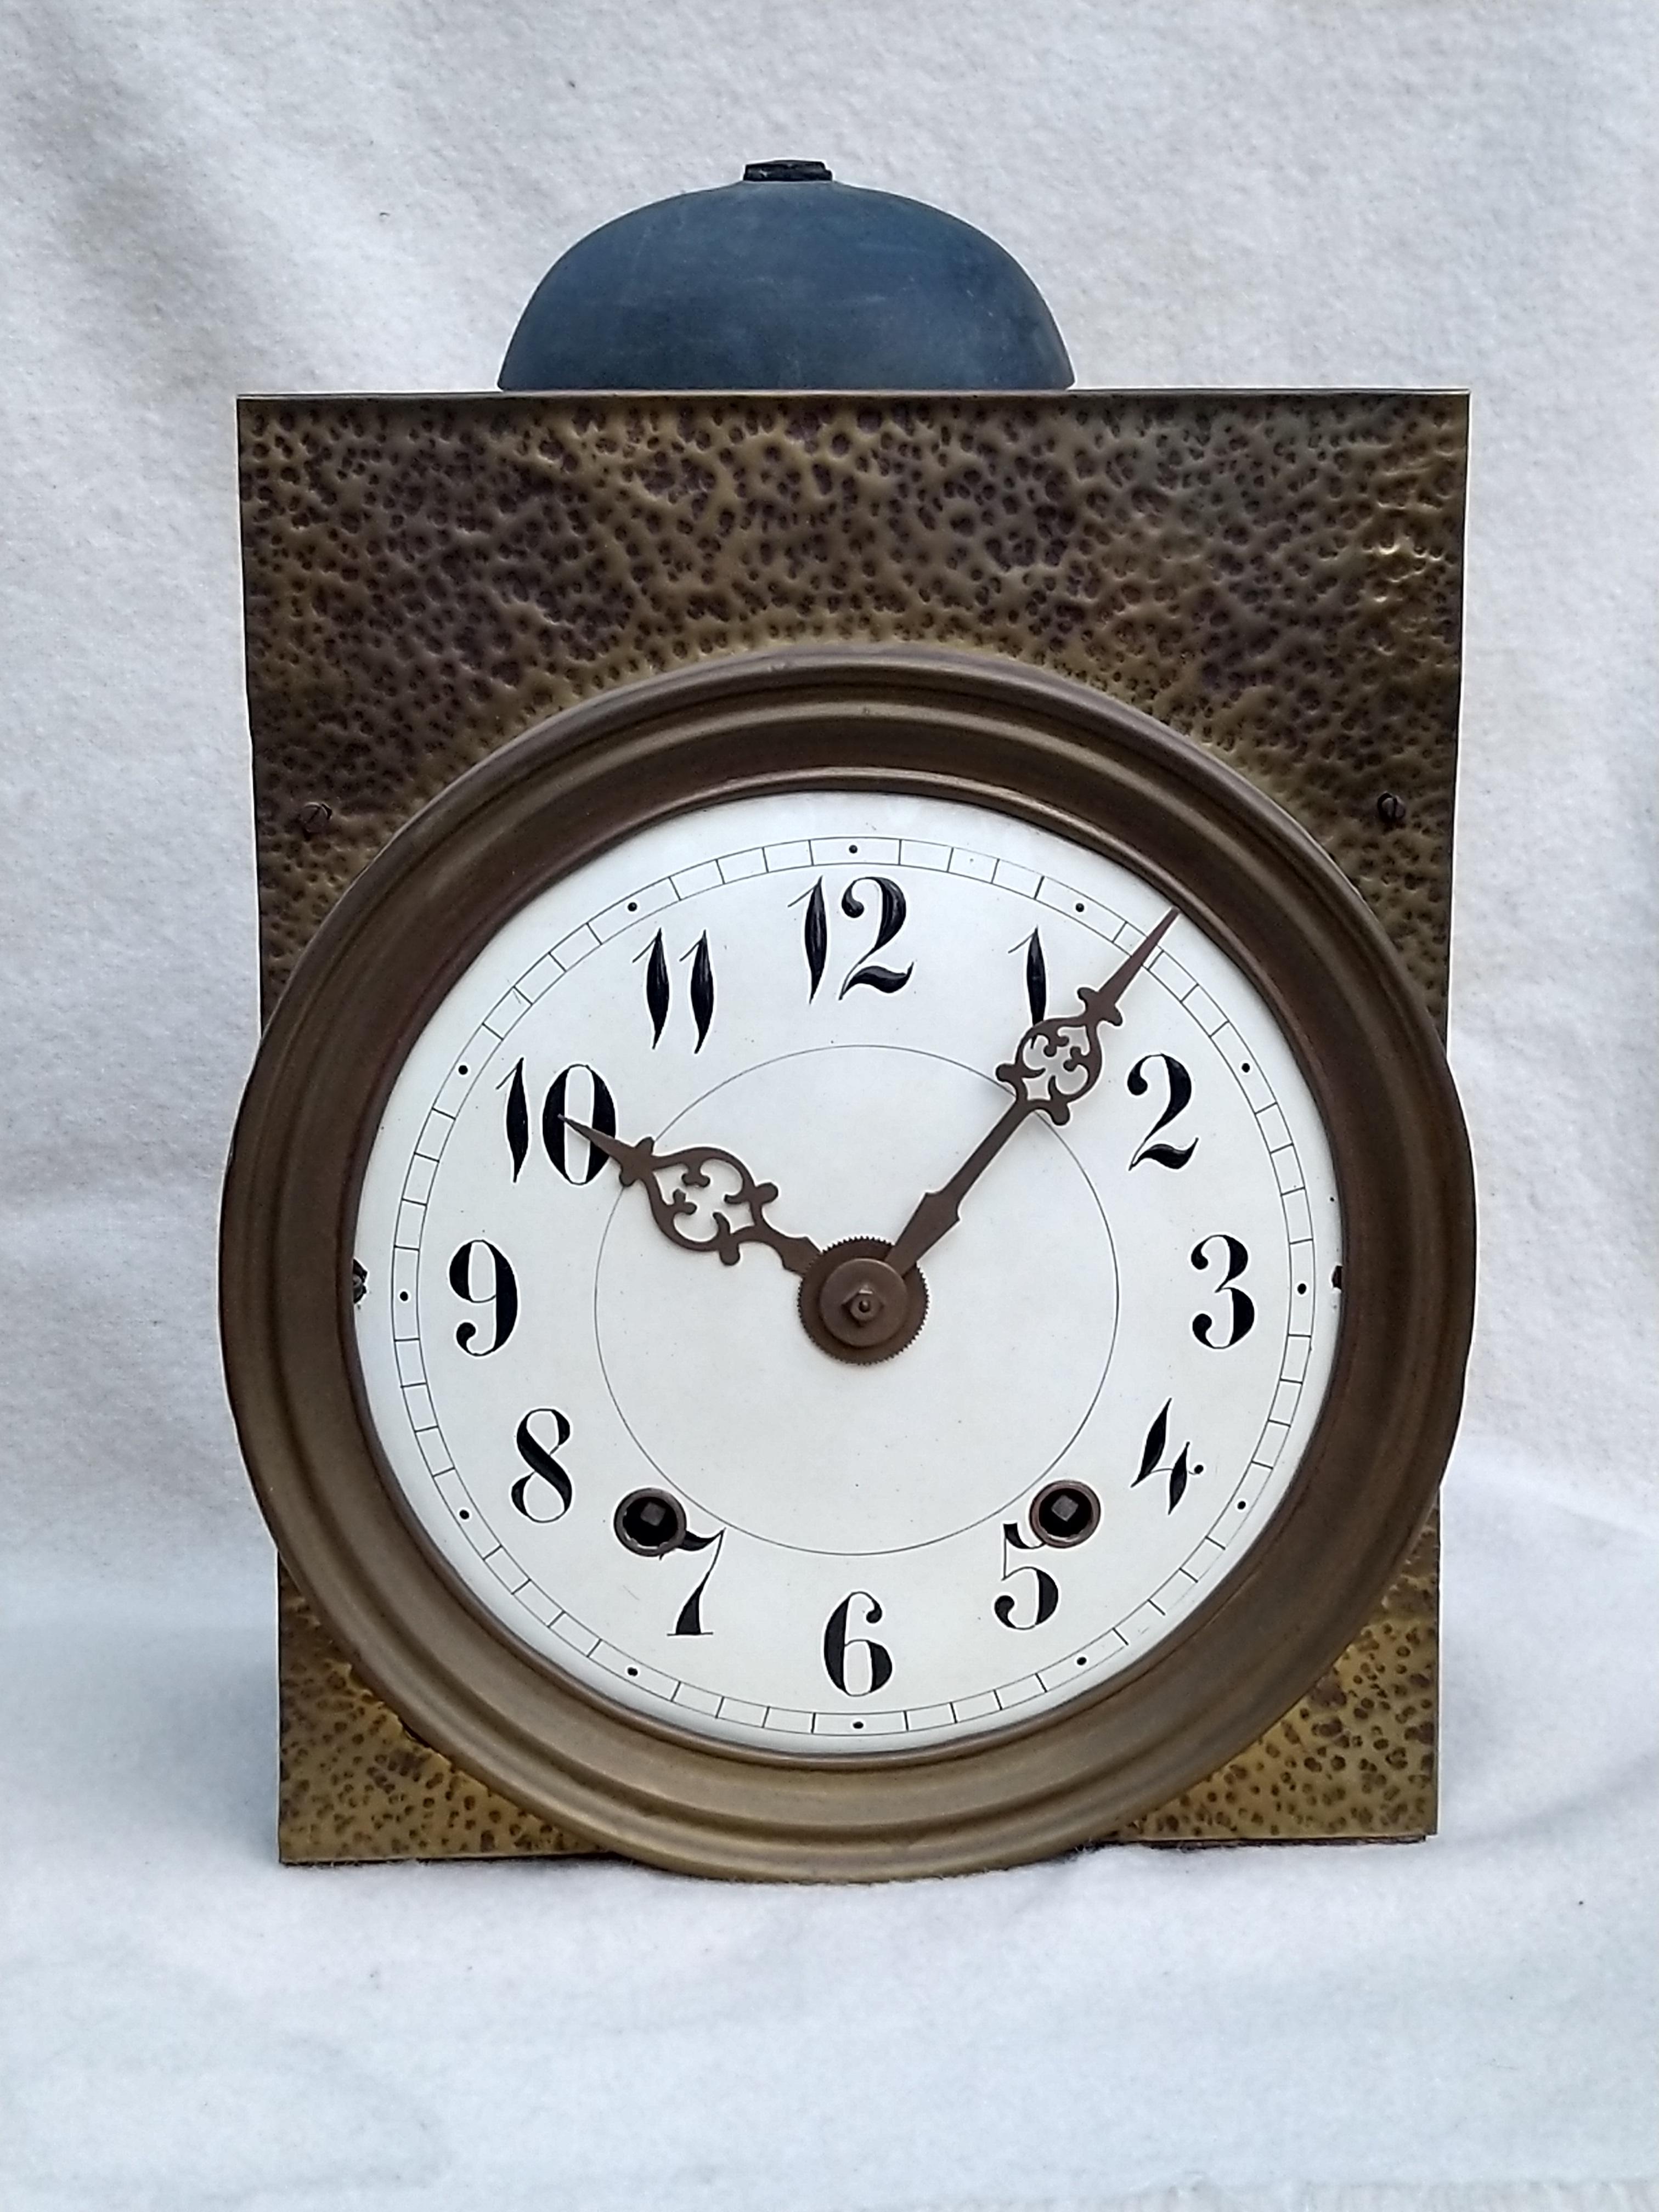
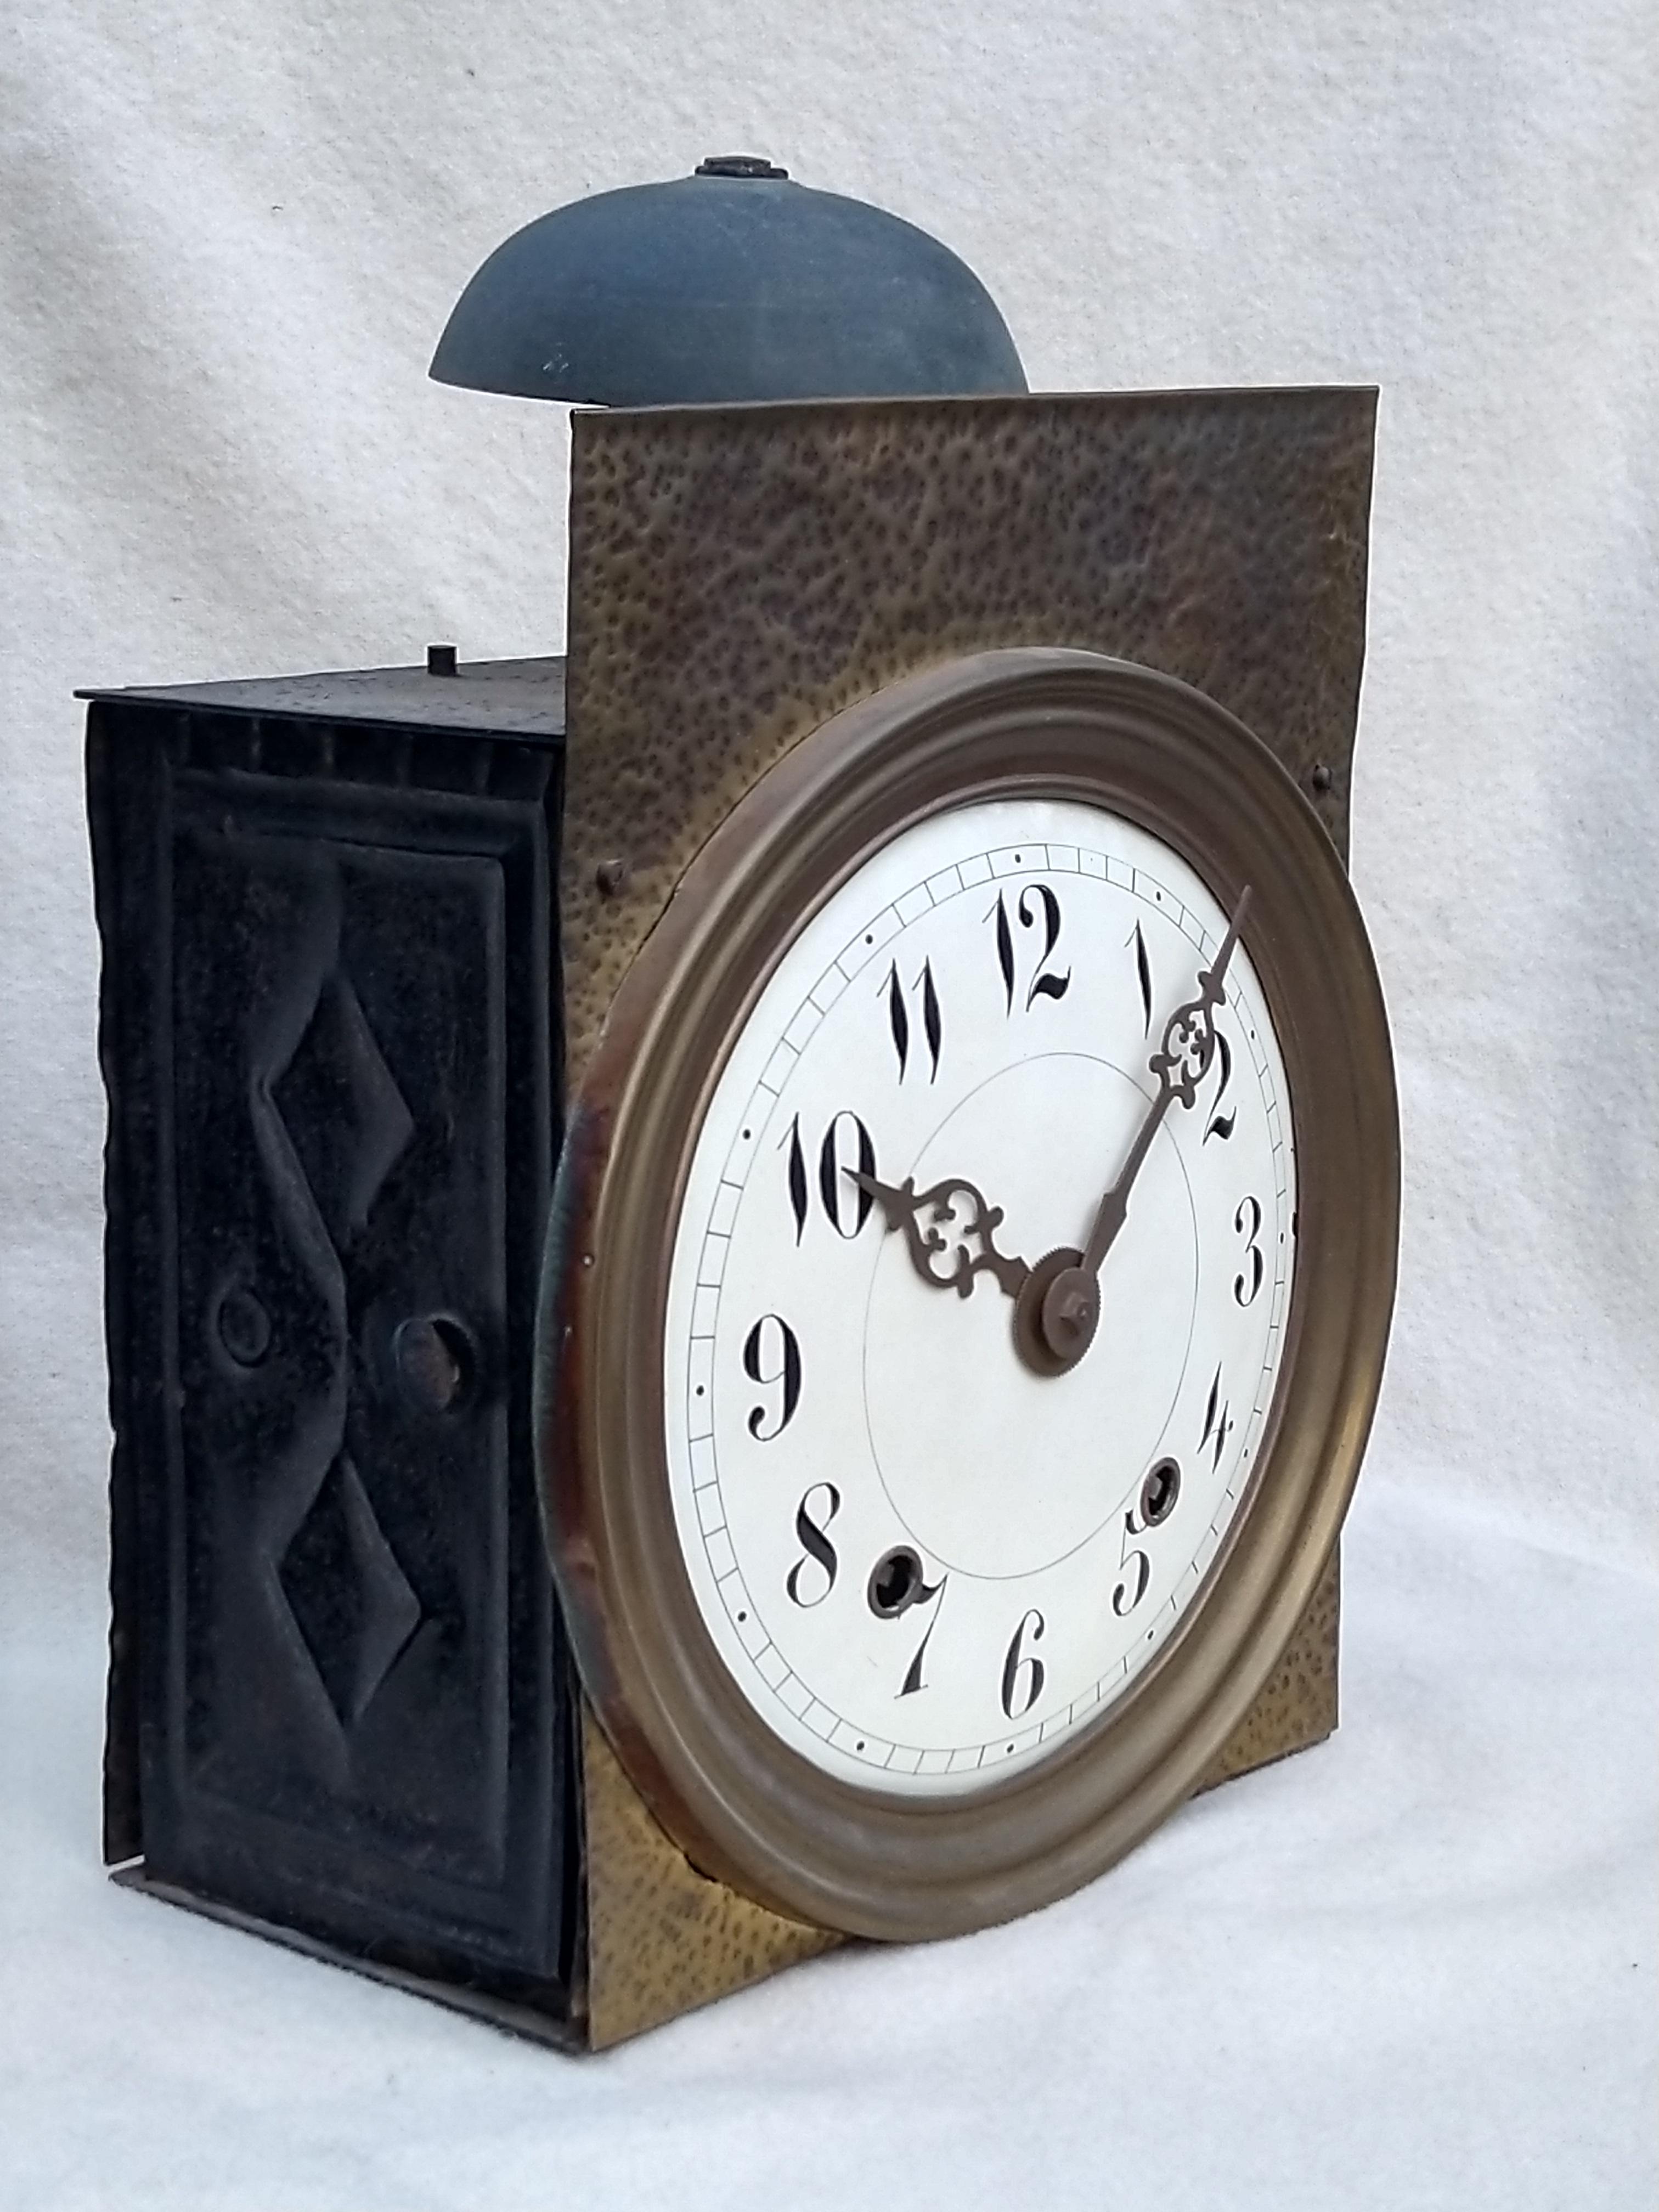
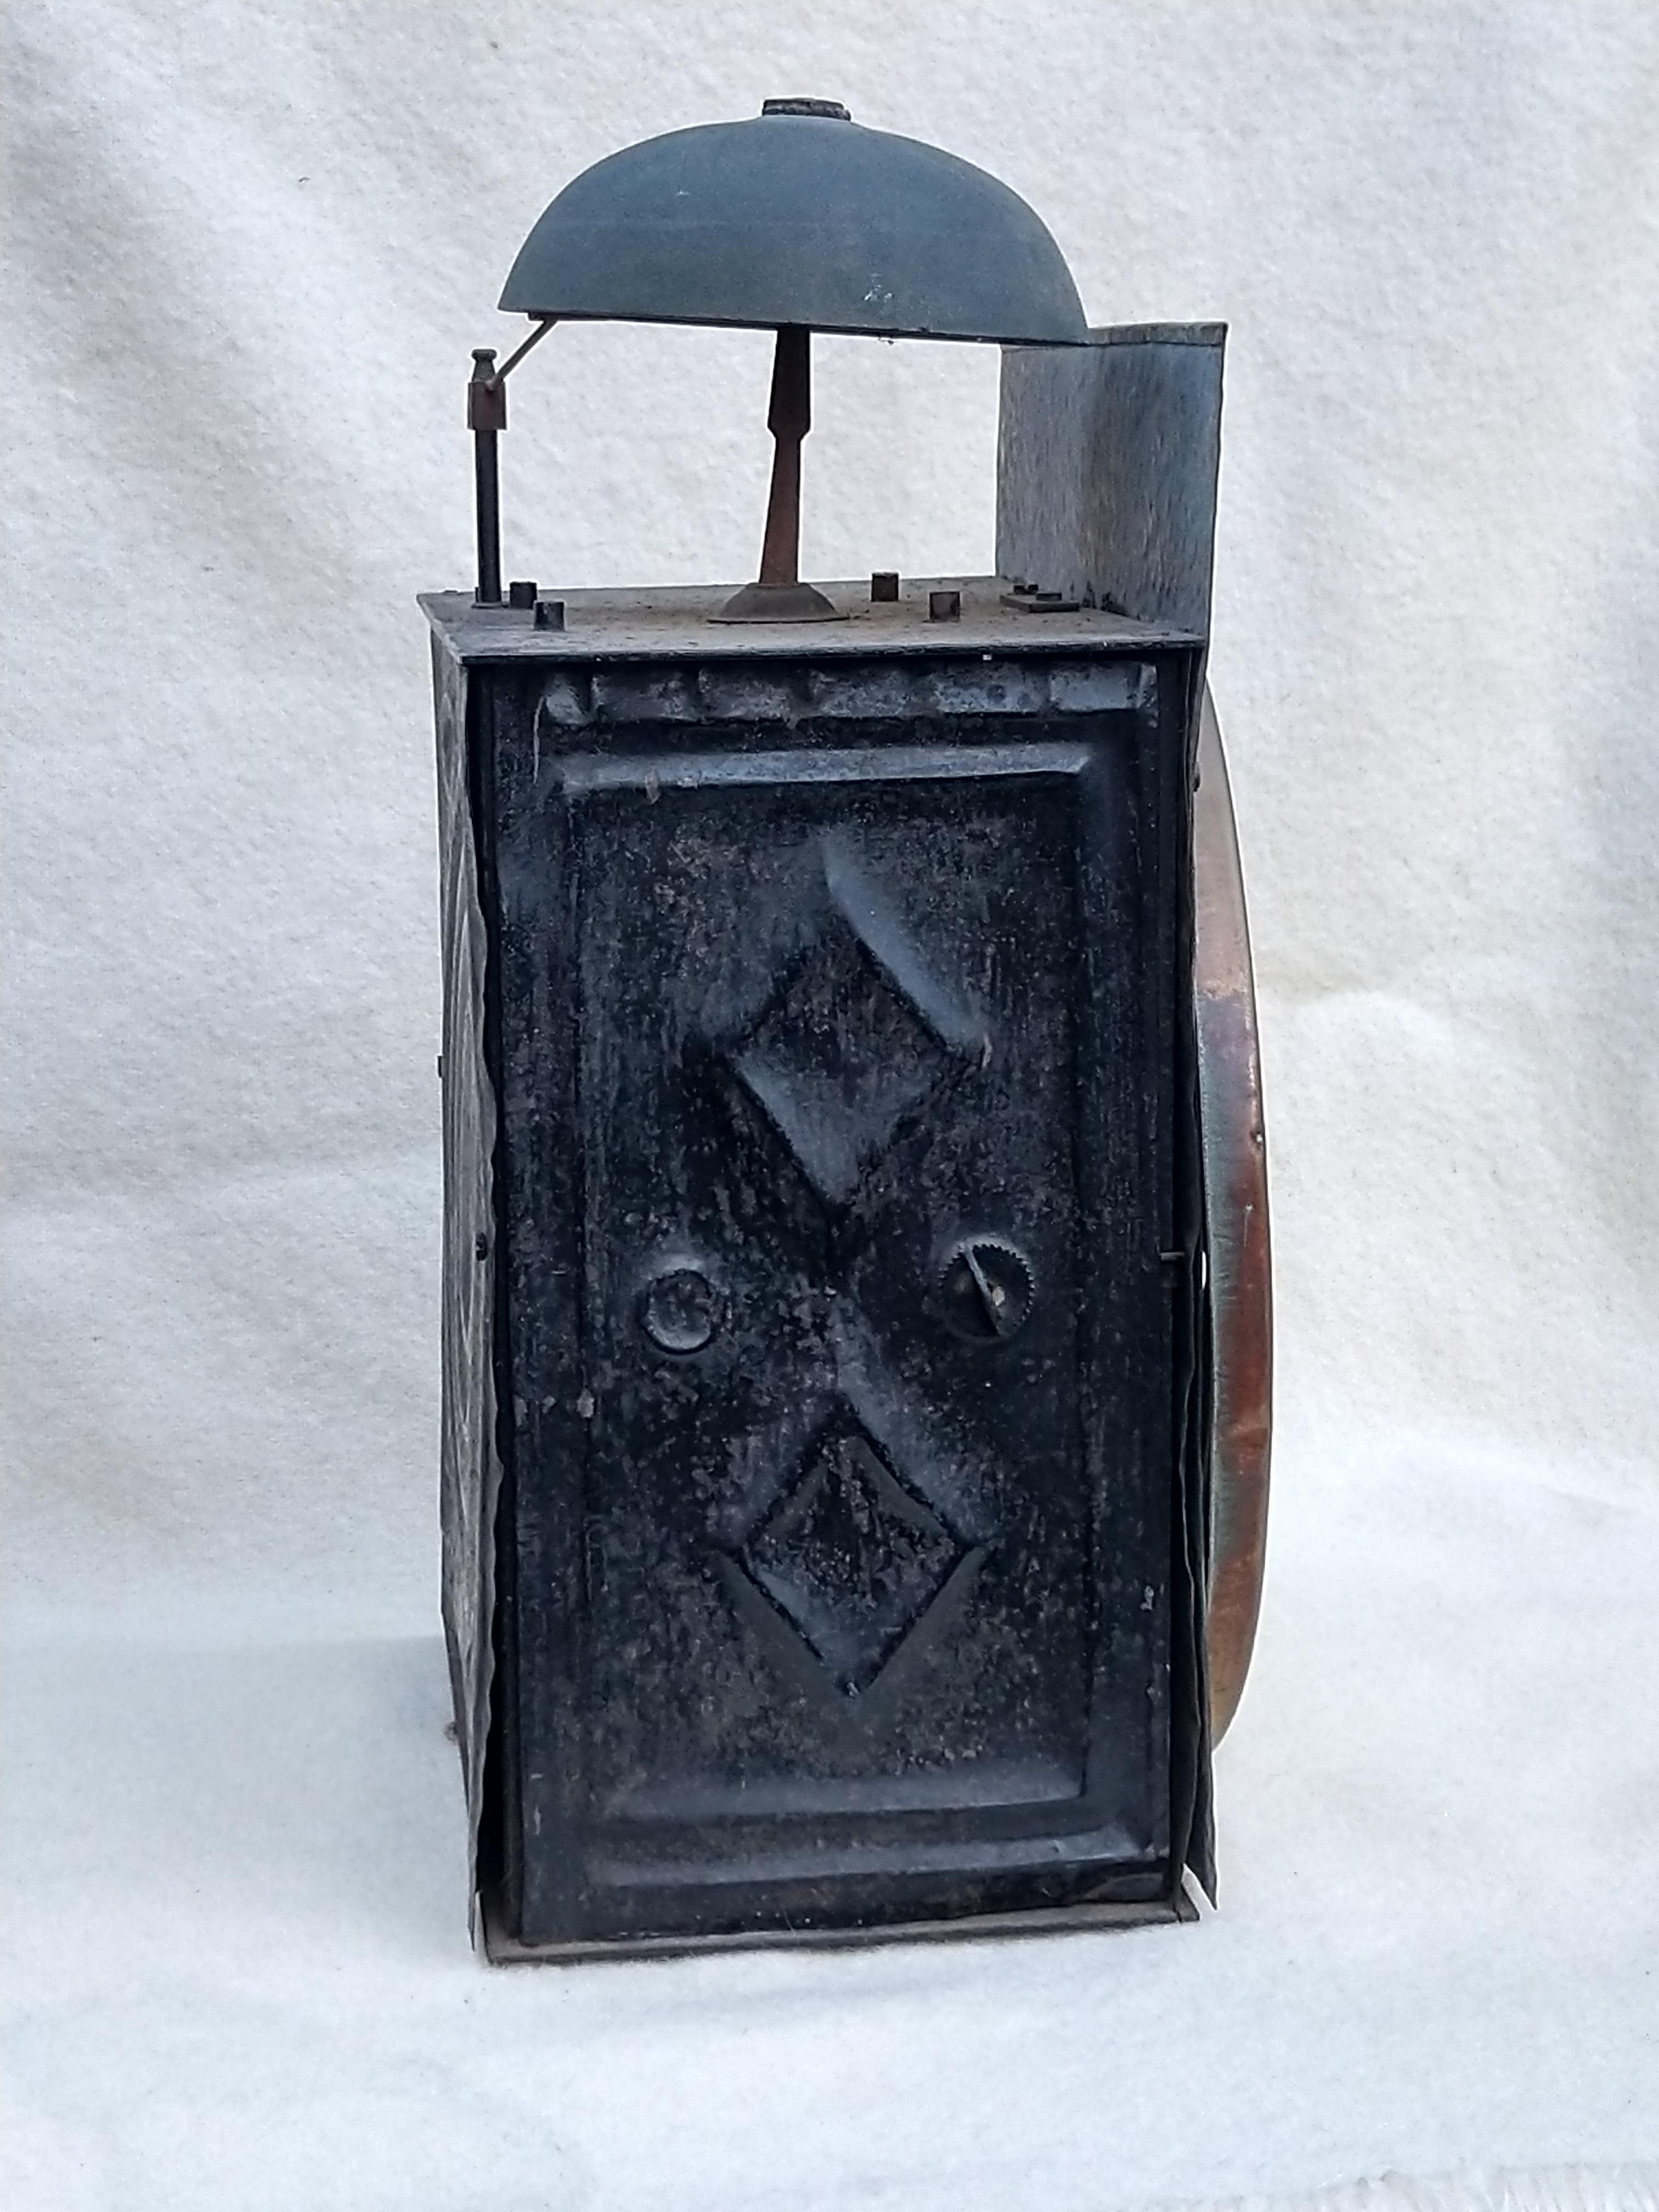
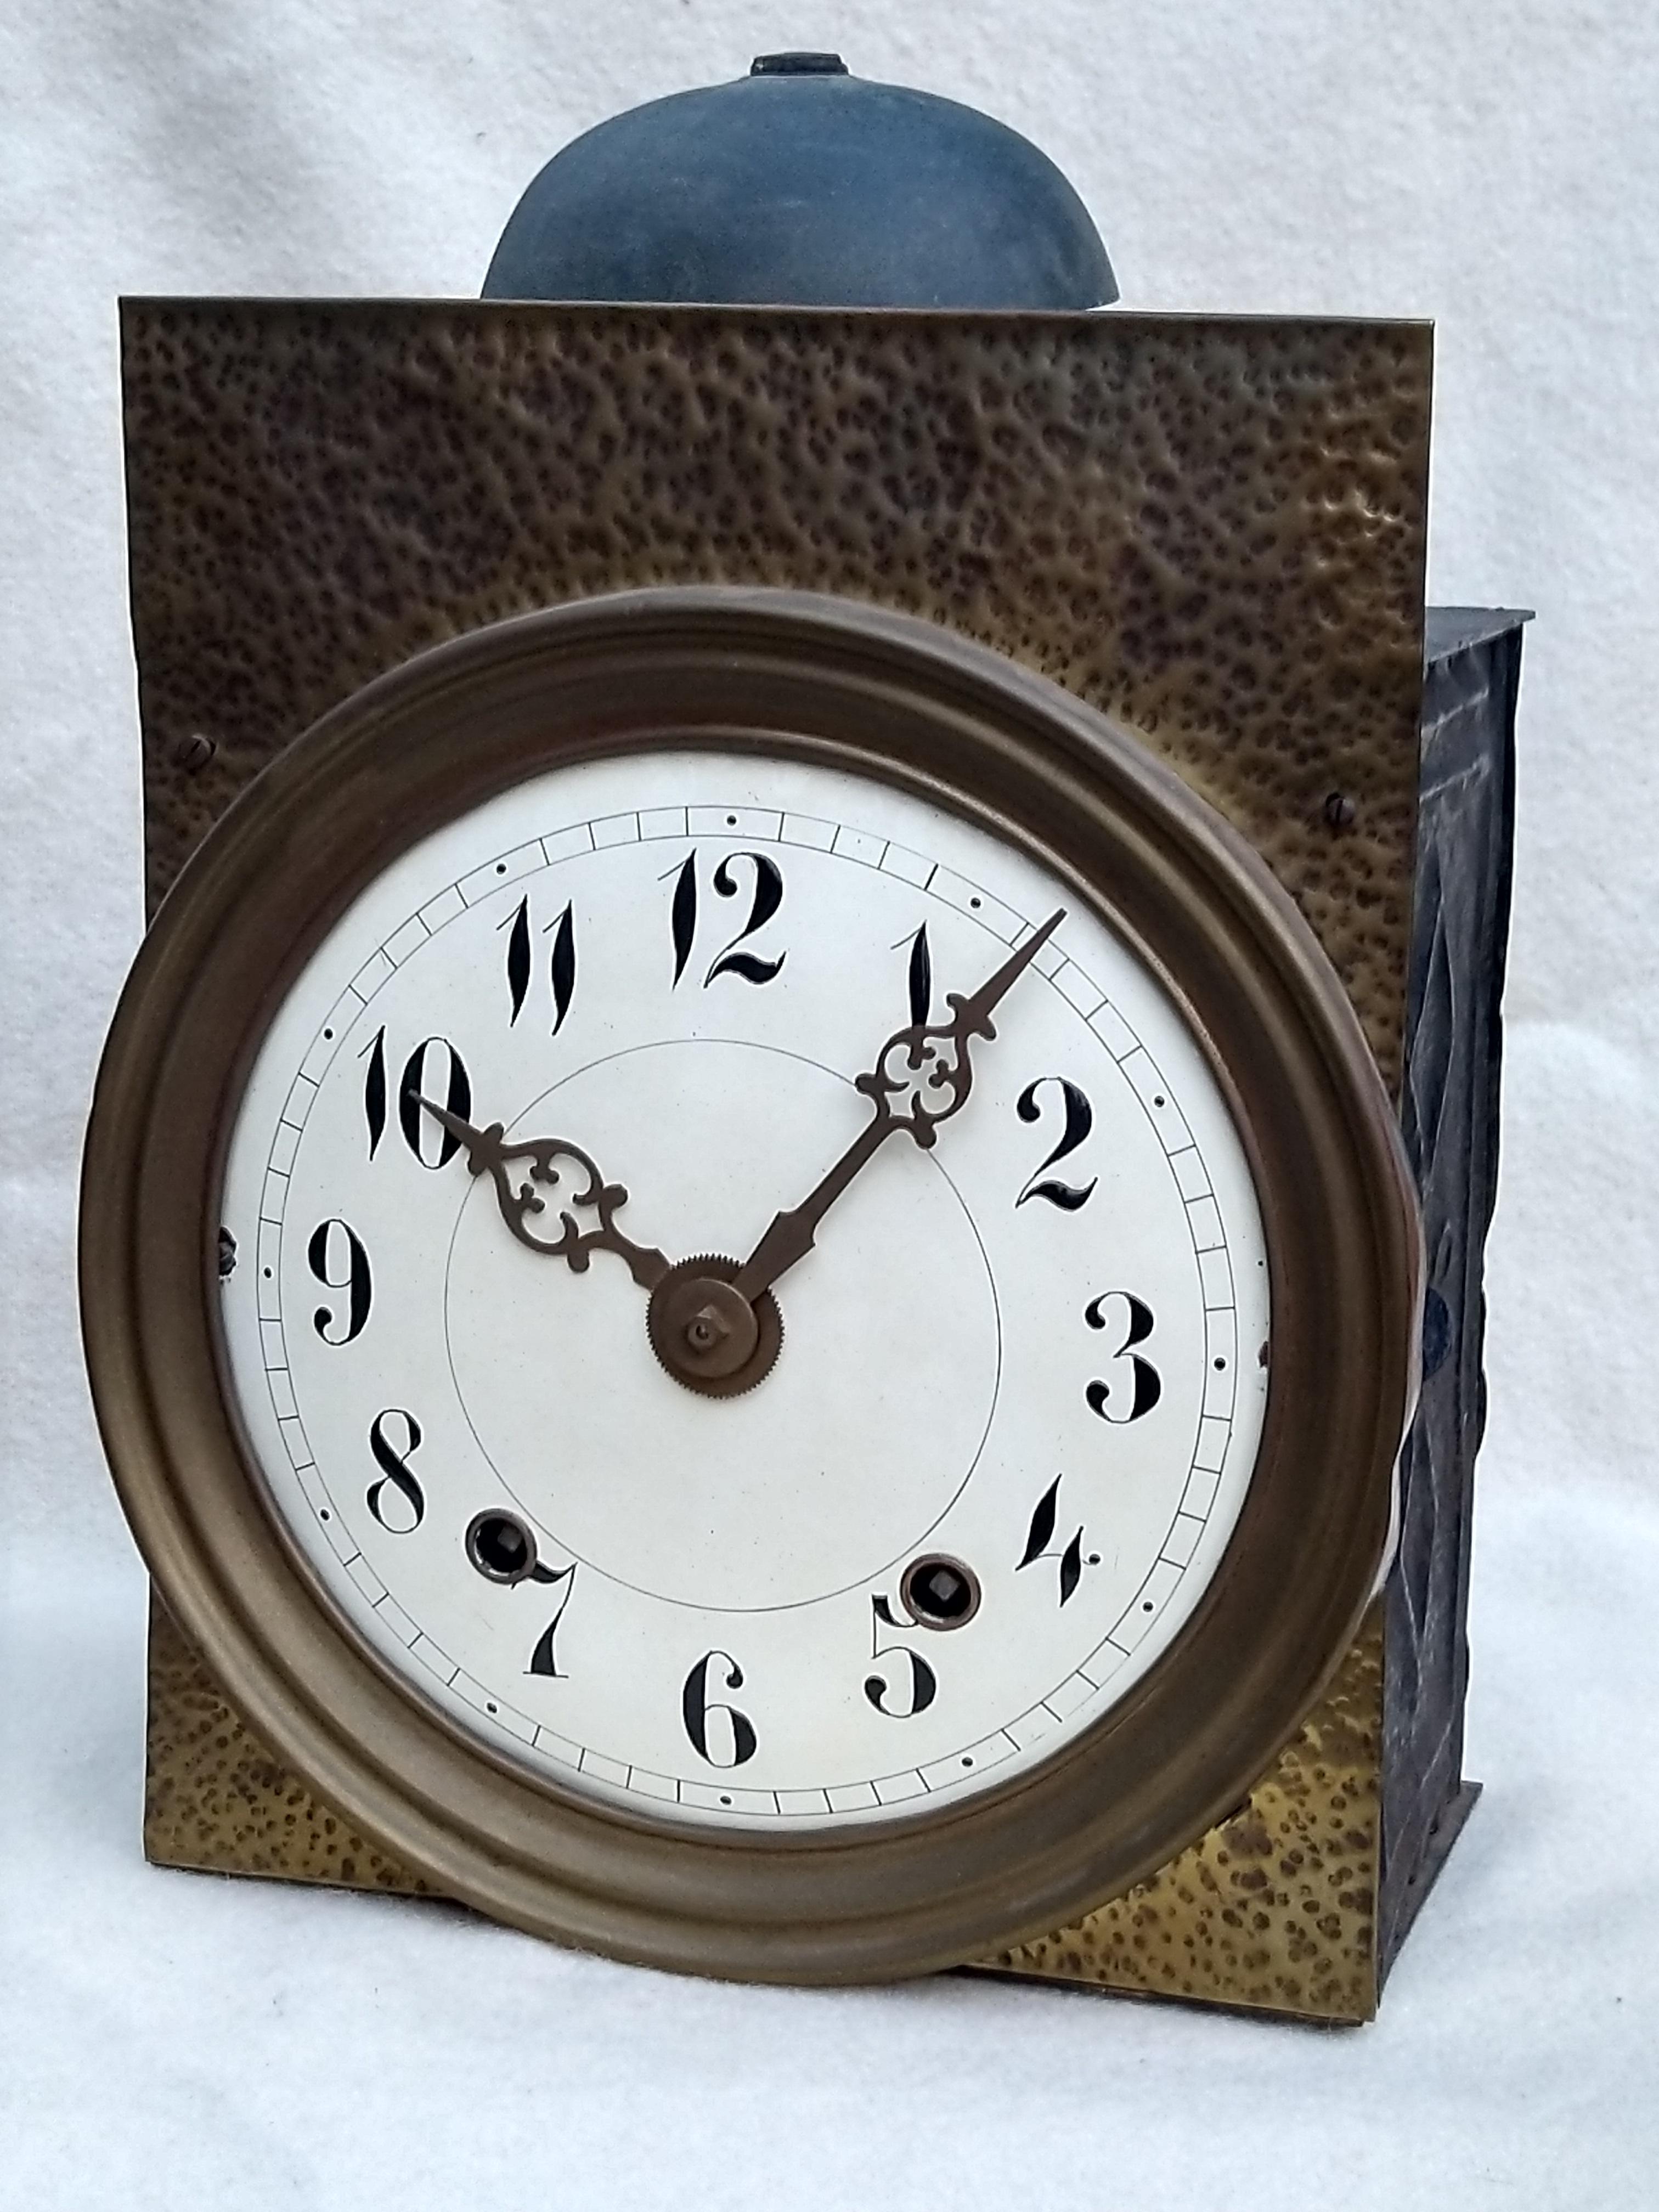
What? That clock. It was here when we moved in.1 point
-
Hi there are several places in th US to get bits, Jules Borel has been mentioned, there is Timesavers, Otto Frei, Esslingers, Perkins in Canada, UK. Cousins, A.G.Thomas, Gleave and co all material houses and suppliers it’s just a case of checking out each. Esslingers is a good site with a wealth of material and tutorials and that’s just one. Cheers1 point
-
Are you dealing with this type of cannon pinion? As opposed to the normal type? from Fried’s Bench Practices

 1 point
 -
You could try to straighten it but I bet it will break before it's straight. You could try gripping it with some fine tipped pliers, using the serrations to help alighn the end and apply gently pressure as you rotate the gear end. Probably better to just try and find a replacement. Mind you once in use that slight bend may not be the issue you think it is, you could just use it and see, a little wobble of the second hand may not be a problem.1 point
-
Late, as in the late Dentarthurdent... Welcome to the forum.1 point
-
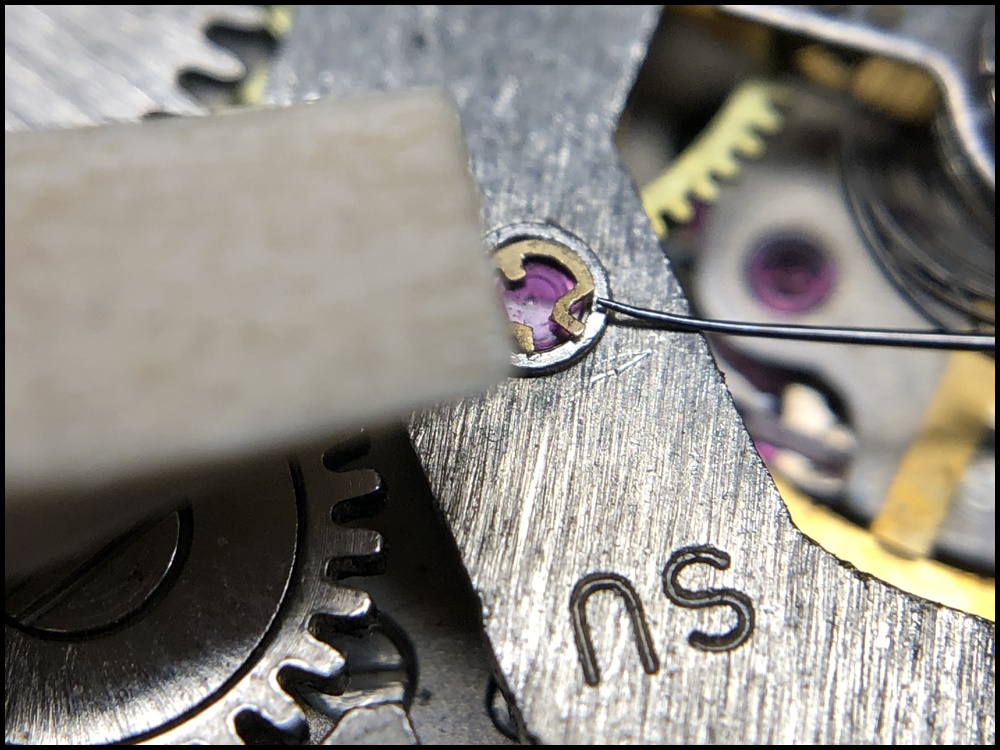
I thought some future repairer might find this thread so I will now try to describe how I dealt with the spring that covers the cap jewels for the escape wheel pivots. Thanks for all input which proved very helpful. The diameter of the spring is approximately 1.2 millimetres (the cap jewel diameter is 1.1 mm ) and the spring sits submerged in a hole and the edge of the spring is inserted into a groove that runs around a bit below the hole. It proved difficult to find a tool that was small and flexible enough to hold the spring in the hole while prying it out, so I found an alternative strategy that worked well both for removing the spring and for refitting it. See the below description. To get the spring out I used a sharpened oiler while covering as much of the jewel hole as possible with a piece of peg wood carved like a screwdriver. I jabbed the oiler under the spring and then bent the spring inwards and upwards which caused it to come loose from the groove/lip without putting undue stress on the spring. When the long leg of the spring (the other leg is, yes, shorter) has been freed from the slot in the hole, it is basically just a matter of carefully lifting the spring out of the hole. The cleaned cap jewel was refitted in the hole. To get the spring back in place, I pushed one edge of the spring into the groove of the hole. After that, I again covered as much of the hole as possible with my pegwood screwdriver blade (not visible in the picture). Finally, I gently pushed the other leg of the spring in and down with my tweezers to get it into place in the hole. Hopefully, it is clear from the picture that I pressed onto the edge of the spring between the two closed tweezer blades. Spring is fully seated.
 1 point
 -
Hi there is a whole industry in India recycling watches, I would hazard to suggest that any watch obtained from India is of the Mumbai cobbled school of watchmaking and any one buying one will appreciate that. Buying one is a bit of a lucky dip. Good luck with the clean up.1 point
-
Hi Anthony tother way round with me Scottish mother and Lanc Father brought up in Yorkshire an like your self not disposed to throwing money around. I have three sets of screwdrivers two I bought many years ago and still good, and a french set from redrooster uk they all need dressing but using fine grit wet and dry on a block with a little oil works wonders. Unfortunatly watch screws differ in slot width with different manufacturers so having a few screwdrivers dressed differntly is handy. cheers1 point
-
If you want some quality screwdrivers without paying the earth pop over to the quality Chinese tools thread, there is a set on there that are of a very high quality for under £30 a set, they also look identical to one of the Bergeon sets if that's important .1 point
-
Fitting the screws perfectly is due to dressing, not the blades. New Bergeon blades do not fit many screwheads properly and require some time with India or Arkansas stone to get just right. If you then switch calibers (from say a Japanese Seiko to a Swiss AS movement) you may then find your carefully dressed blades don’t fit those screws and need to be reshaped. At that point, swapping in a set of replacement blades may save time and effort, especially if you’re continuing to work on the previous caliber. CousinsUK sells a range of “Swiss Quality” screwdrivers (made in France) for 2.65 GBP each. They take the Bergeon 6899M hardened stainless steel blades, the Bergeon grub screws etc and are highly recommended. The Chinese Kwong Yuen screwdrivers are also well recommended.1 point
-
Hello Anthony, the short answer is yes, high quality tips in cheap bodies is a practical way to save money. You can get better value for money than the Bergeon ones, too. Whatever you get, you will still need to dress them regularly to keep them sharp, so get yourself an Arkansas stone. If the blades don't fit your screw slots, that has nothing to do with the brand name, and everything to do with how you have shaped them.1 point
-
Hello trey, bunch of friendly knowlegable folks here, welcome.1 point
-
Welcome Trey, enjoy the forum.1 point
-
I've had that problem with GS PA crystals, too. They don't always fit as well as one might hope. Fortunately, since they are acrylic, the can sometimes be tweaked without too much trouble.1 point
-
I’m from an engineering background, if it’s not broken it doesn’t have enough features1 point
-
The MSDS show the Ammoniated 111 to be And the Non Ammoniated 566 to be This one is for the ELMA Red


 1 point