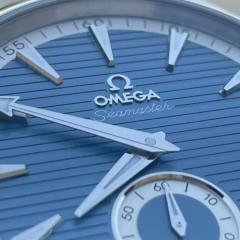
Leaderboard


Popular Content
Showing content with the highest reputation on 11/26/22 in all areas
-
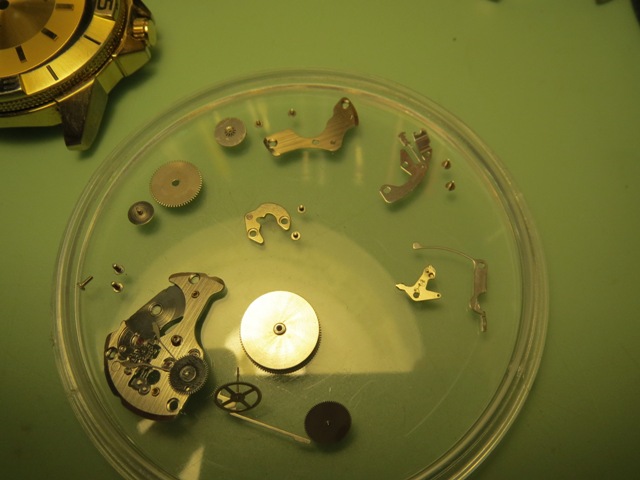
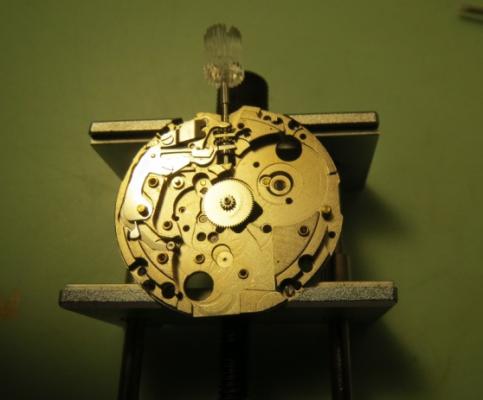
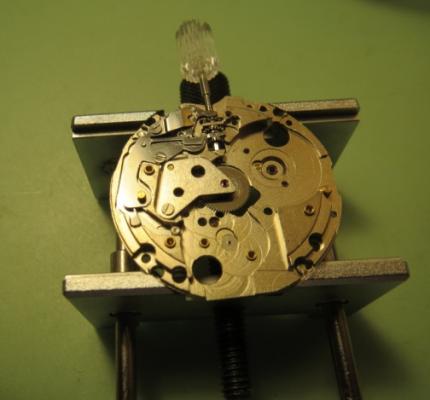
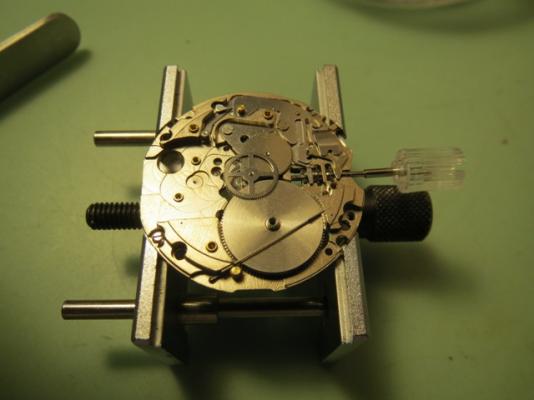
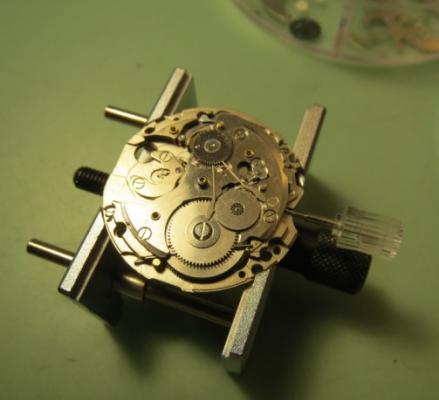
Oh no! That's not good! I actually found a site that sells job lots of various calibers for parts/repair at (what I consider) a decent price. I've bought 4 more 7009a's, just waiting for them to be delivered. I figured I'm going to lose parts so having spares will be good. I've managed to slowly get everything I need in regards to the oils. 9010, D5, 9415, Molykote DX, 8200 and 8217. That should cover my bases for everything. Also a silicone sponge greaser. It took a long time to get everything and cost a lot of money, but I've discovered time and money is the name of the game for this hobby. I was digging through my desk drawer the other day and actually found the bottom half of the barrel! It had flung in there and disappeared towards the back. So I've managed to recover all the missing parts now. I've managed to work out a process for manually reinstalling the mainspring and arbor, but I've ordered some really cheap winders from Ali express that will be delivered in the new year. I'm going to try and give this crappy old movement a proper clean and see if I can get it back together though, just for practise.2 points
-
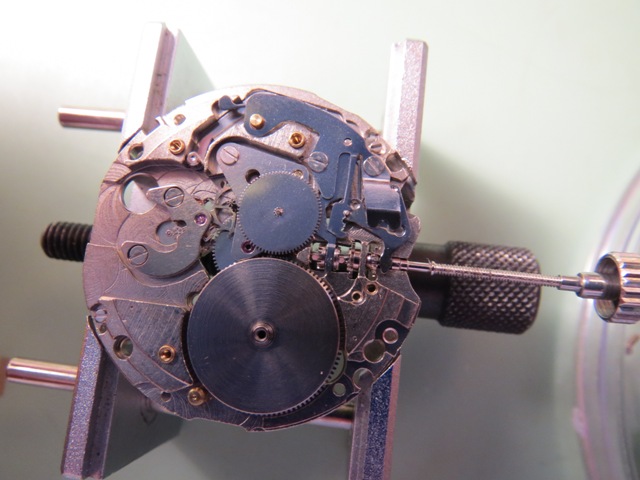
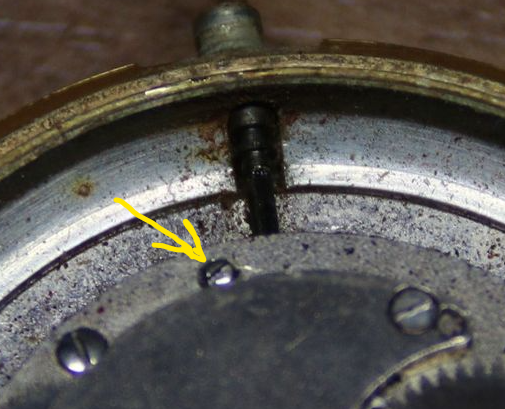
Ok, this watch is getting set to the side for a while. I went through the process of setting the banking pins, "banked to the drop", then opening them up to allow further slide. Ran for a bit, then the escapement jammed again. Took a look, and the roller jewel is coming loose, and it's sitting at an angle and moving around! Enough already I don't have a tool for setting the roller jewel, not something I've needed to do before. So, I got on the bay and found a combination tool at a decent price. I have shellac, just no tool to hold the roller. When it shows up, I'll continue on with this repair. There are other things going on, too, but one step at a time, maybe I'll get this thing to run. Onwards!2 points
-
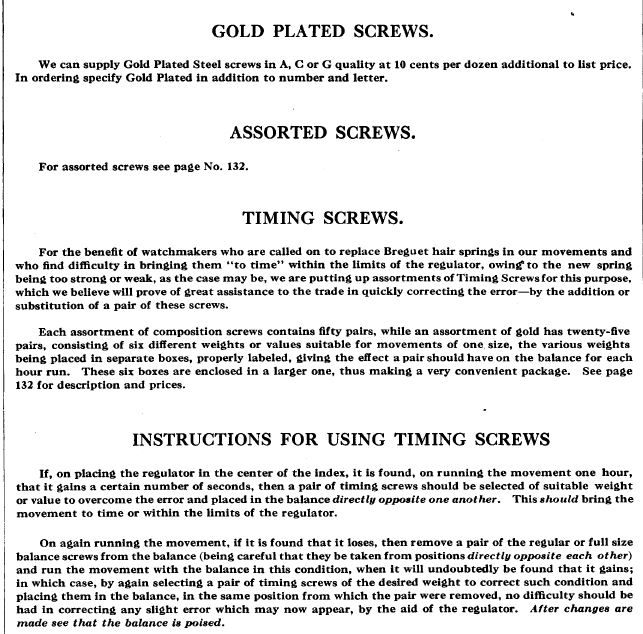
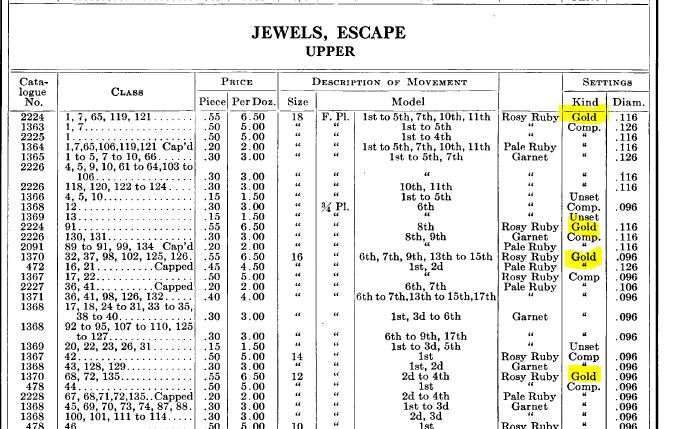
Early on in the discussion the reason I was asking was it looks nice and clean it probably isn't the original spring if the watch itself had water damage. Because often times you will see hairsprings with a little bit of rust damage and yours looks brand-new. As I said early on one were doing diagnostics it would be a clue that this is not the original hairspring. I snipped out some images from the Elgin 1915 parts guide. As you can see an example of jewels in settings. They come in gold and basically brass or unset ones. Also came in a variety of materials different colors sapphire because there were probably still using natural sapphire they had fully perfected synthetic. So the pretty sapphire with gold settings would go and expensive watches. Then you can even see they had gold plated screws at one time I guess you could adopt those. And then some information on the timing screw assortment.
 1 point
 -
I hadn't noticed the ring. Once the stem is removed, the movement and ring should come out the back. The stem looks almost out, but corroded, and possibly bent. Is it only corrosion stopping it coming out ? Try turning and jiggling it as you pull.1 point
-
The clue is : if the dial is bigger than the hole in the back of the case, it can't come out that way ! I can't see any gap under the bezel on the crown side, have a look between the lugs. Are there any letters under the balance wheel ? To remove the stem, try unscrewing this screw about 2 turns.
 1 point
 -
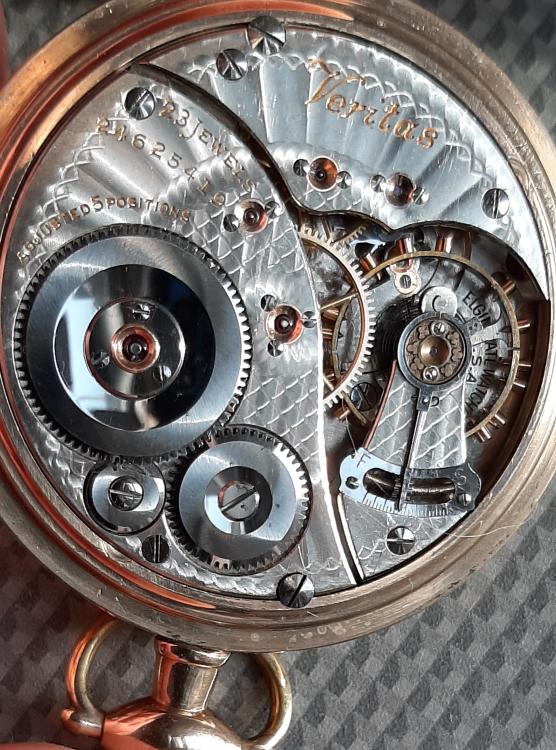
I'd forgotten about that. It's been many years since I've serviced my pocket watches. My Elgin Veritas has rose gold timing screws, jewel settings and the centre wheel is gold plated. I'd forgotten just how nice it is (jewels at both ends of the barrel, ah !.)
 1 point
 -
I intentionally haven't left any feedback yet for the seller, in the hopes they'll just provide a refund or send me another. I wanted to give them an opportunity to make it right before making them take a hit on their 100% reputation. I'm sure it'll get resolved eventually.1 point
-
I have on occasionally applied for a refund on eBay and have been successful., The process is slow but works.1 point
-
Obviously a mistake. It can happen.1 point
-
What a mess. Don't worry you will get your full refund.1 point
-
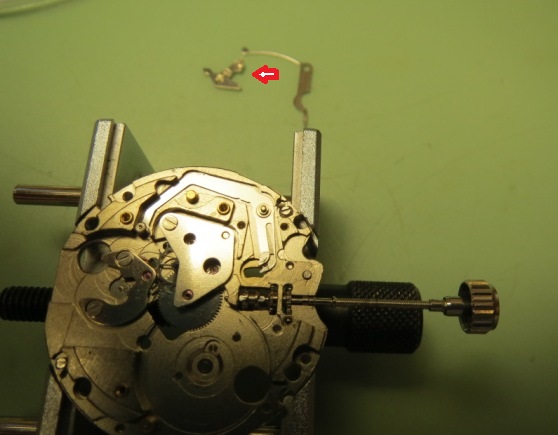
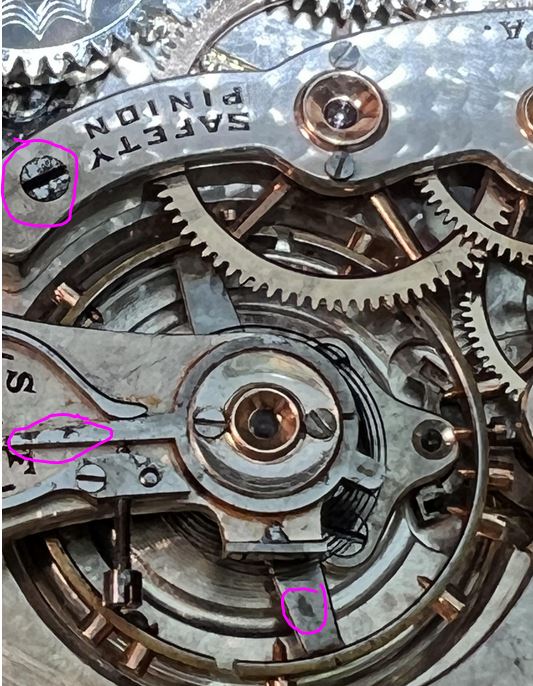
Then just a clarification Because is not clear in my mind. You removed one of the screws and verified your running super slow. Did you remove the opposite screw on the other side? Then Found out still slow and Removed the mean time screws or did you just remove the mean time screws? Then yes the balance wheel is original as the quote above indicates. II snipped out an image and circles some things. Notice the dark spots like the one screw that looks very bad the regulator arm and even the balance wheel what exactly are those dark spots? Classically to me that looks like rust damage Or perhaps a corrosion caused by rust were water that's been cleaned up. As a reminder this watch has been serviced before who knows what's happened to it before but I've seen this before it always reminds me of rust. One of the problems with vintage watches are they been worked on a lot. We don't know their prior history. We do know unfortunately from Our own experiences that damaging or destroying a hairspring is actually quite easy to do. Then somewhere in the discussion was the suggestion that the balance staff might've been changed that's another opportunity for an accident to occur. It might not have even been the hairspring damaged some times when people restaffed they break the collet of the hairspring. Like wrong sized staff will do that sometimes or just careless handling. Then to the best of my knowledge I've never actually heard of hairsprings getting weak like a mainspring. Otherwise all the watches of very old age would all be failing now and they're not At the time the watch was made hairsprings were available as a separate item. These premade hairsprings are not vibrated to match the balance wheel. There Made to very exacting specifications for timing reasons The stud is exactly at the end of the hairspring there is no room to adjust as that would screw up the specifications of the over coil hairspring. If you pre-make your hairspring typically with over coils you then have to match the balance wheel to the hairspring. Easy to do in the factory because they have lots of timing screws harder to do in the field as we don't have typically those timing screws. But at the time hairsprings could've been purchased you would've been able to purchase the timing screws. So basically we have a slow running watch with everything that's perfect the balance wheels the right balance wheel for the watch. Hairsprings don't have serial numbers but they're easy to destroy we see it all the time on this group newbies want to swap hairsprings. So that is a very likely scenario hairsprings been replaced. Somebody just didn't understand that you can't just replace you have timing consequences unless you have enough screws to fix that problem.
 1 point
 -
Welcome to the WRT forum.1 point
-
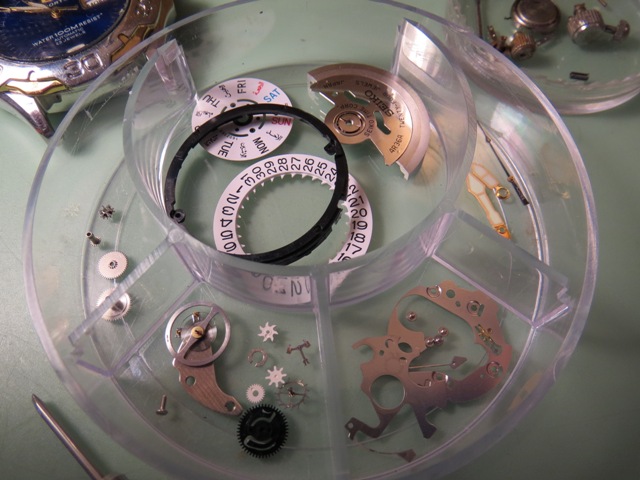
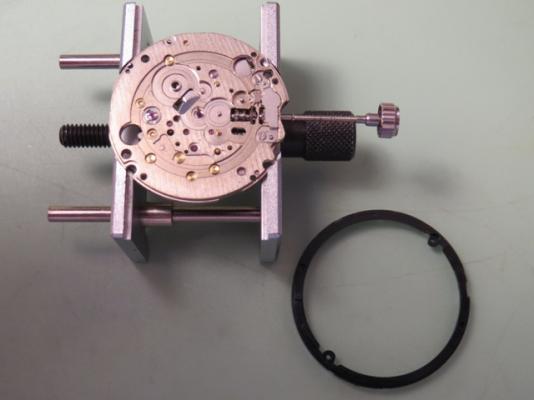
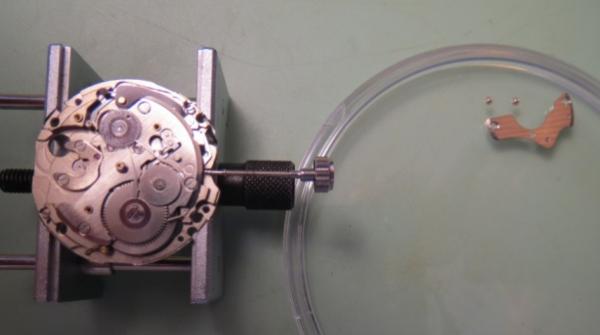
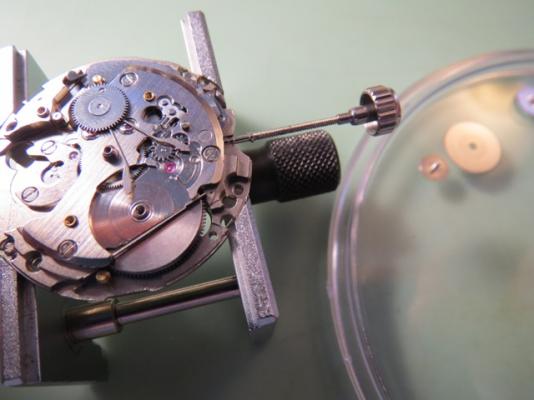
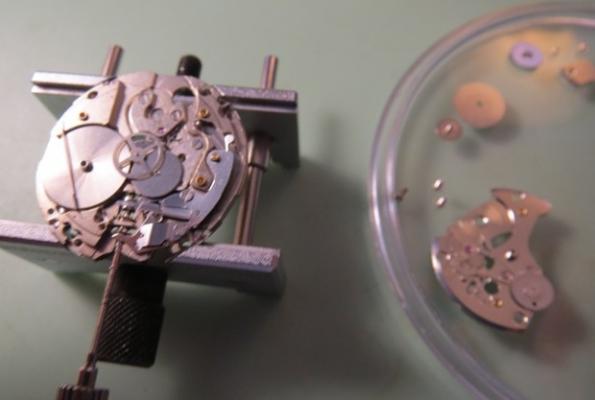
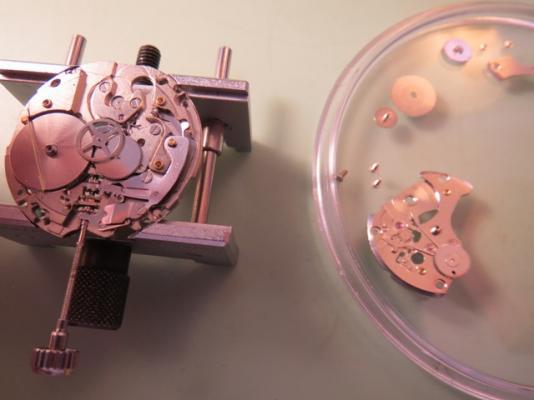
Yes lubrication is an issue for us beginners... @watchweasolgenerously shared a PDF with some alternatives to Moebius, but it depends on where you live (here I cannot purchase what he is suggesting, for example). ...btw, I have almost finished reassembling my 7009a, but... at one or two screws are missing. And I really did not realize loosing them at any time during the previous operations, sigh...1 point
-
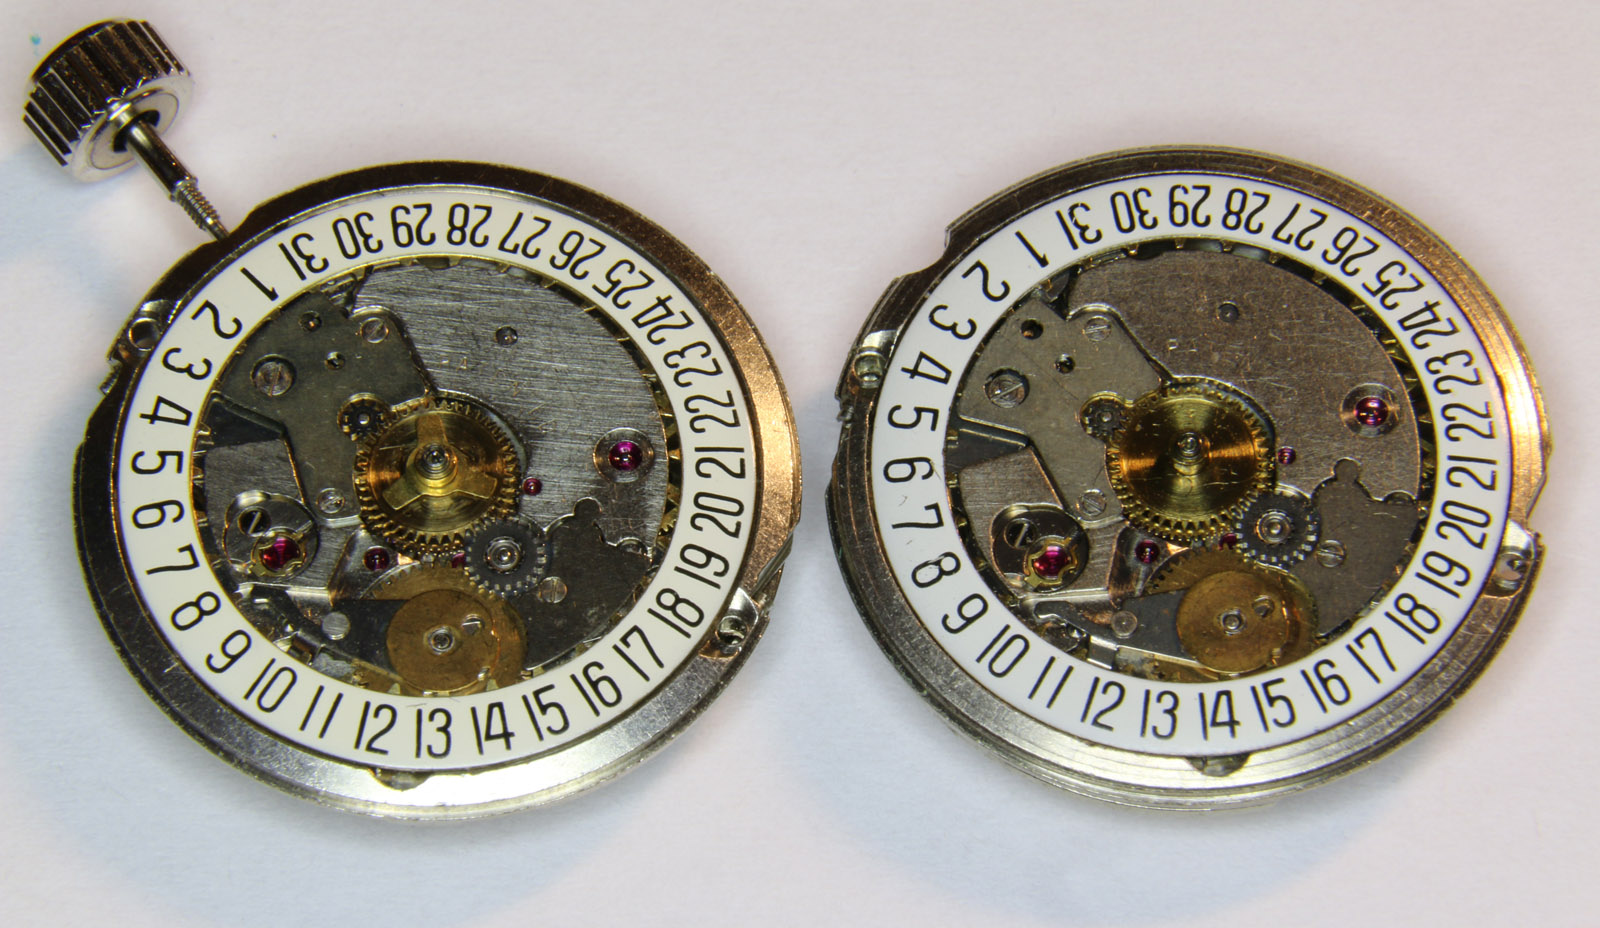
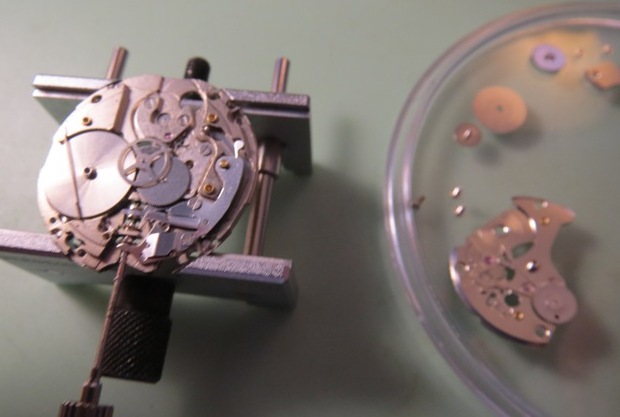
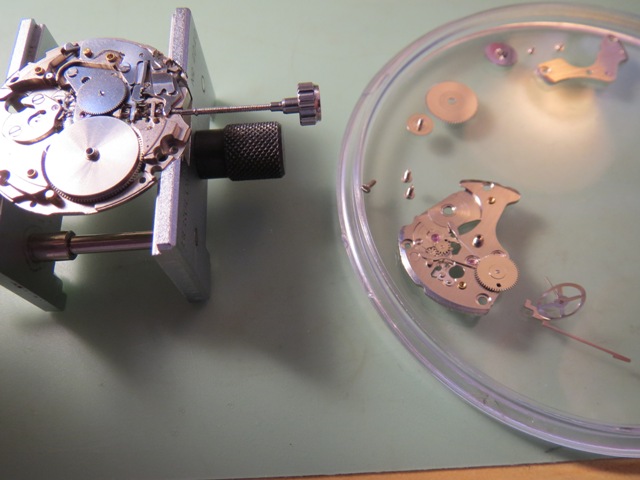
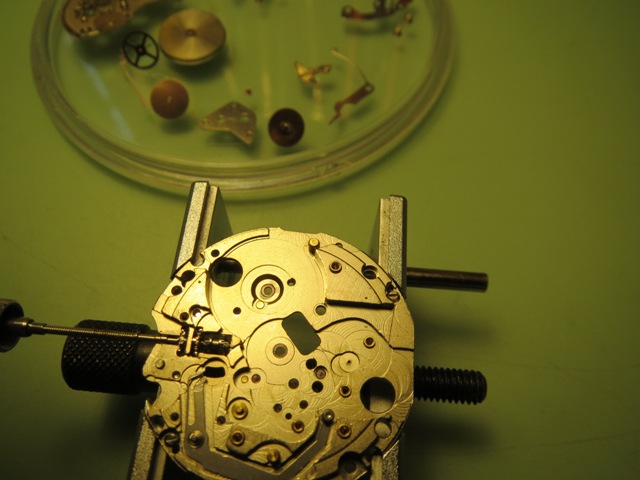
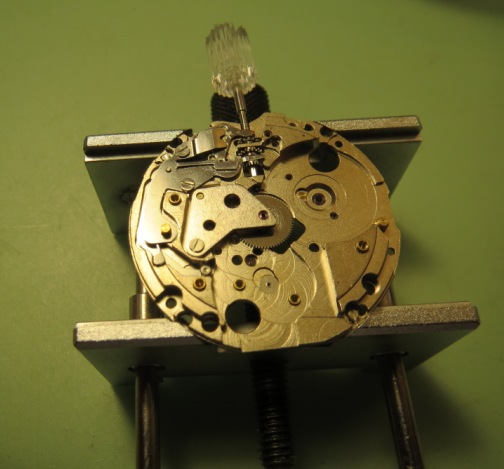
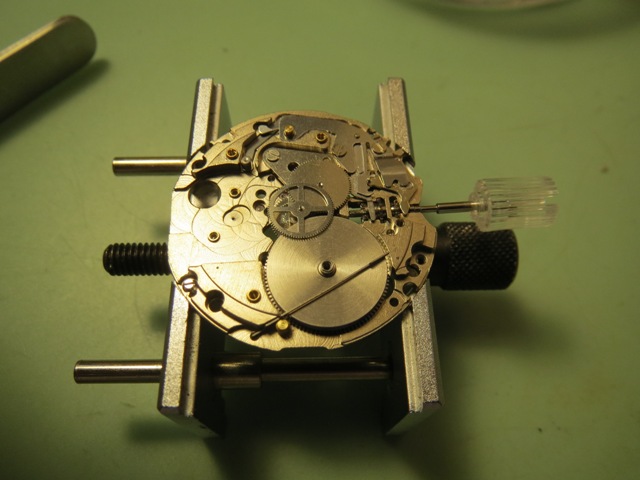
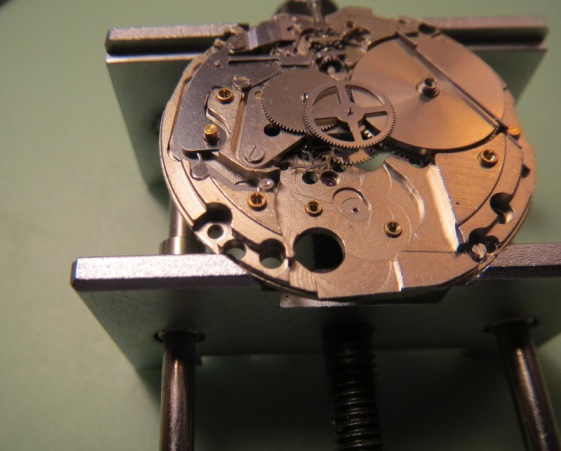
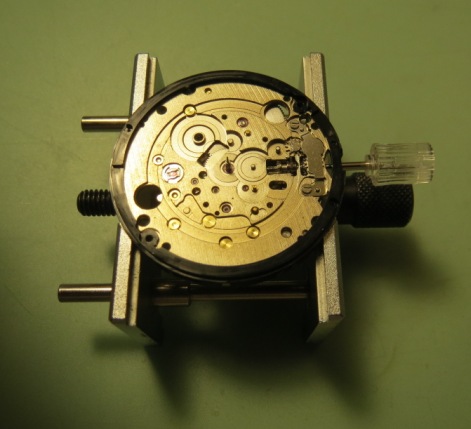
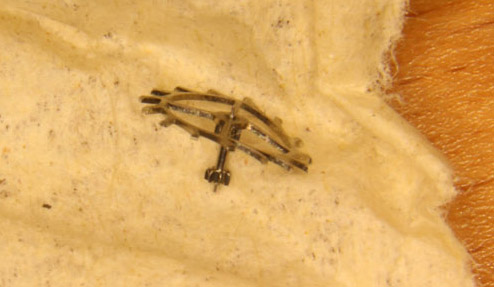
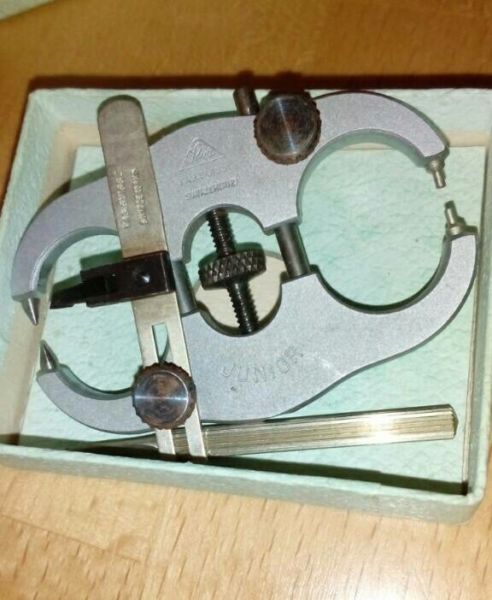
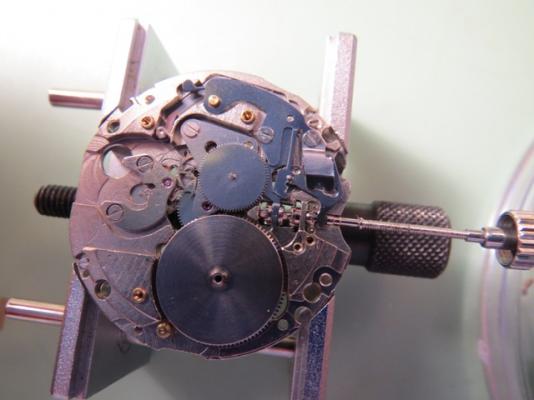
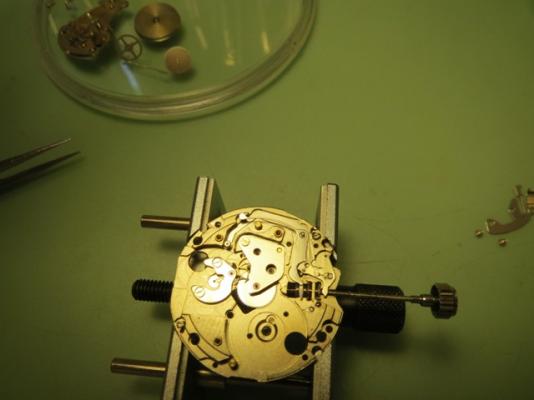
Also merely to gather more and more experience, I bought two ETA 2472 over the time for little money on ebay. I think they were less than 20 EUR each. I already worked on one which did not work, since one of the escapement wheel pivots was sheared off. I demagnetized the movement which I hadn't worked on earlier and put on the timegrapher. The result is excellent, especially since the beat error is zero. I did not adjust anything yet. For the first movement I ordered a replacement escapement wheel on ebay. Unfortunately the seller didn't pack it properly. This is the result: A bent wheel. I was able to fix it with this trueing caliper which I also got for very little money on ebay. This is the result of the movement with the repaired escapement wheel. BTW the seller of the bent wheel refunded me and apologized. He asked me to keep the bent part. The movement which I will work on now has a problem in the date mechanism. The date just doesn't move after midnight. I assume it's a problem of lubrication. Let's see. I will now disassemble the movement. I will use the order that ETA suggests on the 2824, @bobm12, this thread is only for you Cheers Alexander


 1 point
 -
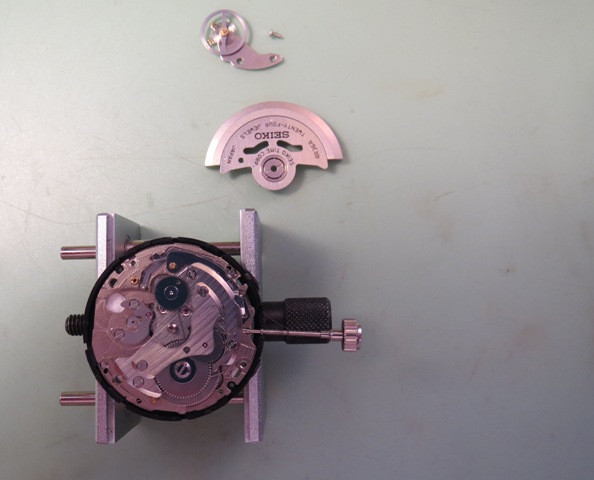
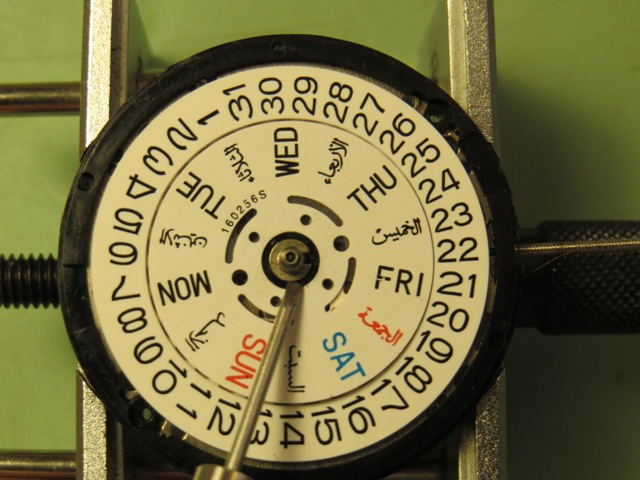
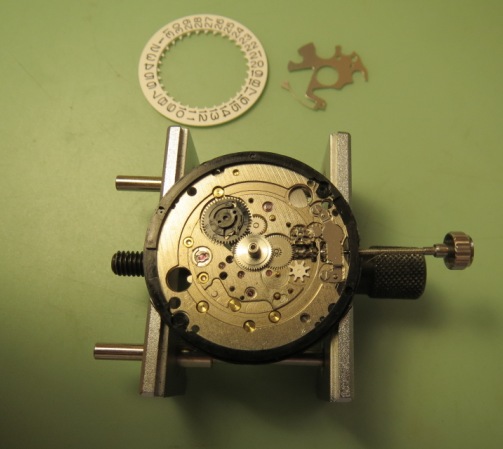
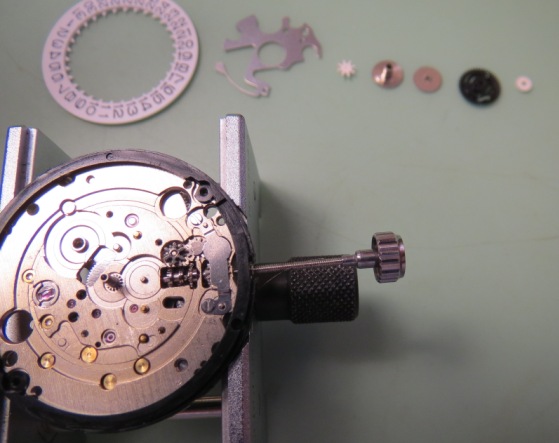
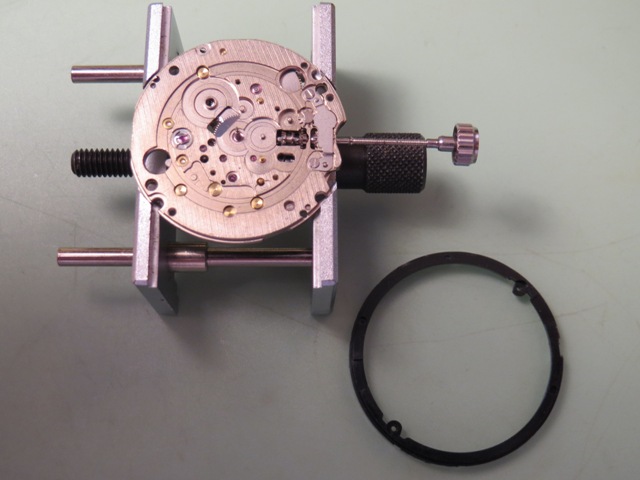
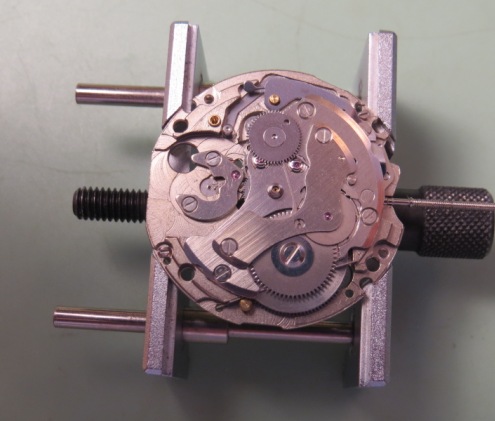
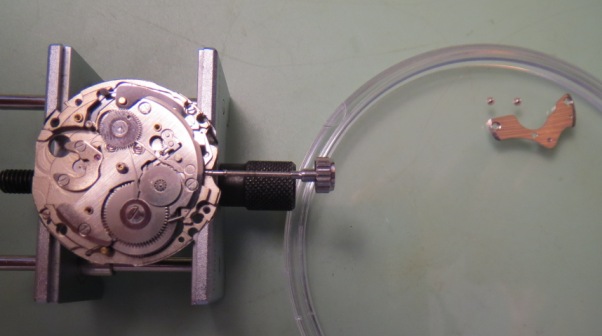
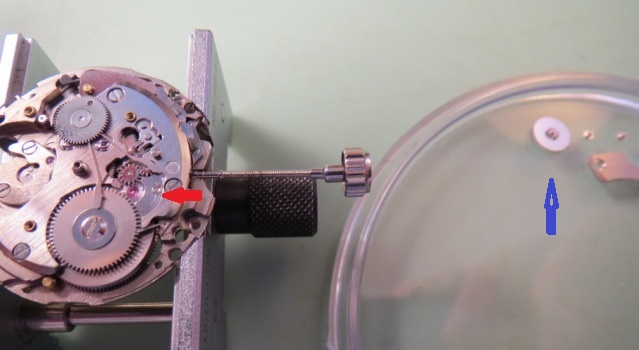
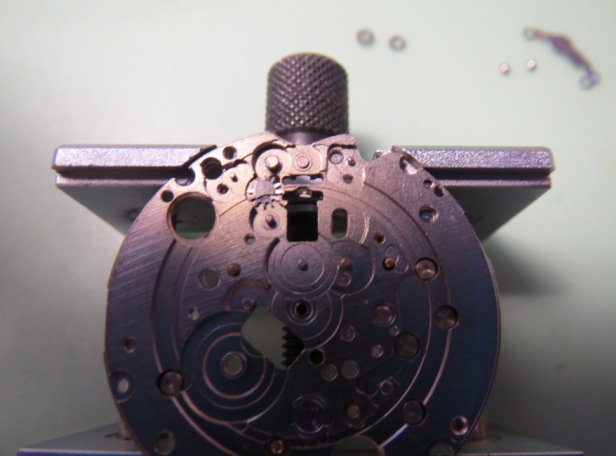
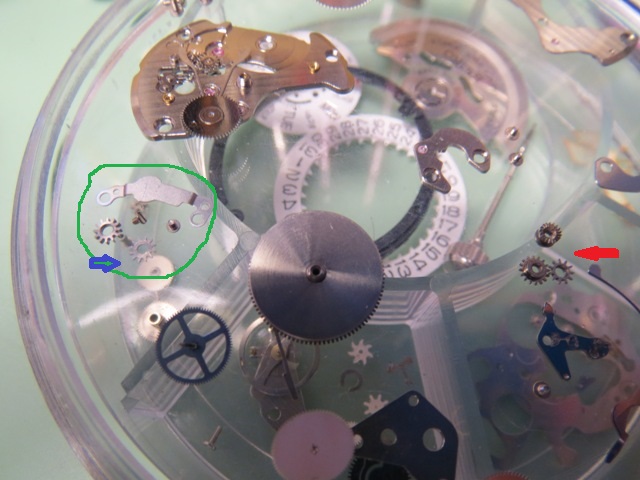
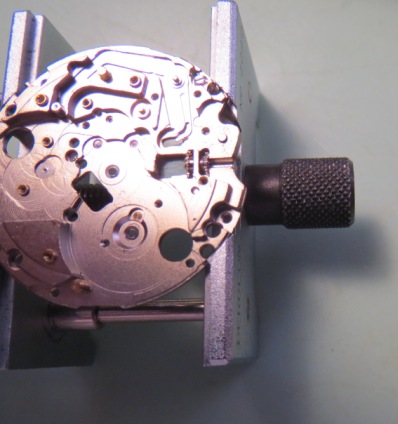
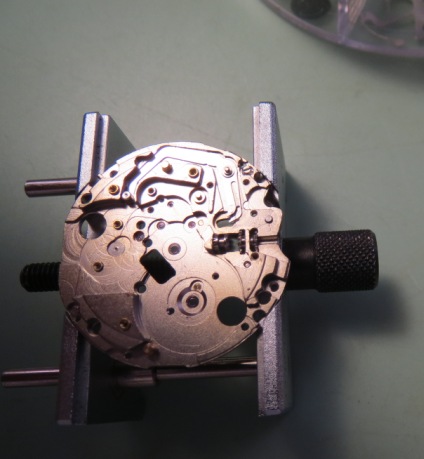
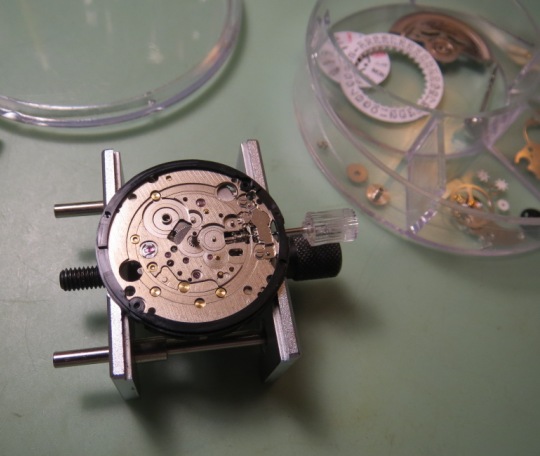
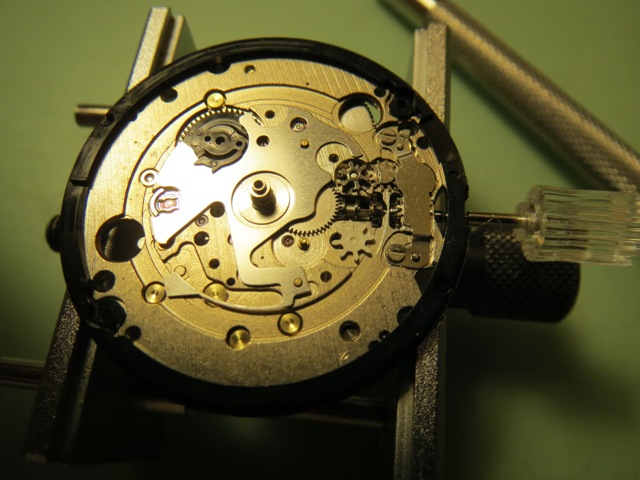
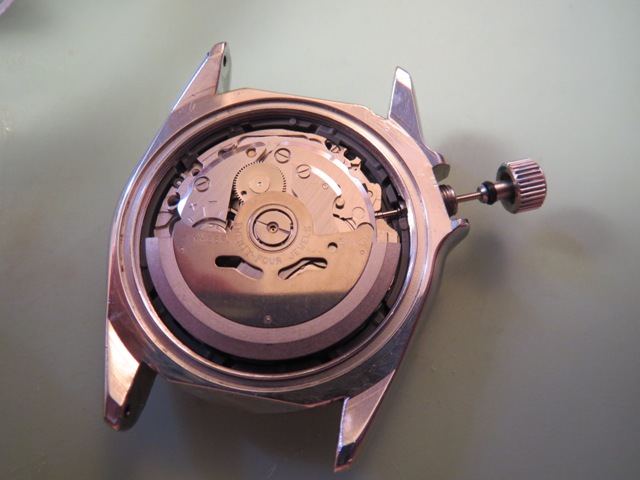
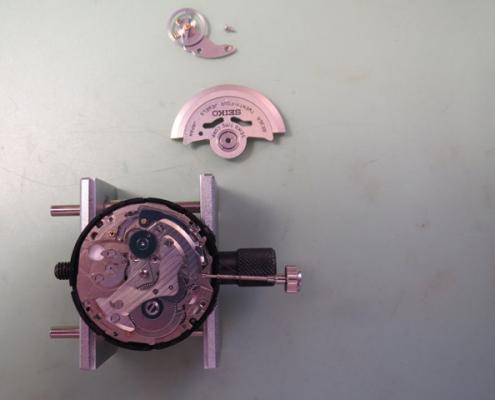
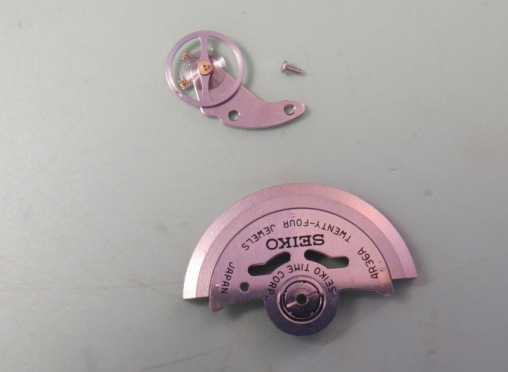
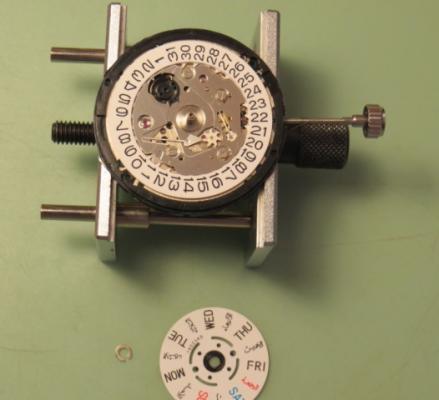
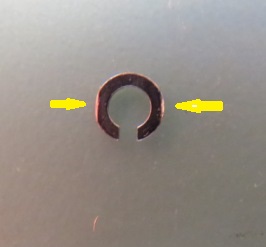
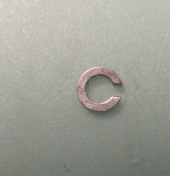
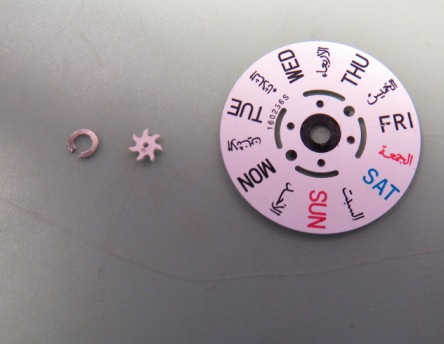
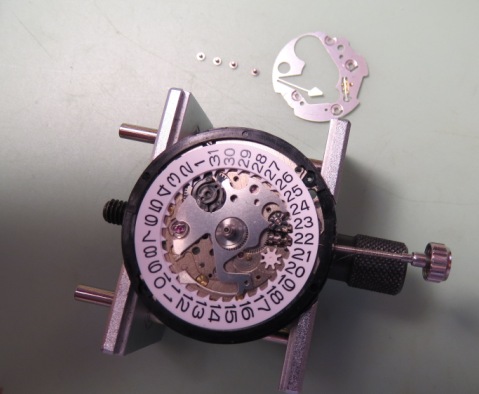
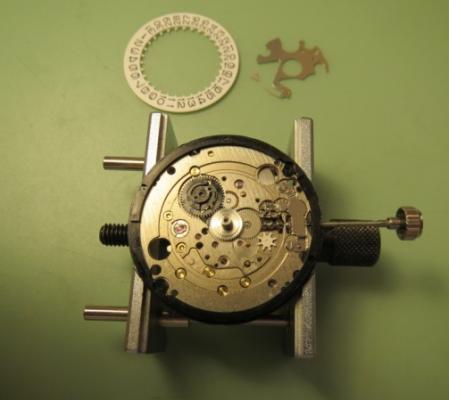
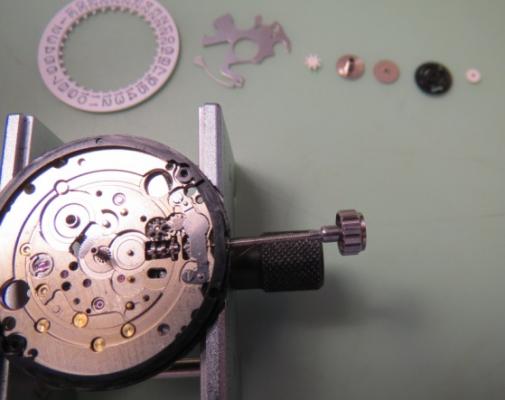
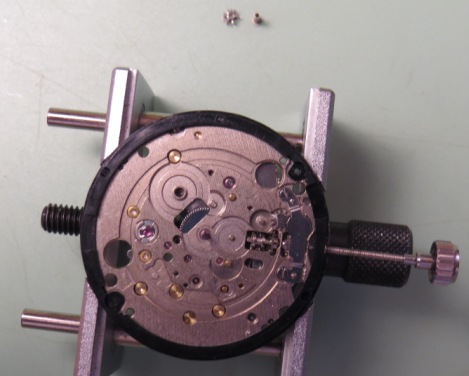
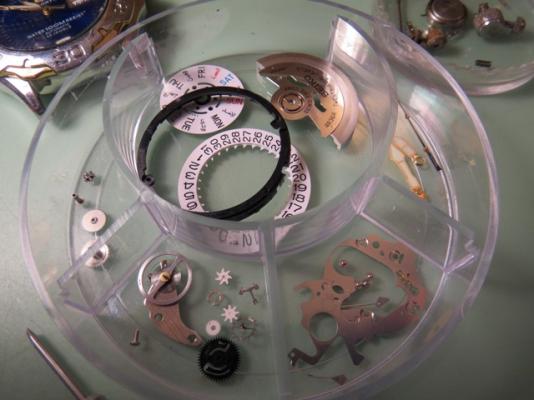
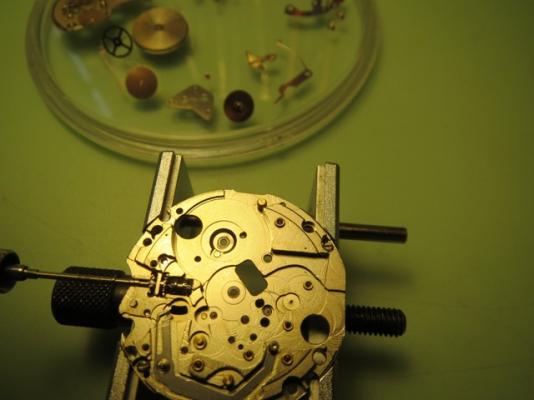
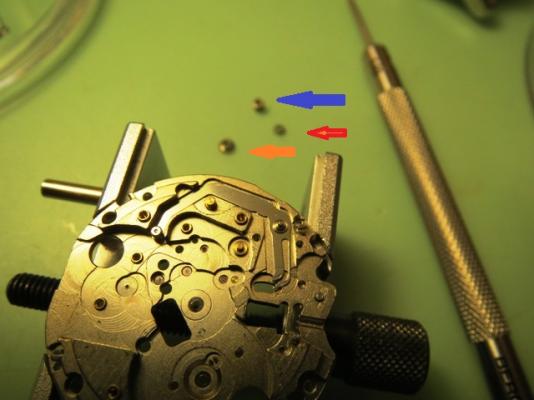
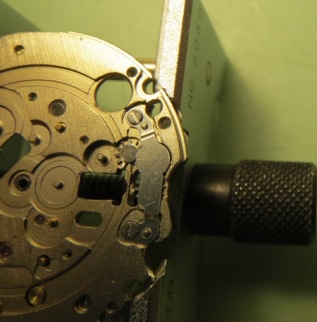
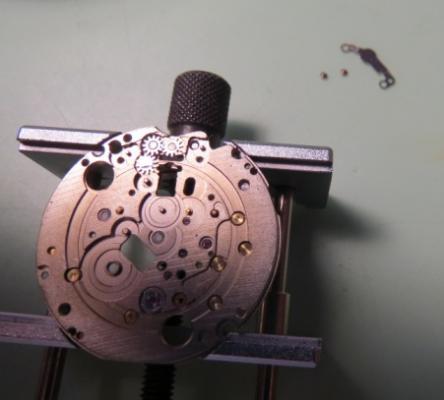
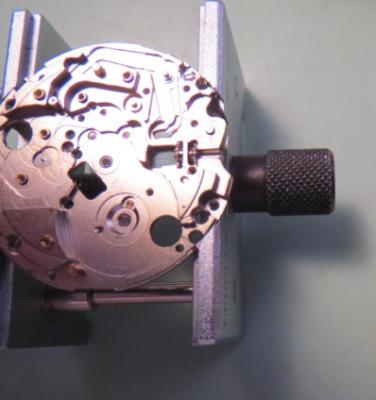
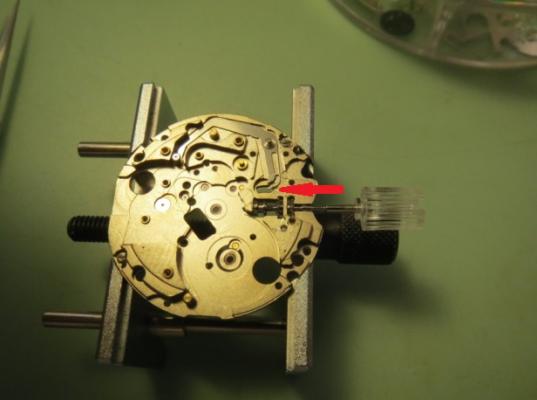
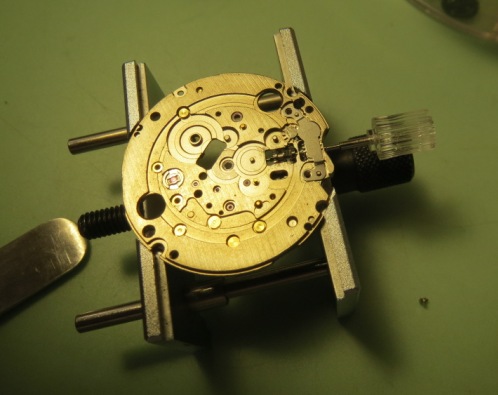
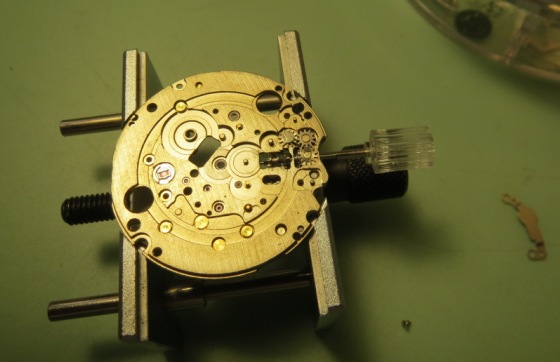
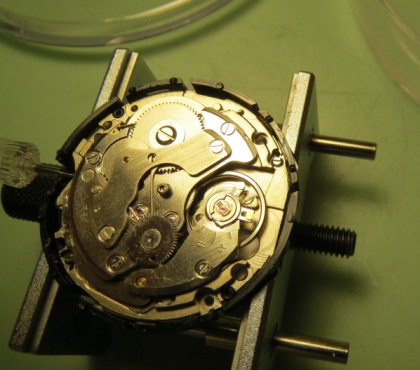
Seiko NH36 Walkthrough This walkthrough complements the 7S26/7S36 excellent walkthrough on this site by Lawson (http://www.watchrepairtalk.com/topic/682-seiko-7s26a-complete-service-walkthrough/). I strongly recommend to check out Lawson's walkthrough first). This is a more recent movement based on the said 7S26. It is a 24 jewels day/date, center seconds, movement with hacking capabilities and manual wind. The ligne is like its predecessors ~12. It is popular in the new Seiko models and Invicta watches among others. In brief, former movements didn't have hack or manual wind. Still, several parts are interchangeable with the older 7Sxx series. Here is the service data: 6810_Seiko NH3 Series Part Sheet.pdf My first step here will be to remove the "oscillating weight" and balance and place in a safe place. Those parts could be easily damaged so we put them out of harm's way. Starting on the bottom side, normal removal of "snap for day star with dial ring" Note that the reverse of the snap has indentations to fit a small screwdriver and lift it clear of the day disc (yellow arrow). This is standard for this movement family and snaps, day disc and date rings are interchangeable. The other picture shows the snap right side up. Under the day disc: Showing the "intermediate wheel for date corrector": Moving on, "date indicator maintaining plate" and related screws. No philips proprietary 4th screw here, all four are the same... Date jumper and date dial: also "Day Date corrector wheel", "hour wheel", "minute wheel and pinion", "date indicator driving wheel" and "intermediate date driving wheel and pinion": "Canon pinion" and the new addition for this movement "Day Date corrector setting transmission wheel E": Removing the "Dial holding spacer" (this one is from a 7S26 not the original one which is thicker): Turn over Baby! Ehem, just the other side view... :) More changes are introduced: We remove the "automatic train bridge" and screws: Notice the added 24th jewel (red arrow) to accommodate the newly designed "second reduction wheel and pinion" (blue arrow) which is much thinner than in previous movements. Removing "ratchet wheel" and its screw (nothing new here): Removing the familiar "Barrel and train wheel bridge with hole jewel frame", notice the familiar "long screws" inherited from previous designs: This bridge has been modified also to add the manual winding mechanism. More on that later. Removing the click and the "fourth wheel and pinion": At this point we remove the rest of the loose bits ("Third wheel and pinion", "scape wheel and pinion" and "barrel complete with mainspring": Then we remove the "Yoke spring" and characteristic "long" screws (different from the ones used in the balance cock and "barrel and train...bridge": Removing the "yoke" and the "setting lever", note how the lever shape has changed from the previous models: The story so far after removing the "center wheel bridge" and its short screws, the "center wheel and pinion", "pallet bridge" and "pallet fork": On the main plate, showing the added "balance stop lever": And the "day-date corrector setting transmission wheel A" (red arrow), "winding pinion" (orange arrow) and "clutch wheel" (blue arrow): Close up of what is left on this end: Removing the "guard for day-date corrector setting transmission wheel" and short screws. Underneath the "day-date corrector setting transmission wheel C" and the "Day-date corrector setting transmission Wheel B": After removing the transmission wheels B and C we are left with the built in wheel on the frame: Notice that transmission wheel "B" (blue arrow) is thinner than its counterpart "C": Next: "Barrel and train wheel bridge with hole jewel frame" disassembly:


 1 point
 -
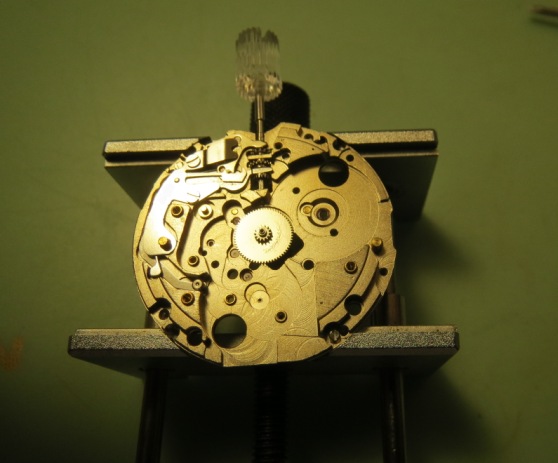
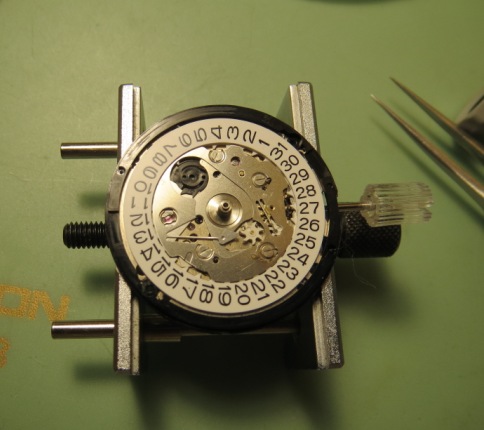
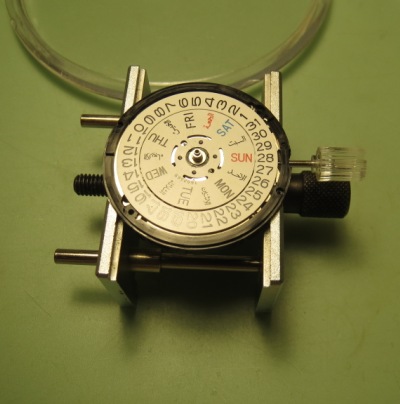
So, here comes the assembly of this movement. It should be short for two reasons: 1.- I got so much into it, I forgot to take more pictures. 2.- It is mostly a reverse of the disassembly and/or covered in Lawson walkthrough where similarities match. All that said, I usually start at the keyless works with this movements: Remember the skinnier cog goes towards the crown. One trick to hold this bunch of parts without falling is to use rodico to cover the bottom of the hole. Then, I hold them with the stem: NOTE: The arrow points to the "groove" where the balance stop lever and the setting lever engage. Turn the movement on the holder and do the other part, the manual winding portion, again the skinny cog goes on top of the stem: Center wheel and its bridge, just like the old 7S26 movement: And proceeding as per the old movement: Escape wheel in place: Pallet fork and bridge followed by the Barrel and train wheel bridge (after quickly putting it together): At this point I think it is a good idea to stop this side, turn over and first add the dial holding spacer: Then the canon pinion: Finally all the other parts (forgot to take all the intermediate pictures), up to the date jumper: Then add the date dial and on top the date indicator plate, At this point a present 2 screws to hold it down loosely (not tighten) and check that the date jumper can do its job. and its wheel is engaging properly. Finishing the dial side: Then turning over and adding the balance: And to finish we add the oscillating weight with ball bearing....standard procedure on this movement.... One important part here is to match the center of the oscillating weight and winding stem and set the hole of first reduction wheel gear on the imaginary line toward the balance bridge guide pin. As per service data. So, there you have it! NH36 complete walkthrough! Enjoy! Cheers, Bob


 1 point