Leaderboard


Popular Content
Showing content with the highest reputation on 11/15/22 in all areas
-
Thank you, that's greatl! My school boy French was failing me trying to find anything Thank you! That makes sense, there is a brass finger on the lever, so it looks like 'avec doigt' then Andy2 points
-
It's happy to see you.2 points
-
Hard steel cone bearings in the head. They had a lower grade headstock for a while that used bronze bearings there. Honestly not a big difference, and many extremely good machines used bronze bearings. But the "Hard" was the cream of their crop (until they went with angular contact ball bearings).2 points
-
unfortunately like so many eBay purchases definitions can be a subject to interpretation.2 points
-
Hi Rob If you start with Fried, Donald De Carle, you wont go wrong. I have attached one for your interest. The Chicago one is in bits but its all there 1156193141_JosephBulovaSchoolofWatchMaking(1).pdf chicago lesson 1.PDF chicago lesson 10.PDF chicago lesson 11.PDF chicago lesson 12.PDF chicago lesson 13.PDF chicago lesson 14.PDF chicago lesson 15.PDF chicago lesson 16.PDF chicago lesson 17.PDF chicago lesson 18.PDF chicago lesson 19.PDF chicago lesson 2.PDF chicago lesson 20.PDF chicago lesson 21.PDF chicago lesson 22.PDF chicago lesson 23.PDF chicago lesson 24.PDF chicago lesson 25.PDF chicago lesson 26.PDF chicago lesson 27.PDF chicago lesson 28.PDF chicago lesson 29.PDF chicago lesson 3.PDF chicago lesson 30.PDF chicago lesson 31.PDF 588239796_chicagolesson32Part1.pdf chicago lesson 32 Part 2.PDF chicago lesson 33.PDF chicago lesson 34.PDF chicago lesson 35.PDF chicago lesson 4.PDF chicago lesson 5.PDF chicago lesson 6.PDF chicago lesson 7.PDF chicago lesson 8.PDF chicago lesson 9.PDF 468703549_ToolsMaterialsoftheTrade.PDF2 points
-
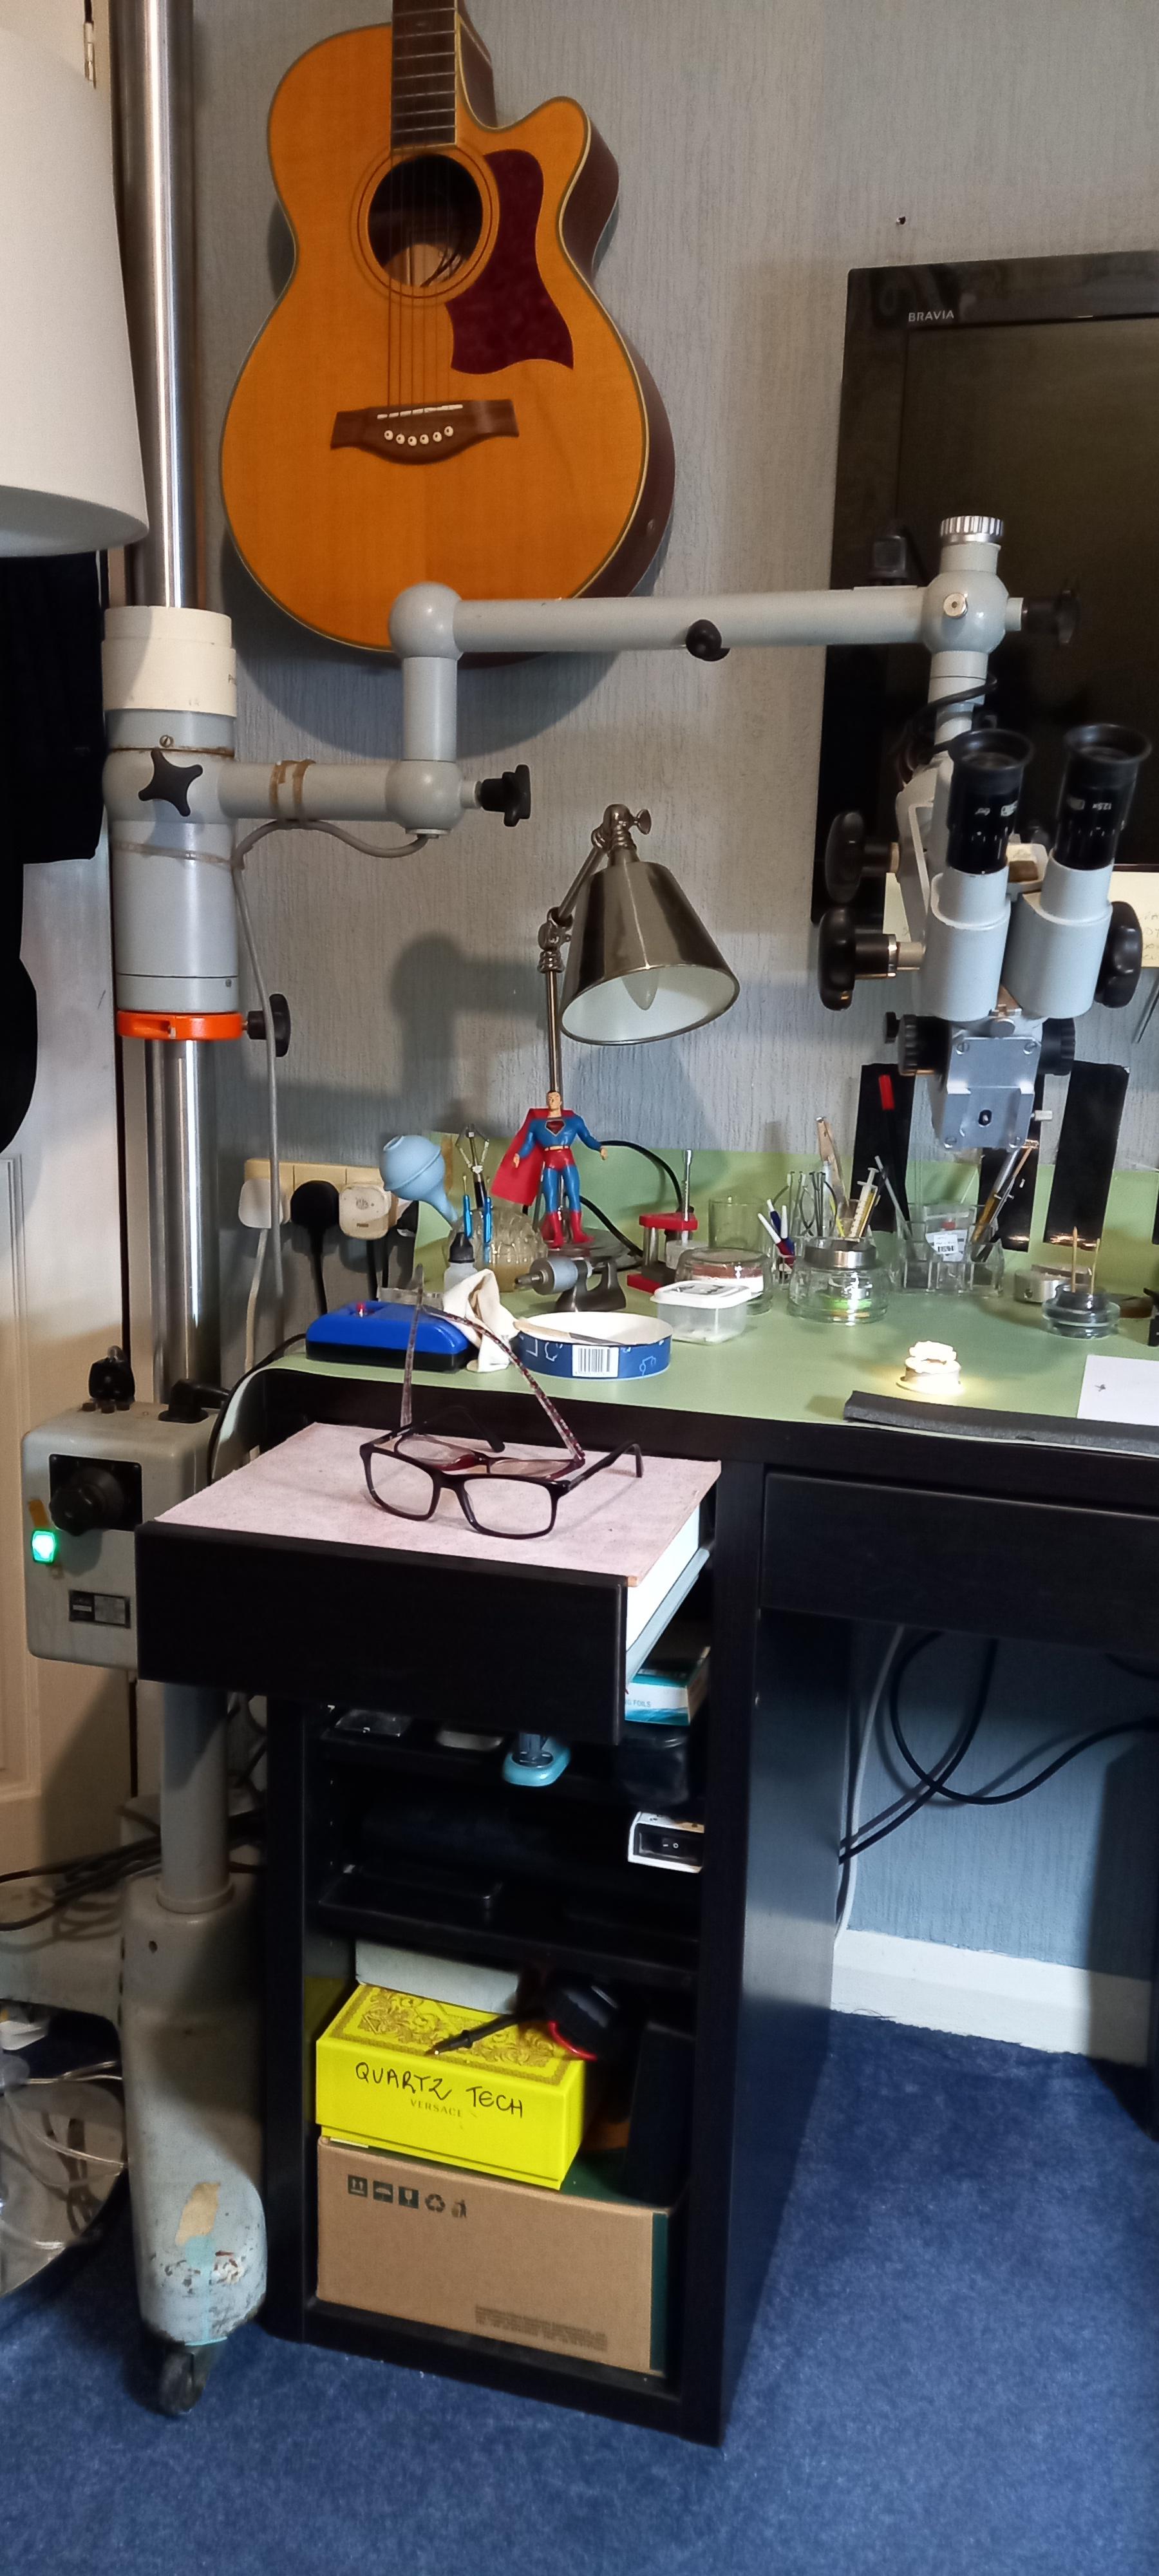
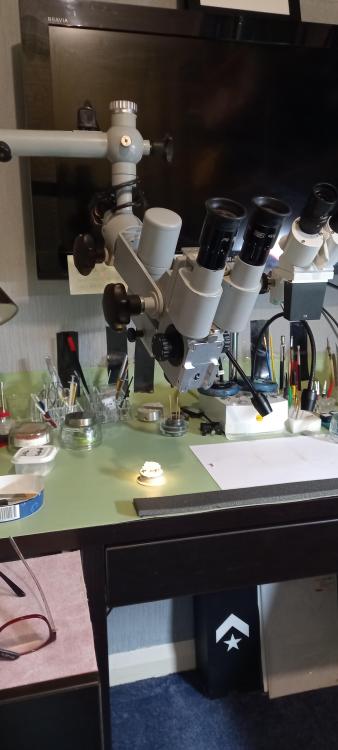
Hi peeps hope you all well. So here it is, I've been after a new bigger better scope to replace my pre Amscope ( Swift ) which has been ok but lacking on magnification and field of view. Asked around here for a little while and thought I'd be getting the same one Alex from About f______ time suggested. Also a few good guys here said similar. Did i listen ? Er yeah i did but then this baby fell into my hands today. I say fell which is not actually possible because its huge and and its heavy, veeerry heavy. It took two very strong boys to get it upstairs and into my watch room, me and my lad and hes 6 ' 5" and built like a brick shitter and I'm freakishly strong for a 5' 9" old fart. Bigger and better doesn't begin to describe it, its the biggest and the best lol, well i think so, I'm very happy. So what is it ? . Its a surgeons microscope, I'd guess around 50 years old, kept in a hospital's storage for god knows how many years finally released to make way for new old microscopes to fill the hospital storage. Made in West Germany, solid and stable as hell fully adjustable in every way possible. It has 3 light luminosity settings, 4 colour filters 2 camera mounts and the best bit is a Carl Zeiss 5 fixed magnification lens. Working distance of around 10 inch for all magnifications. The price ? I hate talking about prices, to me its priceless like my brother from another mother that aquired it for me gratis.
 2 points
 -
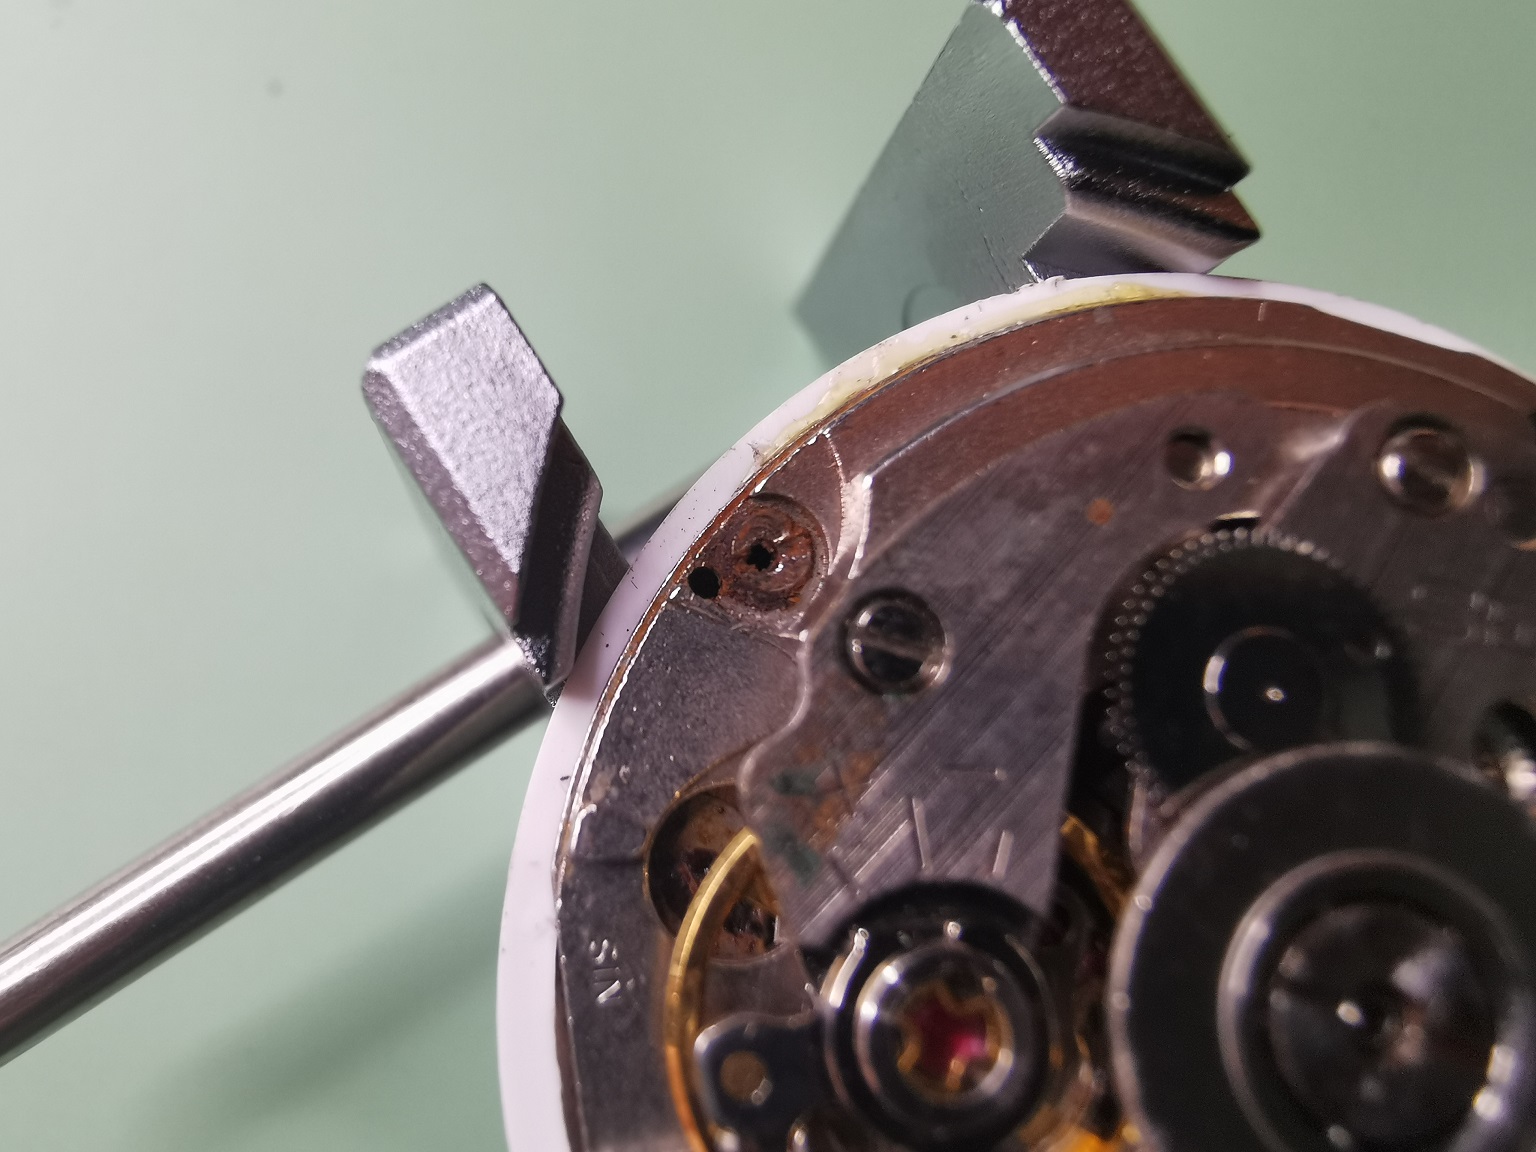
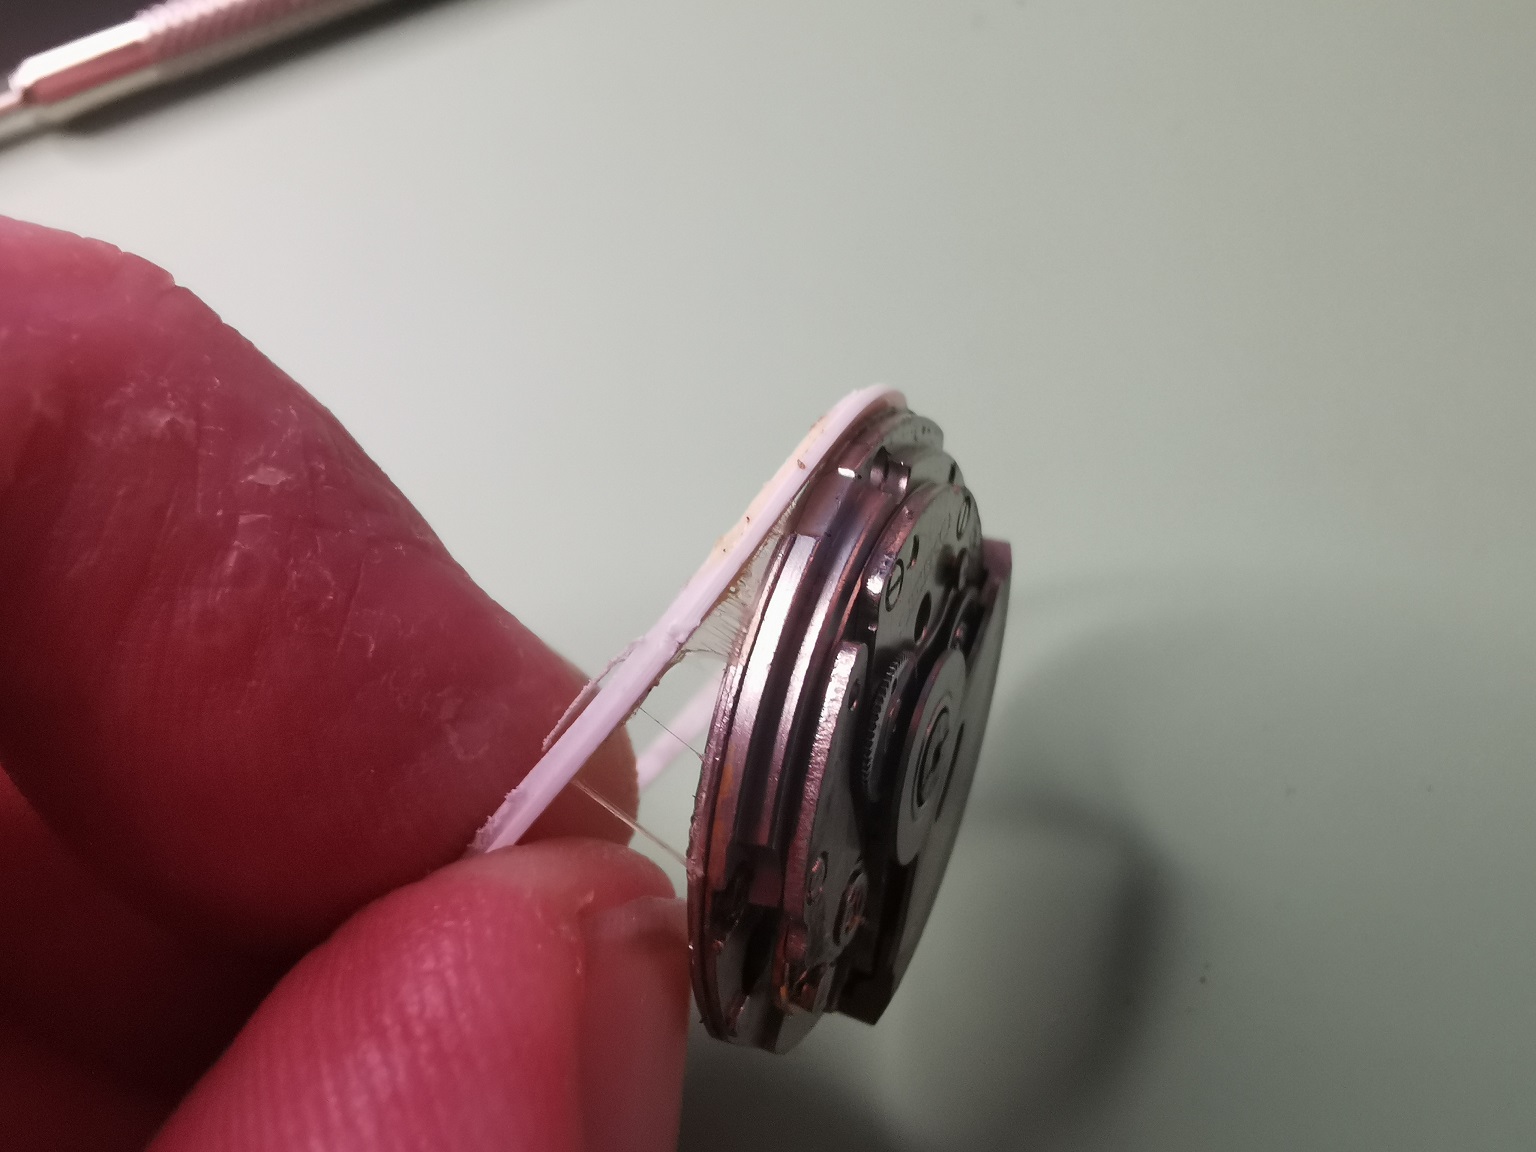
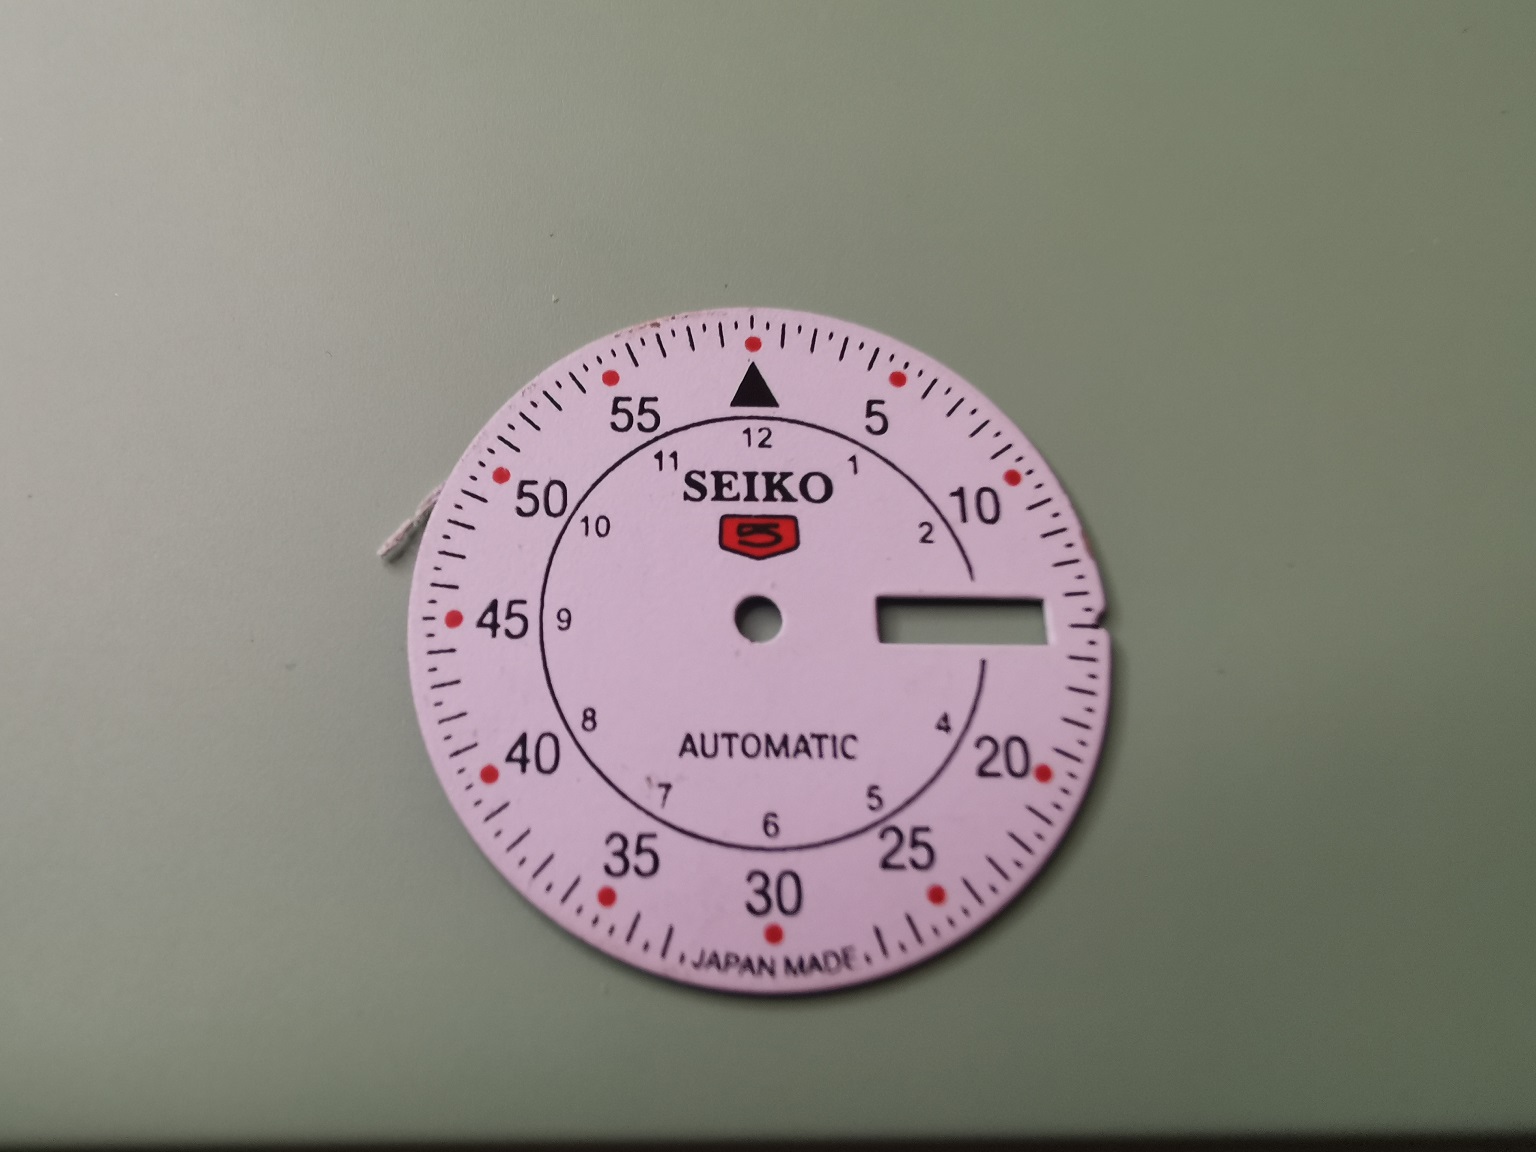
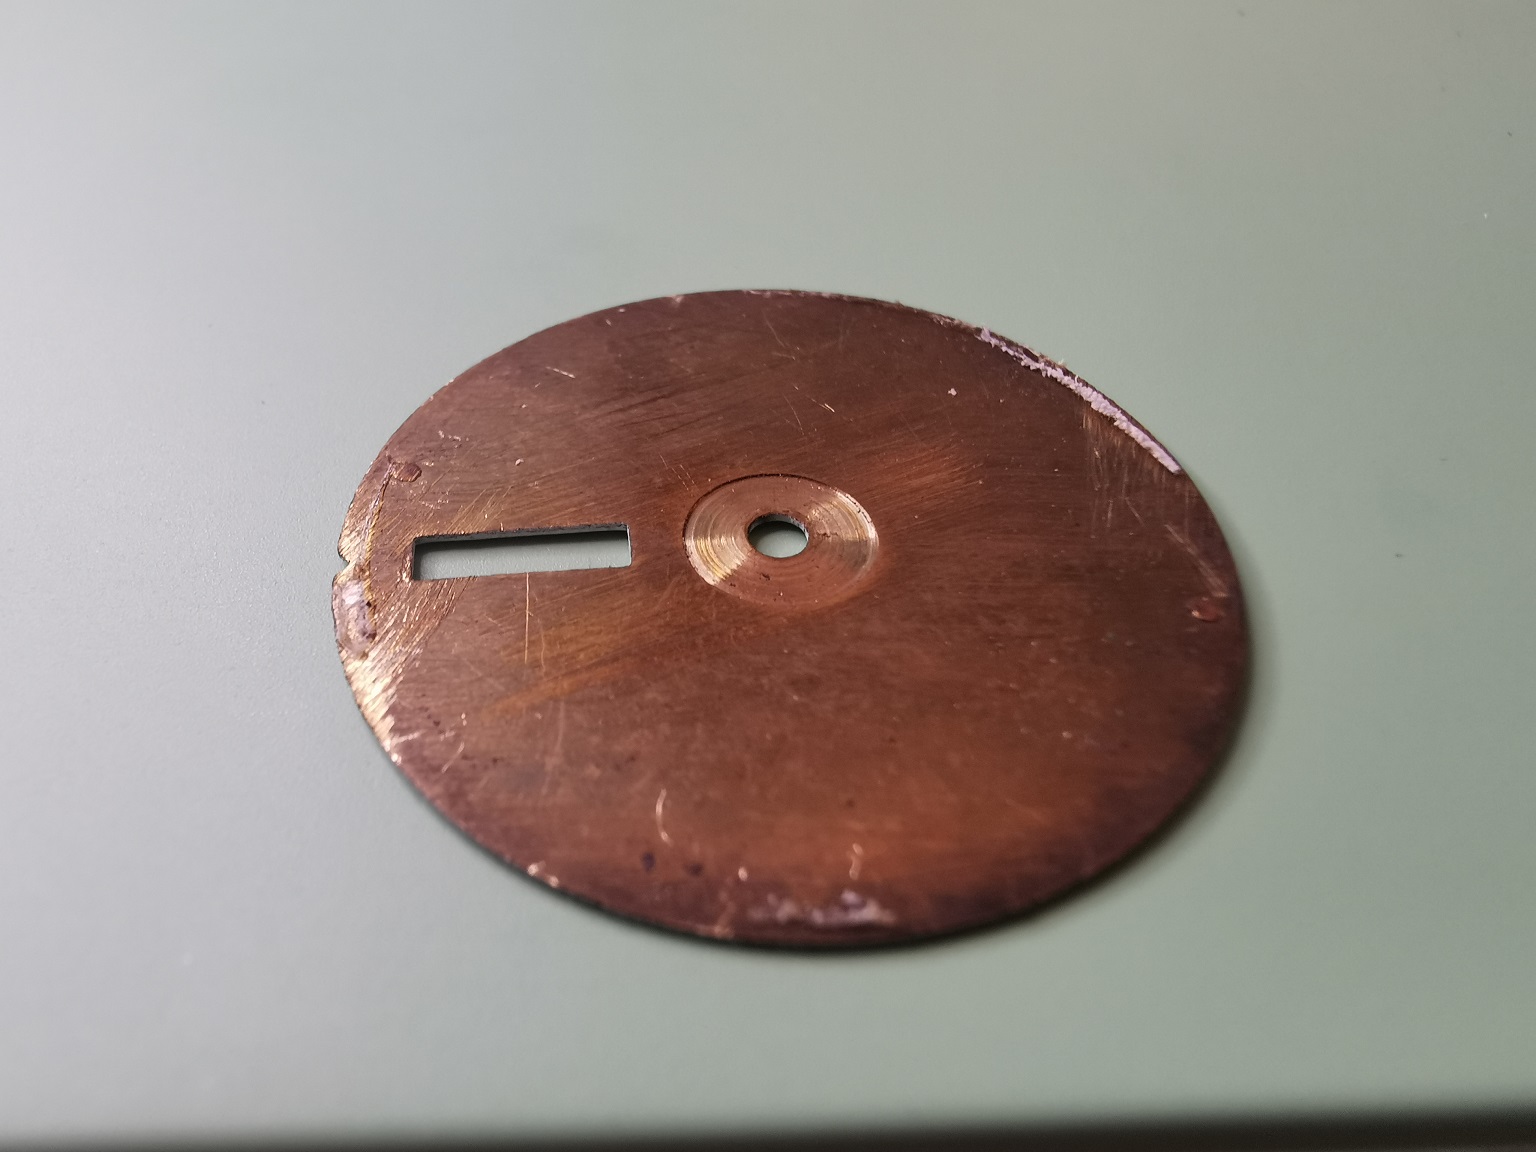
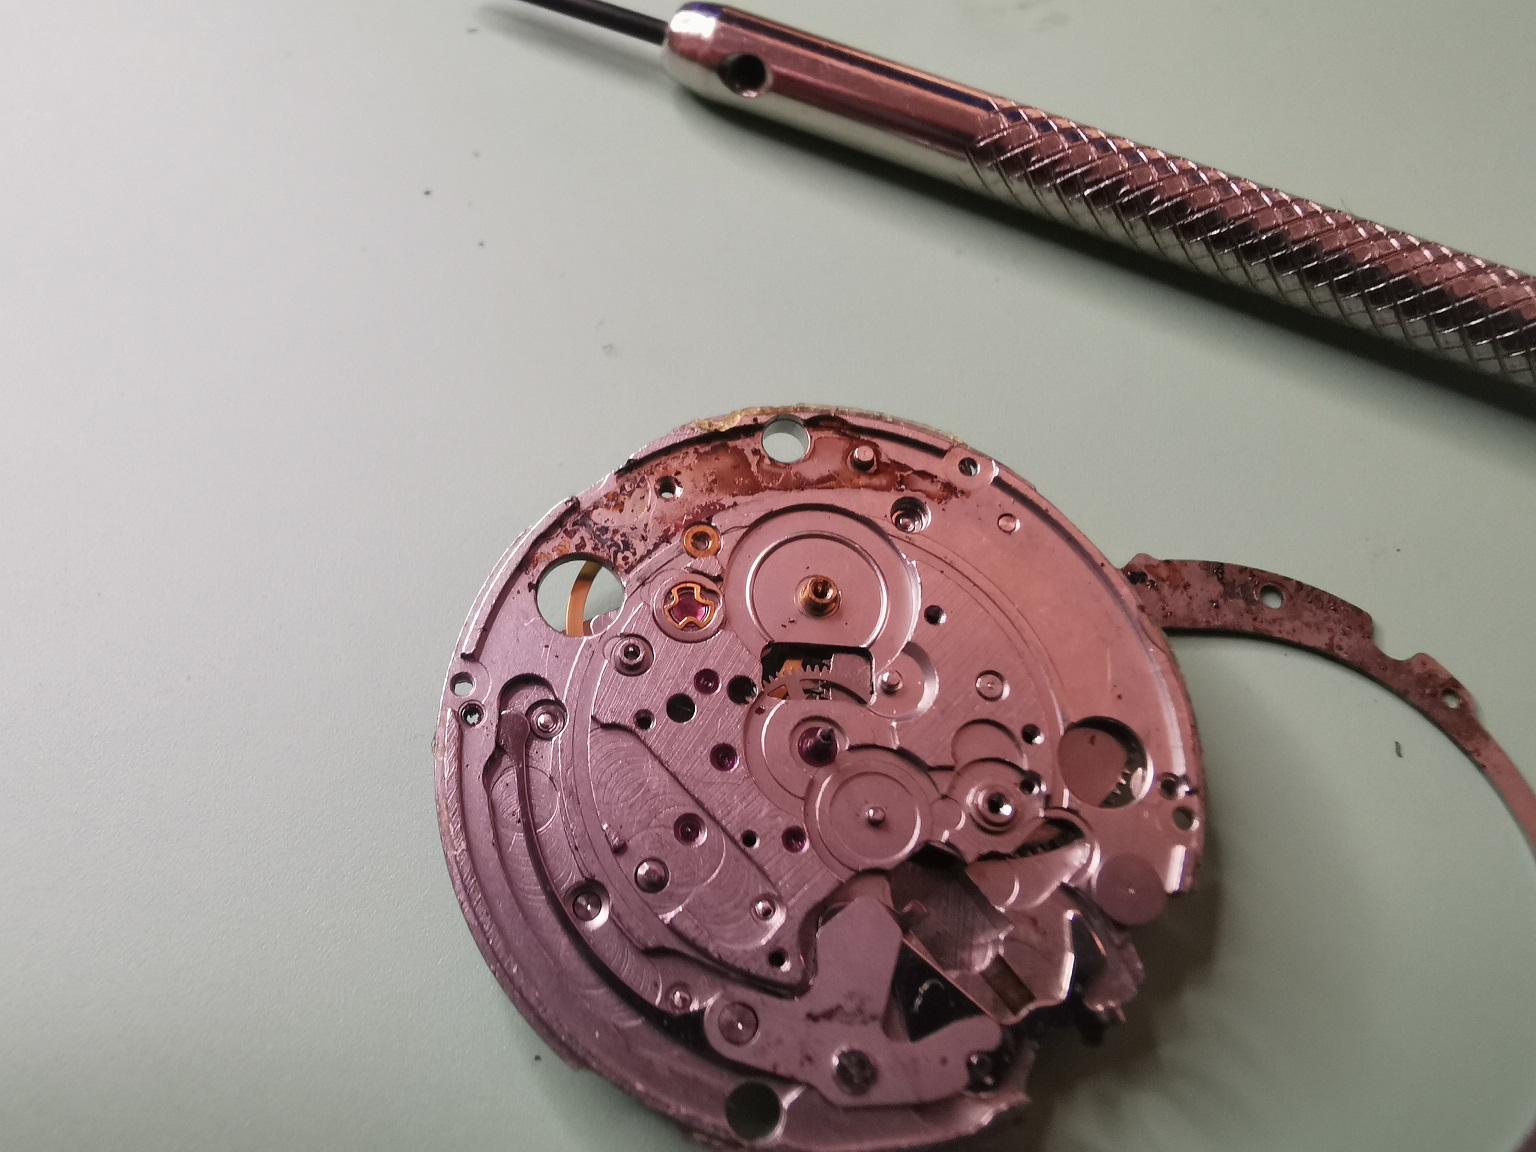
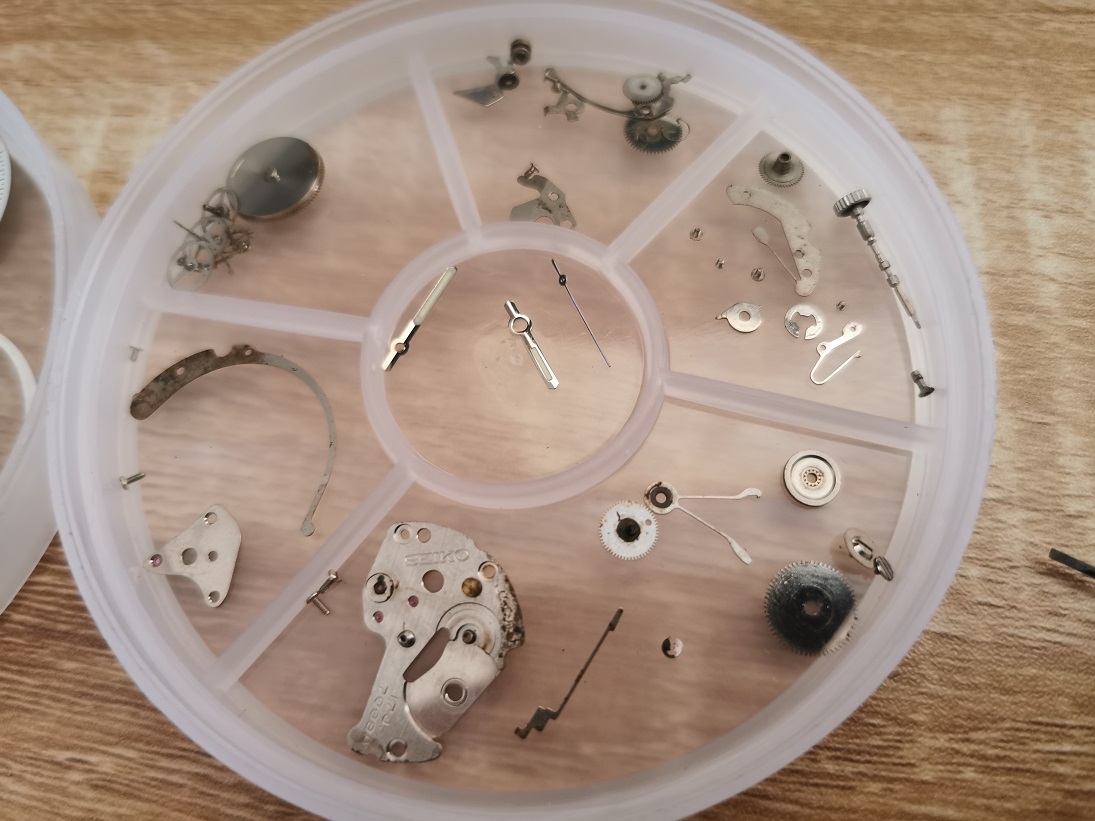
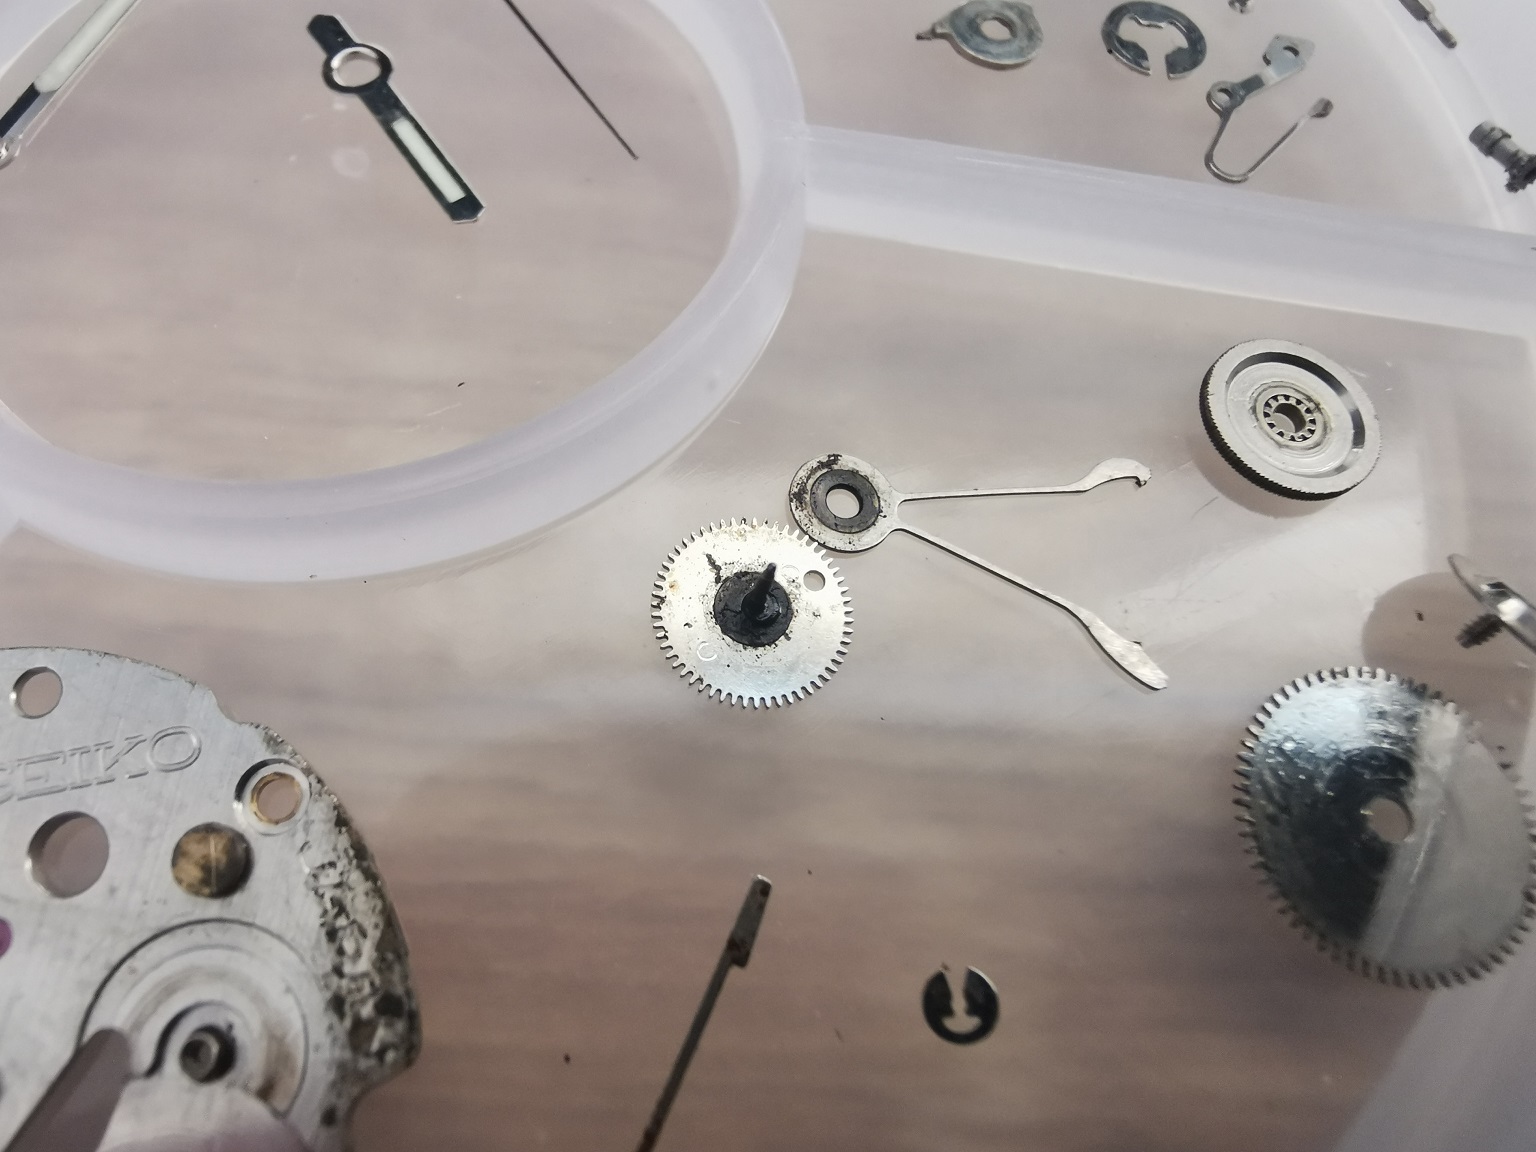
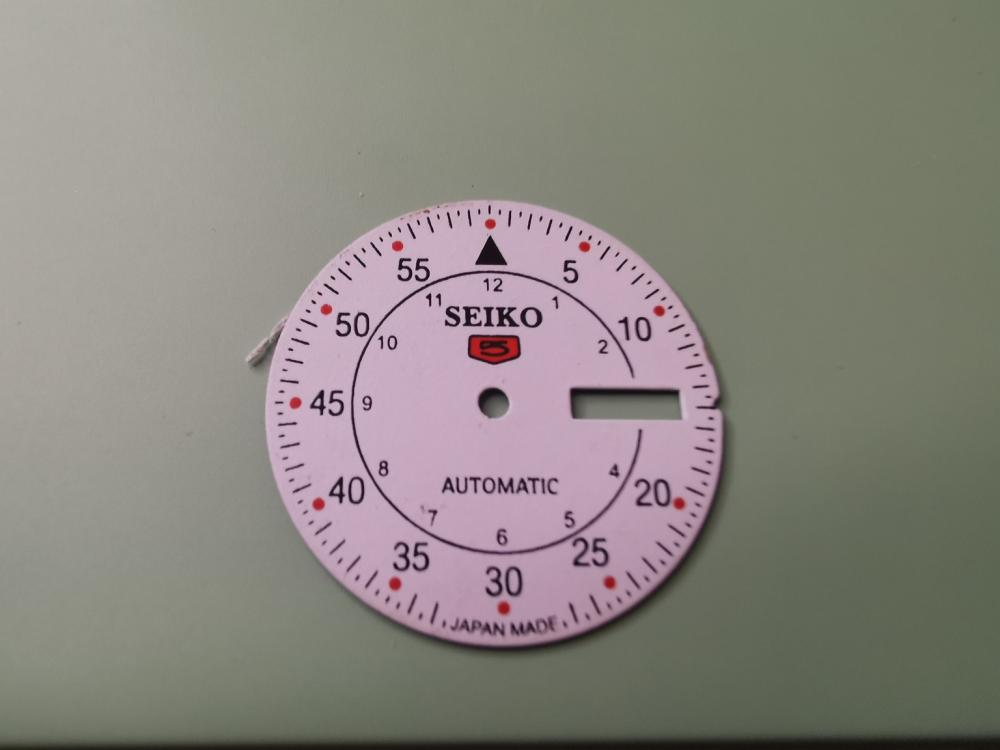
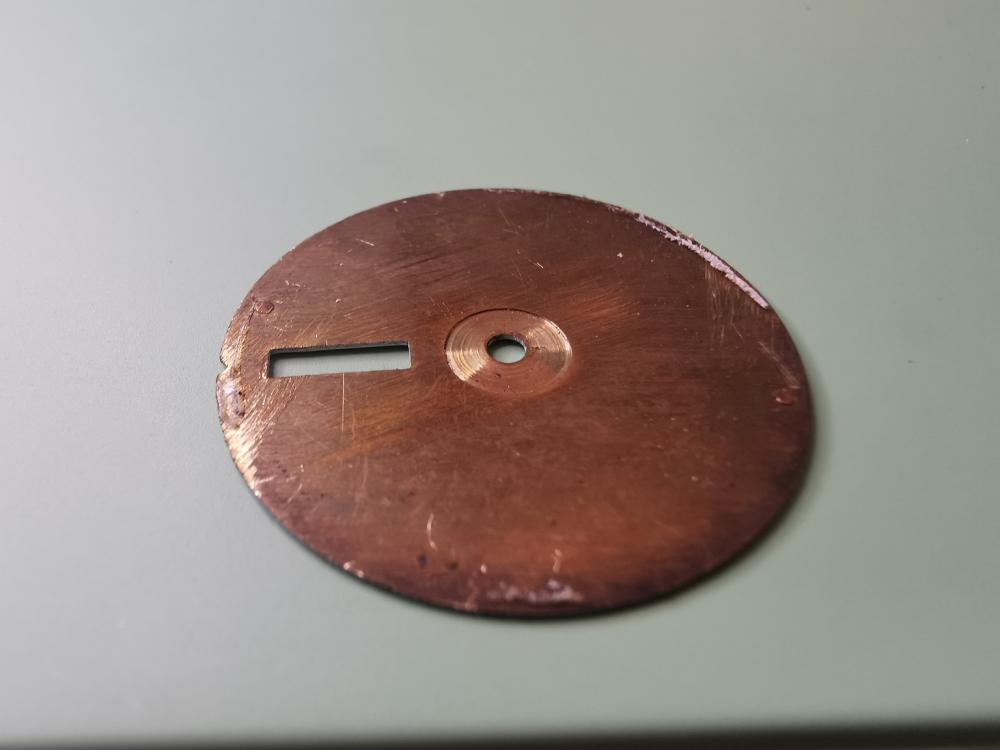
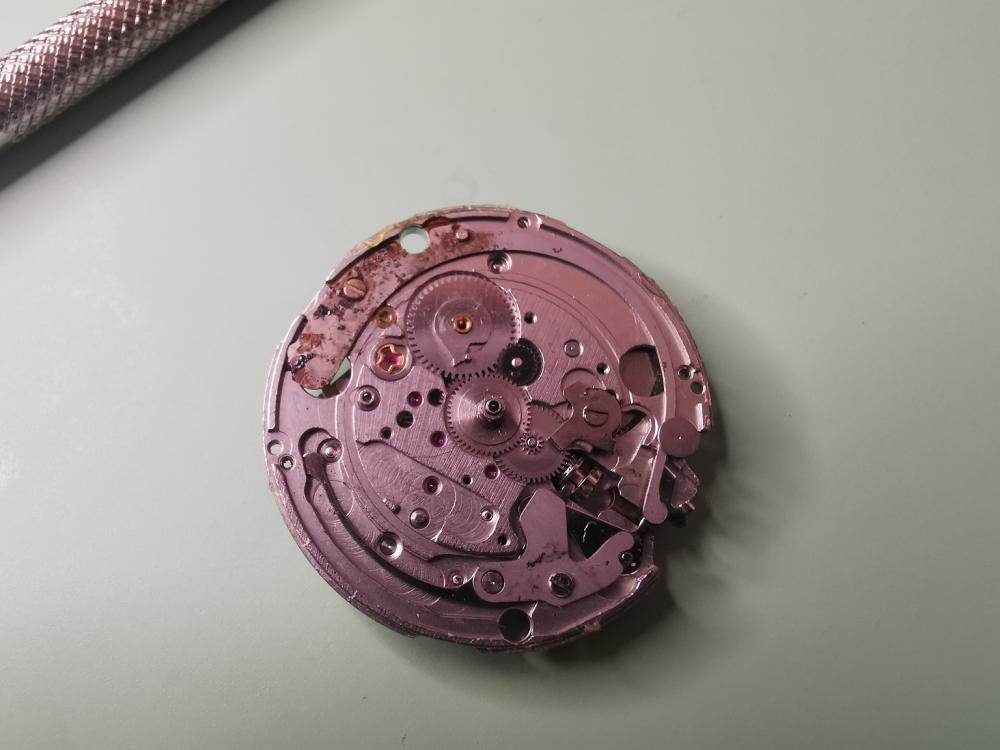
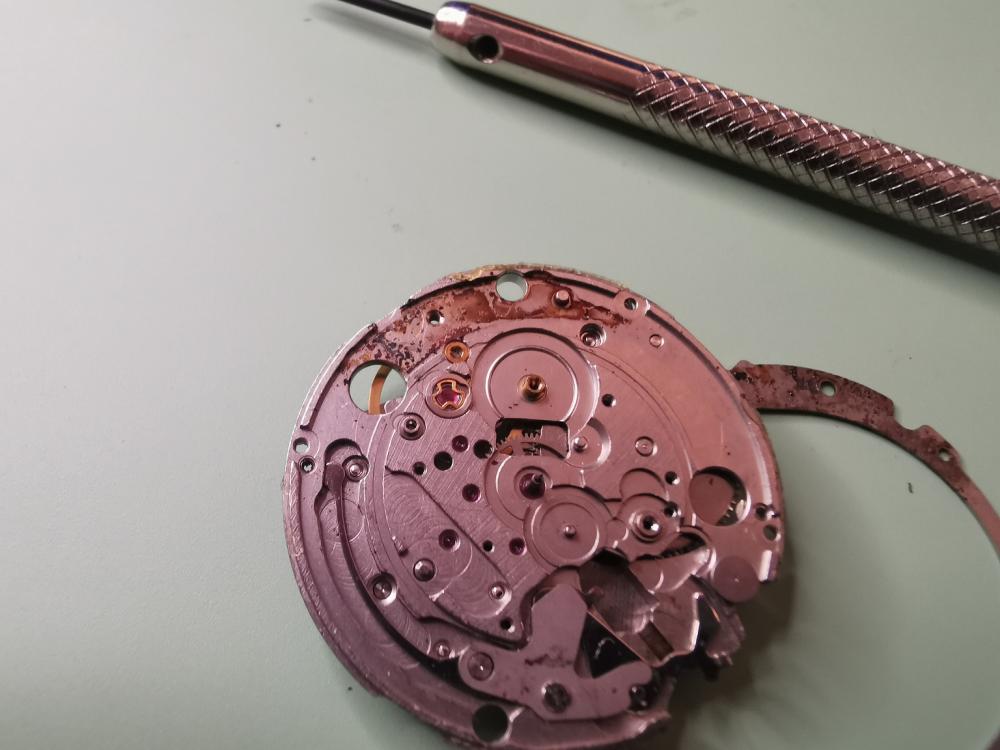
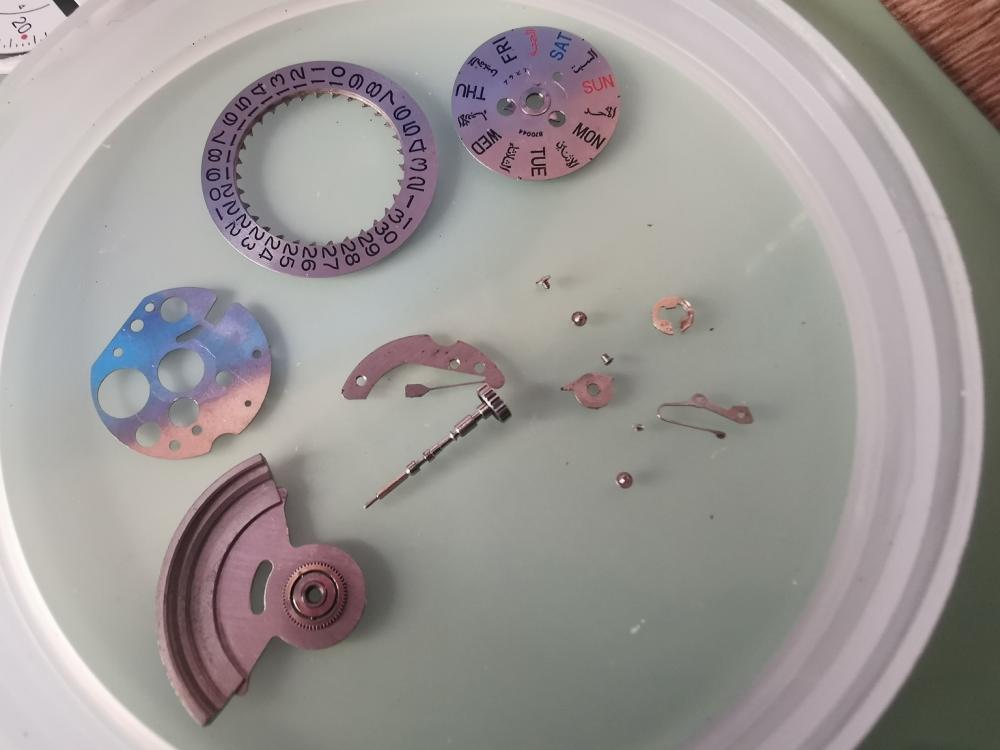
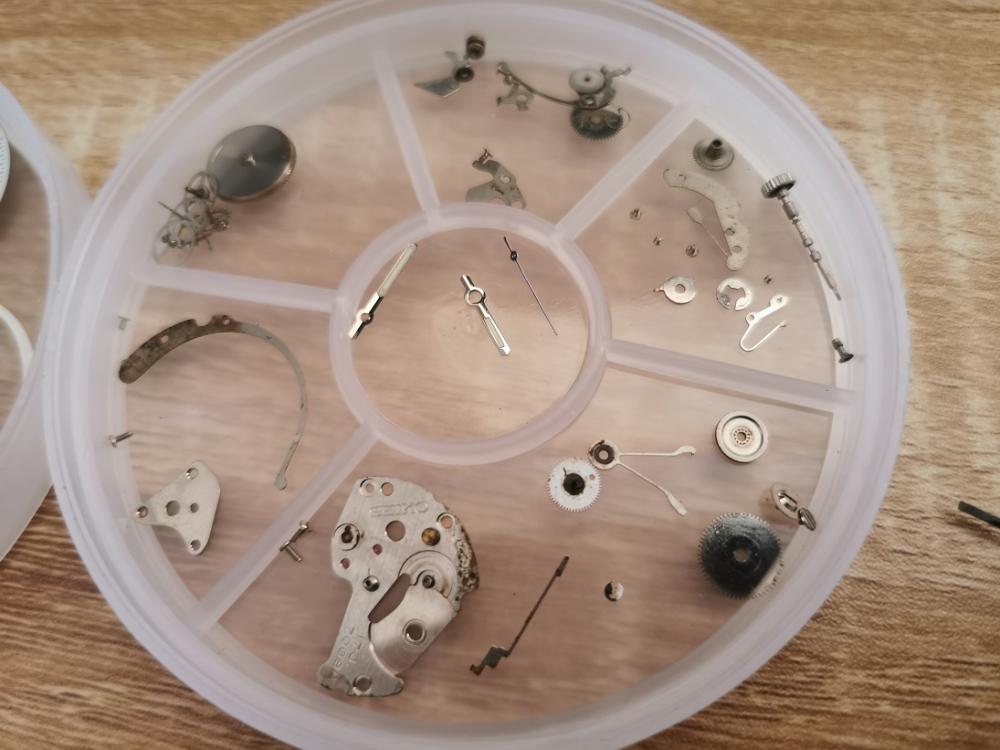
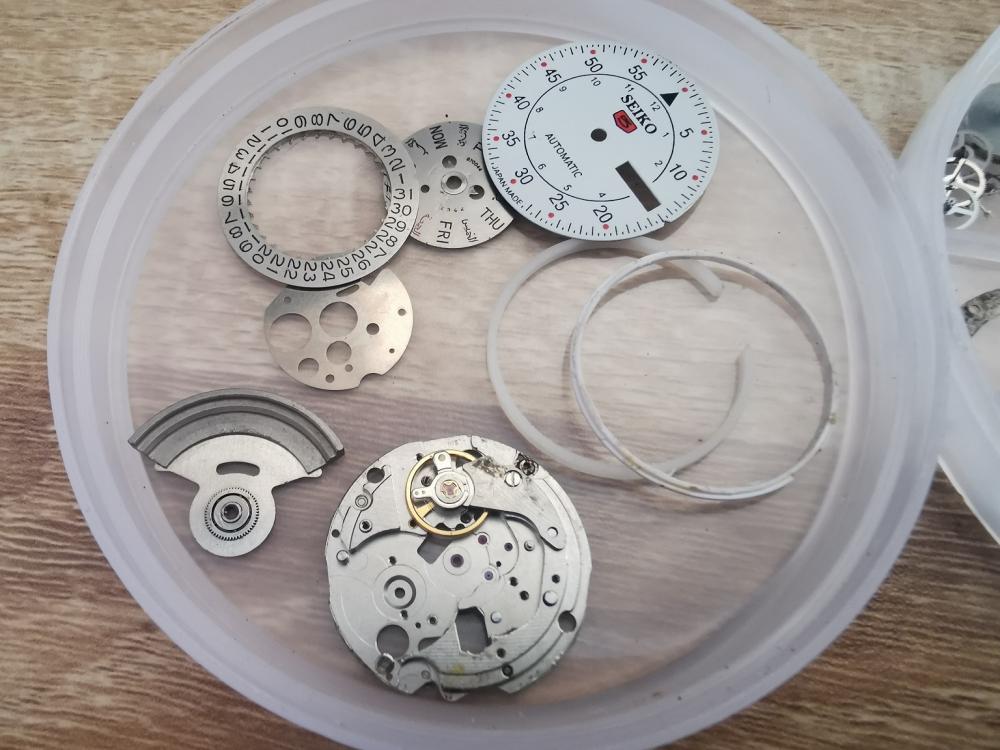
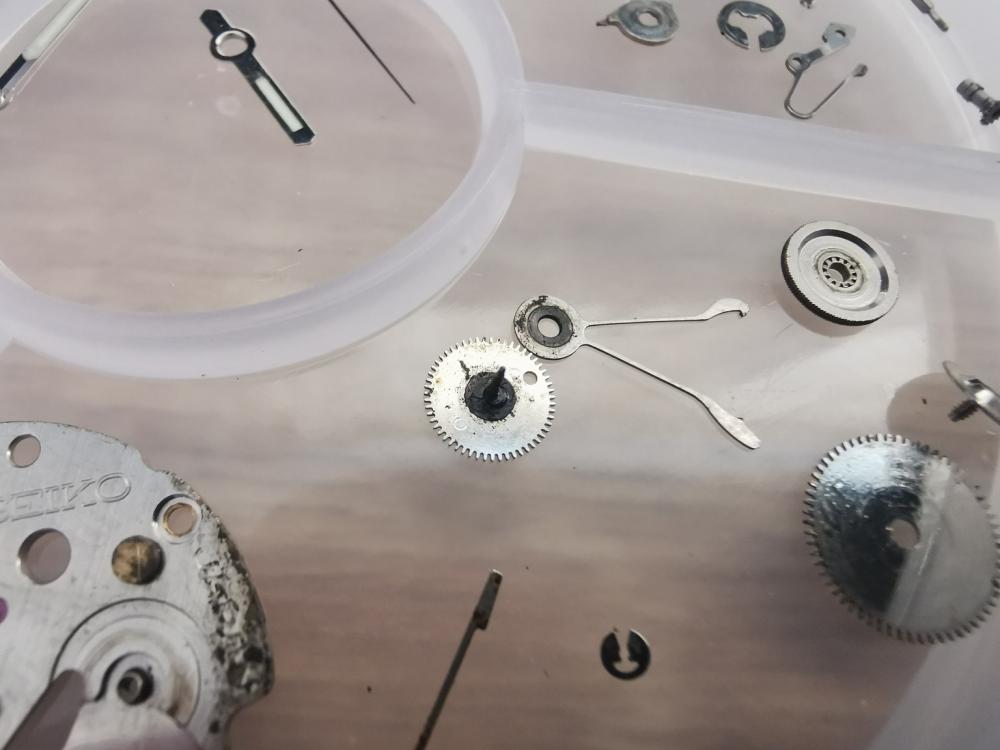
I'm a complete beginner, but dead keen to get stuck in. I'm still waiting on some tools, holders, dial cushions etc to turn up, but I've decided I can still get to work disassembing my first movement. This is a 17 jewel Seiko 7009a. I bought this as a cheap practise movement (to be honest, nowhere near cheap enough), so I'm not super invested in this timepiece or keeping it authentic etc. At worst I see this as being used for parts in the future, but if I can disassemble, clean it up, reassemble and get it to tick I'll feel like that's achievement enough. Straight off the bat, it looks like a clean enough watch, but if you know even a small amount about these movements you'll have already picked up on a few things. No Seiko will have "Japan Made" on the dial, it's obvious the dial is not sitting correctly in the case, the crown extends too far out (and is entirely the wrong type), there's no surround on the date window, there's no loom, no indices, the logo and badge are printed.. An obvious dial repaint, but that's fine, I don't want to risk ruining a nice watch on my first time out. When you pull the crown out to set the time, the movement shakes around inside the case like a pinball, so obviously there's something up with the movement ring. Also, I cannot got the strap off for the life of me. Timegrapher results are as expected, absolute chaos. Seriously low amplitude, terrible rate and beat error. Removing the movement was pretty standard, pull crown, push pin, remove stem, movement falls out. Removed the hands, and then here's where it gets fun! First thing I notice is that this thing is full of corrosion, especially on the side opposite the crown. One of the dial feet screws is especially rusted, but it turns out it doesn't matter! Stay tuned to find out why. No gloves because this thing is going to get a thorough clean and I don't believe it's possible to make it worse than it is right now. Turned the dial feet screws but the dial just did not want to let go. Figured it was just being a bit stubborn, so started prying it with a screwdriver. Oh, it was being stubborn alright. Both the dial and the movement ring had been glued to the movement. Here's the front and back of the dial in all it's glory, complete with glue and no dial feet. Removed the oscillating weight and then started removing everything onthe dial side. The day corrector spring is absolutely covered in rust, as well as the plate underneath. A little while later and I've got a couple of trays full of parts waiting for a clean (once I'm set up for it). To be honest, I don't think I'll be able to clean these to any high degree of standard, but I'll try and do my best. When I next get time I'll be inspecting parts and jewels to see what kind of condition we're looking at, and to see if my cheap digital microscope is any good. I've got to get something to use for cleaning jars and baskets this week, then I'll be using dish soap for a degrease, then shellite (naptha) for clean and rinse in sealed jars in an ultrasonic. Pictures on the internet really don't do any justice for how absolutely ridiculously tiny these parts are, especially some of the screws. I've got everything sorted into what I hope is a logical grouping of screws and parts, hopefully not too much of a drama when it comes time to reassemble.


 1 point
 -
They will be fine in the cleaning solution. To make the hammer heads soft brush the leather with a little oil. They won't become soft over night it will take a long time but it will sink in and make the leather soft.1 point
-
Now you know why depth of teeth are so important and also the shape of teeth. It sounds as if you have fixed it.1 point
-
Pretty sure this is relating to the guard finger on the fork of the lever. The roller has a notch that the finger skims through as it switches from one side of the staff to the other. Its a shock protection feature. The pl - plateau i would suggest means the roller has no notch and the fork has no guard finger. Coincidentally i was polishing the finger sides to contact the roller with less friction, i might add just for fun .1 point
-
Hi Andy I have the catalogues but it does not explain the abreviations,. remember these are swiss publications and therefore are in their language. But on the tech sheet there are two balances complete one is for a balance with a jeweled roller and the other with a brass finger. So before ordering you need to check and see which it is. I have attached the tech sheet for the BFG 866 to give you some idea. 2529_BFG 866,866.31.7.pdf Hi Just gone through all my Renata cat's a dgt = avec doigt (finger) and pl = plateau (roller).1 point
-
I have a little coffee mug warmer that gets just hot enough. I leave the bezel sitting upon it for a few minutes (since the warmer doesn't get very hot very quickly). Then I use a little suction cup to pick up the crystal and place it in. Sometimes it needs coaxing to pop into place but usually, if I've measured right, it settles in. And when the bezel cools the crystal is snug.1 point
-
Hi, My name is José and I'm a 28 year old enthusiast of vintage watches. It all begun when i watched a video from youtube channel Wristwatch Revival I always enjoyed puzzles and what's a better puzzle than a watch? I already disassembled an old ALPS watch, but the hairspring was gone and i have no idea where to buy another one Looking forward to learn a lot in this forum, Best regards1 point
-
@Endeavor it's great when it just works1 point
-
There's no fix for this that won't involve a lathe at least, and some skilled work on that machine. Any type of glue will definitely not hold up, and even very careful soldering would never come close to the strength of the original material. If I needed to do this, I would bore the bridge out in a faceplate in the lathe, to the diameter of the broken off tube, then (from underside) make a small additional recess a little bit larger, perhaps just 0.10mm deep. This would accept a tube of the original diameter, which has a corresponding lip on it to fit the recess, that gets pressed in. Would need a left hand tap to thread the tube*. The press fit should hold up to the stress of tightening the screw, and the lip would prevent pullout under load from winding (the winding pinion pushes up on the crown wheel while turning it). *For those without a full selection of left hand taps, which is pretty much everyone, on a piece like this in brass you can take a similar left hand screw from an assortment and file 3 flats at 120 degrees and make a tap that will work fine for a use like this.1 point
-
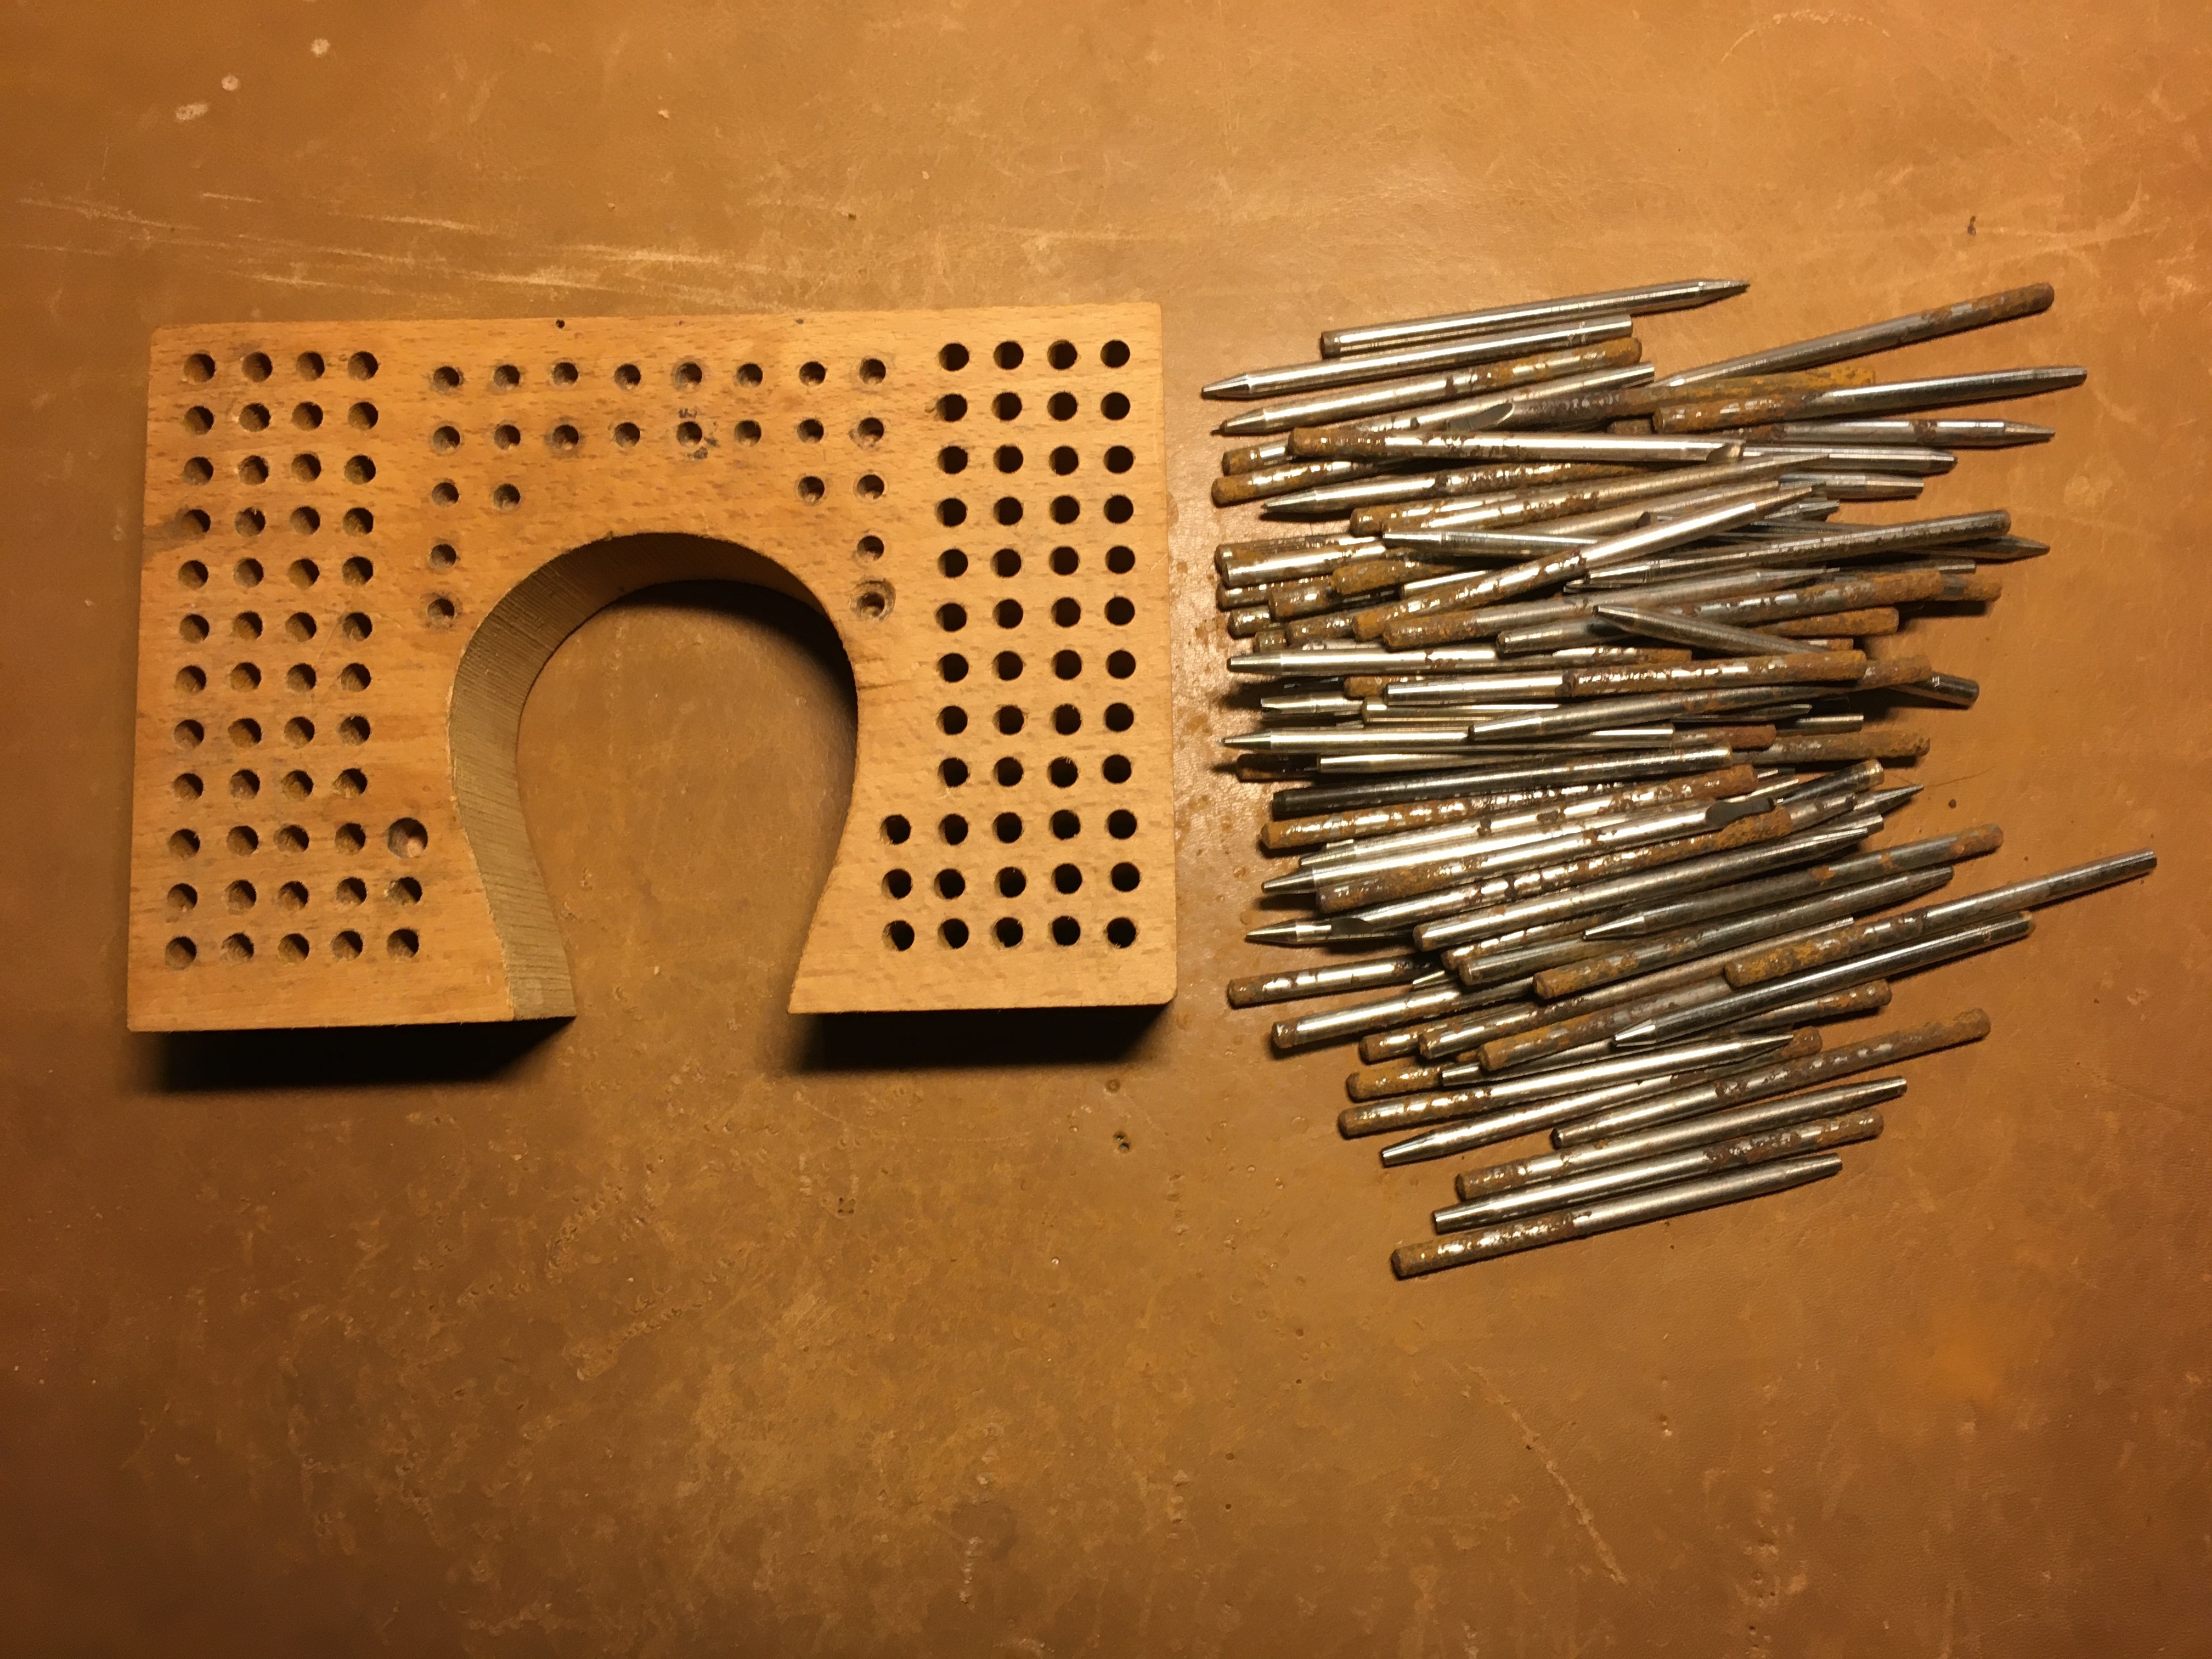
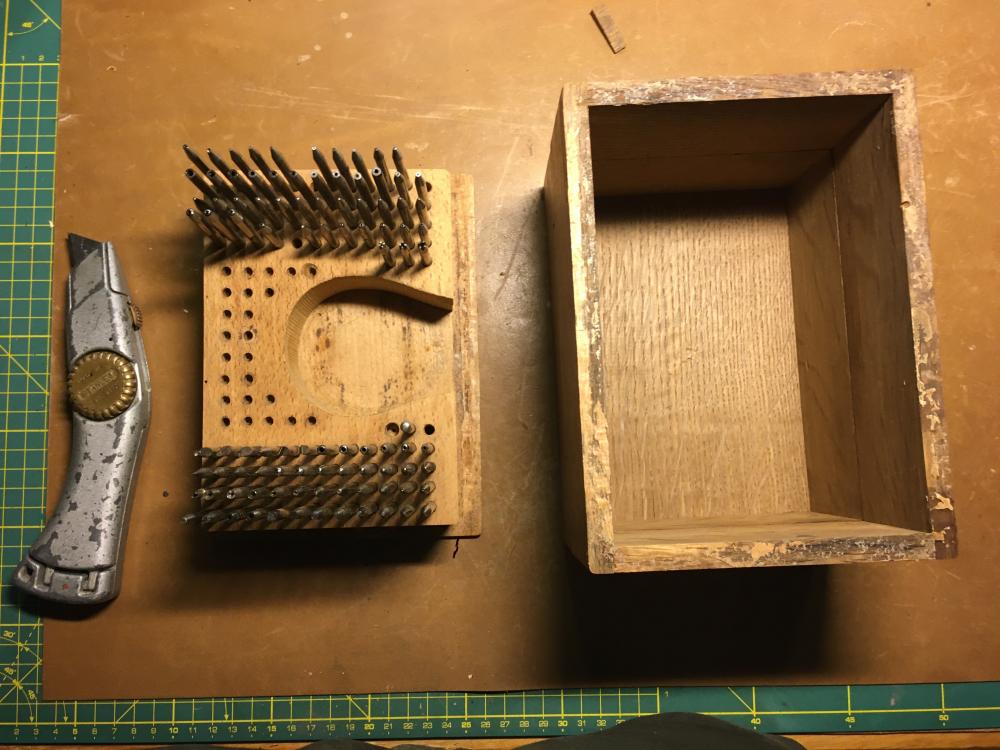
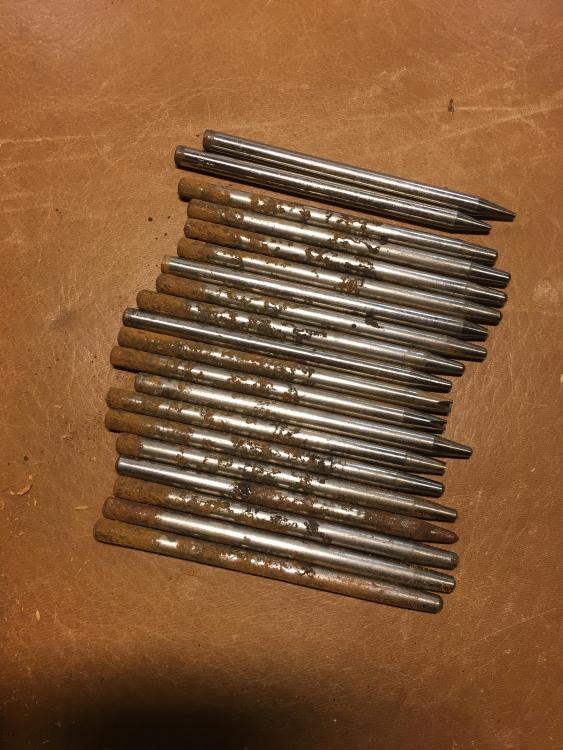
According to the seller; "With some easy to polish off surface rust" Anyhow, they are all out and with no real damage to the box or the punch-holder. Will put the punches tonight in the vinegar and tomorrow it's another day @tomh207 After the refund I paid €100 for the set. Once done, I'll make a special "you are my friend"-price Thanks all for your help / support and I'll be back with the end result
 1 point
 -
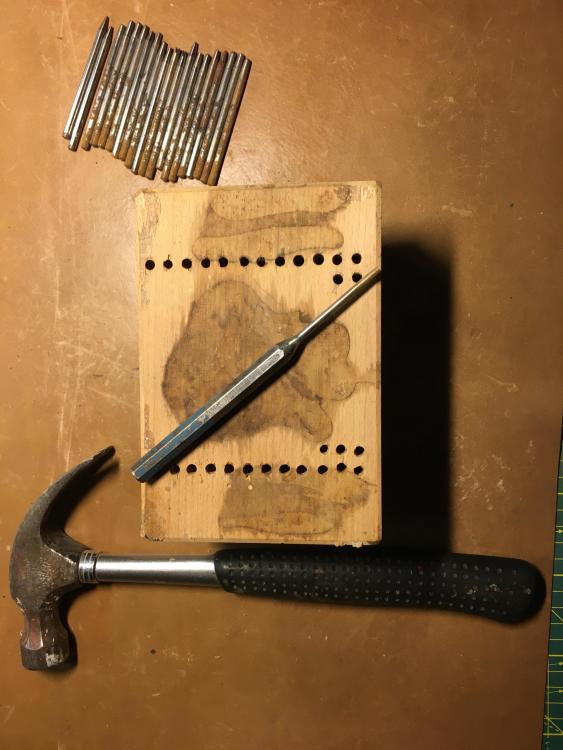
Hi they were well rusted in, once cleaned up and waxed run a drill through the block to remove any rust adhering to the wood. Asv suggested either vinegar or Coke will soften the rust prior to wire wool and wax. If you have a lathe or a drill put each punch in it and spin using the wire wool to clean. Once its tidied up and the box fixed it will make a good set. there is nothing missing. good luck.1 point
-
was this a bimetallic balance wheel? The reason I ask is that they're not all made the same some of them are very very soft and I think they almost distort themselves if you look at it wrong and others are really really resilient to doing things.1 point
-
Well done for that, do some time with them in vinegar with an ultrasonic and rinse them off with IPA followed up with a coat of renaissance wax. Tom1 point
-
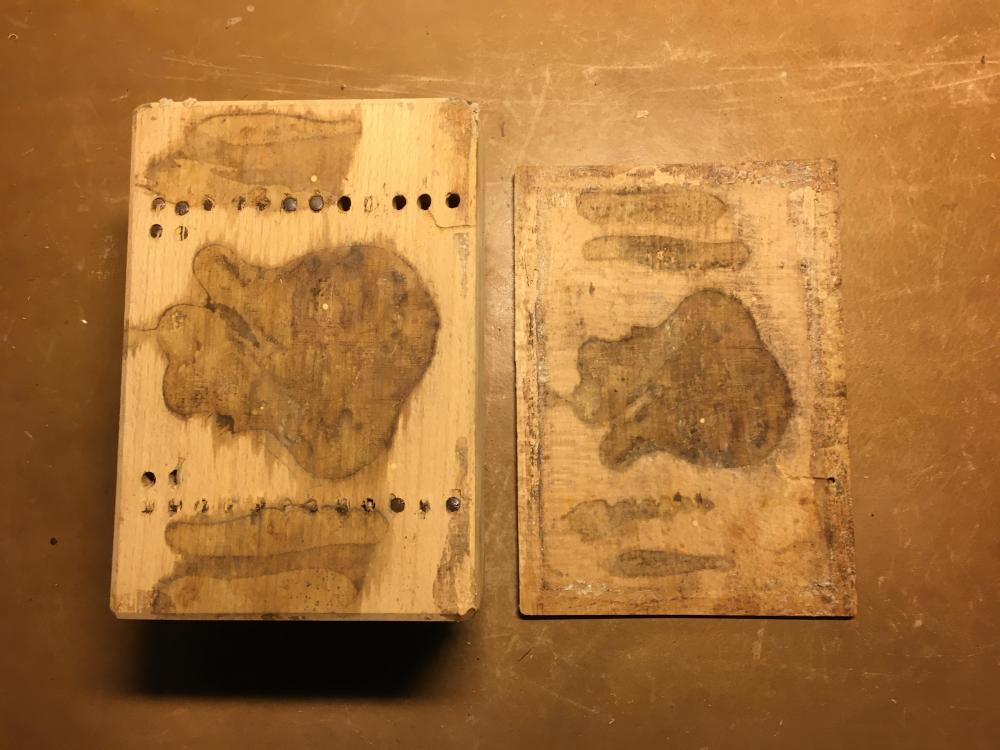
I had a look at that. It seems that the wooden block containing the punches is glued onto the bottom of the box. The bottom of the box seems to be the same type of wood as in which the punches are situated, but they are for sure two separated pieces of wood. The sides are made of a different type of wood. So, my suspicion is that the, let's call it the "punch-block" is glued onto the bottom plate and the sides of the box are glued onto the bottom. It also seems that the holes, in which the punches are situated, are fully drilled through the "punch-block" and that the bottom of the box acts as an "end". I was also thinking of trying the free the bottom plate of the box-sides, destroy the bottom plate which would than give me access to the "punch-block" and knock the punches out from underneath. A rectangular bottom plate can be easily constructed again. That's an option, perhaps a bit further down the line ?? ***UPDATE*** I decided to pursue the idea of trying to separated the bottom with the sides of the box and had some suc6 ! Now trying to separate the box-bottom from the punch-block ....... perhaps the sun comes up tomorrow after all? *** 2nd UPDATE *** Oh Lordy, no wonder that they were as stuck as stuck can be. They are slowly coming out one-by-one and quite some work ahead to save this set ...; Not such a good idea to store tools in an unheated garage or on the attic
 1 point
 -
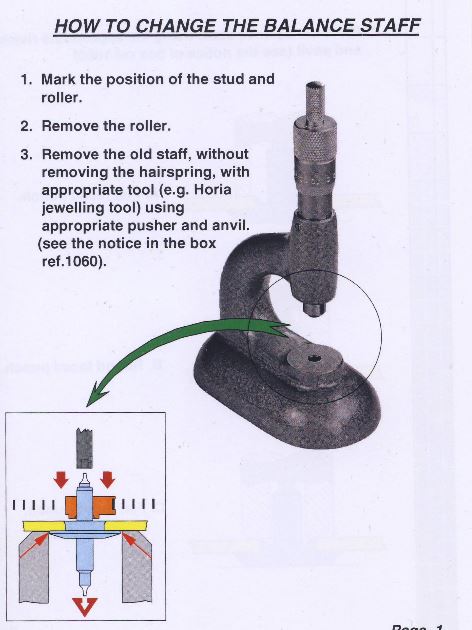
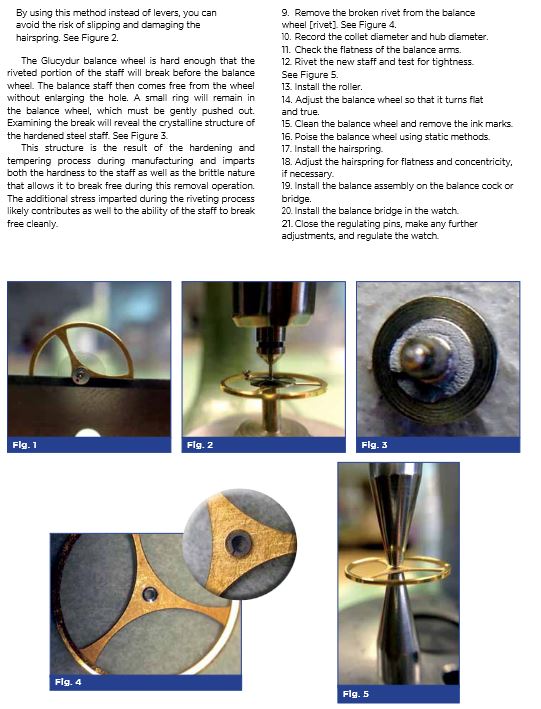
one of the problems with this discussion is there are too many variables that will affect the outcome. Then we have all kinds of examples of things for instance Elgin, Hamilton and Rolex made balance staffs that are supposed to be driven out without a problem. before I continue one of the nice things about where I live is the remnant of a AWCI chapter. We once were AWCI but we split so over the years I've had really interesting lectures and knowledge gained. including from memory three separate lectures on replacing balance staffs of interest in this particular discussion. One of the lectures given by somebody who is Rolex trained. He brought the Rolex tools the jeweling tool and demonstrated and explained why Rolex pushes the staff out. I have some pictures down below that show this. So is explained that the roller table was removed with whatever method you like. note was extremely long time ago so I don't remember sort of how he removed the roller table. One method was to grab it with a lathe collet and just rotate the thing off but he might have used razor blades I just don't remember. then we all gathered around for the procedure. The interesting aspect was he asked everybody be super quiet because when the river broke it made a very distinctive sound. Then he picked up the rivet and put it on his hand and brought it around and show dusters is beautiful shiny ring of the rivet. Then I'm assuming he restaffed the watch I don't remember that aspect I was just finding how to remove the staff interesting and of course you need all the special tools that come in the fancy Rolex box that none of us is ever going to have. not a lecture given by the same person and somebody else was on modern vintage staff replacement. Both of them discussed knocking the staff out were driving it out by a minor clarification here. When you go to knock the staff out if there's any sort of resistance in other words it doesn't just instantly pop out were instantly want to come out then you will have to do some cutting. When I was in school the instructor George showed us how to use the k&d tool and his procedure was to weaken the rivet just a little bit and claim to never have a problem. Then the most recent lecture was based on another discussion somewhere in the universe that resembles this one the sins of driving the staff out basically. Don't remember the watch for his example was a wristwatch it to the wristwatch a whole bunch of balance staffs that he had for that particular watch and what he did for his lecture he and do it they are you get a PowerPoint buddy put the staff in the history of the staff out you put it in drove the staff out and I don't remember how many times he didfive or 10 just don't remember all the see if there was any damage at all the conclusion was there was none. then thinking of pushing the staff out I remembered once seen the article in a magazine. the magazine is a horological times published by AWCI rather than quoting I discuss snip out a tiny section for you. Oh and on the next page he has a reference to not thinking this is a good idea for a nickel balance wheel which I assume is the white colored metal ones. Kinda like in the video above for the person says this is what Rolex taught us except here somebody thinks nickel would be bad. In other words if you going to do this you need a hard balance wheel and is staffed it's hopefully going to break. oh and then in the lecture of worry restaffed the watch a whole bunch of times yes there were some people unhappy with that. There is also discussed if the balance wheel is not made out of steel another method would be to just dissolve the staff out. Another was dissolve at the same way out as you would a broken screw in a plate is just use alum as that would cause no problems at all. Then back to too many variables. All the methods are good and conceivably all the methods are bad. For any of us who been around for a while we've seen bad. people I got carried away cutting the rivet often cut the balance arms and also of course cutting the hub often cutting the balance arms. All the methods that rely on rivets breaking relies on a very hard staff what about a staff that's cut from softer metals? Or maybe things were a little bigger than they should abandon somebody really hammered down hard and mushroomed out the metal and know that is not going to drive out really nice and clean. so I just thought I'd add to the controversy of whatever it is you're doing that's controversy of removing staffs
 1 point
 -
Can you post a pic of the dial side? Your escape wheel has a conical pivot on the lower side, which means it should work with a cap jewel. If the cap jewel is missing, or if the wheel was replaced with one needing one, it would cause exactly the issue you are seeing.1 point
-
@Marc; the watch-crytal has arrived (CousinsUK). Inserting the crystal went actually much easier than I thought. I've a paint-stripper heating gun with 2x postions; 1 & 2. My approach was to heat the "glass-ring" on the lowest position "1" for about 30-40 seconds ........ if that didn't work, I always could give it some more "whack" ("Gie it Laldy" for our Scottish friends ) , either longer on position "1" or go to position "2". One thing I had to take into considerations; the PW has a silver-case and the hinges are "silver-soldered", so I didn't want to heat the "glass-ring" too high. I didn't want the silver-solder to melt. Anyhow, my first attempt with about 40 seconds on the lowest "1" level of my "paint-stripper" turned out to be good enough for the crystal to drop in. I did let the ring and the crystal cool down and all seems fine !! The crystal seems fully fixed with no heat-cracks !! Thanks for your help !!1 point
-
Kinda like that scene in CROCODILE DUNDEE where he goes: "That's not a knife, this is a knife" That's a big one alright! May it serve you well.1 point
-
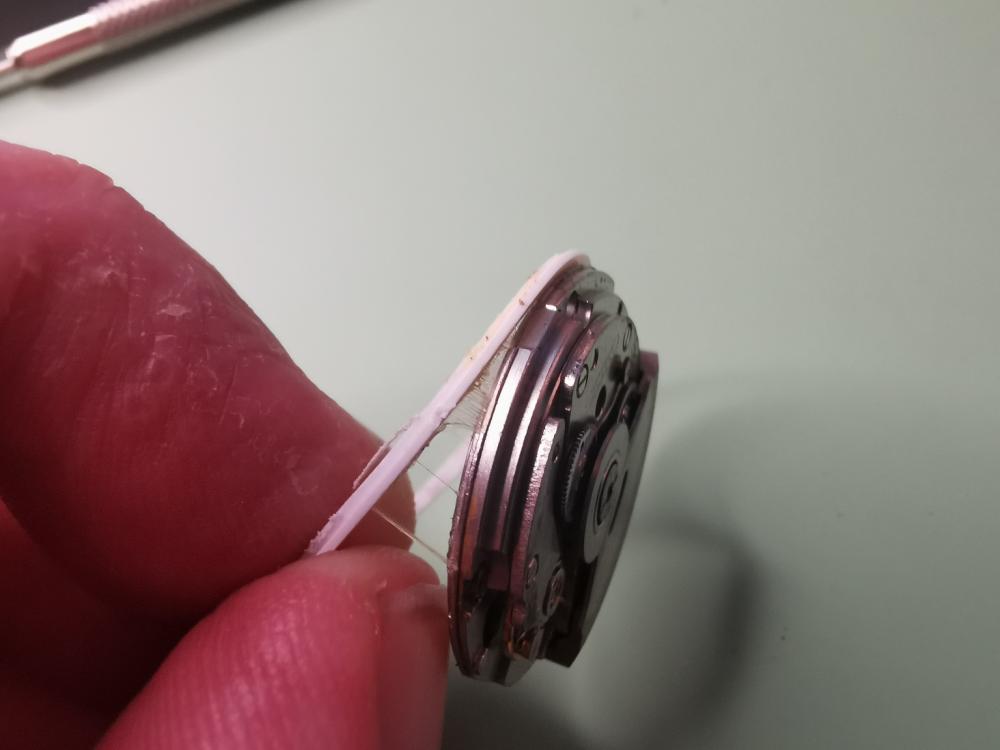
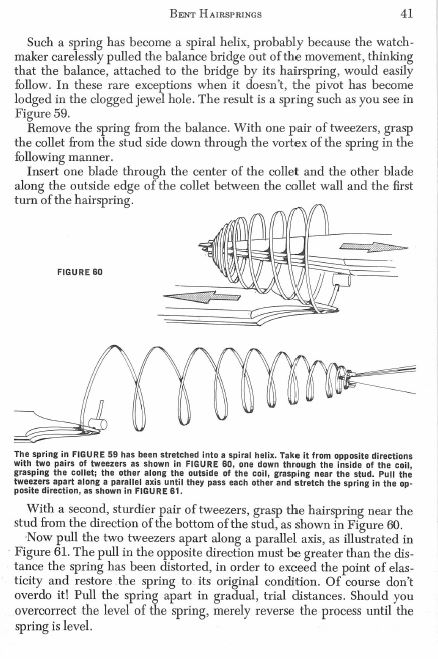
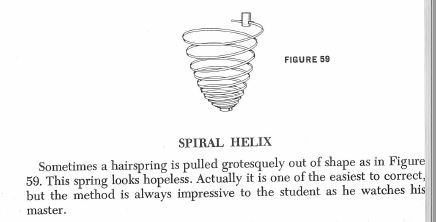
your hairspring does look like it desperately needs help. If you believe the book I have on fixing hairsprings the cone shaped isn't that hard to fix the rest of it would be depends on how much practice you have somebody that's really good could probably fix all of this. oh one of the problems with a book like this is the person who's doing all of this is extremely good as this means if you haven't been practicing on hairsprings and practicing means practicing learning how to fix them not practicing on how to destroy them then your success will vary by quite a bit then no it is not going to work at all. The easy way to find that out is after replace the balance staff put it in the watch and see what happens it should become apparent really fast it is not going to work at all.
 1 point