
Leaderboard


Popular Content
Showing content with the highest reputation on 11/02/22 in Posts
-
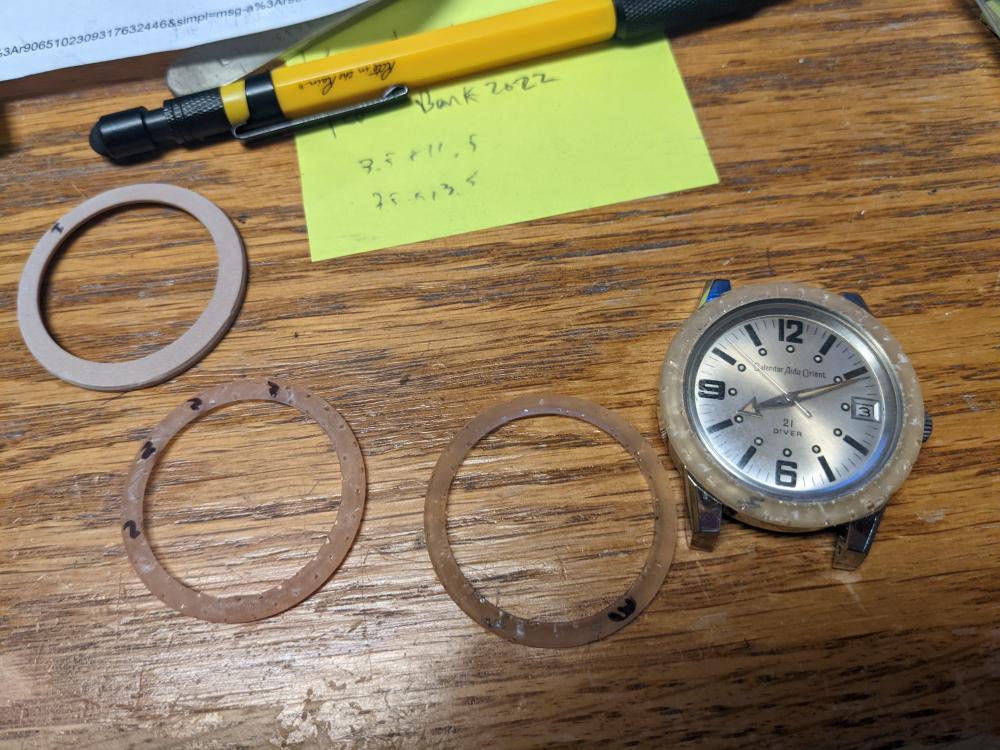
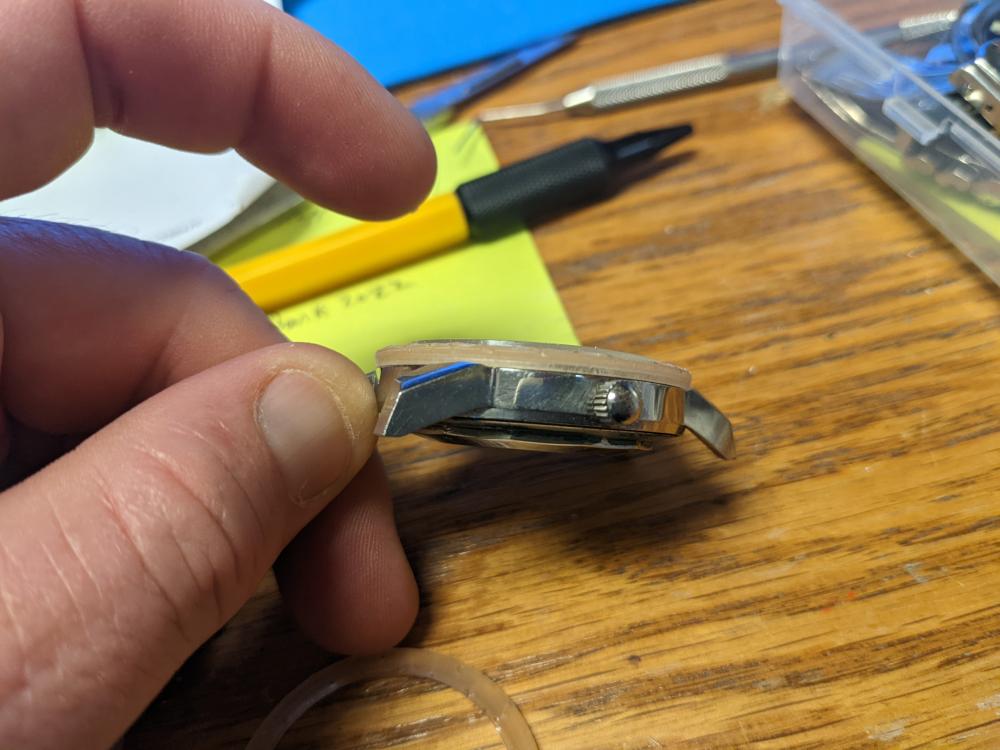
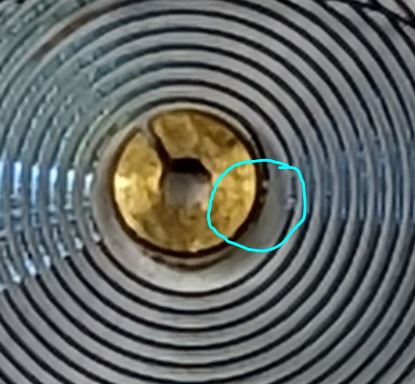
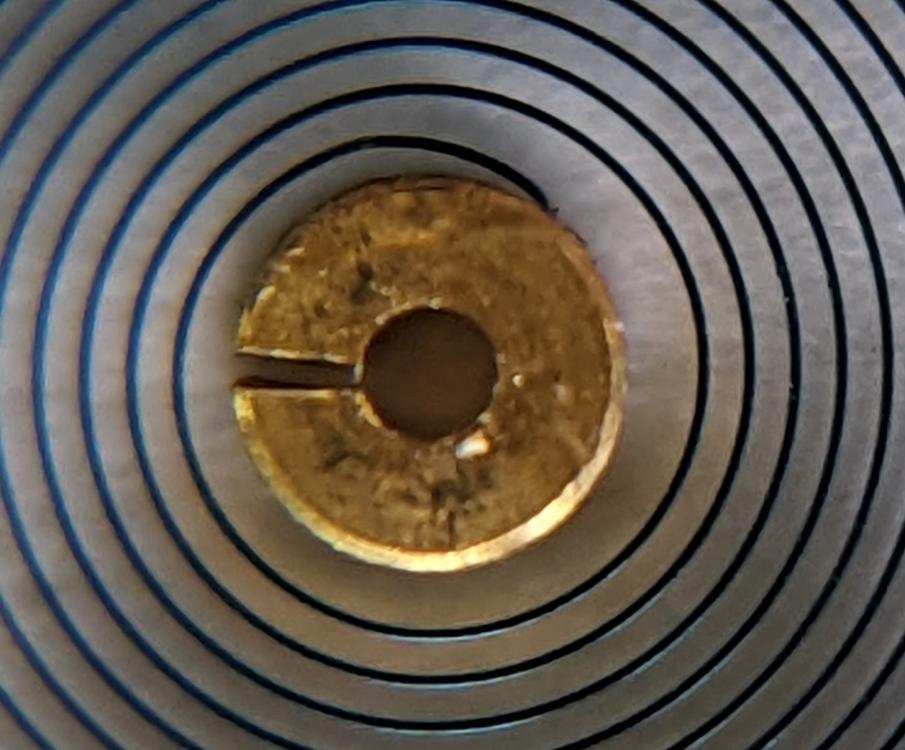
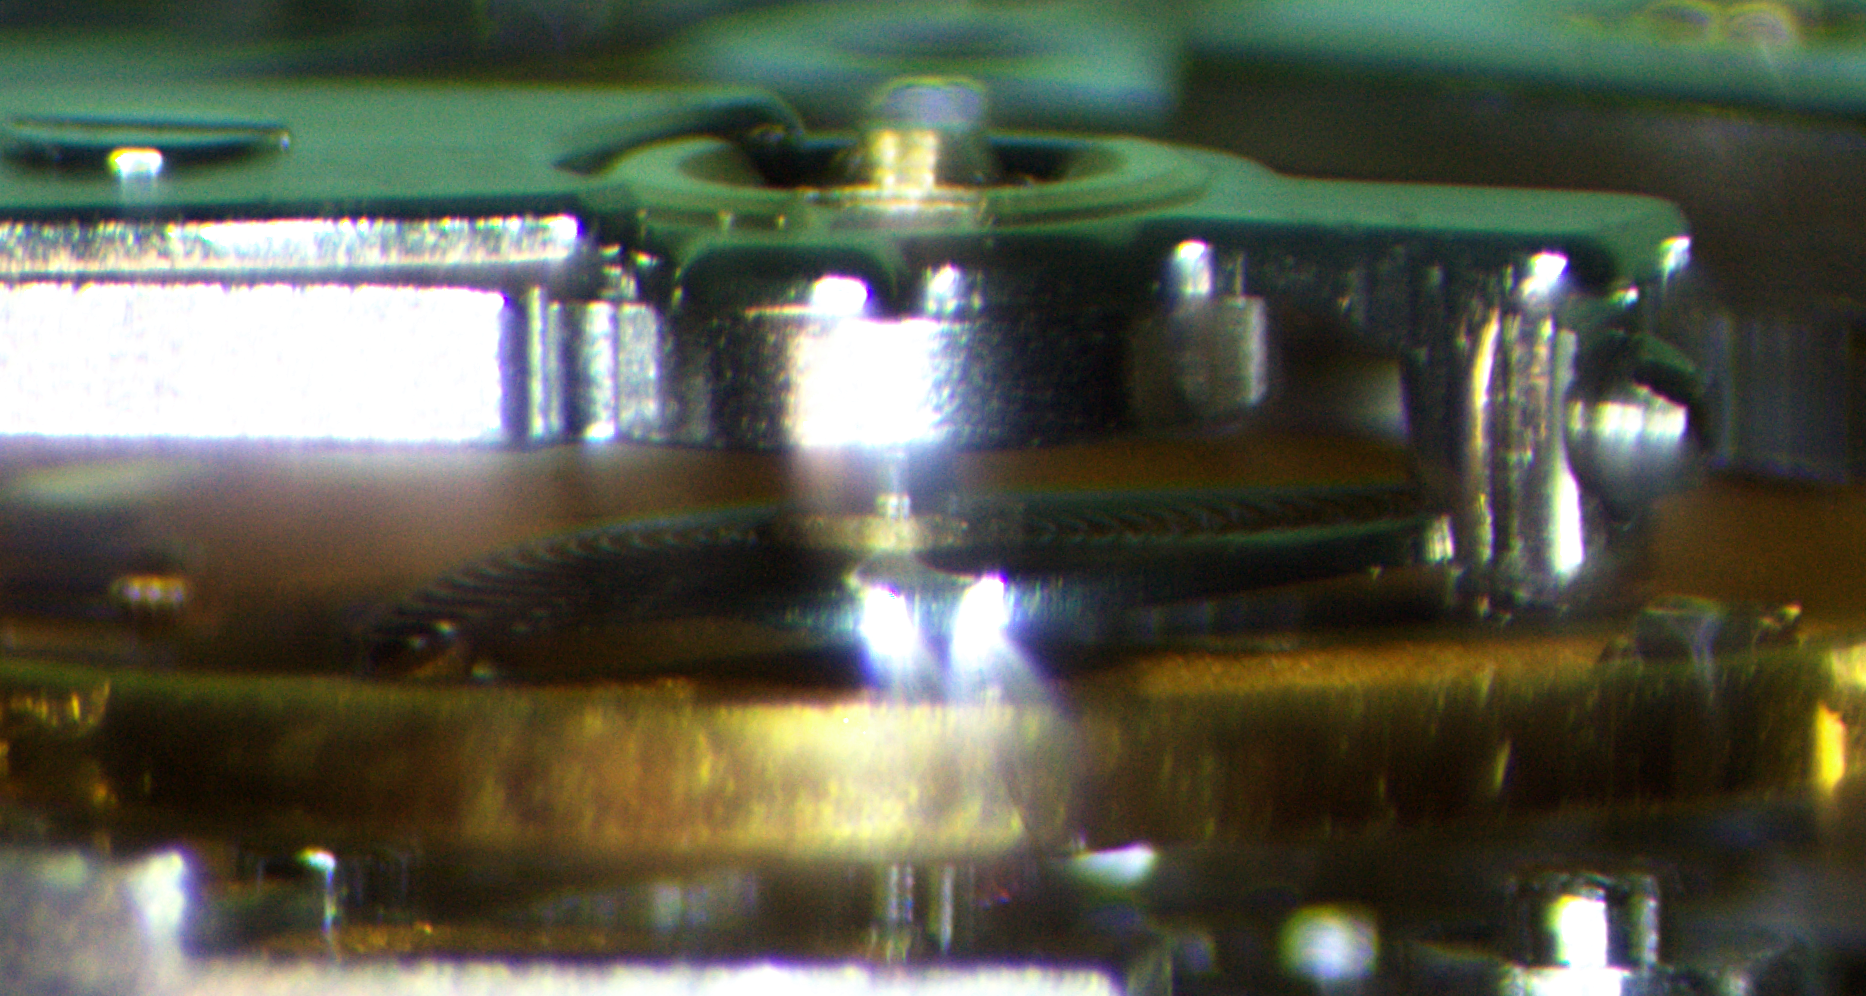
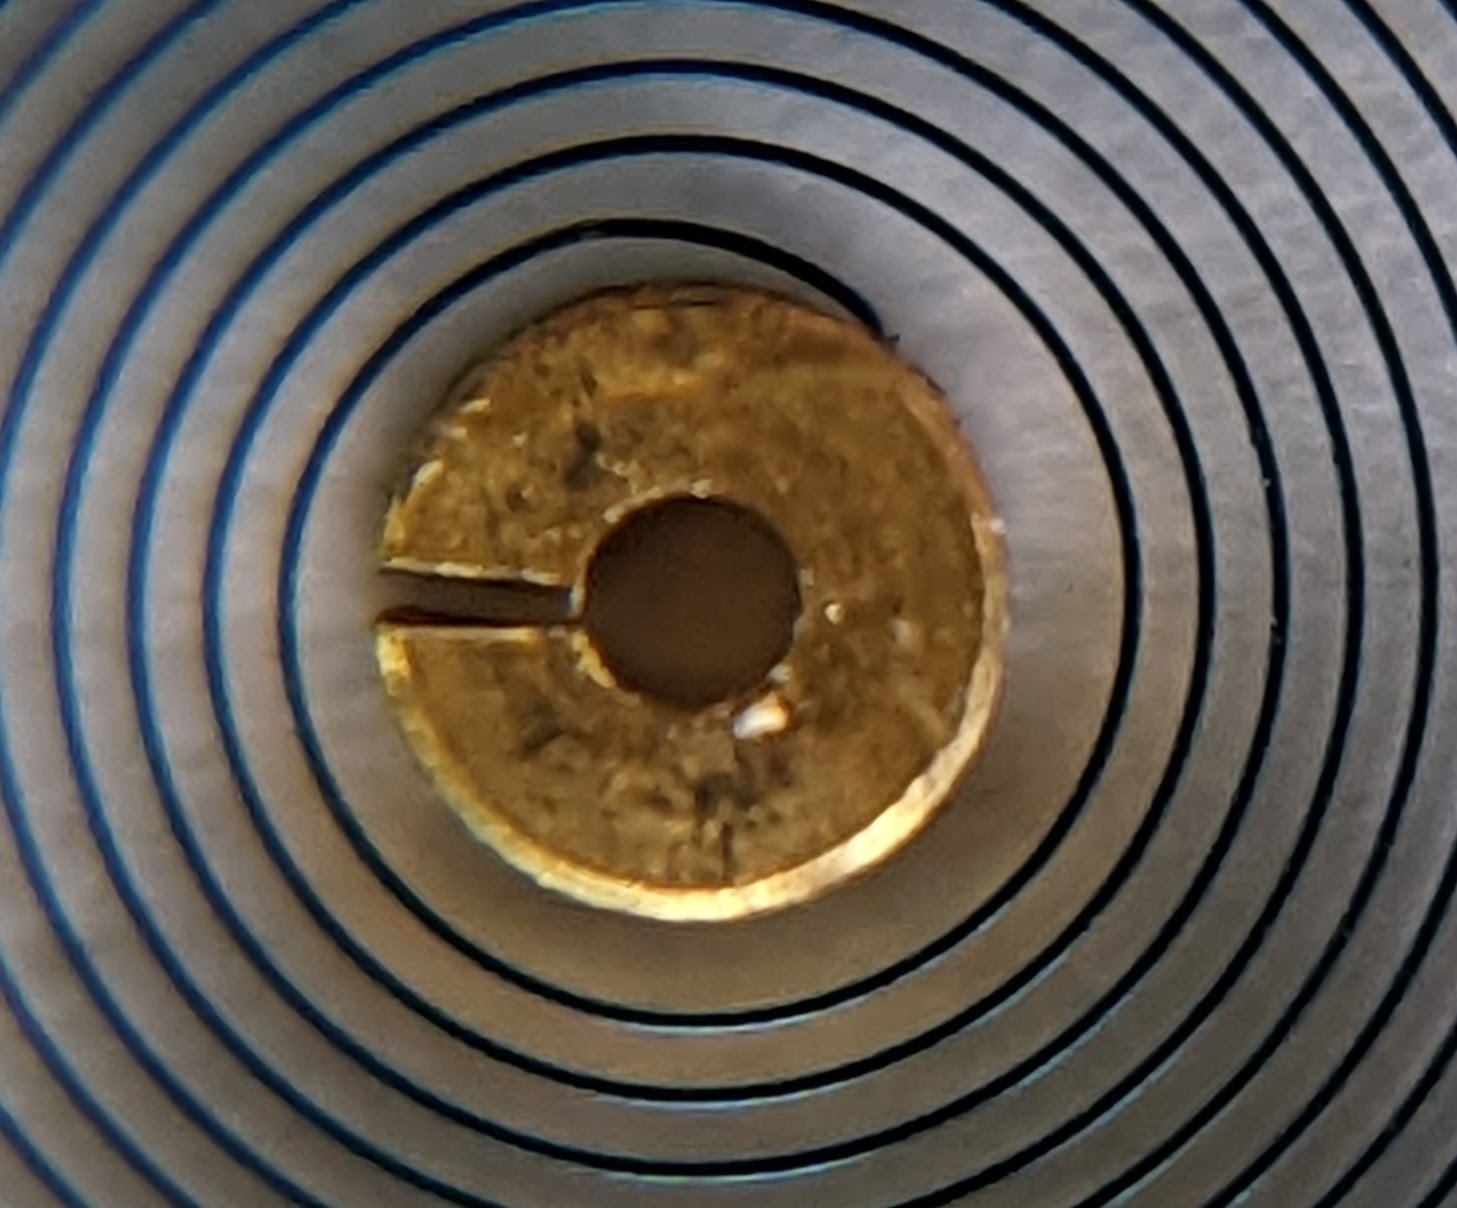
Update: I have manufactured a trial bezel from ceramic. It has a nice friction fit but loses the fit when a spacer ring is used between the watch body and bezel. This needs to be adjusted. I still need to add the coin edge and other markings but I am getting closer and closer. Here are a few pics of this process. The first picture shows the ceramic bezel in it's green state before removing from the workpiece and an 8+hour sintering cycle. Notice how much this ceramic shrinks from green state to final state. Original bezel can be seen sitting inside the green state ceramic one.

 5 points
 -
I have been pinging watch parts left right and centre for as lomg as I remember but today and only today I had the brilliant idea of checking the state of my tweezers and boy o boy were they in a terrible shape, I sharpened them carefully and slowly and now I have been trying to ping a small acrew for over 15 minutes with no succes. I FEEL STUPID, but hey you live and you learn4 points
-
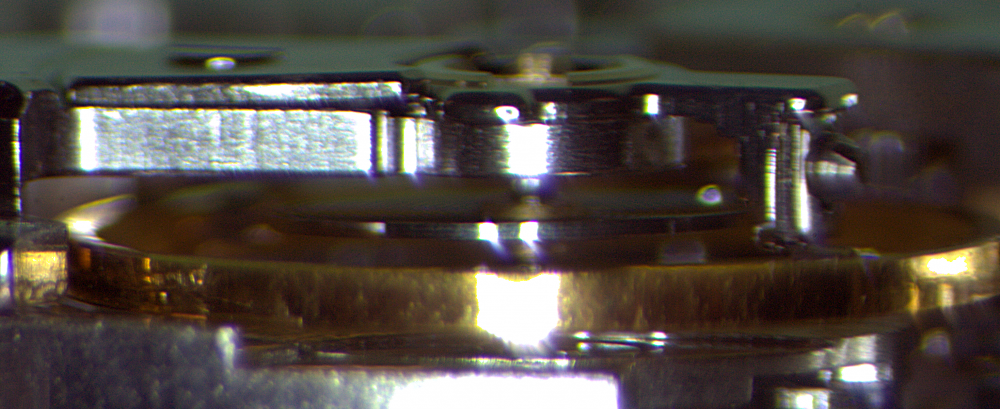
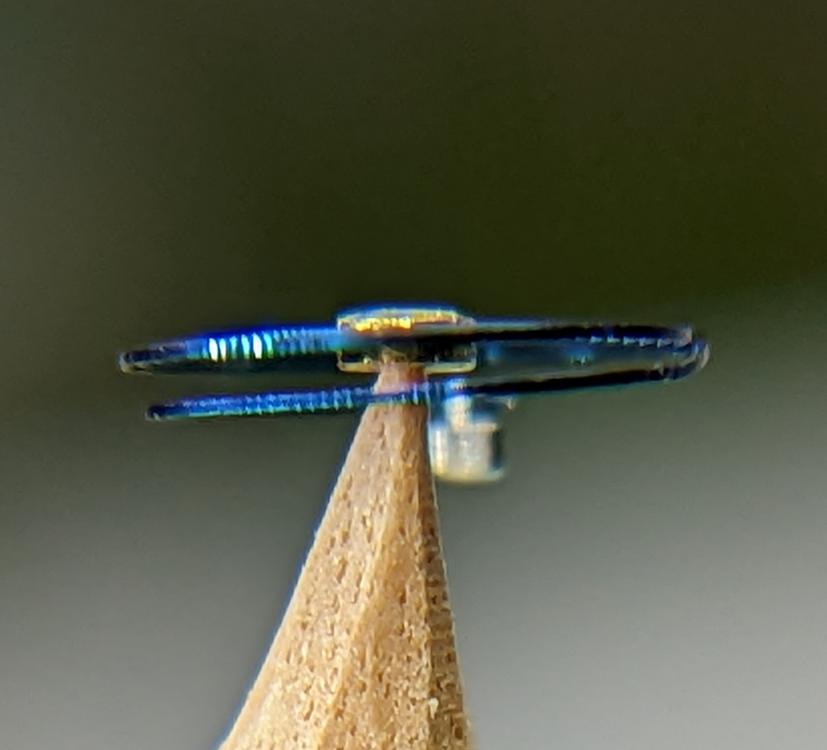
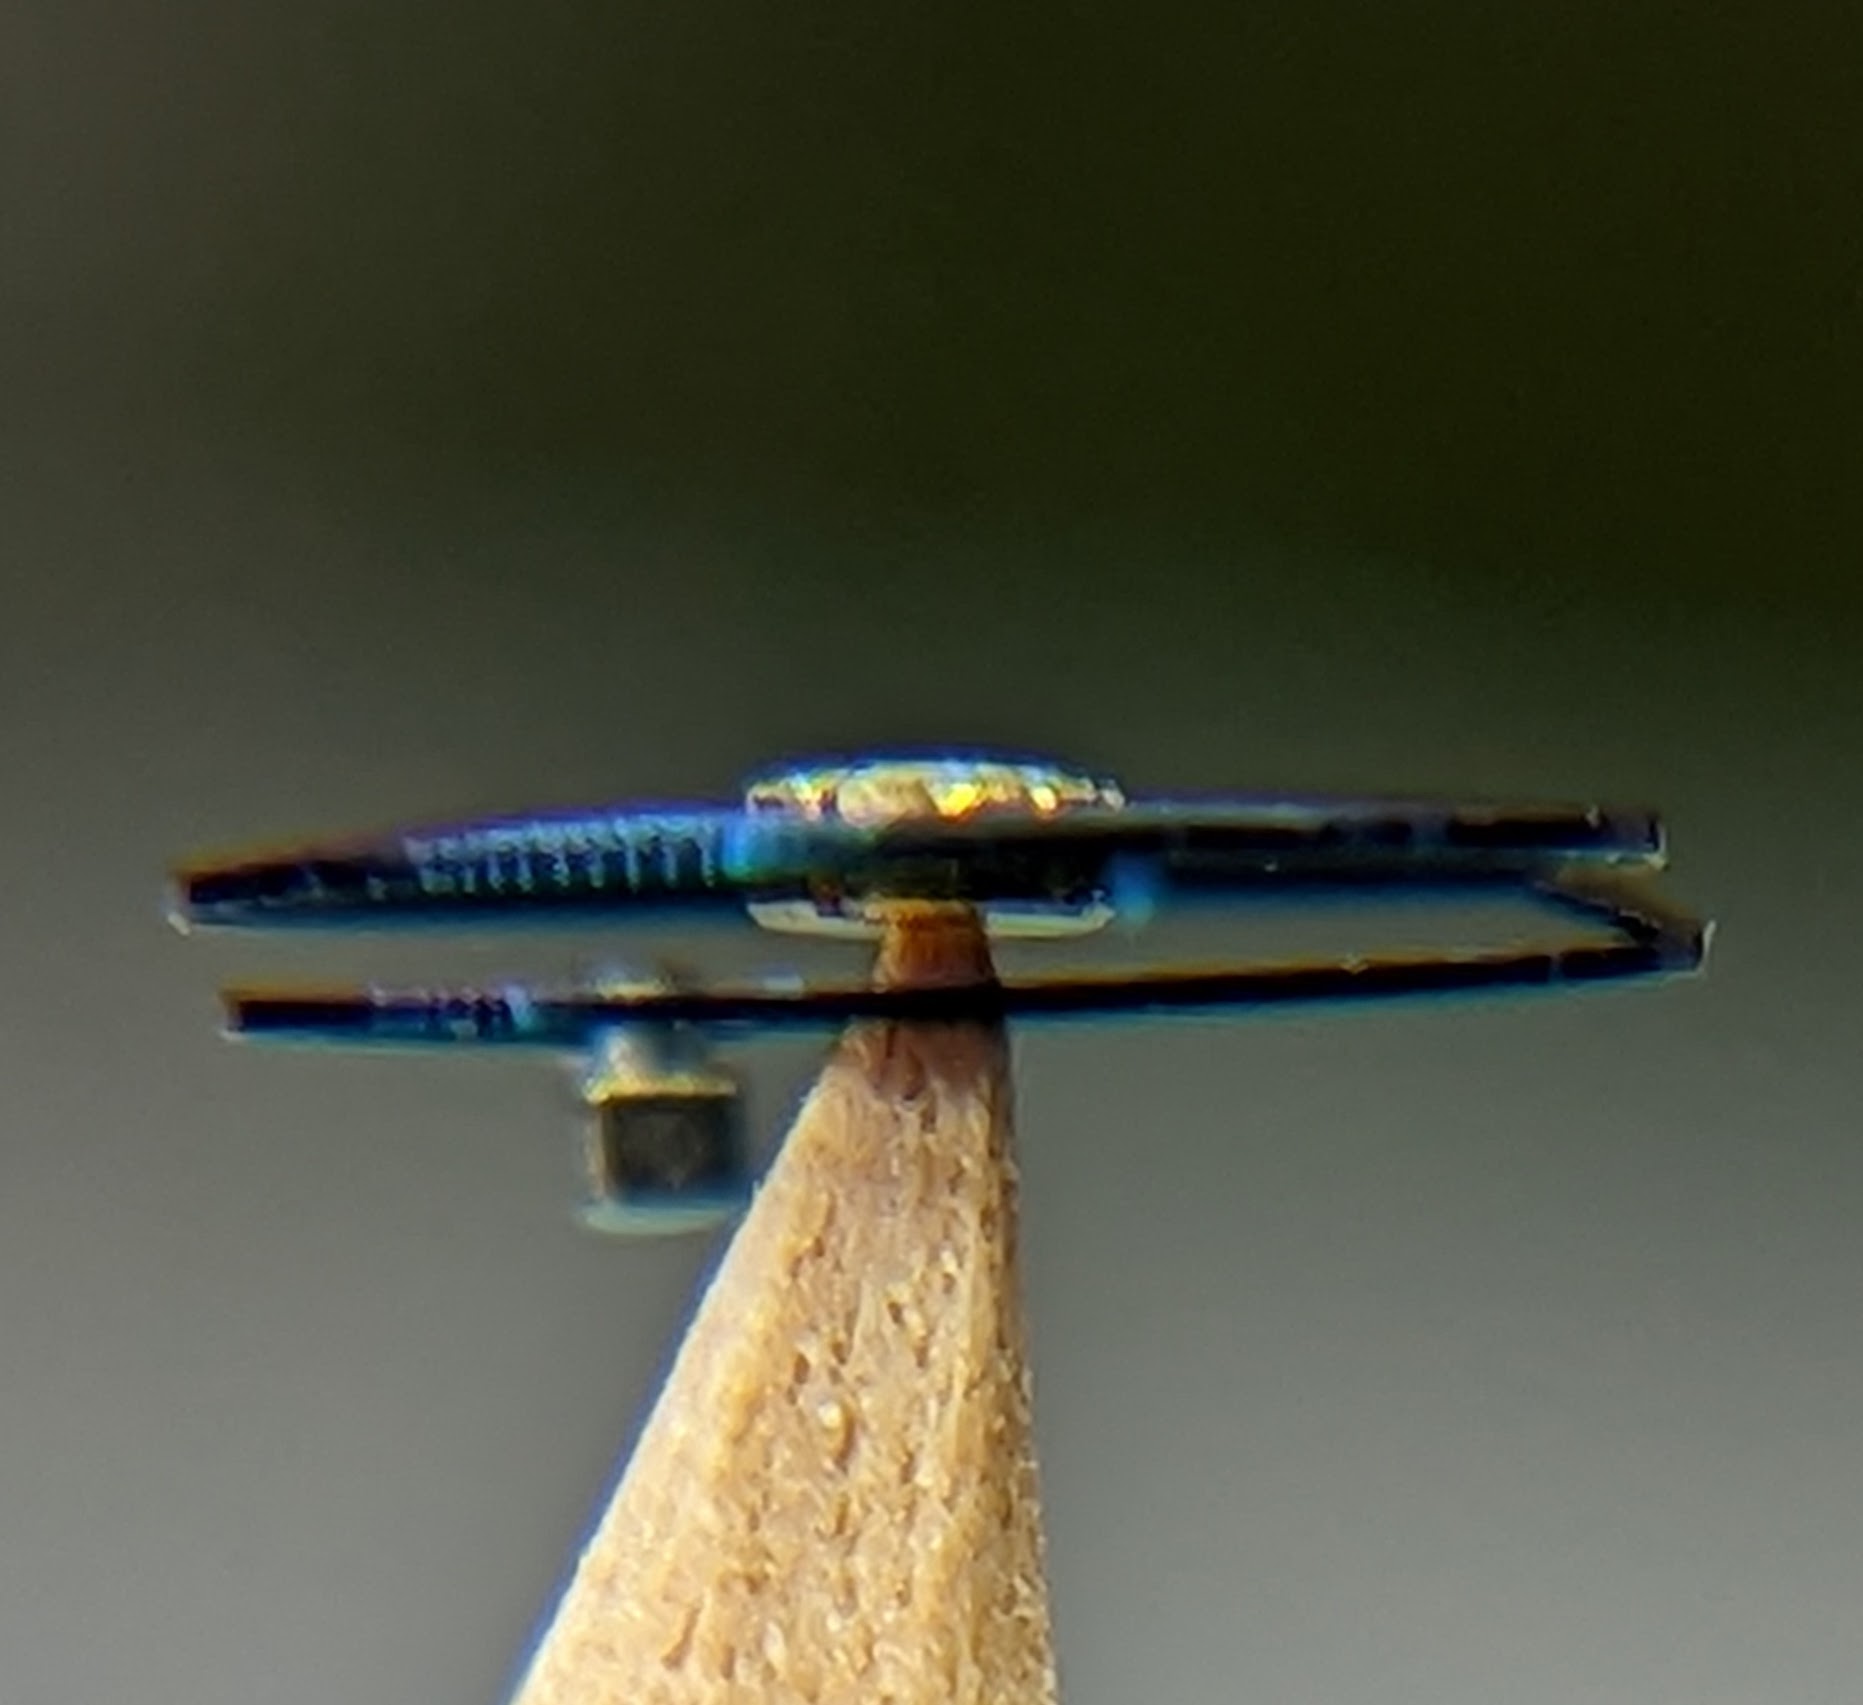
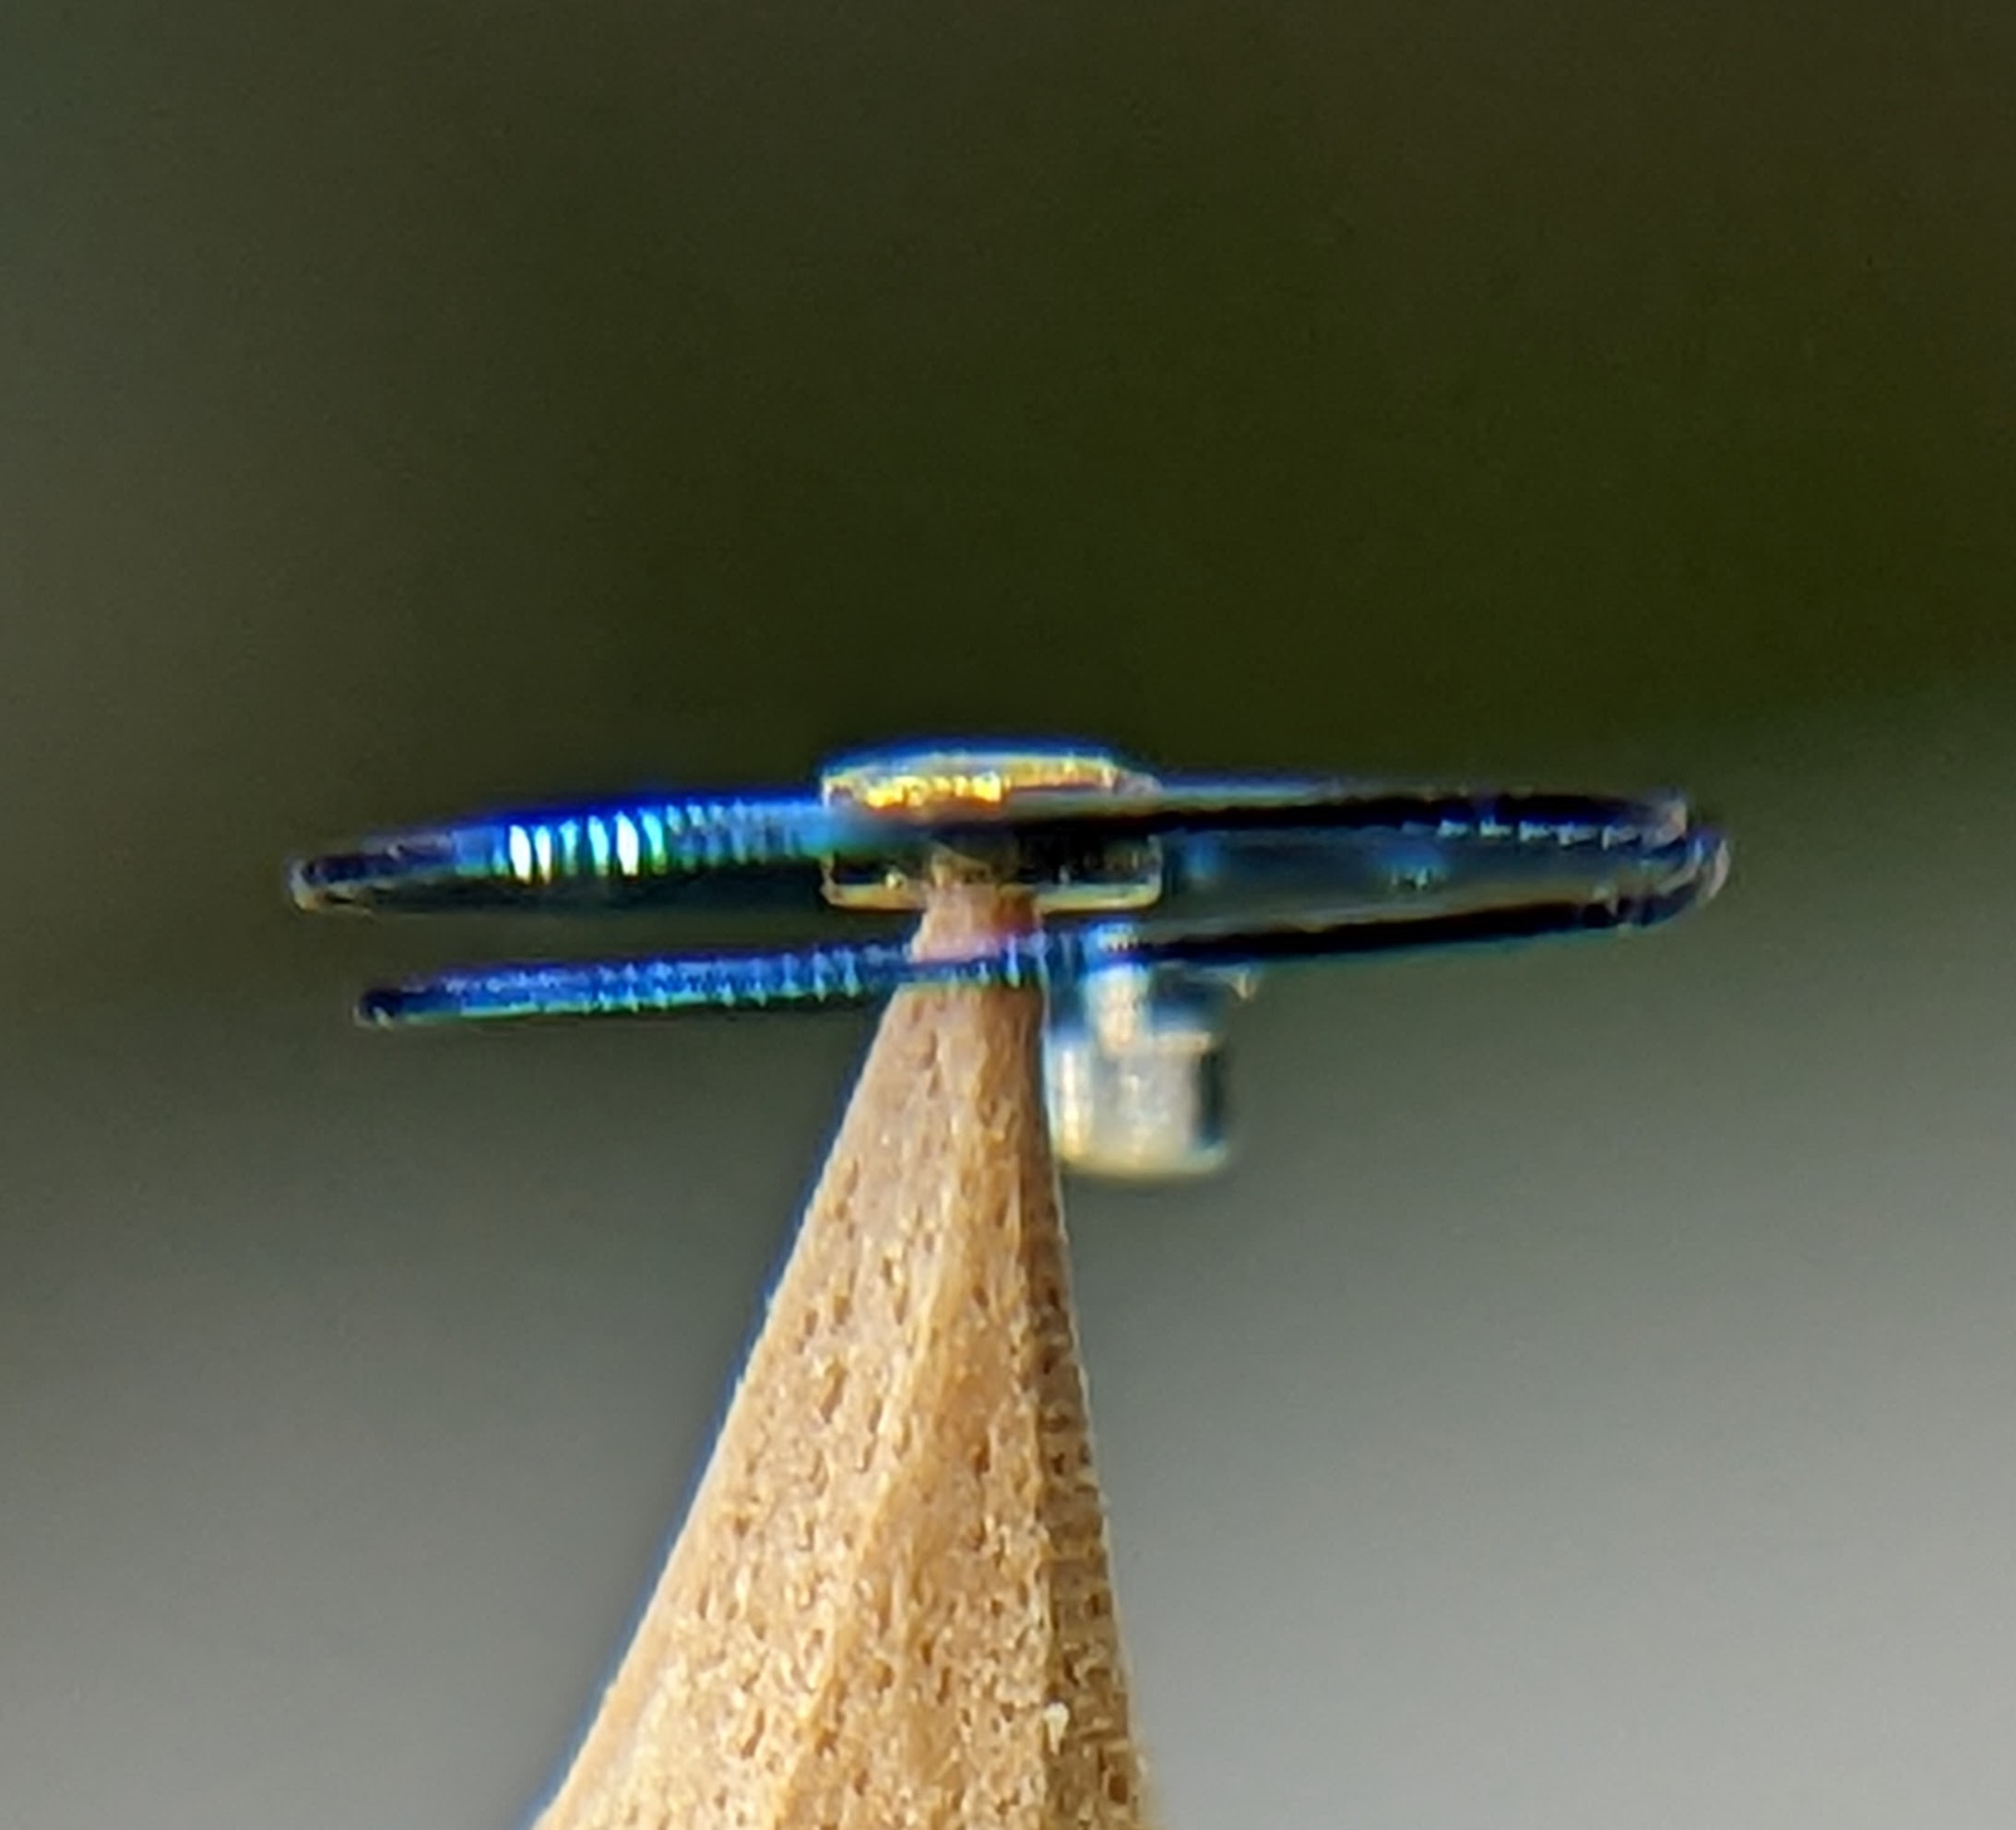
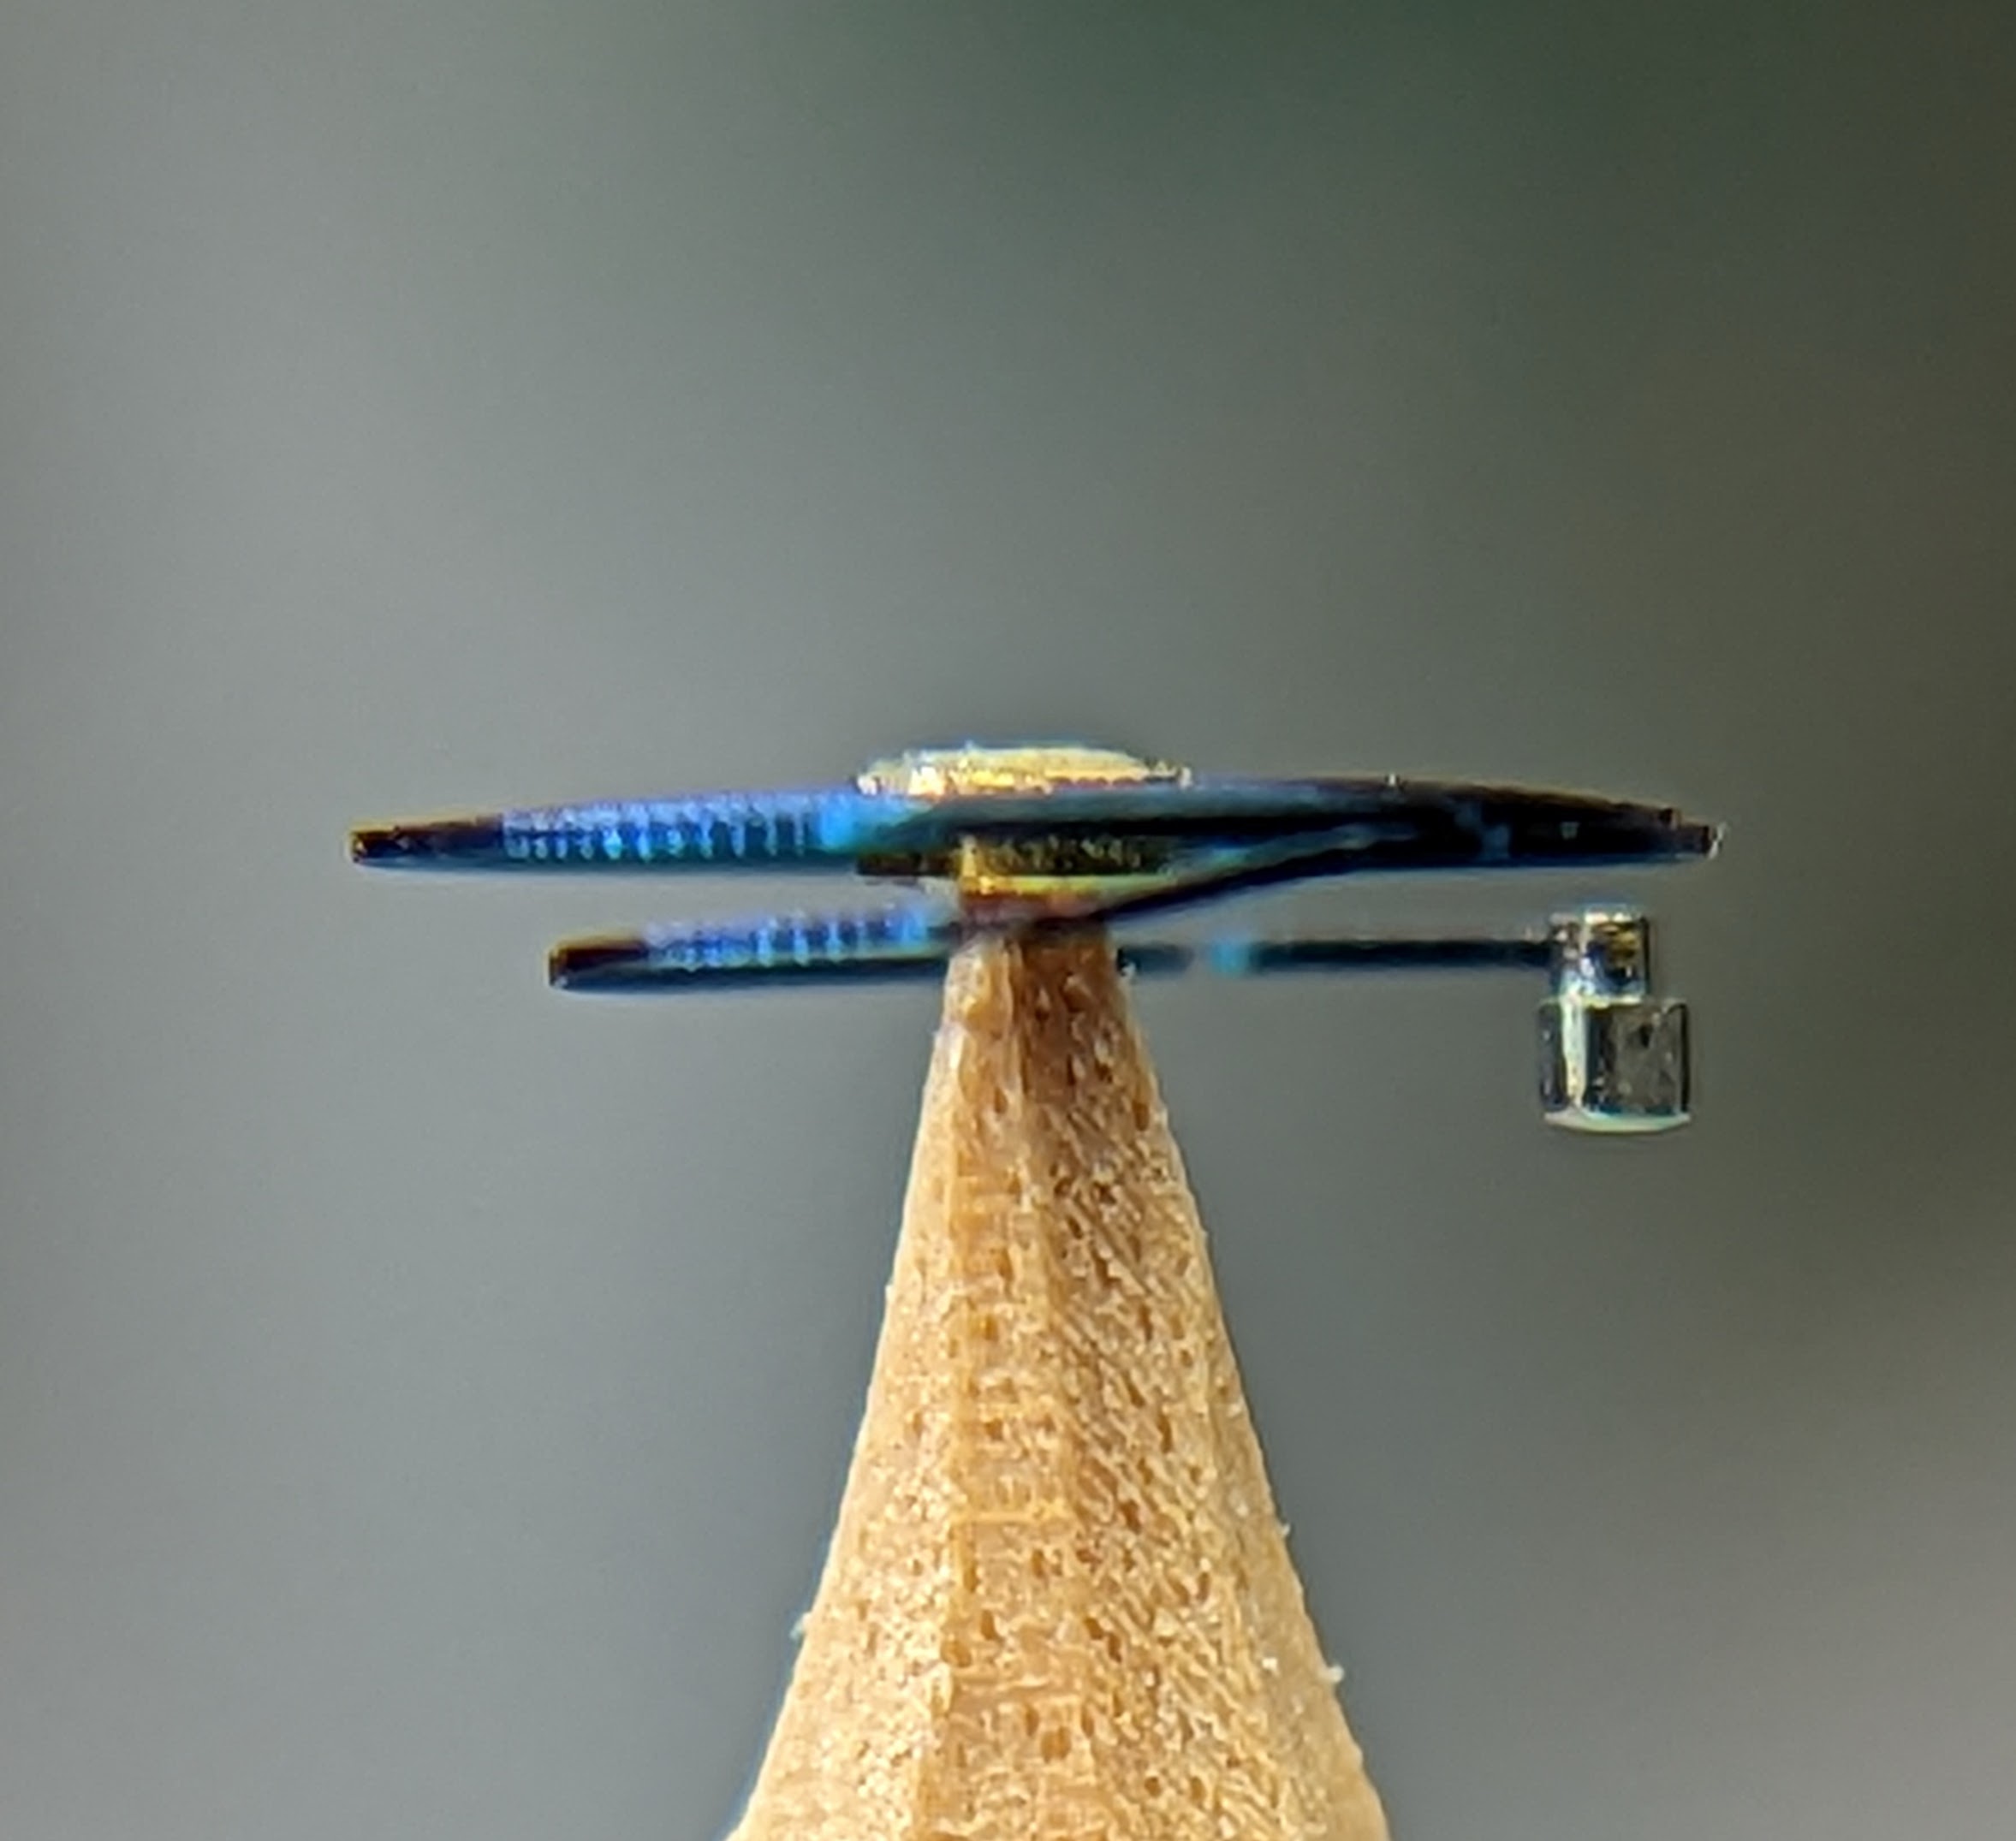
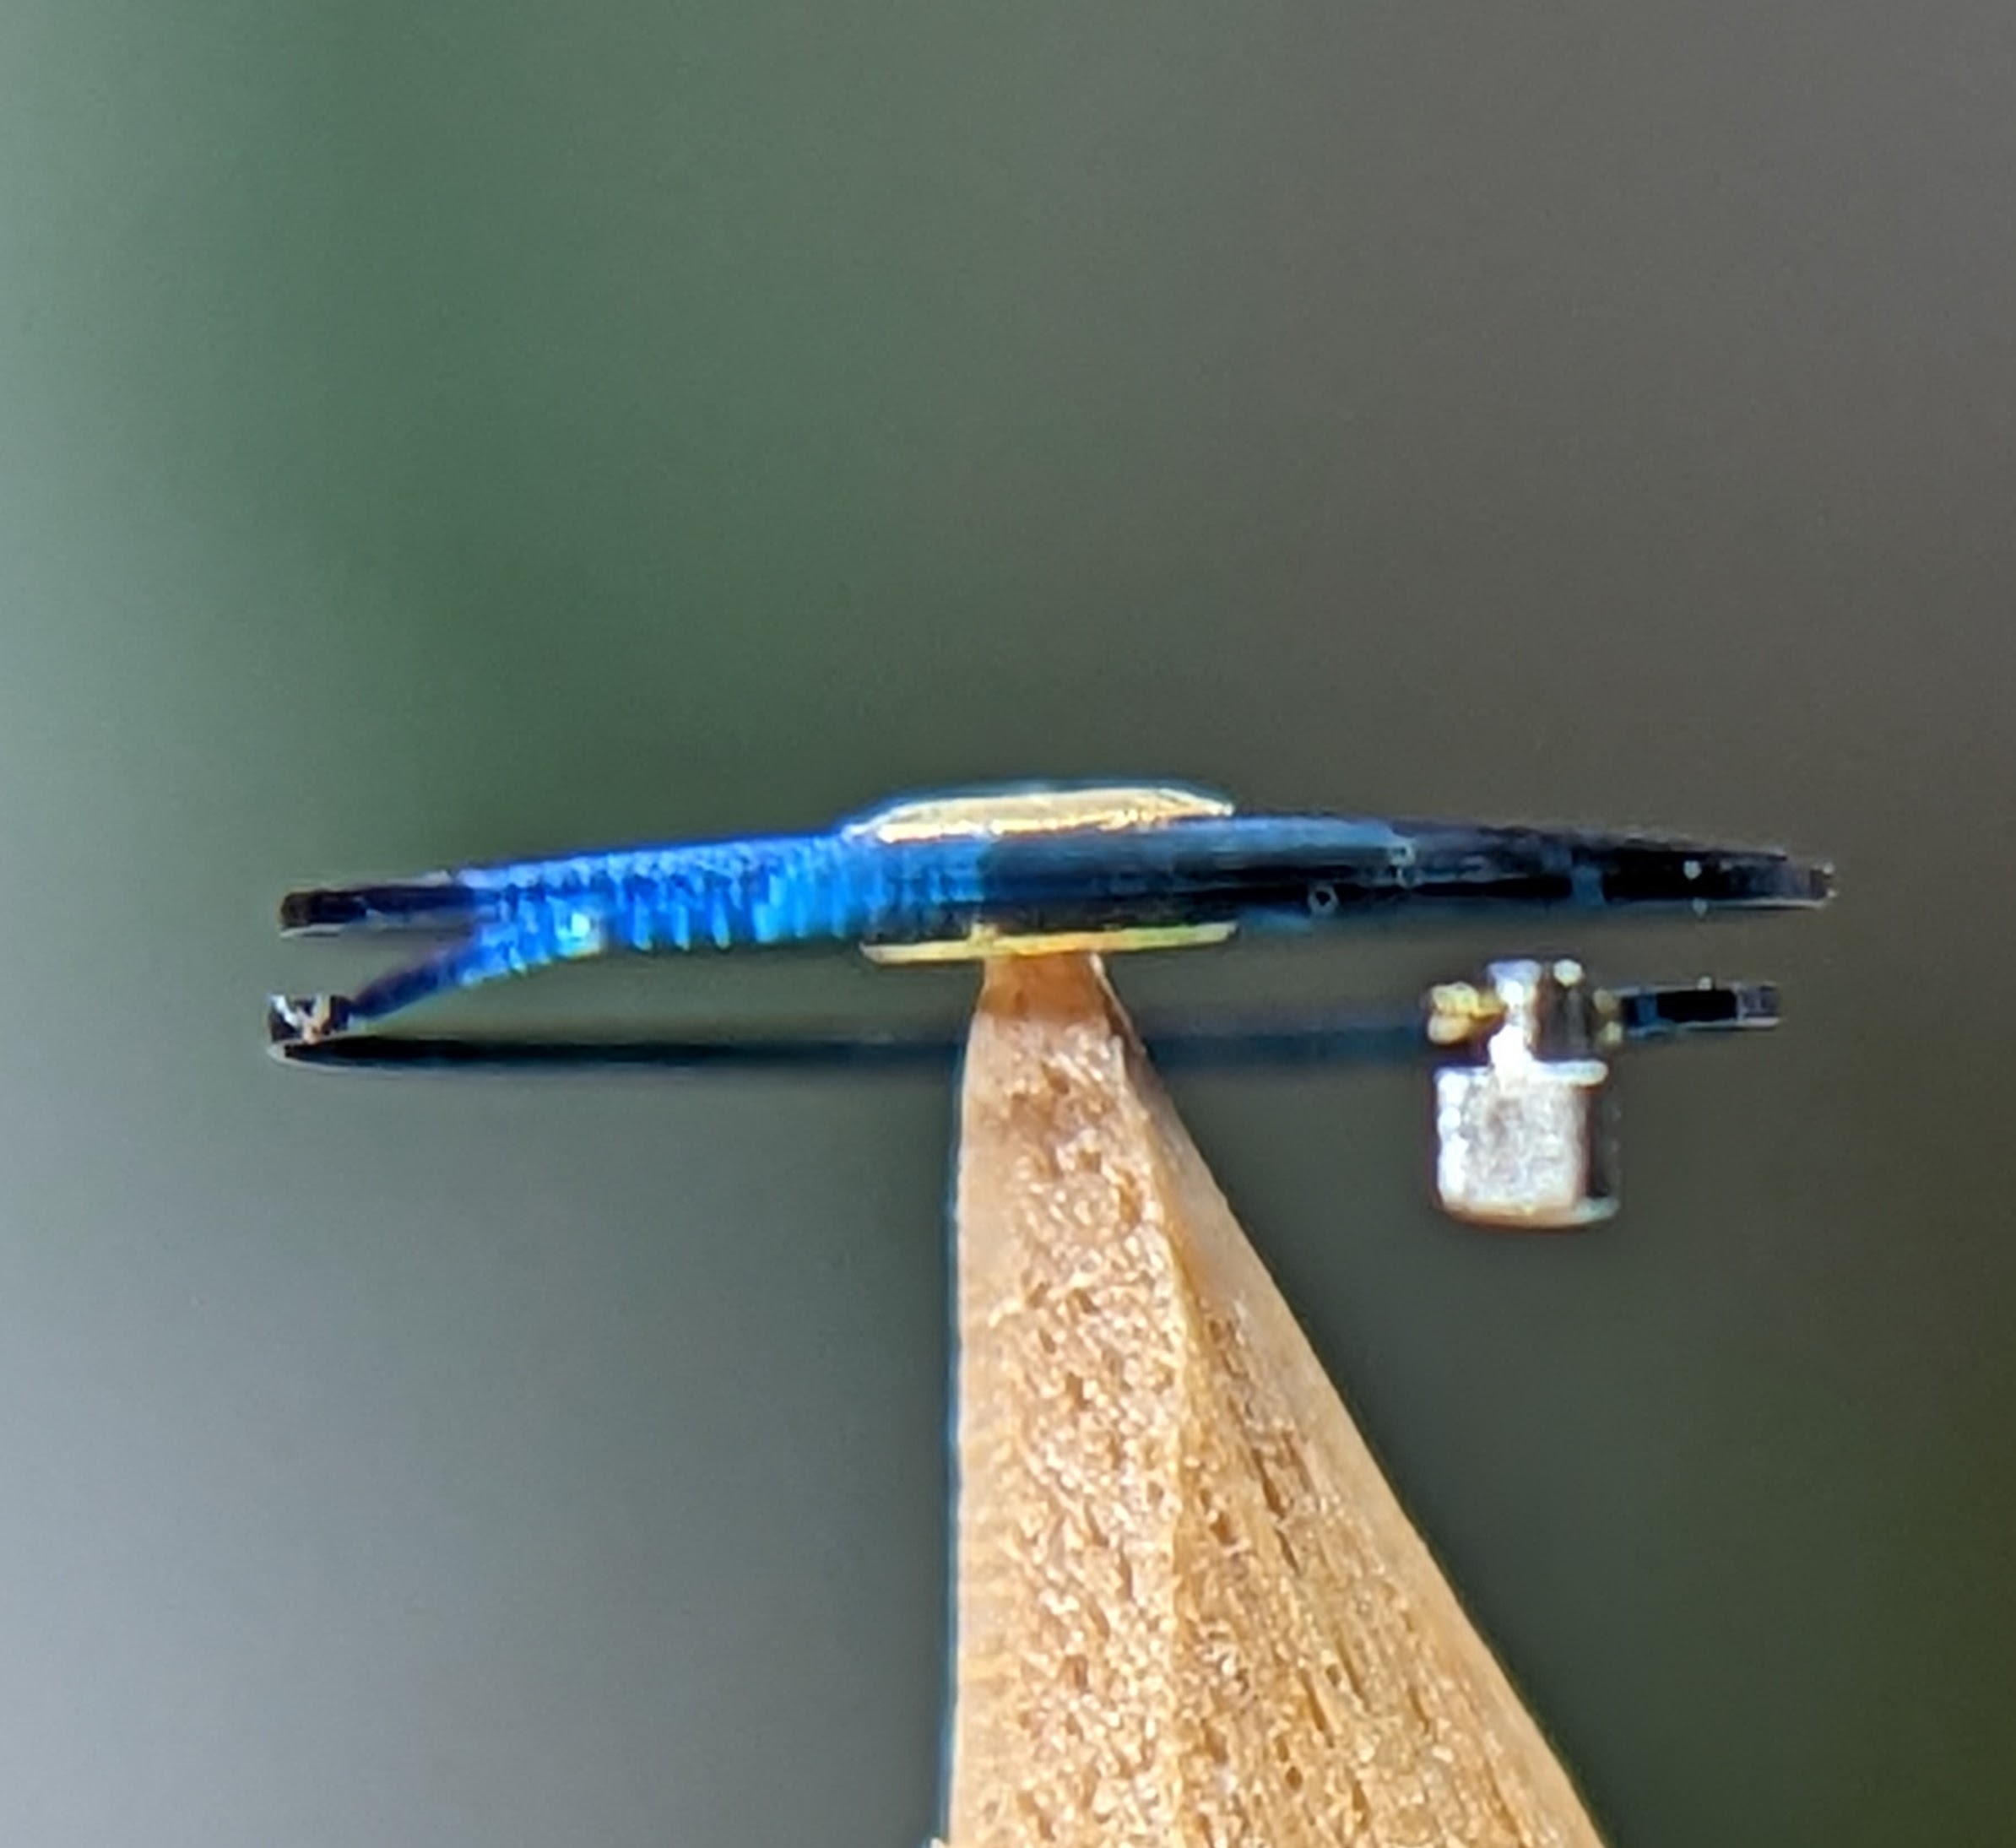
Well this was the most nerve-wracking thing I've done with a watch so far. I could see my heartbeat making the tips of the tweezers wobble. But I have to be proud of this before and after. Before: After: A slight twist right at the "stud" brought the left side up, but it also showed a twist near the dogleg that brought the front closest to us way up. A slight twist there flattened it out. I know the more experienced hairspring maniuplators know this, but when I say "slight," I mean "sliiiiiiiiiiight." The absolute tiniest touch made permanent changes to this spring. It honestly feels much softer than other springs I've manipulated, but that could be my imagination and/or inexperience. Either way, I'm letting it run for a bit before regulating. Meanwhile, cleaning up the case and getting the automatic works together.

 3 points
 -
Haha, you flatter me. And there’s waaaay more qualified Seiko guys than me. @Birbdad Can I tell you a little secret? That backlash thing doesn’t always work like you’d hope. Typical Seiko’s are made by the millions with pretty large tolerances. On some you win the tolerance stacking lottery, on some you don’t. It is what it is. You can obsess over getting this right on a $40 movement or you can put many of them together and get a feel for them. After you’ve done maybe 10 of them you know if it’s gonna be a runner or not. Install the main barrel and centre wheel by themselves, mount the train bridge. Use a puffer on the barrel teeth. If it moves freely, you’re good. Take those out, install the train without the barrel, mount the train bridge again, do the puffer test on the escape wheel. If all good you proceed to fit everything and move on. Again, once you’ve done a few you’ll get a feel for it, it’s not easy to teach this and as a beginner, I wouldn’t obsess over it at first. It’s not like it’s a COSC certified movement. Lastly, and I’m going against the grain of accepted wisdom here, but on a modern cheap Seiko movement, don’t bother with taking the barrel apart unless you have the equipment to put it back together. 99% of them are good. Without experience, you don’t know what you don’t know. I’m busy clearing out some of my watch collection of pieces I’ve done long ago but never wear. I cringe now when I put them on the TG and see they haven’t held up well over time. Why? Because I didn’t know then what I know now. So I’ve had to redo the service on these before passing the pieces on. It happens and you can’t hope to achieve perfection on your first try. Get those pieces working well and learn from the experience. The day you stop learning something new every time you work on something is the day you either give up the hobby or start earning a living from it as otherwise it’s no longer stimulating. Ok, I’m probably being a little harsh but you get my point. I understand the strive for getting things perfect right from the get go. But that road leads to frustration. Because in the beginning it won’t be perfect. Accept that and learn from it and most of all, enjoy the journey and the small wins when something works better than it did before. But don’t beat yourself up. You can always circle back to things down the road as you gain experience. Anyway, at the risk of rambling and repeating myself, just put the damn thing together and see what happens. Repeat this a few times and learn from it. Don’t get frustrated and have a good time, take the small wins. “Perfection” will come with time. Spoiler: no one is perfect…3 points
-
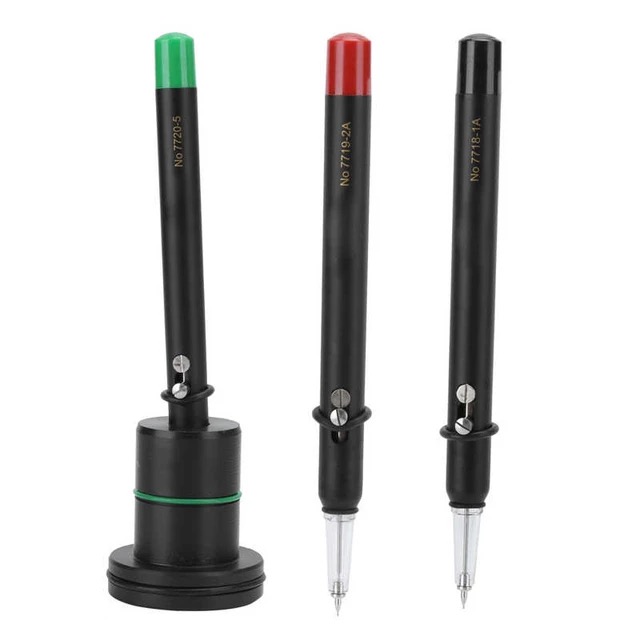
I am sure the auto oilers are not clones but from the same factory Bergeon use for theirs. Not only do they look identical in every way but the parts are fully interchangable, which is handy should you ever need a new needle as the Bergeon one is actually marginally cheaper than the AliExpress one once postage is added and a lot quicker to arrive.2 points
-
It's nice to be able to use the tool as an 'inverto' with the stakes doubling up as an anvil, but I wouldn't get too hung up on it. There's a good selection of stakes and anvils there. Make sure the width of the stakes are a universal size of 4.7 mm, as I've got a staking set that are 5 mm and only for that set. Where the others, such as Favourite, K and D and Gesco are all 4.7 mm I rarely use anything other than a dedicated anvil with my inverto, but I do have a huge selection of them.2 points
-
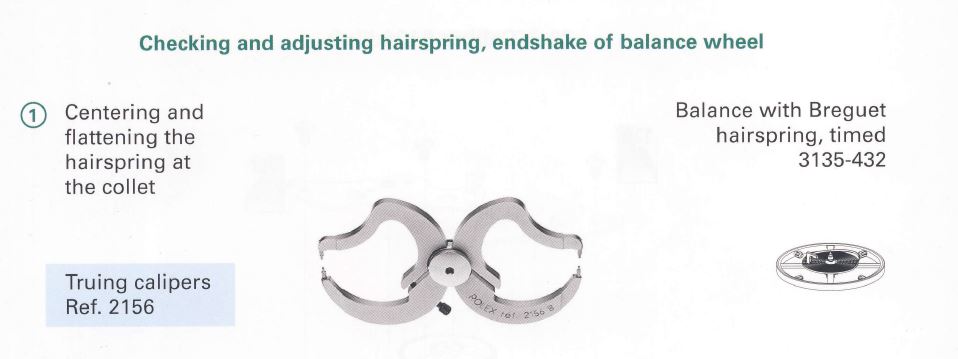
smoothing broach is nice because you can rotate and look at it but there is a better way. I swiped an image out of a Rolex service manual. A better way to look at hairsprings is to put the hairspring back on the balance wheel. then you need a set a calipers of the right type you can spin the balance wheel look at the hairspring and see if it is flat or not. also good for verifying whether they hairspring is centered. It's a lot easier to do it this way than it is in the watch. Then when it's good enough they can go back in the watch because that's the ultimate place where the hairspring has to be right. then yes the after looks really really good considering how bad is was the first place.
 2 points
 -
Haha when mentioned. And as if by magic the genie-us appears. And i beg to differ, certainly not as charming and witty with devilish good looks. Did i ever mention that i really liked your self designed movement cleaner ? There you go Col very wise words from a guy that knows his onions. That is an essence of watchmaking Col, to keep trying till you find the problem/problems and fix it. You will learn far more that way than just putting it back together and it working the first time assembly. As Gert was saying enjoy the journey. This is just your frustration talking, i was similar when i started and i will bet that a lot of us here were exactly the same. Eagar to get a watch back together and running,that will change the more you do. There is no time scale very few of us here are earning a living from it. I now love the problem solving, the buzz that comes when seeing decent tg readings for me is way higher than the balance wheel setting into motion. Dont be mate, you wont find every fault all the time visually. The tg will help you diagnose problems that you just cant see.2 points
-
Good decision. My assessment of your first video had more to do with the abrupt deceleration than with the lack of backlash. As Gary and others have said, you don't always see that. The train appears free now.2 points
-
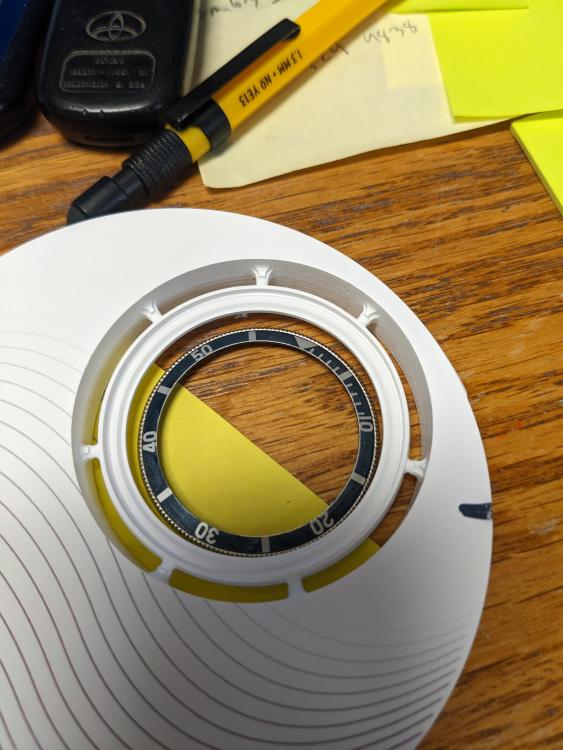
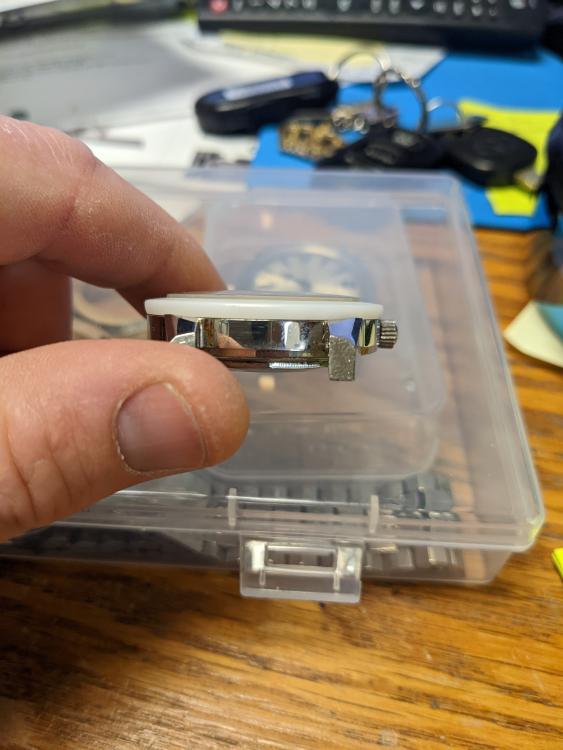
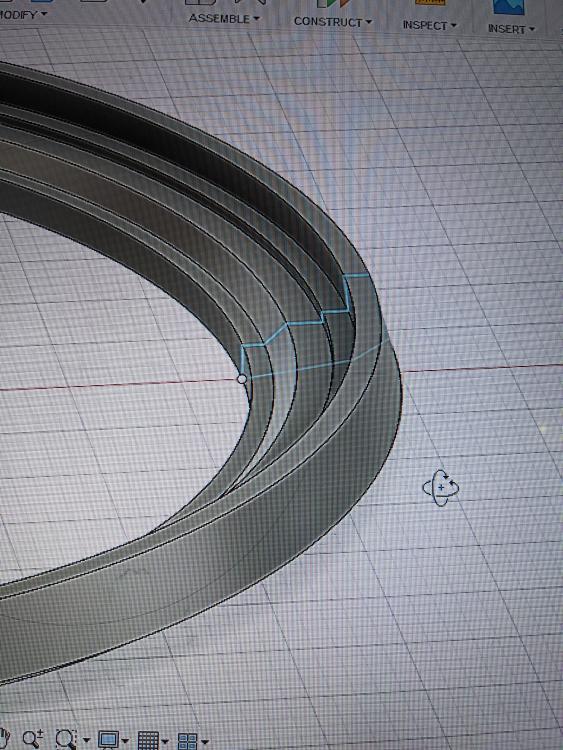
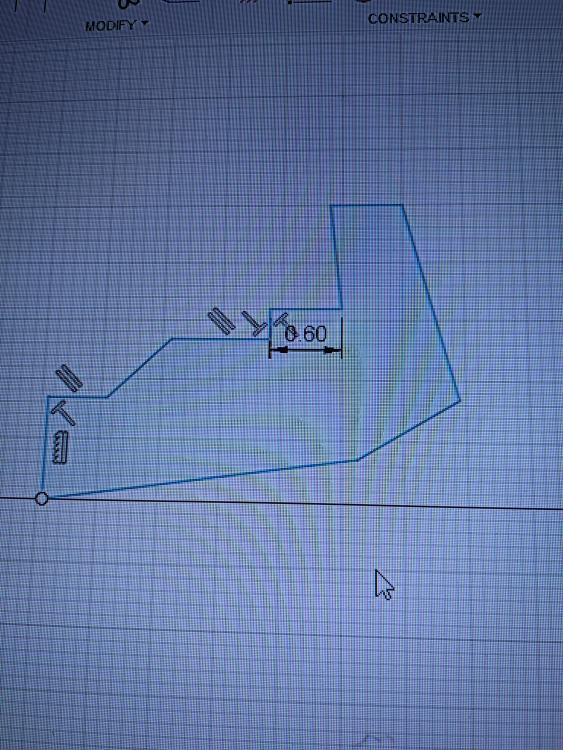
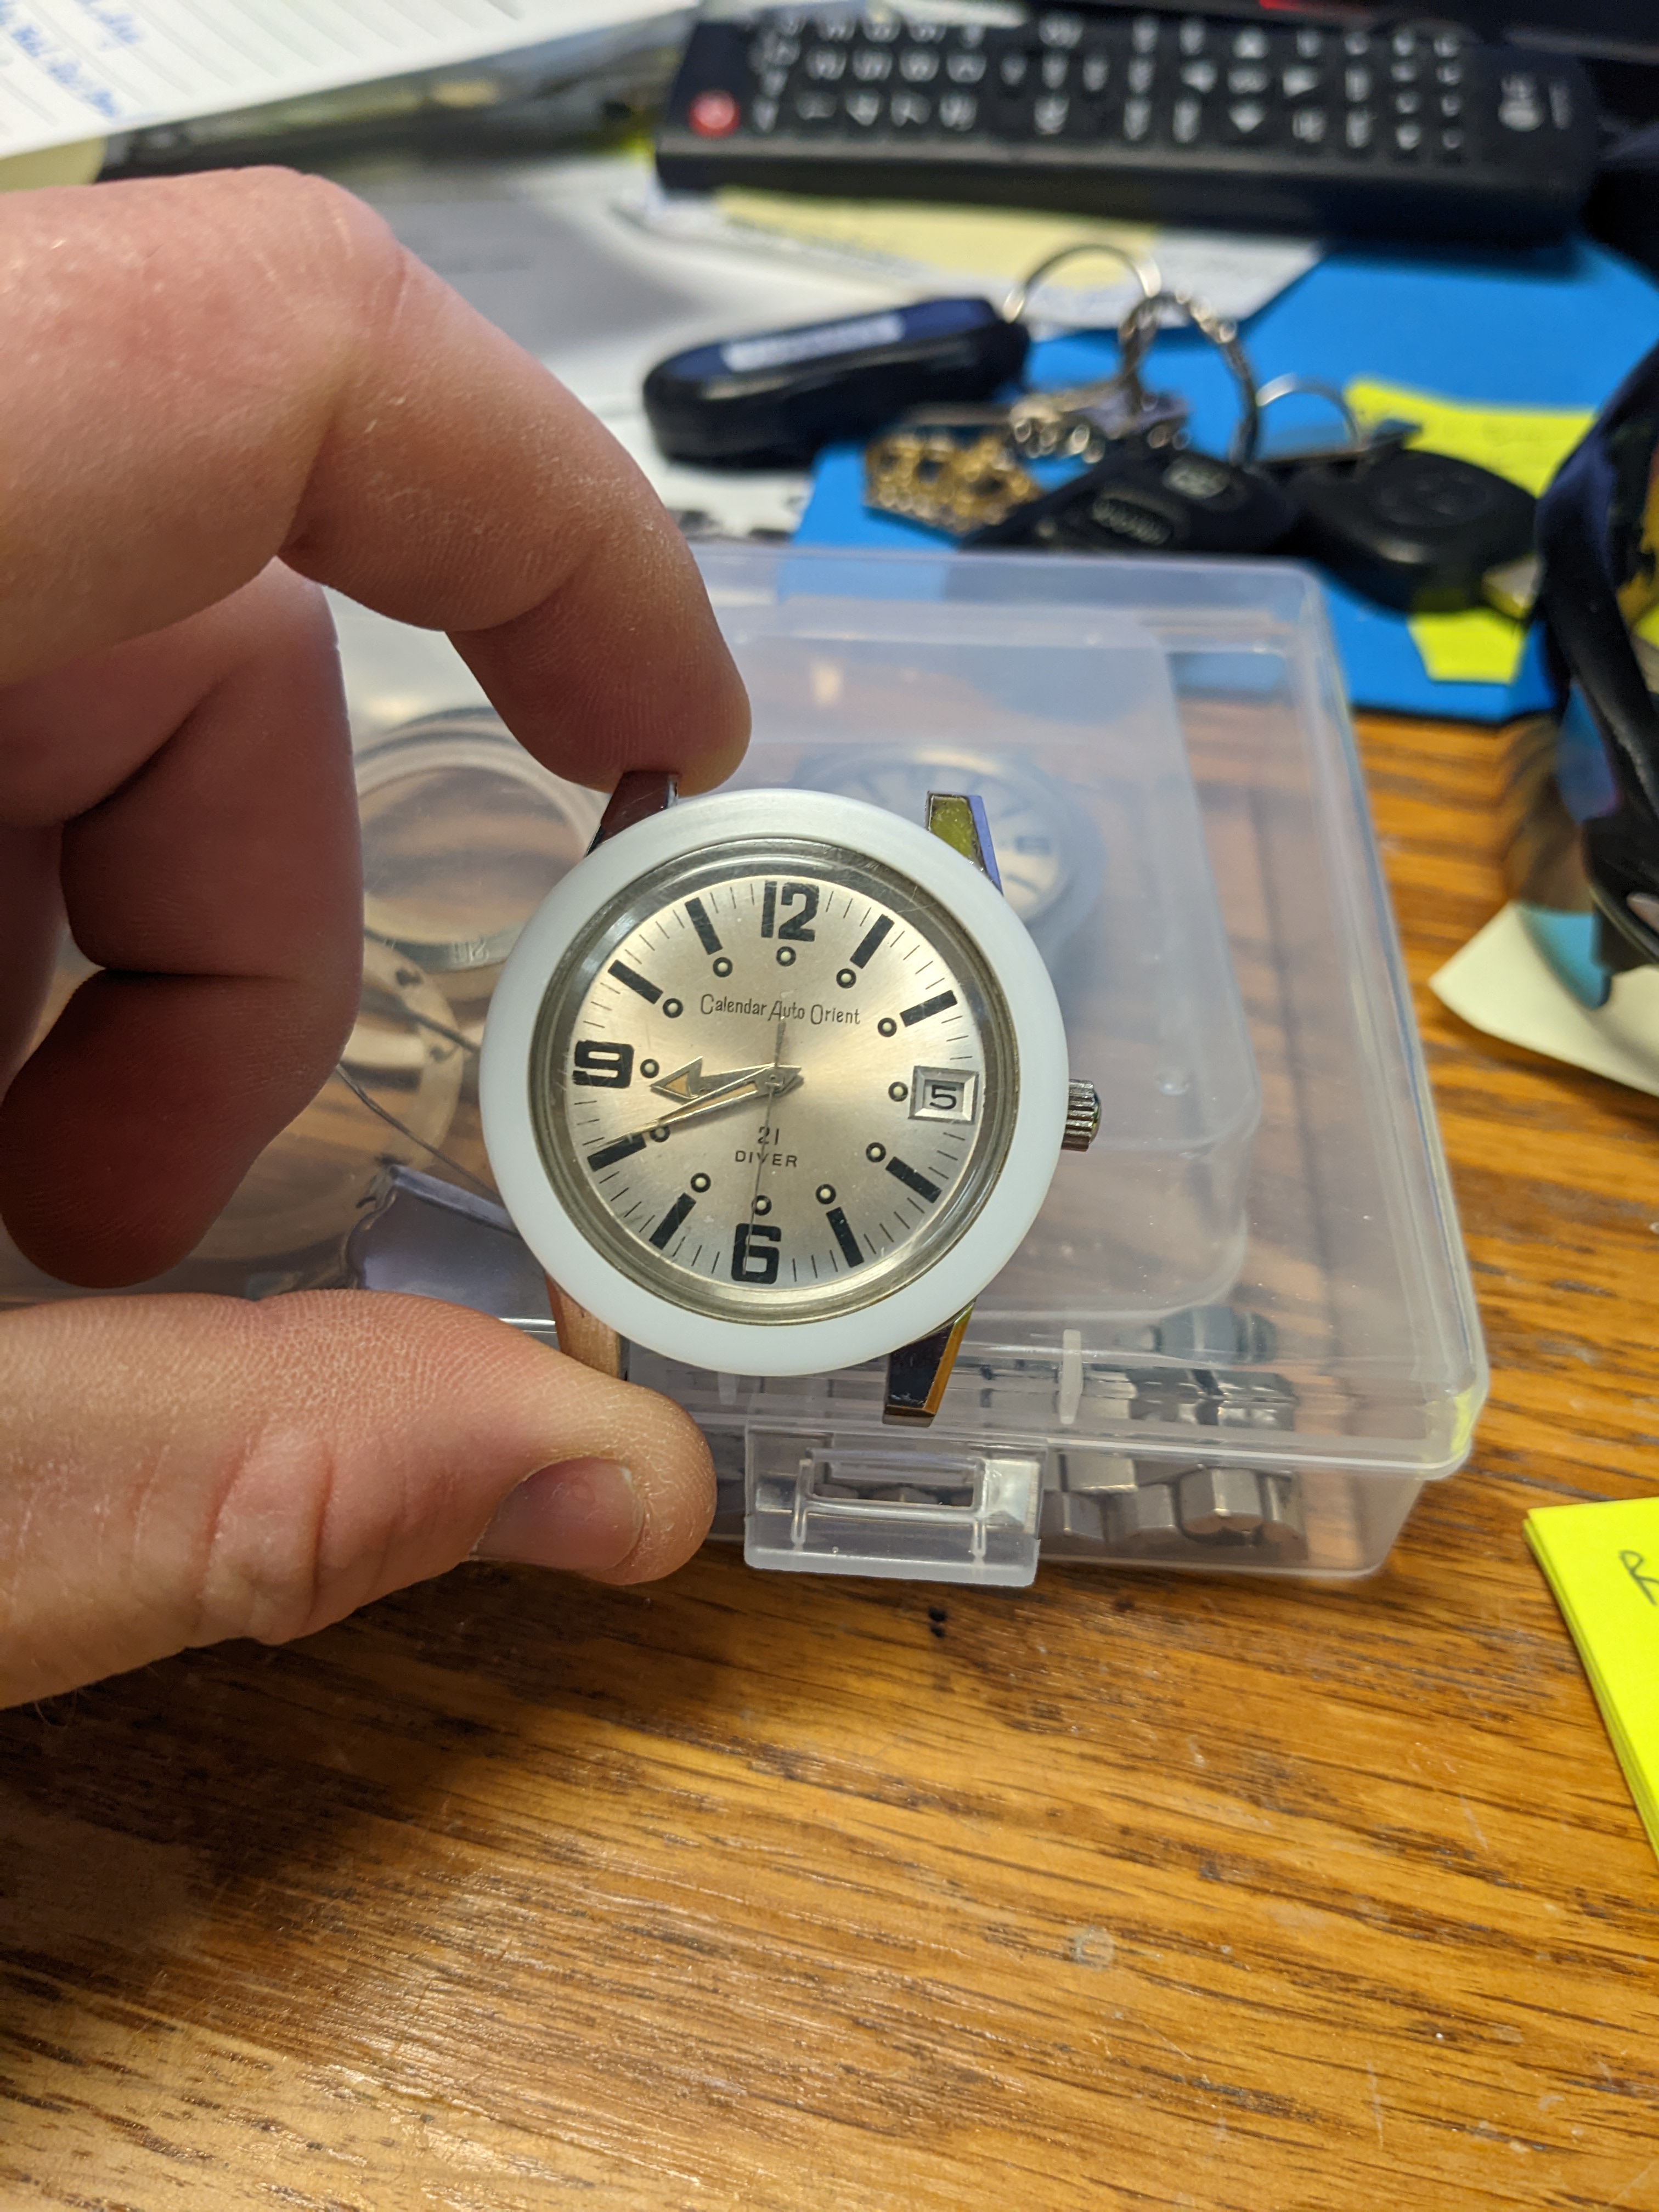
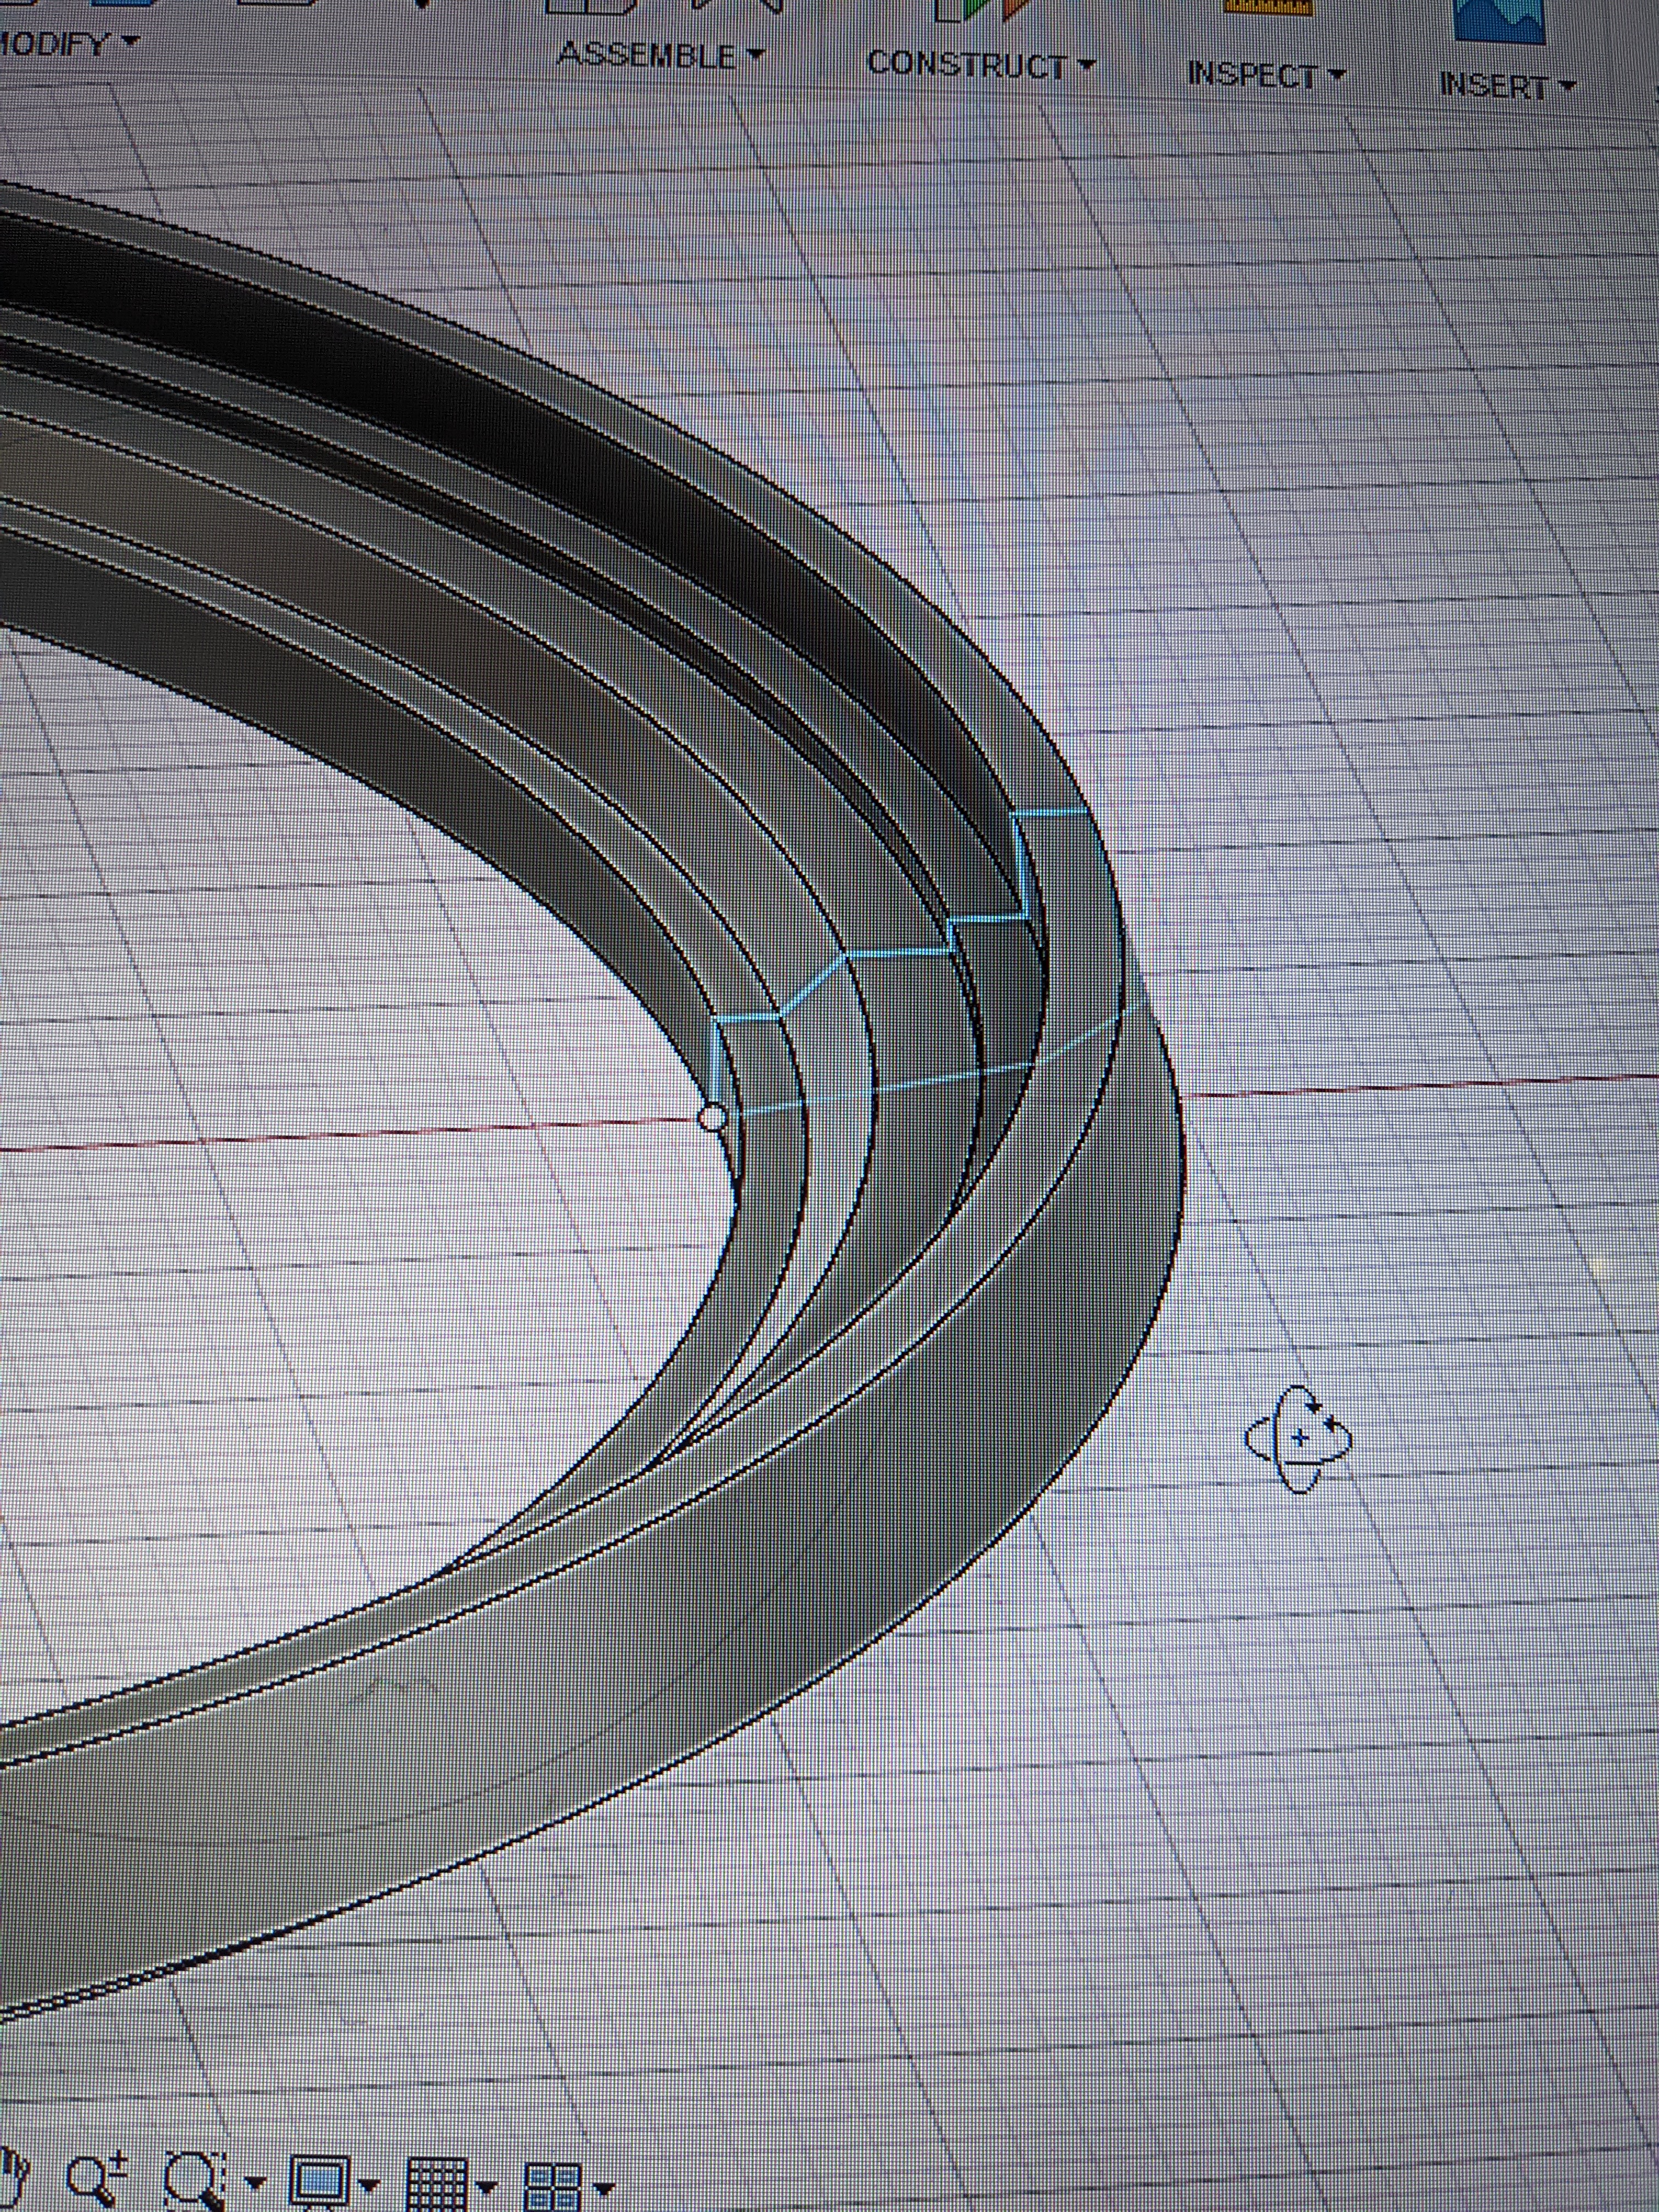
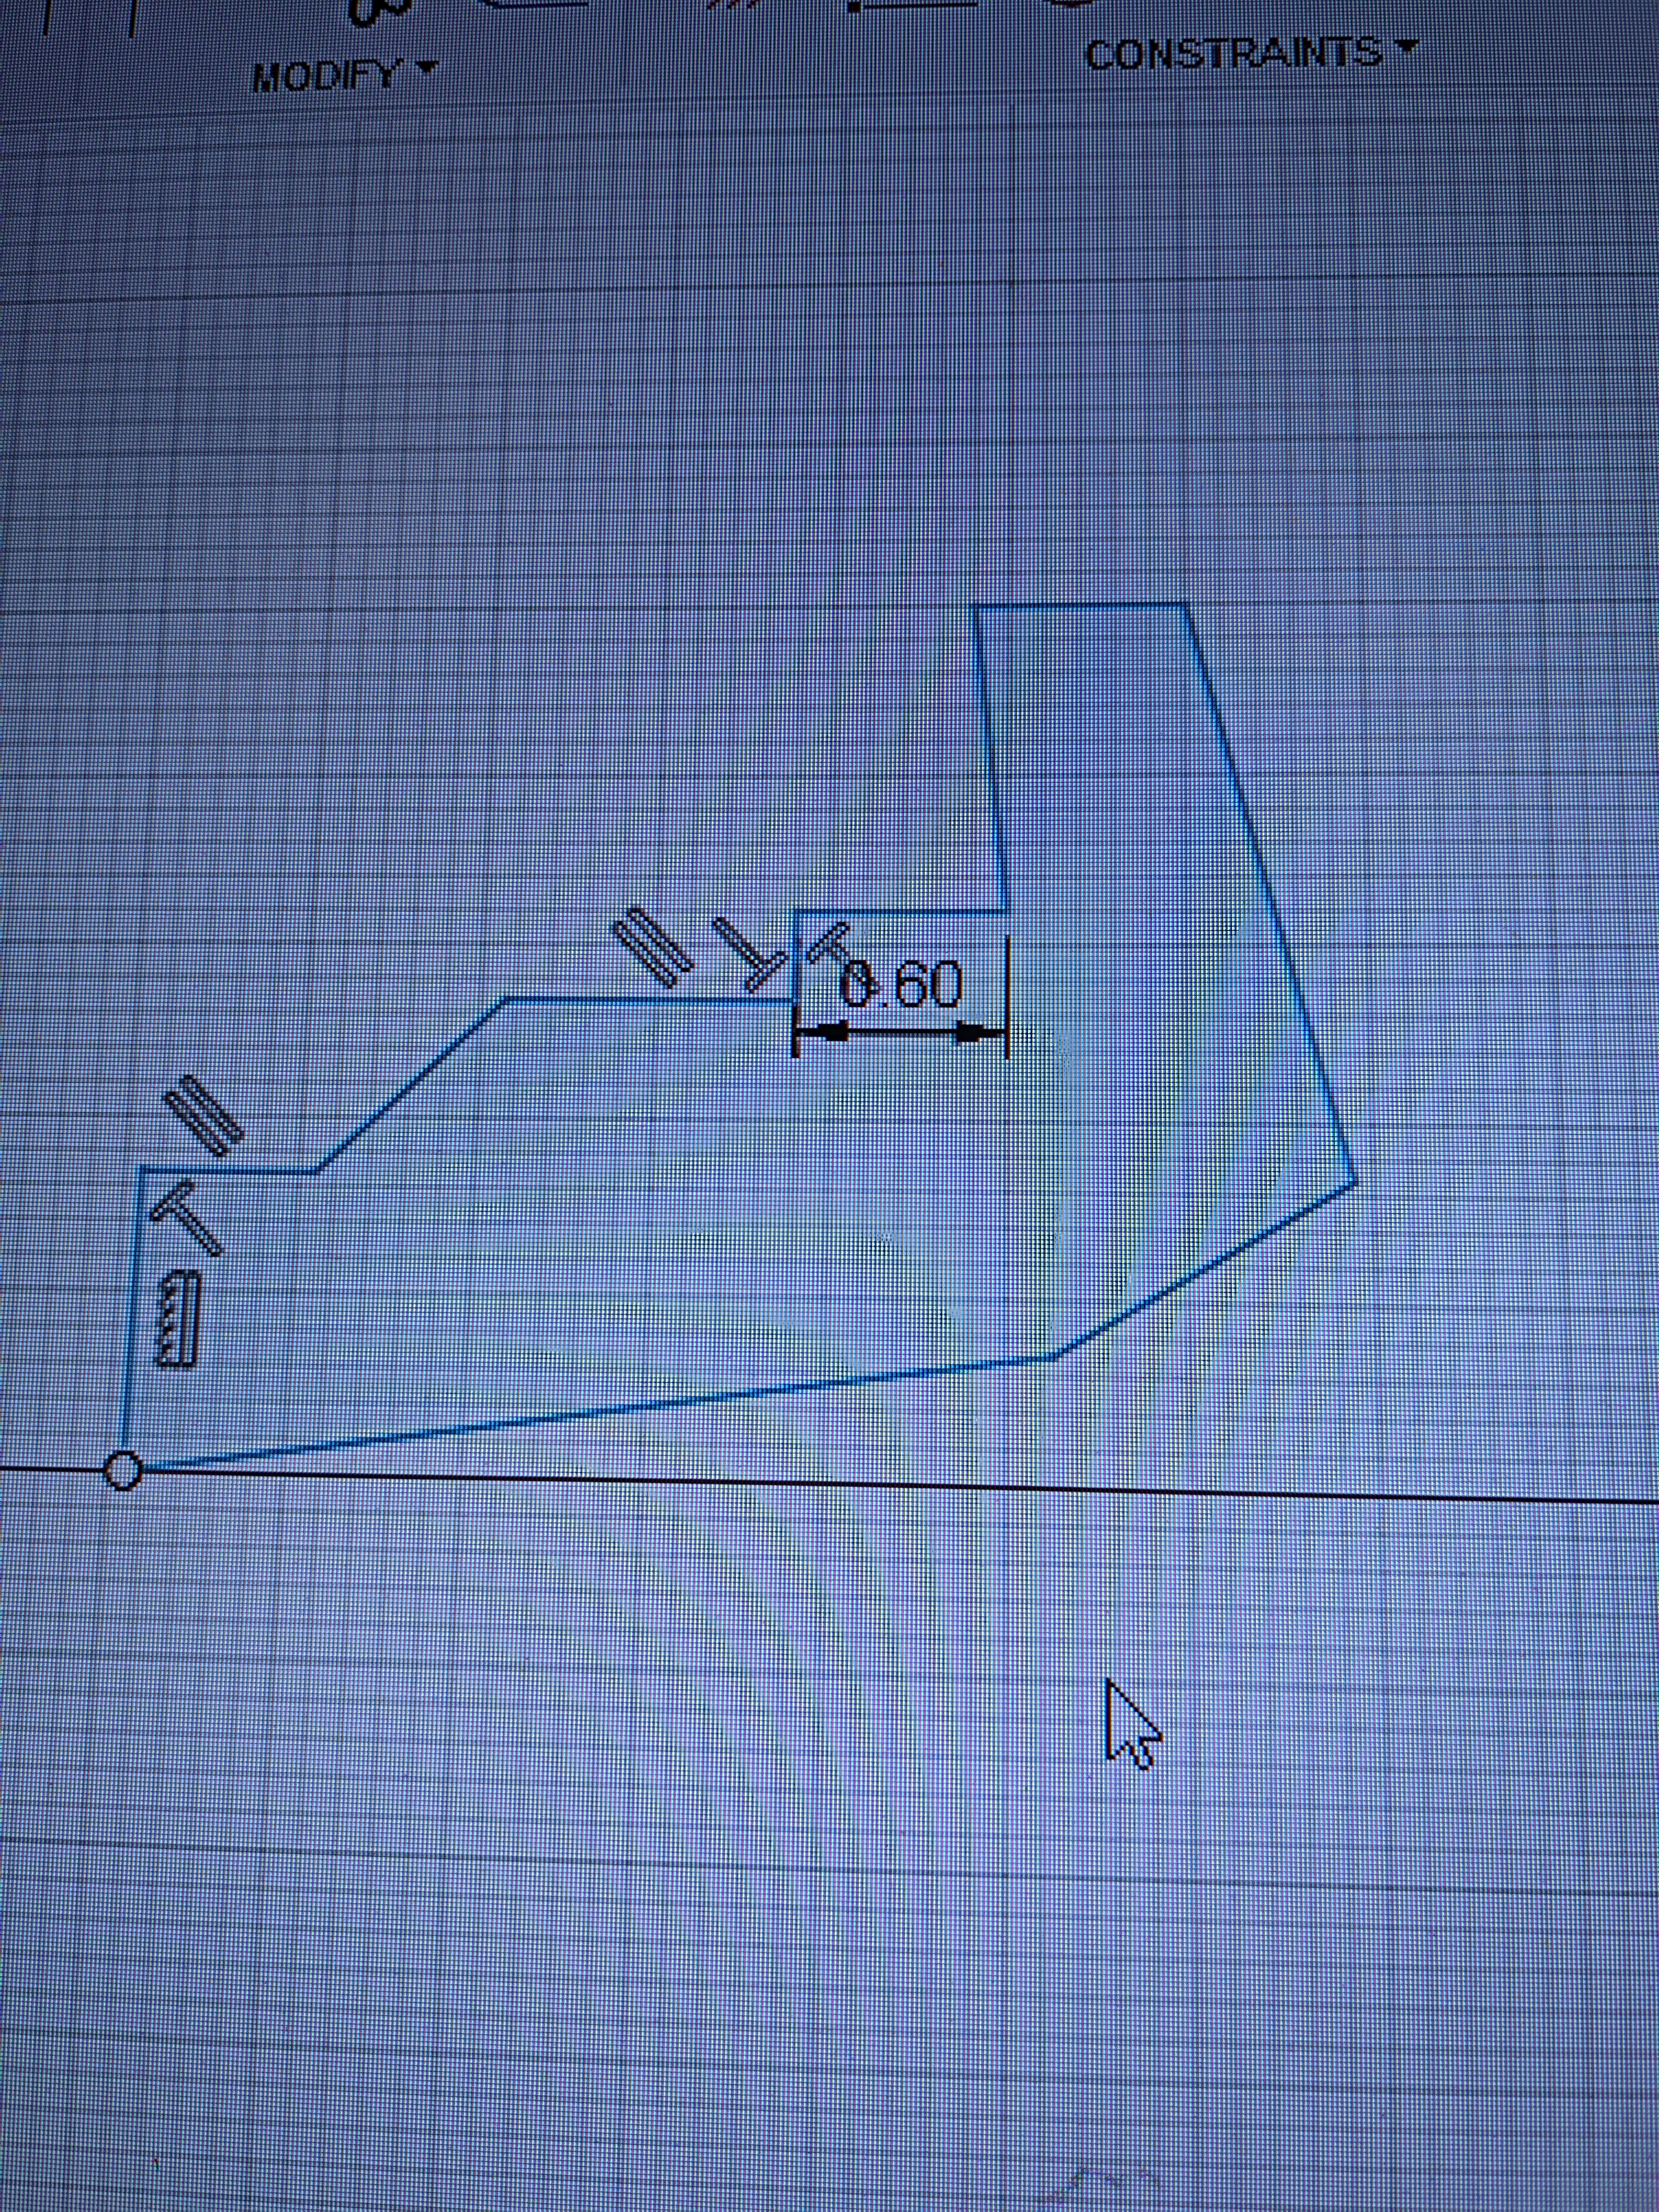
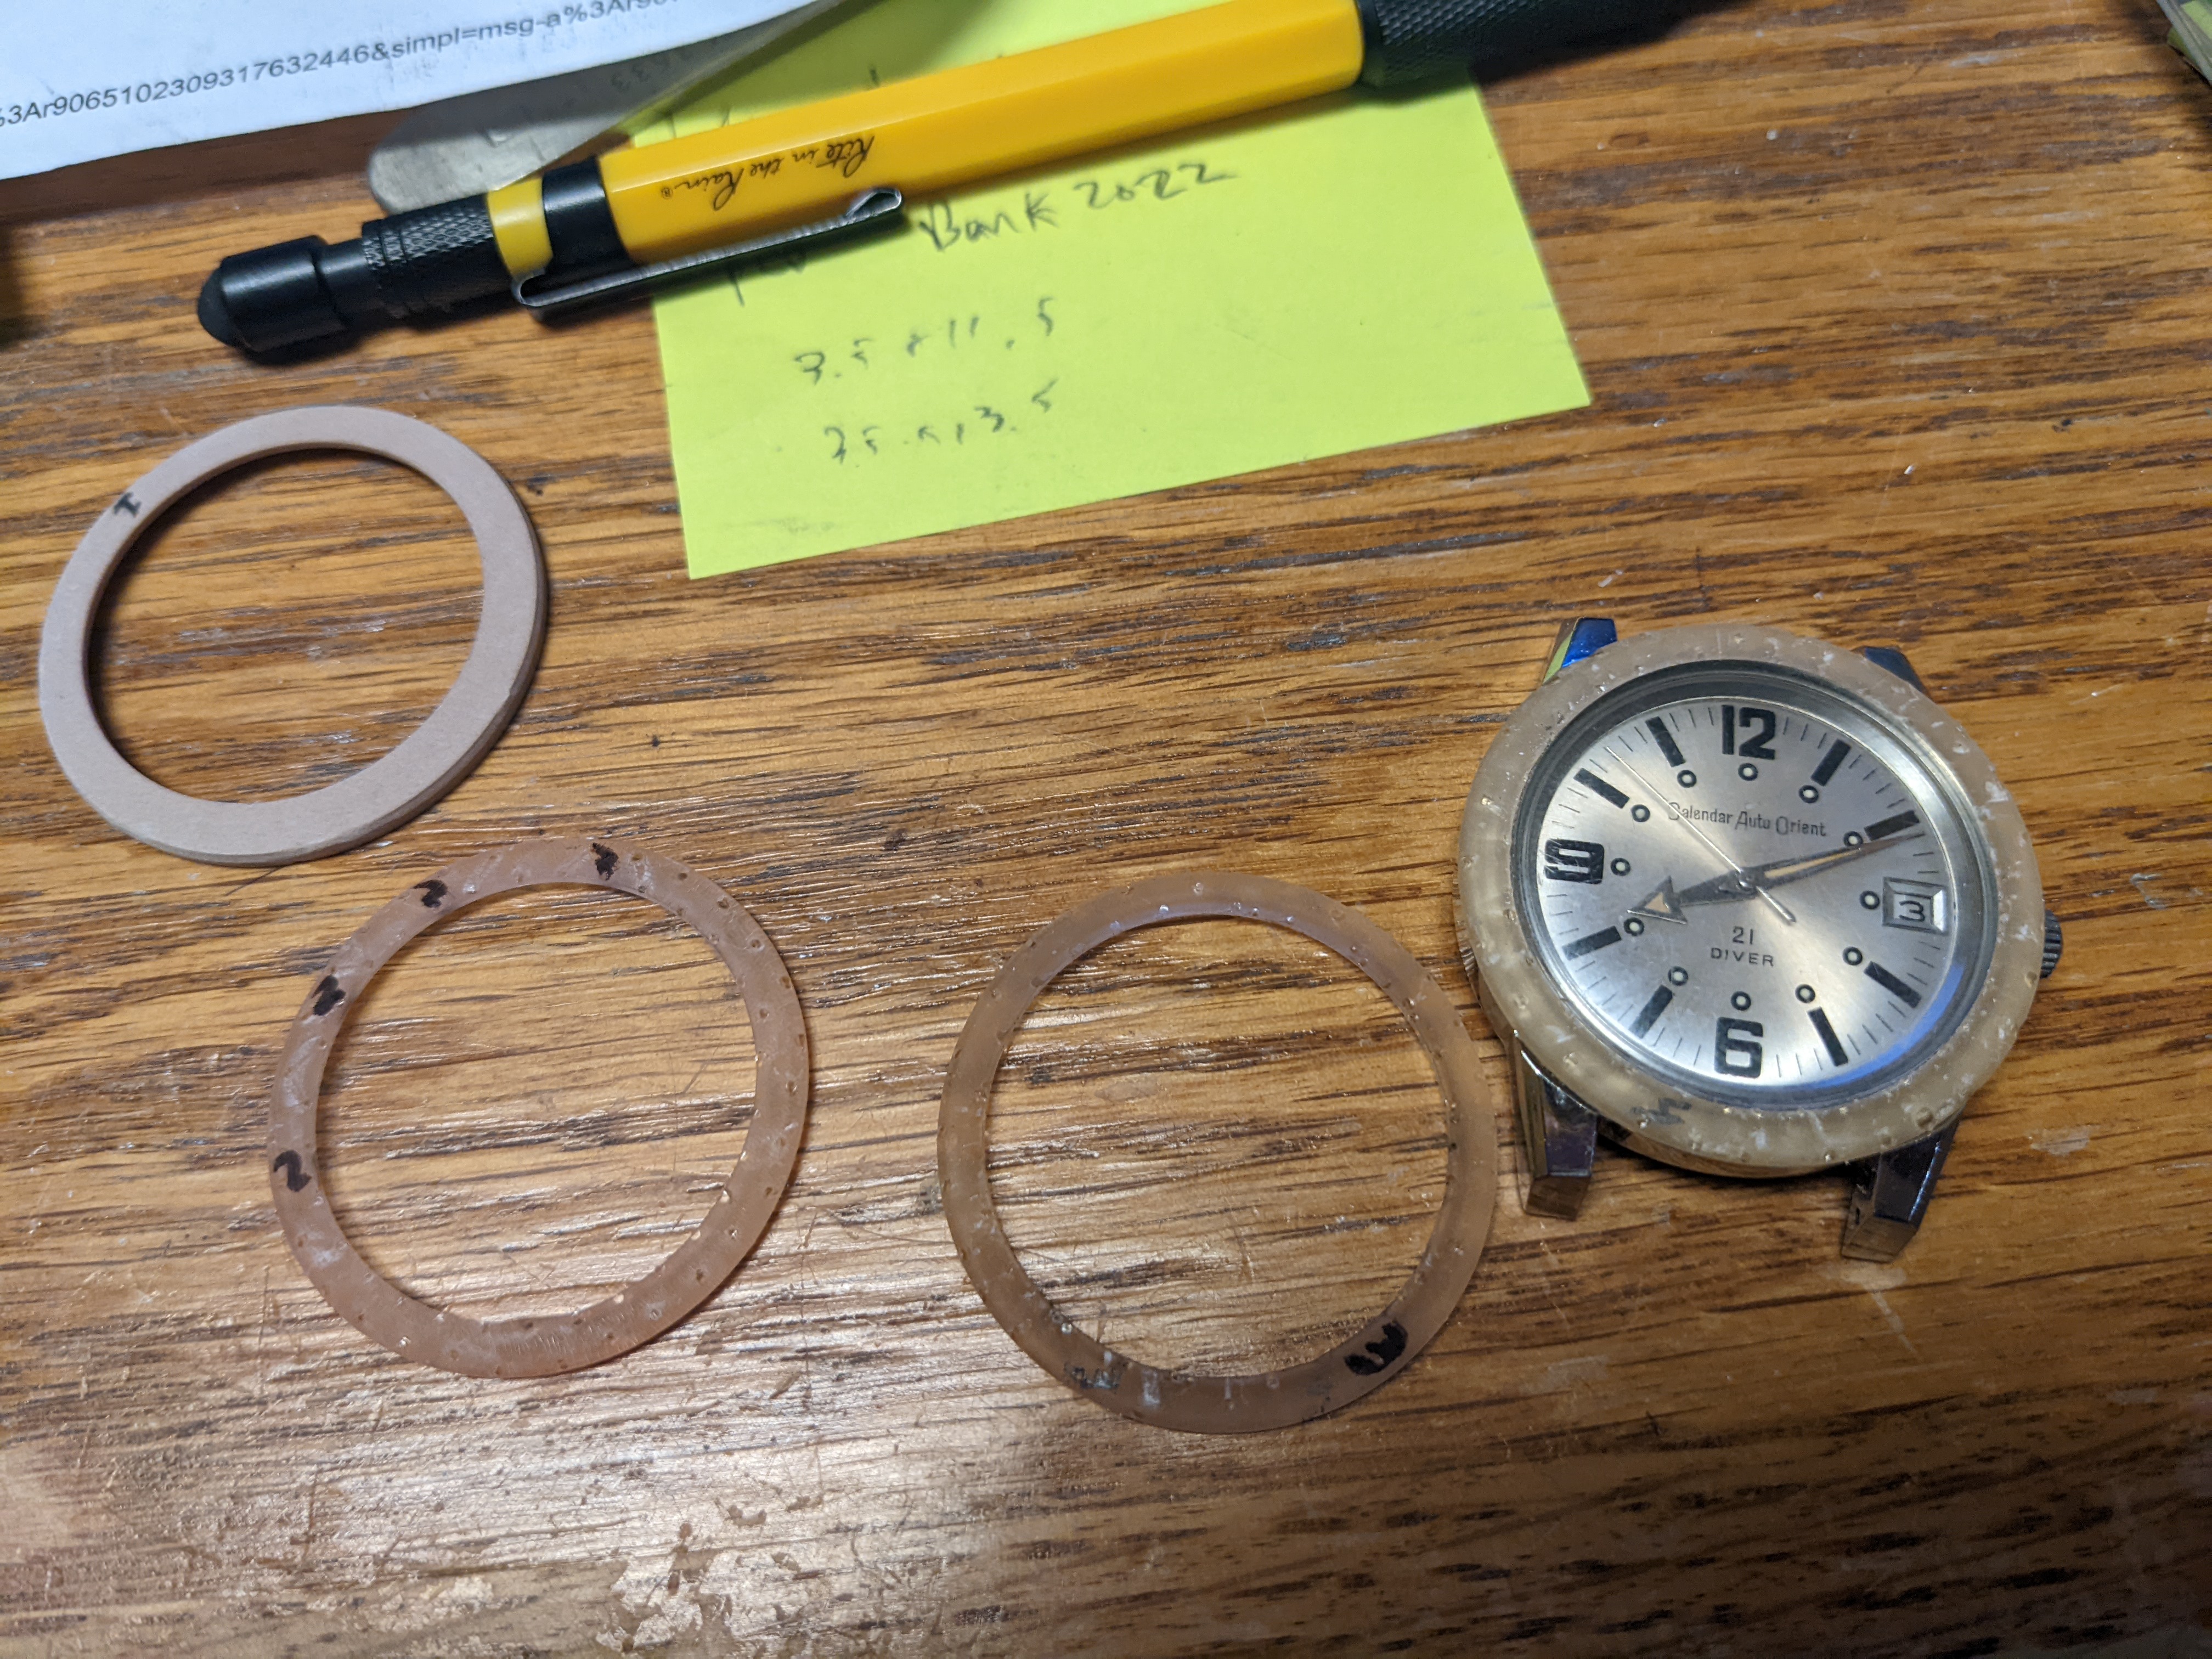
As part of my watchmaking journey I decided to replace some bezels on a watch that bezels are very hard to come by. I was able to pick up a donor watch with a bezel that I am taking measurements from. I am slowly learning fusion 360 and printing my prototypes. Once I have a working prototype I will manufacture them from either titanium or aluminum. This is where I am now on these orient dive watches.
 1 point
 -
I have a Helios set very similar to that one, and the quality is very good. The stakes are dia. 4.7mm. To be honest though, I think you will be looking for an inverto-style anvil with a base to add to it before long, and for that money, it may be better to wait.1 point
-
Because they are meant to slide independently of each other, but over time they have become jammed with crud and stuff, so will need cleaning by taking them apart if you want them to move independently! You're right, if you move the stud support the balance will move in that direction as well to bring the impulse jewel into the centre of the bankings, but the same will happen in the scenario of the curb pin and boot gripping the hairspring and the stud support and index moving at the same time and distance and not crumple the hairspring. You could argue in this situation, is it the stud support pushing the hairspring and balance around, or is it the index/curb pin and boot gripping the hairspring that is pulling the hairspring and balance around, as the stud support and index are fused together?1 point
-
Bergeon designed those nylon pushers so that they would split and break so you can buy a new one.1 point
-
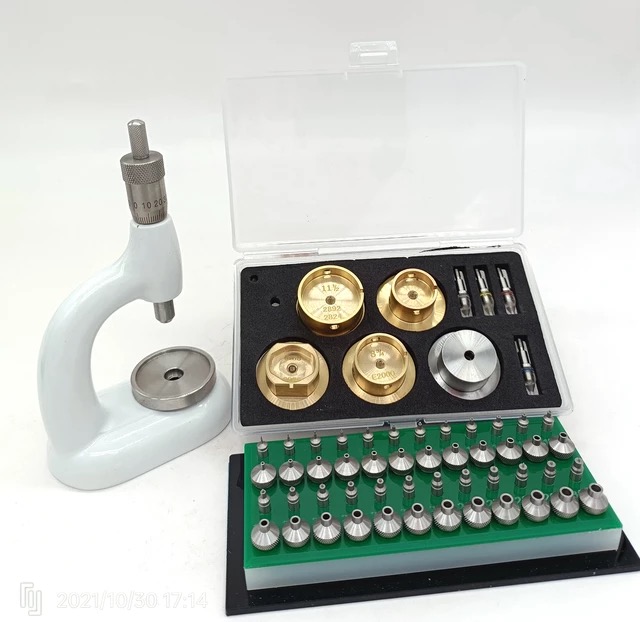
A few AliX vendors have this clone Horia tool. Besides the jeweling anvil pump set it comes with a set of handsetting attachments. Has anyone used one of these? AliX 11.11 sale is on so I just ordered the 1A version of these clone automatic oilers. 25 USD.
 1 point
 -
I don't know what you are worried about saying it strikes to fast. It is fine. If the fan had been lose and still rotating after the strike had finished that will cause the strike to run fast. The other would be the weight load if the weight was too heavy that also would make it strike fast. Setting up a Vienna can be a problem you have various ways making sure the pendulum is in the correct place and center to the scale which is just below the bottom of the pendulum.1 point
-
Hi depending on your dexterity one could move the stud support for a good delta number 0.0ms or as close to as possible then check the rate. To adjust the rate hold the stud support and move the regulator independently. I the regulator and stud support are very stiff there is no recourse but to dismantle the cock and free off the action.1 point
-
Failure is your best teacher! Edison never made a light bulb first time he tried. He made thousands! And when he moved on to the next attempt he saw it as a lesson learned, rather than in any negative sense. Perfection is a noble pursuit and it is a good thing to reach for, but when you fail, which we all do, then at least progression can be claimed. This is from my experience and experience has shown me there are many things in a watch movement that have to be right to get it to work to it's optimum, but only one major thing that will grind it to a halt, or run poorly. As @gbyleveldthas already said, the more movements you do the better the feel you'll have for those movements and their idiosyncrasies, especially Seiko's! and the more you will learn. Also, one person giving advice, or telling you how a certain process in watchmaking should be done, doesn't make it 'the truth'. You'll see a lot of that on YouTube. There are many ways to skin a cat a lot of the time and some that are just weird. I had a student recently that was told by a previous 'watchmaker' (and I use that term in the loosest sense) to 'tickle' the coils of a quartz watch if it wasn't working. Seriously! Yeah, he believed it and was running a screwdriver blade across the micro wire coil which could break at any moment doing it. This was one case that was just weird. I like your enthusiasm to get it right though. It's good to be a sponge, especially regarding this kind of work.1 point
-
looks like a good set all the punches and stumps are there Some makes had bases others did not. I would think a base could be made for the set to enable the punches to fit in the tool.1 point
-
Welcome to the form, it’s difficult to access the problem. You really need to find a qualified horologist.1 point
-
Oh there's no frustration at the moment. I was very frustrated when i hit a couple of road blocks before with bad luck with hairsprings and my auto oiler not behaving as expected but I seem to have surpassed them. I'm just enjoying myself and taking my time now and glad to be hopefully in the home stretch. Gonna finish the movement assembly on saturday and can't wait! I got another one already cleaned and ready to assemble and I bet you once this one is done and running that one will only take an afternoon. THen i'm on to my first non runner project watches.1 point
-
Hello and welcome to the forum, we usually like to have an introduction so members know whom they are talking to and their skill levels. Can you post some pictures of the watch , front/back and the movement. Also what is the caliber number of the movement. The symptoms you describe would lead one to believe that there are still some crumbs/shards in the movement and wearing it has moved them into a position causing the watch to stop. So remove the movement and inspect the movement again. It may require stripping down and cleaning to remove all the debris hence the reason the caliber number would help should we be able to get a service/tech sheet for the watch in order to help you. cheers1 point
-
Thanks, yes I have a proper mainspring winder set, I think I will open it as it is not crimped. thanks for the advice1 point
-
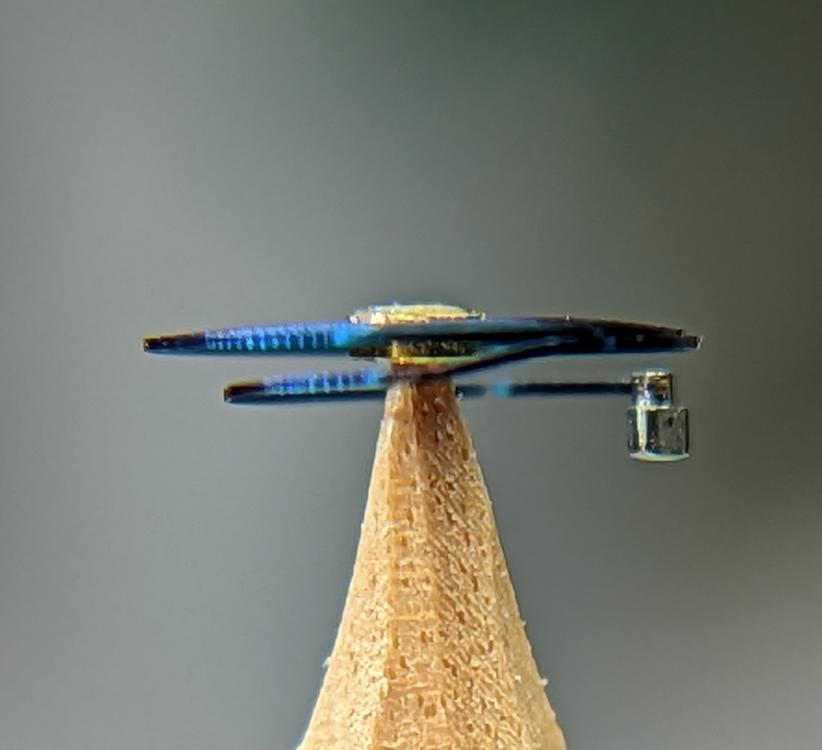
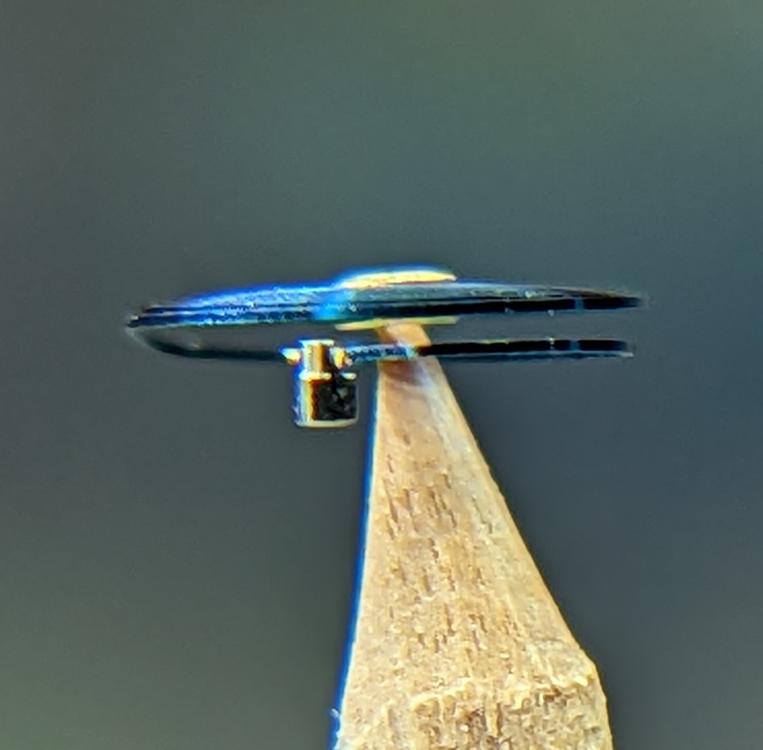
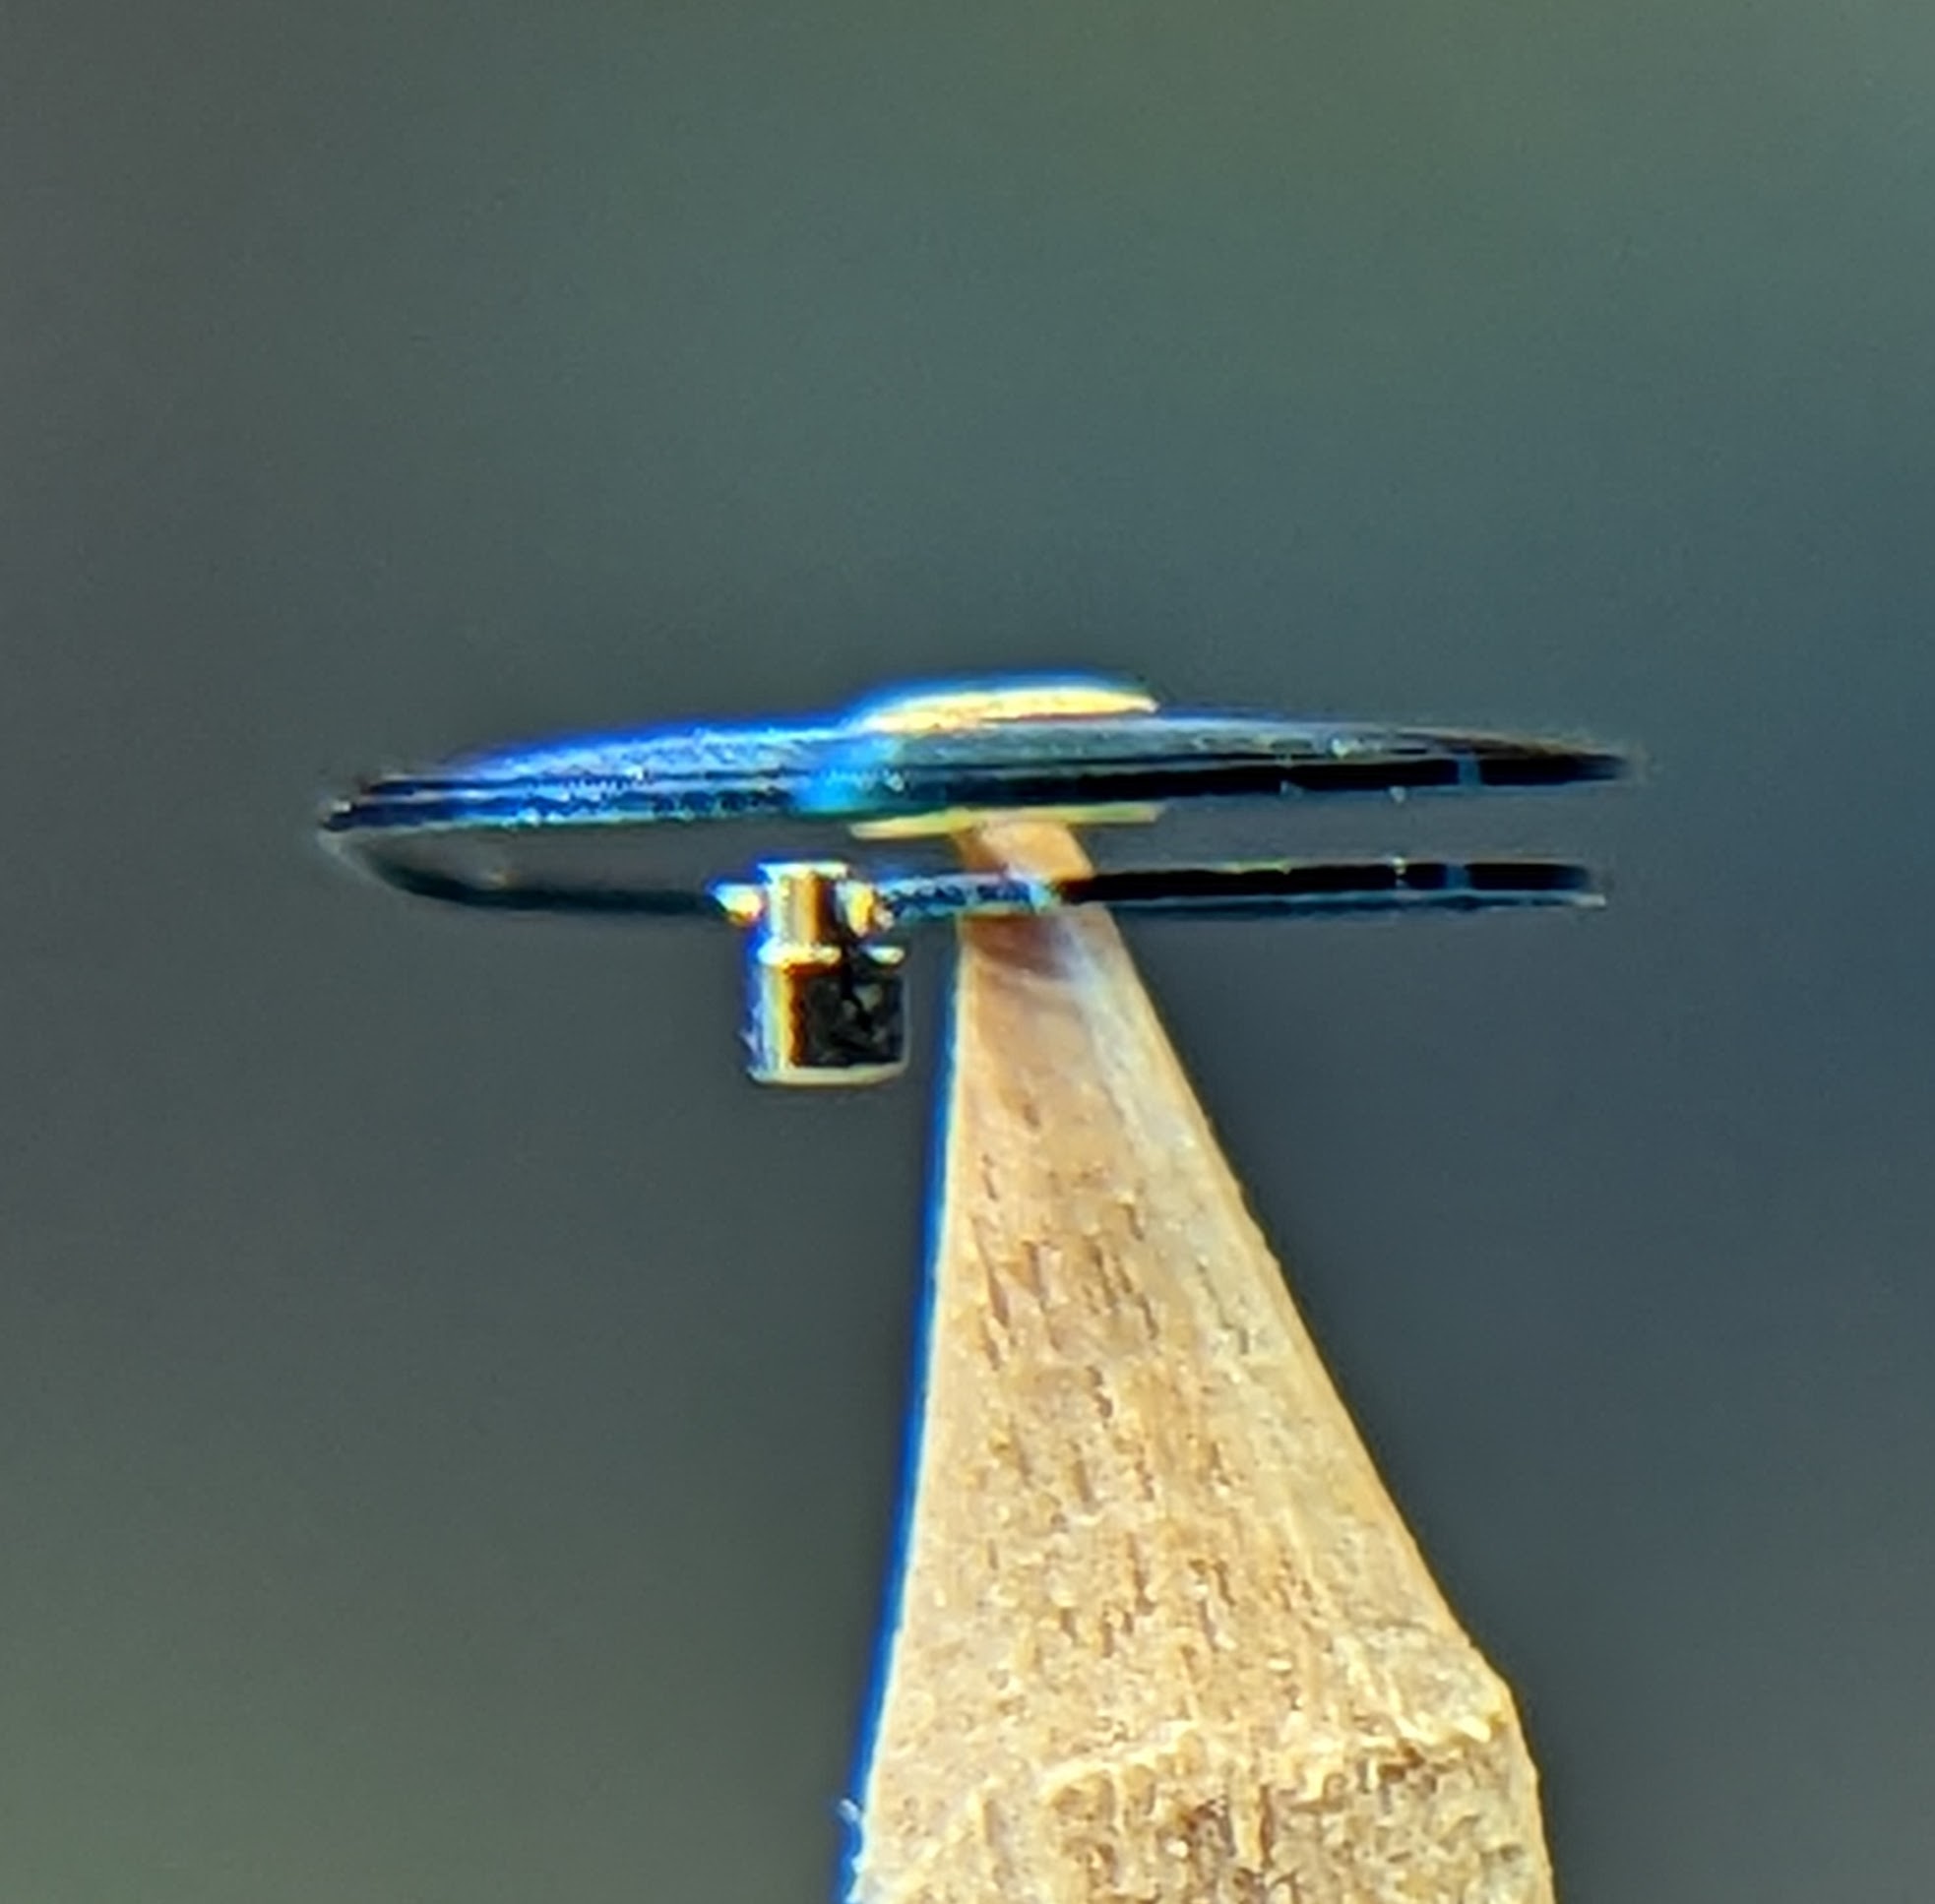
How about this. Before: After: P.S. Here is the hairspring from different angles to check flatness:


 1 point
 -
Hi All, Newbie watch person. I recently became interested in this fascinating hobby. So much to learn and so many watches to play with. I am in awe of the miniature engineering that goes into them. Am doing Mark's online course and have nearly finished, can't wait to get stuck into working on one. Cheers, Davo.1 point
-
You bought a watch with a mechanical movement, but received one with a quartz movement. Don't open it, you will invalidate the guarantee. Send it back for replacement or refund.1 point
-
Hey thanks, I found some dirt cheap watches on Aliexpress I'll buy her like 10 of em1 point
-
Cool thanks. It's less than i'm trying to get things perfect and more that i have zero frame of reference for any of this, there's a checklist for beginners, seemed like a good idea to pay attention to it. What i dont' want to do is get the damn thing together and it doesn't even keep good enough time to bother wearing, then i gotta disassemble, reclean and go down some big rabbit hole to find the one of seemingly 100 things that is responsible. I like to do things right the first time and I just learn better that way. Doesn't have to be perfect but to do things the way they're supposed to be done. It might take me a couple months of my rare spare time to get it right the first time, but i do it once the second time will only take an afternoon. That's just how i am. If those two things you mentioned are your test this is passing that with flying colors and I'm gonna move on with the assembly and lubrication. I'll be pretty disappointed if i get the thing put together and run it for a bit then put it on the timegrapher and it's just not performing.1 point
-
Unless it’s crimped shut, you can open it, provided you have the means to properly install the MS again. There was this whole “unbreakable” phase the industry adopted when it developed modern steel mainsprings. And parts were easily accessible. No one at the time would’ve thought there would be a “Swatch” group that would try to kill off independent repair. I should add that I’m working on a Longines L989.2 movement now - extremely rare twin barrelled marvel from the late 80’s. Only tackle what you feel confident you can replace if you screw up. Know your limits.1 point
-
Jfc ? Is that anything like kfc cos im bloody starving Yep Gert is the dogs nads with seiko.1 point
-
Here's one way I check the train of wheels. With just the train installed, no mainspring barrel and no pallet fork, I use my puffer to gently blow air at the escape wheel. The escape wheel should take off and spin vigorously. Then, I put the mainspring barrel in, and do the same. This time, the escape wheel should "bounce" off the resistance of the mainspring barrel, and then run the other direction a bit. This I call recoil, I've heard other terms used to describe the bounce. Once you've done this with a few watches you'll get a feel for what the train should do. Cheers!1 point
-
I bought a "Pocket Geiger Counter". It's a small detector which plugs in to a phone or tablet. They were made cheaply for selling in Japan after Fukushima. They don't seem to be on sale any more. But a quick search on ebay/Amazon, there are detectors available for less than £50. Be careful that you get a "Nuclear radiation" detector - ie. measures alpha/beta/gamma particles. A lot of the radiation detectors listed only detect electromagnetic radiation.
 1 point
 -
I am wearing one now...my first one that I brought back from the dead. Have saved another one and have bought a running one. I have three. But I only wear the one. They are straightforward to service overall.1 point
-
Re-plating involves putting the case through a diluted acid bath, then through a nickel / chrome bath to electroplate it. Covering that chapter ring to prevent liquid ingress during this process will be a challenge. Maybe you lucky and you can put the glass back and case back. Find a way to seal the stem tube. Then you can plate the case, but understand you’ll have to spend time ensuring there’s no leaks so fluids can’t get to the chapter ring. I’ve done some DIY nickel plating so it’s something you can experiment with at home. Alternatively there’s a “wipe on” plating process you can try at home that doesn’t involve immersion in liquids, but basically dabbing an anode in plating solution and wiping it over the surface to be plated. I’ve never tried this method but I’ve seen is being done with ok results. Those are the only possible solutions I can think of1 point
-
My general advice on this one is leave it alone. Bezels typically are not restored. They are replaced or left alone. Sometimes, we strive to restore a watch to new condition but often times, attempting to do that does not increase the watch's value at all. If the restore looks like an attempt to restore it more than an actual new watch, that is more distracting than just letting the watch be with all of its character lines. I am sort of like an OCD type of person and I do not like anything misaligned or out of symmetry. I don't like stains or scratches. It has been hard for me to learn this principle. When I'm shopping for a watch, I generally stay away from the ones with badly stained dials or bezels, but sometimes, the stains and scuffs can be attractive, but you need to learn how to appreciate that aspect. I have slowly come around on this and gone against my natural tendency. Some of my restorations are very subtle, letting the marks remain but just taking much of the light wear marks away. Of course, this is totally subjective and others will have their own opinion. This is just my humble opinion. I think your bezel looks ok as is. I also don't think there is any way you can make it look much better and I wouldn't use anything other than mild soap and warm water and a very soft brush or just my skin to clean it. Even then, that is risky as you don't want to flake off any of that pretty purple paint. Every time I've attempted to fix a dial or a bezel, I make it worse. Just my two cents.1 point


.thumb.jpeg.47a54c96c07cb7d64b695e5ff6c0bcf0.jpeg)