Leaderboard


Popular Content
Showing content with the highest reputation on 01/23/21 in all areas
-
Just fixed up my old YEMA Jump hour from 1975ish. As shown earlier I polished through the chrome and had to re-plate it, and did a full service on it as well. This bad boy will be going for years to come ? 582951535_Untitled2_1080p.mp42 points
-
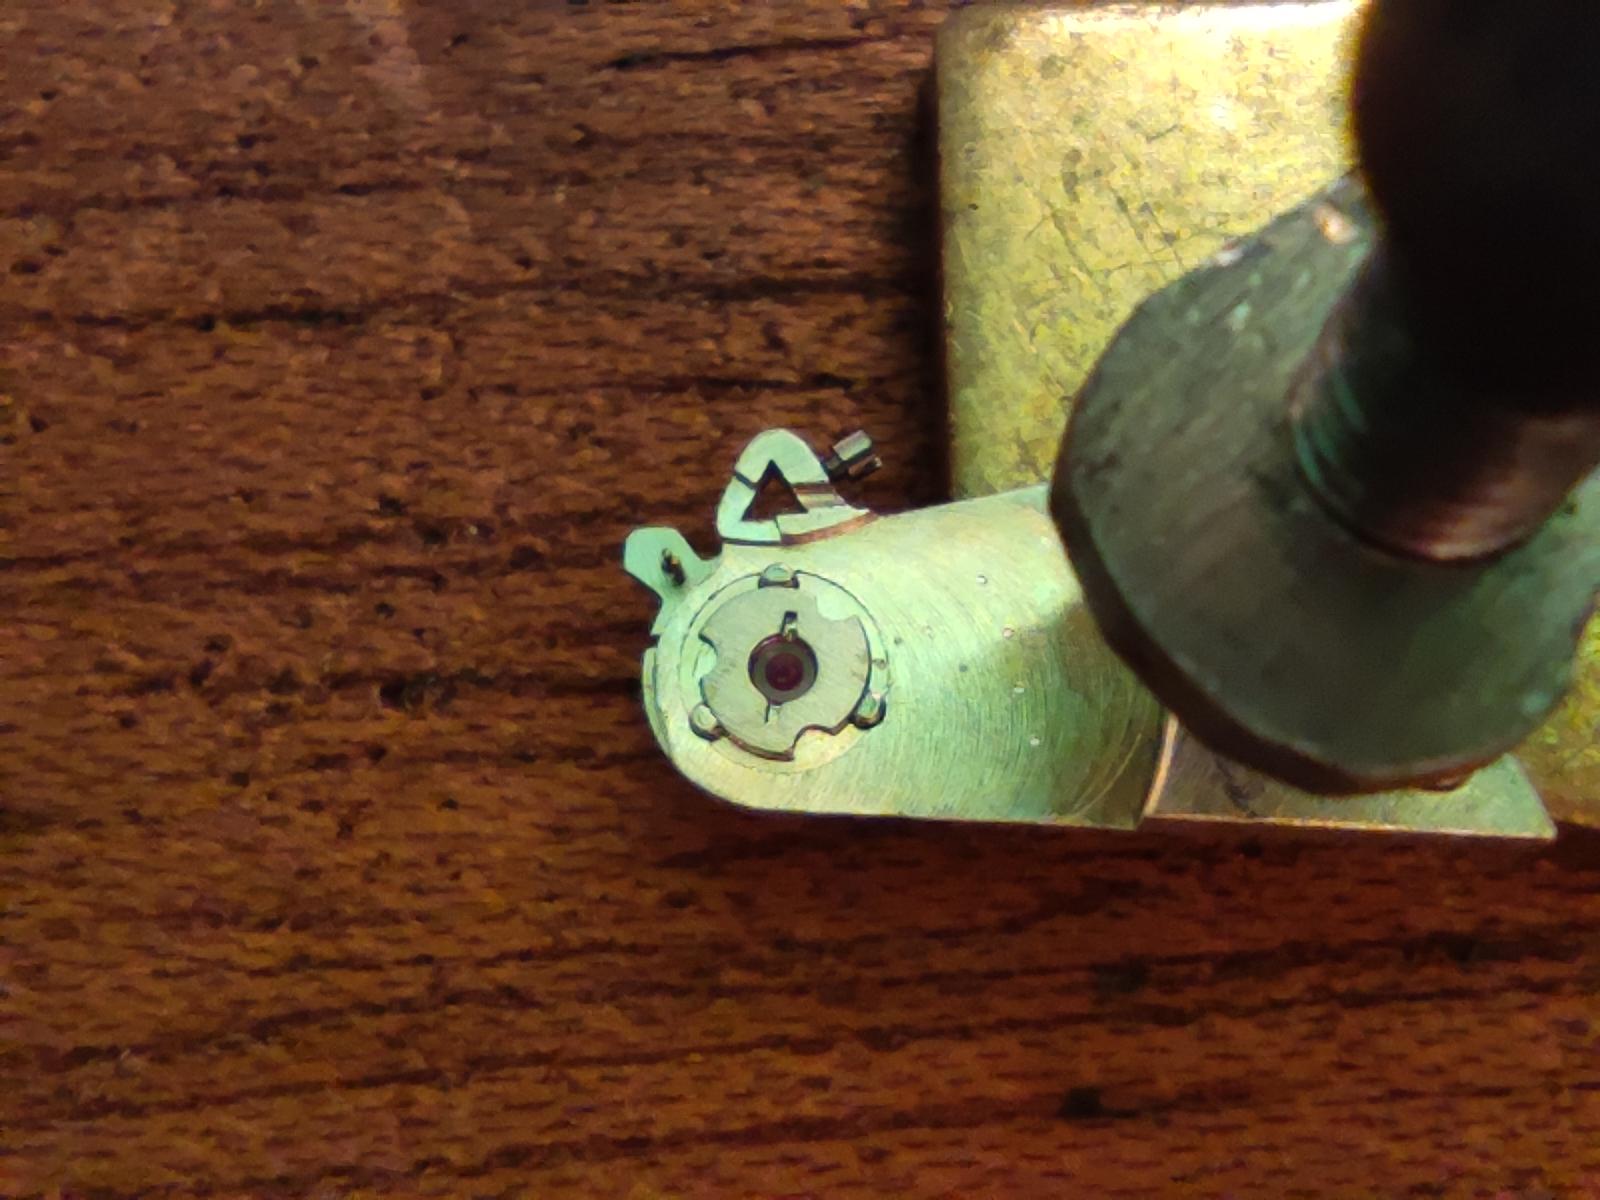
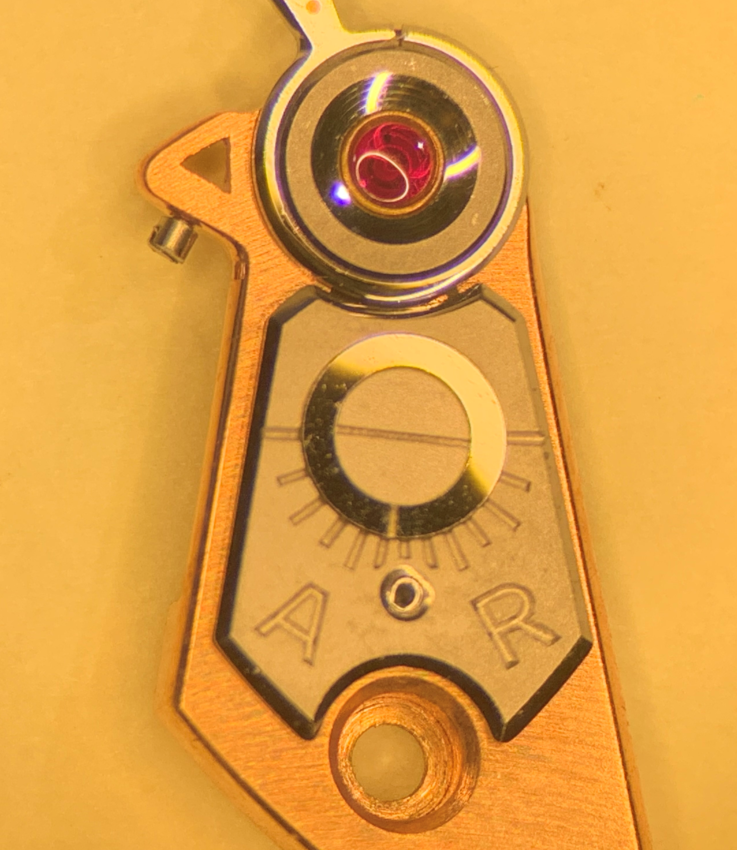
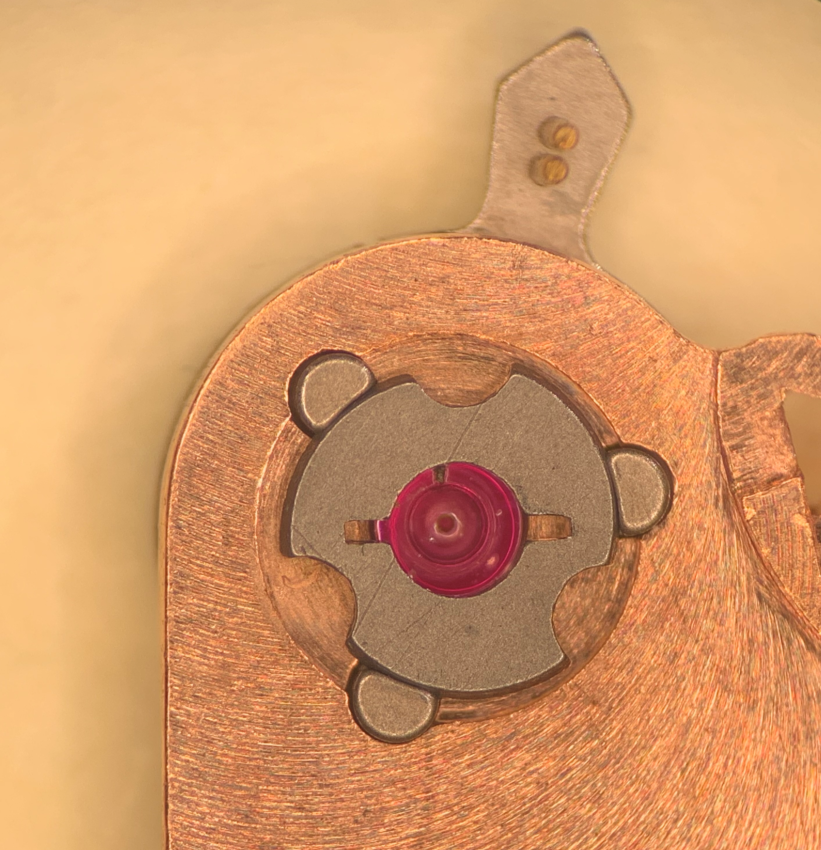
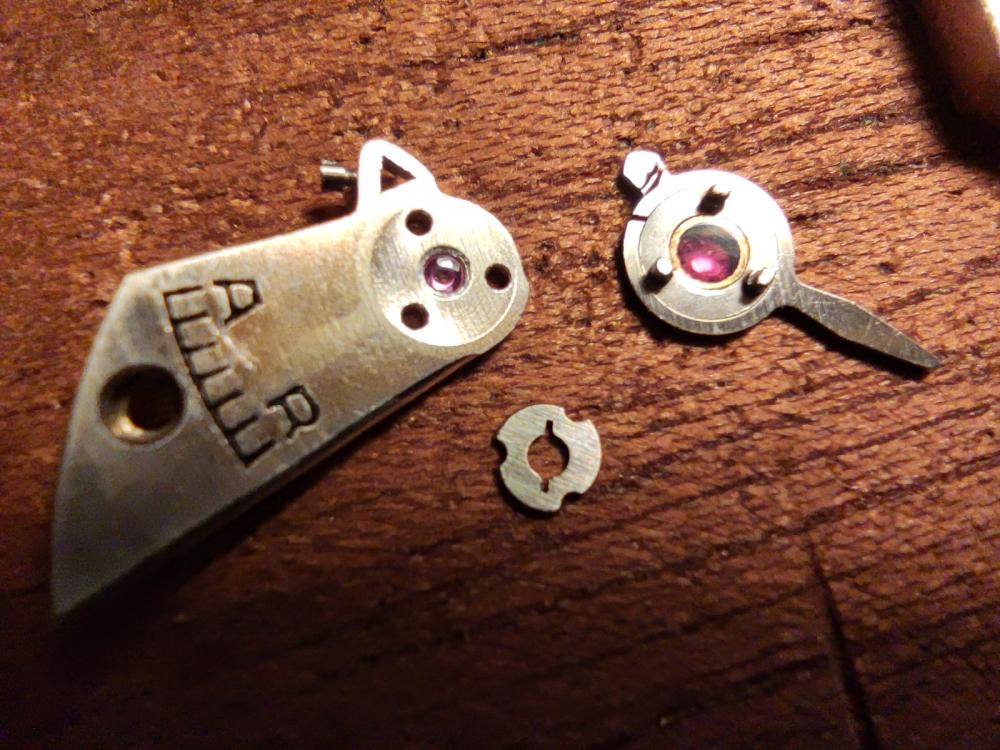
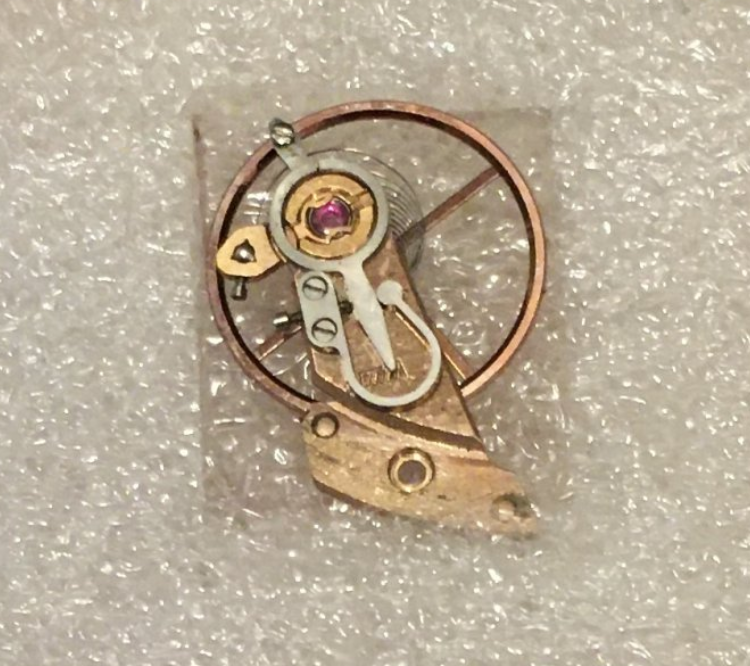
Dear all, Not really a walkthrough but something I wanted to share since I've never seen it before. I 've striped down an cleaned a 1935 made Omega 23.4 SC calibre. Losened the balance spring stud and removed the balance wheel to take off the cap jewel when I found this piece of pure swiss mastery: The regulator, regulator arm and cap jewel is one unit which is held by three pins and a slotted disc serving as a bayonet lock. When you insert the screwdriver into the centre slot and turn everything comes undone and falls out. Like so: You can very comfortabley grab the cap jewel now by the "handle" and clean it with peg wood in the benzine jar. The caliber is small - only 23.7mm across but the parts are so well made that putting it together again is a matter of seconds. I'm really impressed. All the best Alex

 2 points
 -
Your question was already answered by Nickelsilver. I just want to add my comment before you spend 35€ Your watch, 19''' was produced with three different Staffs: you may want to remove your existing staff first to check which one to order. BS4652 19 482 240 BS4653 19 484 240 BS4654 19 488 2392 points
-
That's the diameter of the hole in the balance wheel.2 points
-
Misshaps occur when you exert force. I put the balance aside, put a bit of oil on the boot ,turn a couple of times so it turns nicely, rinse. You would then proceed with installing balance complete.2 points
-
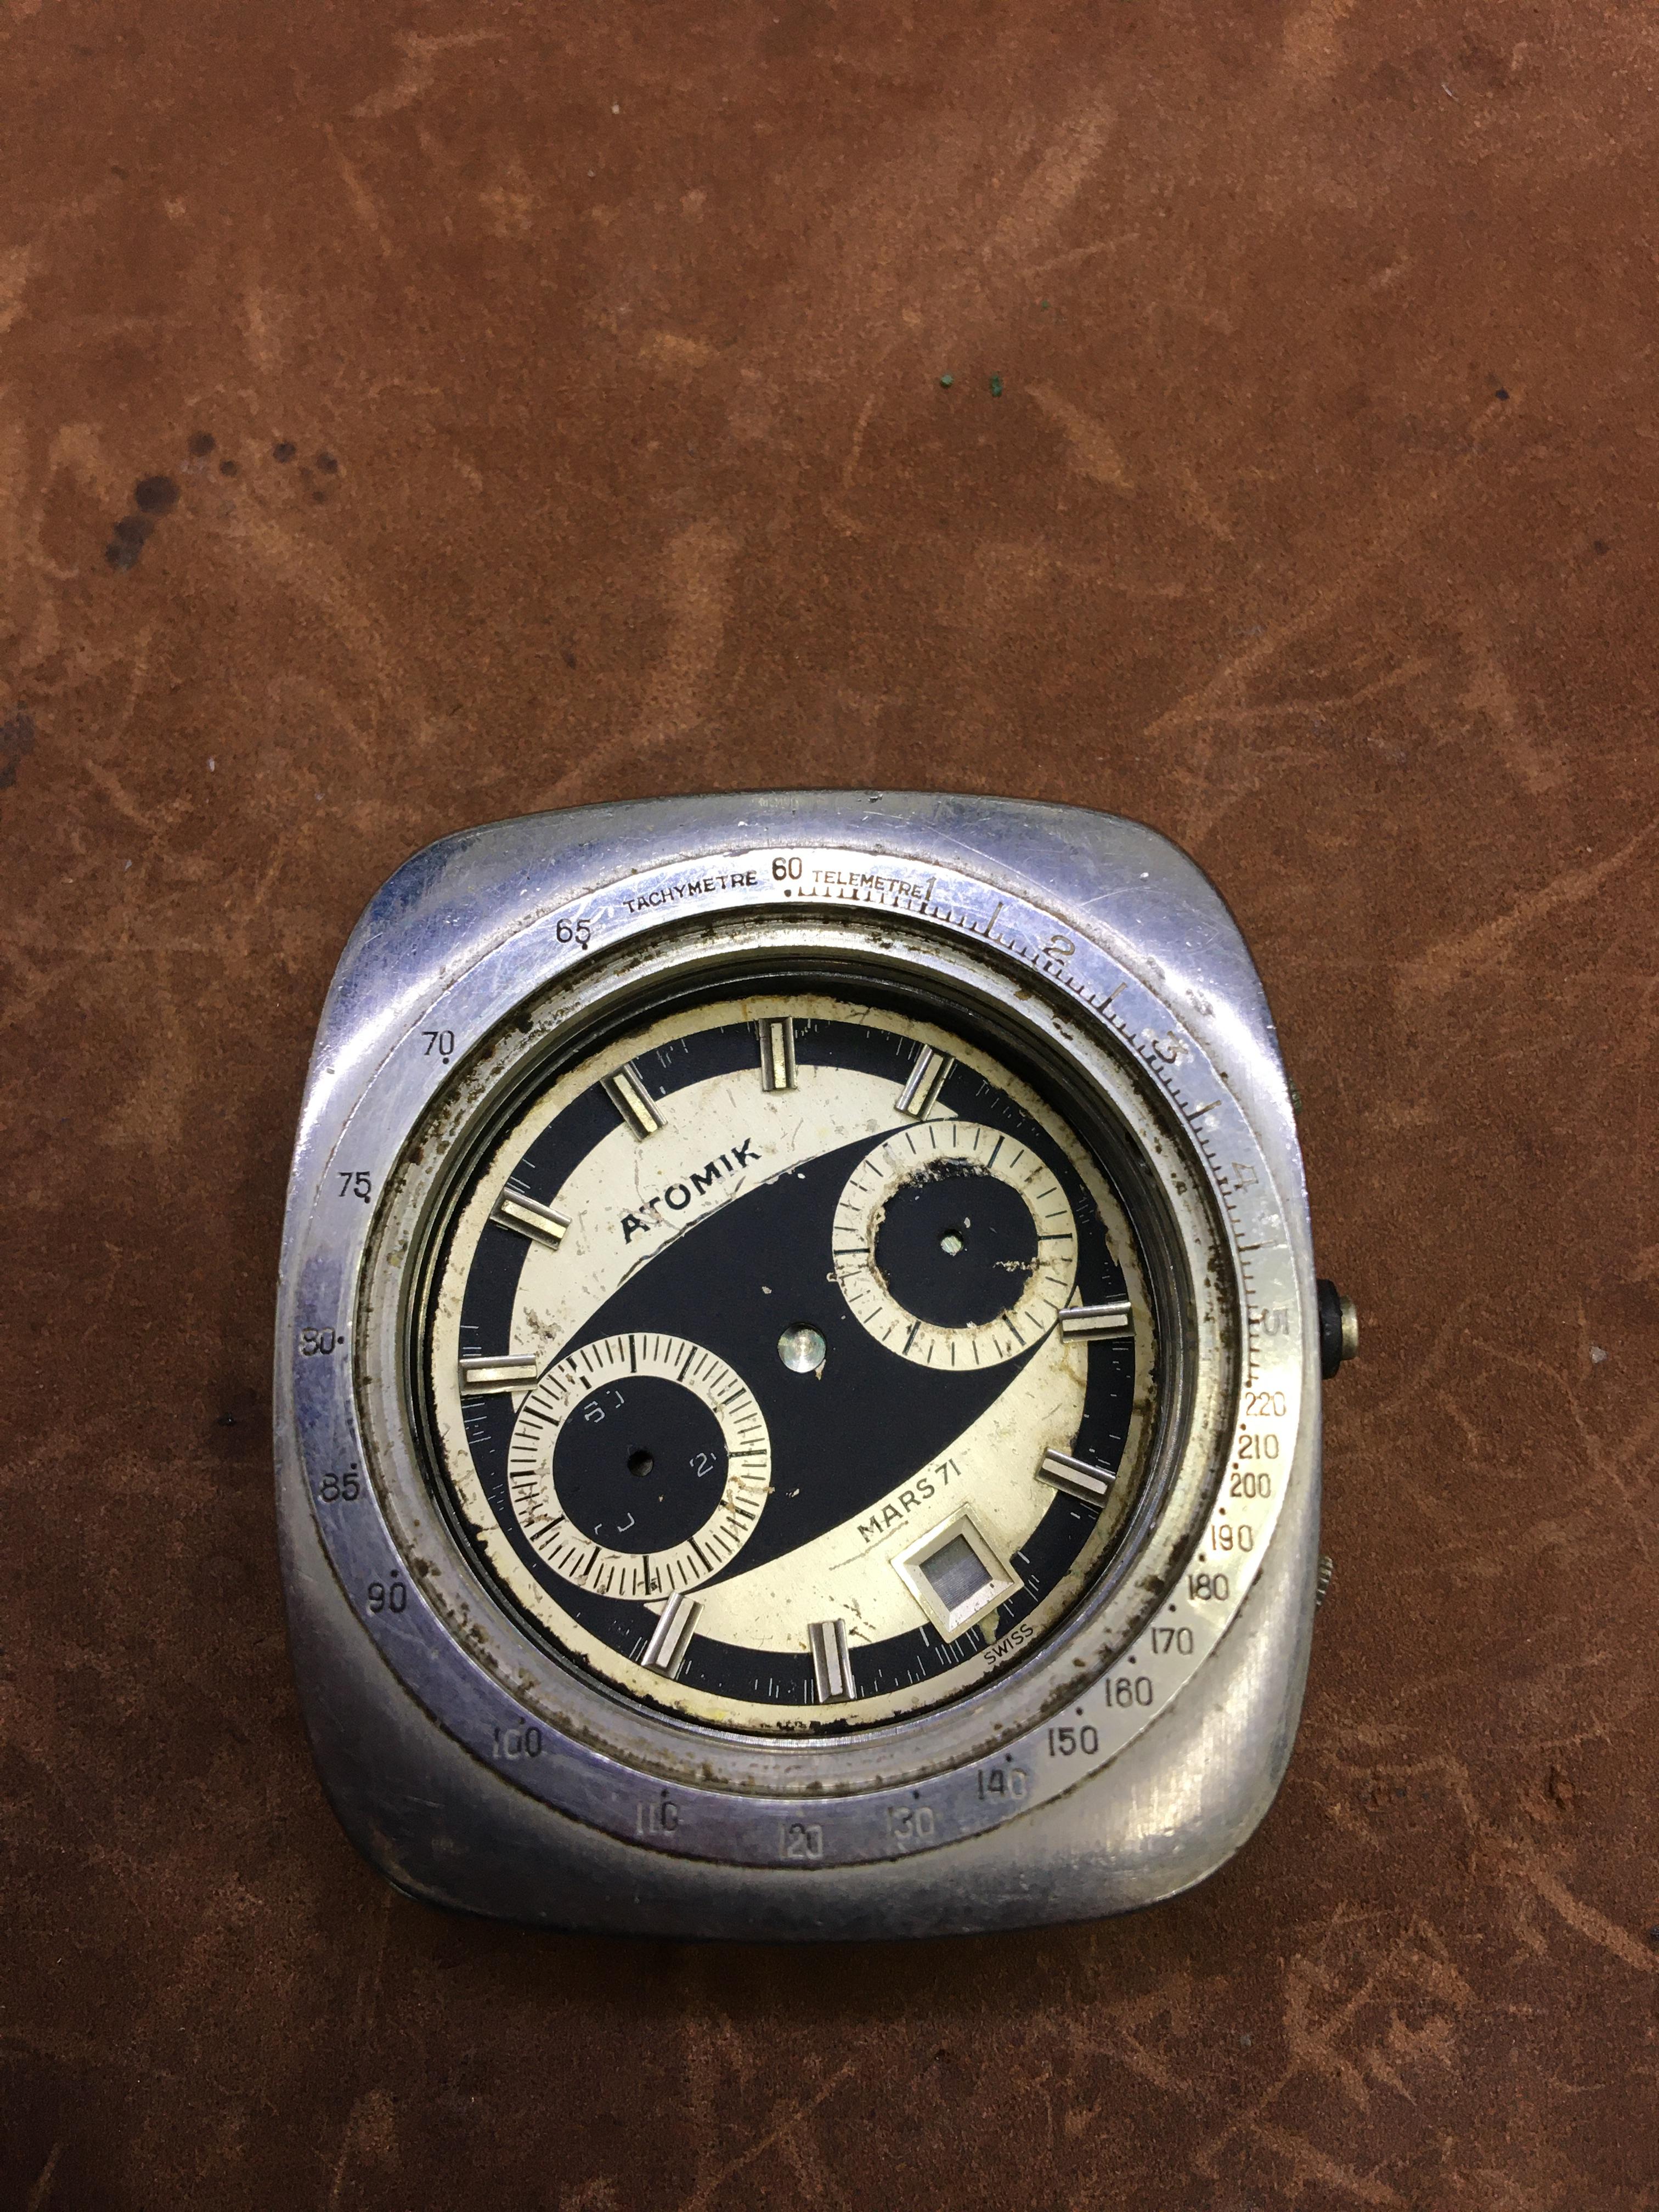
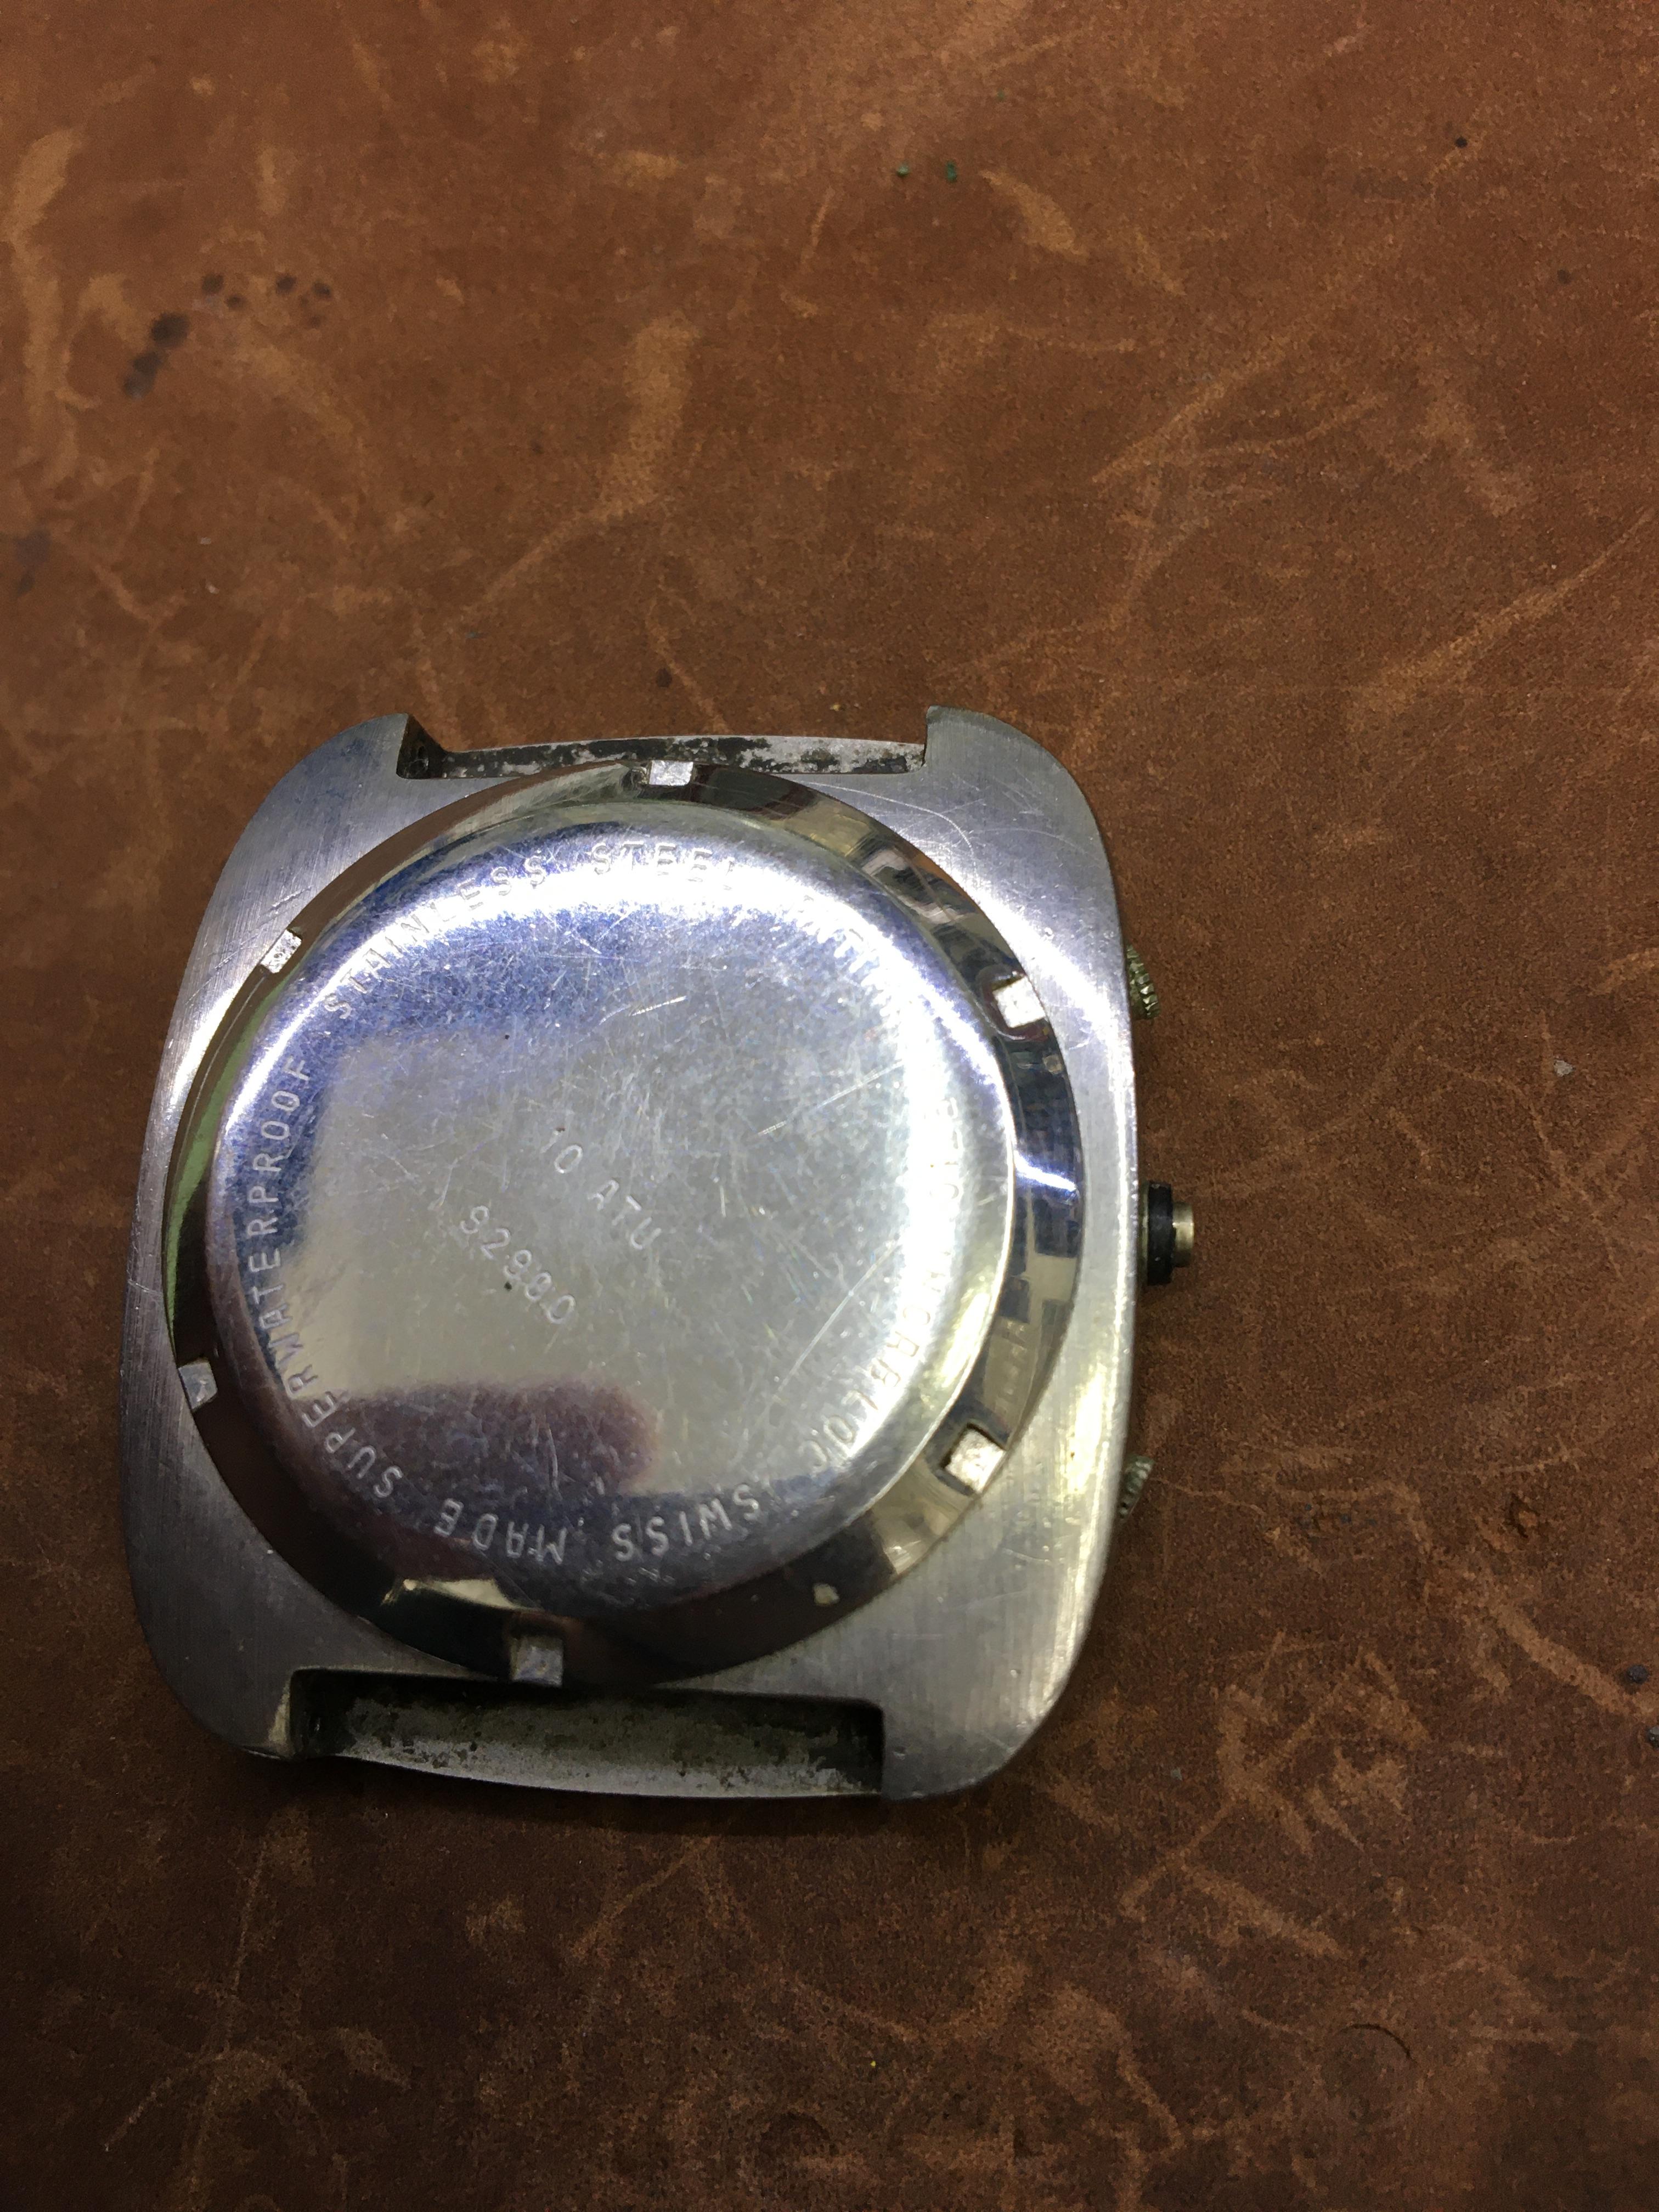
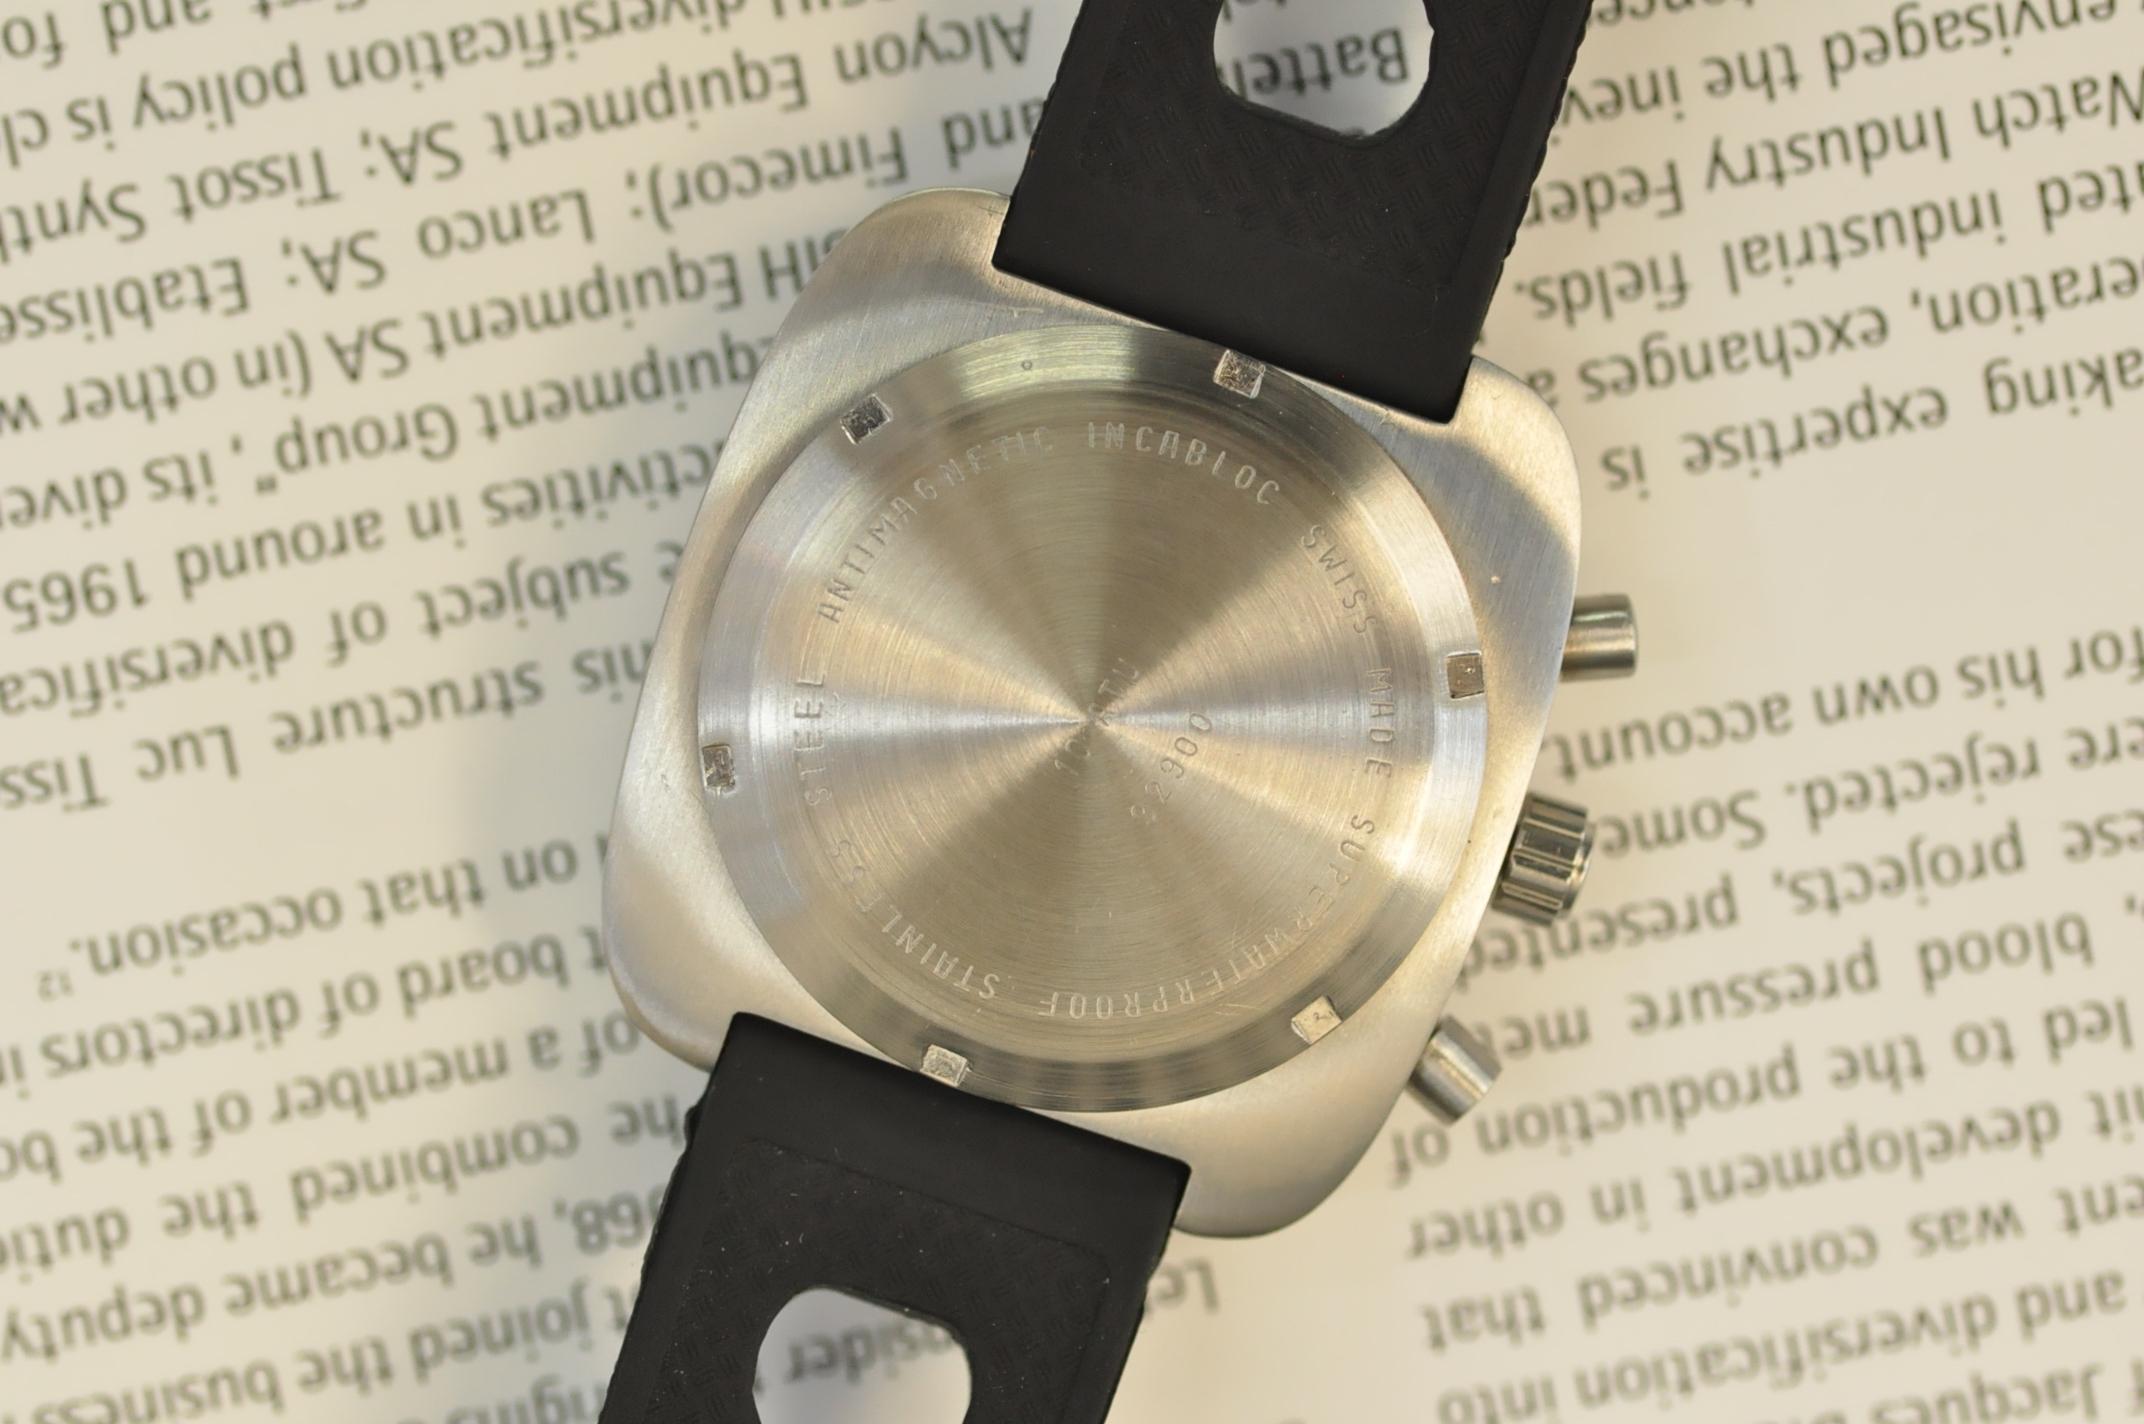
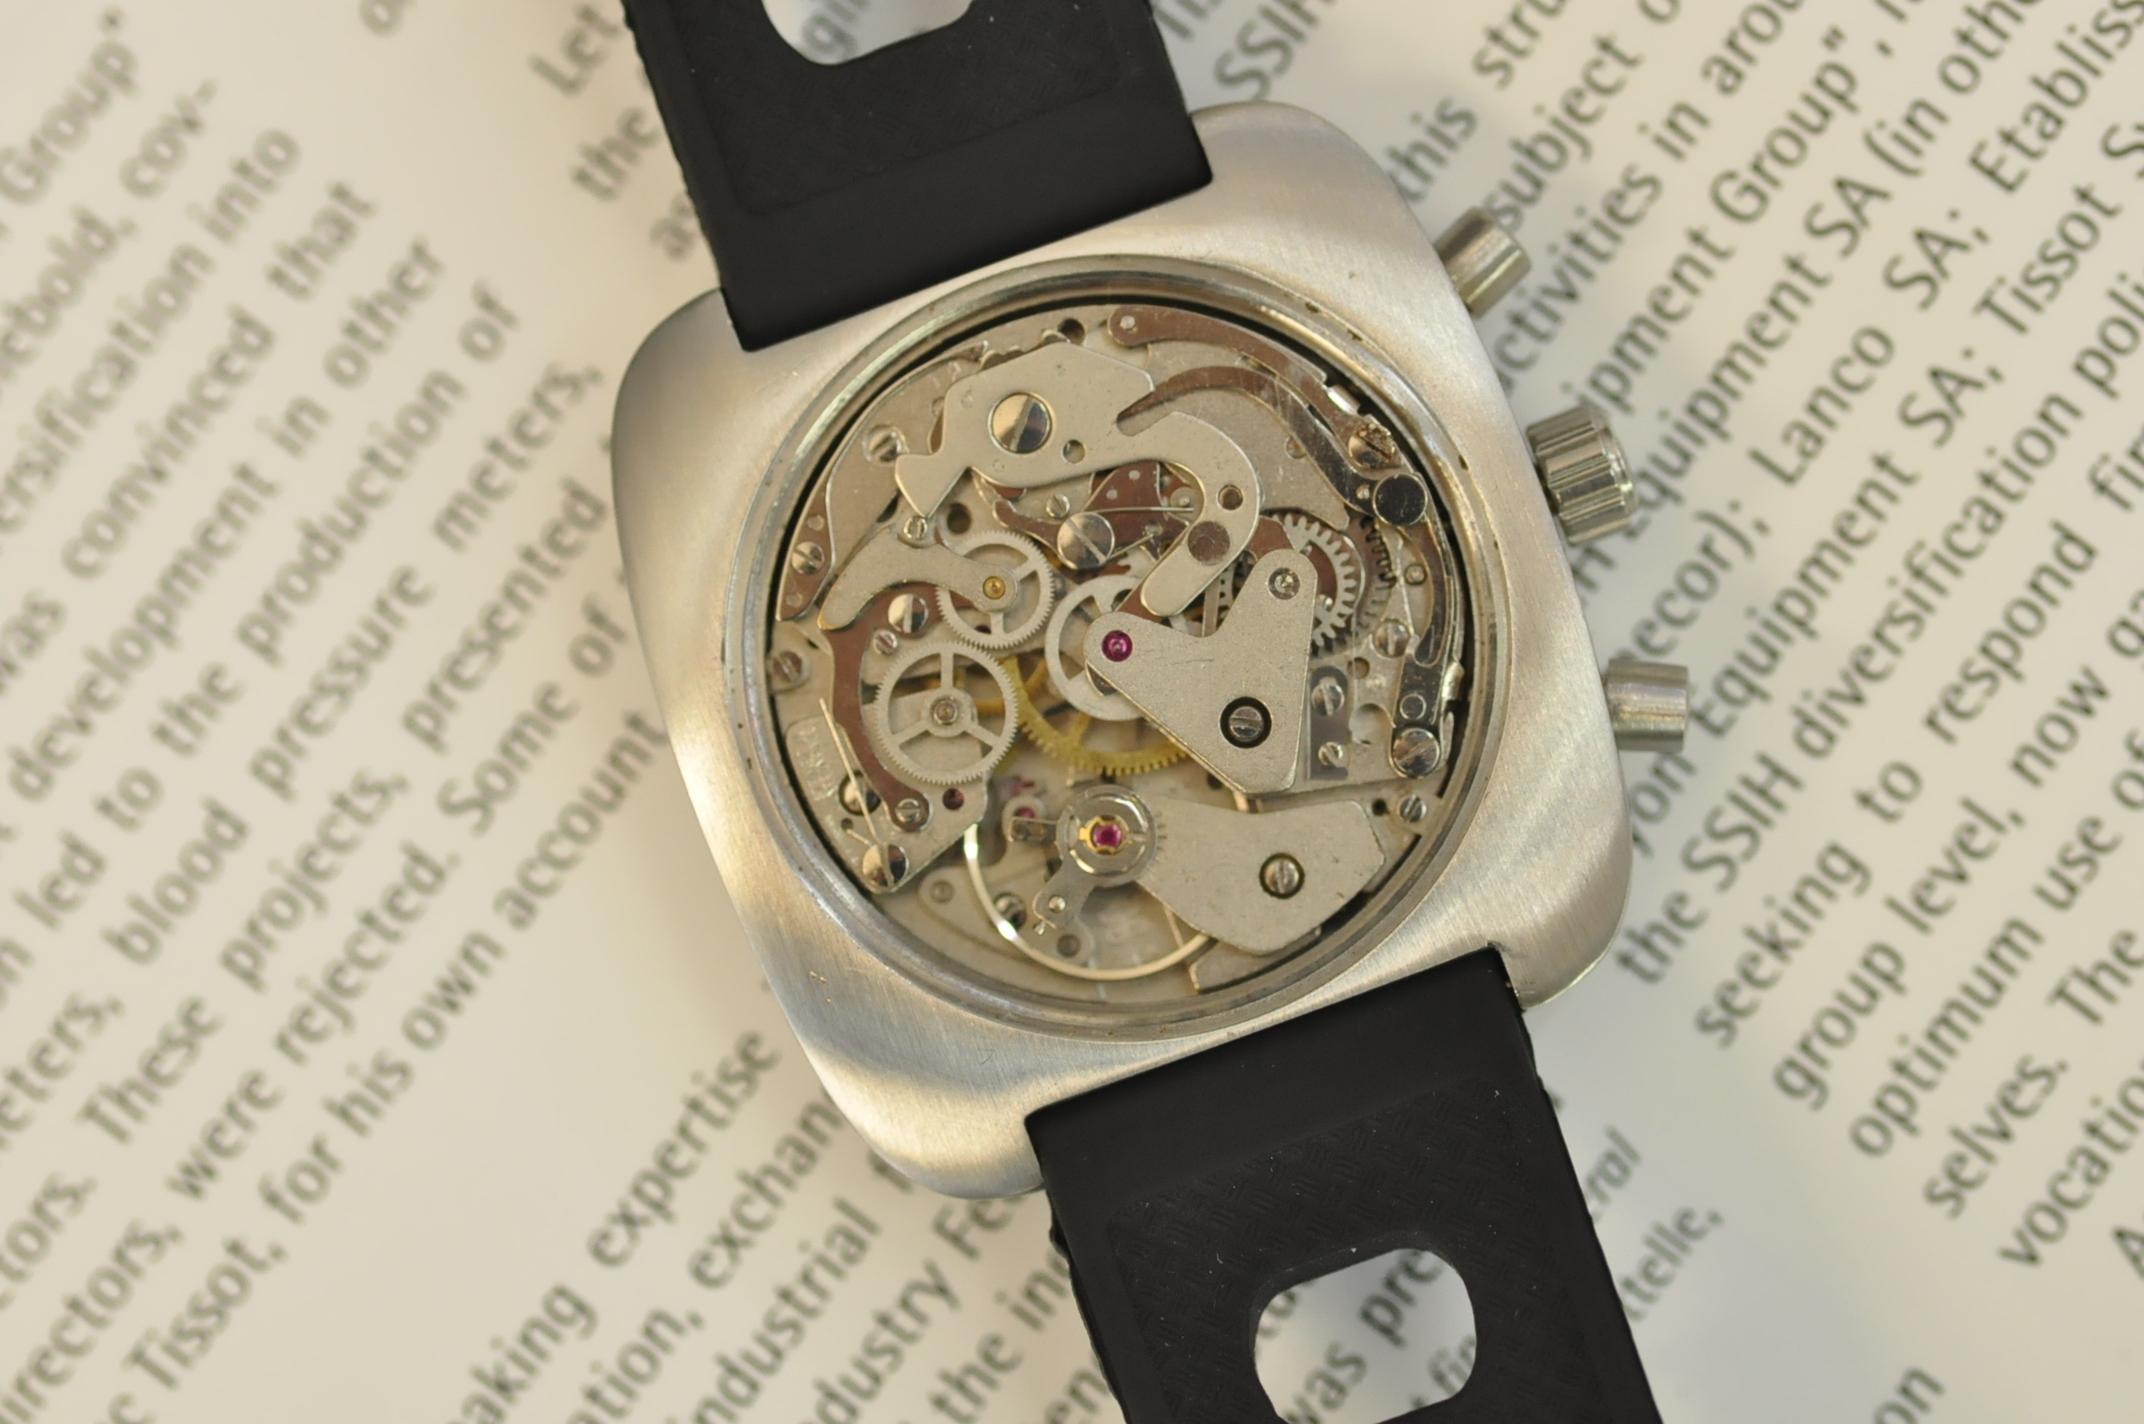
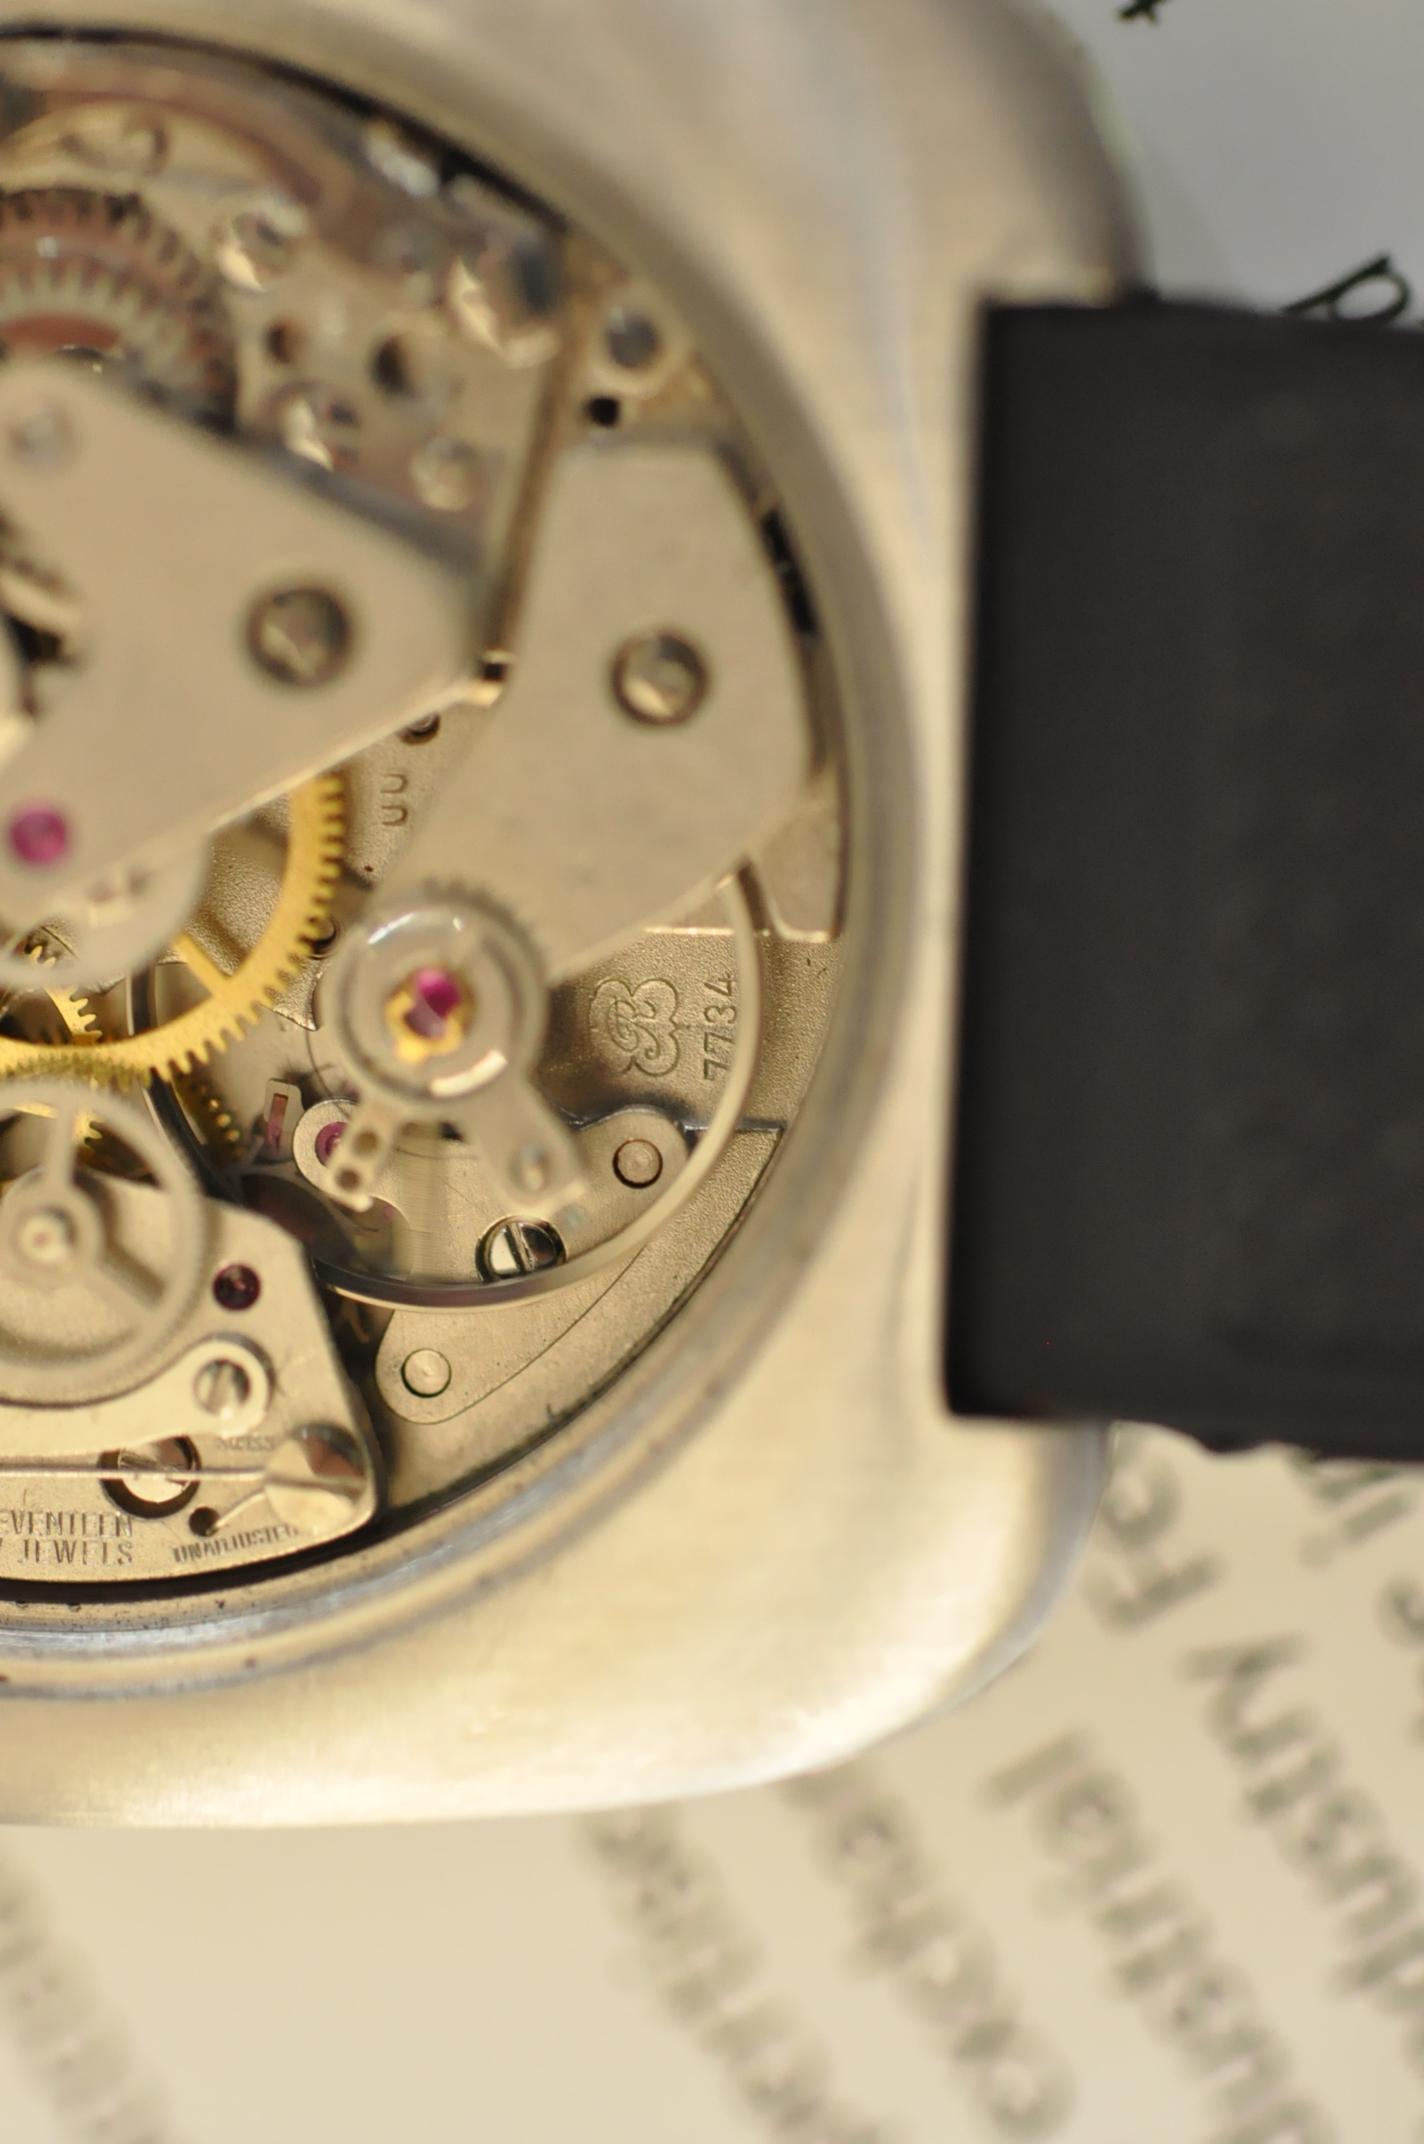
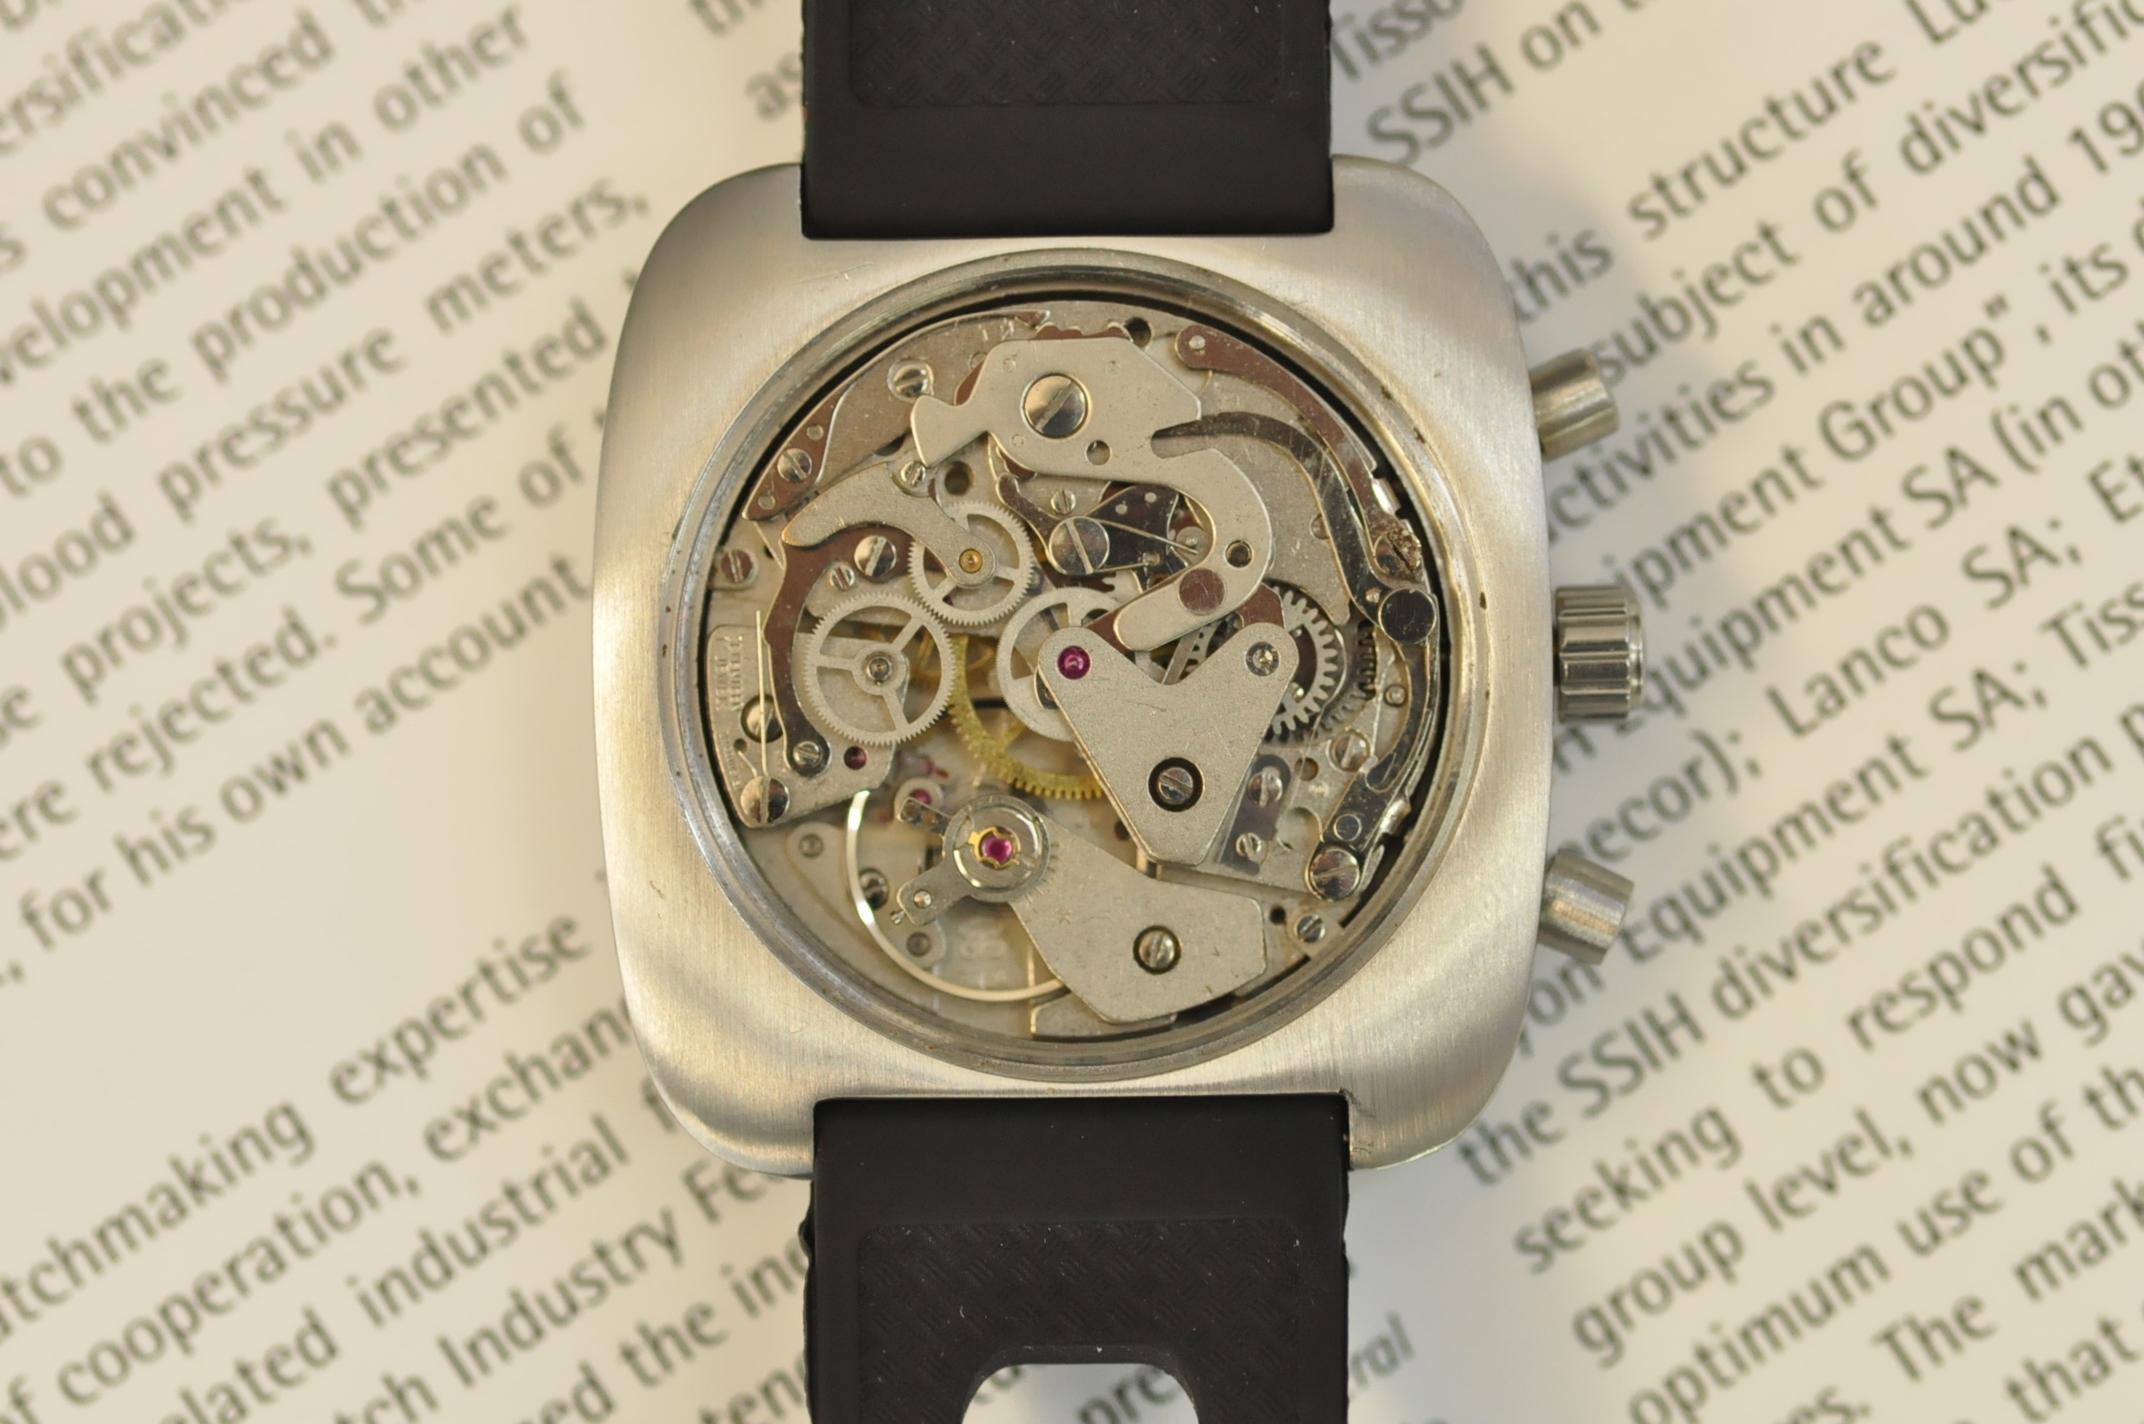
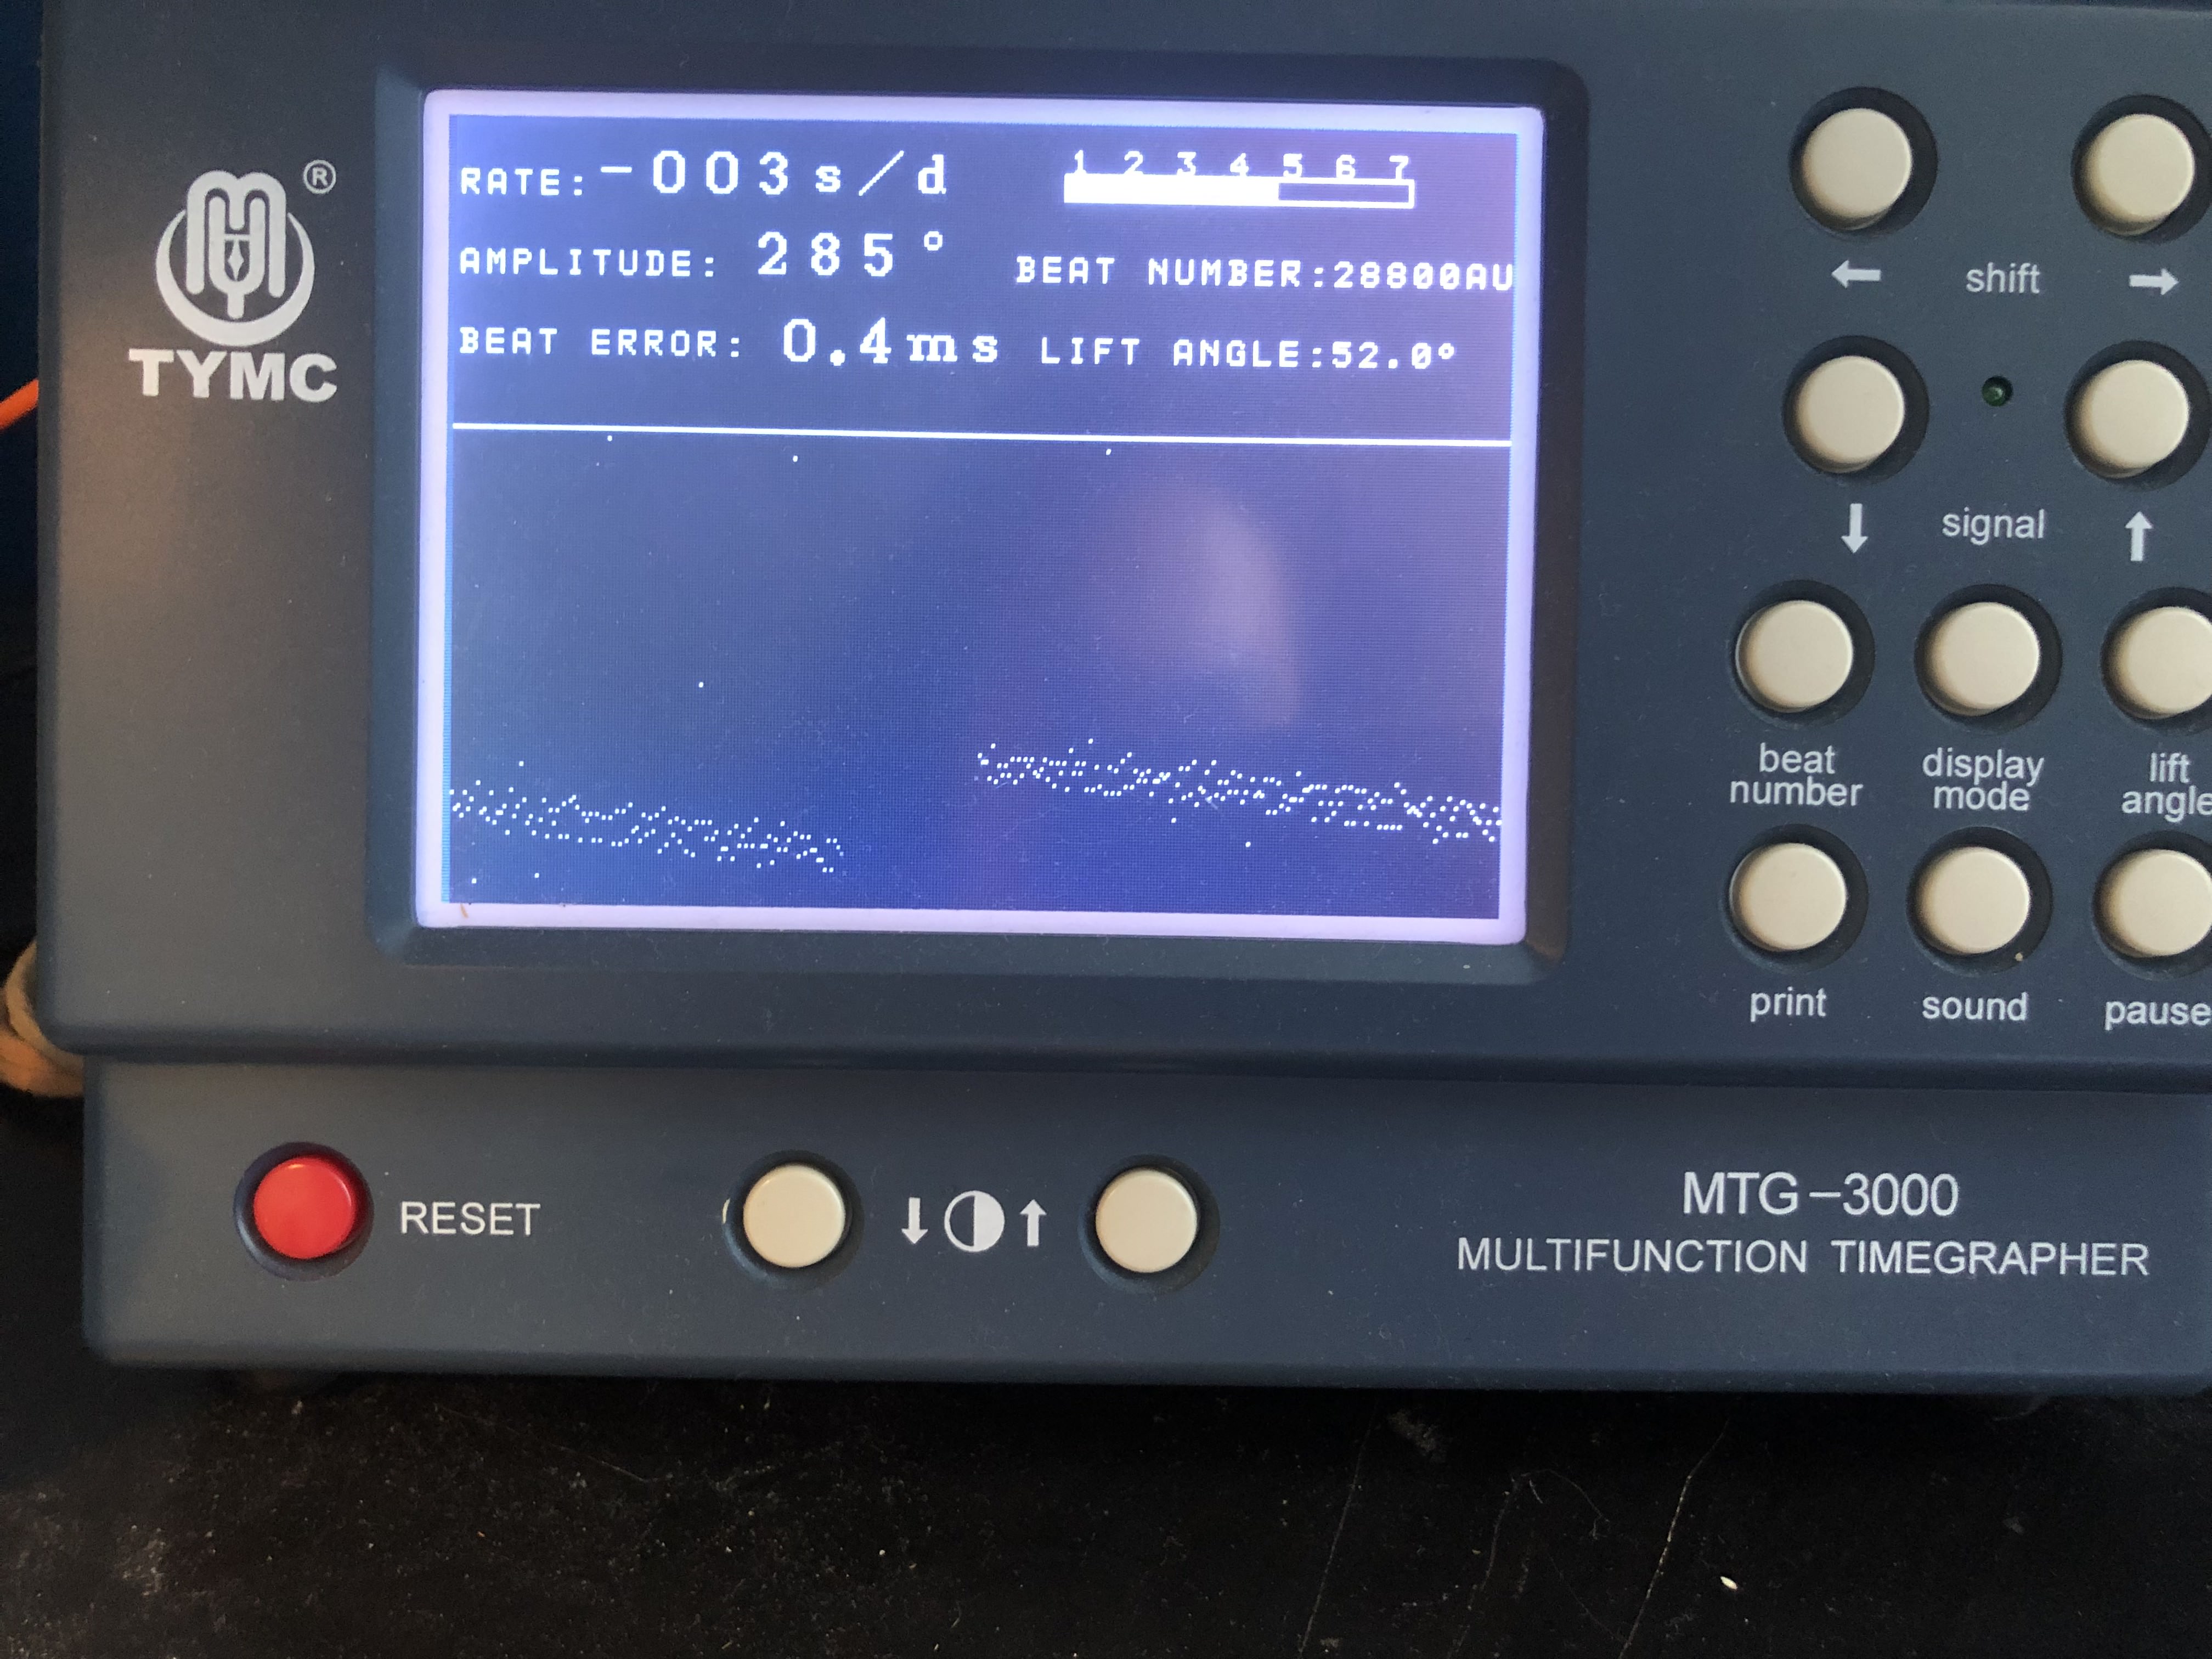
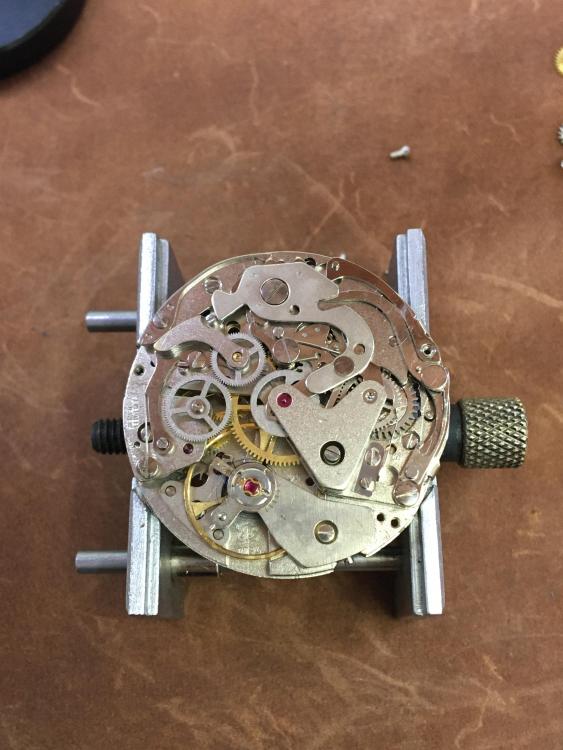
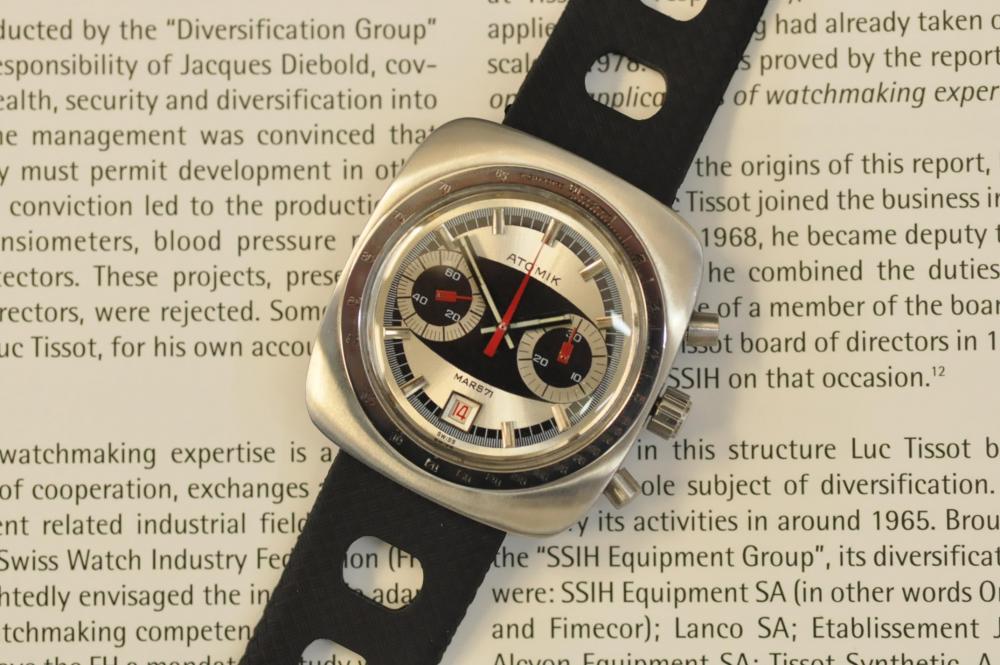
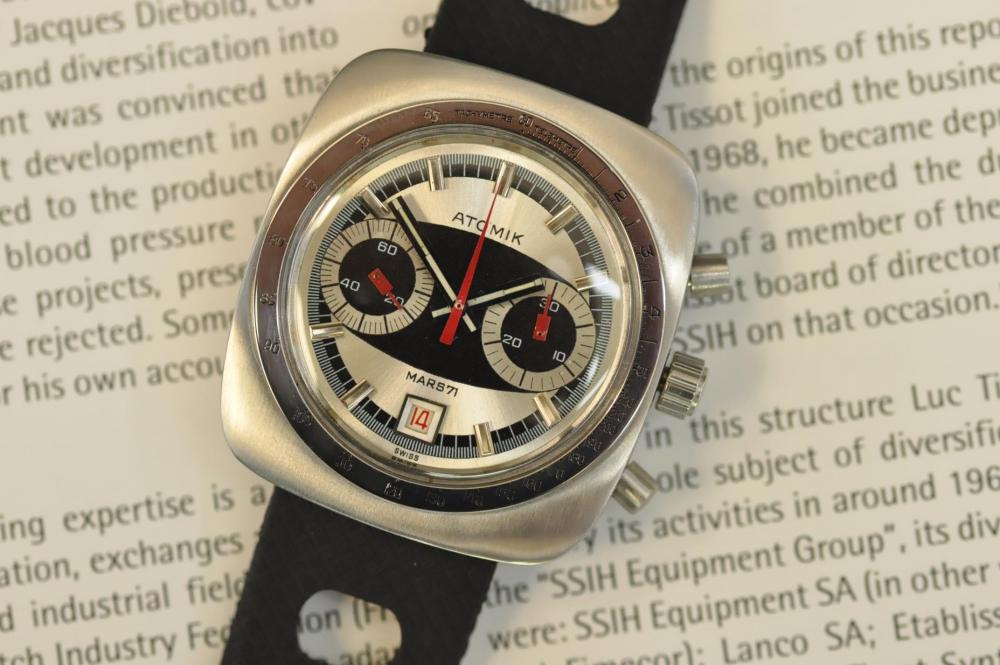
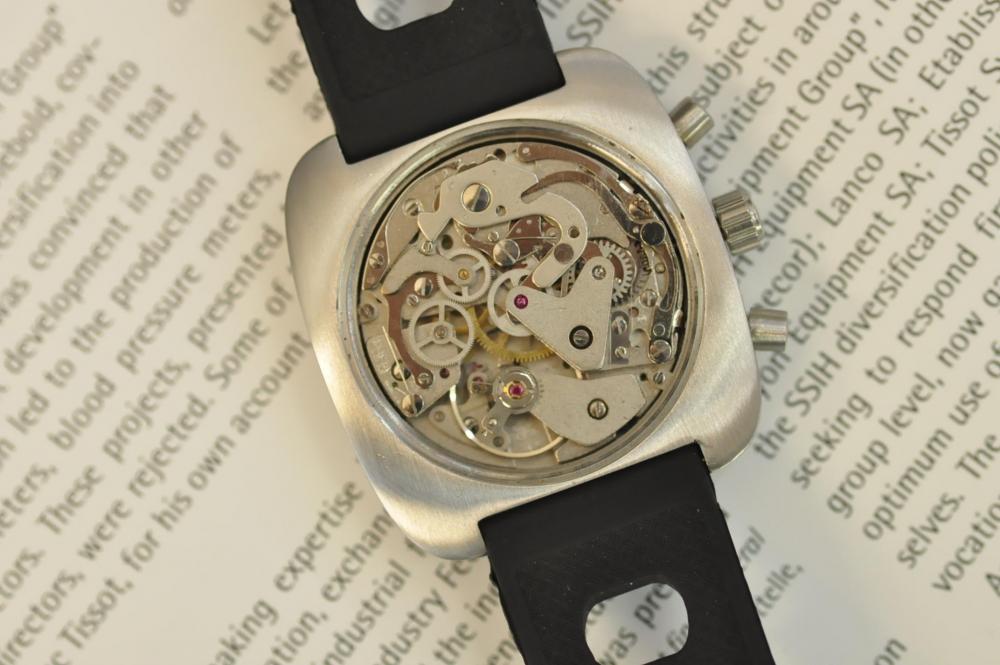
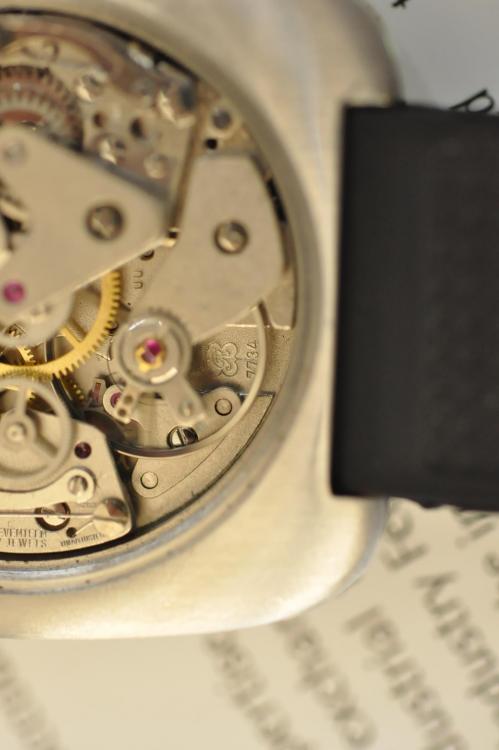
Hello, everybody. I wanted to share my restoration stories that I have done for a long time and thrown into my archive. First I discussed the Atomic Mars 71 Brand using Valjoux 7734. As it was seen, scratch and dial is broken. To begin with, I tried to brush the Case as Brushed and make it the first day. If it is decorated, I polished and re-painted the indexes (with acrylic paint). I usually do this in three layers so that the paint is not deleted in a short time. I replaced the case buttons and tubes with aftermarket buttons. Since the condition of the dial was in very poor condition, I had it re-painted. The quality is not so good. In Turkey, unfortunately, not doing the job well. Caliber 7734 (Valjoux) is a special and robust mechanism for me. With good maintenance and lubrication, you can reduce deflection values up to 3-4 seconds per day. I added a short timelapse video about it :) As a result, such a result came before us. Thank you Taskin https://www.youtube.com/watch?v=XKH6yTKUfpM


 1 point
 -
Hi everyone, have you guys and gal's heard the rumor about butter, well I'm not going to spread it.1 point
-
My Dad gave this to me on my 14th birthday. I had wanted it for several years. Some years later, I had another dial made for it that was customized with my name on it. I kept the original dial. Today, I finally got the courage to take it apart and restore the original dial. Judging from the lume on the hands, I am guessing that maybe I did that myself a lifetime ago. Part of me wants to have the dial and hands refinished to match. The other part of me says no...leave it be. Maybe a little surprising that I would be nervous about doing this today. Already in the last few months, I have disassembled and reassembled several watches (one a chronometer Chronograph) without much fan fare. But, this watch is personal...the others were from the junk box.
 1 point
 -
As a retired medical radiation physicist, I would be very wary of radium as it's half life is 1600 years (as opposed to tritium which is 12 years), which means it's strength won't diminish in our lifetimes for sure. So, I personally would not wear a radium dial watch 24/7 as it is close to the skin, constantly exposing with alpha, beta, and high energy gamma rays (so sticking radium hands in a typical lead box doesn't really do much), and the radiation level varies from watch to watch. Granted, it's probably small, but is cumulative over time and increases significantly the closer it gets to you. And, as has been previously pointed out, inhalation or ingestion of radium particles is especially bad as now the radium is up close to internal organs like the lungs. Also, proper disposal of radium is tricky as it's effect never diminishes. Companies that dispose of radioactive material as a business have state licenses that they must adhere to; watchmakers? I doubt it. https://www.livescience.com/39623-facts-about-radium.html#:~:text=Radium emits alpha particles (two,according to New World Encyclopedia.1 point
-
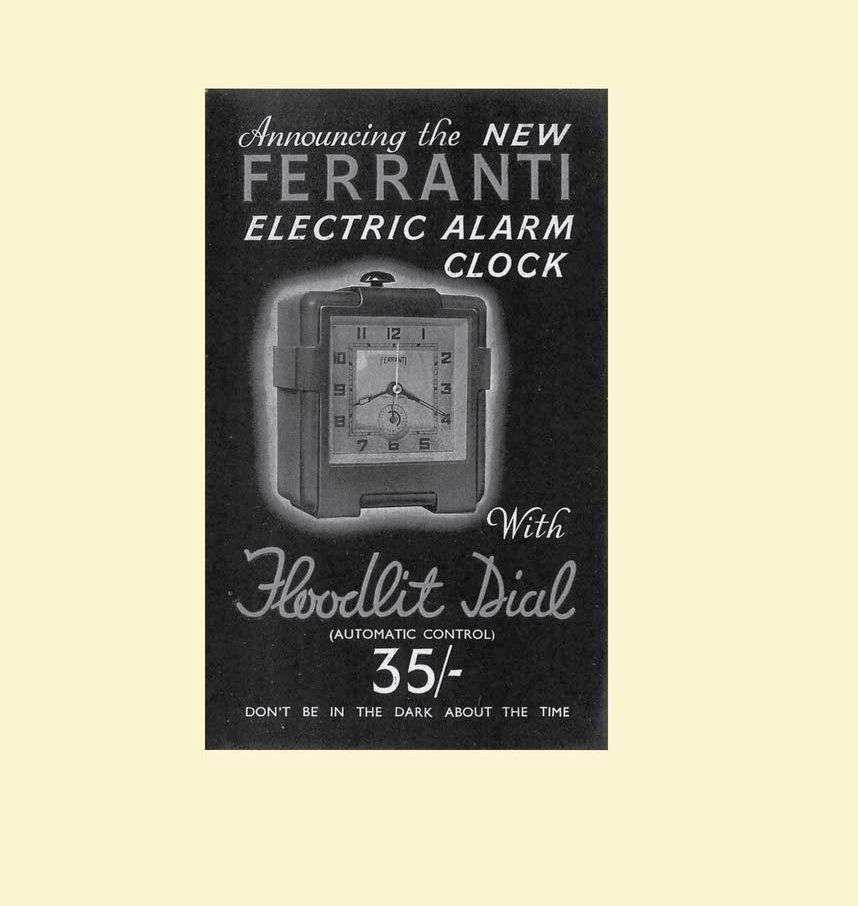
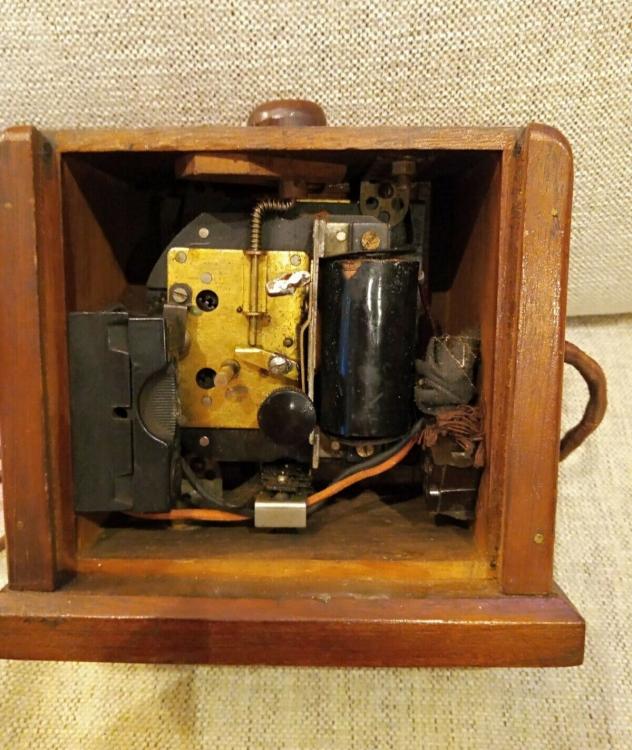
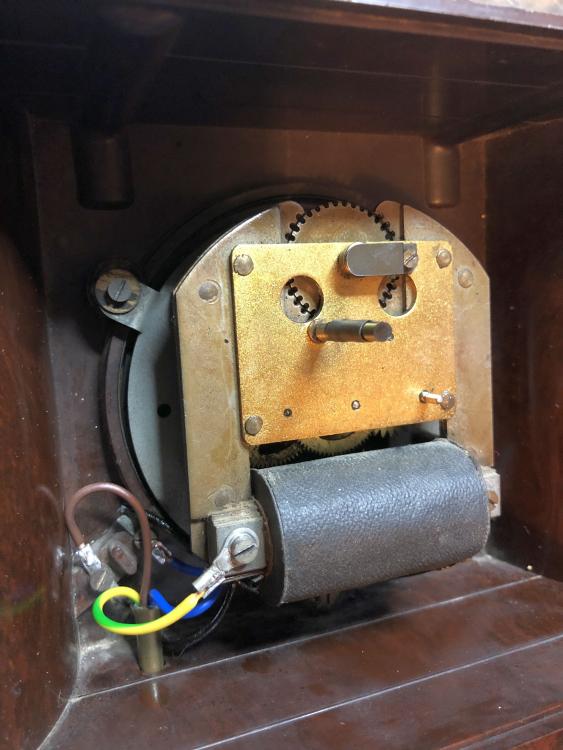
This is the mechanism in the 'Floodlight alarm' identical to the other alarm that I have other than a simple cam mech to turn the dial light on at midnight and off at 8am, which sadly doesn't work as the secondary winding in the coil that turns it into a 3volt transformer, is open circuit.... Note the use of Meccano to hold the movement in the case ? This is what it looked like when I got it......?

 1 point
 -
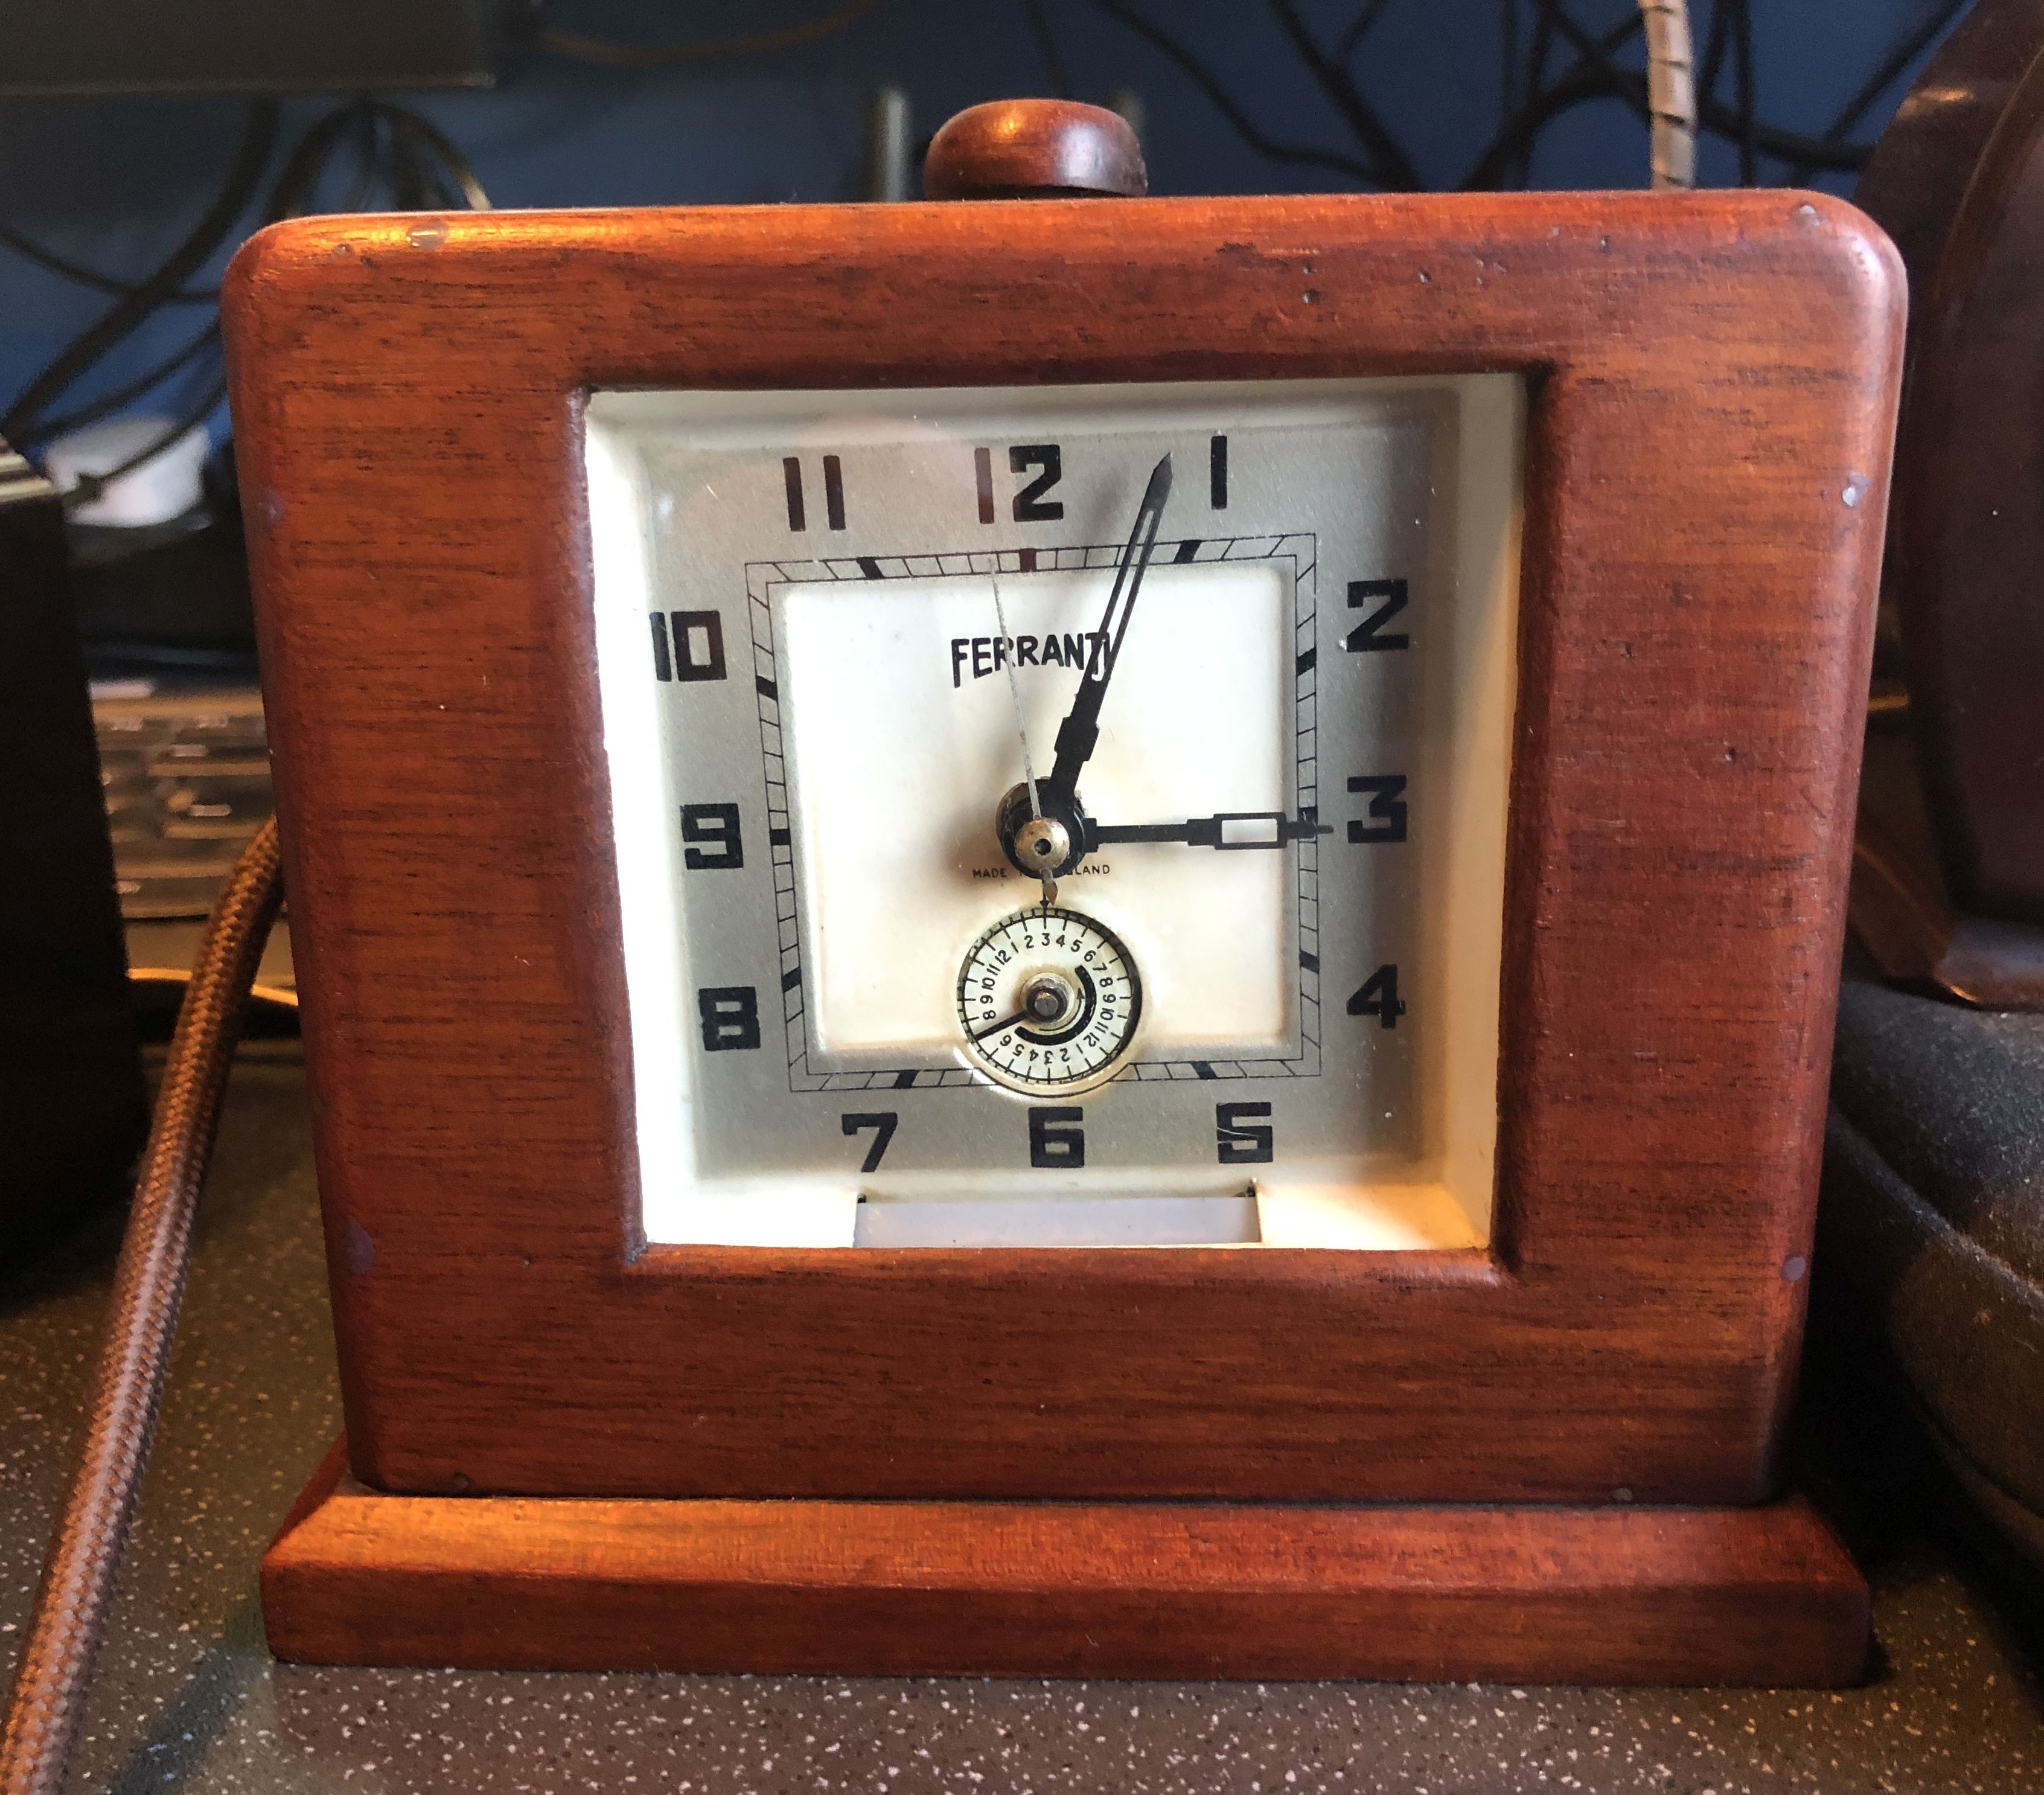
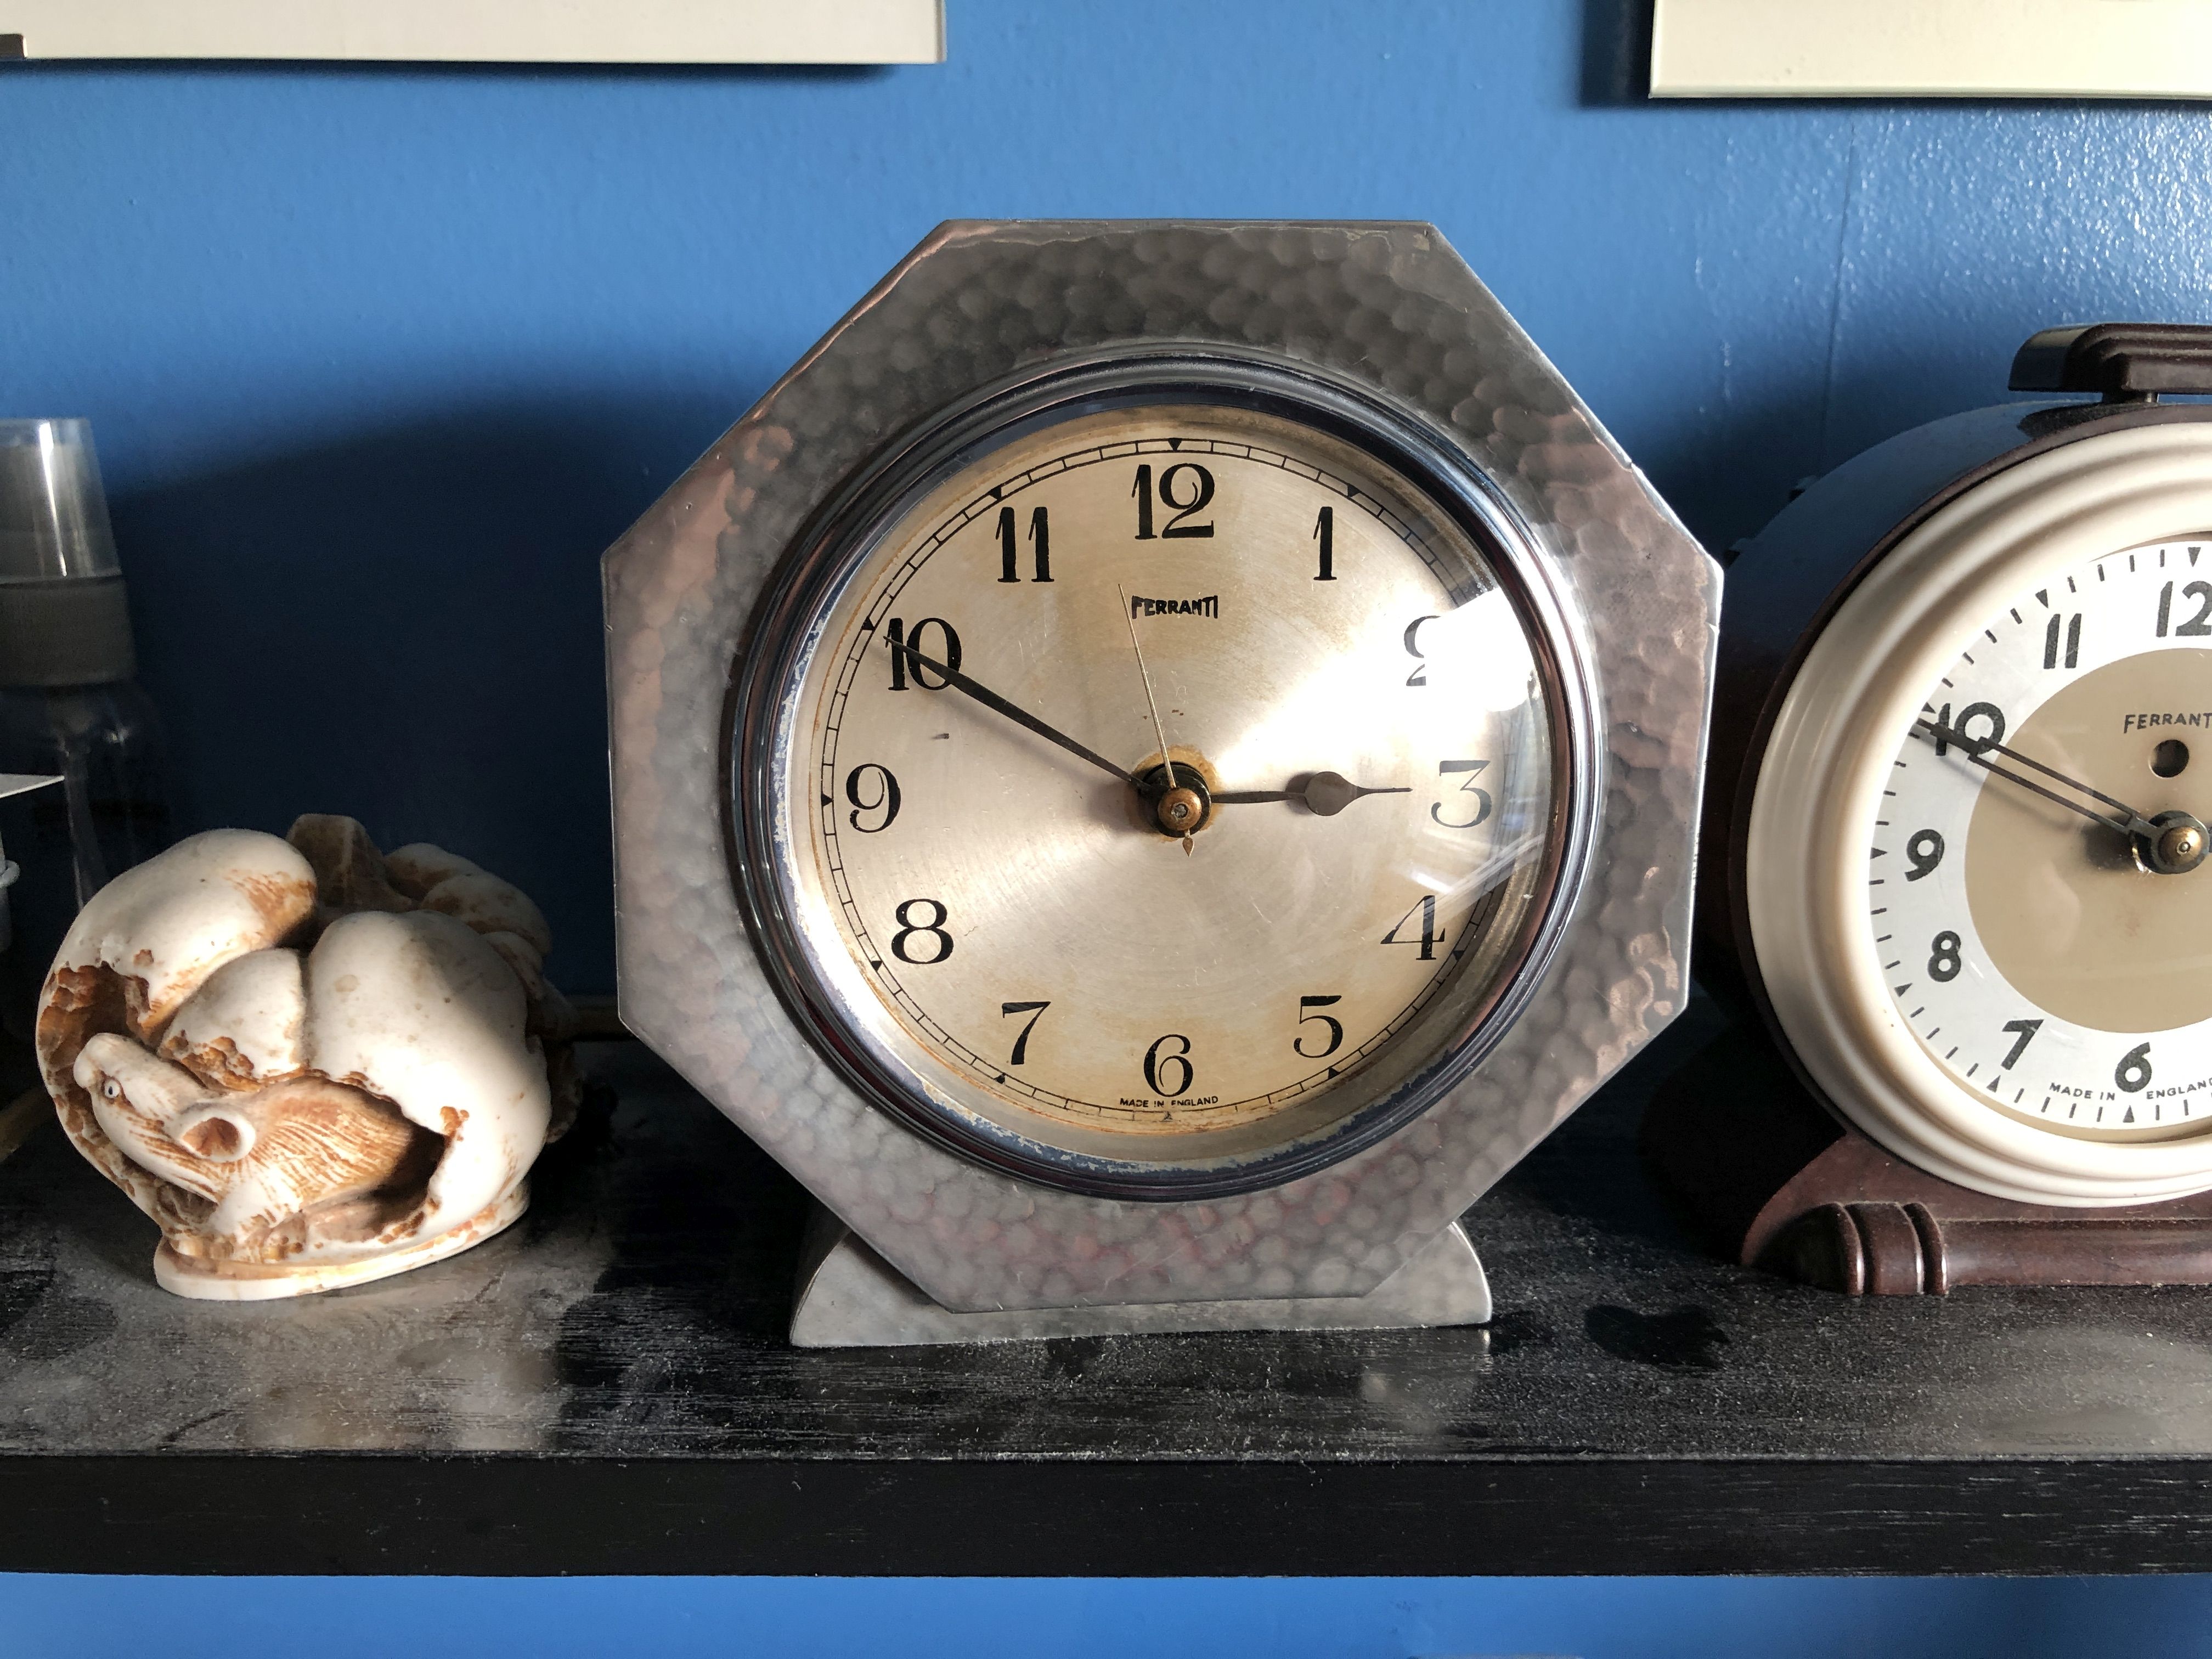
Well Andy, all of my early ones are made by 'Ferranti'. This is their 'Model No2', and was made between 1932 and 1936, (shown prior to restoration) This is the 'Model No4', again 1932 to 1936, Both of the above have the 'broad spade' hands so date to 1932/33.. This is the 'Model No8' alarm, which dates from 1936.... This 'was' originally a 'Model No6' 'Floodlit' alarm, made between 1936 & 1938, but about 60? years ago someone broke the Bakelite case and then rehoused the works in a home-made wooden case (which I have attempted to 'sympathetically restore') Would have originally looked like this....... And the pièce de résistance, this 'Model No12' with a solid pewter case, only made between 1934 and 1936........ All the above clocks do, and are currently running..? Typical movement for the non alarm varieties (in the No4 Model)......
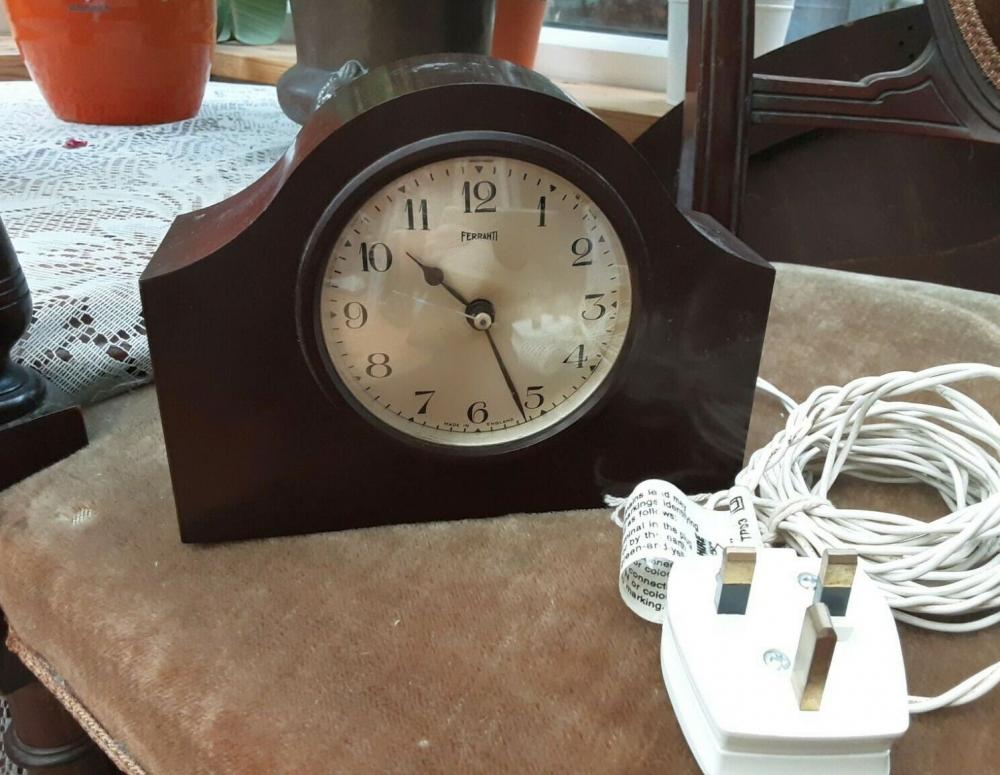
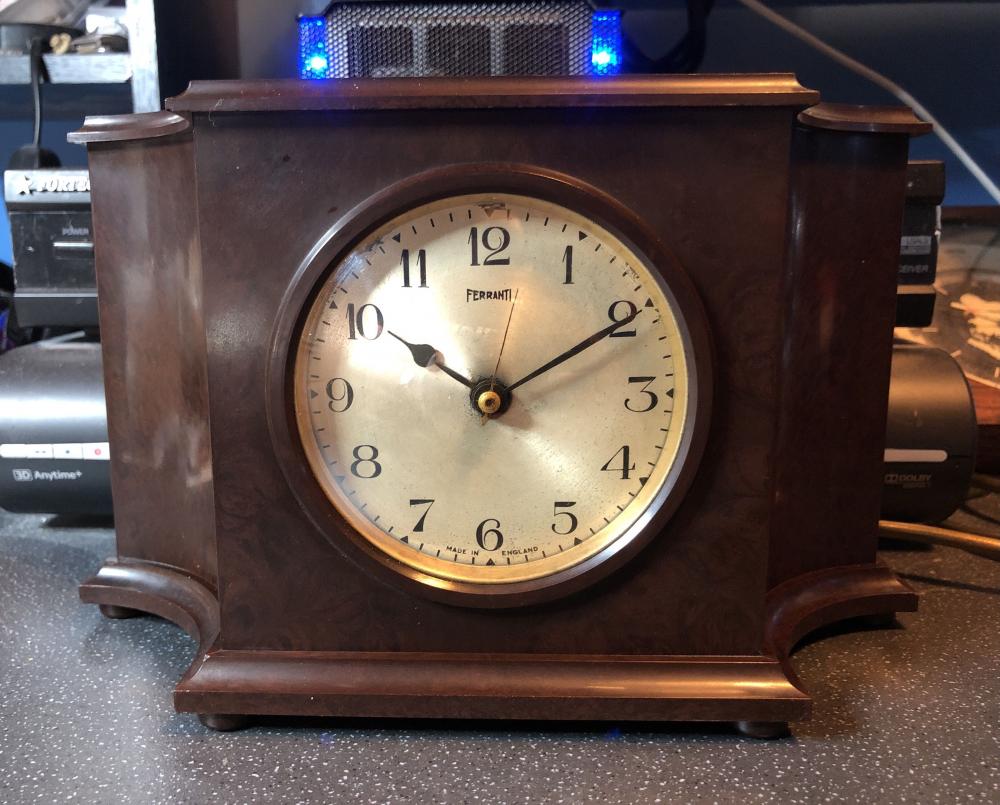
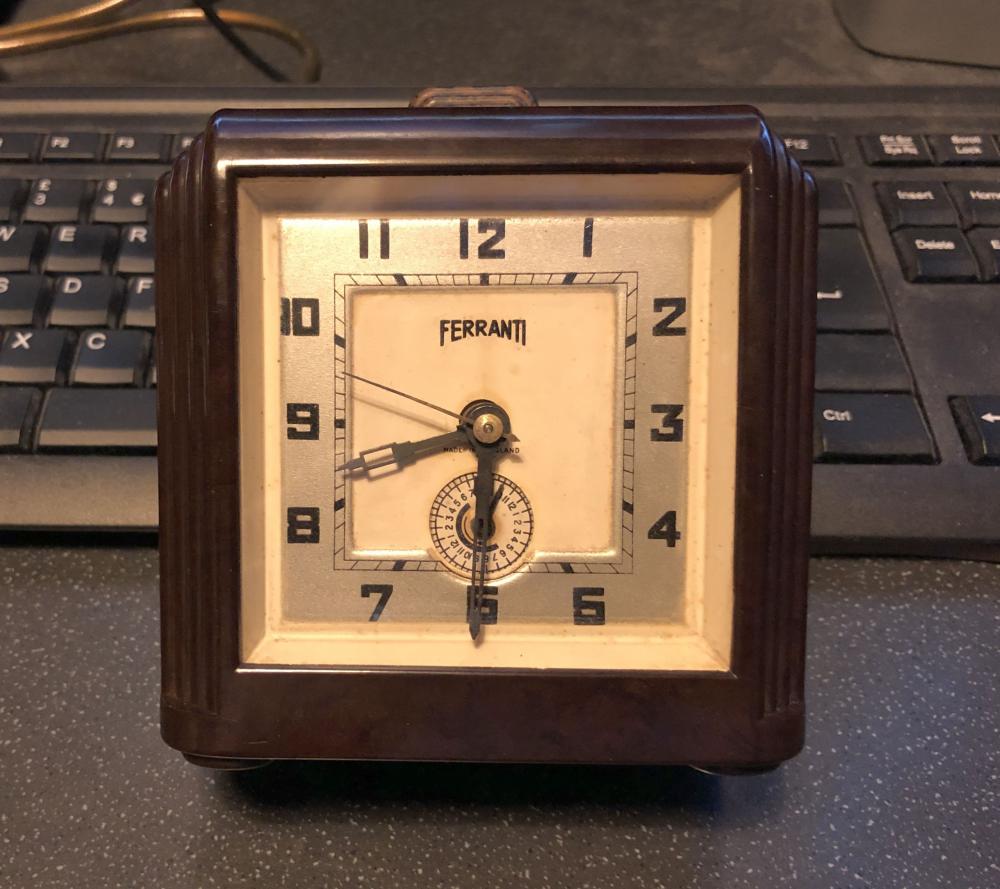
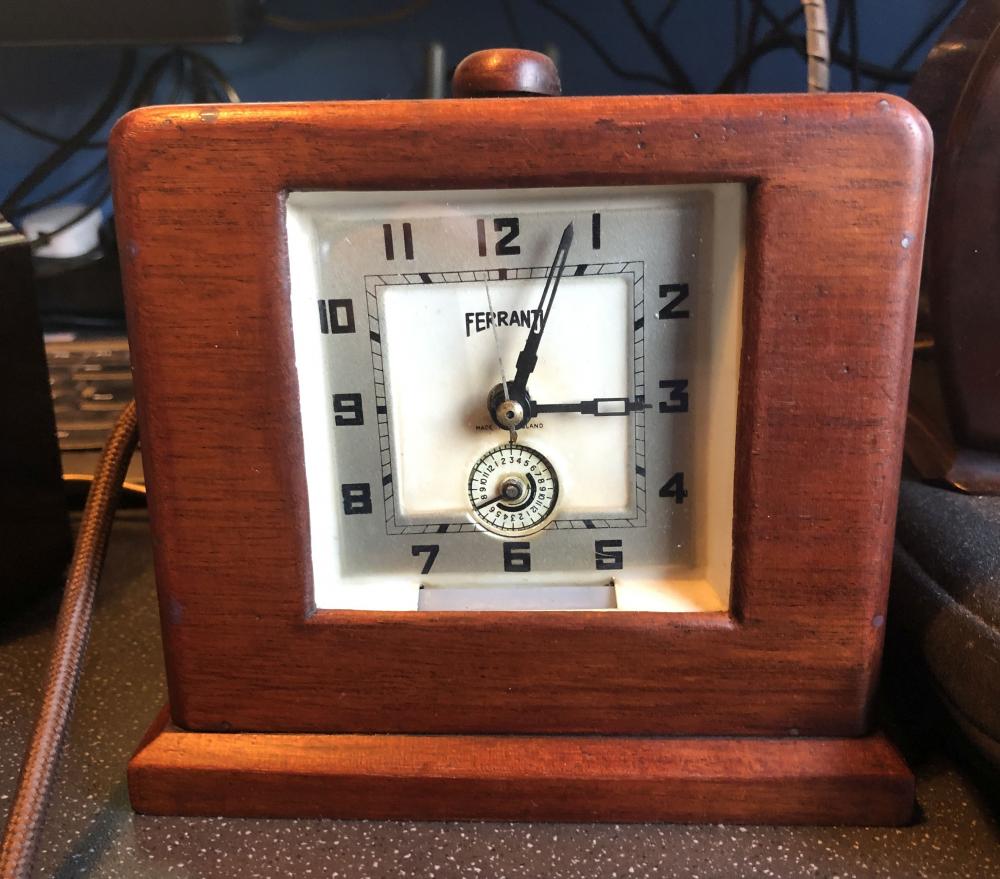


 1 point
 -
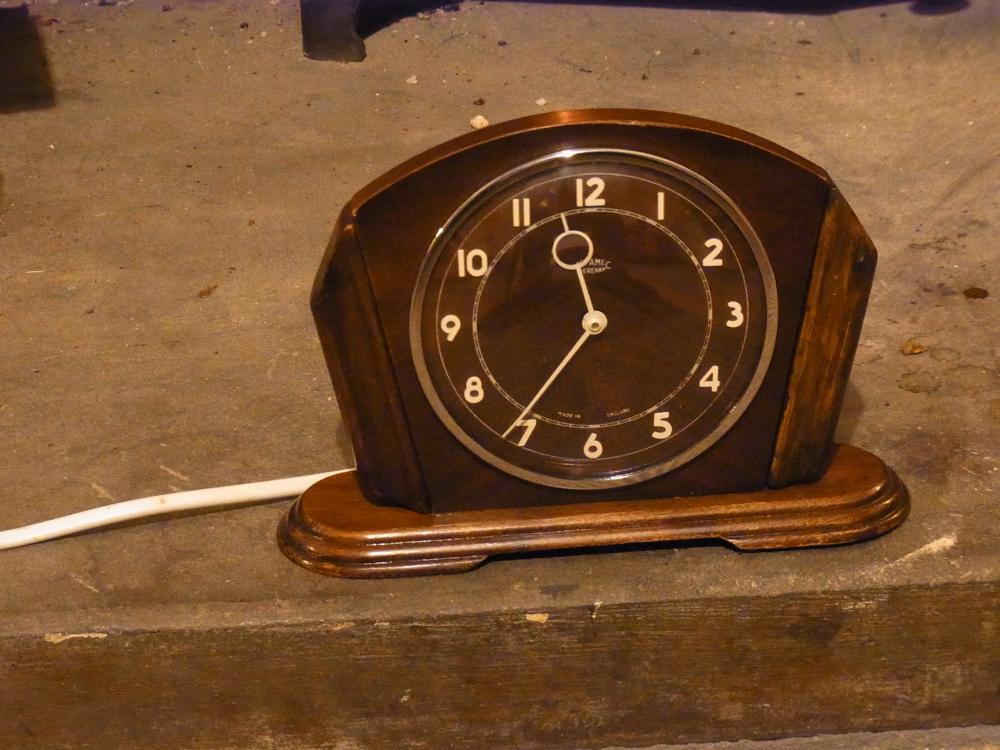
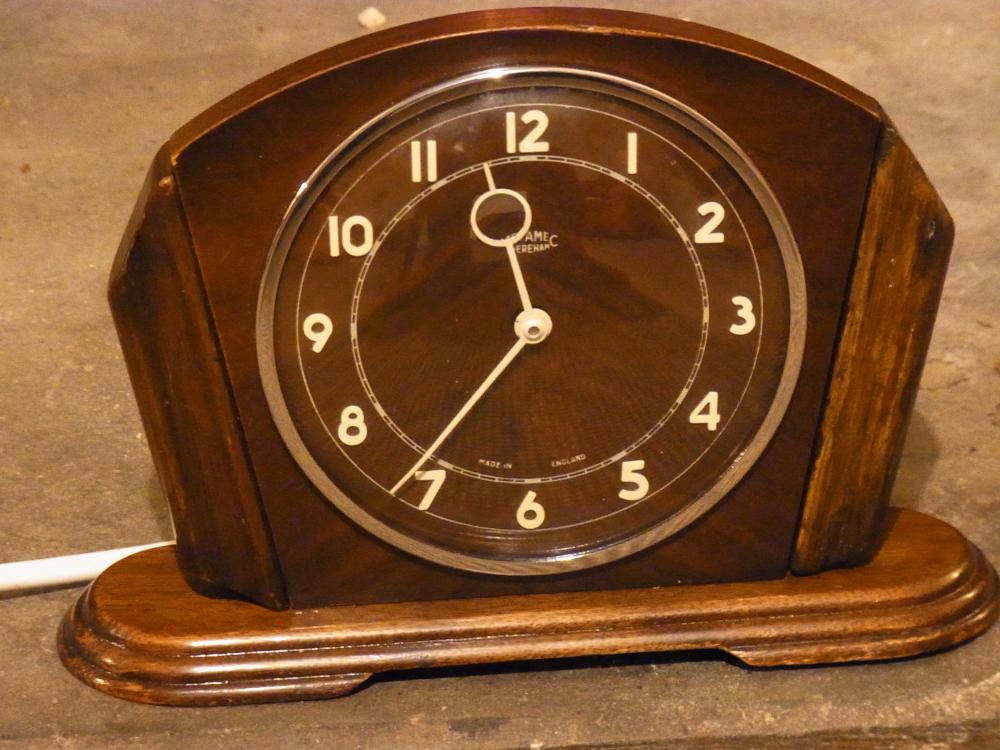
The earliest mine could be is around 1947, since that was when Metamec was founded, but it is more likely that it is from the early 1950s. I'd love to see a few pictures of the 1930s models. Who made them and do they work? Electric clocks have been around a lot longer even than the 1930s, but the first synchronous mains clocks date from around then. https://en.wikipedia.org/wiki/Electric_clock Many years ago (back in the early eighties) an Engineering firm customer of ours in Glasgow was closing down, and moving out of an old Victorian building. Bolted to the wall in their hallway was a rather ancient but quite attractive electro-mechanical long case clock. It was way too big for me to carry, and I had no way of removing it from the wall. Nobody else seemed interested in it. I often wondered what became of it. It didn't work, and given that the building was scheduled to be demolished, I have a horrible feeling it ended up in a skip.1 point
-
Don't know about '1950's technology' Andy. I have five that were made before 1935, so really from an age when Mallard was setting the world speed record for a steam train and Frank Whittle was still in the theory stage of Jet engine development...? A bit more 1935 technology HERE.........1 point
-
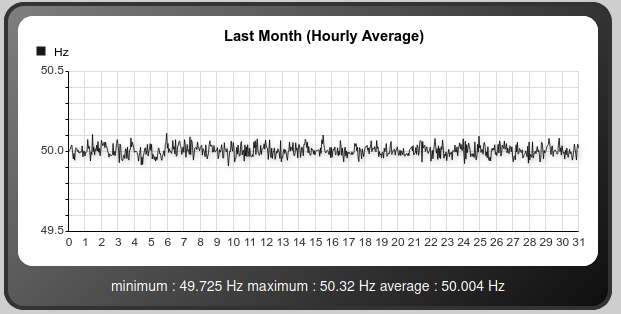
If any body is interested in monitoring the grid frequency to get an idea of how accurate (over the long term) these synchronous clocks are, you can watch the deviation in real time and view graphs of long term accuracy here. https://gridwatch.co.uk/frequency?old= Currently (pun intended) we are looking at an average of around ten parts per million, which compares pretty favourably with a typical watch quartz crystal figure of around six parts per million. Not bad for a piece of mass produced 1950s technology, although you have to bear in mind that in the 1950s the grid frequency wasn't nearly as well regulated, but none the less these clocks were, and still are pretty good time keepers.
 1 point
 -
always a good operating procedure before ordering a balance staff measure all the dimensions and compare if you can with the staff your ordering before you order. Then when you get the staff you also want to measure everything again to avoid unpleasant surprises down the road. then what's weird site below has two identical watches for the same number which represents the ligne size and then there's a third one that's a little variation in the height? which is why you have three staff sizes apparently. http://www.ranfft.de/cgi-bin/bidfun-db.cgi?10&ranfft&0&2uswk&Revue_19 http://www.ranfft.de/cgi-bin/bidfun-db.cgi?10&ranfft&0&2uswk&Revida_19 http://www.ranfft.de/cgi-bin/bidfun-db.cgi?10&ranfft&0&2uswk&Revue_19H5_61 point
-
I forgot for up above it would also be nice to have a picture of you holding the watch in the movement holder so we can see if there was an issue with how the machines picking up the watch plus whether you've ever had this happen before?1 point
-
I love 30mm Omega watches, especially in a slightly larger cases with 19 - 20mm lugs. Very classic look. And also, the movement itself looks flawless.

 1 point
 -
It’s French thing... https://en.m.wikipedia.org/wiki/Ligne diameter of your watch plate, aka Caliber1 point
-
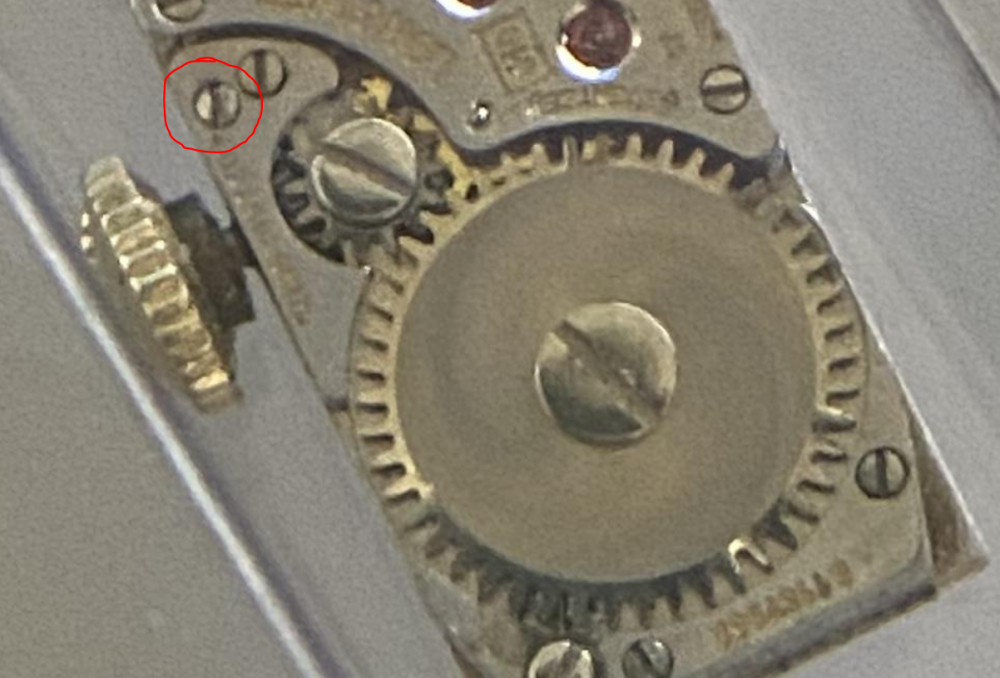
Loosen up that screw to pull out the stem.
 1 point
 -
What a cruel joke... during pandemic / lockdown / curfew when all coffee shops are closed.. https://www.youtube.com/watch?v=mHz4O3gFQ7s1 point
-
Three old guys were out walking .First one said "Windy isn't it ? " The second one said " No it's Thursday! " The third one said "So am I let's go get a beer"1 point
-
I have a link to a website below that you can use to convert your image files to JPEG which the discussion group can look at versus the file you have which the discussion group Process and most people probably can't look at it. out of curiosity which timing machine are you using? it would be nice if you'd wind it up again give us a photographs in preferably two positions. Either dial up or dial down and one of the crown positions like crown down fully wound up. but as a reminder fully wound up means you wind it all the way up but let it run about 30 minutes and then put it on the machine. out of curiosity how did you clean this watch? Then did you remove or replace the mainspring? Tell us about your lubrication techniques then background history what was the watch doing before you serviced it? https://heictojpg.com/
 1 point
 -
Are you not able to fully assemble the balance, place the hairspring between two pins and turn the boot before installing balance assembly?
 1 point
 -
With just one coat of shellac, its still looking a little patchy and a shade or two too light, but the general colour isn't bad. I'll let this finish set up, and apply a few more coats tomorrow and see if it blends down to something close enough to the original for me to call it finished. If not, then I'll sand it down some and push the base colour a little darker. The good thing about the colour is its pretty dark, so it should be relatively easy to match. Pushing things a little darker is always a lot easier than trying to go the other way.
 1 point
 -
Not the most user-friendly / pleasant to search site in my opinion. Some crystals are harder to locate than others. I did not use this company, but used Cousins many times, and eBay also.1 point
-
The English Patient...
 1 point
 -
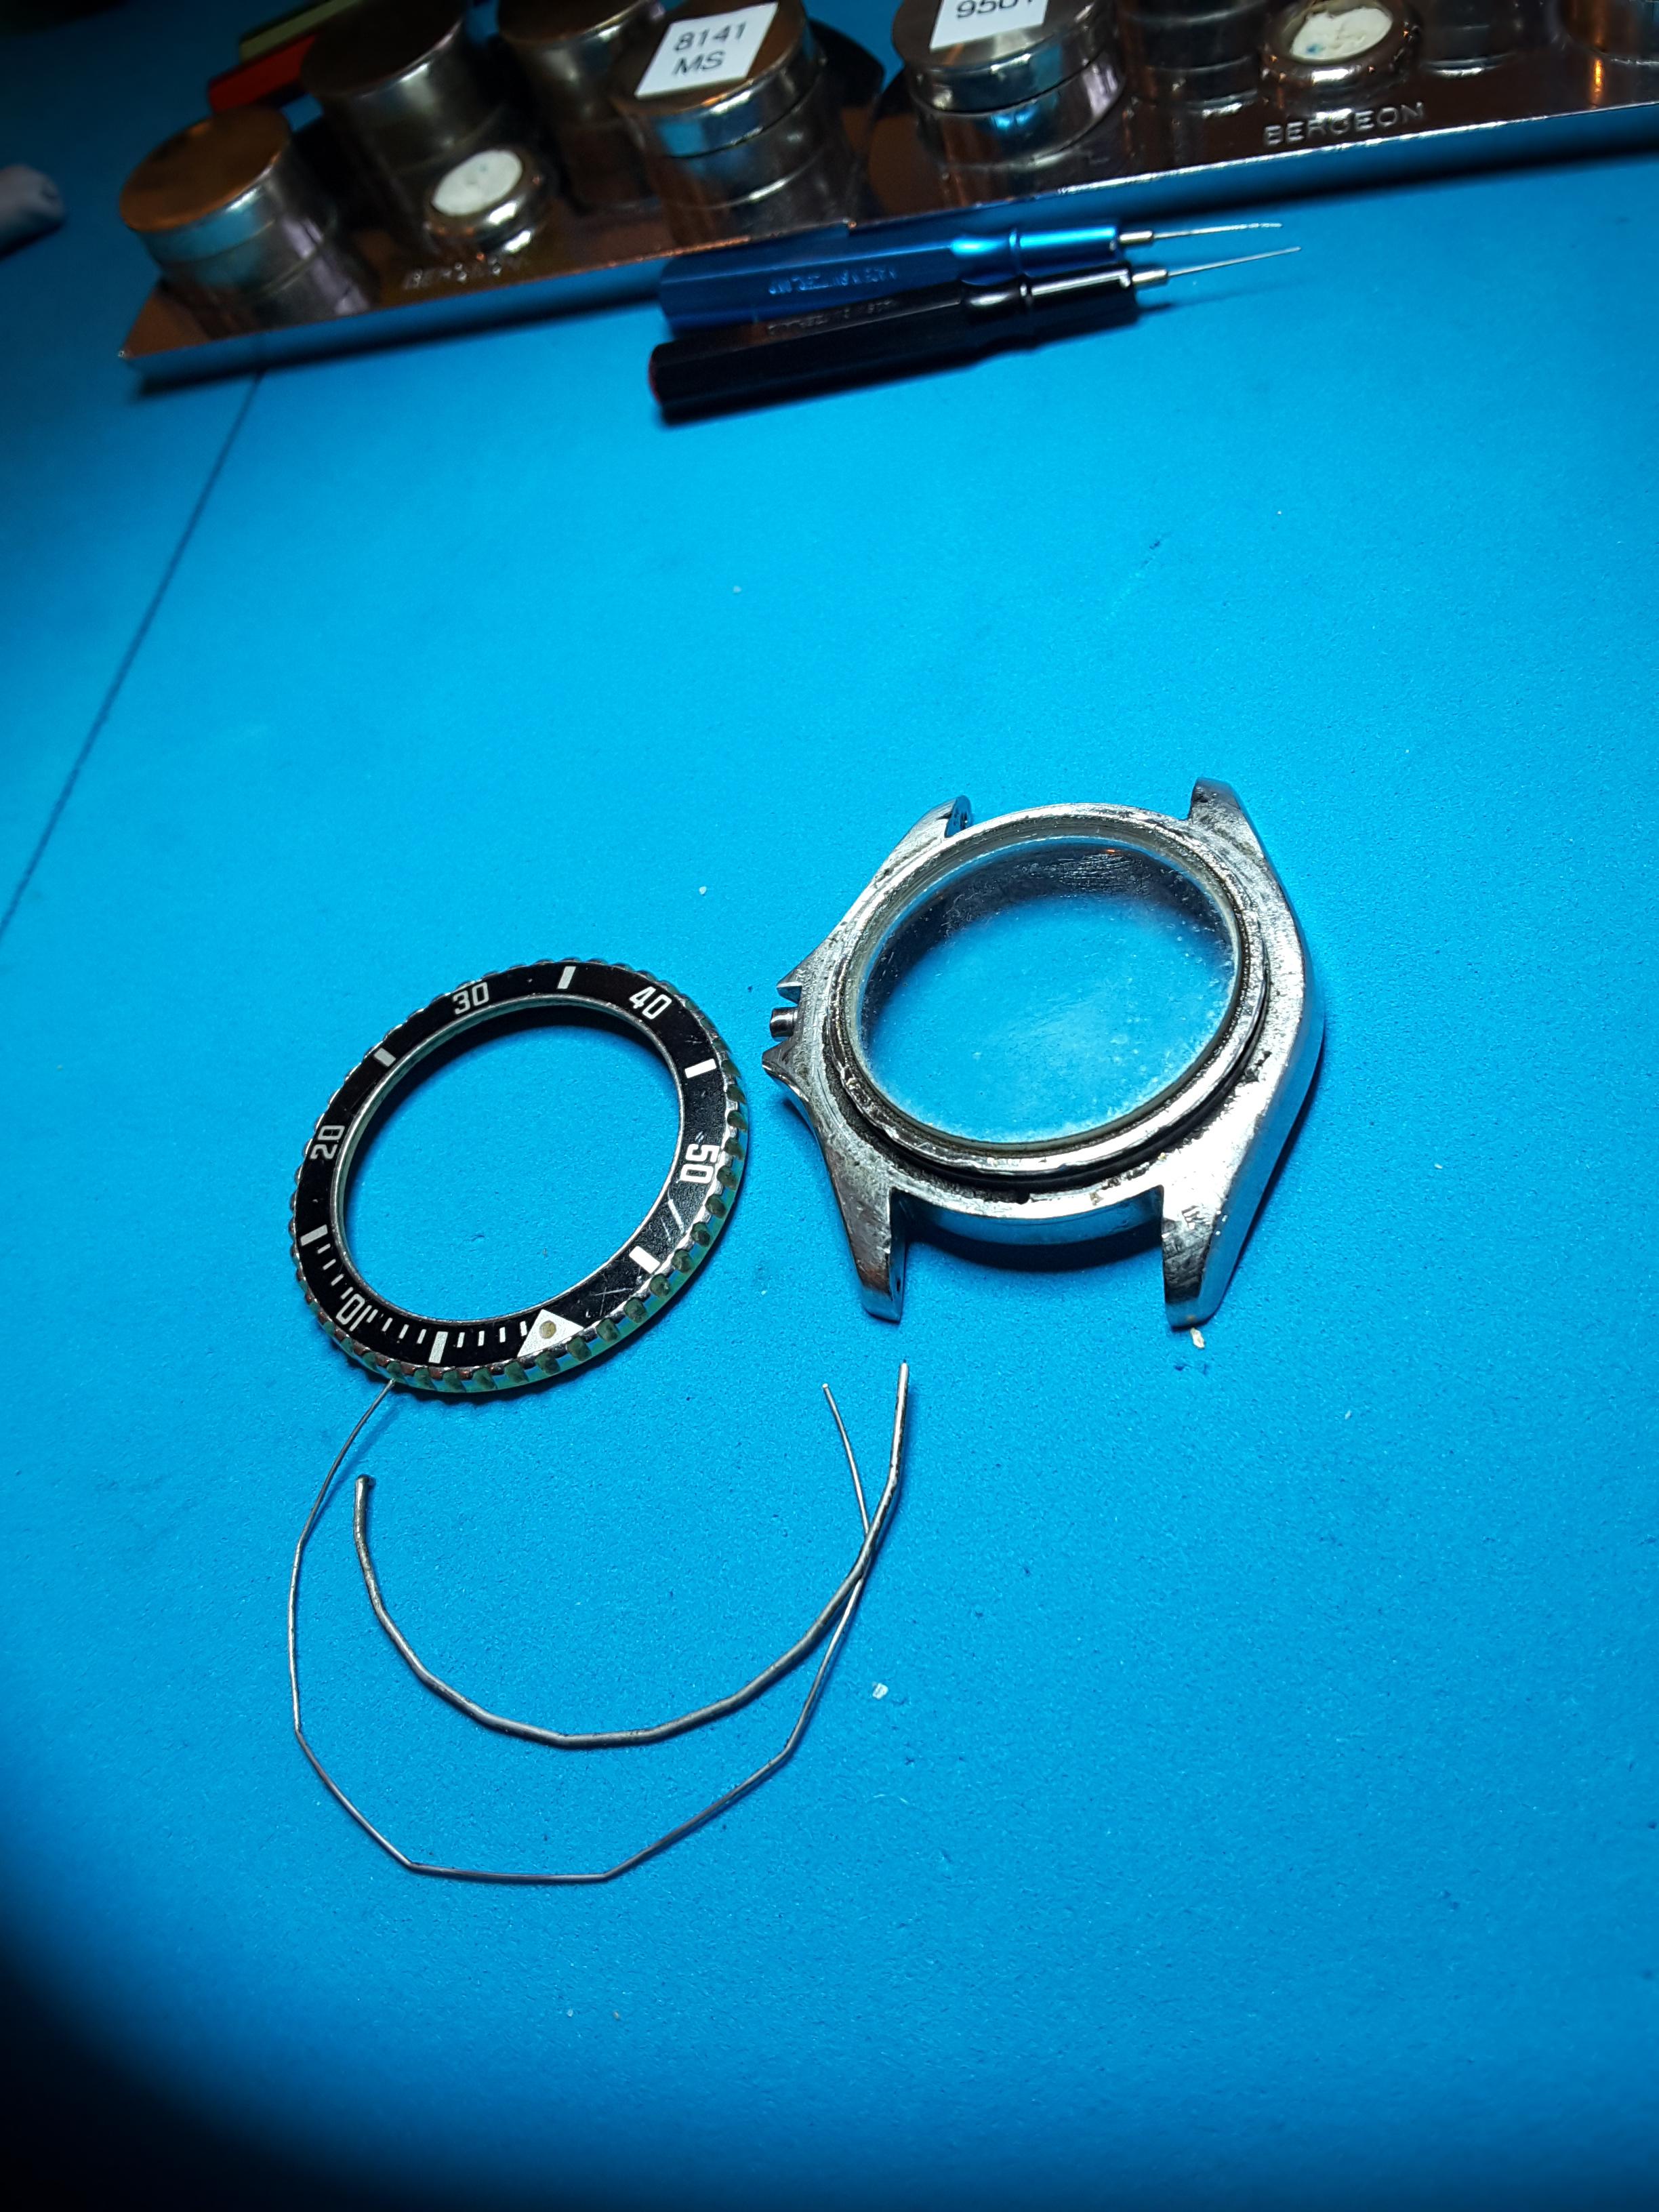
Bezel, the metalic ring in which the crystal fits is to be removed if this is a front loader.1 point
-
Solved – Removing outer bezel A special thanks to @mikeyt_53 (WTF) for responding and relating your experience. These comments along with a number of YouTube video’s, in particular (below) stopped me from second guessing myself, resulting in successfully removing the TAG bezel. For those that follow I succeeded using the following method. 1. Working a knife edge between the case and bottom of bezel, lifting the bezel enough I could spray (into the hex-spring groves) penetrating oil. 2. With the knife holding a small gap I worked in a small jeweler’s flat screwdriver, widening the gap a bit. 3. Using a second small flat screwdriver I worked the gap around the bezel bottom until the bezel popped off the case. Note: that before using this method I tried using a four point case-splitter which did not work. Again, thank you & good luck Will
 1 point