Leaderboard


Popular Content
Showing content with the highest reputation on 12/21/20 in all areas
-
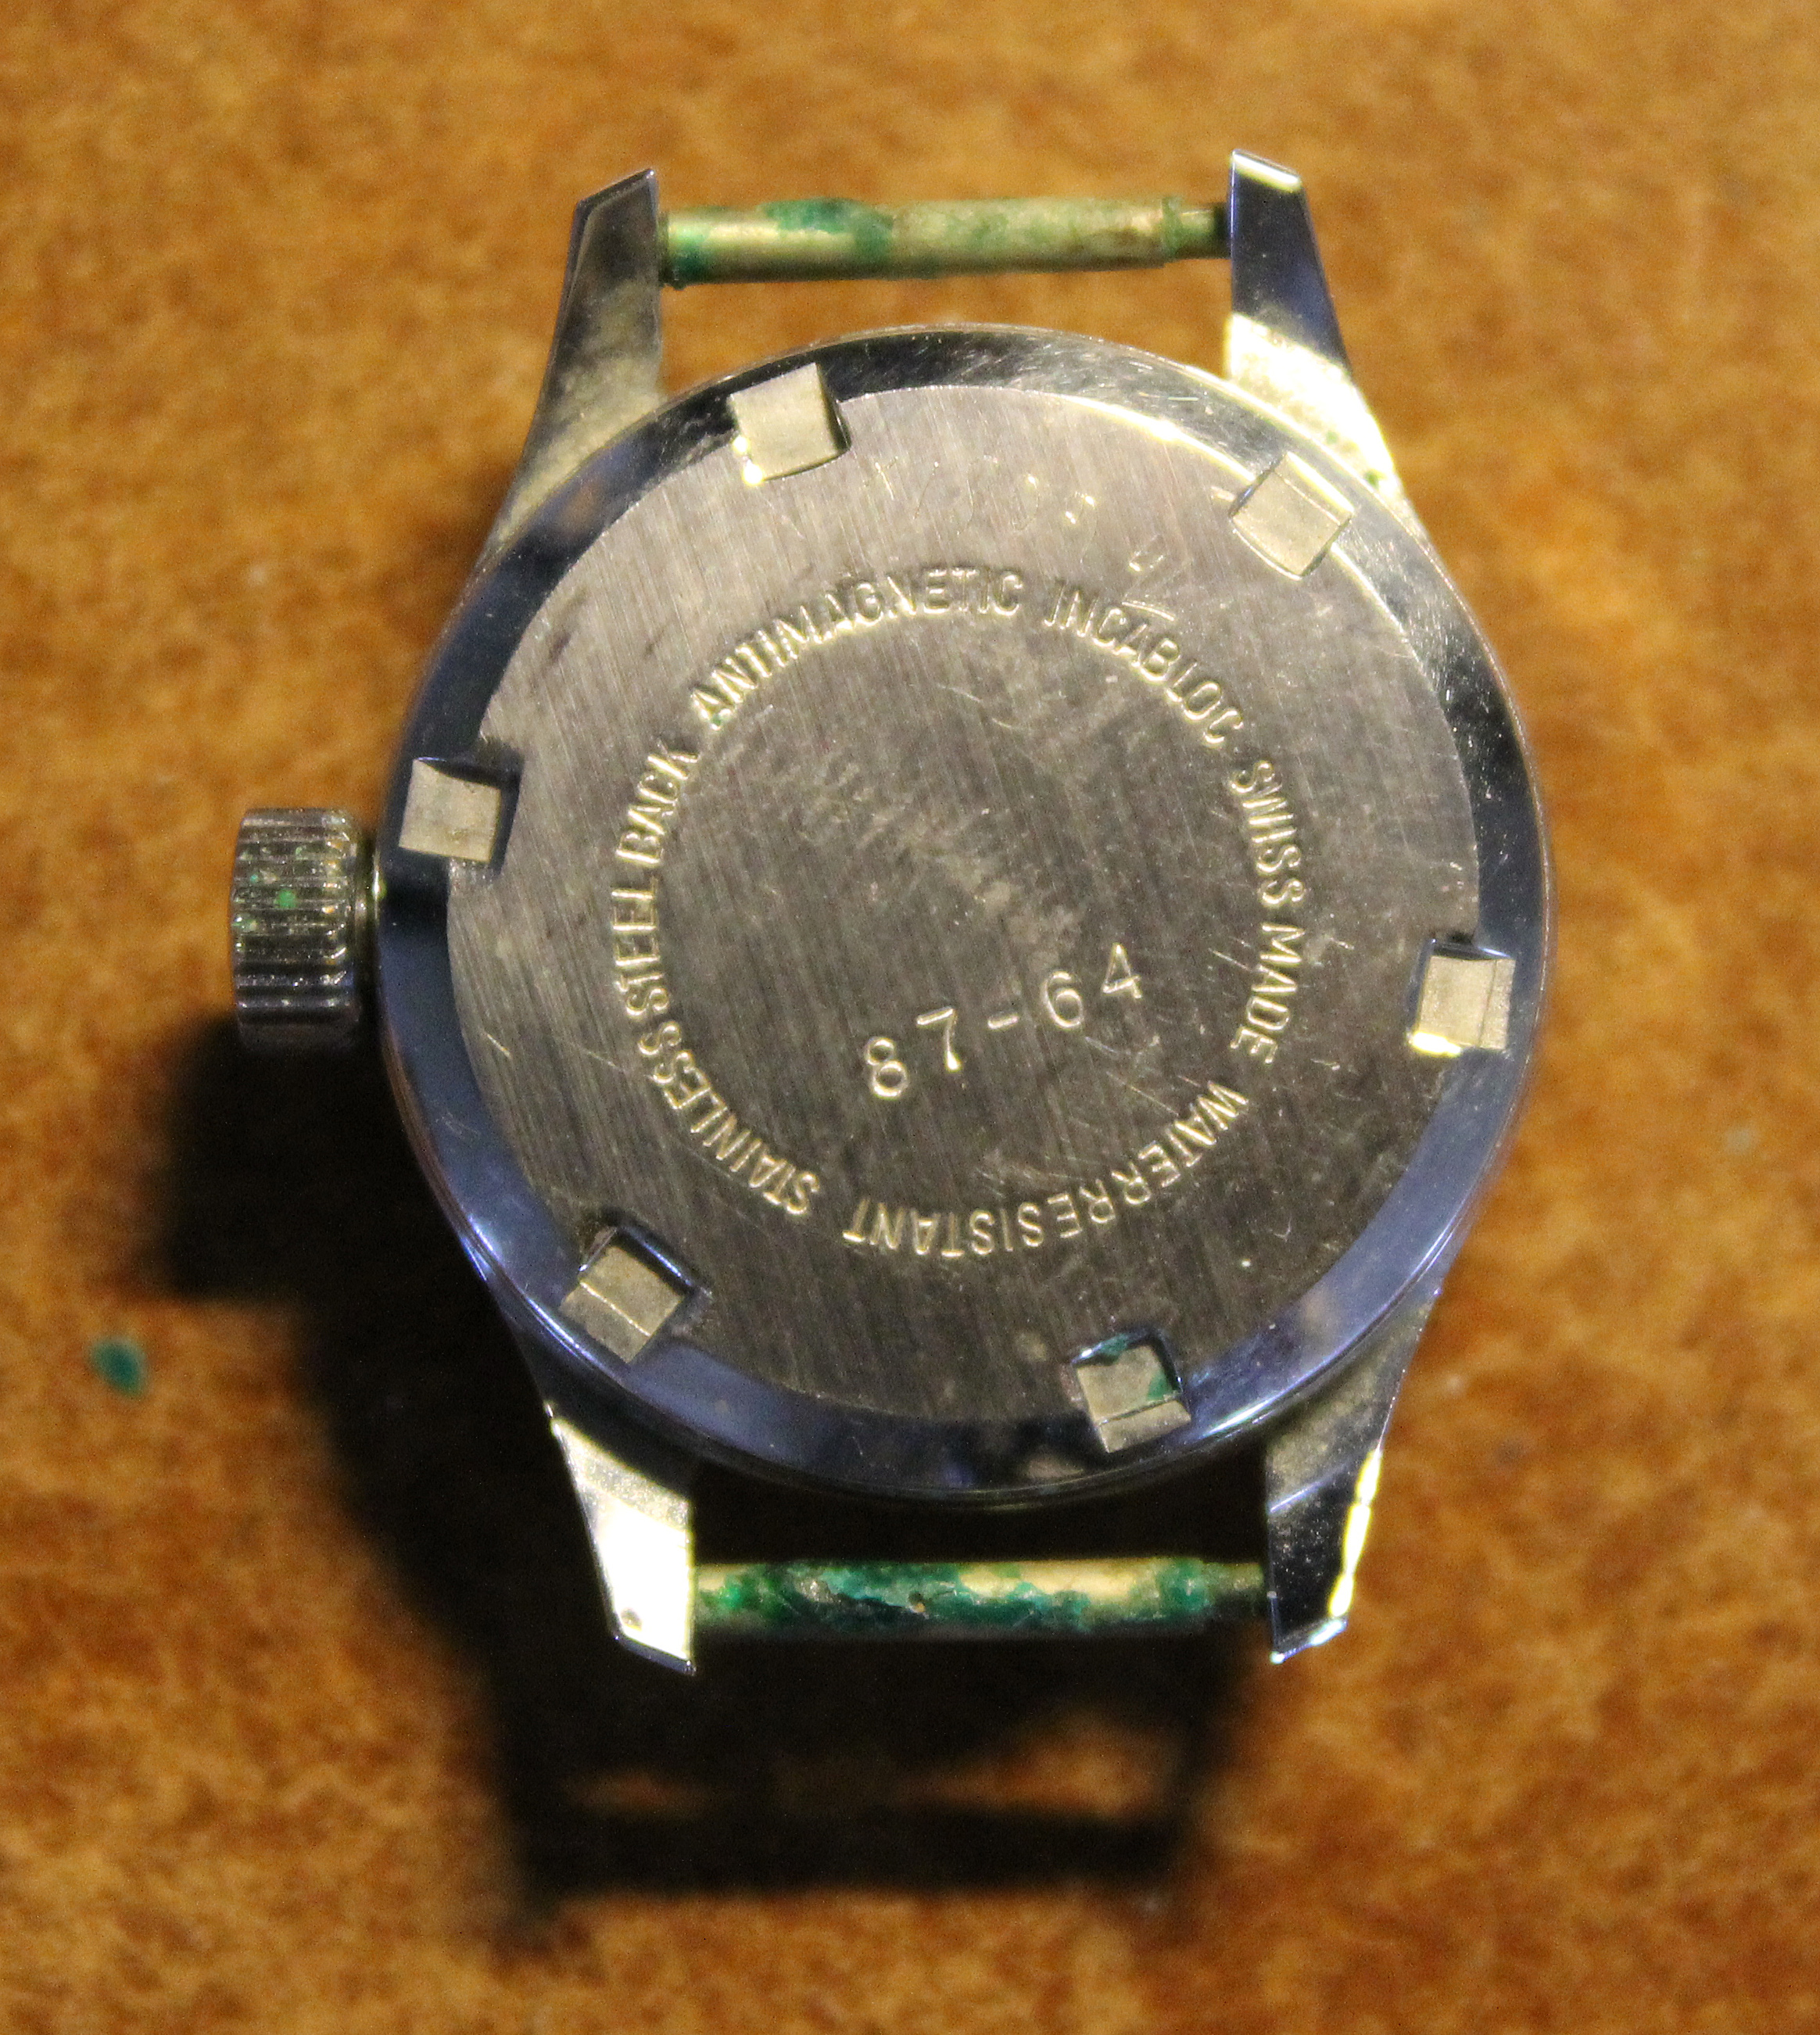
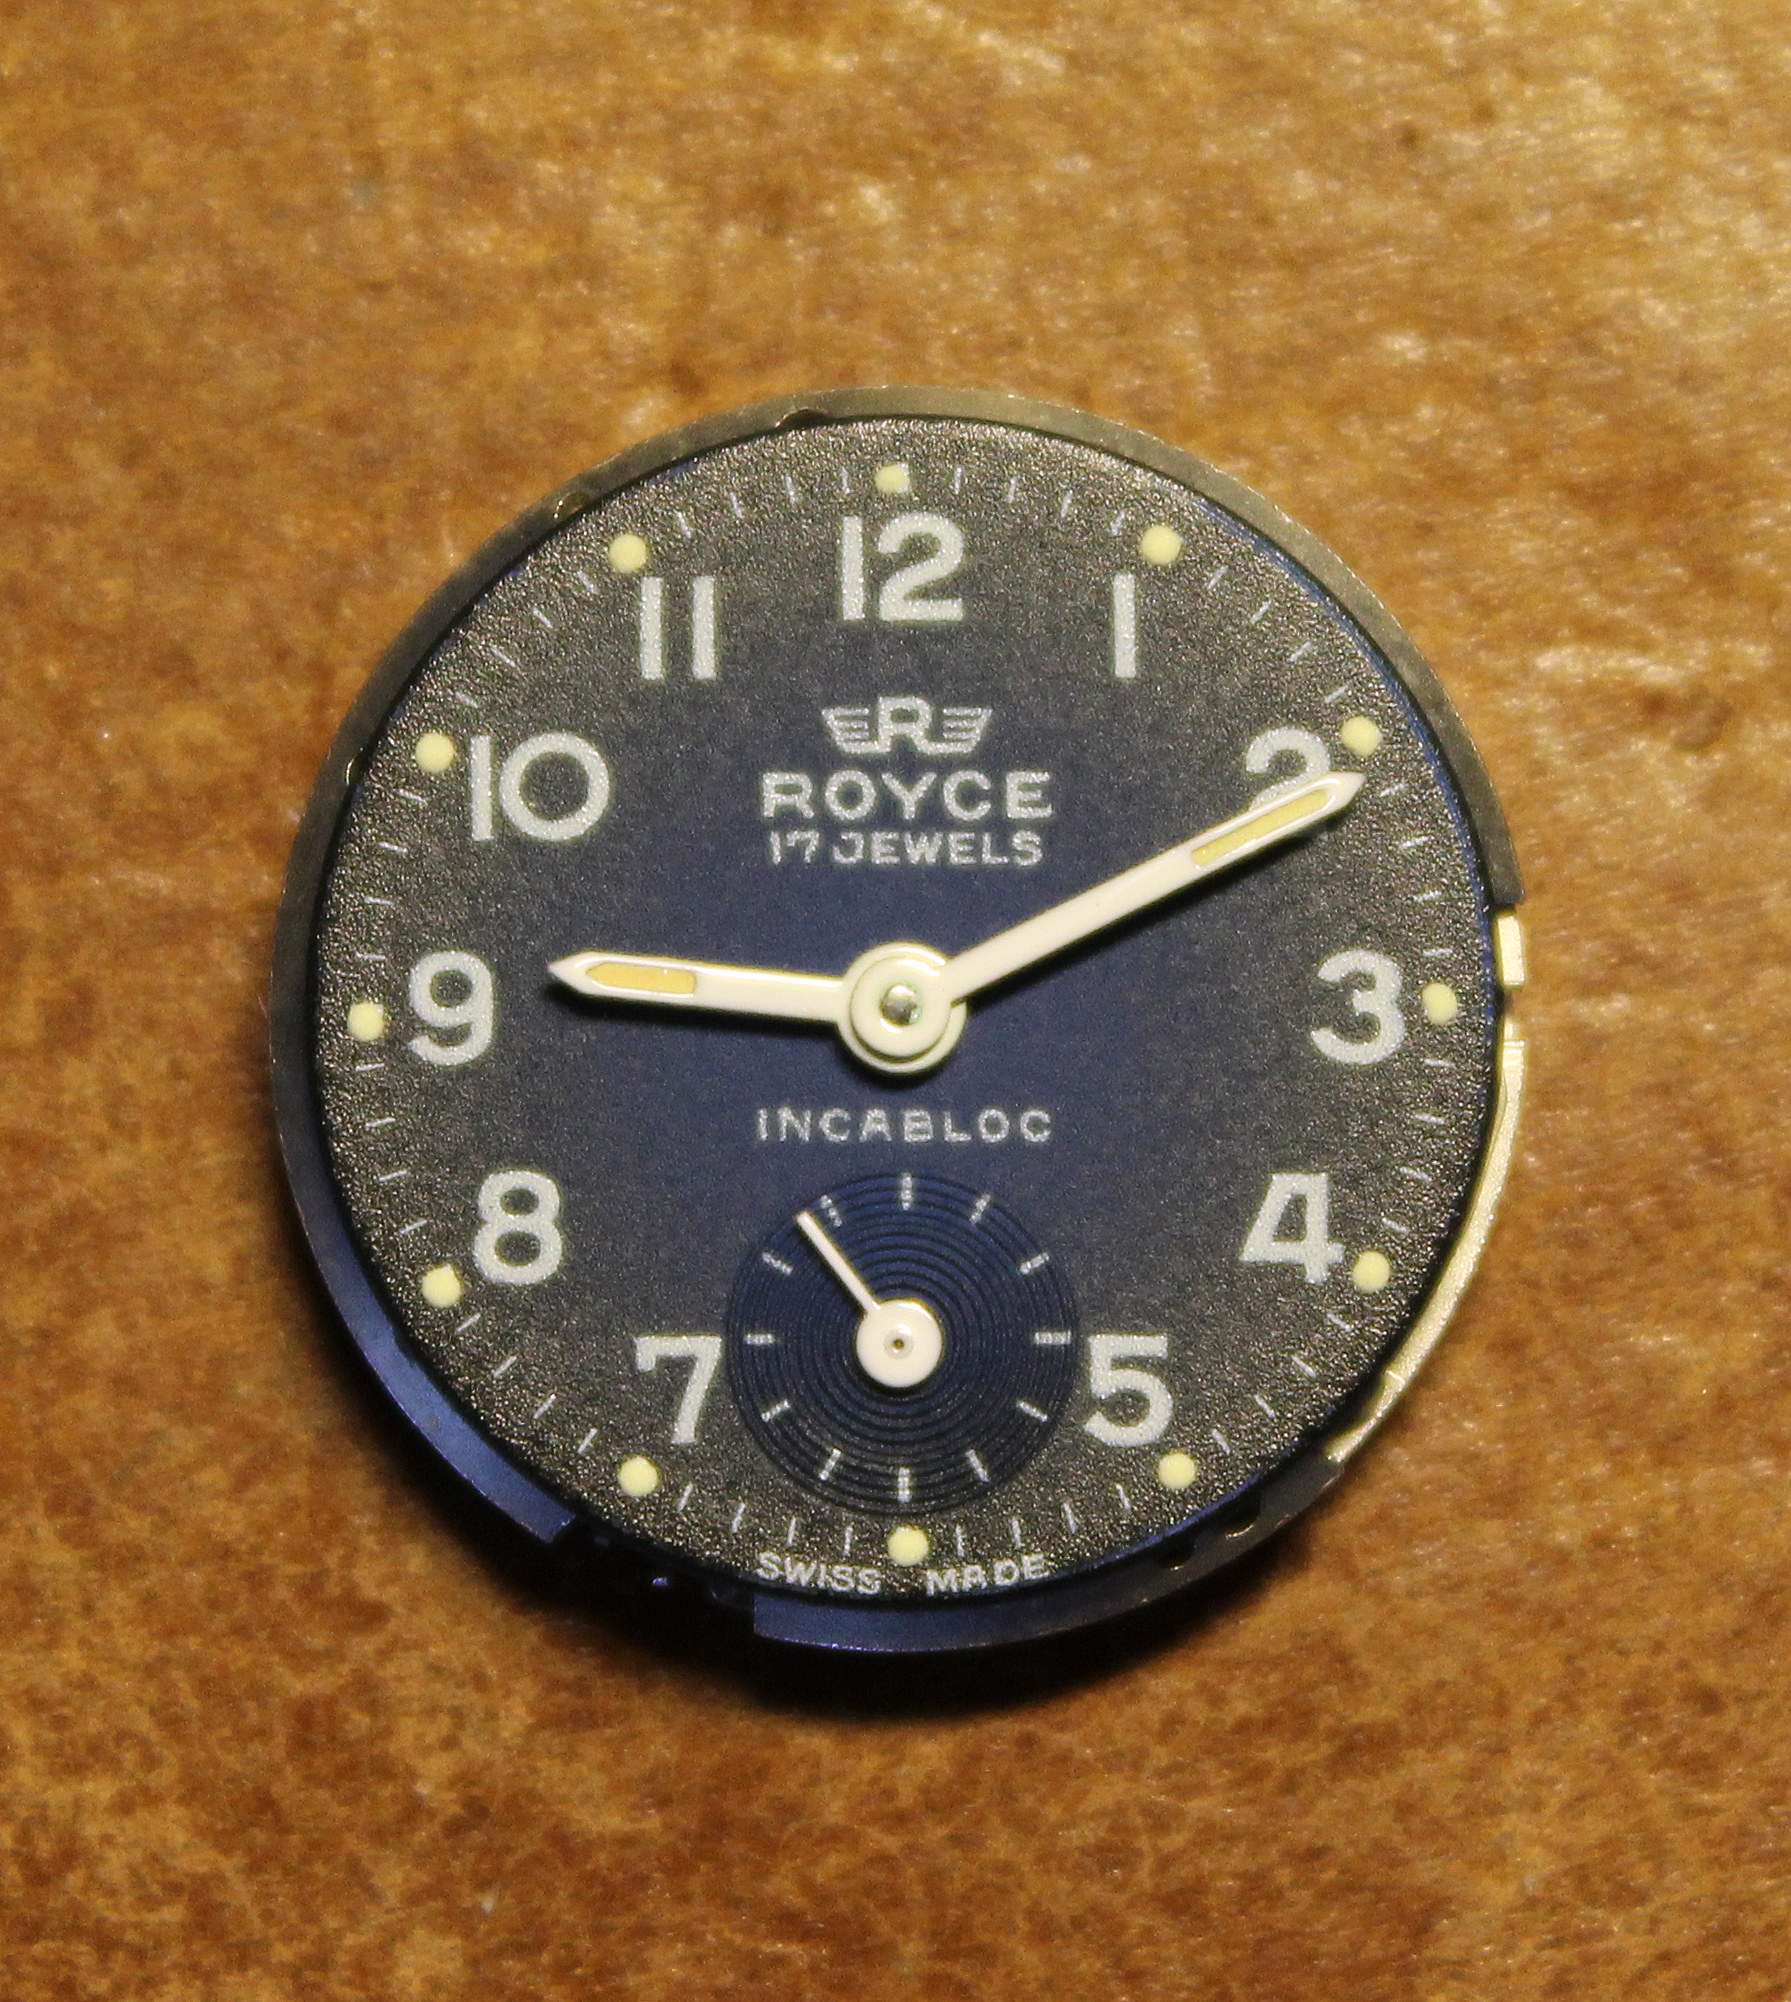
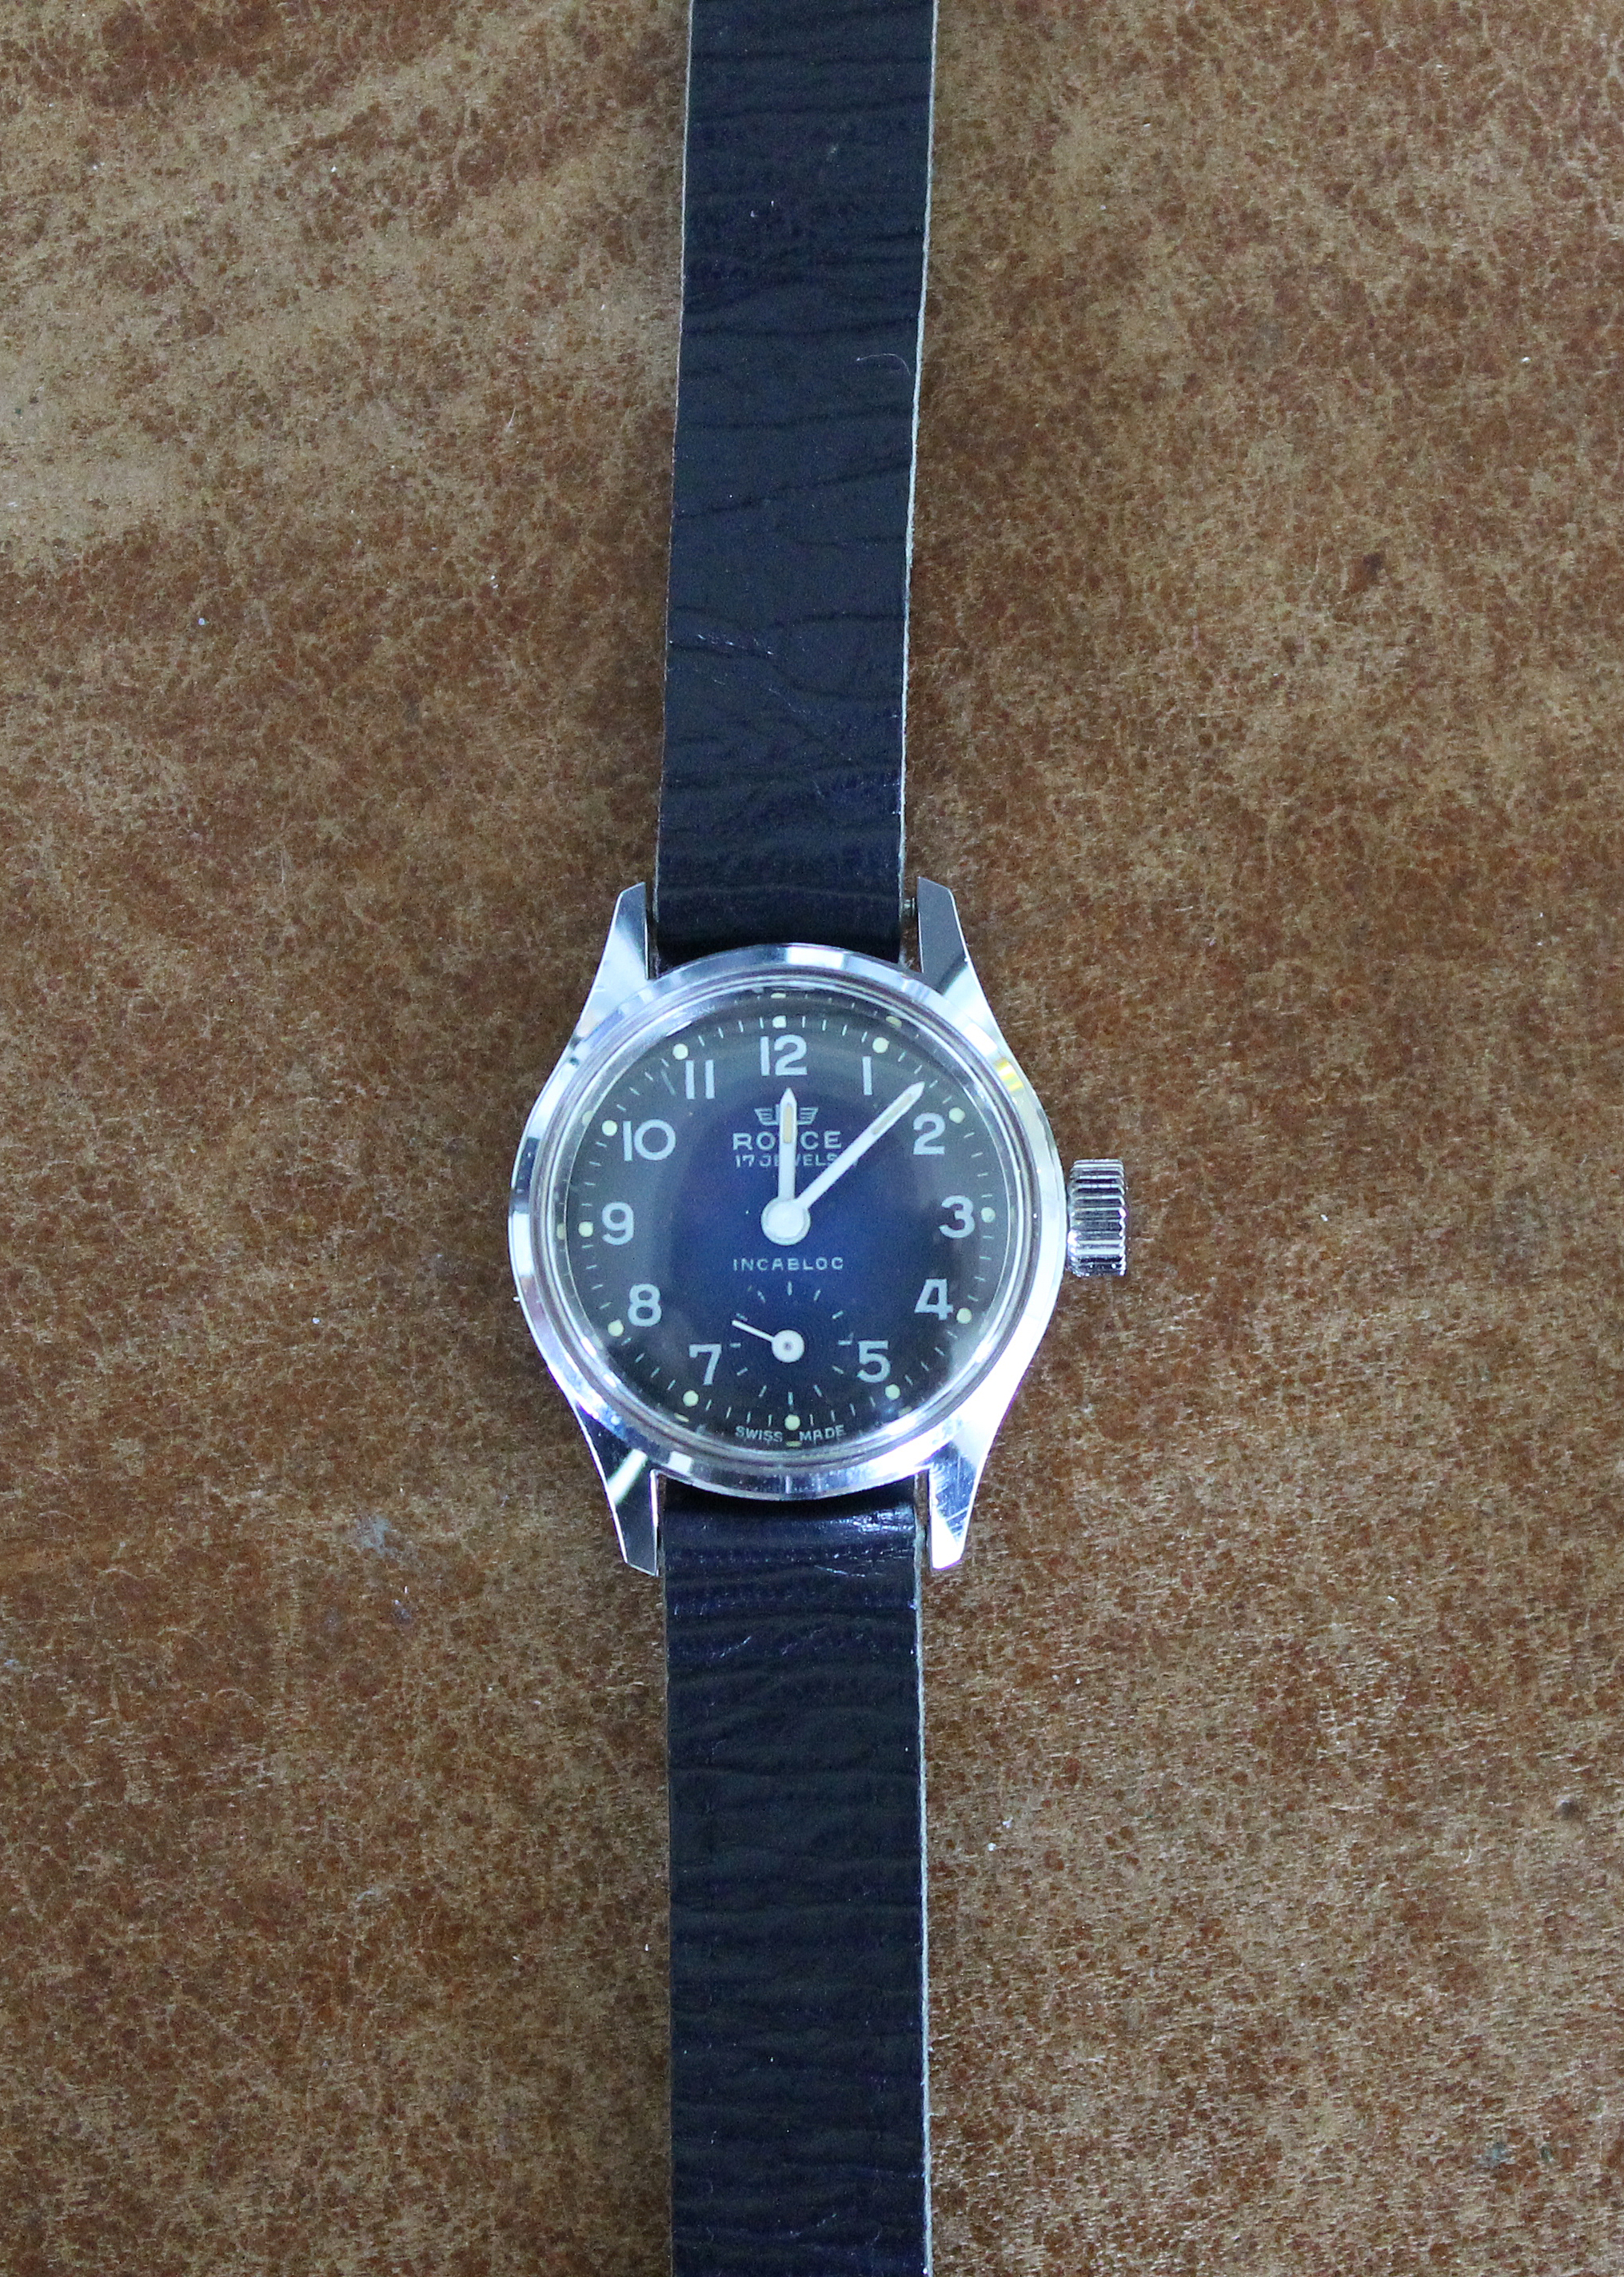
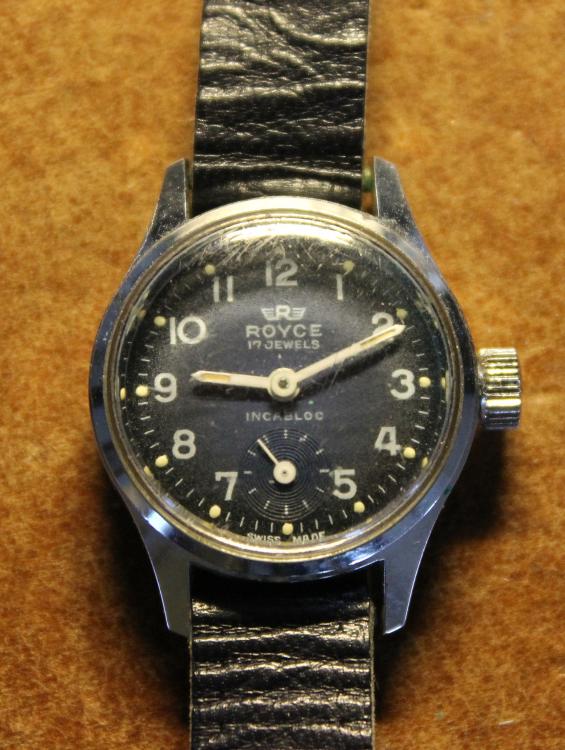
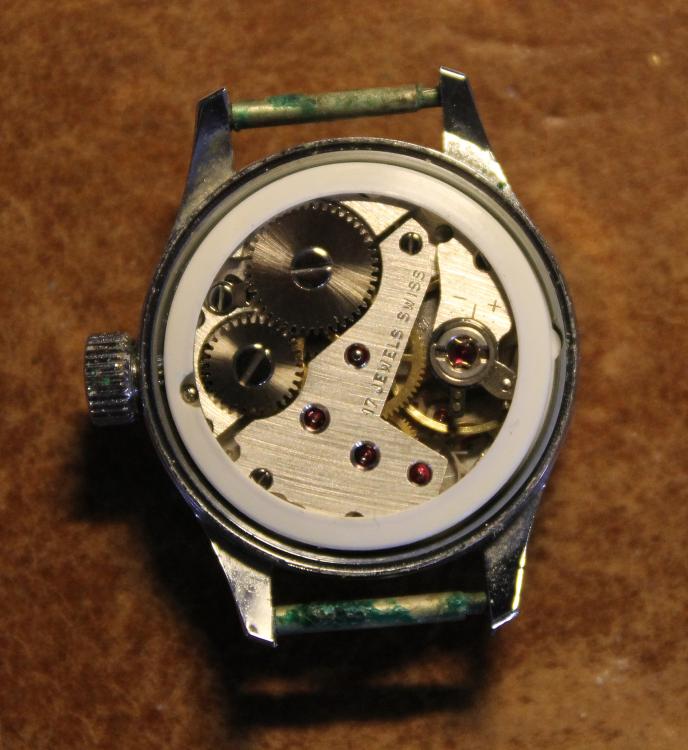
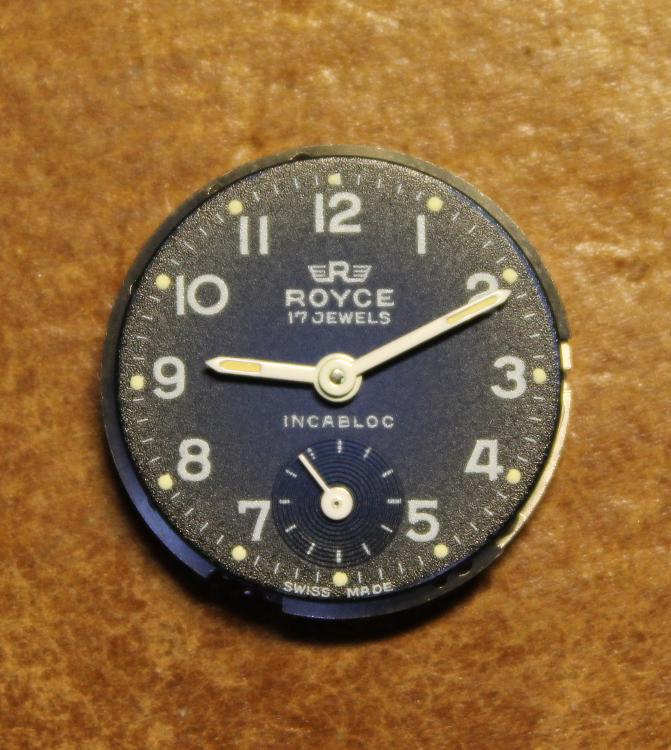
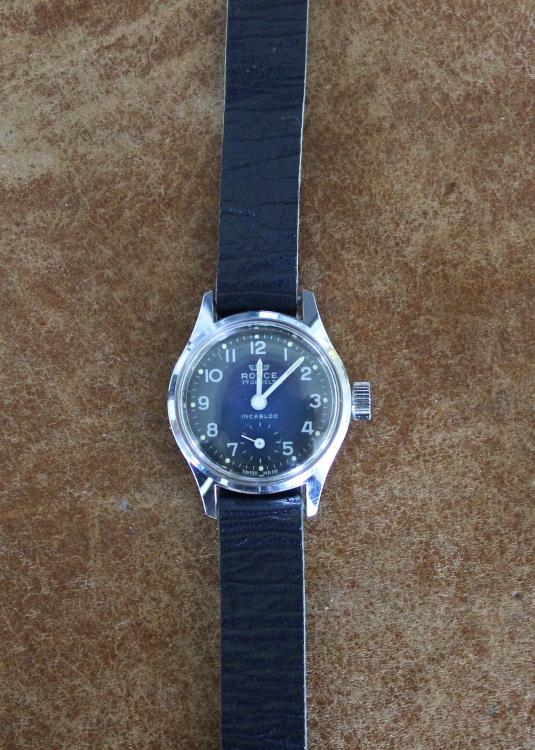
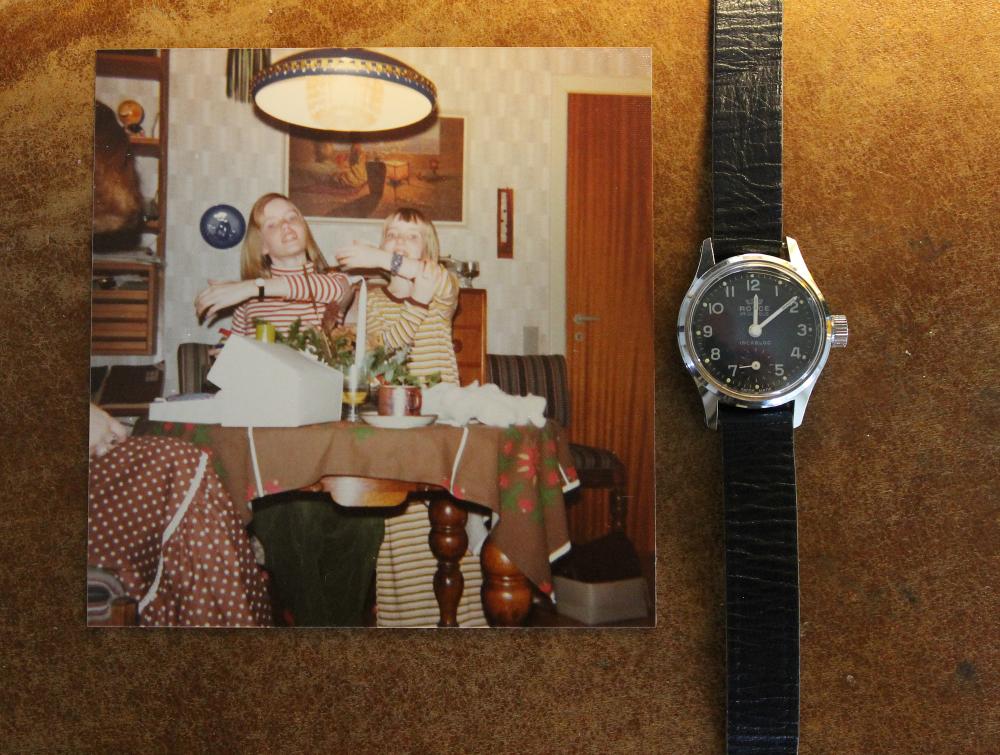
The clock strikes Christmas 1975 and these two sister were each given a watch which they are, here on a picture, proudly showing off. Their last parent recently passed away and in the parents "jewellery-box" one of the thought long lost watches emerged again. Inside the back-lid was the name S.Kocher stamped, a Swiss company long gone, went begin 1980's during the "Quartz"-crisis under. The watch was in their line of the "Royce"-watches and had an undisturbed Swiss 21.600BHP, 17-jewels AS1726 cheased /non-running movement. I serviced the movement, which now runs with a 0.0ms beat-error and a 270 degrees amplitude (DU & DD), polished the acrylic-crystal and case. It gets presented back to the owner on Christmas 2020, exactly 45 years later, in a nearly as new condition ? I'm sure for her a happy X-mas with some old memories ? For me another fulfilling job done ? Happy X-mas !


 7 points
 -
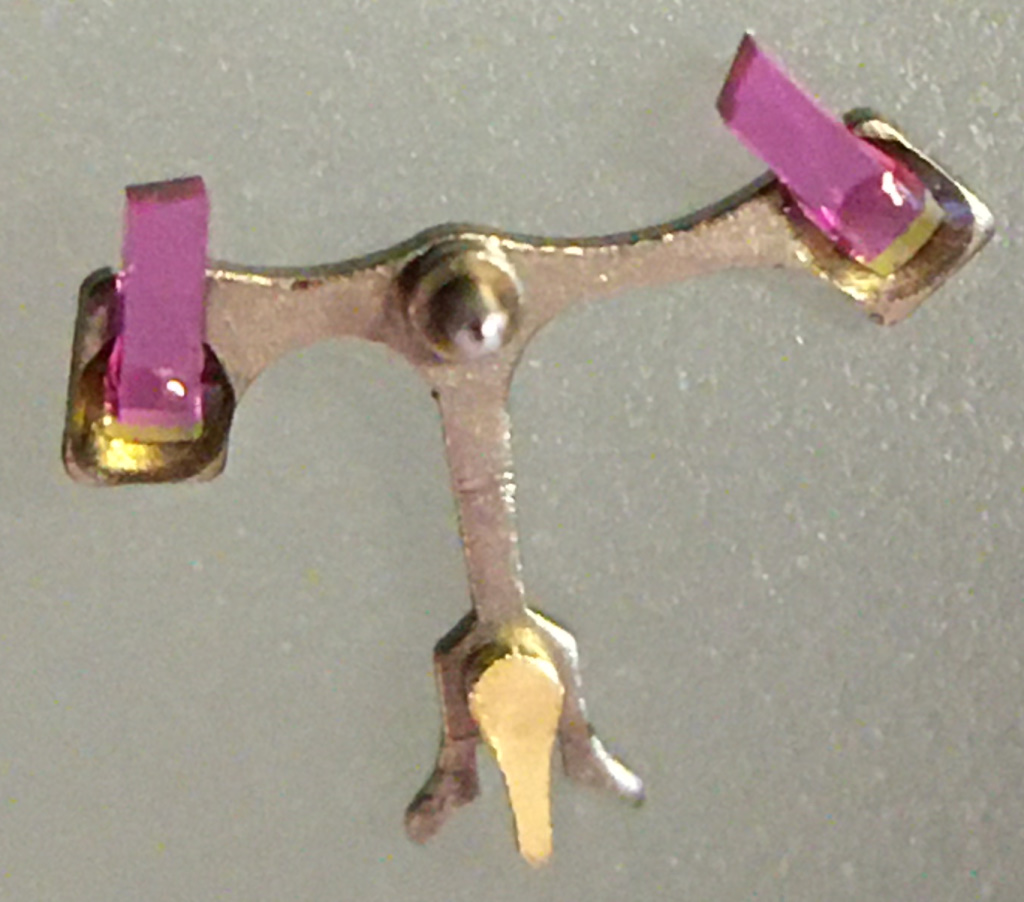
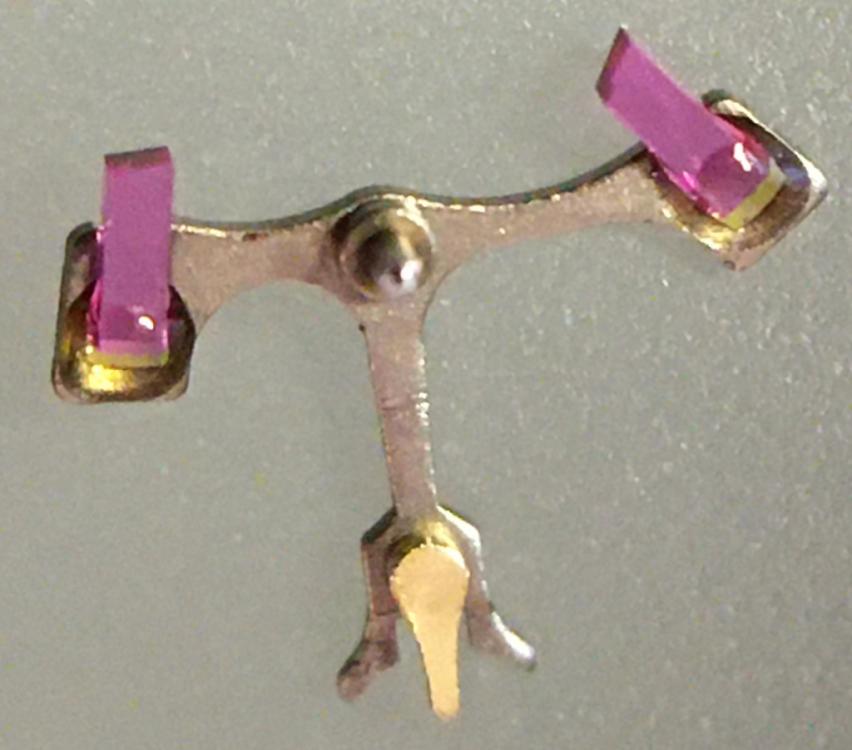
Intro A while back I successfully made my first attempt refitting and adjusting pallet stones using shellac. It was something I had dreaded doing (it seemed difficult) but in the end it wasn’t that difficult at all. Having gathered experience from a few years of handling tiny watch parts using tweezers and having developed some left-hand dexterity as well (I’m right handed) probably helped. Anyway, I thought I’d share the experience with anyone who would be interested and hopefully there’ll be some other WR-talker, now or in the future, who’ll find it useful. If you’re new to this topic you might find this page and this video on the watch repair channel a good start. As I didn't want to risk ruining my Gaston tool I melted and prepared the small pieces of shellac on a chisel tool (my improvisation) that I happened to have in my tool box. However, the chisel tool had a very tough plastic y surface but I was able to burn it away to expose the bare metal with my alcohol lamp before melting and forming small pieces of shellac on it. However, the pieces of shellac needed were much smaller than what they looked like to me in the video. My way of making even smaller pieces was simply to poke the small pieces that I had made with tweezers once they had cooled and were hard. Setting and adjusting the pallet stones was easier than I thought it would be. I didn't realize the fork slots for the stones pinch the pallet stones (Vostok calibre 2414) and actually keep them in place before the shellac is applied. So, I could replace the pallet stones and then check and adjust the locking depth to the escape wheel teeth before applying the shellac. A bit fiddly yes, and you do need to develop some dexterity with tweezers before you try this but not to the point that you break a sweat. Anyway, thank god for my stereo microscope! Anyway, it was my first attempt, and as is common when you try something for the first time, I made a mistake. Despite very consciously applying what I felt was a little too little shellac it still flooded the stones and a large portion of the fork when it melted. Also, I applied too much heat so that the shellac started boiling creating bubbles. So, I decided to start all over. Fortunately, the “industrial isopropanol” (so called on eBay) that I have is very efficient so no problem removing the shellac from the stones and the fork. The second time around I only used a minuscule amount of shellac. Also, I heated the Gaston tool holding the fork in short turns, just so that the shellac would fully melt without staring to boil. Much better! The following is what I would suggest based on my first experience: Basically, follow the video I linked to above. In the video, Mark pokes and scrapes the fork and the stones with tweezers to get rid of old shellac. I tried that, but it wasn’t very efficient. Instead I would let the pallets soak in industrial isopropanol for about 10 minutes and then use a paintbrush to brush them clean. The shellac dissolves completely in the isopropanol and the stones can then be easily removed and further brushed if required. To insert or slide a stone back into the fork slot I found holding the fork by the end of the slot (opposite side of where the pallet stone is inserted) with tweezers (left hand) was giving me the most control. I placed the pivot of the fork (guard pin up, of course) in a small hole in my staking block while inserting/sliding the stones with another pair of tweezers (right hand) into the slots. After having applied the shellac Mark suggests re-heating the shellac to adjust the stones. I was worried that it might result in a mess if I tried it, so I decided to do the adjusting before applying the shellac as shown in this video. The slots for the stones pinch the stones pretty well so if you're careful while you're testing the lock to the escape wheel teeth this method works well and won't dislocate the stones. However, to make sure, double check the positions (depth and angle) of the stones before applying the shellac. Now, the tiny piece of shellac should be placed on the rear section were the stone meets the fork. Mark is clear about this in his video but for some reason it completely passed me by when I made my first attempt. In my second attempt I followed Mark's instruction, but the piece of shellac, being very asymmetrical in shape, was difficult to place in the right spot. However, after warming the pallets to the point that it had only softened the shellac a bit, I discovered, to my surprise, that I could manipulate the shellac into the perfect spot with the tip of my tweezers, without the shellac sticking to the tweezers. Of course, as I've come to realize, every repairer must find his or her own way, but hopefully you'll find my "discoveries" useful. Above is a picture of the result. It's not perfect but still worked very well. The amount of shellac on the entry stone is a bit too little, and there is a < 1 degree tilt on the exit stone (which, of course, can’t be seen in the picture).
 2 points
 -
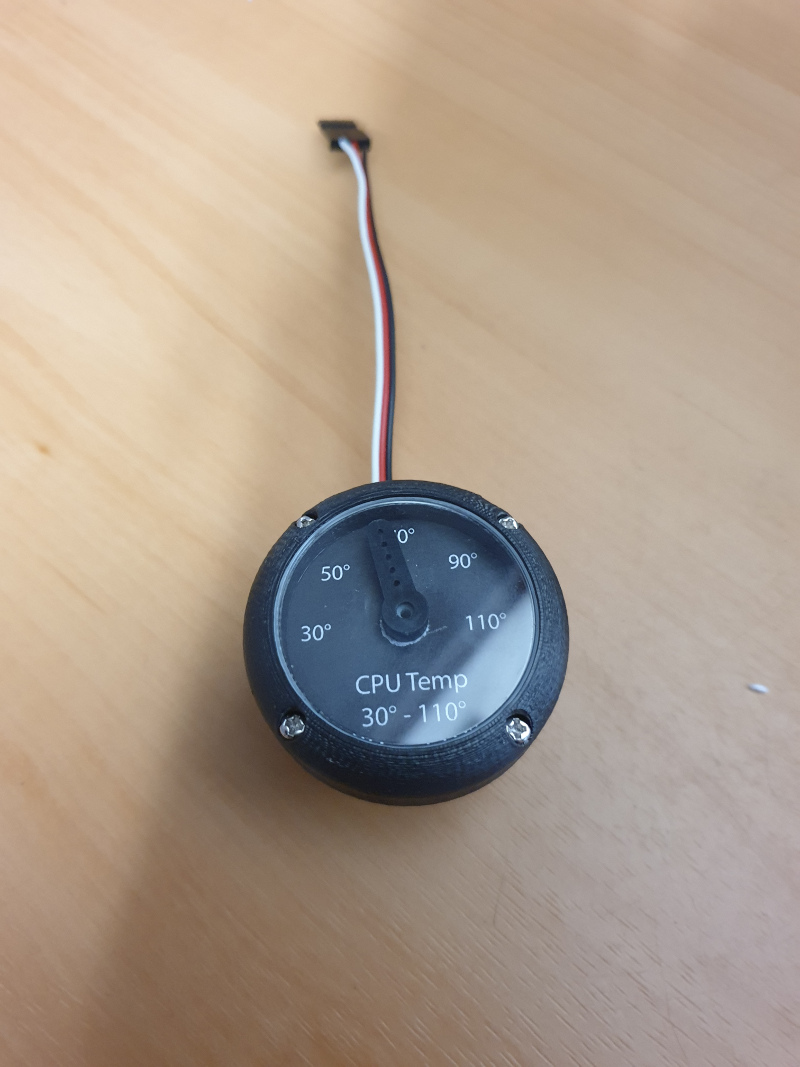
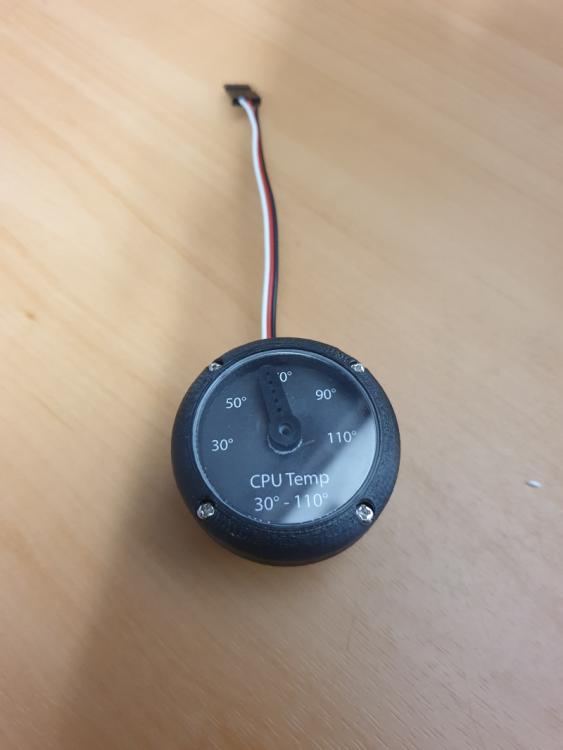
My 13 year old son is very much into computer coding and has moved so far beyond my coding ability that I don't understand half of what he is telling me he is doing now, but I thought I would post a picture of a project he did over the weekend. But first I need to mention he is a big fan of aircraft clocks and very quickly took my Russian AChS-1 'MIG clock' to sit beside his computer and then when I restored my WWII German Kienzle aircraft clock he very quickly grabbed that one too. But back to my son's project. He has always wanted an analogue dial in the style of an aircraft clock to display the CPU temperature of his computer, so he decided this would be his weekend project. I found him a micro servo in one of my drawers left over from my RC plane days and gave it to him. He then wrote a C# sharp program for his computer that runs in the system tray and reads the temperature of the CPU and passes this value out on one of the USB ports to an Arduino he had programmed to read this value and drive the servo with a PWM output. He then designed a dial inspired by the 'Mig Clock' at half scale on Fusion 360 which he made sure the dial size would fit one of my larger spare watch crystals. We then 3D printed it on Sunday and he then designed a dial to fit it and finally I fitted the watch crystal to it for him tonight and here is the finished product. He now has the C# program running on his computer passing the CPU values to an Arduino driving his analogue CPU temp gauge. He has plans to expand this and create another gauge for the GPU temperature now and is talking about changing the case design to incorporate an RGB LED, so it can shine blue, green or red depending on how hot it is. When I was 13 I did enjoy coding in 'BASIC', but never did anything that complicated. How times have changed. Tony
 2 points
 -
Alarm "clock"! ?
 2 points
 -
2 points
-
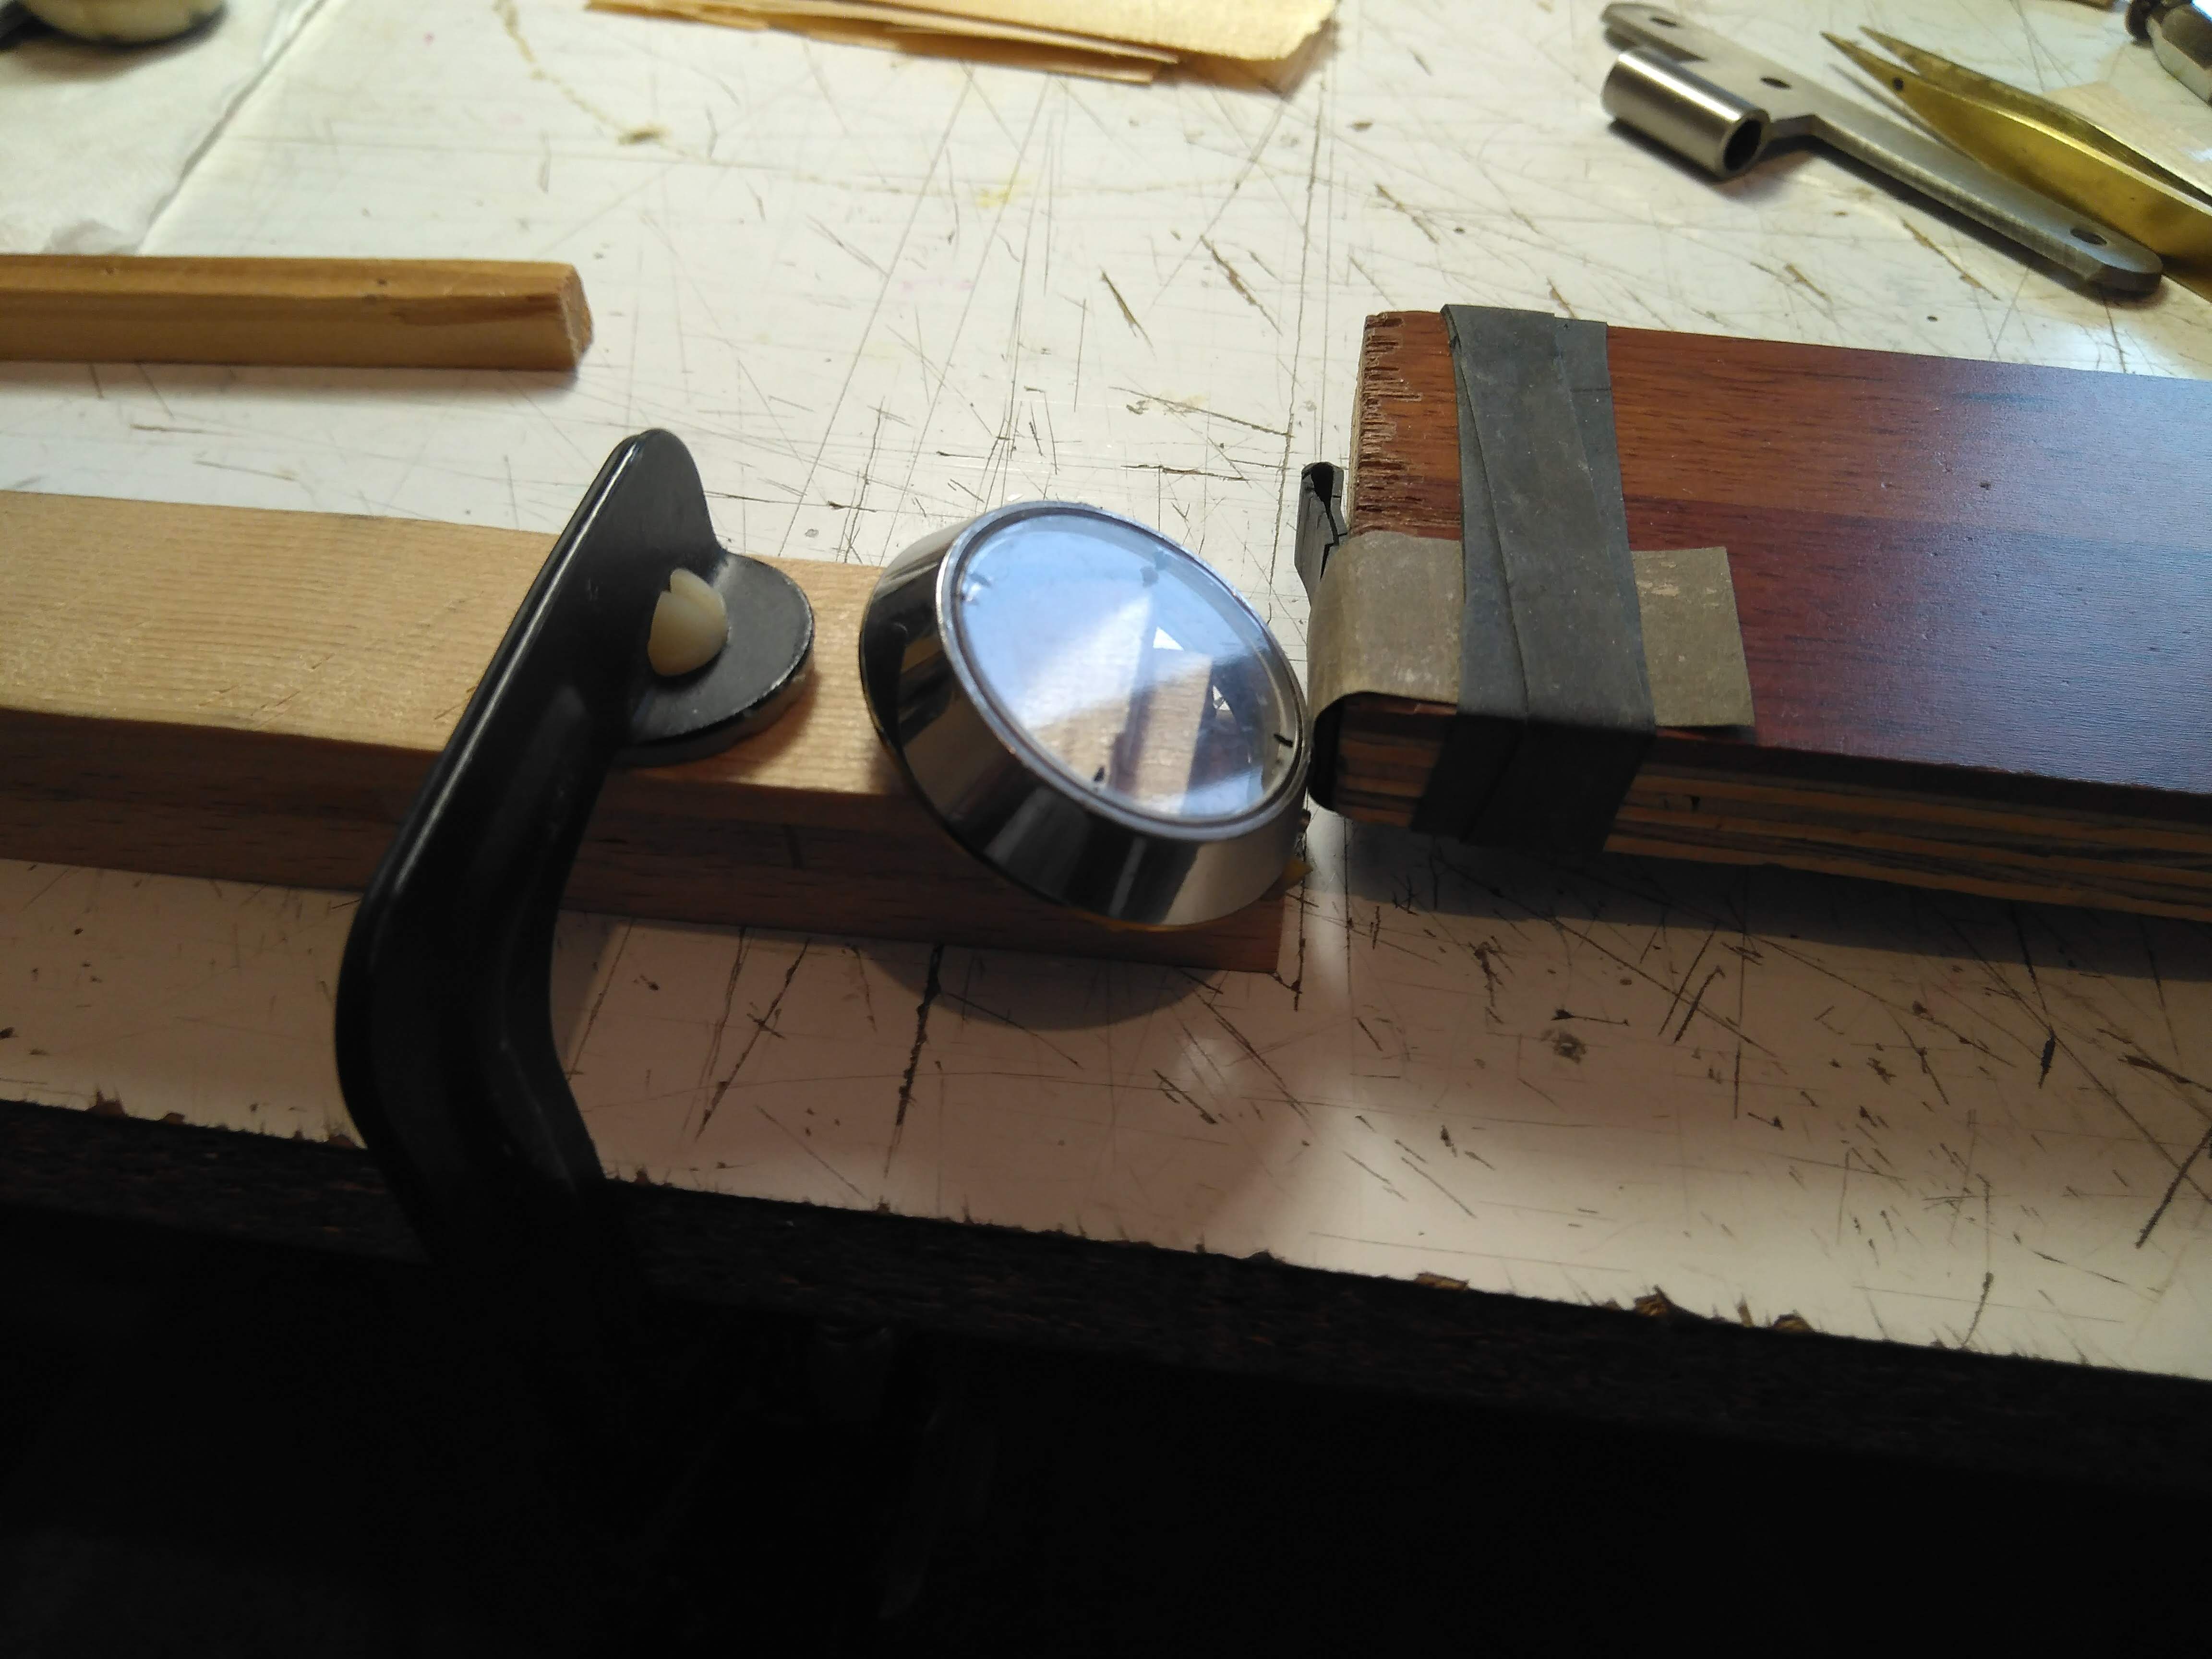
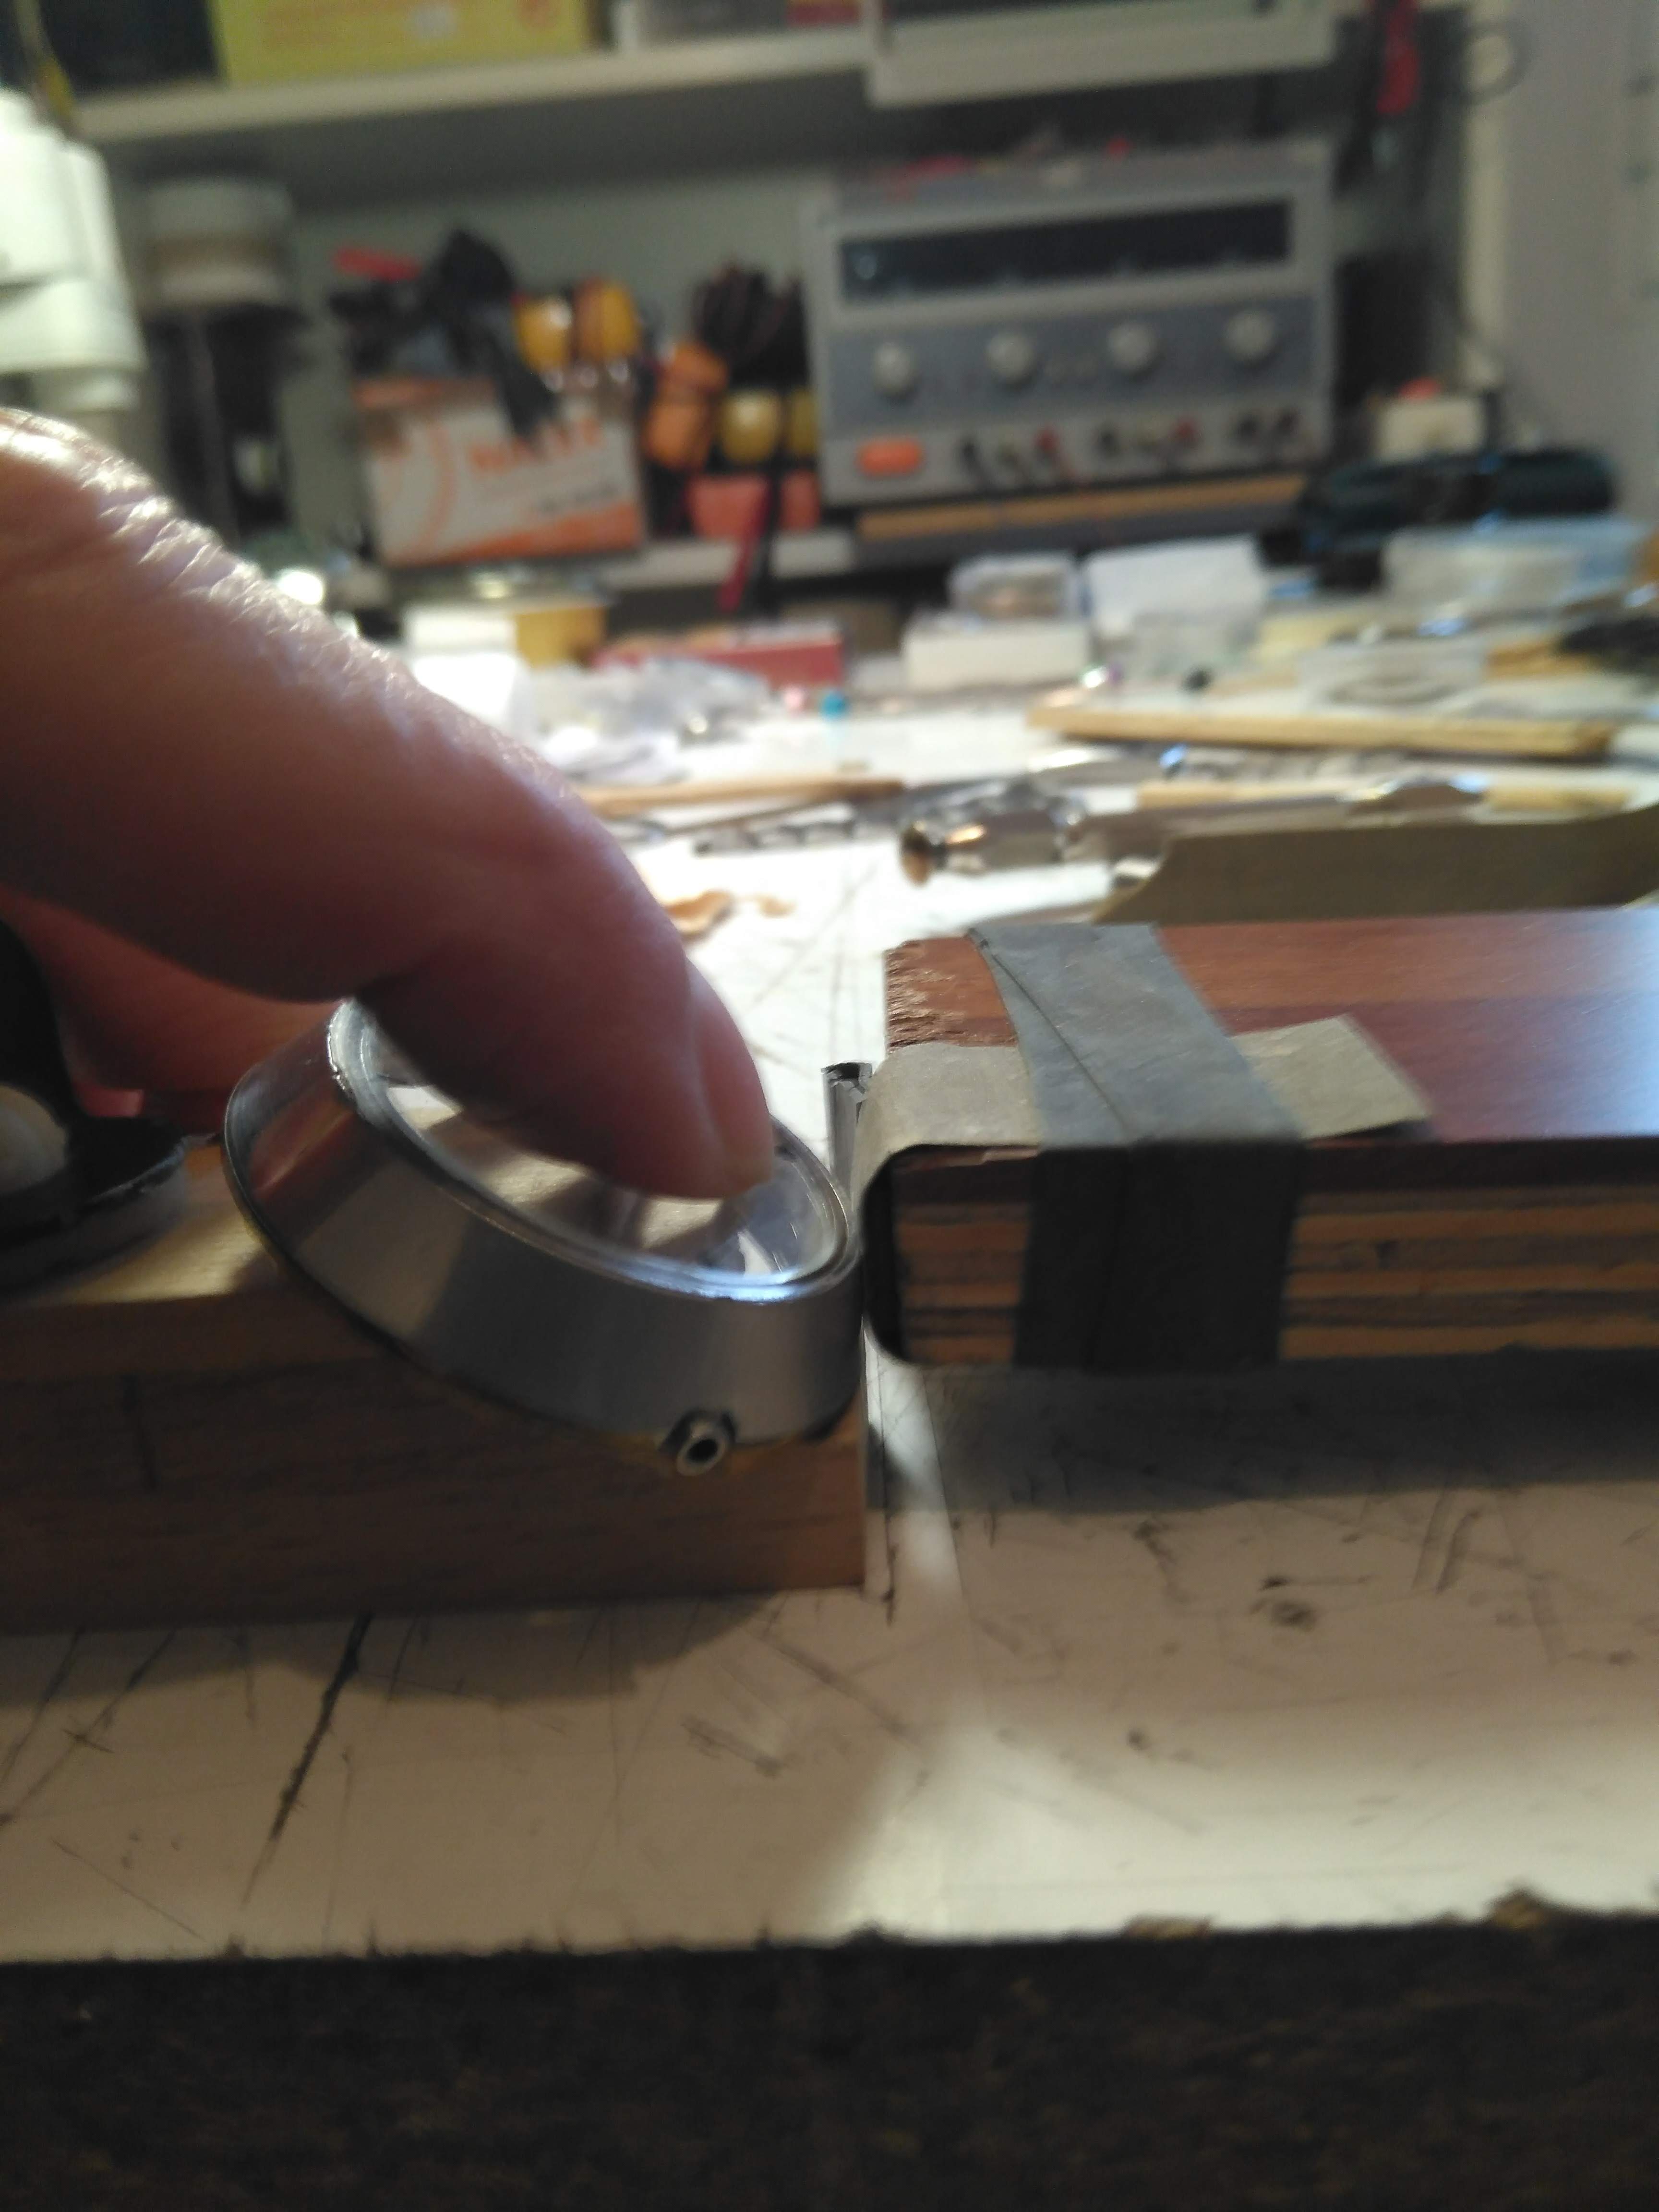
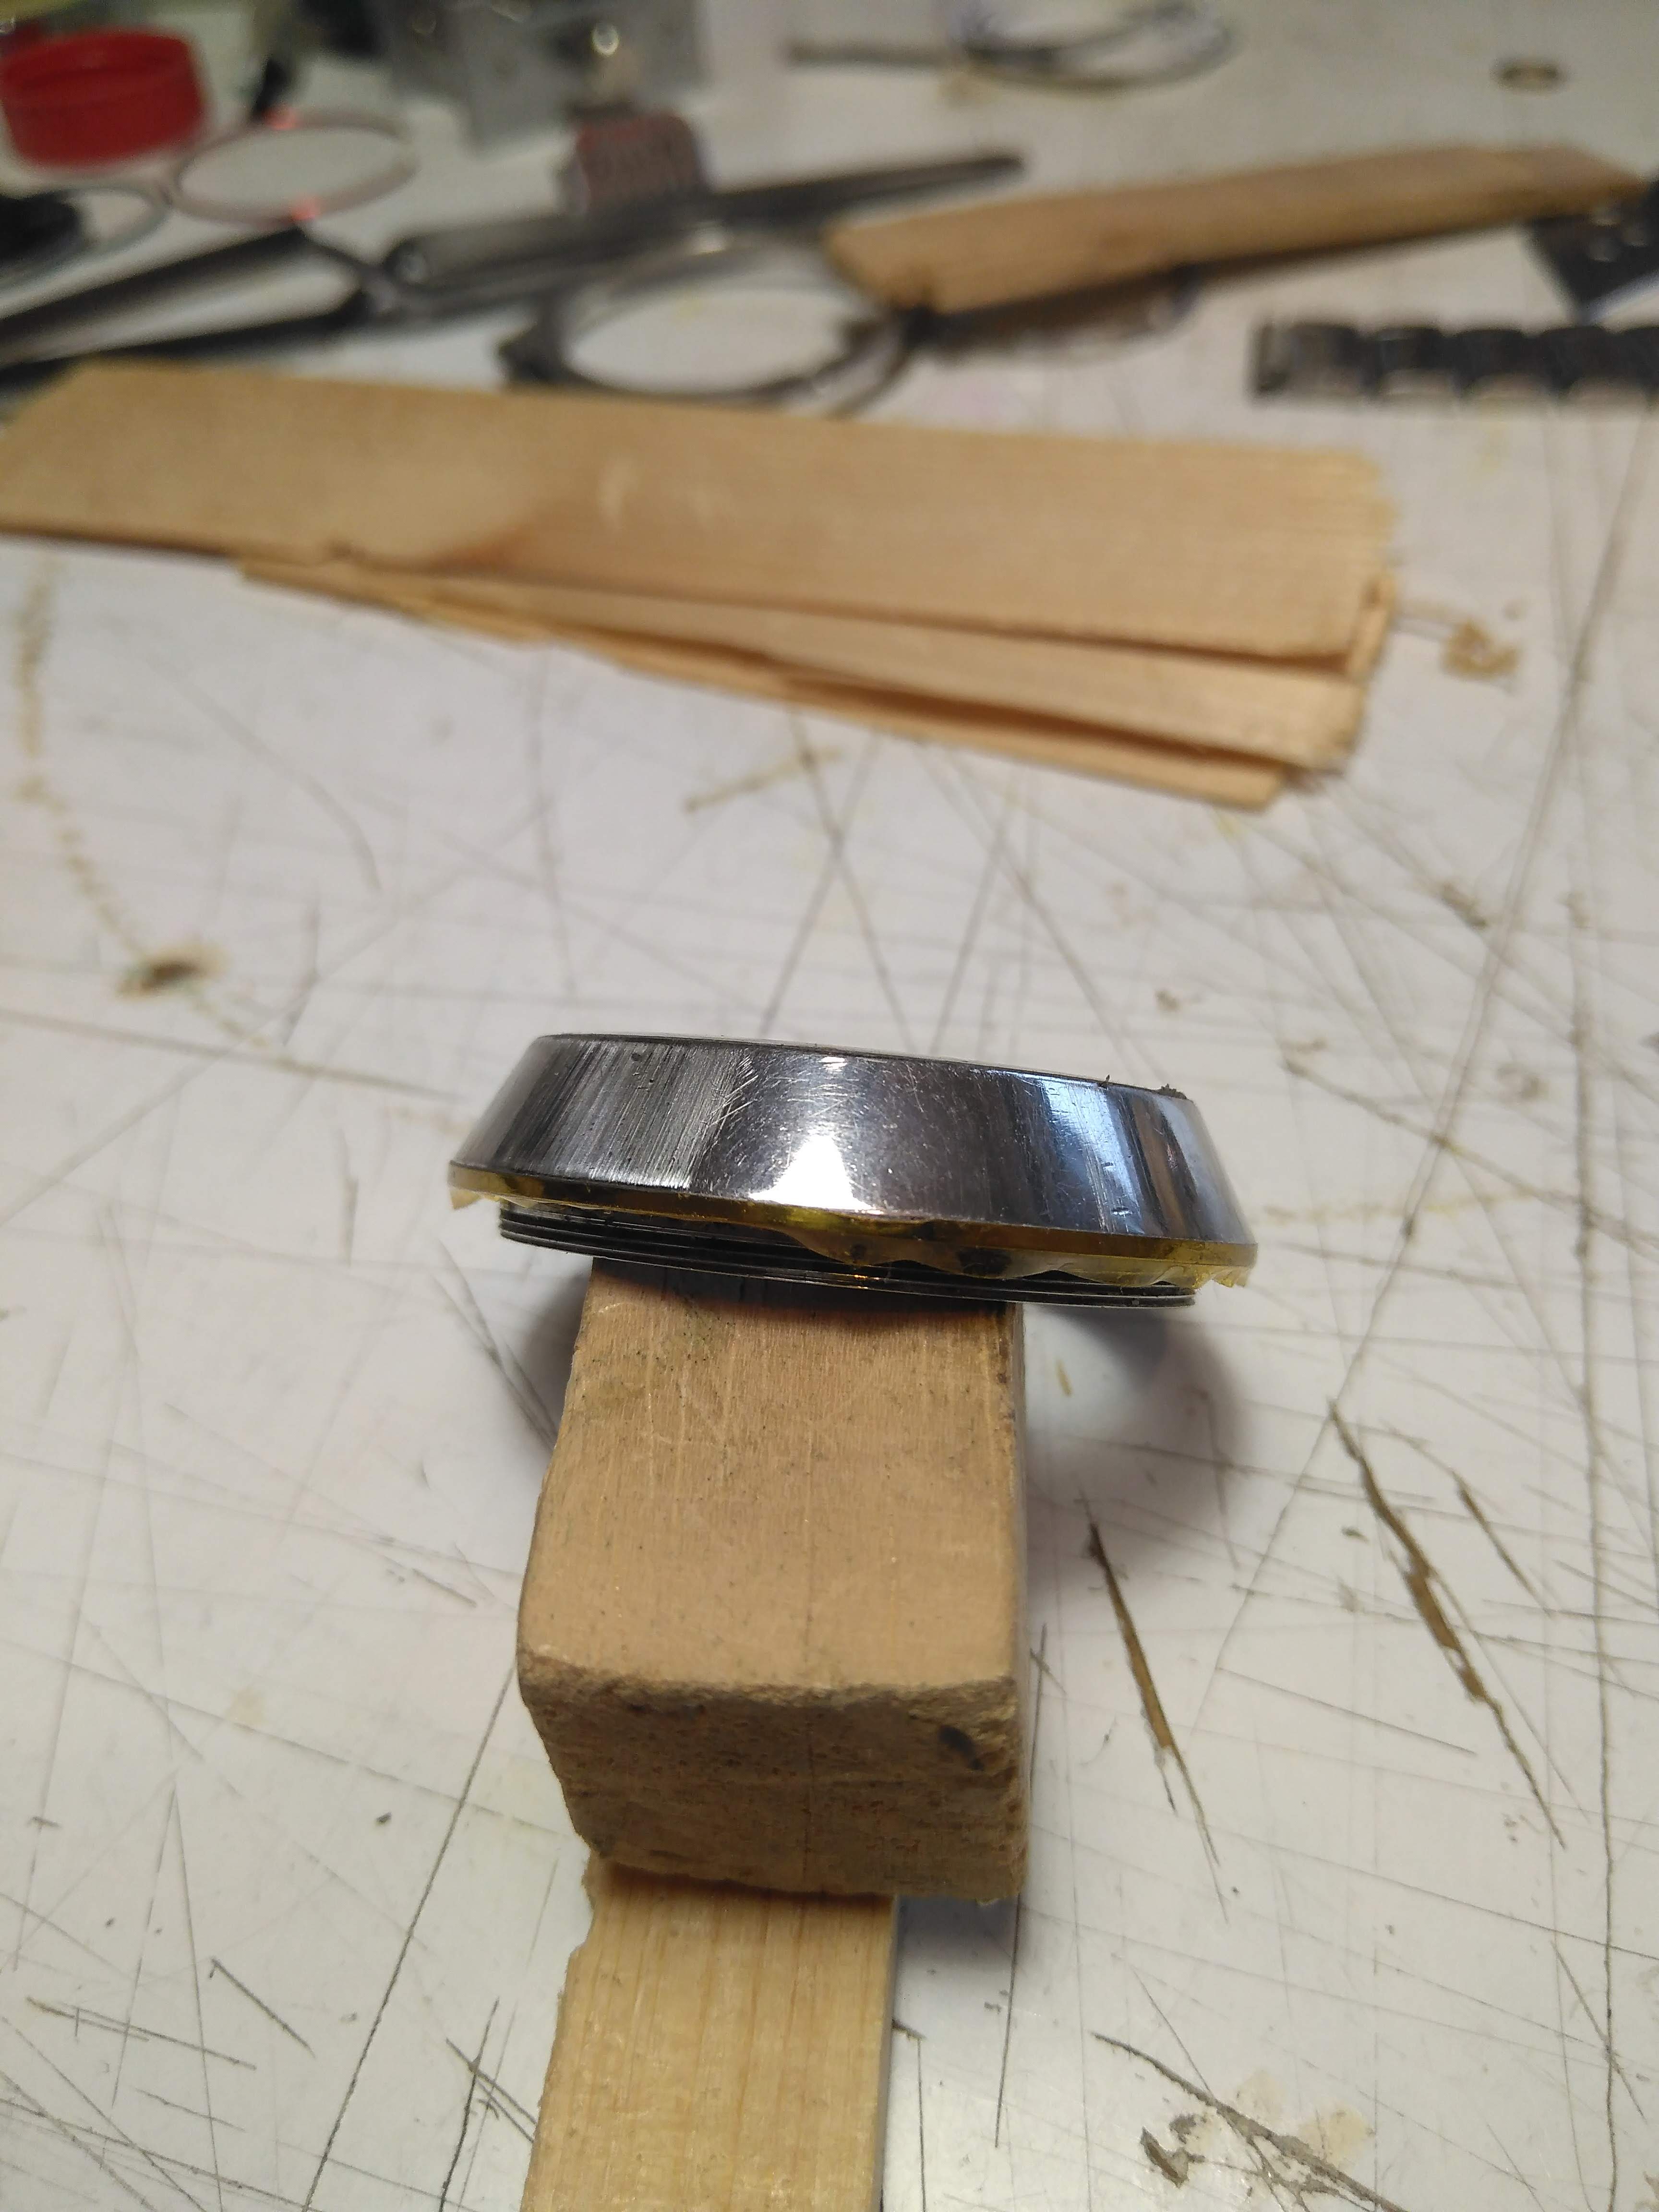
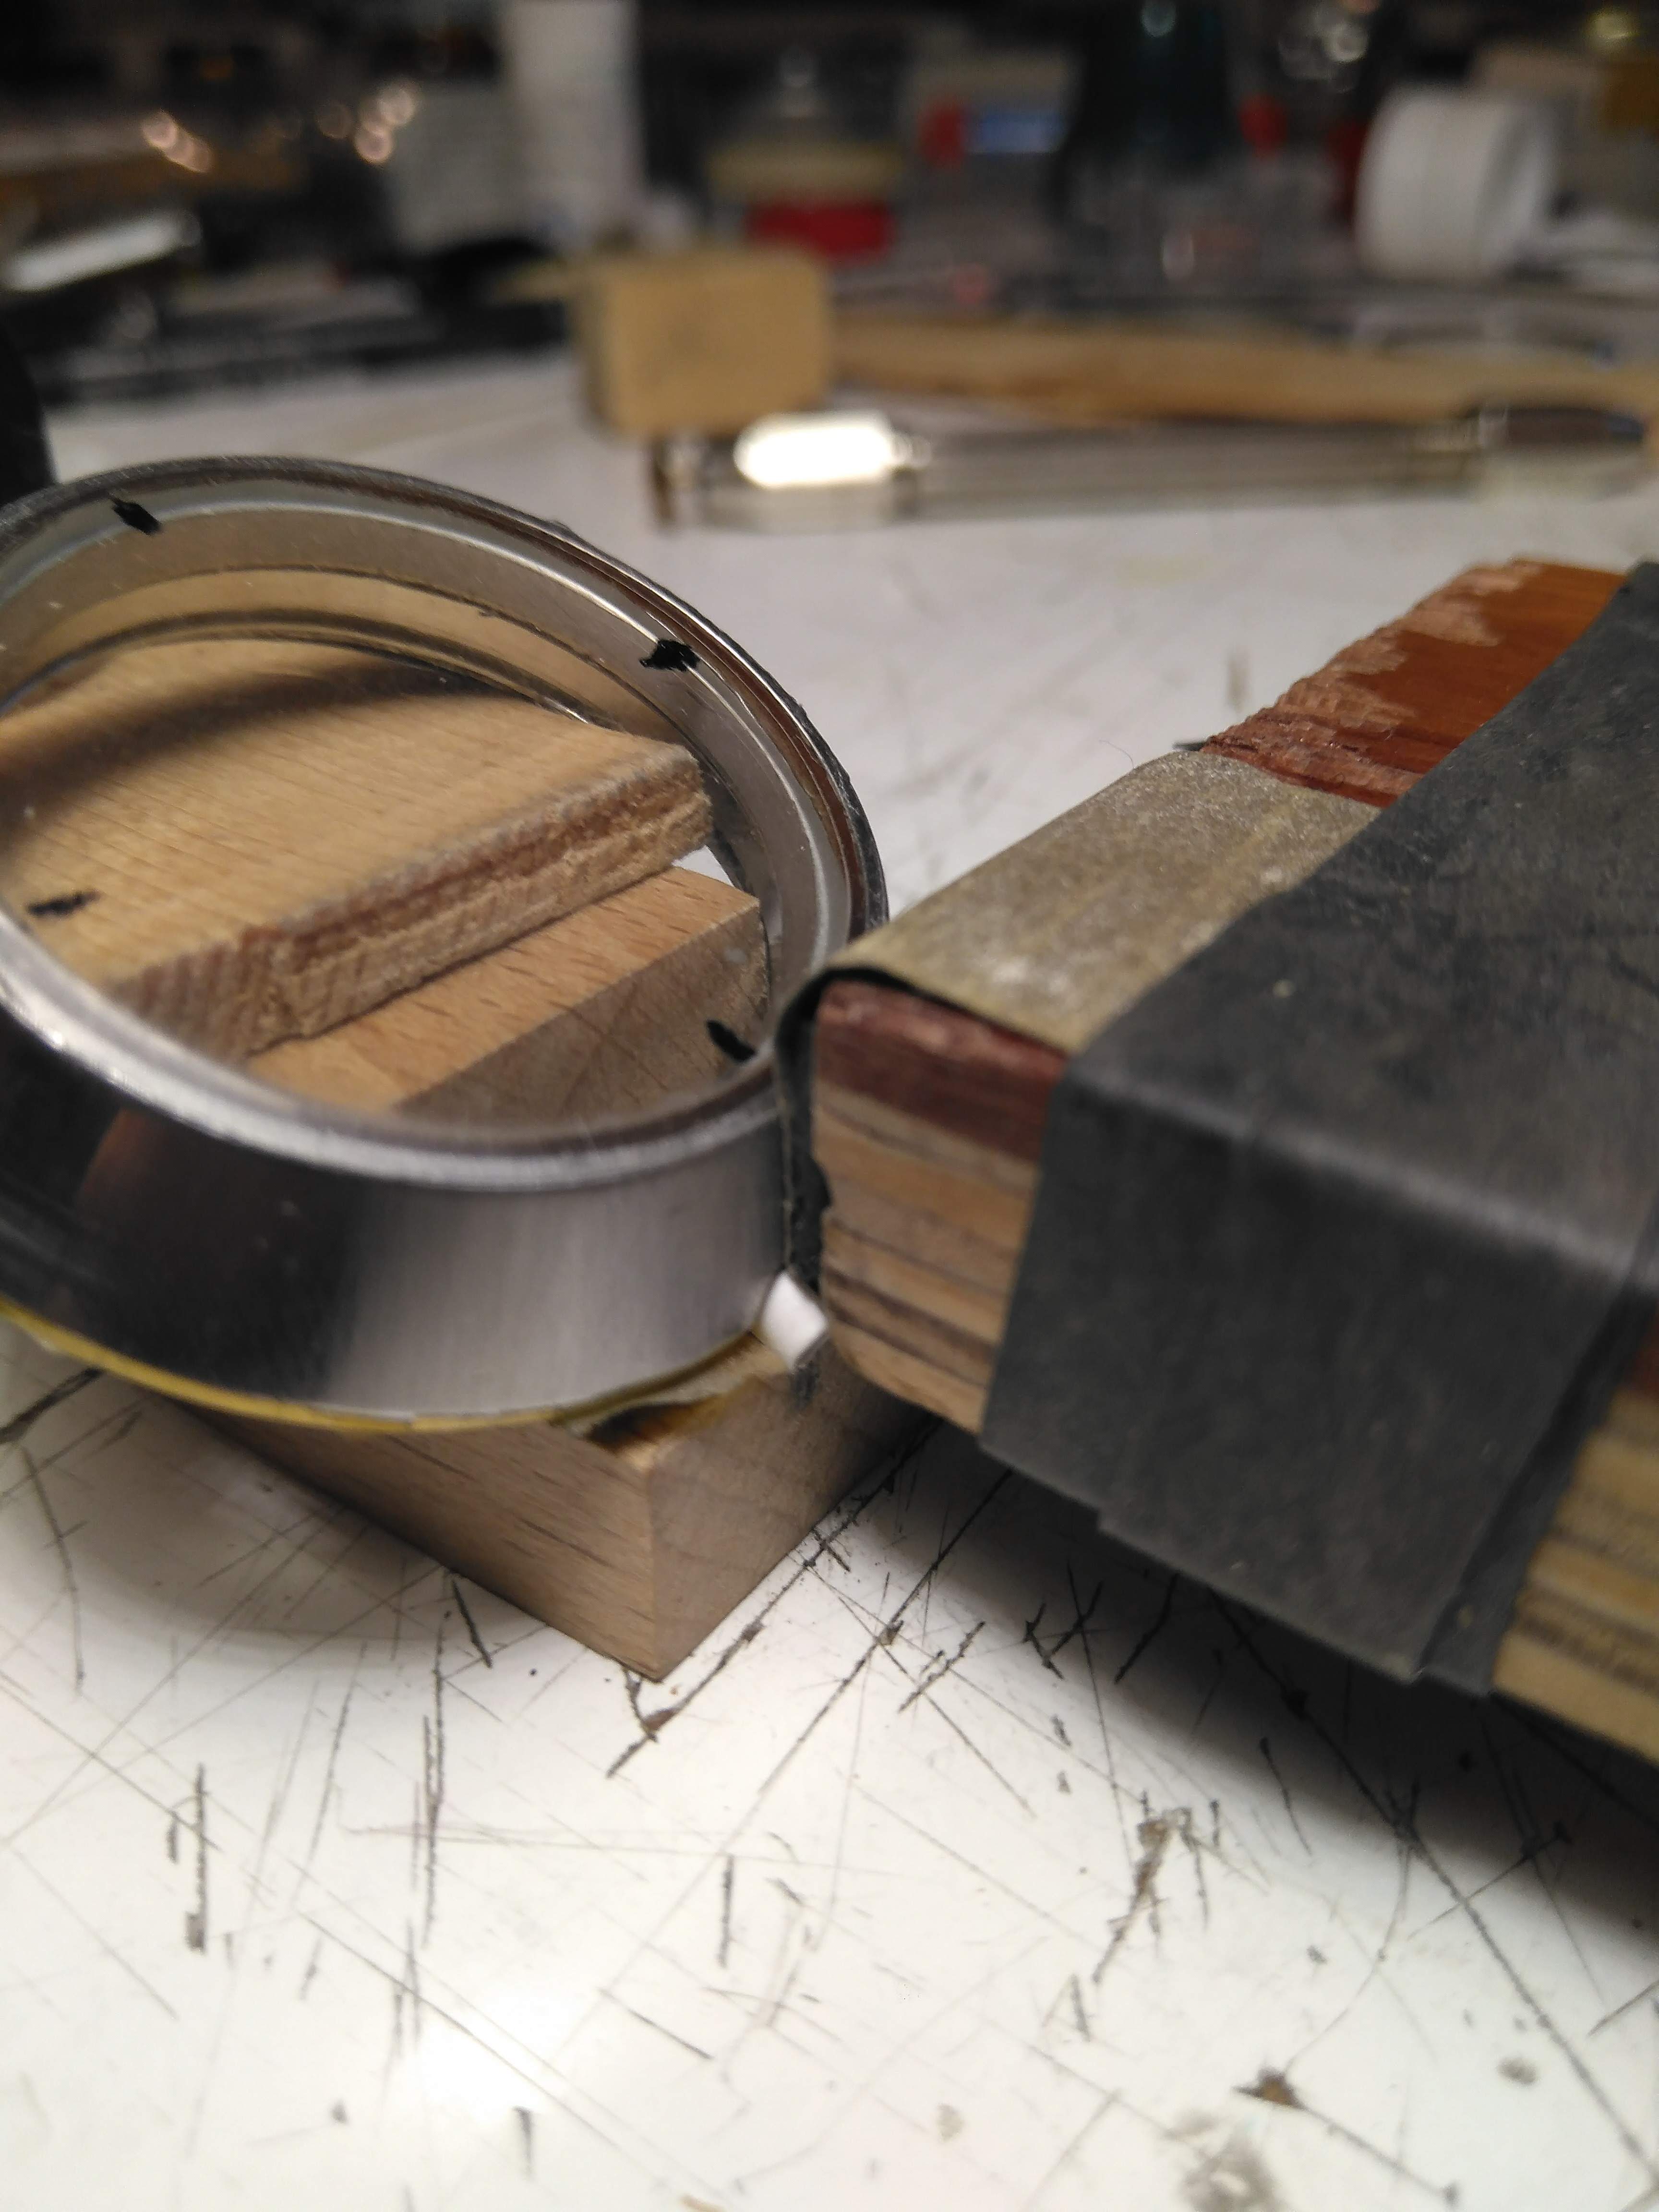
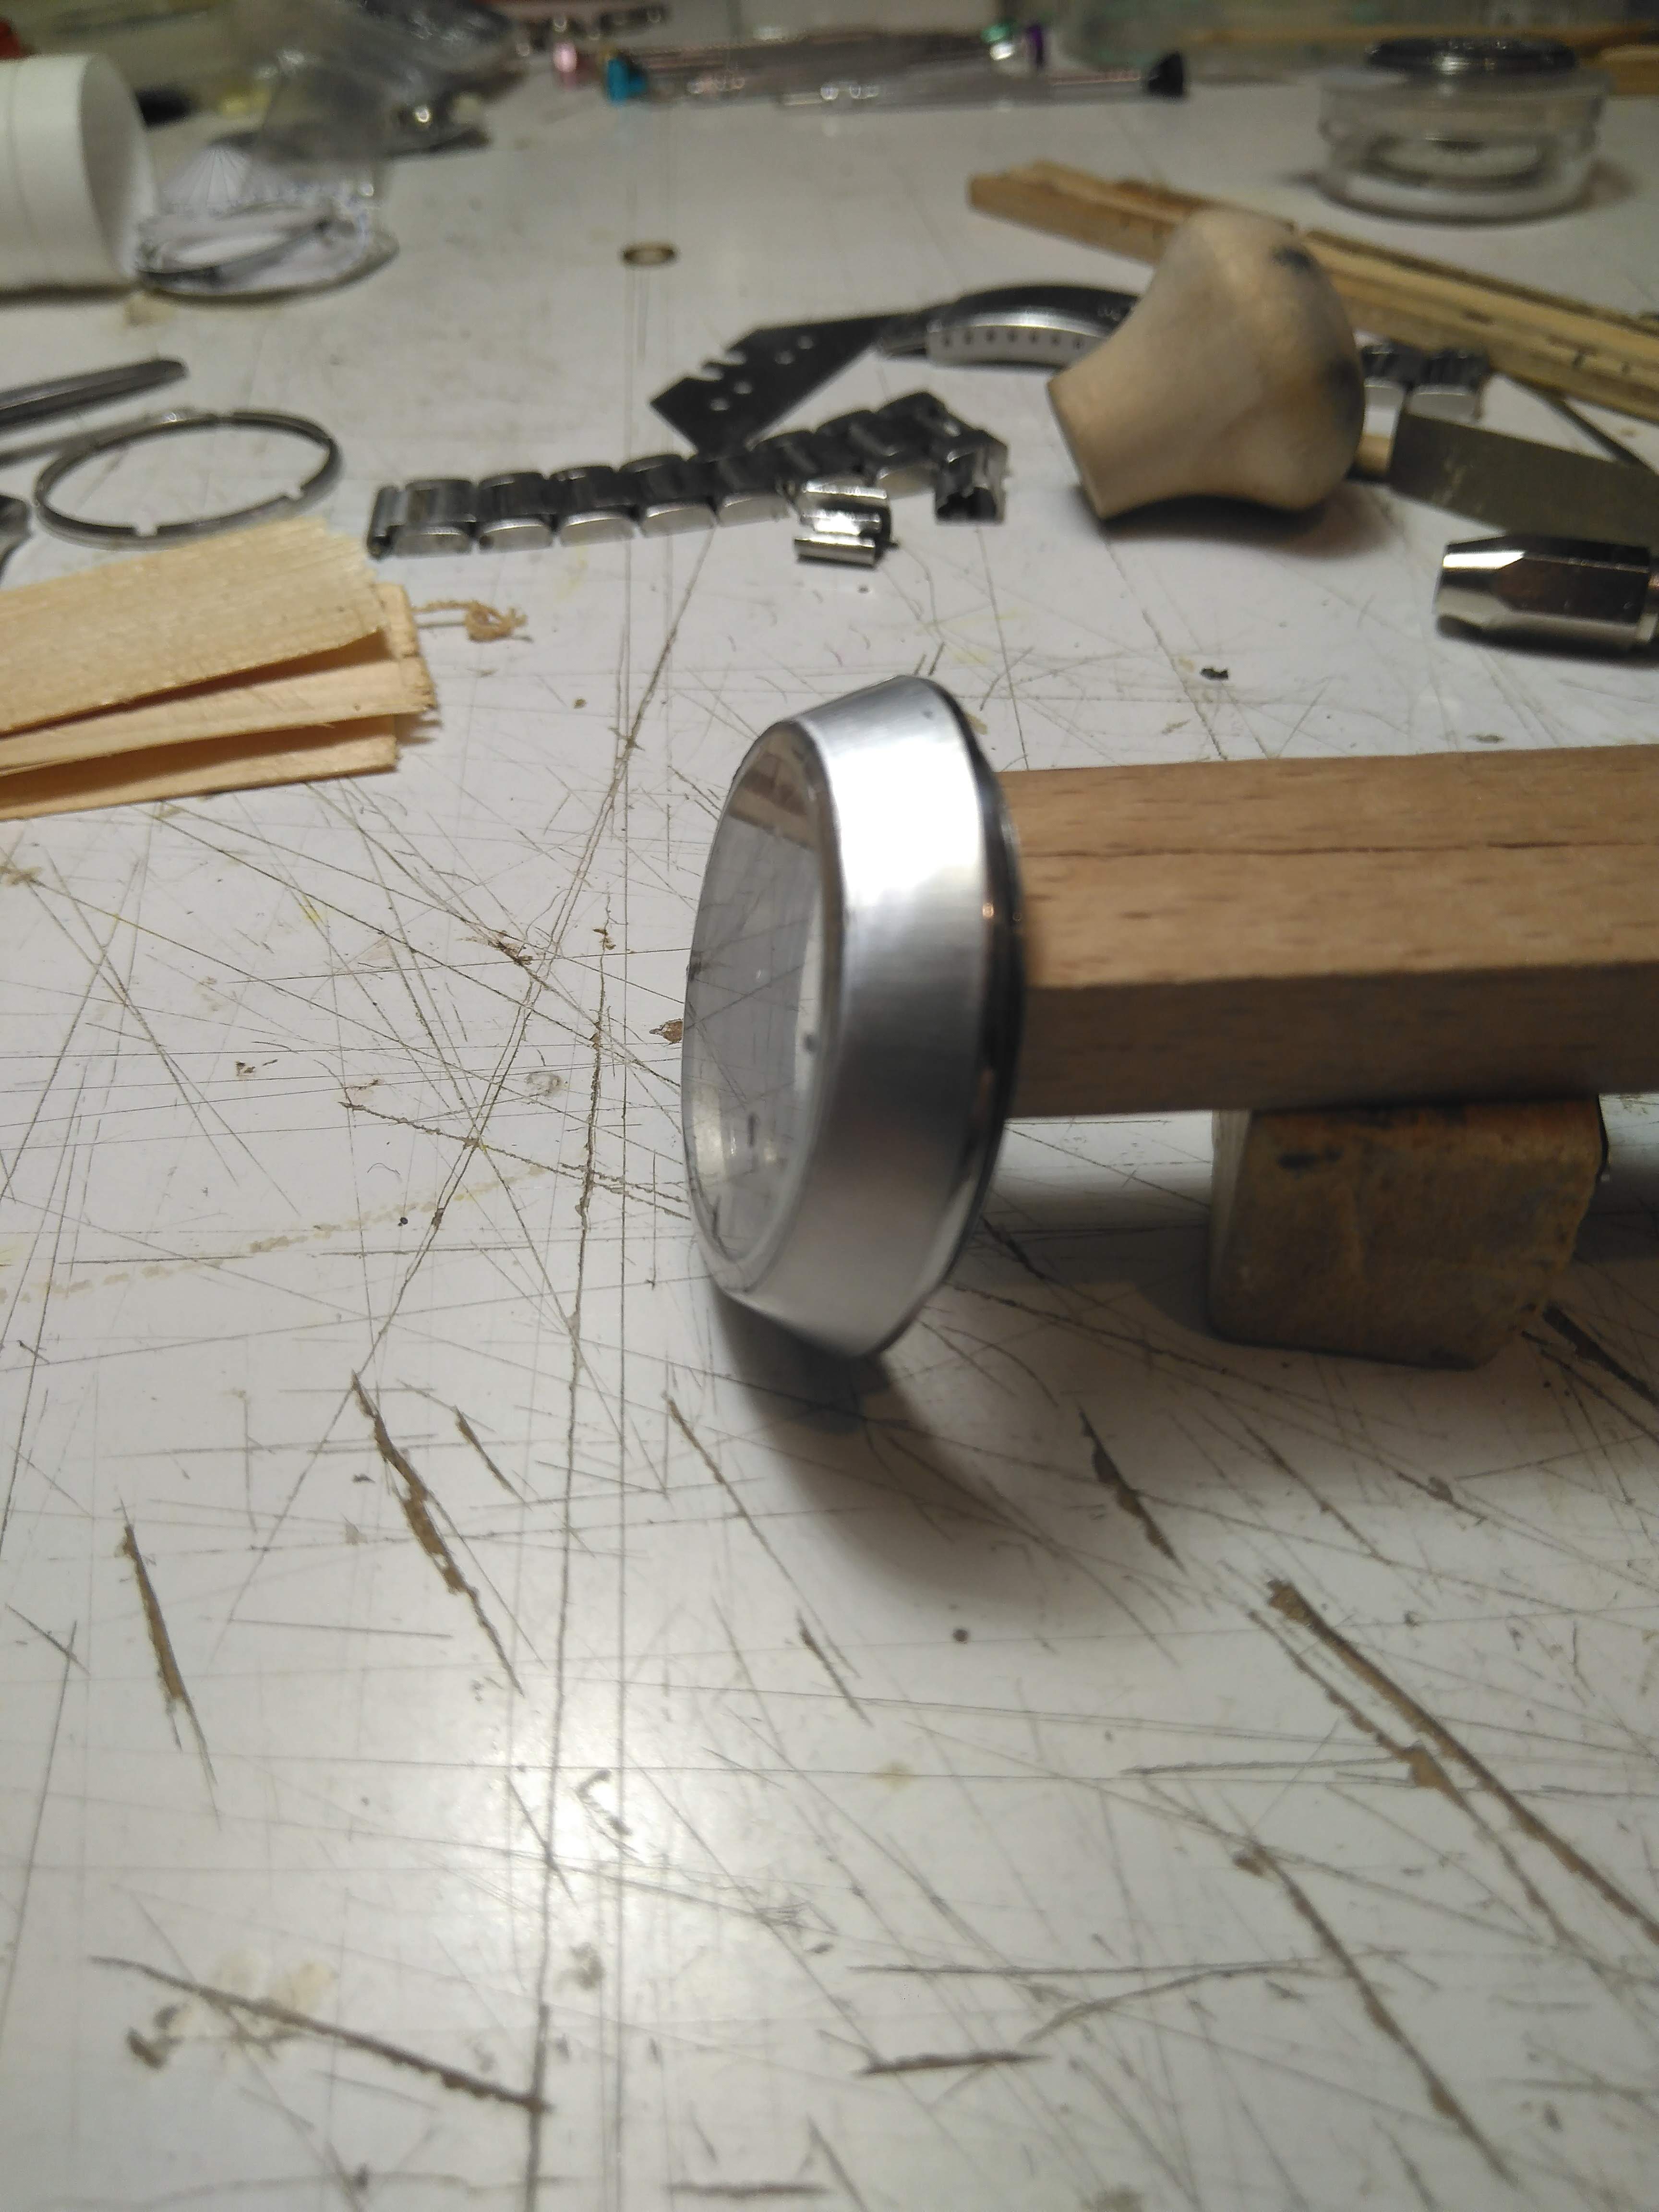
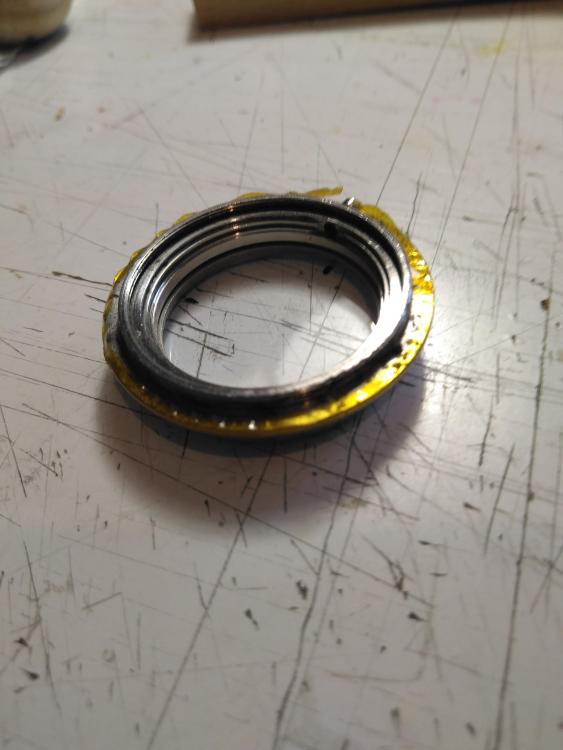
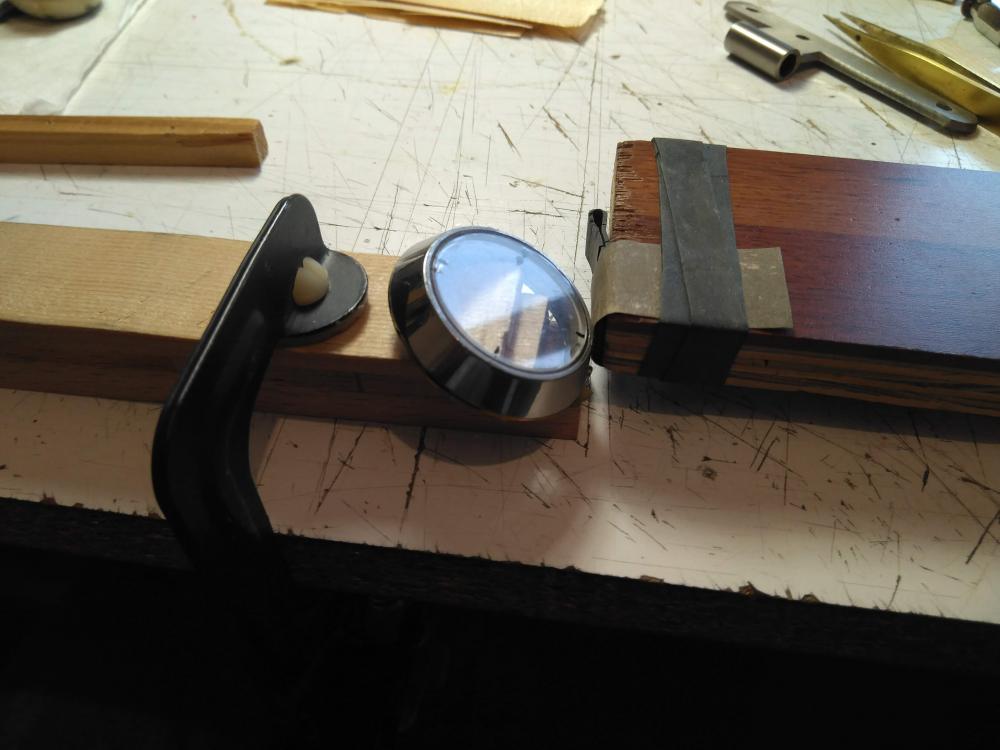
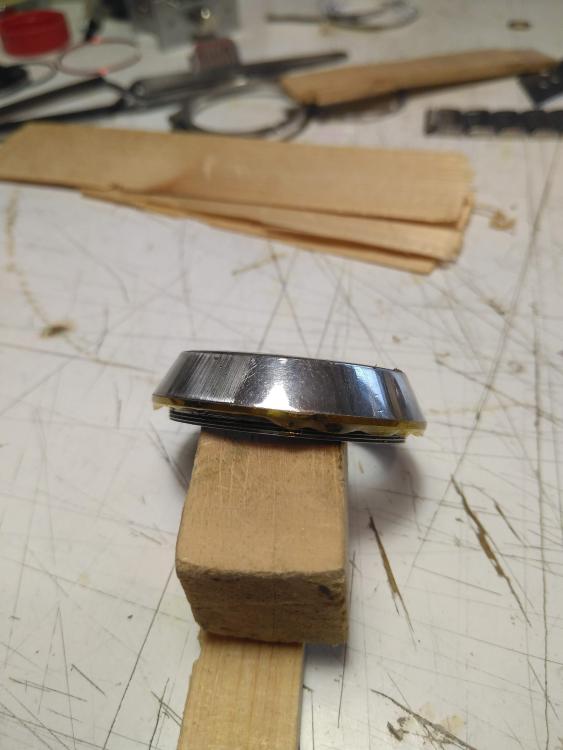
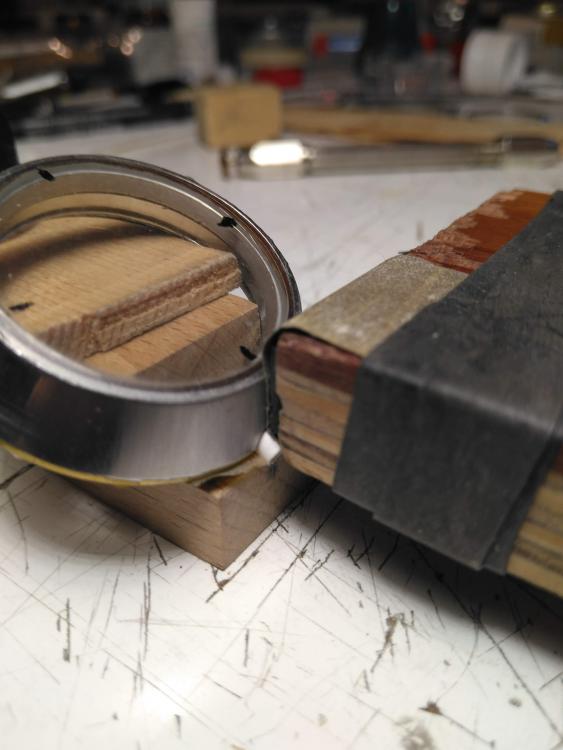
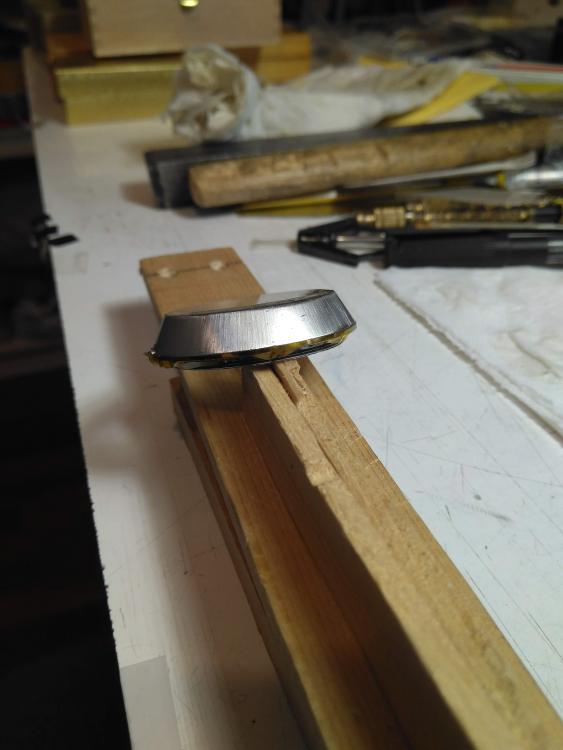
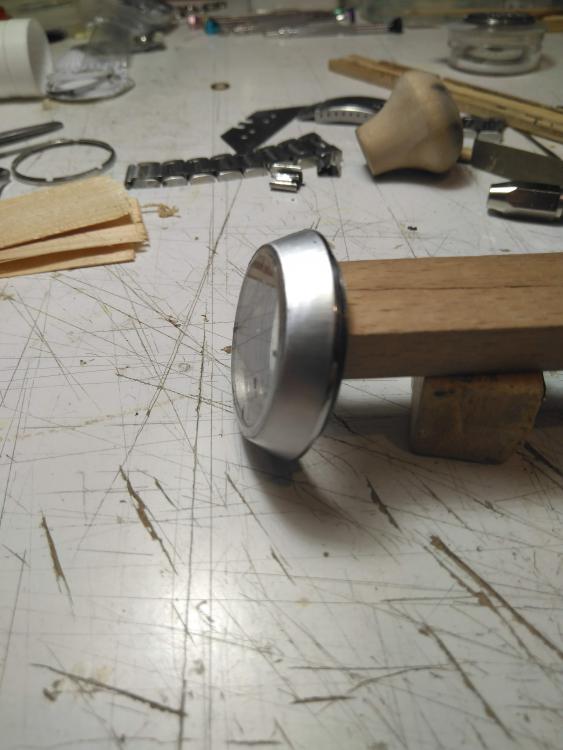
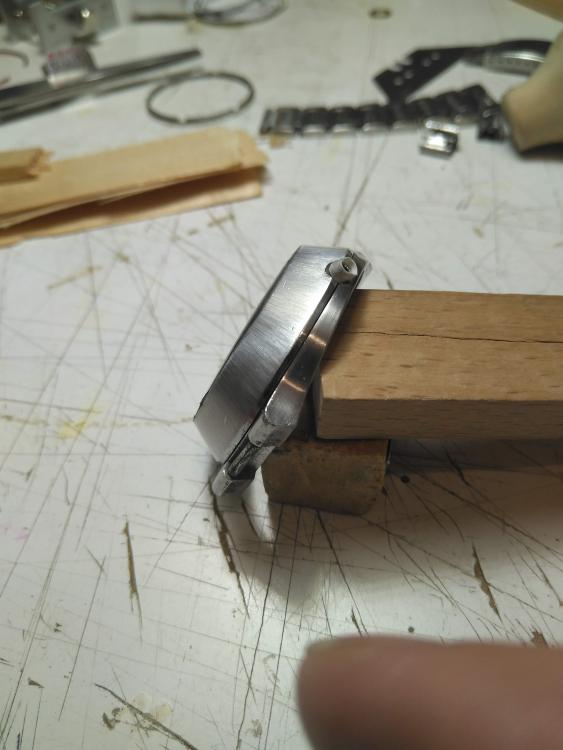
Hi, I hope you all are fine Those days I found an old omega f300 cone case sleeping on the drawer polished as a mirror when I bough it, many years ago cheap as scrap. I decided to give it a try and among other tasks, rescue it's finish, and discovered that it's impossible to do it by hand, each run marks his scratches in a different direction giving even worse impression than mirror polish, so decided to take the challenge of scratching it in a radial and homogeneous pattern. I read somewhere a post about redoing an Omega cone surface, and found it really difficult, doing supports, regulators and so on, and requiring even a grinding machine, impossible and not to inspiring for me. Saw even someone using a dremel that took the hell out of me. Below it's the simple contraption that allowed to do it, maybe you can find it useful for your projects, it's cheap, easy to build and makes the redo a piece of cake. All the secret is to guarantee that sanding paper (or whatever you use) attacks the surface always in the same "radial" direction, this is impossible if you grab the case or sand paper by hand, any minor deviation will shine as a photo flash ruining the look. So to do it you may elaborate a complex rotating support, or take a simpler approach. As the watch is round, almost any "support" that "fills" the case will allow to rotate it around that position keeping the angle and relative position of the case. So with just a few sticks laying around I've been able to "build" a really simple "fill" to firmly support the case in a fixed position, allowing it to rotate freely but preventing any displacement up down, right or left, so keeping the case in the same relative angle no matter how much you rotate it. The second challenge was to make a sanding "device" to scratch the cone wall without any lateral displacement, so, just up and down motion along the cone wall, with any lateral distraction. Again an old lumber piece and a single carpenter clamp did the trick. Below are a few photos of the job, cheap, easy and efficient, I hope you find it useful. It was fun to repair a watch case with lumber, sand paper and carpenter tools, still thinking what use give to the hammer. My apologies, but don't know how to lay the photos in their place Ask if any doubt. Cheers and take care Ricardo

 1 point
 -
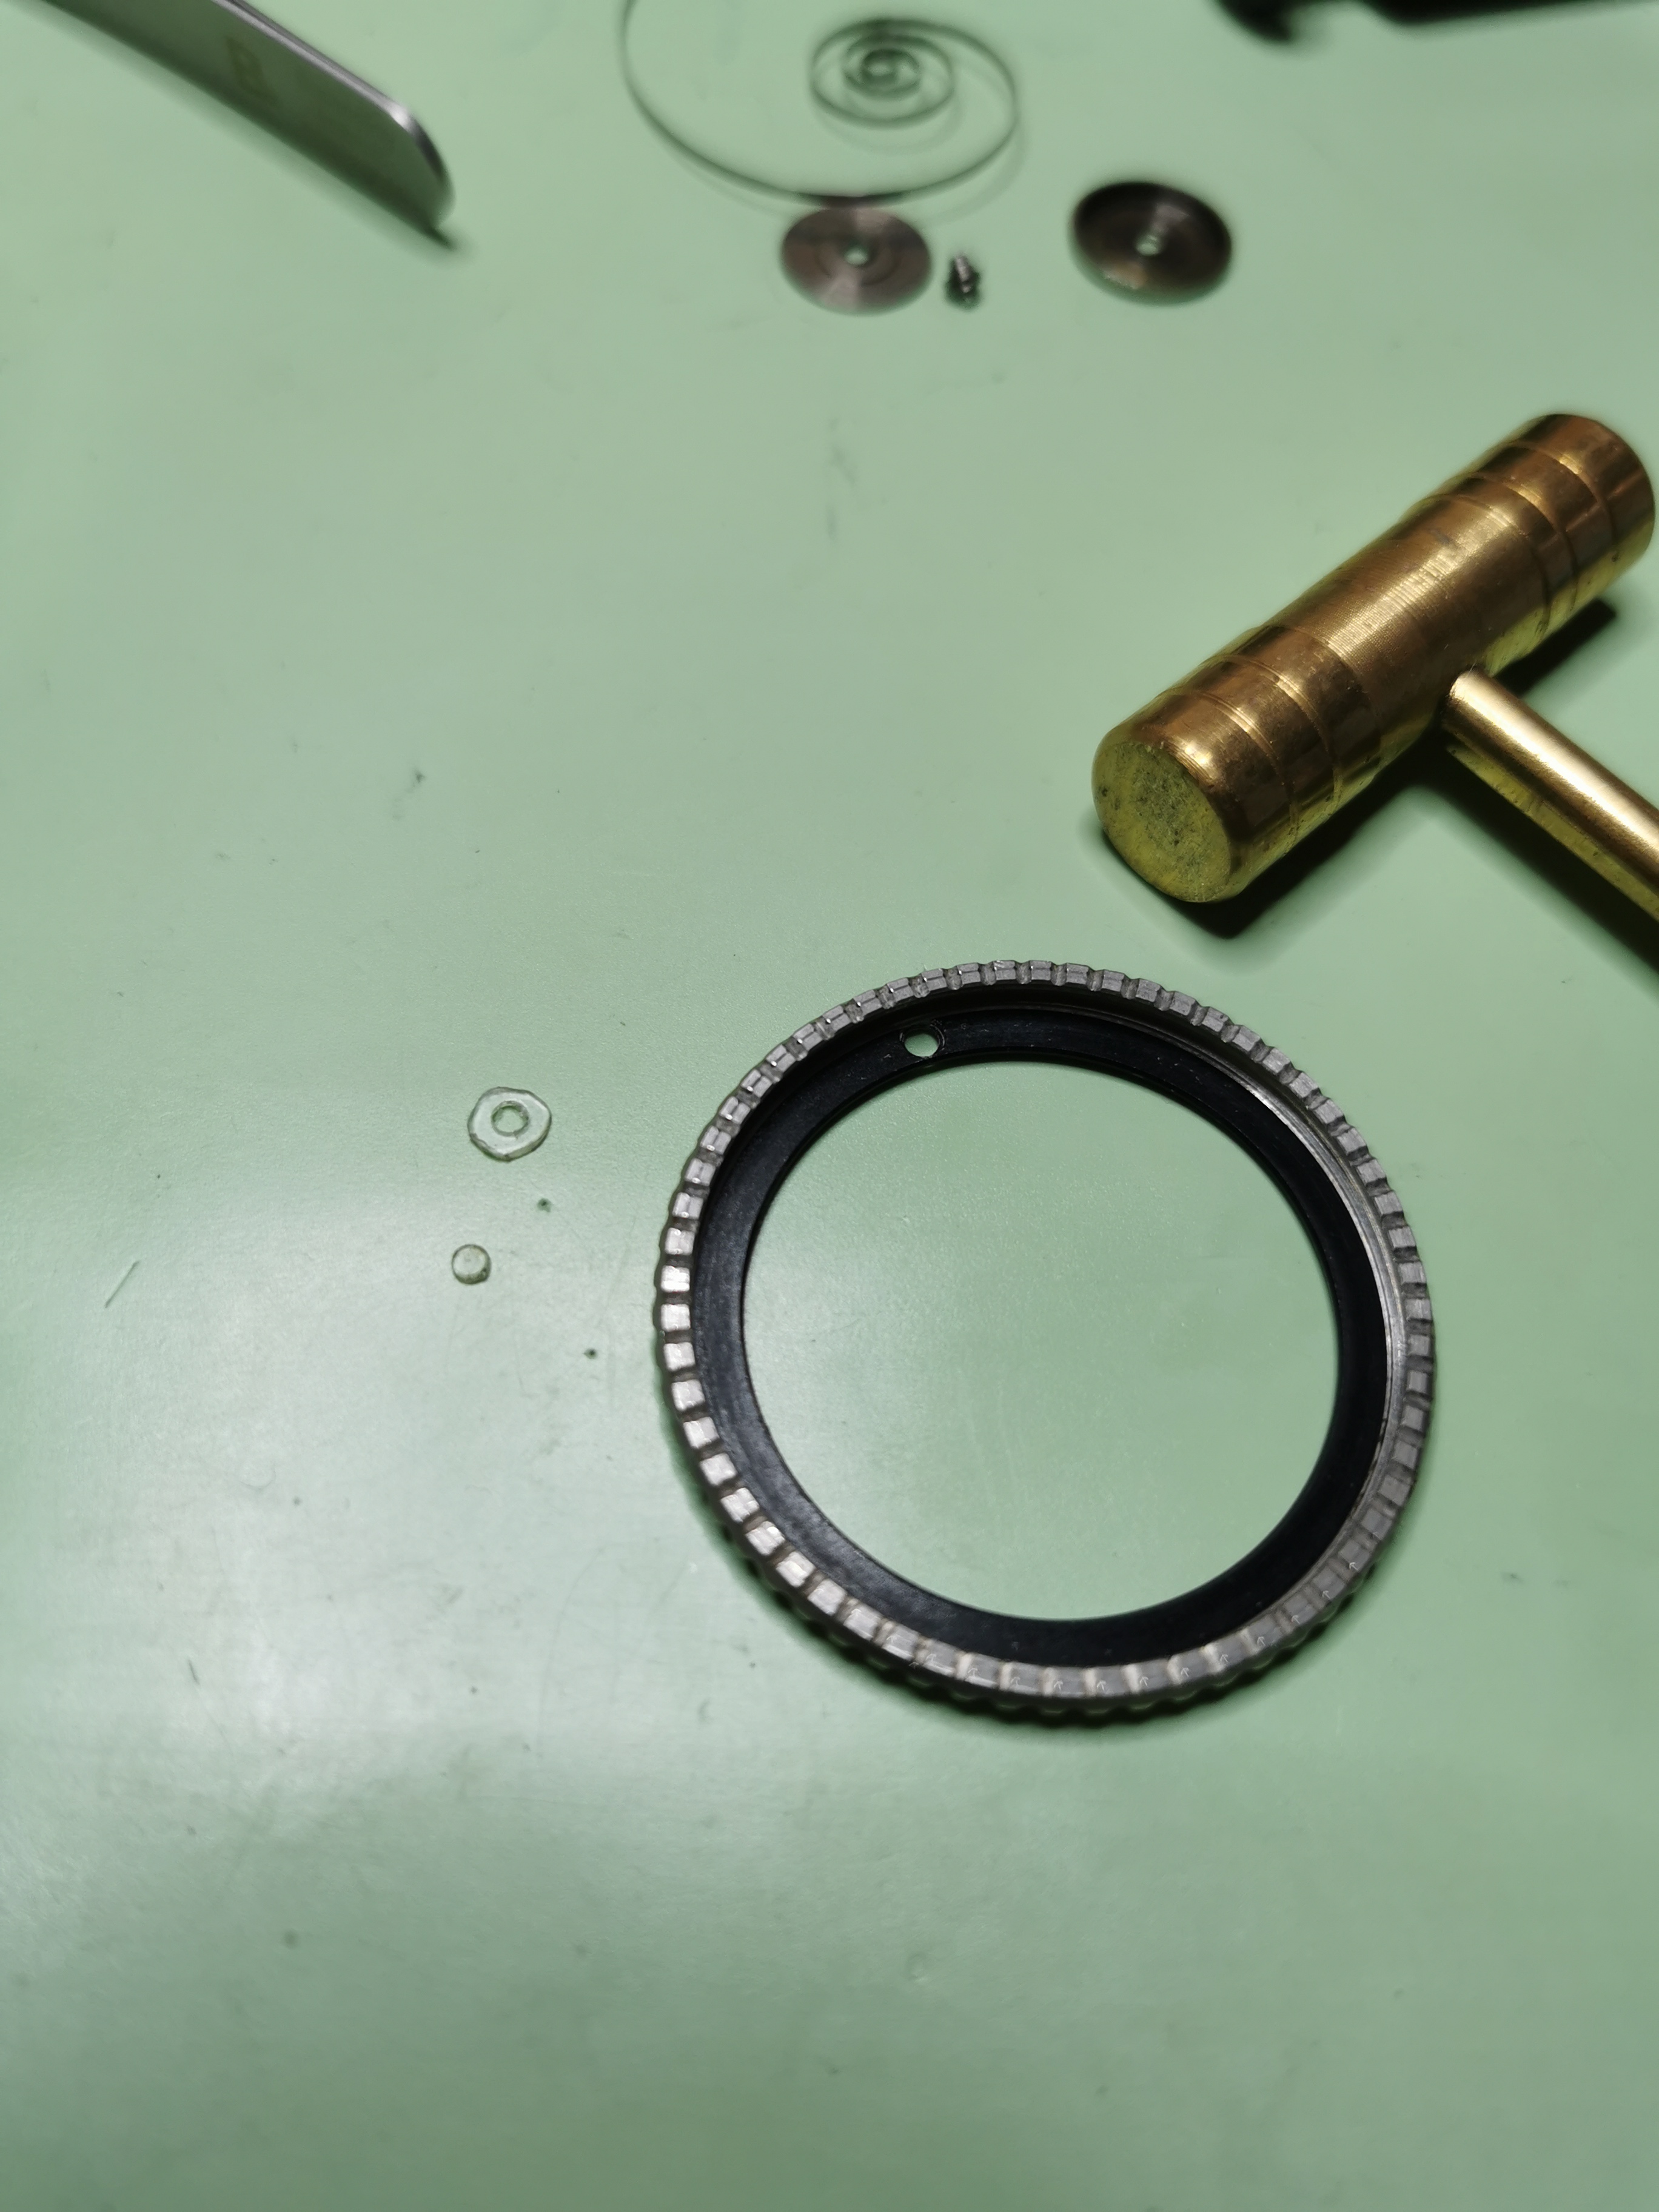
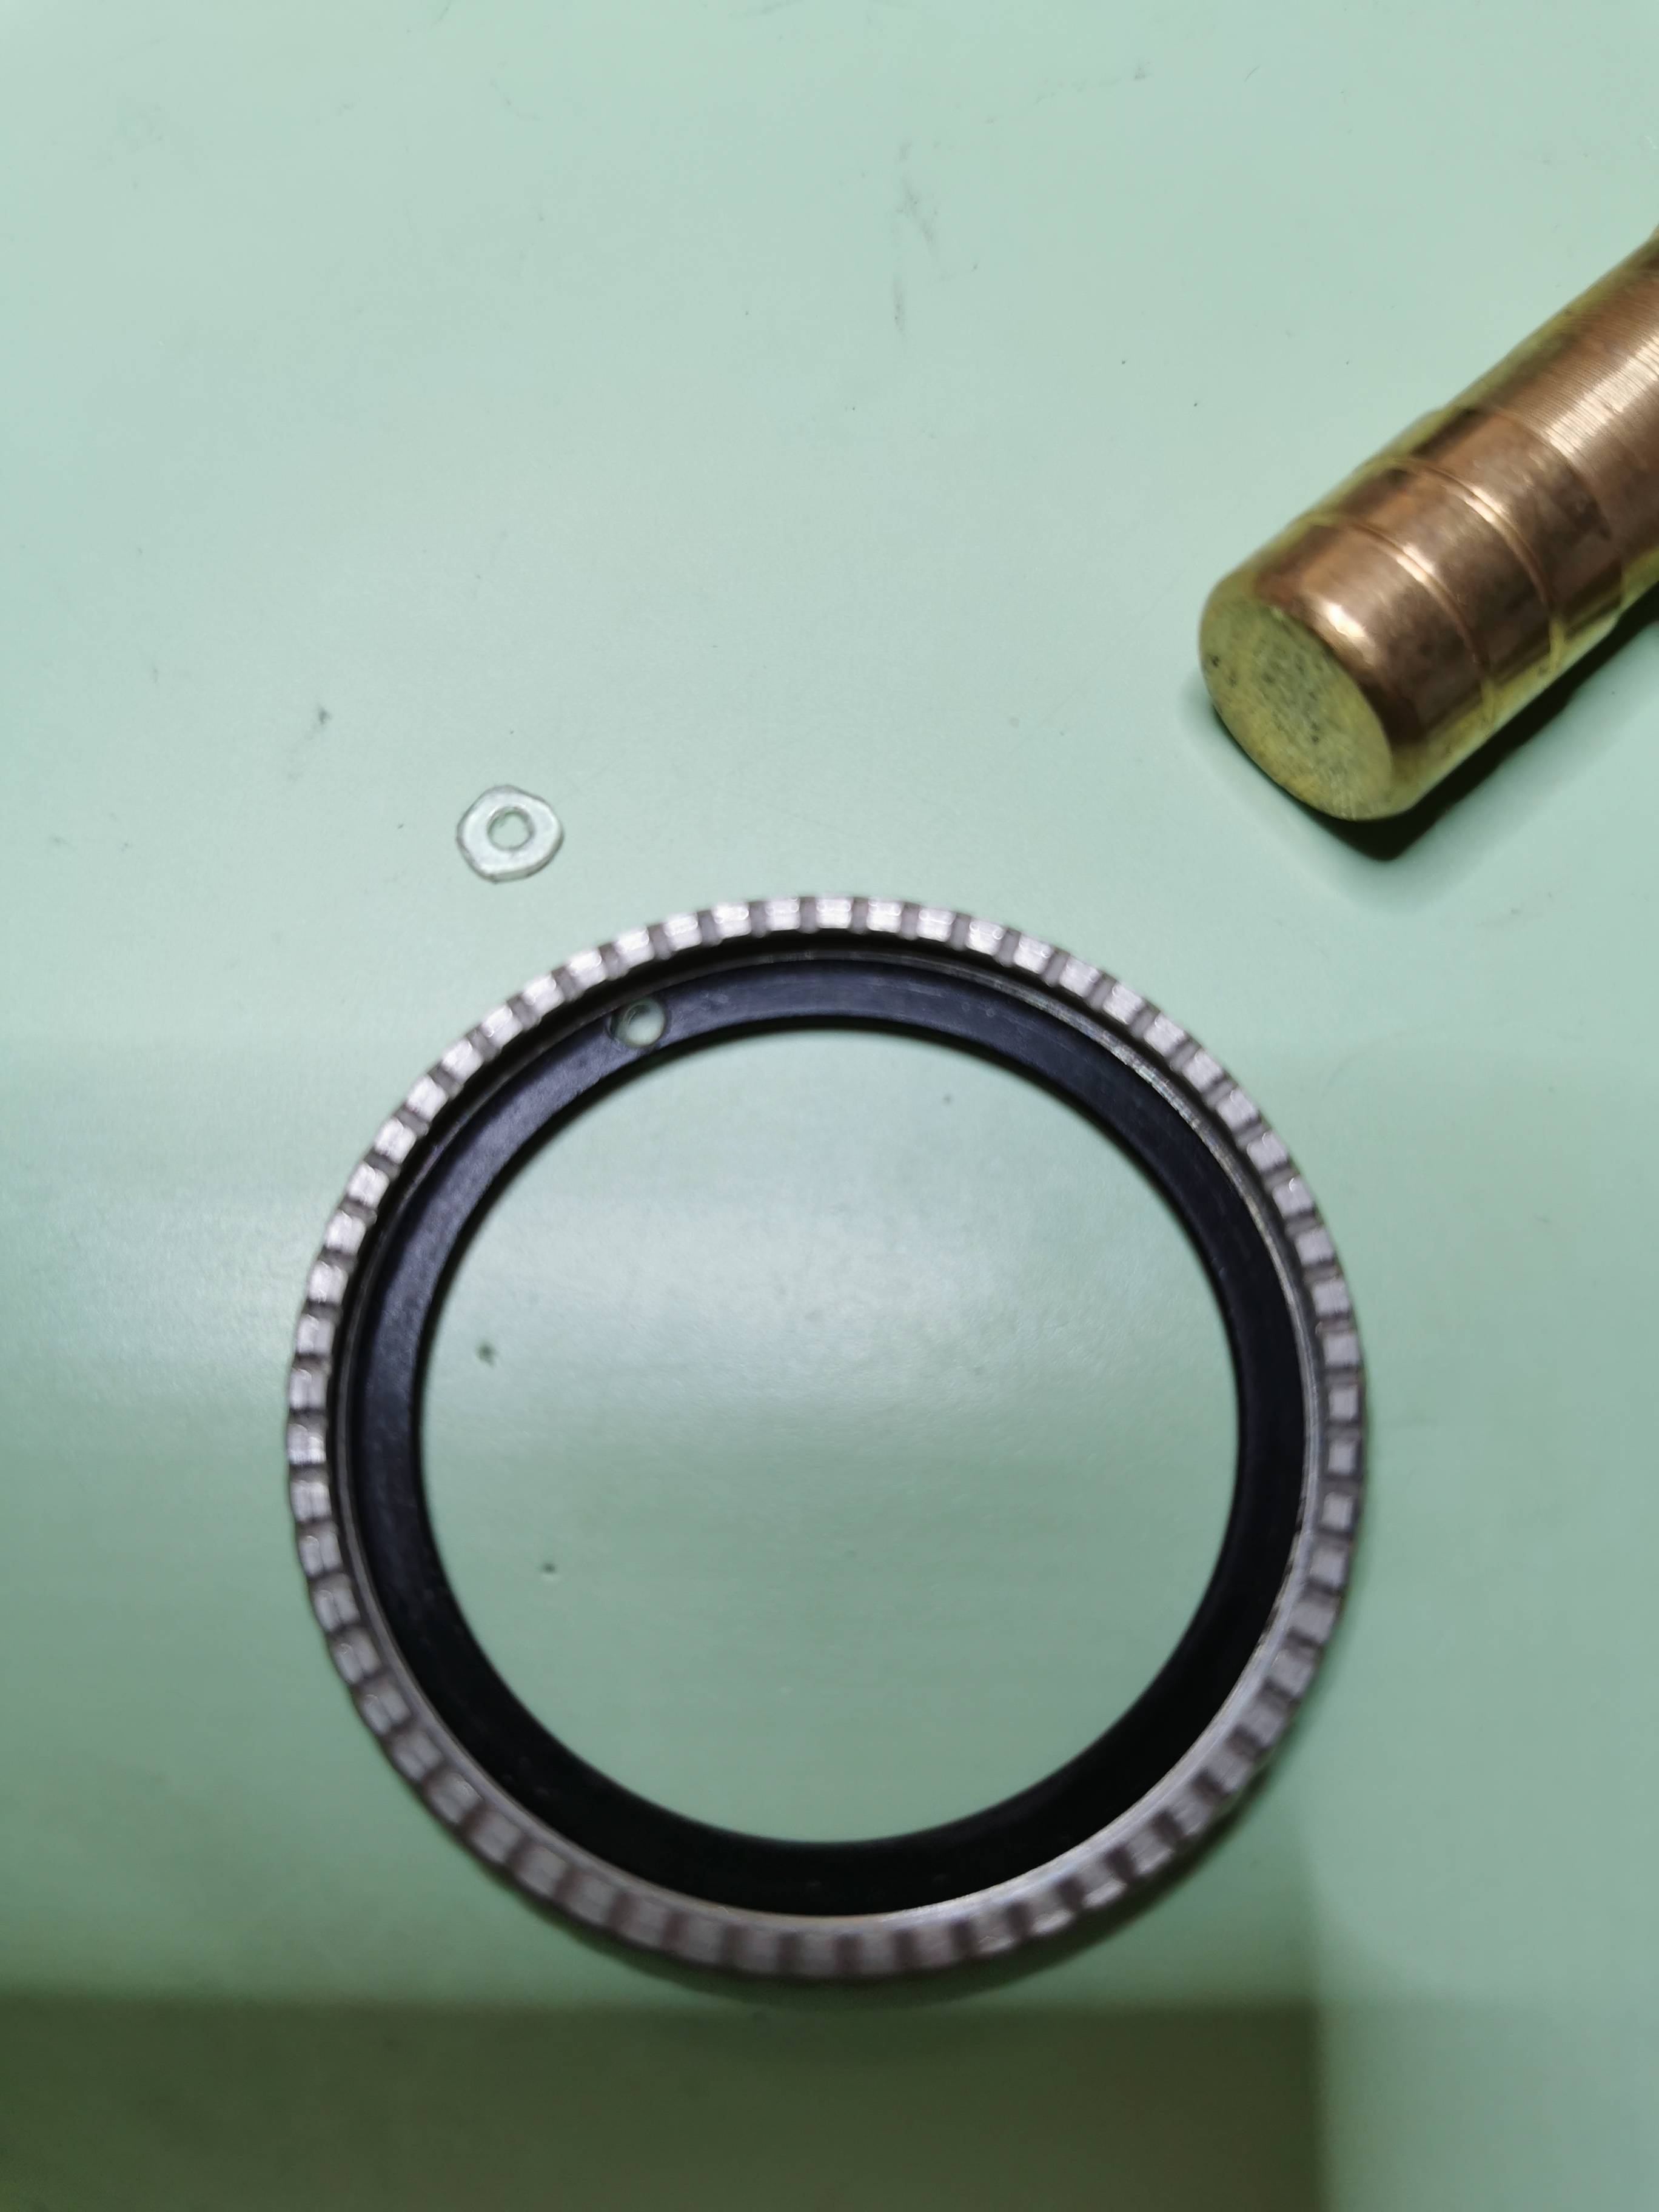
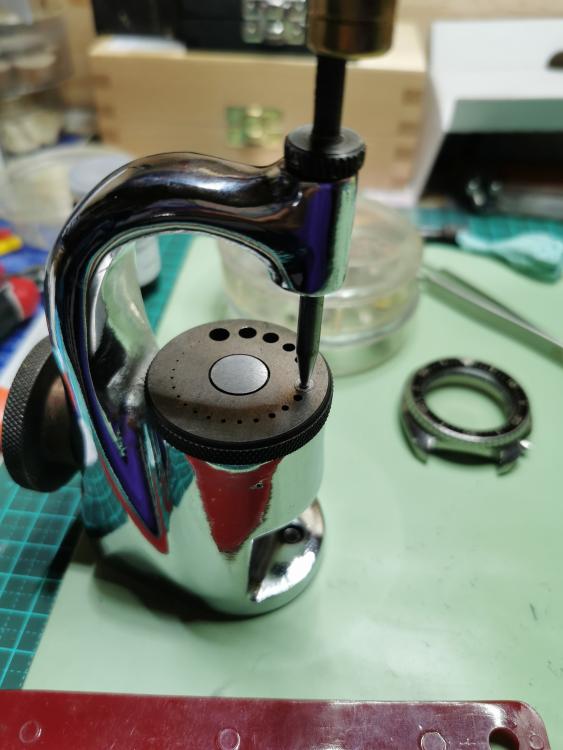
Manufacturing Seiko lume pip for 6309 7040. Using a staking set and peice of plastic from bergeon packaging which is the right thickness, once in the bezel I will relume with c3 and post more photos


 1 point
 -
This discussion and you in this discussion is not disappointing. Disappointing is sometimes posting a response and never seeing it if it was helpful at all. I was thinking of something one of my instructor said? "Do not please the timing machine" Maybe that might work here. In other words all you want to do is get the watch to run preferably better than it was before. But don't get obsessed with it has to look perfect on the timing machine or it has to be perfect don't worry about that. Worry about's okay don't worry at all try to have fun and see if You can get the watches to run. A unfortunate problem especially for new people is the assumption that every single watch you work on is going to run perfect. Or for that matter even a run at all.1 point
-
I would say if angled "yes". My word is based on the fact that extra torque does force escapements which wouldn't with regular barrel torque.1 point
-
Thank you for sharing your experiences. Describing your "learning curve' is a very valuable lesson to all of us ! ?1 point
-
Fantastic . Going to steal this method from you. Have done some with Lume and clear epoxi . But this would probably look better. And more original. Epoxi and lume would work fine on the Vostok1 point
-
Great post! I also did several similar projects for other people who bought their watches (mostly Bulova) in 1970s. Always getting very positive and somewhat emotional feedback when people see their high school graduation gift watches, etc in working like new condition.1 point
-
I've got a Grana that I believe is in a pallet stone adjusting way. I tagged and bagged it for later when I'm feeling confident enough to tackle this.1 point
-
Well done indeed. Quite a Christmas gift. I can perhaps guess how she will feel to have it running again. Some while ago, I got my old Wolbrook (HB115 movement) running again. It's on my wrist right now. It was my grade school watch, from the mid-1970s also. She will be very glad.1 point
-
very happy ending well done and a Happy Christmas to you.1 point
-
I dreaded adjusting and re-fitting pallet stones for a long time, but once I got around to it, it wasn't as hairy as I expected it to be. I've summed up my experiences in this thread and I thought you might find it useful.1 point
-
We were taught in school to do just as you've done here, with one simplifying step: when you have your shellac strand on your pegwood, break it off leaving 2-3 mm. Now you have a shellac applicator. Heat your fork, and apply the shellac directly with the shellac-tipped pegwood. You very quickly learn how thin to pull it to have a useful "tip". This is done with sharpened pegwood.1 point
-
Servicing my 2nd Omega cal. 268 (service walk-through for my 1st here) I wasn't too happy with the state of the shellac holding the pallet stones in place. The shellac had crackled quite badly and some pieces had fallen off. So, I decided to remove and refit the pallet stones, and in the process I made a few more observations and experiences I'd like to share. 1. Removing the old shellac was not as easy as just soaking the pallets in isopropanol and brush it off. The shellac just wouldn't dissolve. The shellac only softened somewhat in the isopropanol despite leaving it in for over 30 minutes. So, I had to scrape the shellac out using pegwood dipped in isopropanol, and I even had to poke some sections of the fork slot with my most pointed tweezers (being very careful not to scratch the fork). My newly bought fresh shellac dissolves completely in isopropanol in about 10 minutes. I estimate that the old shellac was almost 60 years old and perhaps it is the case that the chemical composition of old shellac changes over time so that it becomes harder and less susceptible to isopropanol!? In that case, it explains why it is sometimes possible to rinse the pallets in isopropanol without the shellac softening, while at other times it leads to the shellac becoming very soft and soggy dislocating the pallet stones. 2. I wasn't sure it was the case that the fork slots always, or most of the time, pinch the pallet stones, but I have since then learned that the stones should always fit snugly in the slots. The exception I believe might be some very old pocket watches. Well, the point being that we can adjust the locking depth of the stones to the escape wheel teeth (as shown in the video I linked to in my previous post) before fixing the stones with shellac as long as we're being gentle. 3. I found a more efficient way to create small pieces of shellac of a more convenient size by heating the end of my shellac stick until it starts to glisten and then stick the end of a small piece of pegwood (2 mm in diameter) into it and pull out a tapered string of shellac. As long as the shellac is warm you can basically pull out a string as thin as air. Anyway, when the string is tapering from about 0.5 to 0.1 mm I stop pulling, let the shellac cool and break off the string. After this I use the tip of a sharp scalpel to cut the string into small conveniently sized pieces. 4. The Gaston tool mentioned in my previous post proved to be more useful than I first thought. As it firmly holds the fork in place it makes it easy to refit the stones by sliding them into the slots. So, no need to hold the fork steady in a staking block using tweezers held by the left hand (which feels a bit scary really). Also, the arms of the Gaston tool really makes it easy to push the stones into the slots in a very exact manner. I think that sums up most of what I learned doing this operation the second time around. So, hopefully it will be useful to present and future WR-talkers who are in the process of learning this technique.1 point
-
Spectre6000, You are doing very well, and I an sure the more you do the better it will get. We all have dog days when everything you do turns to s***, but its these days we learn from again well done ?1 point
-
I've had good results with your typical rattle can lacquers and clear coats but there are actually specialist lacquers for brass, both spray on and brush on. I even used pound shop rattle can lacquer for the brass fittings on the windows and doors in our previous place, and that lasted for years. There are specialist lacquers for brass musical instruments for example, but they tend to be a little pricey. You will also find lacquers for brass bullet and shell cases, however I don't think they are necessary for this, as the item will see very little contact wear, so pretty much anything will probably work. The lacquering process is typically fairly easy, if you are careful. As with most finishes, a few light coats gives a much better finish than one heavy coat, but more important perhaps is the removal of any old finish first. You can boil the item up with some baking soda which works reasonably well, as most varnishes and lacquers will then simply peel off, if the underlying material is not too pitted or tarnished. Avoid caustic paint strippers as they may well react with the metal. I've not tried the "green" citrus ones, they may or may not react with the brass. Alternatively you can remove most finishes and tarnish with acetone and/or abrasives. Once the item is clean, then polish, brush finish with fine emery or 000 wire wool or shot finish depending on the effect you want, and then really importantly thoroughly clean the surface with acetone and wear gloves to ensure that no oils or dirt get on to the item while you are lacquering and blow off any dust with a puffer or canned air. If you don't do this, then you may end up with some perfectly preserved finger marks spoiling your mirror finish, and have to start again. Don't be tempted to blow the dust off with your breath as this may cause problems with moulds or other contamination from the moisture in your breath getting trapped under the varnish. Wipe it off with a lint free cloth or blow it off with clean air. When drying between coats, hang the item in a dust free area. A large cardboard box sat on its side works well as a space to hang small items in if you are working in shed or other area where there is likely to be a lot of airborne contaminants. If anybody has any other tips they want to add, then feel free. Also, no I wont be lacquering the movement plates in this clock, they are pretty industrial looking and nobody will ever see them anyway, so its not really worth the effort.1 point
-
@JohnR725 I hope my response wasn't too disappointing. Like you said, it takes a long time to learn watch repair, and I'm at the beginning of that journey. I recently realized that part of the beginning of the road is learning how to tell if I have succeeded or failed. A few days ago, I serviced a low grade pin lever movement. I thought I botched it, but it turns out I actually did a great job. My expectations just weren't aligned with the reality of cheap movements like that. My intent was to figure out how to tell if I've succeeded or failed, where previously even a fantastic success would have been perceived as a failure. This evening, I serviced a movement for the first time with a result that I can call an unqualified success! It's well within the range one would expect of an average movement, and by the time it's run in and regulated, may even fall into the range of what the chart up there is calling a precision movement! This is a first for me. Like you said, it's going to be a long journey. Once I get a few of these under my belt, I'm going to have to come back through this stuff when I can make more sense of it. I'm nowhere near poising balances or adjusting pallet stones or anything. Right now, I just need to figure out how to quit borking up hairsprings consistently.1 point
-
And the reason could be as simple as that, wanting to make it better, to improve the precision, motivated by pure interest. That is for sure, but trying to achieve some improvement, rather than aiming for chronometer grade, I personally find interesting enough. I found the below section of Mark's Vostok service video quite inspiring.1 point
-
You can "unzip" the cores of old power supply transformers. I have done this to make coils for other stuff, but not, so far, for watches. If you have an electric sewing machine, you can unwind the transformer core on to a sewing machine bobbin using the bobbin loading function.1 point
-
in case wear has shortened pivot so its shoulder rubs on jewel setting/ housing hole, one can instal end stones dome side facing the pivot to compensate for the wear, it also reduces endshake. You will notice the pivot rubbing on jewel setting if you were to put the end stone back flat side facing the pivot.1 point
-
1 point
-
What the OP asked in his latest post is what material to use to make a shock spring. My suggestion would be to try again a feeler gauge blade, like for the impeccable setting lever spring he did already. Maybe 0.03mm or 0.05 thickness.1 point
-
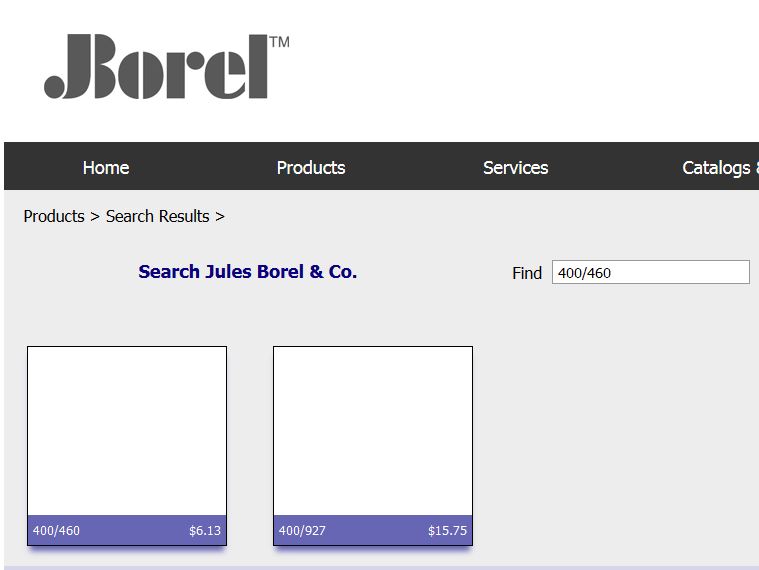
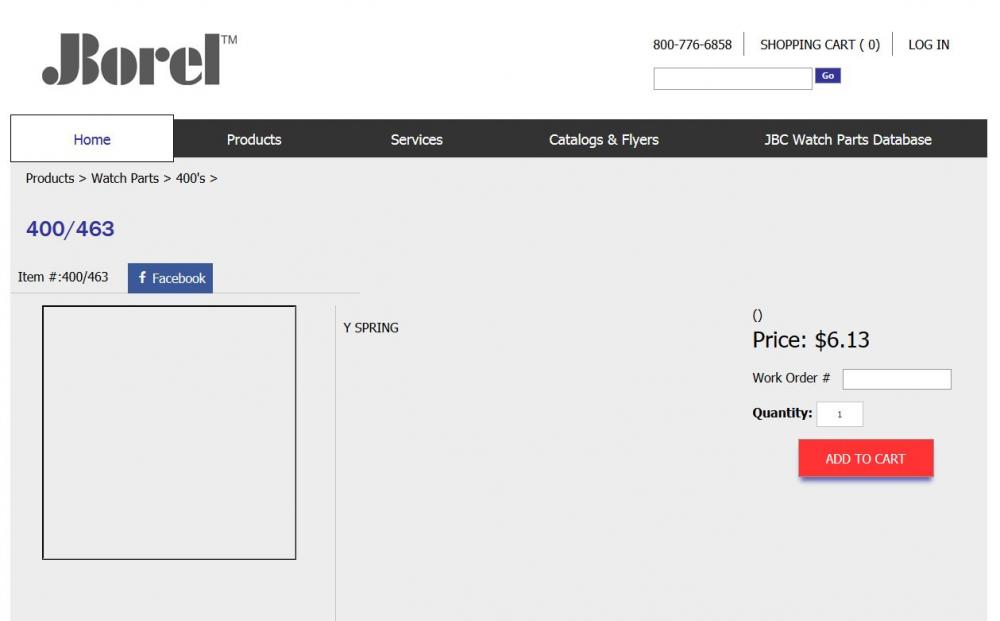
Unfortunately that's a question everyone has in watch repair from time to time. Then a lot of times there is no answer. Did you know if you look at the top of this webpage that you're on now there's some interesting things you can click on it like one that's labeled resources. I wonder what would find their oh wait we find the link that I have below. It lists helpful things but? I remember when I started watch repair I knew there are material houses in Seattle. Because the students we had the rundown town and purchase our tools and end up visiting all of them. So when I started we had four different material houses. What I found interesting was I was looking in the phone book yes you can tell how old it was or IM there was no Internet. Looking in the phone book the material houses didn't exist? That's because there wholesale typically they deal with people in the trade. The meeting of this is there are more material houses out there than on this resource list. In watch repair you need to become a detective. Consider every single watch the scene of the crime you have to figure out what happened there. Cleaning isn't going to necessarily solve the problem. Figuring out what parts you need where to get it all of that requires a lot a detective work. So for instance in Seattle we have 2 1/2 material houses. At least left and none of them as far as I can tell will acknowledge online or any other way that they exist at all. One of them will only do material if you have a business license she'll only sell wholesale. On the other hand she will sell your tools and supplies if you're a hobbyist. The other material house sells to everybody. So if I needed this part I would just call up Debbie and give her the part numbers and did a couple weeks would find out if I get it or not. The other problem of course is where do you live in the universe. I suspect there is still material houses out there beyond the listing below and you just have to go find them and see if that do business with you. I know that some of the online ones will not if they think you're a hobbyist. Somebody in the past was looking for a part I found it inquired and there politely told to school way or maybe not so politely. https://www.watchrepairlessons.com/2019/11/08/watch-parts-tools-suppliers/ To understand what I gave you above I snipped out the entire section of the printed or PDF book on shock springs for your watch manufacture. Then I went online and snipped out the entire section for your watch. If you're wondering why the initials GEN are there when you doing online search they shorten the name to just a couple letters. We do get something interesting the physical listing versus the online listing online gives us one more number. So now that I grasped were looking for a Y spring we see that two of them are listed. So what you would be looking for is bestfit 400/460 or 400/463. Oh and just to make things more interesting there were several systems for watch material at least in this country and more other places. Unfortunately we don't necessarily have the reference material so we don't know what the other systems are. This means when inquiring for parts from wholesale material houses you have to give them enough information that they can look in their reference material and find your part otherwise I get really cranky and won't give you the time a day. Which is why a lot of the wholesale ones will not deal with hobbyists. Oh and we get one other interesting from all of this if you look at by listing above for the part number 400/4460 we do see another part number listed and that is the factory part number. So if you had an actual technical sheets that would be the number probably on that sheet. Then but I go to the first link and do a search I can't give you the link that I have because it appears to be from my search so what I've done I snipped out images because we also get something interesting which also answers a question. So searching for 400/460 the image comes up and there's two items? I'm assuming that whatever reason their system somehow associates that other part number with what were searching for. Zero idea what that part is and clicking on it we discover that it's not available which is helpful? Reason it's helpful is when you search for the parts that were looking for they appear to be available and can be ordered. Oh and depending upon time and space especially in the old days when there were way more material houses a lot of companies had generic assortments. Which is why I'm giving you the second link. The problem is if you look older watch your part may or may not be in a generic assortments. http://www.julesborel.com https://www.cousinsuk.com/category/shockproof-blocs-springs-insettings

 1 point
 -
https://uploads.tapatalk-cdn.com/20201007/450db96f34f26fa9d434e392f9f6be27.jpg This is the one to buy: Vallorbe, please stop looking for othershttps://uploads.tapatalk-cdn.com/20201007/148a198dc7cdcf0572ed5a044b4145ba.jpghttps://uploads.tapatalk-cdn.com/20201007/a8e4e298d49f2b706450ffa14c3671e5.jpghttps://uploads.tapatalk-cdn.com/20201007/7dd42cfb446857ea68557a24213f569b.jpg1 point
-
When I make a balance staff, which is about once a week, I rough turn the pivot leaving about 0.02mm on its diameter and then count on the Jacot to give me a beautiful cylindrical pivot coming off of the conical portion. The whole point of the tool is to get nice cylindrical pivots- with the exception of the 4th wheel runner, which will purposely produce tapered pivots. If a Jacot tool is making tapered pivots then it is out of alignment*, either from being dropped, or having its runners mixed up with another tool. Older tools aren't adjustable, though some have a "headstock" end that can be raised and lowered, but the more modern Steiner/Horia (Hahn) tools provide means to adjust the height and front-back alignment. * in some cases when doing conical pivots, if the burnisher has too large of a radius it will make horrible unusable "tapered" looking pivots. The Bergeon tool above comes standard with a radius that corresponds well to most wristwatch movements. If buying a secondhand Bergeon carbide burnisher beware that the radius on some older ones is larger and really for pocketwatches. The very old Bergeons have a metal cap for the end, the middle period a purplish bakelite cap, and new ones an anodized purplish aluminum cap.1 point
-
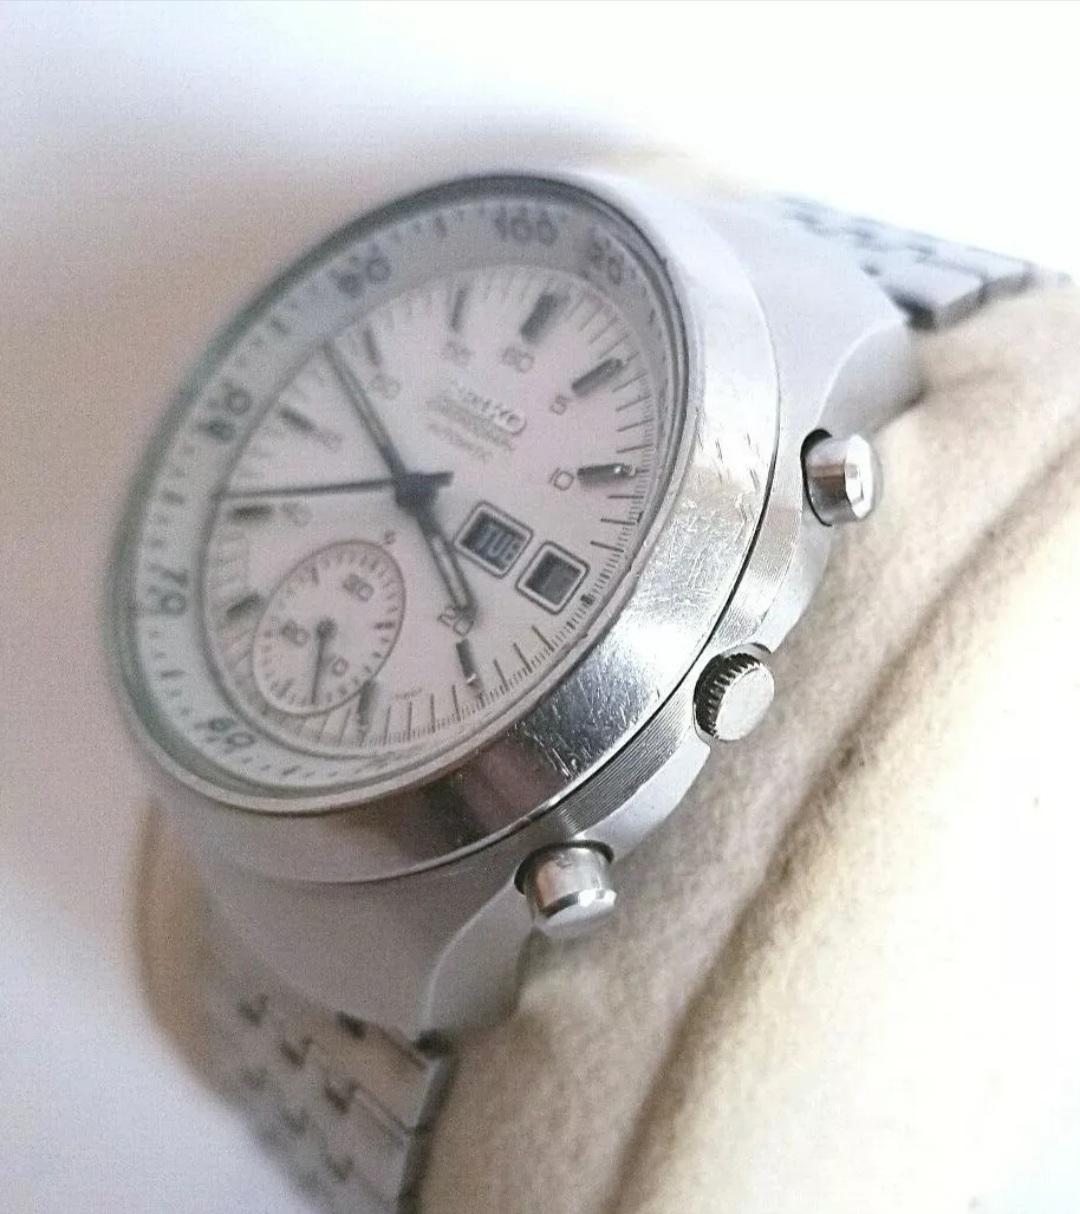
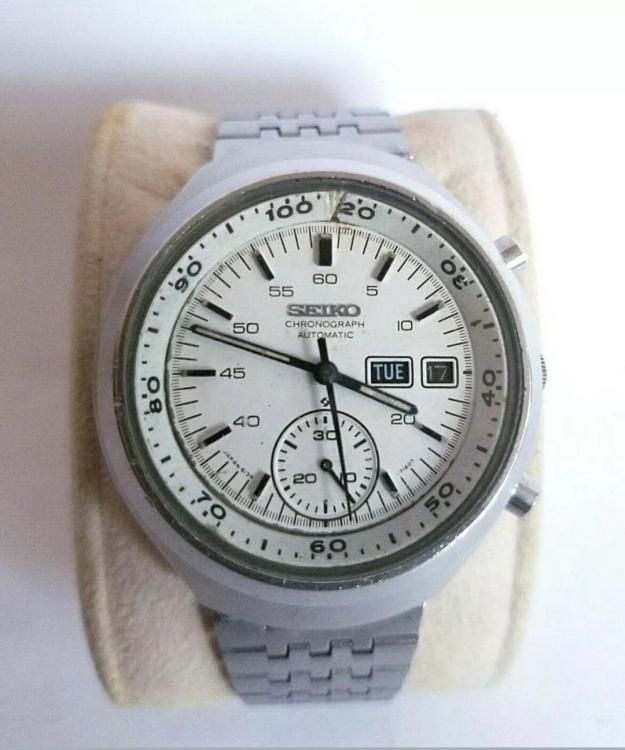
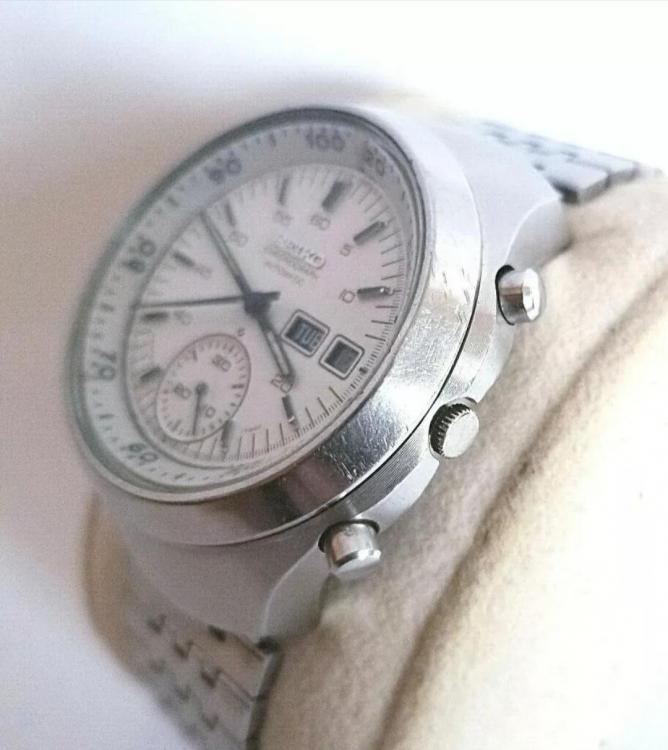
Just picked up my first Seiko Speedy. The reference is 6139-7100, affectionately known as the helmet. I've also seen the white dial version referred to as the Stormtrooper and the black dial version the Darth Vader. The inner bezel and the case back are not original, hopefully that's all that's wrong. I plan to go through this per Mark's video on the same movement. Gain experience and get it nicely tuned. I have had my eye on one almost since I began repairing and collecting watches. Very excited for this watch and very pleased with the purchase price.
 1 point
 -
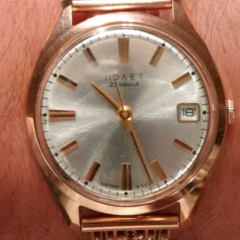
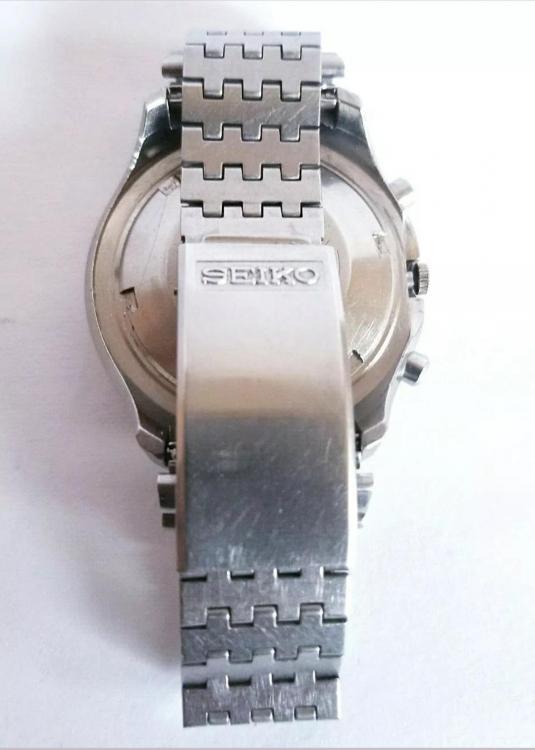
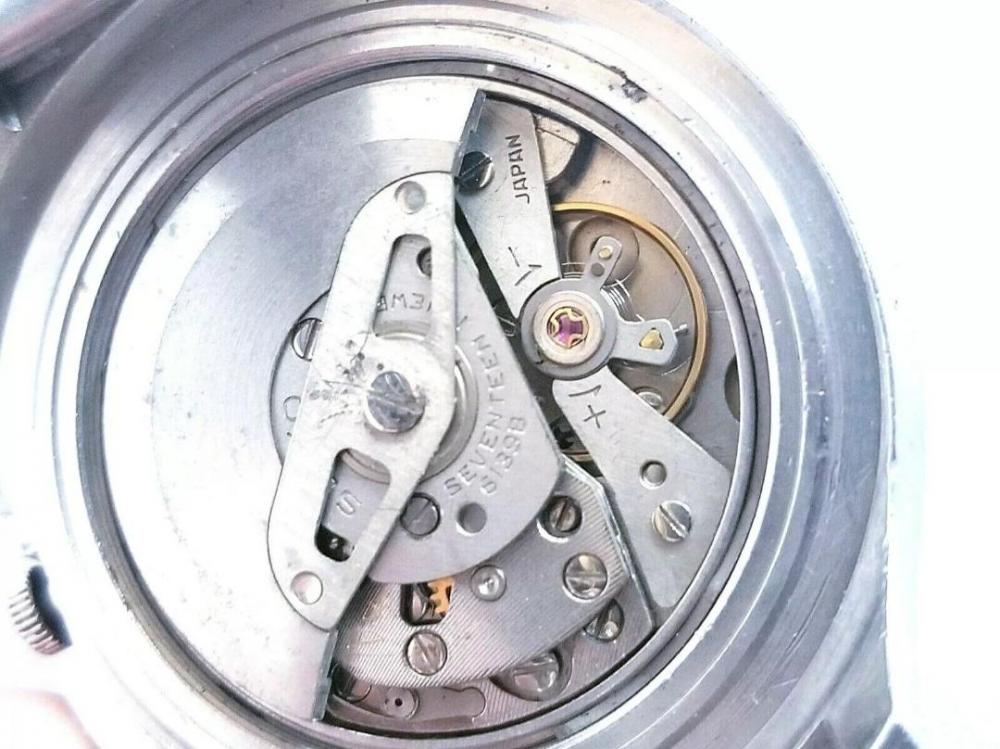
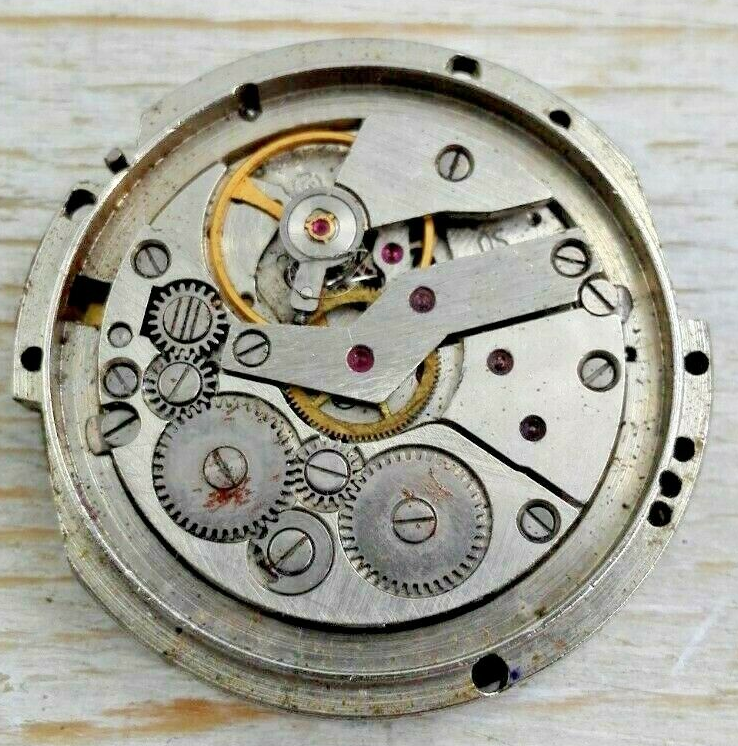
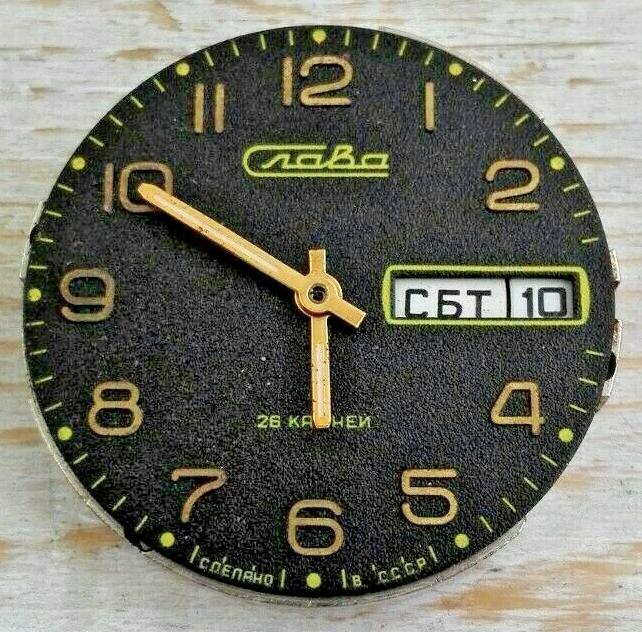
I liked the dial on this, and swithered about buying it, as I have quite a few other projects in the pipeline. However since I picked up a bunch of Sekonda corpses with these Slava movements in a while back, some of which had trashed dials, I have a bunch of parts for this scrapper, including a clean, almost new looking case, a number of suitable seconds hand and a balance, so it may not need too much work to bring it all together. At just under four quid, the price means it just squeaks in to the 404 club. It is heading my way from Ukraine, and surprisingly the postage wasn't too bad. I've had local sellers charge more, but who knows how long it will take to actually get here, when you factor in snail mail from Ukraine with coronavirus restrictions. Ouch... I hope that isn't blood, and I don't hold out much hope for that hairspring. Although this might technically end up as a frankenwatch, looking online at similar examples, the case I have means it should be pretty faithful to the original. The only missing ingredient here, as usual is going to be "spare time" to actually get it torn down and built into a working watch. I will of course keep you all posted if I make any progress.
 1 point