Leaderboard


Popular Content
Showing content with the highest reputation on 12/01/20 in all areas
-
My advice: leave it alone unless there is a compelling reason to remove it. Older Rolex (15xx) works this way too, and those parts, though easy to find, command silly prices. So, I suggest ultrasonic cleaning (even though mine is busted), then careful oiling with the finest oiler as required. A "compelling reason" to remove it might be a broken jewel/worn bushing for instance. And re-installing it correctly without a jeweling kit probably wouldn't go perfectly. I understand you can't always ascertain that without full disassembly, but sometimes you have to punt.2 points
-
the tool found way up at the top of the page looks like I have two of them. One here at the bench at home and one at the bench at work. then the other tool is only at work I feel deprived here that I don't have one at home also. Then the real question becomes which one do I grab when I have to take one of those wheels off? It's always nice to have options because a lot of times one tool just isn't going to cut it. But I'm guessing I usually grab the one that I gave an image for then if that doesn't work I use the other tool. On the other hand maybe I just use whichever when I grab first. But maybe I could do an experiment today. Did occur to me I have a watch that has a wheel like that's that does need to come off maybe I'll see which tool I grab first today if I remember.2 points
-
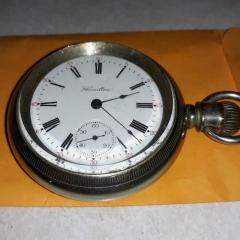
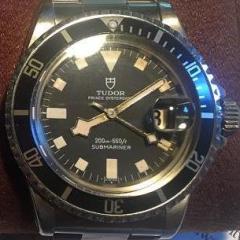
Welcome to the forum. Yes, this comes out the front. The two large casing screws need to be removed, and then the crystal and bezel for it come off. A sharp, clear photo of the side of the case, should confirm the bezel is a separate piece. The press might be used to reinstall it- not a concern at the moment. It appears the small screw, adjacent to where the stem enters, is the stem release. Loosen, but don't remove, that screw, and the stem should pull out. Then the movement can be removed from the front. You may want to remove the hands before you take the movement out, to protect them from damage.2 points
-
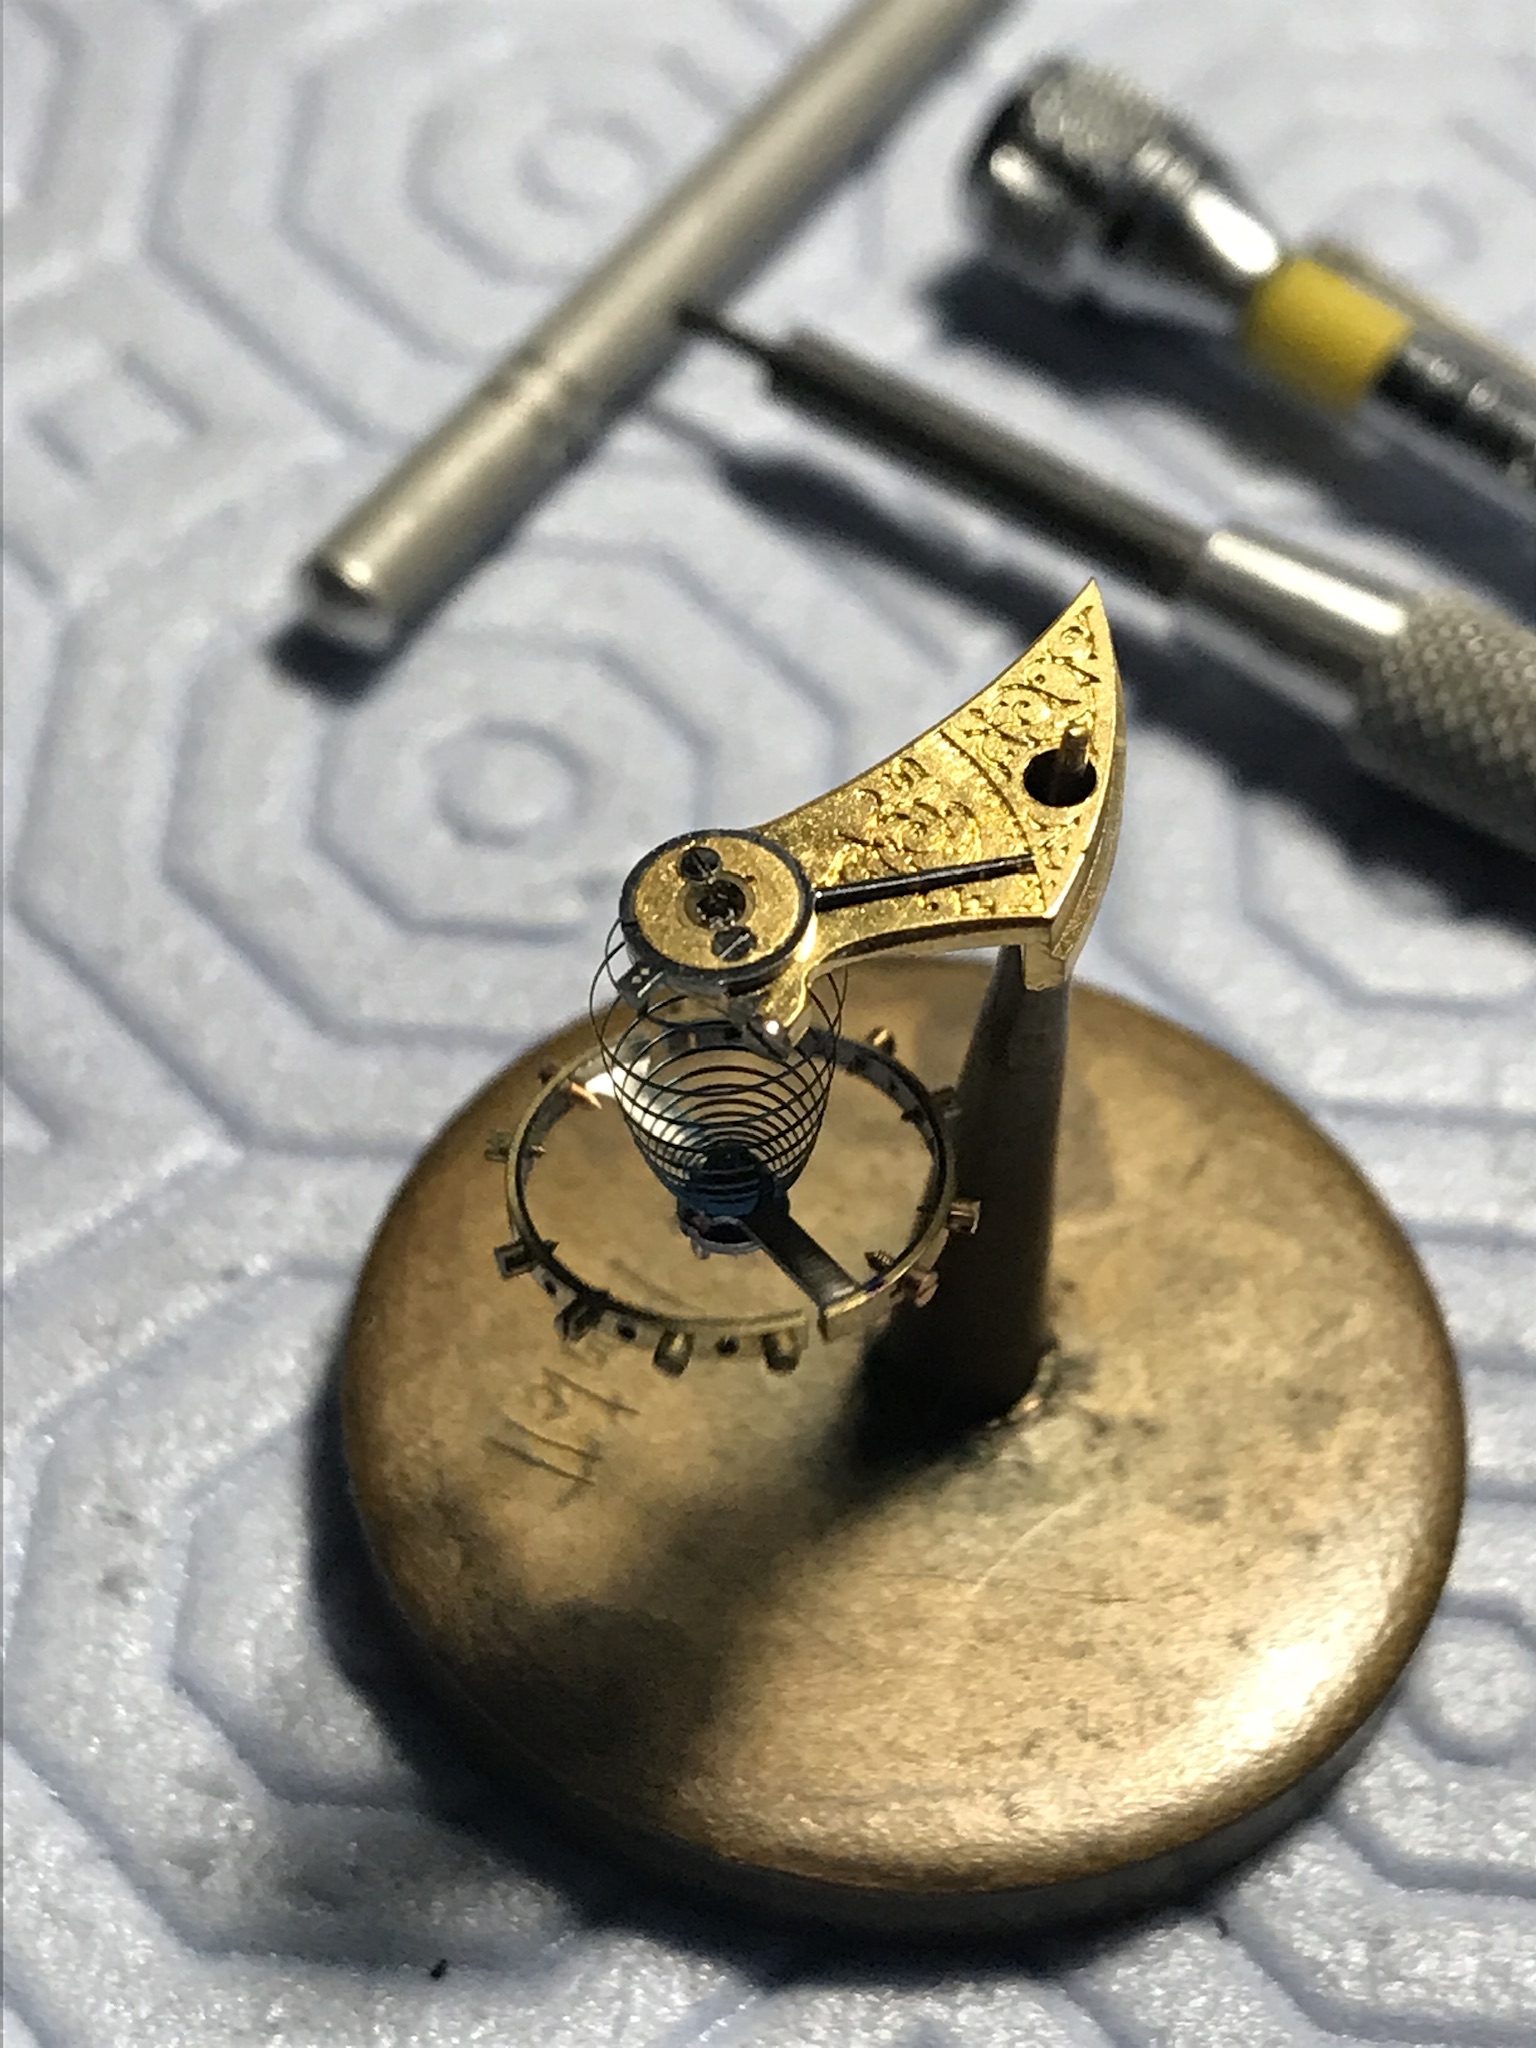
Ah- in that case the cap jewel may well just lift out once the screws are removed. Joe- the stud is just sitting on the cock, held by the screw. With the screw out it will just shift over off the cock, no danger. Similar studs were used on many high end pieces, particularly marine chronometers.2 points
-
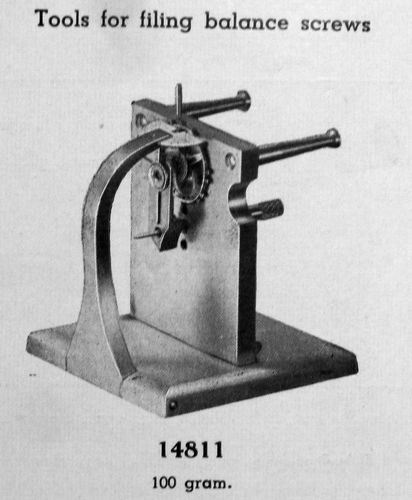
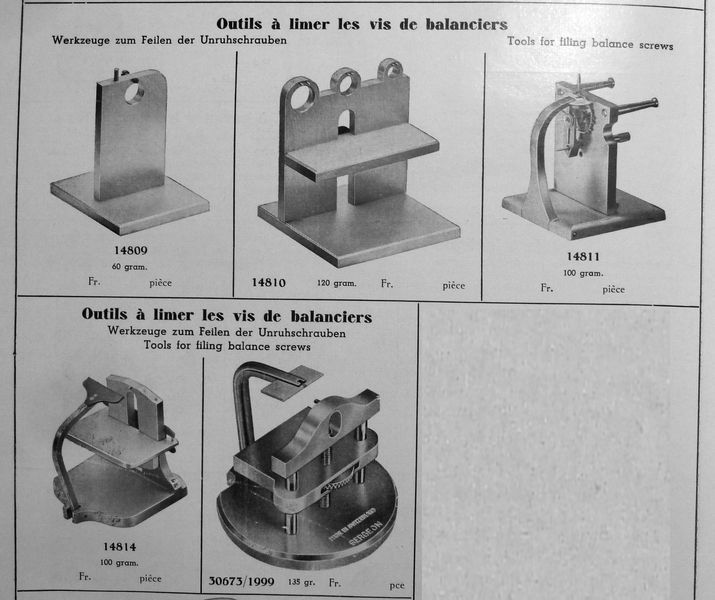
This tool was sold as "tool for filing balance screws". Hence the "unknown" pin. Funny that the tool is still made with that pin without knowing its reason ?. I had searched some time for # 30673 until I found mine. I use it rarely but I am happy I have it when I need it. Frank
 2 points
 -
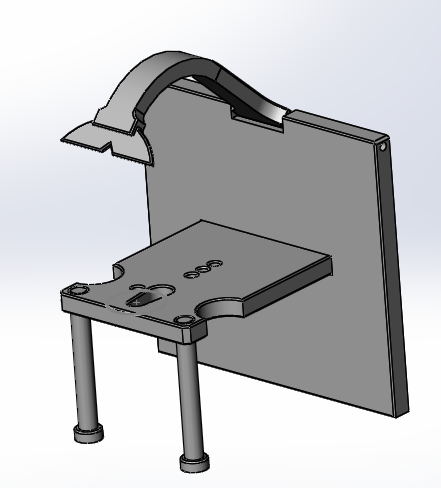
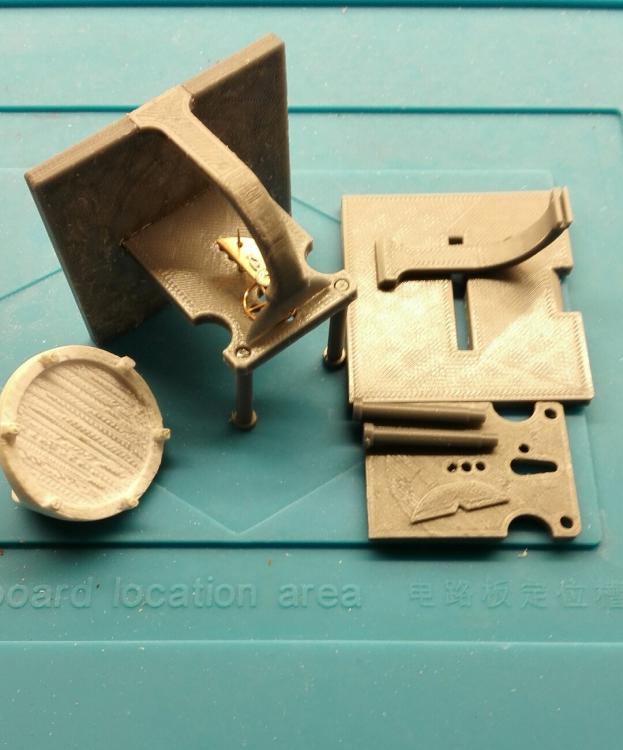
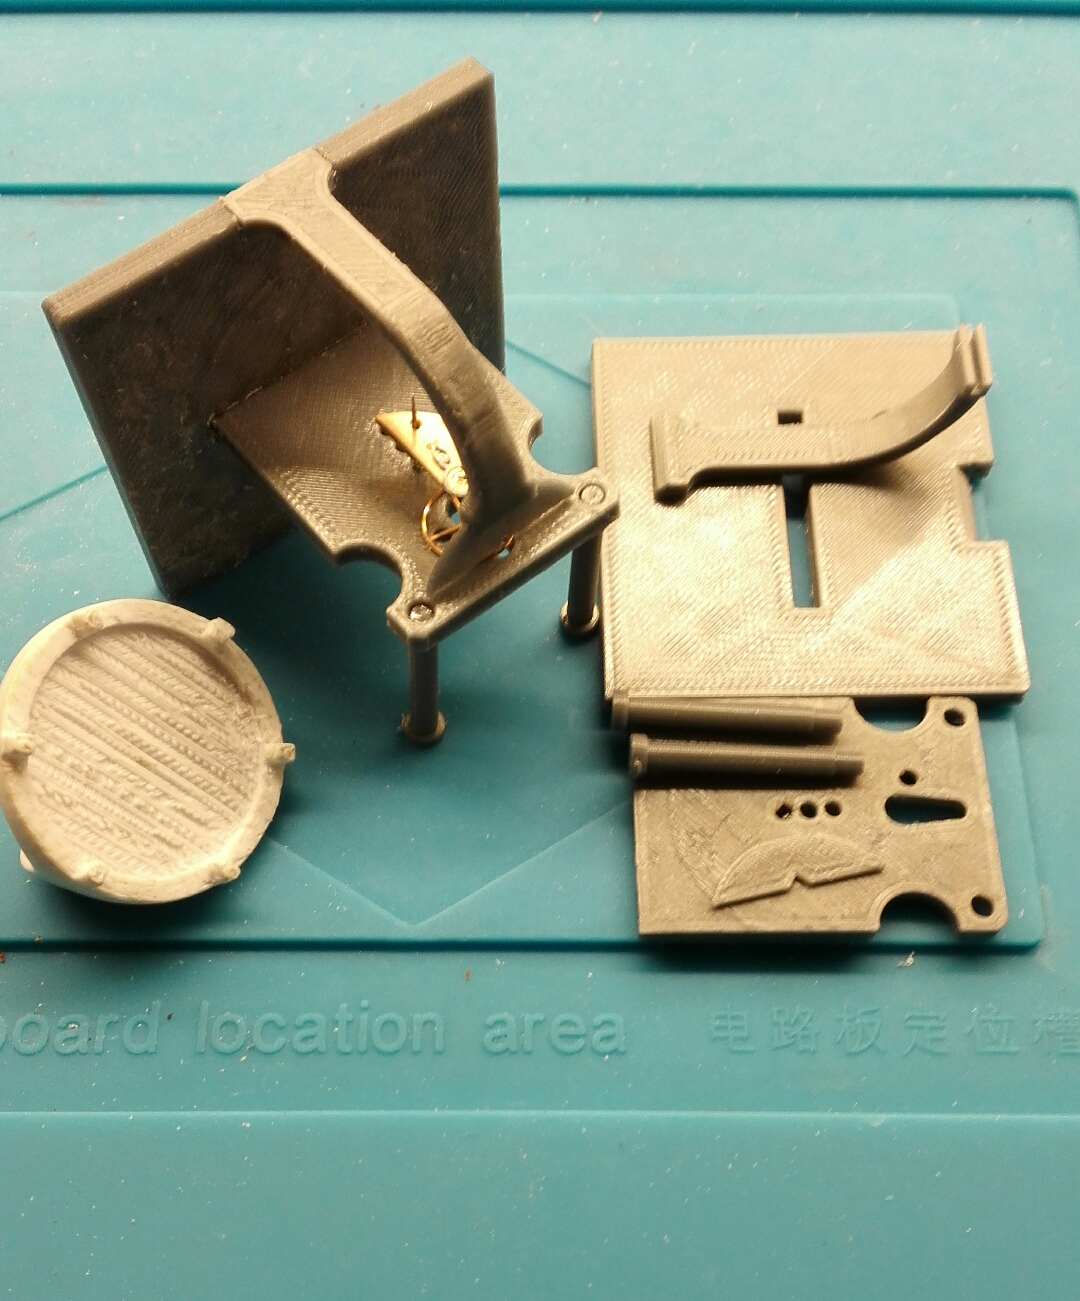
I made some parts for this balance tool i Solidworks and 3D print out the parts in PLA a very strong plastic, even case openersw resist the forces, otherwise it is good to make different movements holders.
 2 points
 -
And I agree with watchweasol, in that if the bezel is NOT separate (Which is why we need the sharp focus side view- to determine that), you will need to remove the crystal with that crystal lift shown. I have the same one (well, an antique Vigor branded one), and it works great (once the decomposed rubber bands inside that open the fingers are replaced)! They are replicated in China now, so should not be too expensive. Another idea: if you can get the crown and stem out, re-install the back, and try an air pump at the crown tube to pop the crystal out. (but you'll still need the lift to get it back in!).1 point
-
Then if it's also resistant to human caused damage, that would make it the greatest thing ever!1 point
-
Thank you very much! I can't today (parts to inspect) but I'll work up some refined drawings and go out for quote. Out of curiosity, is anyone else interested in one of these? Making three will be expensive per piece, but price will drop with quantity. Tolerance will be somewhat loose, so that helps control cost as well. Dies and movement holders have tighter tolerance, so higher cost despite their relative simplicity.1 point
-
what I will try to remember to do is to take the other camera to work today. I have a specific camera I use whatever I'm doing watch photos. The problem with the picture of the tool it doesn't really show how it really works. so I think getting a picture would be a lot easier than trying to explain it the tool works really well.1 point
-
Tudor is on the money. You may require atool like the one attached if the watch doesn't have a removable bezel a little light reading attached. Gruen-Watchmaking-Lessons (4).pdf Gruen-Horological-Text (4).pdf
.thumb.jpg.ea12775e0bf5d5c2bd5ce2db8668c384.jpg) 1 point
1 point -
In my watch repair book, there is a section on dealing with positional error. It has a really great chart (I copied it for my work area), which shows "the error", the position, and what to do about it. Also, it reminds us to know when it's "good enough". One take away, without referring to the book I don't have handy, is that for a wrist watch, dial up and pendant down are the two positions of greatest interest. If the wearer has the watch on the right wrist, then pendant up and dial up, with less fiddling with other positions, to reduce hair loss. And from those two positions, their average should be +/-0 to the best of our ability. Then, when worn (or resting on a table), the error will be well within acceptable.1 point
-
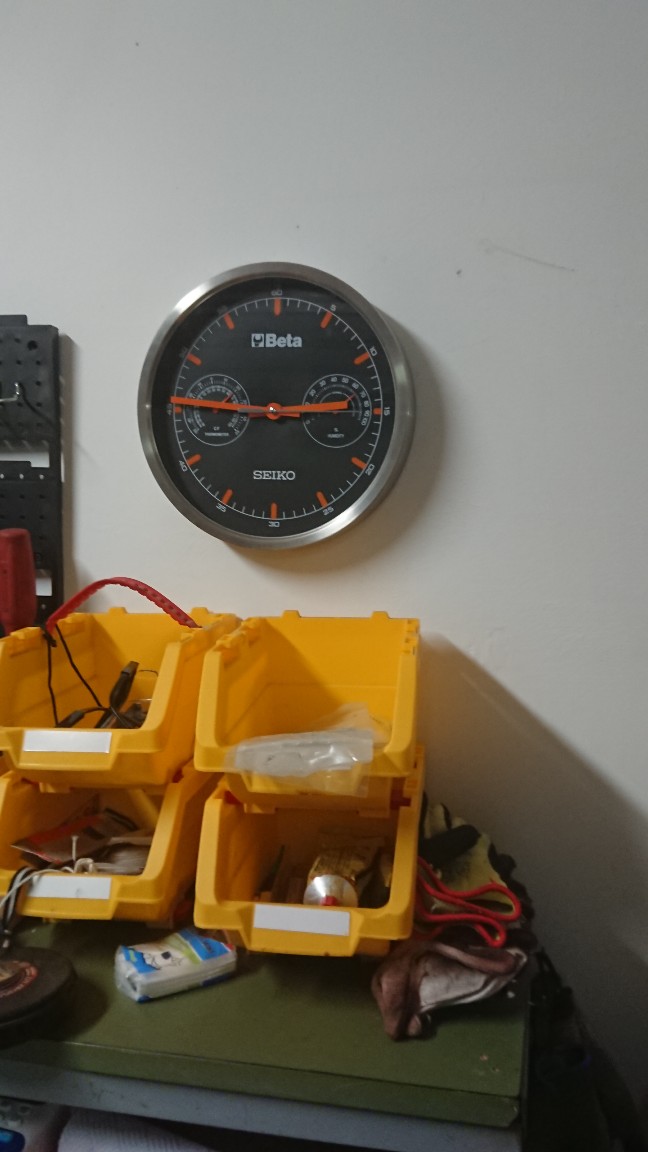
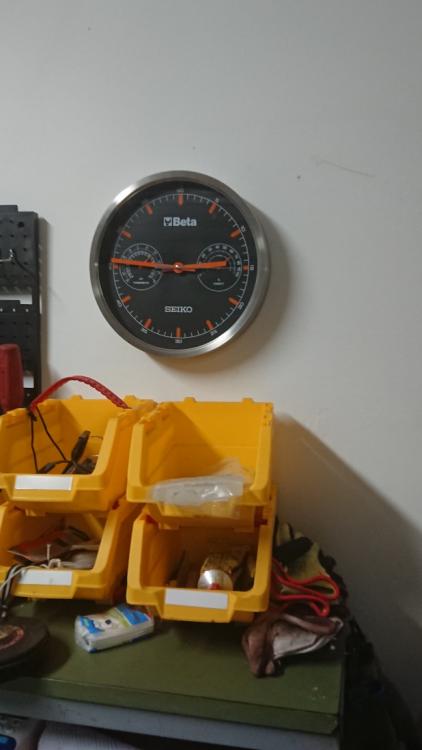
Beta is a bespoken Italian tools brand. Got this from their shop but I couldn't stand the wobbling seconds hand and noise. So I got a Seiko sweep seconds mov.t which legitimated the label where it said quartz before. Also replaced the glass with a thicker one. Thermometer is far from accurate but one can't get everything in life ?
 1 point
 -
A lot of what makes a watch "chrono" grade is simply the hairspring. I read that sometimes at Mercer they would abandon a given hairspring, sometimes after days (weeks) of adjusting, as it just wouldn't rate correctly. A friend of mine who worked at Hamilton during the war told me one of the bosses in the prototype lab took a rated marine chronometer, and changed the escapement from spring detent to pin lever to demonstrate how fabulous the Hamilton Elinvar Extra hairspring was (mated to their ovalizing balance)- it still rated well within the federal standard for marine chronometers. The fellows I share my workshop with delivered prototype a while back; this was passed by COSC before delivery as part of the contract. In production the customer couldn't get them to pass... found out they were using another hairspring supplier, suggested they source some Nivarox 1, no, no that's not going to fix it... then, they got Nivarox 1 and boom, it passed. So while you can almost always improve a watch's rate, sometimes no matter what you do you won't get chronometer level performance.1 point
-
You will be able to clean and oil that particular area without removing the Driving Wheel. It can be easily damaged even if you use a proper tool. Warning! ?1 point
-
Hello all, What a great site!. I really like your spirit of sharing knowledge and providing support in a positive way. As way of introduction, here's a bit about myself: I've been involved for decades with using and analyzing many things microscopic. I frequently work at the the 10's of micrometers scale, so the skills of working under magnification, and manipulating minuscule items with precision tools has become second nature. My interest in watch repair grew out of my desire to maintain old precision instruments. As a casual collector of old clocks, compasses, dial gauges, a few watches, and sundry other high-precision gear, I'll occasionally acquire a piece that needs a little TLC. Being a DIY'er, my method has been to do the research and carefully dive in. Self-teaching this way can be difficult. This site has helped to lower the learning curve and make the experience more pleasant. At the moment, this is a hobby - but will it become more? I suppose time will tell. Cheers~!1 point
-
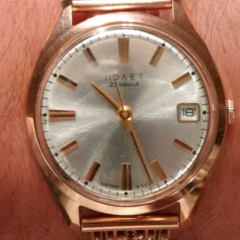
That strap looks good on there. Now it looks "retro" rather than "old". For whatever that's worth...1 point
-
I think that sums it up well. Coming from the "old days" at Omega, they would pick the cream of the crop for "Kew Observatory" testing. The held very tight tolerance on everything, so they had a very low failure rate overall, but like anything made in quantity, there are always some that stand out- particularly regarding positional error. The old Omega Constellation watches had always held the best of the best movements, and I believe at one time Omega held the highest quantity of Kew certified movements. Any of them, from the pre-quartz era can be made to perform at that level, but it takes some doing.1 point
-
There's a tool for this. I don't really know a good way to remove it without the tool. The driving wheel is a friction fit on an extended pivot on the 3rd wheel, and it's quite easy to bend it or break it. The tool reaches between the spokes and lifts the wheel, pressing on the bridge. There's one for even spoke wheels and odd spoke wheels.
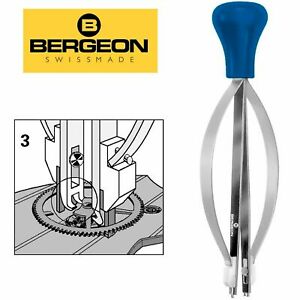 1 point
 -
Love this, the red really pops, oh so 70s!1 point
-
I see the stud screw now, so I just loosen it, unless the stud slides outward easy, DO NOT DIRECTLY PUSH ON THE STUD AS YOU WOULD BE PUSHING ON BALANCE PIVOTS TOO, I use a pair of tweezers, hold the tweezers at 45 degree one arm push on the stud, another under stud holder. You just want to break the stud loose off of its hole, it can then be easily pushed out when the cock is removed, hold your hand about a cm above bench and drop the balance on tissue paper, cloth for low altitude soft landing.1 point
-
1- Generally a chrono grade balance will be made from Glucydur, a copper beryllium alloy. It's hard and stable and works well with Nivarox alloy. The hairspring will be Nivarox 1 or equivalent. The jewels will be of extra high quality. 2- The machines used will be the same. But different materials and less control set the pieces apart 3- The main difference is the higher quality materials, as above. On more "boutique" movements, that aren't mass produced, there might be an emphasis on extra finishing of pinion leaves and pivots, perhaps using convex face olive hole jewels, or adding cap jewels to the escape wheel etc. 4- Not really sure, like at ETA? I think they have their top grade, then the other grades. 5- They are superior in that they have been officially tested and proven. It would be like if your neighbor was the best high diver in the world, but had never competed, they can't really claim that title. Otherwise, from a given manufacturer, I don't think you will see a difference in service life from a chrono grade or a lower one of the same caliber. Going back to the past, something like a Peseux 260 has an enormous mainspring (2.50mm height, 0.13 thick) for the caliber size, driving an enormous balance wheel, with proportionally small pivots, so that piece will probably need more frequent servicing to avoid premature wear from all the power going through the train, and be more delicate due to the tiny pivots.1 point
-
On a watch like that I will unscrew the stud with the balance and cock in the watch, then gently slide the stud off the cock. Unscrew cock and lift off, remove balance from movement. With the cock off set it on a bench block so you don't bend the pins while loosening the screws for the cap jewel. Then, on these American pieces, the hole jewel and cap jewel will normally press out (they are both mounted in an individual setting). They made star-like "jewel pushers" with different sized brass tips, but you can press them out with pegwood normally. If they are stubborn then best to use a jeweling tool (first choice), or a staking tool (second choice, be gentle).1 point
-
No doubt removing the two little screws is the prefered approach and less risky with balance detached from the cock, since you would have more control an can push down on the screw as hard as needed, if placed on hard surface. I can't see how stud is to be safely detached from this particular cock !! with regular screw stud type, it is safer, if you loosen the stud screw when the cock and balance are still mounted on mainplate. I usually put some penetrating oil on both little screws and attepmt the unscrew next day. Hope this helps.1 point
-
then, there's the dilemma of removing old staff from balance to install a new one and I'd need a lathe for that too! this repair is growing legs just as I sit here and type! ?1 point
-
Seems a sensible approach jdrichard. Thanks, I'll probably give that a go tomorrow evening.1 point
-
1 point
-
I would just grab the complete balance cock and lift it out while tilting the movement to allow the balance to come out. The put the whole lot on a balance tack and loosen the screws. Then take the balance off the tack and support the balance on a metal block with holes to support the balance. Lower the balance cock / bridge for Americans:) so the hairspring has little tension and take the stud out. Now you have the balance bridge on its own to work in the upper cap jewel. my guess:)1 point
-
did you notice when you are working on the watch that their serial numbers on all of the plates? There is even usually a serial number on the balance wheel. This is because American pocket watches initially even though there's a parts book even though interchangeability was supposed to exist the parts are usually hand fit. A lot of it depends on which company did the manufacturing and when they were manufactured. So it's usually a bad idea to start swapping parts between different movements. a important rule to remember when replacing balance staffs is to always measure the old one versus the new one. This way you avoid unpleasant surprises. A lot of times with American pocket watches the modern replacement staffs are deliberately made over size. This is because it's easier to reduce things to fit than it is to add on to your staff. So it's very important to measure before putting it in. then a watchmaker lathe unfortunately on American pocket watches isn't an absolute must but just about. Even if you got the right staff you also find that the watch companies made staffs with the same part number with different pivots sizes. So you might have to reduce a pivots size or reduce the length sometimes they were made longer than ever supposed to be so you could fit them.1 point
-
Thats what I do, if you assess removing the bumps would let the cock down enough for pivot to fully enter jewel hole, I,d give it a try. its easy, wont cost anything and levels the cock with gears bridge.1 point
-
I would do as Nickelsilver recommended: adapt the screw. A basis and strict rule in watchmaking is: never alter the original movement parts, but adapt the replacement part to fit! Frank1 point
-
First of all the inner part of the bearing will be particularly hard steel, so drilling with anything other than carbide will be quite difficult. Then, is this a new bearing? Or new rotor? Did the nut not fit before? Easiest thing would be to modify the nut, but will need a lathe for that. If you really want to drill it, and have tools that will cut it, then fill the race with super glue. Drill. Soak in acetone to remove super glue (do one to remove, and then a clean soak to get any remaining residue).1 point


.jpg.c894cda8fc9076b093382682501ed0f1.jpg)