Leaderboard


Popular Content
Showing content with the highest reputation on 05/15/20 in all areas
-
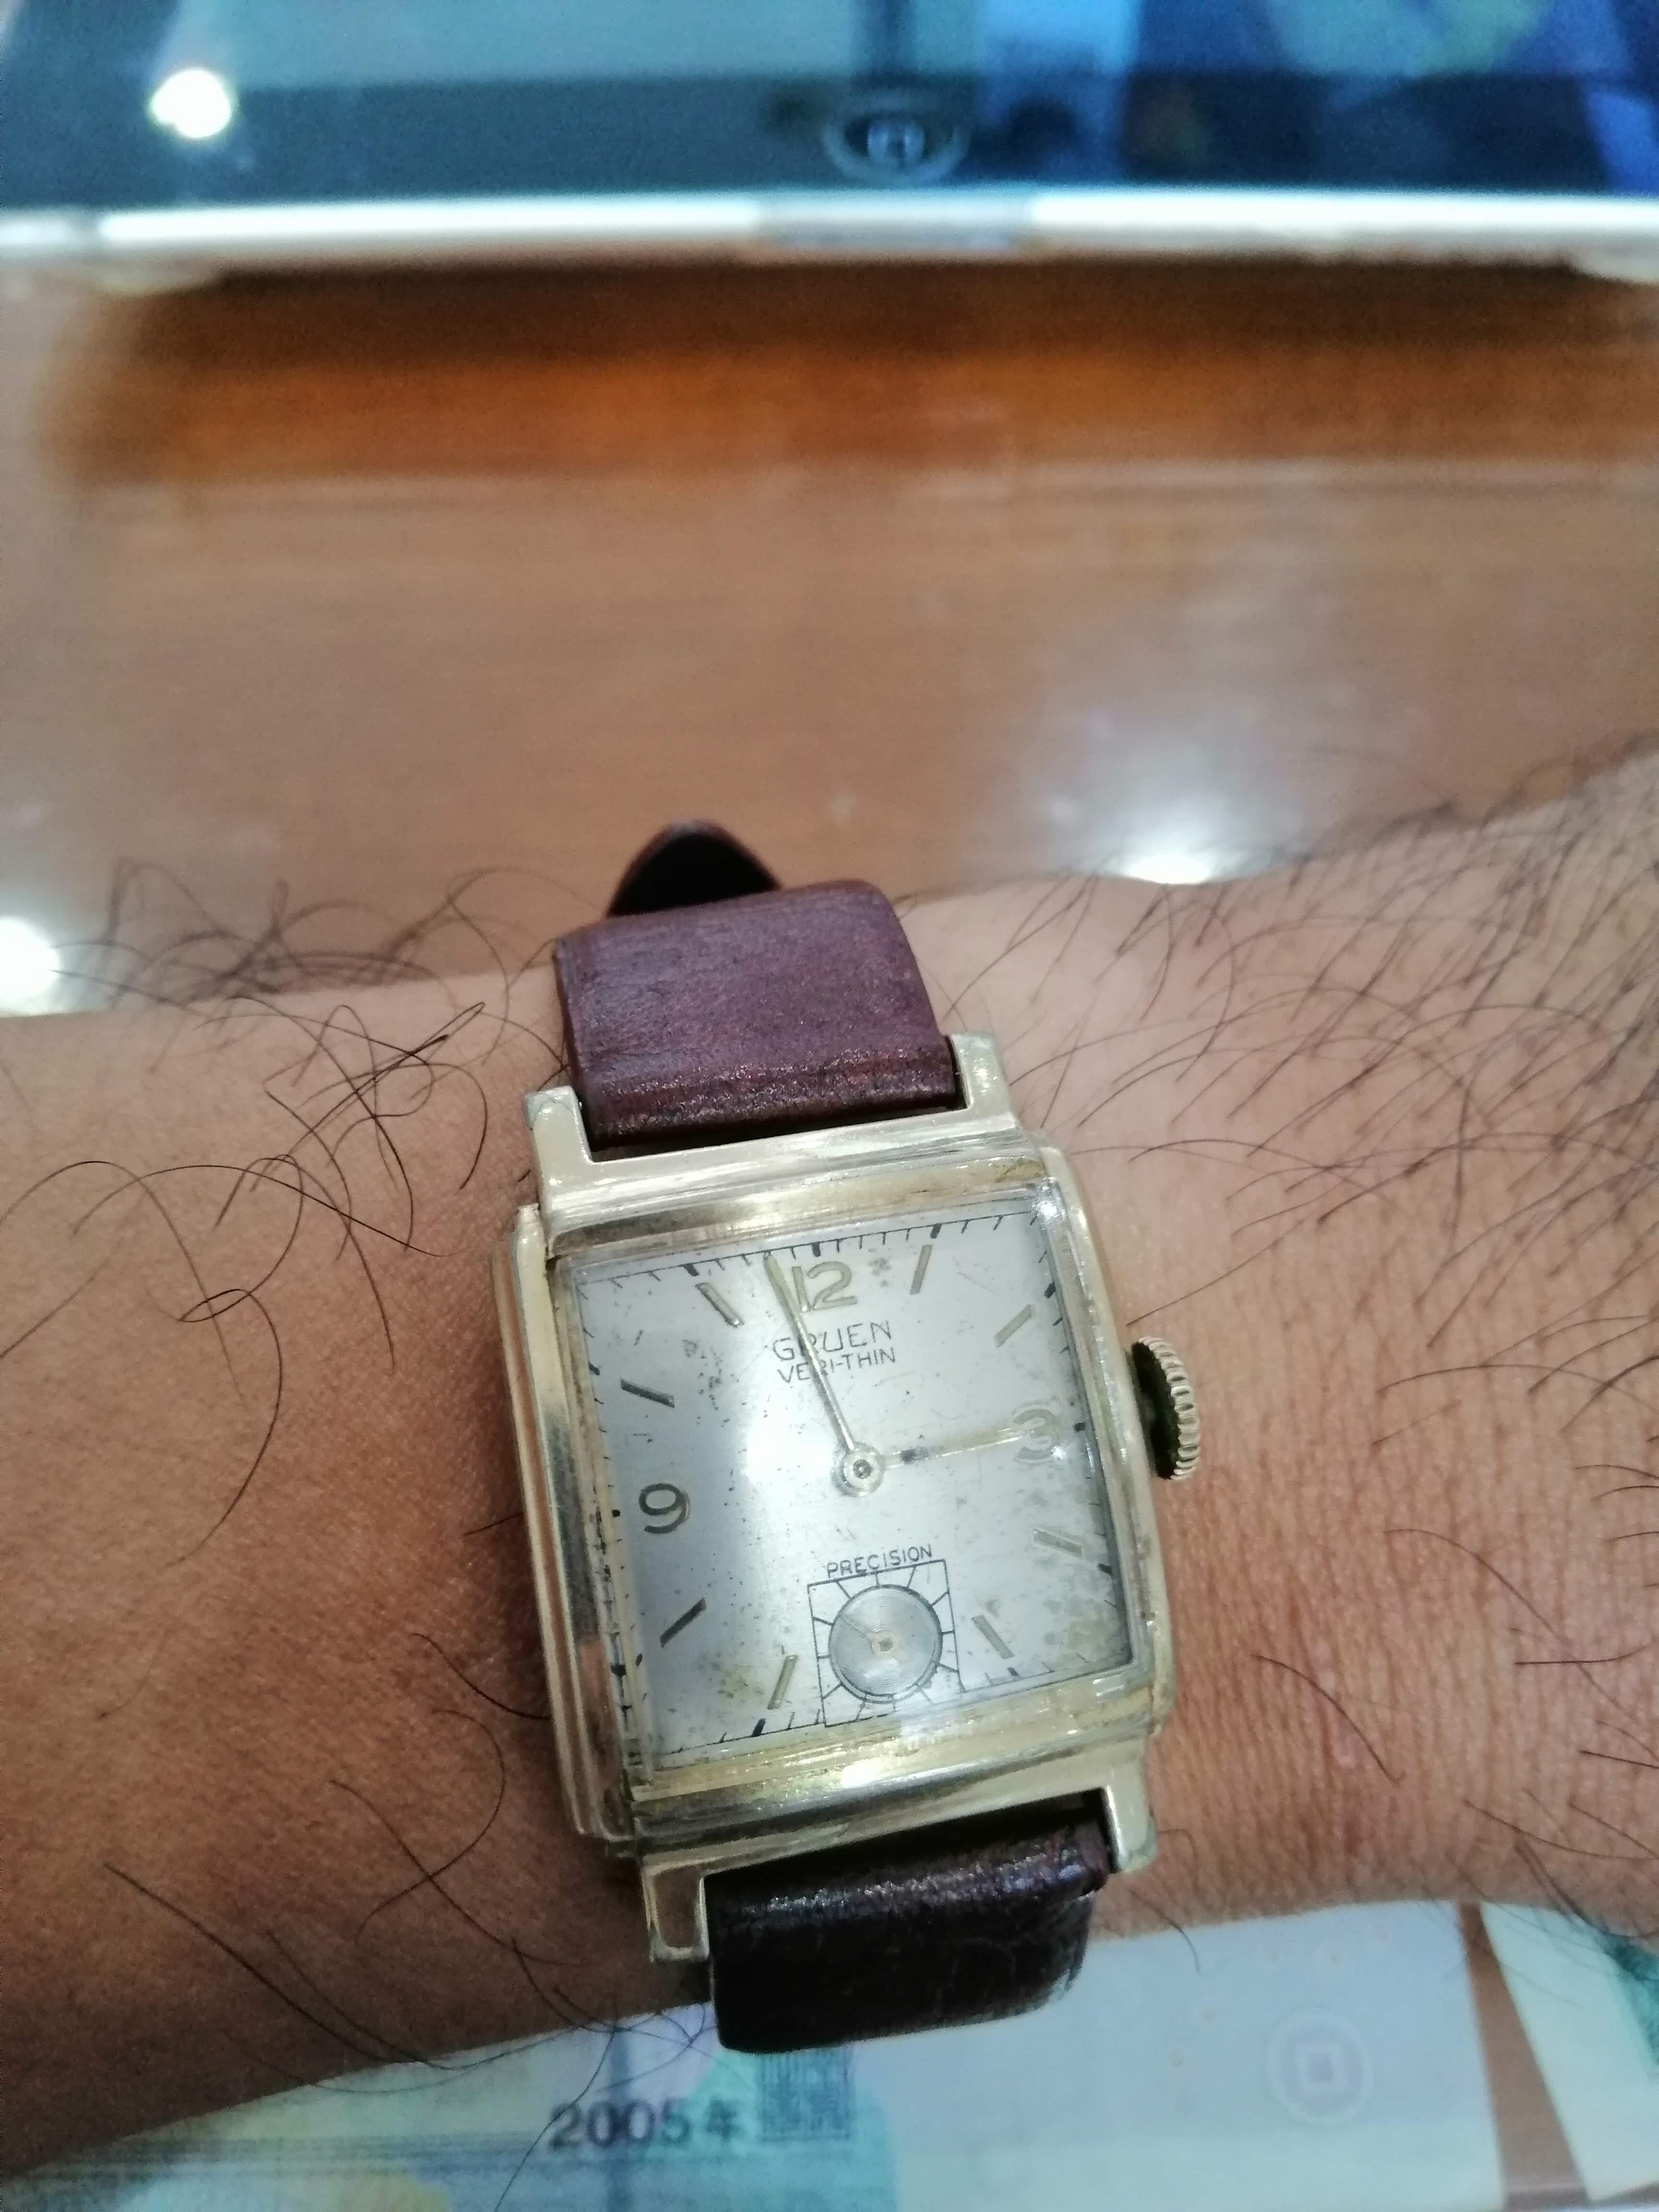
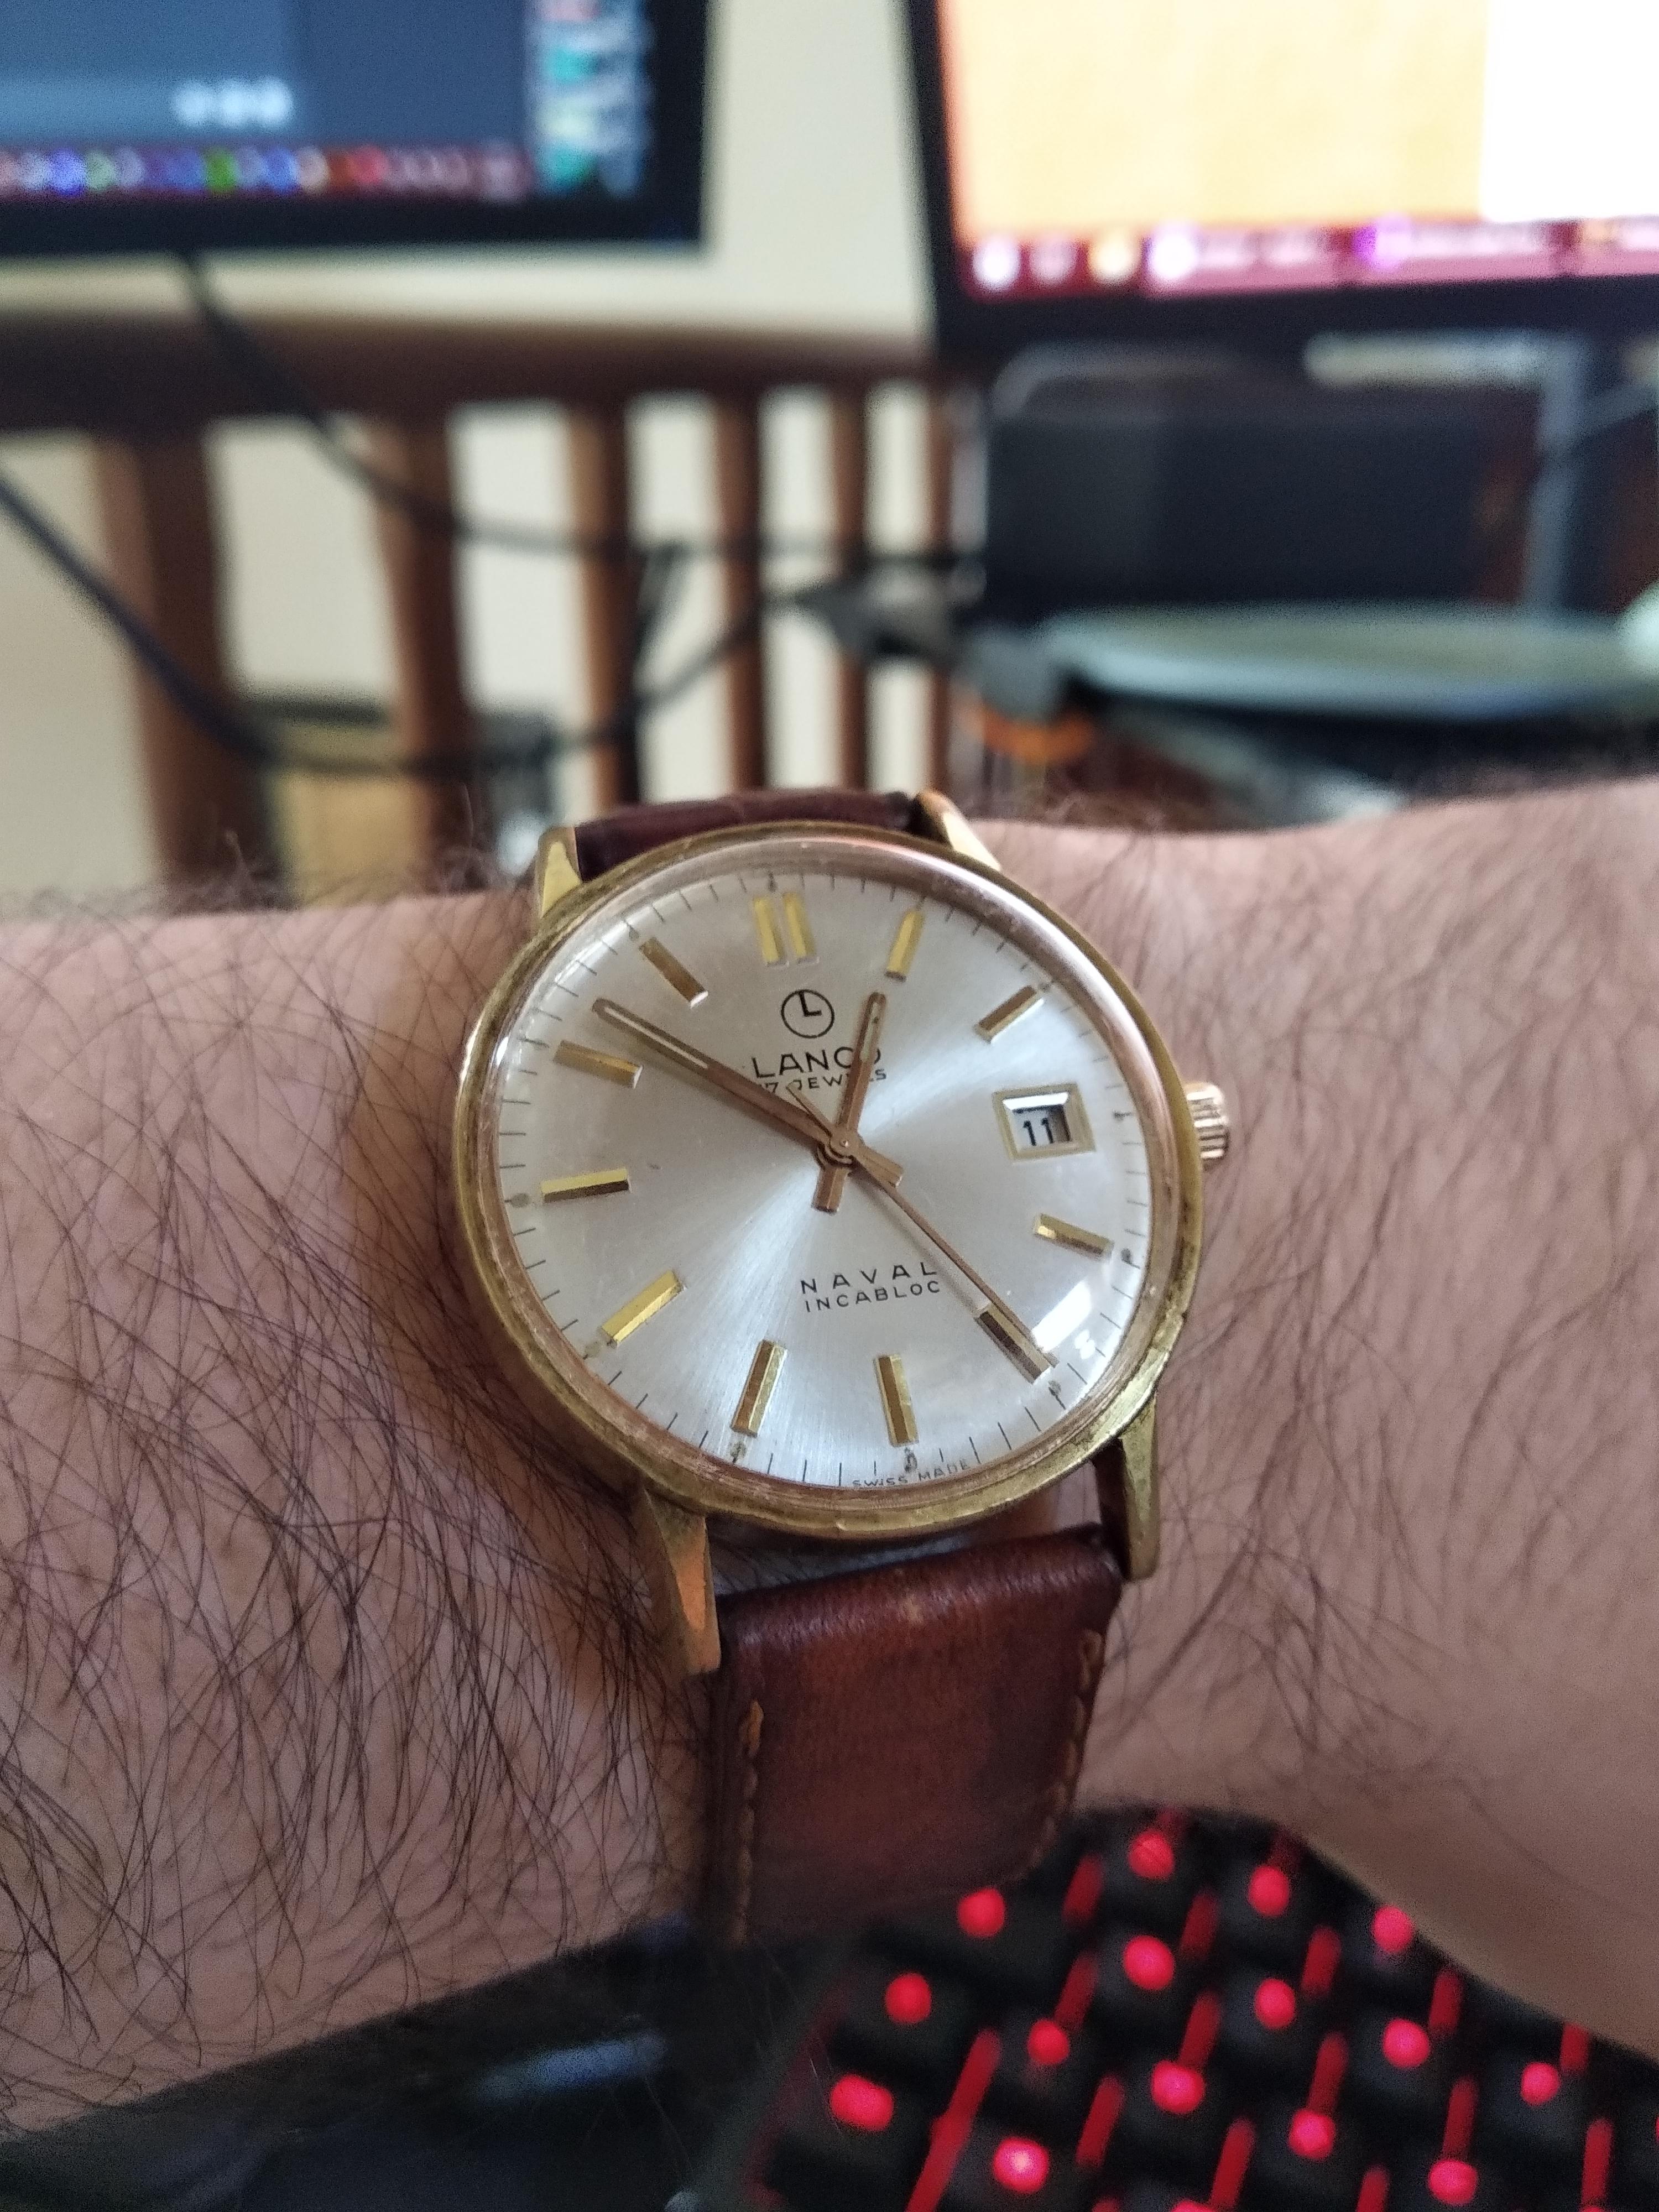
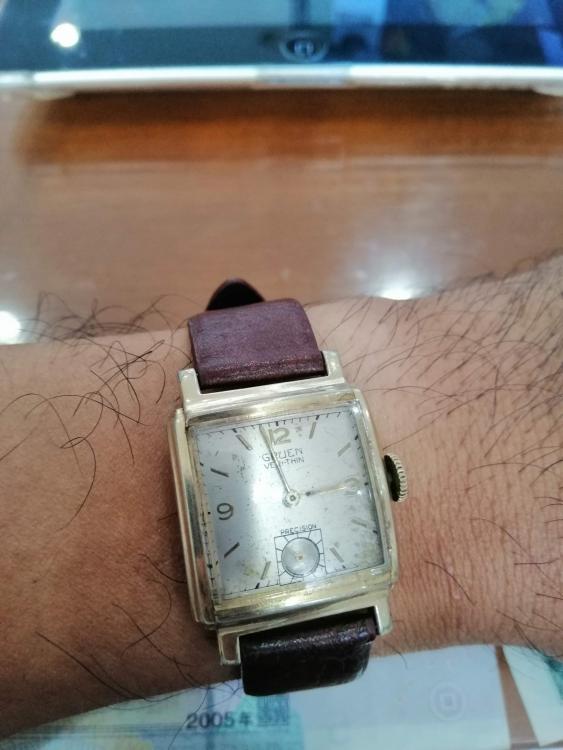
Hi everyone, I'm Hai, from Vietnam. Nice to join you guys. Wearing a 1941 Gruen Veri-thin, small and fit. Too small for men's wrists, maybe consider it as unisex Have a good day, stay safe!
 4 points
 -
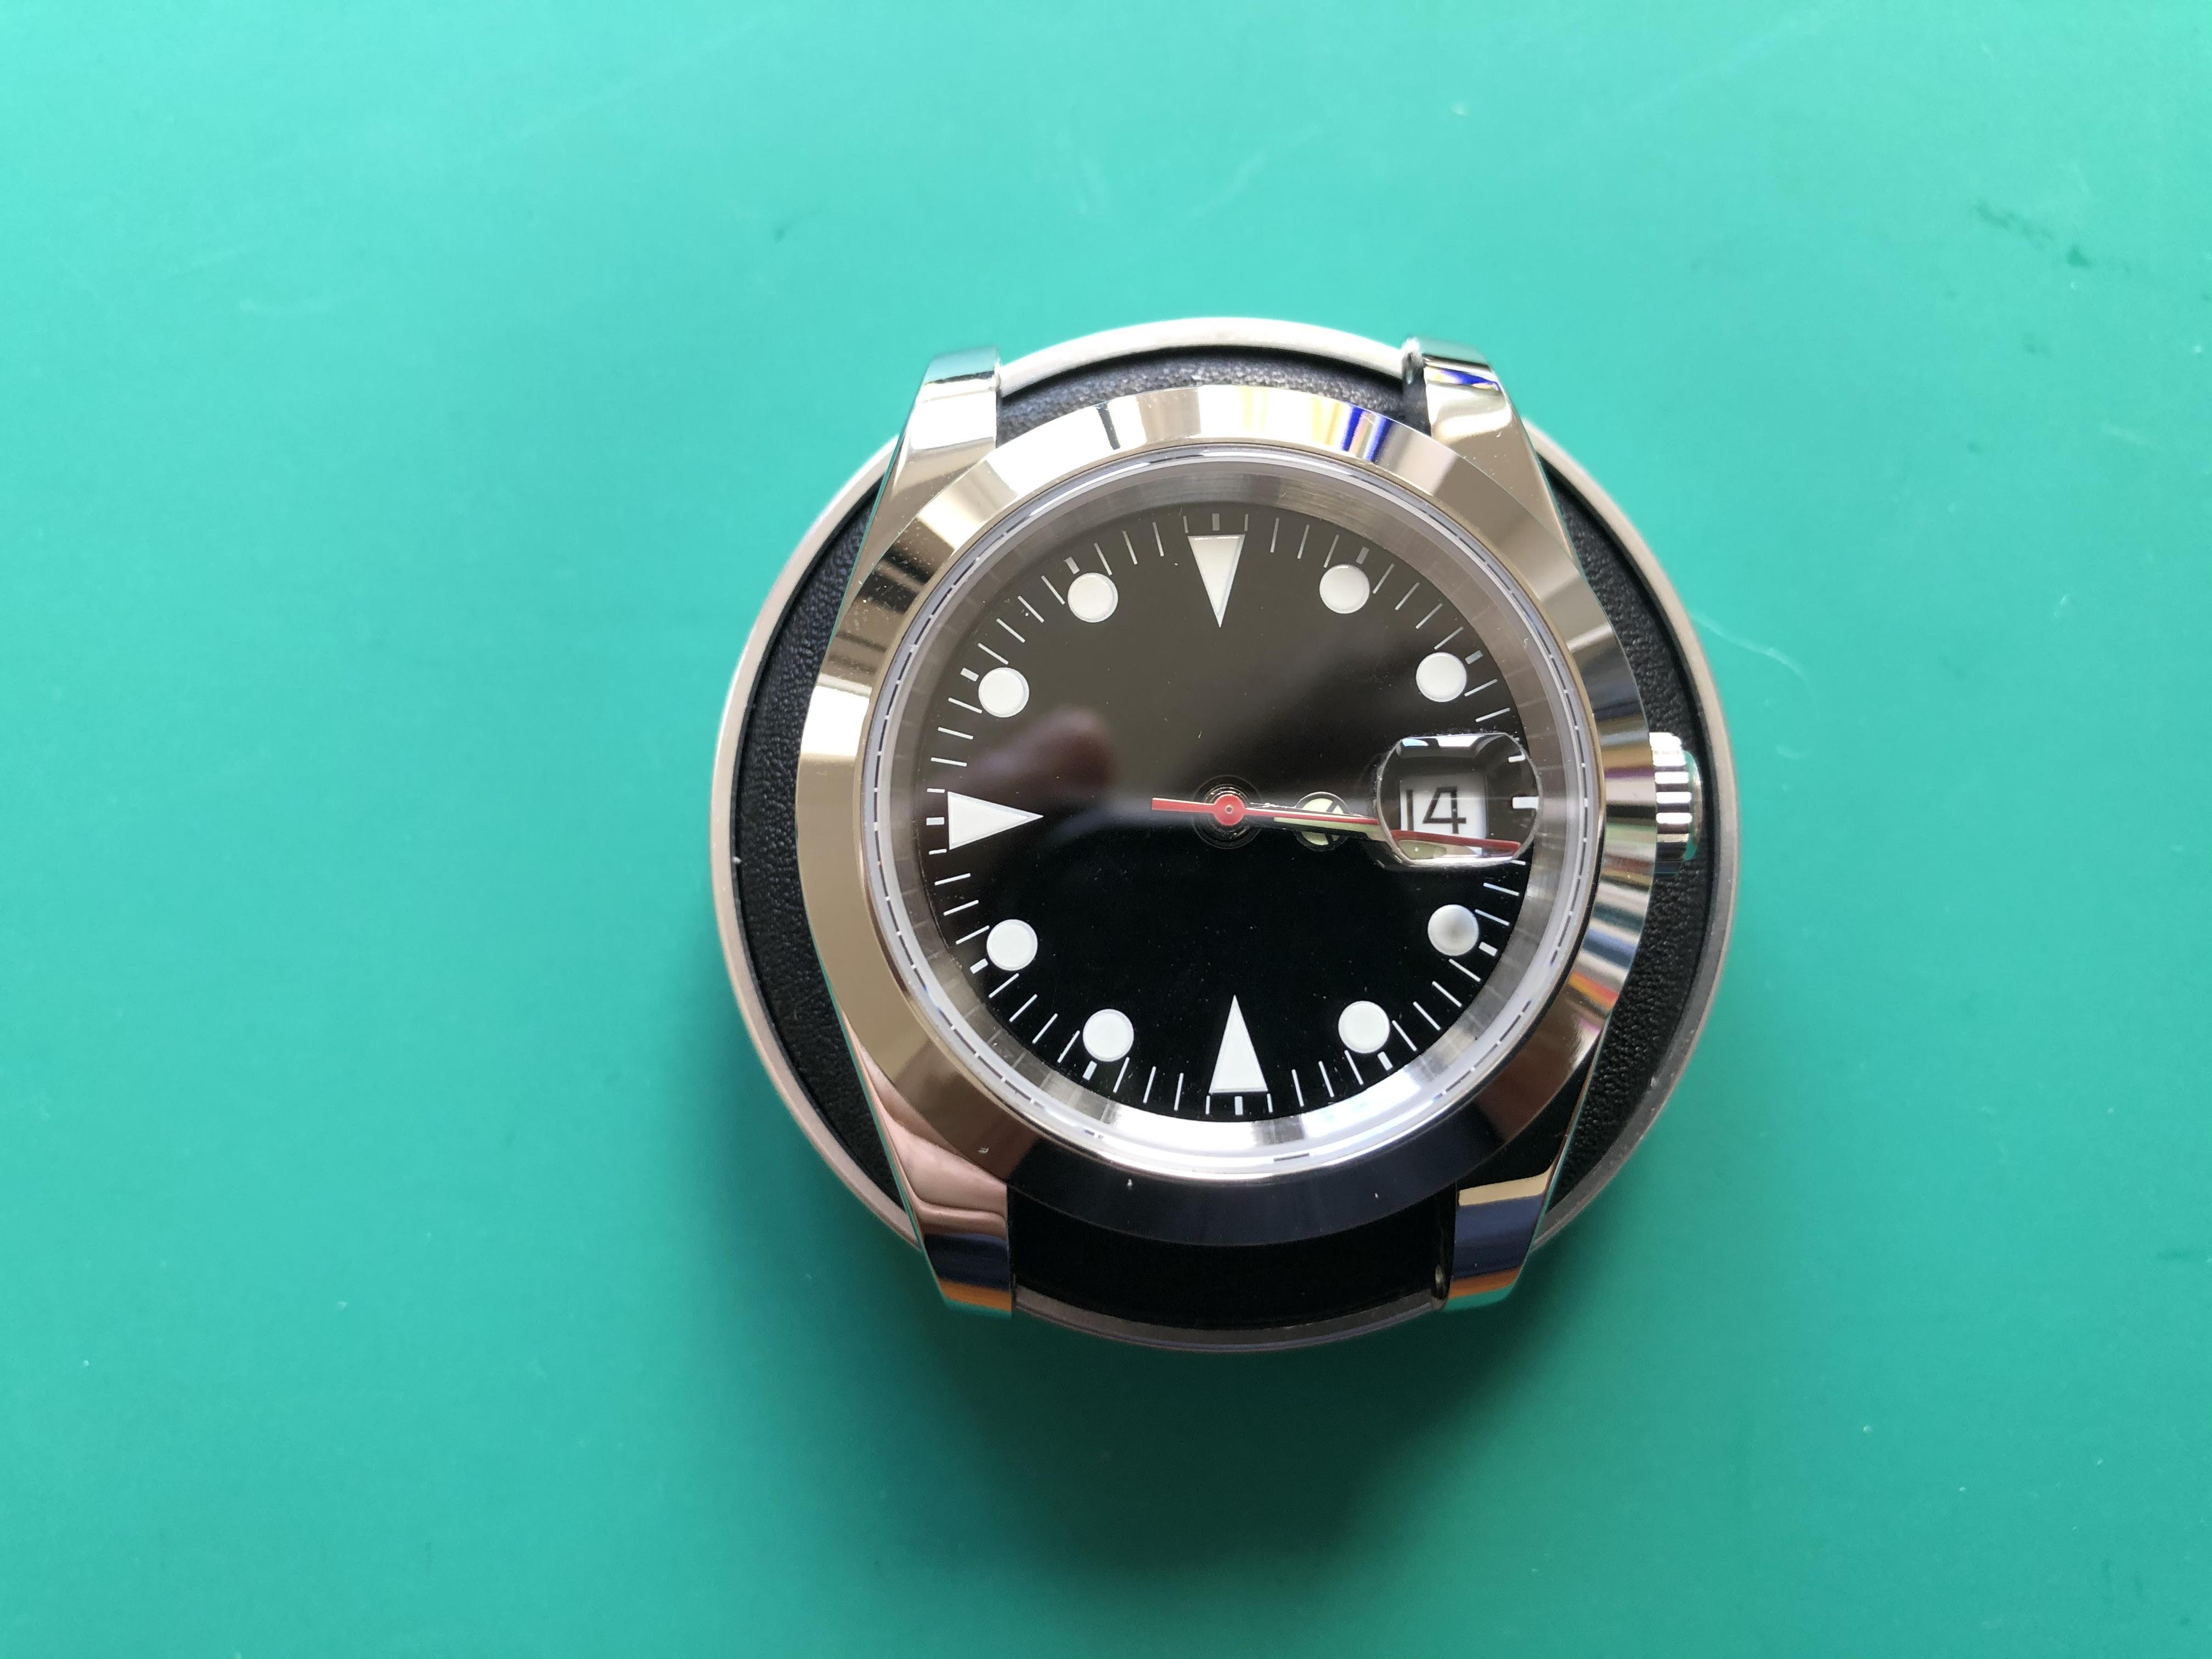
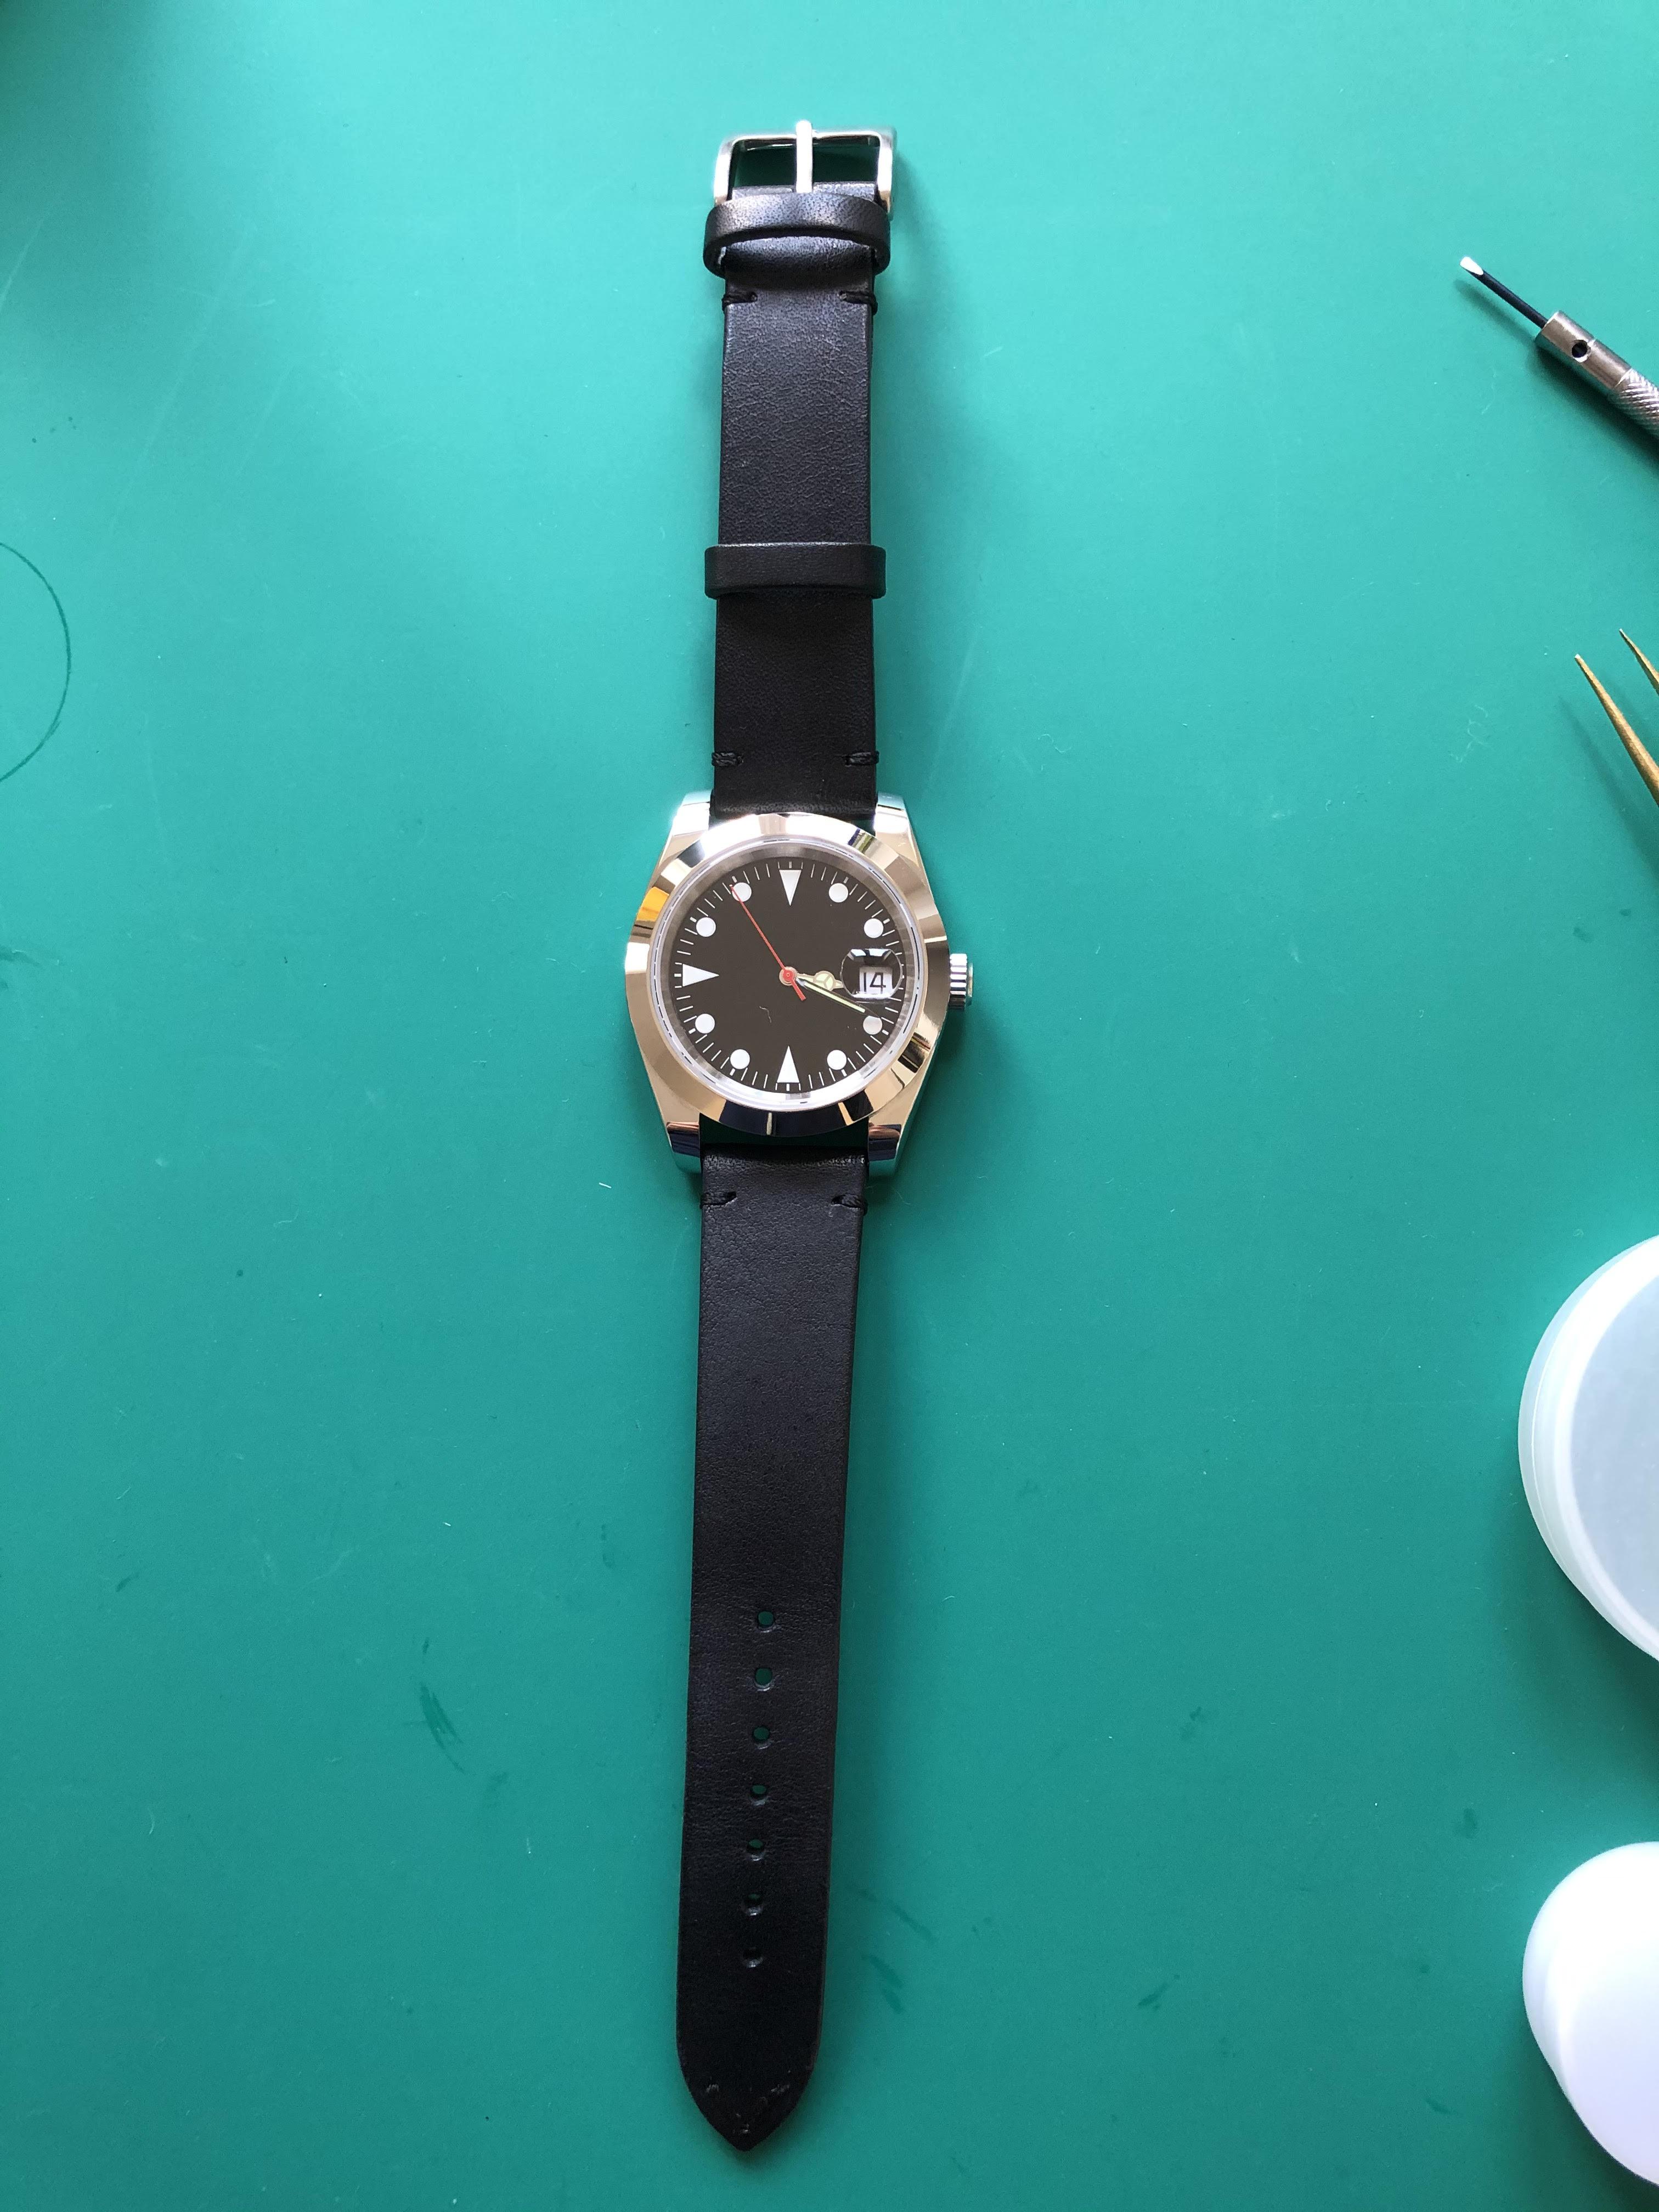
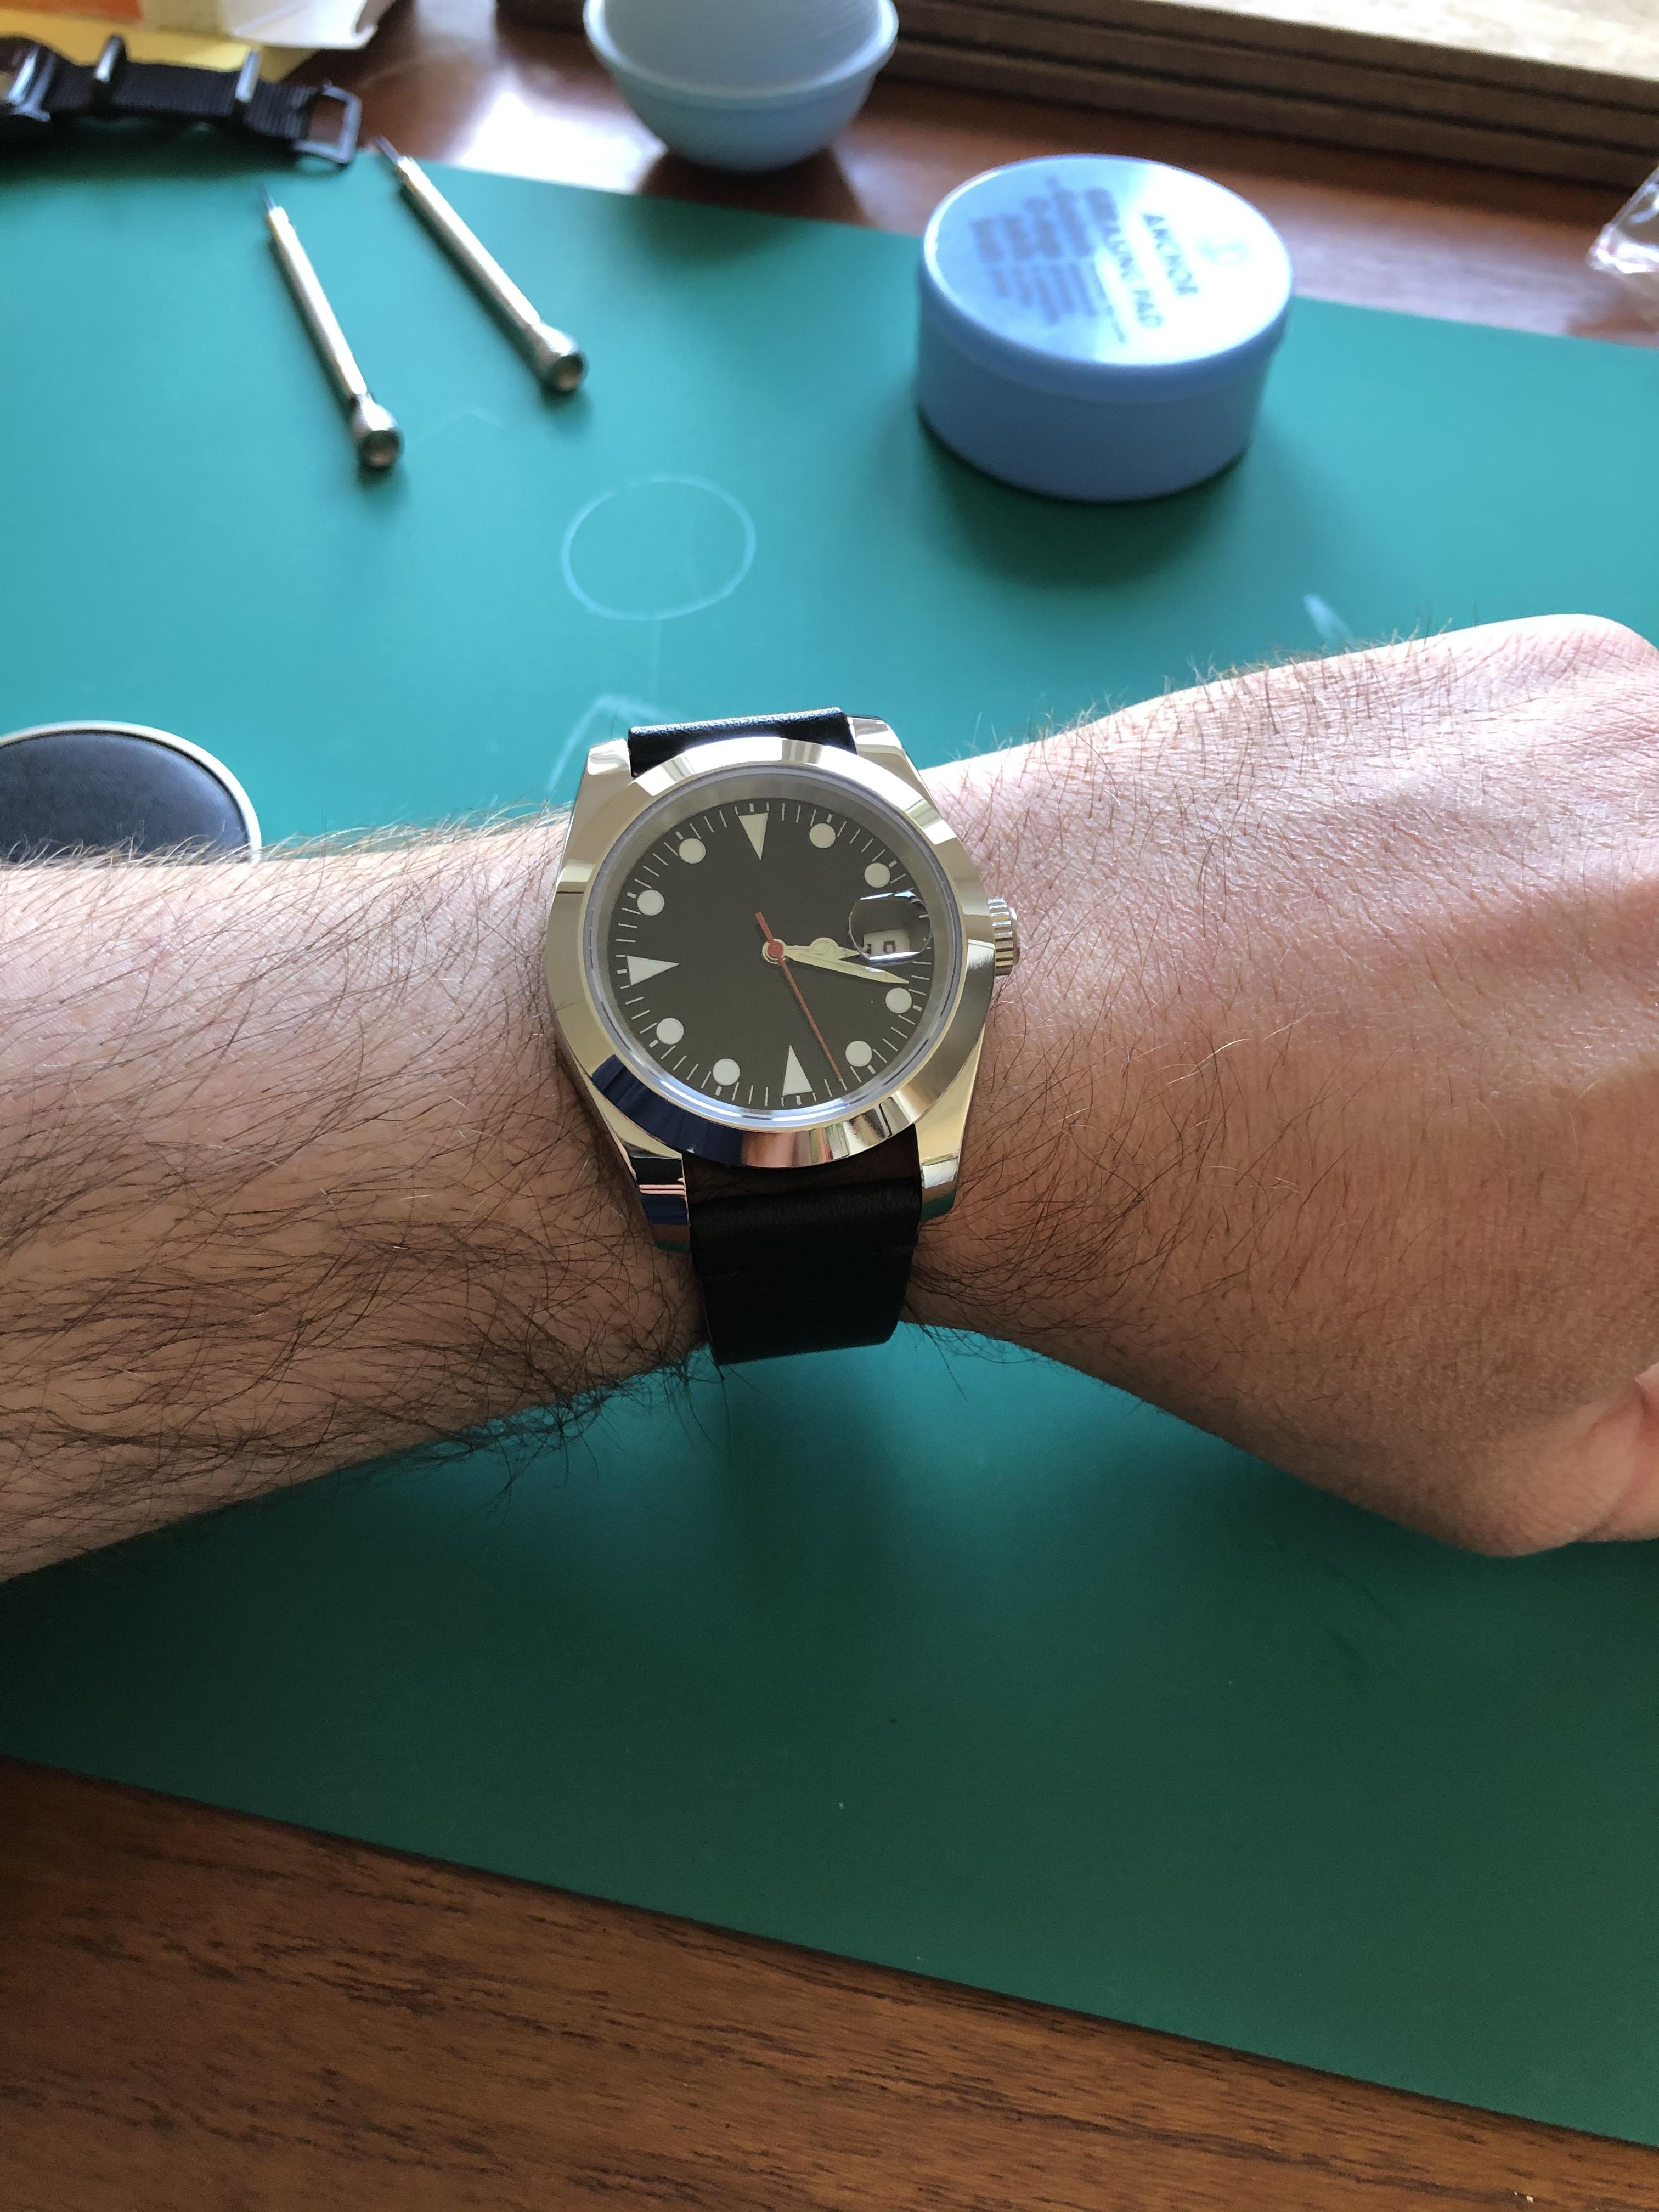
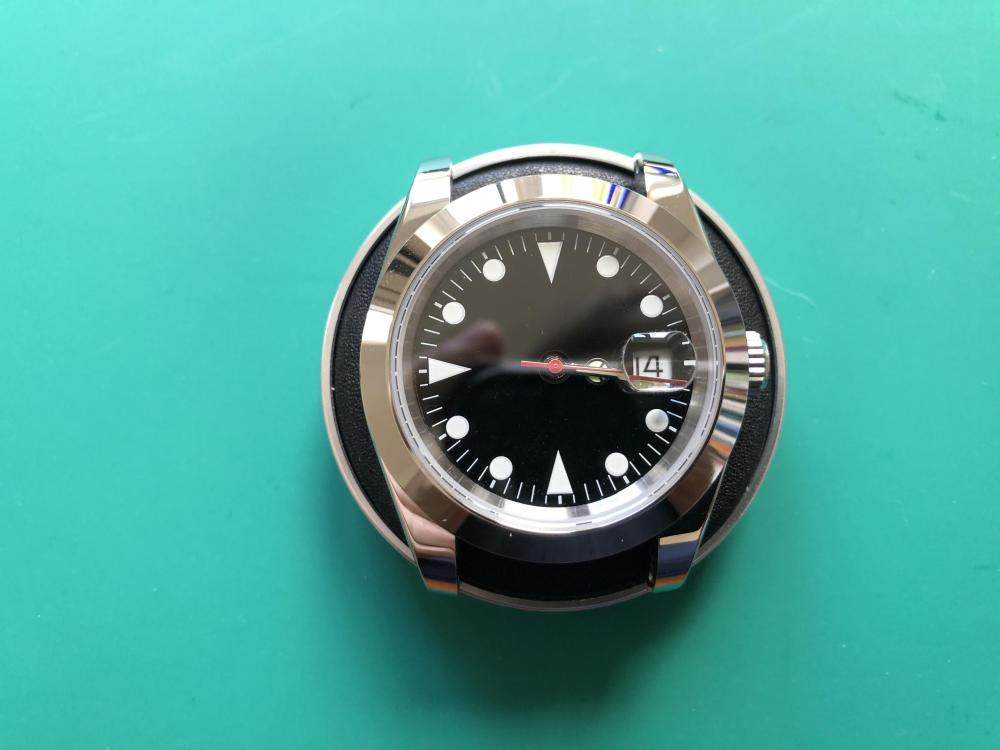
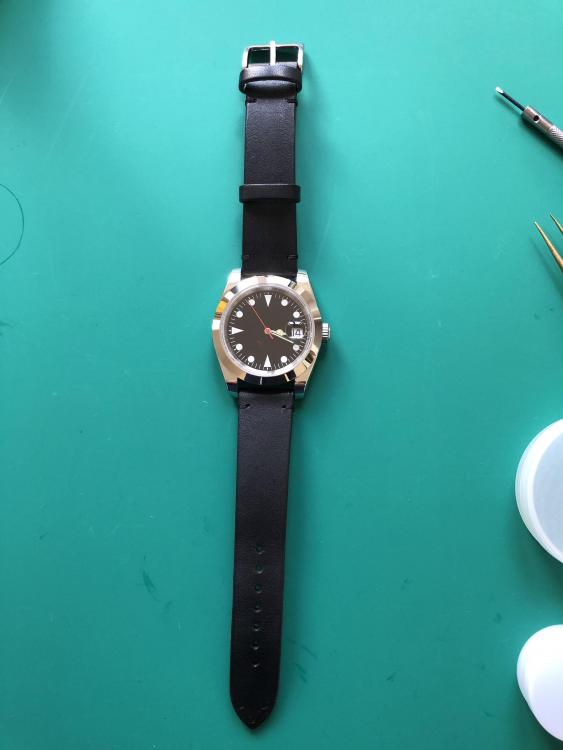
Hi all, This is my first watch build. I started it in January 2020 with no previous experience of watches or watchmakers tools and it's been quite a learning curve but hugely enjoyable. It runs on a Miyota 8215 movement that appears to be working well (after a few issues with hands getting stuck). Total Cost of materials was £115. I've never owned an automatic watch before so am enjoying wearing this, but I think the dial looks pretty bland without some form of personalisation. I'd appreciate any thoughts on how it looks now or how others think it could be improved. I've had a great time on this project and am happy with the cost, but would be interested to hear what others think of the total cost of the build, does it seem worth it? Cheers, Tom
 3 points
 -
I have had this situation when I cut too much material off my balance staff on the lathe. You can close the hole by light tapping on a round stake in your staking set. Choose a stake with diameter slightly larger than the hole but not too large. Pick a flat area of your staking set table area so your not over a hole. Tap a few times but not too hard or you could split the roller table. Kind of like this video I made where I am closing a Hairspring collet, but this time you are tapping on the hole area with a round tipped stake that will spread the metal and thereby close the hole diameter. You may need to remove the jewel if it interferes with the stake. Sent from my iPhone using Tapatalk Pro2 points
-
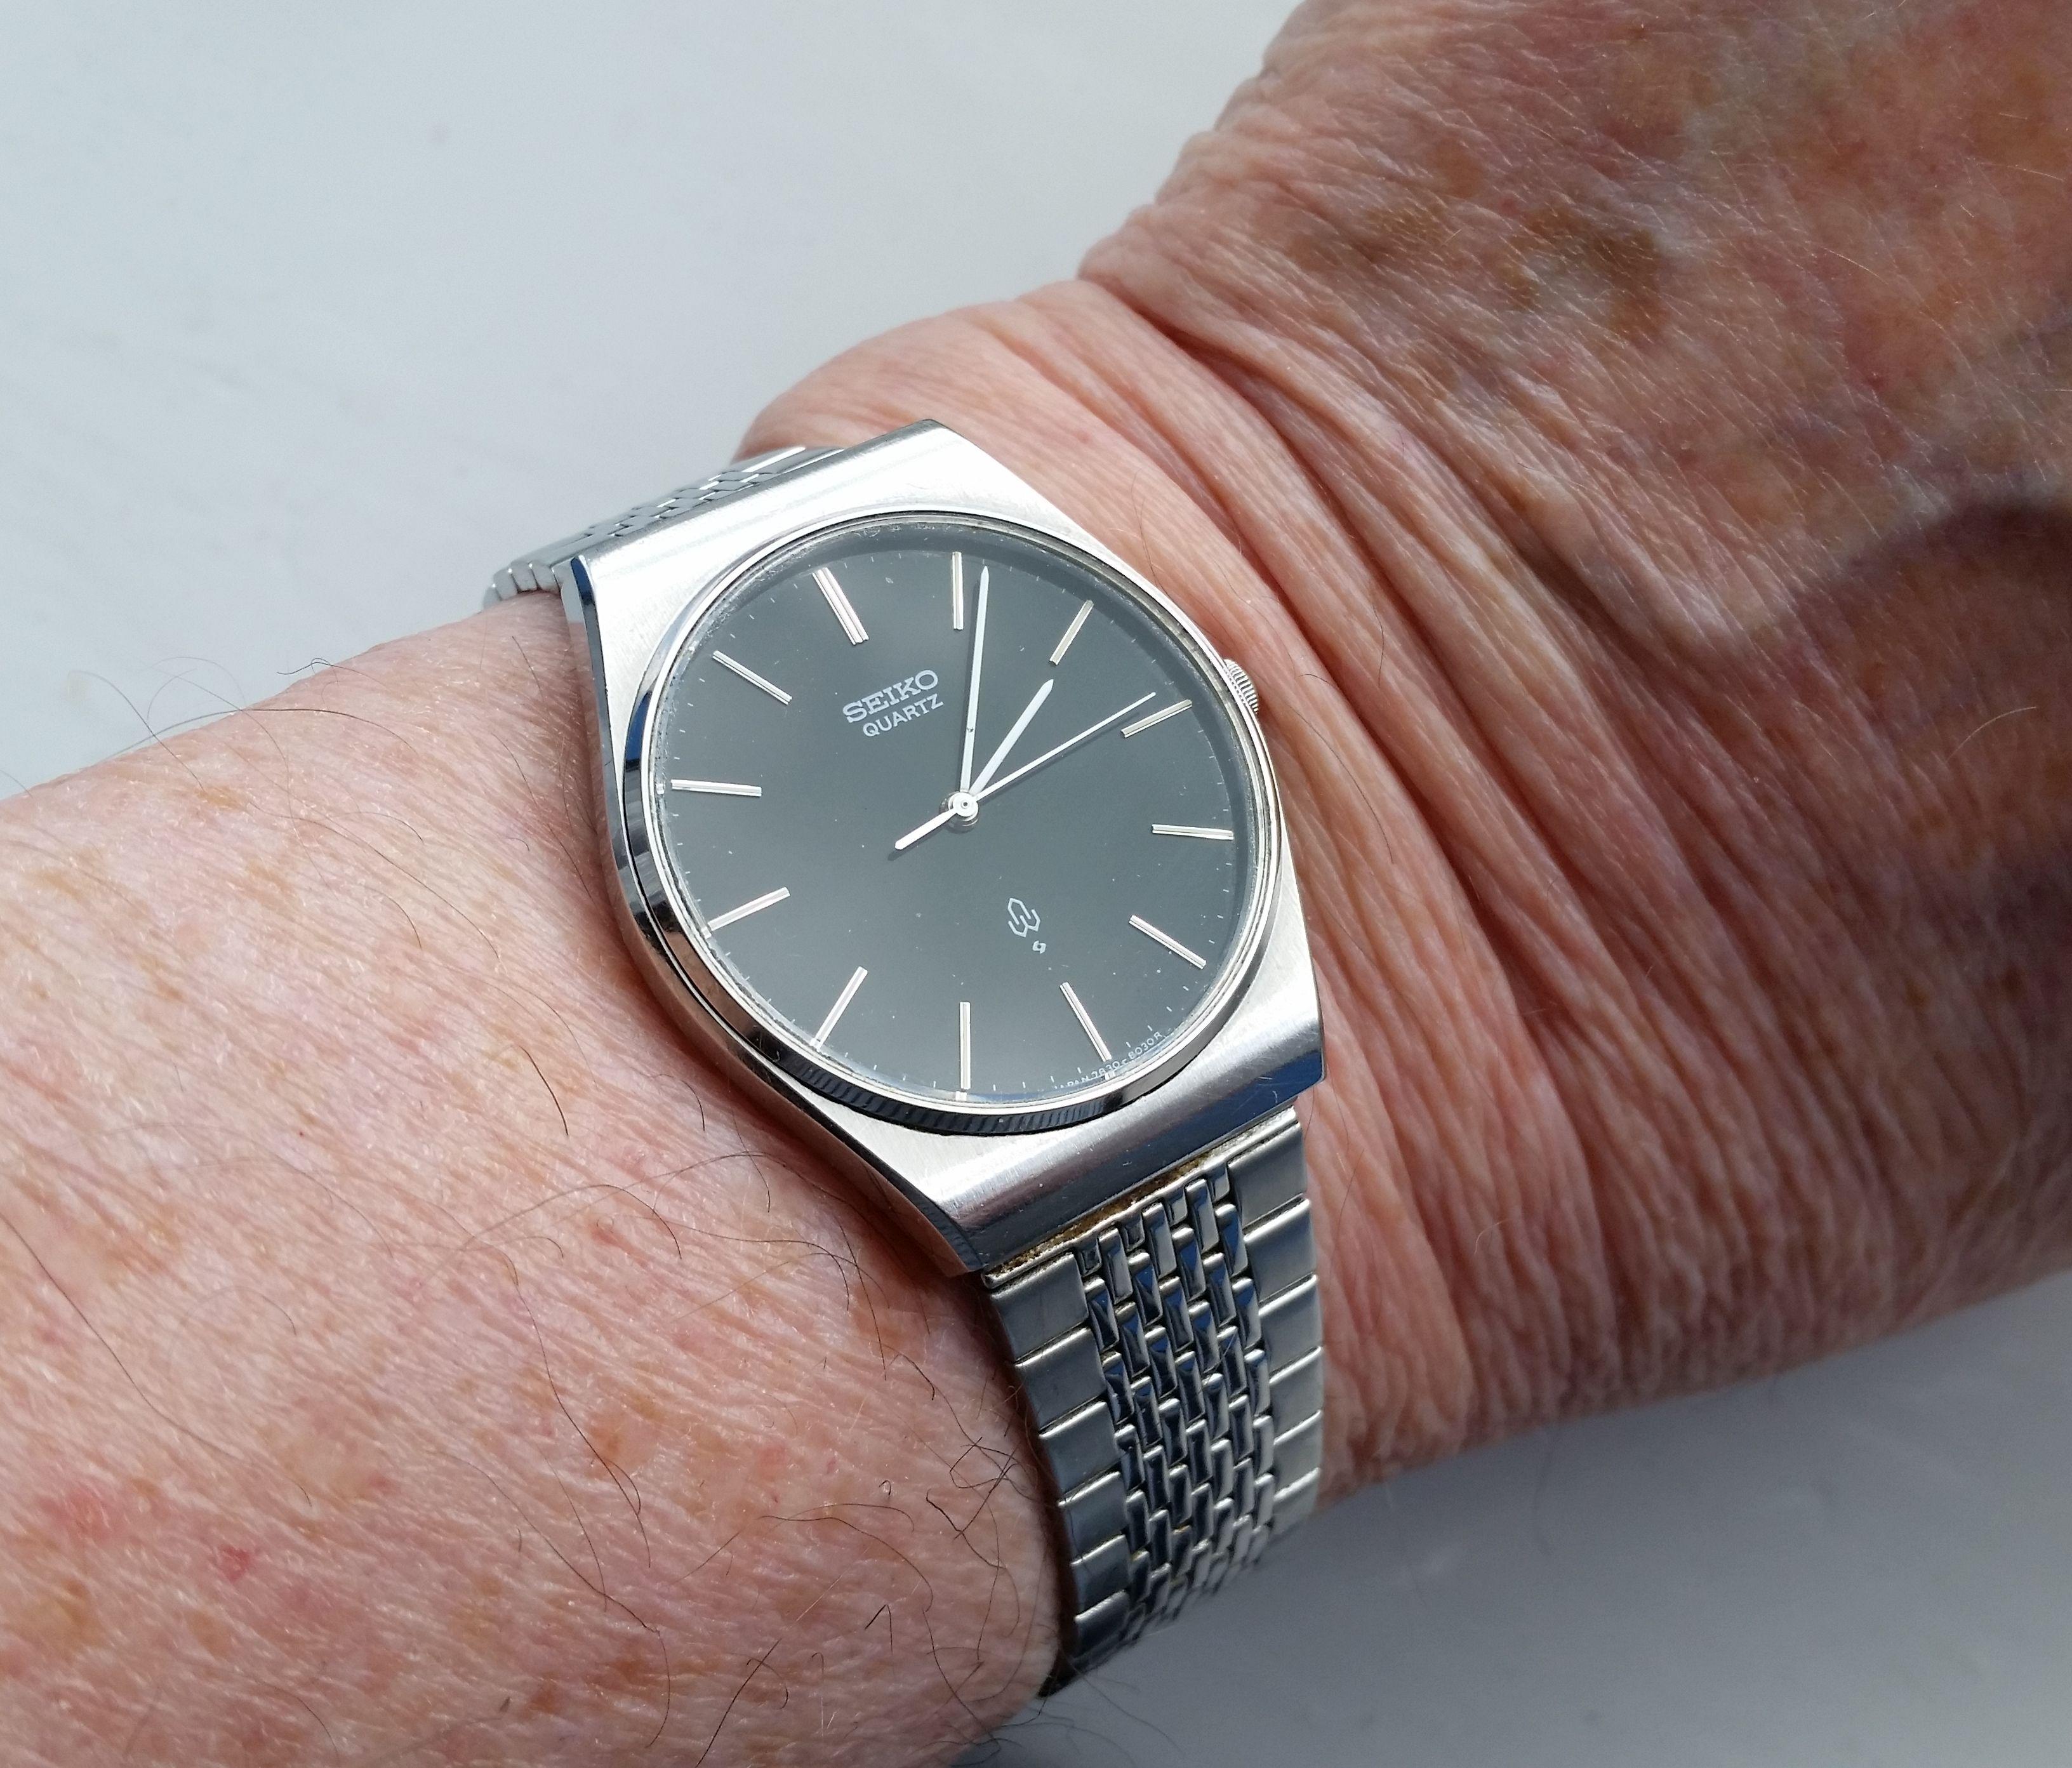
Super thin (5.3mm) vintage quartz Seiko 7830-8020, from May 1977, just fitted a replacement crystal....
 2 points
 -
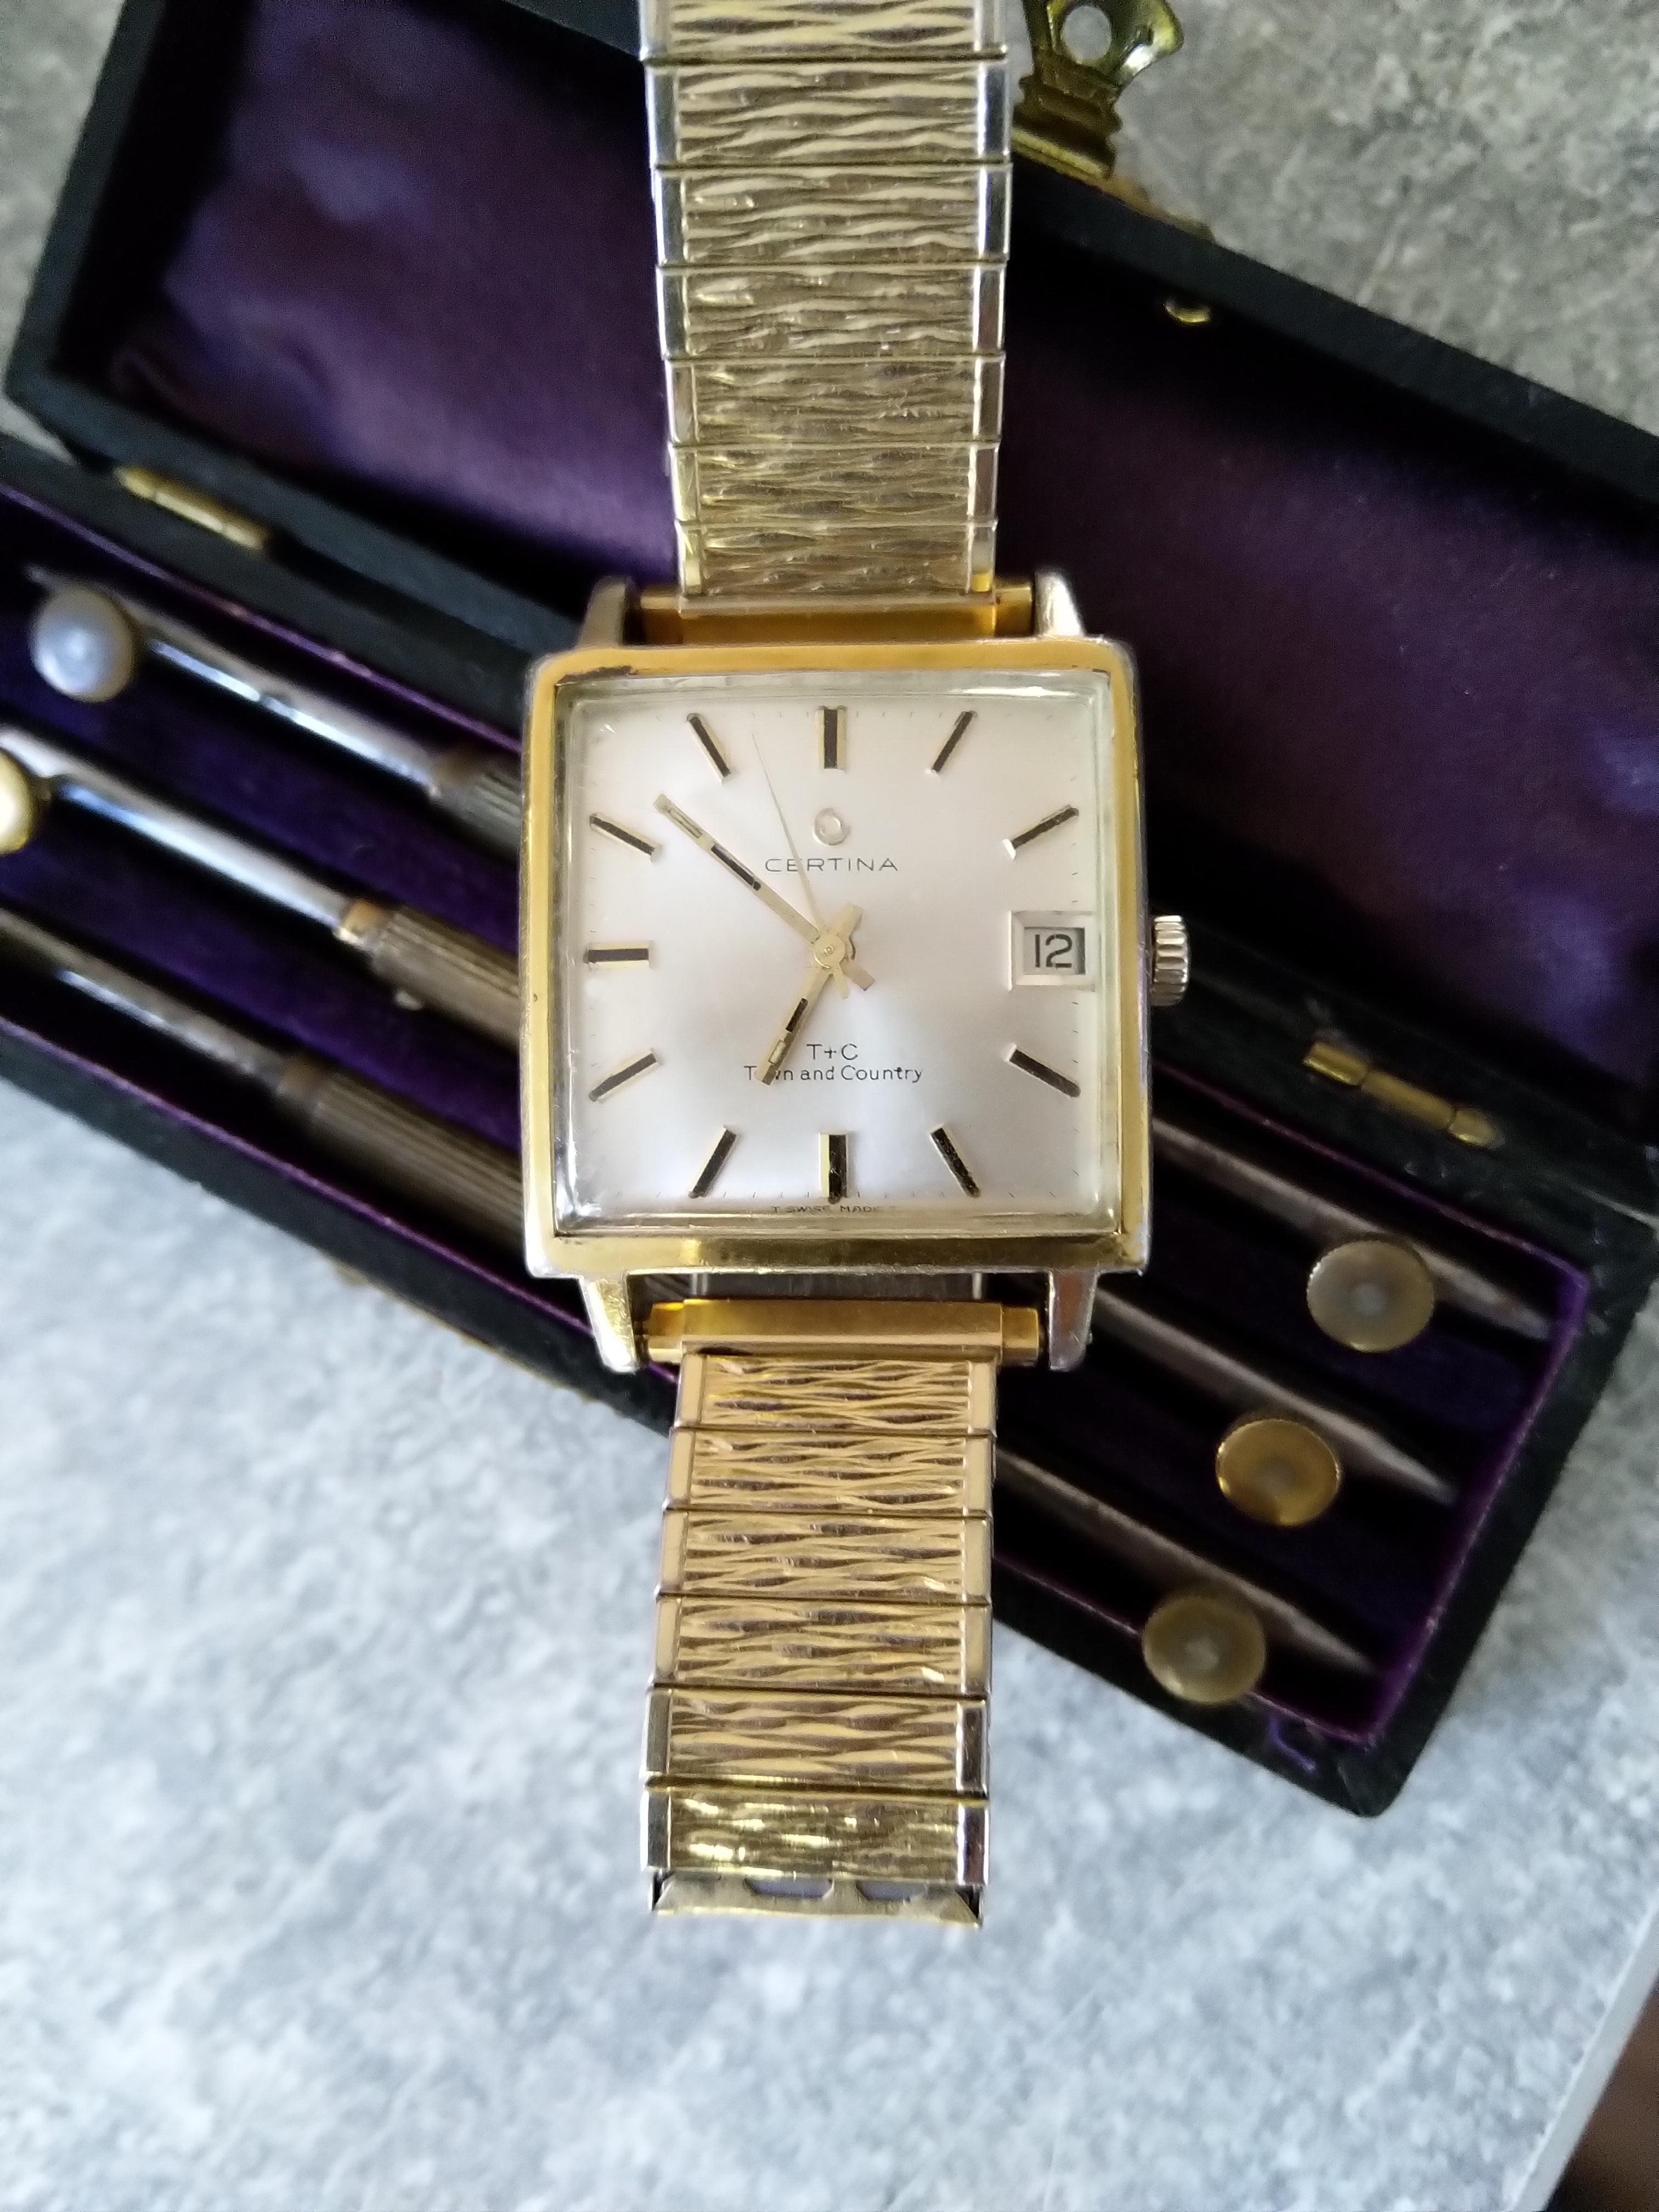
Here is another T&C which got its service yesterday, I wasn't surprised when it got in line for a date wheel replacement, it still gets to be aired today while it is in the hospital queue.
 2 points
 -
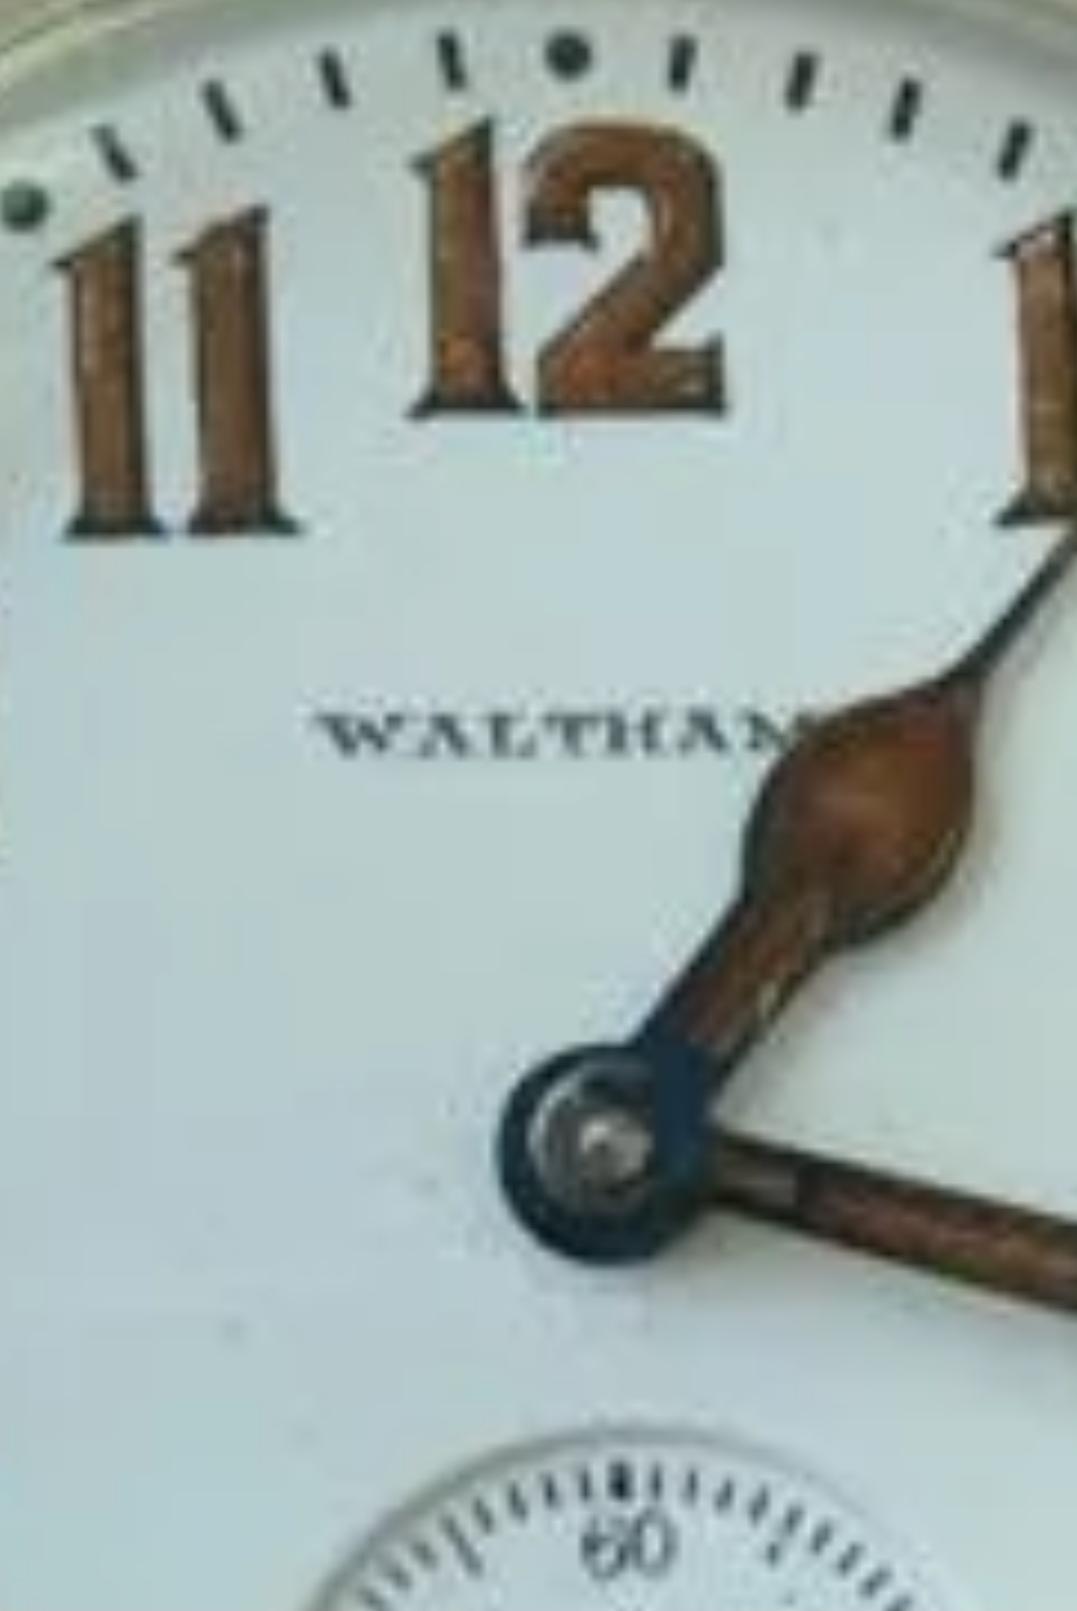
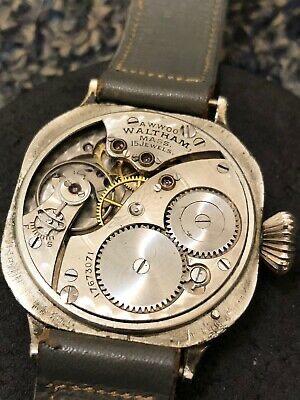
Ha, yeah clearly my brain is working today.. Of course it won't let me edit that post now. It is definitely a Waltham
 2 points
 -
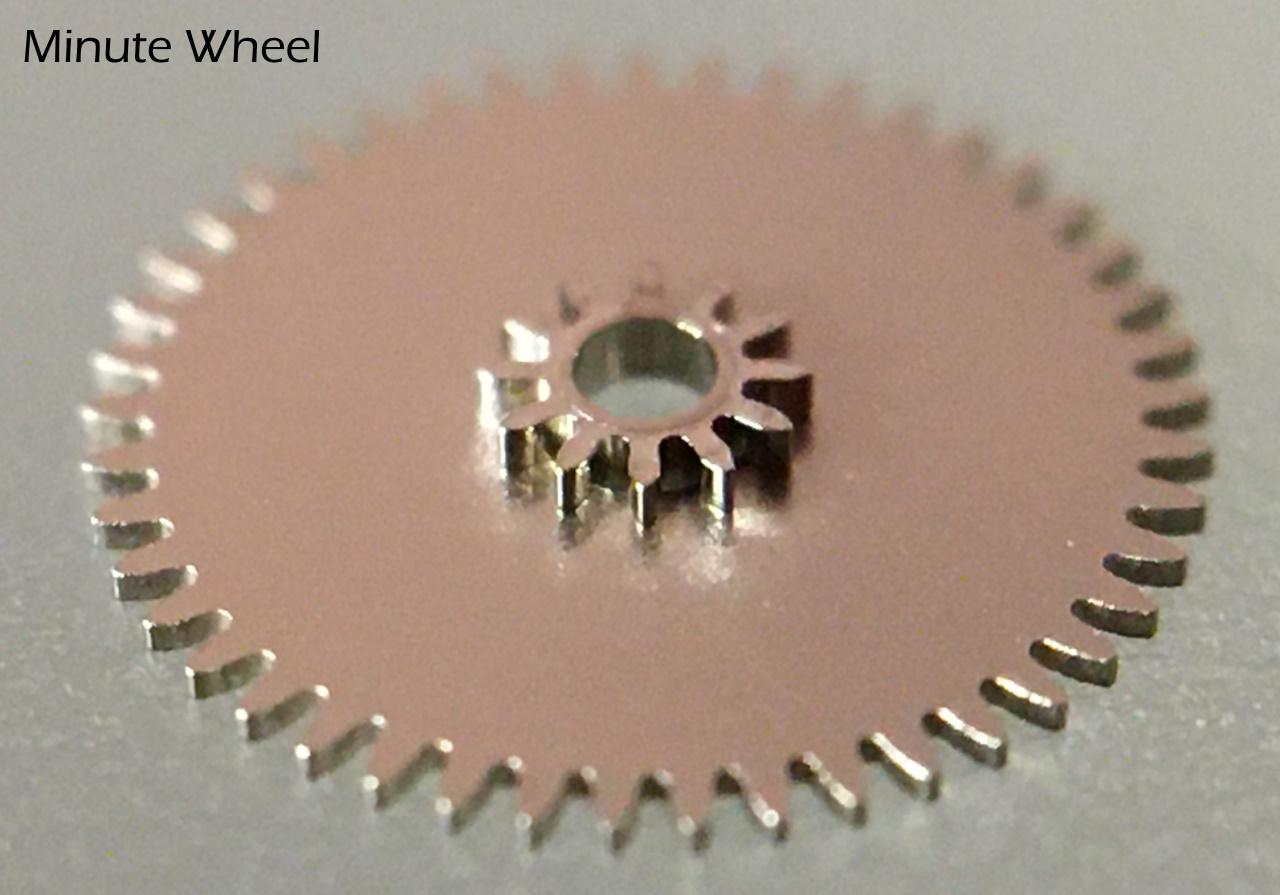
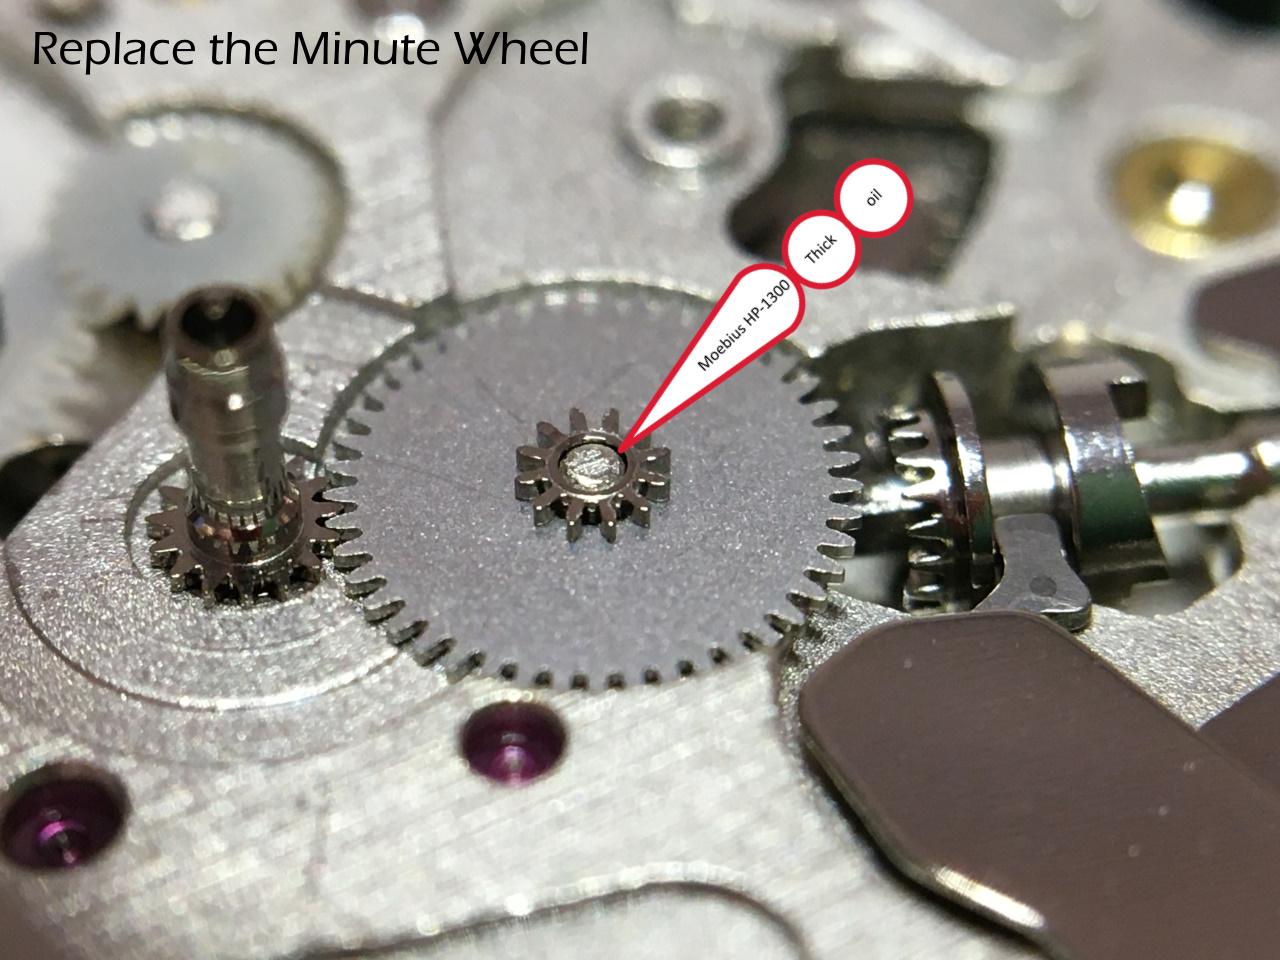
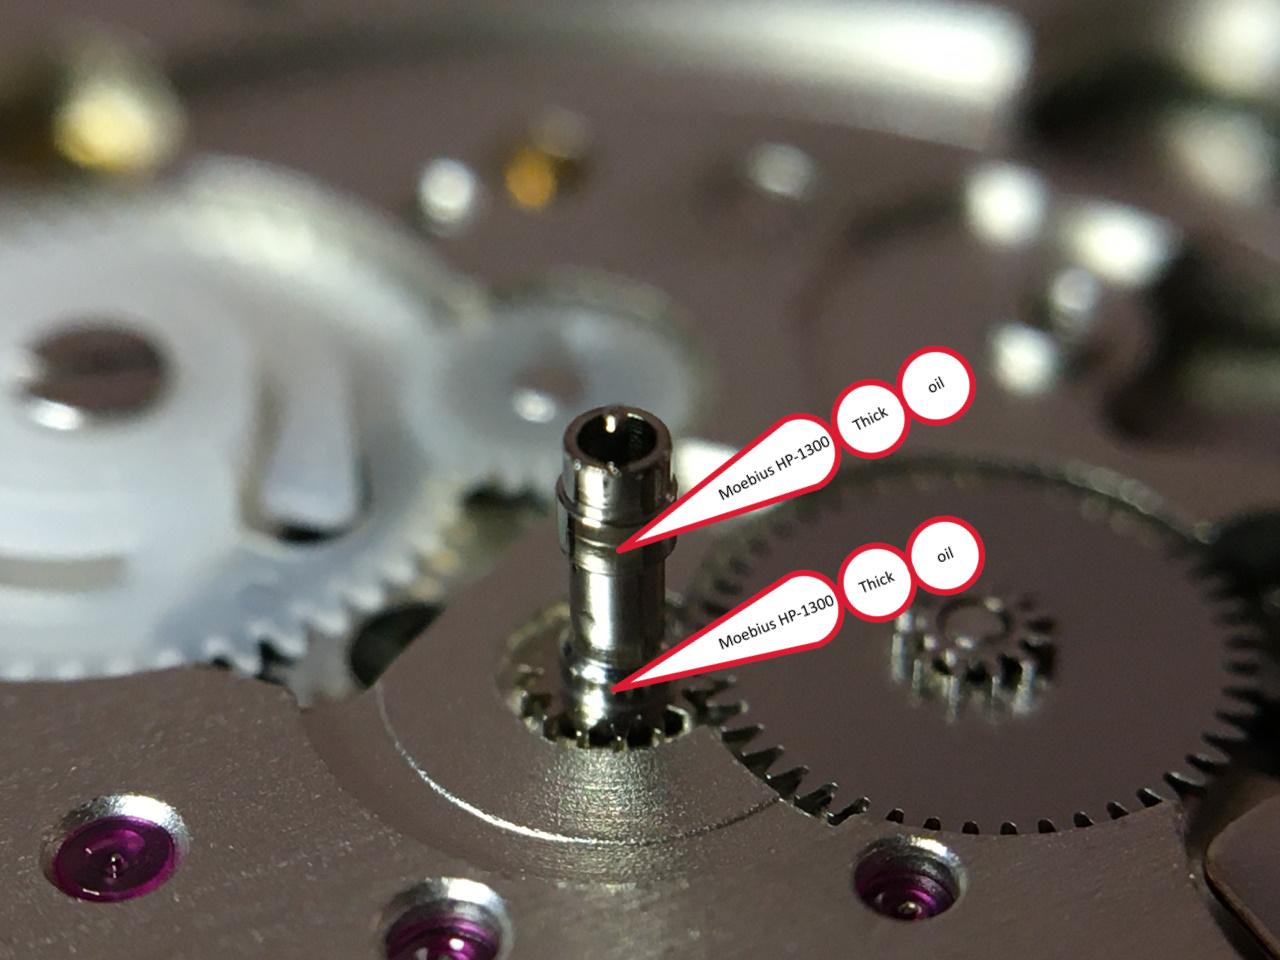
I suspect there is something restricting the minute wheel from turning freely. Even if the canon pinion was so tight it was hard or impossible to set the watch it wouldn't stop it from running normally.2 points
-
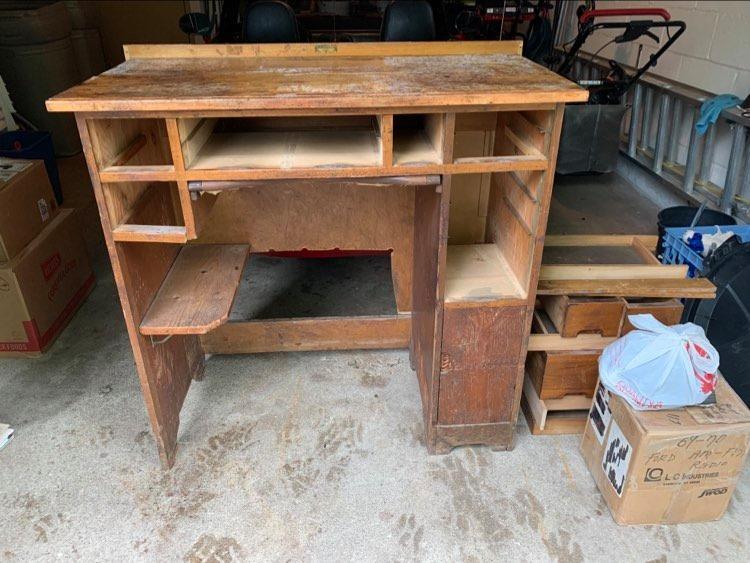
One of the things about my interest in time pieces is the long and rich history. so what better way to get a sense of it than to sit at a true watchmakers bench. Here is where it begins - all the draws are to the right. The shelf is not original and you can see the back has been cut out. The lower door doesn't look correct either. Most noticeable damage is that many of the joints need to be re-glued. I will start with giving it a good wash with wood cleaner. And here it is after a good scrubbing, See how the wood has already become lighter in color. - that board will be what I use to repair the back panel.
 1 point
 -
many thanks.....1 point
-
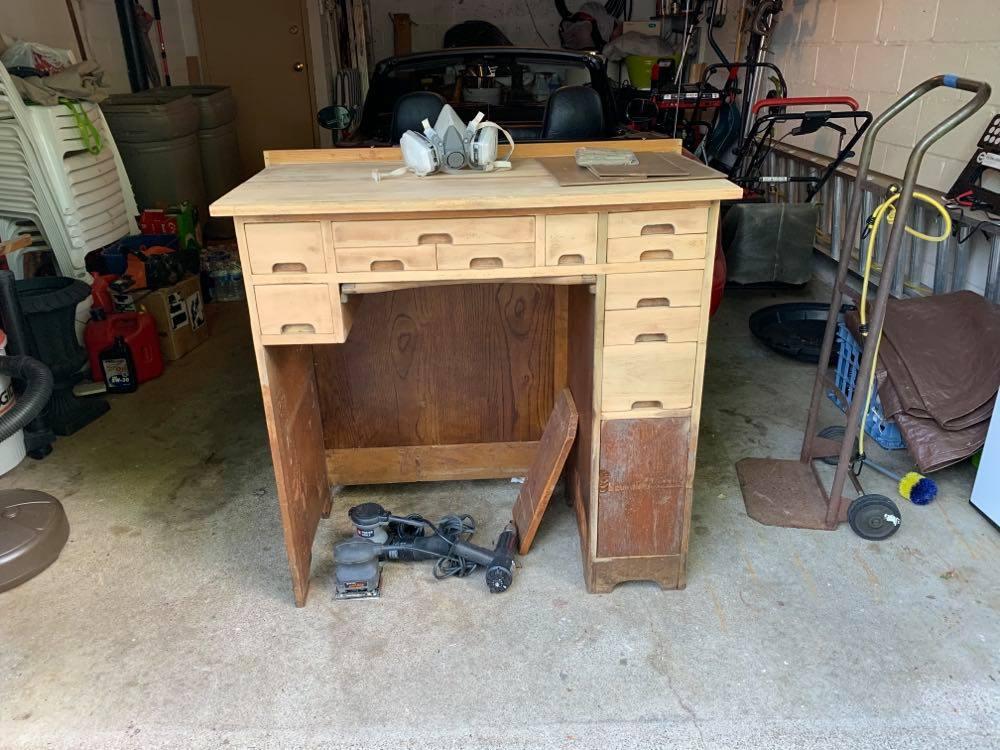
using a liquid stripper was moving super slow so I got more aggressive today with sanders. Much faster! Hopefully tomorrow is nice weather and I should be able to finish all the sanding. The wood will than be oil treated and waxed. Well that is the plan anyway
 1 point
 -
Thank you. This is exactly the thread I was looking for. I read it in January but lost the bookmark. I appreciate the software recommendations as well, looks like a productive weekend ahead!1 point
-
Also worth a read is this thread.1 point
-
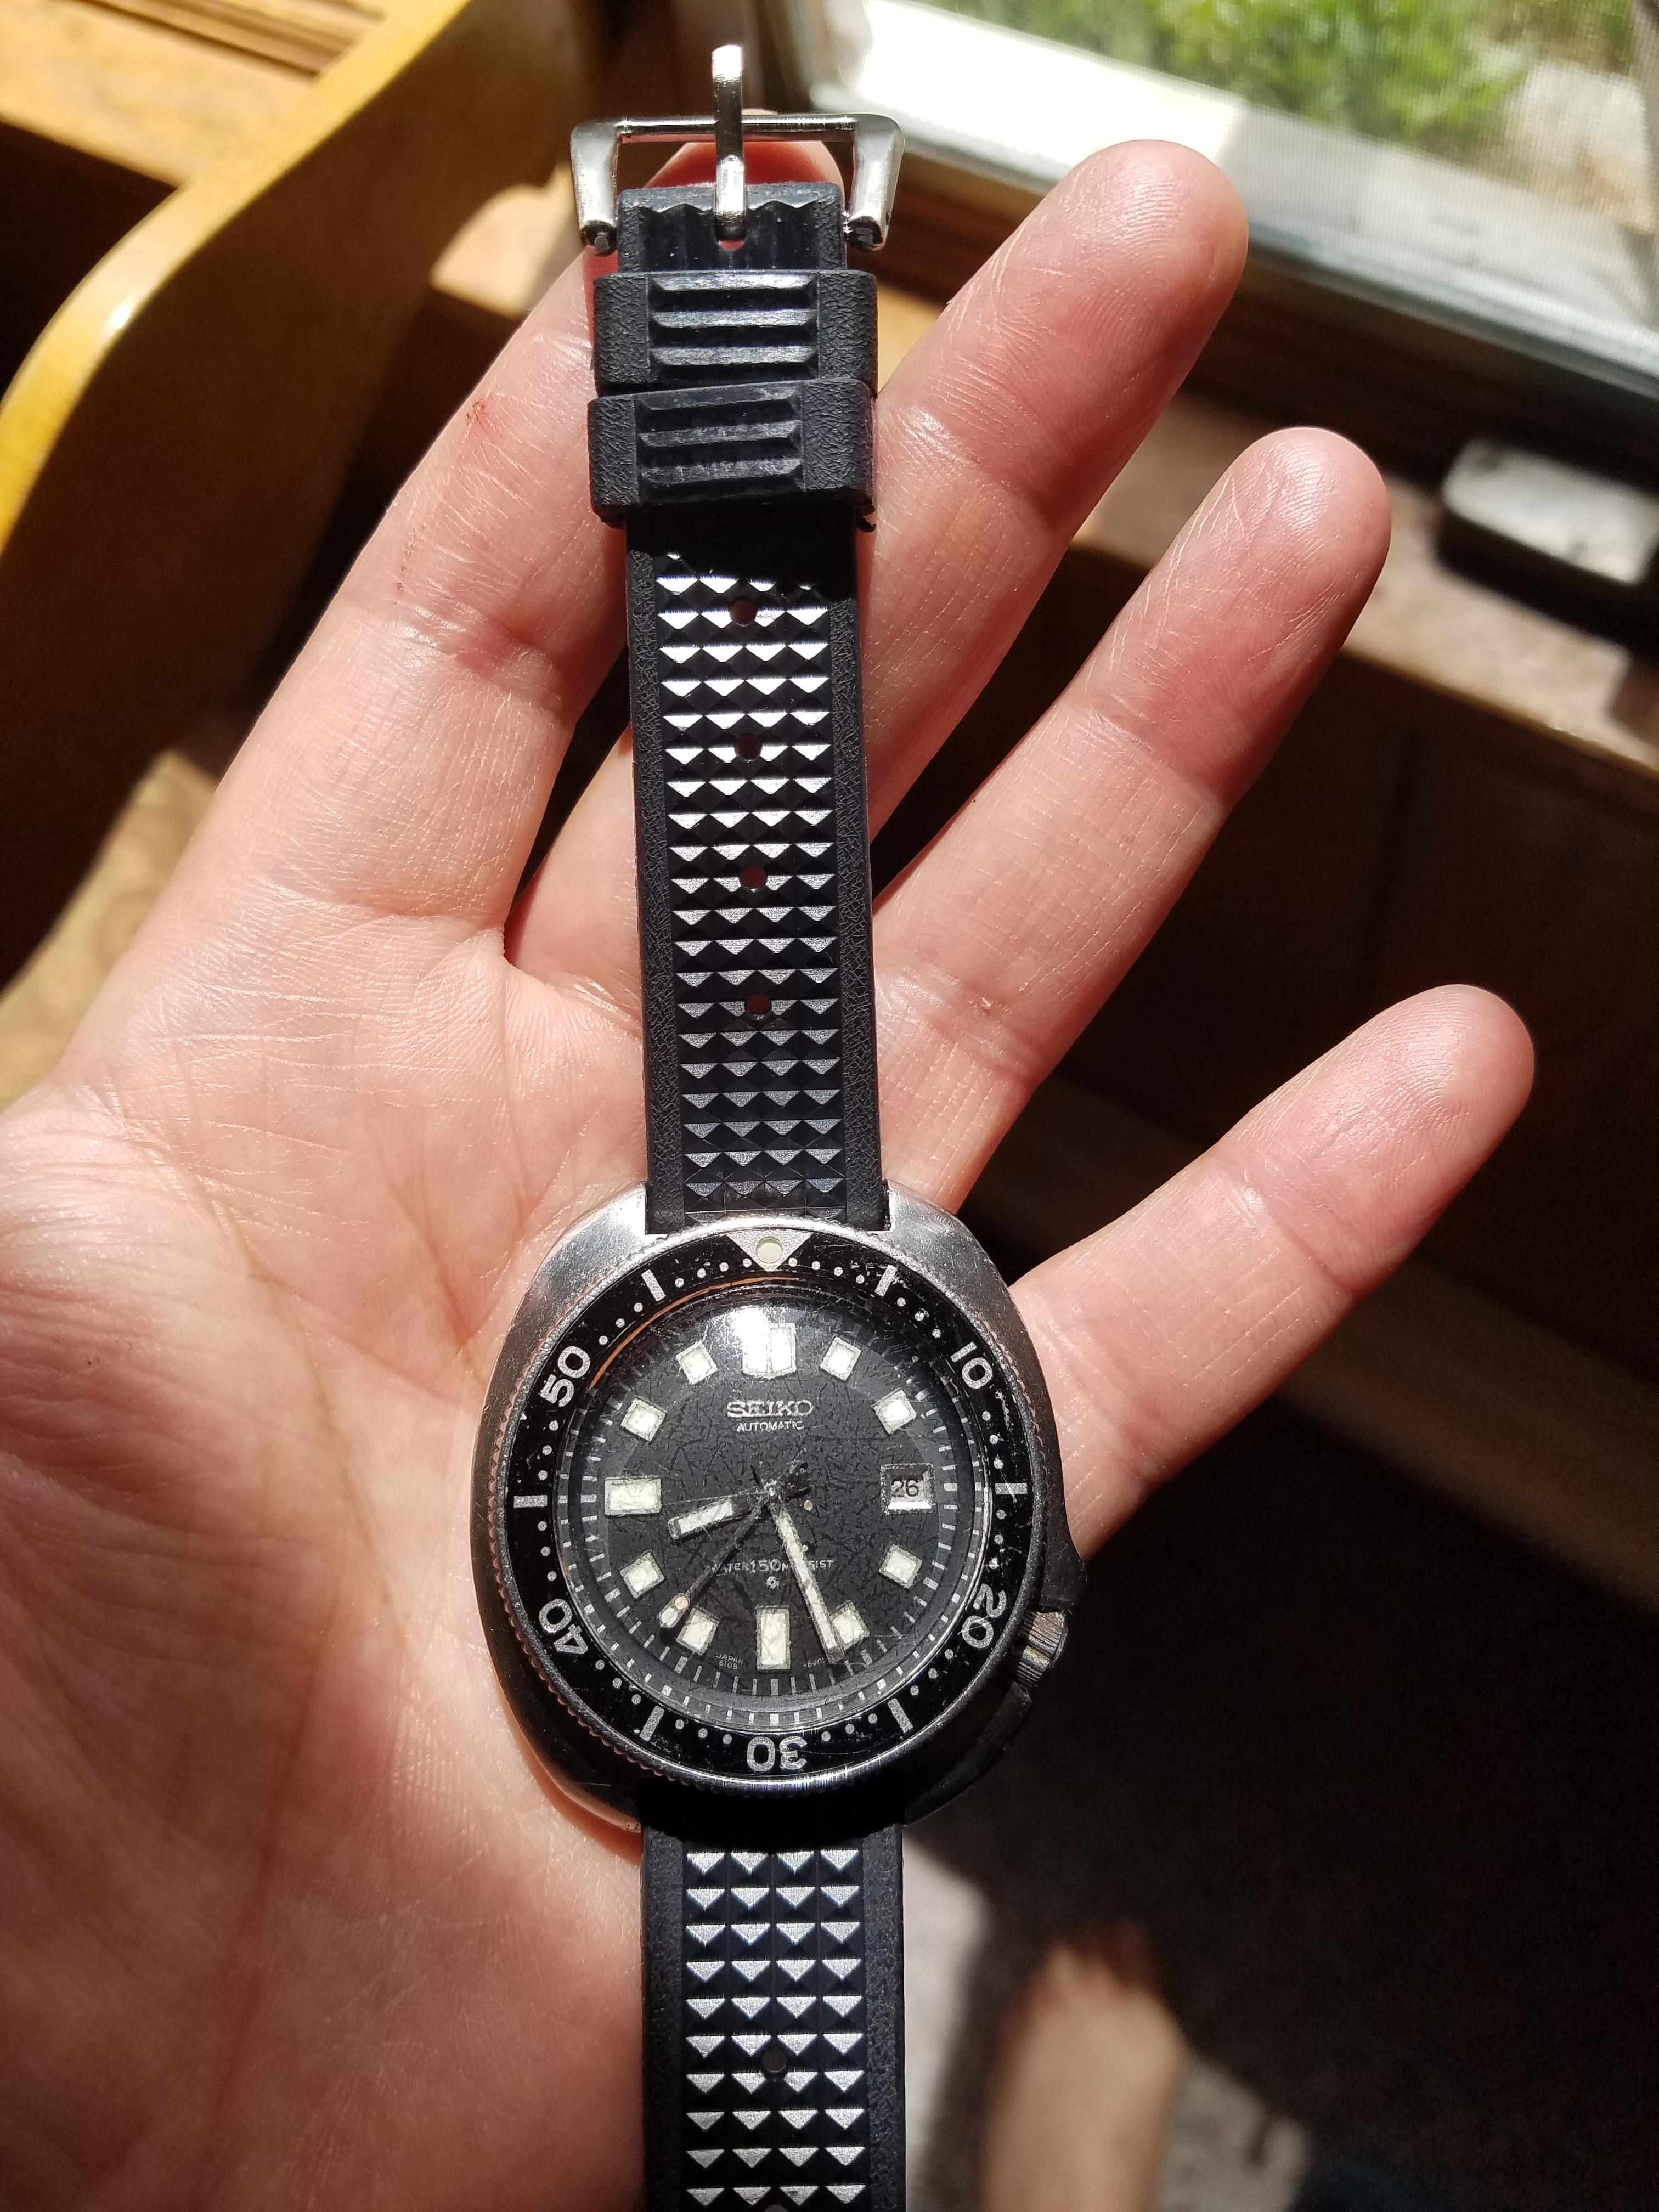
My 1971 Seiko 6105 - 8810. Just recieved new waffle straps in the mail and wanted to see what they look like. Not bad I must say.
 1 point
 -
1950 has that kind like the left . Sure it isn't from a 1950 . The 1950 is a no date. Therefore lower then the 1802. Or even a 1800/011 point
-
Inkscape -> https://inkscape.org/ The GNU Image Manipulation Program (GIMP). -> https://www.gimp.org/ Those would be my suggestions.1 point
-
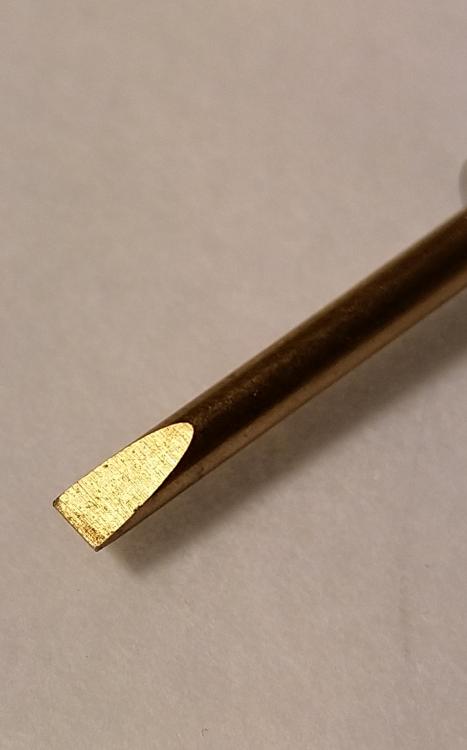
To me, the OP blade are not hollow ground. As such he'll not need to buy an expensive tool like that at this stage of the learning process. Regards NAD Sent from my moto g(6) play using Tapatalk1 point
-
Yes I see now the spring just lifted up, as you see Rodico is da shit when working with this type of winders1 point
-
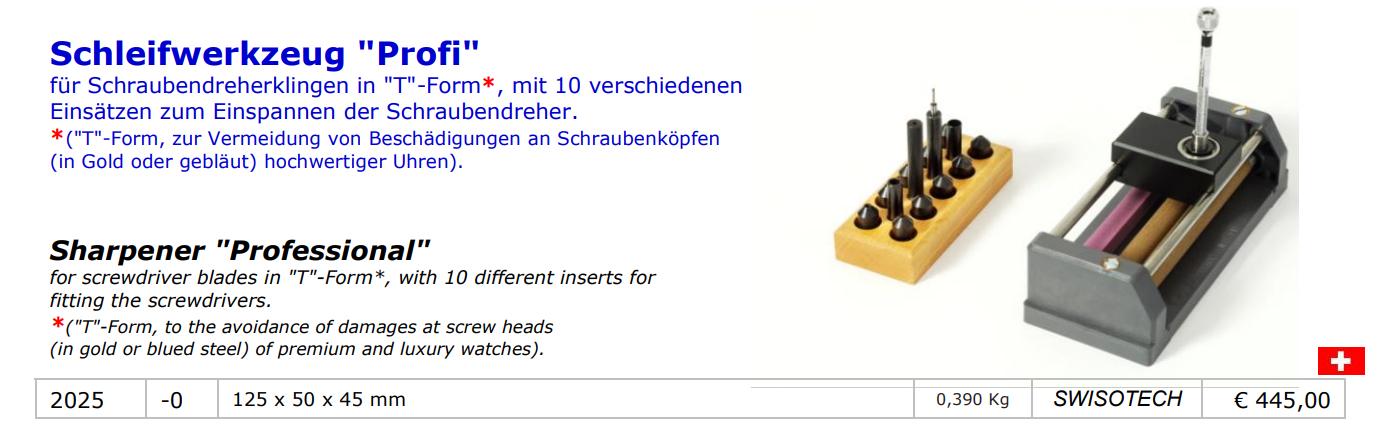
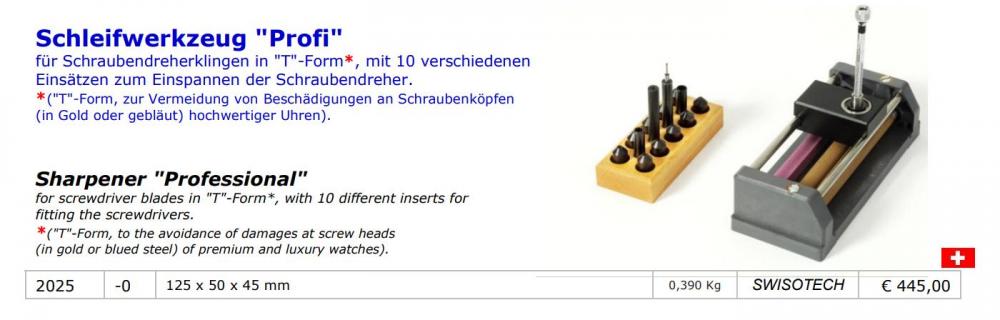
The first blade is for sure not shapened with a hollow shape, but it has a to hardened tip with brittle metal, one can se it flaking away which isn't good. In my book to get a really nice surface one can use both of these sharpeners with the horotech style one just must get it to fit good in the toolholder. Swisstech makes a similar one with a bunch of inserts so you always will get the perfect result, and fast, but always with quality the price is a downside. A screwdriver with a softer tip, like the one below made of berylium is almost impossible to get perfect without a good sharpening tool. And in the end it's like with racing with cars, a good car will take you a long way but it's the man behind the screwdriver that makes the difference
 1 point
 -
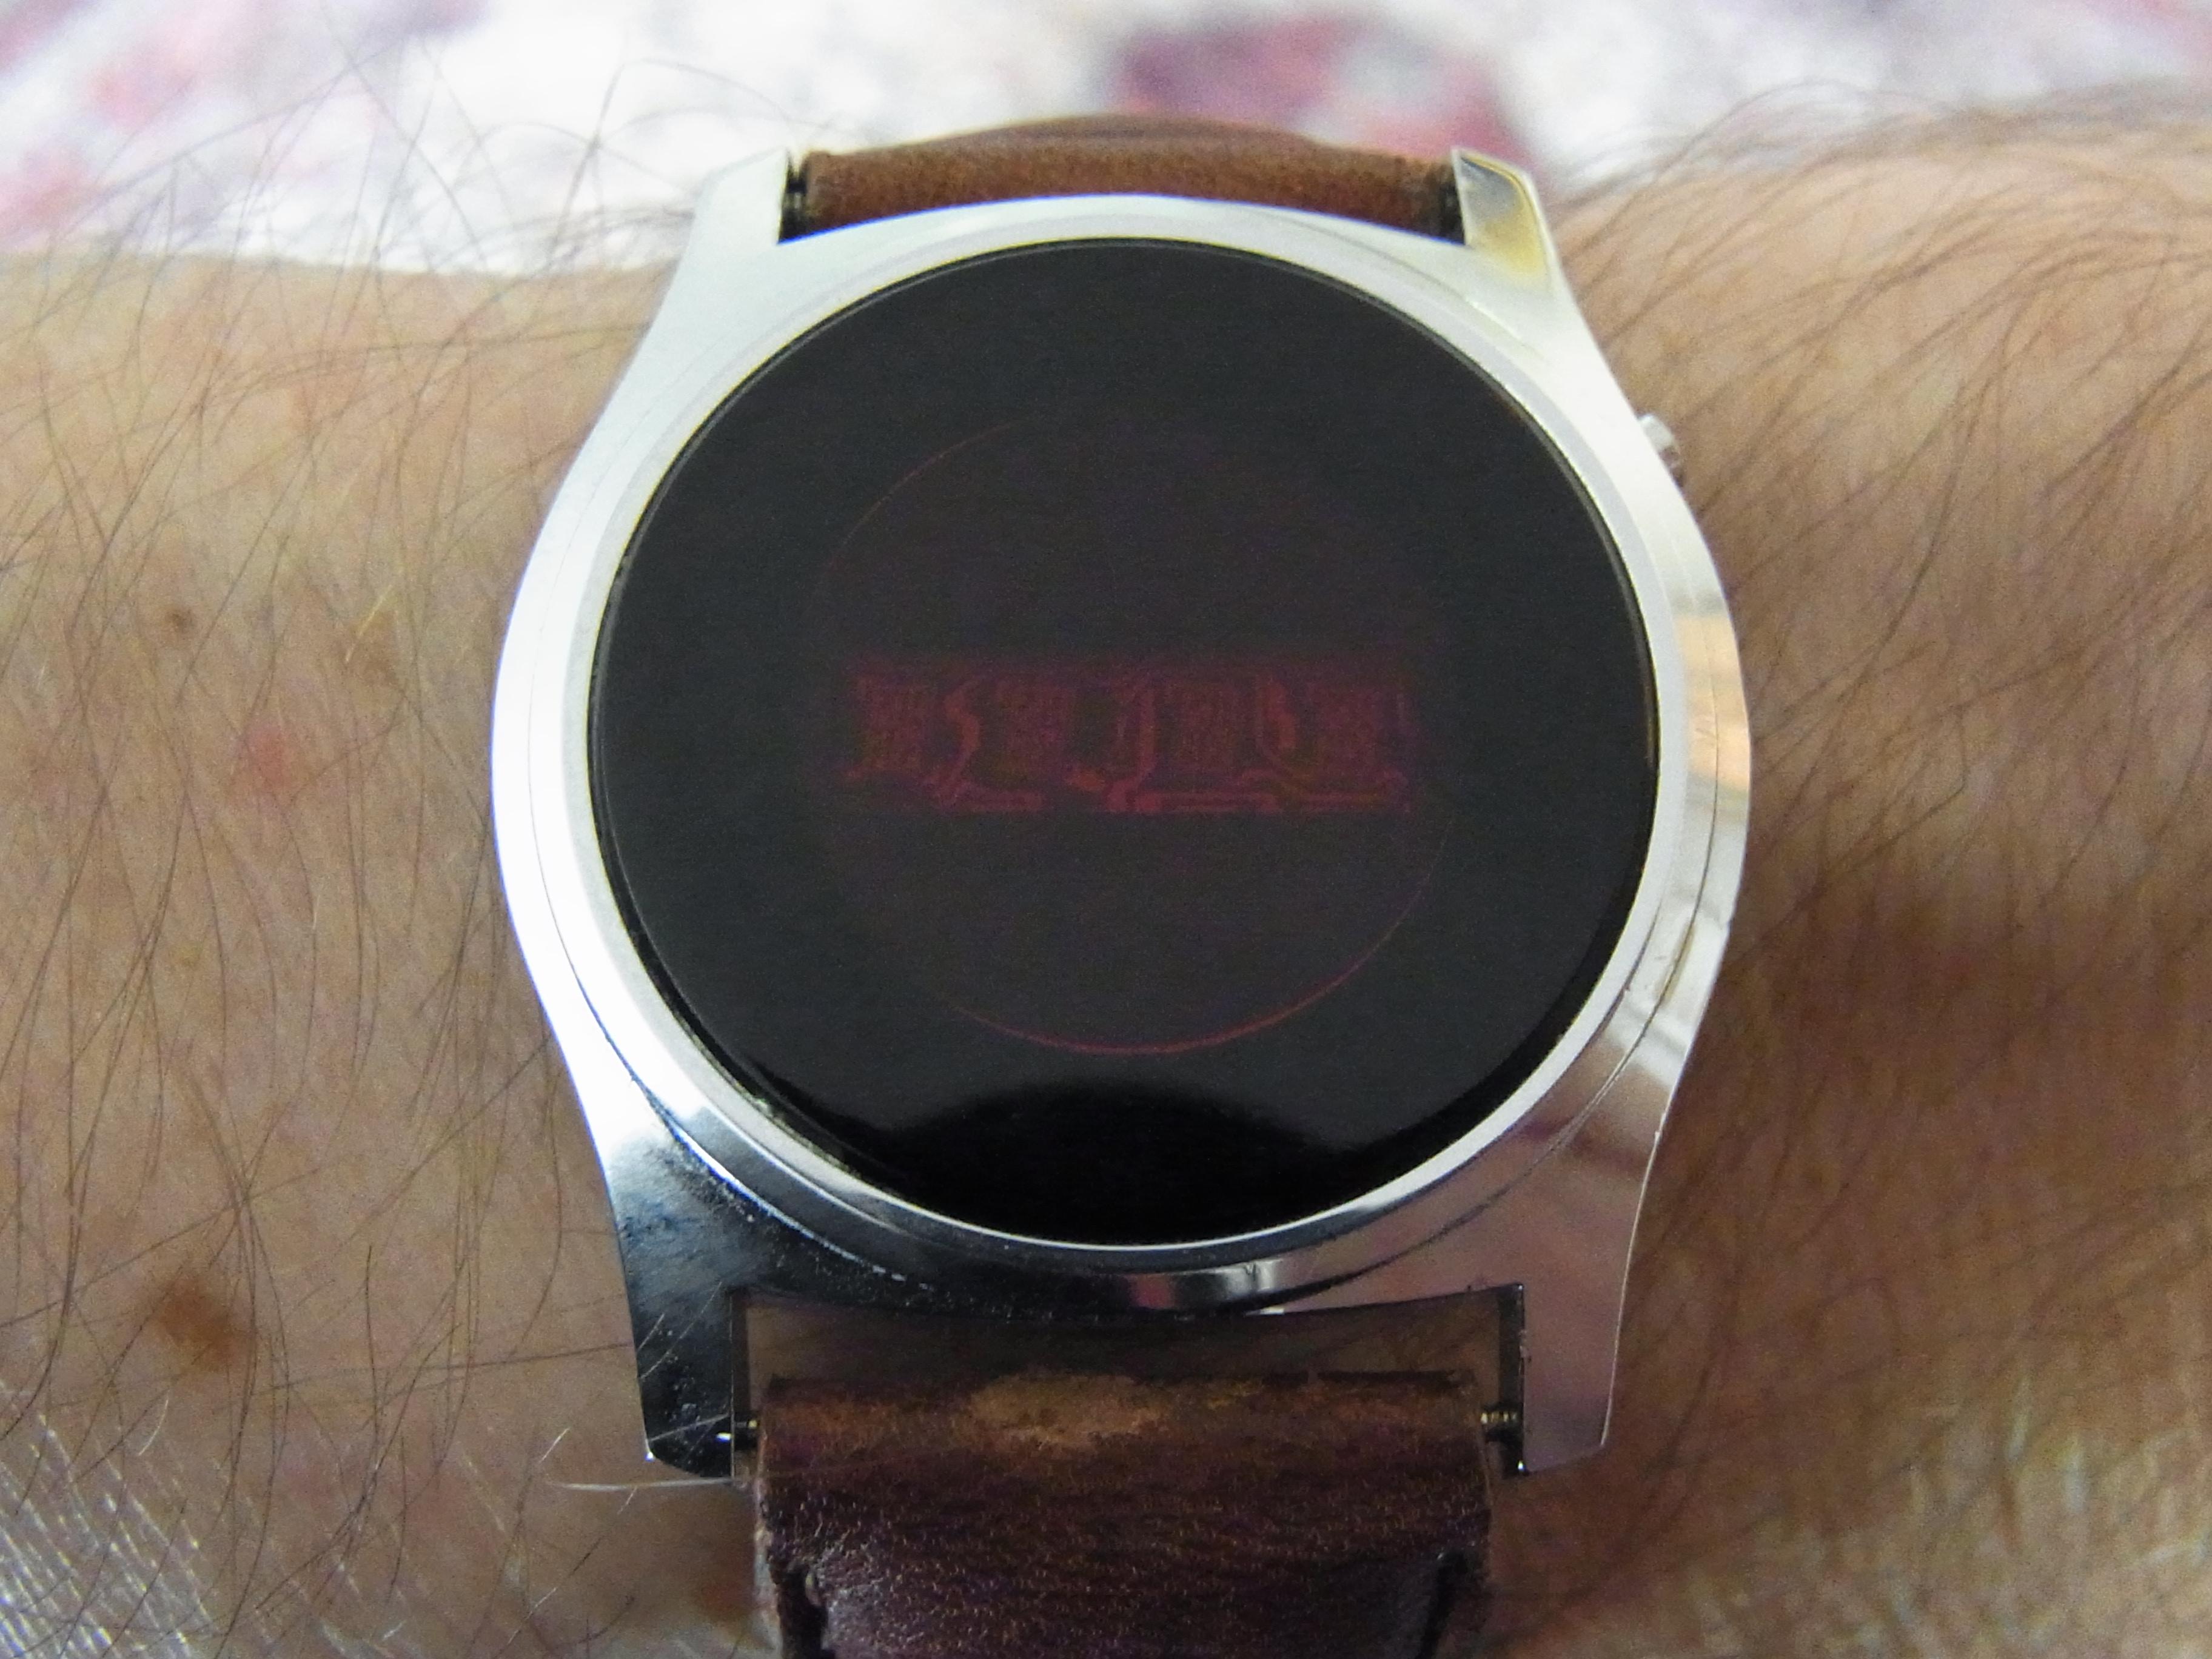
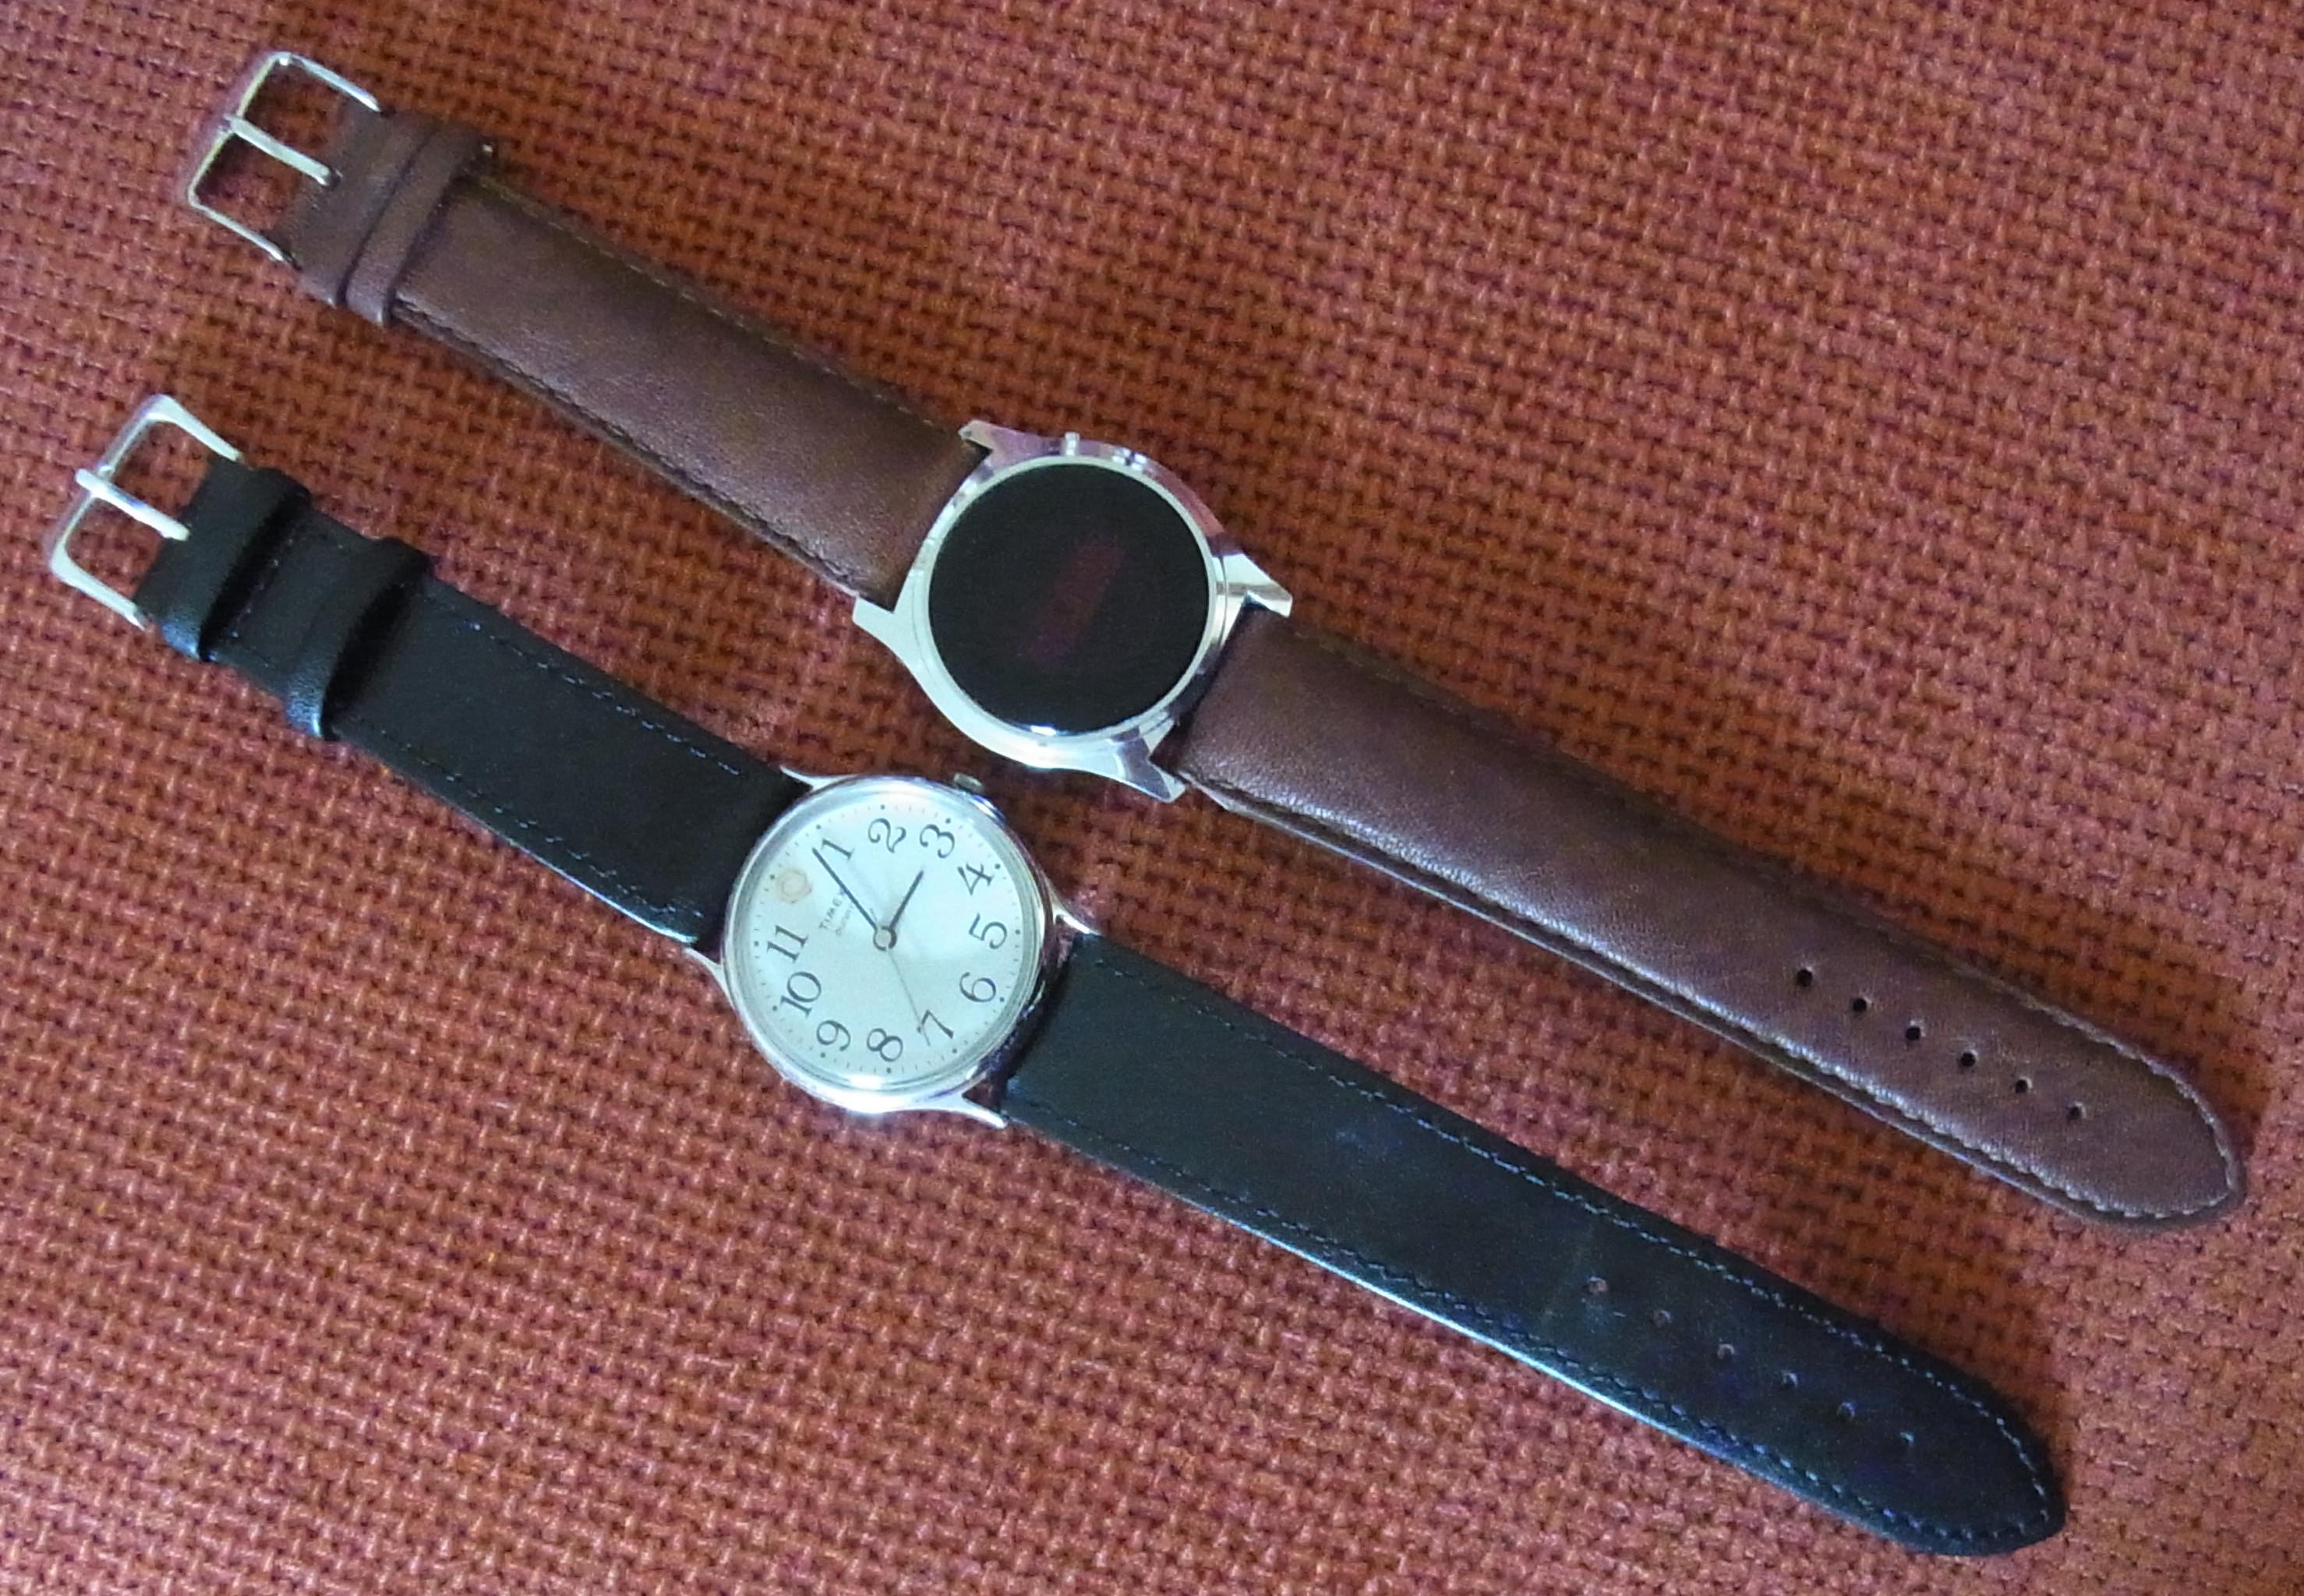
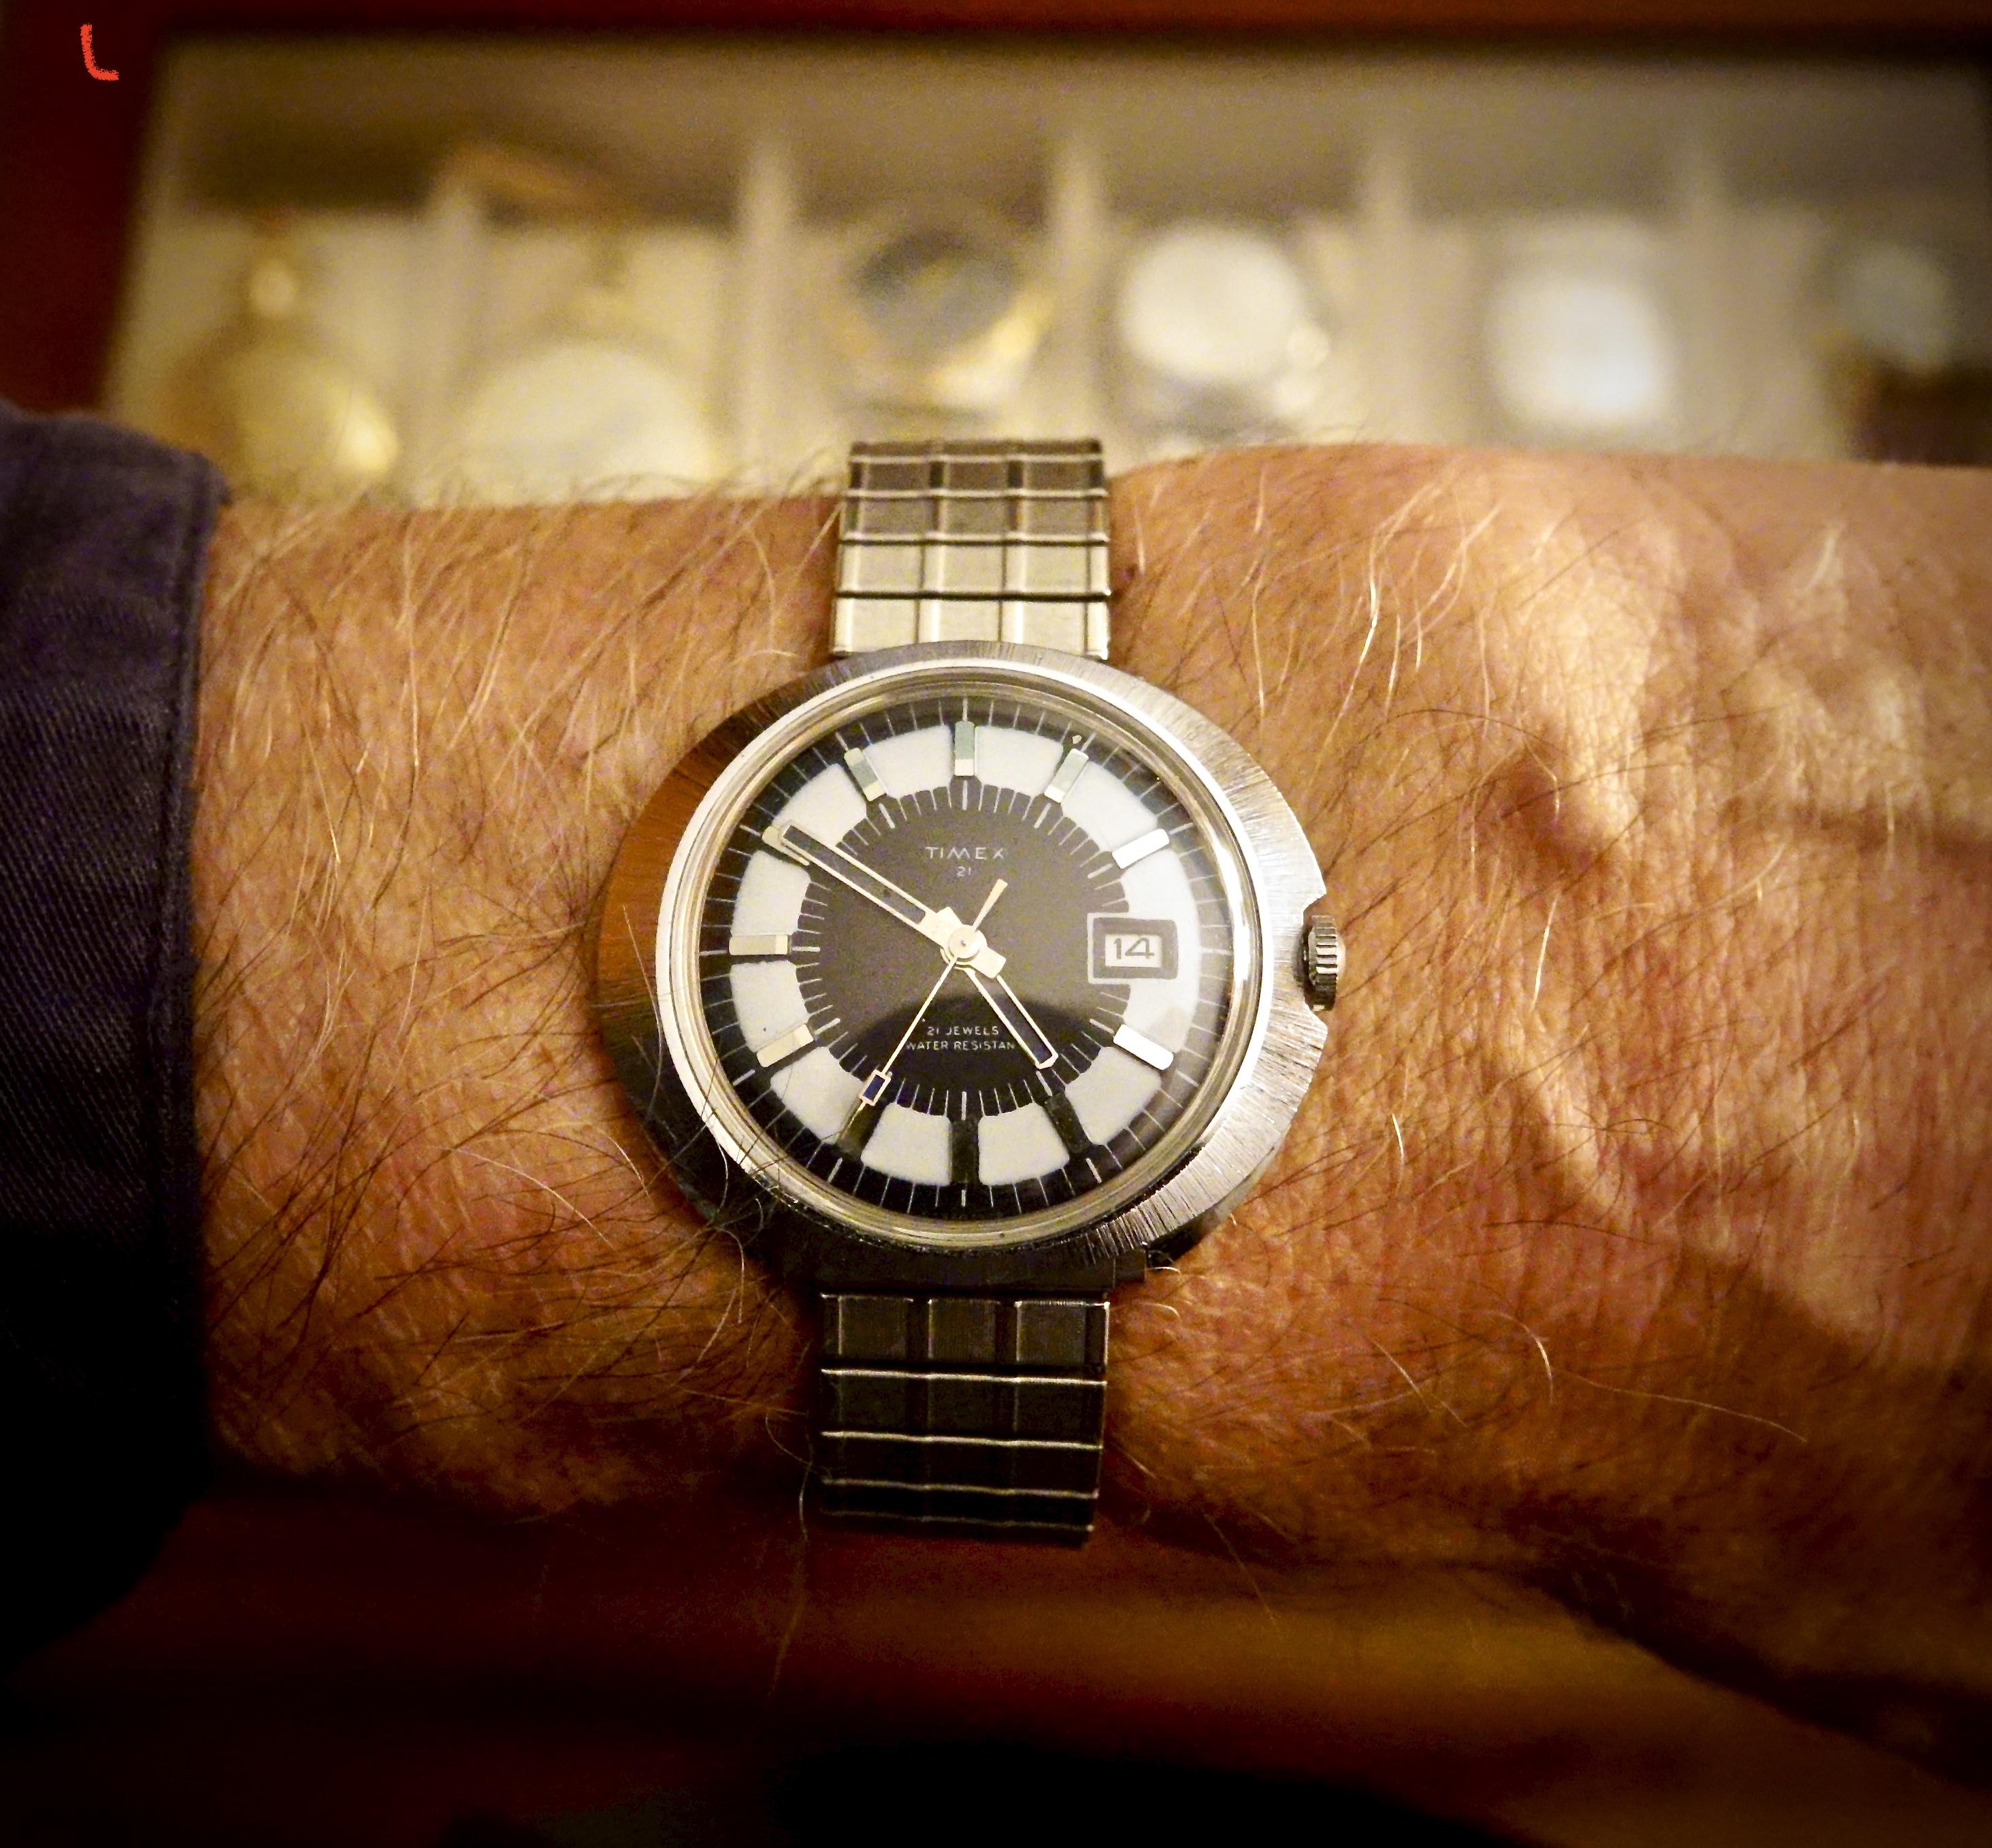
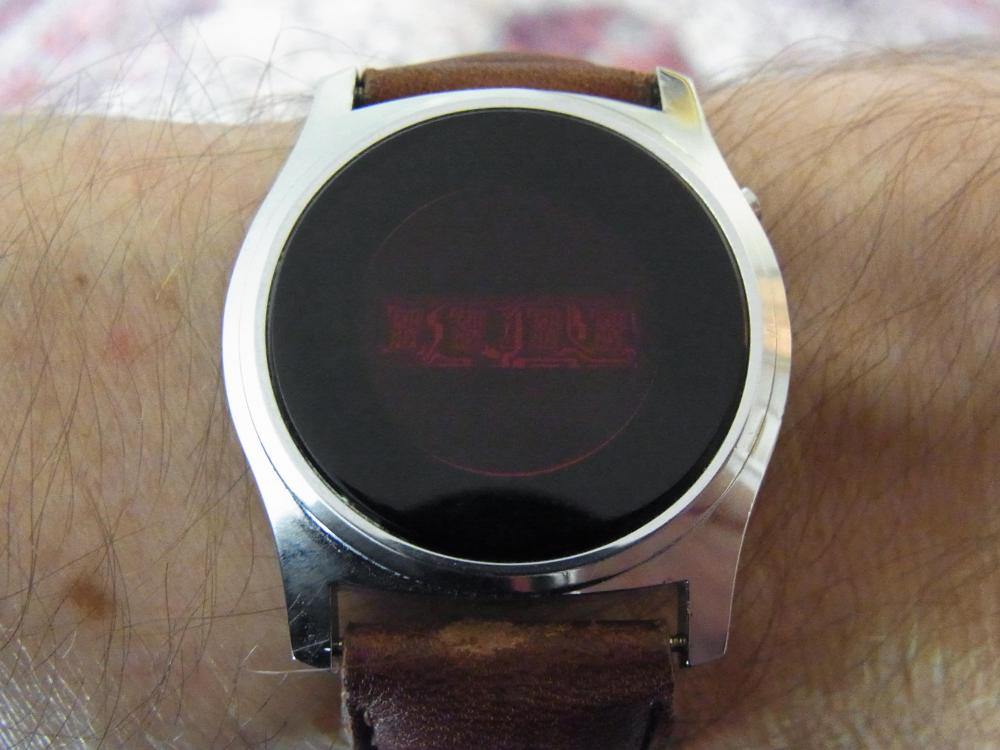
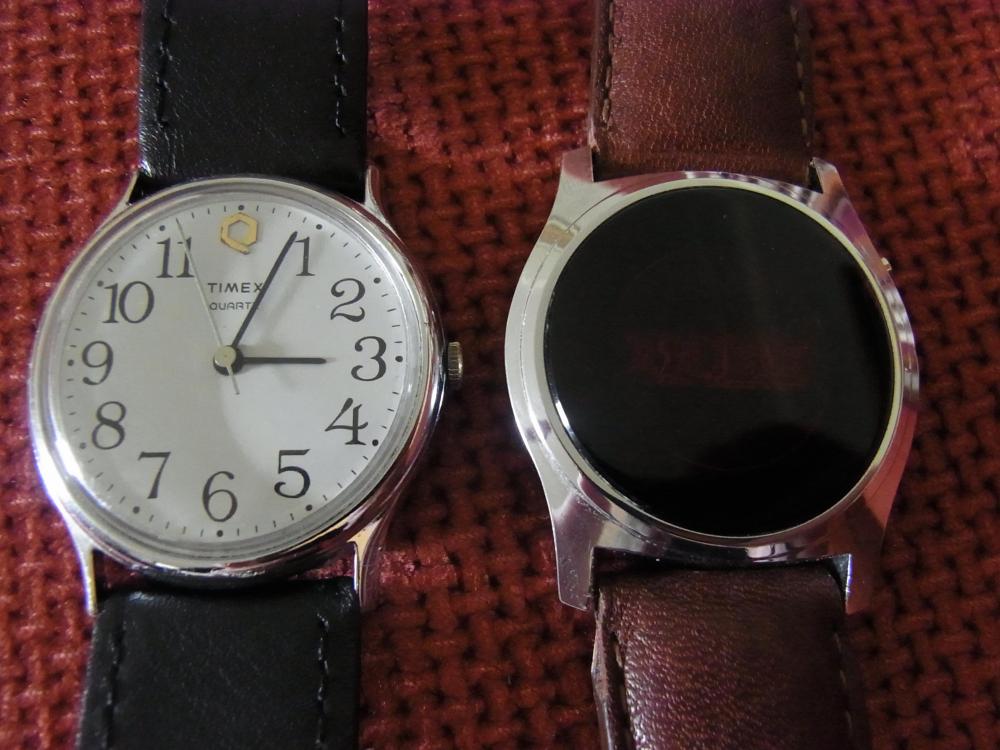
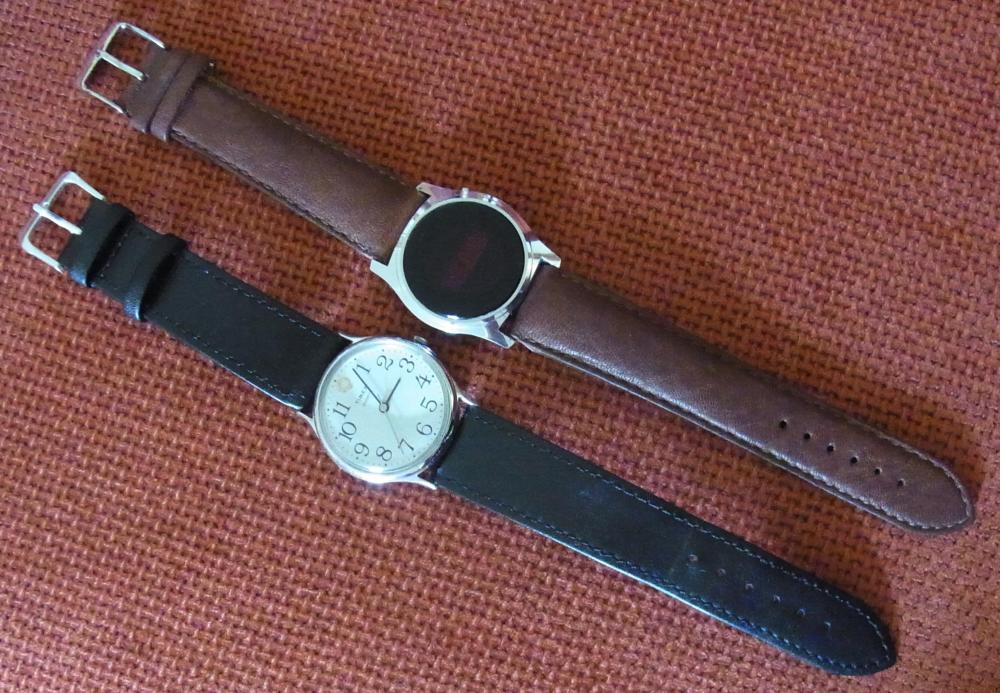
I'm waiting for a 20mm Milanese bracelet for the Timex LED I showed recently. This watch for all its simplicity is actually quite striking, and both fun and enjoyable to wear. In the meantime I popped it on a nice padded chestnut leather band, which is so comfy I may use the Milanese for something else.
 1 point
 -
Little bit scratched1 point
-
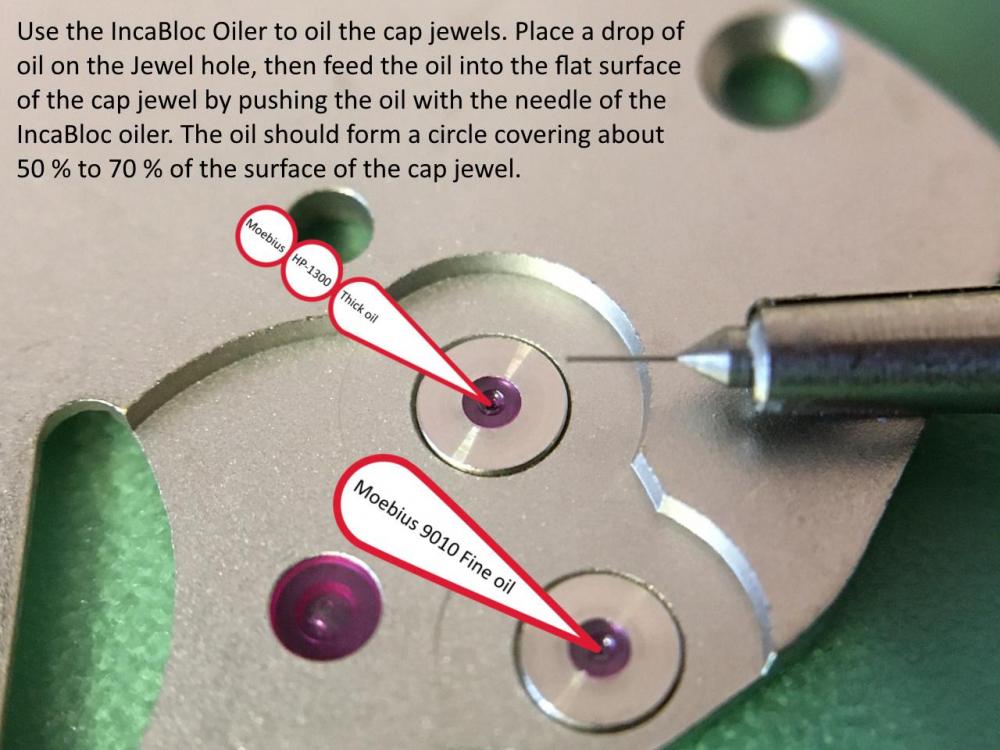
How do you get enough epilame on an oiler for it to not all evaporate away while the oiler makes its trip to the intended part? Also I dont recommend leaving any amount of epilame reserve in open air for as long as you can manage, unless you can get plenty of it for cheap or dont mind evaporating money. I use a small needle syringe for application. I clean the syringe, draw from the bottle the smallest amount I can as fast as I can and close the bottle quickly. The epilame doesnt evaporate so quickly when inside the syringe so I can take my time to precisely apply.1 point
-
Great, I check the min train birdge for sign of gear rubbing on it, you can shim the bridge or attack with sand paper or a flat face chisel, whatever approach that suits you to eliminate the rubbing. Good luck.1 point
-
It looks to run as good as when canon pinion removed. The watch now starts with a couple of winds.1 point
-
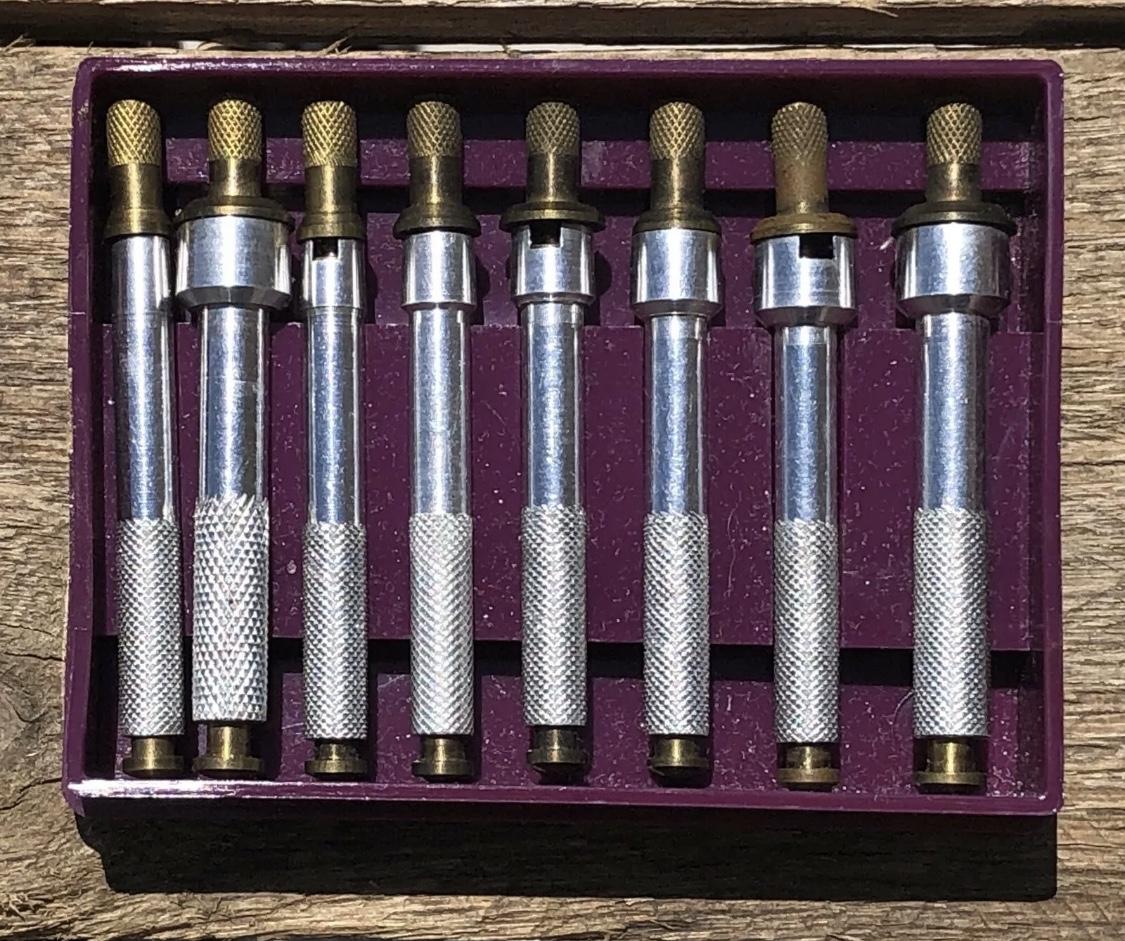
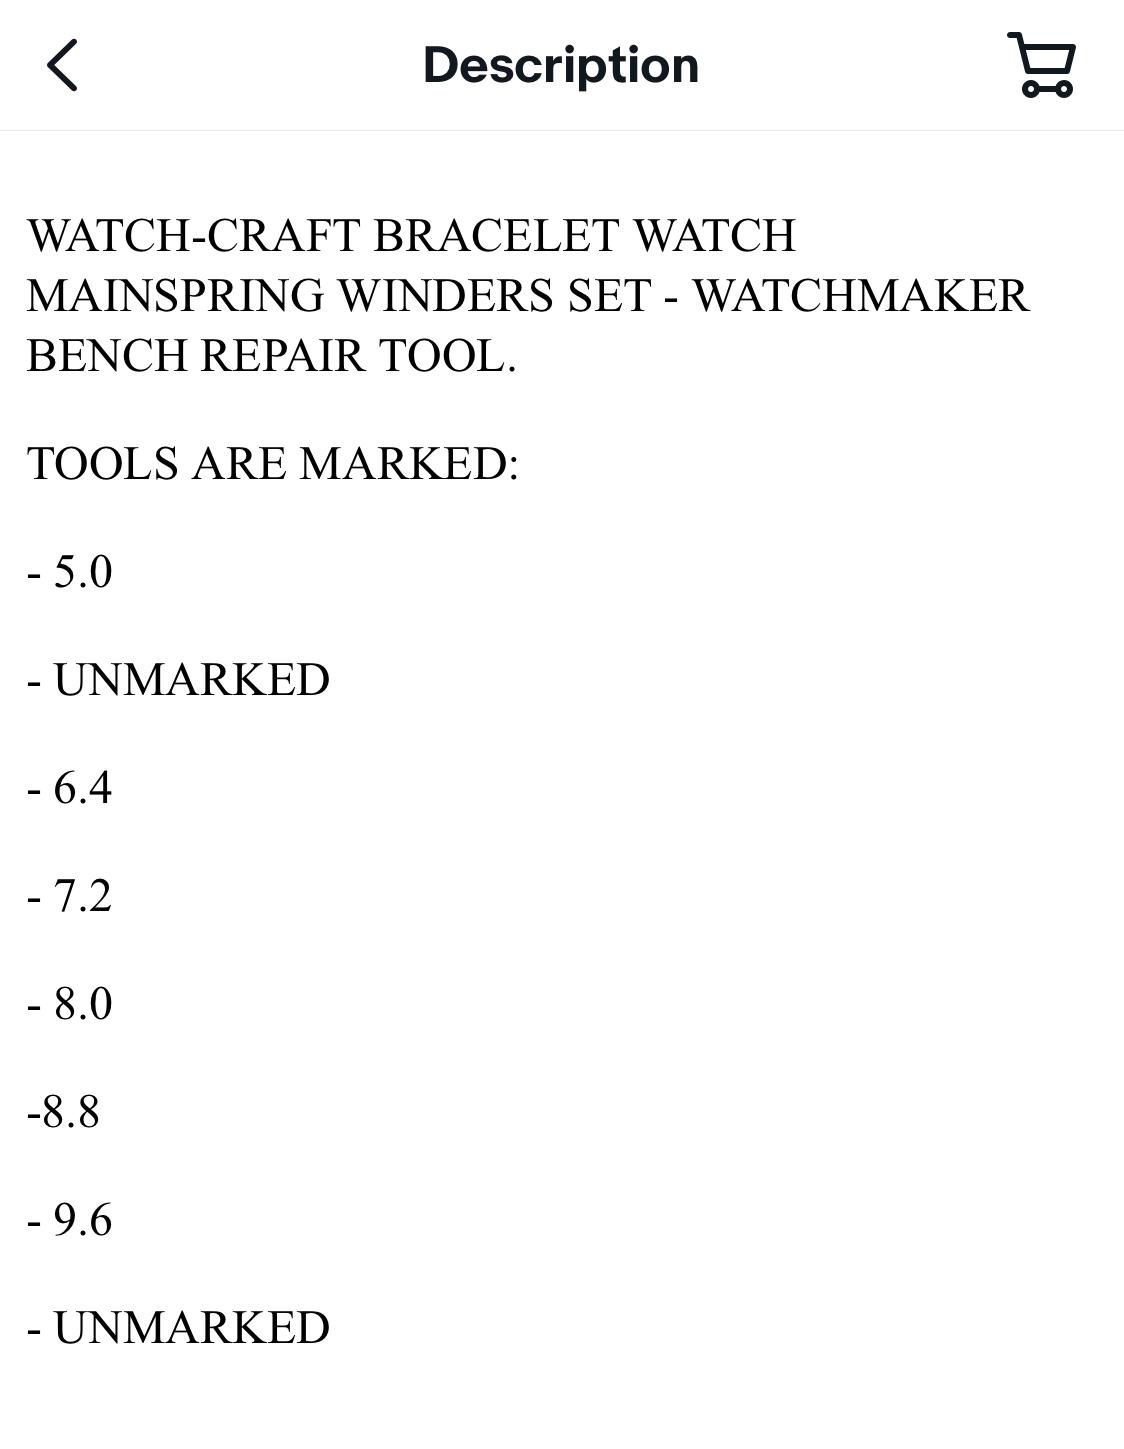
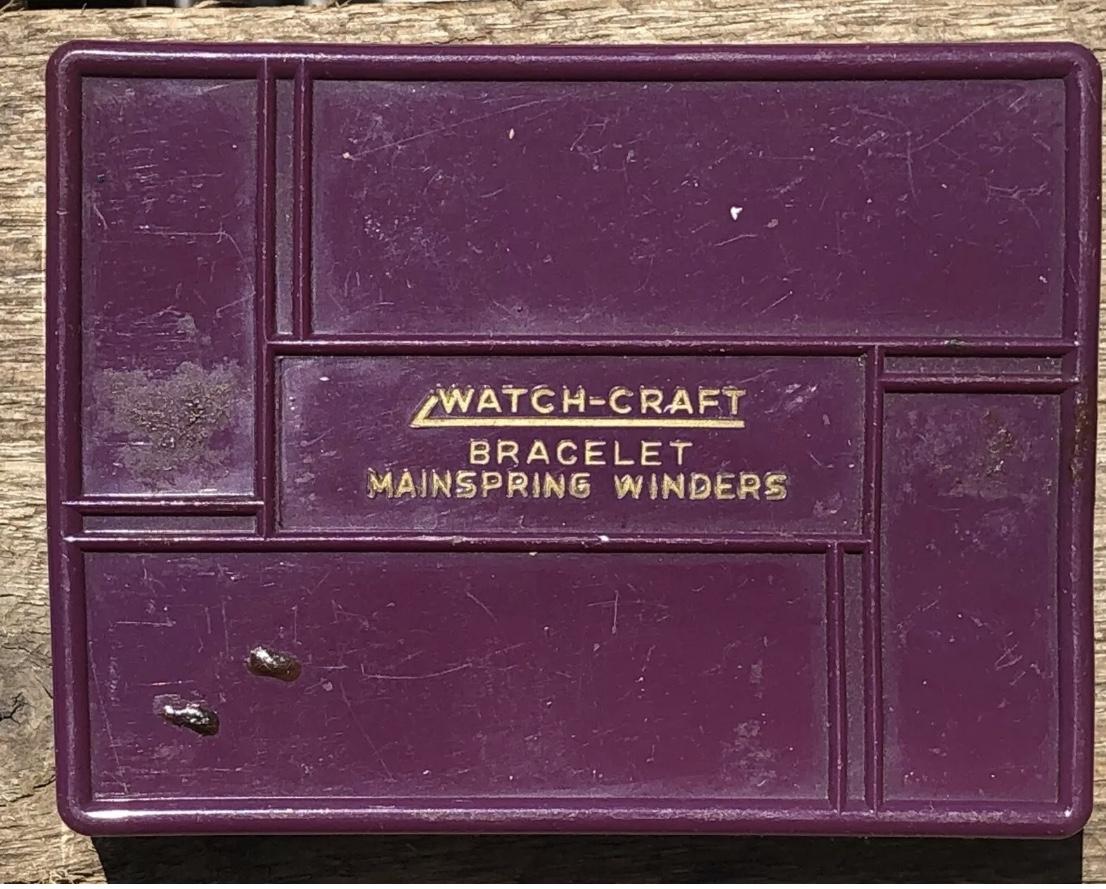
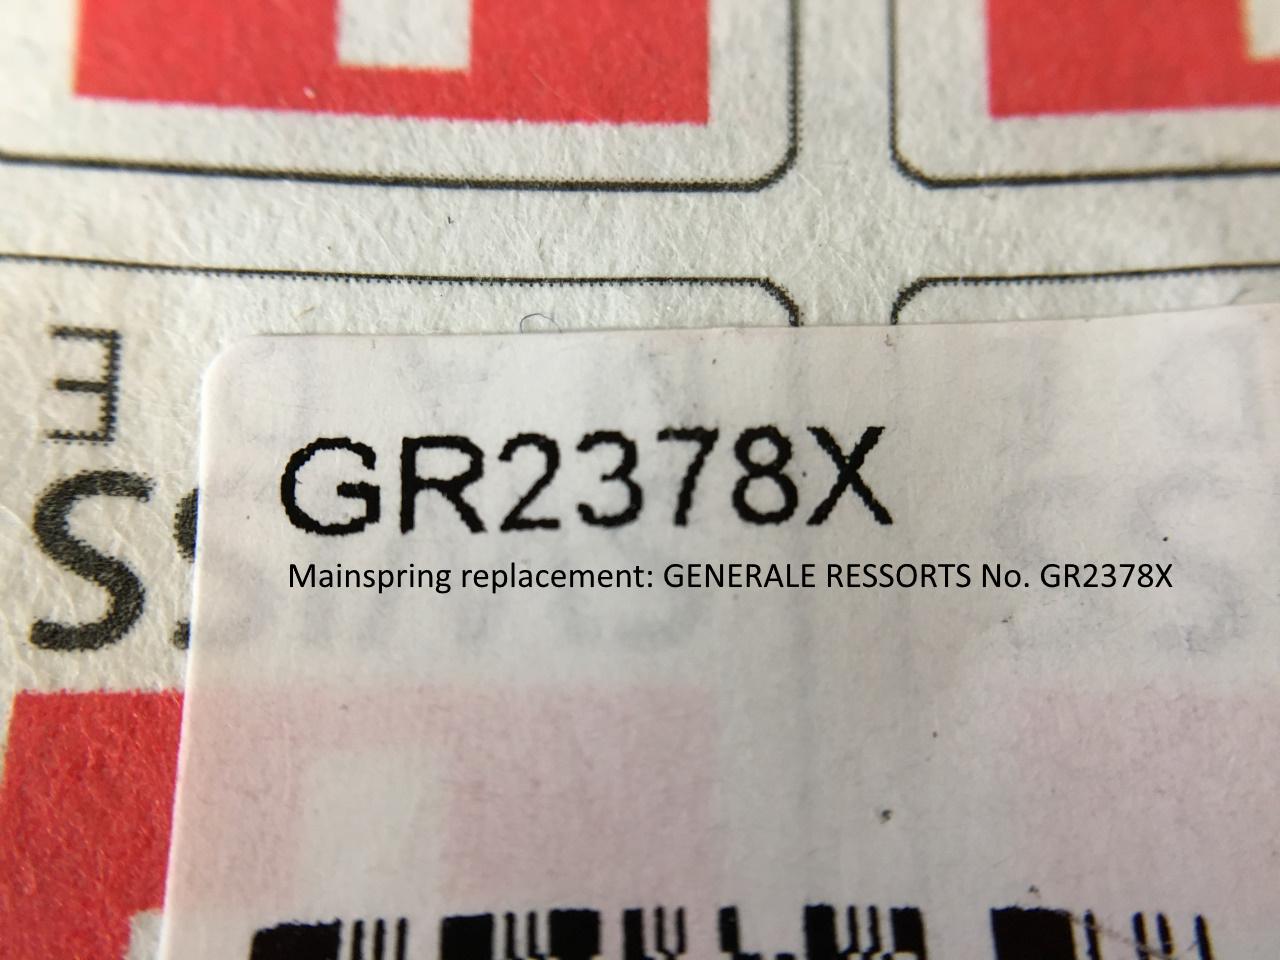
Made an offer that was accepted on this mainspring winder set. I have been researching and asking questions so hopefully I got a decent set? There are so many options and many are quite expensive- I didn’t want to lay out hundreds of dollars only to get the wrong sizes...If I made an error it is not a costly one
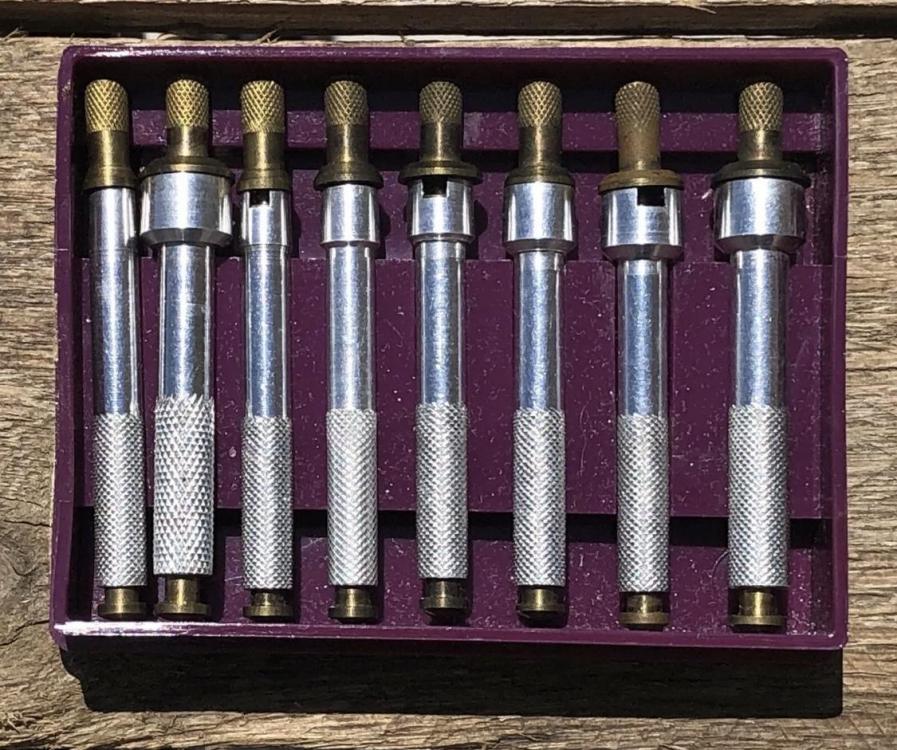
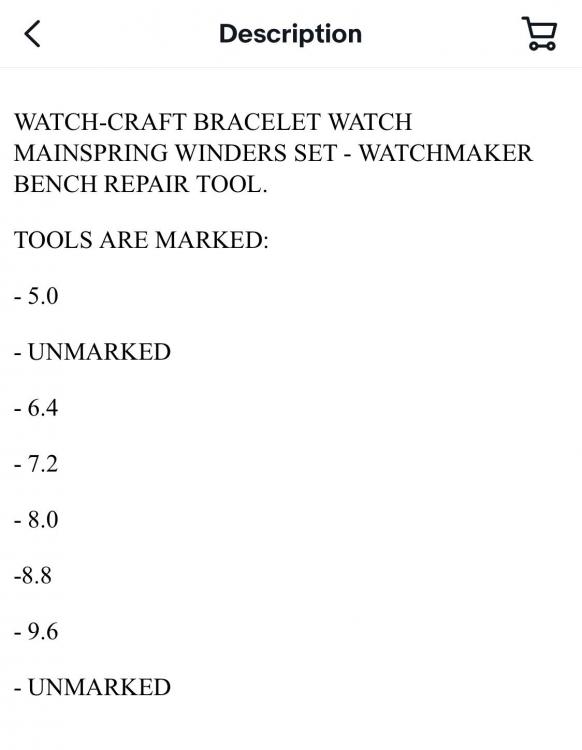
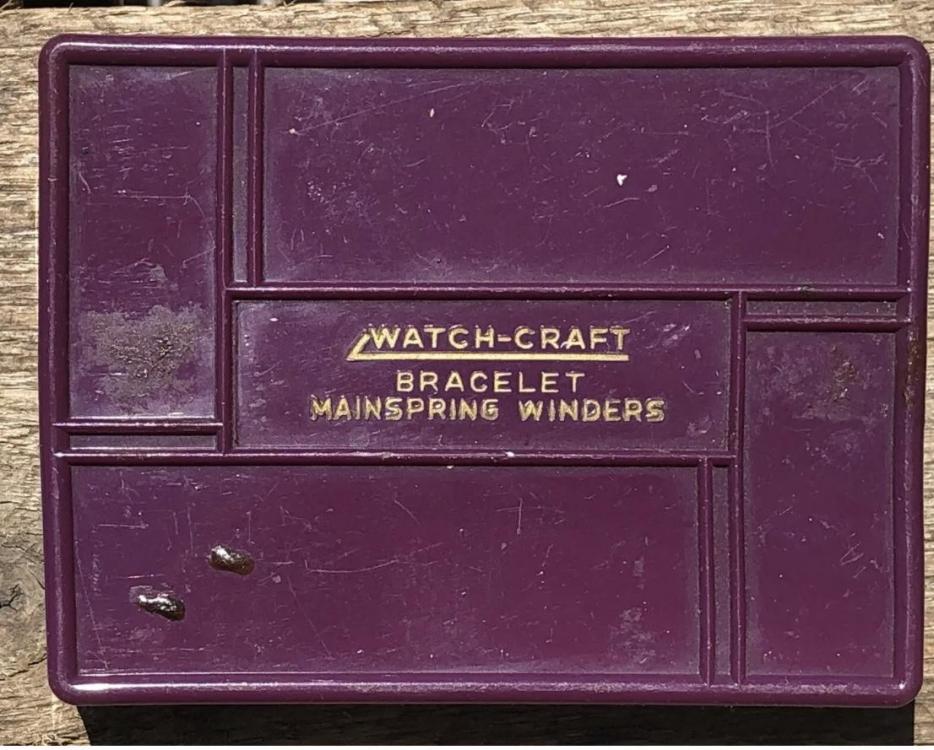 1 point
 -
Hi Mo.... Look what arrived today....Thanks for the heads-up. GB
 1 point
 -
Could be the bridge on minute train pushing down on gears, just to test I loosen the screws on the bridge.1 point
-
here's a picture of me wearing it, I replaced the crystal as well. I couldn't really see what kind of crystal it was so I ordered standard ones (I took three sizes close to my measurements just in case my caliper was not accurate). When I managed to remove the cracked old one I noticed it was fitted with a friction ring :-/ oh well, I inserted the closest fitting crystal I had and used GS crystal cement to glue it into place. I'm not great at that stuff but I guess it turned out OK.
 1 point
 -
Looks good to me ! well done Tom.1 point
-
The interesting bit is trying to print white on a black dial. Most modern print methods rely on using dark pigments on a white background (white paper). There are some options which would allow white, gold, silver etc to be printed on a clear waterslide background, but you would need to do some experiments to see how to do this in practice. I would suggest you look at laser toner printing and heat transfer films which bond a pigment on to the toner using heat. There are a couple of dial printing threads on this forum that you might like to explore.1 point
-
it is not so much the cost but more of the reward to know 'you did it'. of course now you will want to built another and another1 point
-
A nice job very tidy. As far as "was it worth it", In my estimation YES you started knowing very little and now have a better understanding of watch anatomy. In terms of self satisfaction and accomplishment well worth it and you should rightly be proud of your achievement so a resounding WELL DONE You want your name printing on the dial where the normal logo goes as this is a first.1 point
-
An Elgin with a Waltham dial?
 1 point
 -
Nice and simple. 1909 Elgin 165 in a case that looks to be from the 30s going off the chrome finish.1 point
-
Would have thought that THIS ONE (21 x 16, about 0.010" off all four sides to fit) would have been ideal... They state 'rough edges, file to fit'....1 point
-
What about warming and forming an oversize blank, then cutting to size?1 point
-
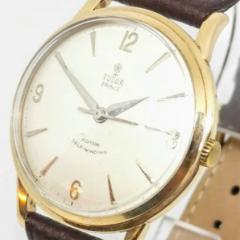
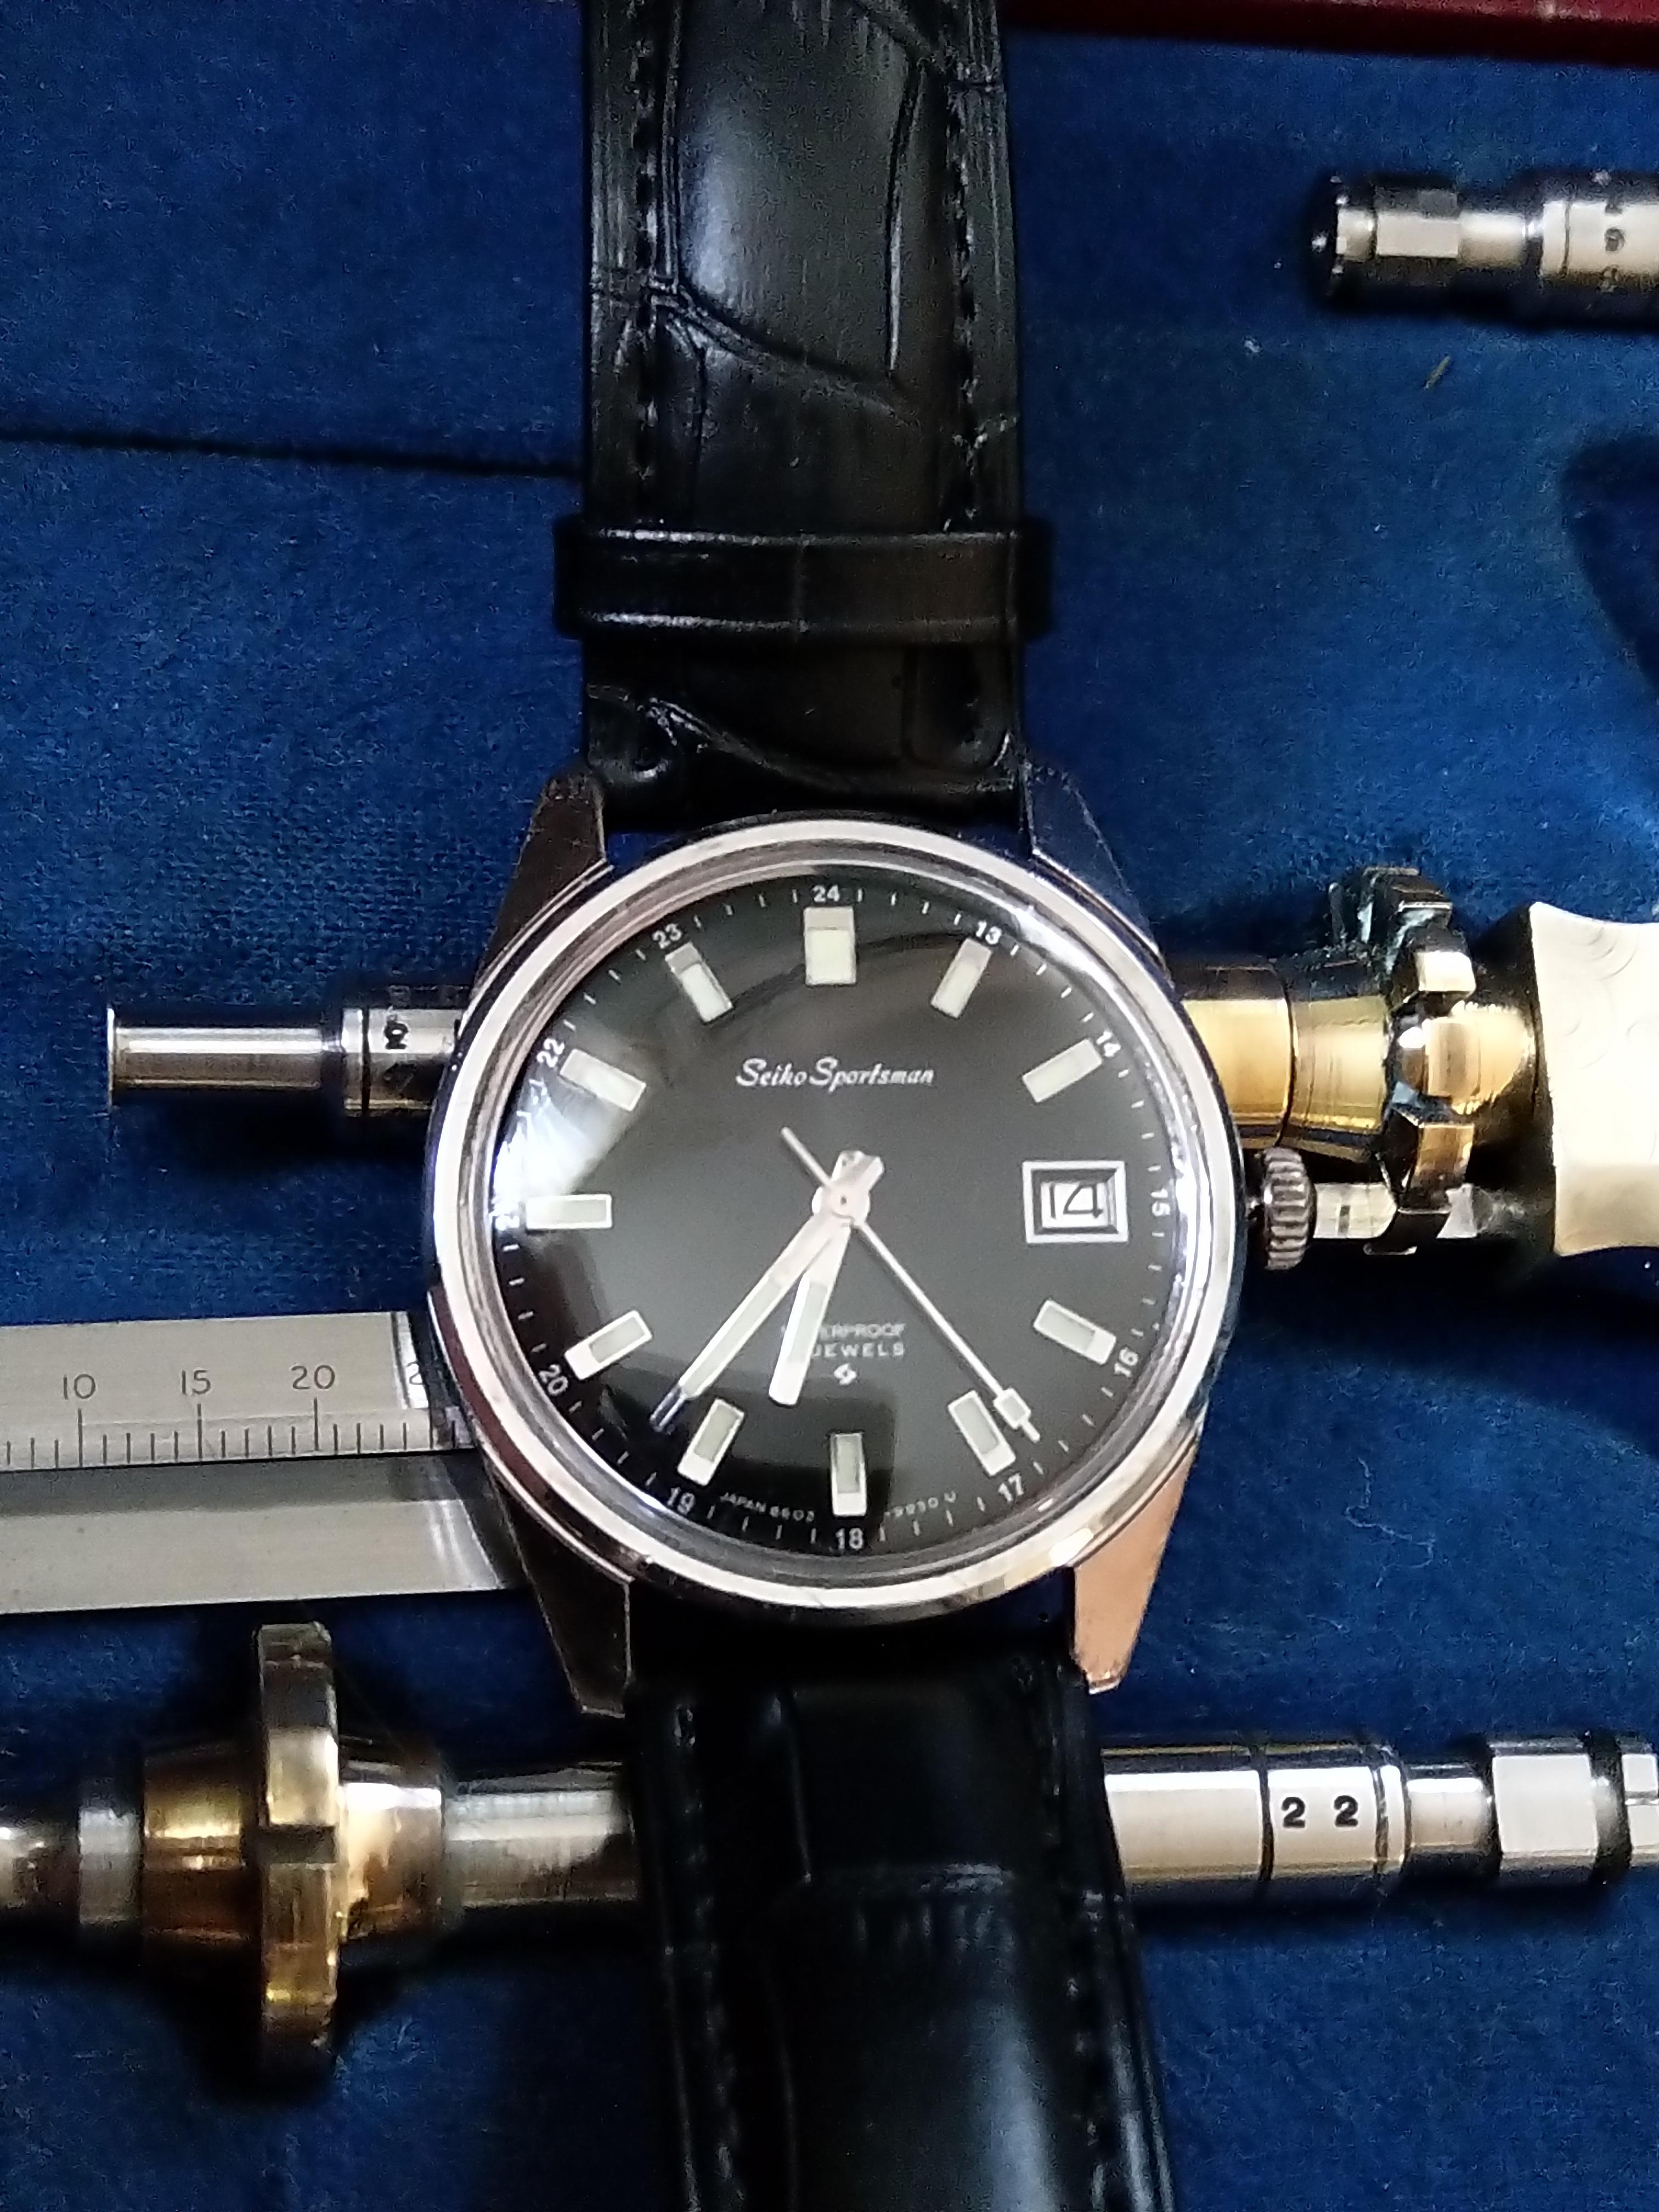
Todays Cert... Naah, Why not pop some Asian bling on the wrist. A 1968 Seiko Sportsman 6602 whith a whooping dark black dial..
 1 point
 -
how does the watch run if the canon pinion is on but the minute wheel is removed?1 point
-
Now when you got the trigger finger in shape you need to read and learn about the next find, I too was looking at that one until I realized i already had a couple. Here you go.. the world is full of treassures ..seitz.pdf1 point
-
The "flat" is the flatness of the rim of the balance wheel. When the pivot is straight the balance will turn with no visible high or low area of the rim. I personally prefer straightening pivots in the lathe with nickel tweezers that have been heated in an alcohol flame until almost too warm to hold. This tool is excellent when used as a gage for very small pivots, as the usual Seitz gages are either in 0.01mm steps, or 0.005mm. When dealing with really small stuff the 0.0025mm steps are great. I don't remember if I mentioned this in another thread on these, but I know a guy who put his in the ultrasonic and it ate into the metal and all the jewels fell out. The flat Seitz gages are (I think) aluminum, these are some other castable alloy which apparently doesn't like certain cleaners.1 point
-
probably too tight, excessive tightening in effect integrates canon and the arbour into one piece. Canon pinion is suppose to turn on the arbour it is mounted on, to set the time. first thing to do in case you haven't already is to put some oil in the canon and turn . If no good you would need to broach it.1 point
-
"The movable ruler is only used to control the flat of the balance : it must not be used to press on the rim or on the top pivot." You drop the wheel with the bent pivot into progressively smaller jewels and lightly straighten it in each one until you're back to the size of the pivot itself. Got it. I'm not sure I understand what the "movable ruler" is for here... I may be lacking in terminology. Is "the flat" the outer perimeter/ring? Then what is "the rim"? Don't press on "the top pivot" makes sense since the force vectors would obviously just bend the lower bent pivot more badly...1 point
-
I think after all this is a watch repair forum not a watch appreciation forum. So if any watchmaker like their craftmanship and so be it. BTW I wouldnt agree that a justification of watch brand depends on how many rich men wear it.1 point
-
By the way took a moment to visit your webshop.. great design like it a lot.1 point
-
I lost a pallet jewel once. It was there on my work mat one moment then gone the next moment. I used a torch and searched high and low. I was on all fours for almost half an hour before I gave up. I said a silent prayer and when I was stretching out my aching back, I caught a glint on the floor just outside of my search area. It really was the missing pallet jewel. So my advice is when you are already on your hands and knees, it doesn't hurt to pray.1 point
-
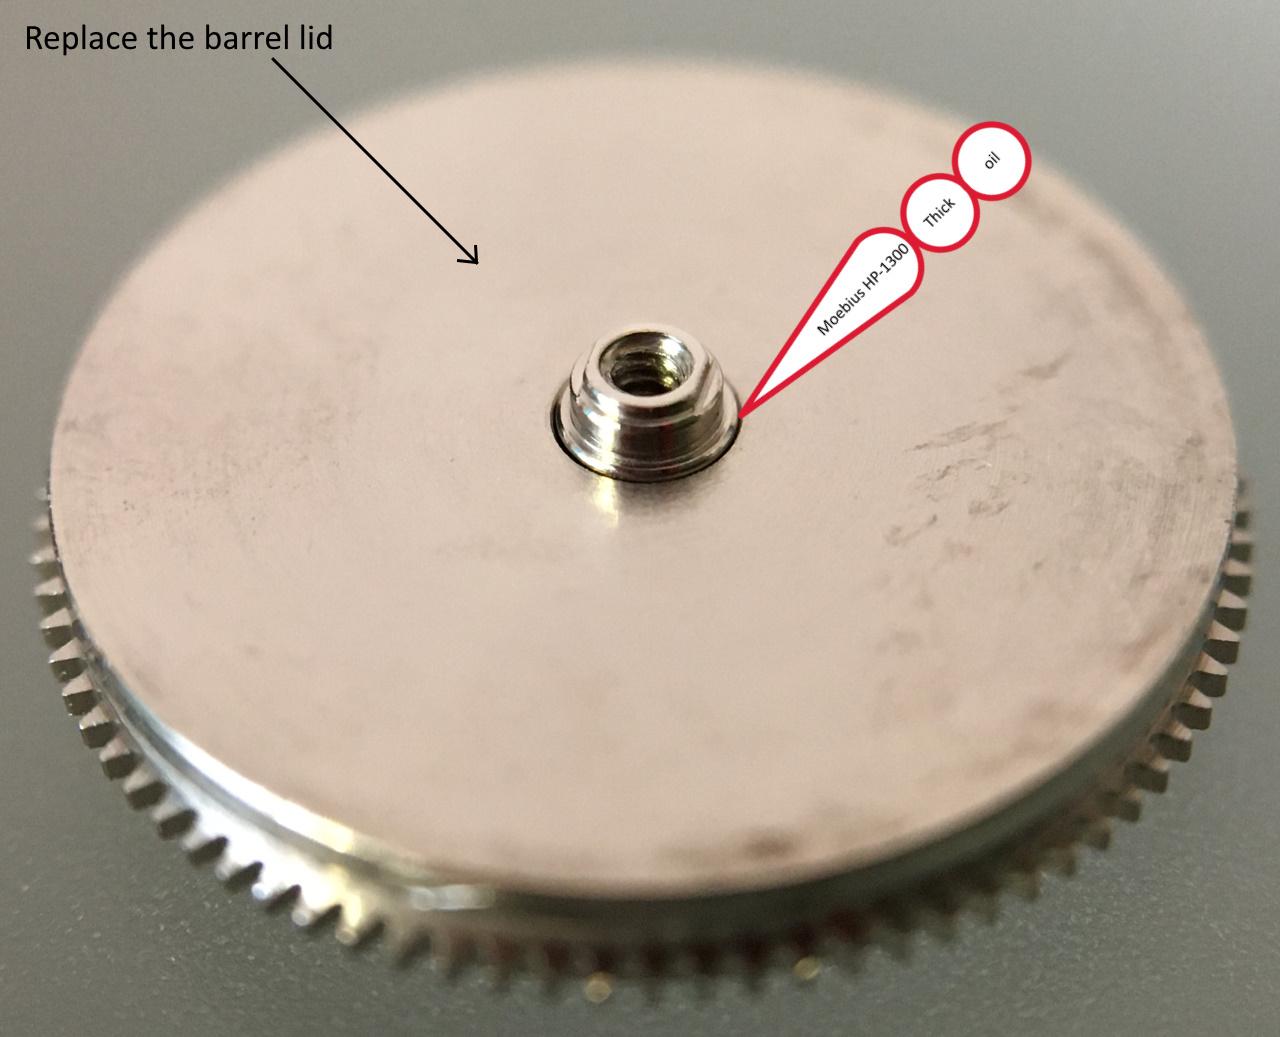
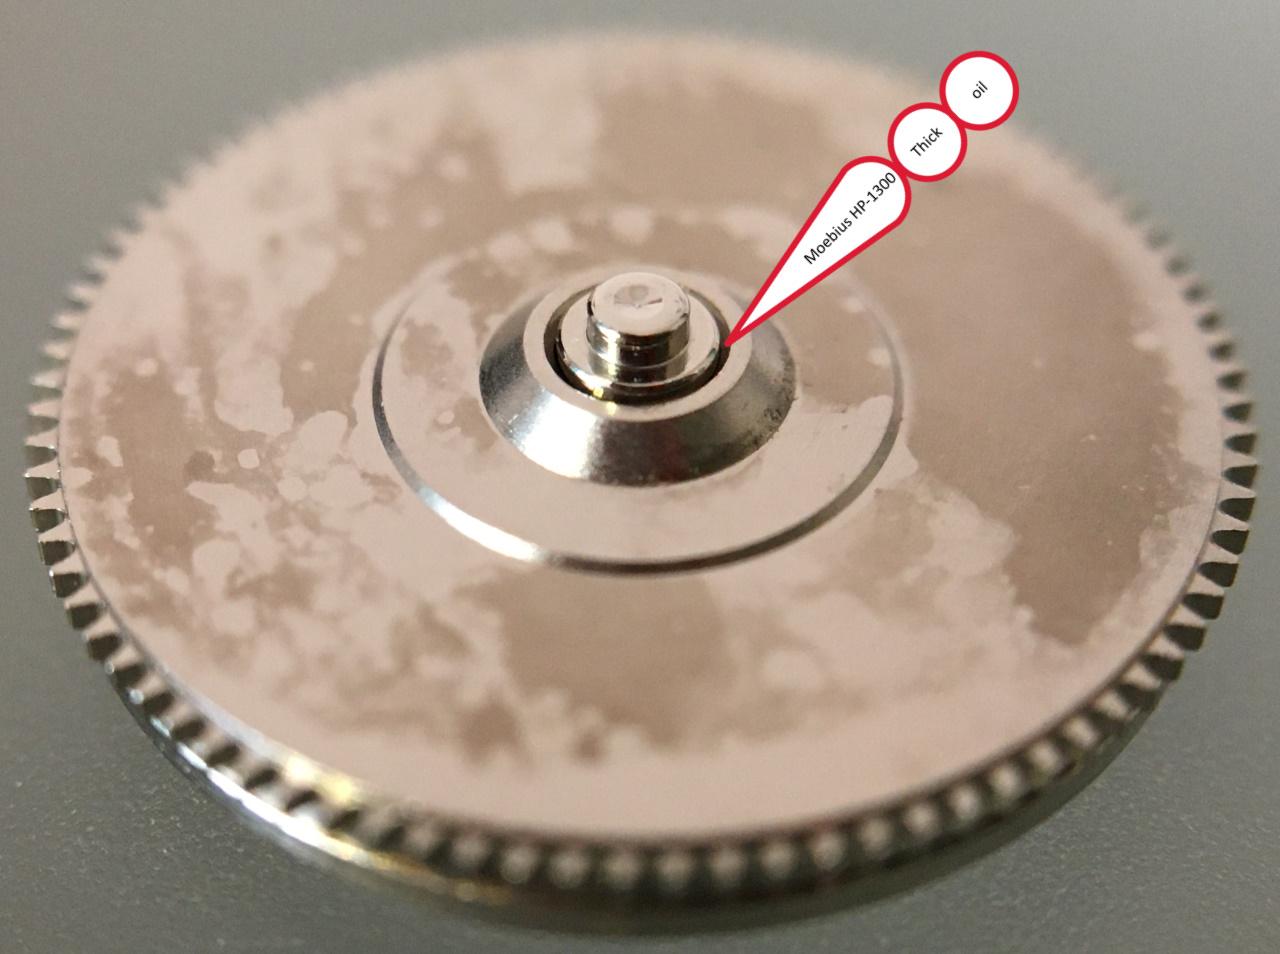
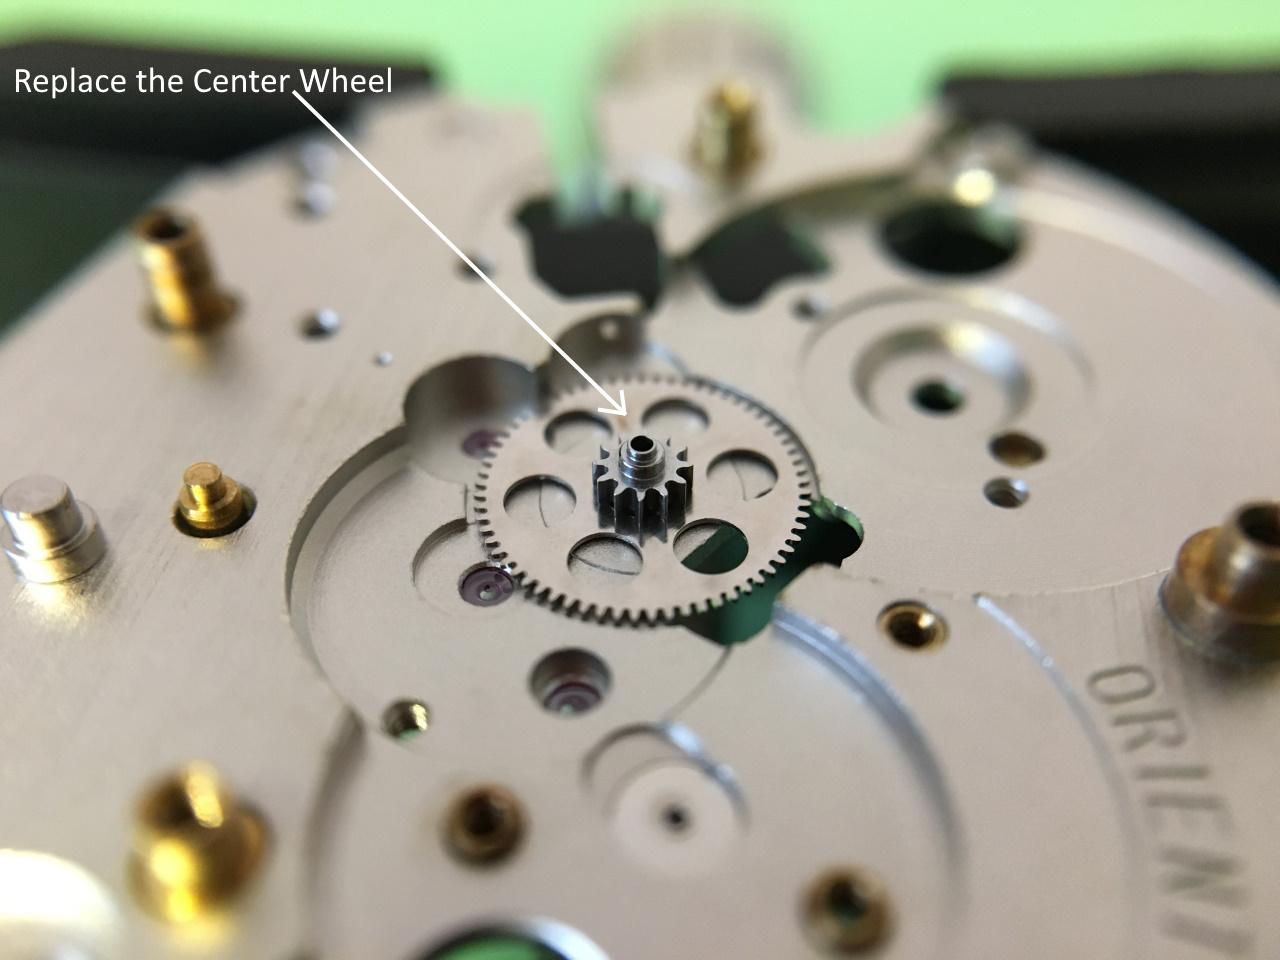
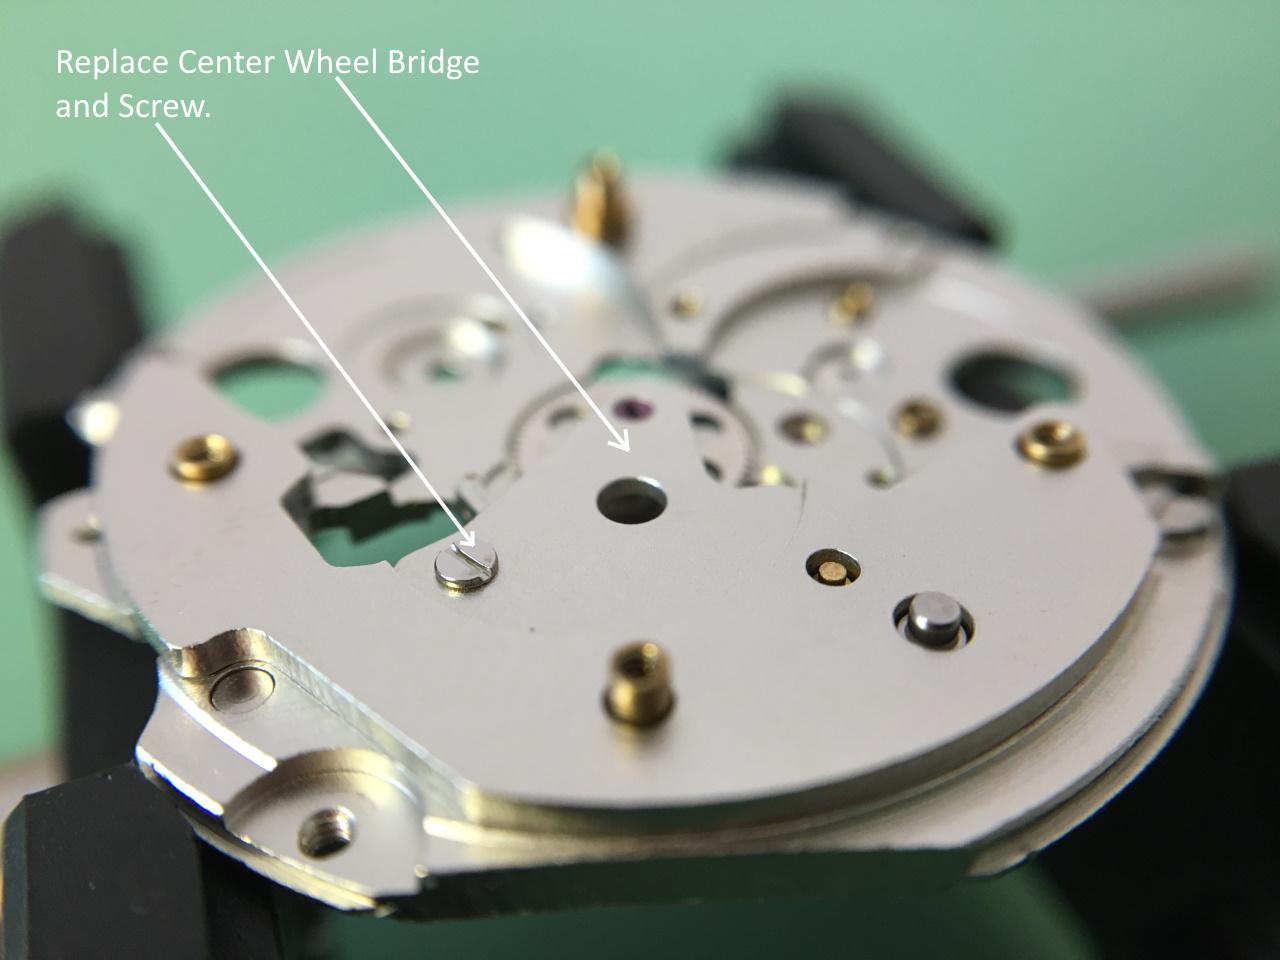
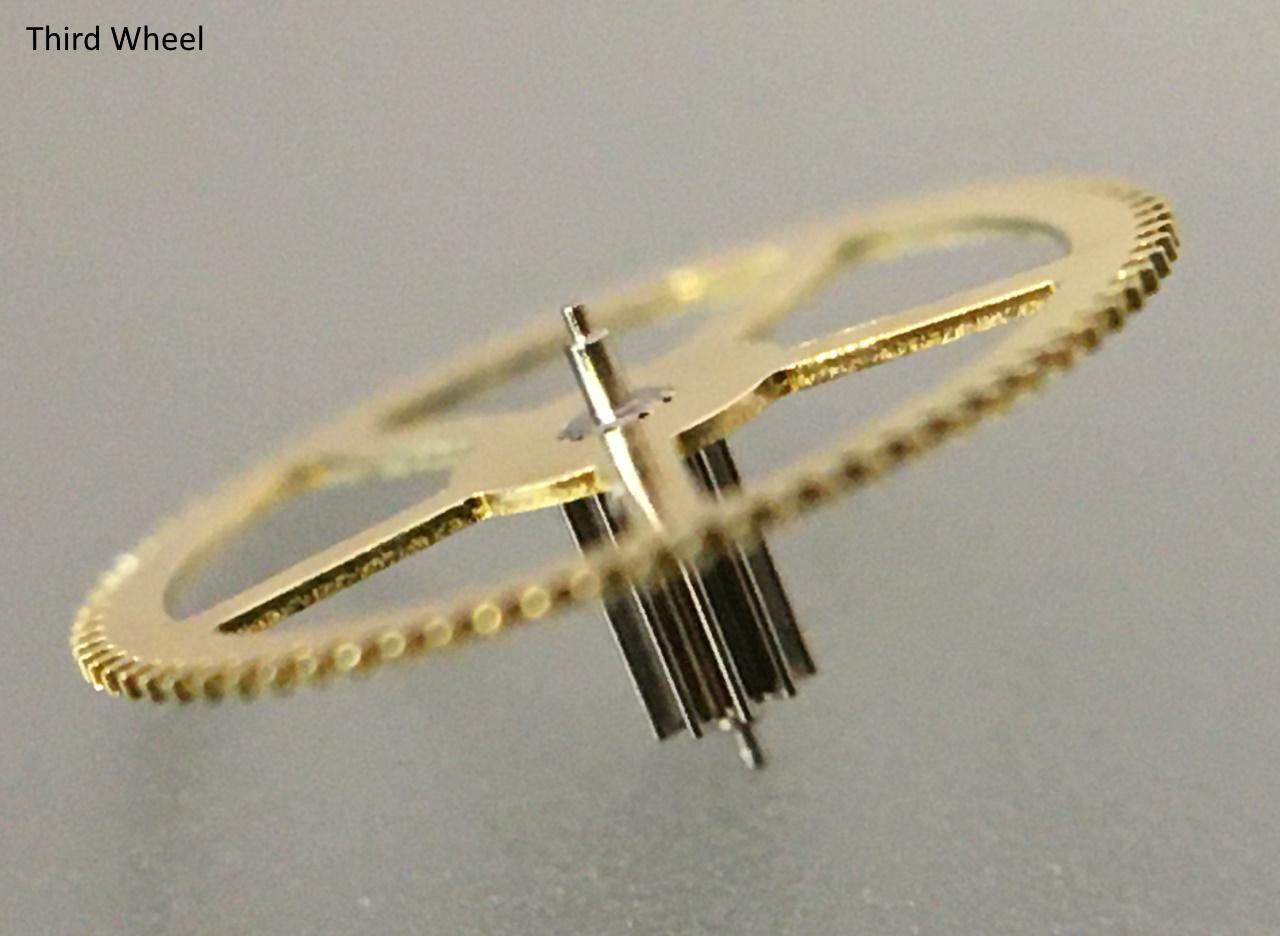
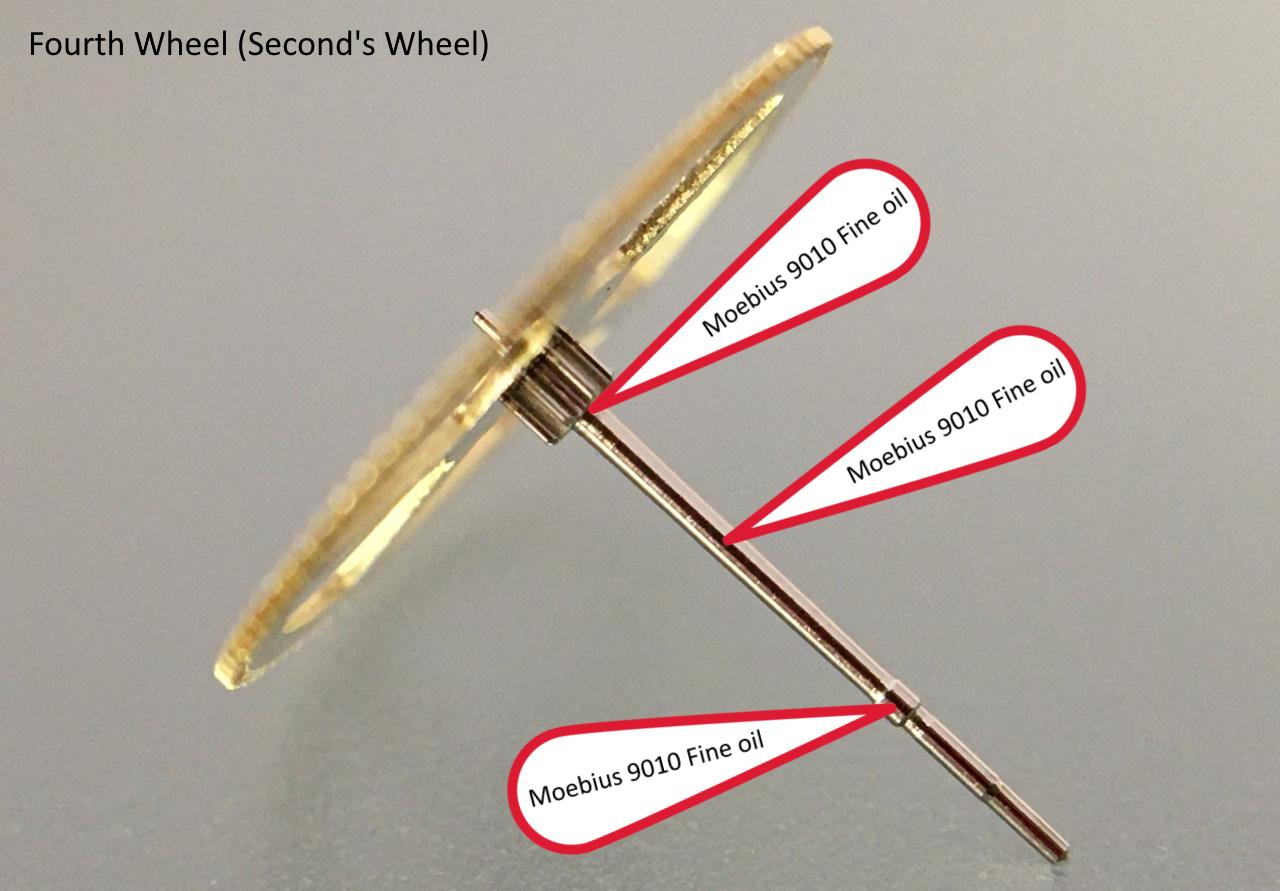
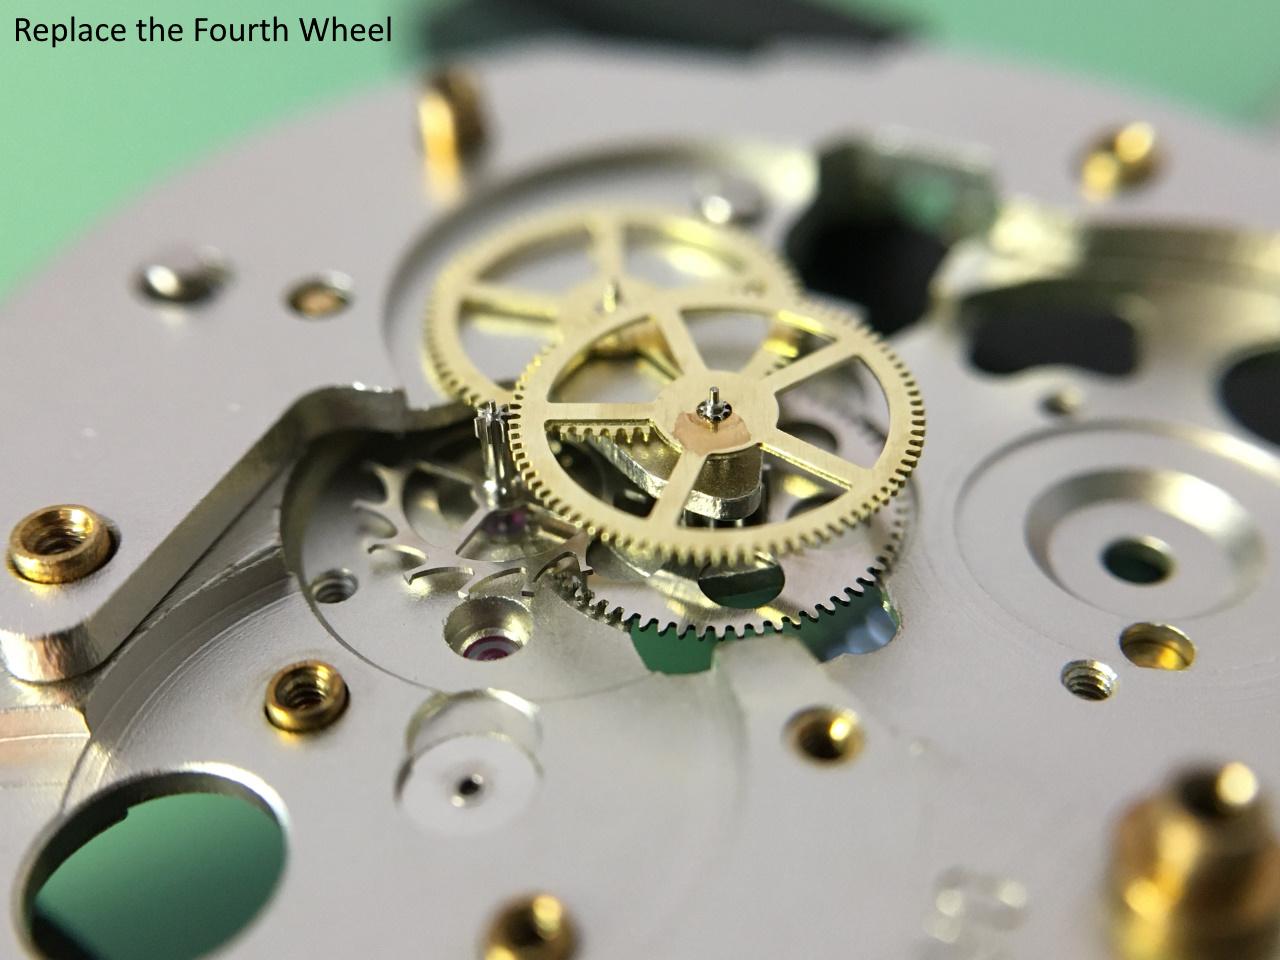
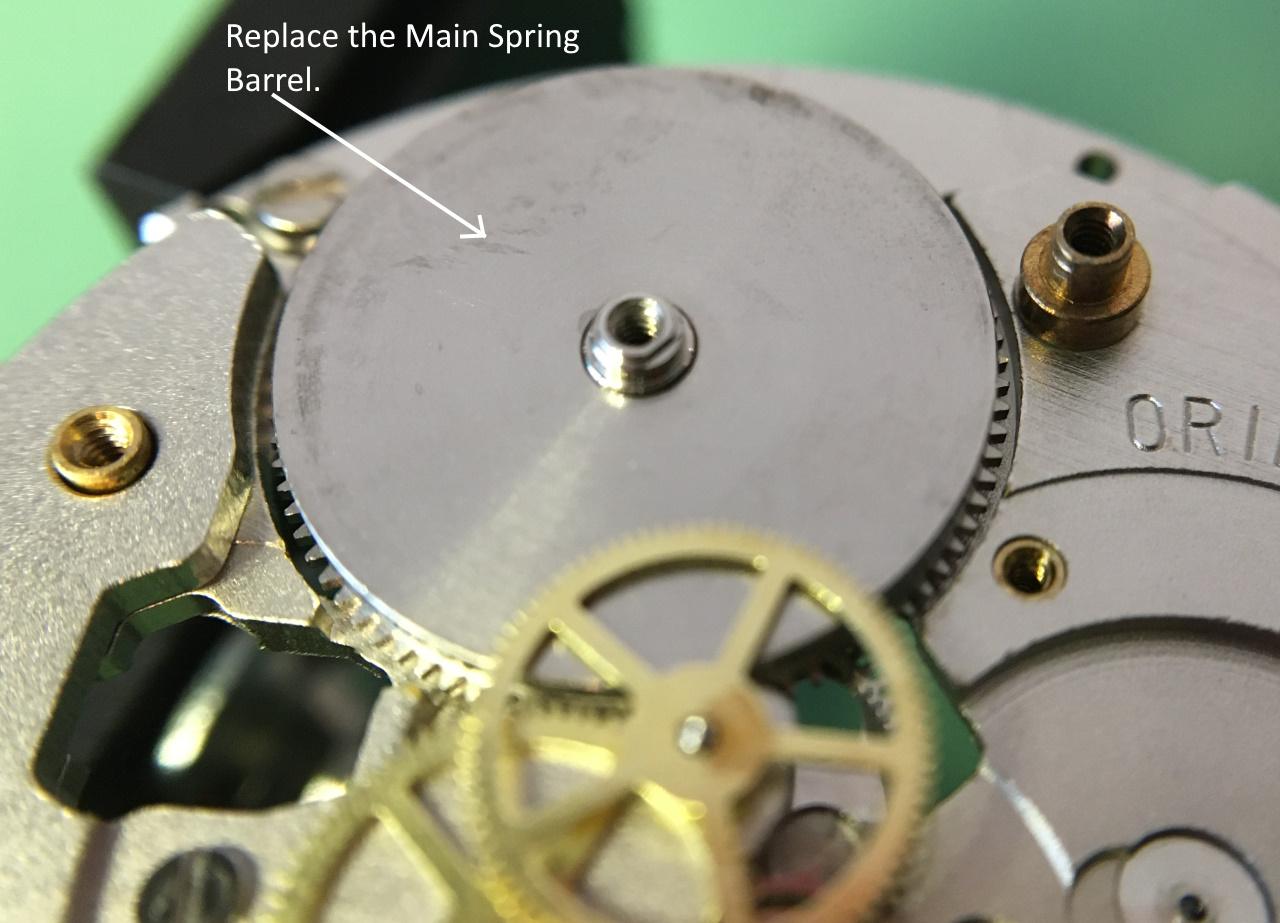
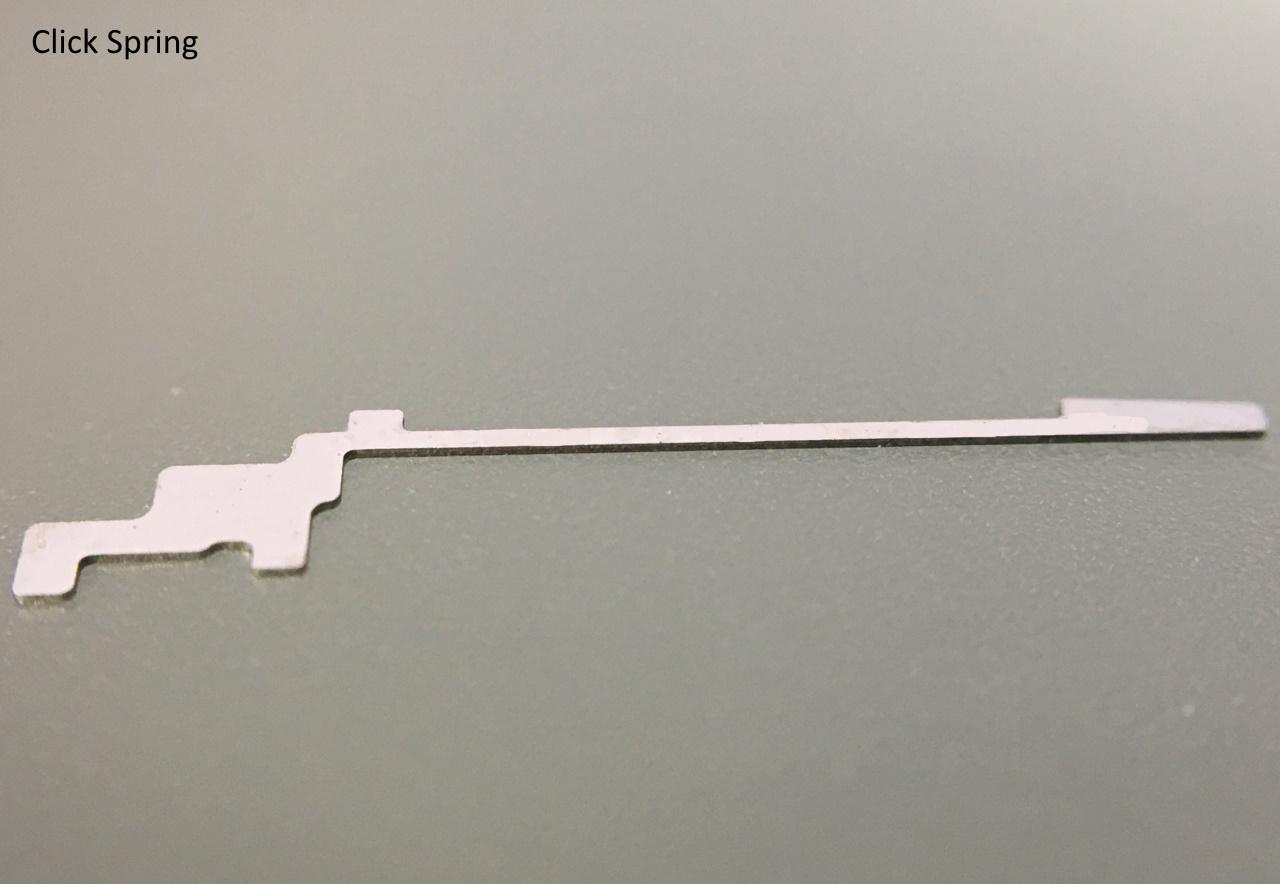
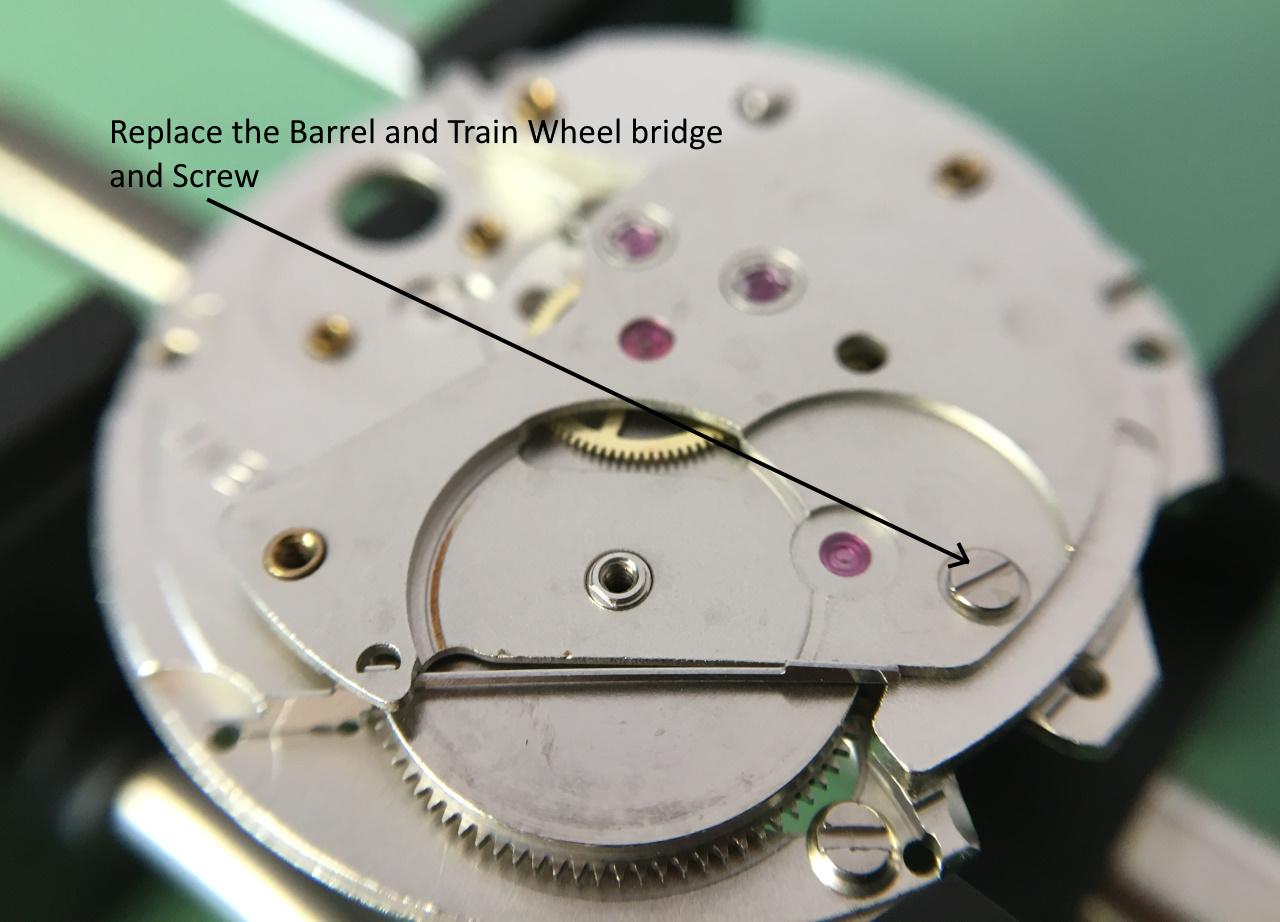
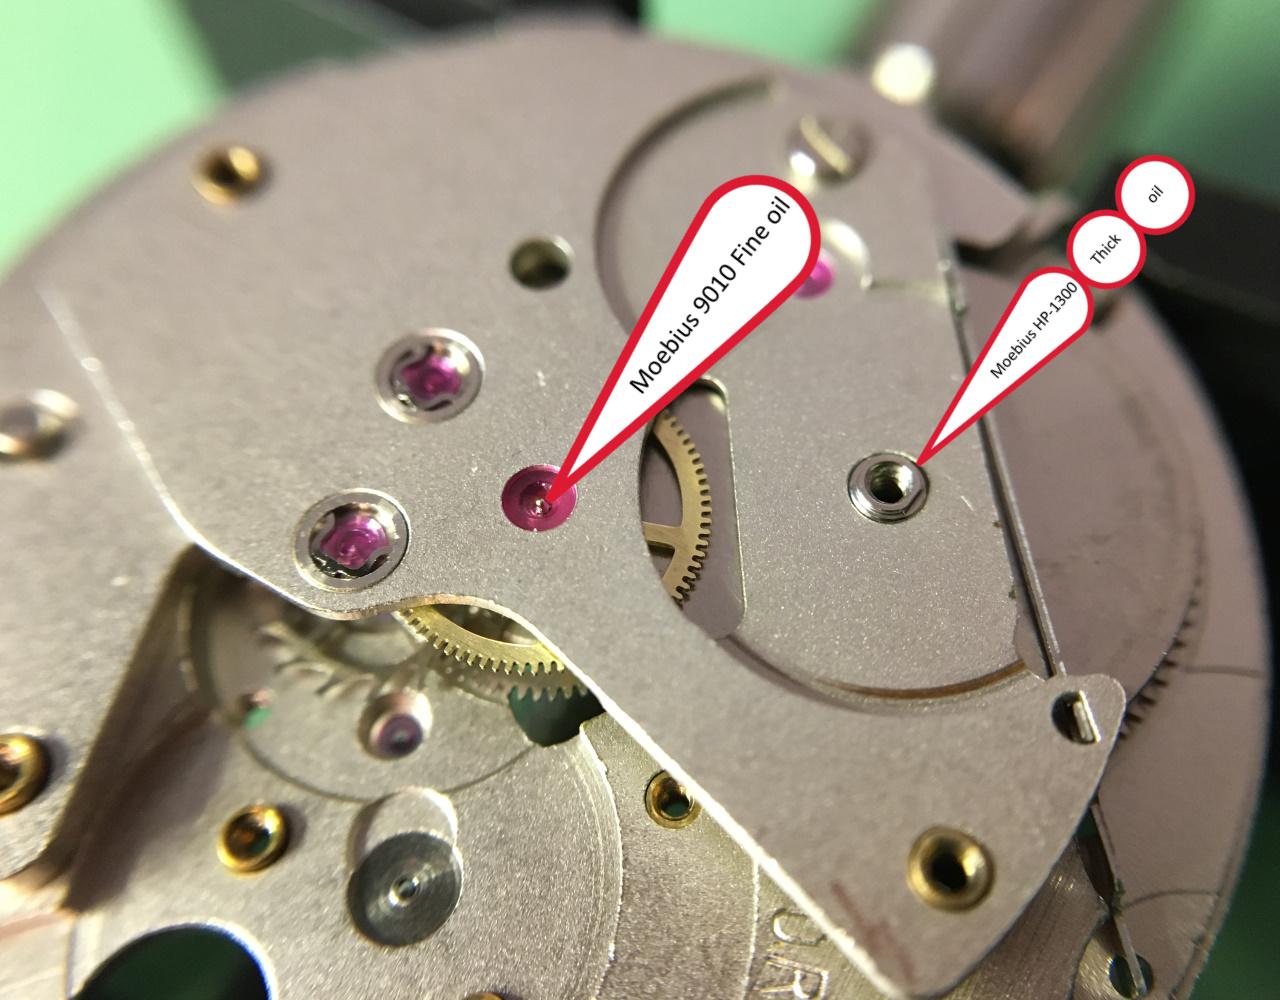
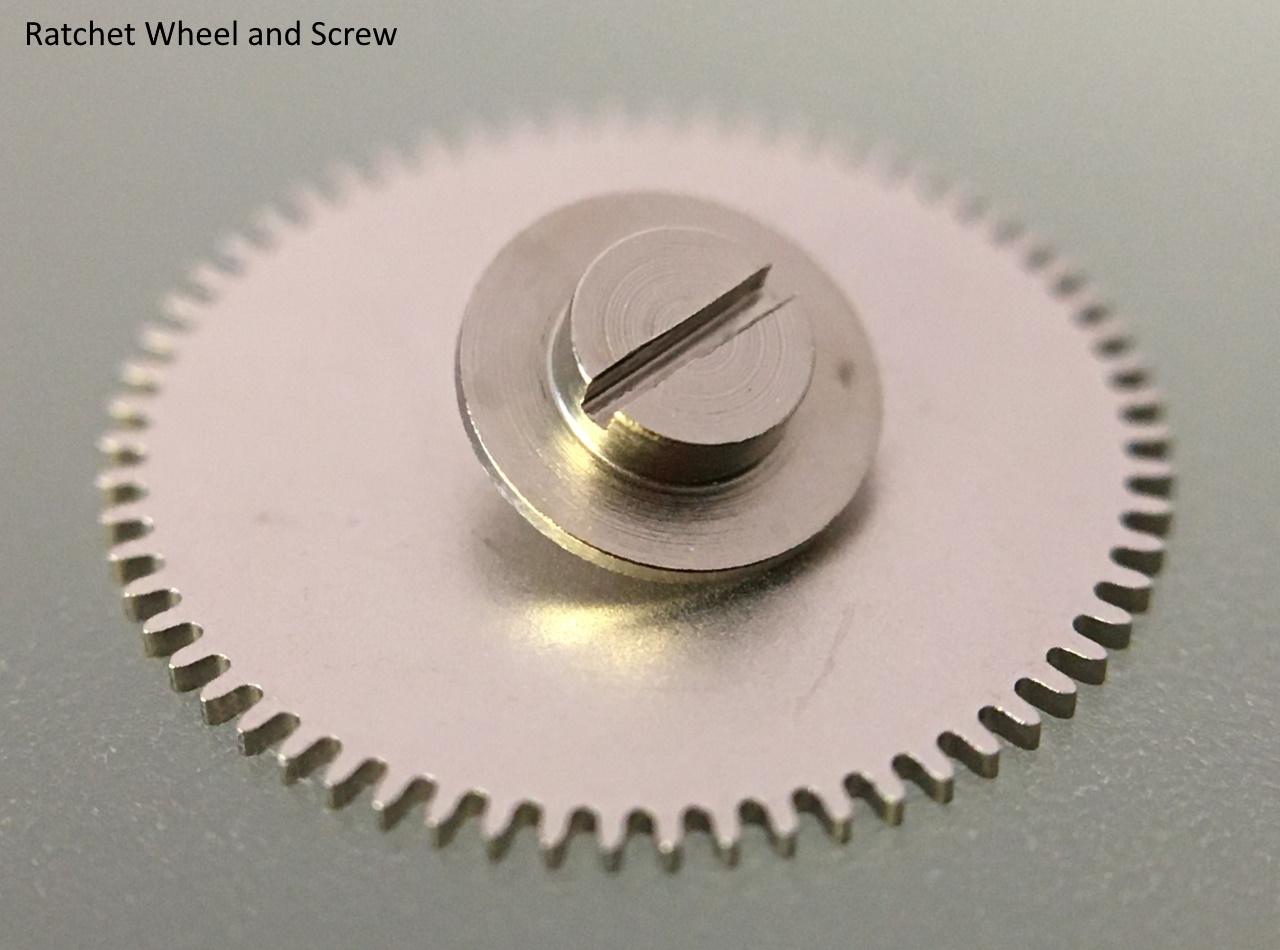
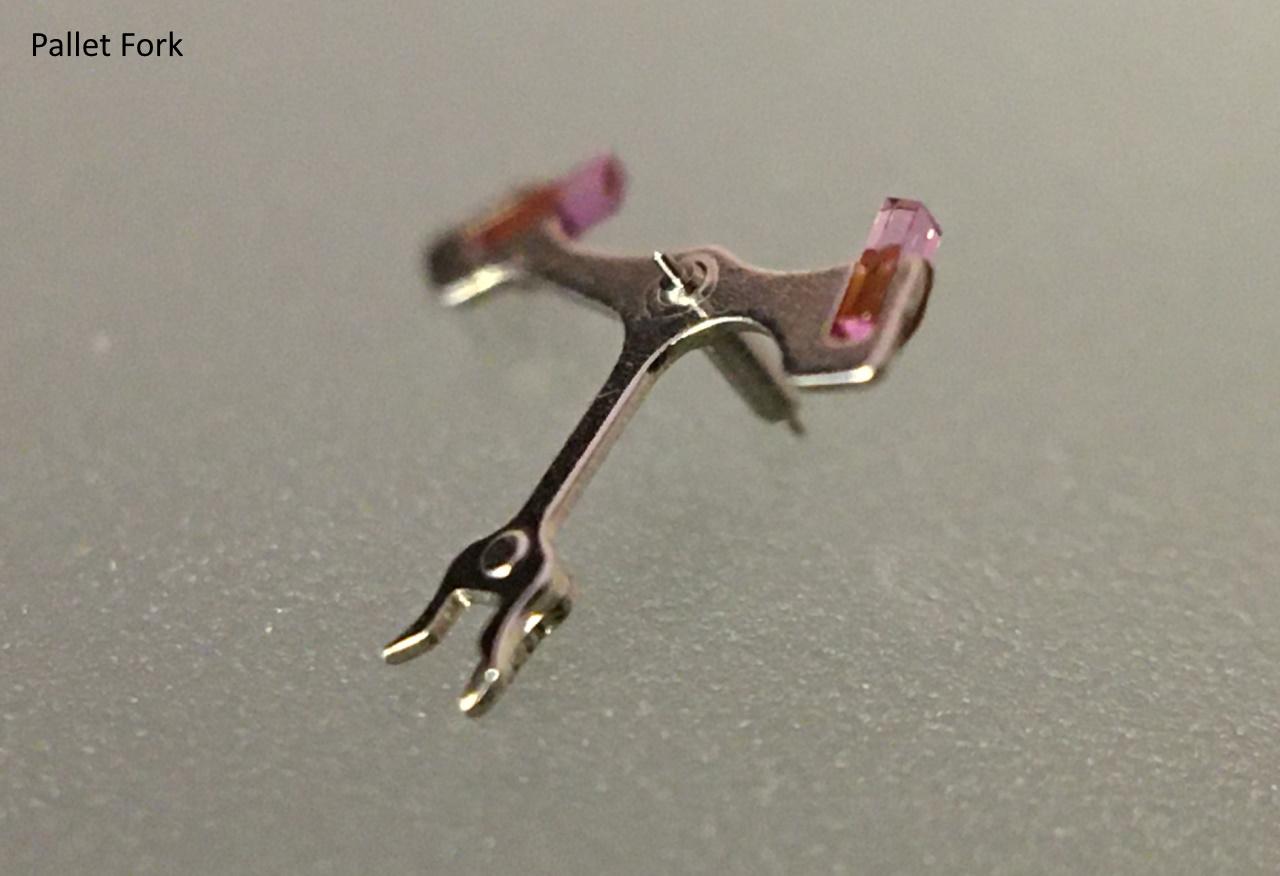
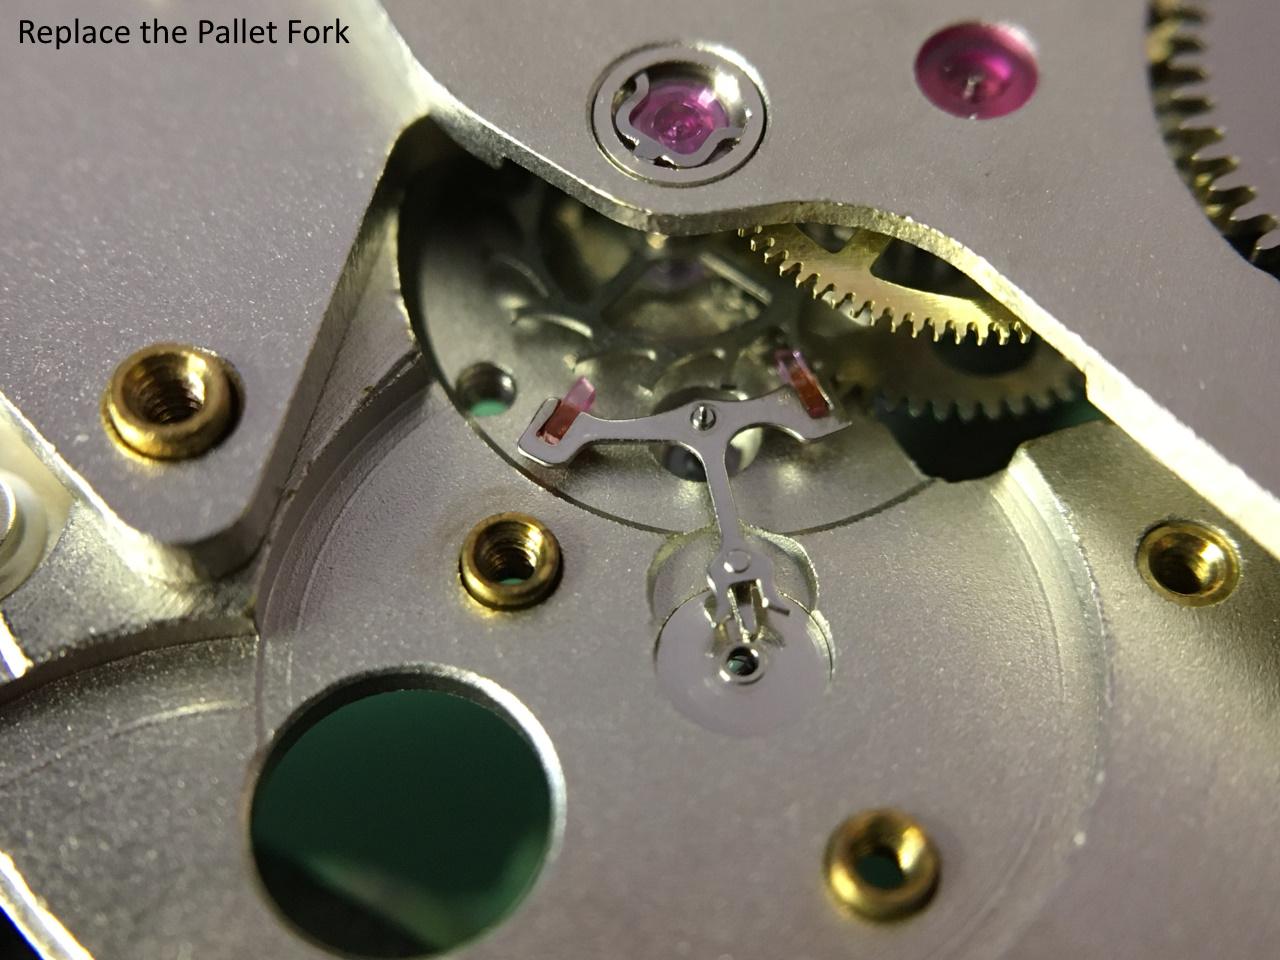
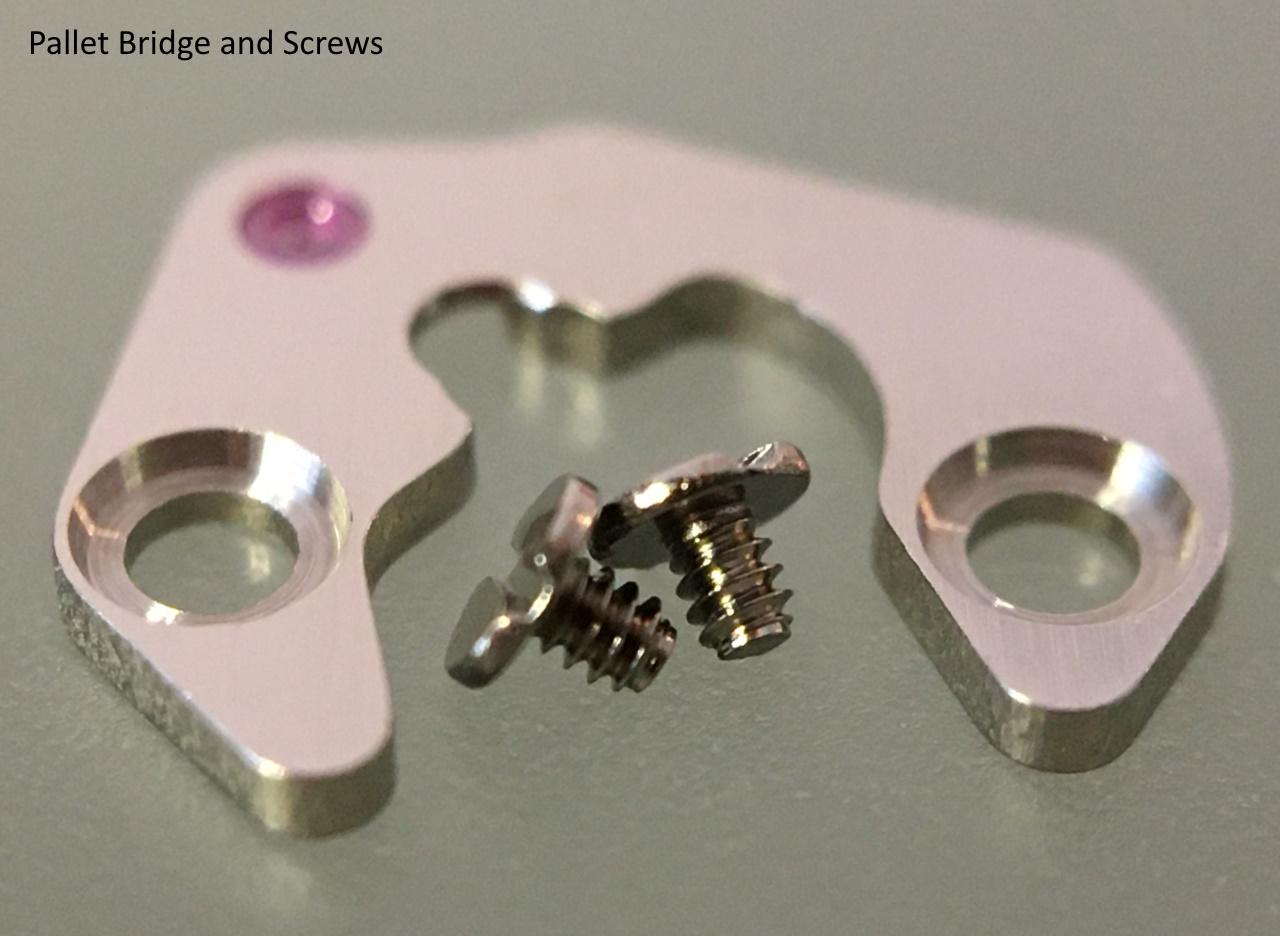
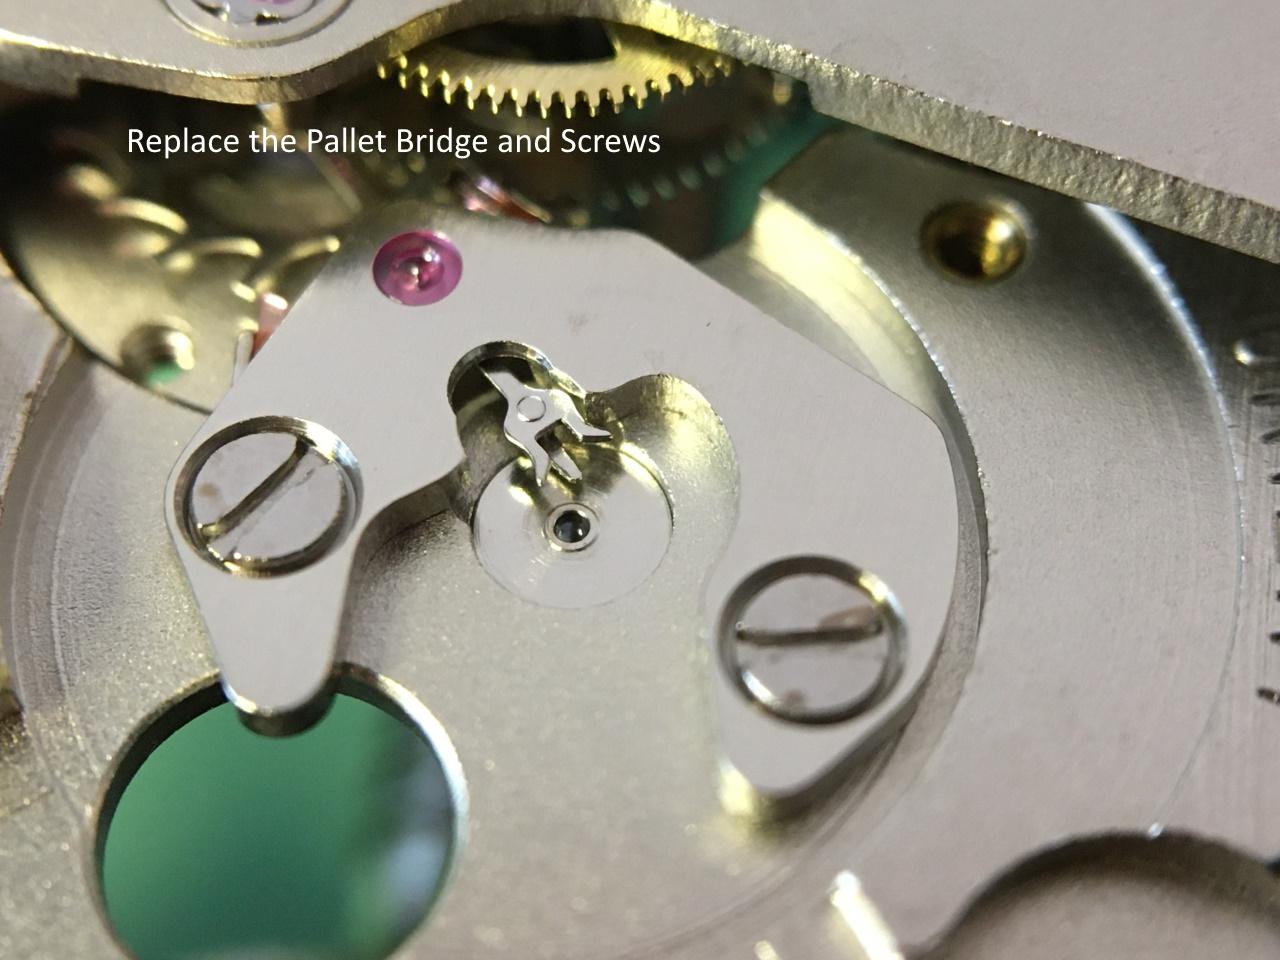
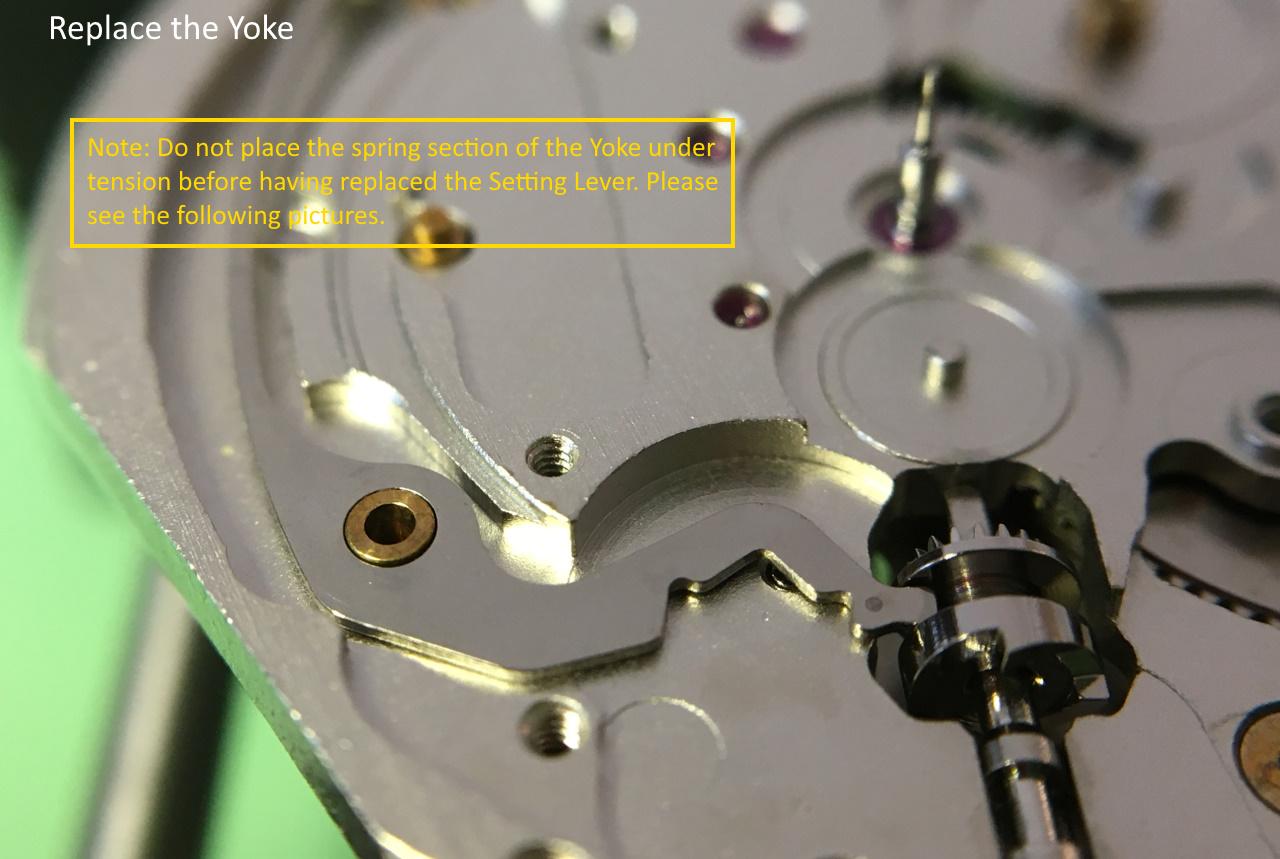
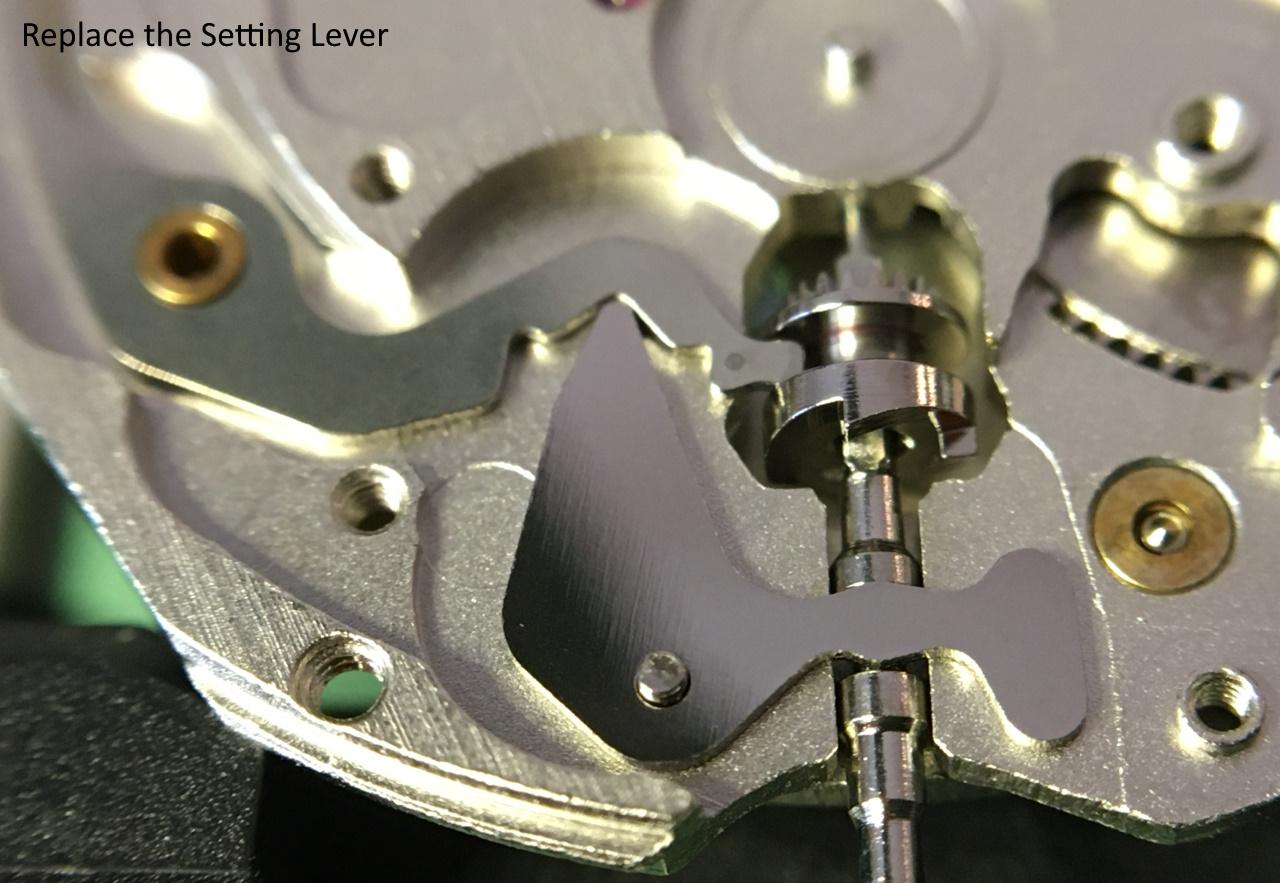
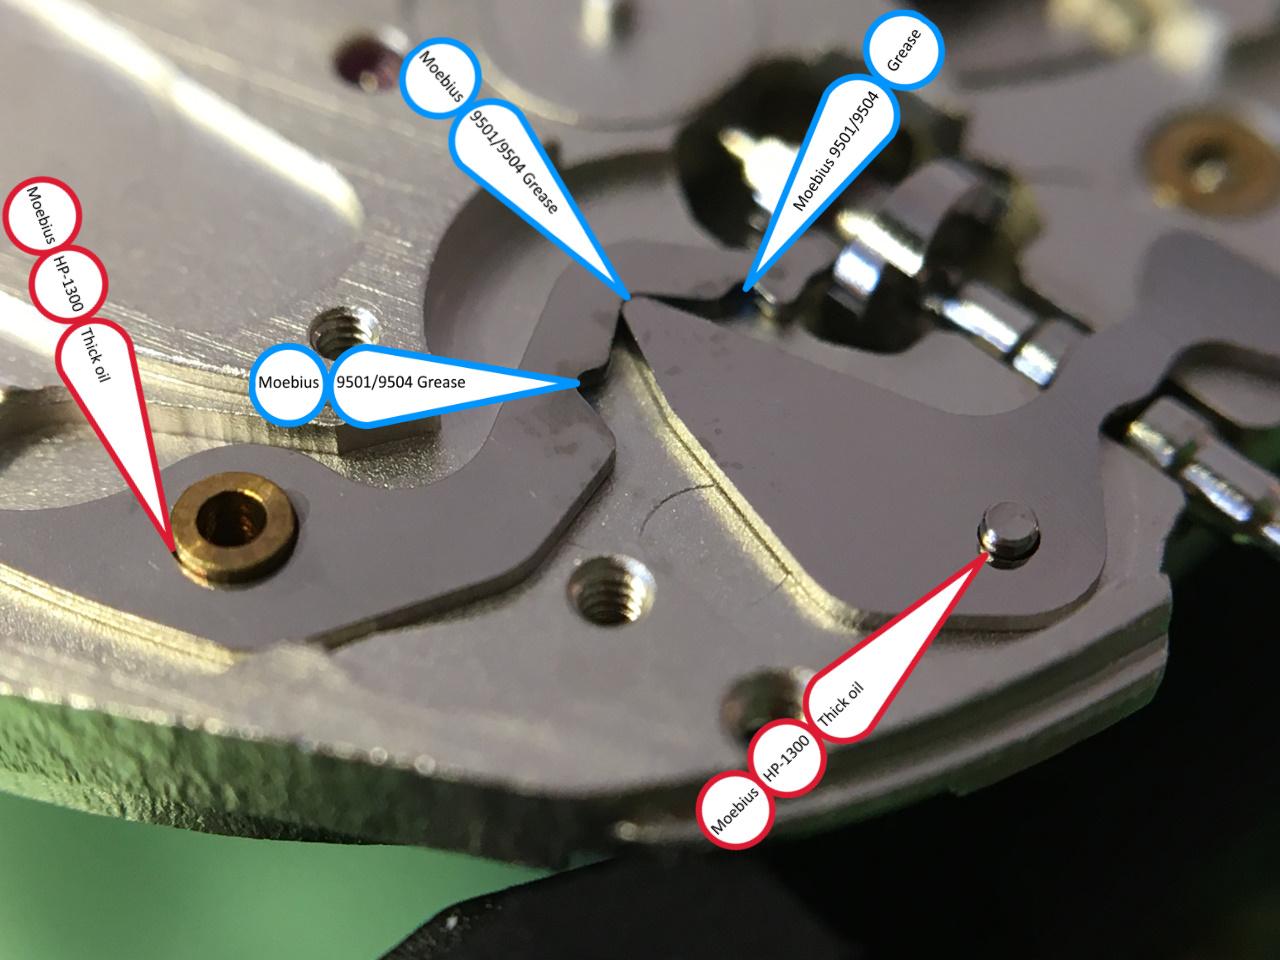
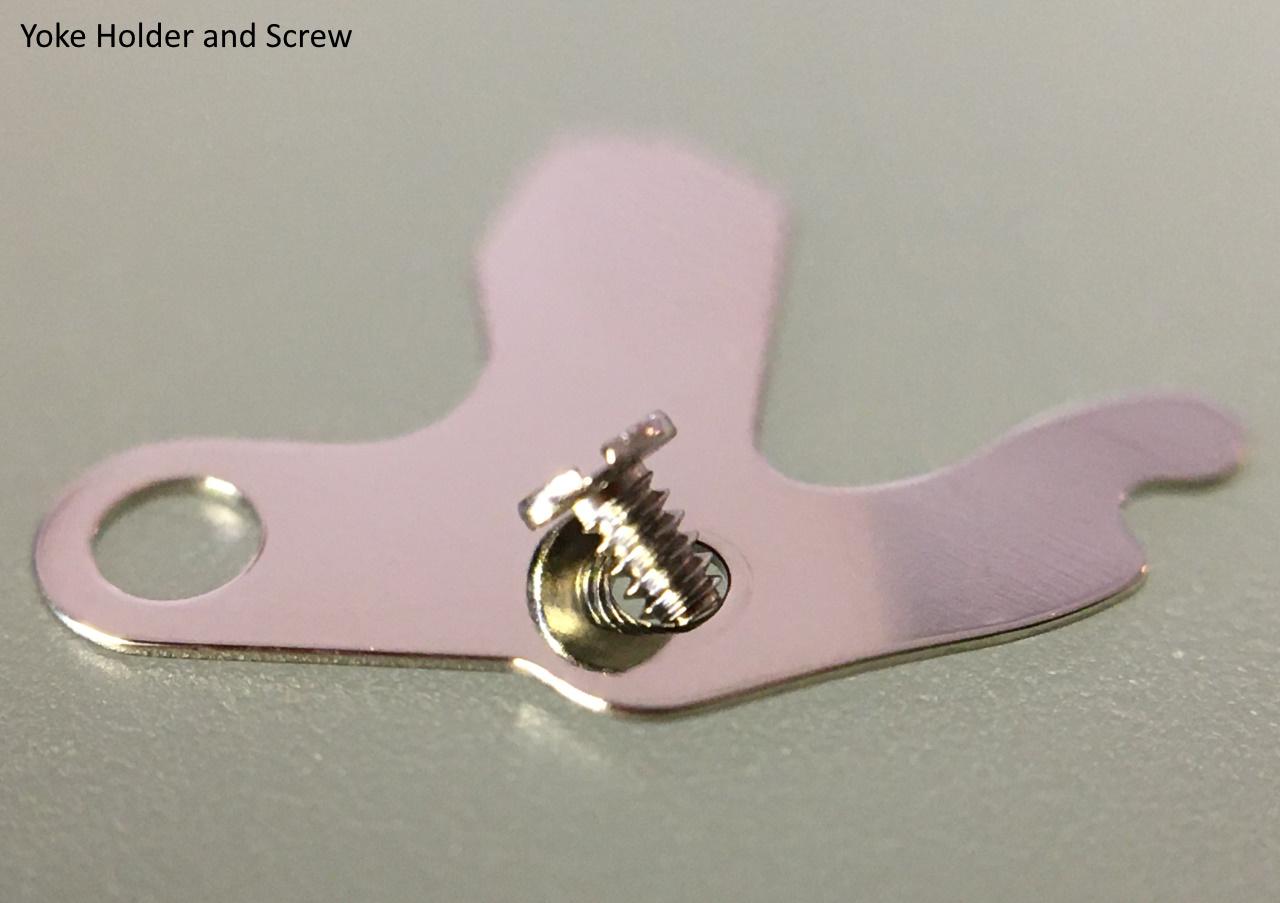
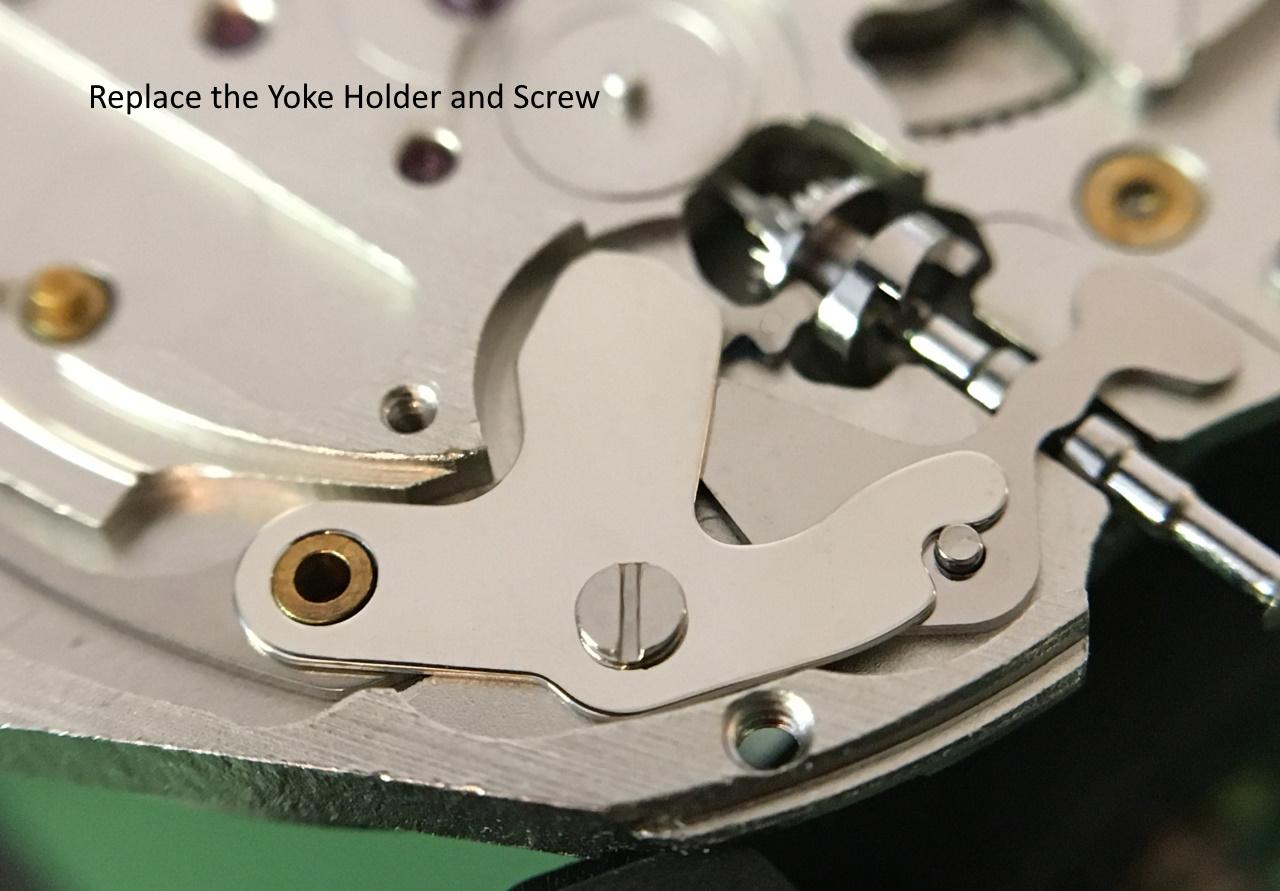
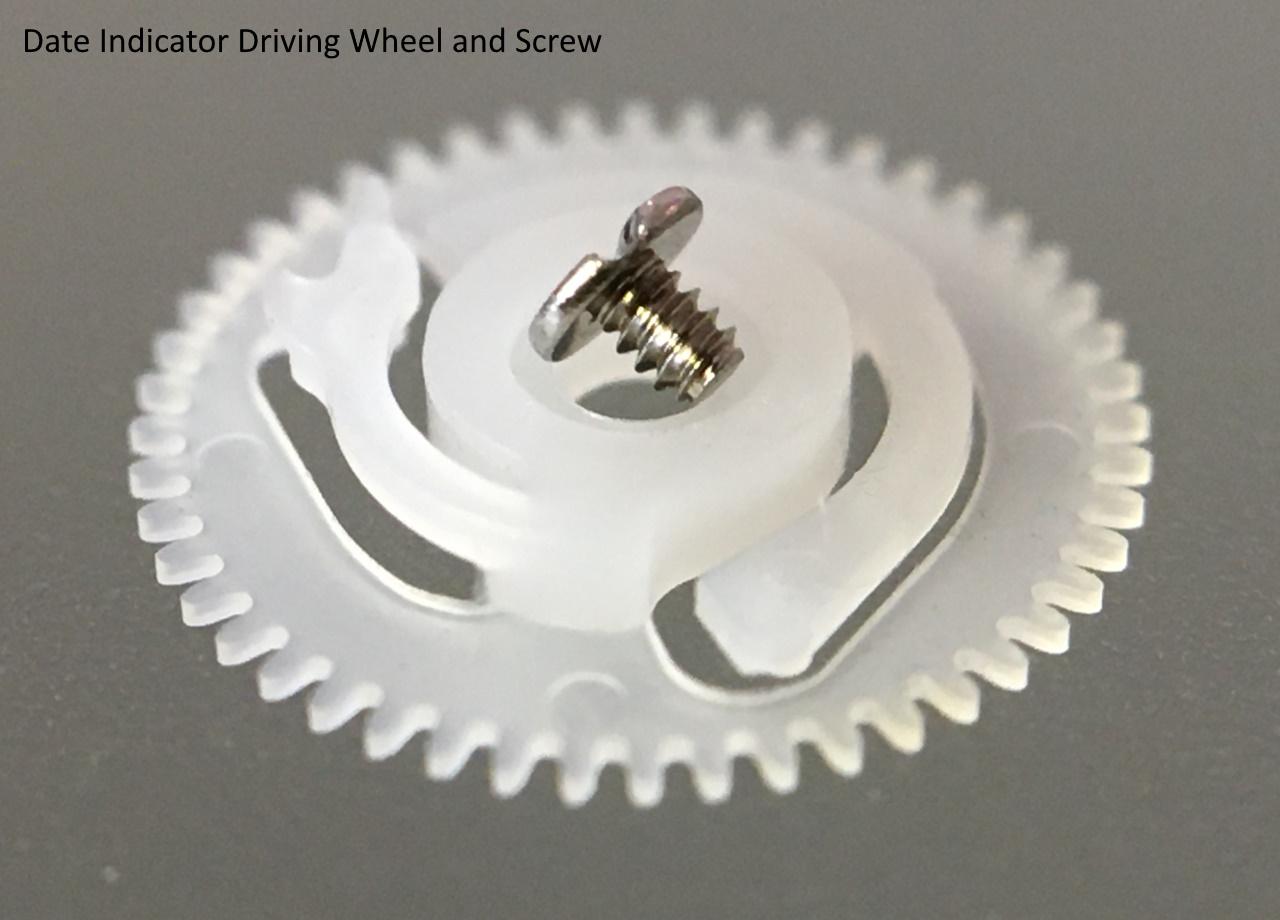
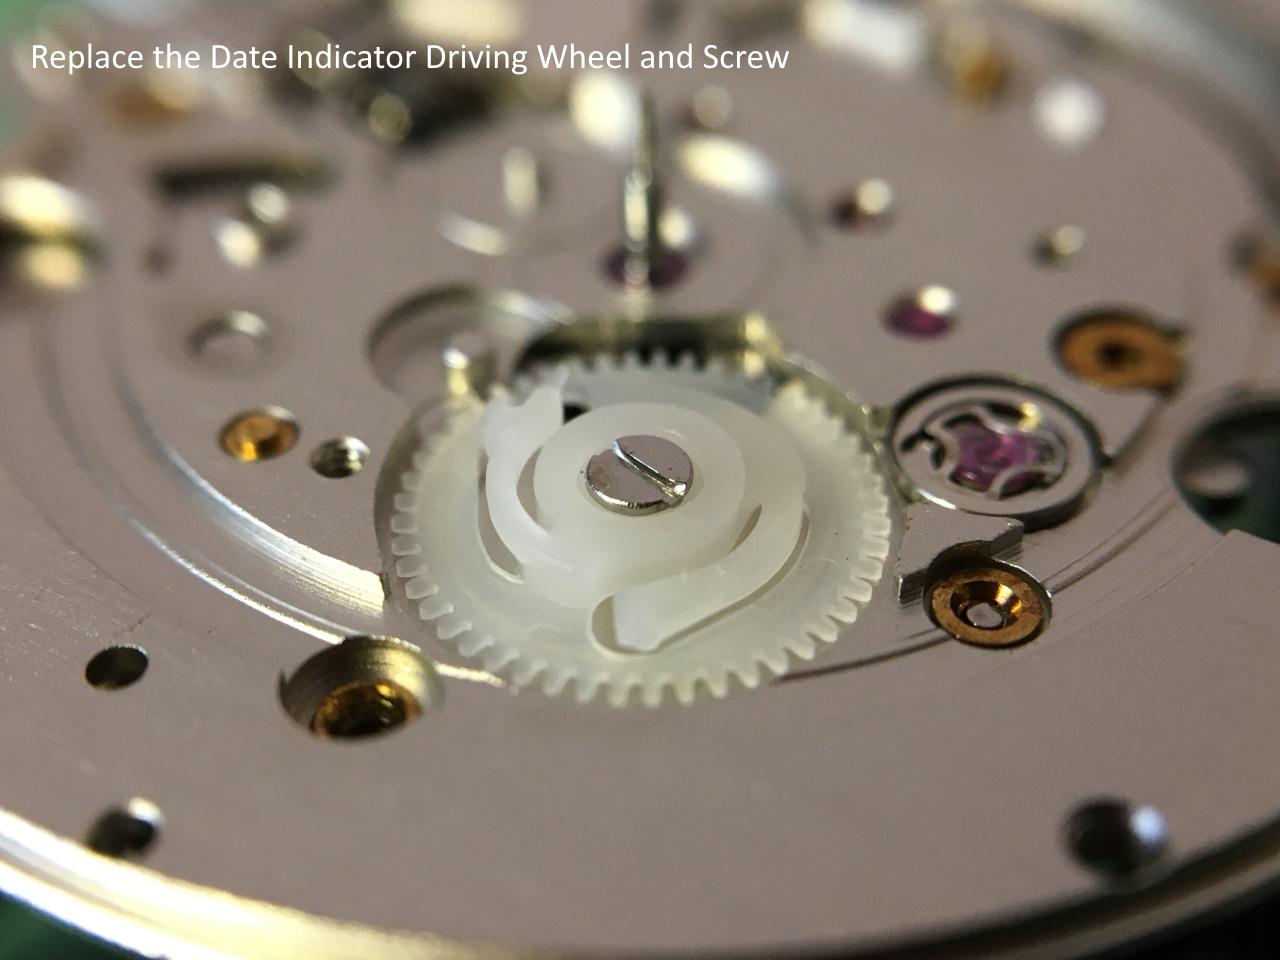
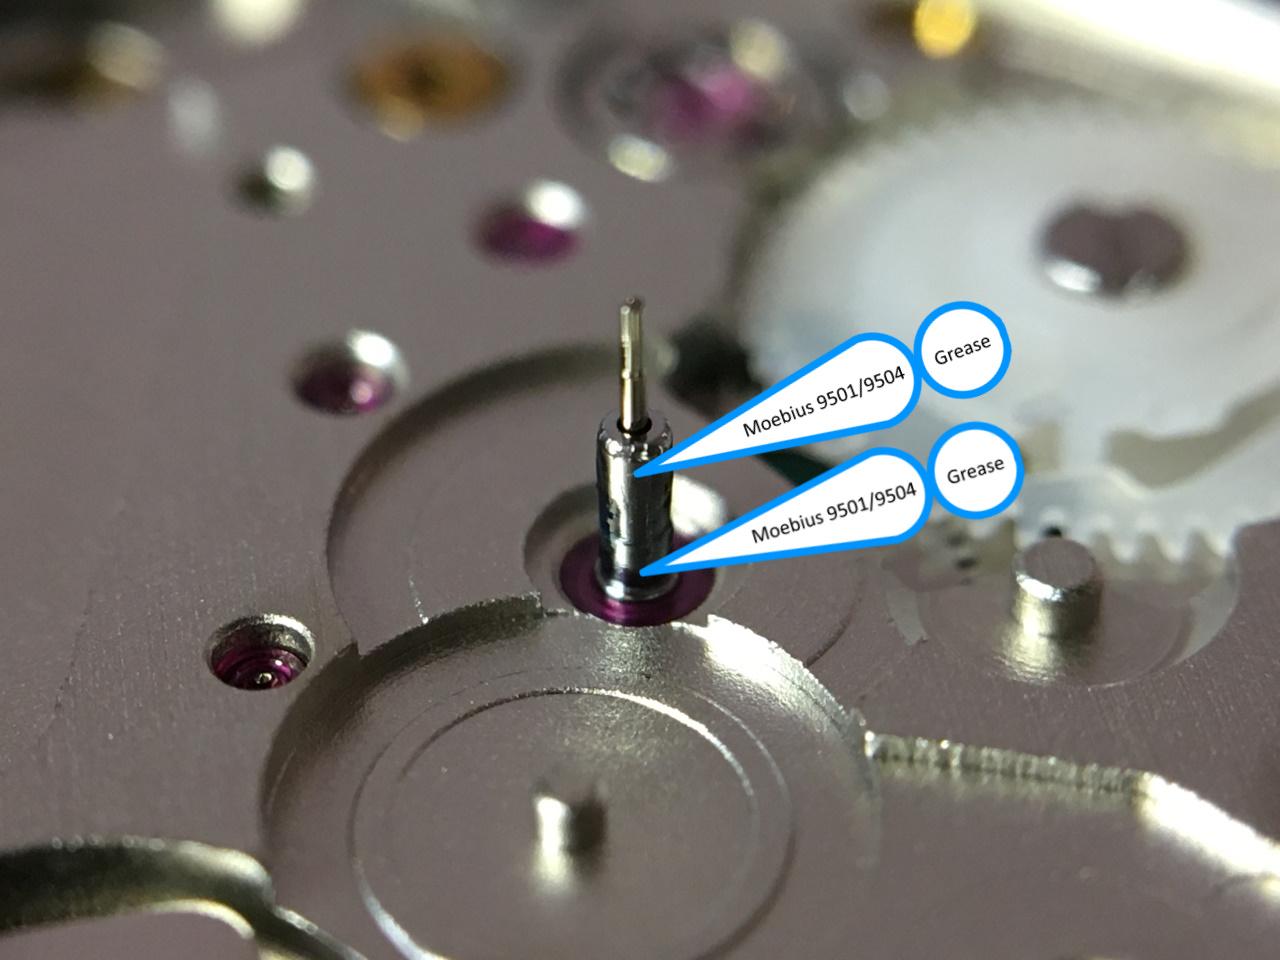
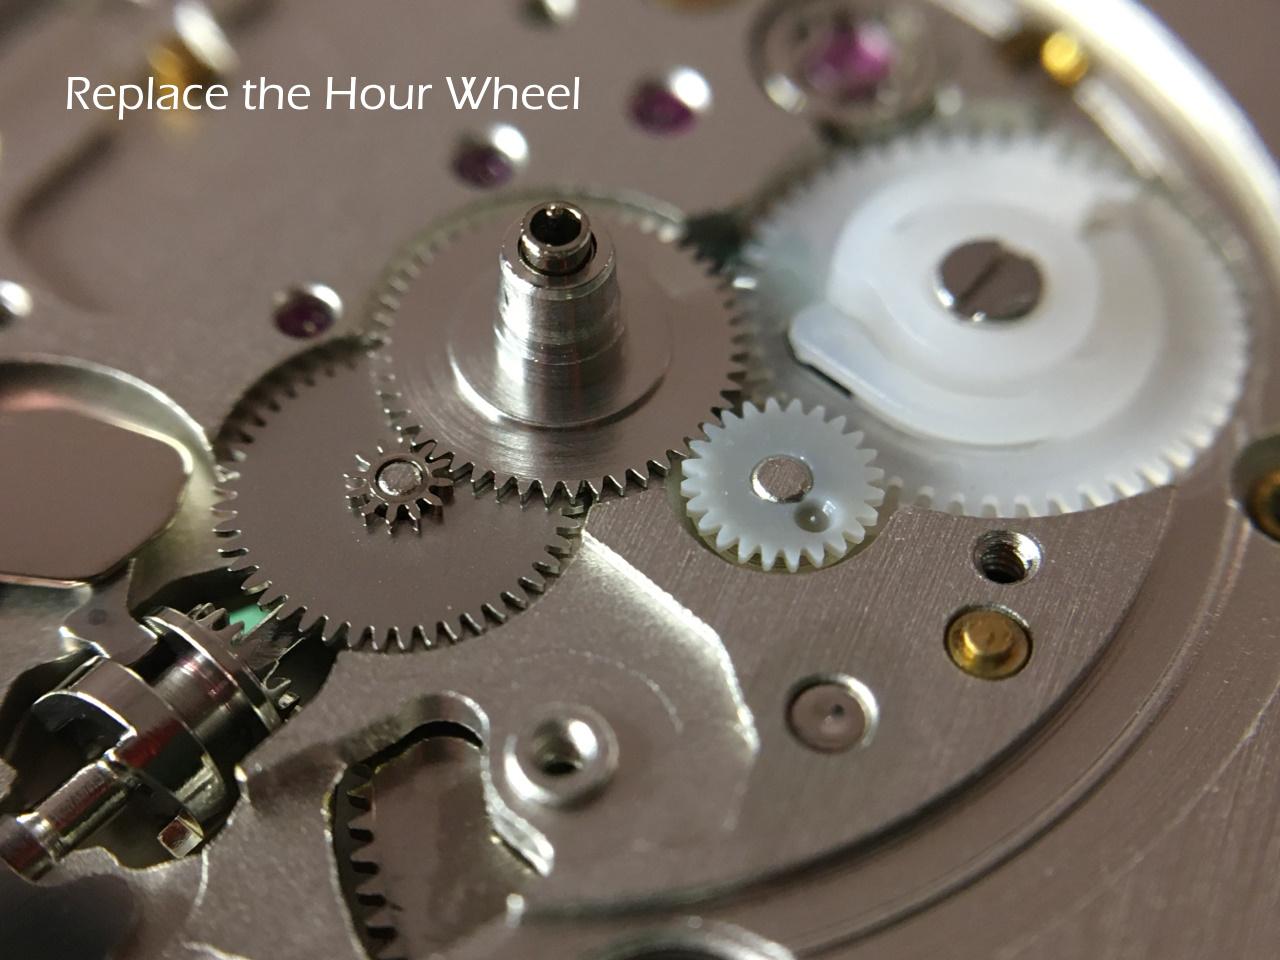
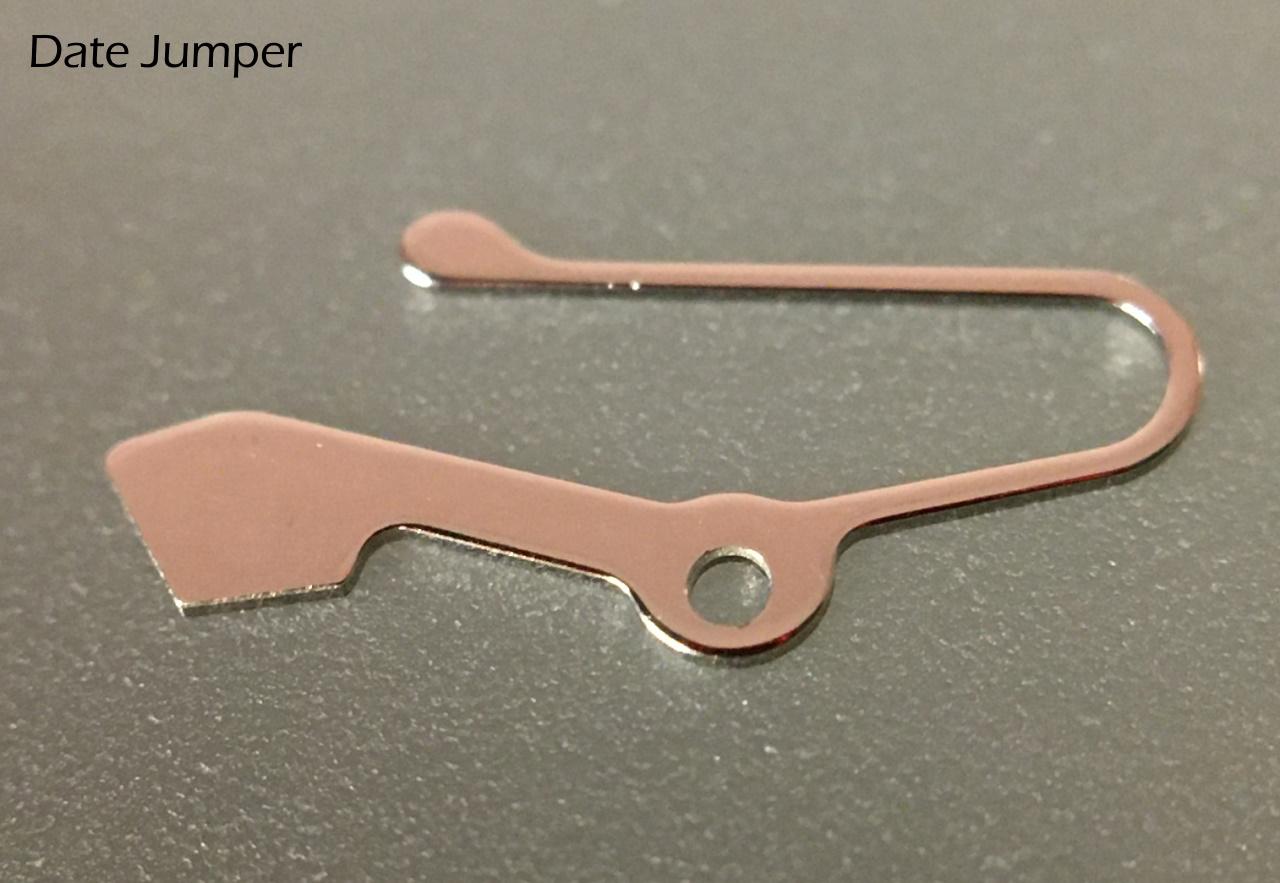
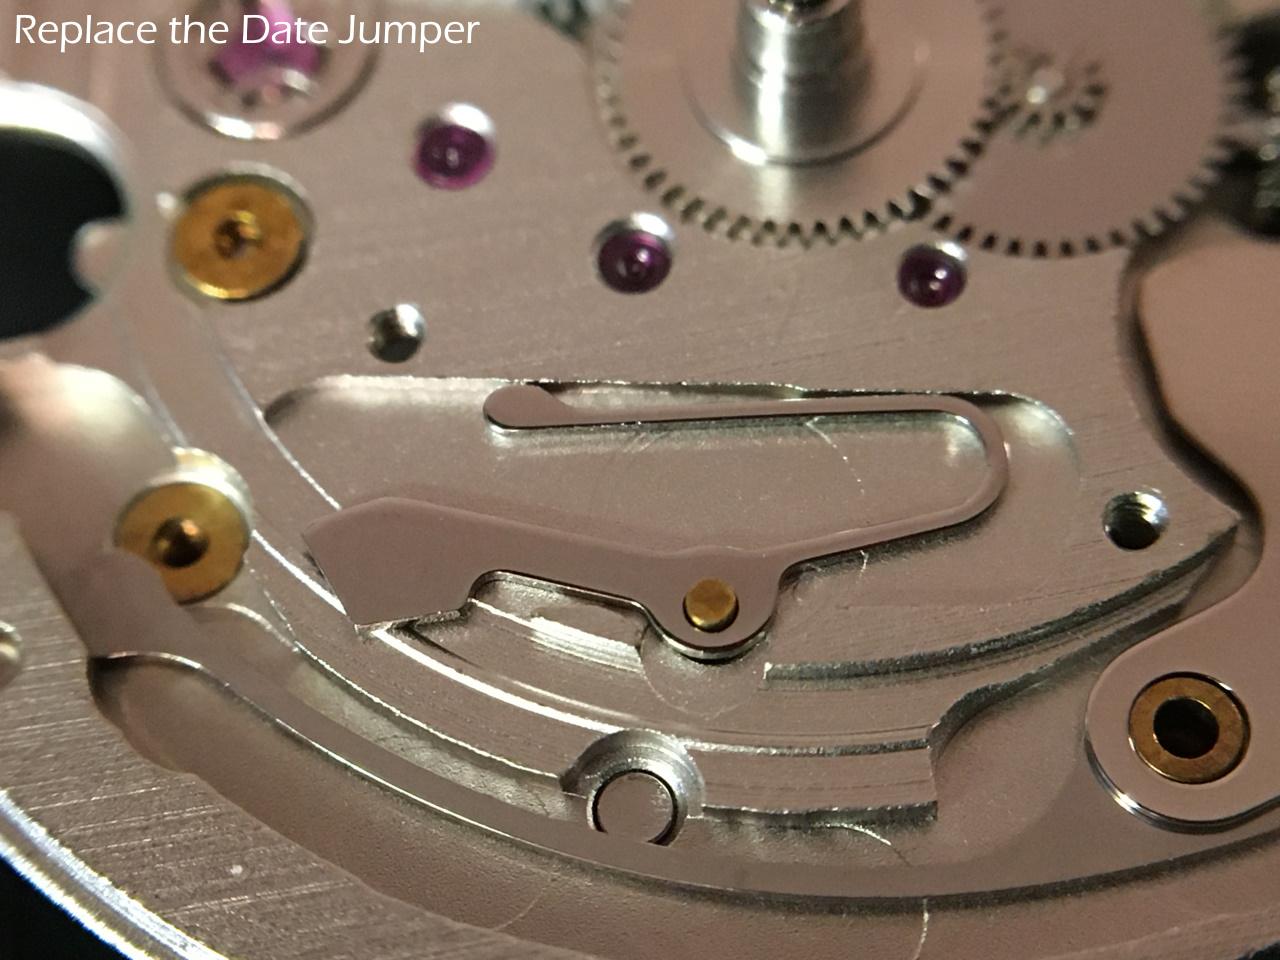
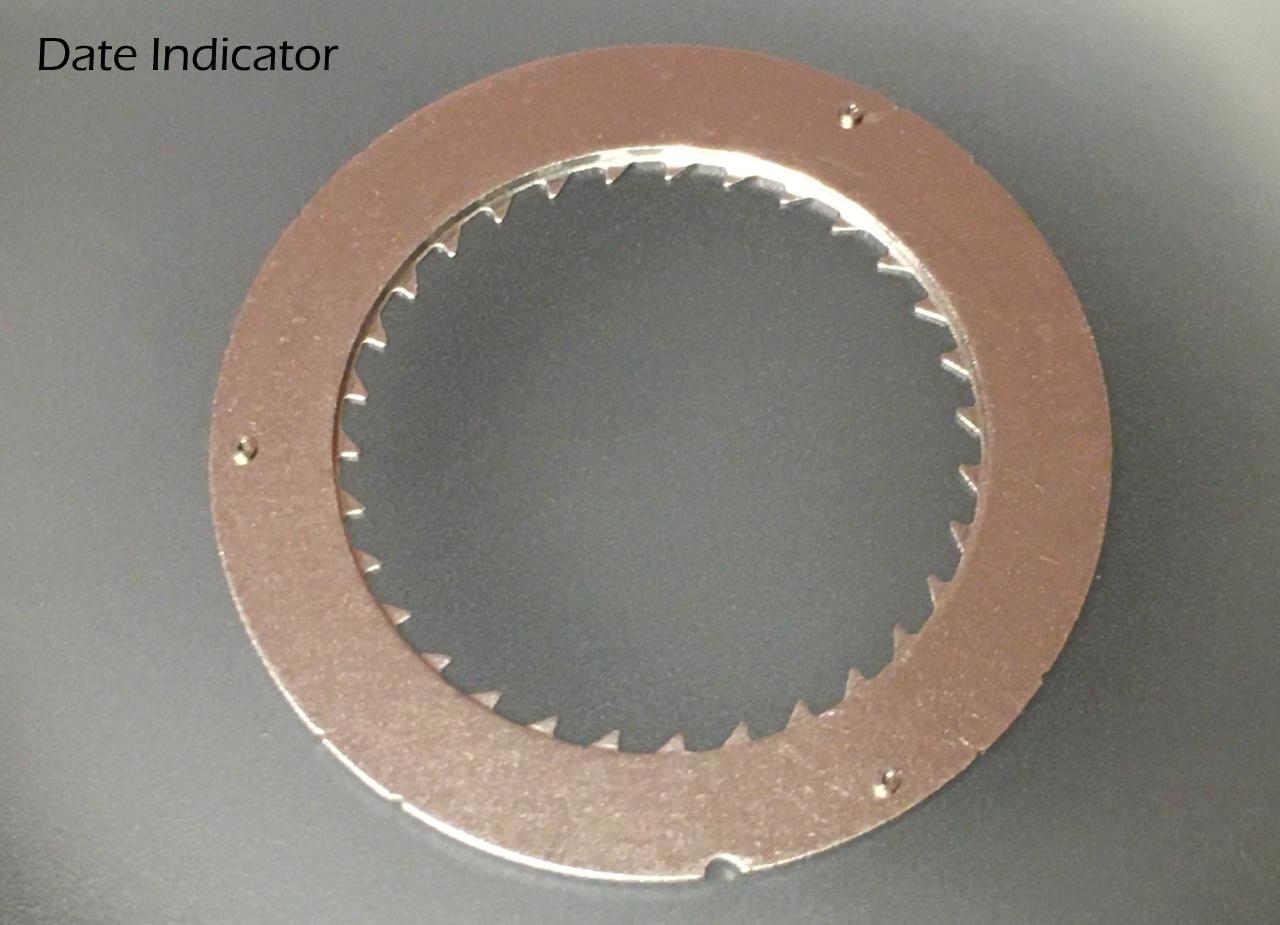
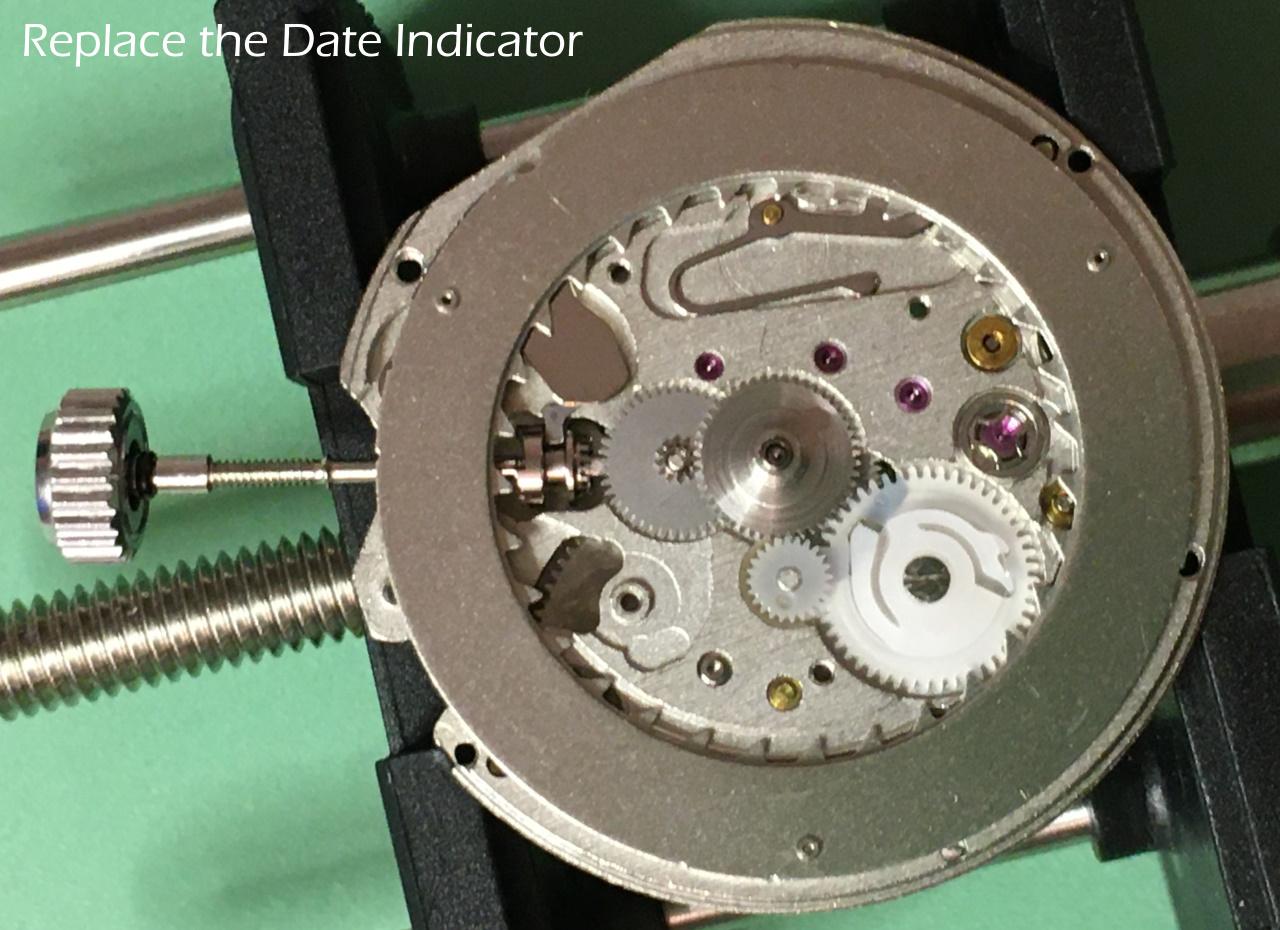
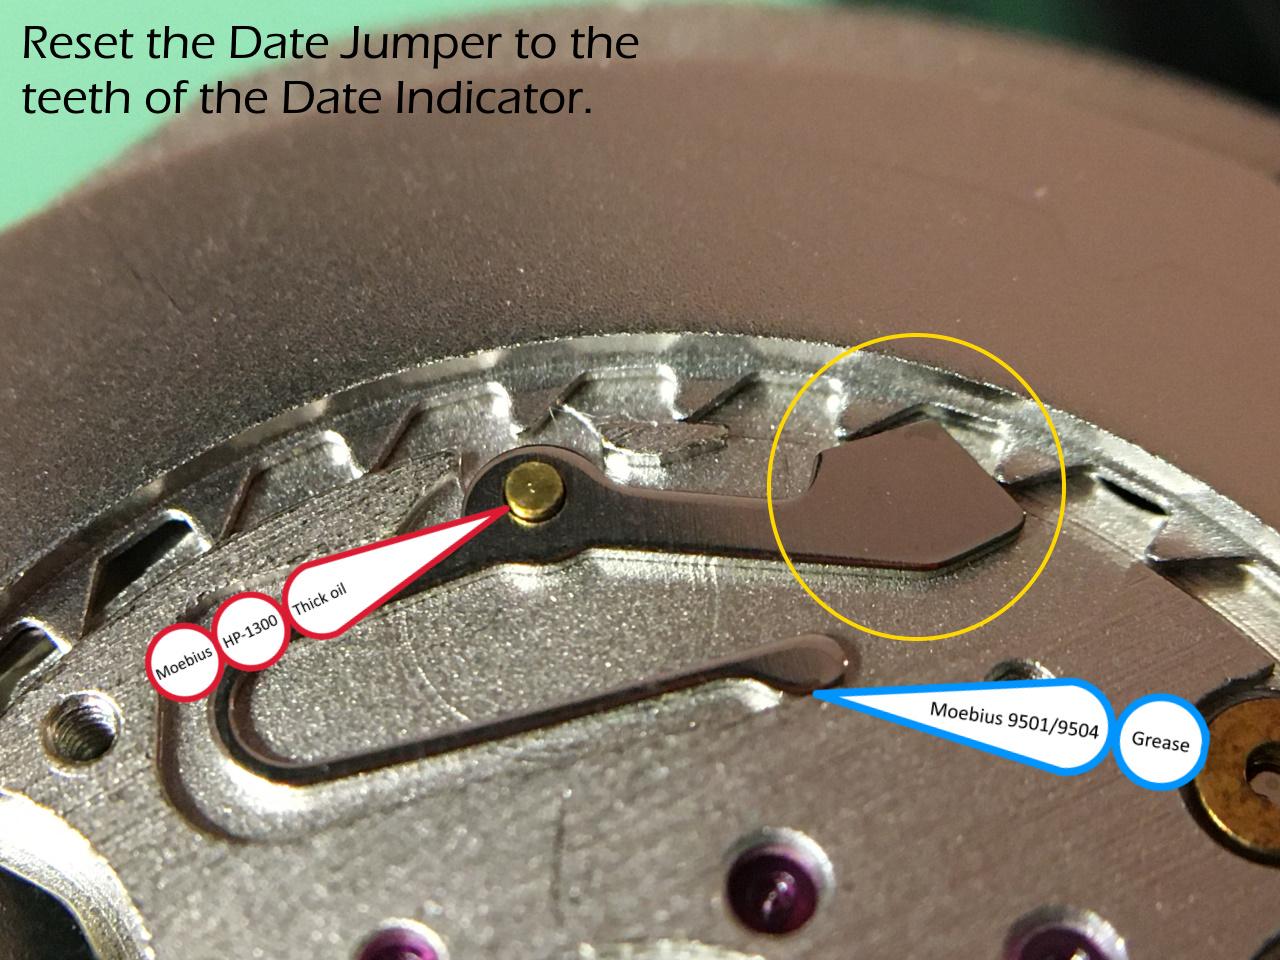
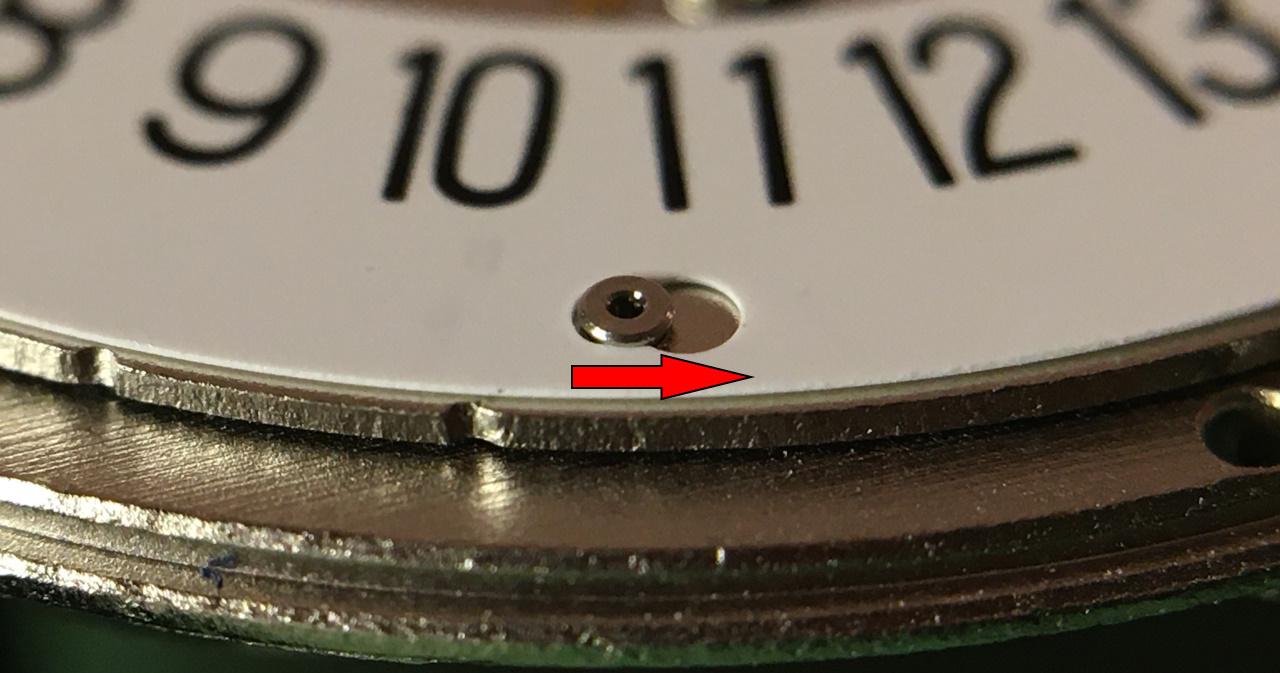
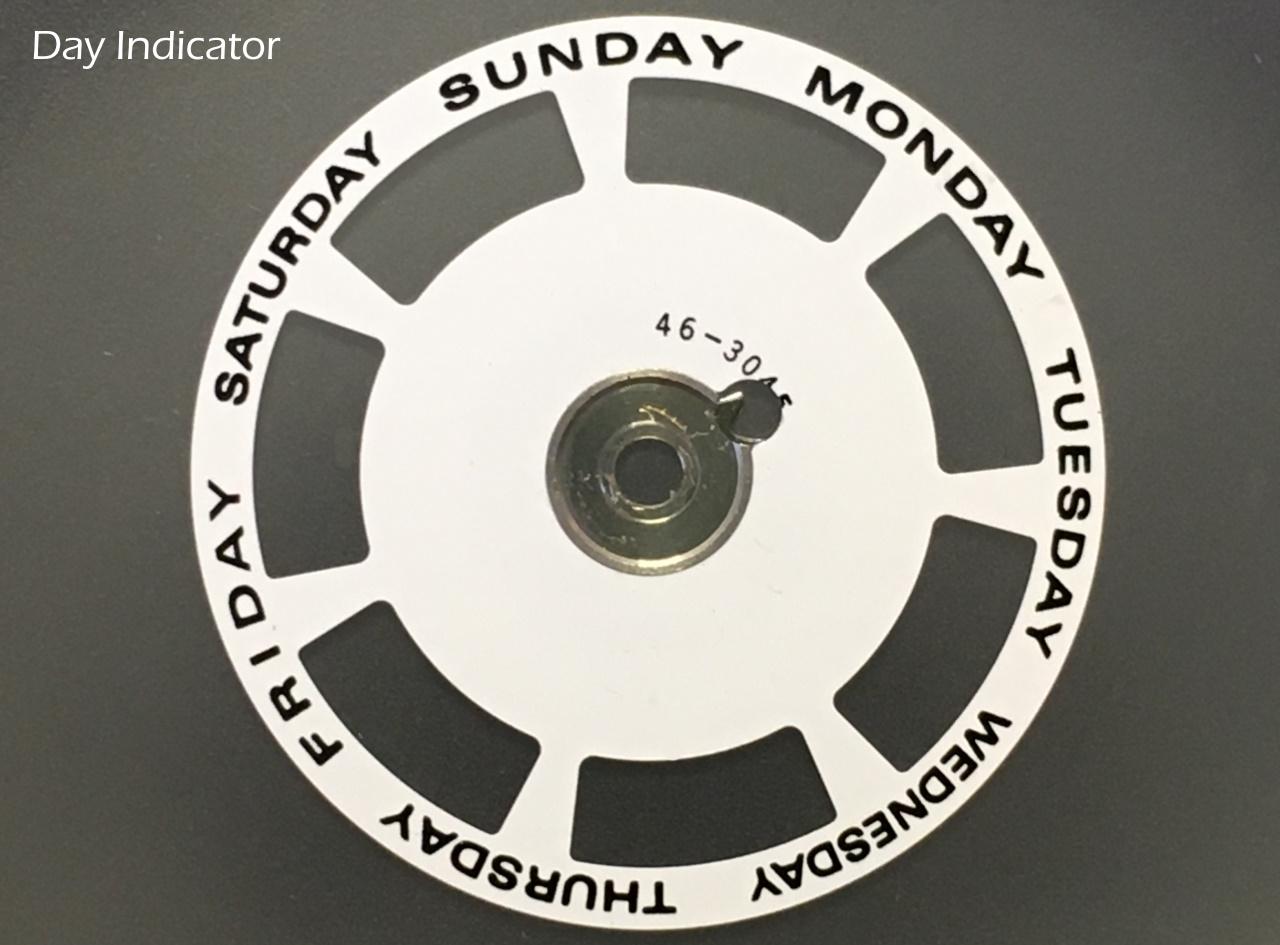
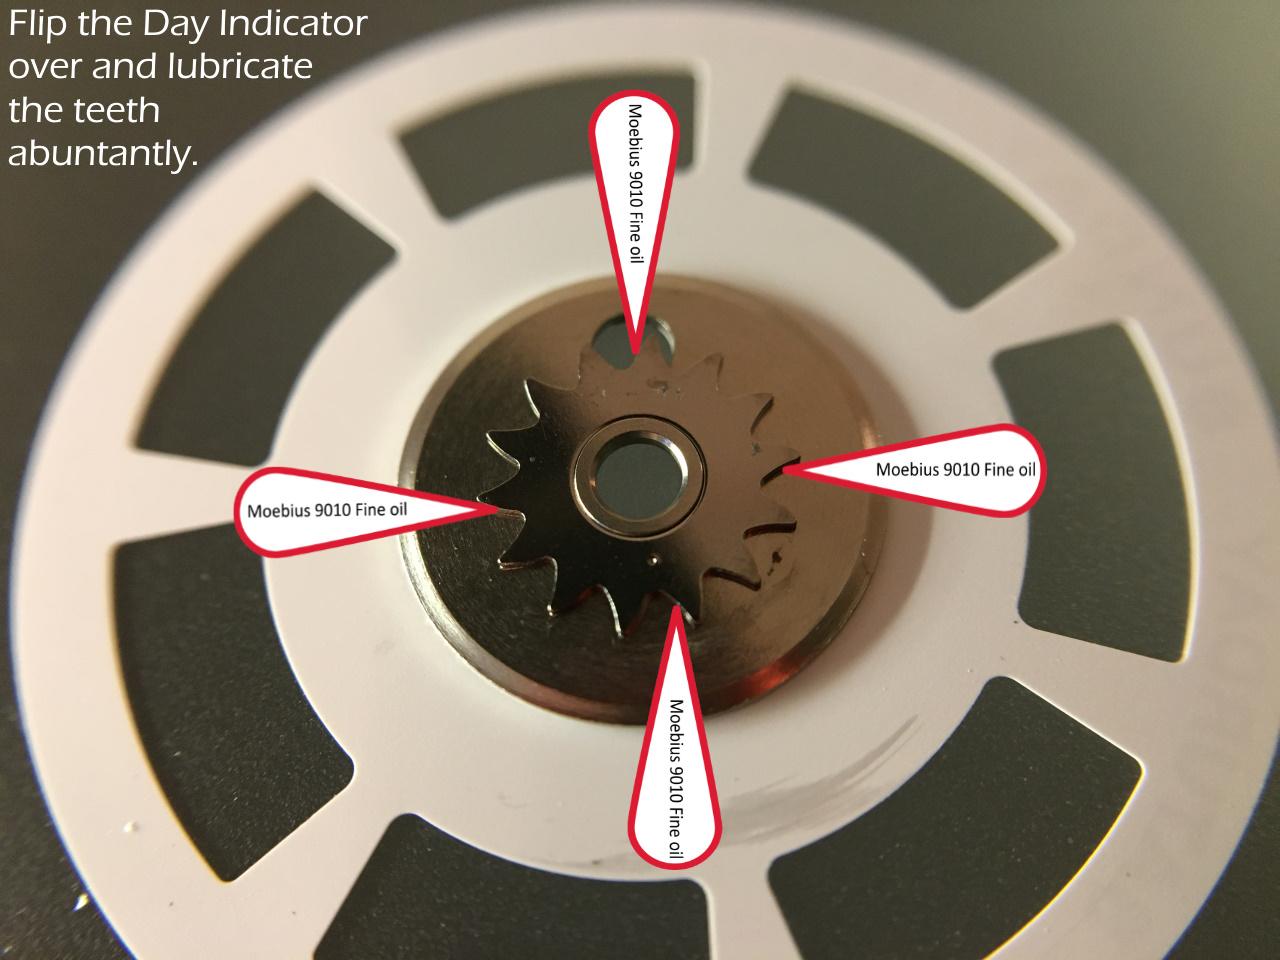
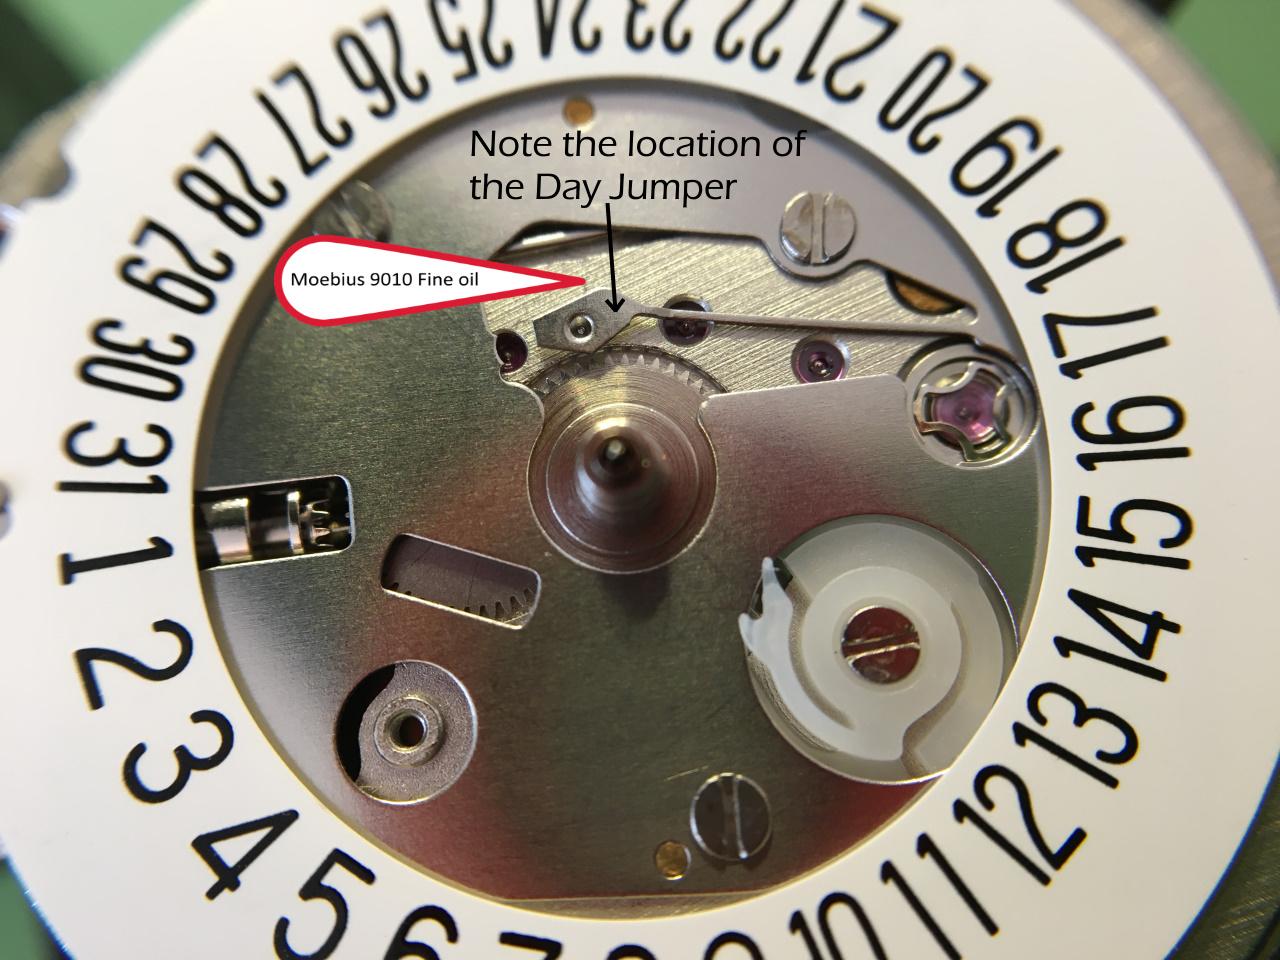
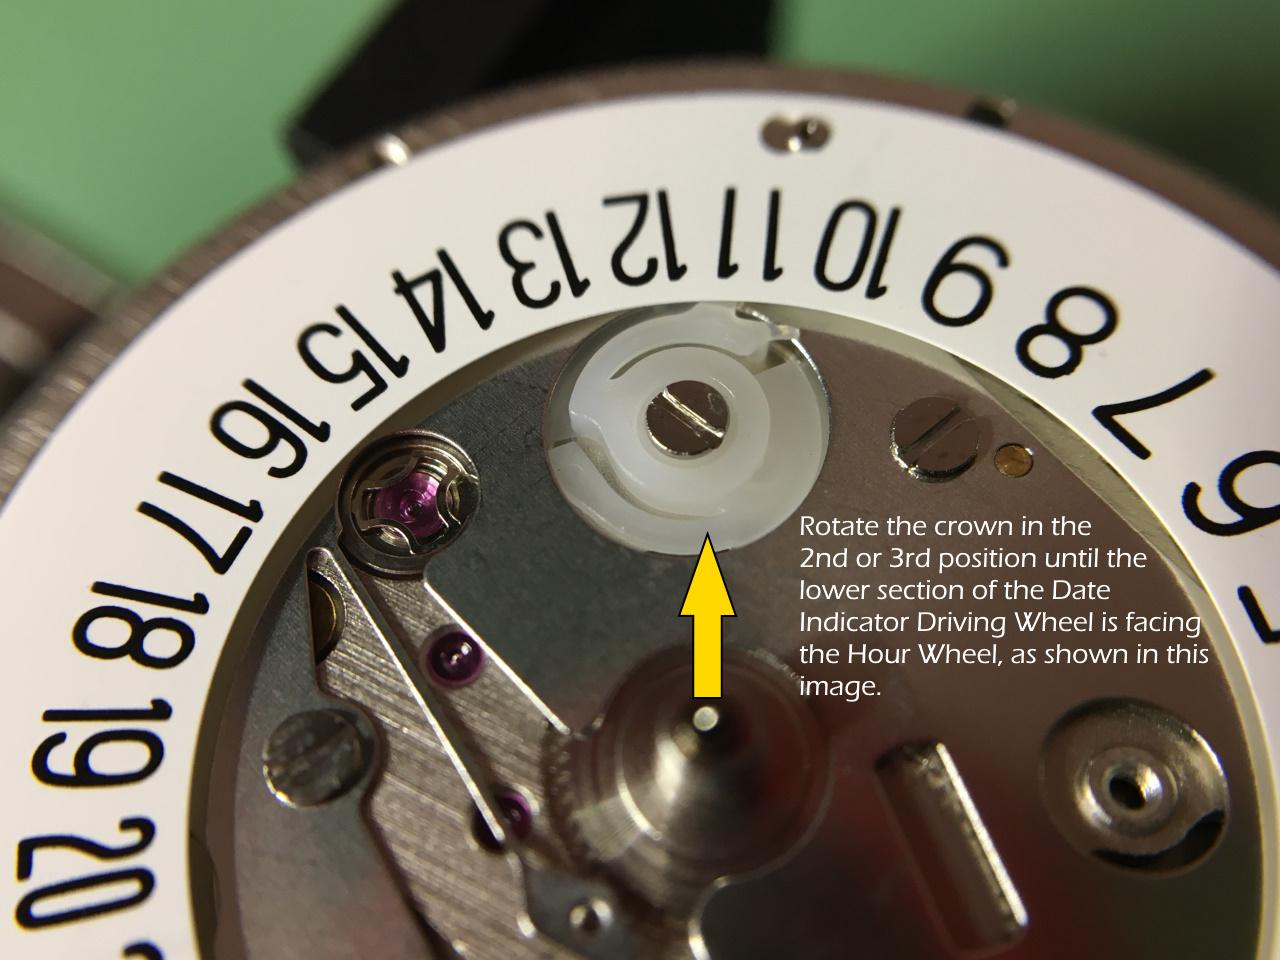
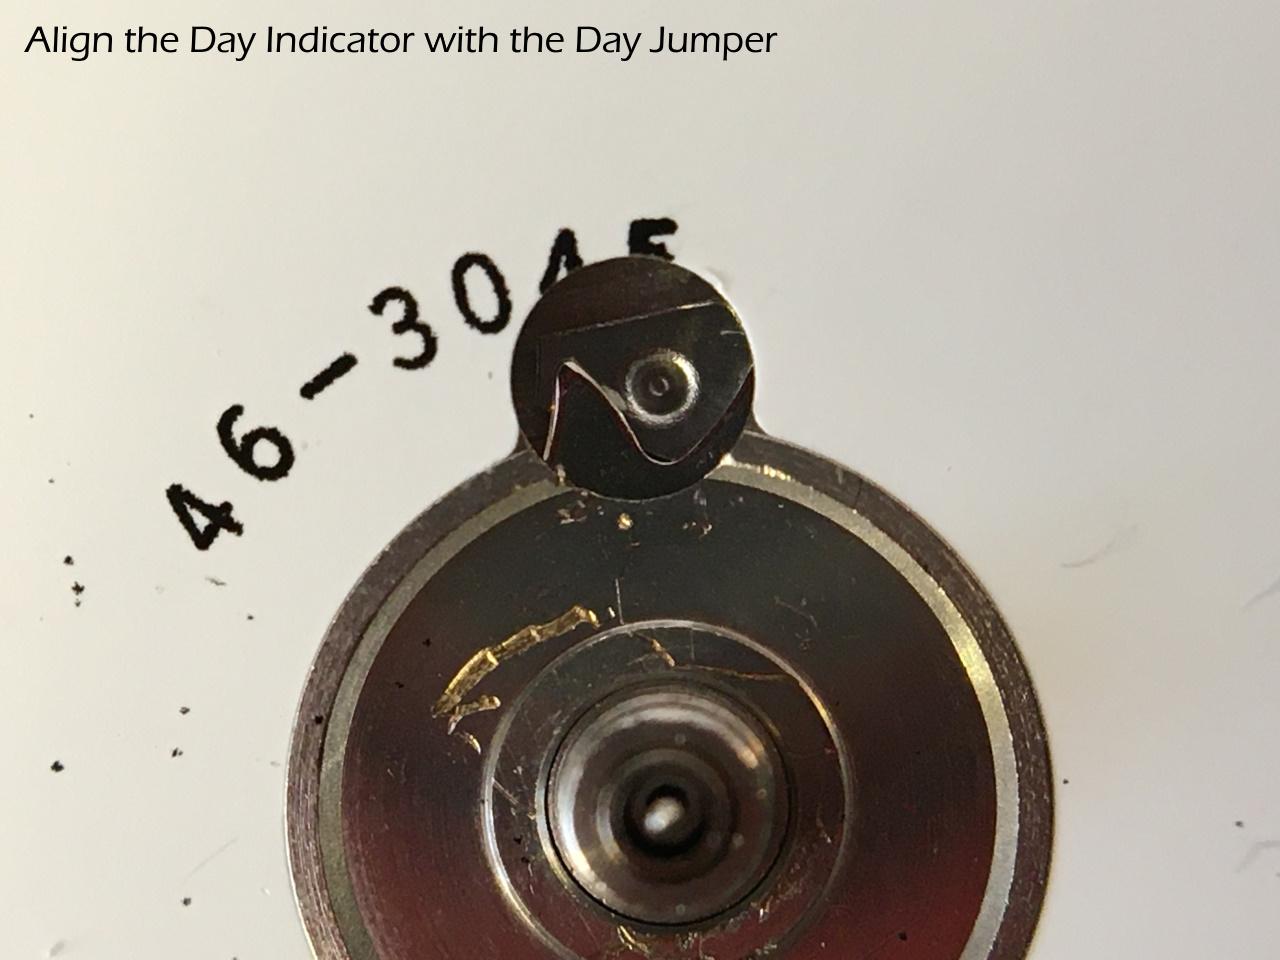
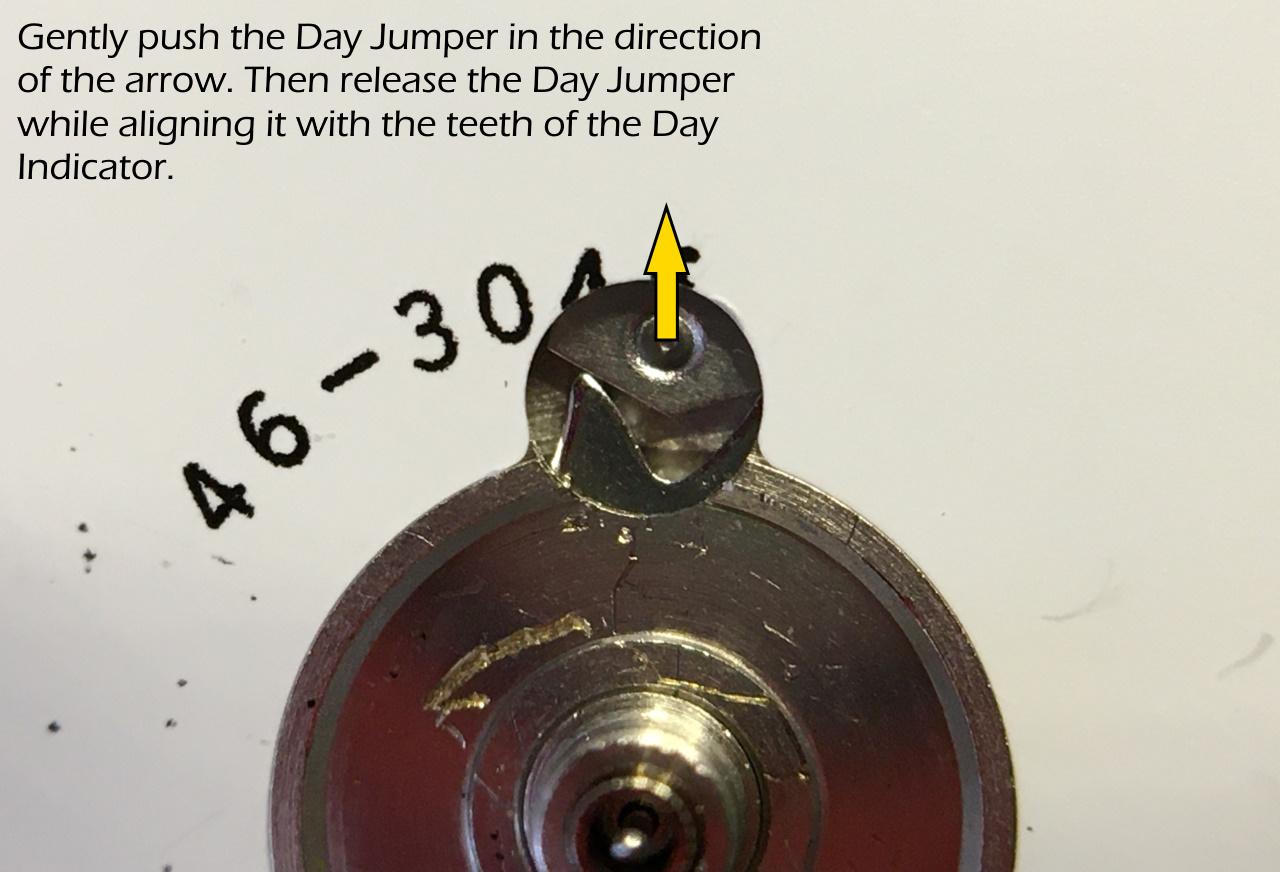
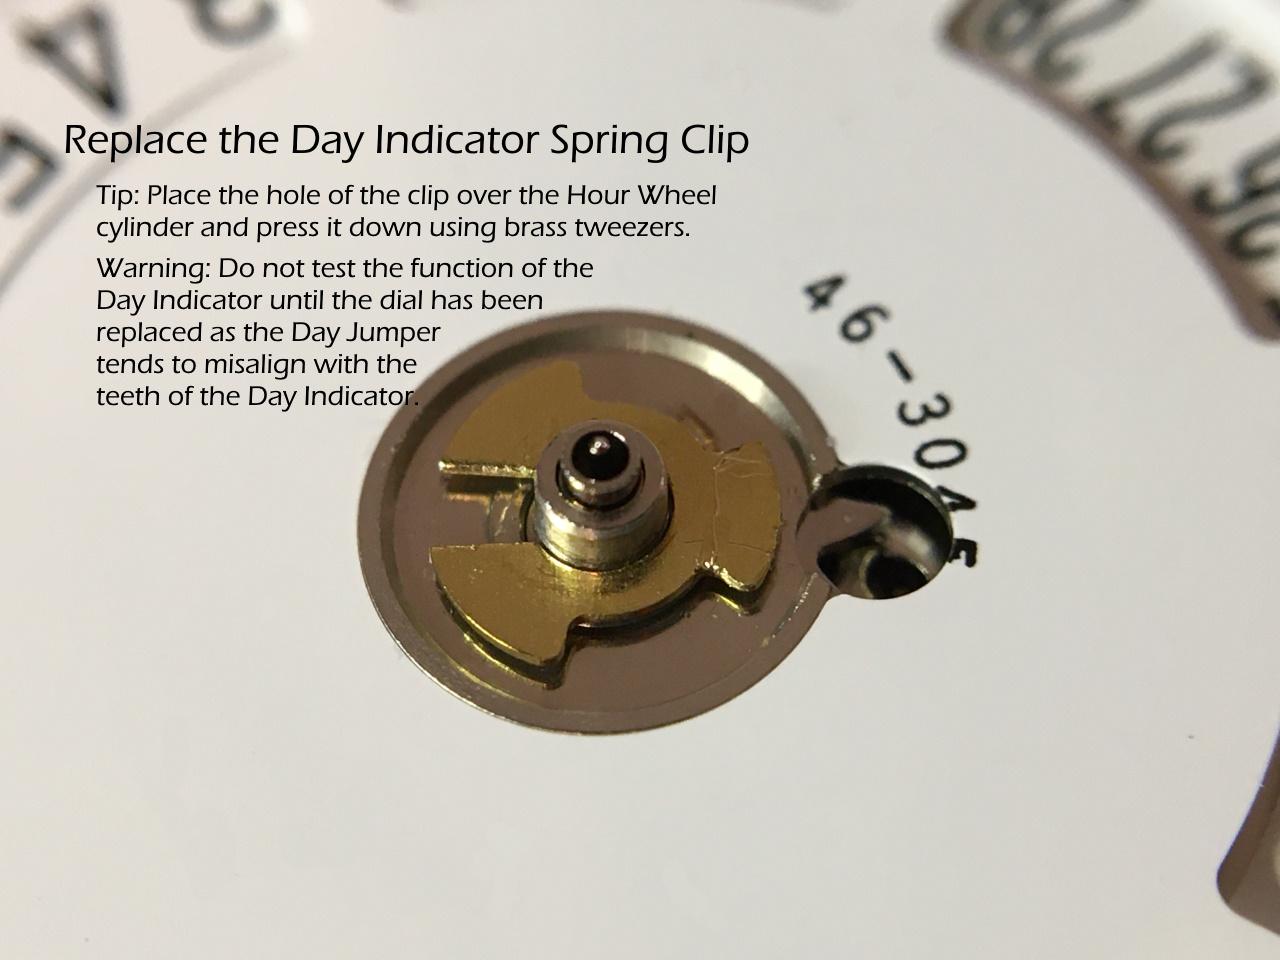
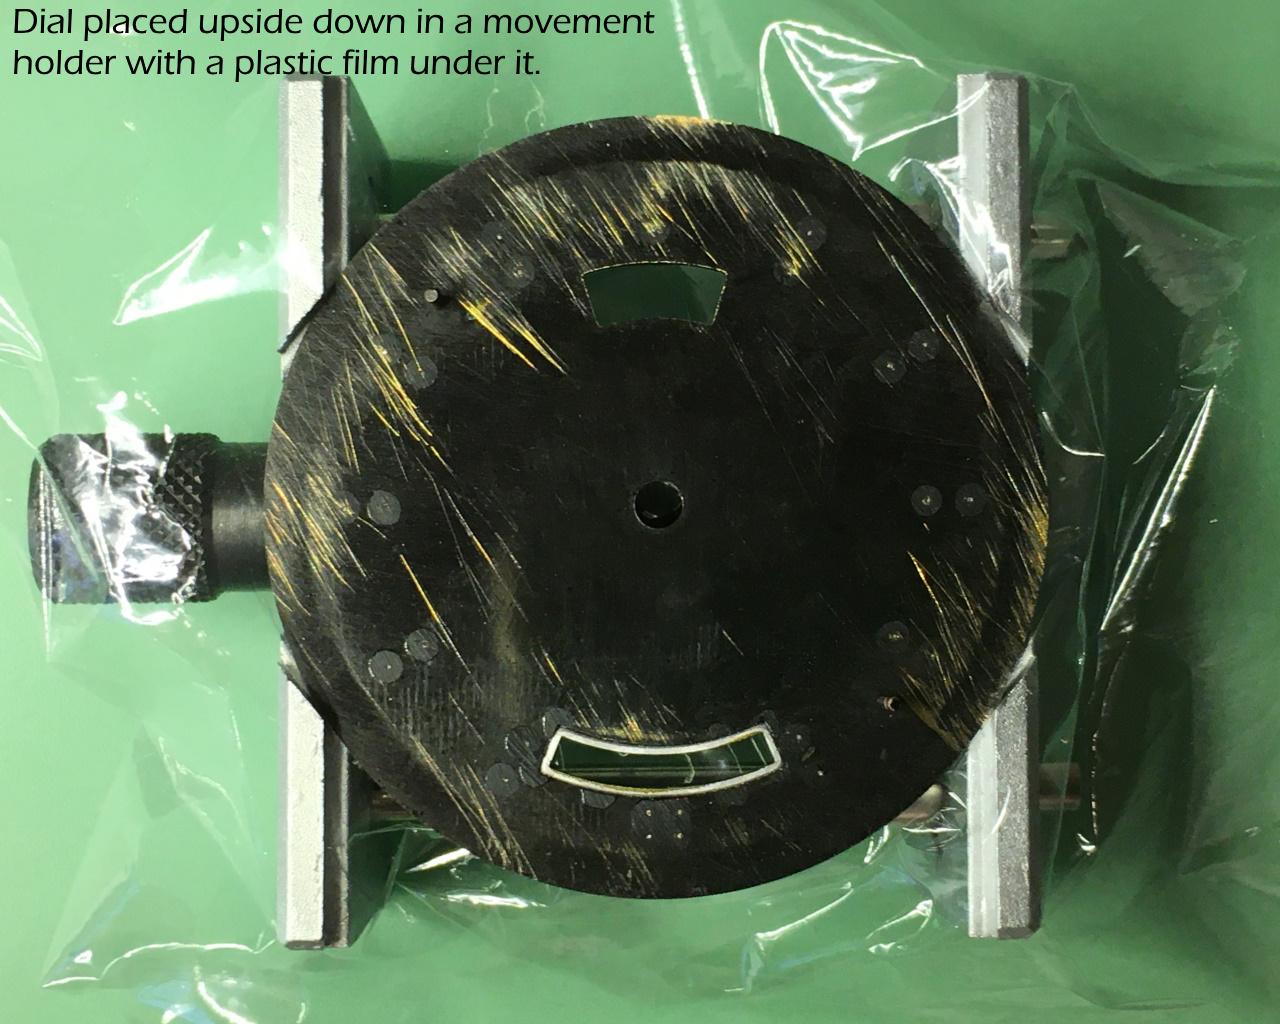
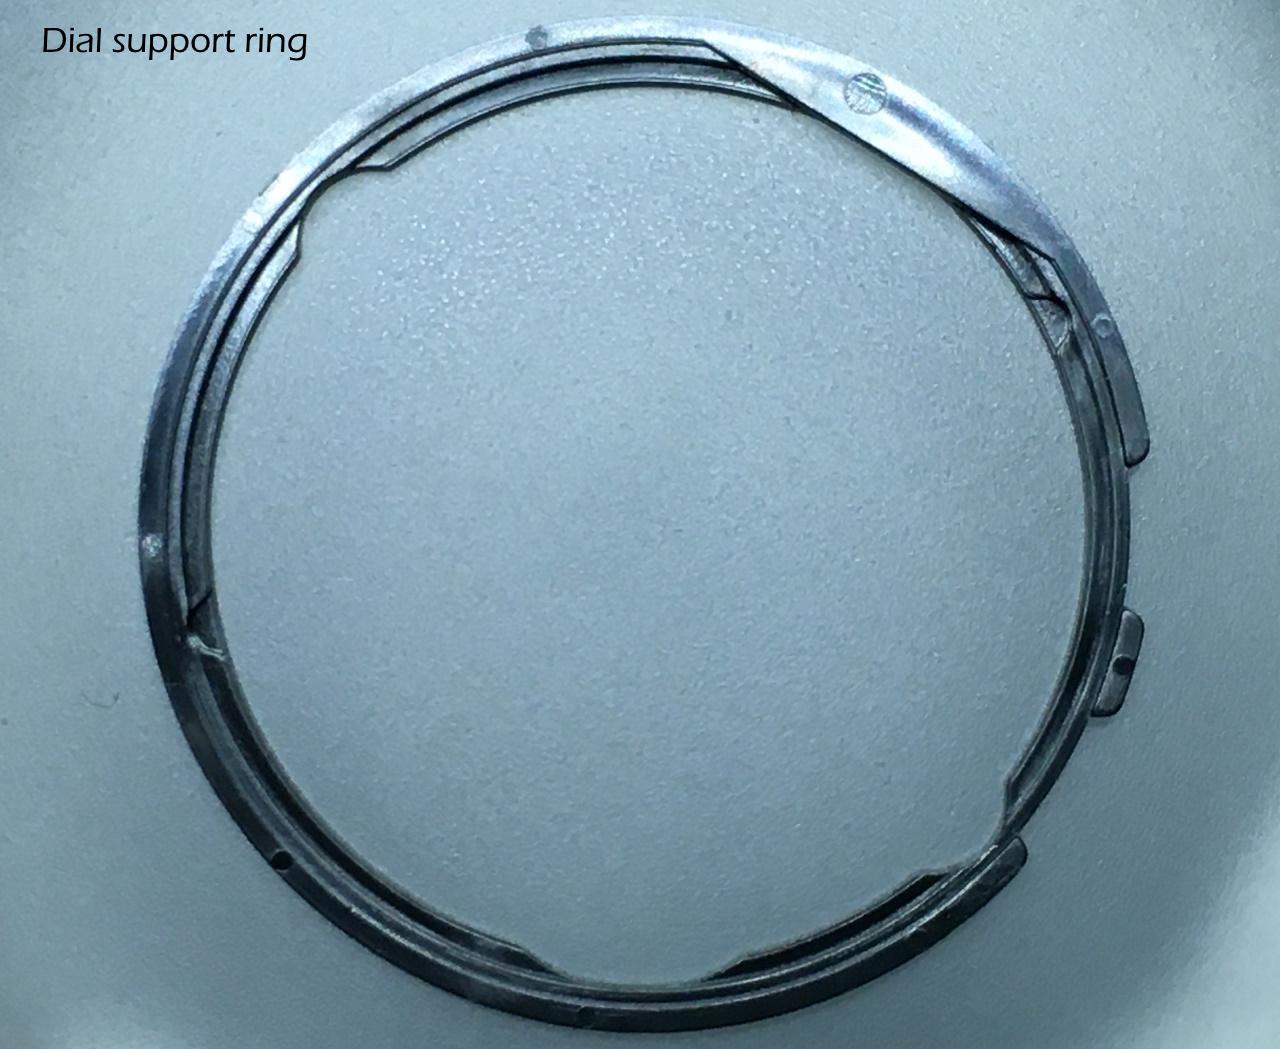
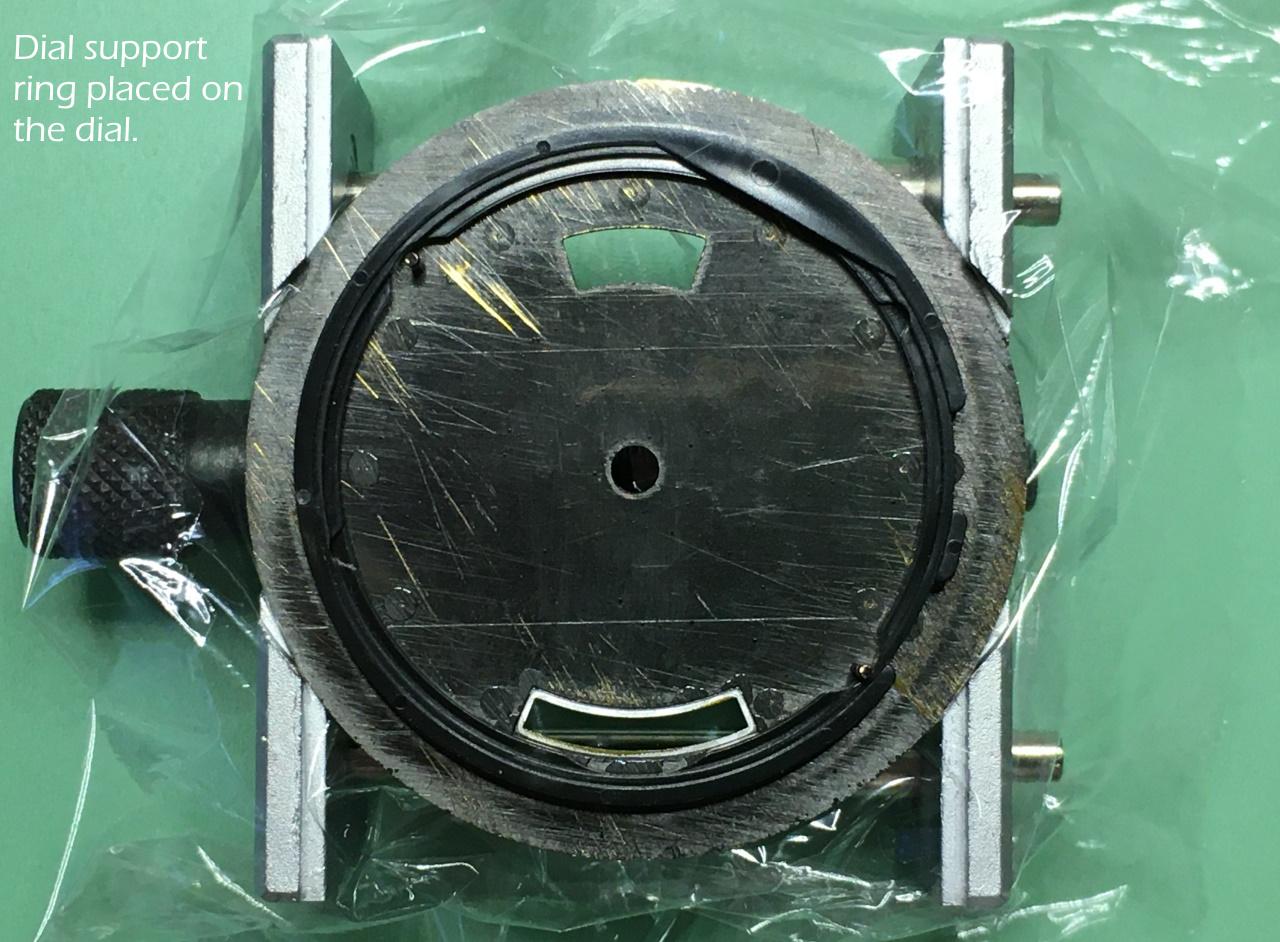
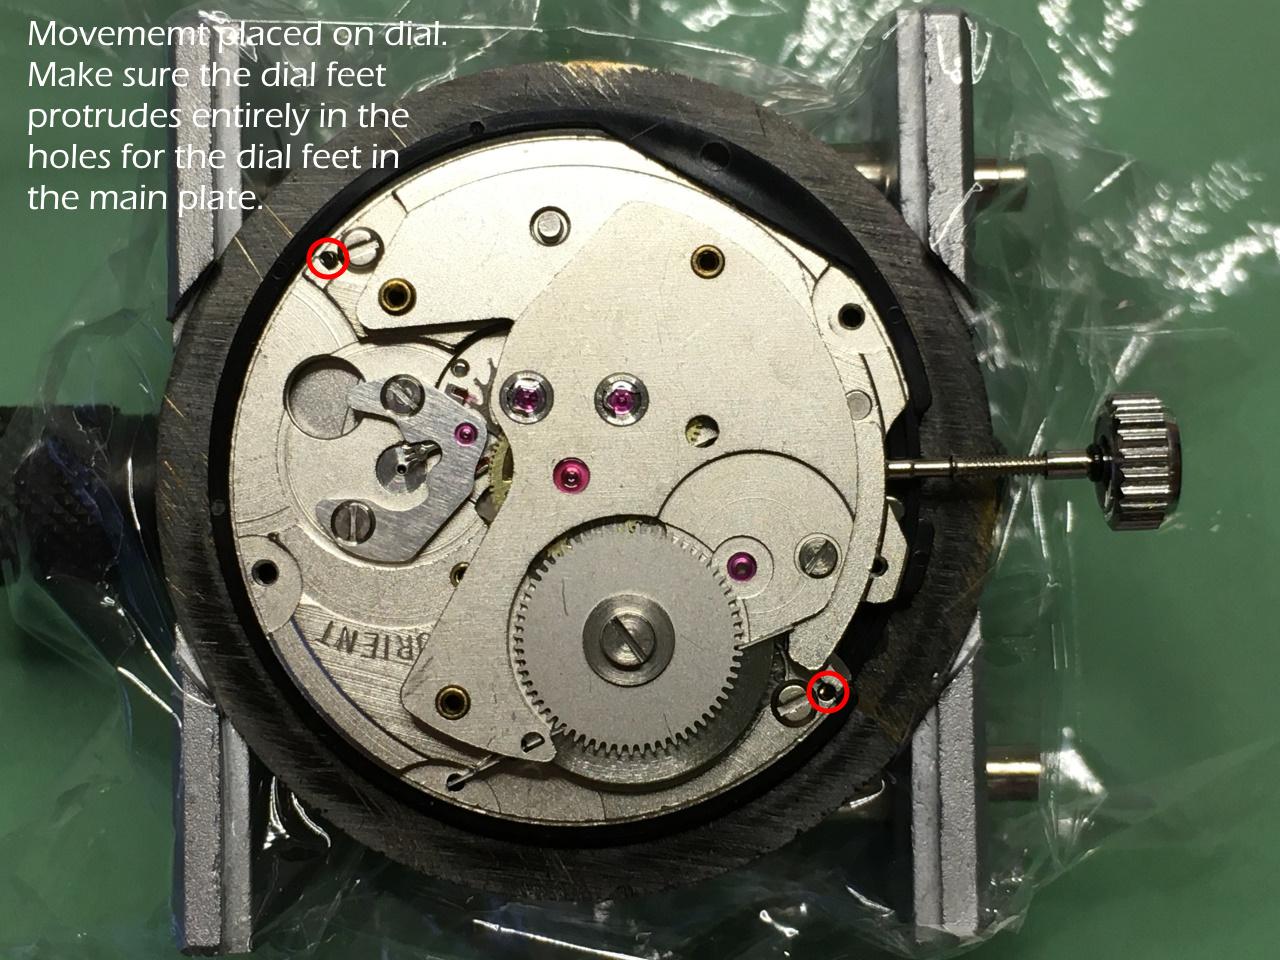
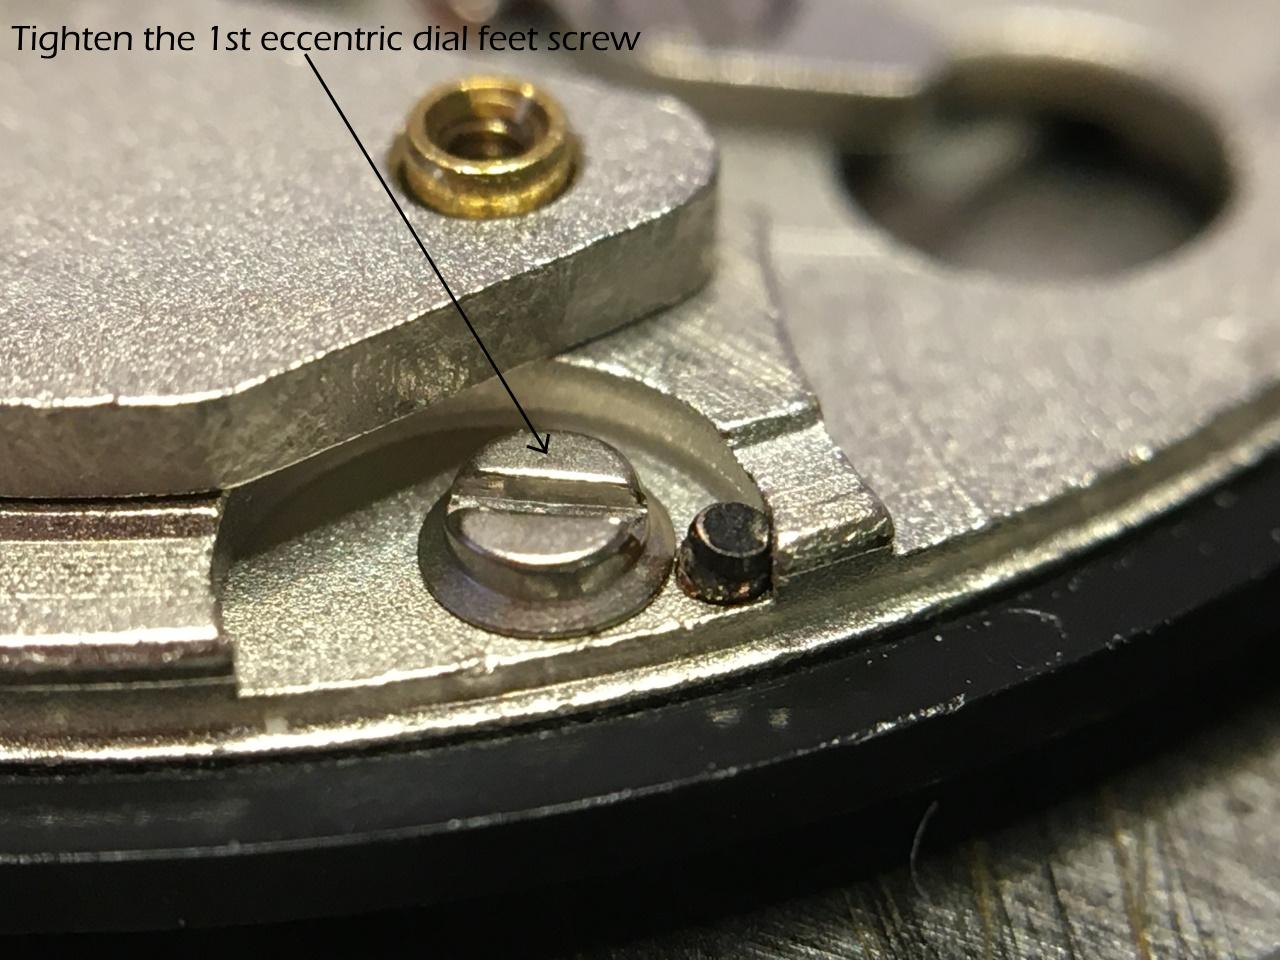
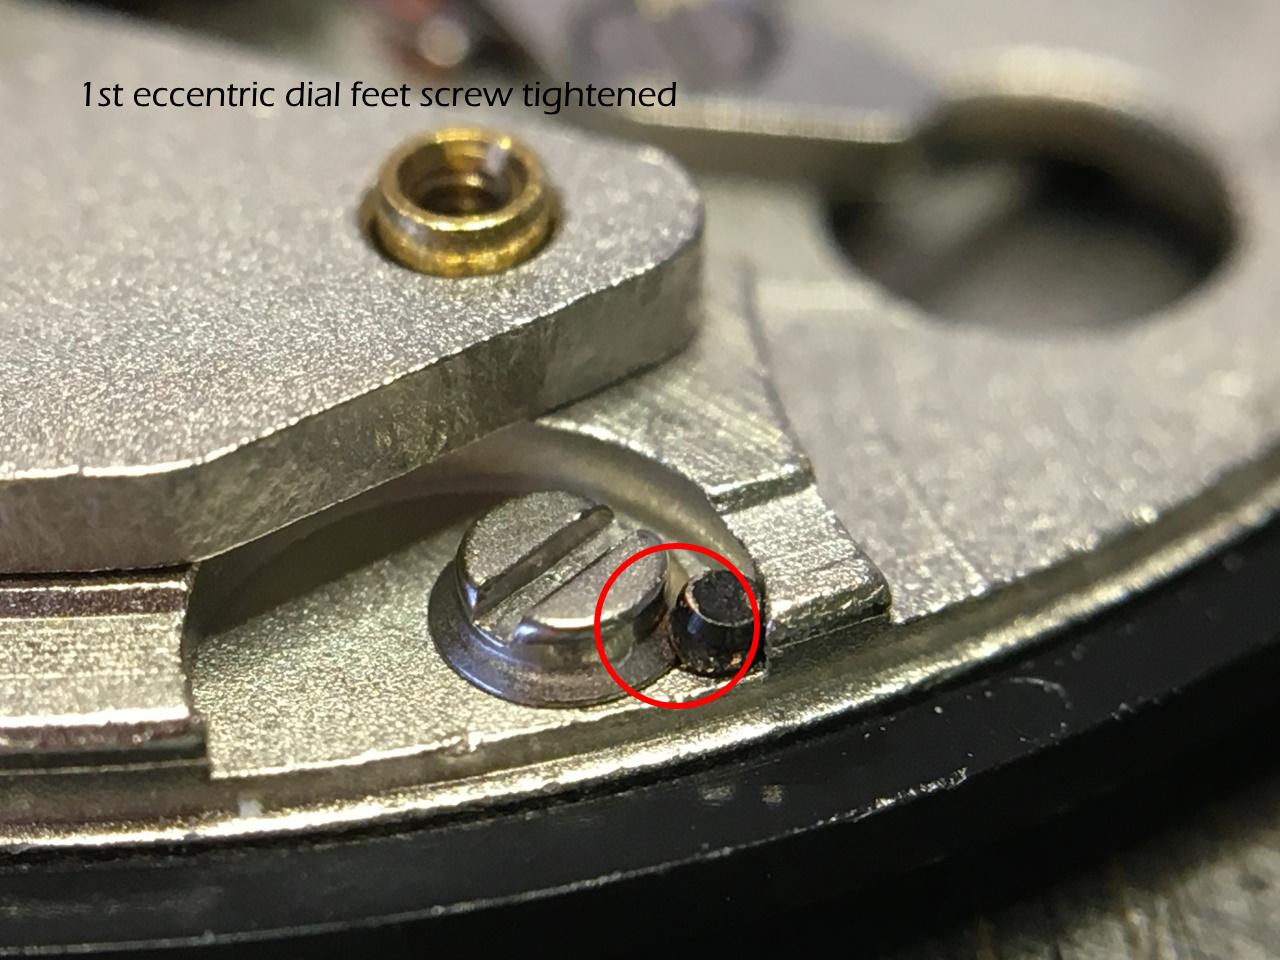
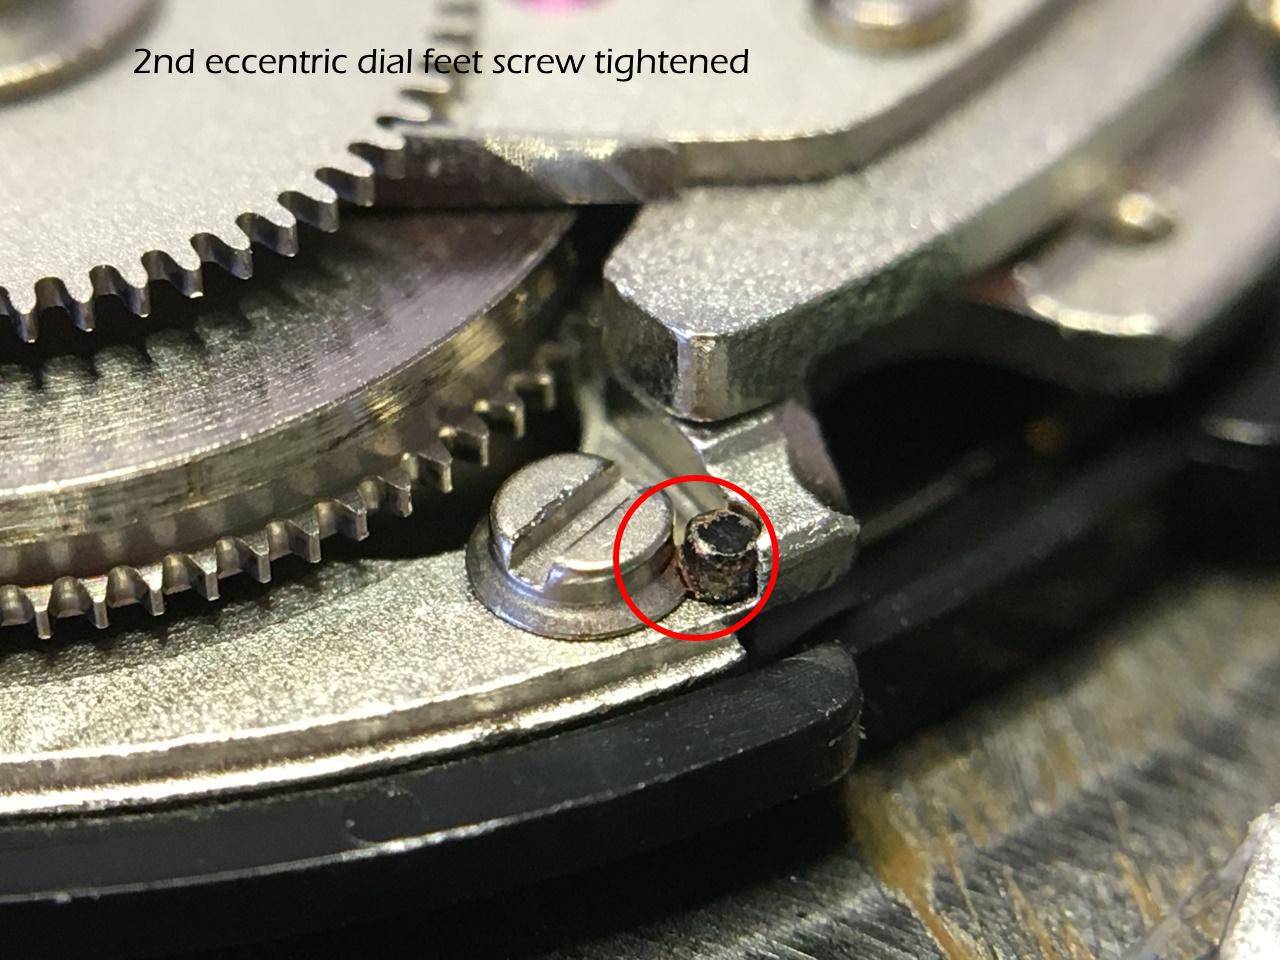
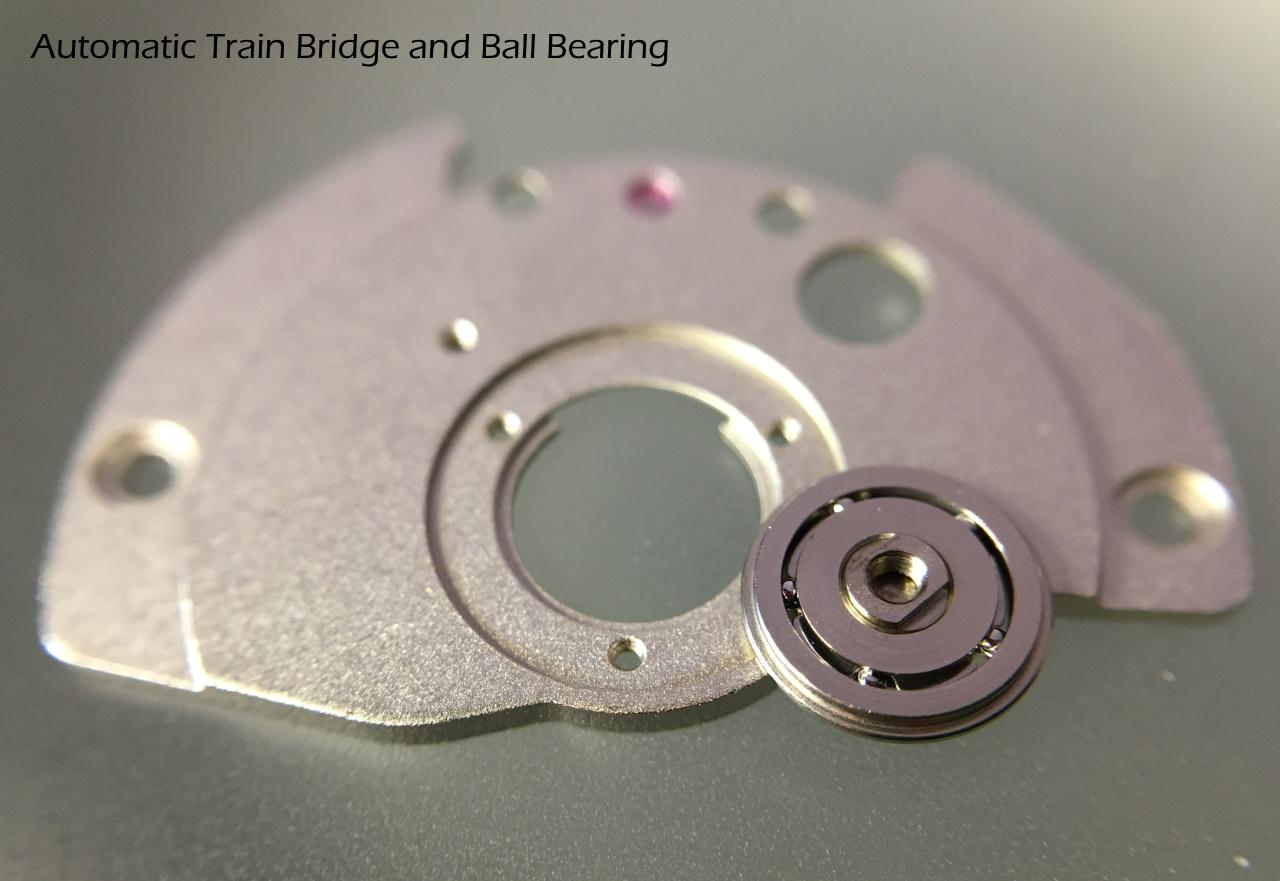
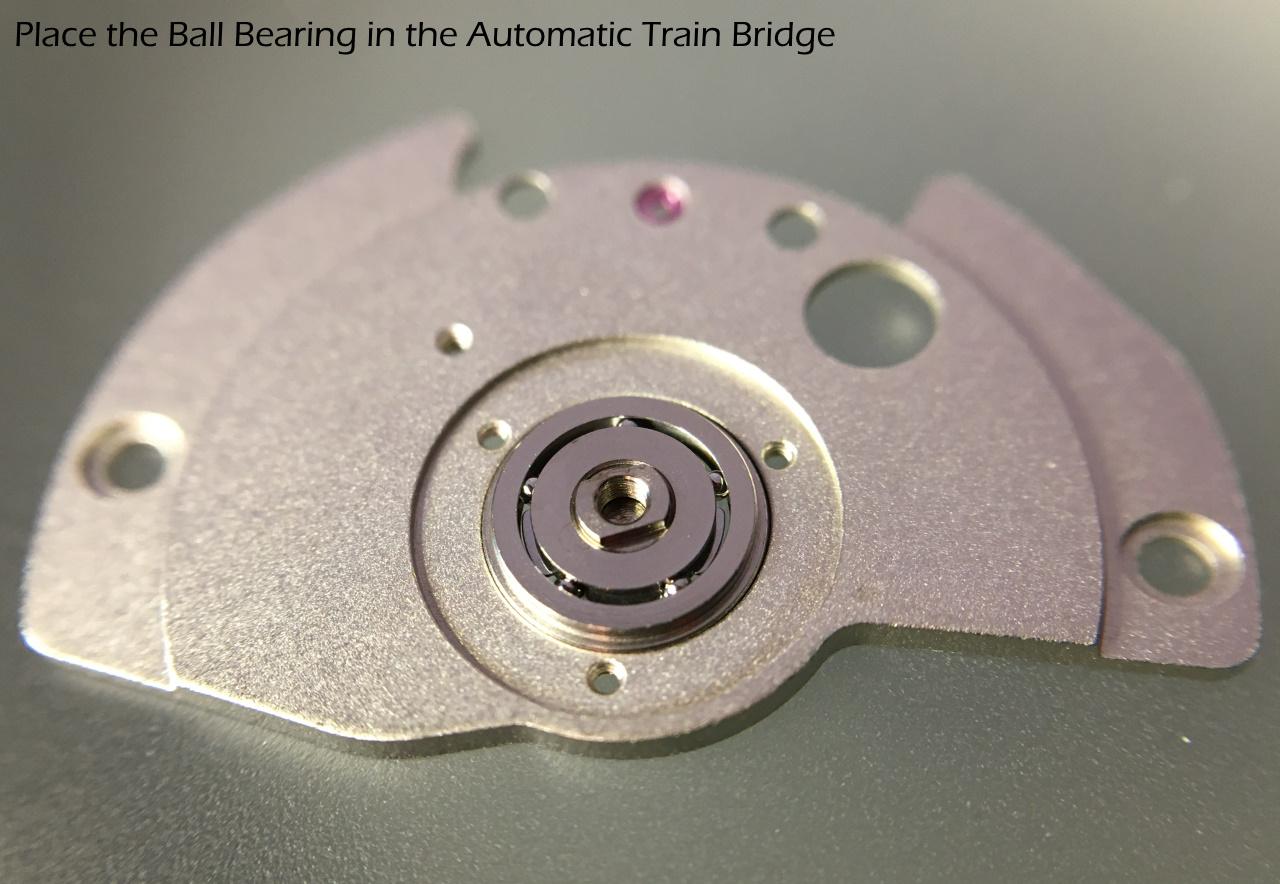
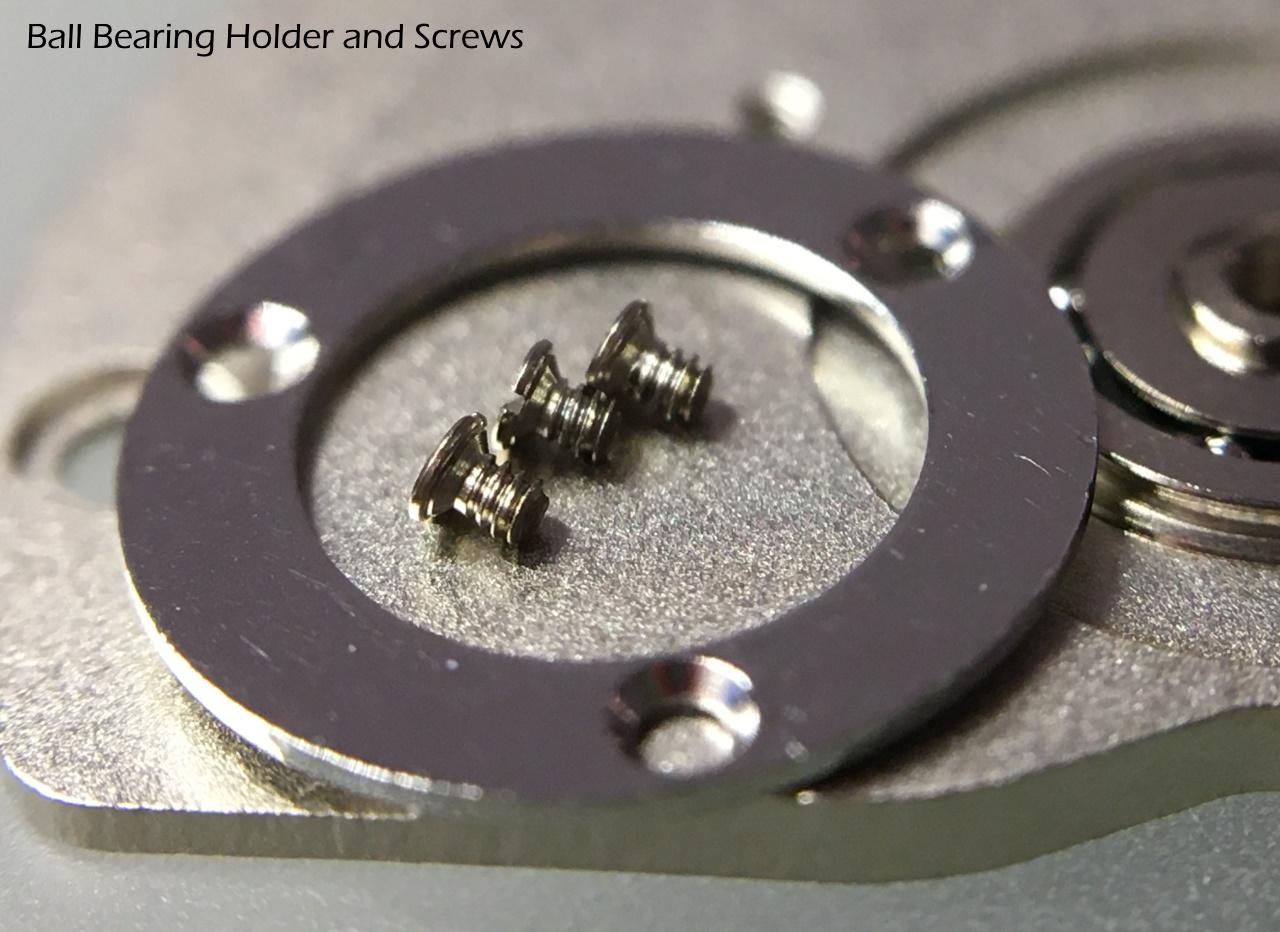
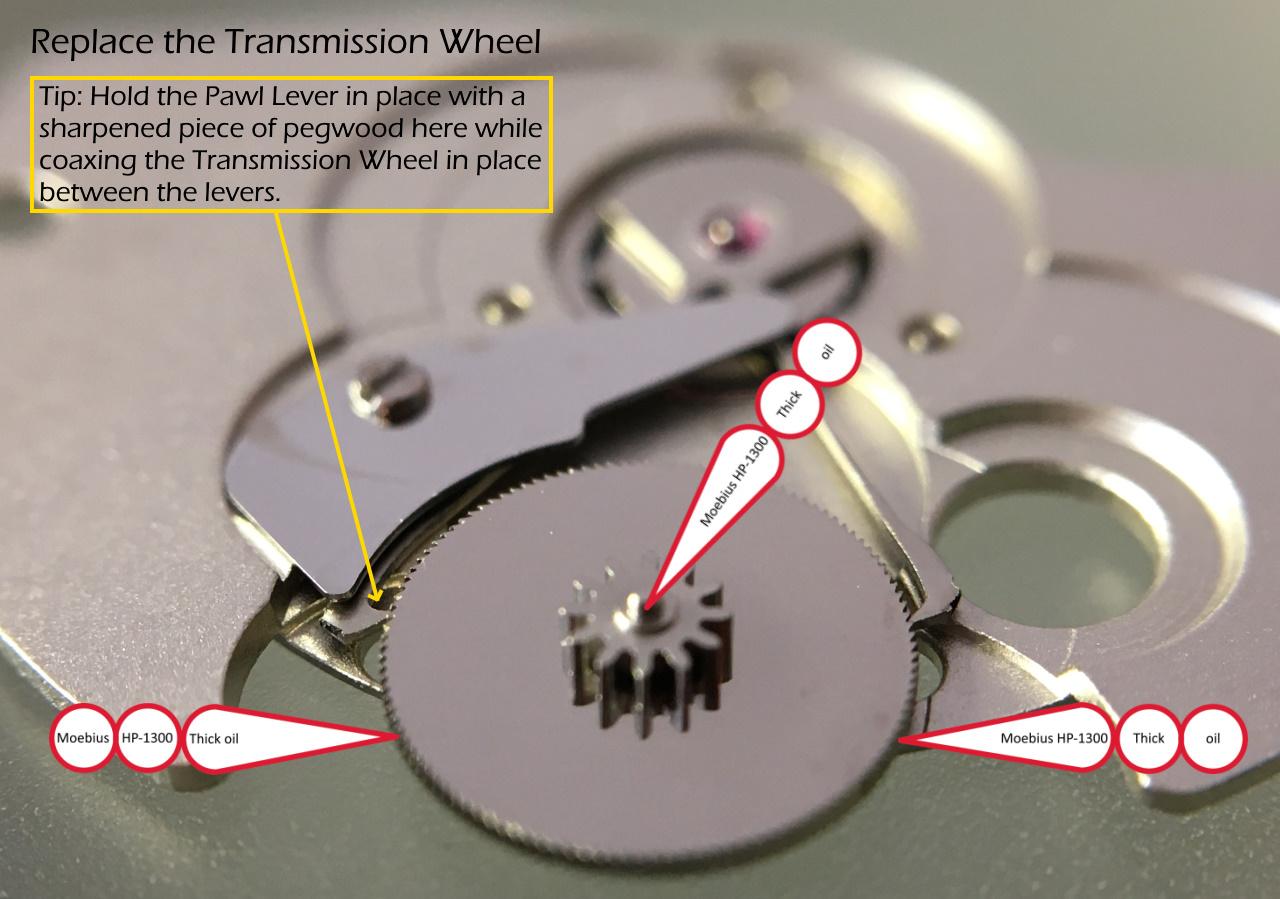
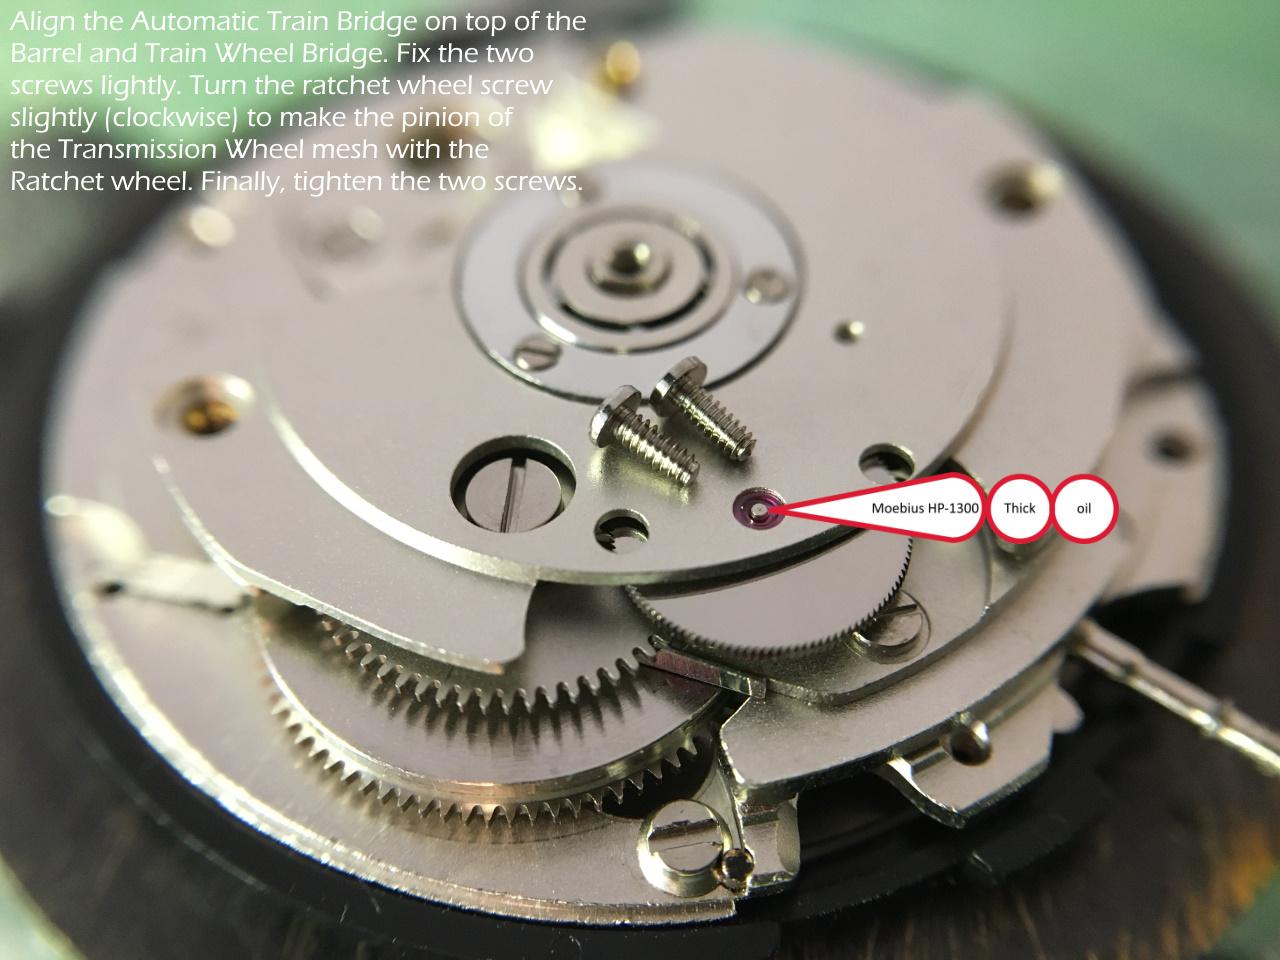
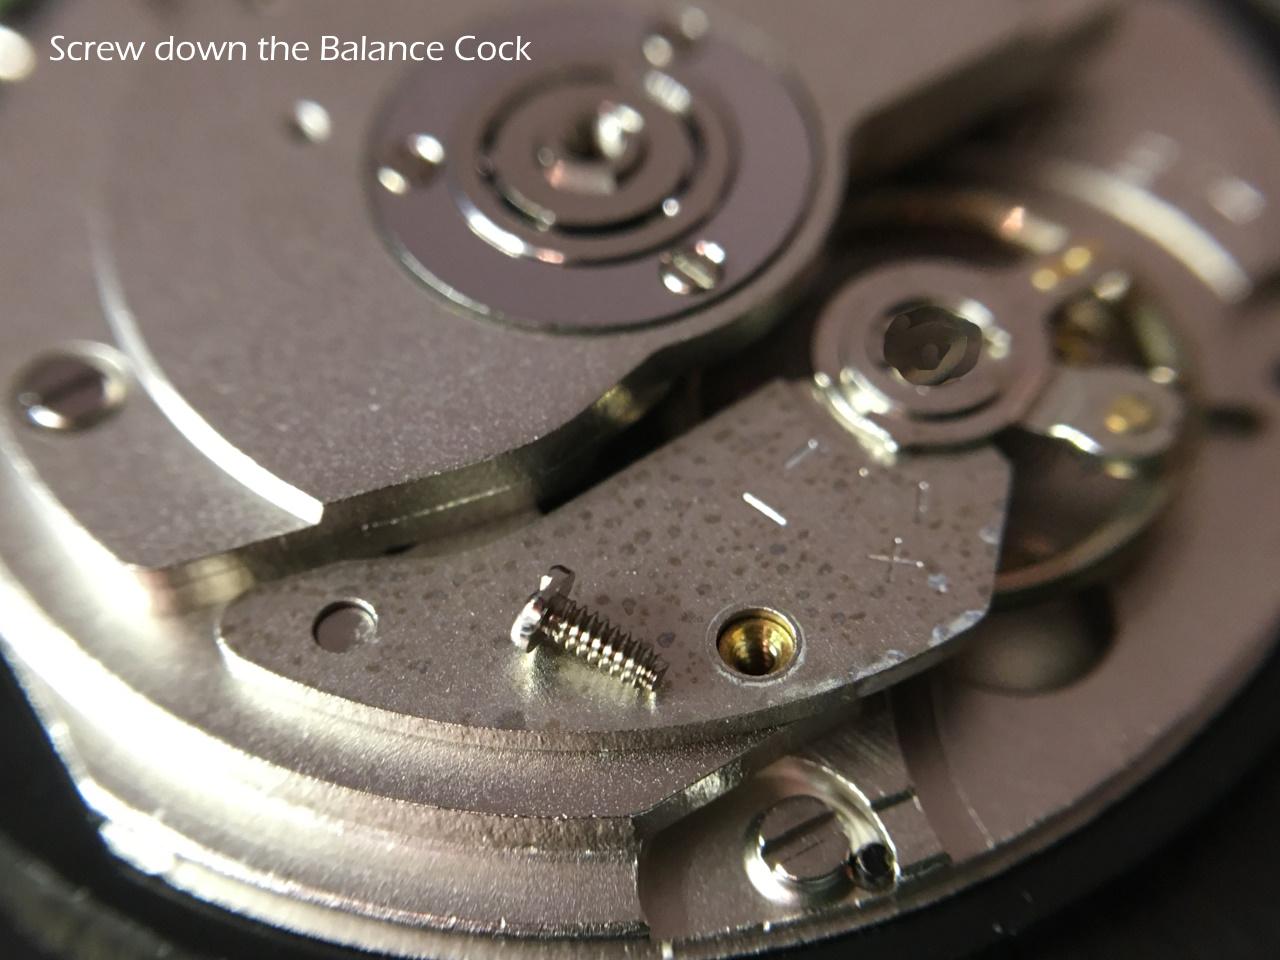
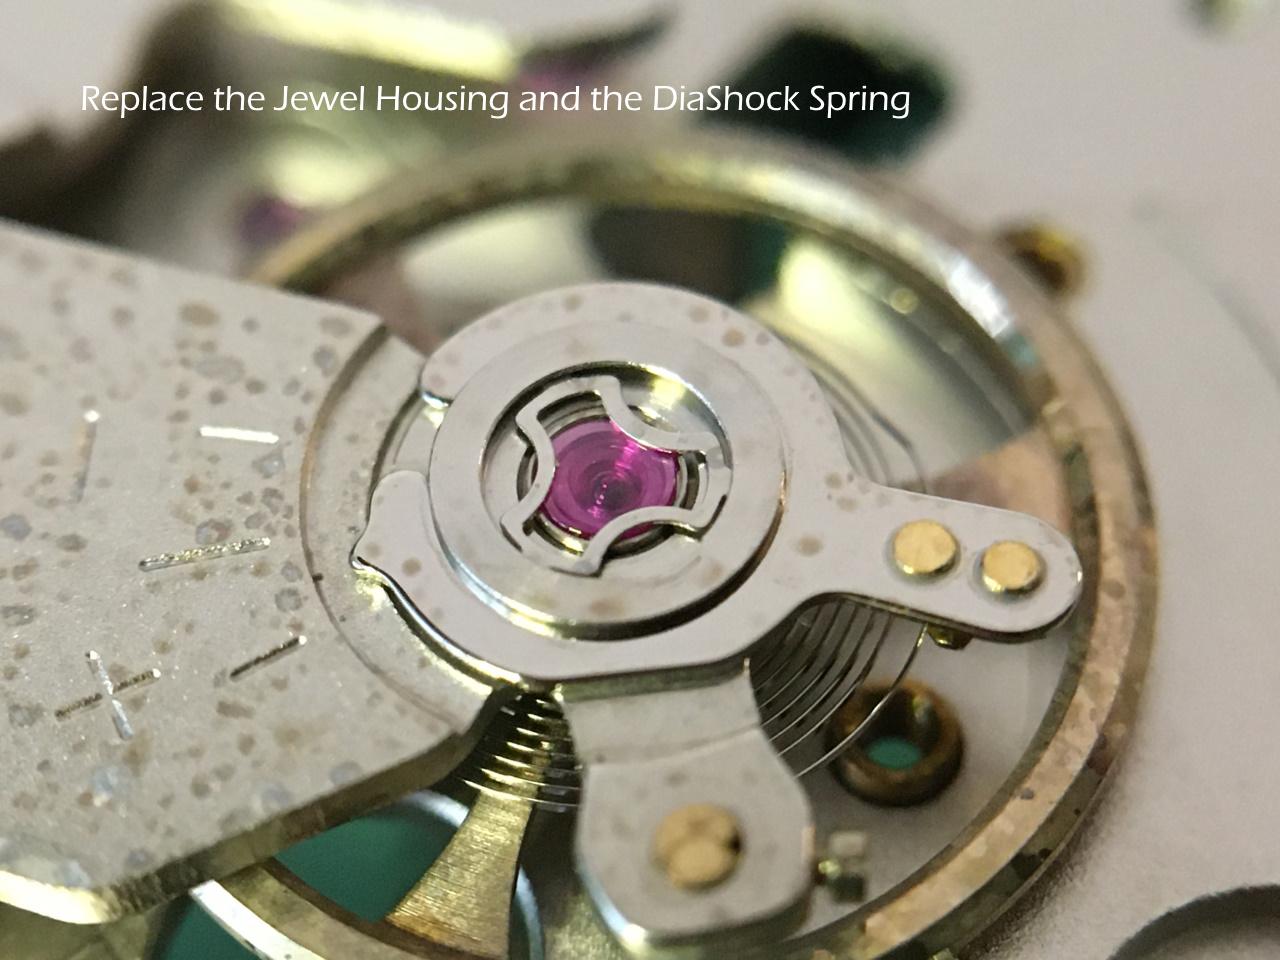
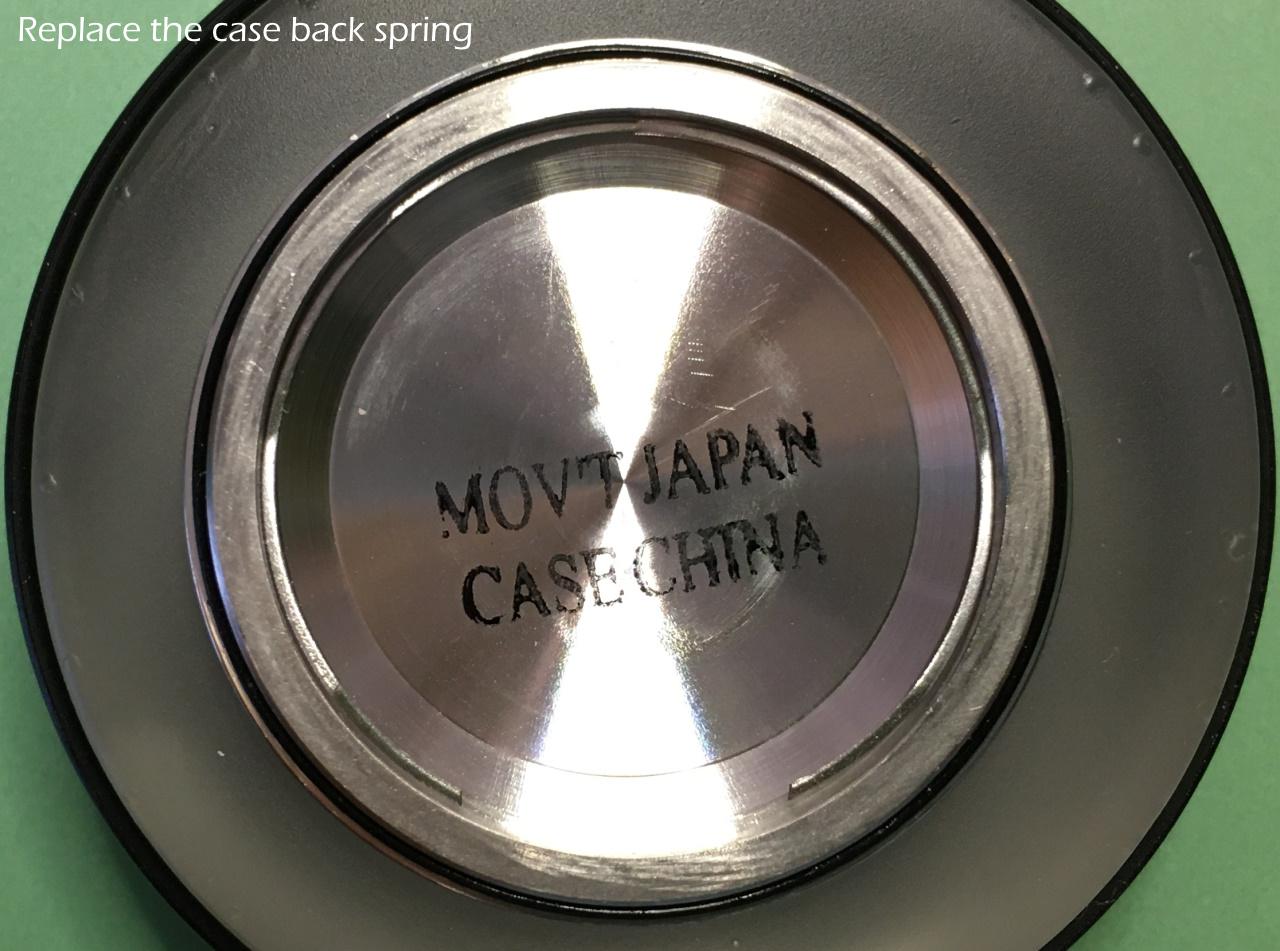
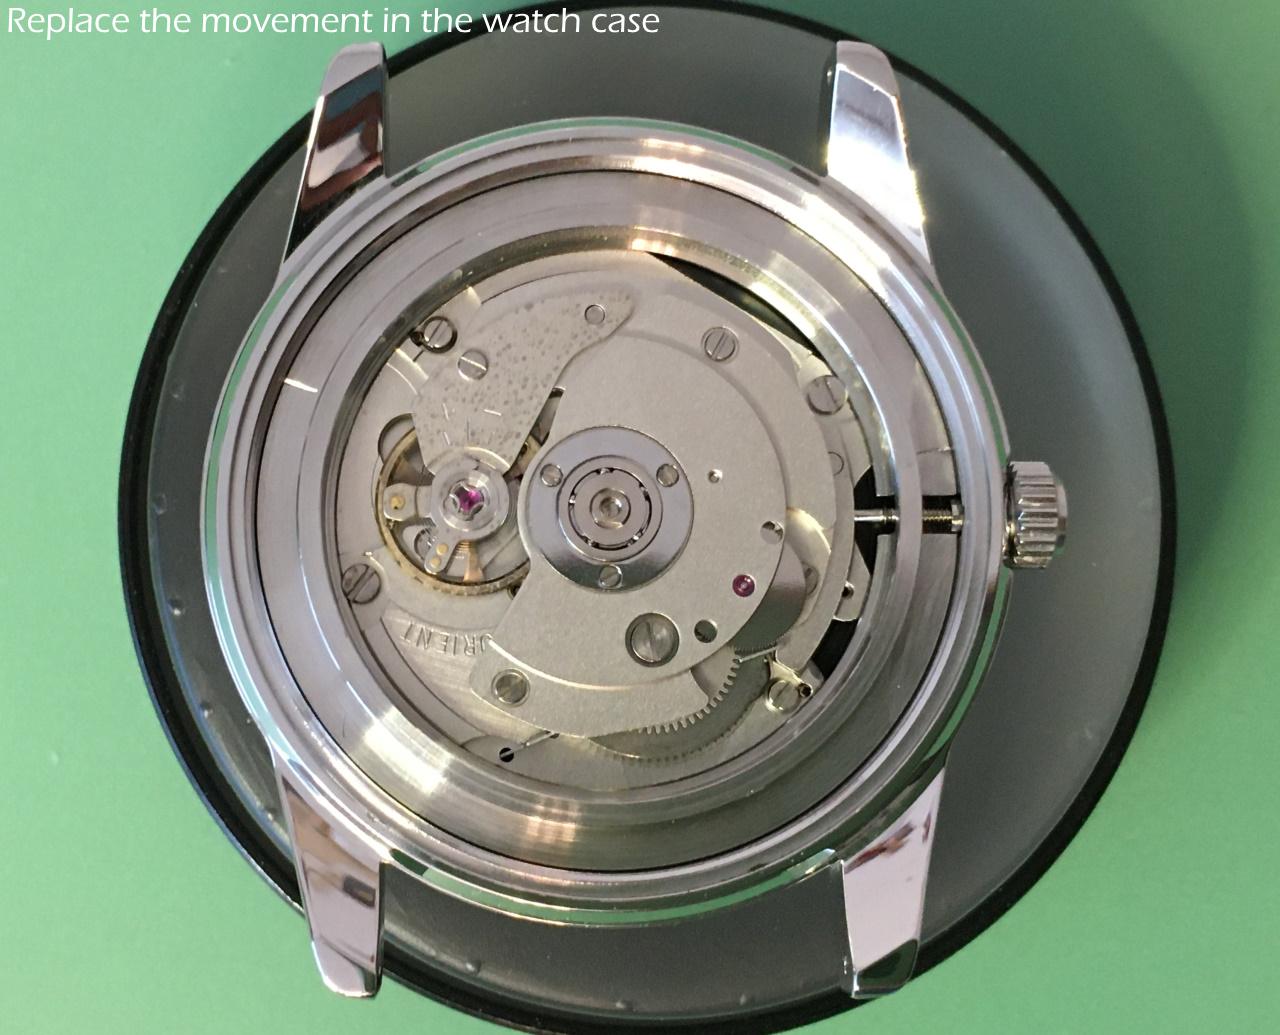
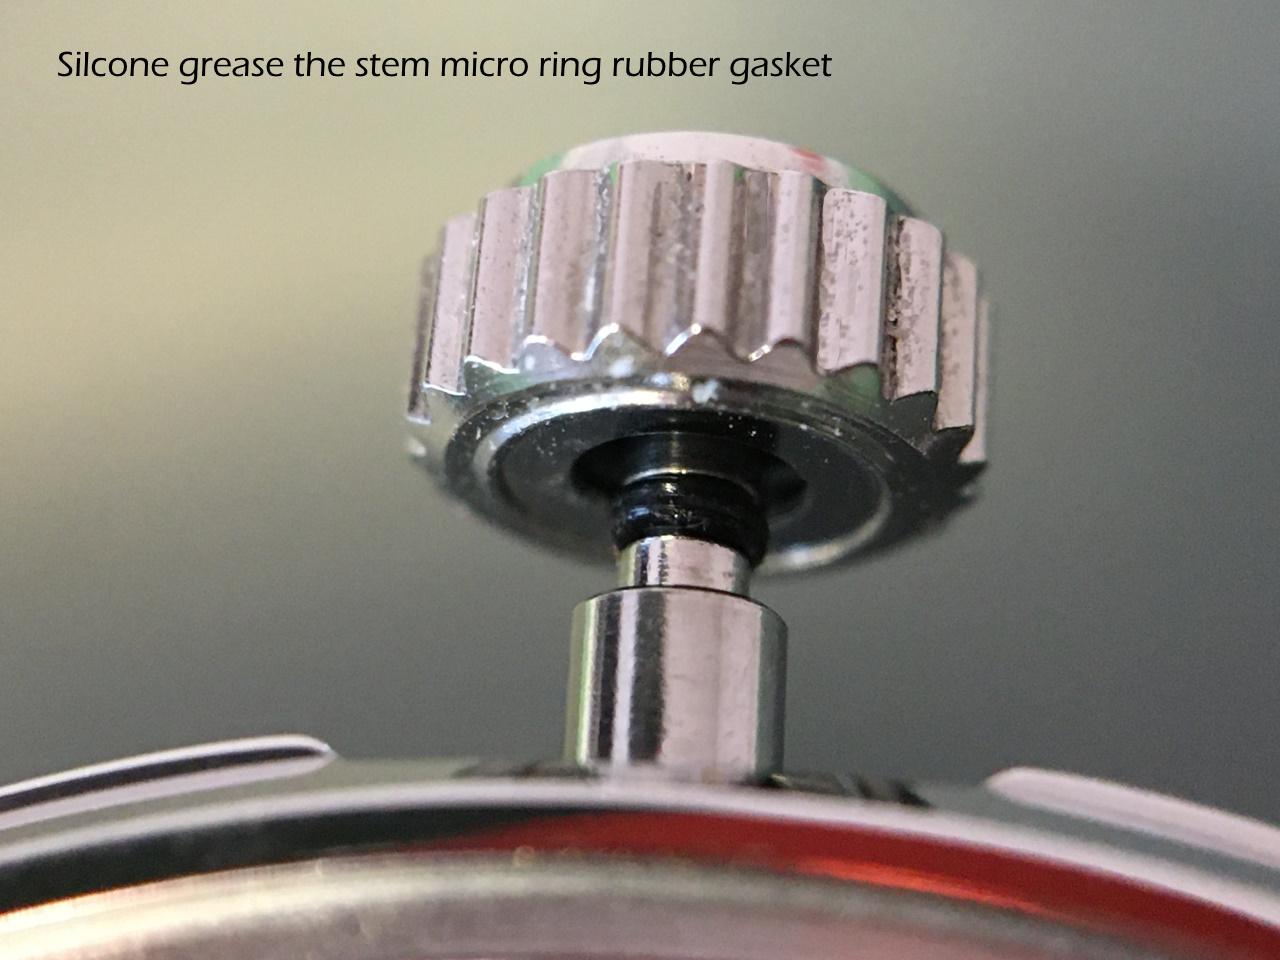
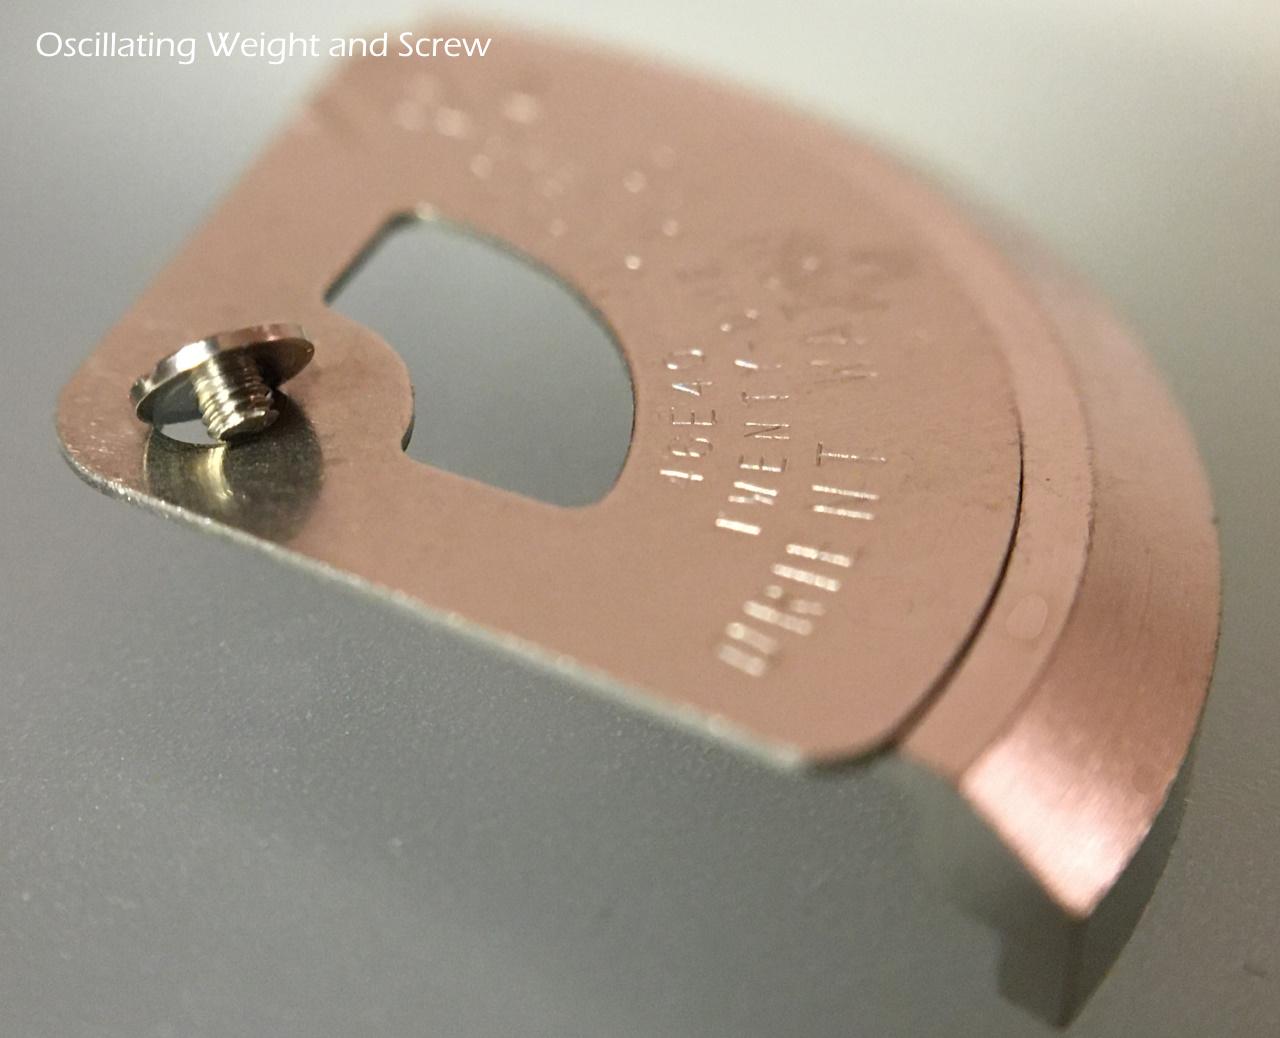
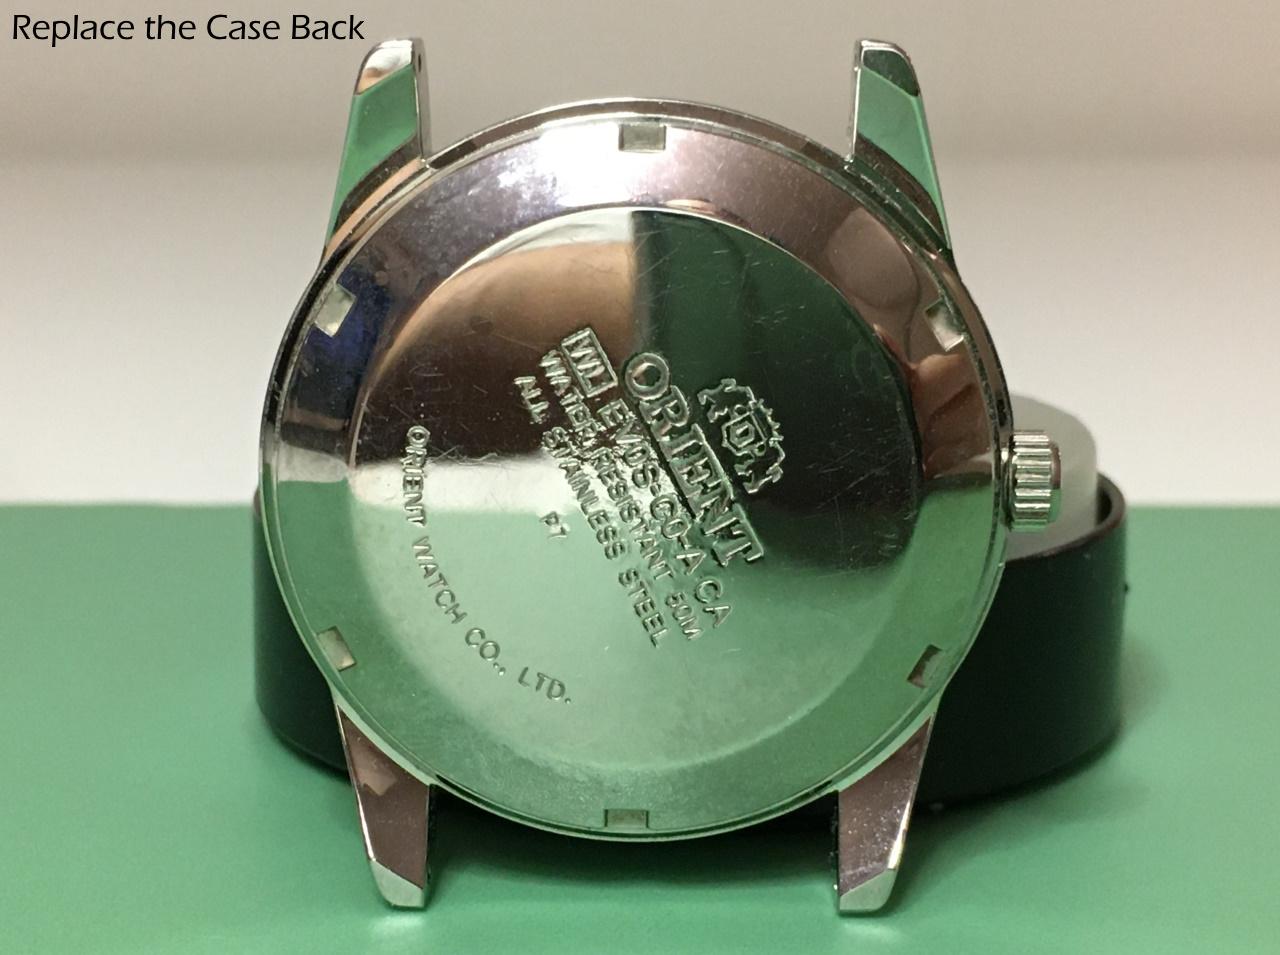
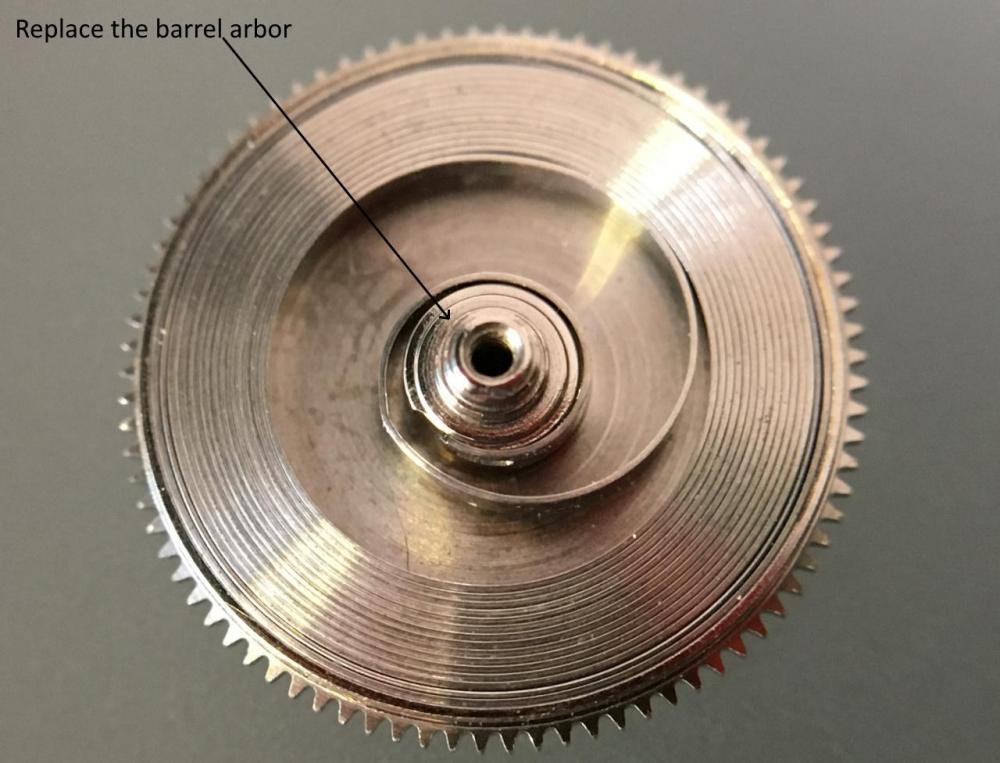
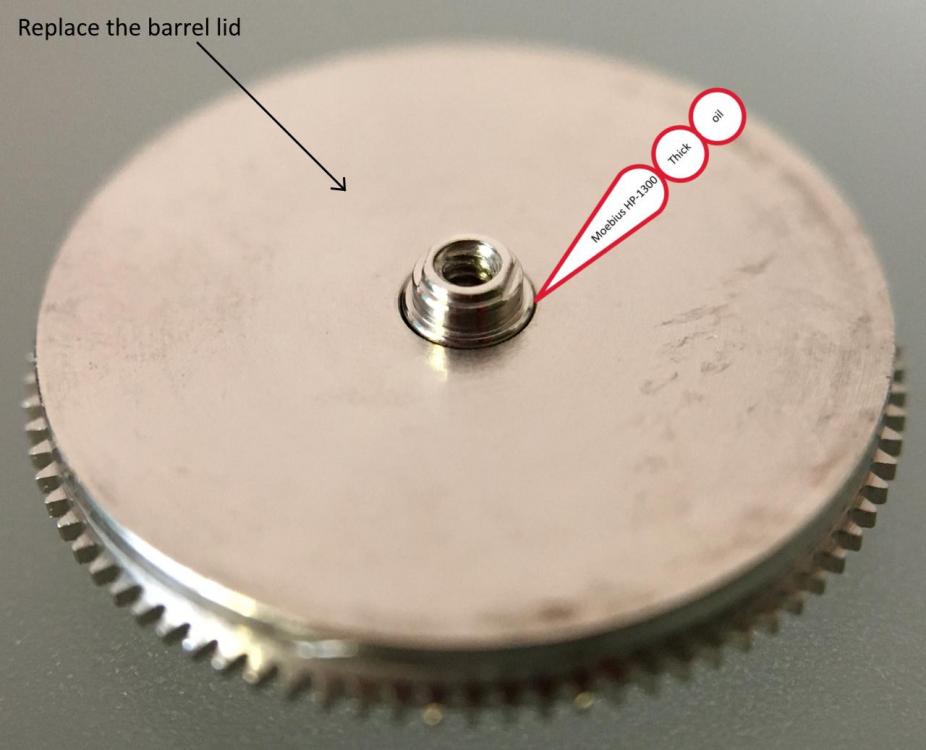
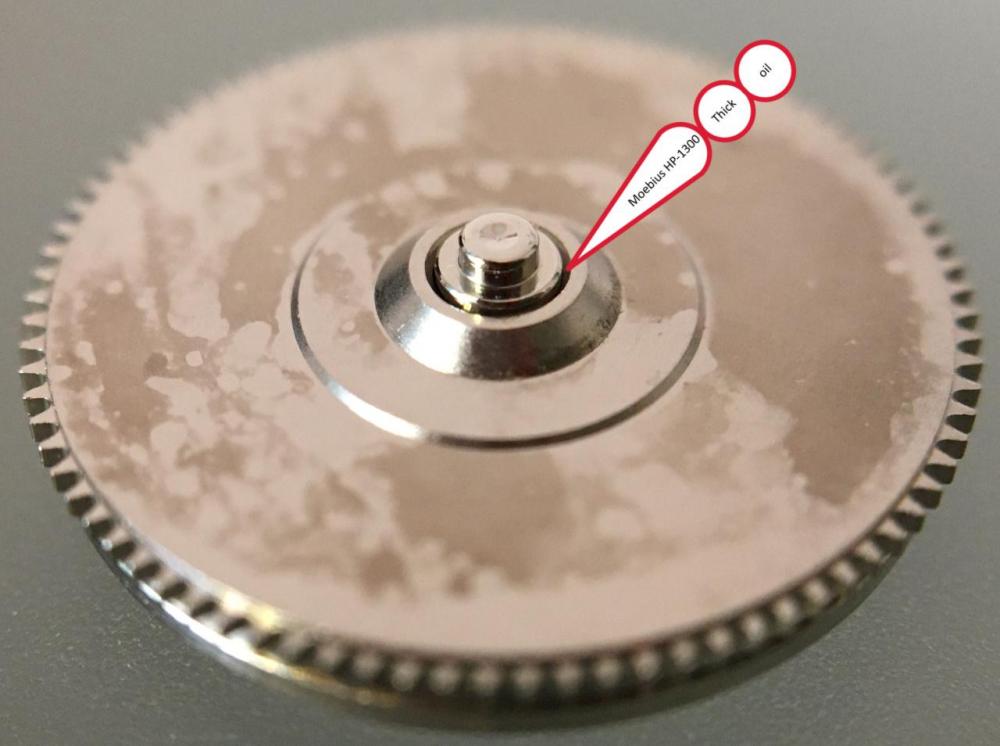
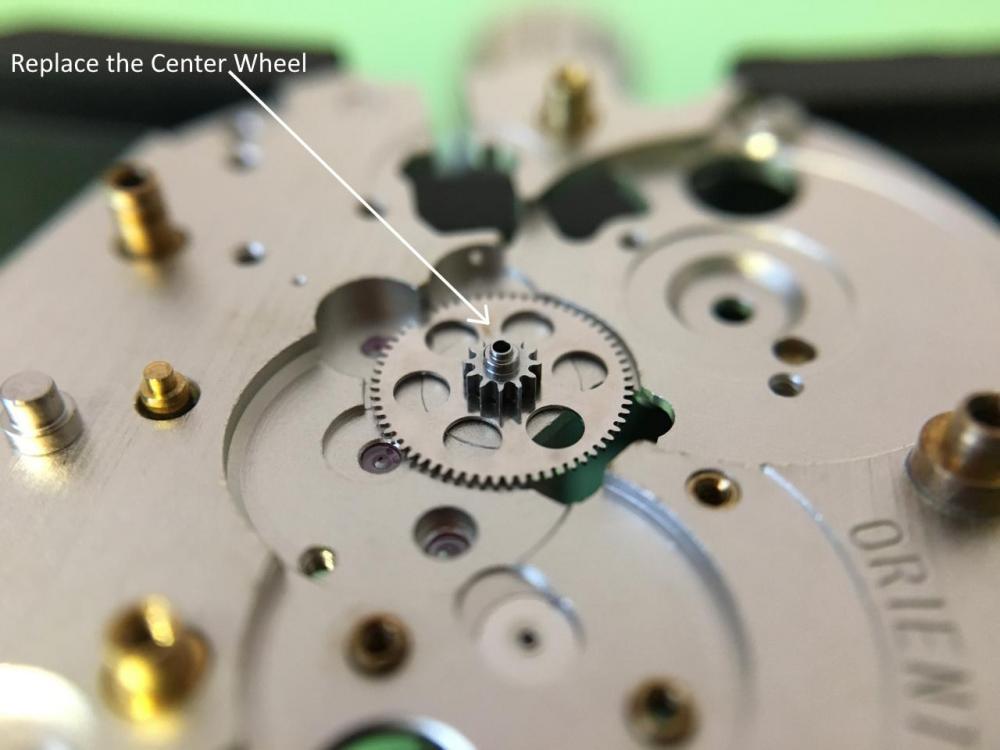
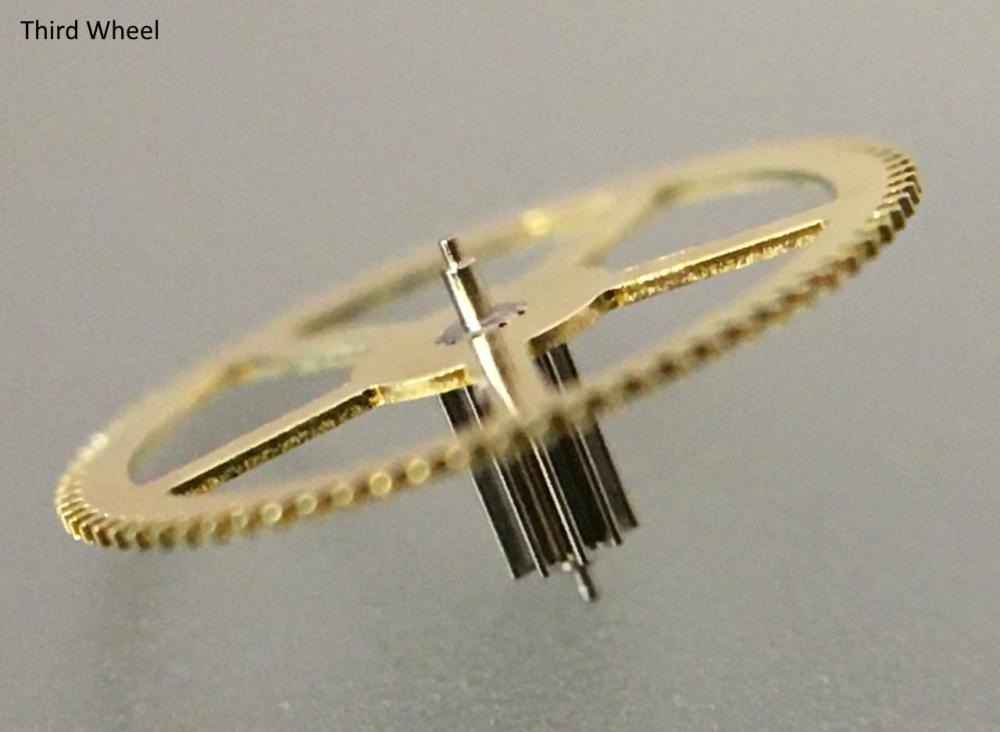
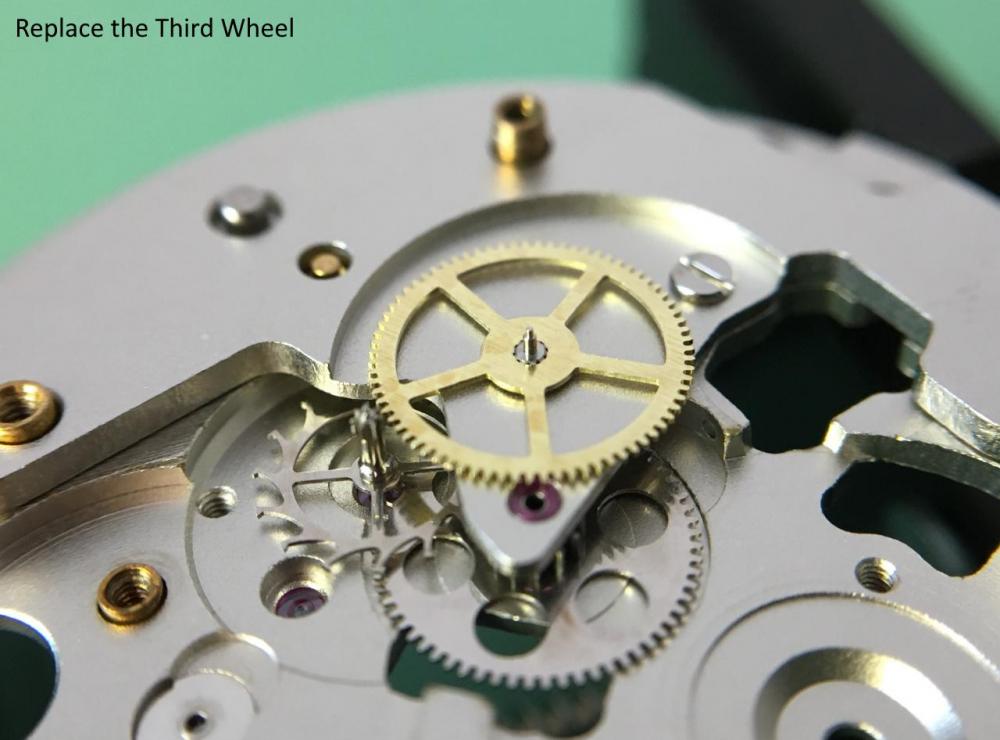
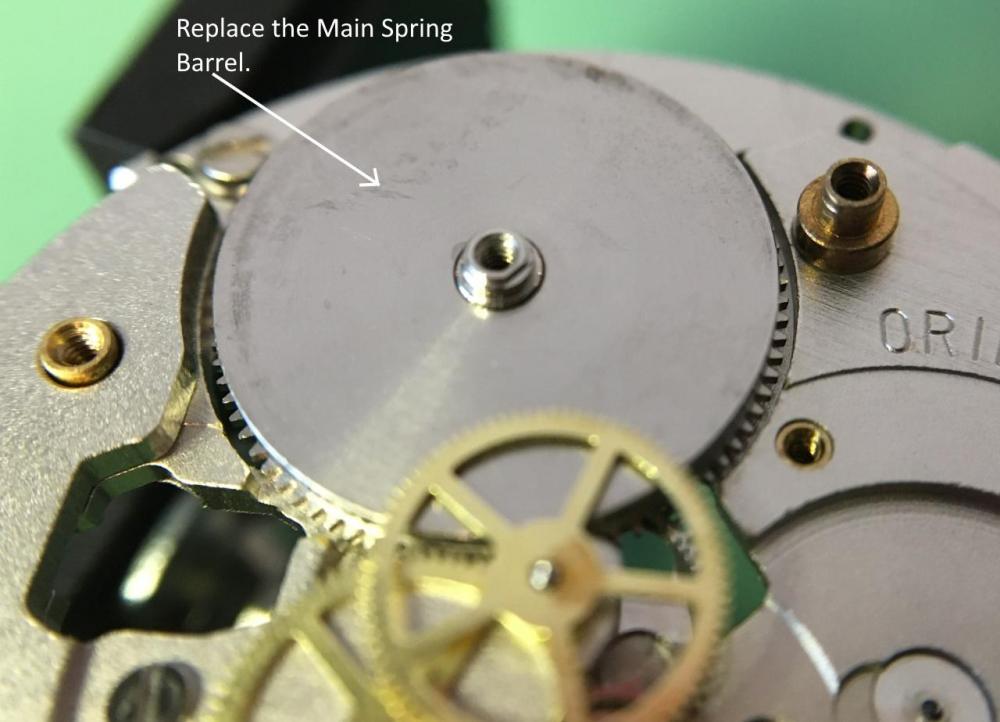
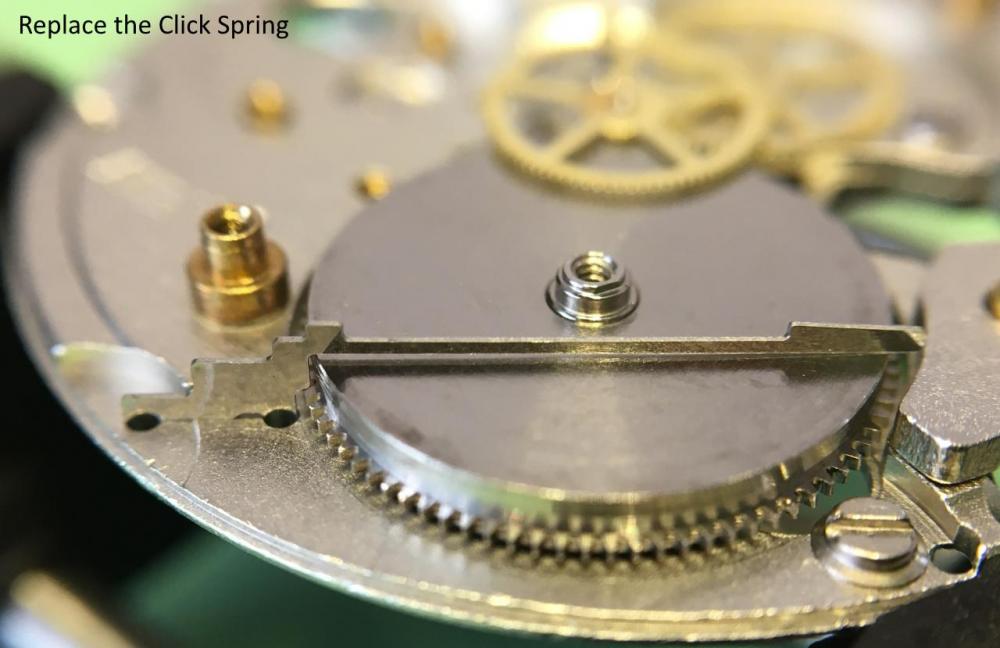
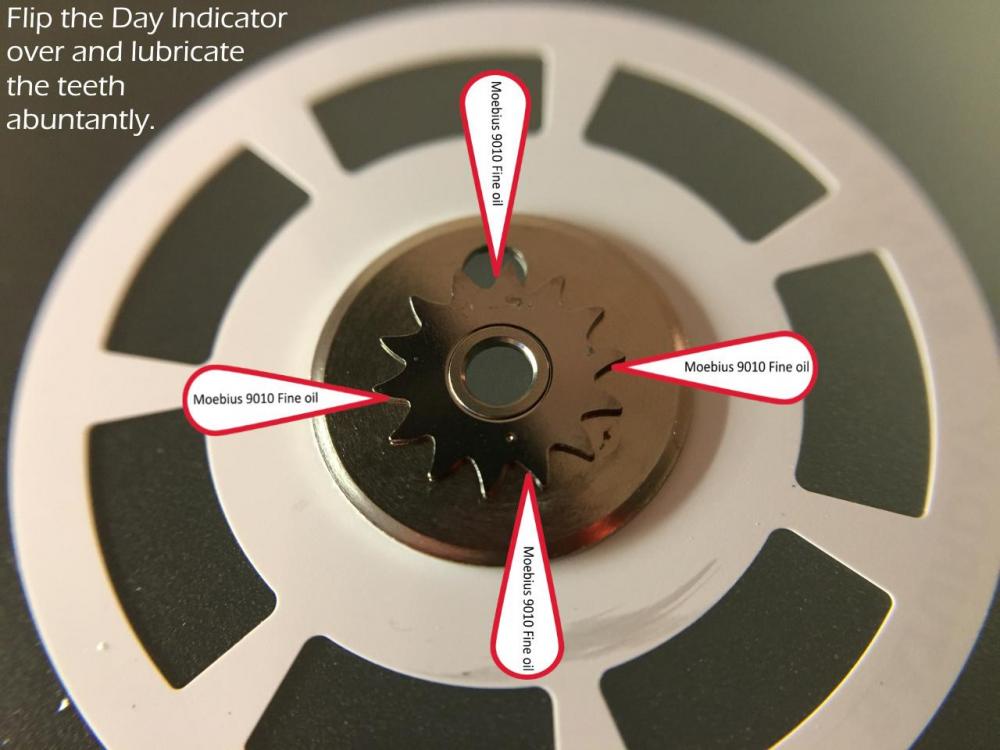
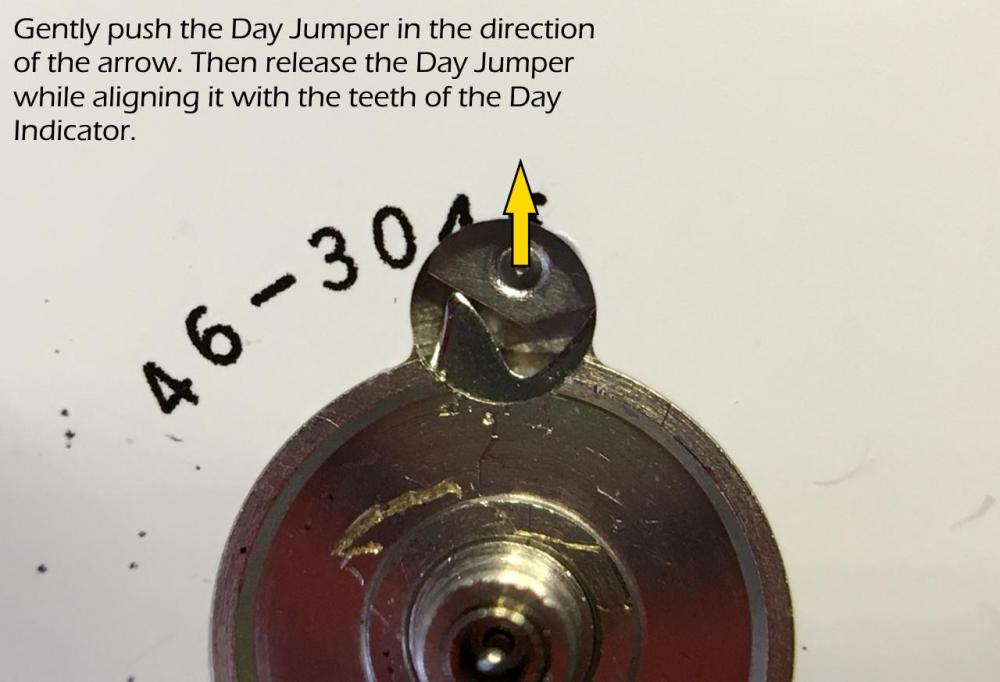
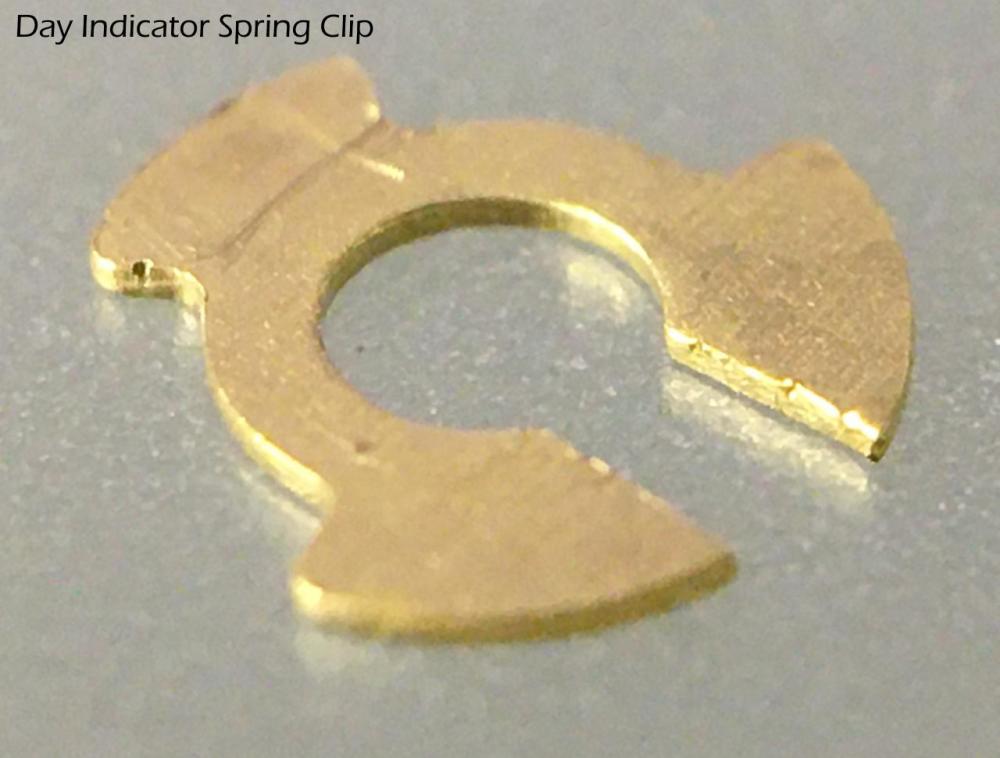
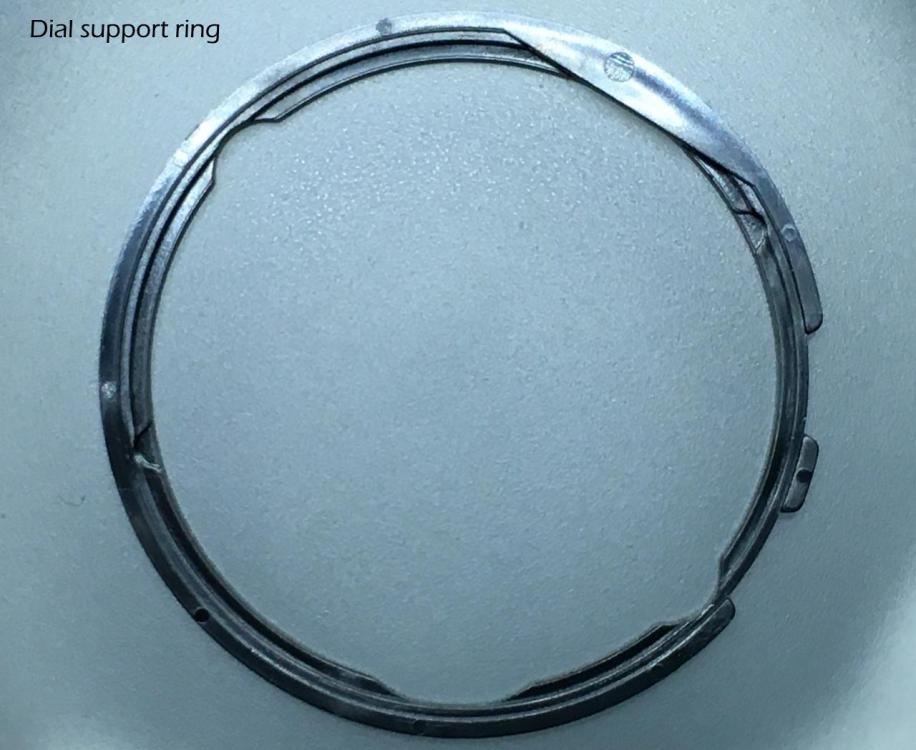
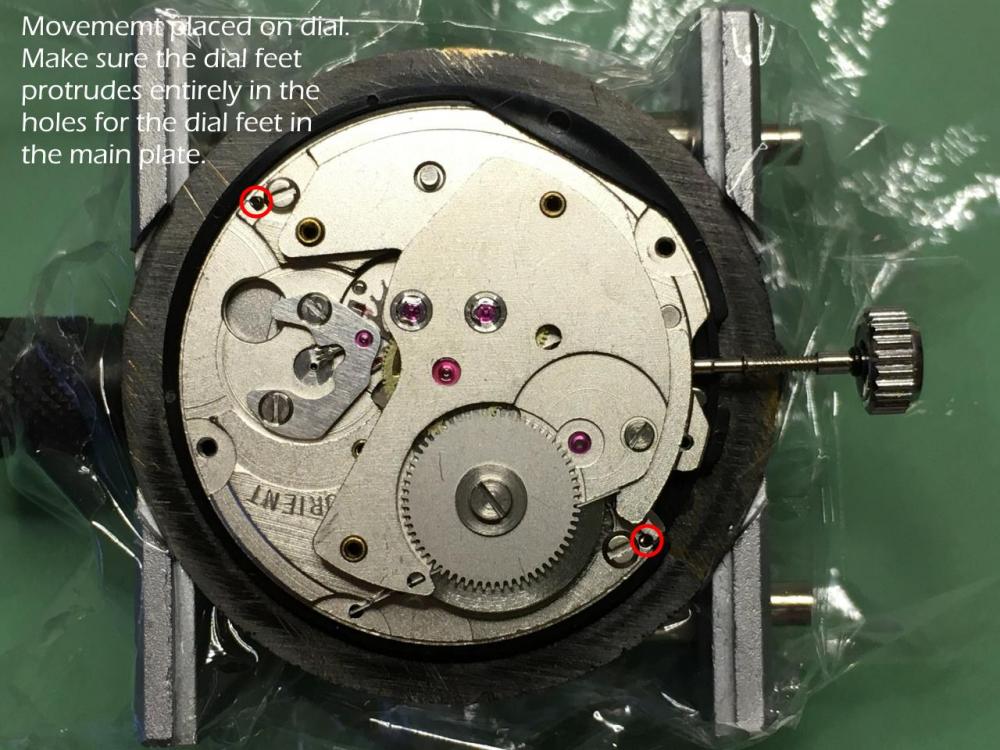
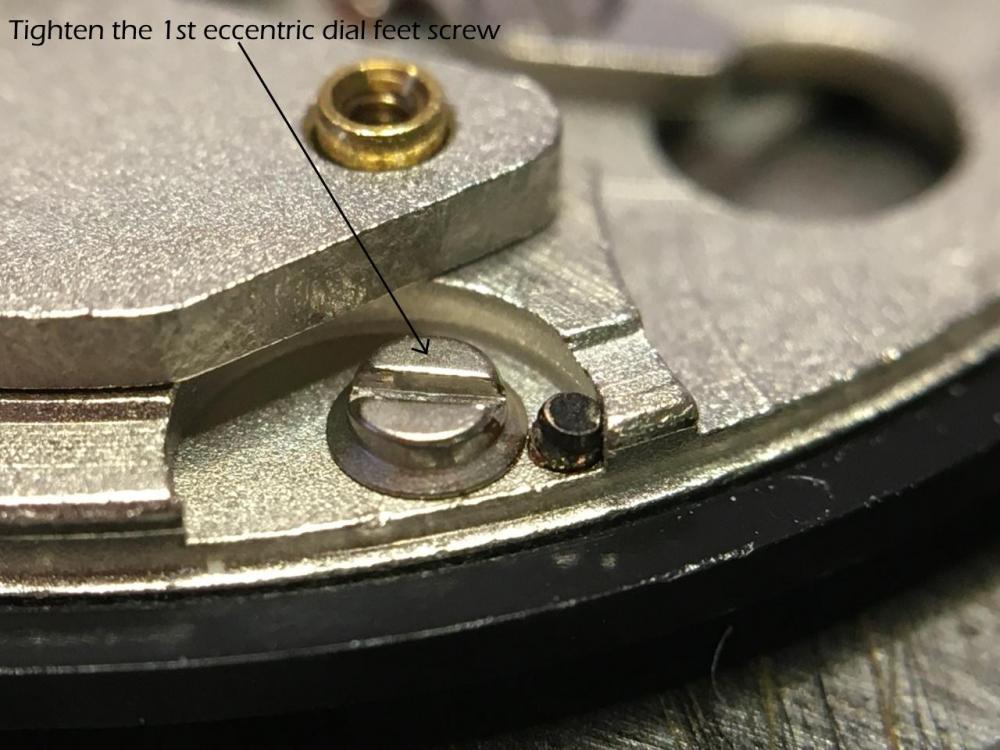
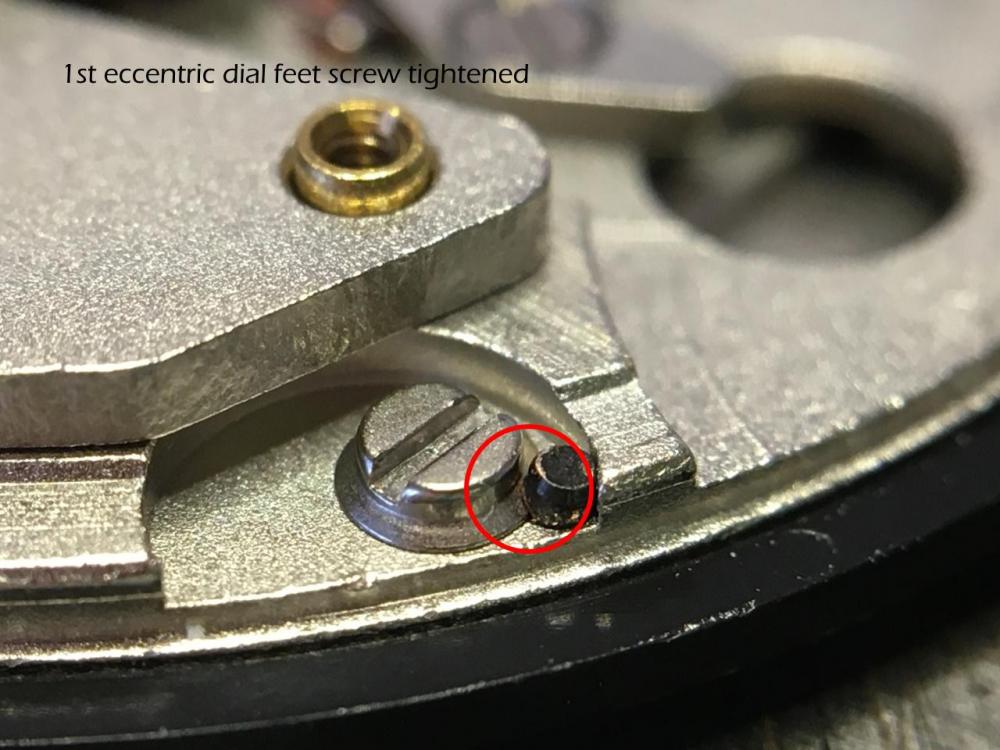
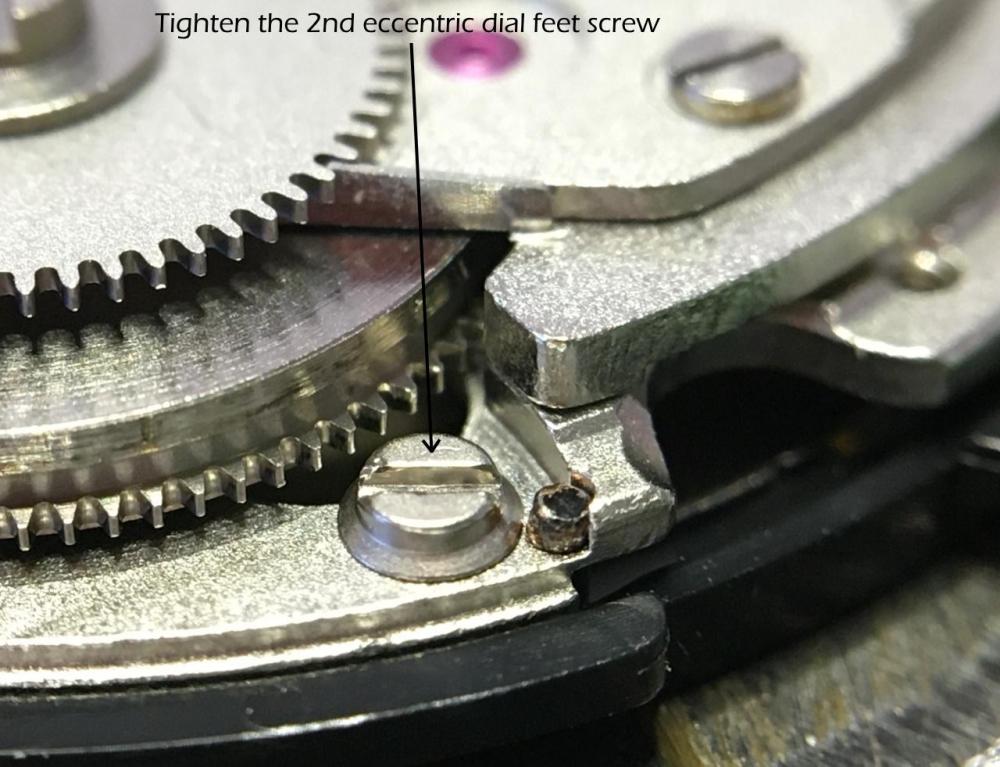
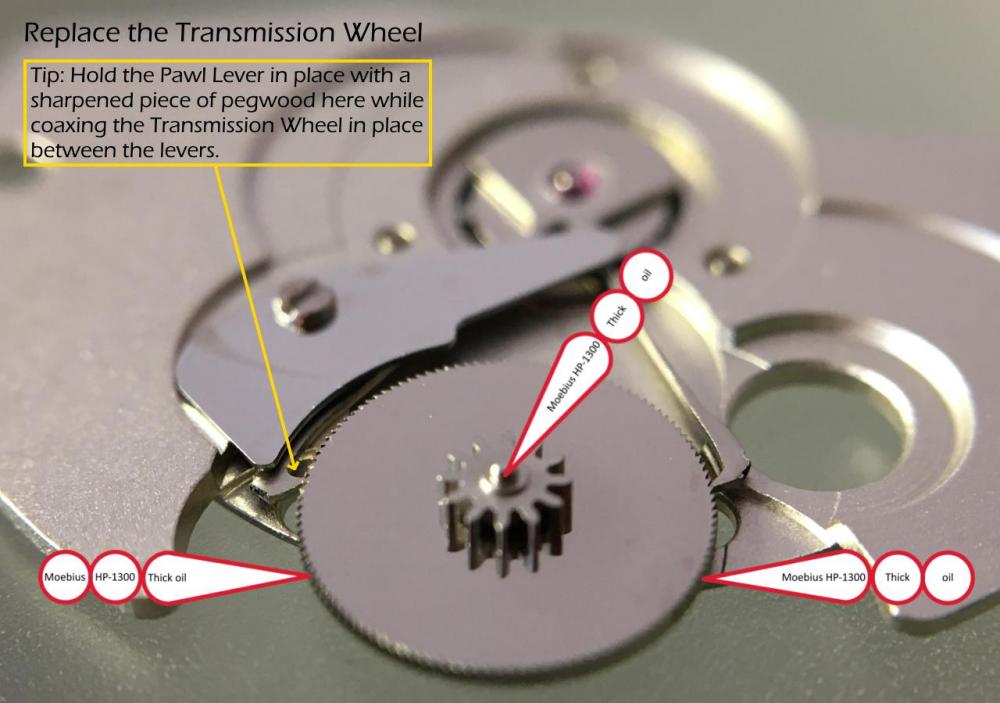
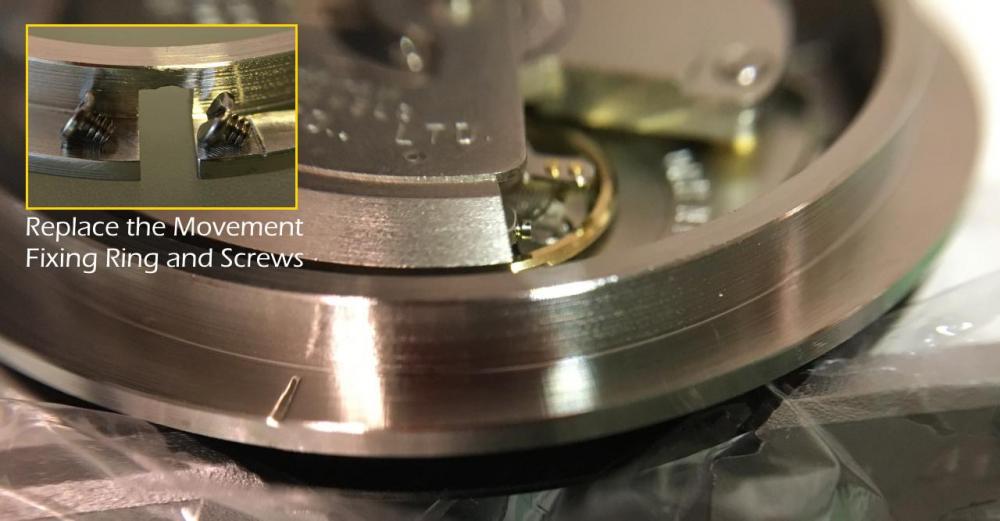
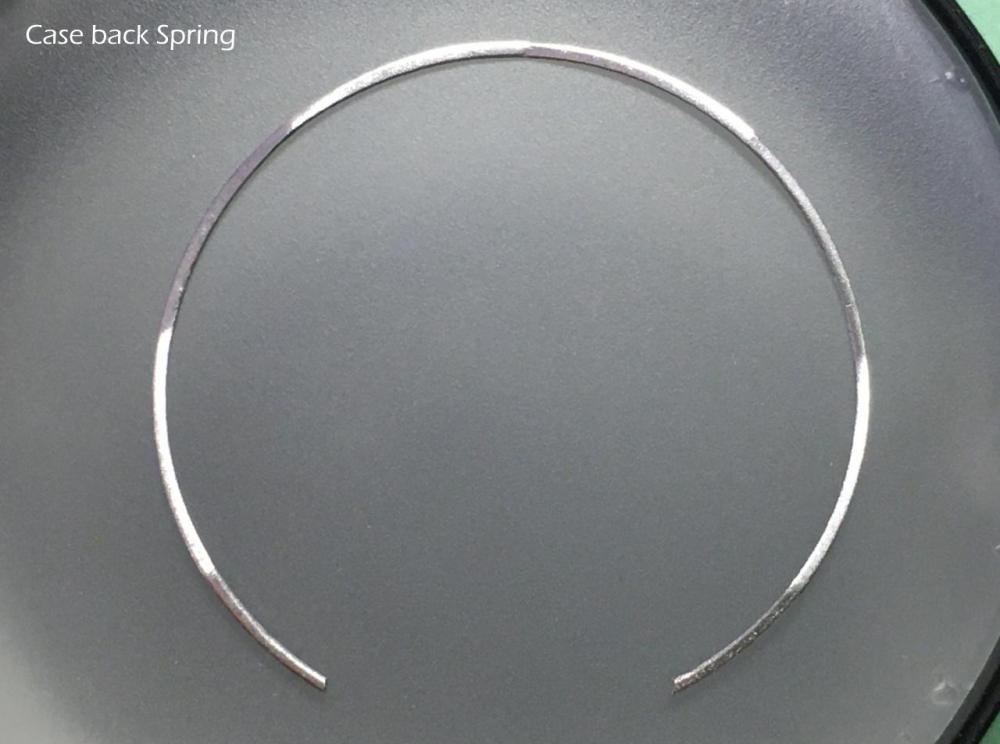
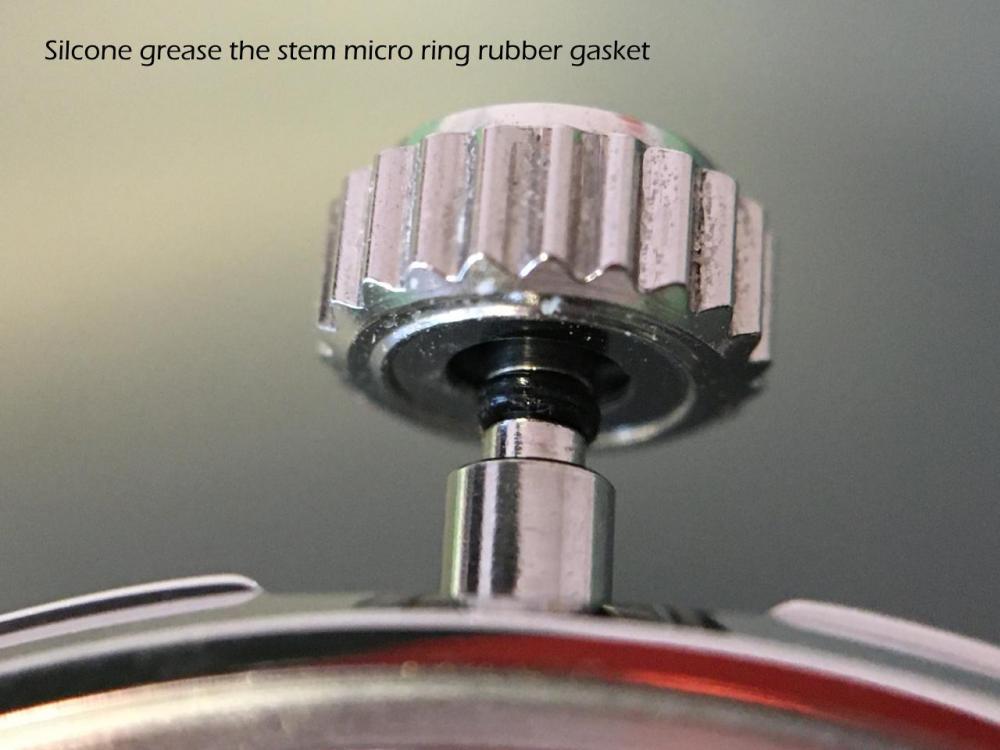
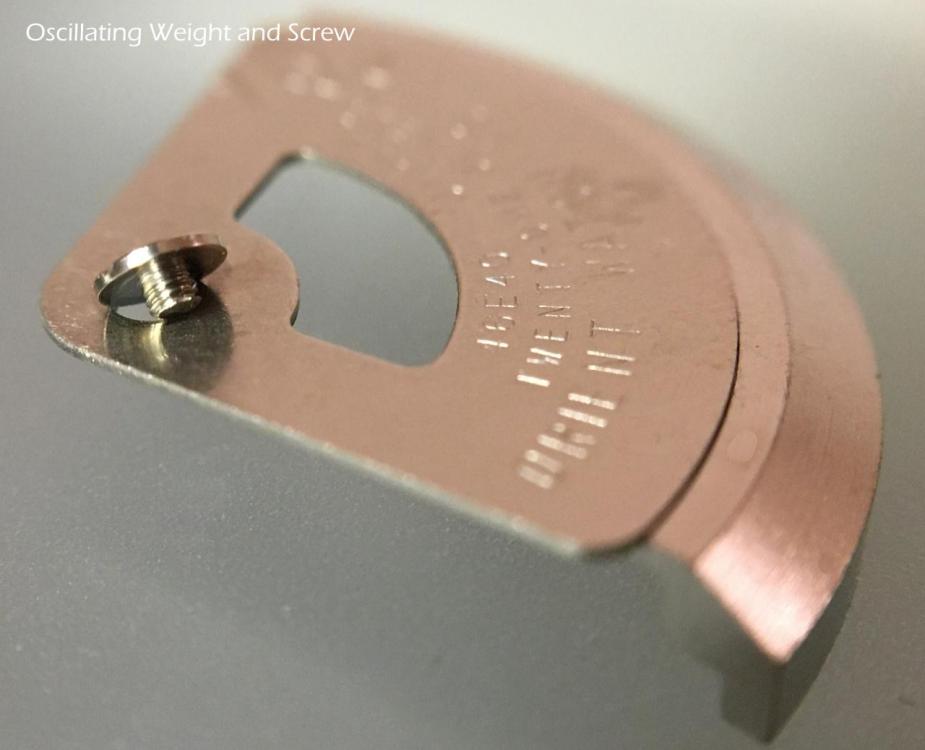
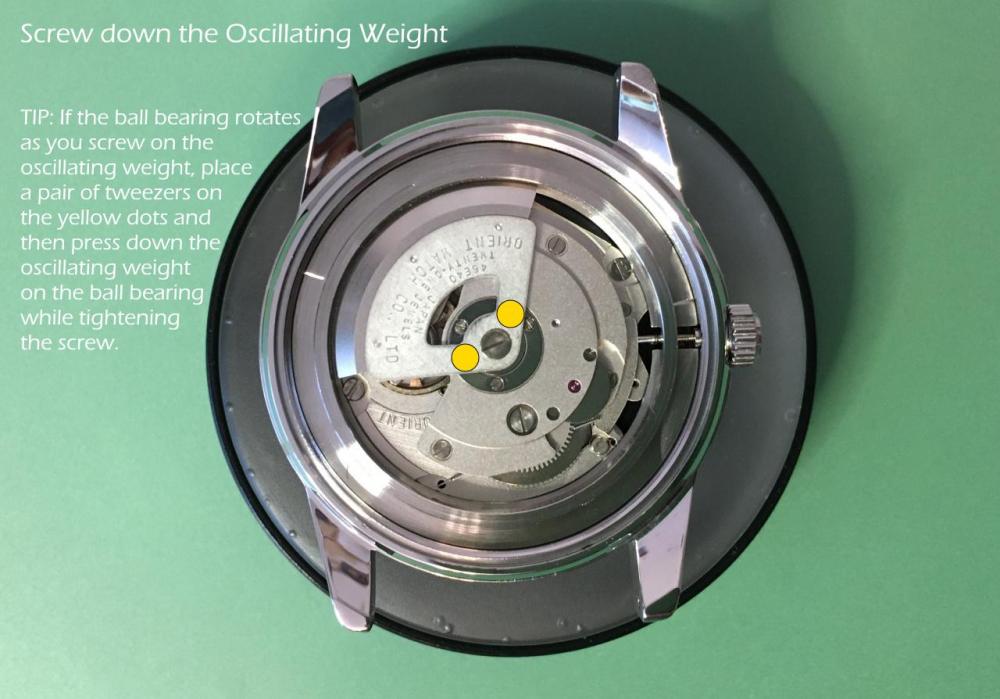
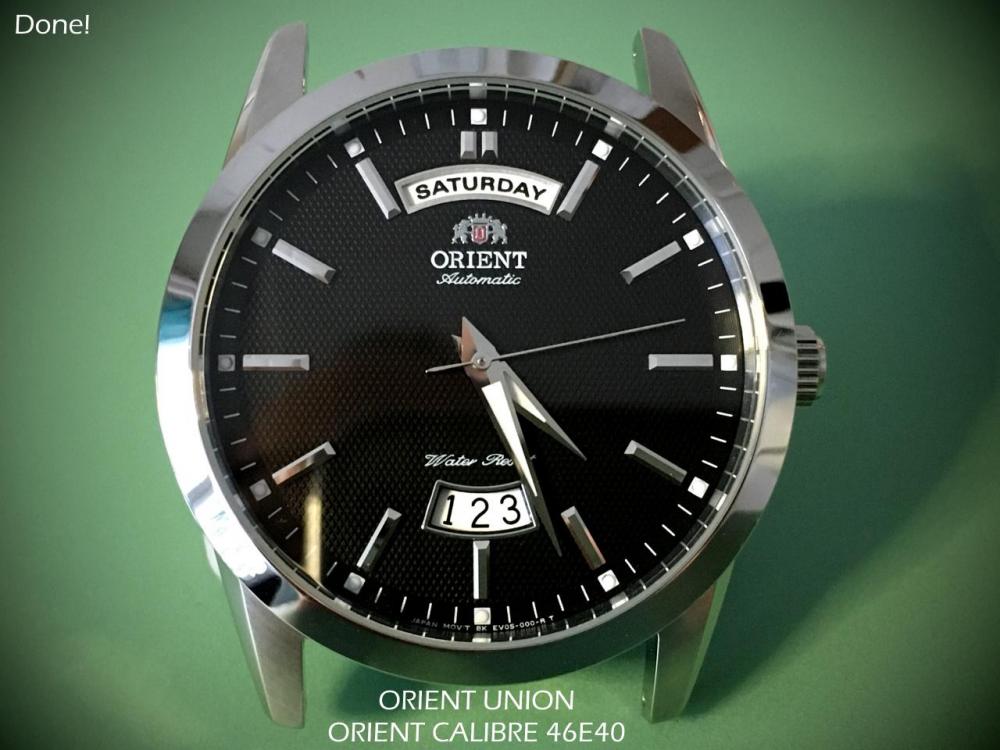
ORIENT Calibre 46E40 Service Walkthrough - Assembly


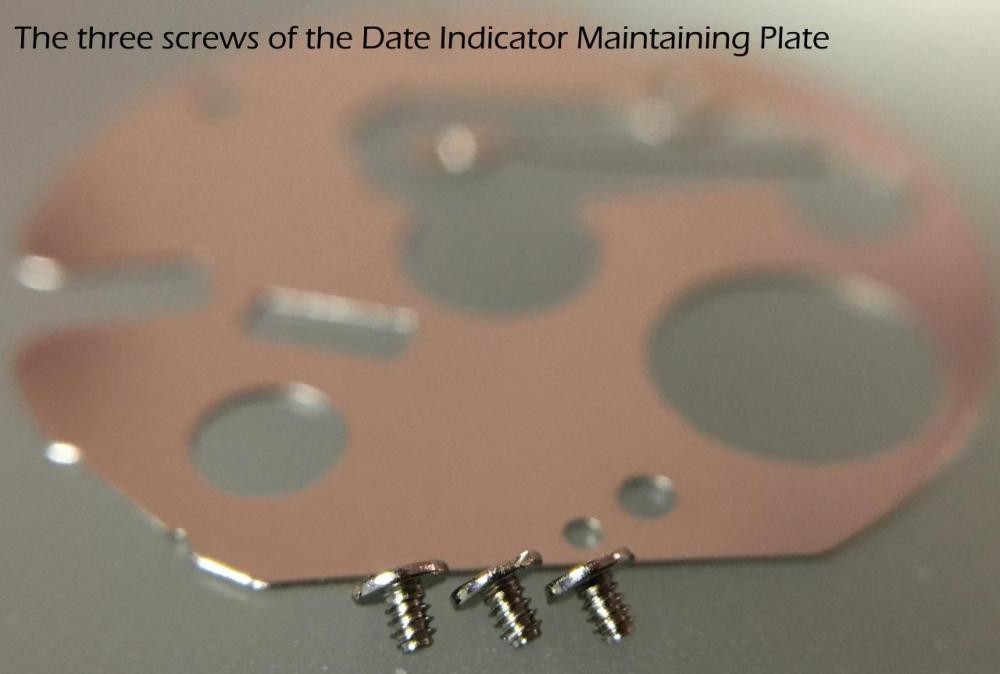

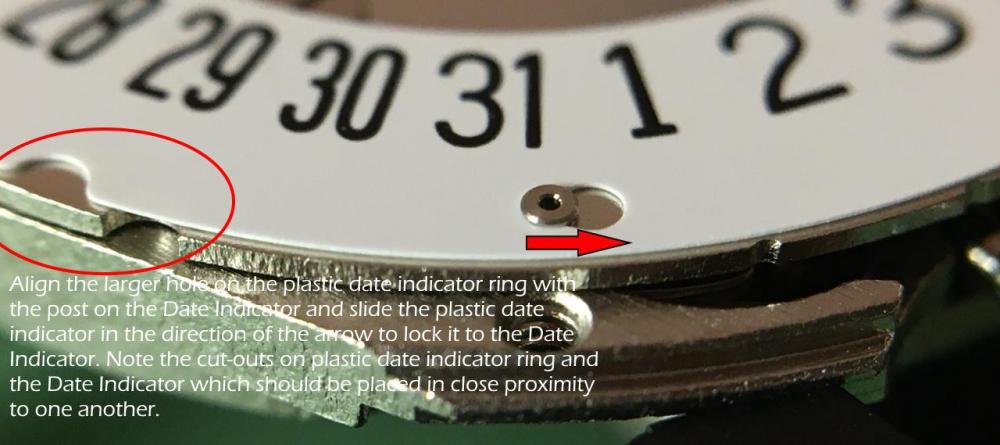

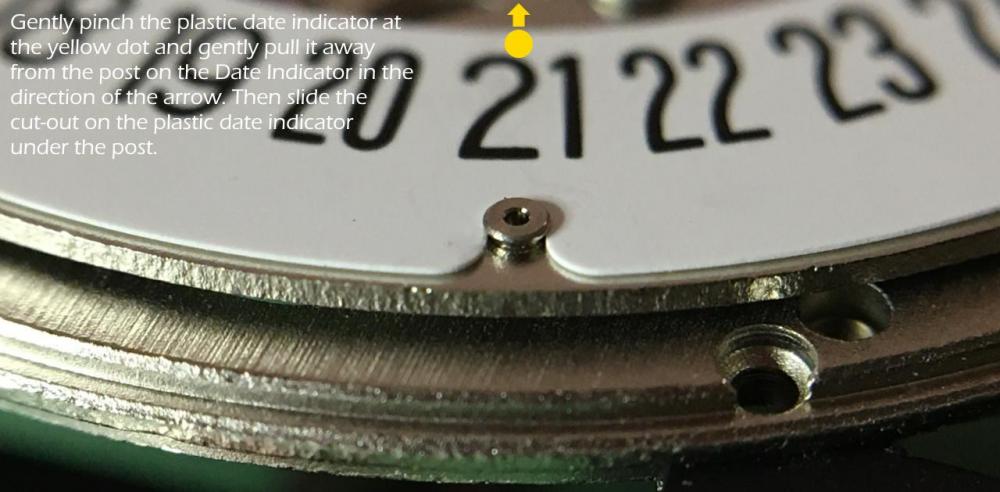
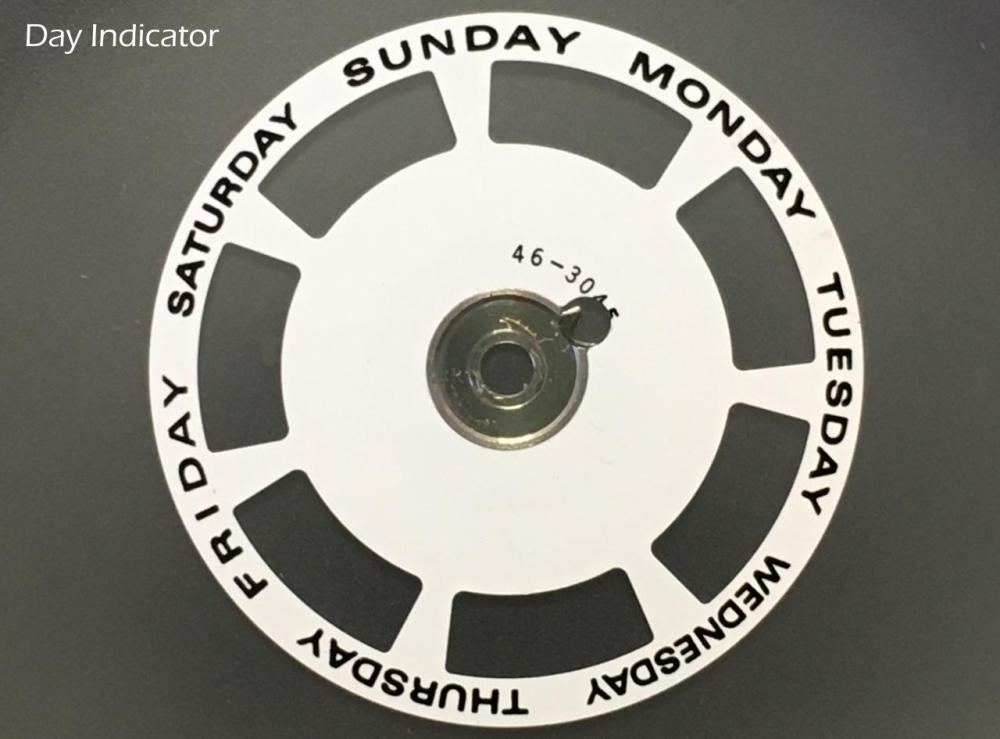


 1 point
 -
Sent from my iPhone using Tapatalk Pro1 point
-
I've never officially been employed as a machinist but have done a reasonable amount of it under less well-paid "general operative" title.. and in my spare time. Watch repair is an interesting activity when it comes to tools. There are so many to choose from, and there's a lot of interest in nice old bits of equipment to make specific parts which can be made using other methods today. In some ways it seems to demonstrate how there was less apparent certainty of the ability to measure and make to size in the first attempt (like knowing what size then hitting it dead on size with carbide turning inserts compared to being able to creep up with HSS with multiple checks as it gets closer).. thinking of wheel cutting, but also turning. I'd be tempted to suggest a Platax tool, though a staking set can usually be equipped with the stakes and anvils to do the same thing. I sometimes make little bits of tooling and other bits.. like some stakes and anvils for my staking set and jewelling tool.. made some tools for servicing the pre-war Zeiss Contax cameras too (pin pushing punches / mini pin spanners/ non-marking gear grip).. I'm presently building a Schaublin-inspired overhead drive for a similar sort of American bench lathe after rebuilding the bench - it was in storage a long time and some missing parts were later acquired seperately. There are a few watch lathe tools such as compound slides, and screwhead polishing tools which are reasonably expensive (though arguably not necessary thanks to gravers and freehand polishing tools). The hardest thing about making hand tools is that they are sometimes too small to copy from pictures. Mainspring winders are useful and some are expensive.1 point
-
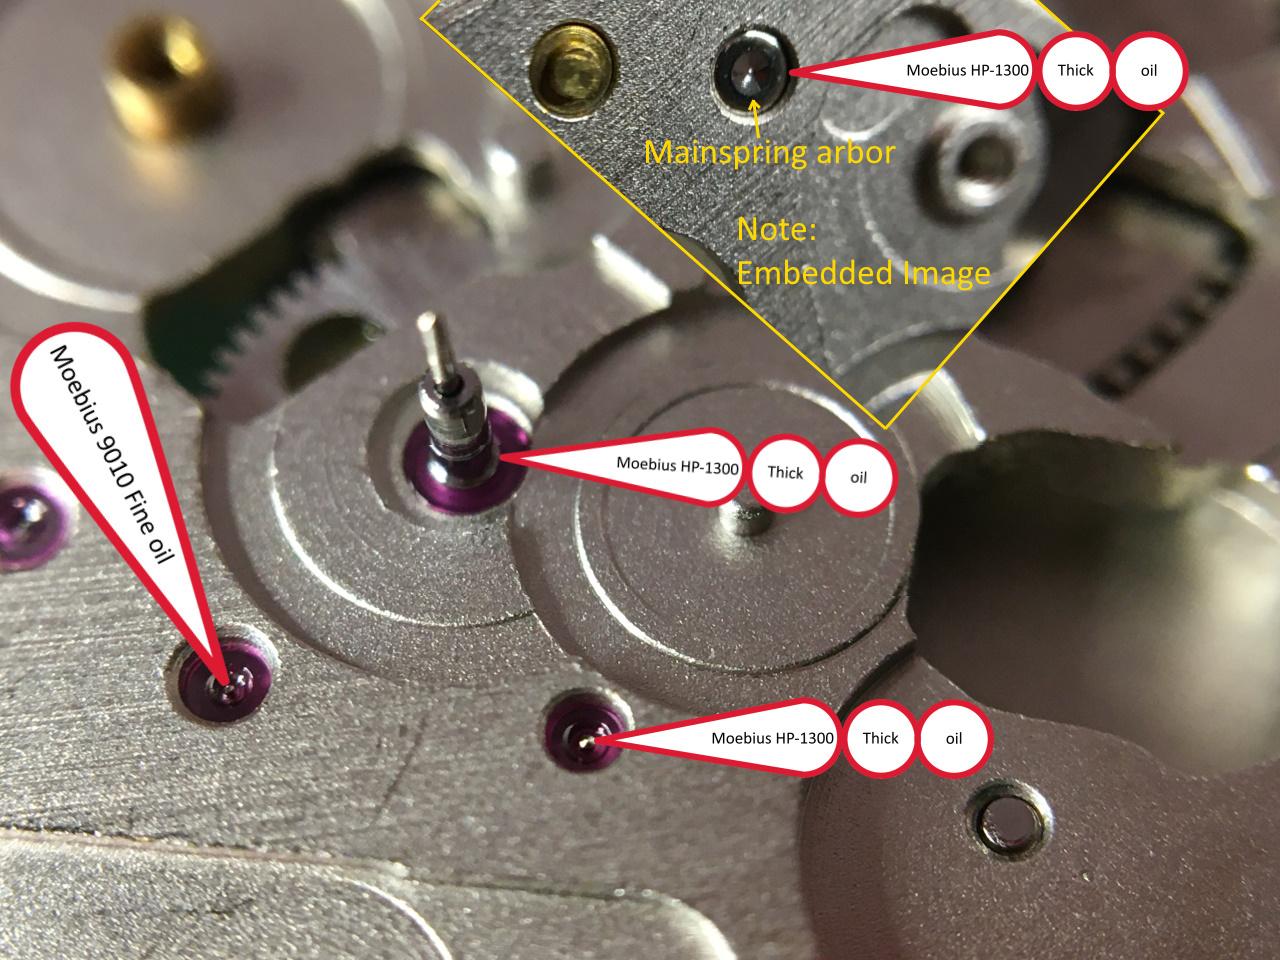
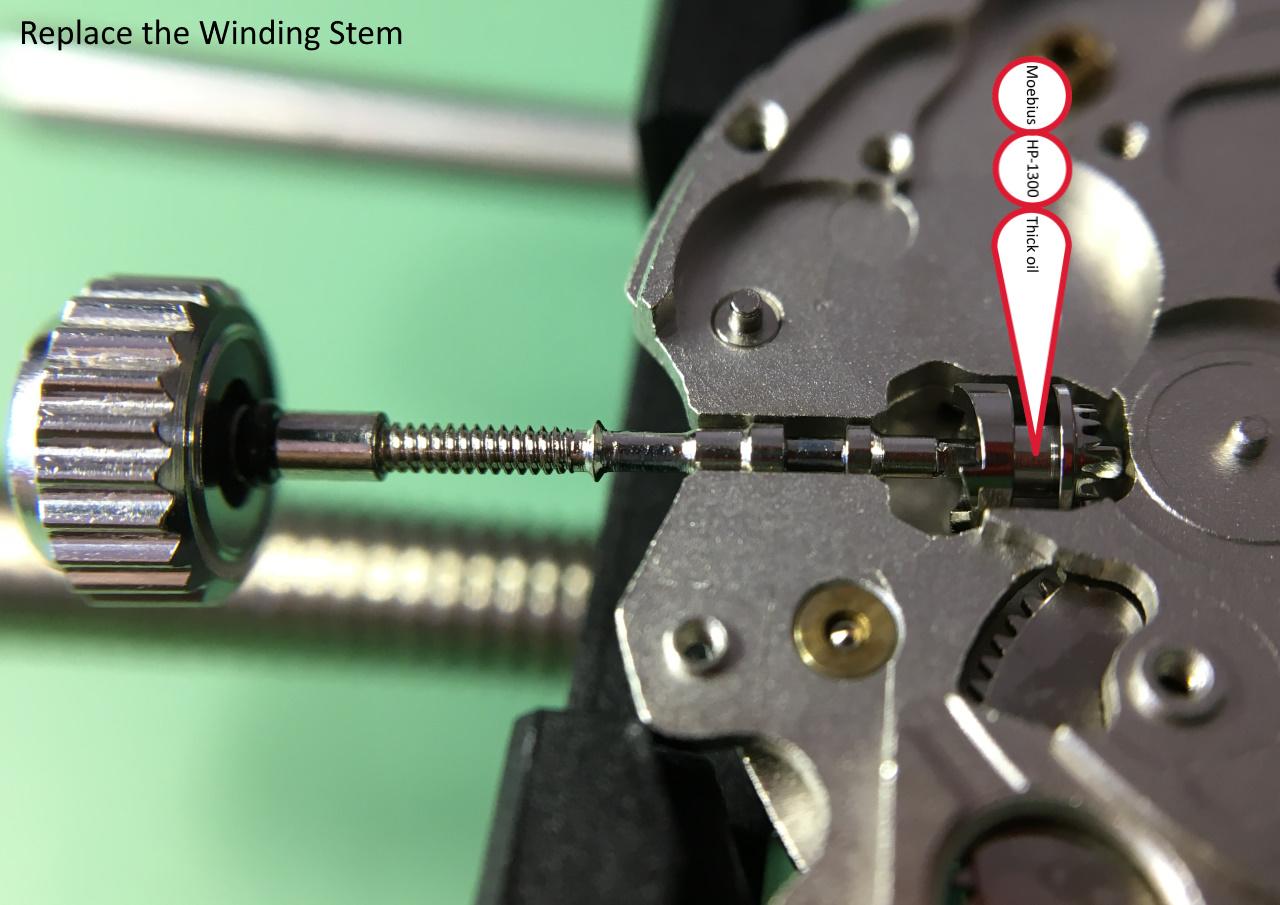
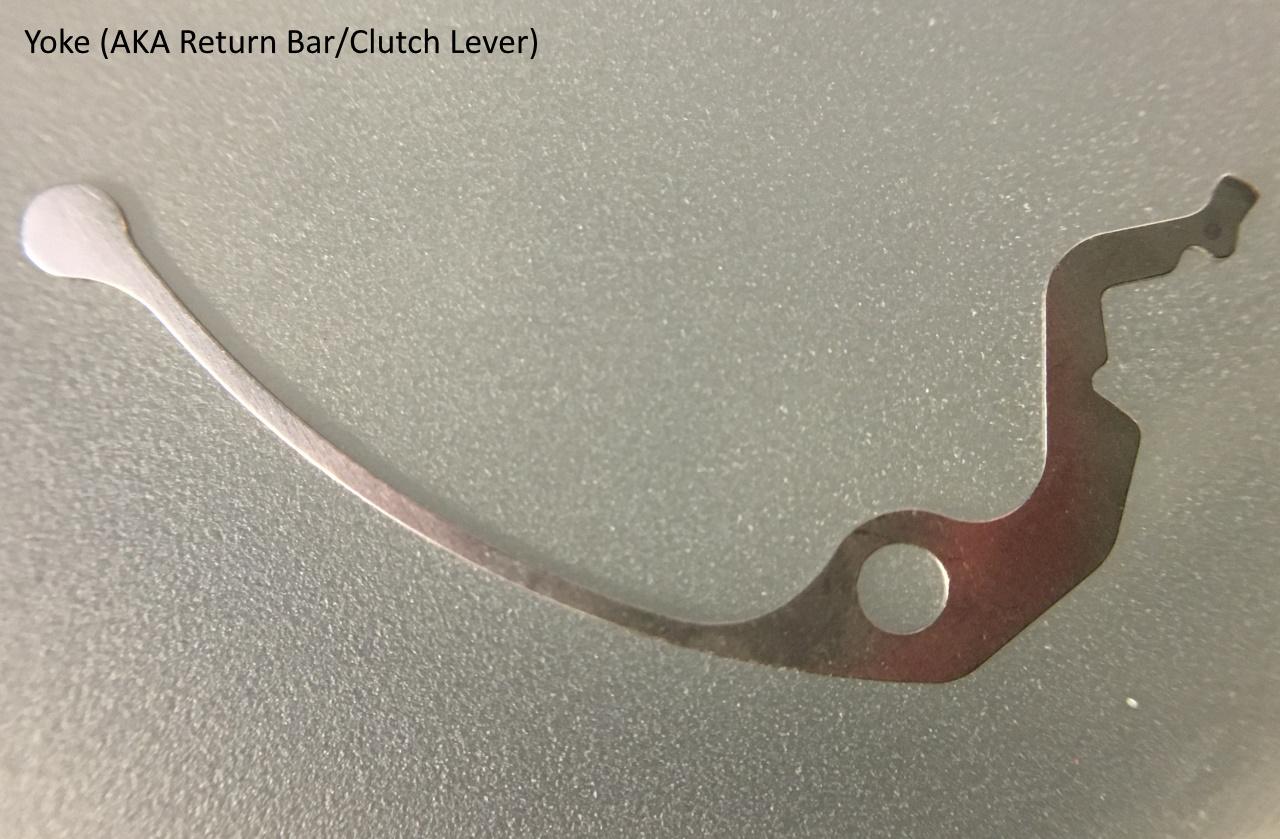
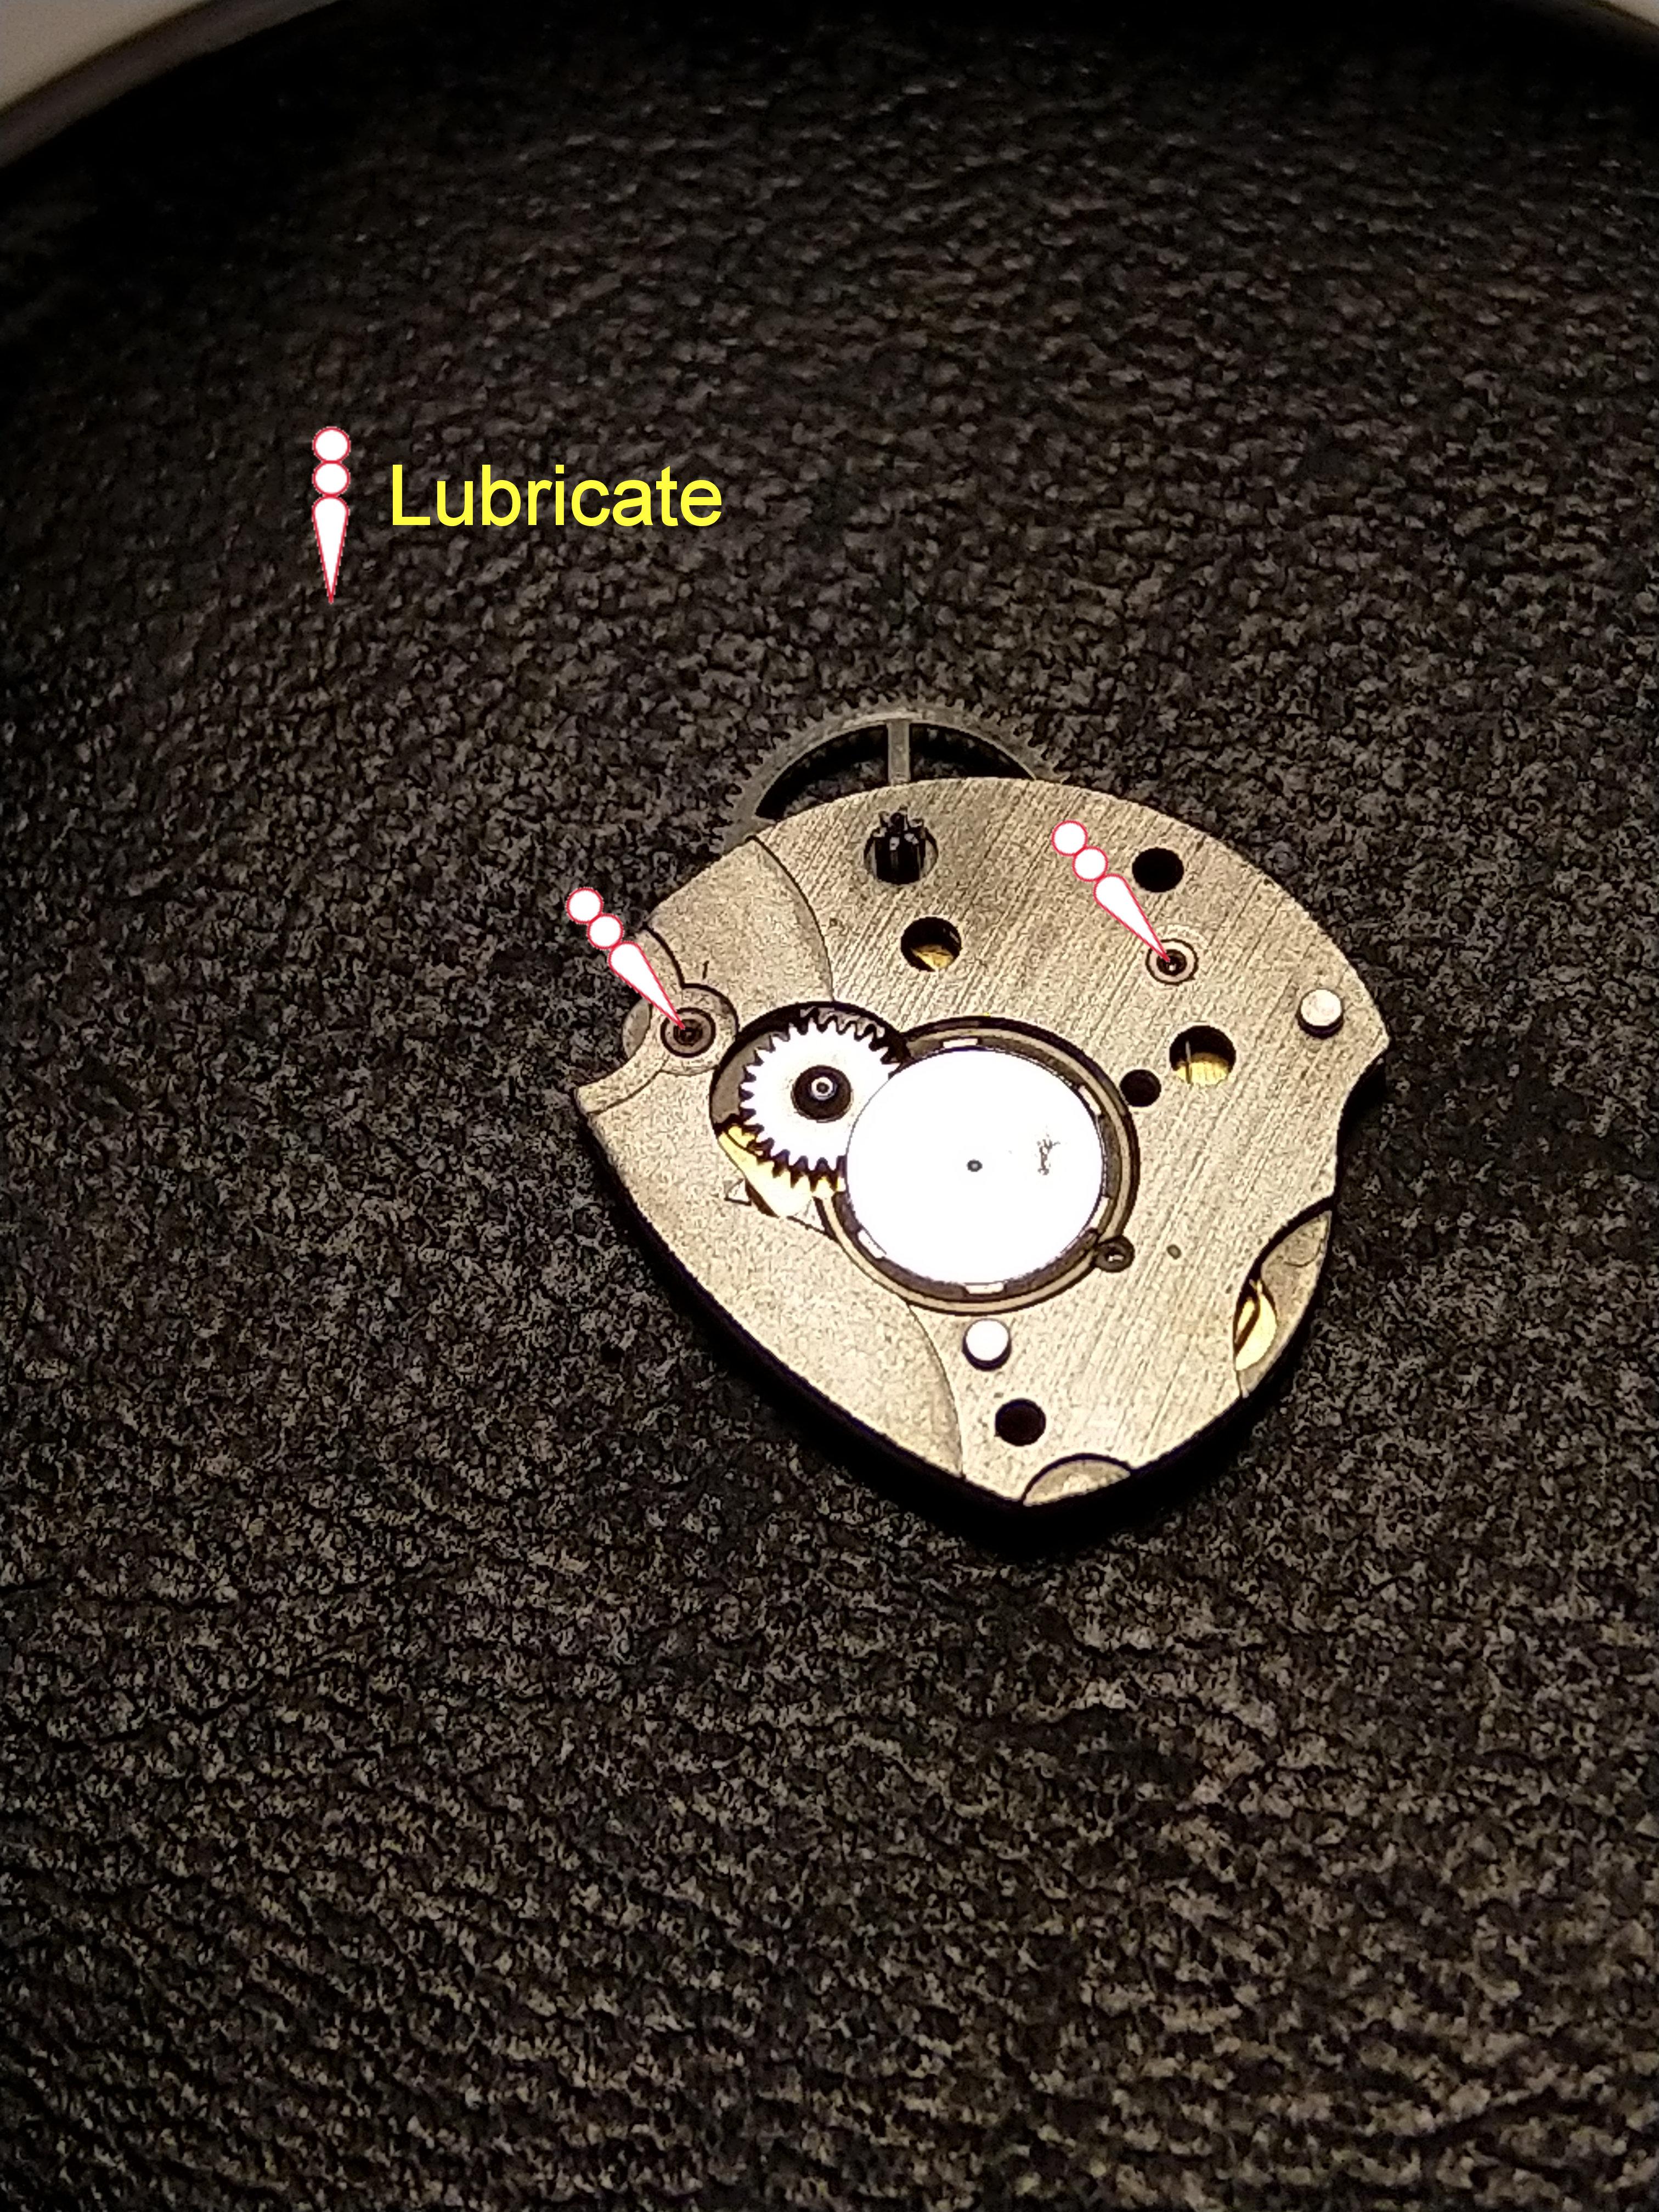
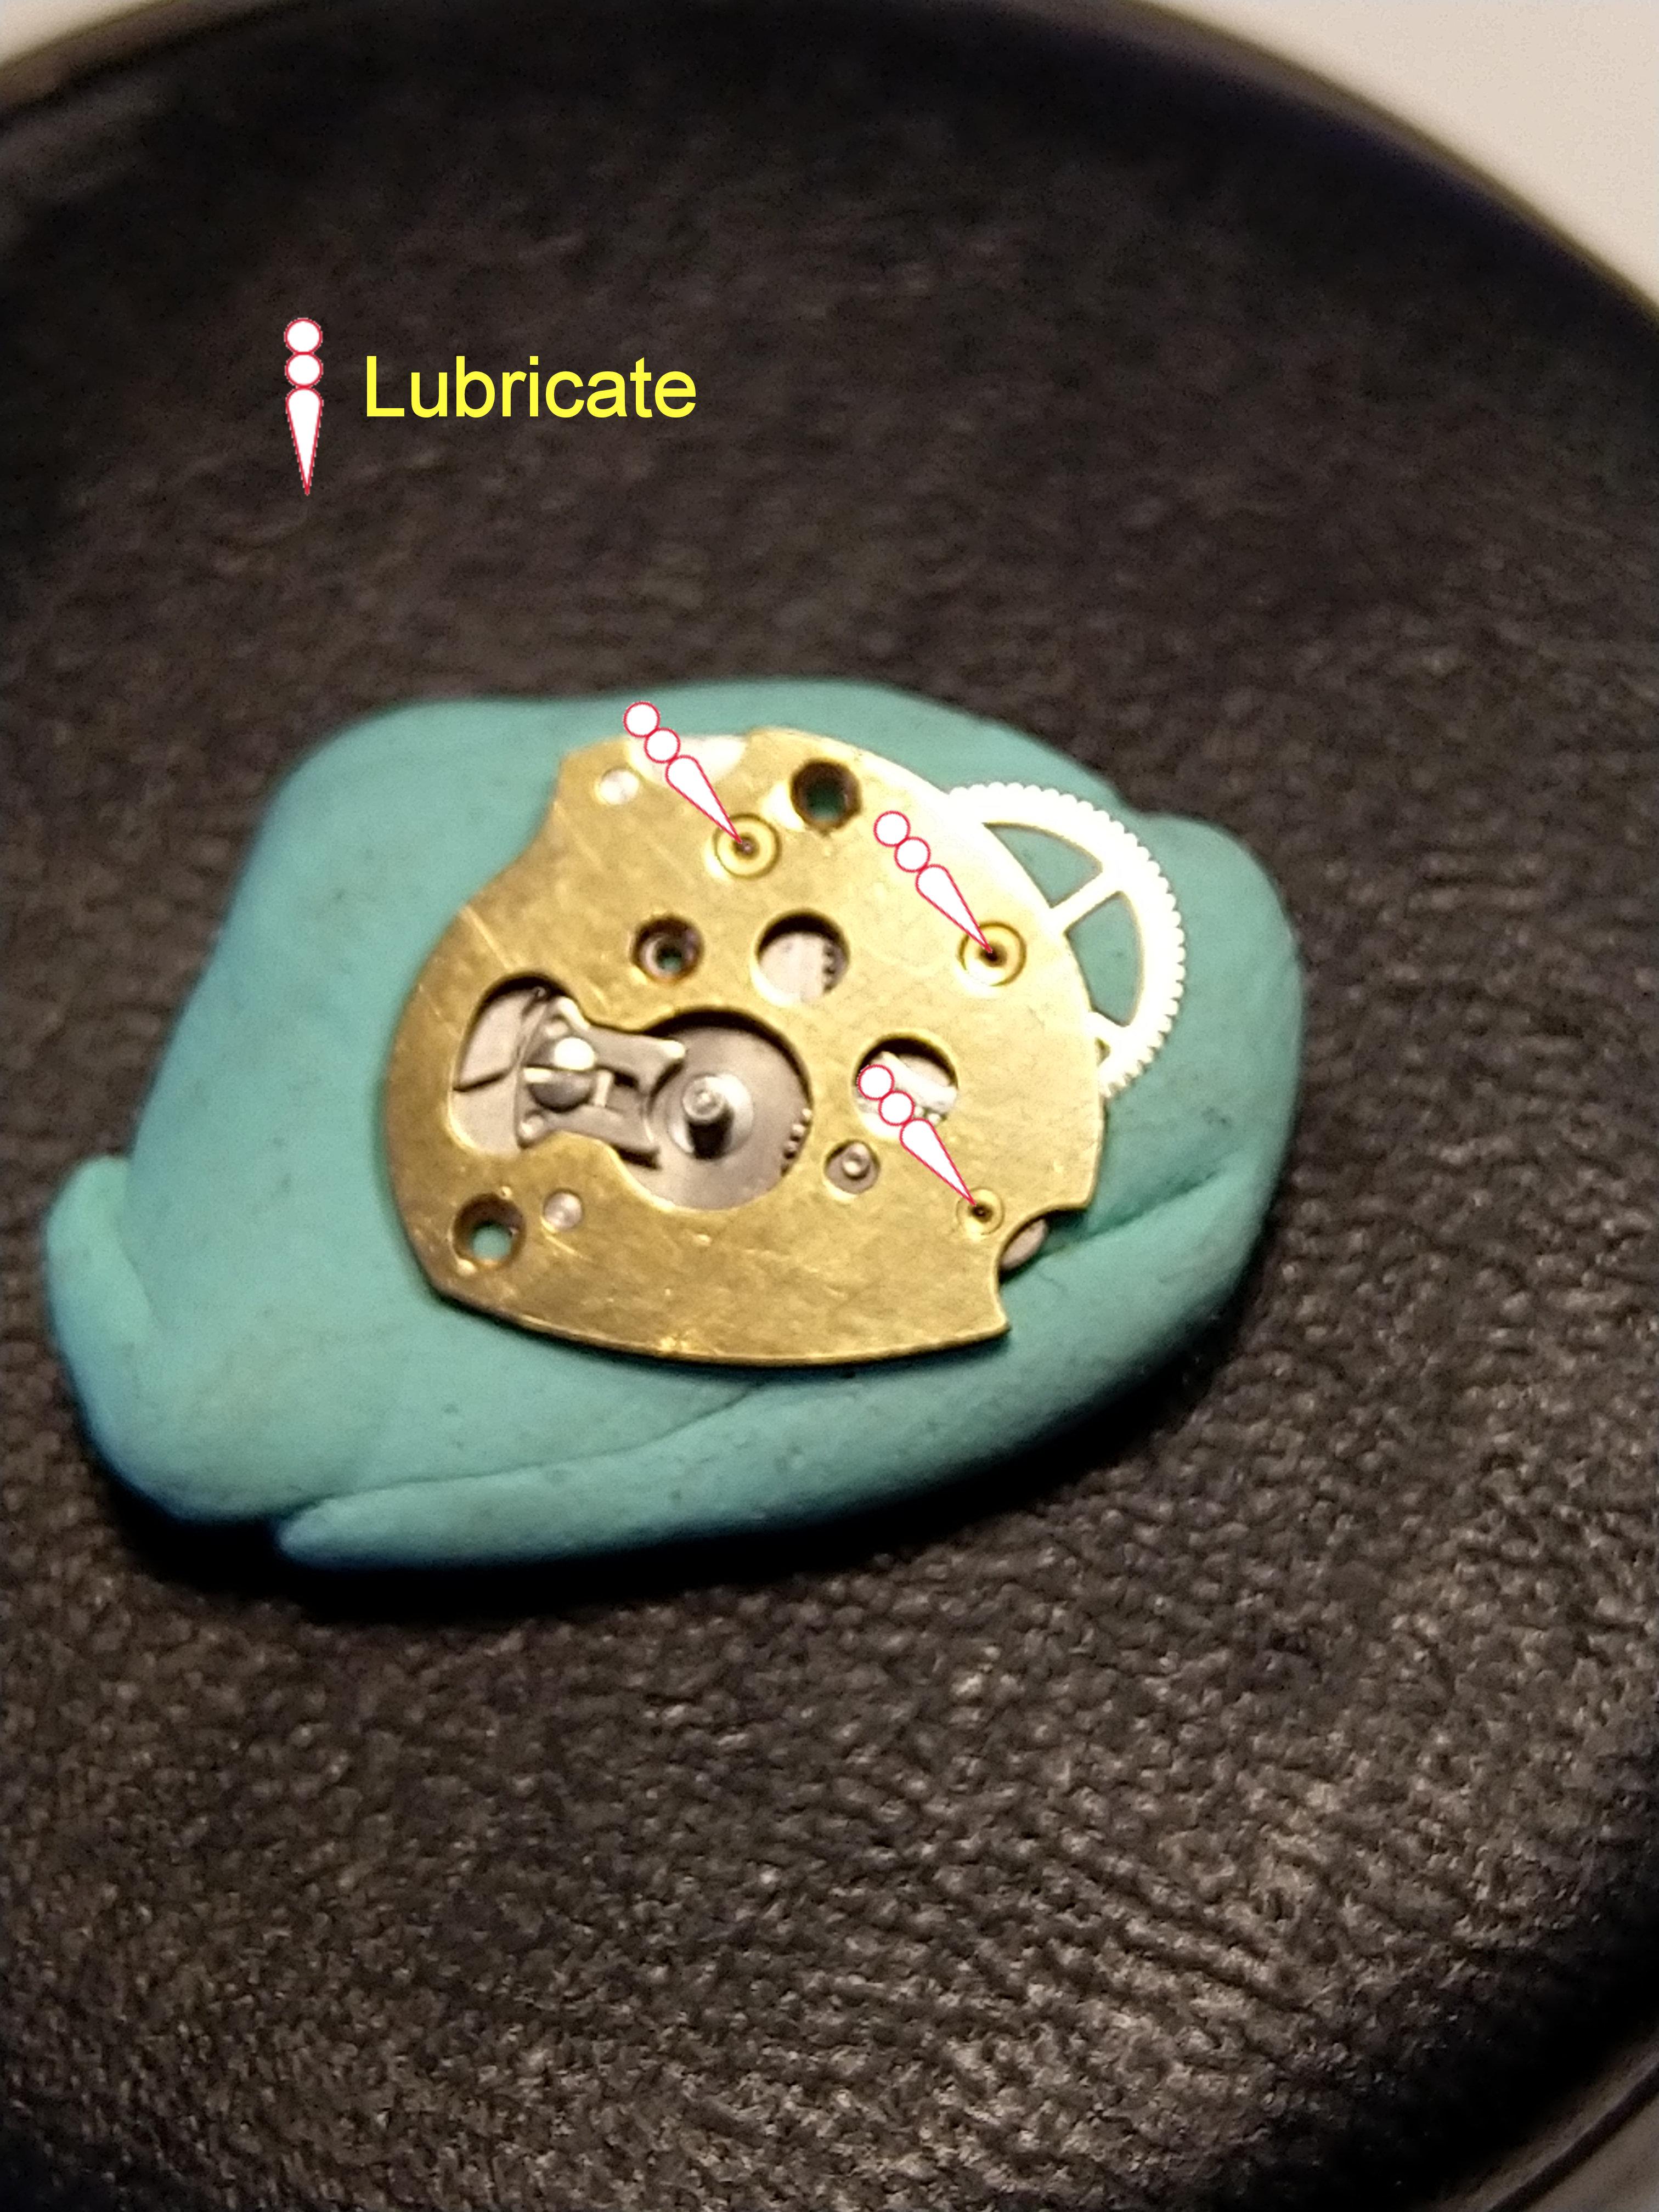
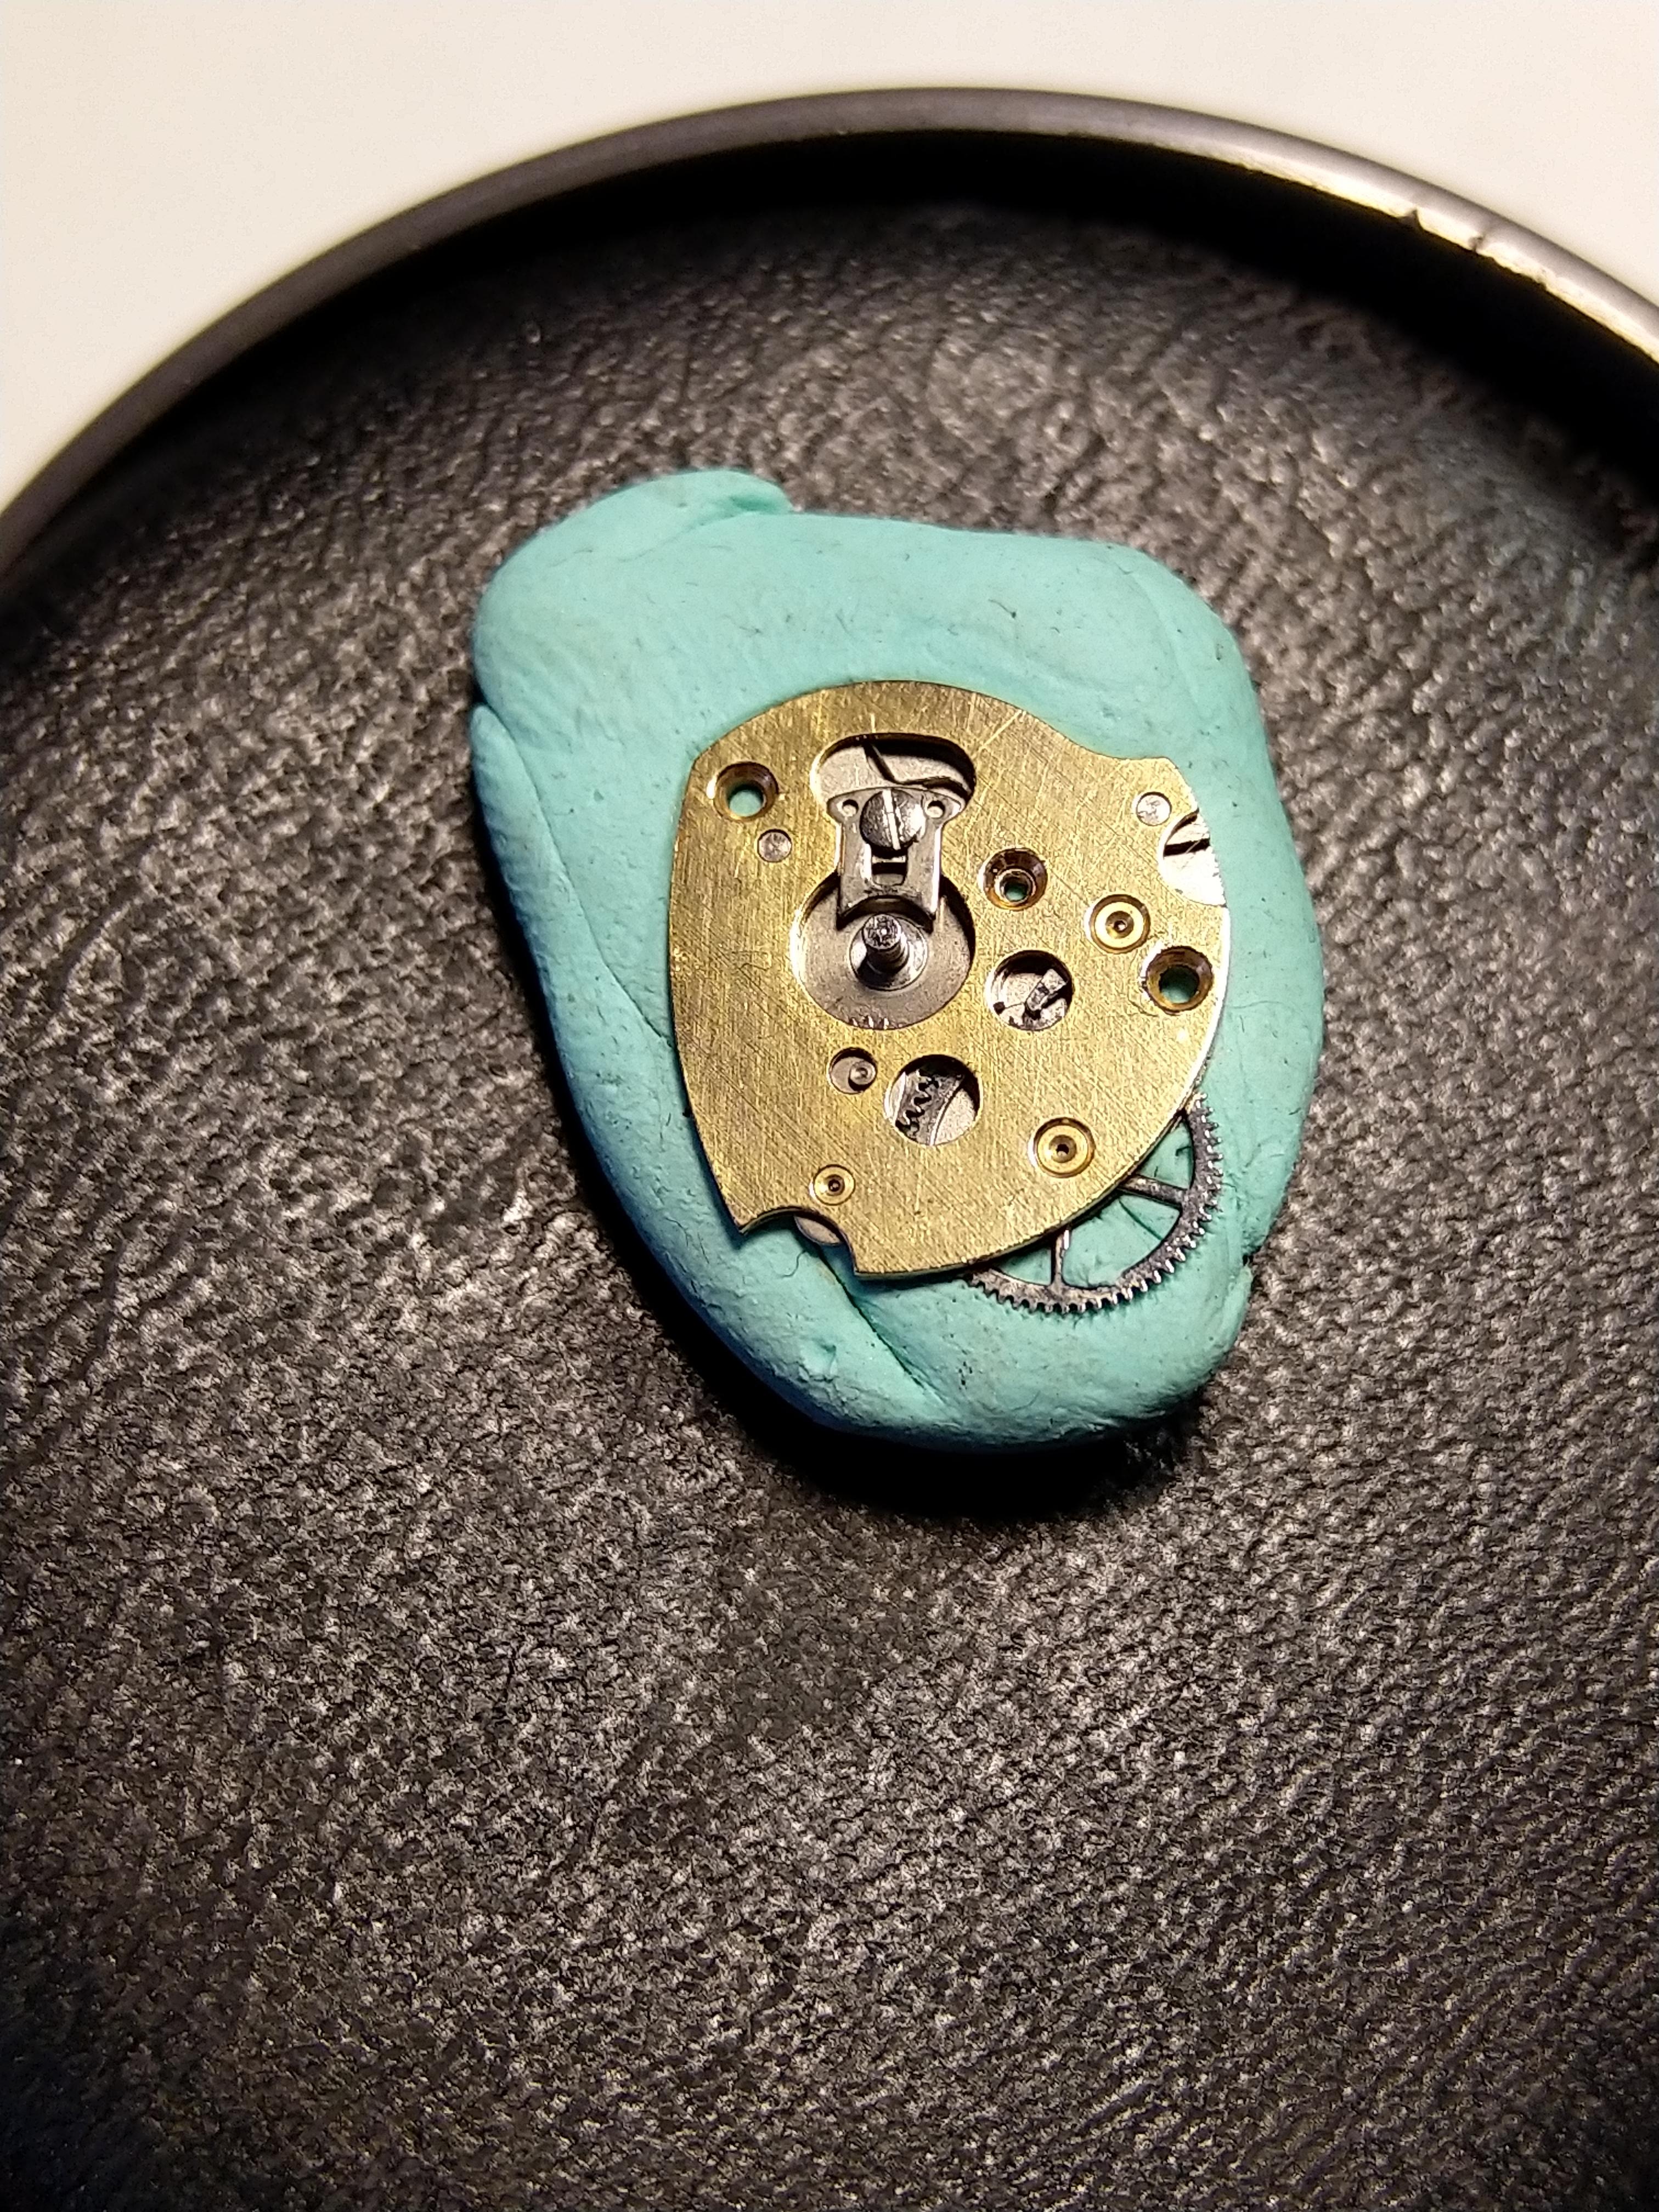
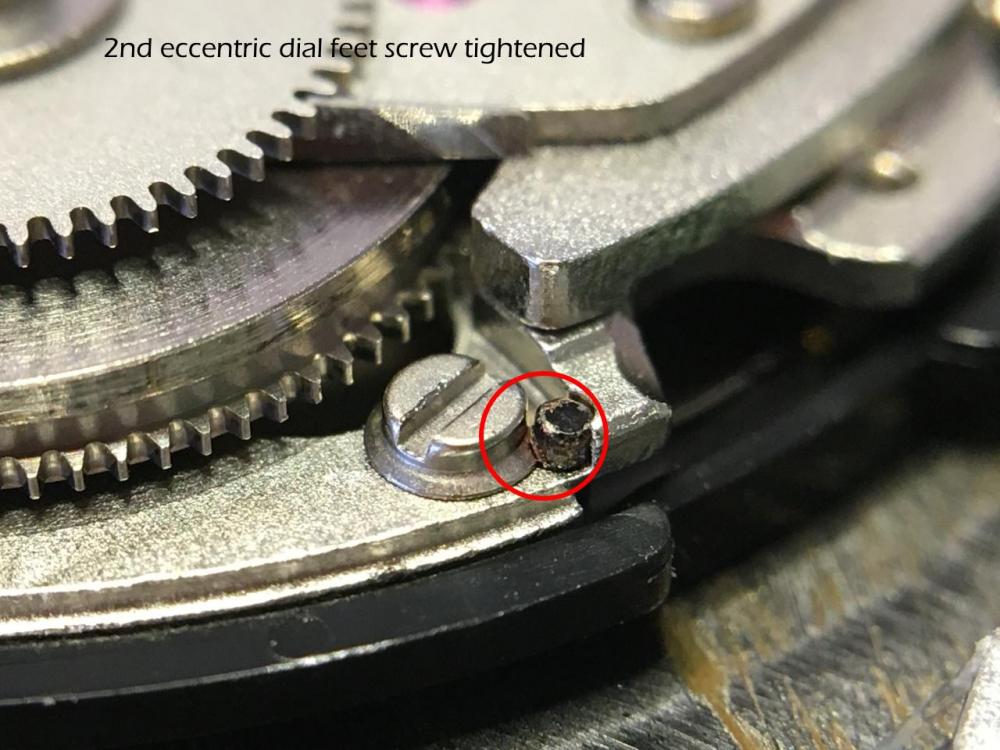
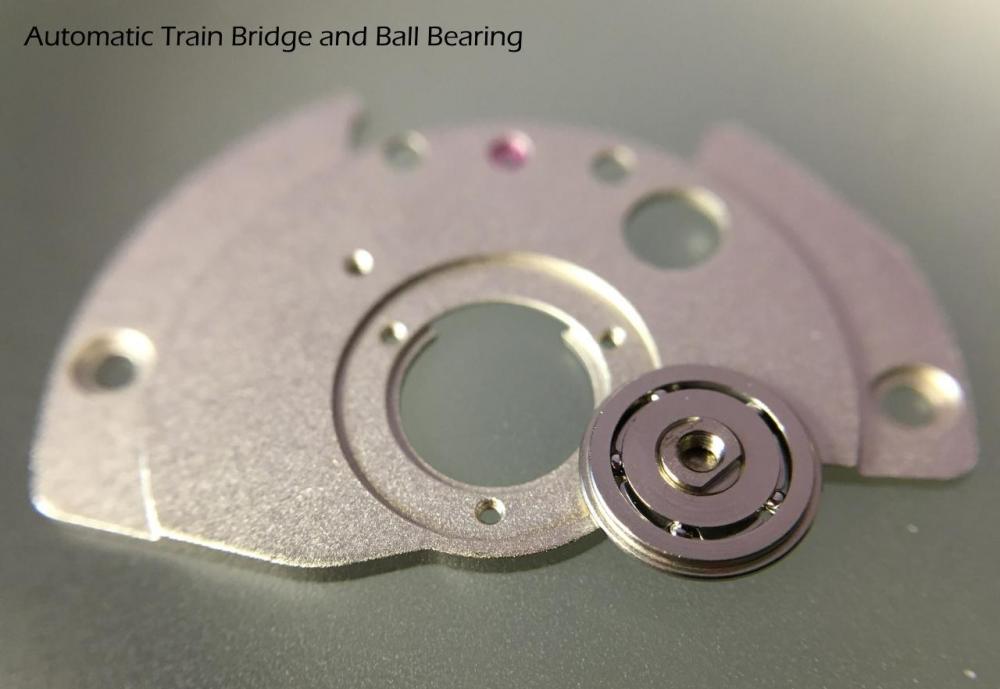
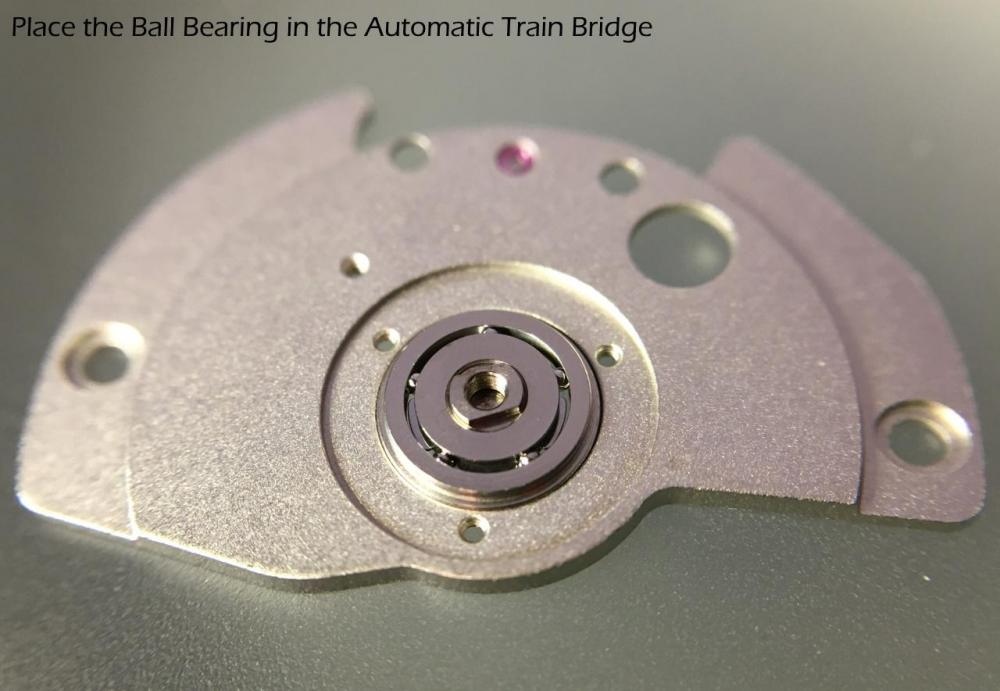
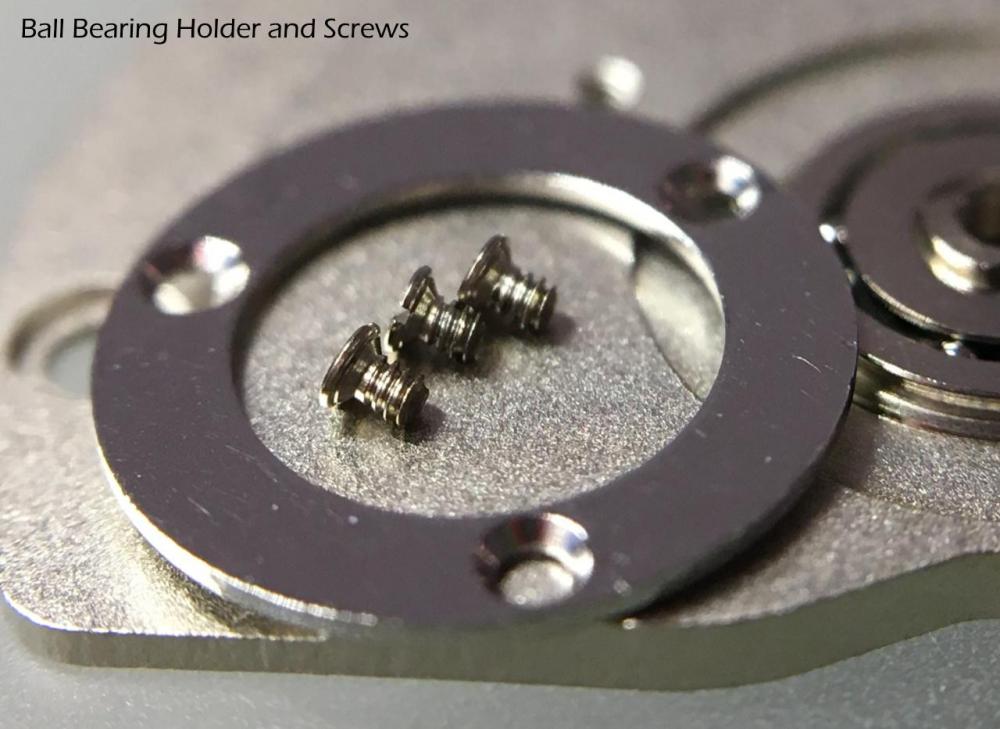
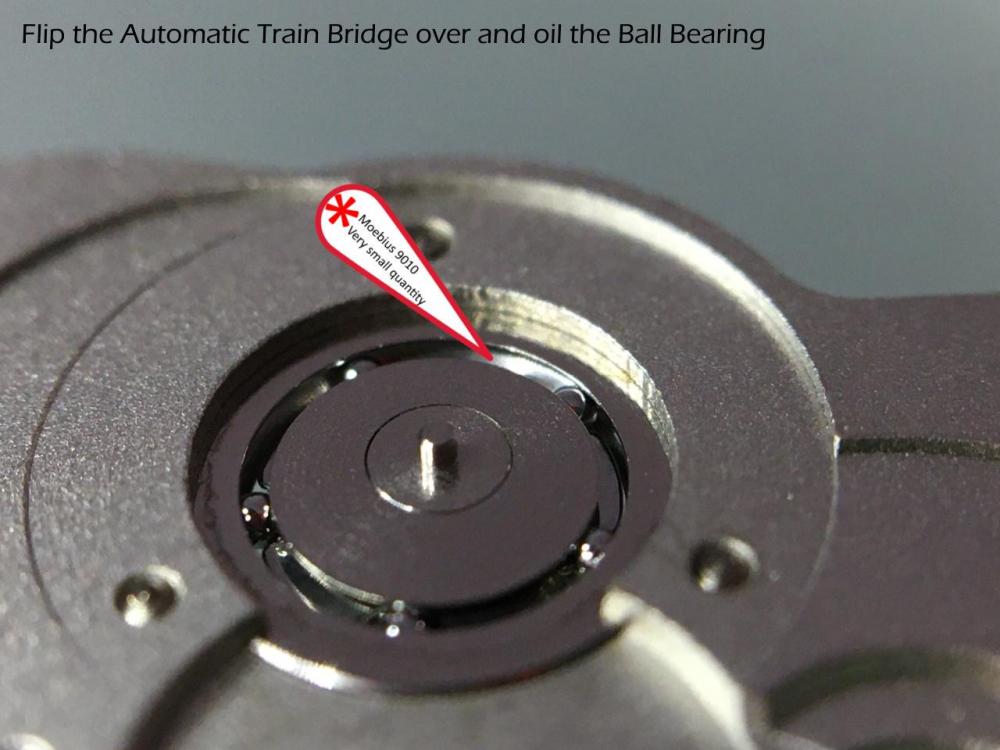
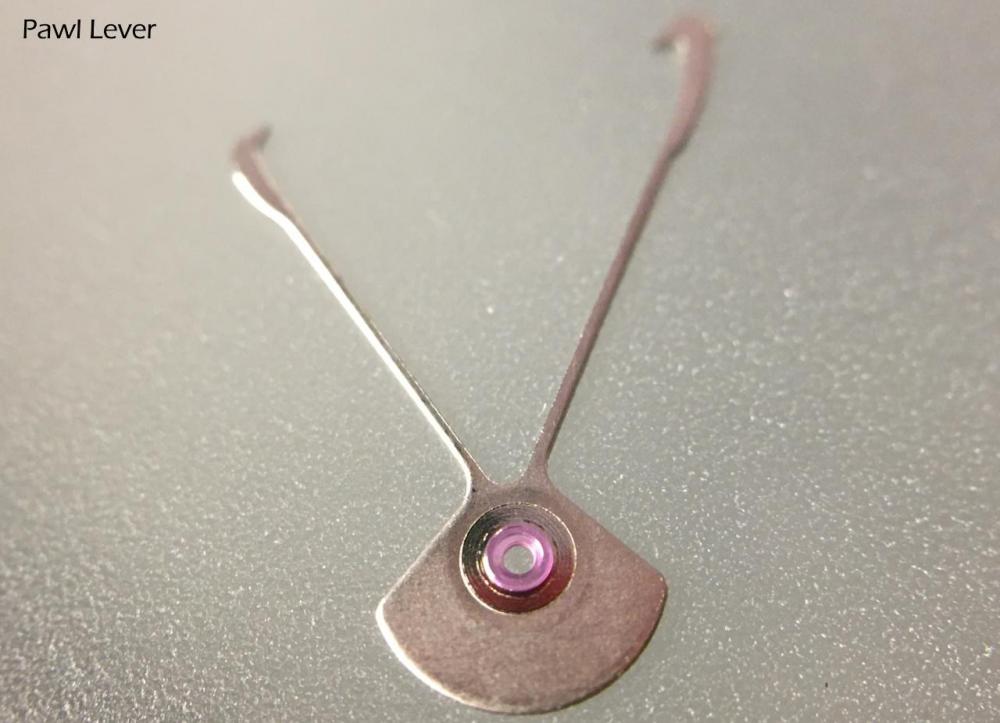
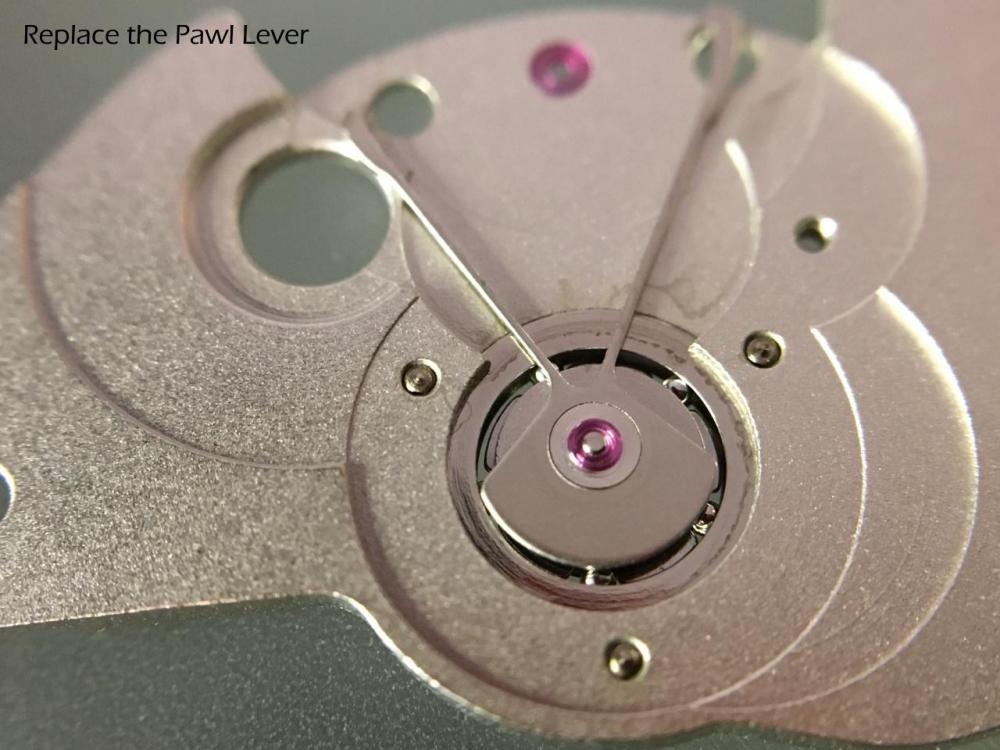
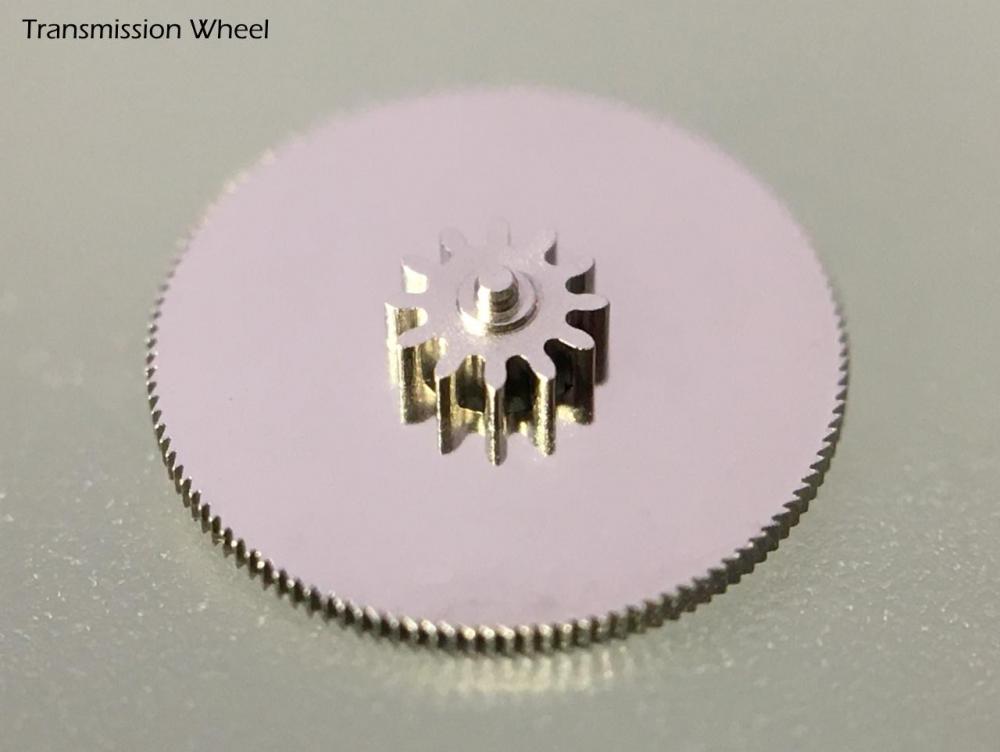
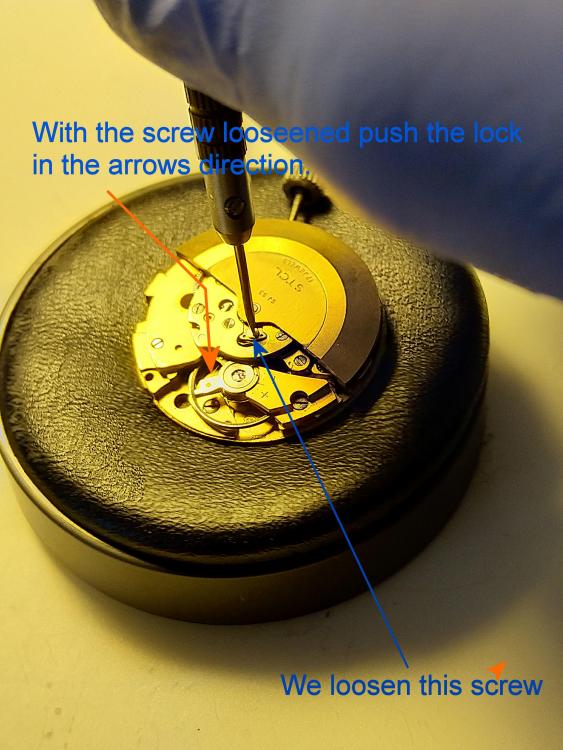
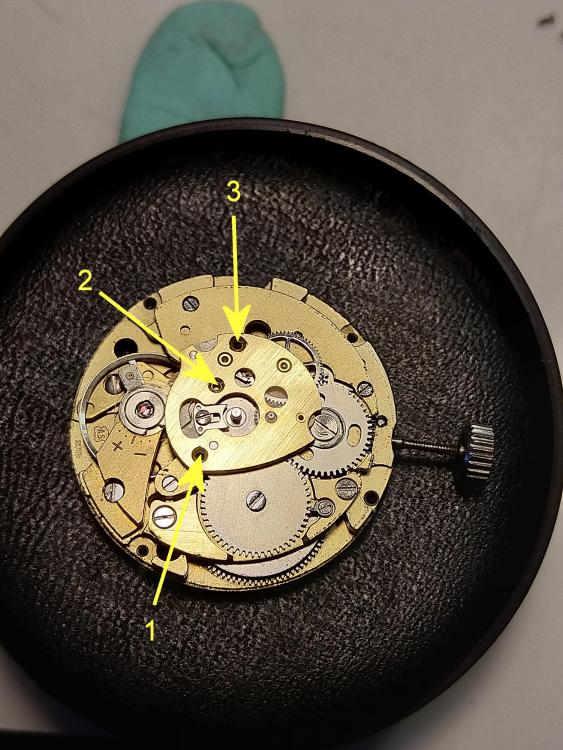
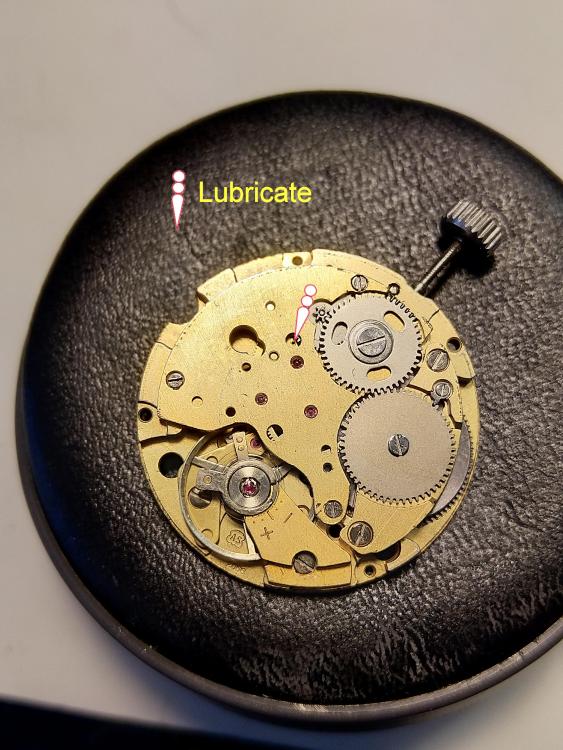
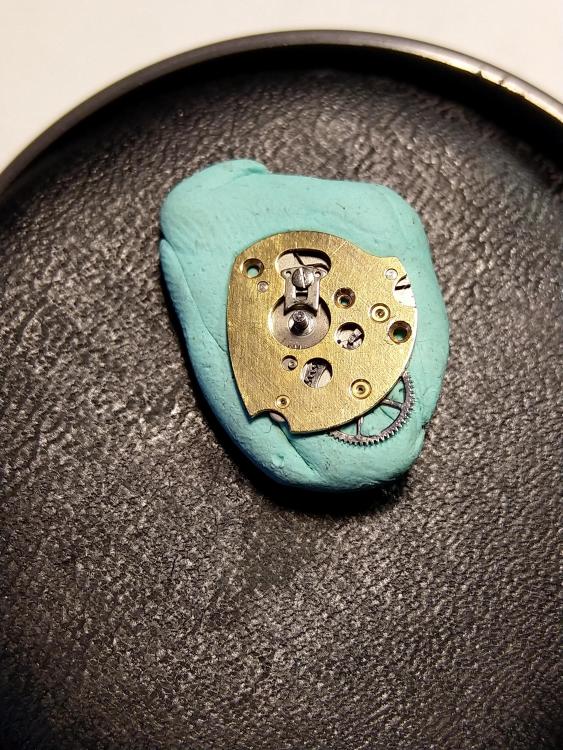
I guess one always can break all kind off springs and by different reasons. I still mostly use manual oilers even if I got a bunch of automatic ones. When looking at your winder assembly I hope you flipped the click so you haven't tried to fit it as it is in your picture. I would invest in Lubricants and practice cleaning of the watch movement as a first step since that will be the most important steps regardless of what you do in the feature in Horology. So even if you got only Moebius 8000 you could always practice lubricate your movement and later on improve the status of it. But now let's se how you could do for now. I taken pictures from the teardown too so you can put it together just by reversing th sequence. First we have to get the oscillating weight off by loosening the lock. Just loosen the screw so you can move the lock to the side. With the lock bolt loose lift the oscillating weight away. To get the autowinder away first screw off the three screws it is fastened with. You could put a extremly small drop in the hole shown in the picture or on the pinion of the gear. Later on when you put the winder back together lubricate at theese two spots. Just a small drop. There are nice pictures shoving the amount you should use in those documents you were presented earlier in this thread . The same goes here lubricate in these three spots, but not when you take the winding assemly apart, just when you cleaned it and put it all together. Always lubricate the surfaces where metal goes against metal. The lever you call "Clutch" actually is like the click by the crown wheel, since you don't have any reversing wheel in this winder this click will prevent the oscillator to wind the mainspring the wrong way. So it is more like a break. In your picture it is flipped the wrong way again. After lubricating where metal parts meet eatch other just put the bridge back and go the reverse way in this picture series. Now you can lubricate in phe previously shown positions. Always try to document by photographing everything before and after you make an egagement on the movement. Hope this helps..


 1 point
 -
Cleaned and all back together with a great amplitude. One question though, how do you set the calendar. Unscrew and you can wind it , one pull and it sets the time, doesn’t seem to be any more pulls??? Sent from my iPhone using Tapatalk Pro1 point
-
This should put your mind at rest. Click on this link. http://members.iinet.net.au/~fotoplot/sdriver/sdriver.html1 point