Leaderboard


Popular Content
Showing content with the highest reputation on 02/05/20 in all areas
-
I am very good with bending, "un-bending" is a different matter.4 points
-
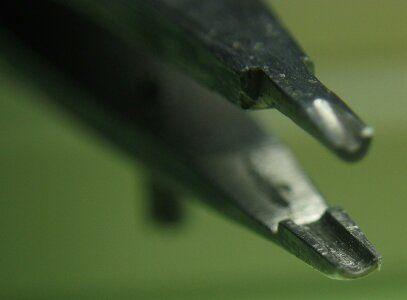
Hi, it was mainly filing and a bit grinding. Origin was a steel tweezers of this type, which I had a lot of: Some pictures of the curve tweezers: Frank
 3 points
 -
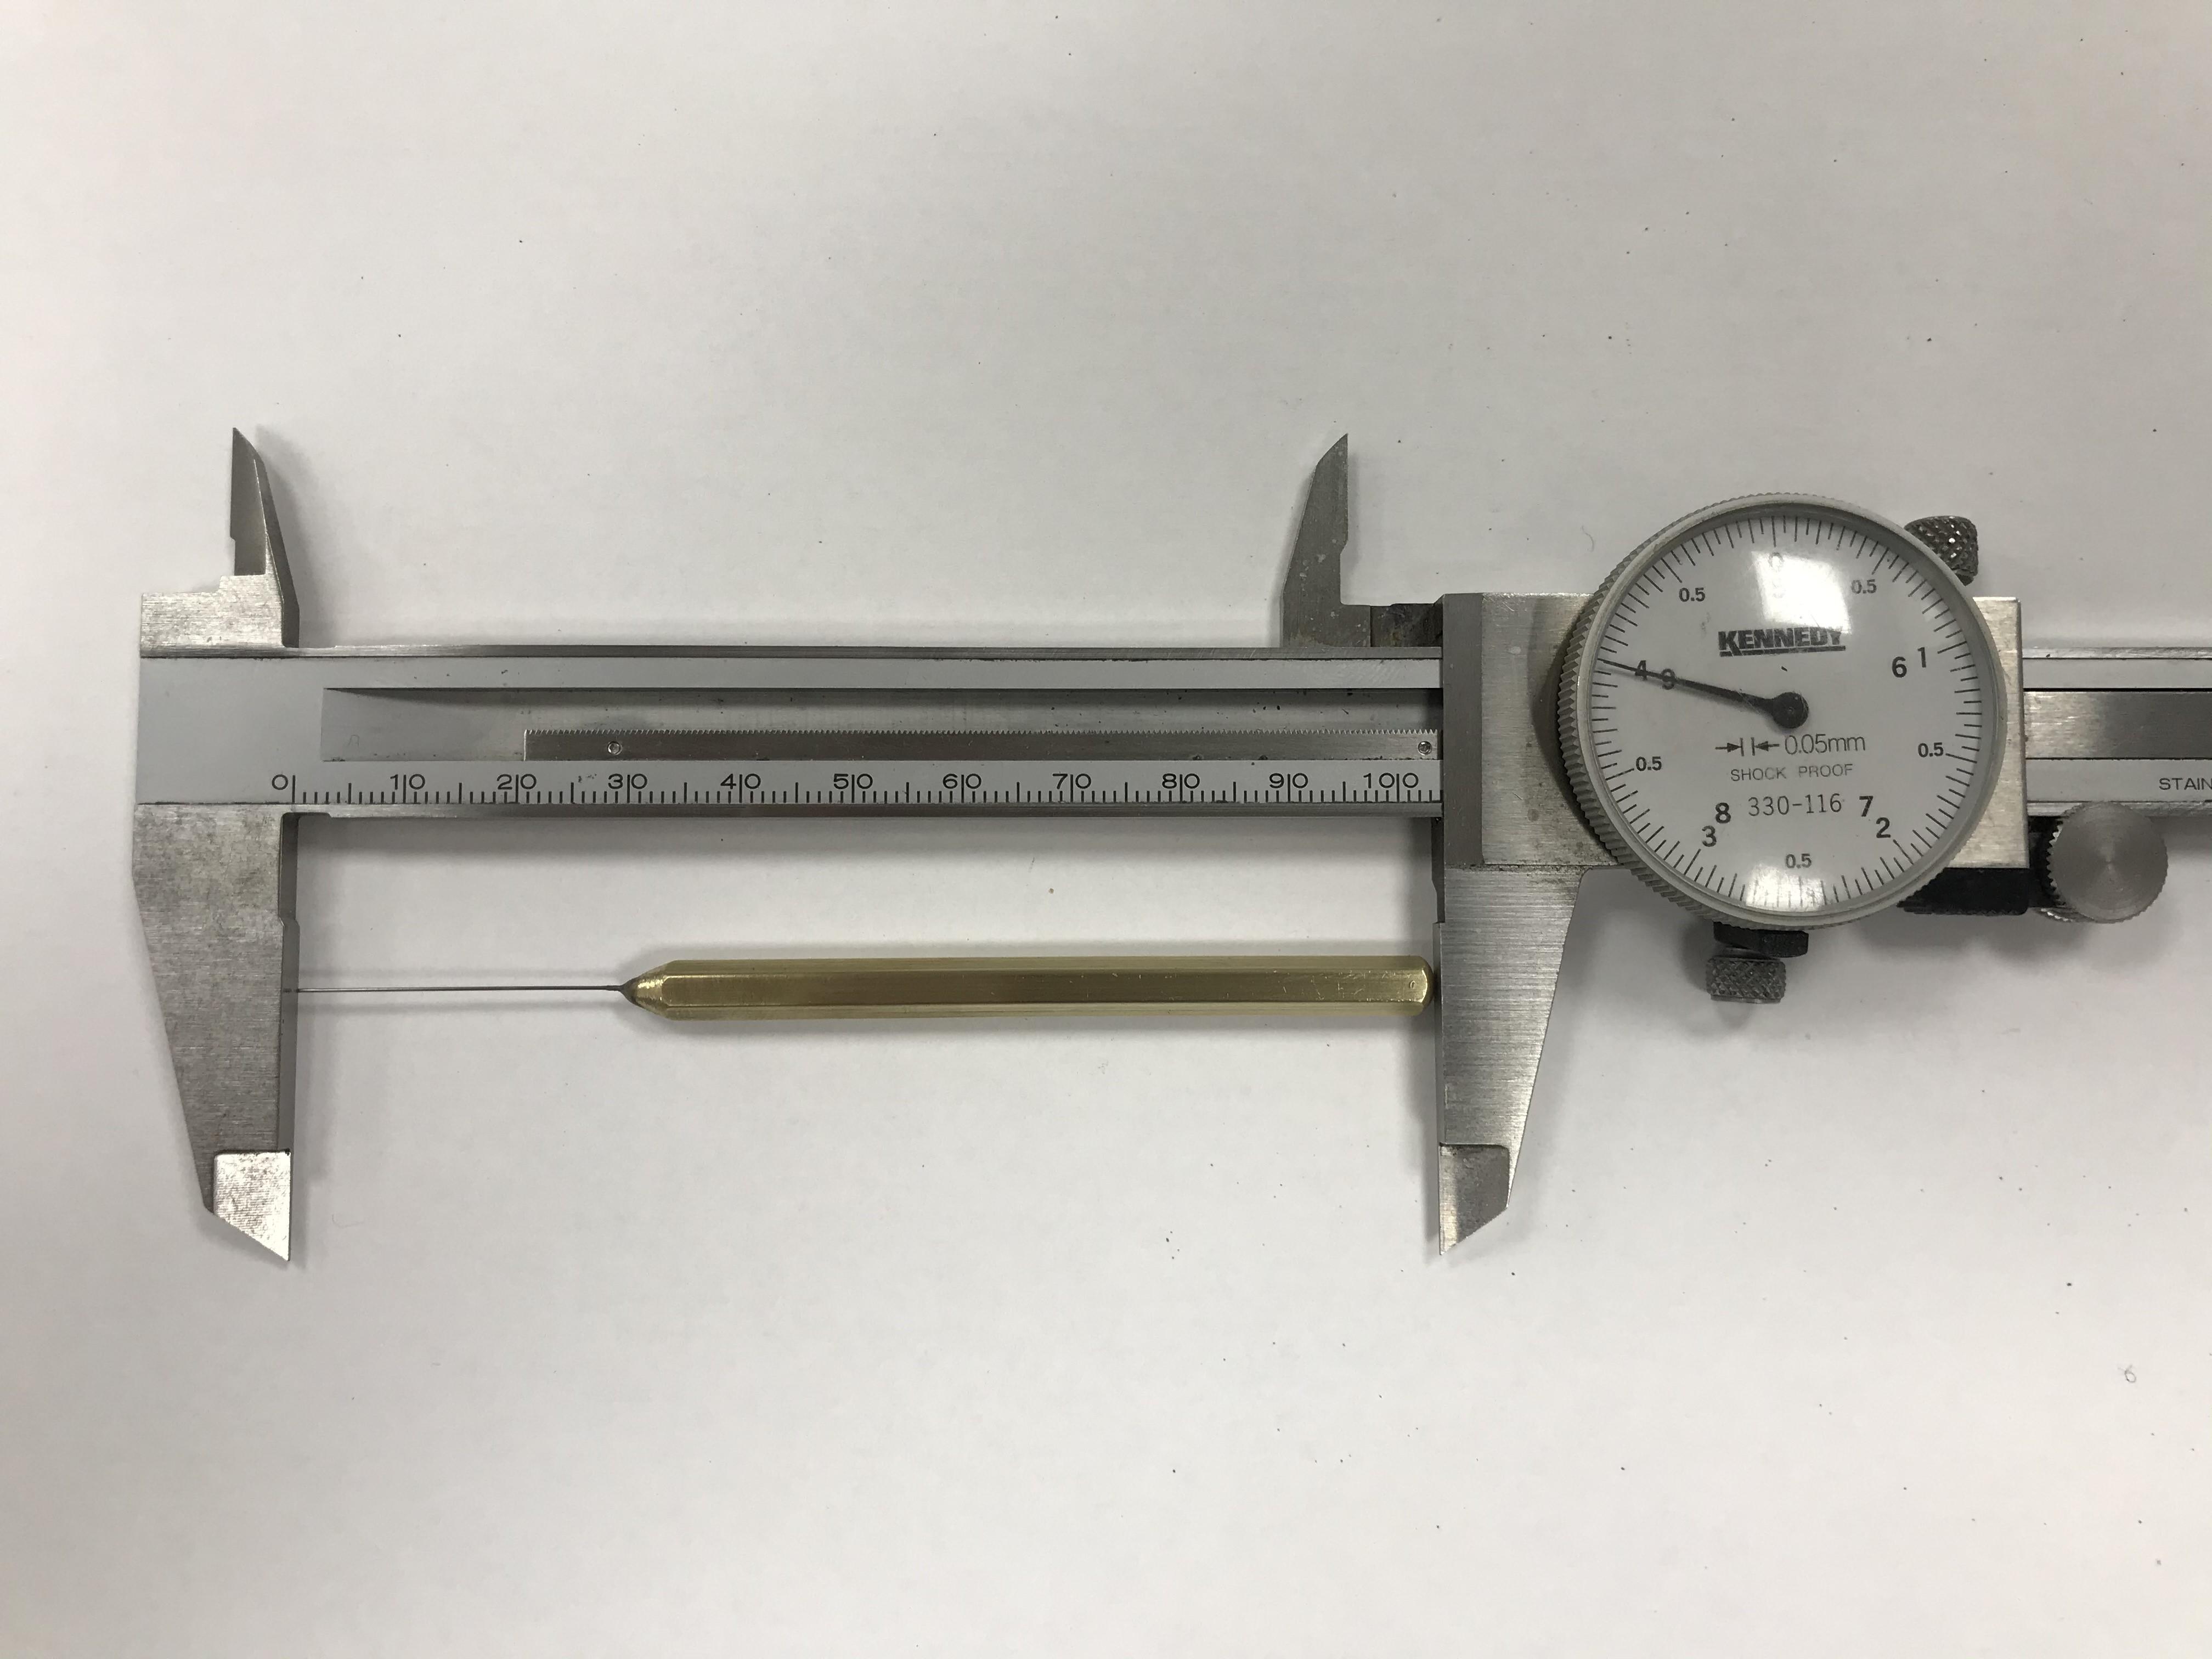
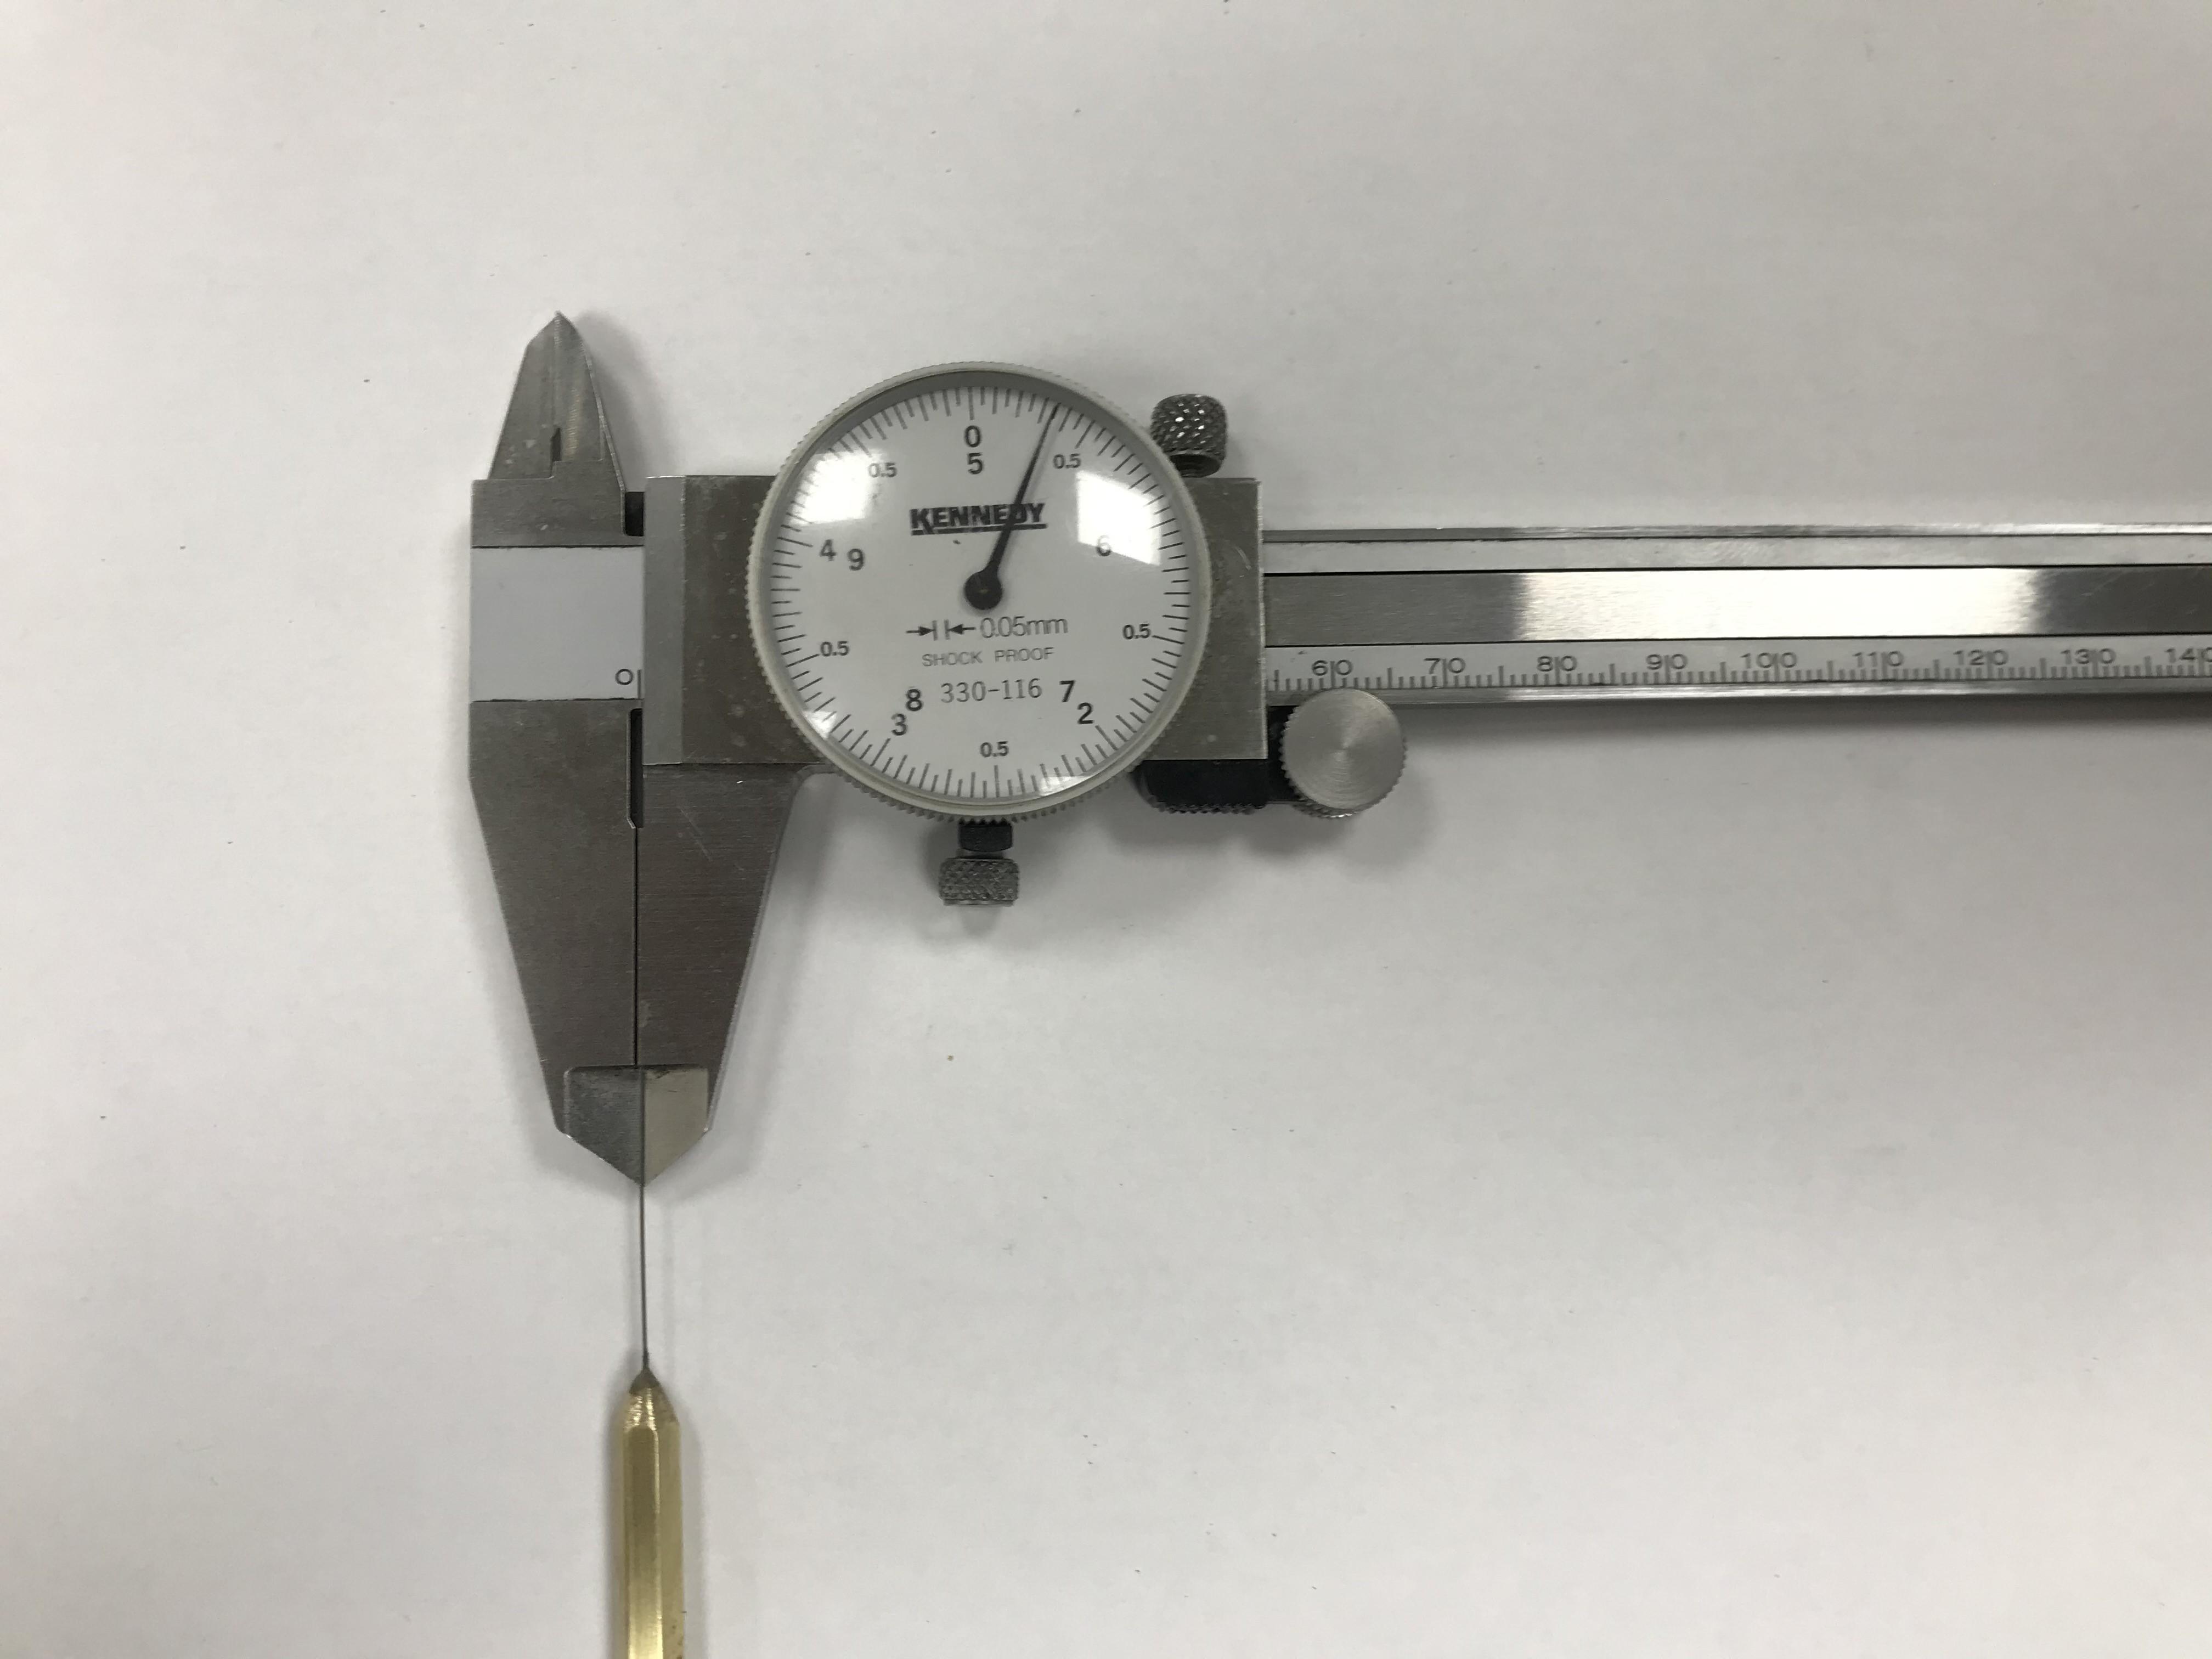
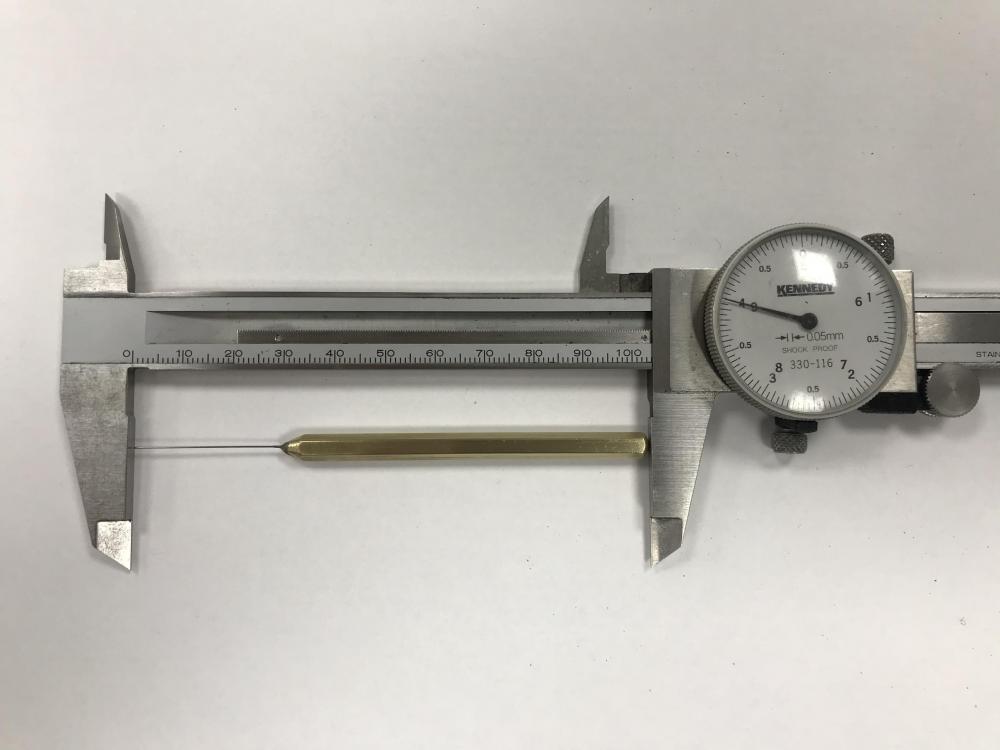
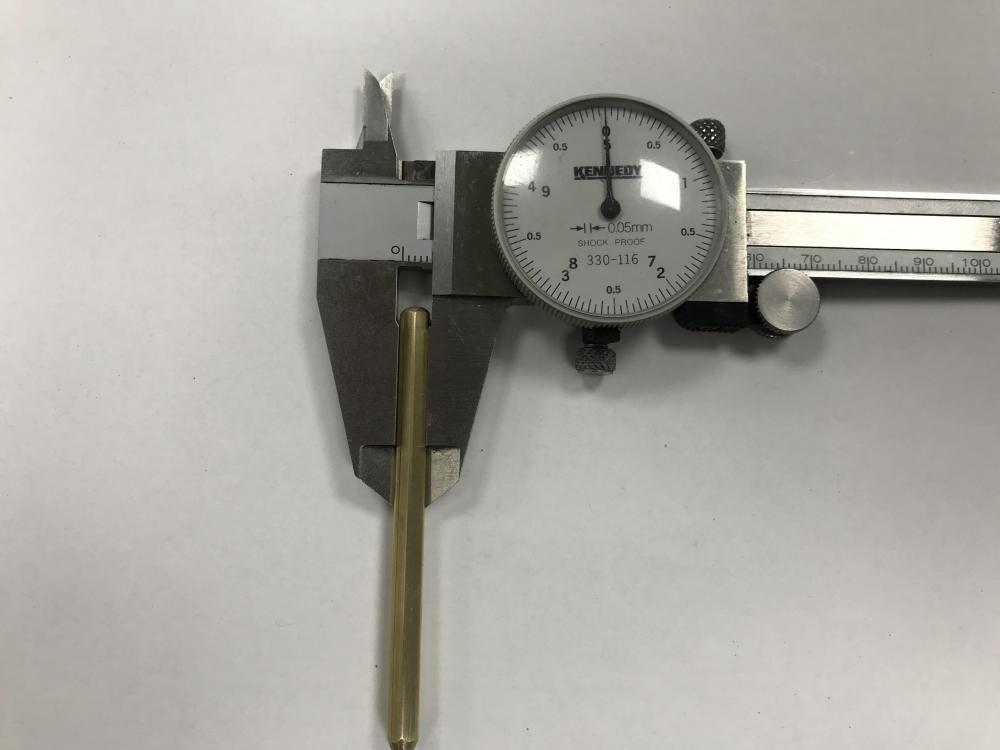
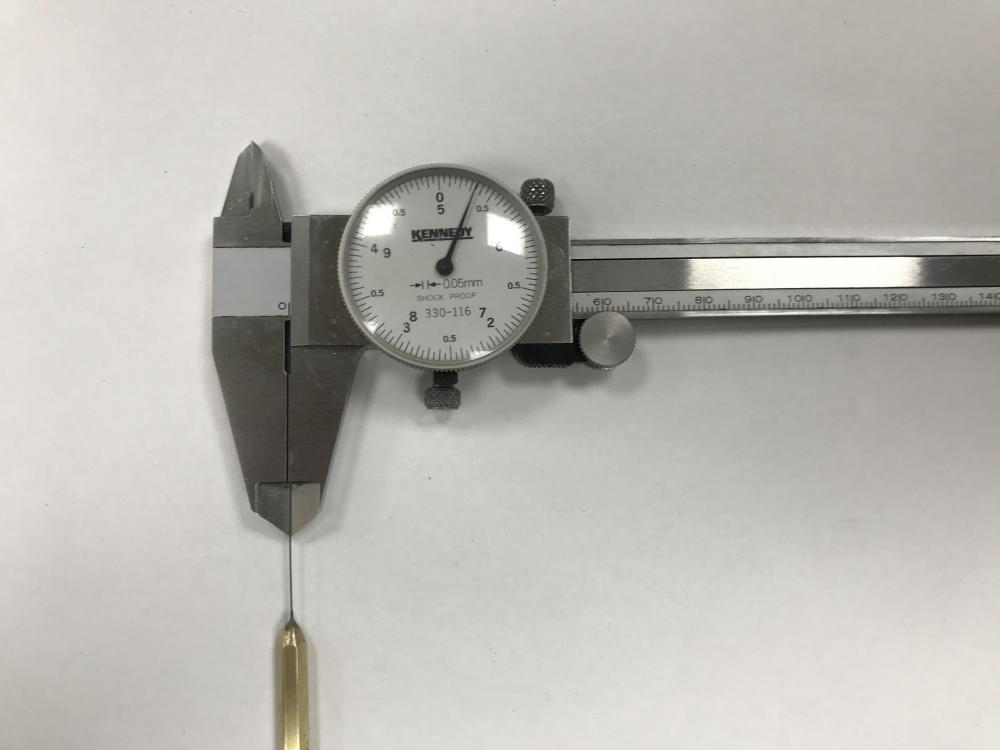
I needed a tool for probing hair springs. I could not find one so I made one. Here are the pics. Materials:- Handle - Brass 5mm hex Probe wire - 0.3mm stainless steel from a wire brush. Drilled a 0.4 mm hole and Haroldited the probe wire in the handle. All anti magnetic.
 2 points
 -
I know what you mean Mo, it's just fun resurrecting something that has been given up on and will probably end up in landfill if you don't give it a new lease of life My current crop of Timex 'Q' quartz watches, ready to be worn again... The jump minute hand one being in the middle. Apologies for the reflections in the dials, I have obviously made too good a job of refinishing the crystals2 points
-
Yes to both above. Ideally you have a mainspring arbor holder (yes this is an actual tool and darn handy), basically a slide locking pinvise for distinct diameters. With this you can confidently coax the most stubborn arbors into the mainspring loop. I have a bunch of them but honestly most of the time I use sturdy nickel tweezers and the tilt-it-in technique. I also have a number of hours of barrel arbor floor searching under my belt.2 points
-
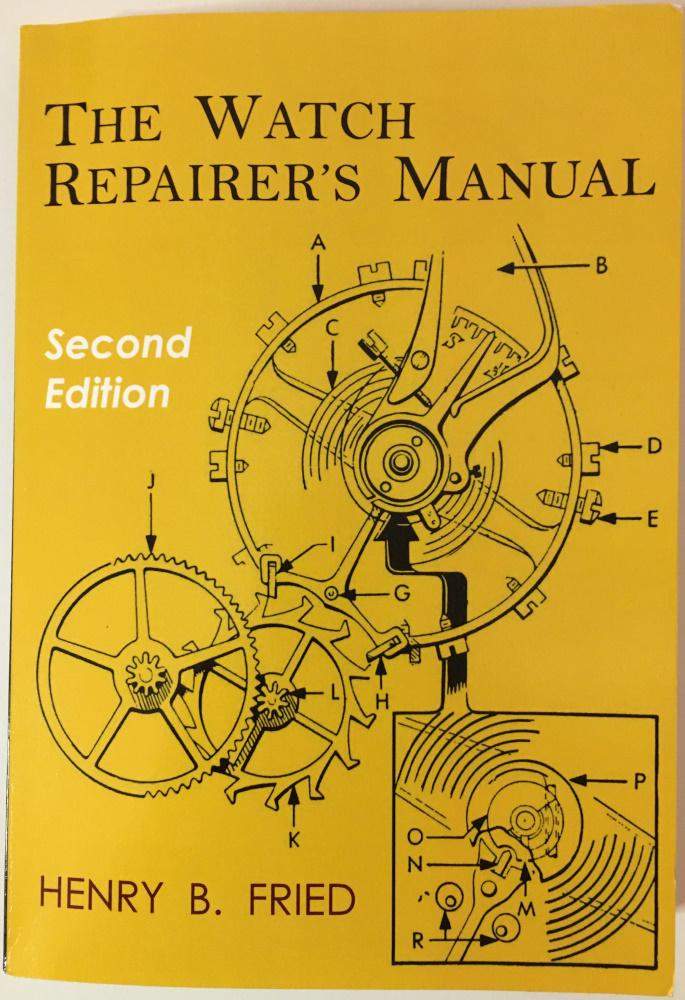
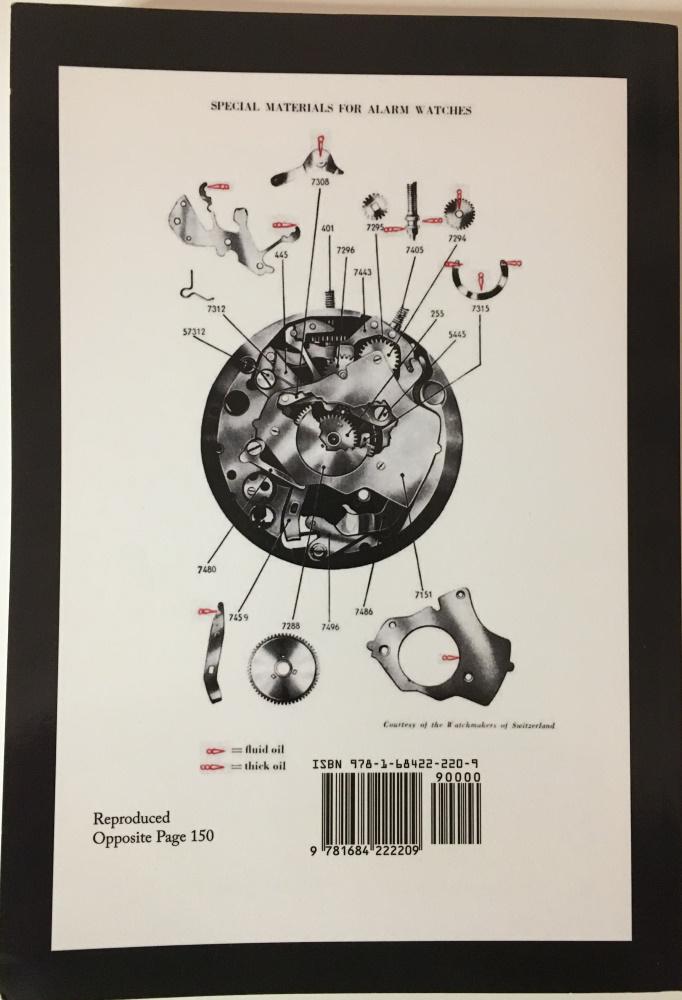
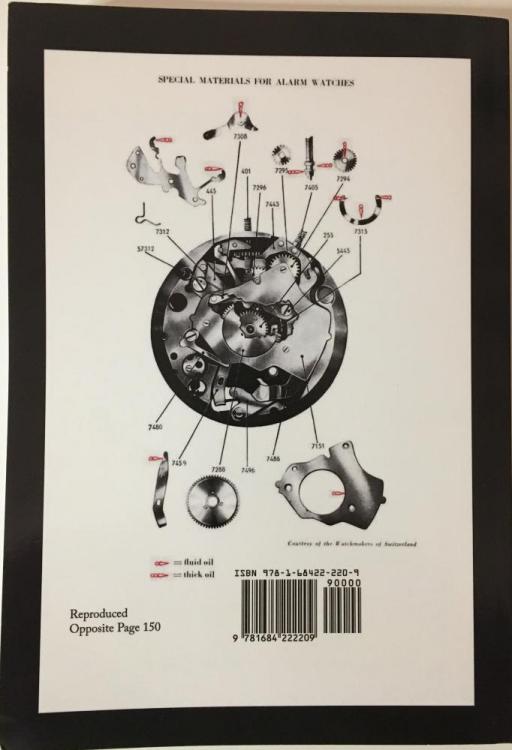
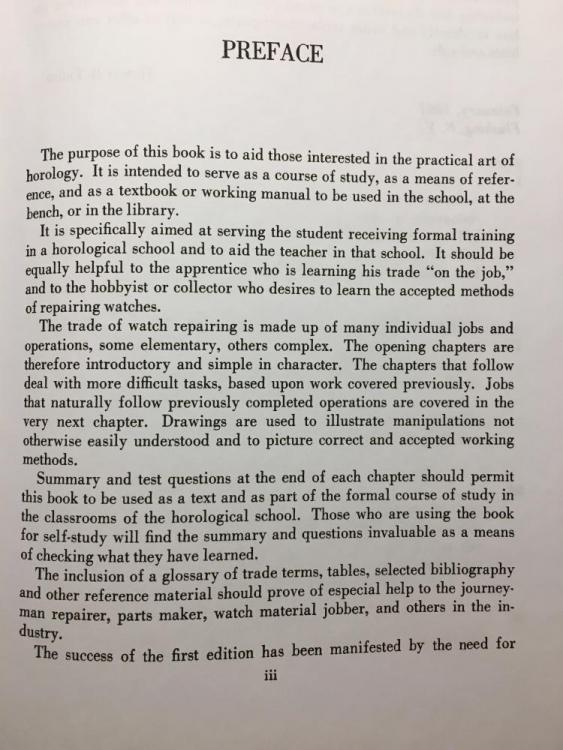
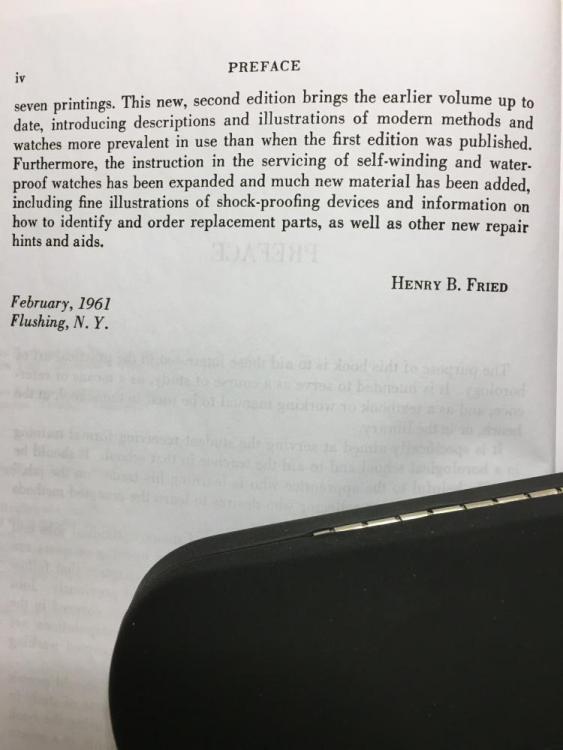
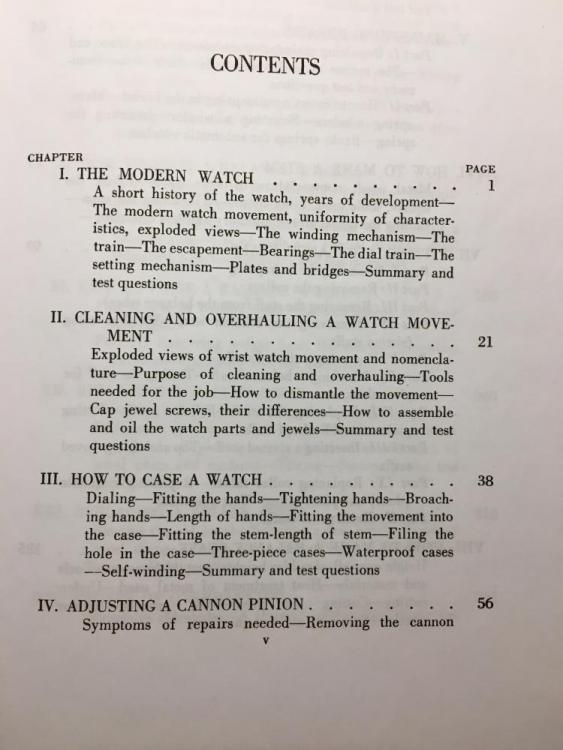
Just before Christmas a WRT member recommended me the book ”Bench Practices for Watch Repairers” by Henry B. Fried. The book is widely praised and mainly covers advanced repair topics about hairsprings and jewelling but also some other stuff. So far, I’ve only read a small part of it, but it is very well written and illustrated. Anyway, this got me interested in the book “The Watch Repairer’s Manual” by the same author. However, I couldn’t find much info about it, so I decided to take a chance and buy it on eBay for approx. $21 including shipping, and I’m glad I did. It is equally well written and illustrated and covers both fundamentals and some pretty advanced stuff. Characteristic of the author is that he is extremely precise in his language and explanations which I both enjoy and find very enlightening. For example, you can expect sentences like: “The escape wheel pinion is the last part in the train, but its wheel belongs to the escapement”. For those of you interested in this book and want to know a bit more about it I have taken pictures of its cover, preface, and contents which follow next. I realise my post may constitute a copyright infringement, but I’m thinking that as I’m not copying any actual content, not doing it to make any profit and as I’m in fact promoting the book, my post may hopefully pass. If not, please feel free to delete it.


 1 point
 -
Hi guys … I had promised that I would make a « custom decal dial tutorial » on another thread there So here we are … There are many variations of decal dials, the best IMHO being the « negative gilt » dials which gives the best results. The process I’m showing today is aabout how to make a dial with black printings on a one color background. I had a cheap quartz diver waiting in my drawers so I’ll make a Heuer diver hommage based on the 980.016 model (quartz one too). DAY 01 : It’s 4:30 AM (I’m an early bird) and I have 2 hours to kill before a business trip to Paris (I’m French) so I decide I have time enough to begin. The first part of the process is to prepare the dial plate : - stripped it, removing all the lumes bars and dots - soaked the dial for some minutes in acetone to remove the paint - filled the tiny holes where the bars and dots go with cyanolite glue - sand everything flat I sand with 800 and don’t try to get a smooth surface as I want the paint to adhere perfectly to thedial plate. Here is the result … Then I want to spray paint. I make a tube with some painter’s tape, from a « curve » with it and place it on a plastic bottle cap. I want it curved so that I can stick the dial on it without any risk of bstructing the center hole or the date window of the dial plate. So I stick the sanded dial plate on the tape tube. As you can guess from the pic below … that’s not the first time a make an orange dial. Then I place the bottle cap and dial plate on a paper sheet and spray paint in orange. I use street art spray paint as it is « water resistant ». As you can see on the next pic, I don’t try to get a smooth surface, or even to perfectly cover the dial plate at first. I will let this coat dry, sand it with 2000 grade, then spray 1 or 2 coats until I get a perfectly smooth orange dial plate, ready for receiving a decal. So I place the bottle cap and dial under a shooter glass and will let it dry for about 24 hours before sanding and spraying the second paint coat. The 24 hours drying time is really important (though it could depend on the paint you use). The paint I use looks perfectly dry after about 5 hours but if you spray the second coat without waiting enough, that coat won’t perfectly adhere to the first and you could get a granular surface like an orange peel. And here is the dial waiting under the shooter glass. On the right is a « negative gilt » dial (third and last matte varnish coat) On the background there are two Raketa 2609 movements from the 70ies, quietly (really loudly to be honest) ticking for test after I‘ve recently serviced them. Now it’s 5:45 AM so I will have a and go to the train station. I’ll sand the dial plate this evening and spray the second paint coat tomorrow morning. Then sand it in the evening and spray the third coat (if needed) the day after. DAY 02 - DAY 03 : So here's what you get after the first paint coat … doesn't look really good but no matter as there's still some work to do to get a better result. And here's what you get after 3 coats of paint, each one sanded with 2000 grade, to get a perfect finish, flat and smooth. Now the dial plate is eady to receive the decal. DAY 03 : I won’t explain anything about Photoshop and Illustrator here … I’ll only explain how I print my decals. One thing really important, from my own experience, is the definition of the design. I’ve tried several, from 1200ppp to 6000pp and the best results I’ve got on printing decal sheets were with a 4000ppp definition. So all my dial designs are done in 4000ppp. The result is really BIG files … for example an A6 template with 12 dial desings ready to print is about 800Mo. As that dial is black printing only I open it with Photoshop and let the softwre (so ont the printer) deal with the printing quality. My printer is an old Epson Picturemate with a 1200 maximum definition. As the good quality decal sheets are not cheap and as I’m a « skinflint» I often print on A7 sheets … 6 dial designs on one sheet. When printed you should let it dry for about 4 hours then spray 2 really thin coats of matte varnish, letting each coat dry for at least 12 hours (24 hours is better). DAY 04 - DAY 05 : 2 days of speed-hiking with my wife so I didn’t worked on that tuto. You can check on the net what speed-hiking is, but to summarize it’s hiking as fast as you can with really light backpacks, trying not to run (or only short runs). On a good day you can walk 5 to 6 miles/hour … when trained you can walk up to 6,5 miles/hour … and while I trained for my first 62 miles ultra I achieved to walk (no running) up to 6,85 miles/hour (11 km/heure). DAY 06 : Today is Monday 6:00 AM. It’s been 5 days since I begun that tutorial and … my legs ache and all my body is painful (see Day 04 - Day 05) The dial plate is ready and the decal sheet too. You can see that the decal sheet looks matte now. That is because I have sprayed 2 coats of matte varnish on it, to protect the inkjet ink while I’ll soak the decal in water. Of course if you print with a laser you won’t have to spray varnish as the laser inks are (almost) water resistant. First thing to do is to chose the best item on the decal sheet and cut it round. Then you are ready to go. On the next pic you can see all you need now : - dial plate … fixed on a foam board using the dial feets - decal dial … nicely cut round - tweezers - thin and smooth brush (mine’s a watercolor brush) - some « micro set » … or just vhite wine vinegar (it helps the decal to set on the dial plate) - cold water Now you put the decal in cold water and while it soaks you brush some micro-set (or white vinegar) on the dial plate. Then you put the decal on the dial plate. Here you can see why I prefer using clear decal sheets on coloured dial plates … because it’s much easier to « perfectly » positionate the decal, using the central hole and the date-window. When you’re happy with the position of your decal you use a paper tissue to absorb the excess of water. Do that carefully as you don’t want to move the decal on the plate. And here we are … everything worked fine while absorbing the water and the decal position is OK. I’ll let it dry for about 12 hours before I cut the central hole and the date window, before I proceed to the varnish finish. Still Day 06 but 7:00 PM The decal has dried for about 13 hours so now I can proceed on cutting the decal sheet That's what I do then I : - fix it back on the foam board - apply some « micro set » around the center hole, the date-window and the outer diameter - gently press with a paper tissue so that the decal is perfectly applied (no more «air bubbles) And I let dry for 3 hours more Evening … 10:00 PM Now the decal is « perfectly » applied and dried and ready for the finish Last pic for today is after spraying the first coat of glossy varnish I will let it dry for 12 hours, sand it with 2000 grade paper and apply the 2nd coat. DAY 07 : 20:00 AM … only 1 pic today just after finely sanding with 2000 grade the 2nd varnish coat I applied yesterday DAY 08 : Yesterday evening I applied the 3rd and final varnish coat after finelt sanding and cleaning And today I can show you the final result … and say I'm pretty happy That dial is so glossy it’not easy to get a good pic, even on close-up. May I say that me hpone is nit the best at shooting pics (just like me) and the actual dial is much much better that it looks on the pictures below. I hope that you liked that tutorial and that it could be helpfull to members who want to try to build their own watch dials. I’ll try to make better pics with a real camera and a better lens … next week of the week after, after luming the dial together with the hands. Then I will still have to get a case and rework it so that it could be a 980,016 lookalike. Some of you may wonder how much time did I spend to make that dial. It took 8 days to achieve the all process but I spent only 1 hour the first day then only from 15mnm to 5mn the days after. So, apart from the design work on Illustrator and Photoshop (which took me hours), I would say that the whole process is about 2 to 3 hours. I must say that it's not my first try at dial making and I've trained for 2 years now. So if you want to try you should consider spending a few more hours but it's really worth the time spent as at the end you get your unique DIY dial.1 point
-
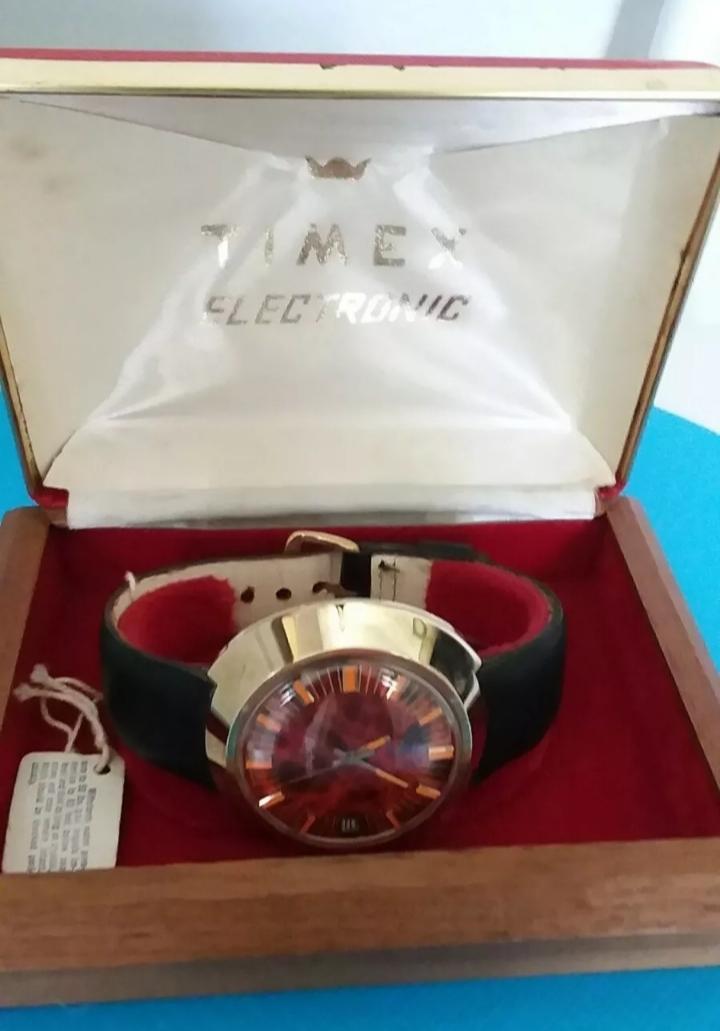
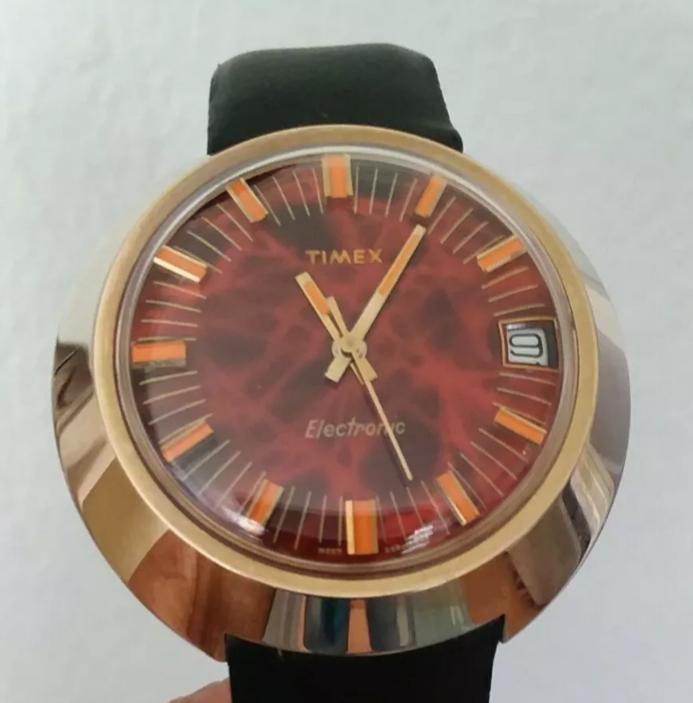
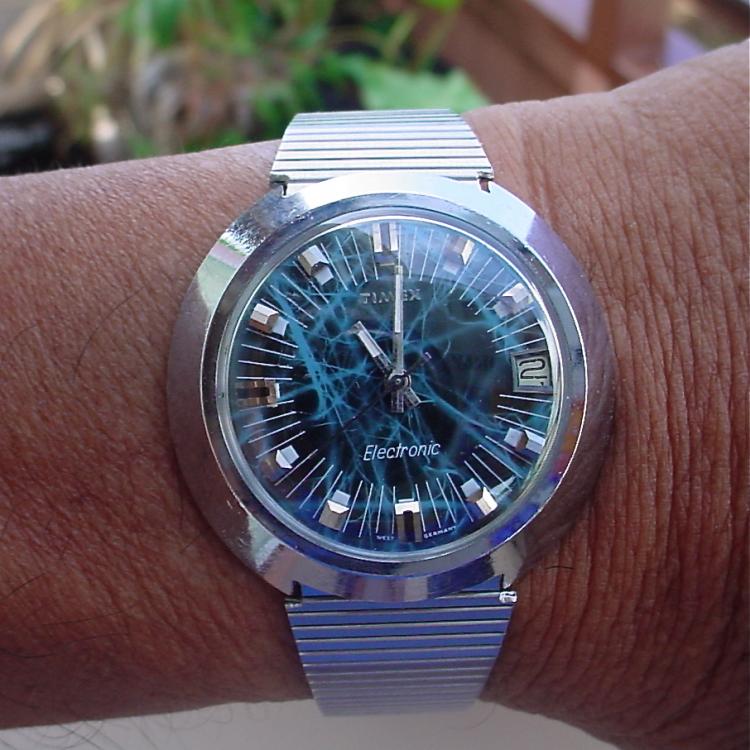
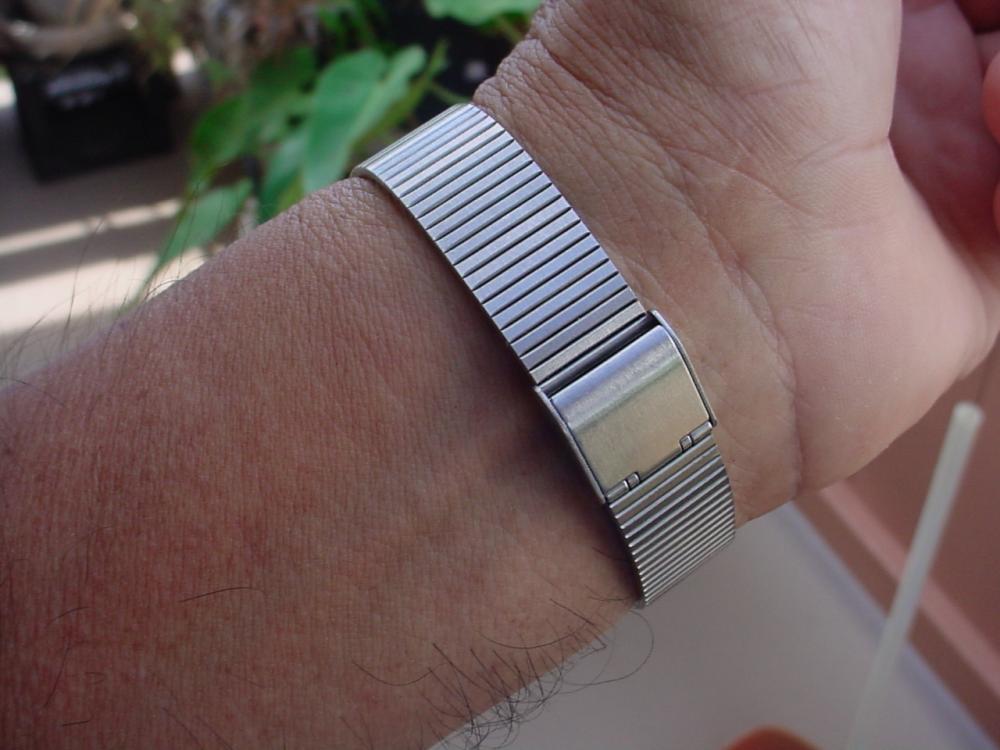
Put down your hammers and back away....Just kidding . Some members have stated thar's how they service Timex Watches . I picked up this Timex Electronic , back-set , front loader at the swap meet for $8 . It wasn't running and had an AG10 battery still installed , but with no visible damage to the movement . This one has the M87 movement with the date . This is a late 60's model called " The Blue Nebula " with a West German movement that was produced by the Laco watch company that Timex acquired when they bought Durowe-Laco at the end of 1958 to get into the electronic watch arena ..... http://electric-watches.co.uk/makers/laco/ I got home from the swap meet , opened the watch up and installed a new battery . The watch would only tun for a minute or less . I did some reading on this movement and started to disassemble it for a service . If you have ever tried to service a Timex you know why the hammers are used . I got as far as taking off the magnet and then the balance and then a voice from above said , " don't do it . Don't go any further "...so I didn't . What I did do was to clean and tighten any electrical contacts that I could reach , and put a light oil on any jewels and bushing in reach and assembled the watch again . At that point it would tun for an hour or two , and stop . I would shake it and get another couple of hour worth of run time . I left the watch under a light bulb for a while and it ran for approx. 24 hours . Back to the light bulb treatment that I may patent and the watch has been running for 5 days now and actually keeping very accurate time .....Honest . I had a watchband in my stash but have had to file some areas where the lug area of the watch was binding . I still have to smooth and buff those areas so it has a better finish .
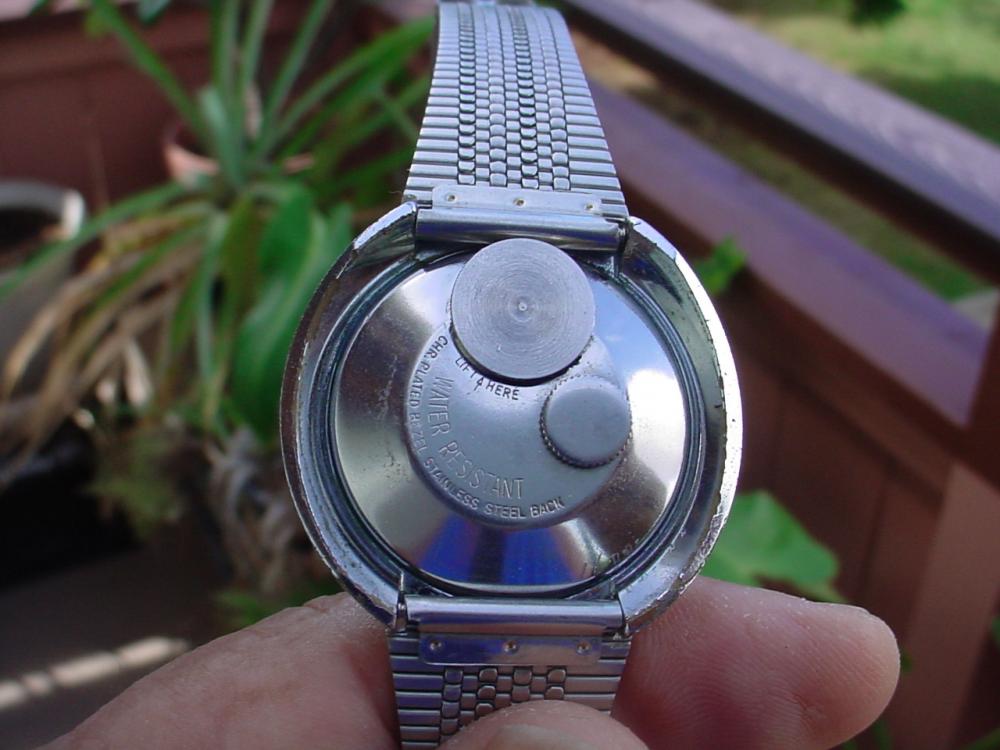
 1 point
 -
Loose canon pinion. This is a really bad idea. Even if all of the pivots are properly lubricated you are spinning everything up to way beyond its design speed, and if the pivots are dry or are contaminated with micro dust particles then you're just going to grind down the bearing surfaces and cause unnecessary damage. Further more you will cause the hands to spin very fast, accelerating and decelerating them via the slipping interface of the canon pinion, and this could well have caused the canon pinion to loosen up to the point where it now no longer does its job. Winding just a small amount of power into the m/s with the pallet fork out so that you can see that the train is free is fine, but spinning the movement up fast enough to "clear out any crap" is kind of asking for trouble. There should be some resistance felt at the crown when you set the hands.1 point
-
Maybe the canon pinion is slipping around the center wheel. Can you move the hands with the stem in the setting position? Do you feel the crown too soft when moving the hands?1 point
-
The solid ss band on the Revere was made in Chicago and is called The Don Juan. The LED works I just have too big of batteries in it for the case to close. Right size batteries are on the way. I'm wearing the Timex camper today.1 point
-
Wow... nice haul. Furthermore I think you get life time membership to the 404 club, since the average cost is around the $2.55 mark. If the TI LED watch, and the Timexes work, the rest is a bonus.1 point
-
Hi A nice little haul, will keep you busy for a while1 point
-
HI VWatchie Just to let you know not yet had the time to check the date wheel issue. Soon as I get some free time I'll have a go at it and I'll keep you posted. Cheers all the best1 point
-
I don't think that is quite right. See here:- You use the tweezers to expand the retaining spring to release the stem.....In practice you usually have to do this twice as the very end part of the stem usually catches on the retaining spring and stops you pulling it all,of the way out......1 point
-
If it is nice and clean, buyers will more likely buy it, also you can ask a good price, its even better if it is complete.1 point
-
Hi if you remove the movement from the front by removing the crystal (front loader) then you have a split stem .pull the stem out to the time setting position carefully place a pair of tweezers under the crown and gently pull evenly and the stem will pull in two pieces. Then you can place the watch on a movement pad and tip it upside down and it will separate from the case .Make sure that you pull evenly with the tweezers .1 point
-
Thank you for the idea to clamp the pallet fork with the jeweling tool - it worked brilliantly! Straightened right out. Used the jeweling tool to incrementally set the height for the shock bloc then micro adjusted the end shake to have just a hair. And the balance springs to life with 0.1 beat error and 290 amplitude. It’s still losing 60 seconds per day so I will likely adjust the Stella screws to capture a better beat rate. And I’ll add, for all the stress of doing this I’ve realized what a dream it is to have a jeweling tool! I really must get one!1 point
-
I lay a thin sheet of rodico and make a divot for the end of the arbor. This holds the barrel securely. Then proceed to hold the arbor flat while working the spring around with a needle (oilers are too delicate). Anilv1 point
-
The request was made to get the watches running. I was told they would be cleaned, serviced, and properly adjusted. I left two watches to be serviced. The one I described earlier and an Illinois "Bunn Special" railroad pocket watch. I paid for and received both back after about 3 weeks and both stopped running on the hour drive back to my home. I returned the watches to the shop the next day and we are now in the "warranty" repair phase. I guess it is just trial and error now until the all of the issues have been identified and corrected. I didn't realize it how long it would take to identify and correct the problems. Hopefully at some point I will receive two fully repaired and correctly working pocket watches.1 point
-
Problem solved...I was mounting it under a micro desk cam and I can see where the top separates .... not visible under the naked eye, appears this watch is a virgin and was not mistreated as there are no marks from previous separations attempts. Thanks...RT1 point
-
Notice how the dial side is much bigger than the backside? Also the case screws are pulling the movement back so that's not the way it would come out. We need a really good side view picture to see what has to come off whether it's only the crystal or whether there is a ring holding the crystal in place perhaps. Pictures a little fuzzy but looks like a button rather than a screw to remove the stem. So move the stem and the two case screws and then whatever has to come off on the front and the movement will fall out the front side.1 point
-
Not sure ice shattered this one. This was my bargain seiko diver. Crown was messed up and the automatic rotor had come off. Bought a new OEM rubber strap. Looks pretty good imo!
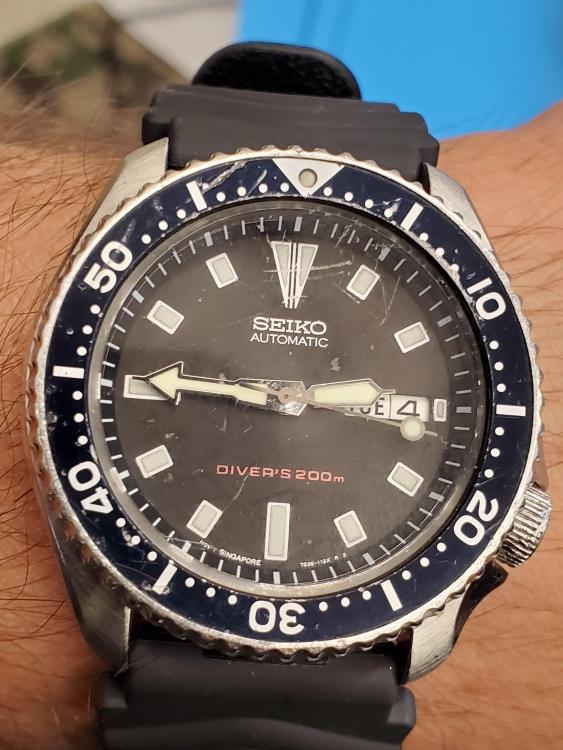 1 point
 -
no I don't have any catalogue information on these. I have rebuilt them before just for the fun of it.1 point
-
I paid $50 for the one I am wearing today at this past weekend antique fair. Maybe I scored a home run?
 1 point
 -
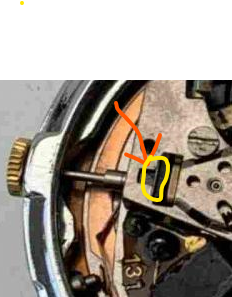
blockquote widget That guard pin appears to be quite bent, (upward as per this pic) normally these would be straight and in between the horns when viewed from above. That in itself could cause a binding and dragging on the impulse jewel in one of the positions according to endshake and movement of the pallet fork and balance.1 point
-
notice the thin metal part in the yellow circle. It is a hairclip that holds the stem in place. Just lift it up with flat tipped screw driver. Be careful to not use to much 'lift' as it will take flight. :)
 1 point
 -
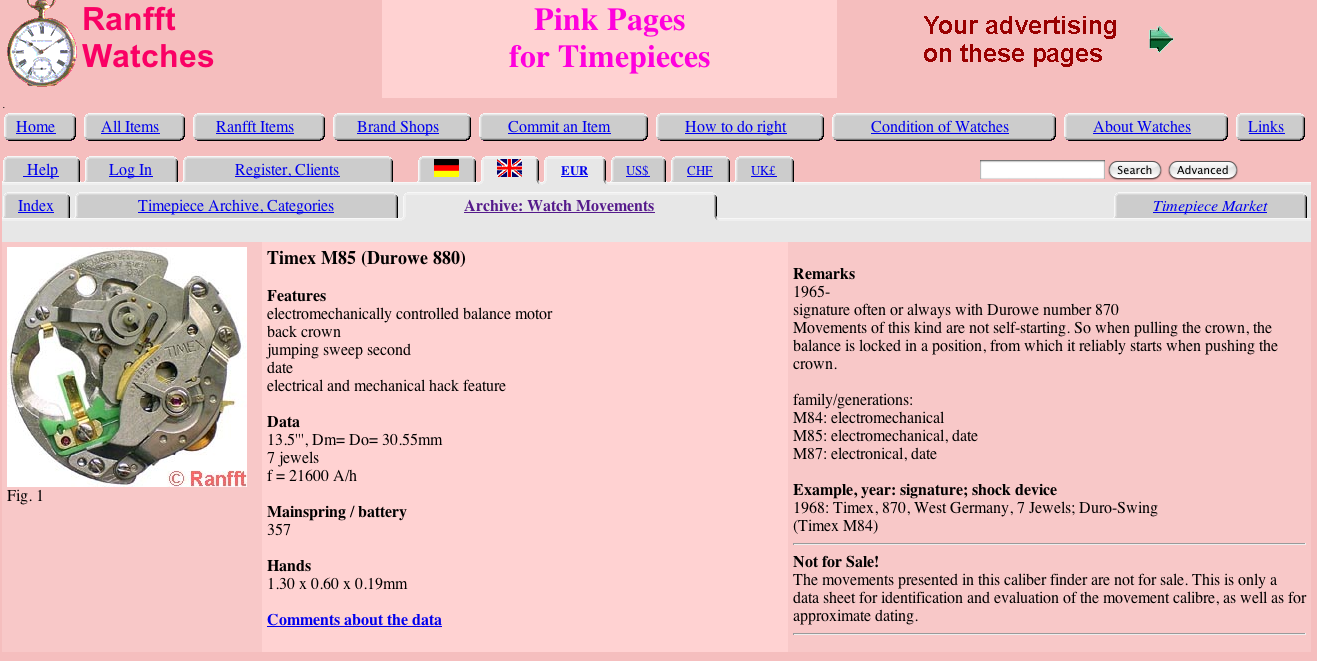
It has a Marvin 362 movement. https://www.vintagewatchstraps.com/movements.php1 point
-
the "scratching" inside is the secret code of the repair man that worked on it.1 point
-
Ummm... all right, I go home and a scrub my "bow milling machine" a little bit more. TheNakedWatchmaker Bastards! Ahh and I quickly add this before my time runs out for modifying the post:1 point
-
Yes, that is a Mercury and it would have come with a vinyl strap of the same color or the dial. These straps tended to get hard and brittle over time. If you are luck to find one, it also is common that the hold down is gone. Also just like in the picture I show which is Charlie Tuna. They also came without the date feature. Other colors, white, red, green, brown as I recall. Mu suggestion is to go with a nylon nato style as a replacement.
 1 point
 -
Thanks Joe. Very strange? I finished servicing the watch and the results are very good. Sent from my iPhone using Tapatalk Pro1 point
-
This JDM Seiko 3862-7010 from 1973....I do love a blue dial1 point
-
Hello, Have someone had experience using sewing needles for recoiling springs? I saw a comment on youtube, his a veteran watchmaker and have been recoiling springs for about 60 years. This was his original post "Thank you for your honesty, only I am nearly 80 years old and have been recoiling balance springs for about 60 years. I don't use tweezers, I use two VERY small sewing needles with the tip of the eye end ground back leaving what looks like a two pronged fork then with the pointed end pushed into a piece of peg wood. These fine eye ends of the needles fit nicely between the coils of the spring with the spring sitting in the forks. It works well for recoiling and flatting the the spring. But you do have to be very calm with steady hands. Good luck." - Keith solloway I think this would be a very interesting topic.1 point
-
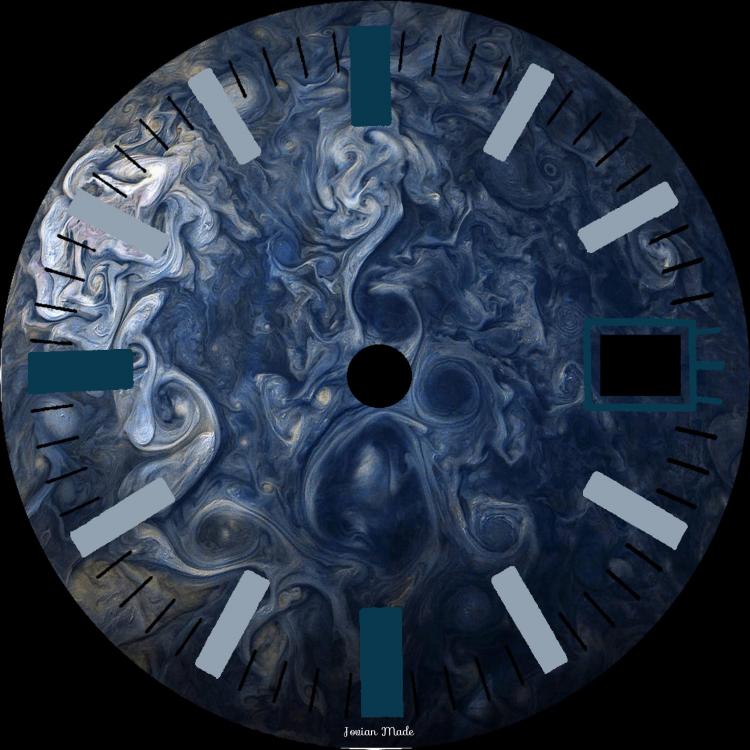
Just to show how simple it is to work with layers to quickly alter the image, here is the same set of dial markings on a vivid blue image in the same sequence. I only needed to alter one layer and pick a new colour to replace the sandy tone of markings of the original example.
 1 point
 -
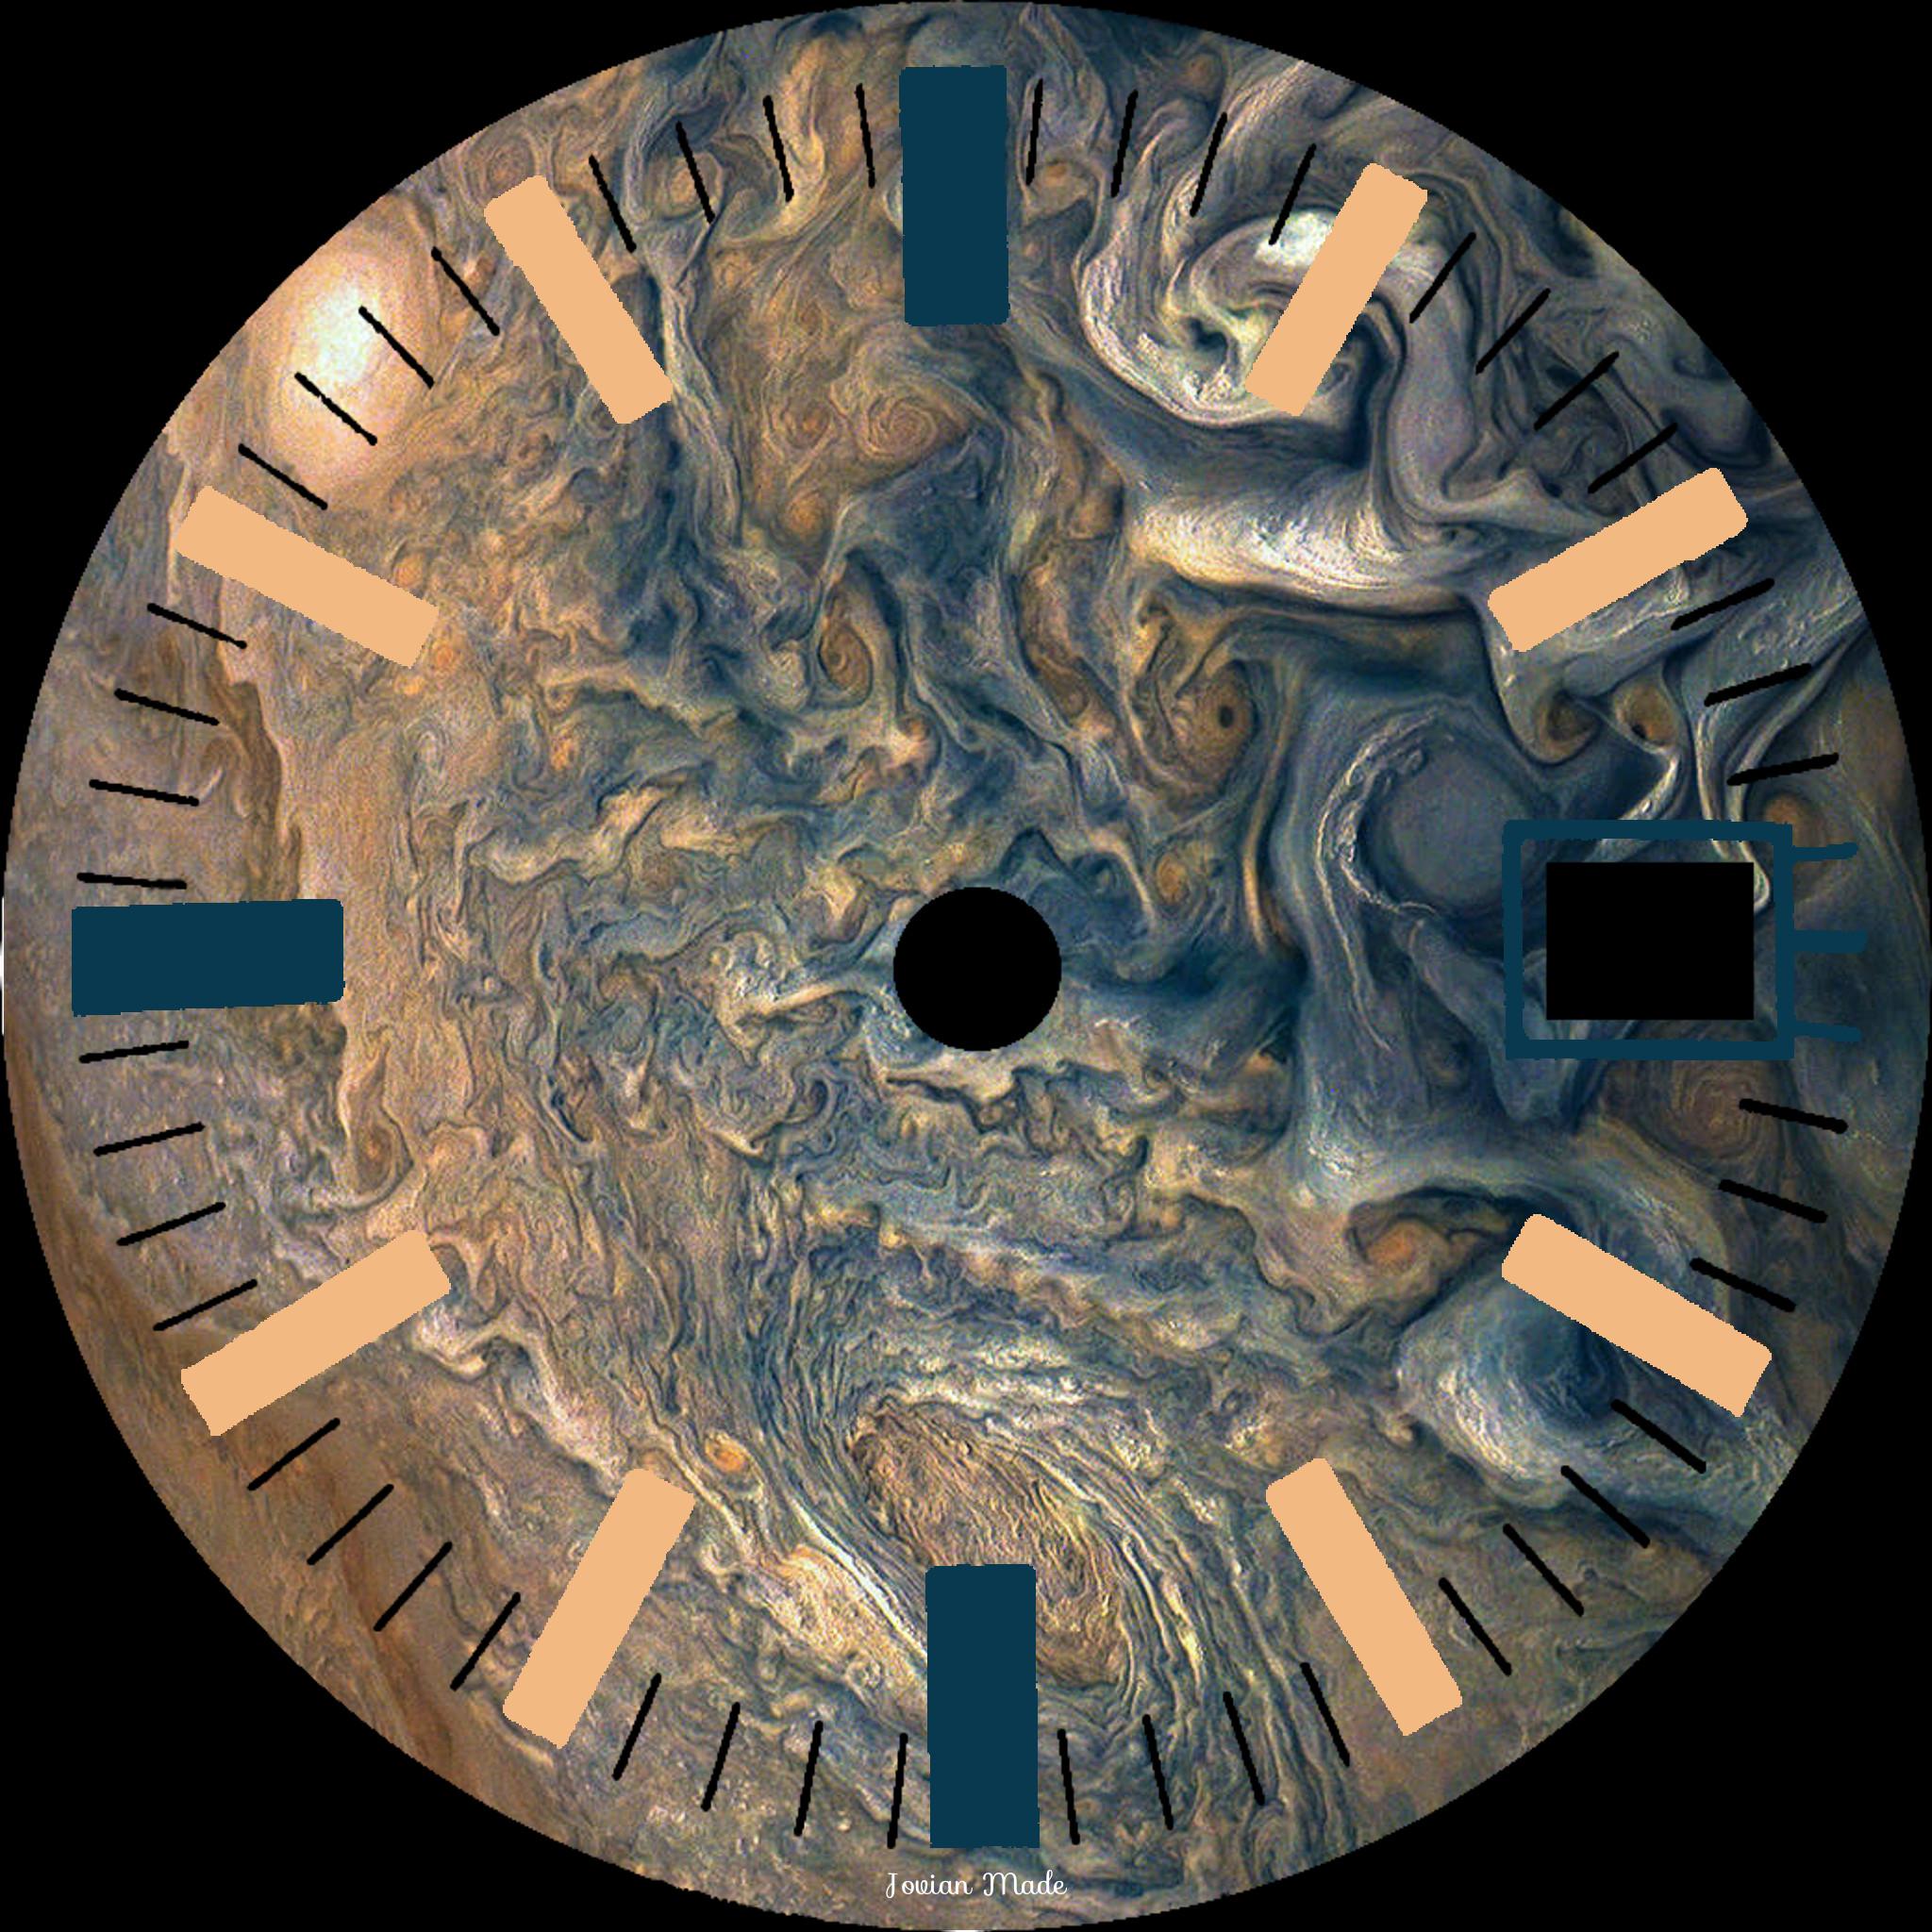
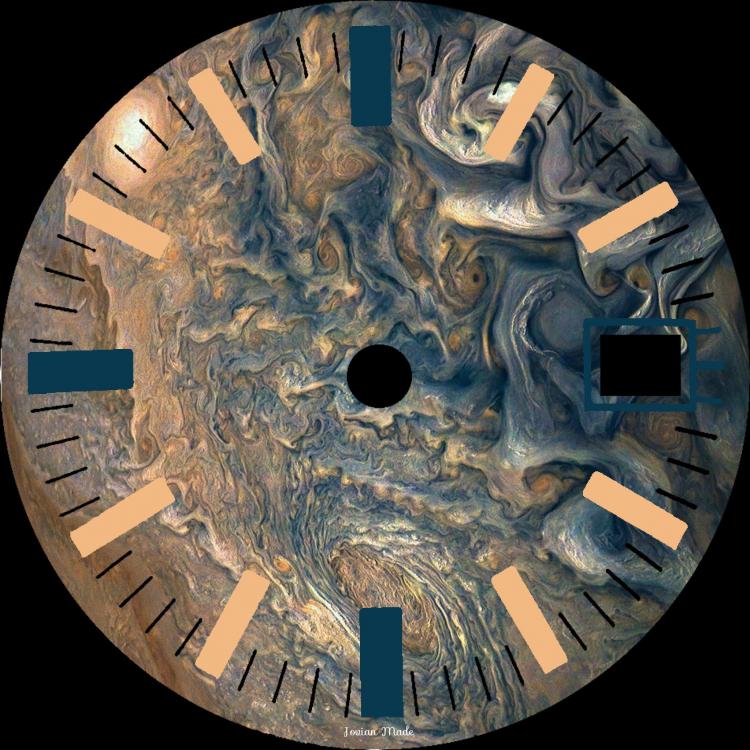
Inspired by a documentary I saw about the NASA Voyager missions (launched 42 years ago, in 1977), which I was watching on the flight home, I decided to see what I could come up with in a Jovian theme. The base image is actually from the Juno mission, but it is such a spectacularly colourful image I had so see what I could make from it. The dial marker positions are borrowed from a Certina 2000 dial, which had a suitably 1970s vibe to it. I can see I could have a lot of fun with this if I can get the technique mastered. The sky and your imagination is the limit. It needs a little more work, and I'm not sure I'm 100% happy with those hour markers, but the great thing about image editors is, if you don't like it you can change it.
 1 point
 -
Hi syfre, I like your prototypes and your spirit of research. Who ever had to make a flat or a Breguet hairspring (happens now and then in my shop), knows why you need such a device. Years ago I made my own device as I did not like the traditional boxes that can test one beat rate only and are ridiculous expensive, very similar to your setup: Advantage: box has a built-in 3 V battery that lasts for years (or one month if running permanently). Frank
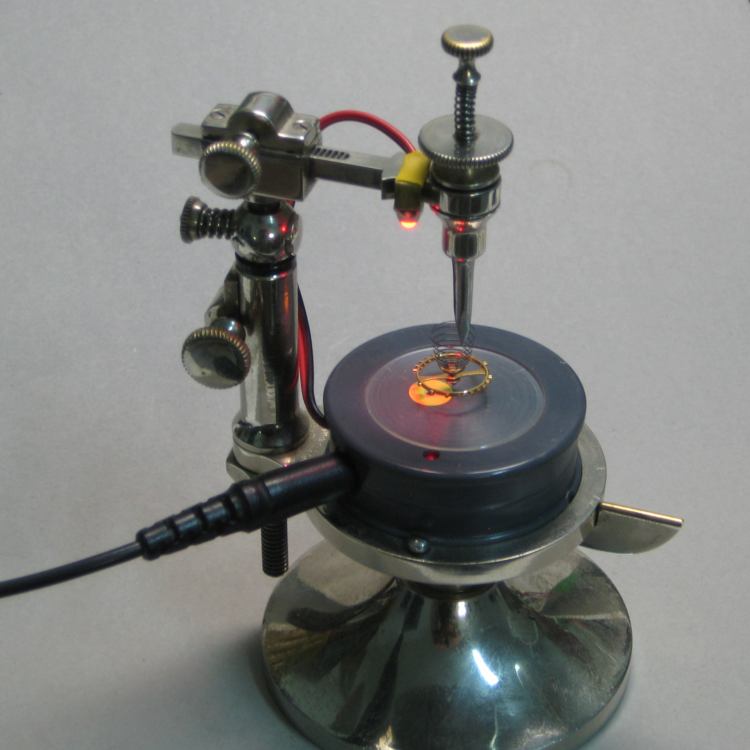
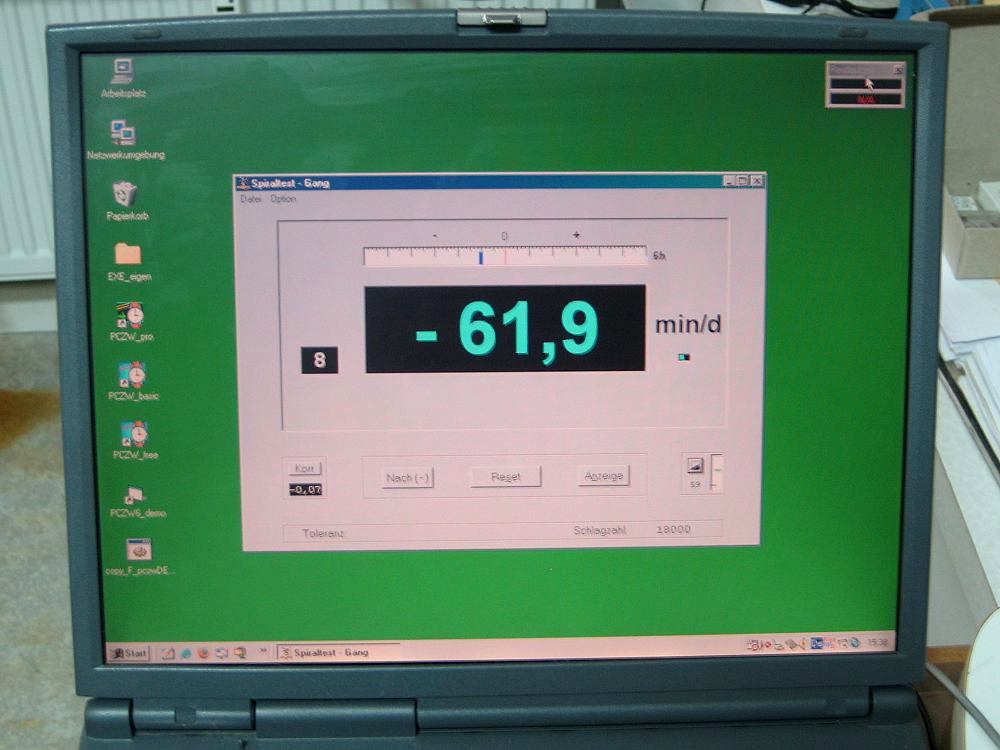 1 point
 -
$8 Daylight robbery.1 point
-
it looks like a very good vintage watch. i hope you can restore it. ! vin0 points