Leaderboard


Popular Content
Showing content with the highest reputation on 12/11/19 in all areas
-
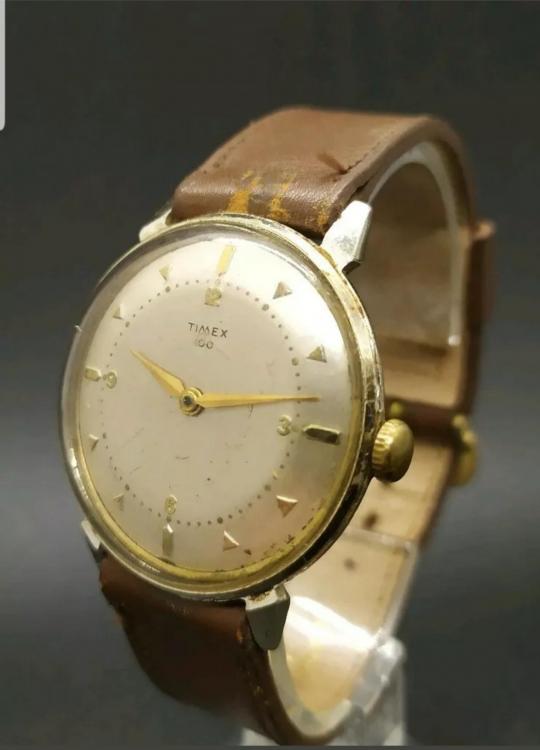
I just finished my 1959 Timex 100. Lots of clean up work as the movement was in good running condition. A huge thank you to @JerseyMo for his expertise and his parts supply
 4 points
 -
Return the watch to the repairer. After a full wind it should run (according to the Eta tech sheet) for a minimum of 38hrs without any movement.3 points
-
Hi guys … I had promised that I would make a « custom decal dial tutorial » on another thread there So here we are … There are many variations of decal dials, the best IMHO being the « negative gilt » dials which gives the best results. The process I’m showing today is aabout how to make a dial with black printings on a one color background. I had a cheap quartz diver waiting in my drawers so I’ll make a Heuer diver hommage based on the 980.016 model (quartz one too). DAY 01 : It’s 4:30 AM (I’m an early bird) and I have 2 hours to kill before a business trip to Paris (I’m French) so I decide I have time enough to begin. The first part of the process is to prepare the dial plate : - stripped it, removing all the lumes bars and dots - soaked the dial for some minutes in acetone to remove the paint - filled the tiny holes where the bars and dots go with cyanolite glue - sand everything flat I sand with 800 and don’t try to get a smooth surface as I want the paint to adhere perfectly to thedial plate. Here is the result … Then I want to spray paint. I make a tube with some painter’s tape, from a « curve » with it and place it on a plastic bottle cap. I want it curved so that I can stick the dial on it without any risk of bstructing the center hole or the date window of the dial plate. So I stick the sanded dial plate on the tape tube. As you can guess from the pic below … that’s not the first time a make an orange dial. Then I place the bottle cap and dial plate on a paper sheet and spray paint in orange. I use street art spray paint as it is « water resistant ». As you can see on the next pic, I don’t try to get a smooth surface, or even to perfectly cover the dial plate at first. I will let this coat dry, sand it with 2000 grade, then spray 1 or 2 coats until I get a perfectly smooth orange dial plate, ready for receiving a decal. So I place the bottle cap and dial under a shooter glass and will let it dry for about 24 hours before sanding and spraying the second paint coat. The 24 hours drying time is really important (though it could depend on the paint you use). The paint I use looks perfectly dry after about 5 hours but if you spray the second coat without waiting enough, that coat won’t perfectly adhere to the first and you could get a granular surface like an orange peel. And here is the dial waiting under the shooter glass. On the right is a « negative gilt » dial (third and last matte varnish coat) On the background there are two Raketa 2609 movements from the 70ies, quietly (really loudly to be honest) ticking for test after I‘ve recently serviced them. Now it’s 5:45 AM so I will have a and go to the train station. I’ll sand the dial plate this evening and spray the second paint coat tomorrow morning. Then sand it in the evening and spray the third coat (if needed) the day after. DAY 02 - DAY 03 : So here's what you get after the first paint coat … doesn't look really good but no matter as there's still some work to do to get a better result. And here's what you get after 3 coats of paint, each one sanded with 2000 grade, to get a perfect finish, flat and smooth. Now the dial plate is eady to receive the decal. DAY 03 : I won’t explain anything about Photoshop and Illustrator here … I’ll only explain how I print my decals. One thing really important, from my own experience, is the definition of the design. I’ve tried several, from 1200ppp to 6000pp and the best results I’ve got on printing decal sheets were with a 4000ppp definition. So all my dial designs are done in 4000ppp. The result is really BIG files … for example an A6 template with 12 dial desings ready to print is about 800Mo. As that dial is black printing only I open it with Photoshop and let the softwre (so ont the printer) deal with the printing quality. My printer is an old Epson Picturemate with a 1200 maximum definition. As the good quality decal sheets are not cheap and as I’m a « skinflint» I often print on A7 sheets … 6 dial designs on one sheet. When printed you should let it dry for about 4 hours then spray 2 really thin coats of matte varnish, letting each coat dry for at least 12 hours (24 hours is better). DAY 04 - DAY 05 : 2 days of speed-hiking with my wife so I didn’t worked on that tuto. You can check on the net what speed-hiking is, but to summarize it’s hiking as fast as you can with really light backpacks, trying not to run (or only short runs). On a good day you can walk 5 to 6 miles/hour … when trained you can walk up to 6,5 miles/hour … and while I trained for my first 62 miles ultra I achieved to walk (no running) up to 6,85 miles/hour (11 km/heure). DAY 06 : Today is Monday 6:00 AM. It’s been 5 days since I begun that tutorial and … my legs ache and all my body is painful (see Day 04 - Day 05) The dial plate is ready and the decal sheet too. You can see that the decal sheet looks matte now. That is because I have sprayed 2 coats of matte varnish on it, to protect the inkjet ink while I’ll soak the decal in water. Of course if you print with a laser you won’t have to spray varnish as the laser inks are (almost) water resistant. First thing to do is to chose the best item on the decal sheet and cut it round. Then you are ready to go. On the next pic you can see all you need now : - dial plate … fixed on a foam board using the dial feets - decal dial … nicely cut round - tweezers - thin and smooth brush (mine’s a watercolor brush) - some « micro set » … or just vhite wine vinegar (it helps the decal to set on the dial plate) - cold water Now you put the decal in cold water and while it soaks you brush some micro-set (or white vinegar) on the dial plate. Then you put the decal on the dial plate. Here you can see why I prefer using clear decal sheets on coloured dial plates … because it’s much easier to « perfectly » positionate the decal, using the central hole and the date-window. When you’re happy with the position of your decal you use a paper tissue to absorb the excess of water. Do that carefully as you don’t want to move the decal on the plate. And here we are … everything worked fine while absorbing the water and the decal position is OK. I’ll let it dry for about 12 hours before I cut the central hole and the date window, before I proceed to the varnish finish. Still Day 06 but 7:00 PM The decal has dried for about 13 hours so now I can proceed on cutting the decal sheet That's what I do then I : - fix it back on the foam board - apply some « micro set » around the center hole, the date-window and the outer diameter - gently press with a paper tissue so that the decal is perfectly applied (no more «air bubbles) And I let dry for 3 hours more Evening … 10:00 PM Now the decal is « perfectly » applied and dried and ready for the finish Last pic for today is after spraying the first coat of glossy varnish I will let it dry for 12 hours, sand it with 2000 grade paper and apply the 2nd coat. DAY 07 : 20:00 AM … only 1 pic today just after finely sanding with 2000 grade the 2nd varnish coat I applied yesterday DAY 08 : Yesterday evening I applied the 3rd and final varnish coat after finelt sanding and cleaning And today I can show you the final result … and say I'm pretty happy That dial is so glossy it’not easy to get a good pic, even on close-up. May I say that me hpone is nit the best at shooting pics (just like me) and the actual dial is much much better that it looks on the pictures below. I hope that you liked that tutorial and that it could be helpfull to members who want to try to build their own watch dials. I’ll try to make better pics with a real camera and a better lens … next week of the week after, after luming the dial together with the hands. Then I will still have to get a case and rework it so that it could be a 980,016 lookalike. Some of you may wonder how much time did I spend to make that dial. It took 8 days to achieve the all process but I spent only 1 hour the first day then only from 15mnm to 5mn the days after. So, apart from the design work on Illustrator and Photoshop (which took me hours), I would say that the whole process is about 2 to 3 hours. I must say that it's not my first try at dial making and I've trained for 2 years now. So if you want to try you should consider spending a few more hours but it's really worth the time spent as at the end you get your unique DIY dial.1 point
-
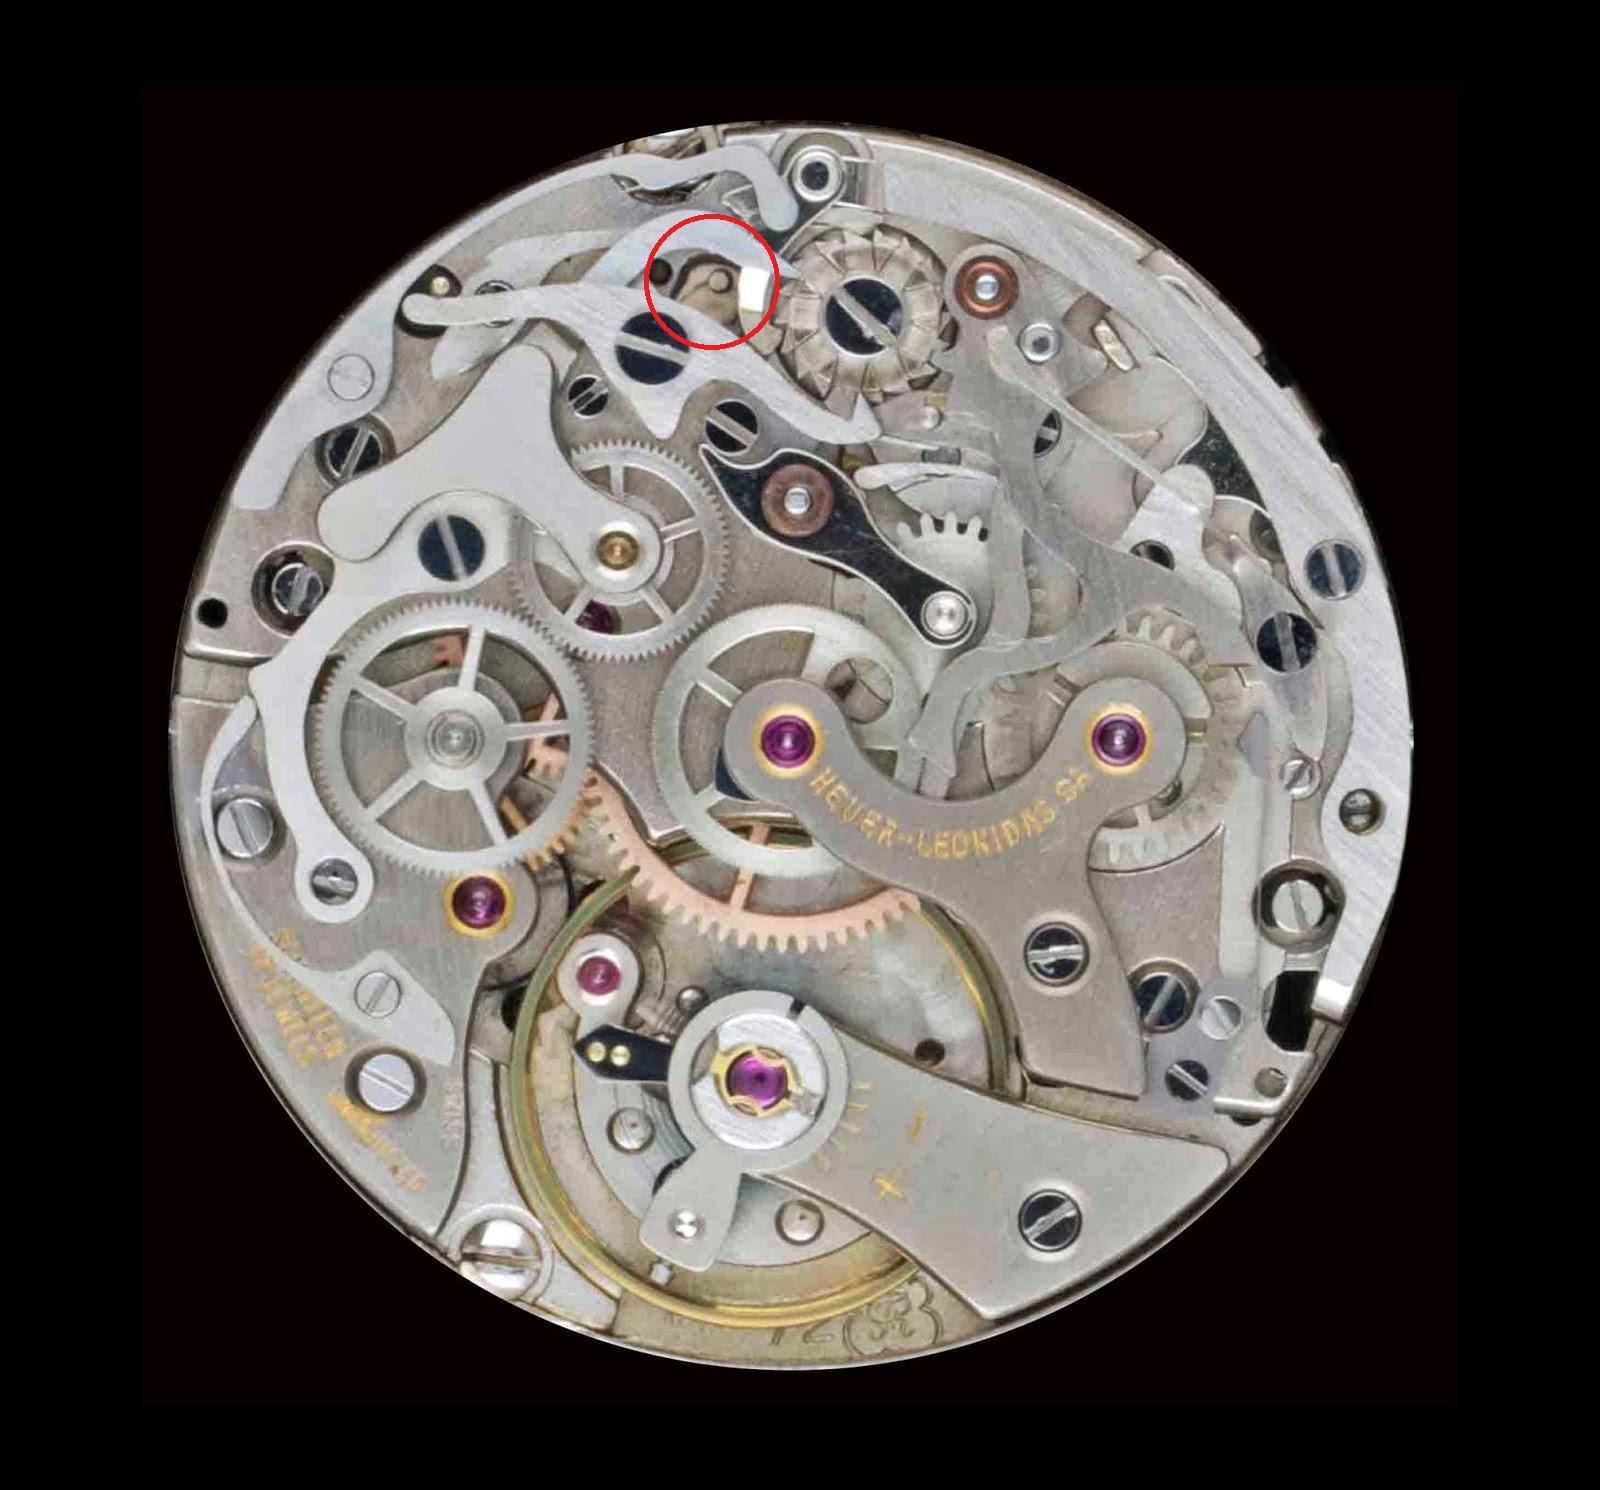
Since it's regularly happening every 8 seconds I'm thinking a gearing problem; the 4th wheel has 8 teeth in its pinion, which will equate to 7.5 seconds per tooth "in action"- but it would be odd that all the teeth on that pinion or the 3rd wheel that drives it would be damaged and damaged equally. Though if for example the train bridge was removed with power on the watch the 3rd wheel teeth may have zipped accross another component raising burrs or something. Is the train nice and free with the balance and fork out?1 point
-
Do what you can within your budget, lots of people on this forum do quite a bit without a lot of expensive tools. It's worth investing in the basics like good screwdrivers & tweezers, and leave the rest for the future. Most of the skills you need to learn at the start don't require the most expensive tools. For example, I still don't have a lathe, although I really should. Good luck!1 point
-
Is this a new movement or one you have cleaned? does it just stop with power on. If the movement doesn't start up when you start to wind it might be out of beat. What does it sound like when going, does it have an uneven sound? if so it is out of beat and needs adjusting. If you could post a photo showing the balance I can advise what you need to do.1 point
-
I'm more inclined to think improperly serviced automatic works. Perhaps improperly lubricated reversing wheels?1 point
-
How long did it sit for? How long did it run for after you shook it? Are you winding it enough? Most people don’t fully wind their mechanical watches not sure how many revolutions is considered fully wound on this movement but if you are only winding it 10 revolutions it does not have much power reserve, the mainspring will stop the balance prematurely (eta 6497 has 46hr reserve) but the mainspring will still have enough tension left on it so that if “motion” aka shaking is used to get the balance swinging it will start to run again. That shaking motion transfers energy to the balance which is somewhat prolonged by the little energy that is still stored in the spring. When their is low power reserve your amplitude drops and the watch will tick faster. Trying winding it 5 more revolutions and check your results. If you are fully winding it and its stopping in a few hours then y shaking its running again for another few hours then i would assume something is jamming up the transfer of power, most likely located somewhere in the balance or escapement, but could really be anywhere. It is a Chinese. Movement and the quality control is horrible. These movements come with many contaminants right out of the factory. Some have actually been faulty,1 point
-
How does the hand winding feel? Does the rotor spin when hand winding?1 point
-
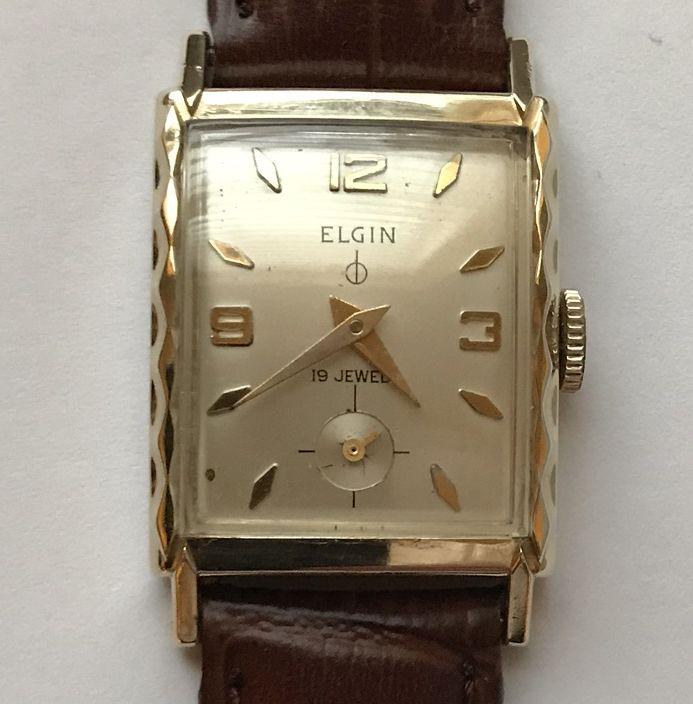
Just finished up yesterday. RMD
 1 point
 -
The click on a 72 is next to the column wheel, there's a pin sticking up through the bridge that you can hold to let down the power.
 1 point
 -
I thought I should drop this here.. Esslinger do dial blanks, for those of you who want to experiment. Follow this link for more. https://www.esslinger.com/watch-dials-blank-brass-dial-discs/1 point
-
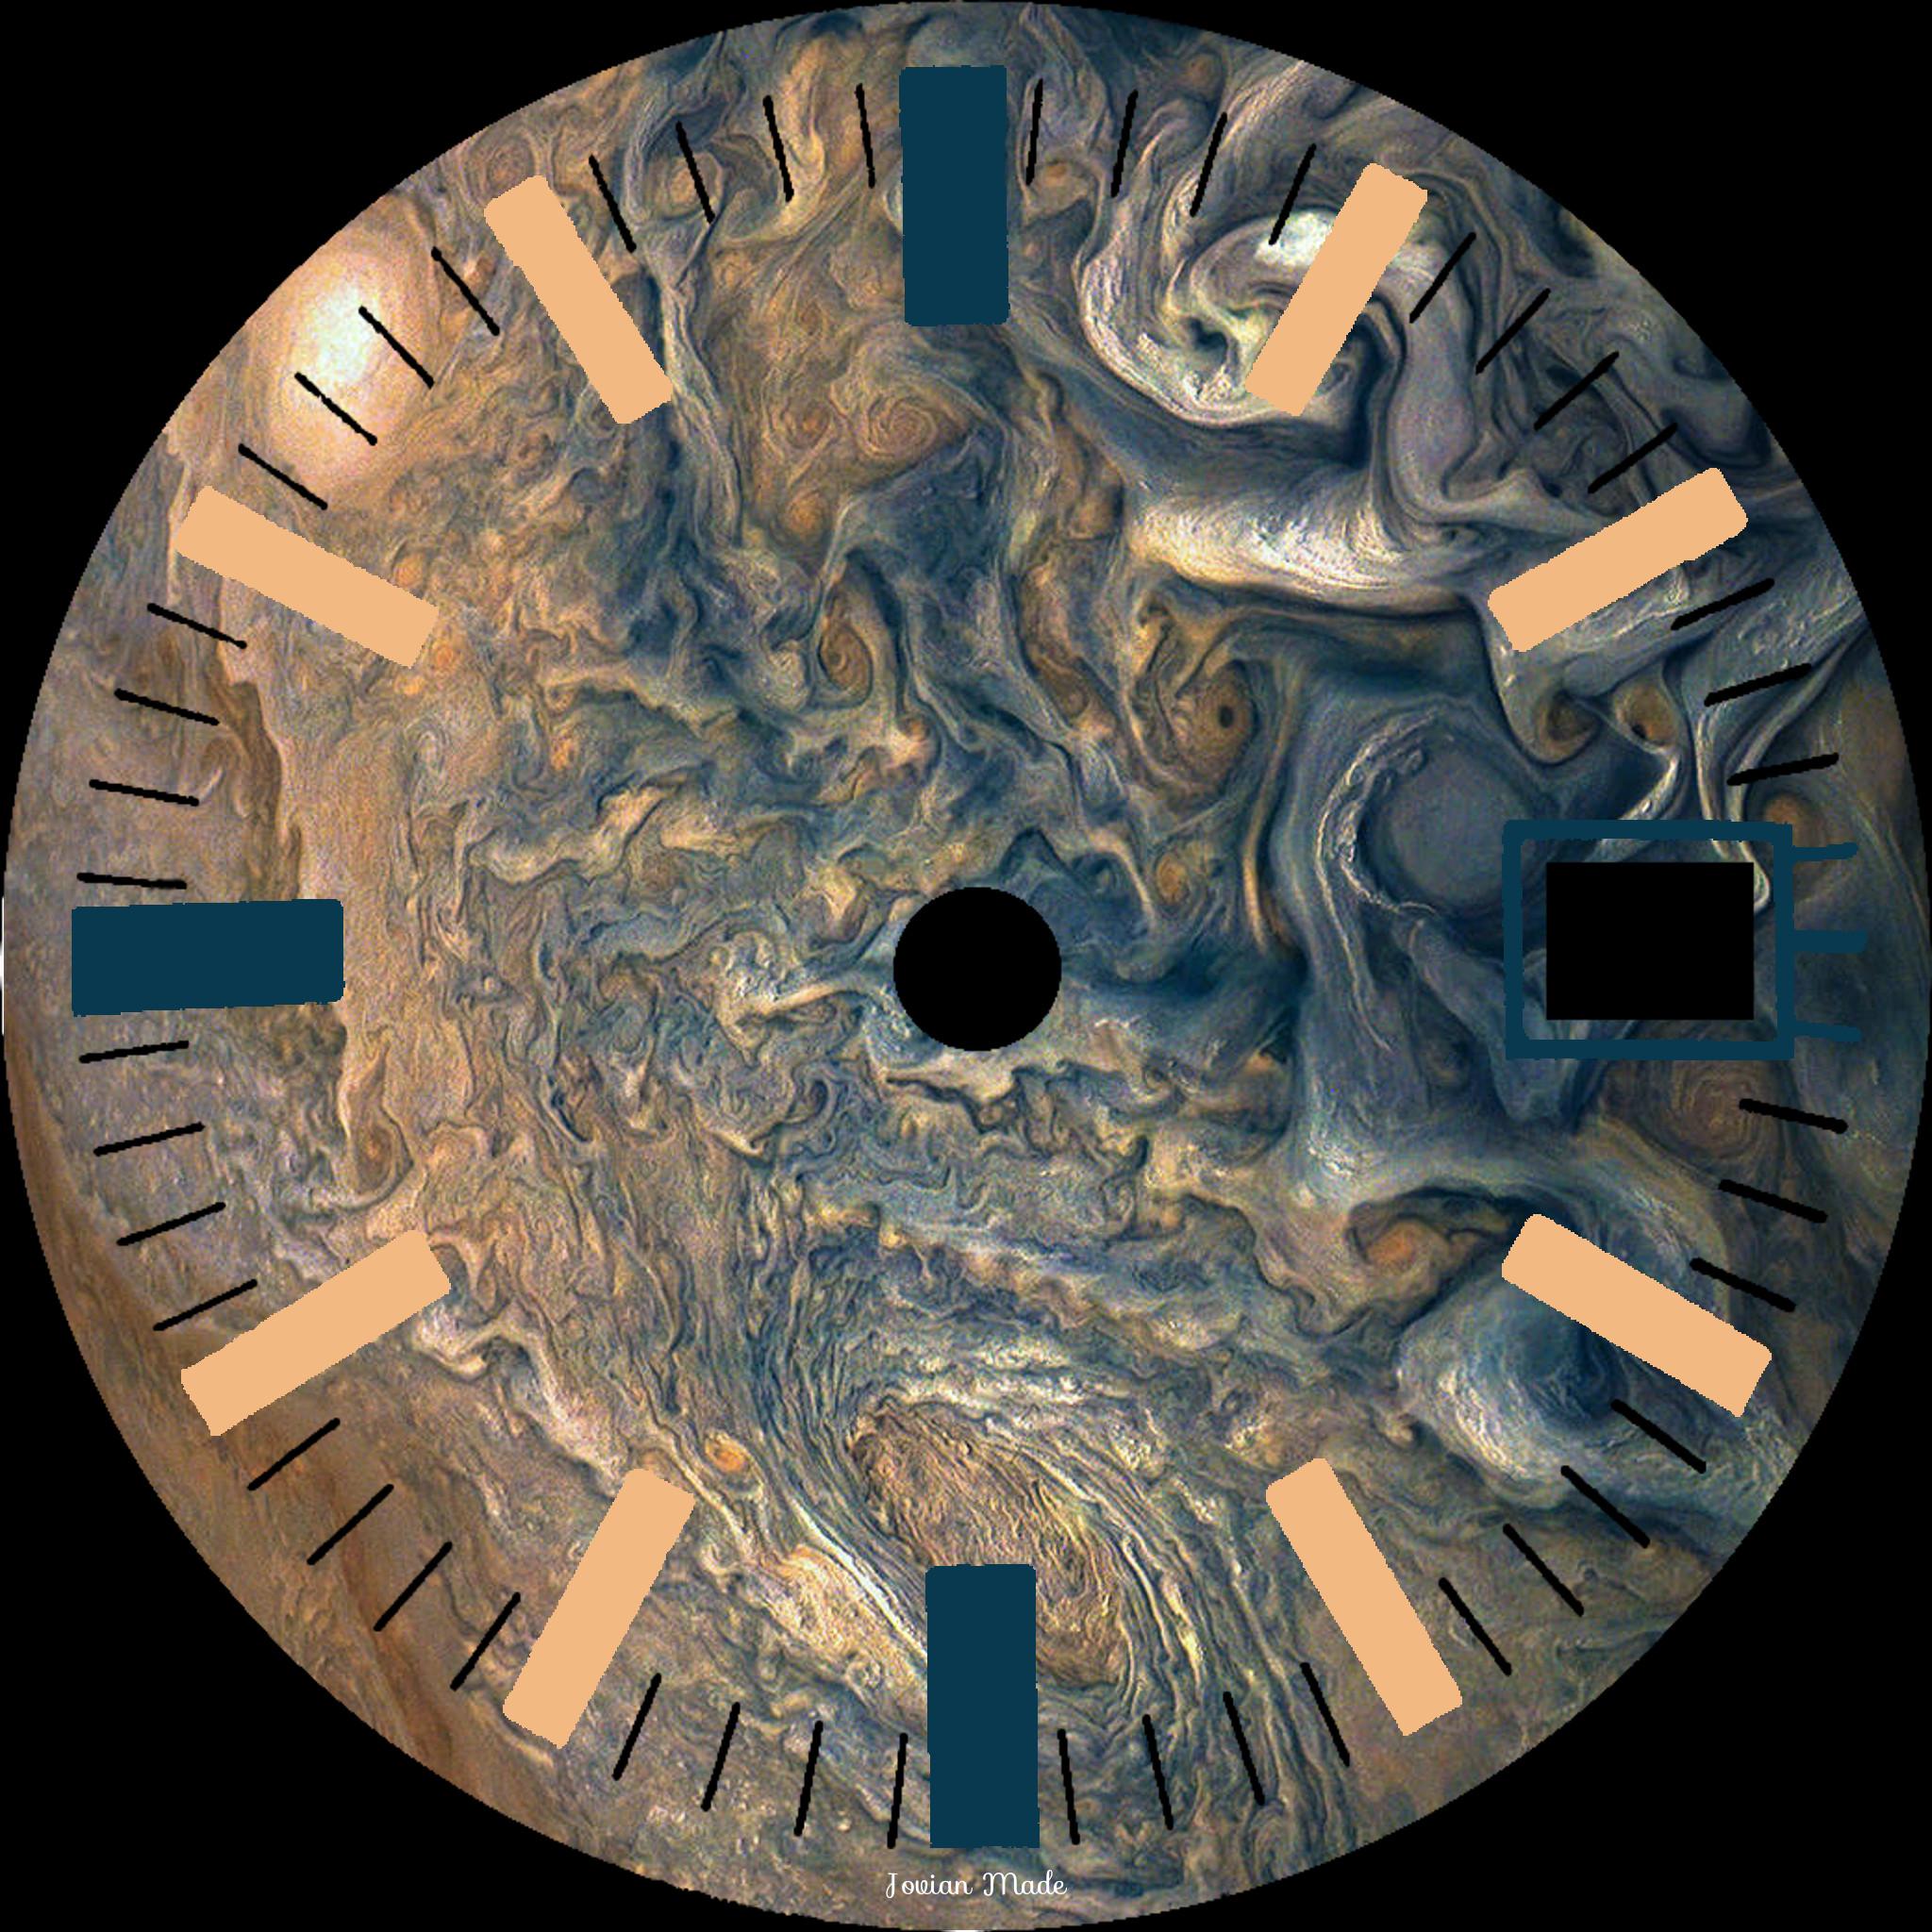
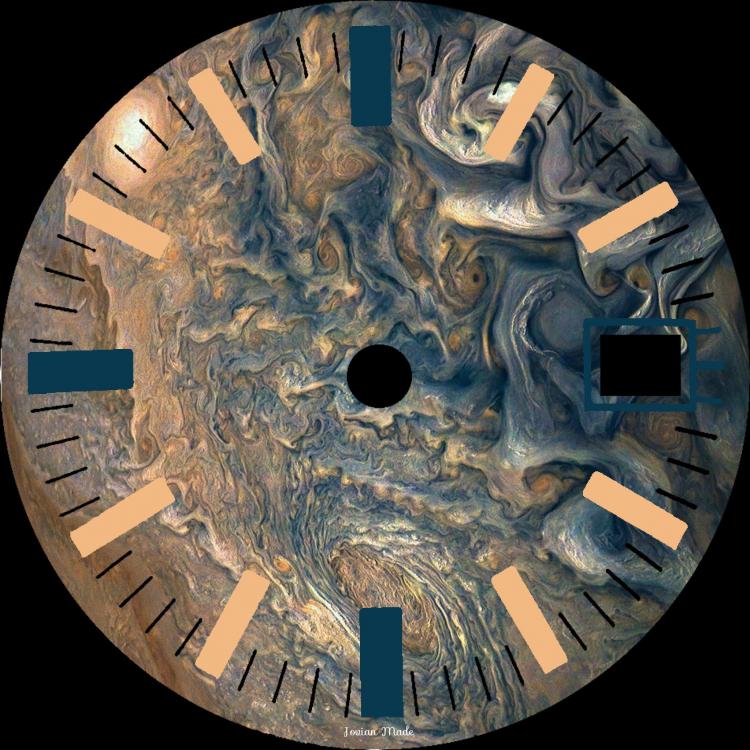
In case you are wondering, those are the clouds of Jupiter. For source image click here. To see more out of this world images follow this link. https://www.nasa.gov/mission_pages/juno/images/index.html1 point
-
Inspired by a documentary I saw about the NASA Voyager missions (launched 42 years ago, in 1977), which I was watching on the flight home, I decided to see what I could come up with in a Jovian theme. The base image is actually from the Juno mission, but it is such a spectacularly colourful image I had so see what I could make from it. The dial marker positions are borrowed from a Certina 2000 dial, which had a suitably 1970s vibe to it. I can see I could have a lot of fun with this if I can get the technique mastered. The sky and your imagination is the limit. It needs a little more work, and I'm not sure I'm 100% happy with those hour markers, but the great thing about image editors is, if you don't like it you can change it.
 1 point
 -
In order for an automatic to run for longer periods or to its full potential it needs to start with a full wind. Not sure what the watch went through in the last 10 years but it sounds like the movement is operating as it should. It could have been in the last 10 years it started with a full wind and he consistently wore it for 10 years? Or did he ever manually wind it? Did he always wear it when sleeping? If so how many times in 10 years? These questions may not have answers but could explain the difference. Movement is def a big part of the winding process in an auto watch, it is within it self a form of winding, which is why they sell automatic winding watch cases. So by not manually winding and not wearing it while sleeping and purposely leaving sitting for long periods to see what the reserve is will all play a part in this.0 points