Leaderboard


Popular Content
Showing content with the highest reputation on 12/01/19 in all areas
-
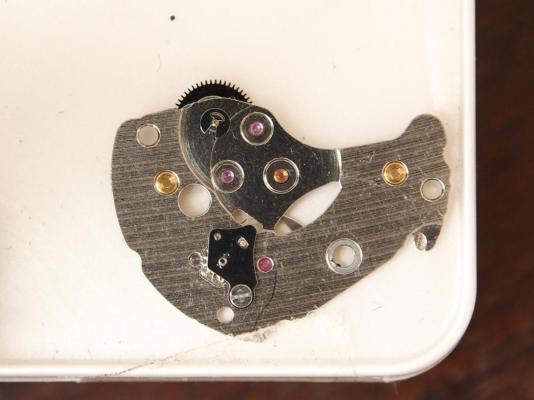
Workshop went well. Cut 90% of a staff, showing all elements of measuring and cutting for balance, Hairspring. Did not finish roller table side but all were good with the information passed along and videotaped. Asked to do another in Jan. Sent from my iPhone using Tapatalk Pro3 points
-
Sent from my iPhone using Tapatalk Pro2 points
-
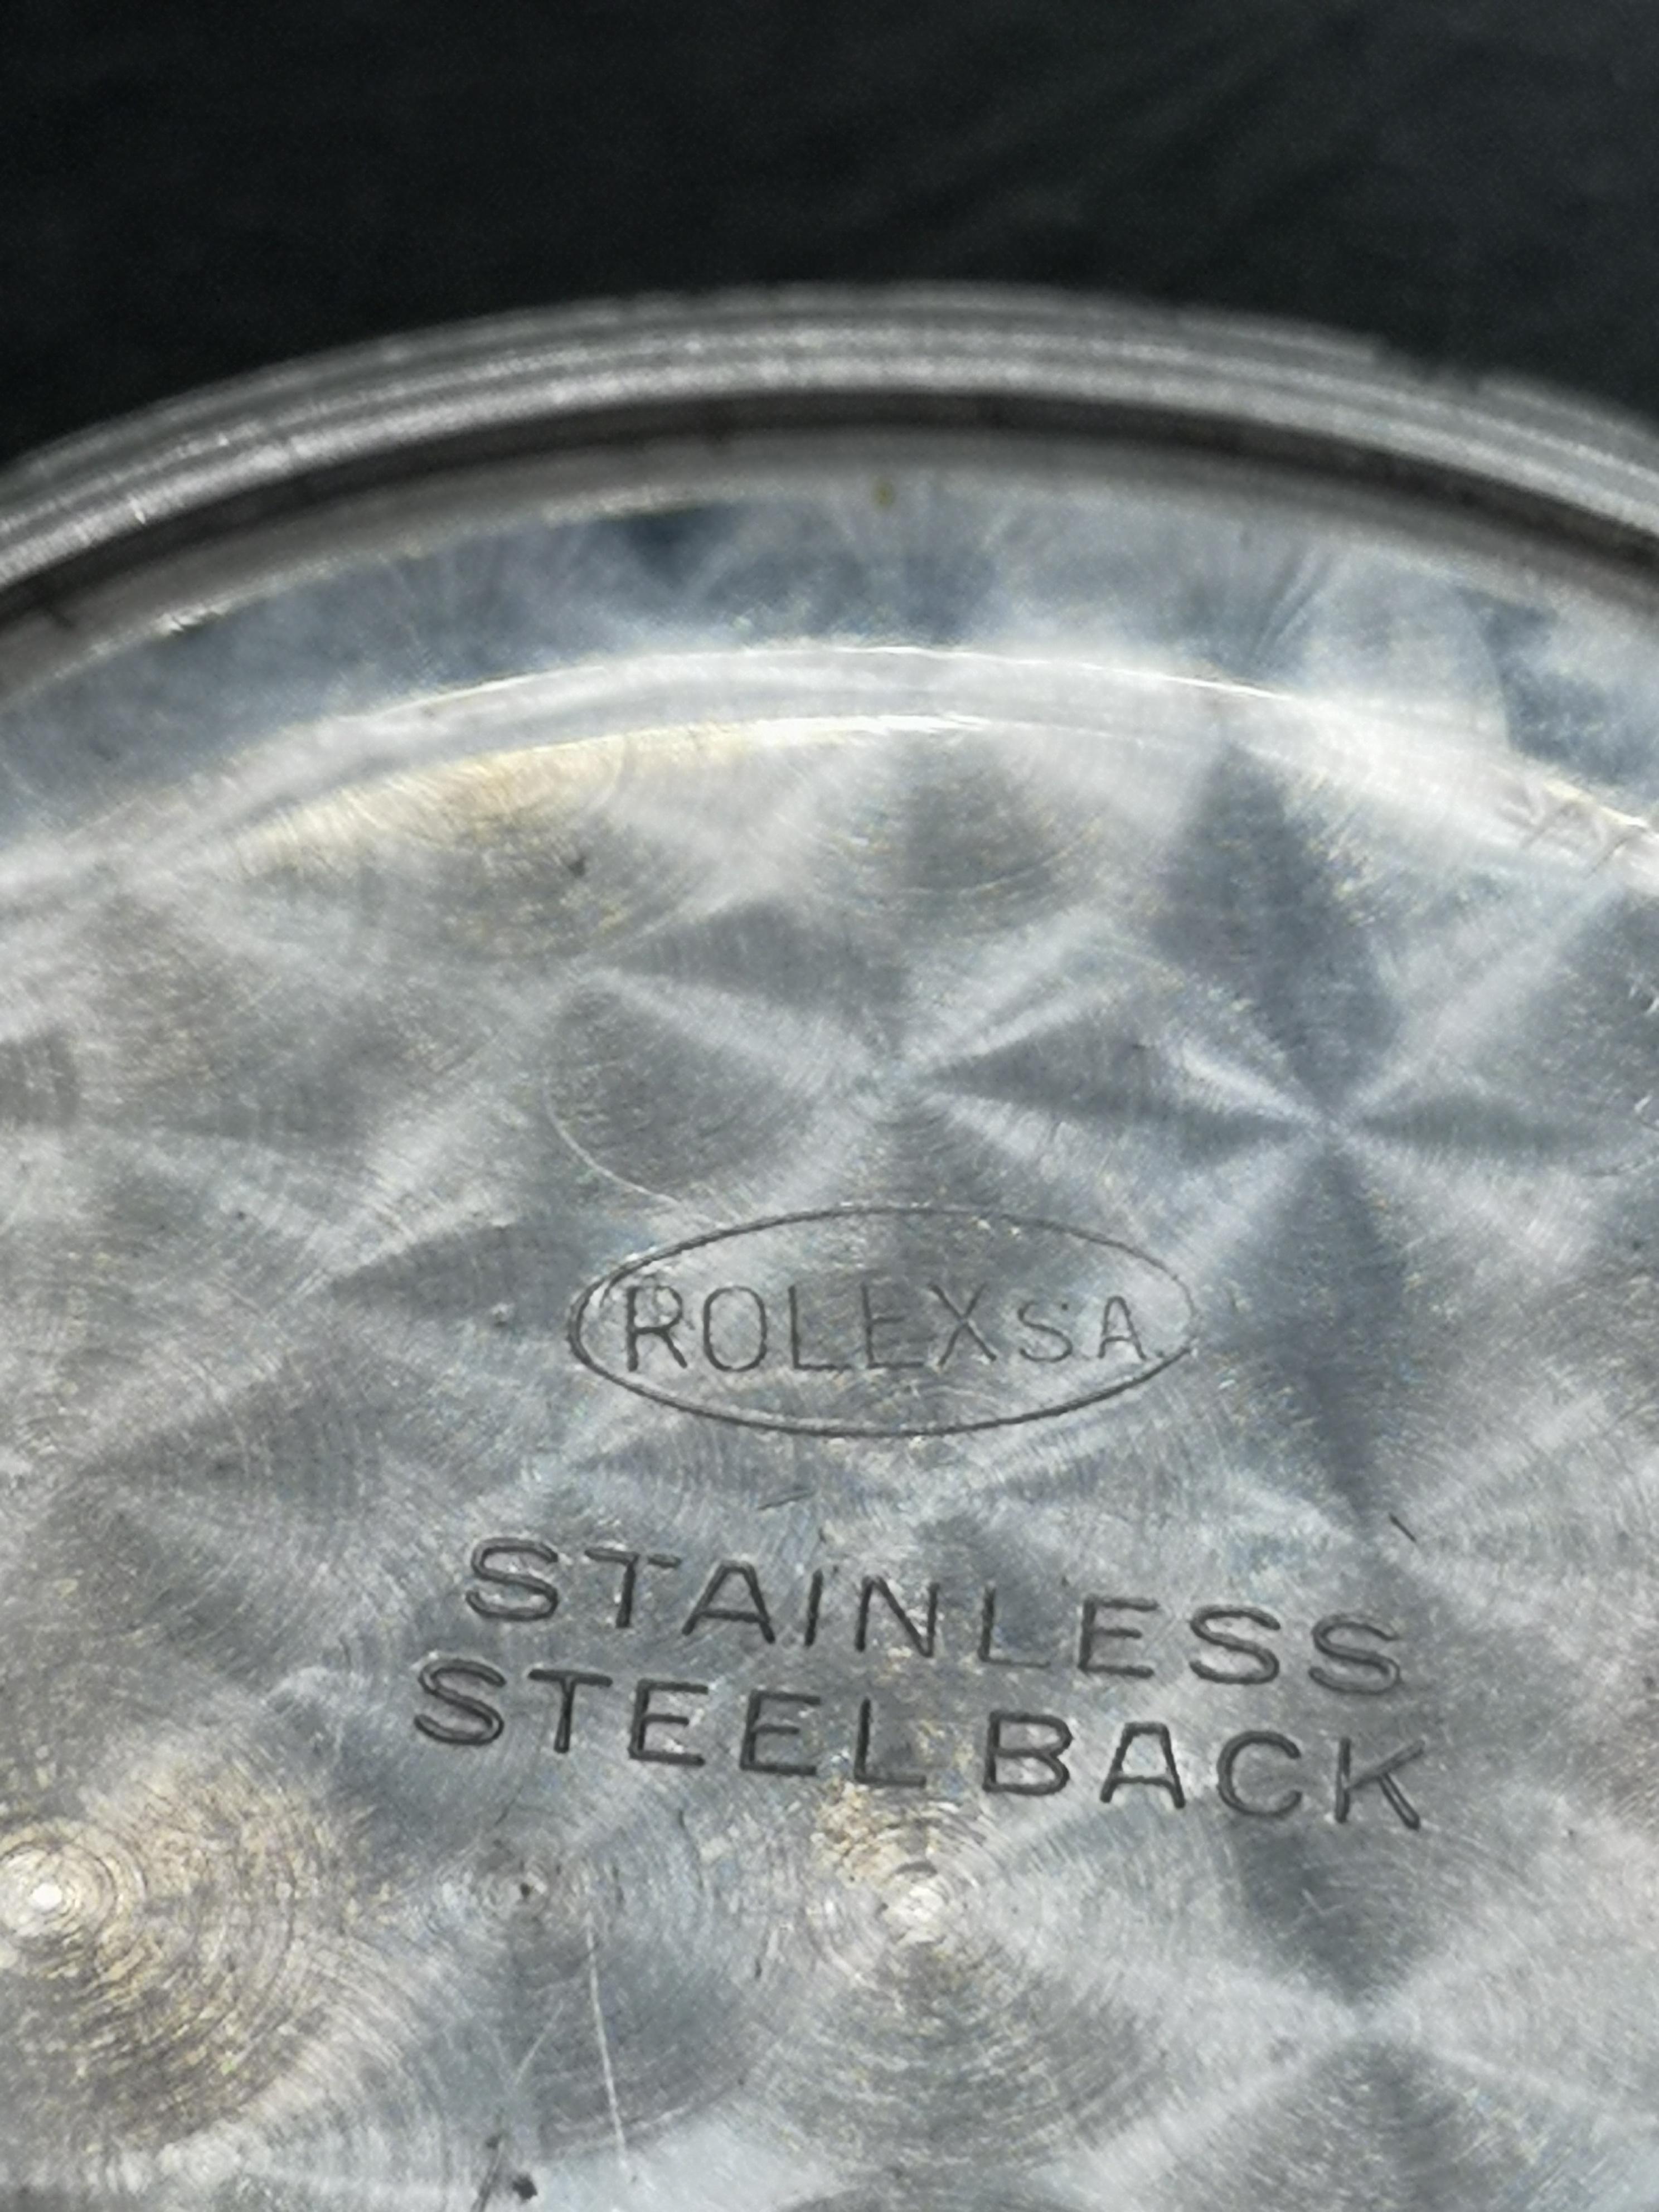
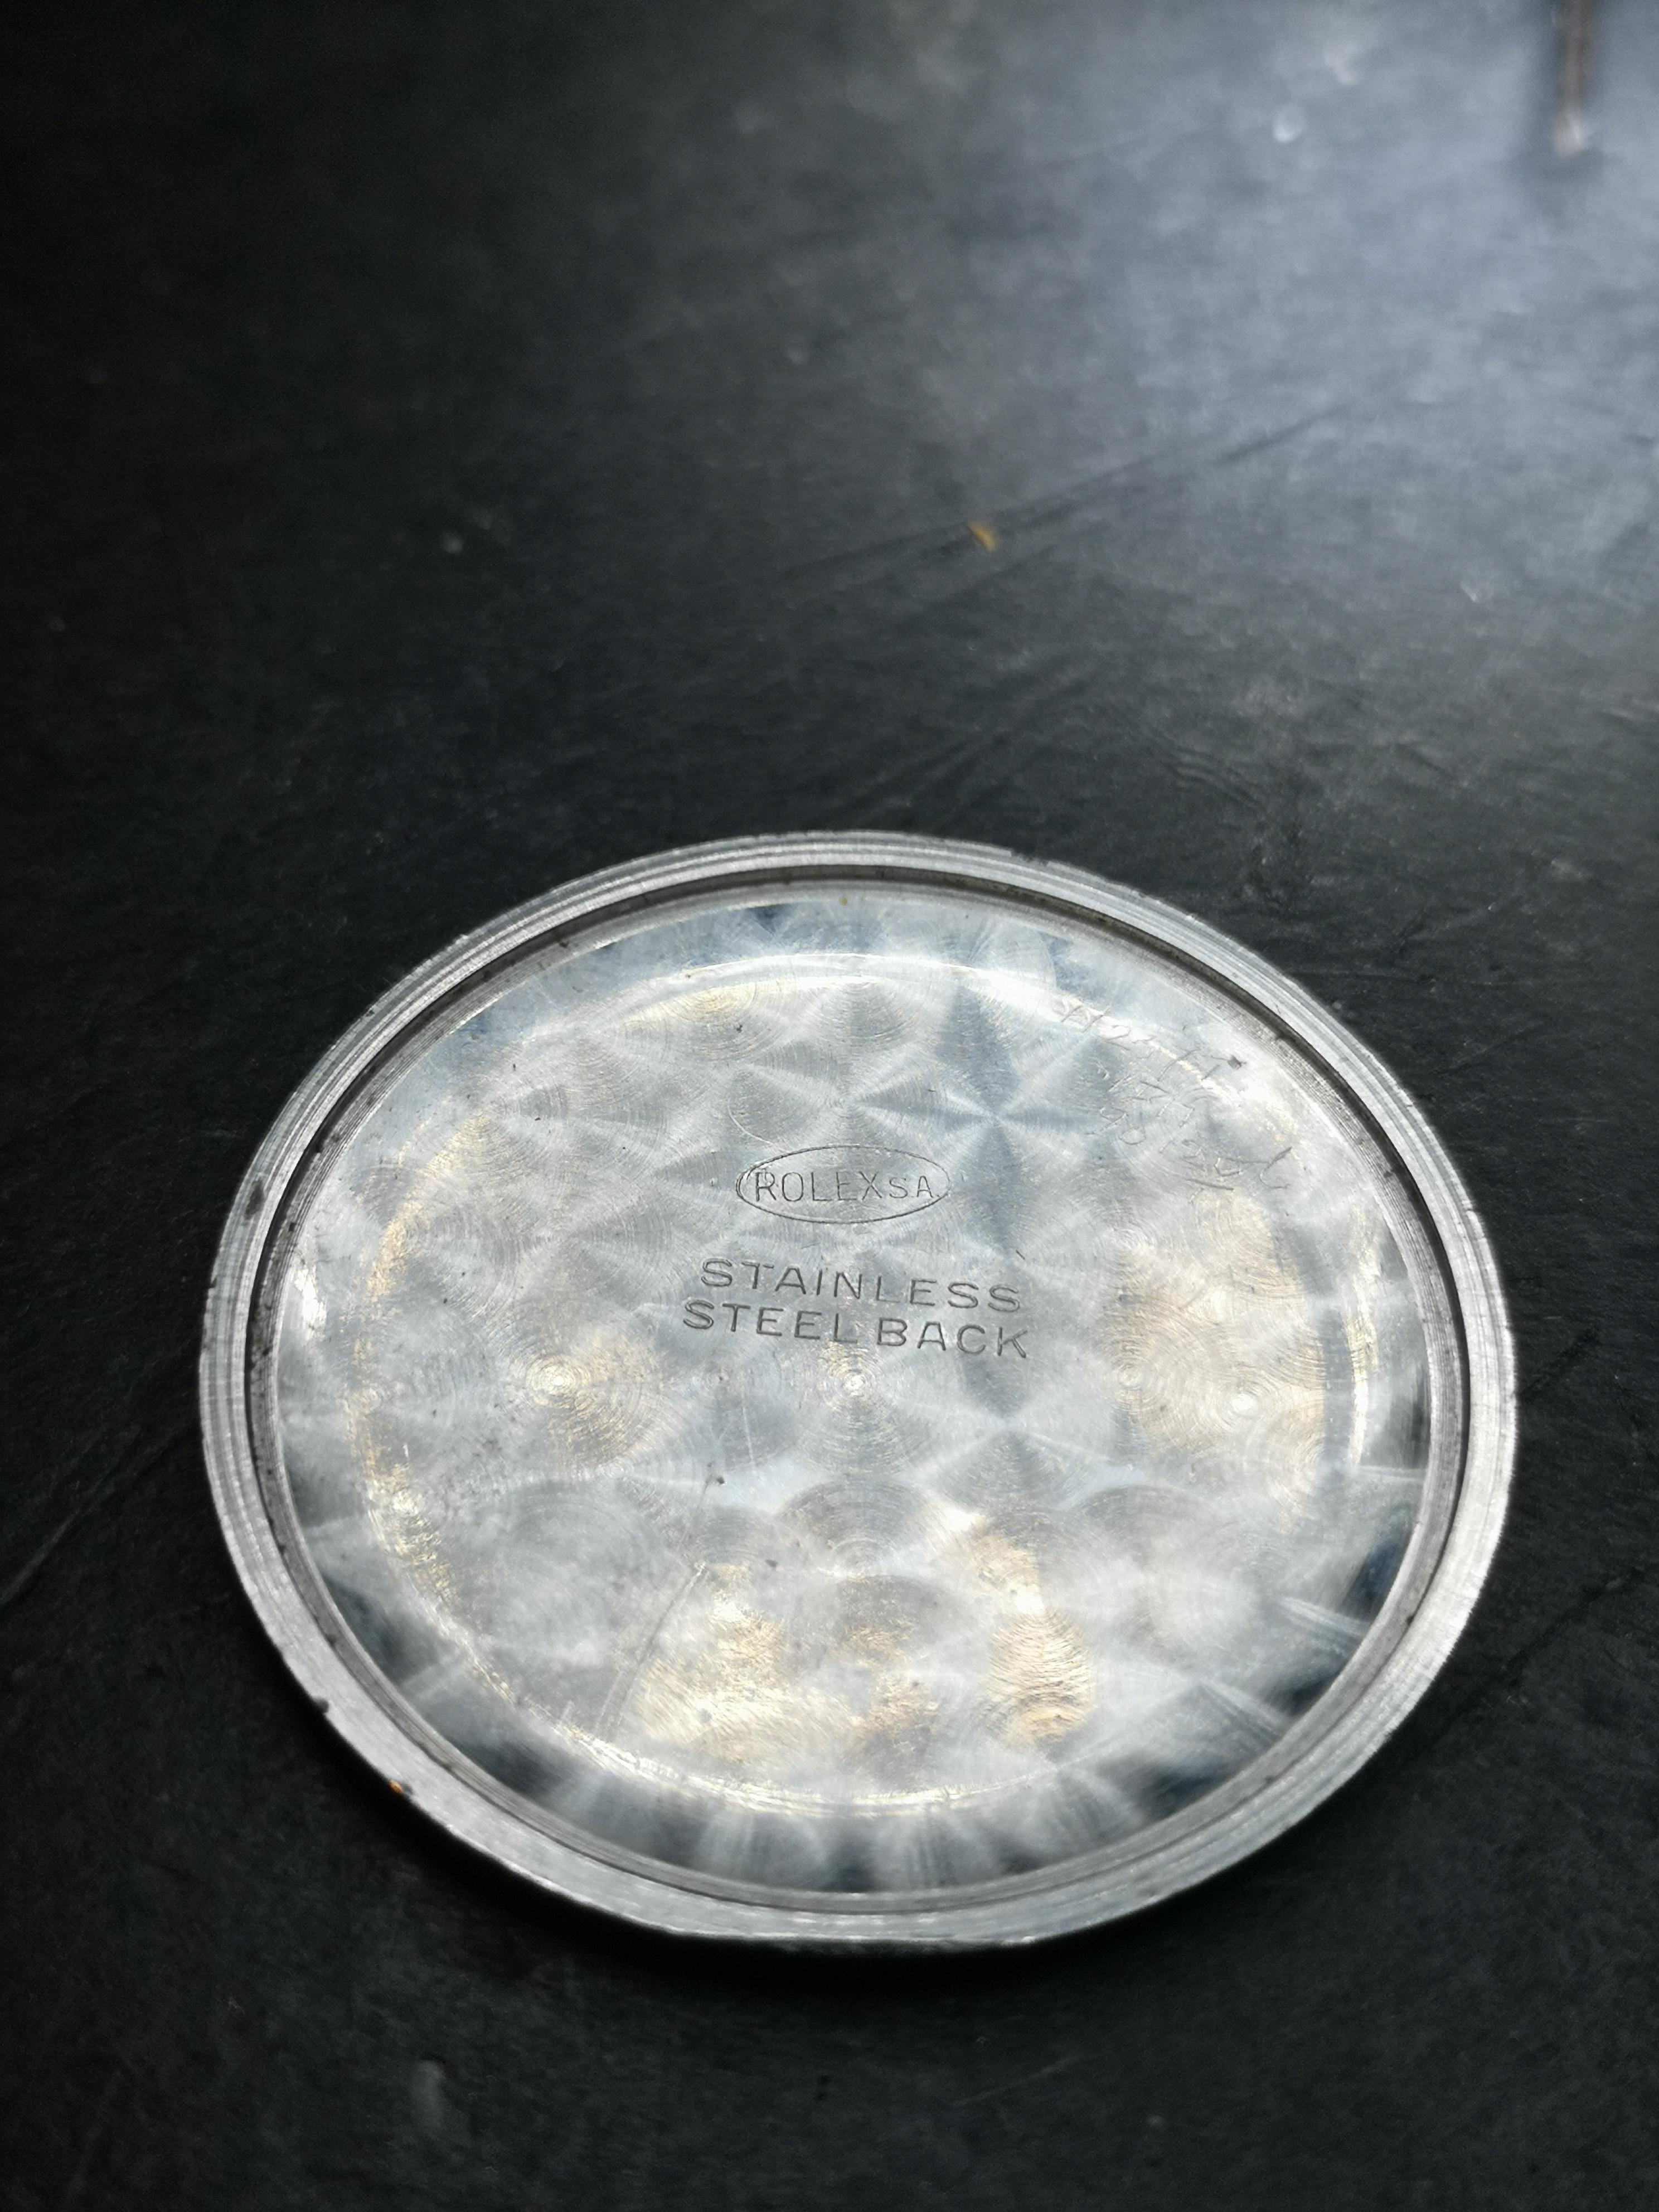
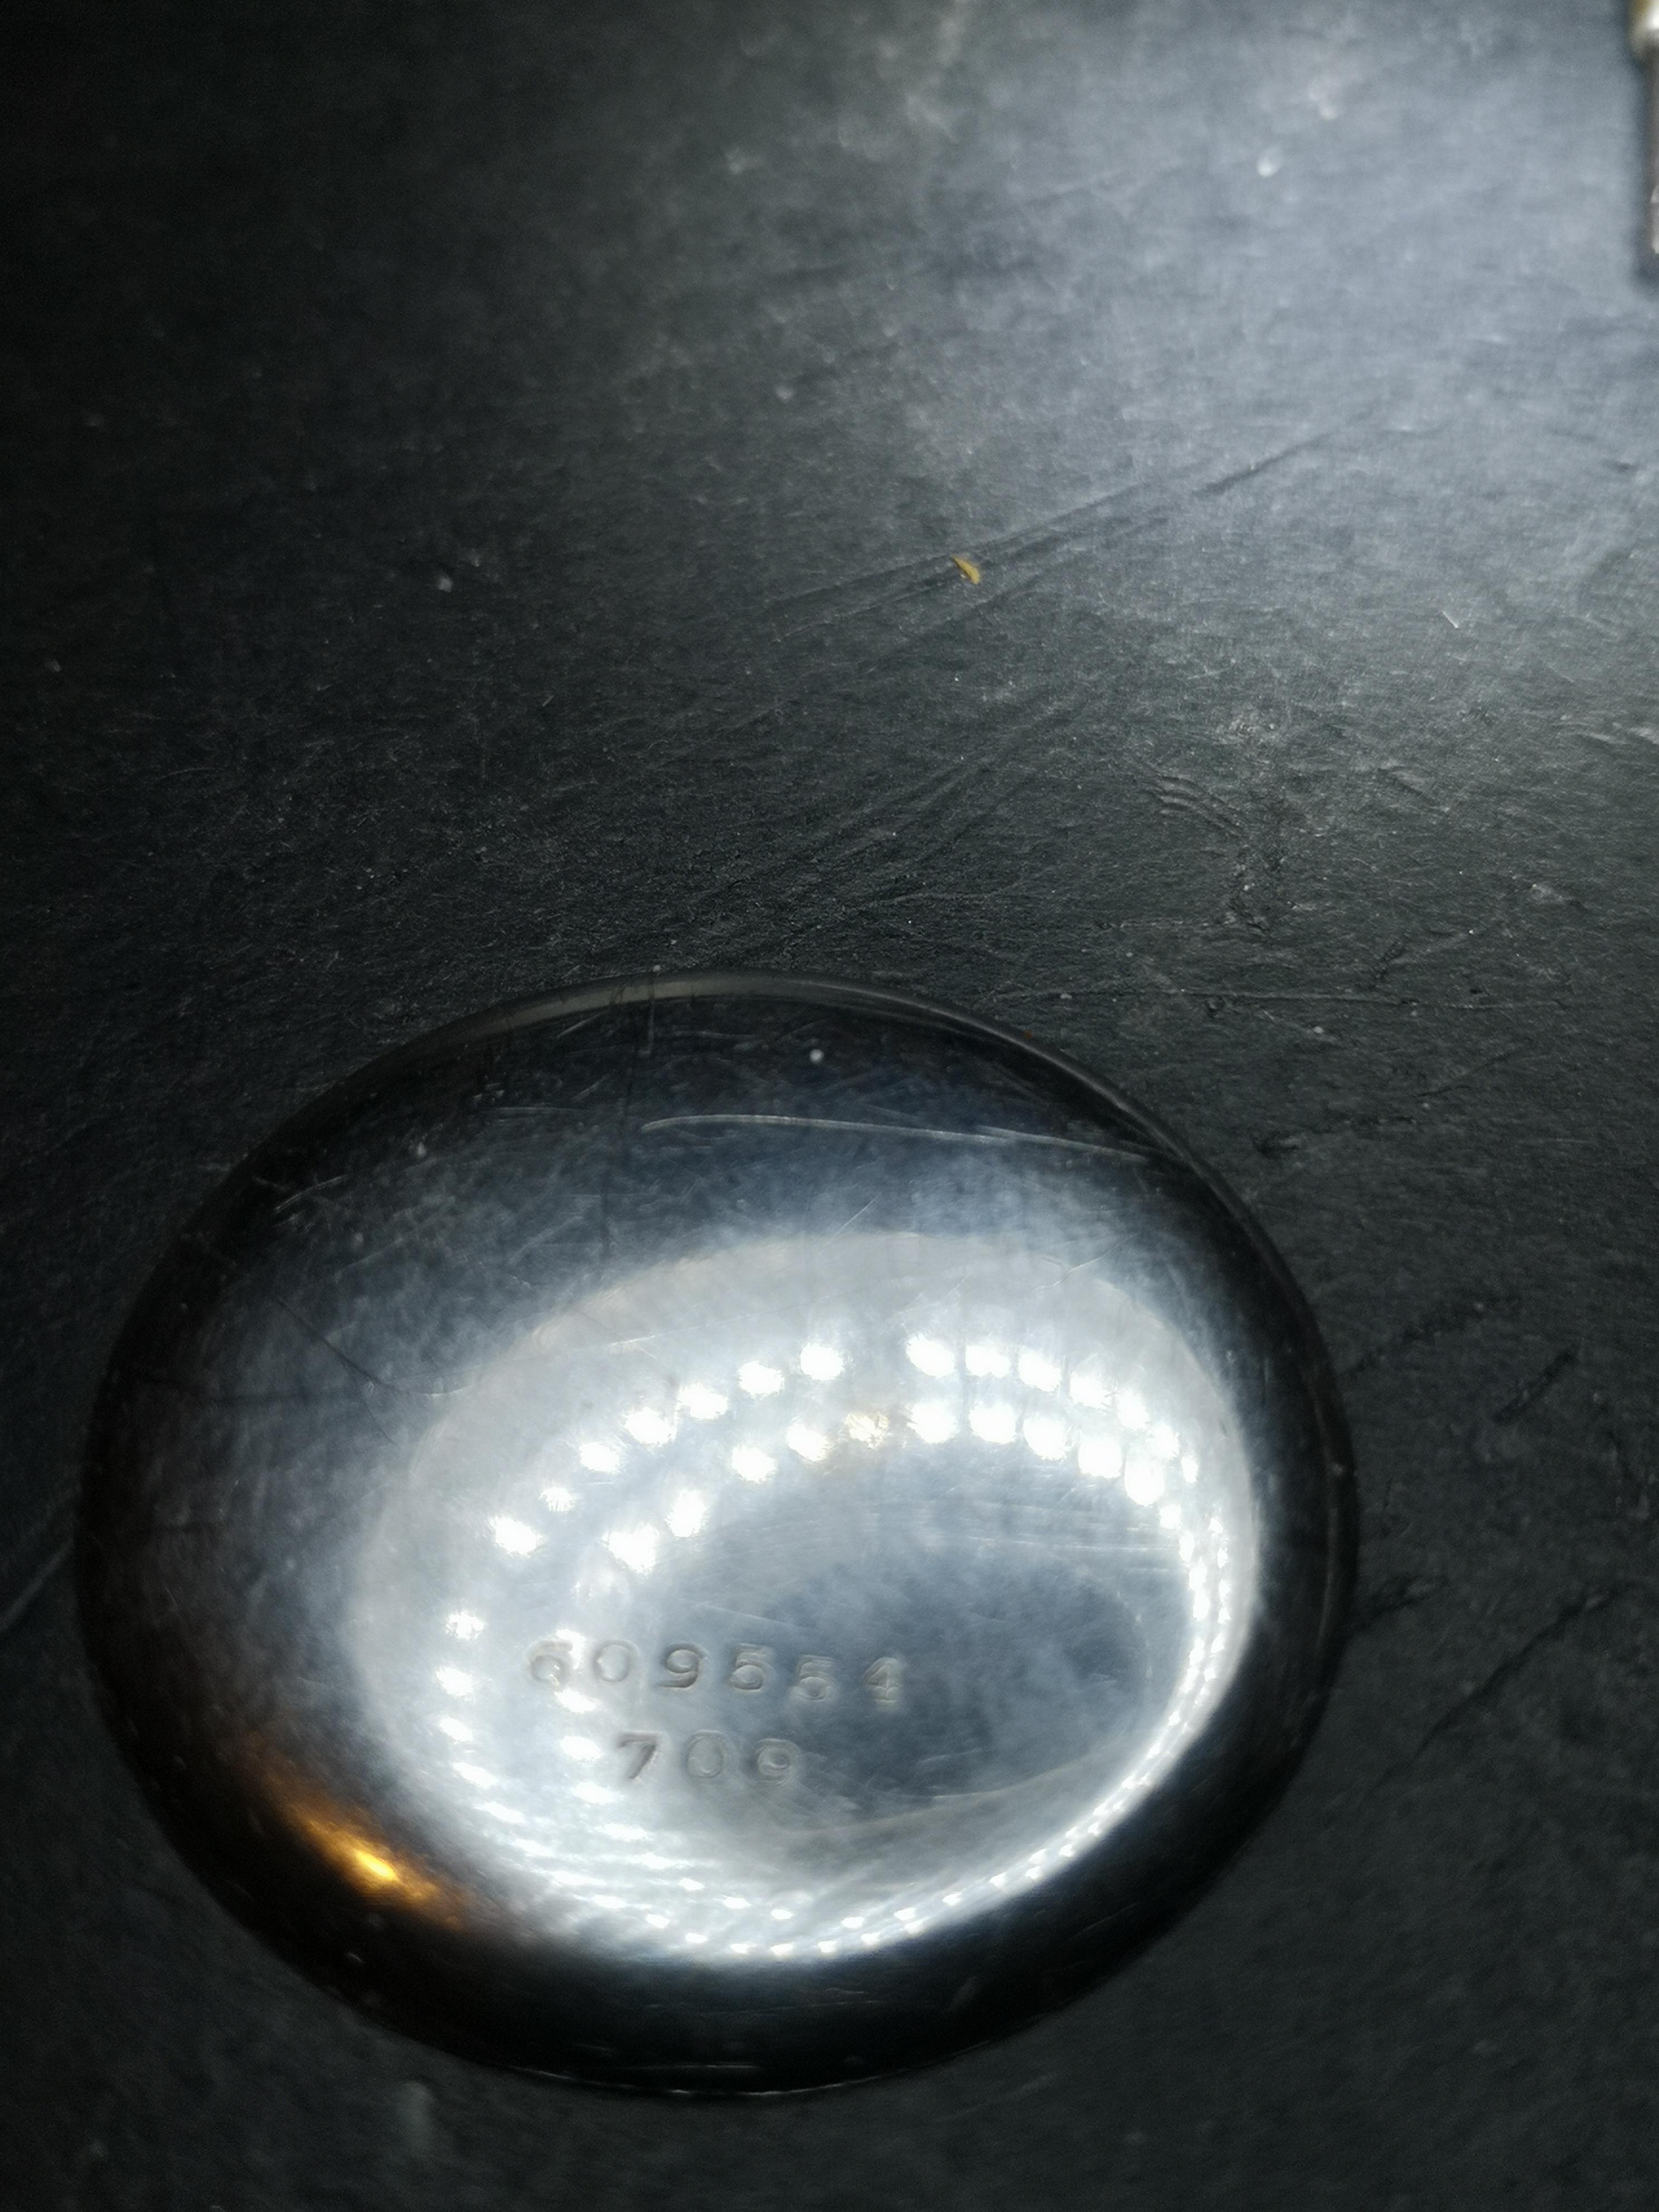
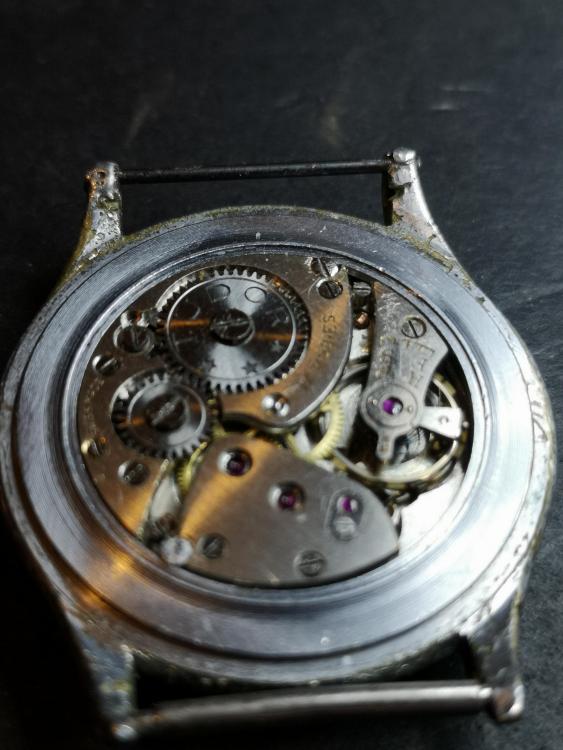
Your case with the George Stockwell mark along with what looks like an 'h' date mark for 1923 led me to this: https://www.worthpoint.com/worthopedia/vintage-silver-watch-1923-case-signed-251013340 Is this the same as your movement? In which case we now have an extra clue in that it is attributed to RWC (Rolex Watch Company). This may open a new avenue for investigation...?2 points
-
Hi I use the same method as Nucejoe and never had a problem over many years doing it. The essence is to take great care in freeing the lower pivot and roller assembly before lifting away from the movement. Then lay the cock on its back with the balance on top and place under cover for protection.2 points
-
I'm toying with that idea. I think I'll see if I already have something that matches, if so, I'll prep those, then take a crack at cleaning up the originals. The thing is otherwise almost immaculate. It has a very attractive Felsa 790 series automatic movement, with buttery smooth winding. This same high quality Felsa movements are alleged to have been used in the Breitling Bydinator series among others. This is about as close to a genuine Breitling as you are likely to ever get for just over a quid. I'll wear it for 24hrs and see if I can get it within a couple of second a day.

 2 points
 -
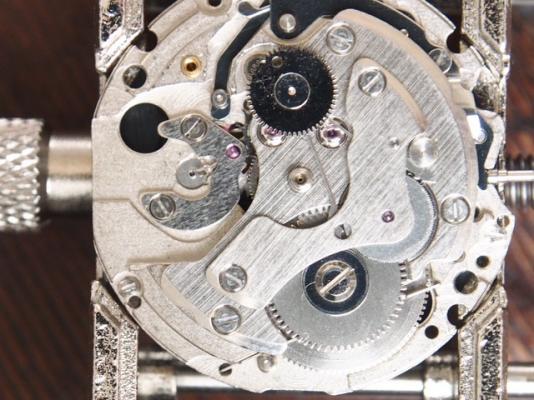
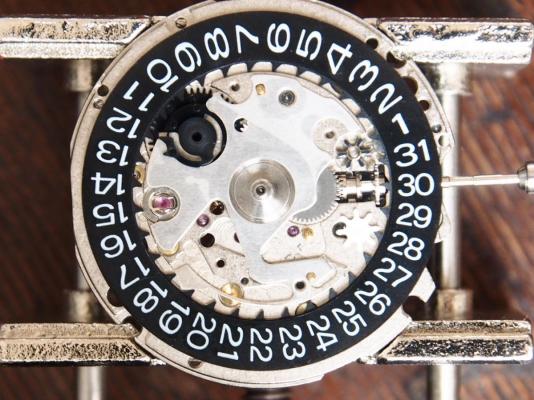
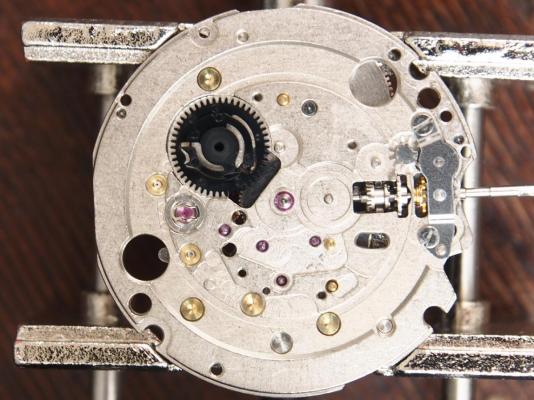
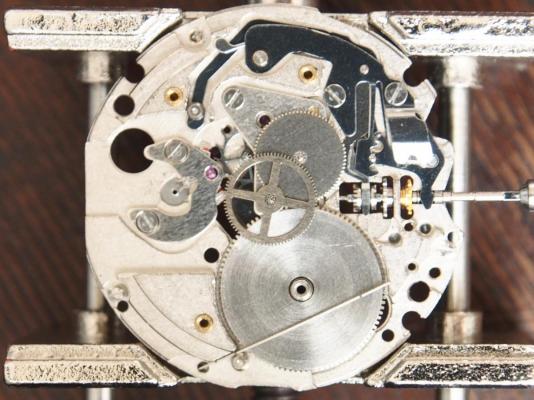
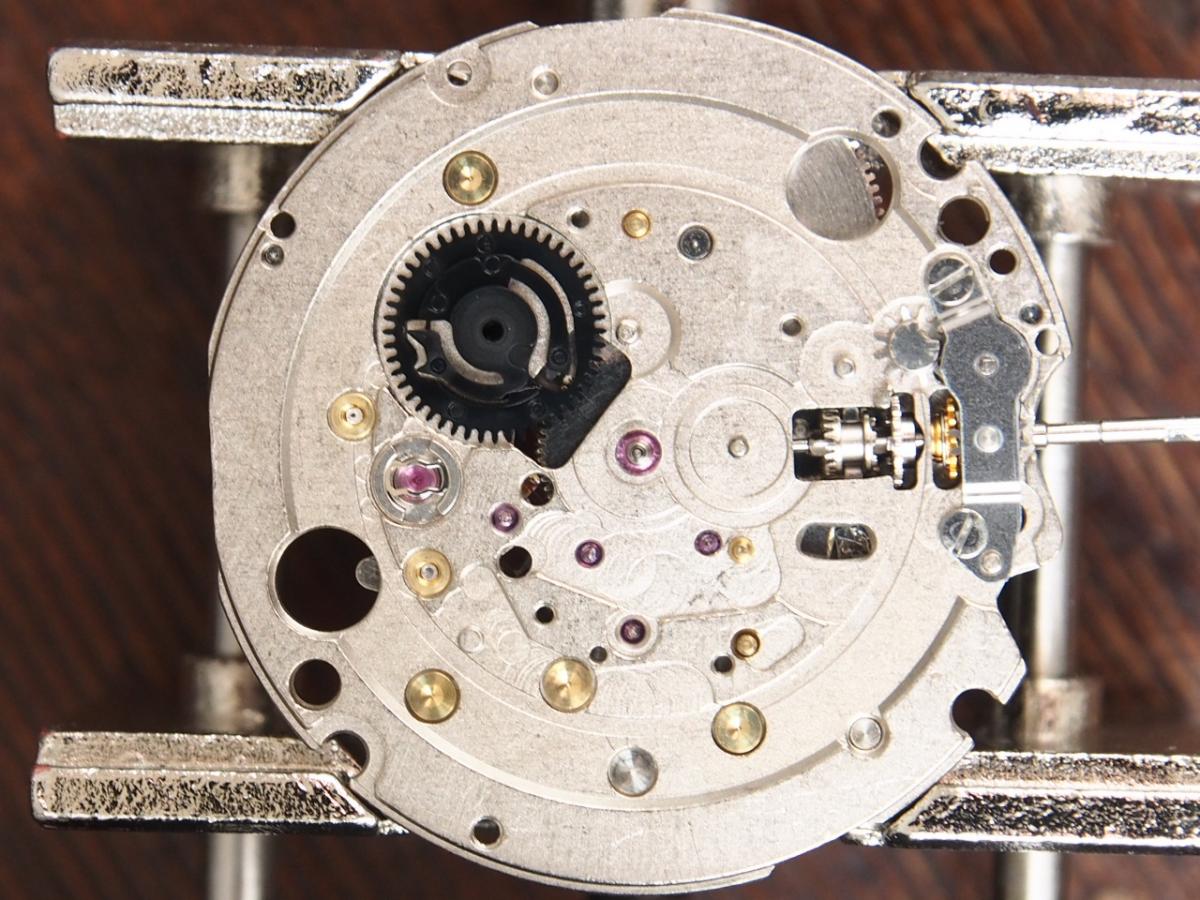
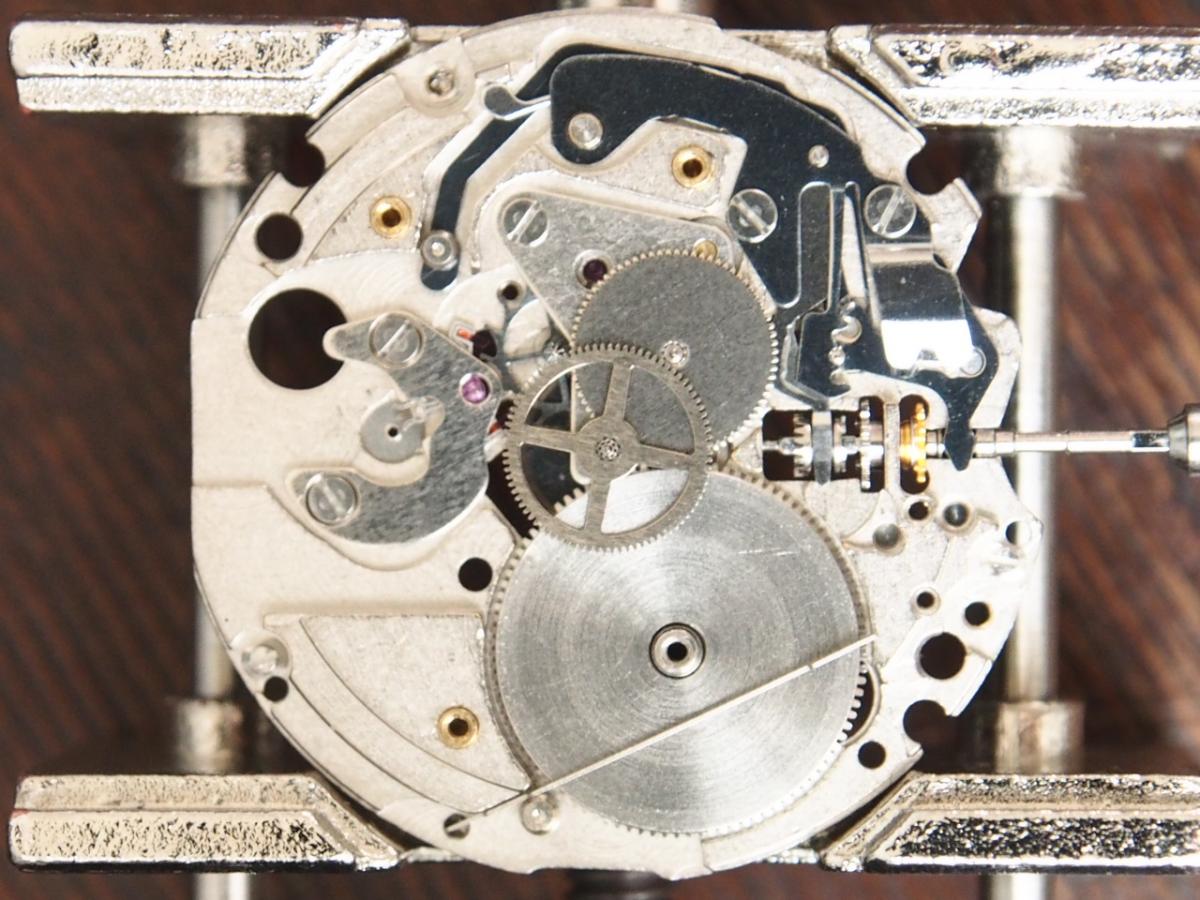
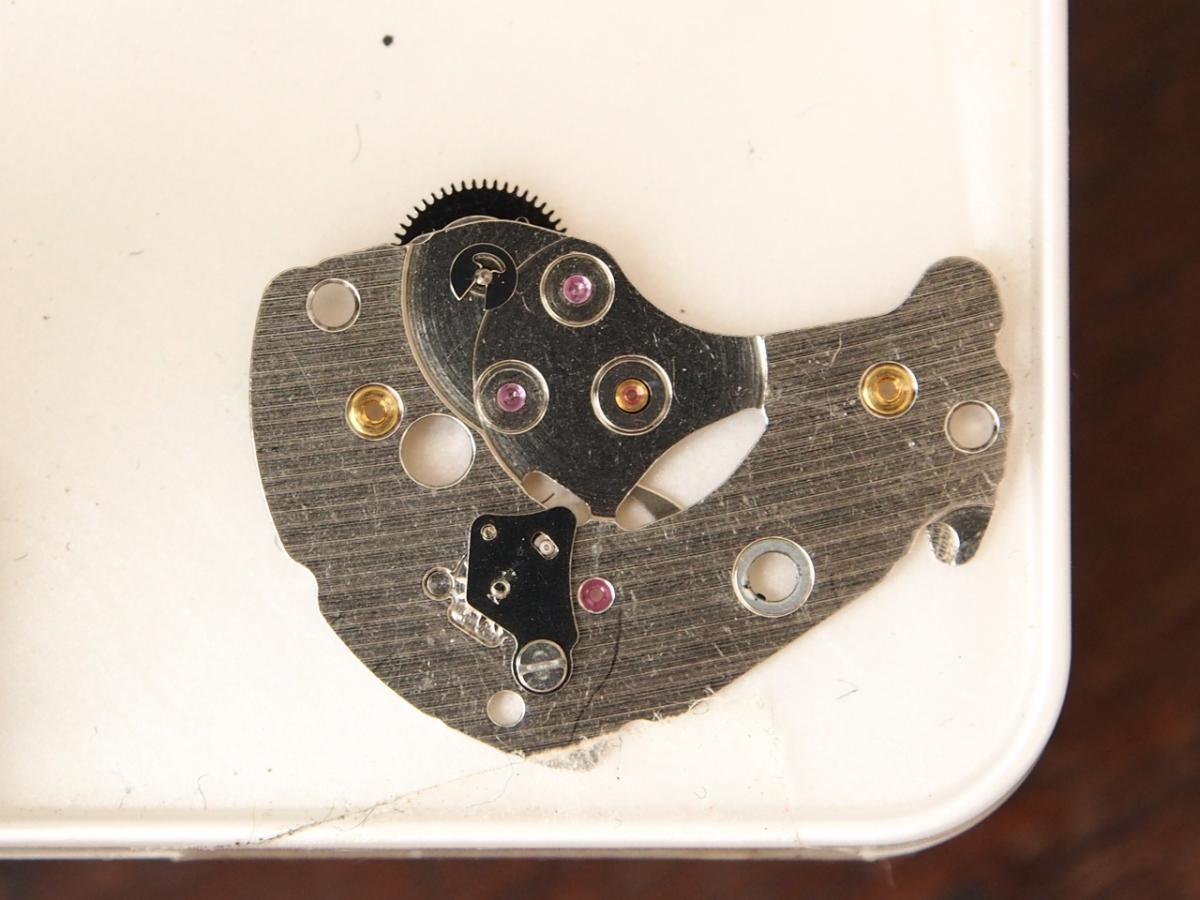
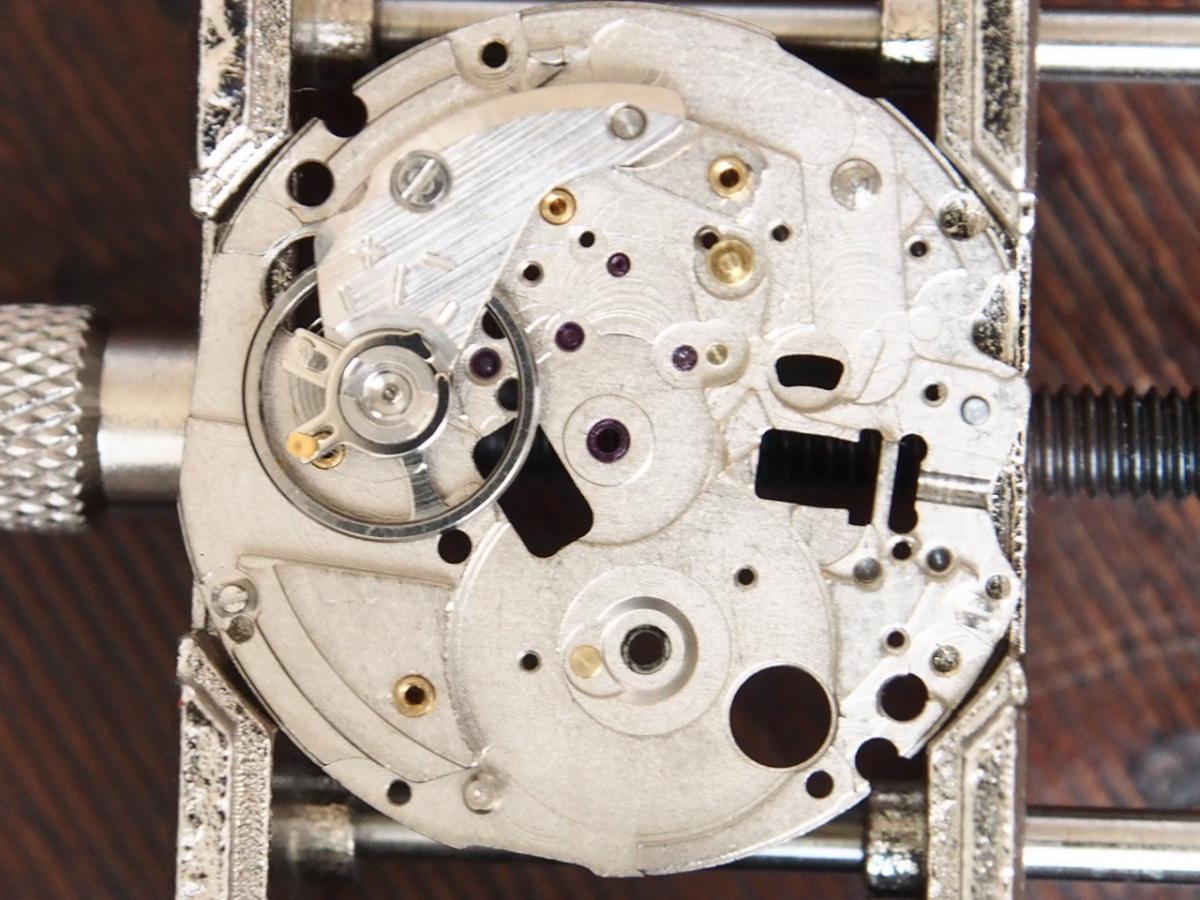
This is my first service walk-through, for which I've chosen this well know Seiko movement. It has a lot of similarities and common parts with the 7S and 4R families. The most notable differences are a separate bridge for the auto winding, and a better mainspring giving 50 hours power reserve. Also, the tiny anti-shock for the train wheels (of debatable usefulness) are not present. Some version have a cotes de Geneve finishing, the one pictured does not. Just like the others it is quite easy to work on. Find attached the technical guide for the SII version, which is named NE15B, In this walk-trough my intent is to give practical advice on certain aspects, which comes from my personale experience and reasoning, Reassembly and lubrication will be covered in the 2nd part. Let's start with the disassembly for which the absolutely indispensable tools are: Movement holder Hand remover tool 1.4mm and 2.0mm flat head drivers Seiko cross-head driver Fine or medium tip tweezers First, I recommend to remove rotor weight with the movement stil in the case, as it it of impediment for all the work to be done later. The movement is kept in case with 2 screws and 2 tabs (not pictured). Remove these, case ring and stem (usual pressing point with crown full in), the movement can now drop from the case - unlike the 7S and 4R where the plastic ring keep it place with some friction. You can now place movement on holder, reinsert stem as it's needed to hold related wheels in place until the very end. Remove hands with your favorite tool, then keeping movement in hand or placing it on the holder with a plastic protection, quarter-run dial the feet retainers at 3 and 10. Gently push the dial out, I recommend to place it in a plastic bag for additional protection. The movement ring goes with other parts not to be washed. Tip: label the tray sectors as in last picture to make it easier to sort and find small parts. Of course some parts will get mixed for cleaning, more on that later. First, remove the balance cock to protect balance wheel and hairspring from any possible incident during subsequent work. When removing the balance push gently the wheel from below to set it free from the fork, and avoid as much as possible suspending the balance by the hairspring. Store it wheel up with pivot set in hole. Turn movement over again to remove all dial side parts, starting with date maintaining plate screws. These can be four flat head screws, or three screws 'A' and one screw 'B' which requires the Seiko or equivalent small cross-head driver. Lift the date maintaining plate and the underneath parts will be exposed You can now remove: Date dial Date corrector wheel (white plastic) Date corrector wheel E (metal) Date jumper Intermediate date wheel (white plastic) Date driving wheel (black plastic) Hour wheel Minute wheel Cannon pinion Now, remove two date corrector wheel guard screws, wheel guard and corrector wheel C. Note: depending on versions the date corrector wheel B can be either a separate part, or attached to the guard. Turn over the movement and referring to 1st picture removing the two automatic bridge screws and bridge, and 2nd reduction wheel. Now we can let down any tension left in the mainspring. Just keep the tip of pegwood on the barrel to prevent it from spinning to fast, with push away the click away from from the ratchet wheel. Now we can remove in order: Ratchet wheel screw and wheel Three train bridge screws Train bridge And will be presented with the train system From which we will remove Click and barrel Fourth and third wheels Escape wheel Pallet bridge screws, bridge and pallet fork. Note: I recommend to not disassemble the barrel on the 6R15 movement, because a special material (SPRON 510) mainspring is used link, for which one would not find an exact replacement, and the barrel is sealed and lubricated for life. If there is any issue with the mainspring, replace the barrel complete. Now, undo the single screw for central wheel bridge to remove bridge, and wheel itself. Next the keyless system, which is kept in place with two screws. There is not much tension in it but is always better to keep the setting lever in place with a stick and then lift the parts, which are: Yoke spring Yoke Setting lever Balance stop lever My tip for last remaining parts (clutch, winding pinion and date corrector wheel A) is to just pull out the stem and pick them up from the mat to place directly in mesh basket. You can now place back the balance back in the movement to protect it during cleaning, and in preparation for the next step, which is removing anti-shock upper and lower balance jewels (Diafix) . My recommended technique is the following: place the tip of the tweezers on the inside of the spring, and rotate the entire holder and movement. Once the spring is out of the frame, close tweezers and store spring in tray, pick up the jewel with Rodico, and place it directly in the metal mesh basket. There is one last task which is removing the 1st reduction wheel and pawl, as well the lower plate from barrel from the automatic train. Just pay attention to not lose the C-clip while pushing it out as shown in the technical guide. My recommendation about cleaning is that with a movement which is spotless like the one in these pictures, I do not wash all the parts, but only those that have jewels, or are to be lubricated. That means you can leave screws, some plates, plastic wheel in the tray, saving time and minimizing chances of losing them during handling. A small mesh closed basket and a larger plastic one are enough. For cleaning I use an household ultrasonic machine, and isopropylic alcohol only, then blow briefly with an hairdryer. Again the reason is that we only need to clean any old oil. Note: although alcohol is detrimental to shellac, I've found that even 10 minutes in there do no harm to the pallet fork jewels, but leave all parts perfectly clean without no residue whatsoever. This concludes the 1st part of this walk-through. NE15-TG.pdf
 1 point
 -
I use diamond paste to. I polished this with 400 paper then 800 and last 1200 wet . And last diamond paste . As i didn't have any ceriumoxide. Result is pretty okay?
 1 point
 -
So many topics written about this, but the same questions are always asked. In short: Only wet paper removes scratches. Depending on various factors, there is no set grade. 400 or 600 are the rough ones to start. Wet paper is not an effective way to finish work after, say an 800 or 1000 grit pass. Use diamond paste on an hard wheel instead. Cerium oxide is not indispensabile. You may find that if fact it does nothing than fine diamond paste does not do but seems harder to clean.1 point
-
You can always trim an Ebay link or most others from the first question mark to the end. Note also the OP needs a reverse movement. He can't fit another.1 point
-
My money is on fossilized lubricant.1 point
-
I have found that there are hairsprings that don't take well to hanging AT ALL !I have ruined Lorsa hairsprings by just letting them dangle long enough to install the balance cock.I wouldn't let one hang any longer than ABSOLUTELY NECESSARY.1 point
-
Hi The short answer is NO as the prolonged weight of the wheel will have an adverse effect on the spring, It was not intended to hang for long periods. If the balance is to be left out of the watch with its cock turn the whole thing upside down and rest the balance in the jewel and cover for protection. If removed from the cock place on an old balance complete carrier an again remove out of harms way. A little for thought can save a lot of money not to mention time.1 point
-
Let me get everything out and I will post pics of everything.1 point
-
When I asked this question some time ago, I was given good advice; carefully free the cock from the mainplate, and lift the cock while tilting the movement to cause it to be on the same plane as the balance wheel. Give the the movement the slightest of taps, only enough to free the balance wheel. It has worked for me every time.1 point
-
Hi Its a watchmakers gauge that measures lignes in 1/12 of a ligne increments.1 point
-
You mean Dormans garage.1 point
-
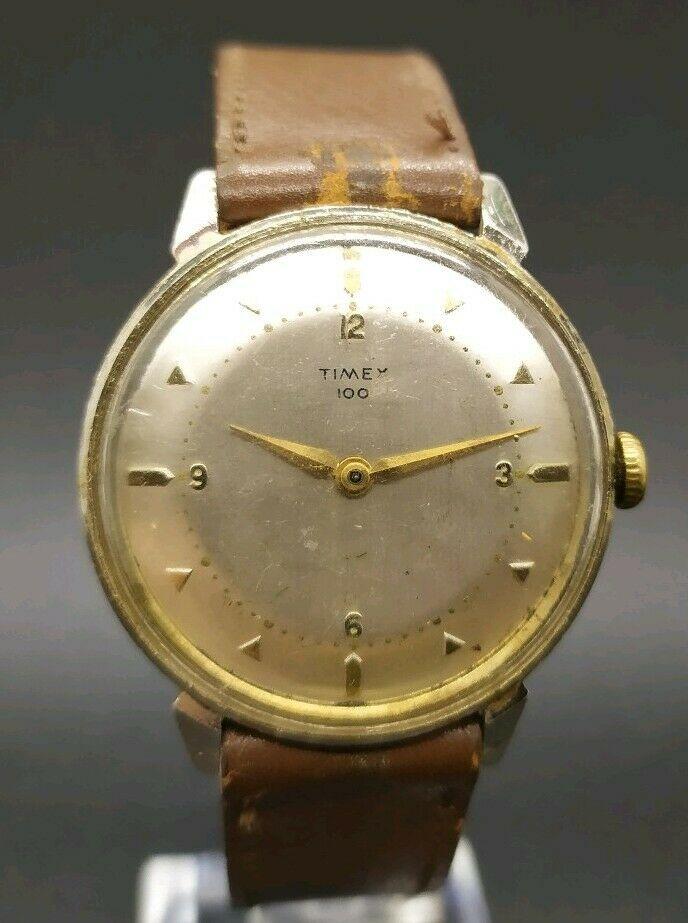
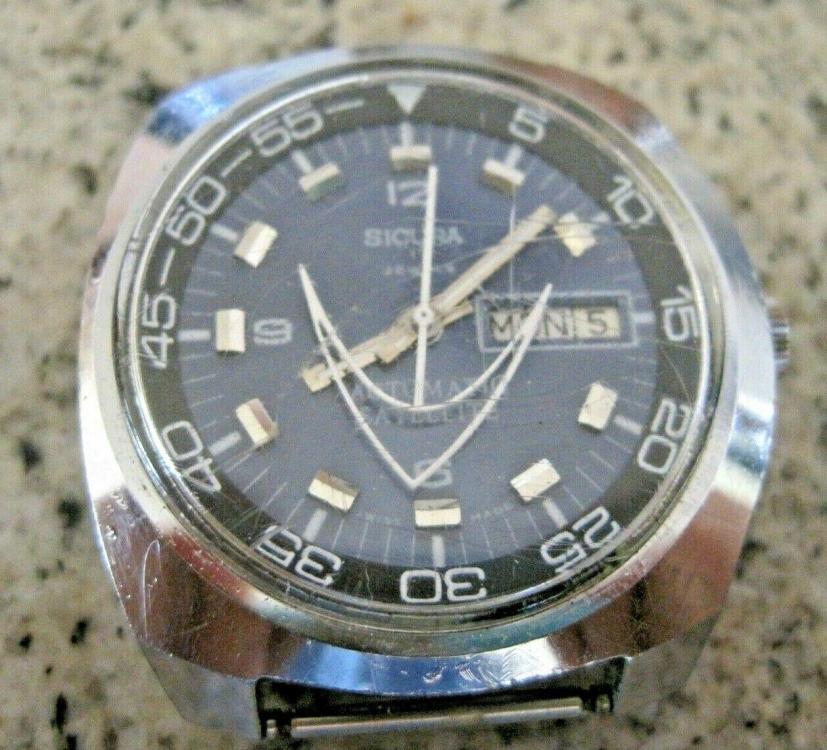
just placed an order for a ratty Timex 100, 50's vintage. Hopefully @JerseyMo will have a few parts available for me to purchase to freshen this up. I also acquired one of my personal grail watches, a Sicura Satellite. This one needs some attention and a thorough polish on the crystal. The Satellite has the most unique and massive second hands I've ever seen

 1 point
 -
Well done!!1 point
-
Same issue here with a Chinese U shaped spring, broke it after trying too many times. I will need special tuition about that. But you can't do a proper repair or service without opening them. Give me Seiko springs any day. Good luck.1 point
-
Is this what you need.1 point
-
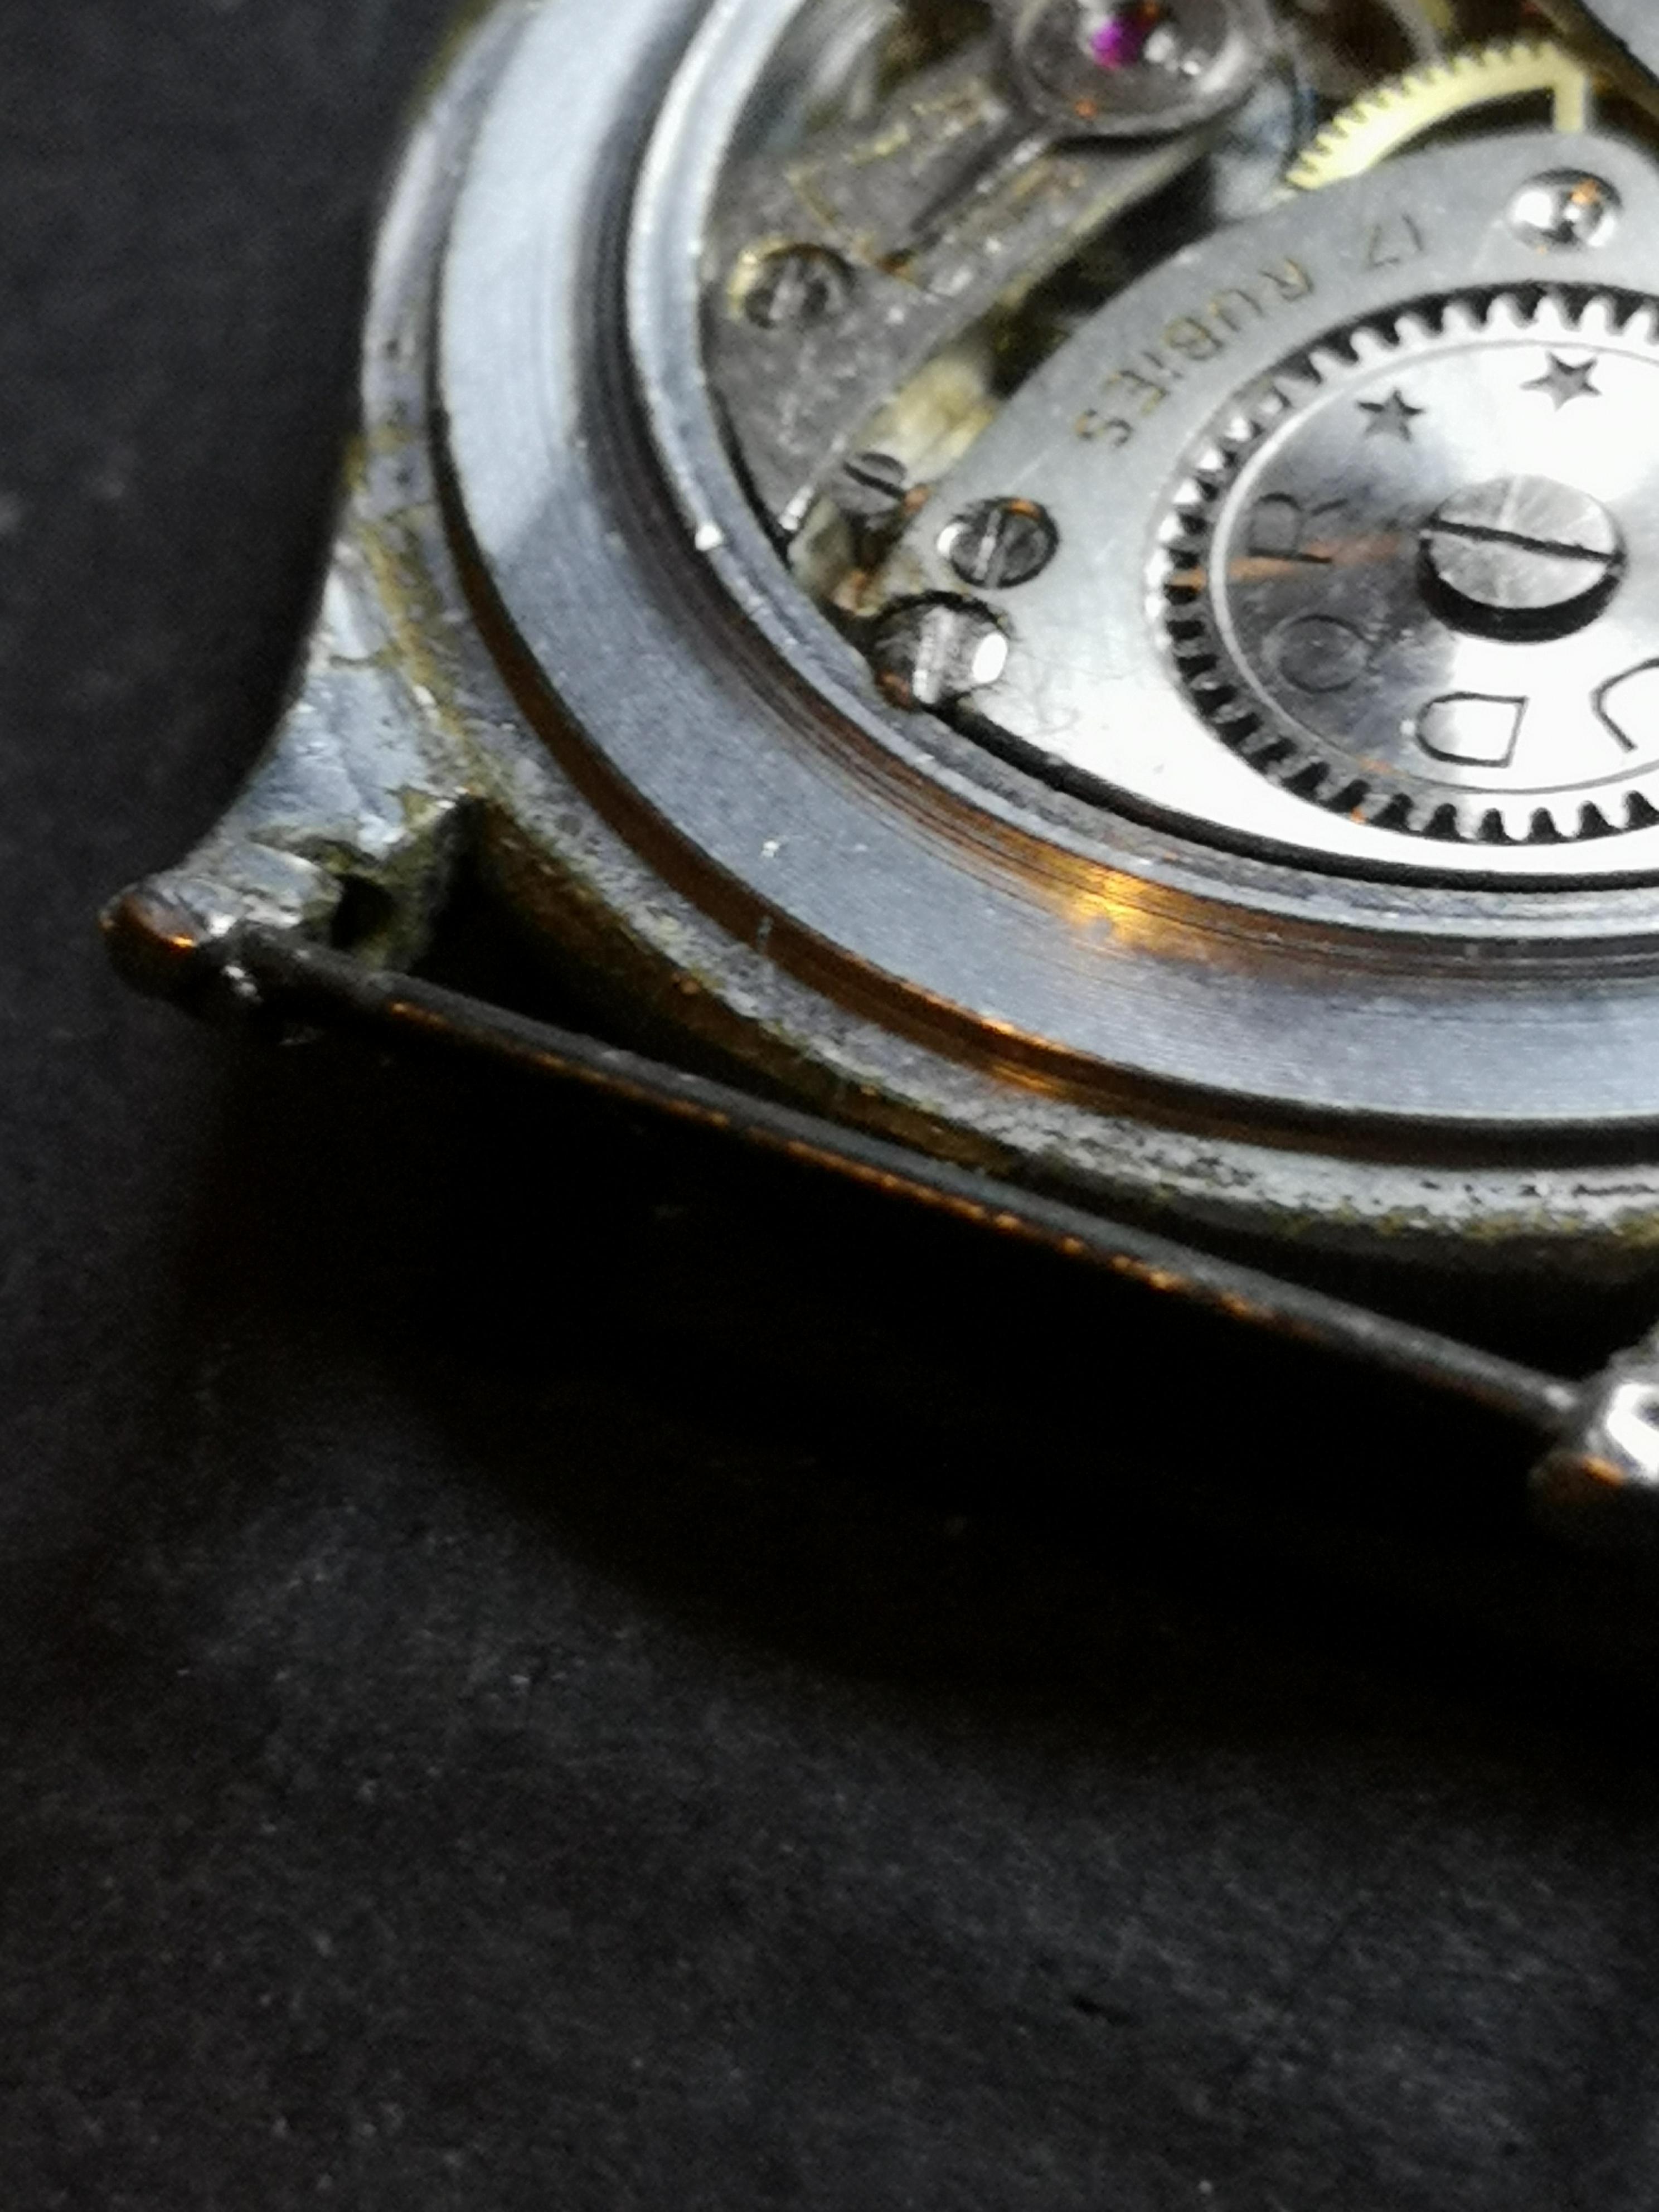
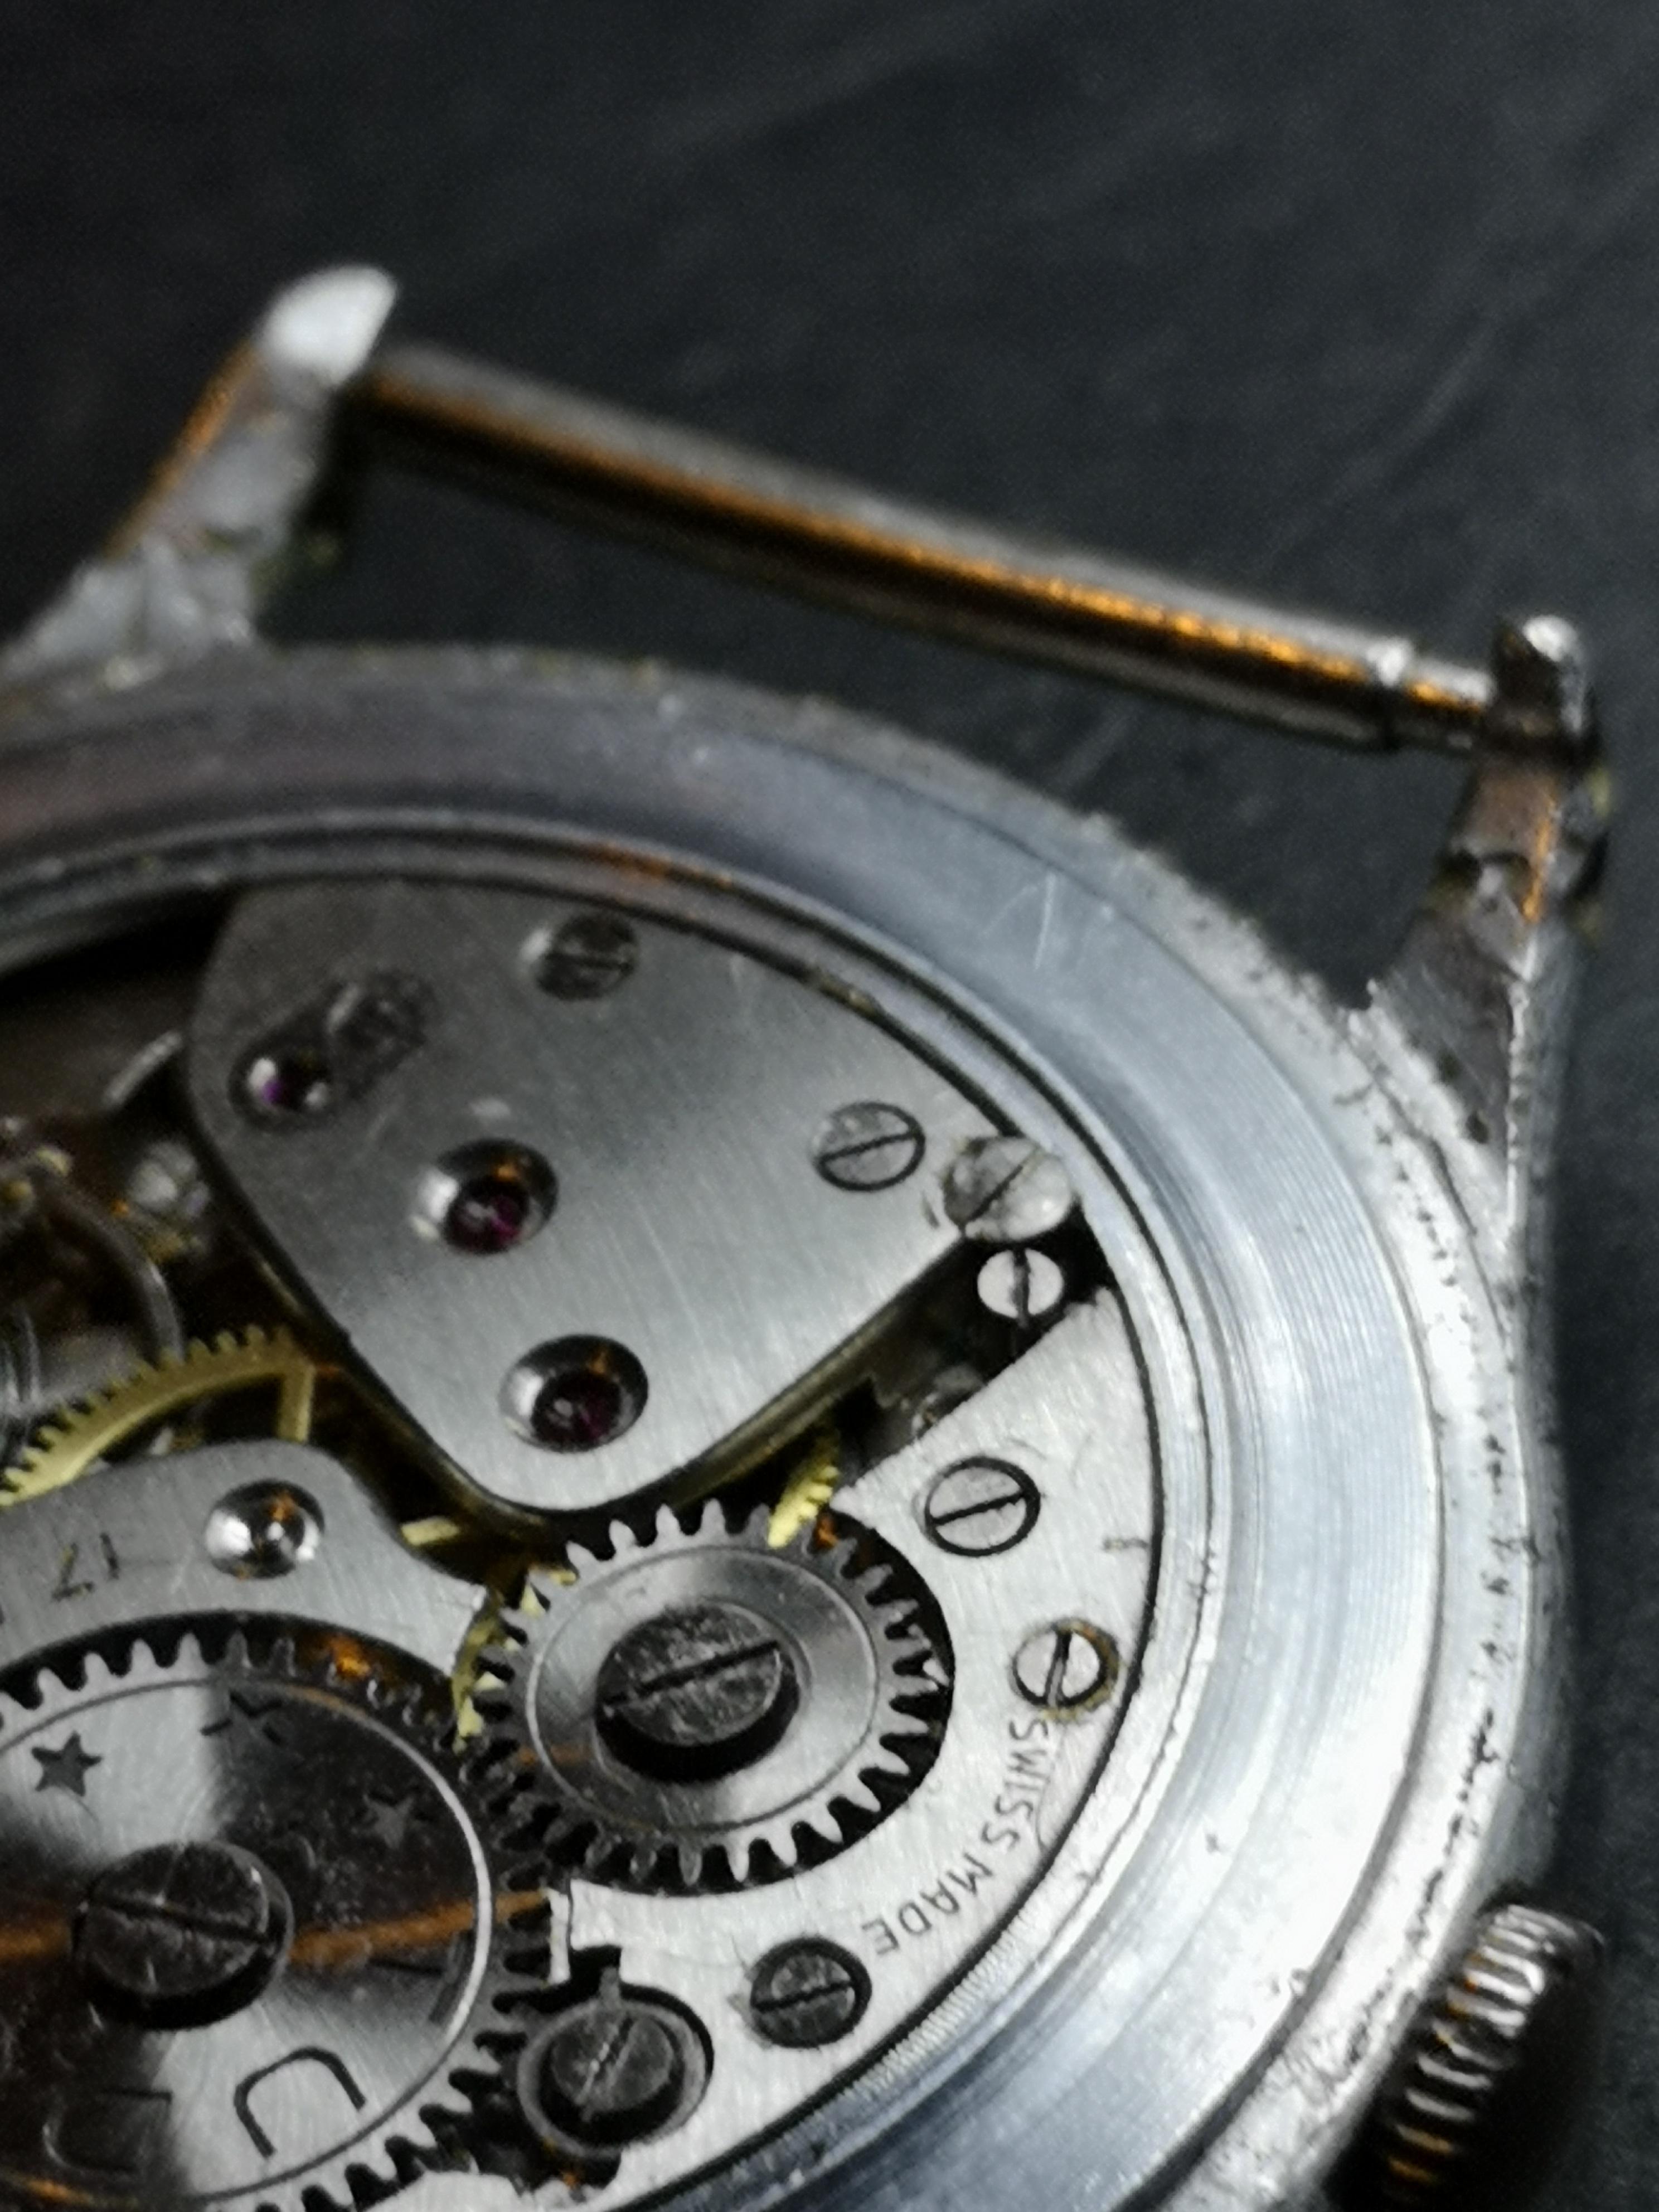
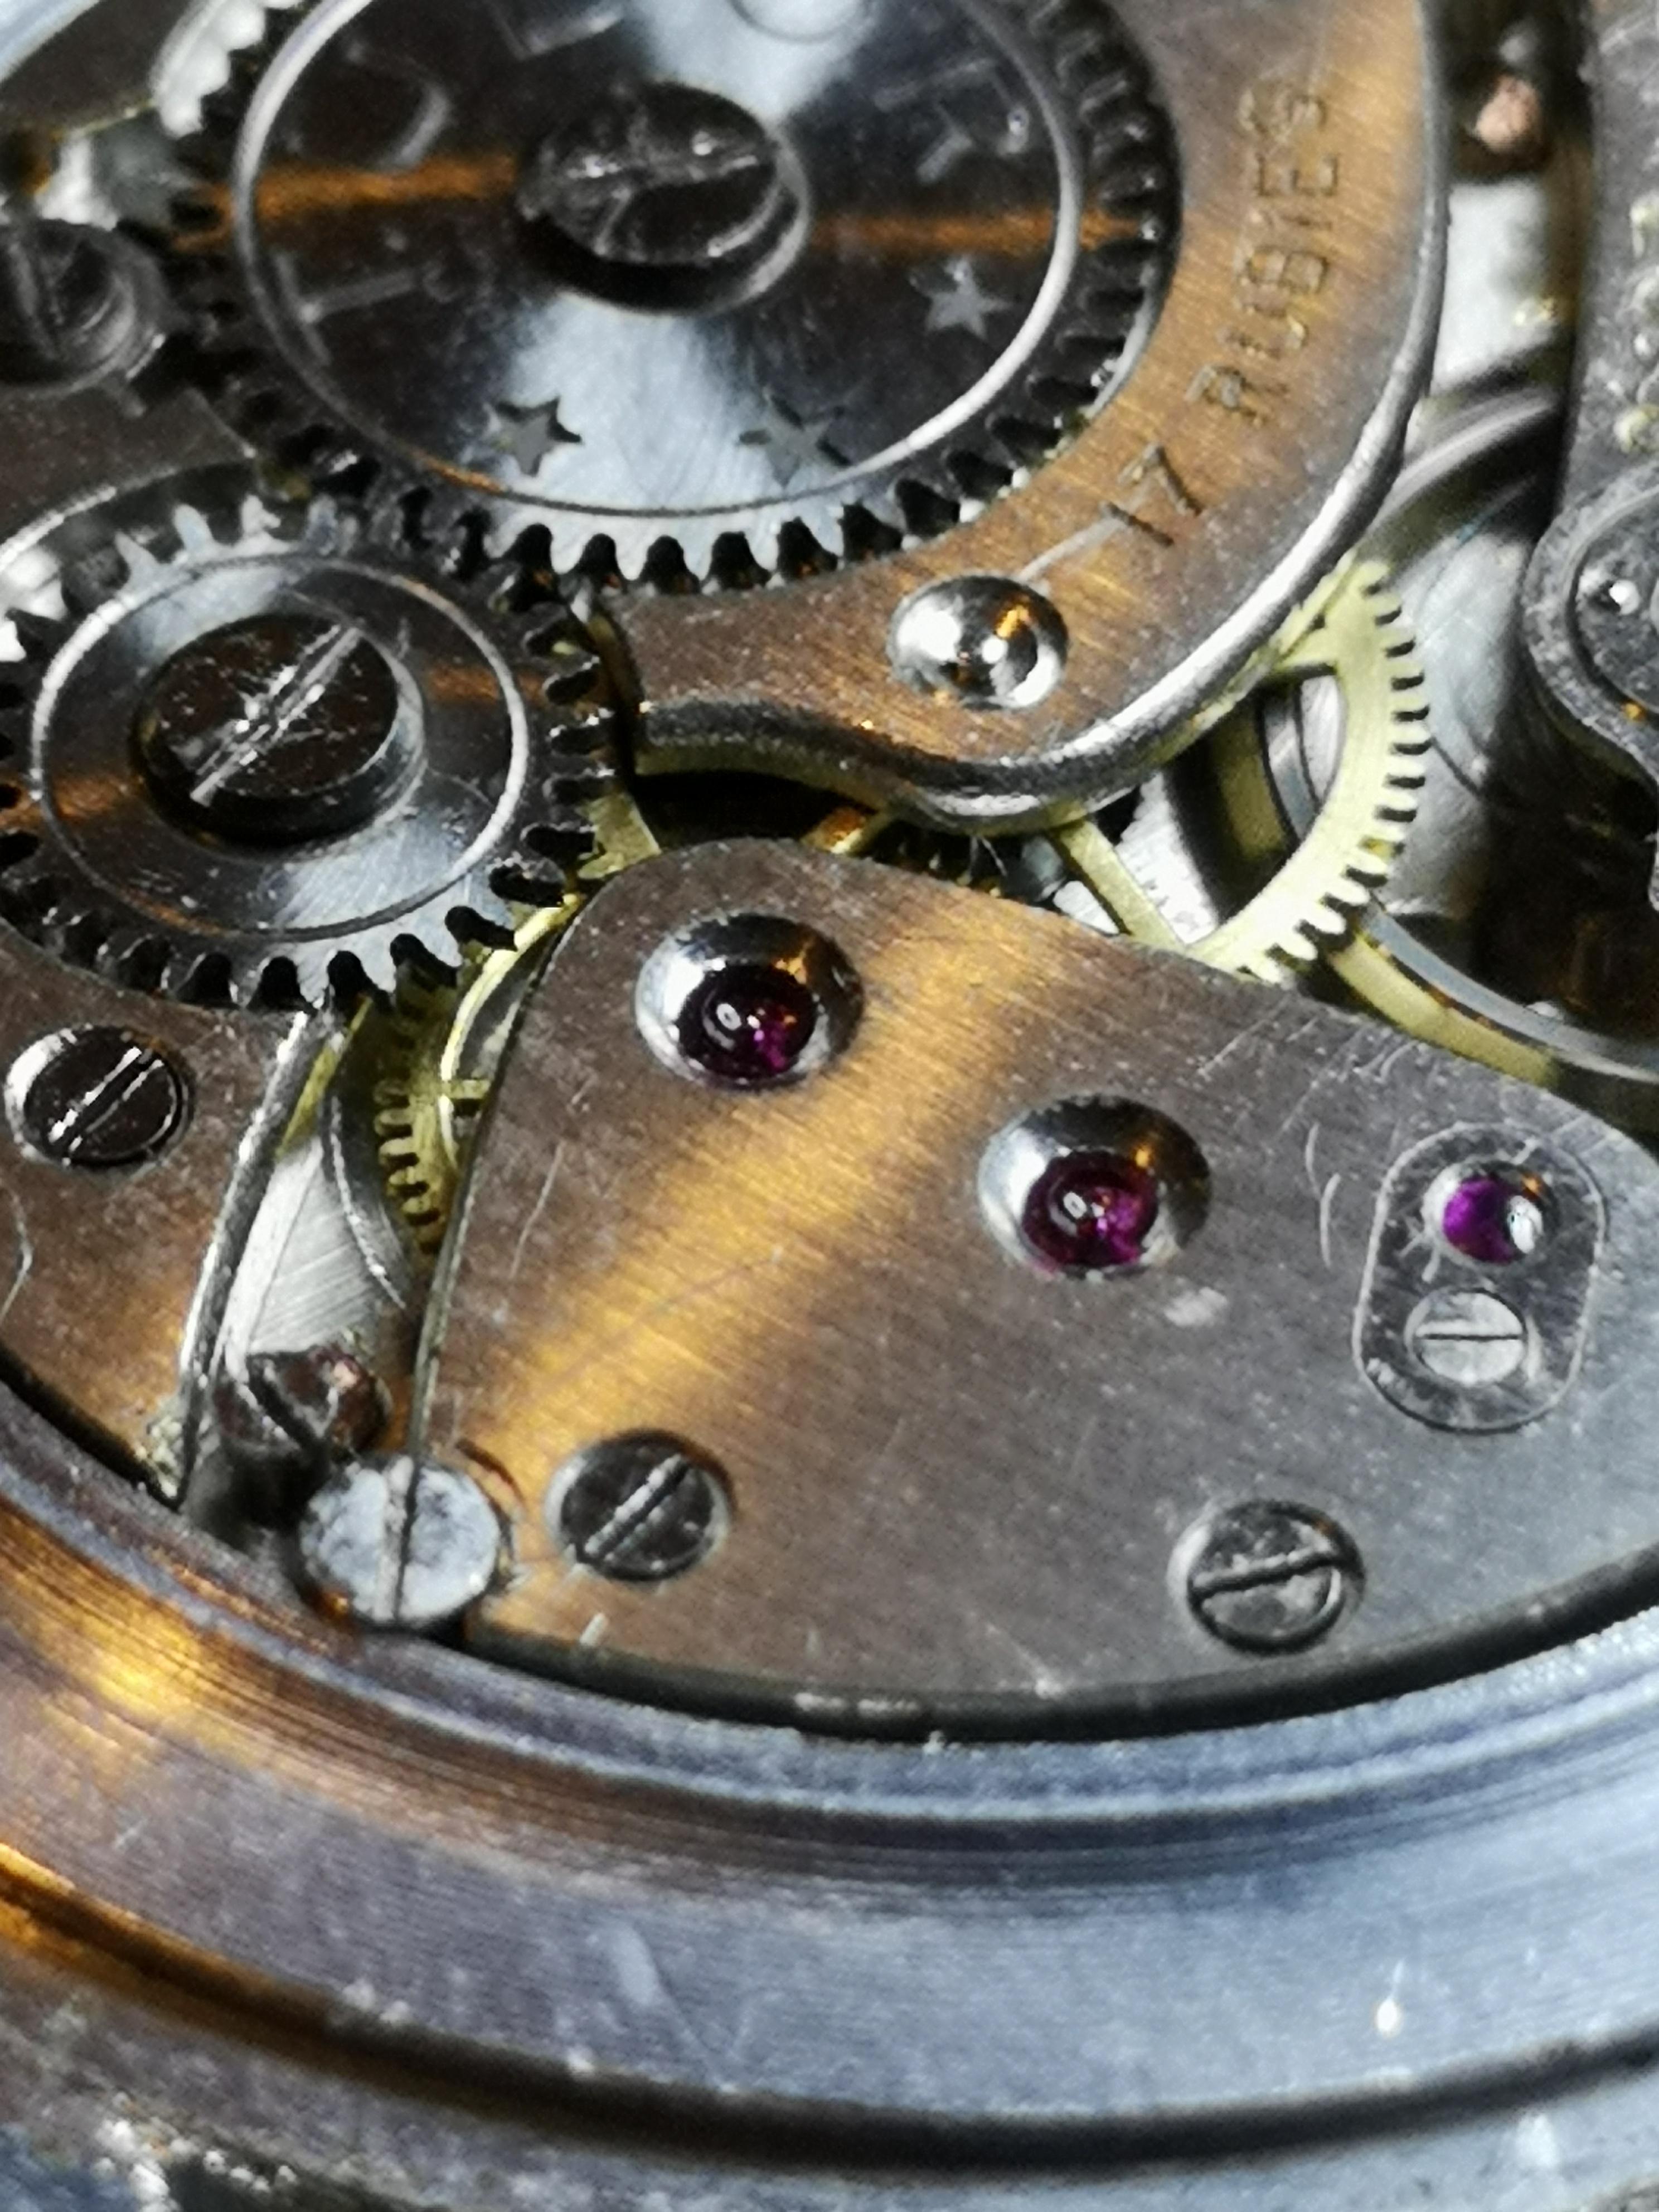
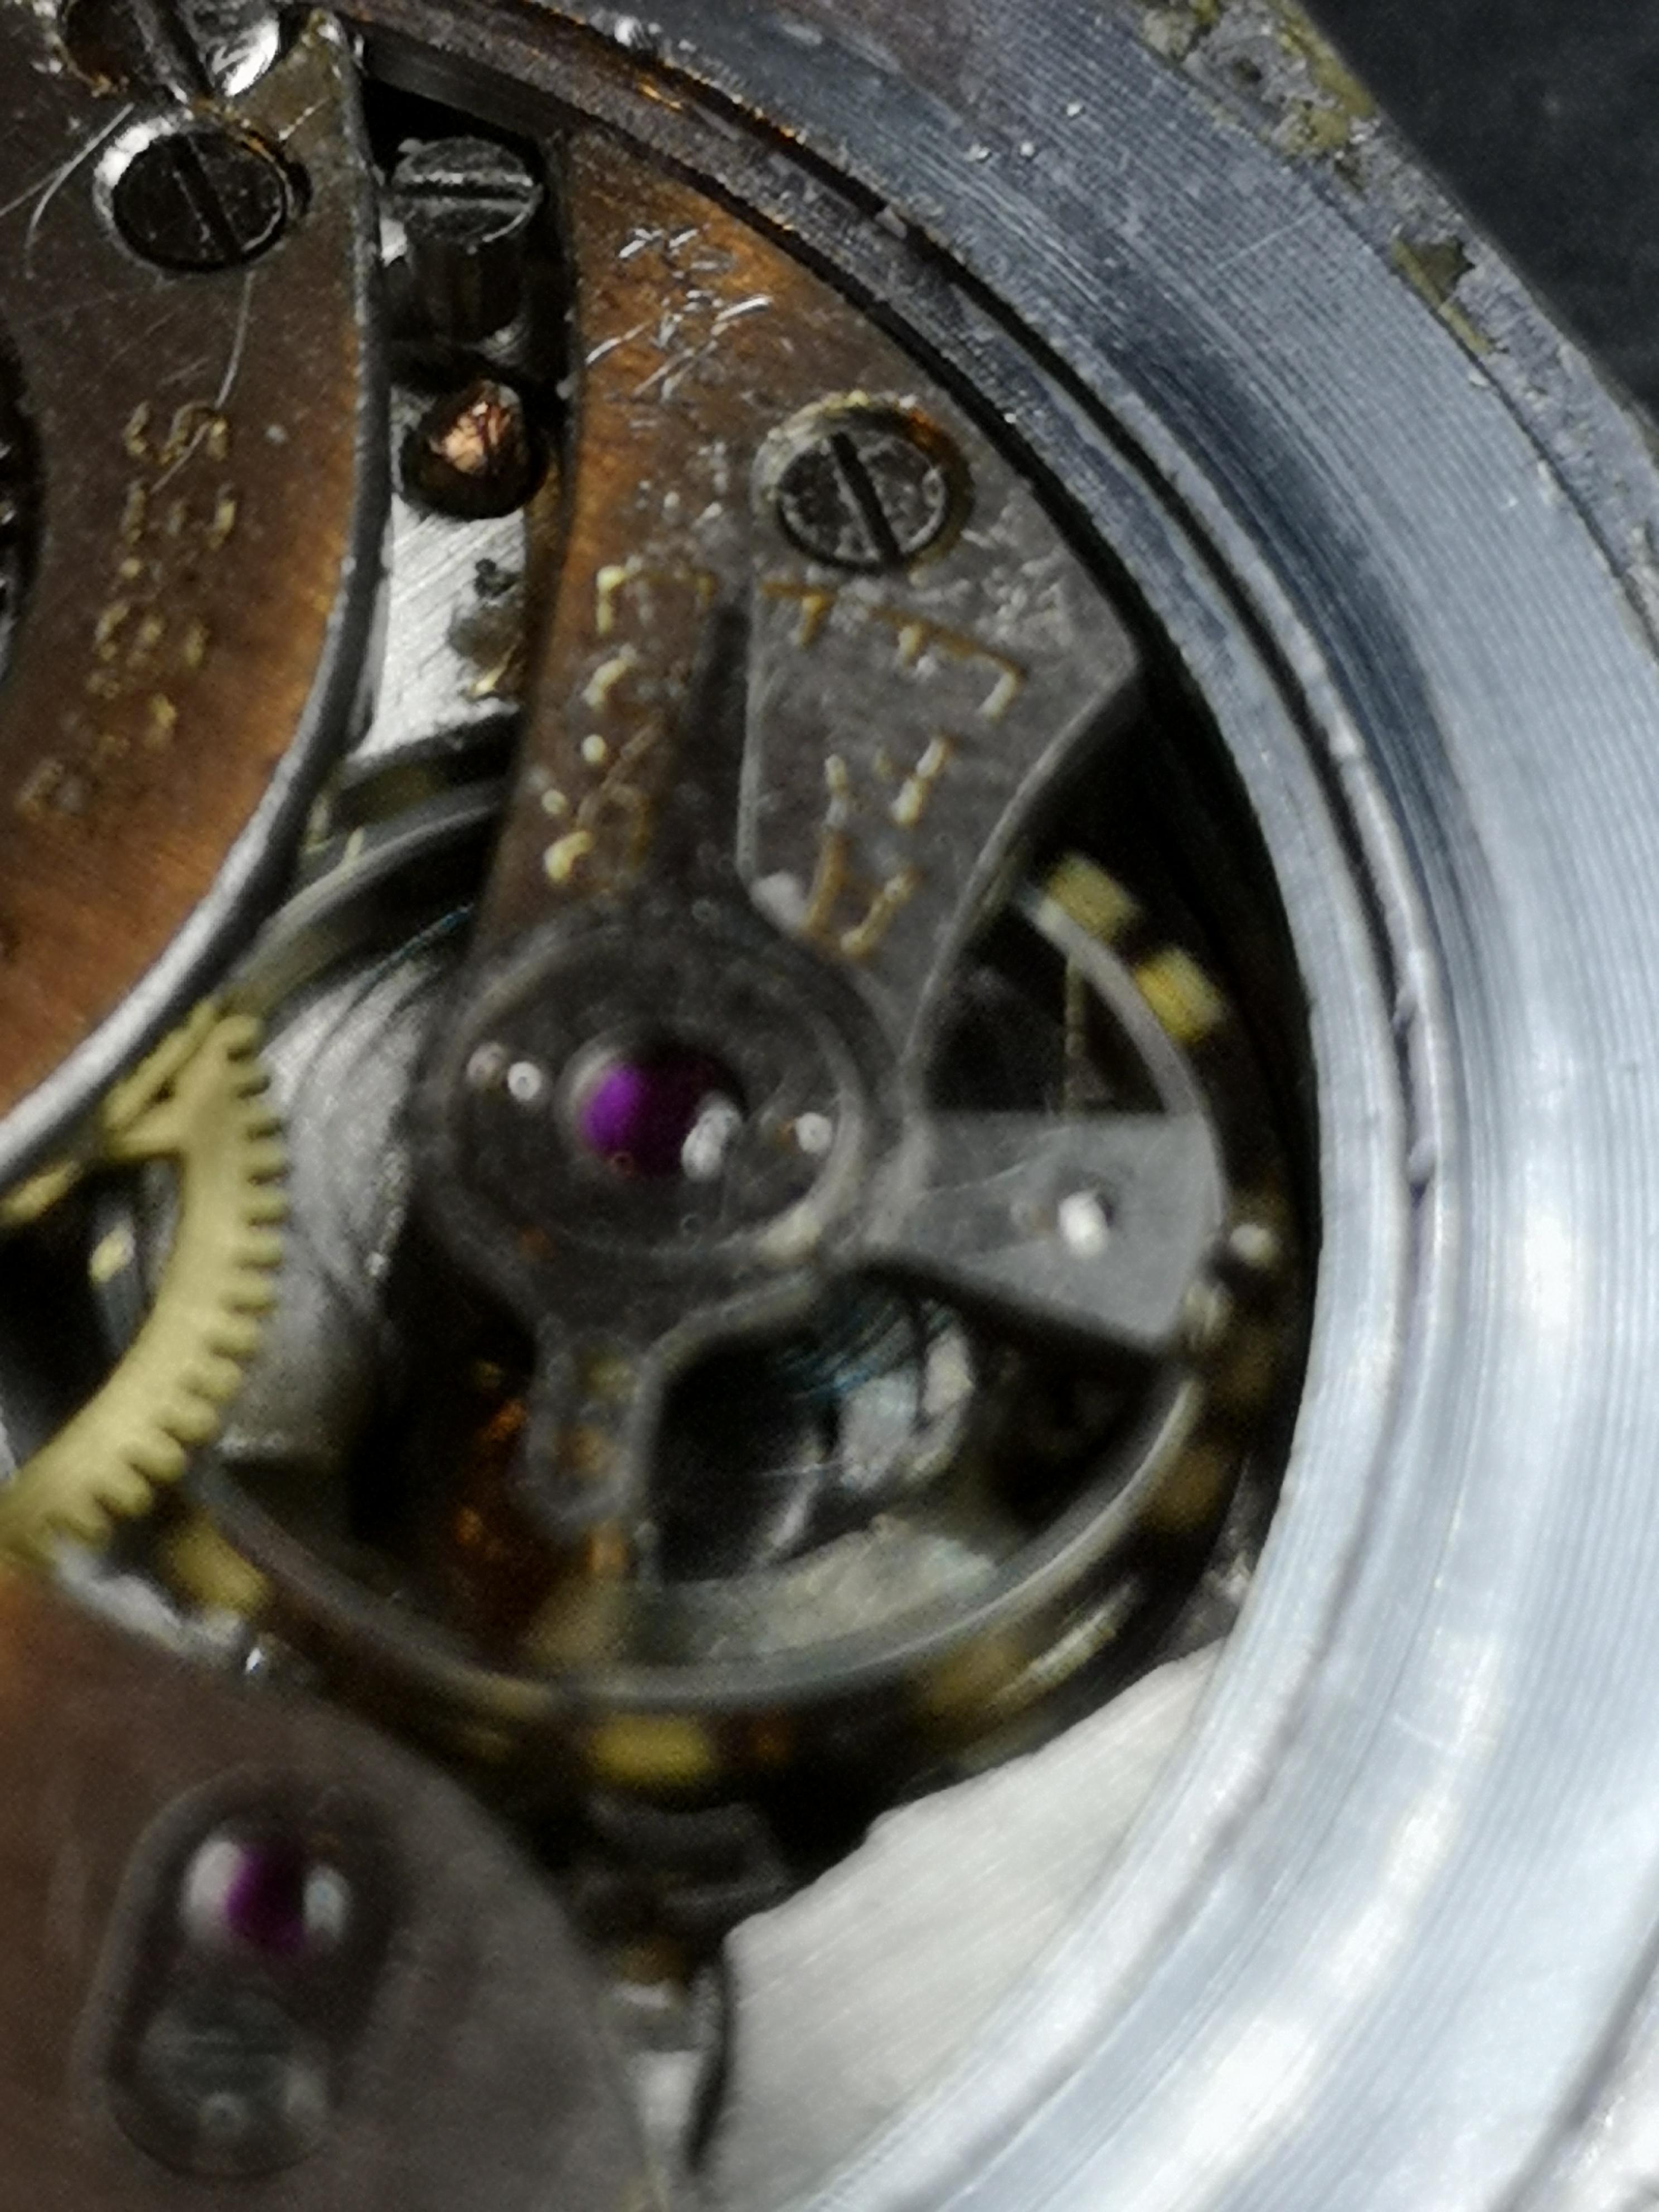
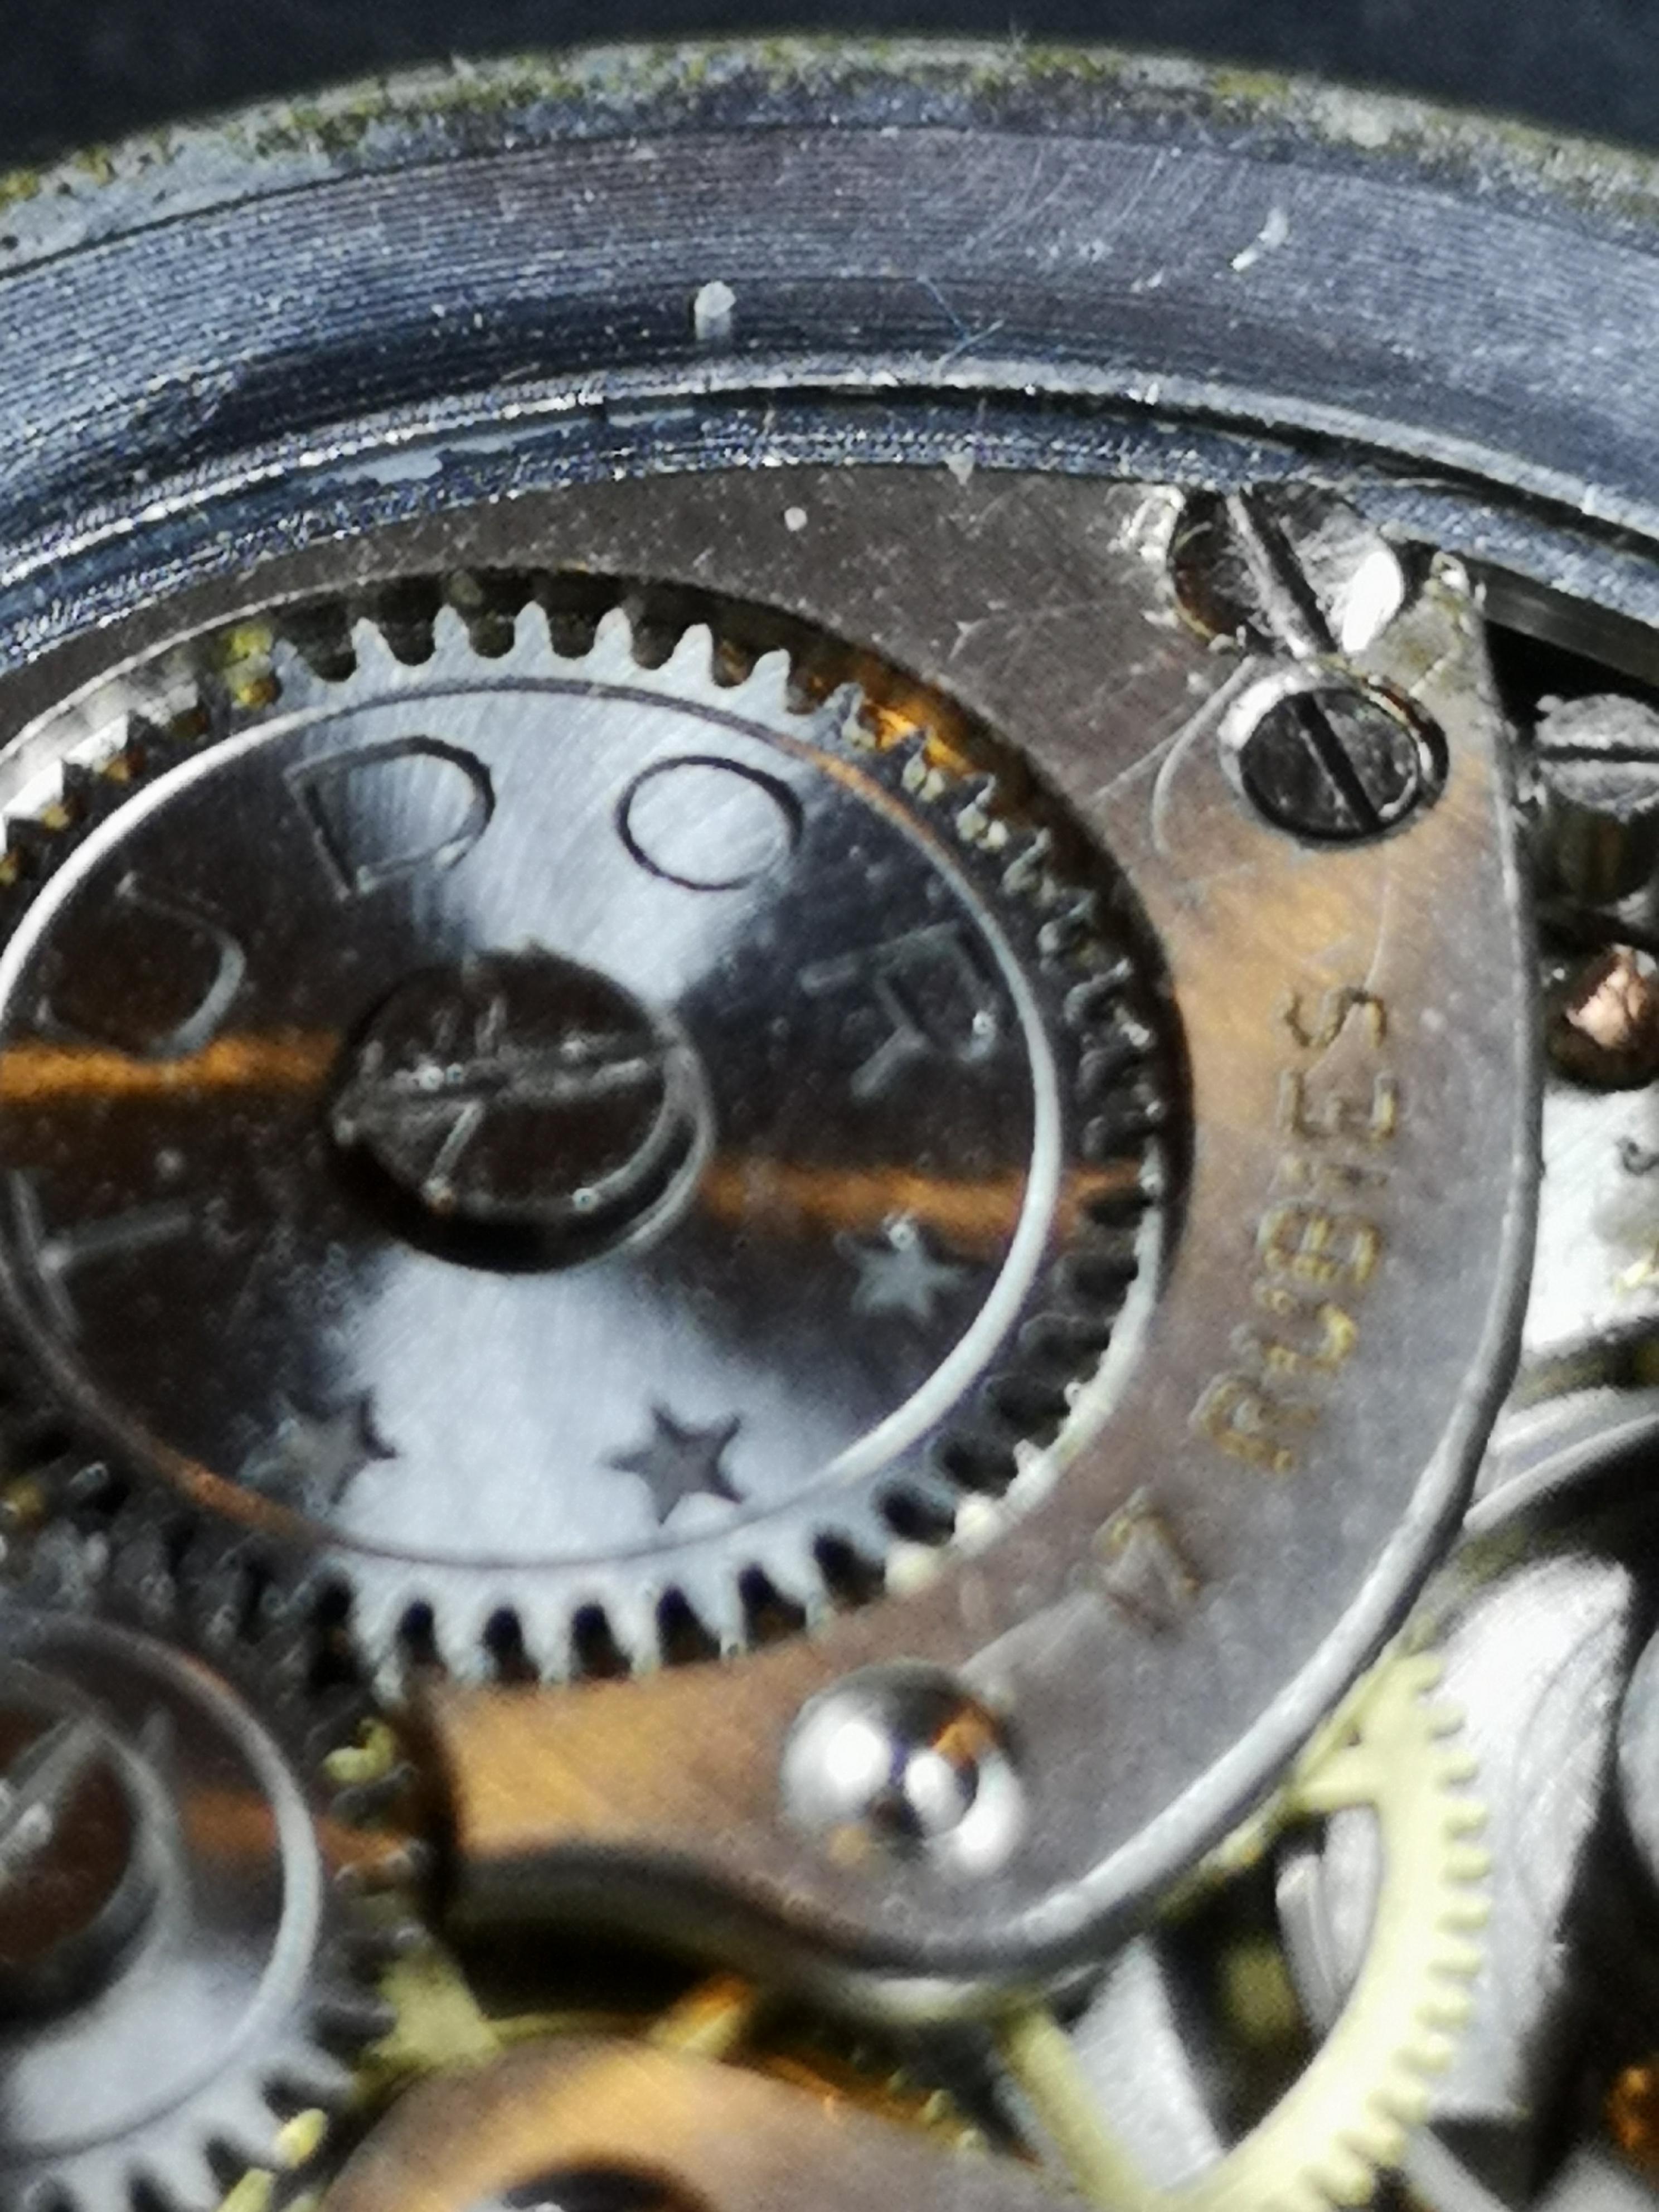
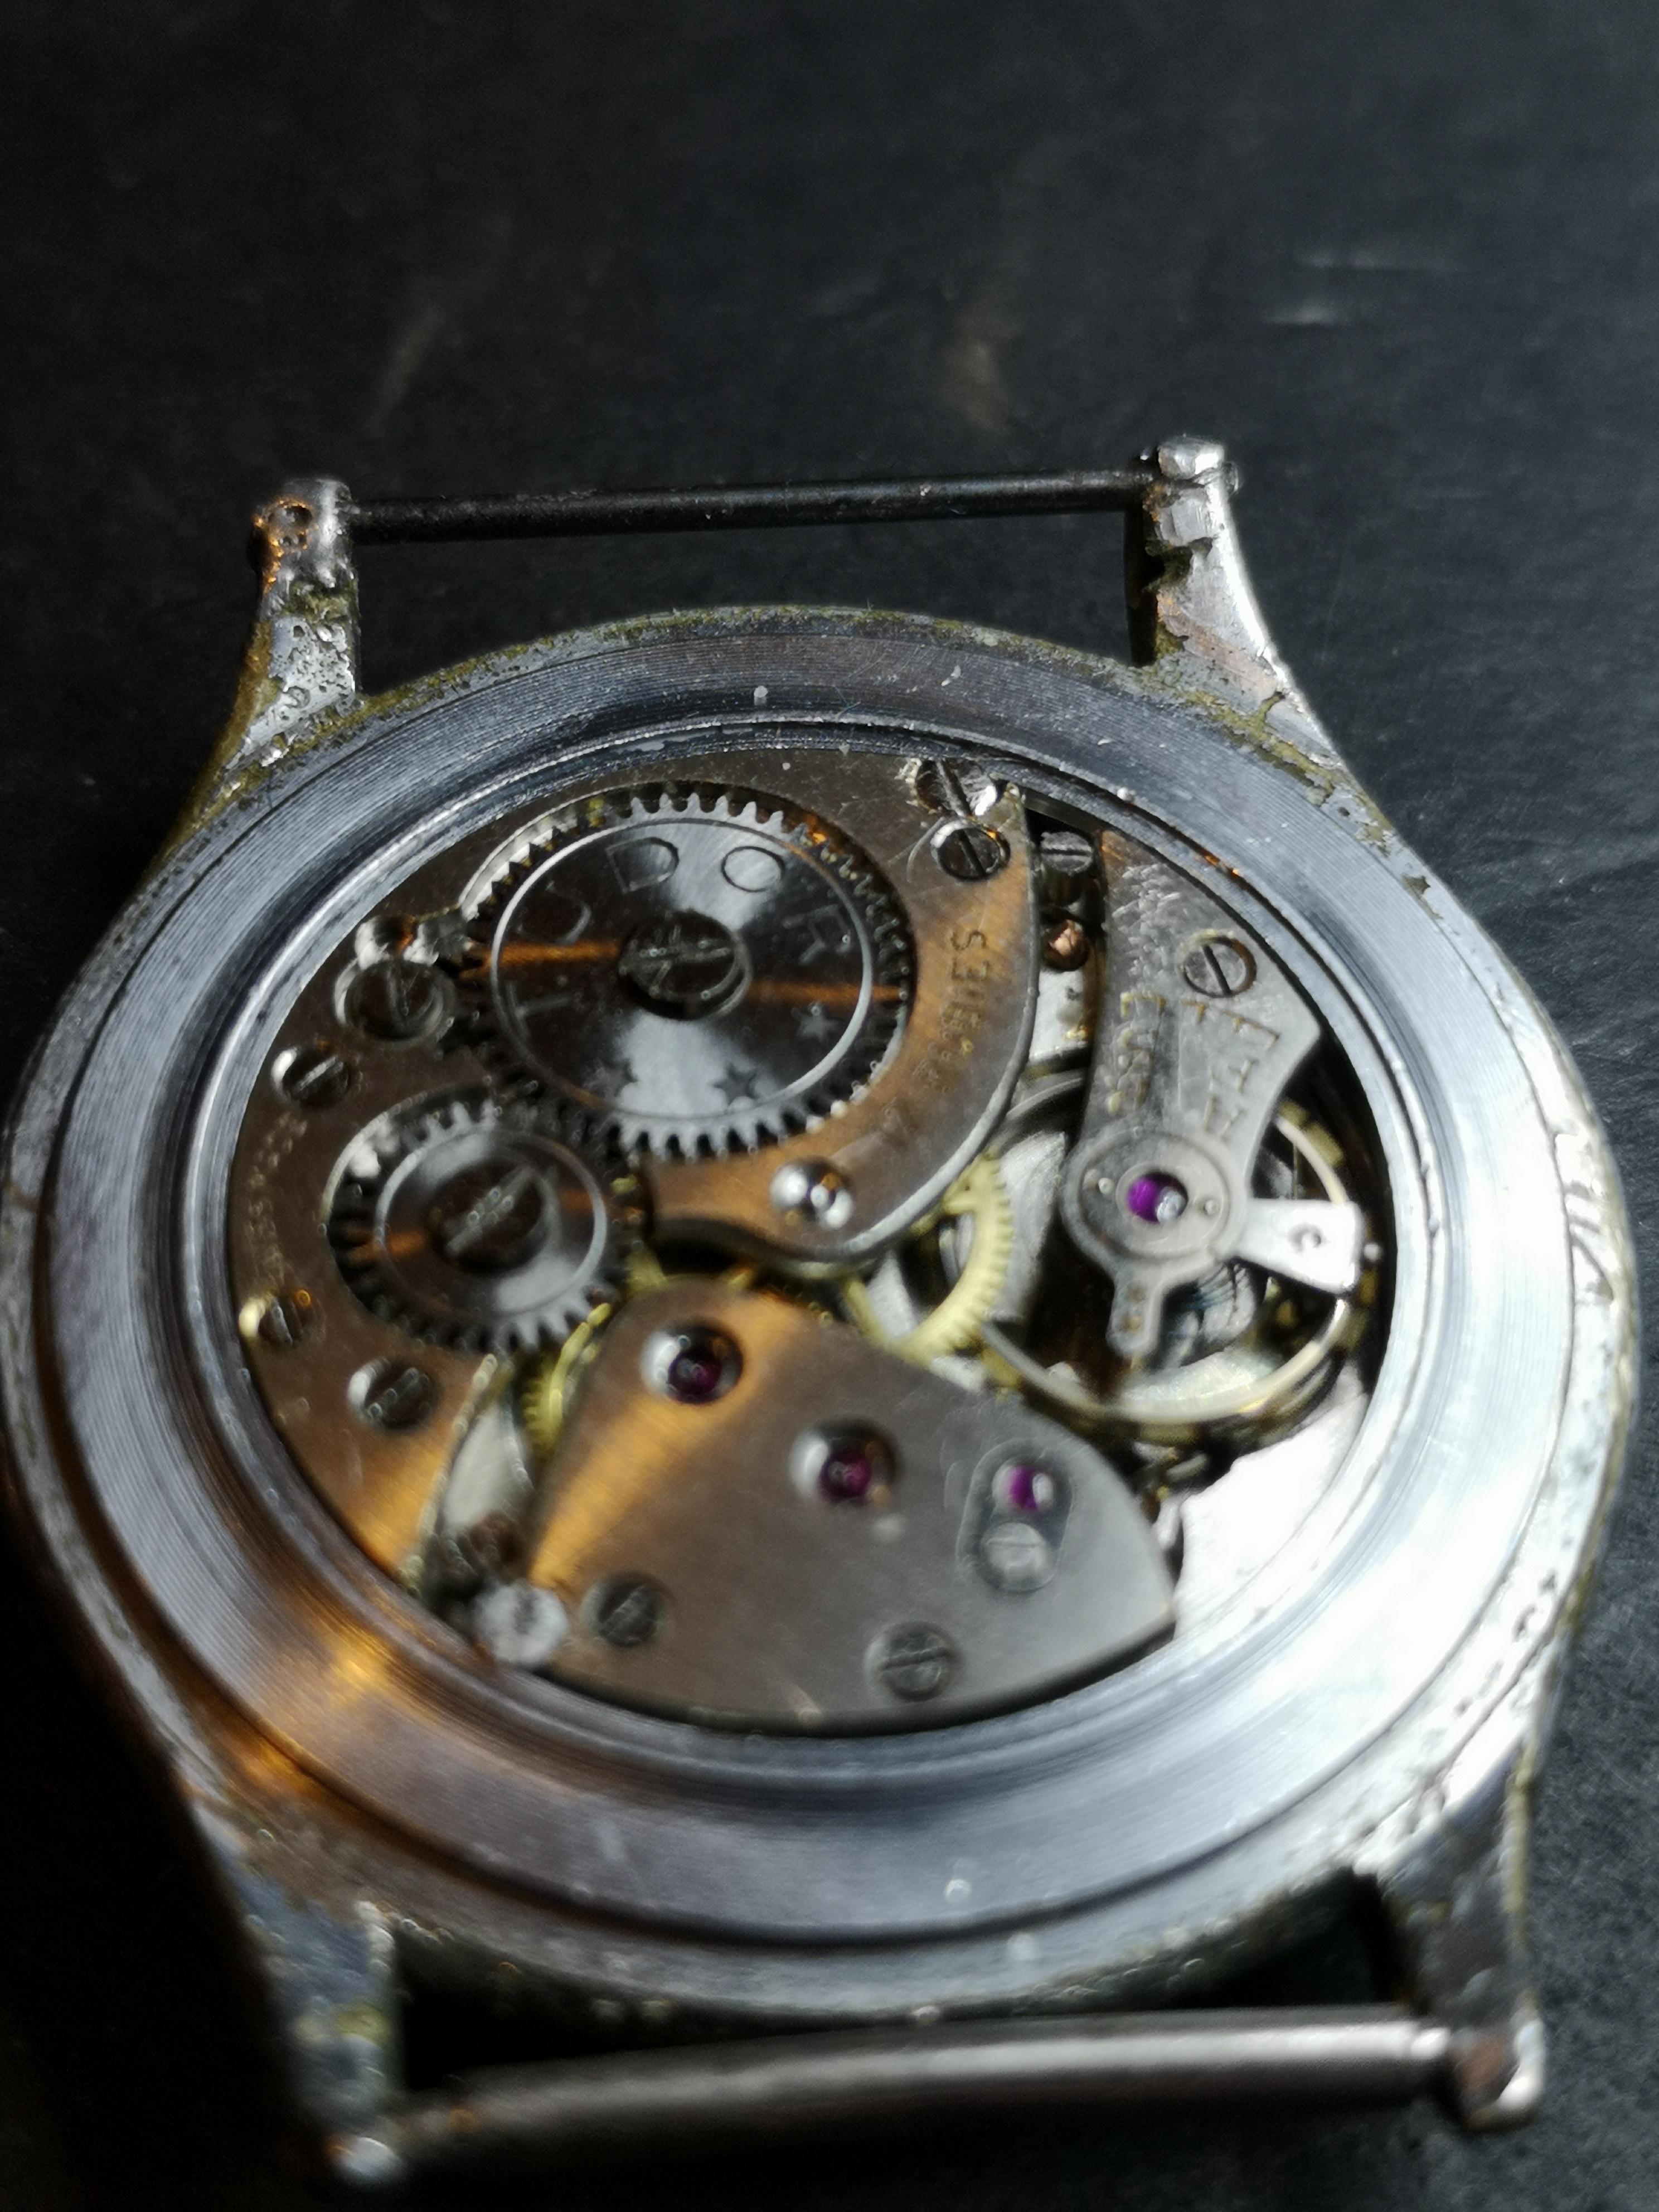
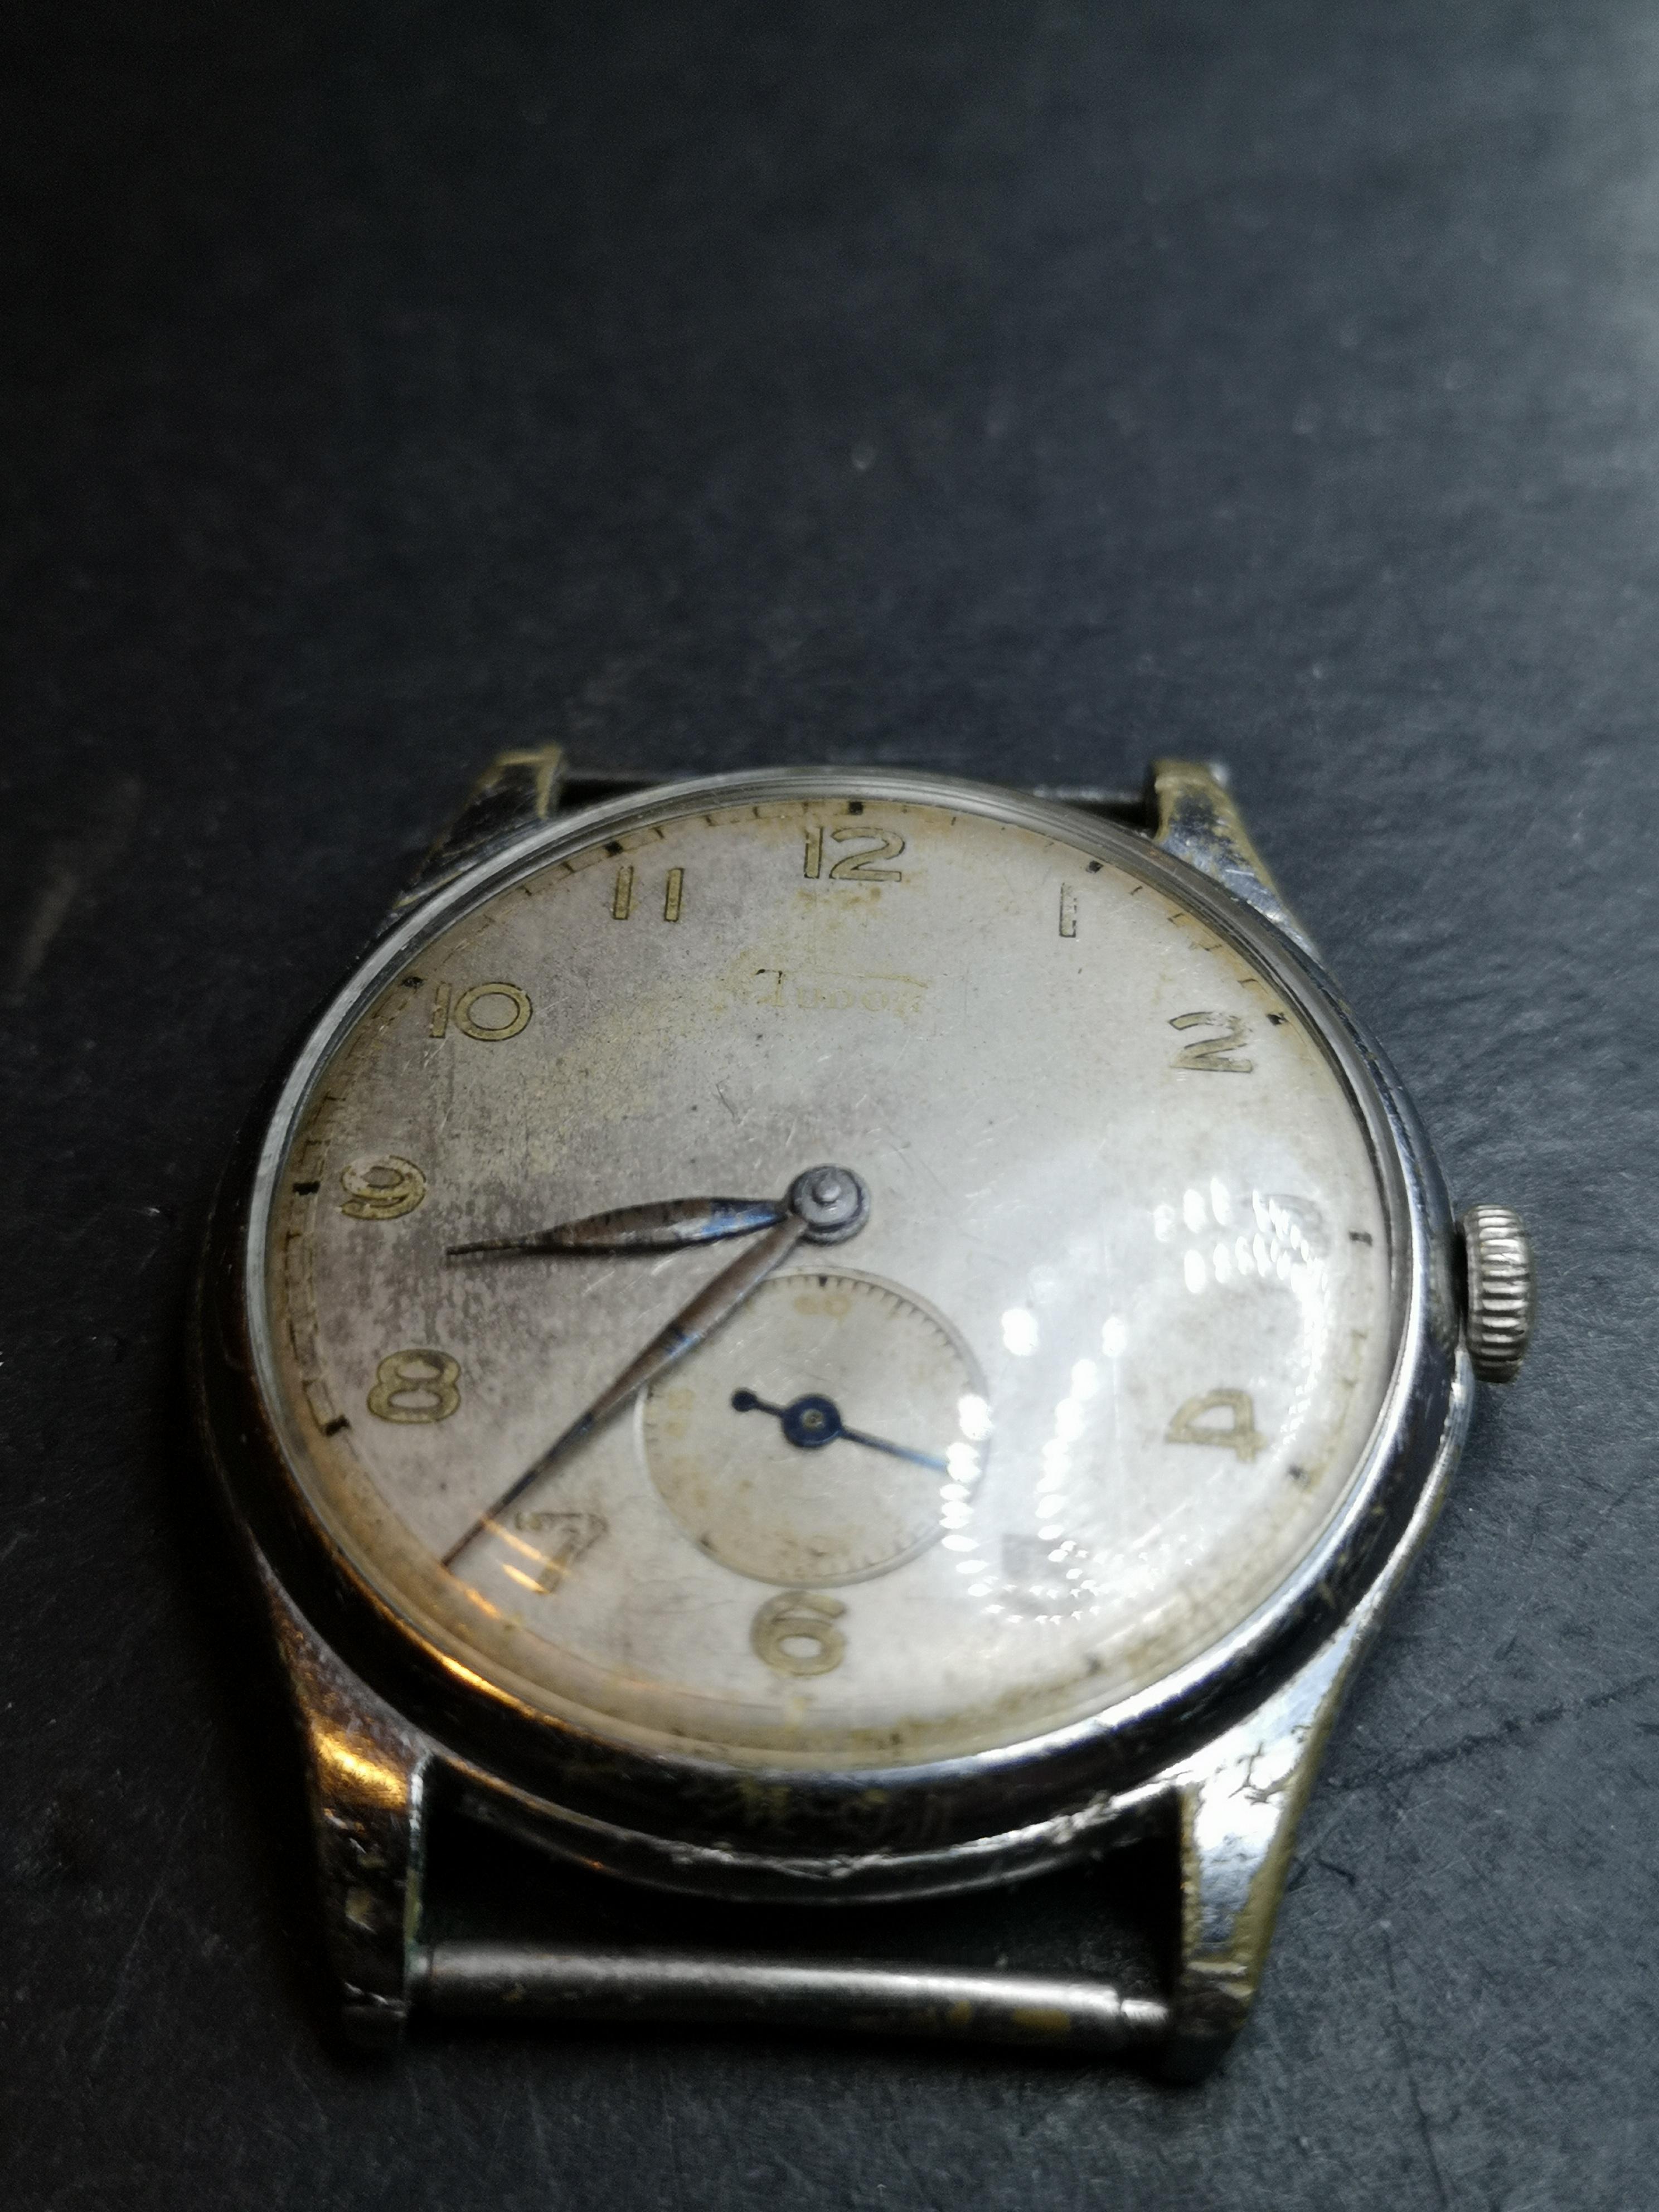
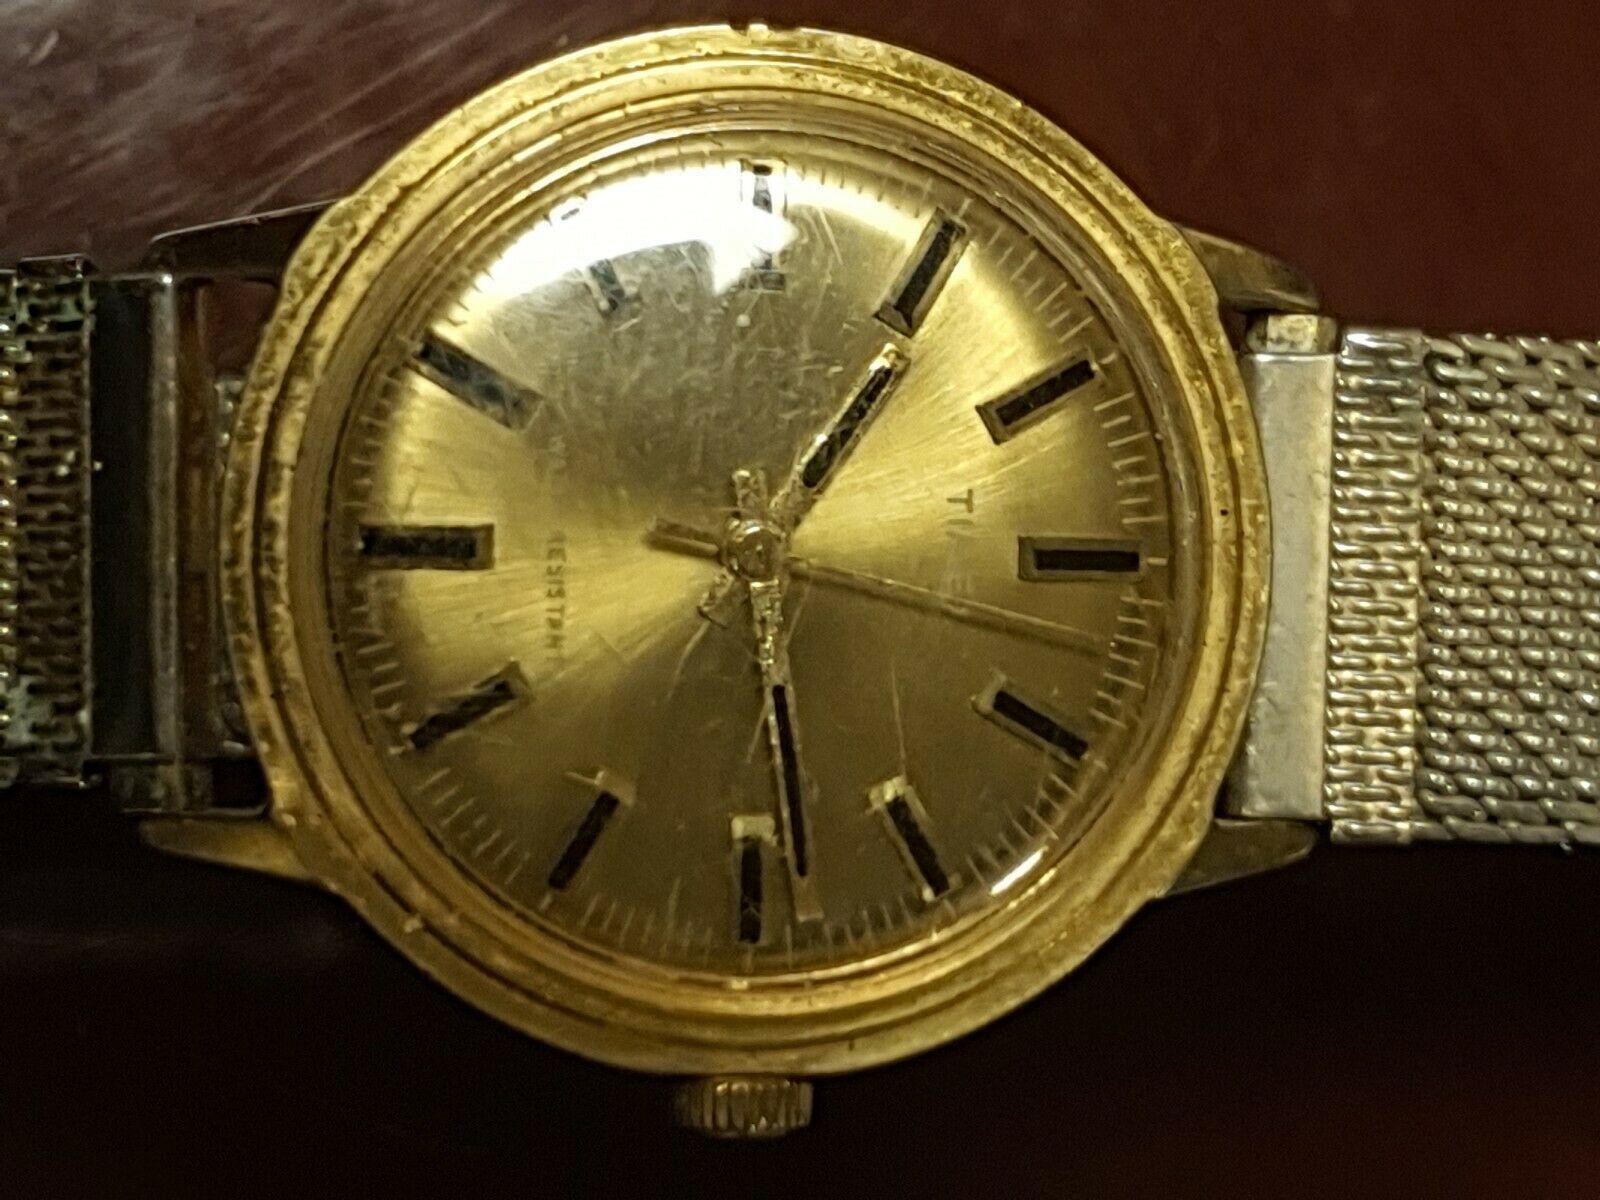
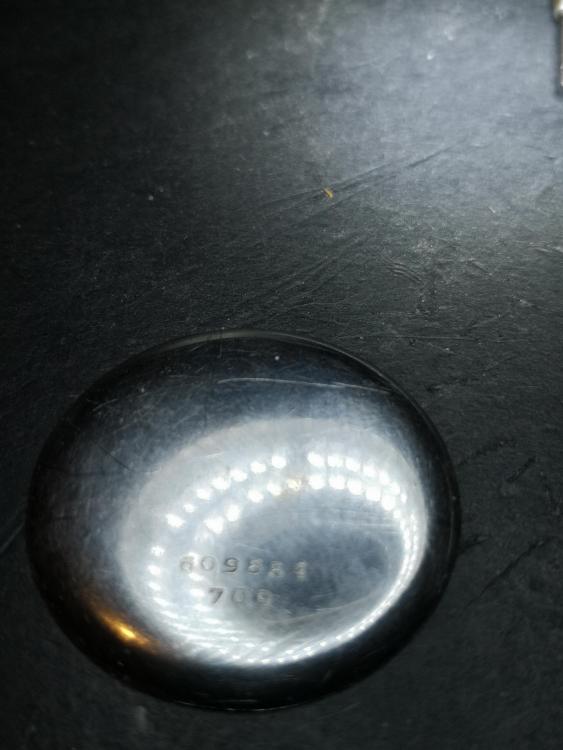
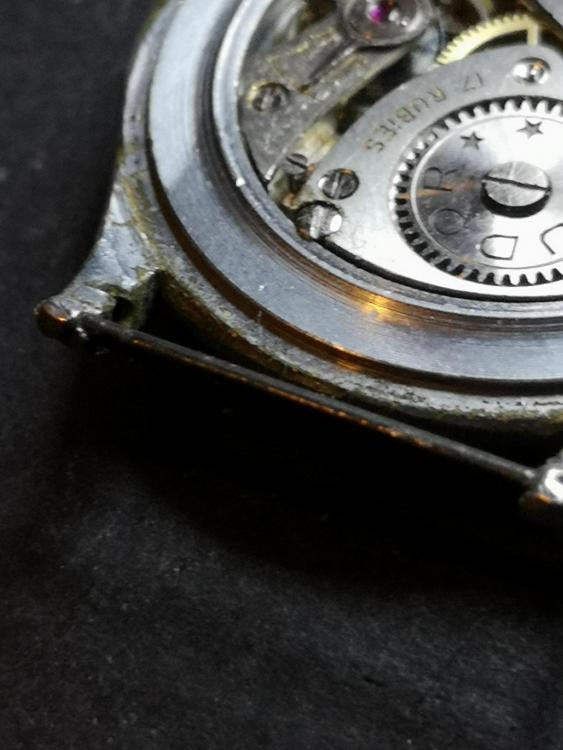
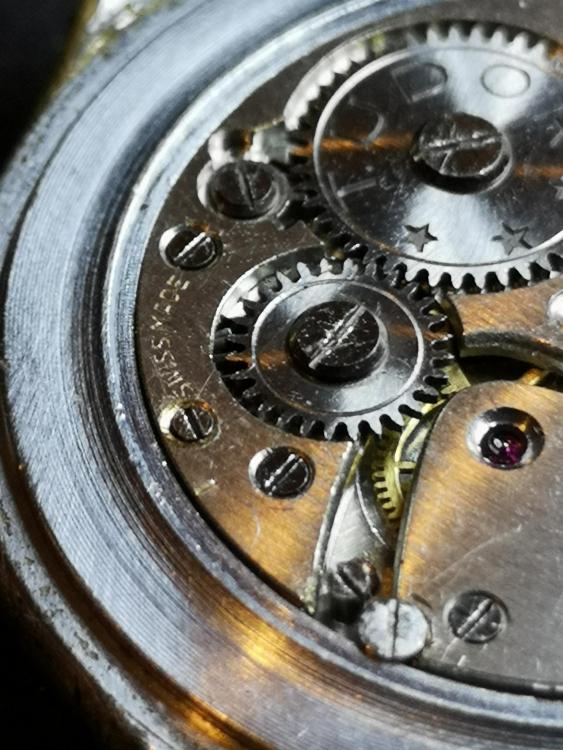
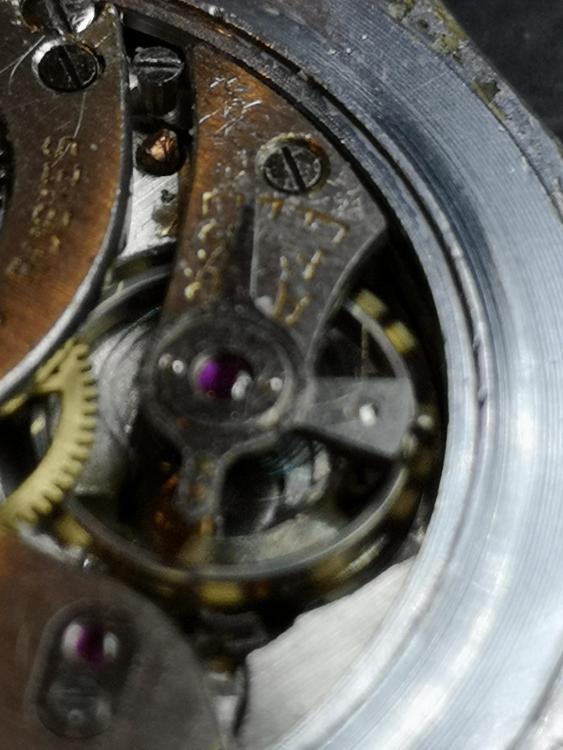
Hi can any one tell me any info on this tudor (i think its a tudor) face is badly faded. What make,cal, year it was made approx anything really. Car boot purchase. Checked on tudor site etc. nowt there. Im sure someone has come across another one like this. cheers guys gary


 1 point
 -
That is good news.1 point
-
Hi D, To remove, I push on the jewel housing from outside inward the Ebauche. Reinsert is from inside ebauche, with shock spring locked, ( empty of the jewels). I approach the desired repositioning ( for decent end shake) in small increments as I know of no tool that would drive the jewel in by calibrated micrometer action. I hope this helps.1 point
-
where can I post all of my tools to get an idea of what I have as opposed to what I need.1 point
-
Hi Gary have a shufty on the bay there are some electronic scopes on there probably chinese reasonably priced and do a reasonable job. Ihave one and had no problems with it. A double lens loupe of suitable magnification should enable you to fit the spring ok. The method I have used is re fit the stud to the cock lay the balance on the cock, remove the pin and manipulate the spring into the hole then fit the pin, tight enough to hold it in position so that when re fitted to the movement any timing issues can be addressed by altering the spring in situ. As mentioned by Rduckworth its a PIA and takes a lot of patience to achieve1 point
-
Another job lot winging its way from the e of bay. This little lot worked out at £1.14 each +(P&P) each. There is also a tin of random dials thrown in for good measure. Fixing that lot should keep me out of trouble for a few days.1 point
-
Welcome Sent from my iPad using Tapatalk Pro1 point
-
That.s a nice looking watch.Looks like a gents dress watch. The trouble with cases that have corners, they are more inclined to let dirt in. Looks like a chip top right or poor fitting, dirt will get in quickly.1 point
-
Hey Yer removed brass pin and the stud. Only thing is now i do not have the magnification to see them close enough to attempt to try to slip the HS through the stud hole. Hope santa brings me a scope that i can use to see them. Thanks for your help. Im sure it would have worked if i could just see the damn parts. cheers gary1 point
-
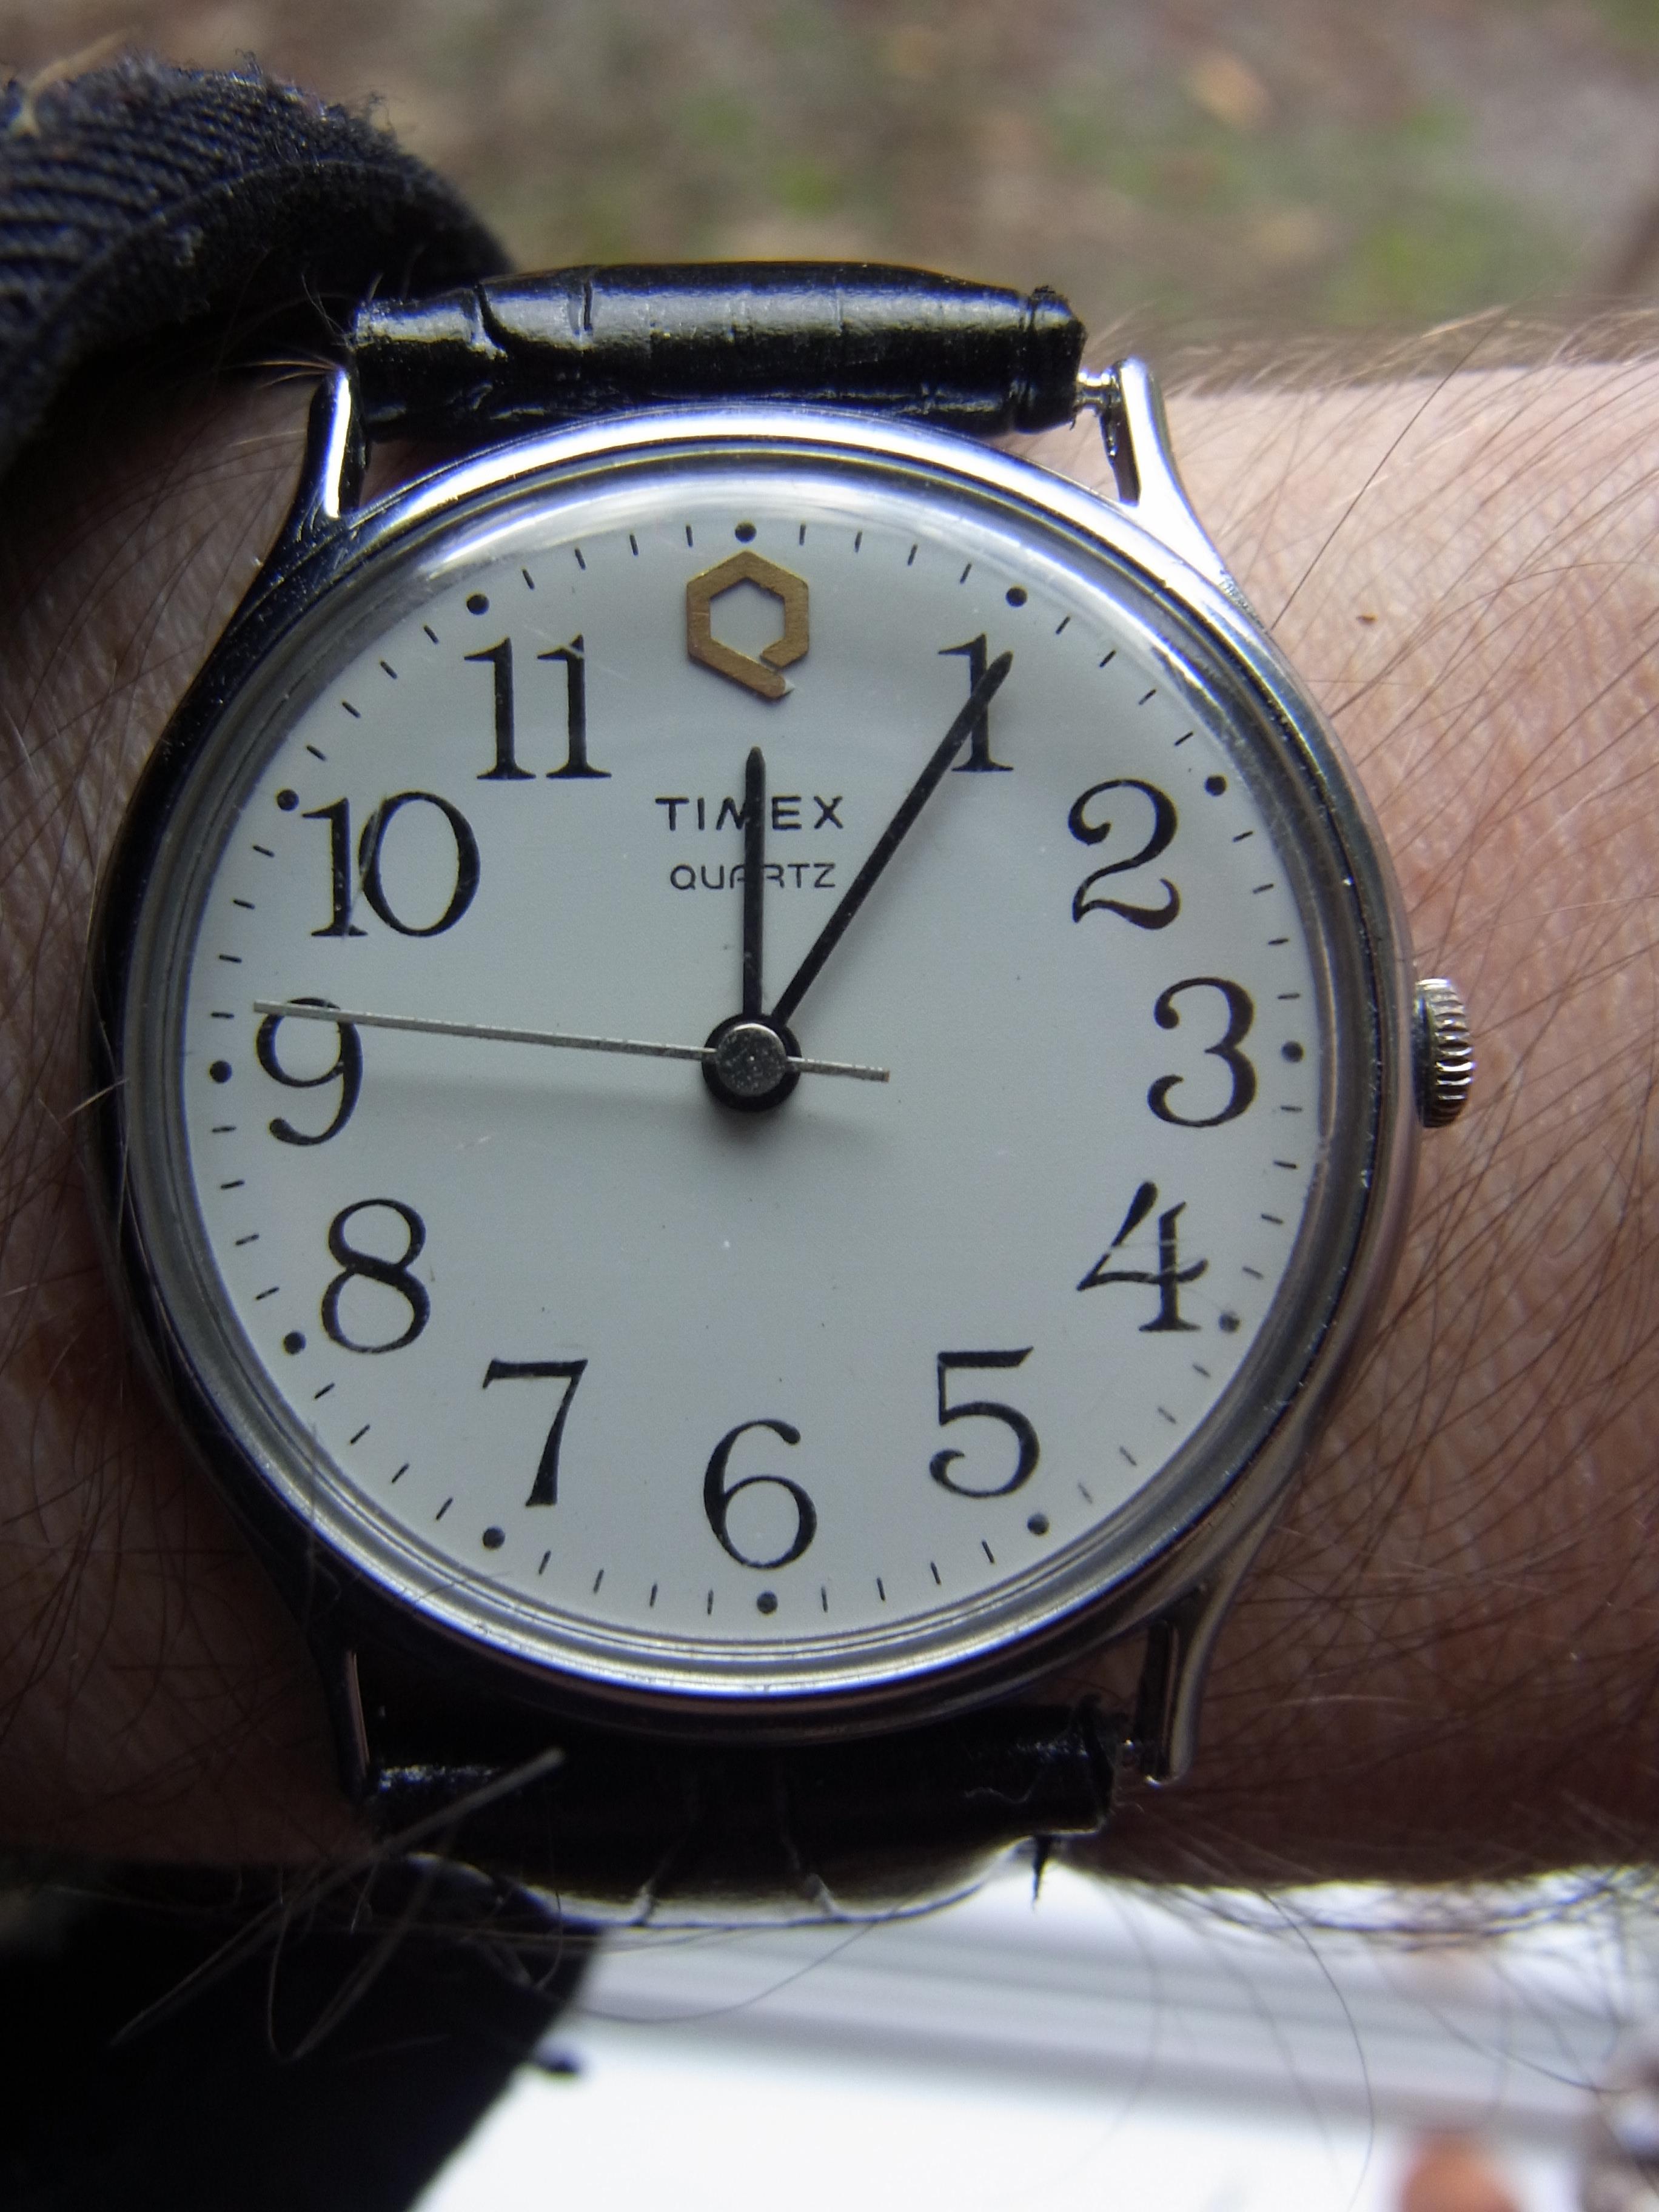
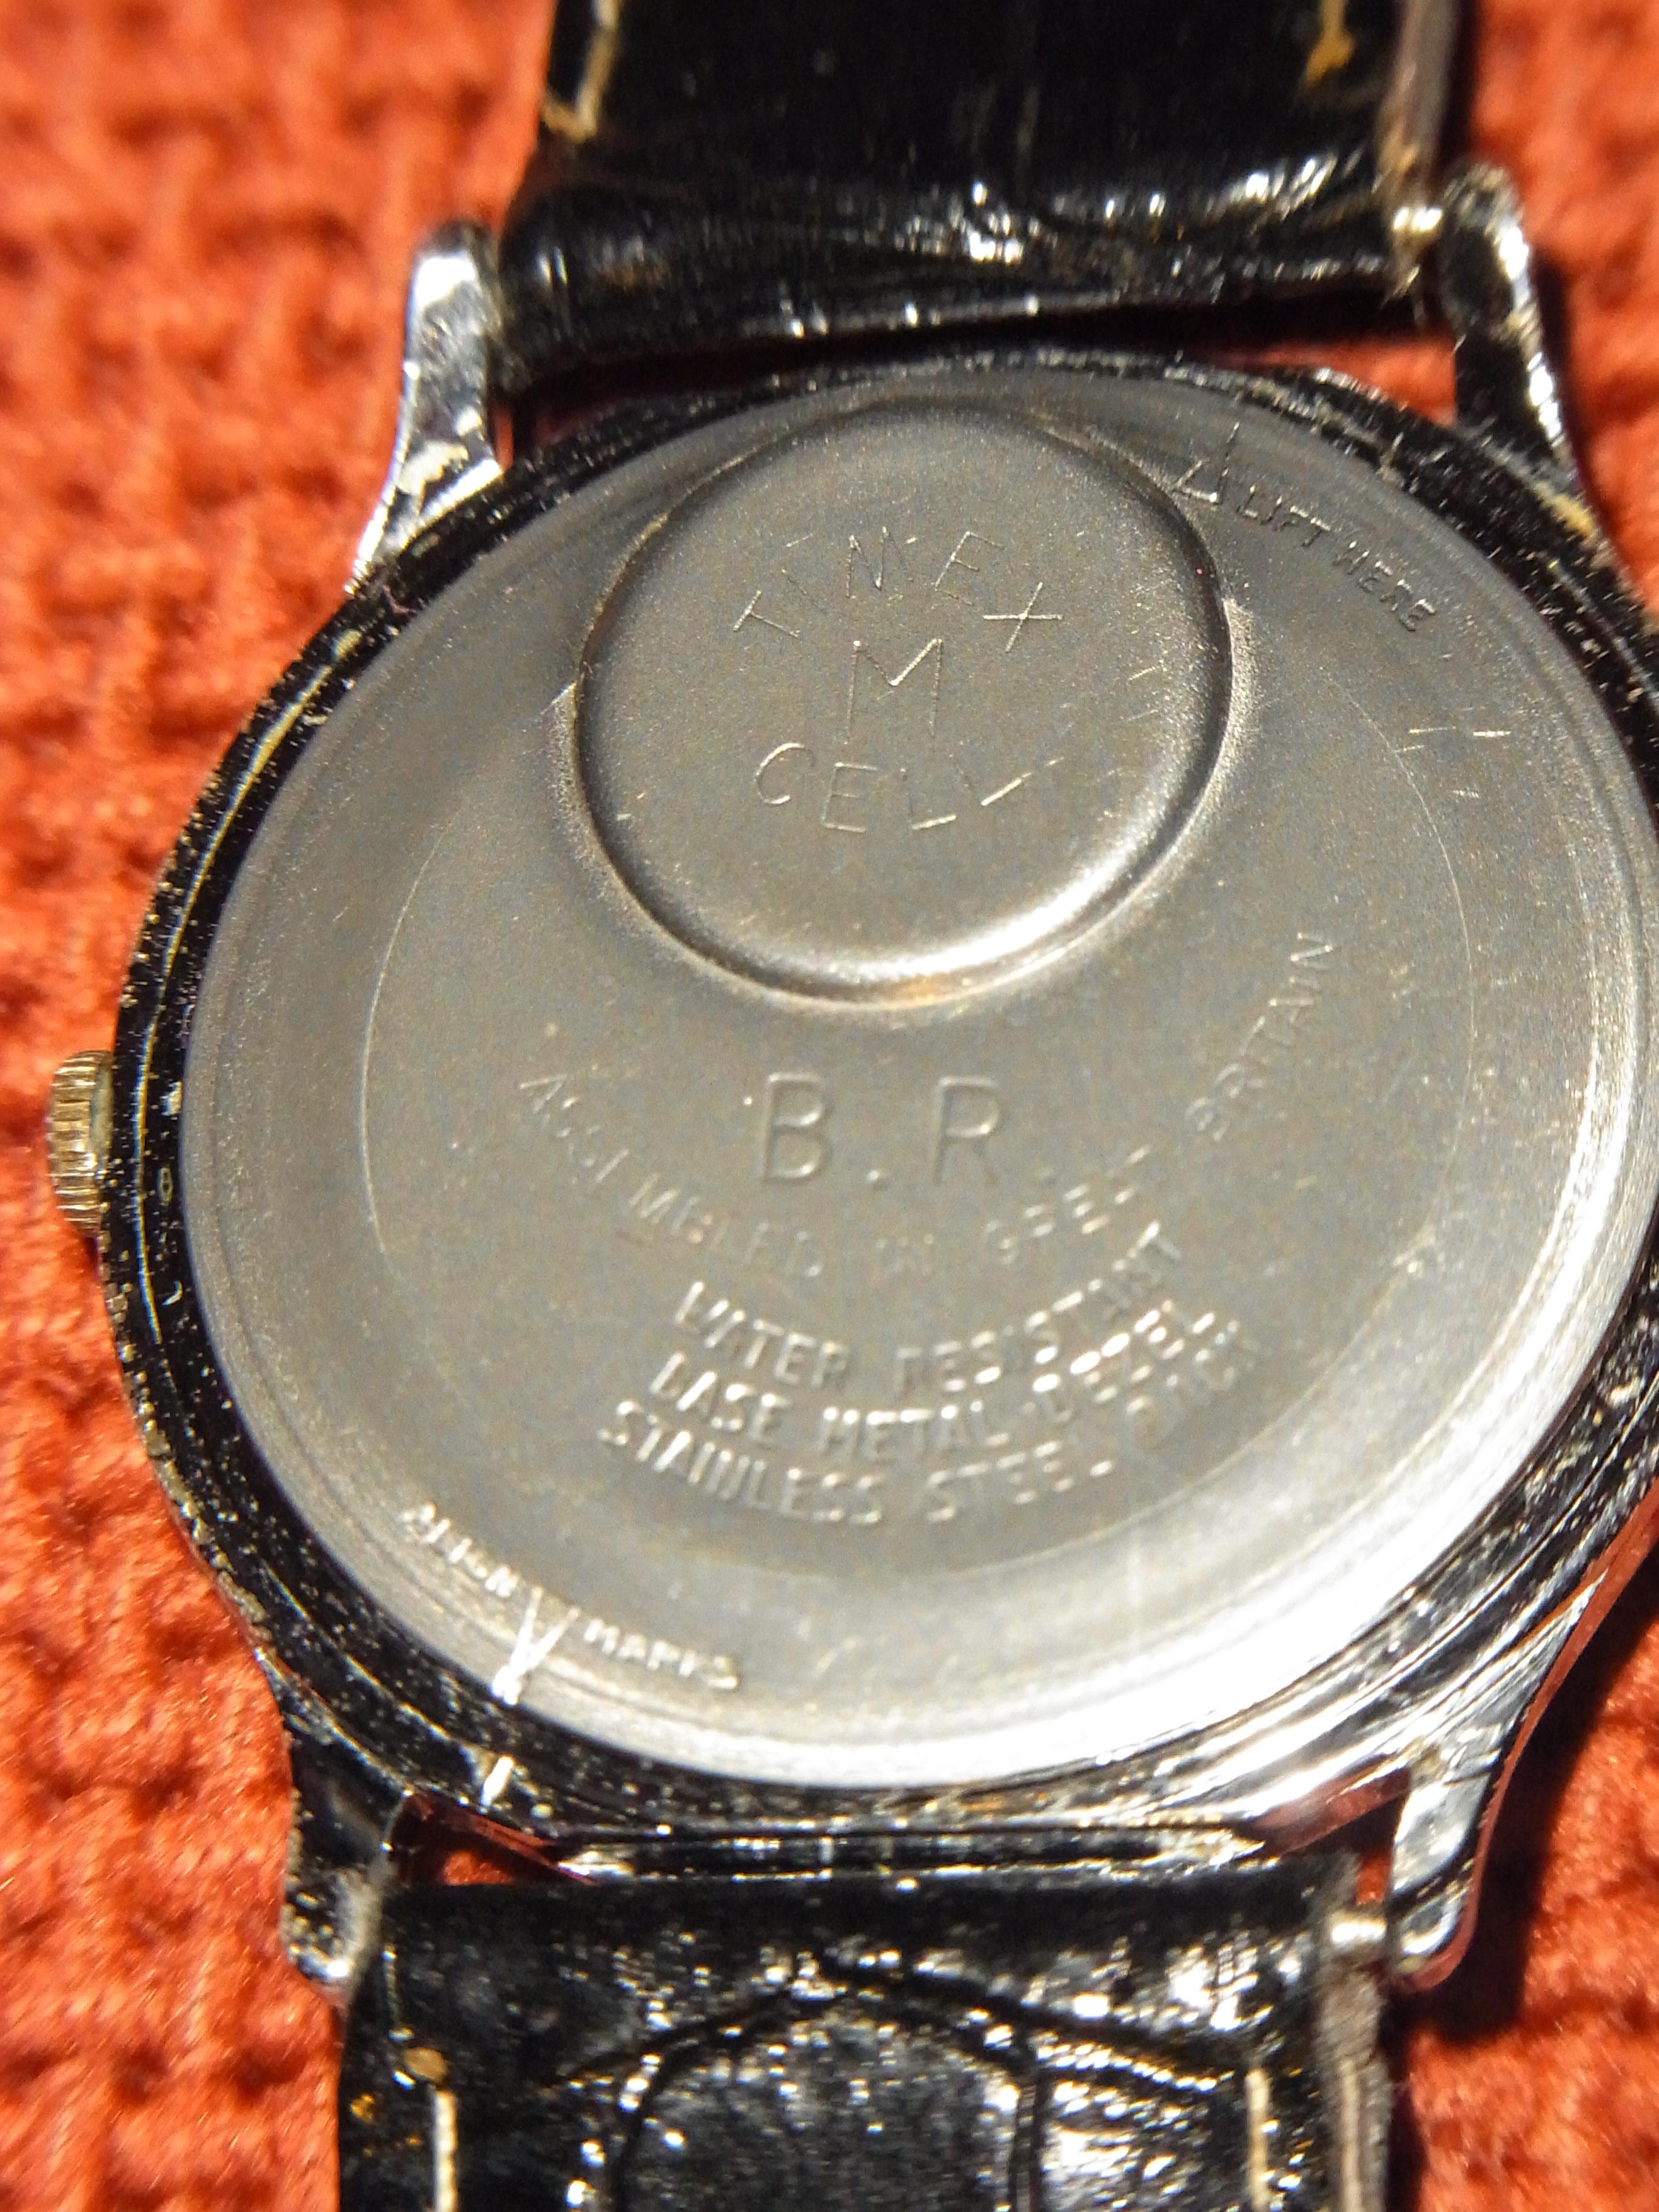
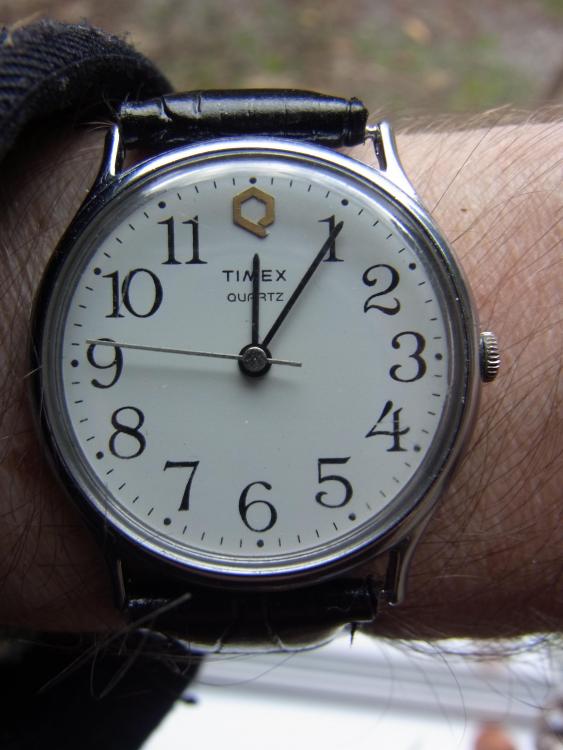
Railway time today, in the form of a British Rail Timex "Q" I posted about one of these a while back, with a made in France dial. This one is similar but different. This one appears to be from Dundee, but the exact date of production is not obvious. It must be pre- 1997 since that was when British Rail was "privatized" (or arguably the profit was privatized and the loss was subsidized, but that is a whole 'nother story). The watch arrived sans pins or strap, in a filthy condition and listed as spares or repairs, not working, but a quick scrub and brush up, and a fresh 'Timex "M" cell' (AG10) and off it went. These high readability dials are perfect for telling the time at a glance, or waving at customers as they charge along the platform trying to jump in to the moving carriages, or indeed ensuring you don't miss your thirteenth tea break of the day as you sit in the warmth of the guards van, guarding a few bashed parcels an old milk churn and a tandem with a wonky back wheel, or whatever other junk the traveling public has entrusted to your care that day. It has a few remaining battle scars, but that is just part of its history. Whether it spent its life with the 'romance' of "The Calendonian" Inverness sleeper trains or passed its days trundling back and forth on the eight fifteen to Bognor, we will never know.
 1 point
 -
HMT on original bracelet, just serviced, looking more original than any I've had from eBay.
 1 point
 -
7a28-7040 today1 point
-
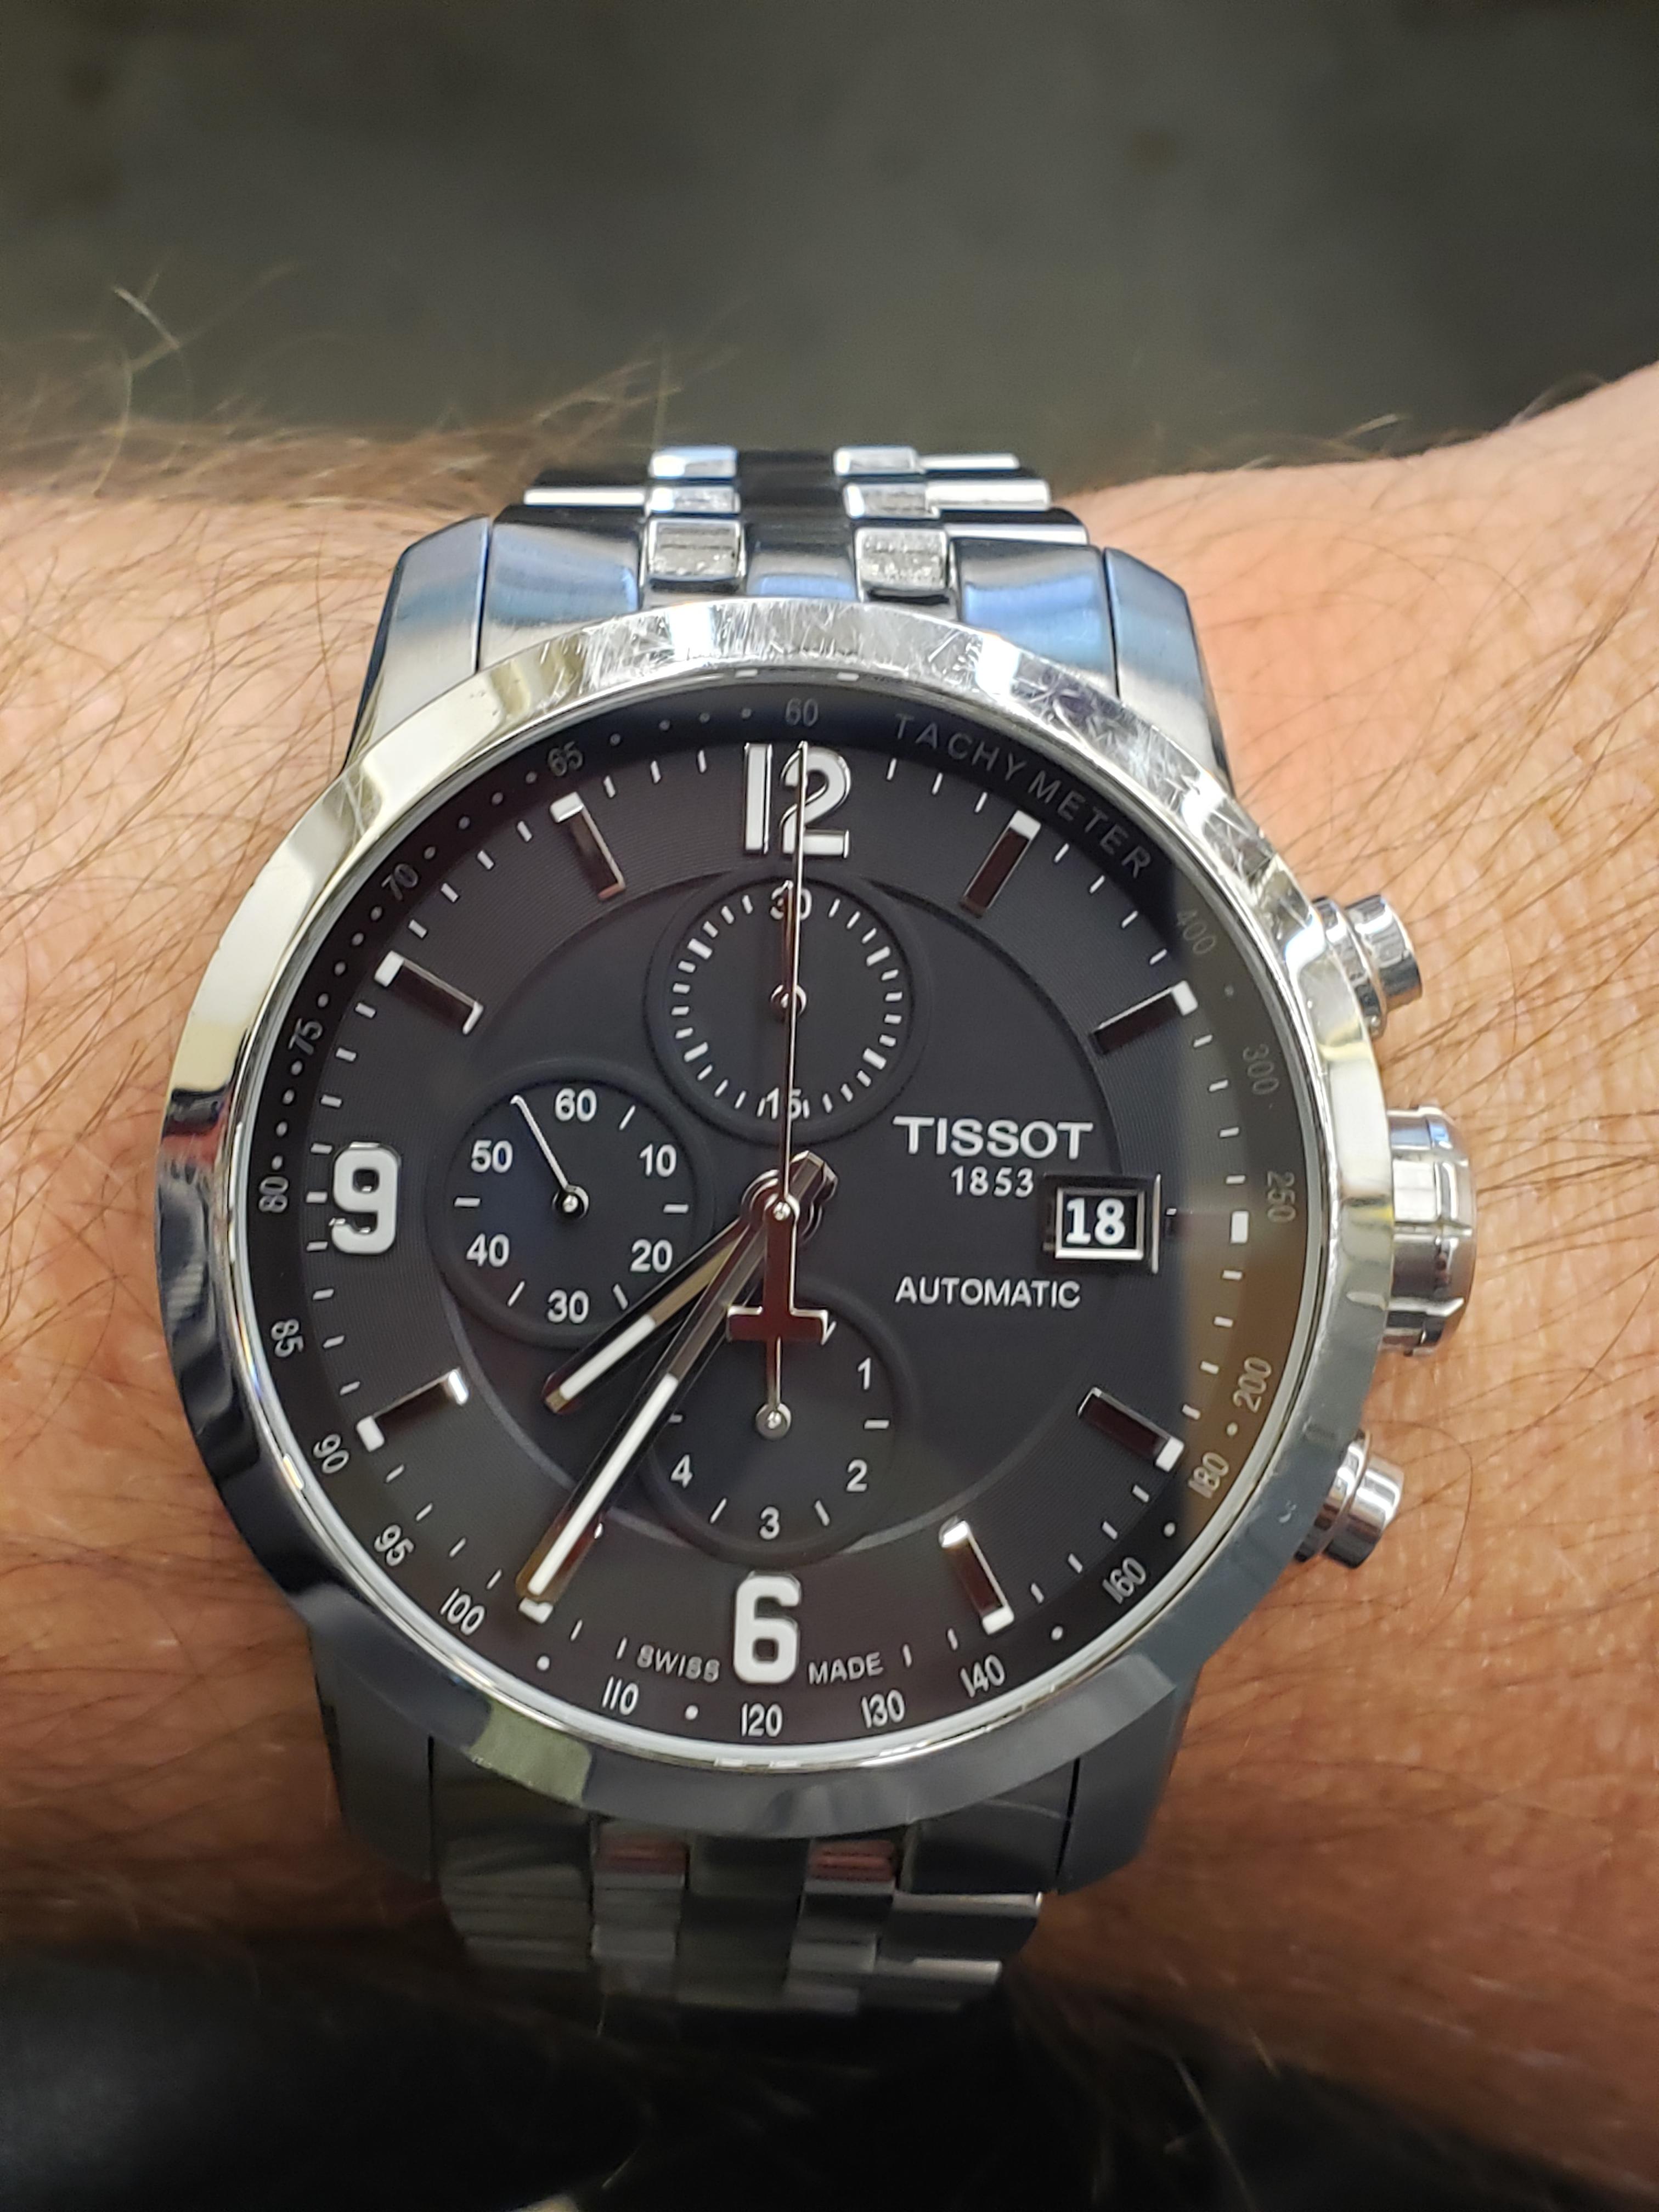
Today I'm wearing my Tissot PRC200 mechanical chronograph. I got this at a heck of a deal. Going to change the bracelet as it's a bit too tight. Looks great regardless.
 1 point
 -
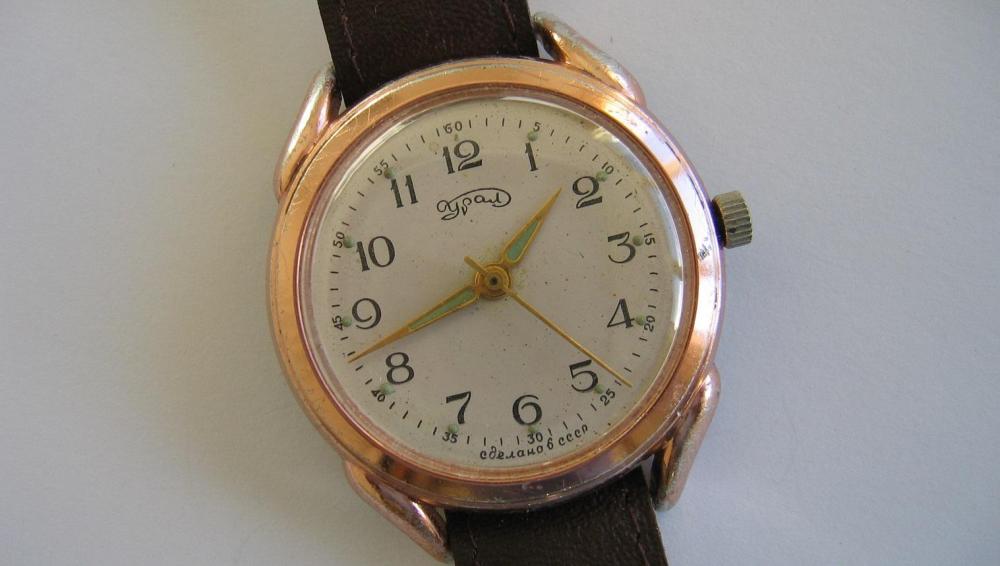
Ural with a mighty 16j Molnia 3608 crammed into its 40mm anodised aluminum/aluminium case. More the height of nonsense than the height of refinement. Regards.
 1 point
 -
NickleSilver and OH, thanks for the feedback. I am planning on a lesson plan as follows: - What is a balance staff - Removing and keeping the old staff - Tools needed to cut a staff - Gravers and Sharpening - Basics in cutting - Measurements and old staff - Friction fit or Rivet - Blued Steel and (perhaps tempering) - Selecting and prepping the blued steel - Phase 1 - Cutting the Balance Surface - Phase 2- Cutting up to the rivet or balance edge (friction fit) and fitting the balance. - Phase 3 - Cutting the HS Collet surface and fitting the HS - Phase 4 - Cutting the upper Pivot and finishing the upper pivot. - Phase 5 - Cutting the rolled table surface (rough cut) - Phase 6 - Cutting off the staff and flipping around in Lathe - Phase 7 - Finishing the RT side and fitting the RT to its friction stop point - Phase 8 - Finishing the Lower Pivot - Phase 9 - Staking in the Balance and Riveting(as needed) - Phase 10 - Staking on the RT - Phase 11 - Jacot Tool and Pivot polishing and sizing the balance staff. - Phase 12 - pressing on the HS I do plan to spend some time on polishing the pivots while the staff is still on the lathe. As well, I plan on showing how you use the old balance staff to measure the cuts. I will also show the use of the Jewelled Gauge to measure the pivots and you bring down the size and how to leave a little extra for sizing with the Jacot. I also have a set of vintage pin gauges that I will use to measure the pivot size on the movement lower and upper jewels. Thoughts?? Sent from my iPhone using Tapatalk Pro1 point
-
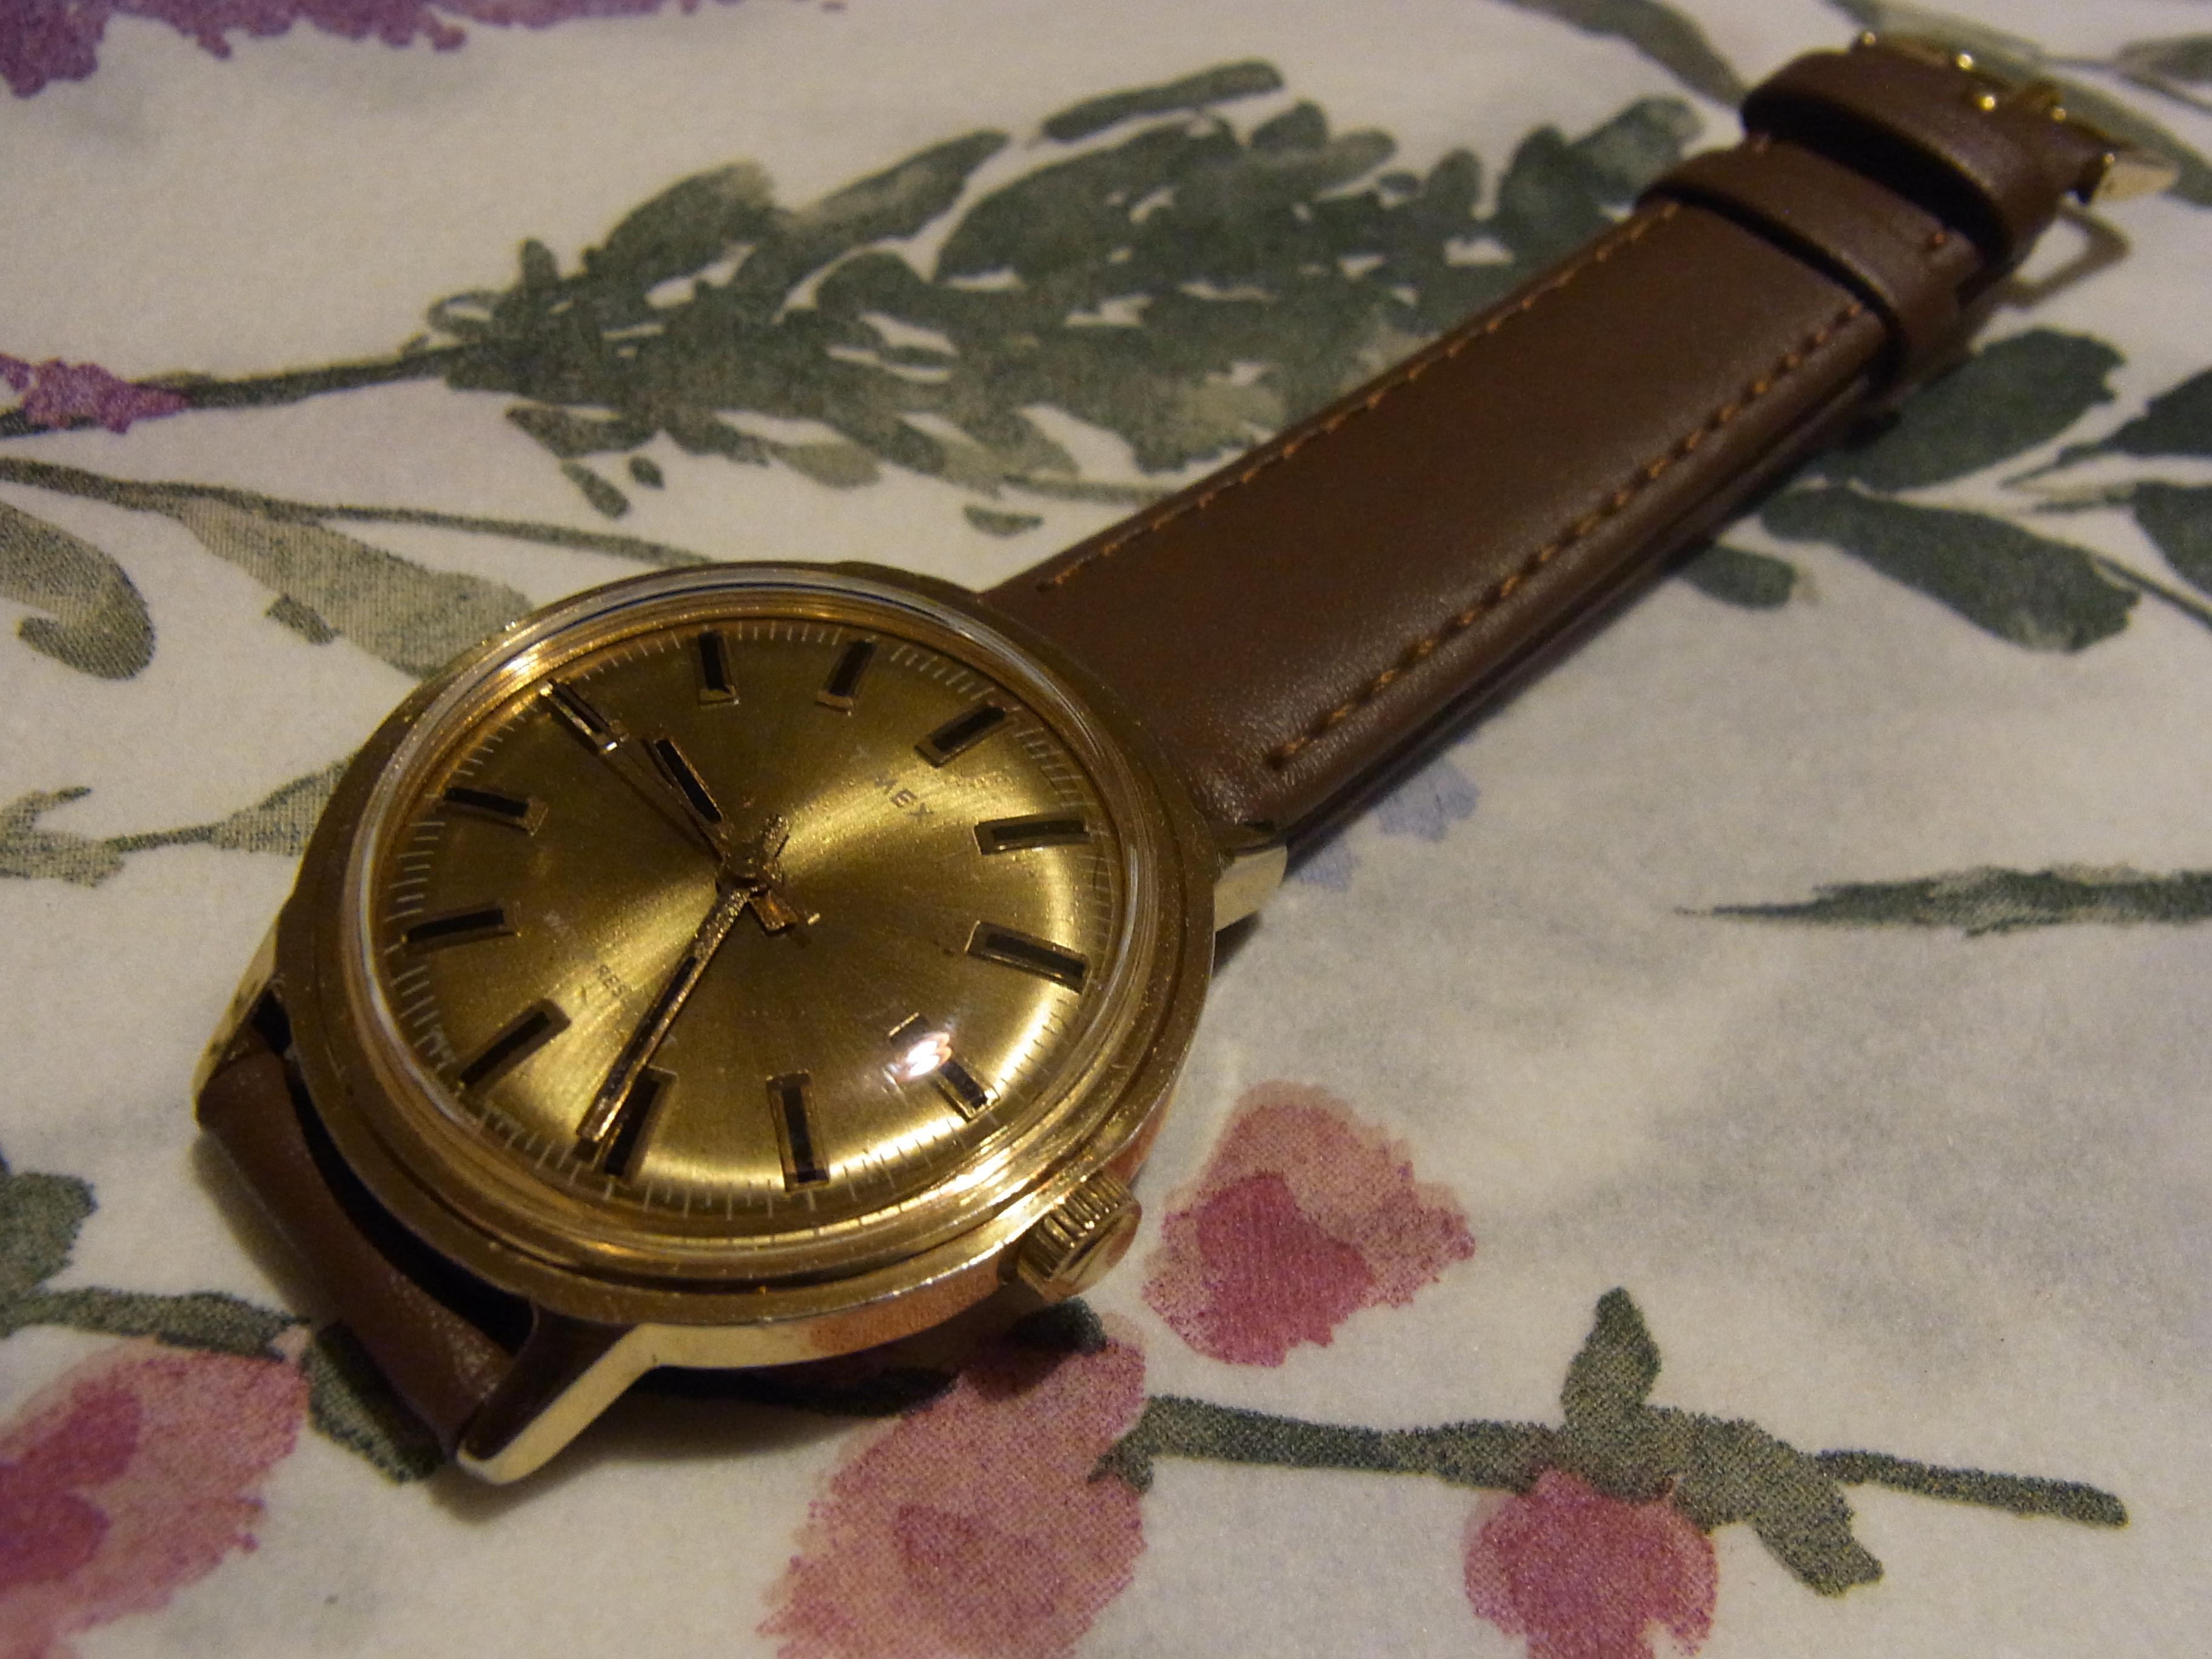
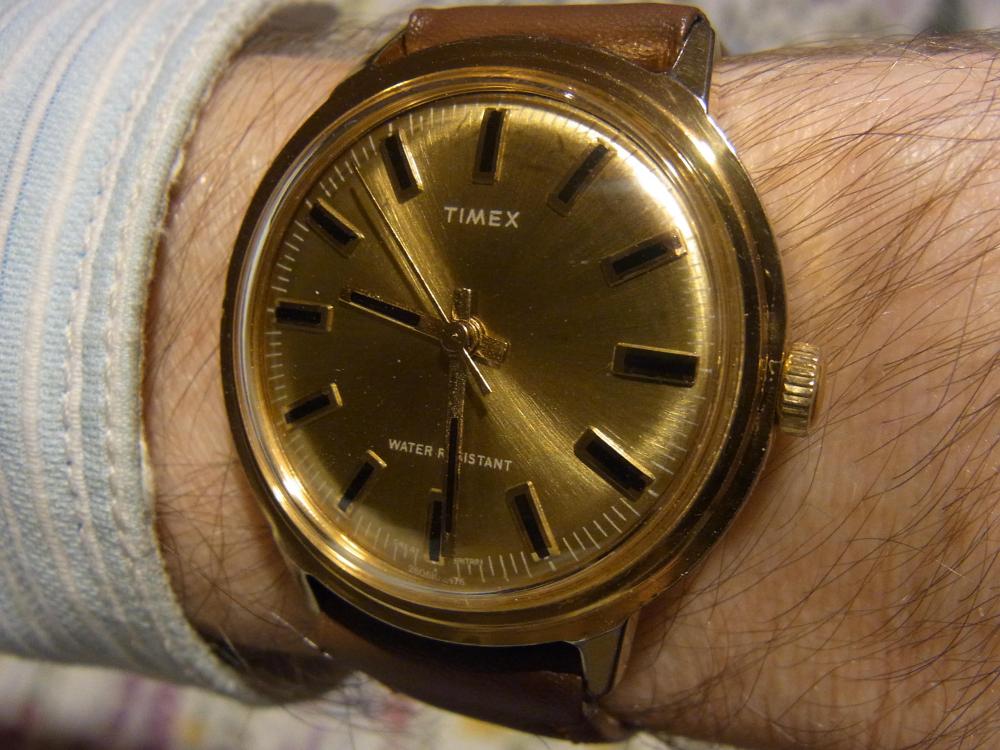
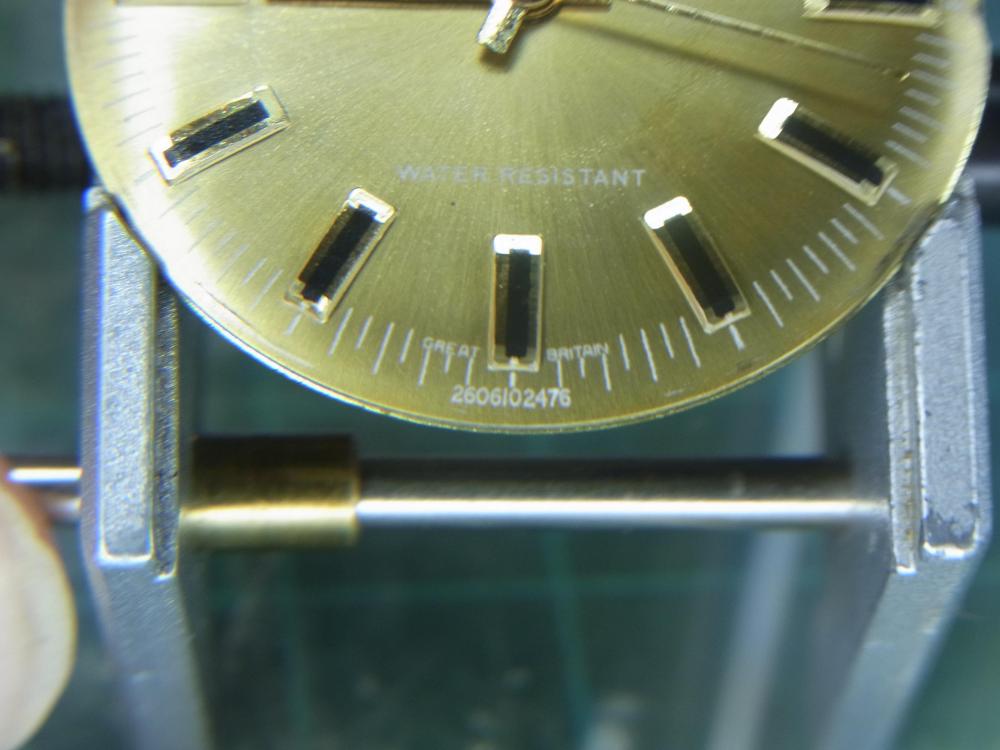
The latest addition to the 404 club, a 1976 sunburst dial gold Timex Marlin (dial code 2606102476). This is how it arrived. What you can't see in the image below are the paint splatters all over the watch. I did manage to re-use the crystal, but it took a fair bit of polishing to get rid of all of those scrapes and dings. The strap on the other hand was a bot of a horror story, so I popped it on something more in keeping with its looks. I think it looks pretty good for 43 years old.

 1 point
 -
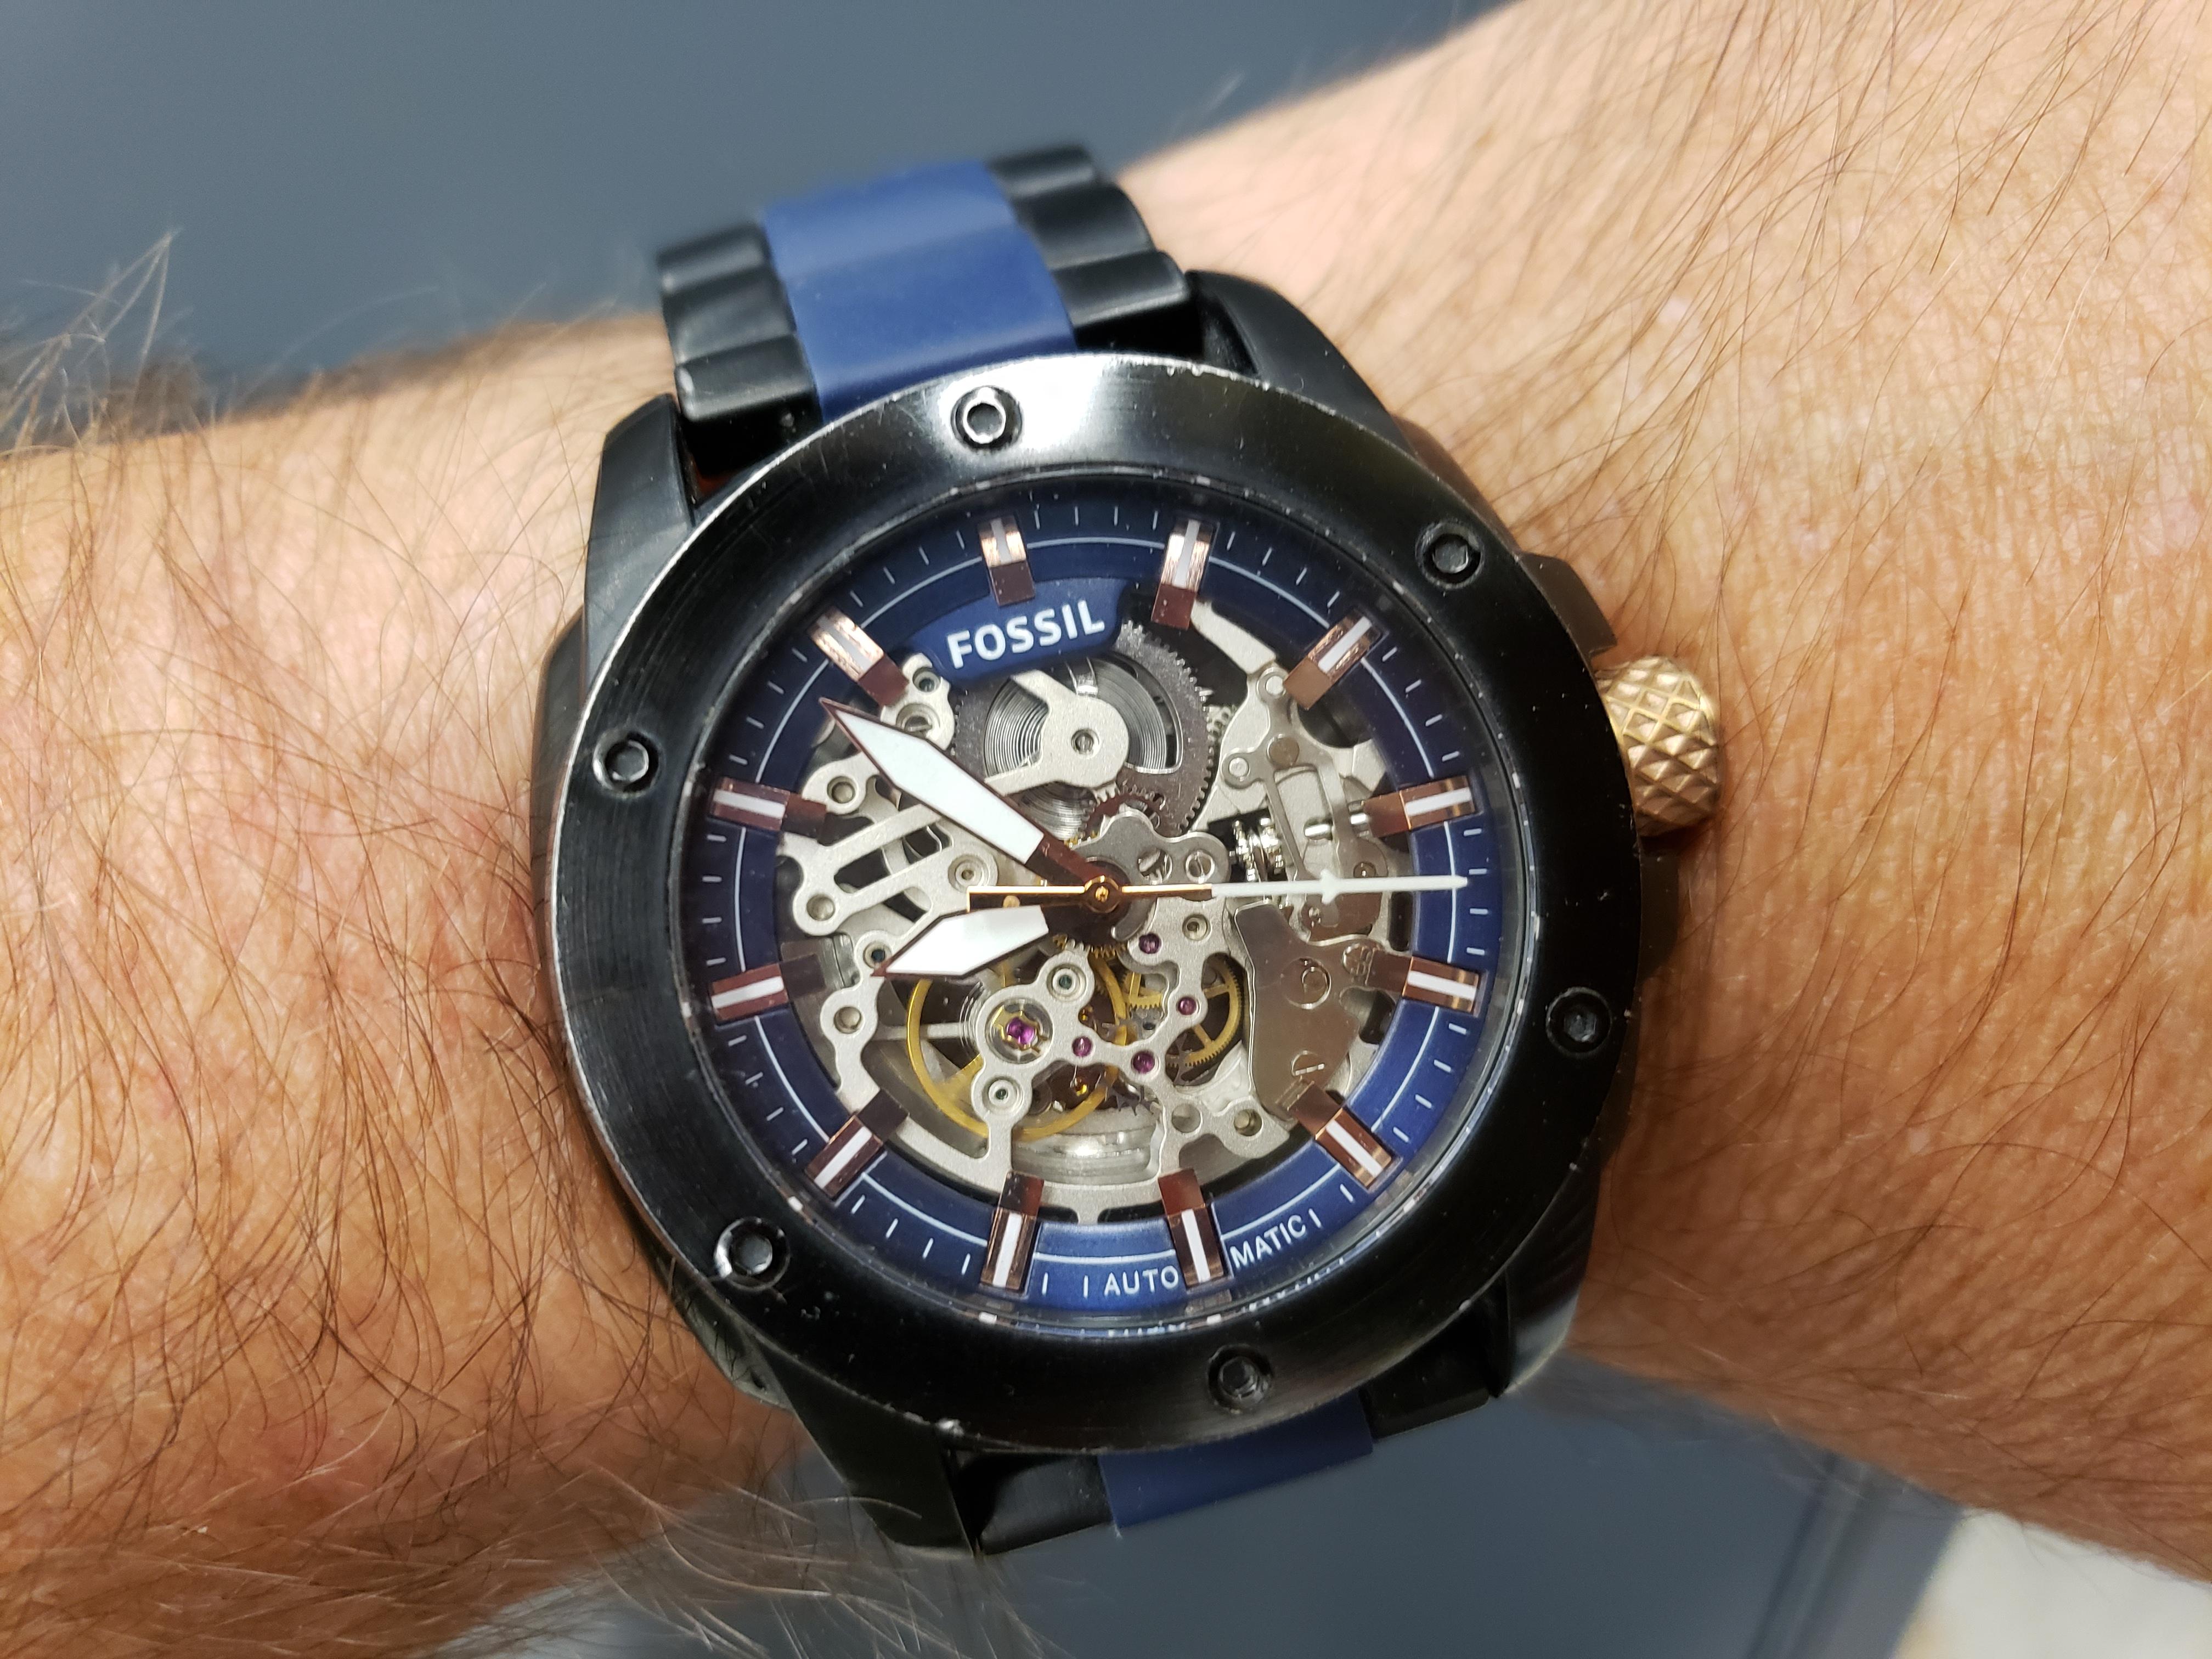
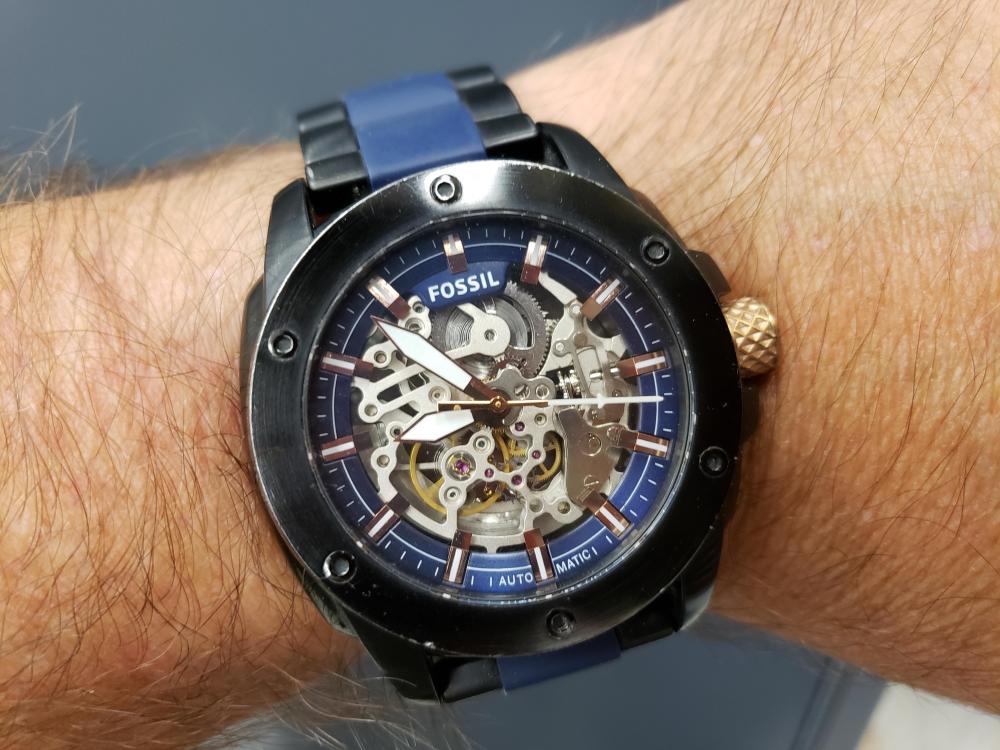
Today I'm wearing my Fossil Modern Machine ME3133 skeleton automatic. This is the watch that inspired me to start collecting watches, especially mechanical watches. It's stylish, rugged and comfortable. It's also a bit big for those that aren't used to larger watches. I don't wear it as much as I used to, but I'll never get rid of it.
 1 point
 -
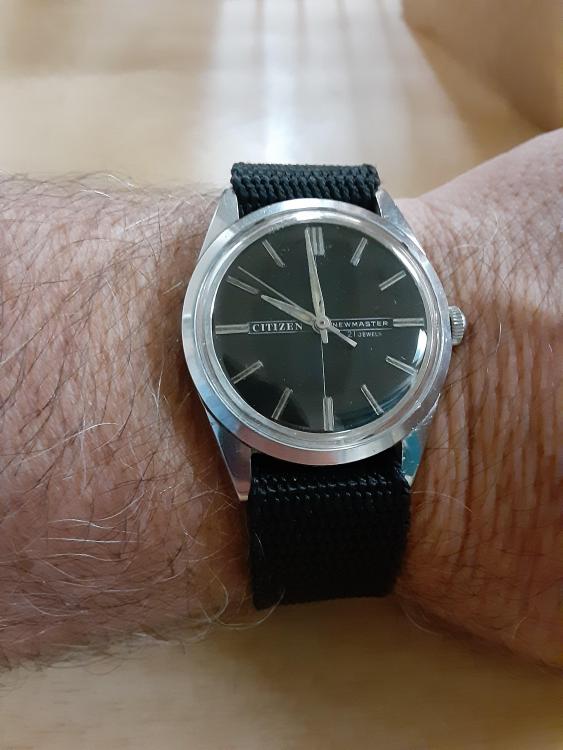
Citizen new master. 21 jewel homer movement.
 1 point
 -
Seiko 7a28 today https://i.imgur.com/TOoaNwe.jpg1 point
-
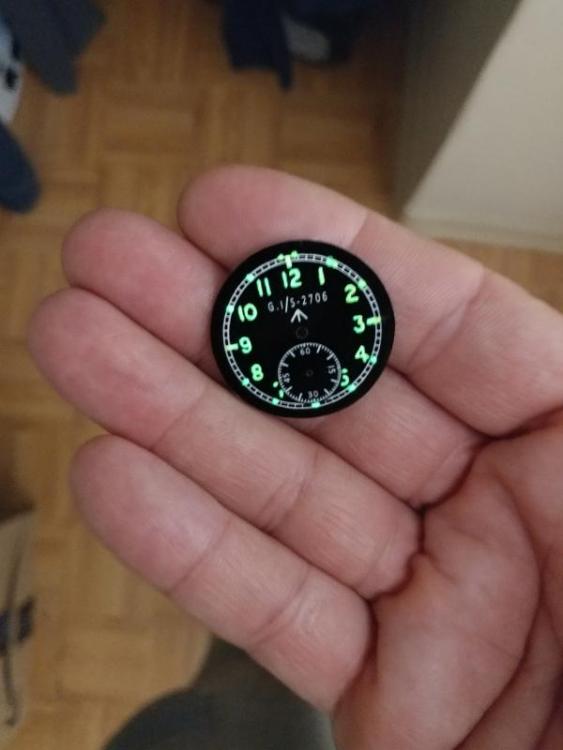
How about this custom dial that's not a decal but made by hand and lacquered and lumed by me
 1 point
 -
good display; el scrapo ? vin0 points


.thumb.jpg.1e0c8e712e274abf69e39fb770fd4b73.jpg)