Leaderboard


Popular Content
Showing content with the highest reputation on 08/01/19 in all areas
-
Many may call it a goner, I have however recoiled many. It is thick and easy to work on. Some advice if you decide to give it a go. You need finer tweezers than what you are holding in the pic. Unpin the h/s off of the stud.Remove the h/s. Insert a safety pin through the collets hole and pin the h/s on a white sheet of paper. Start from the collet outward. Do not work on it more than ten mins at a time. Give yourself time to think about what you done and what is to be done next. Keep in touch with me as you proceed. Best regards2 points
-
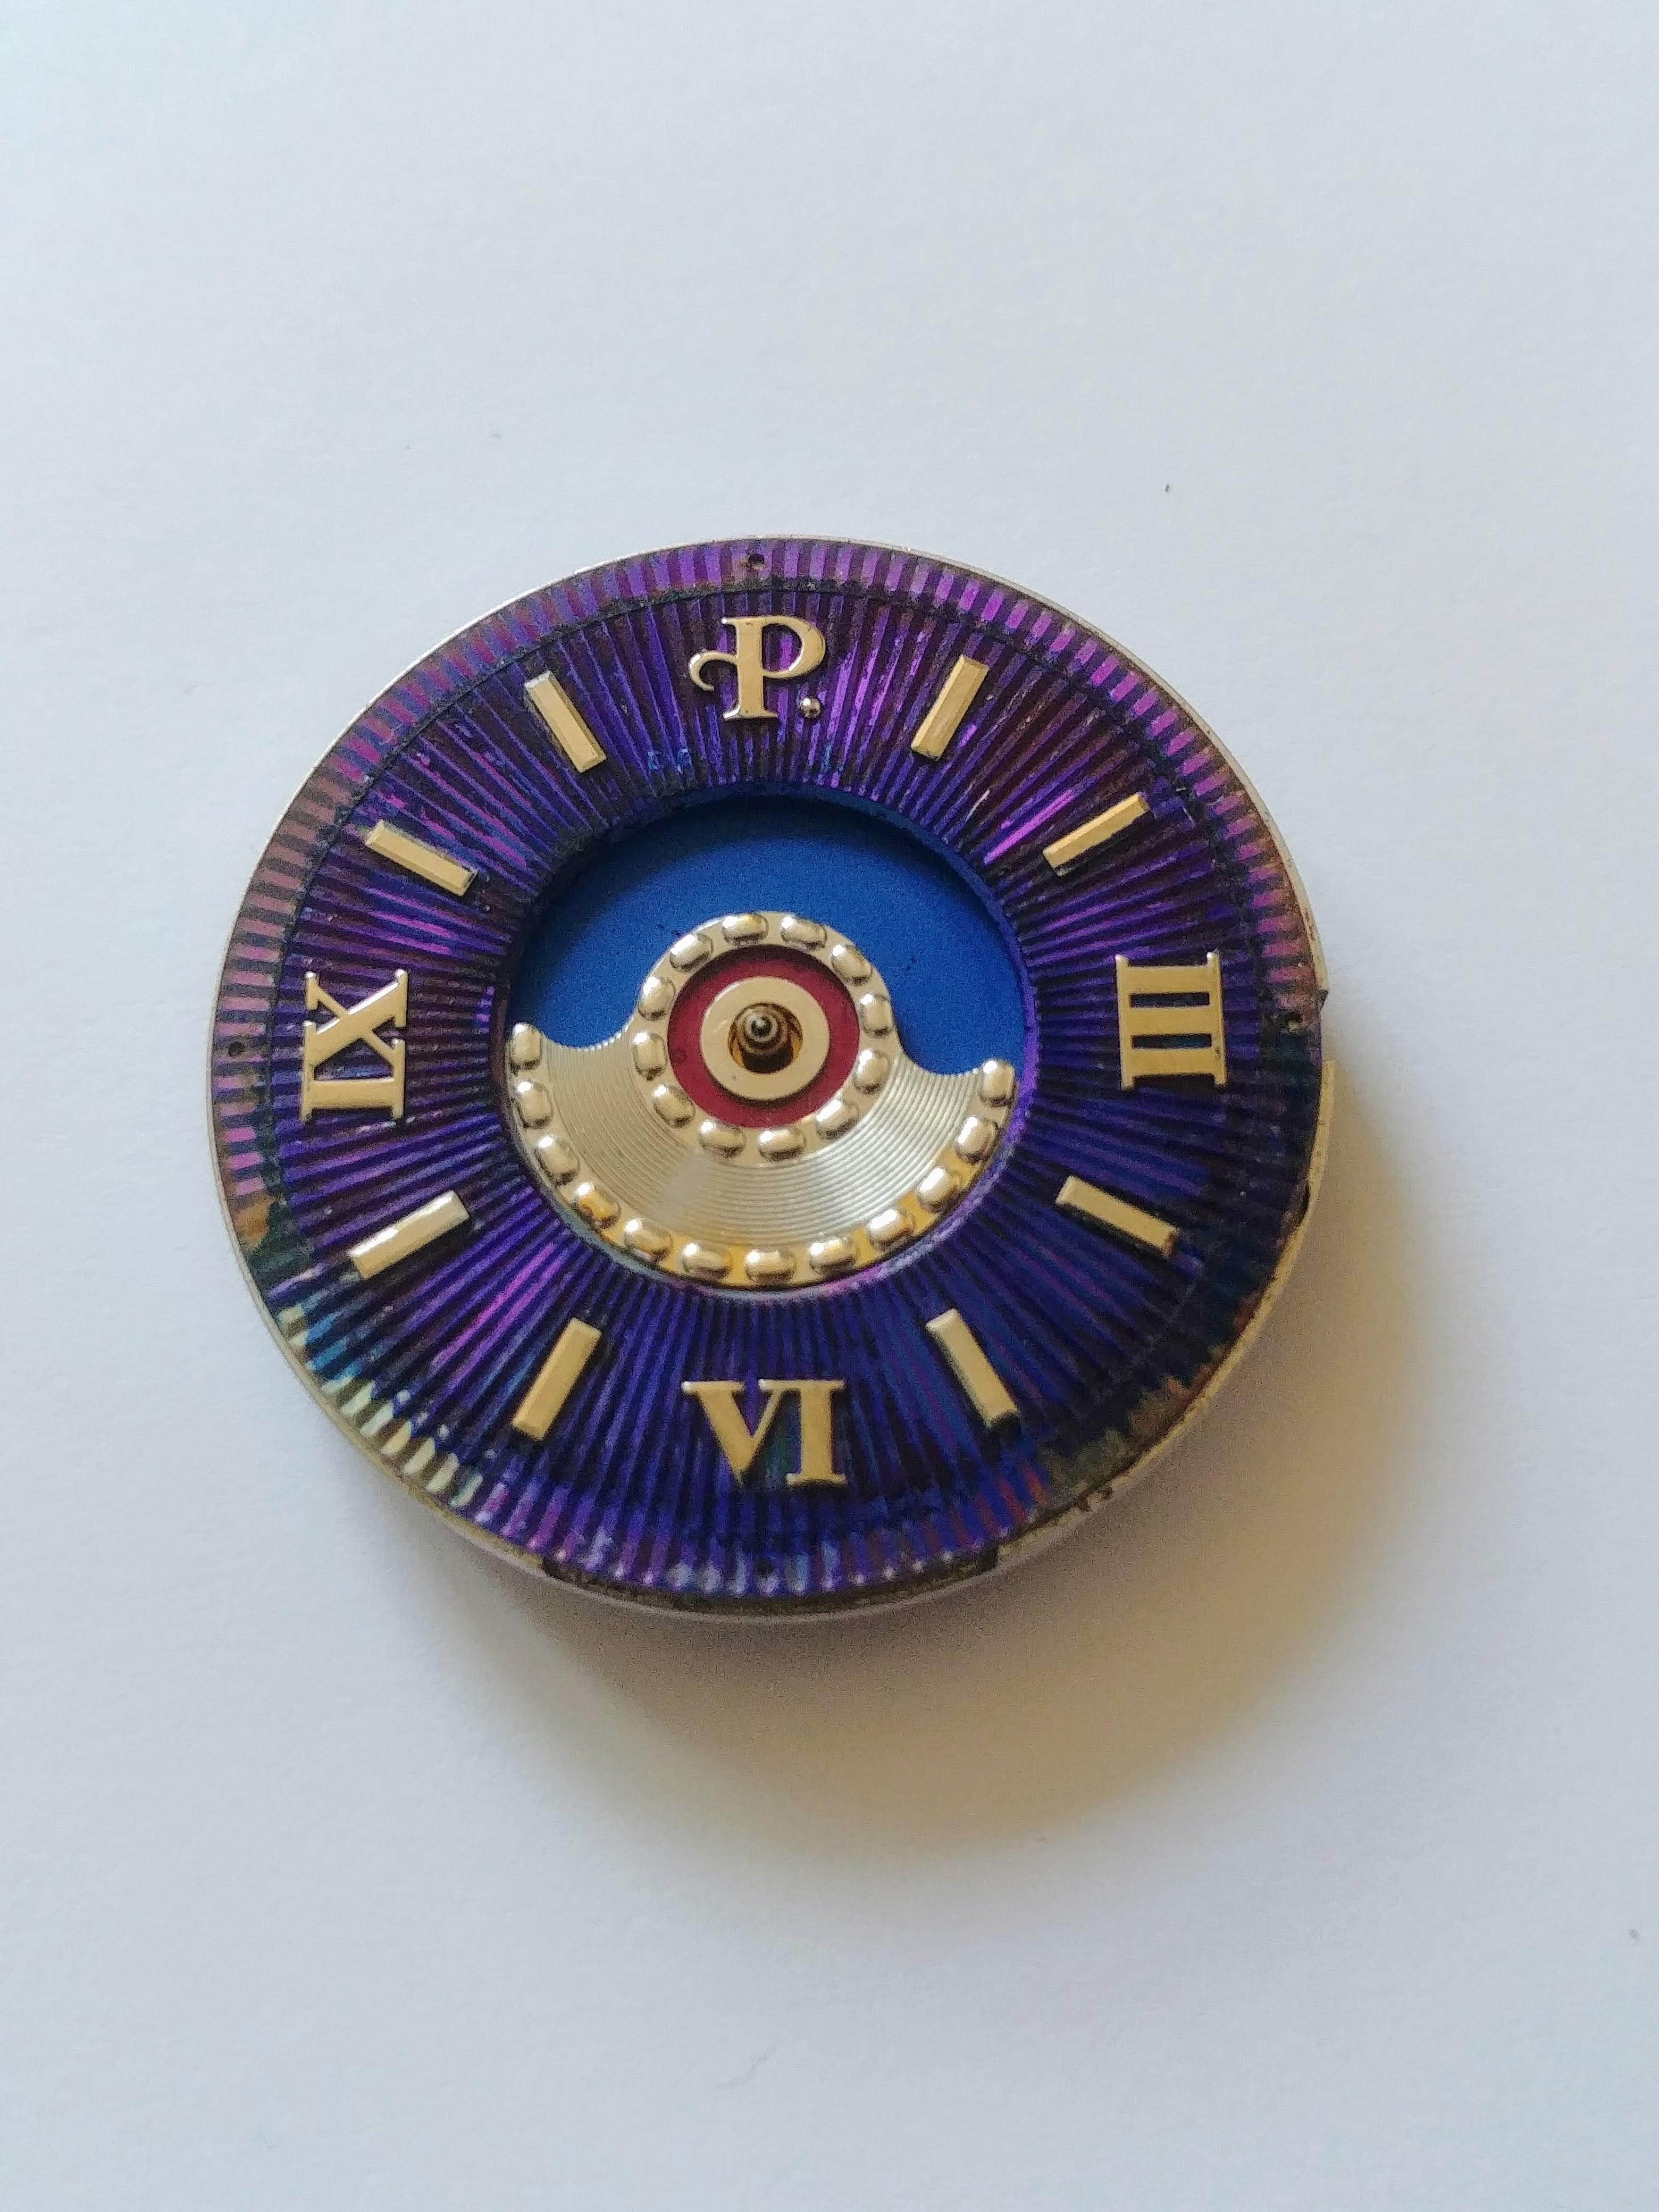
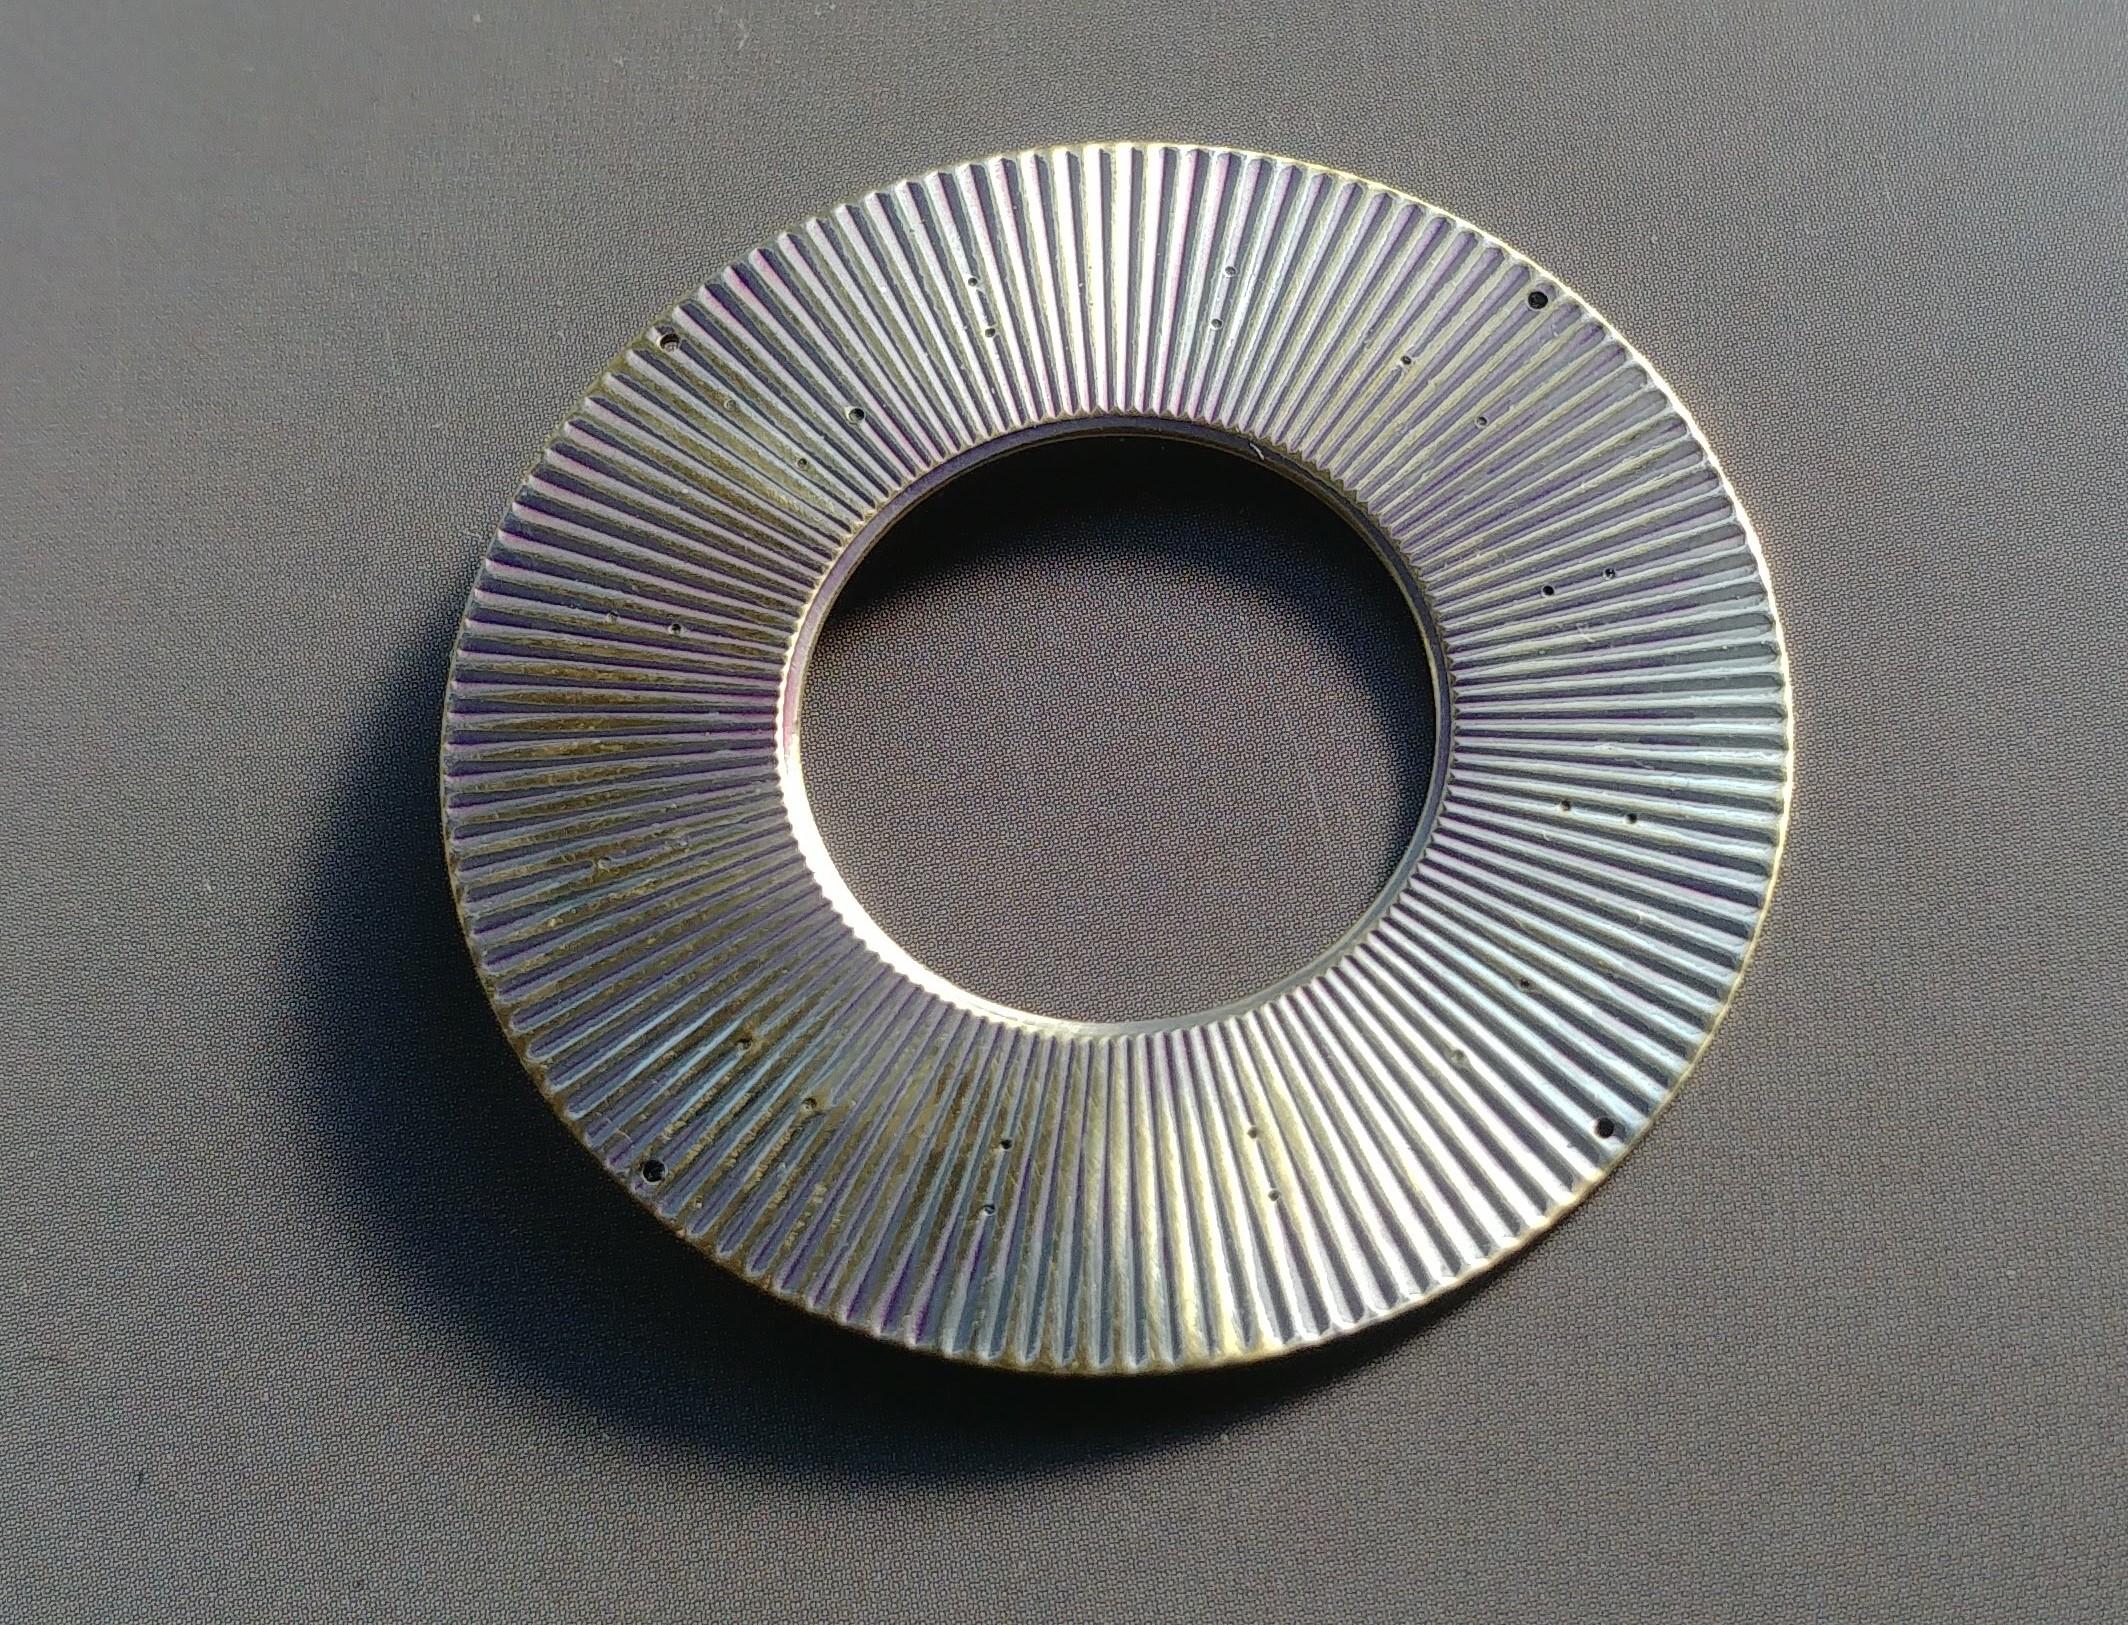
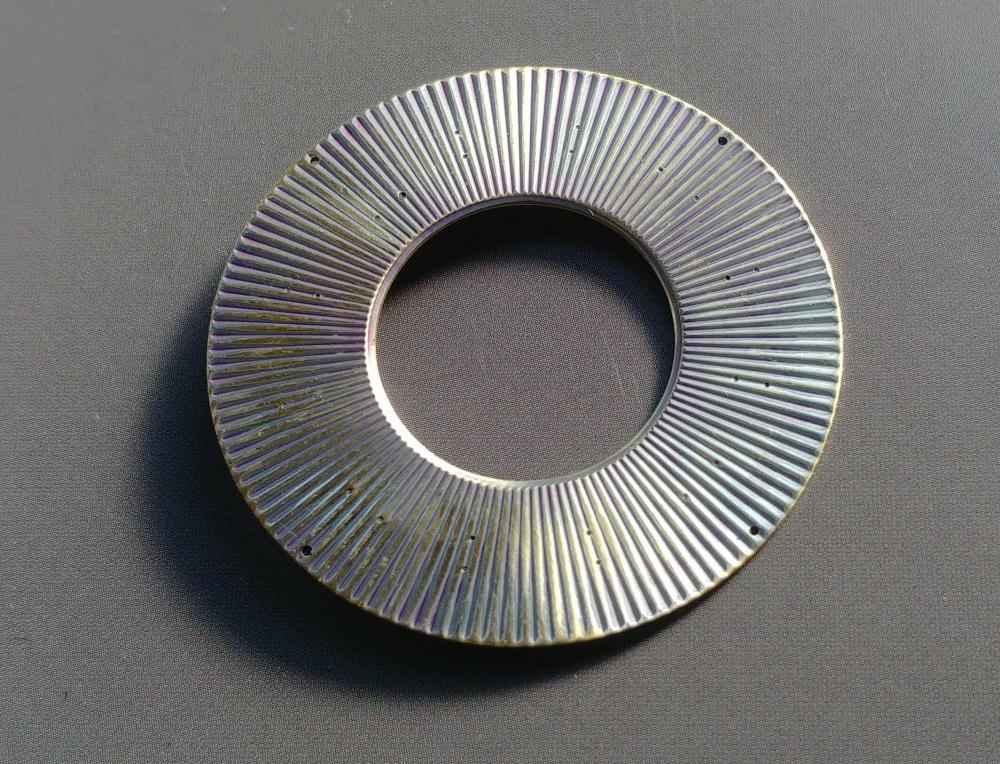
Hi, I will be working on restoring Perrelet James Cook Antarctica. For those who may not know the brand, Perrelet takes its name from Abraham Louis Perrelet, the inventor of automatic watch movements back in late 1700. The brand, however, did not survive through the turbulent times, and was only re-activated in the 1990s. And that's when Perrelet James Cook Antarctica was born. I would say that the Perrelet timepieces from the late 1990s and early 2000s seem to be the most beautiful to me. I think the case design and the dial are timeless, hence my personal affinity to the brand. I already own a two-tone Perrelet Tempest and spotted this Perrelet Antarctica on eBay with some visible damage to the dial and hands. I pulled the trigger and here I am trying to restore it. Also, the bet with the size of the bracelet did not pay off, and I am currently trying to source spare links from Perrelet - what a pain. I already contacted the authorised distributors in the US, the UK and Germany, but apparently everyone in Switzerland is on holiday now! As you can see, the dial appears to be water damaged, but the markers are fine. Additionally, the front rotor (the trademark of Perrelet watches) appears to be discoloured in places, which after some inspection seems to be due to stripping of the nickel (or possibly gold) plating on steel rotor. I will be nickel plating soon (using brush technique) and will share pictures soon. I have managed to remove the markers and strip the dial from its colour. I am however unsure whether the original colour was achieved by chemical treatment or painting - the colour seemed to be completely resistant to varnish. It could only be removed by gentle polishing. There is still some left over in the ridges. I am unsure how to proceed from here. I would like to get back the beautiful blue finish on the dial. I already purchased an airbrush, but I have difficulty in choosing the right paint for the job - I would like to preserve the sharp look of the ridges without putting too many thick coats. I would greatly welcome any advice on what paint would be the best for the job, and how to prep the dial (assume roughing slightly with 1500 sandpaper would do fine?) Alternatively, is it possible to achieve such deep, aquamarine blue colour by electroplating? That would seem like an ideal solution? Hopefully, all the sweat will pay off. I will keep updating the thread with progress as I go. Happy to answer any questions on my work so far.
.thumb.jpg.1c8520451ecd2671931a2b087658480f.jpg)

 1 point
 -
Interesting. I've not even heard of the Perrelet watch brand until this very post but they have some cool timepieces- I like the "Turbine Family". Often the color of a watch dial is achieved through a chemical process. To repeat it you would need to know what metal is used for the substrate (brass, steel, aluminum, etc.) Anodizing also comes to mind because you can get some vivid really vivid colors.1 point
-
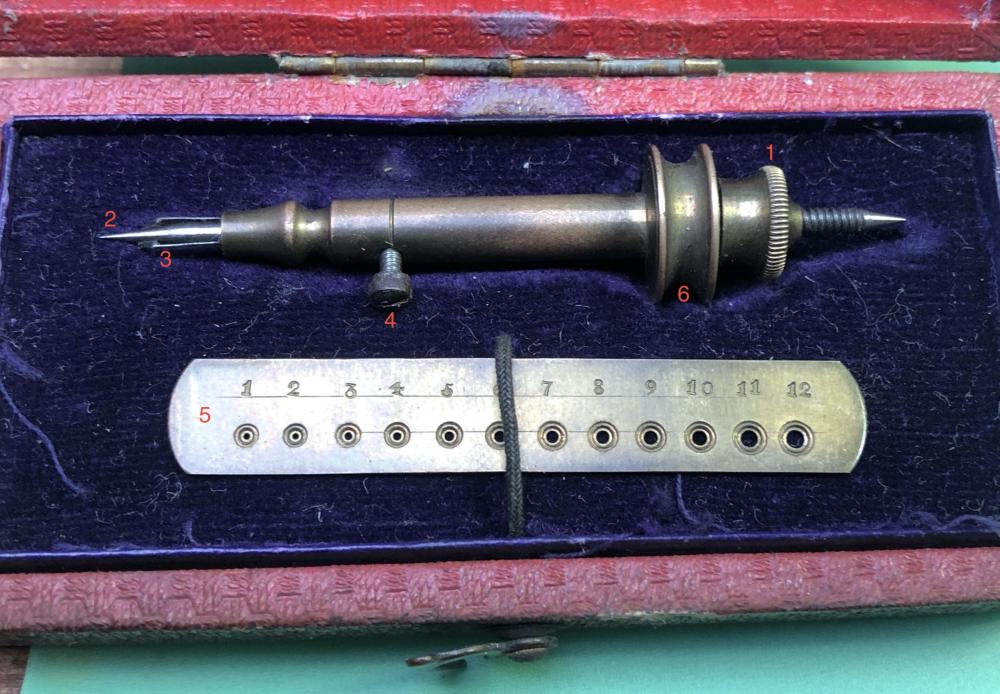
So, here is the interesting jewel cutting tool from eBay. Just arrived today. It's really nifty. I can't find anything about how to use it so I'm making this up as I go along. Let's define some technical terms. 1) Turny bit 2) Spiky thing 3) Edge gougers 4) Locking screw 5) Size guide 6) Maybe thing for a bow It appears that you place the spiky thing into your desired jewel hole on the size guide. You turn the turny thing until the edge gougers fit into the guide edge of the hole. Then you lock the spike with the locking screw. The edge gougers are clever. Each one is split. So I think the inner gouger carves out the floor of the setting for the jewel to sit on. And the outer one creates a wall that you can later use to bend over the jewel and secure it. Because am I right in thinking this is producing a rub in setting? I had a couple of gentle attempts on a thin scrap piece. I used it to ream an existing hole. I would presume you need a pilot hole to start with close to the correct size. I wouldn't like to use this to make a hole from scratch. I am using this freehand. But would you agree that 6 could be a thing to use a bow? Like you would with a jacot tool? But then the tool needs to be held on some kind of stand or device to keep it vertical and steady. So I'm not sure. It certainly doesn't feel very ergonomic using it freehand. And why are both ends spiked?

 1 point
 -
Generally re-assembly is done in the reverse order of disassembly, so there may be enough clues in the original video. There is no hard and fast rule about the order parts come off and go back on, but generally I start by letting down the mainspring, remove crown and stem, then remove hands, then dial, then from the balance side, balance +bridge, balance fork if appropriate at this point, then depending on the way it is constructed, the winder gears, mainspring bridge+mainspring barrel, other bridges and gears in whichever order is appropriate, then balance fork if other things prevented its removal till this point, then turn over, remove keyless work if necessary. I then strip and clean the mainspring etc. More complex watches will have other steps. Re-assembly is generally this process in reverse. Some good close up pictures of your de-constructed watch should give us enough clues to guide you in re-assembly. Finally, don't panic, this is all part of the learning process. Just take care, go slowly and methodically, don't use force, all watch parts are delicate. If you get the re-assembly order wrong, nothing bad will happen, you will just need to reverse the bit you got wrong and work from there. It can be a little time consuming, but if eye fatigue or frustration are starting to set in, put it aside, do something else, come back when you have rested and gathered your thoughts.1 point
-
taking pic.s of the position of the parts as they come out --- it is a "memory thing. for example; which direction does the mainspring go in the barrel? you can put these parts "aside" and start again on another watch? vin1 point
-
Late post [emoji4] Seiko Worldtimer https://i.imgur.com/W8KZSpq.jpg1 point
-
Hi Gary can you tell us what make the movement is, under the balance cock there should be a mark and a number ie ETA 2428-2 or somthing like that way we may be able to find the tech sheet for you. photos are always a great help in cases like this. Withe the front plate in the holder reassemble from the barrel train wheels escapement fork all with their bridges and screws having reached this point insert stem and button and give it a few turns on the mainspring and check the action of the fork if it snaps to and fro to the banking pins when moved (use a fine artists brush) if thats ok then fit the balance making sure it engages the fork ok and it should start up , with luck. Take your time and be careful.1 point
-
It will depend on your skill. If you have never tackled this type of repair before you could end up making it worse.1 point
-
I had a problem like this one and it was due to a bent pivot of one of the train wheels.1 point
-
Is not a matter of beat rate but simply the signal is all over the place, the instrument can't pick a steady refernce. As in all the many similar discussions here(and many related to Seiko) the issue is 99% with the escapement. You may have cleaned pegged an lubed but that doesn't prevent a bent pivot, tight end shake, faulty pallet, distorted hairspring and I might name a 10 possible more possible reasons. You have to inspect, try, possible replace something and try again. Good luck.,1 point
-
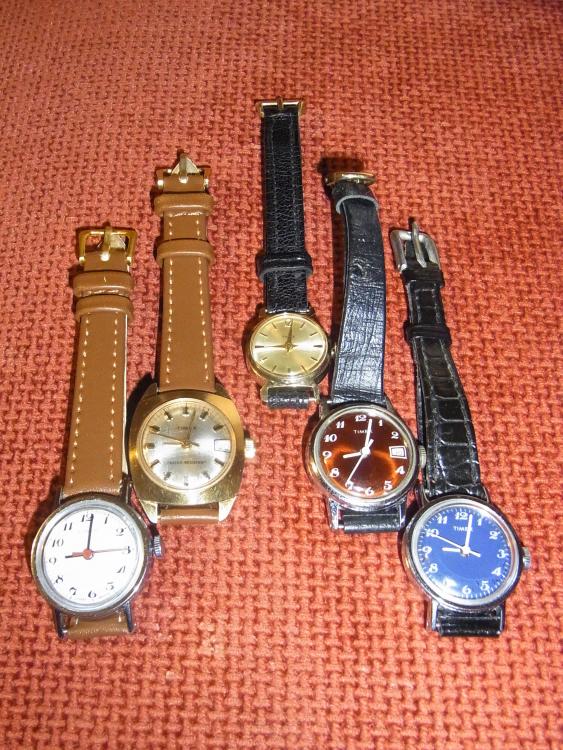
I seem to be amassing a small collection of small Timexes.
 1 point
 -
You want about 0.01mm of freedom in the jewel, so a 0.15 would be great, 0.16 probably still fine, 0.20 would be way too big.1 point
-
I use brass tweezers as well, like in the middle of them. The "offical" way is with a plastic pusher with a hole to pass the arbor, barrel on a bench block1 point
-
I don't use pliers to close the lid. Instead I use the brass tweezers. Not the ends but the mid section.1 point
-
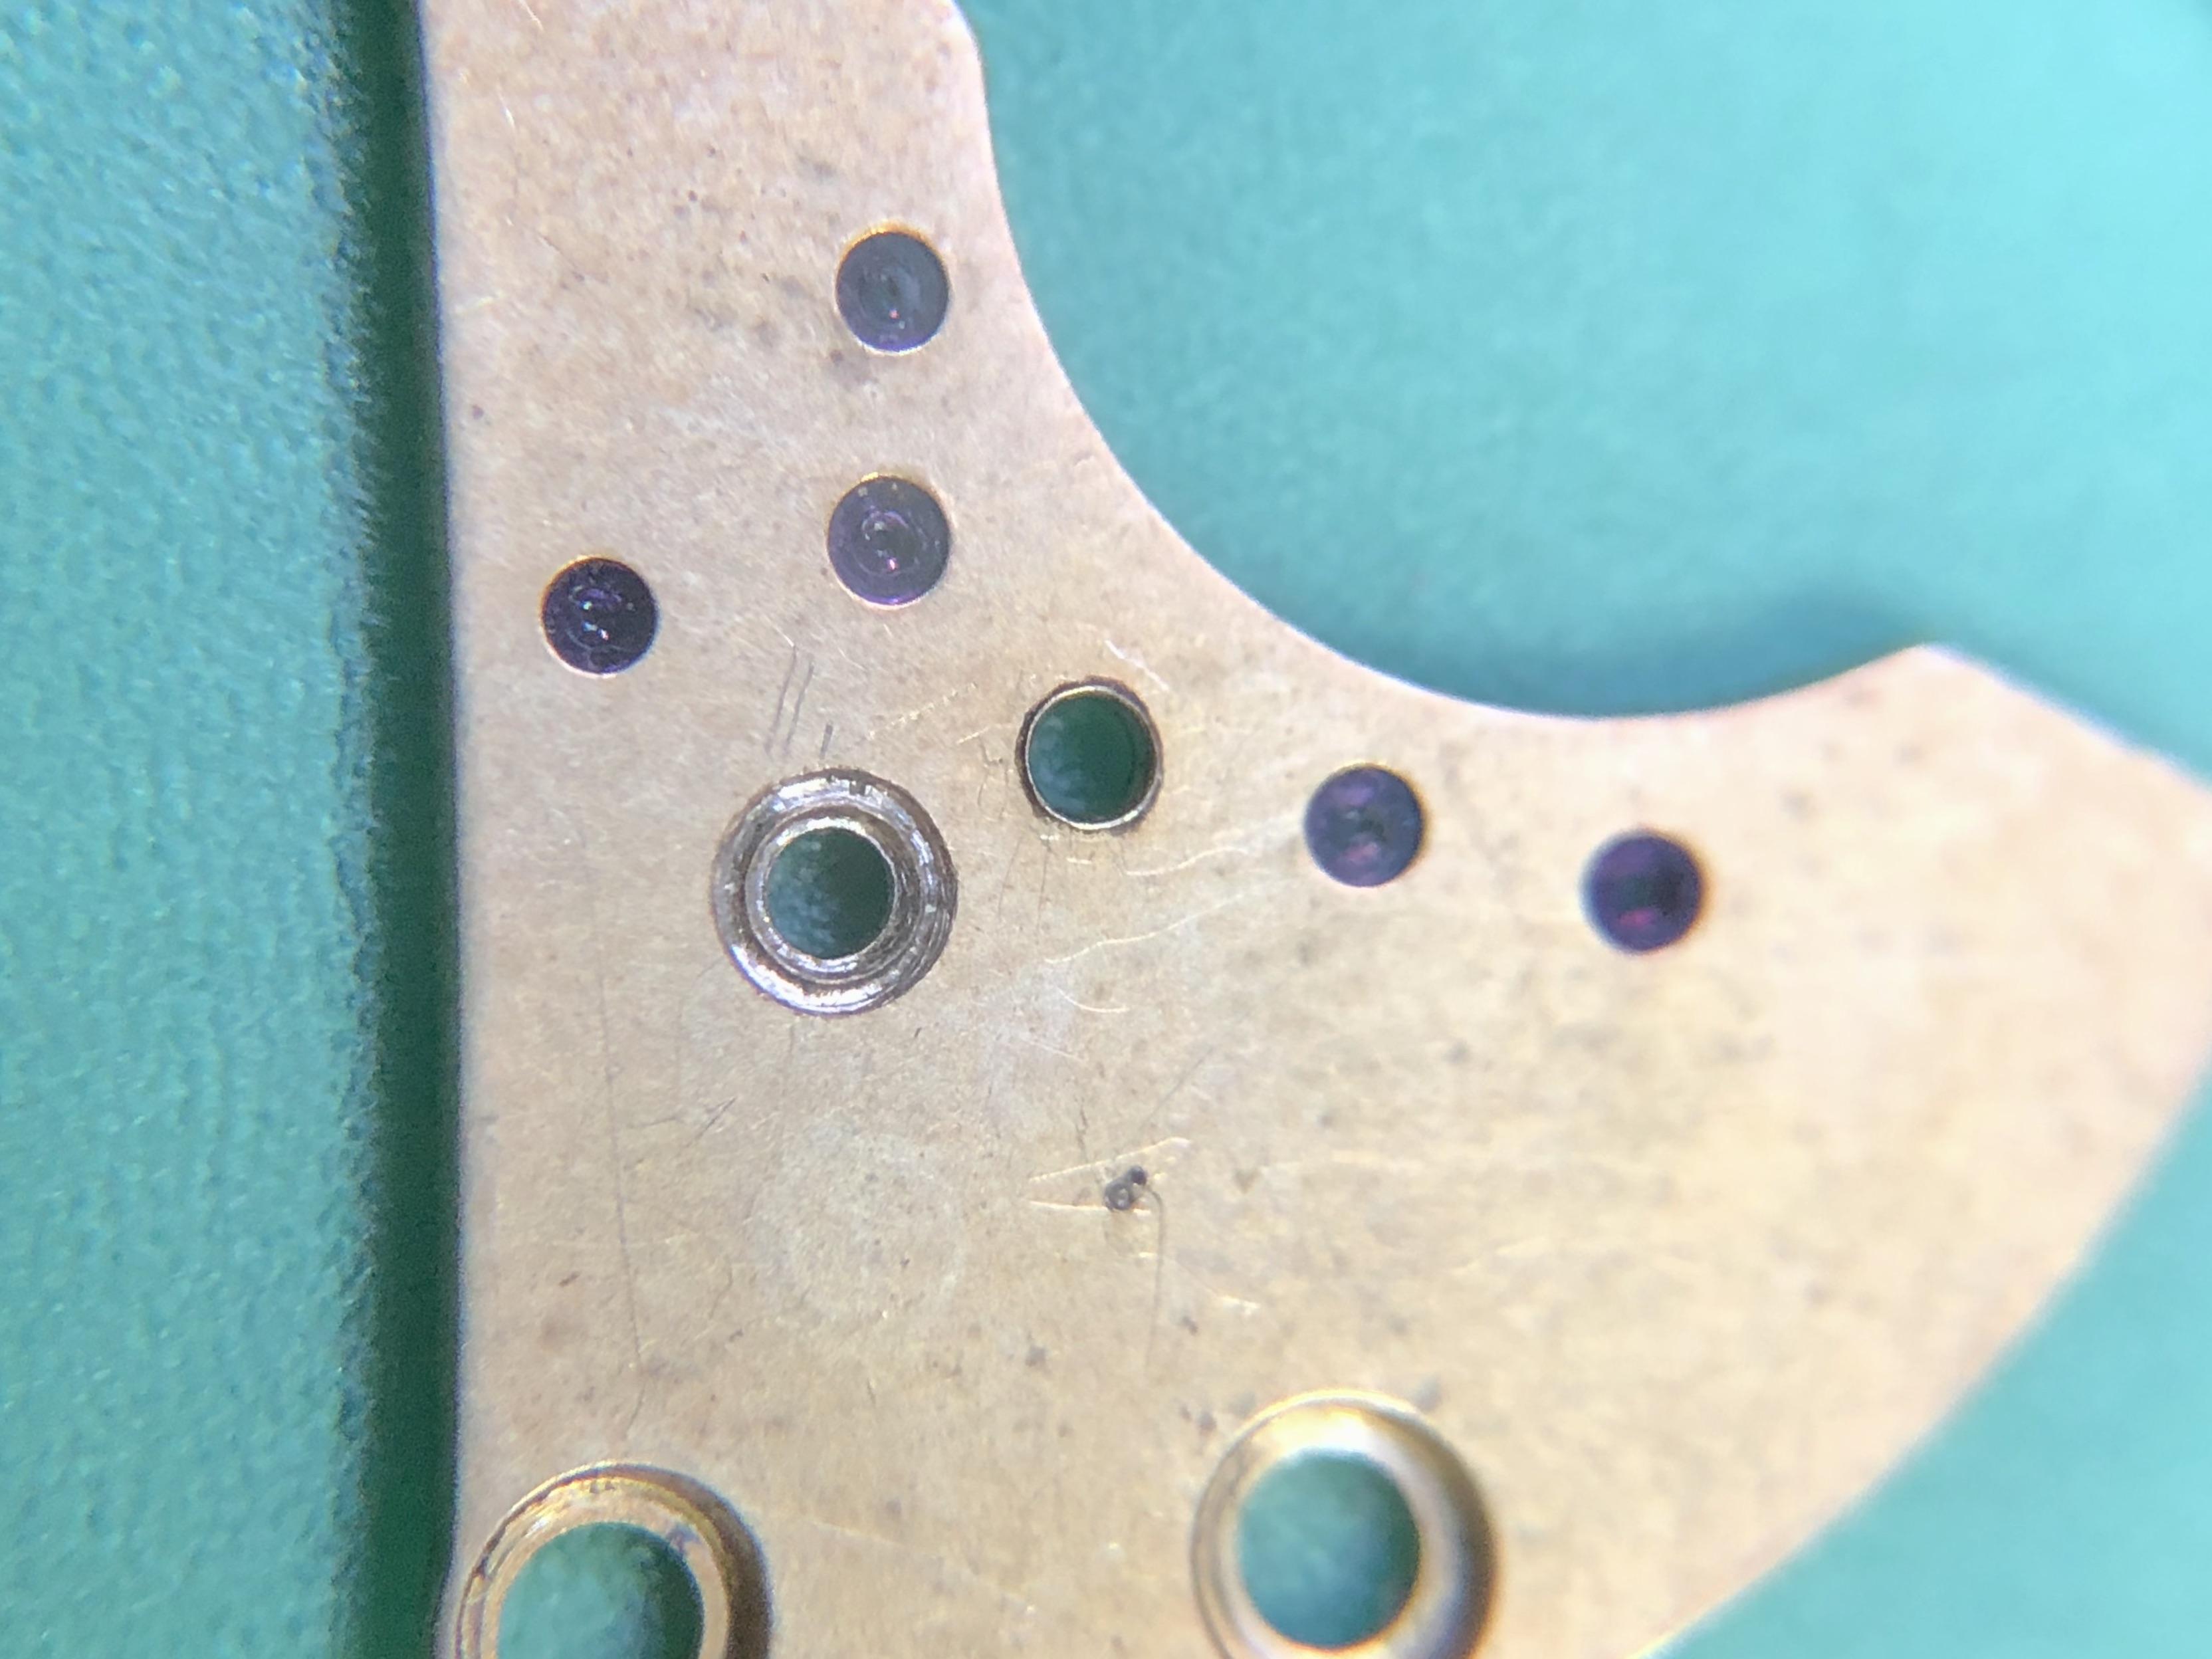
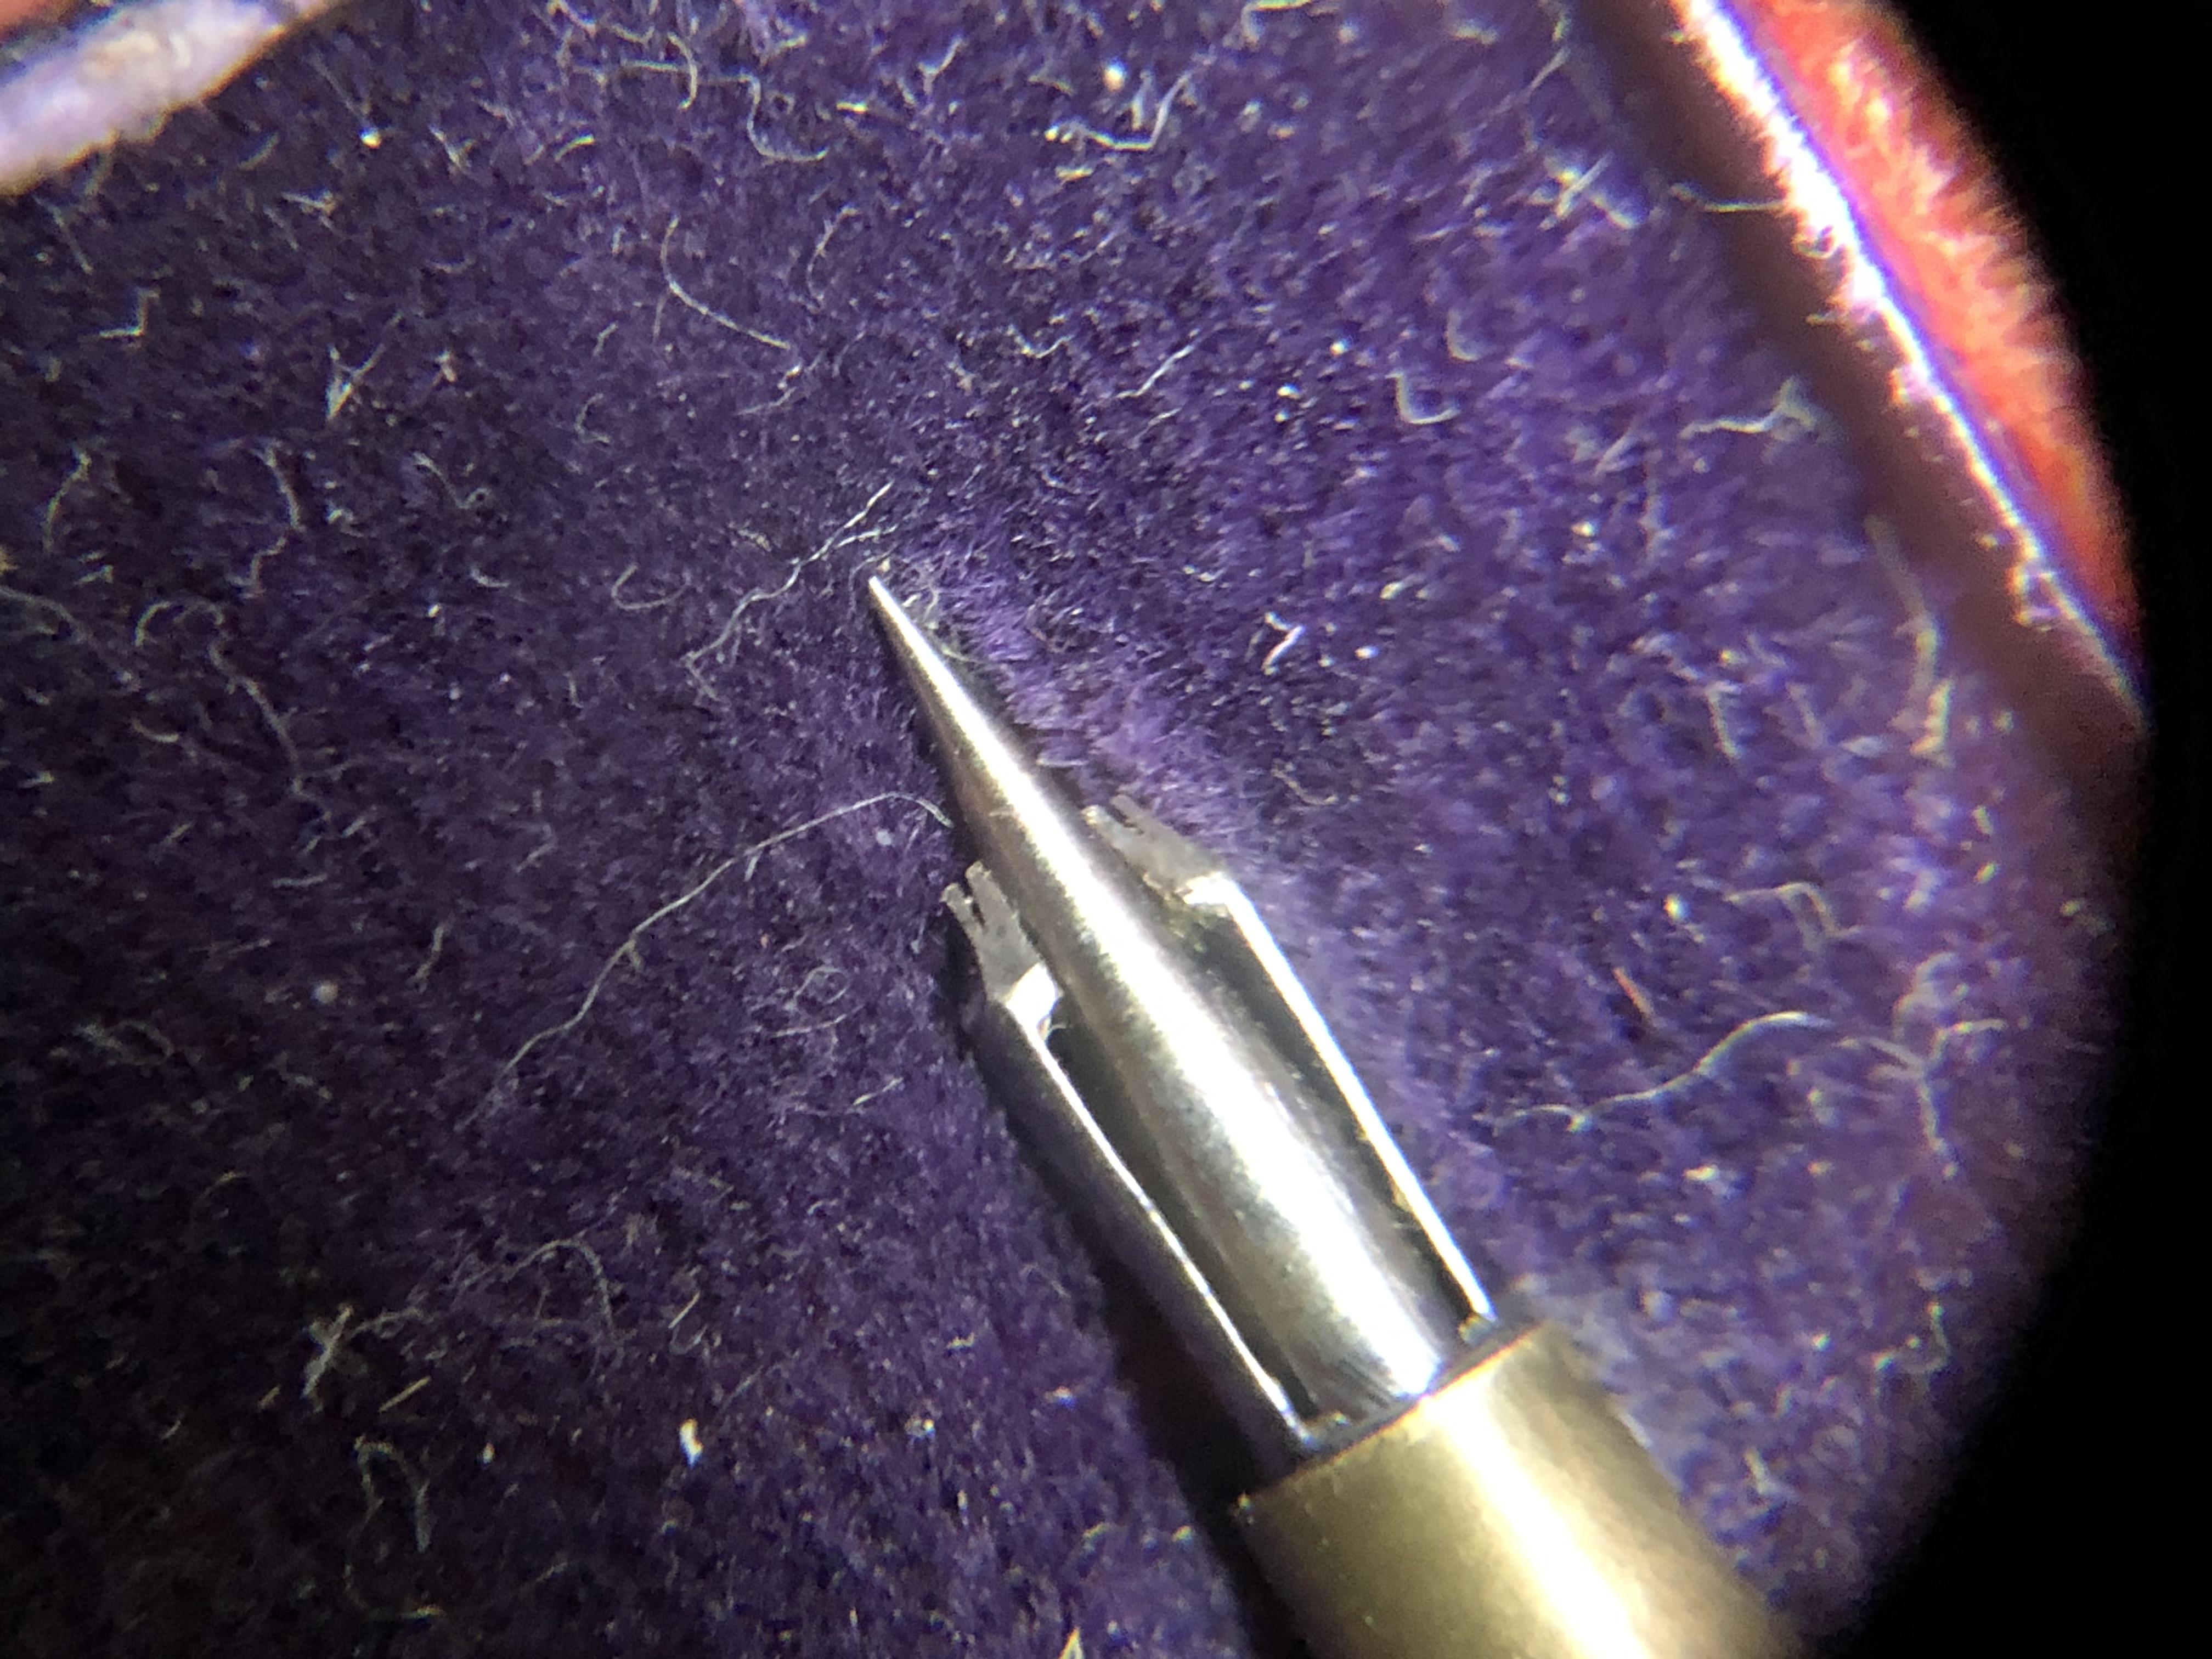
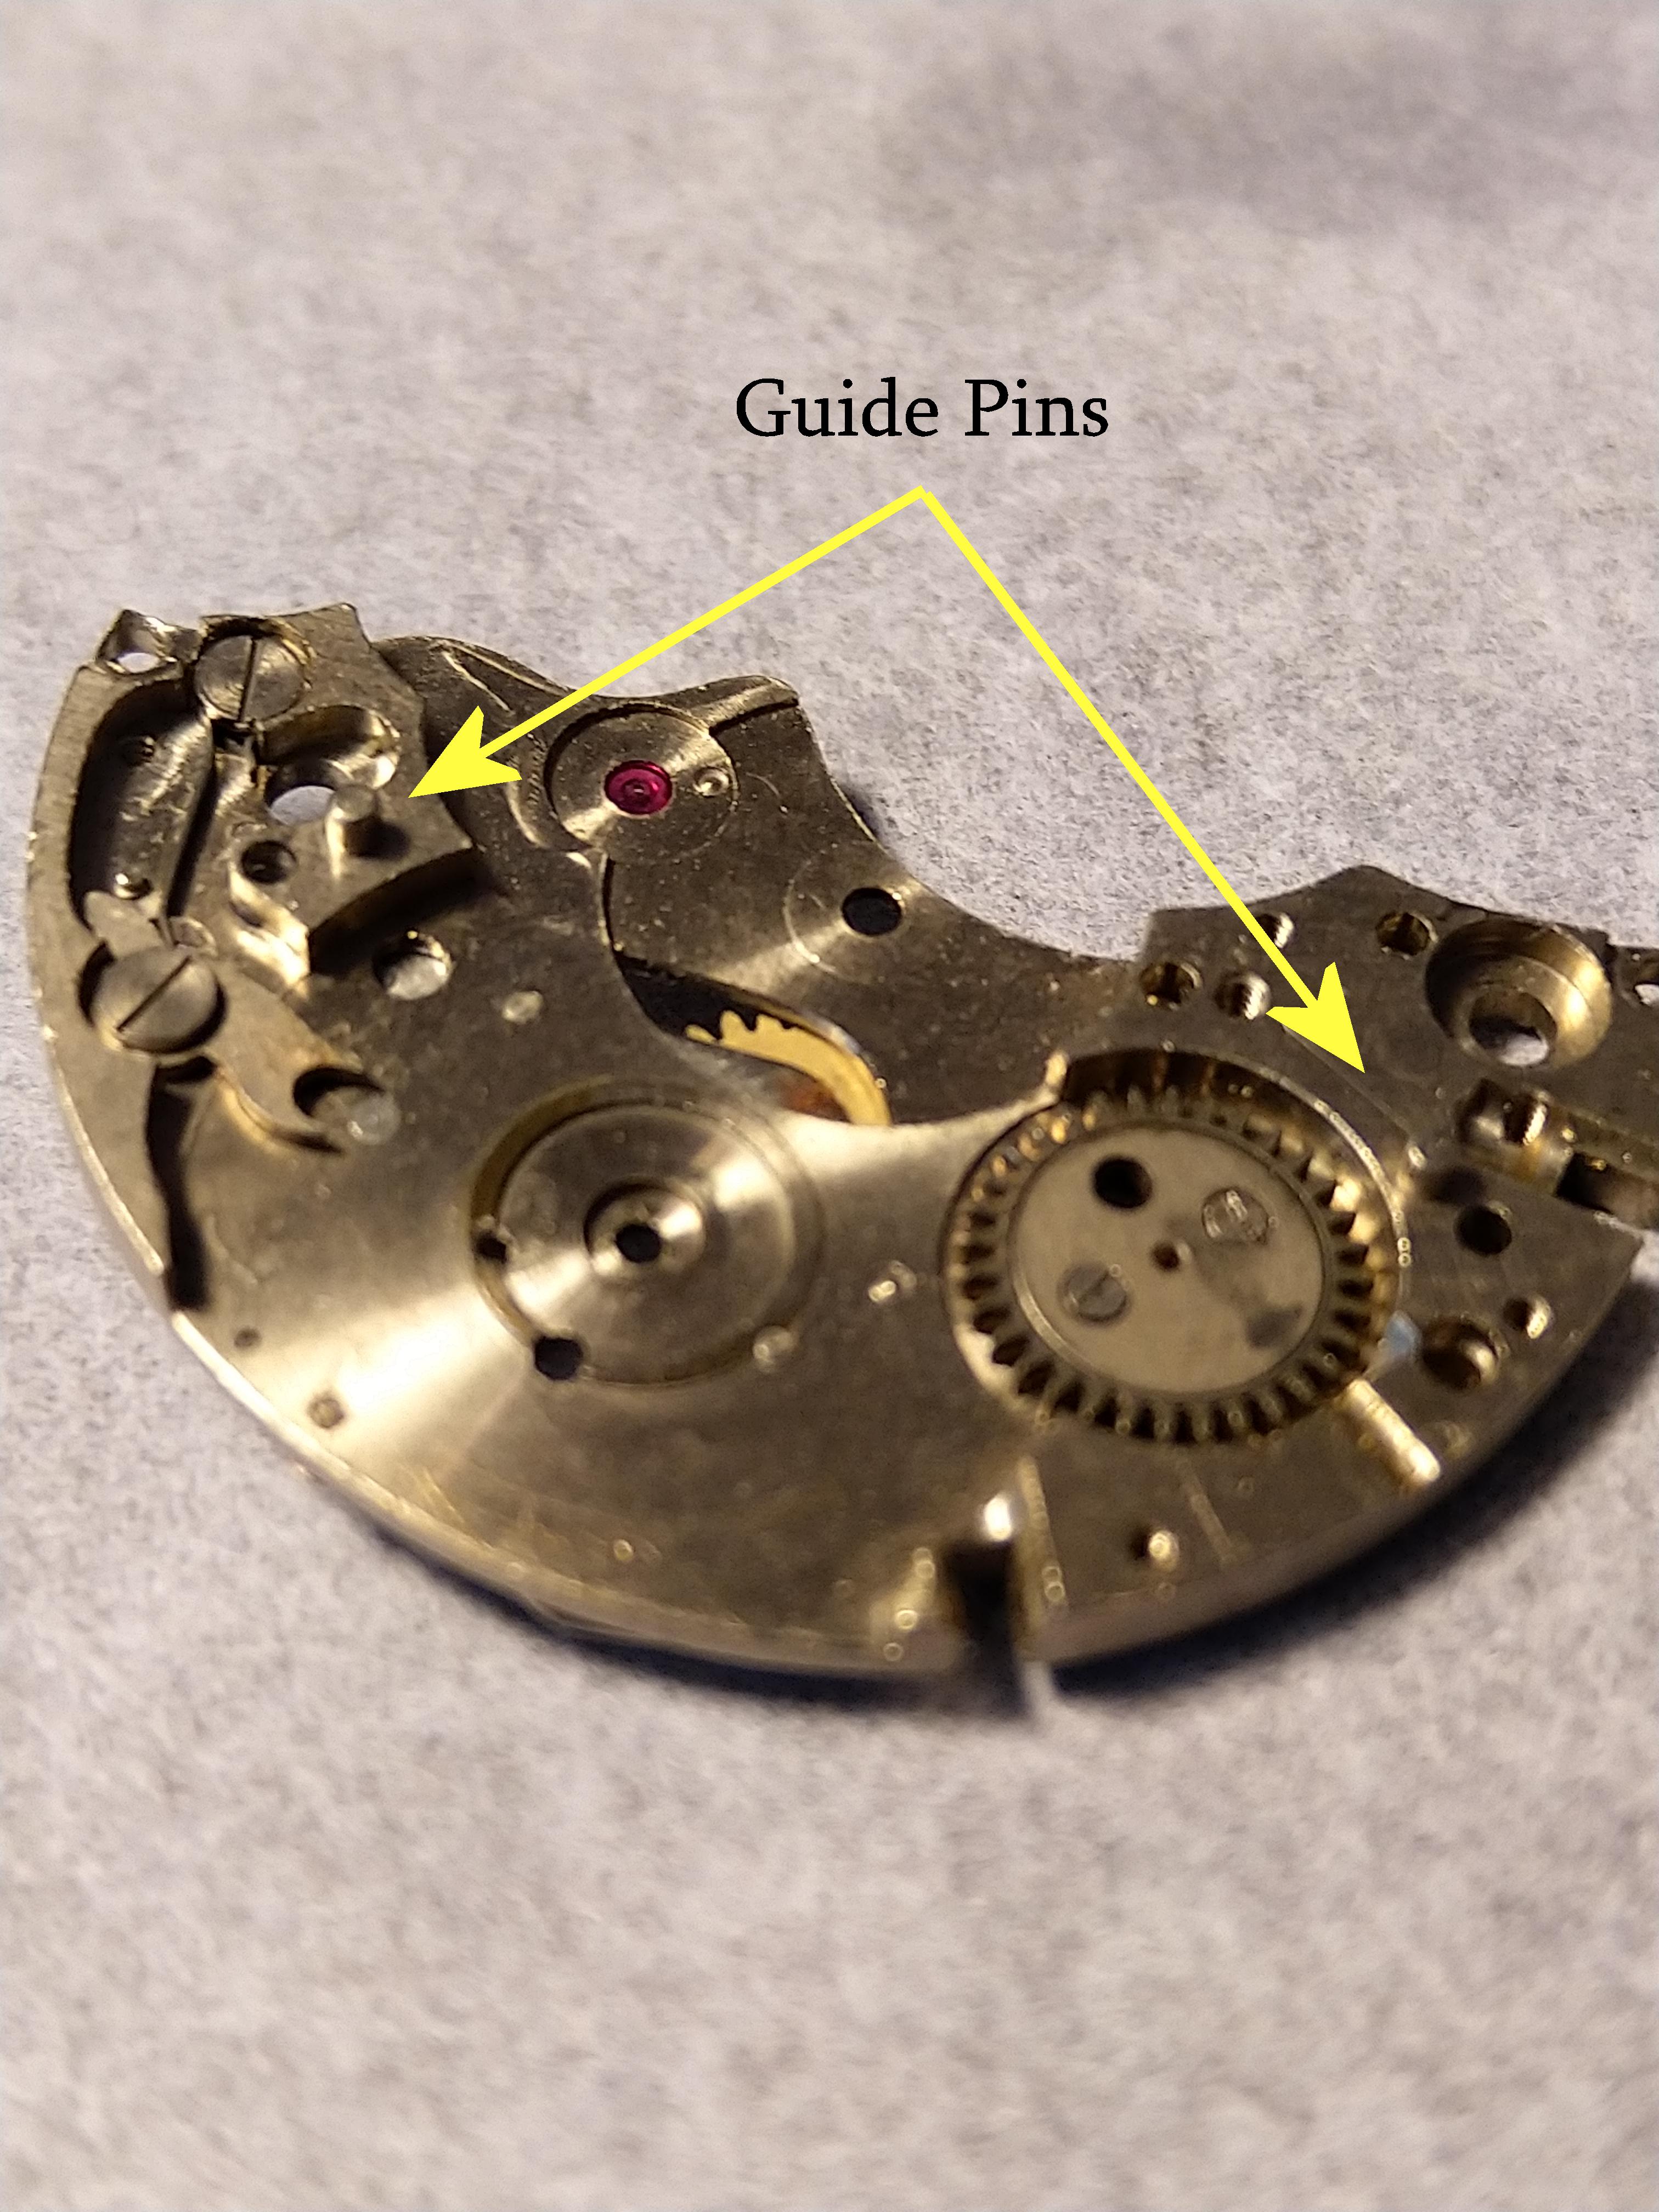
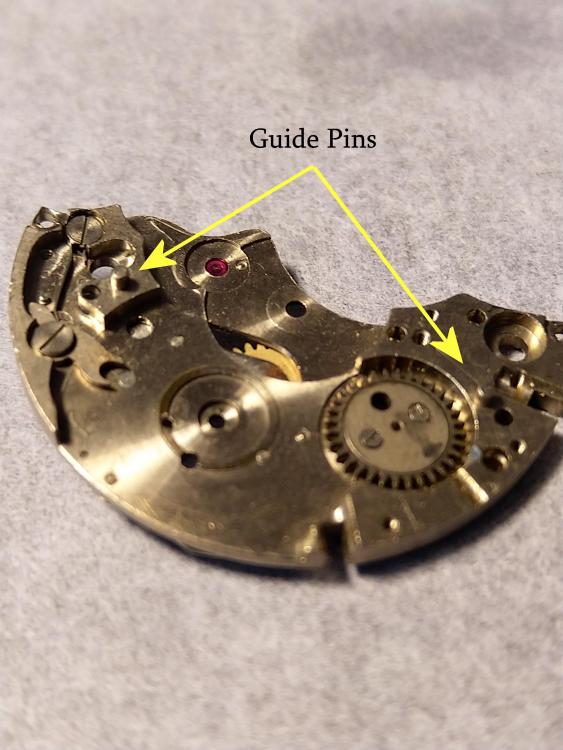
Yes the loose pin is a guide pin from a bridge, but from which you have to find out your self. I'm still pussled about that tube in the jewel, how is it supposed the lubrication comes on to the wheel pivot from the oil cup?
 1 point
 -
That little modification isn't a very good modification, it will require you to modify any pivot on the replacement wheels you buy since I guess the inner diameter of that tube isn't the same as the diameter of the original jewel hole. I would have replaced the jewel and put a new 4th wheel in. If the screw you arre woundering about is the one in the 3:rd picture then it is just a normal screw from the bridge, it should come ontop of where it is now when you put the trainbridge back.1 point
-
About that small pin: Maybe it should be in the barrel bridge (left of the crown wheel) to ensure the positioning. https://www.buzzufy.com/product/landeron-248-barrel-bridge-part-for-chronograph-watch/1 point
-
Hm, is it possible, that the tube (or a part of it) of the little permanent second hand is still sticking on the pivot of the fourth wheel?How does the hand look?1 point
-
You may be correct. Done and installed and works well. And then I found a bad Upper Jewel and had to trim a setting I had that almost fit. Used jeweling Collet in 50mm chuck with a 2mm flat graver and got us down to size. Pivot needed a bit more adjustment. Done and dusted. The movement has a bad mainspring so I installed the balance and put a small push on the center wheel and the balance came to life:) Sent from my iPhone using Tapatalk Pro1 point


.jpg.d958b8cc900212bb26e2febf5e8f5138.jpg)