Leaderboard


Popular Content
Showing content with the highest reputation on 03/19/19 in all areas
-
Here's a fresh upload on Thingiverse for 3D printing. A simplemovement holder for Miyota 8215, Clones and other variants. https://www.thingiverse.com/thing:35018432 points
-
2 points
-
This particular one is not possible to pin unfortunately. The best remedy is to clean out the old adhesive and apply new. I would use a slower drying epoxy (very very small amount applied using a clock oiler for example). Apply when the glue is tacky enough to hold the spring in place so you can test if it is correctly positioned. Once you are convinced of its correct position along the length of the end of the spring then leave it to set. Do this with the stud re-attached to the index but the hairspring not attached to the balance staff so that you can check the position of the hairspring collet being directly over the pivot hole. This will make it easier for you to observe that the spring is straight and true on the stud.2 points
-
Just finished the Level 3 Watch repair course and it was great. Tons of great information and excellent instruction by Mark. Scored well too. Can’t wait for the Level 4 Course just to see it I’m doing it right. Great tips throughout the course as well. Sent from my iPhone using Tapatalk Pro1 point
-
It's about 99.99% not a mainspring issue. It should limp along with a 5x weaker spring- poorly but running. Is the train free with the balance and fork out? Like two clicks of wind, train should run and escape wheel should turn backwards at least a little at the end. With just a few clicks of wind the fork should snap back and forth cleanly. With fork out and balance in, balance should oscillate freely and for quite some seconds with a swift twist of the movement. If these things aren't happening then start checking methodically. Going back to the barrel- it could be an issue: when you assemble it you should hold the assembled barrel between stout tweezers on the ends of the arbor and check for endshake. Make sure the cap is fully seated. Make sure the holes in the plate aren't too worn (often an issue with seiko). But even if all that was wonky it should 'run', at least poorly, with a couple of turns of wind.1 point
-
Hi, I shim the cock outbound ( pig,s ear with a piece of aluminum foil) to temoprarily lower the cock jewel so to prevent the wheel from turning. And mix the epoxy( not runny) after all is set up, smother the expoxy( using a safety razor) on a flat surface( piece of cardboard or glass etc) thin like .25 mm or less, all this just to have good control over the amount of epoxy you pick up, avoid picking excess epoxy ( so if your hand moves/ shakes no expoxy would be on the sides of the blade to get on other parts. Apply the glue and leave stud slot face up. You should have some acetone ready, to immediately rinse if any part get messed up with epoxy. Some epoxy may inevitably ran down the slot, which can later be scraped off. You should expect perfect results. No hard task for a horologist. Regards1 point
-
Congratulations old bean.1 point
-
Old pic but wearing this LM today. Not sunny so looks even more green than the pic. In direct sun it is blue1 point
-
Make sure the upper pivot is out of the jewel if you grab the cock and BW togther and you are not squashing the HS. The BW is not to be actually grabbed rather the wheel hangis on tweezers.1 point
-
Congrat JD, Your acheivements and satisfaction is encouraging. Best wishes1 point
-
Lubetta V105 was developed I believe by ETA. The Rolex reverse wheels are of a different design. Lubetta I think is lubricant. Most odd the Rolex reverse wheels have not lubrication.1 point
-
usually i use a balance tack but i only have one so if i have an extra balance iam working on i place it with bottom pivot down on a piece of rodico. i dont like flipping balance over because i always grab it by the cock, unlike mark how he grabs the cock and balance together. i guess its a matter of preference. placing it briefly on the desk like mark did will not cause any damage to the lower pivot though.1 point
-
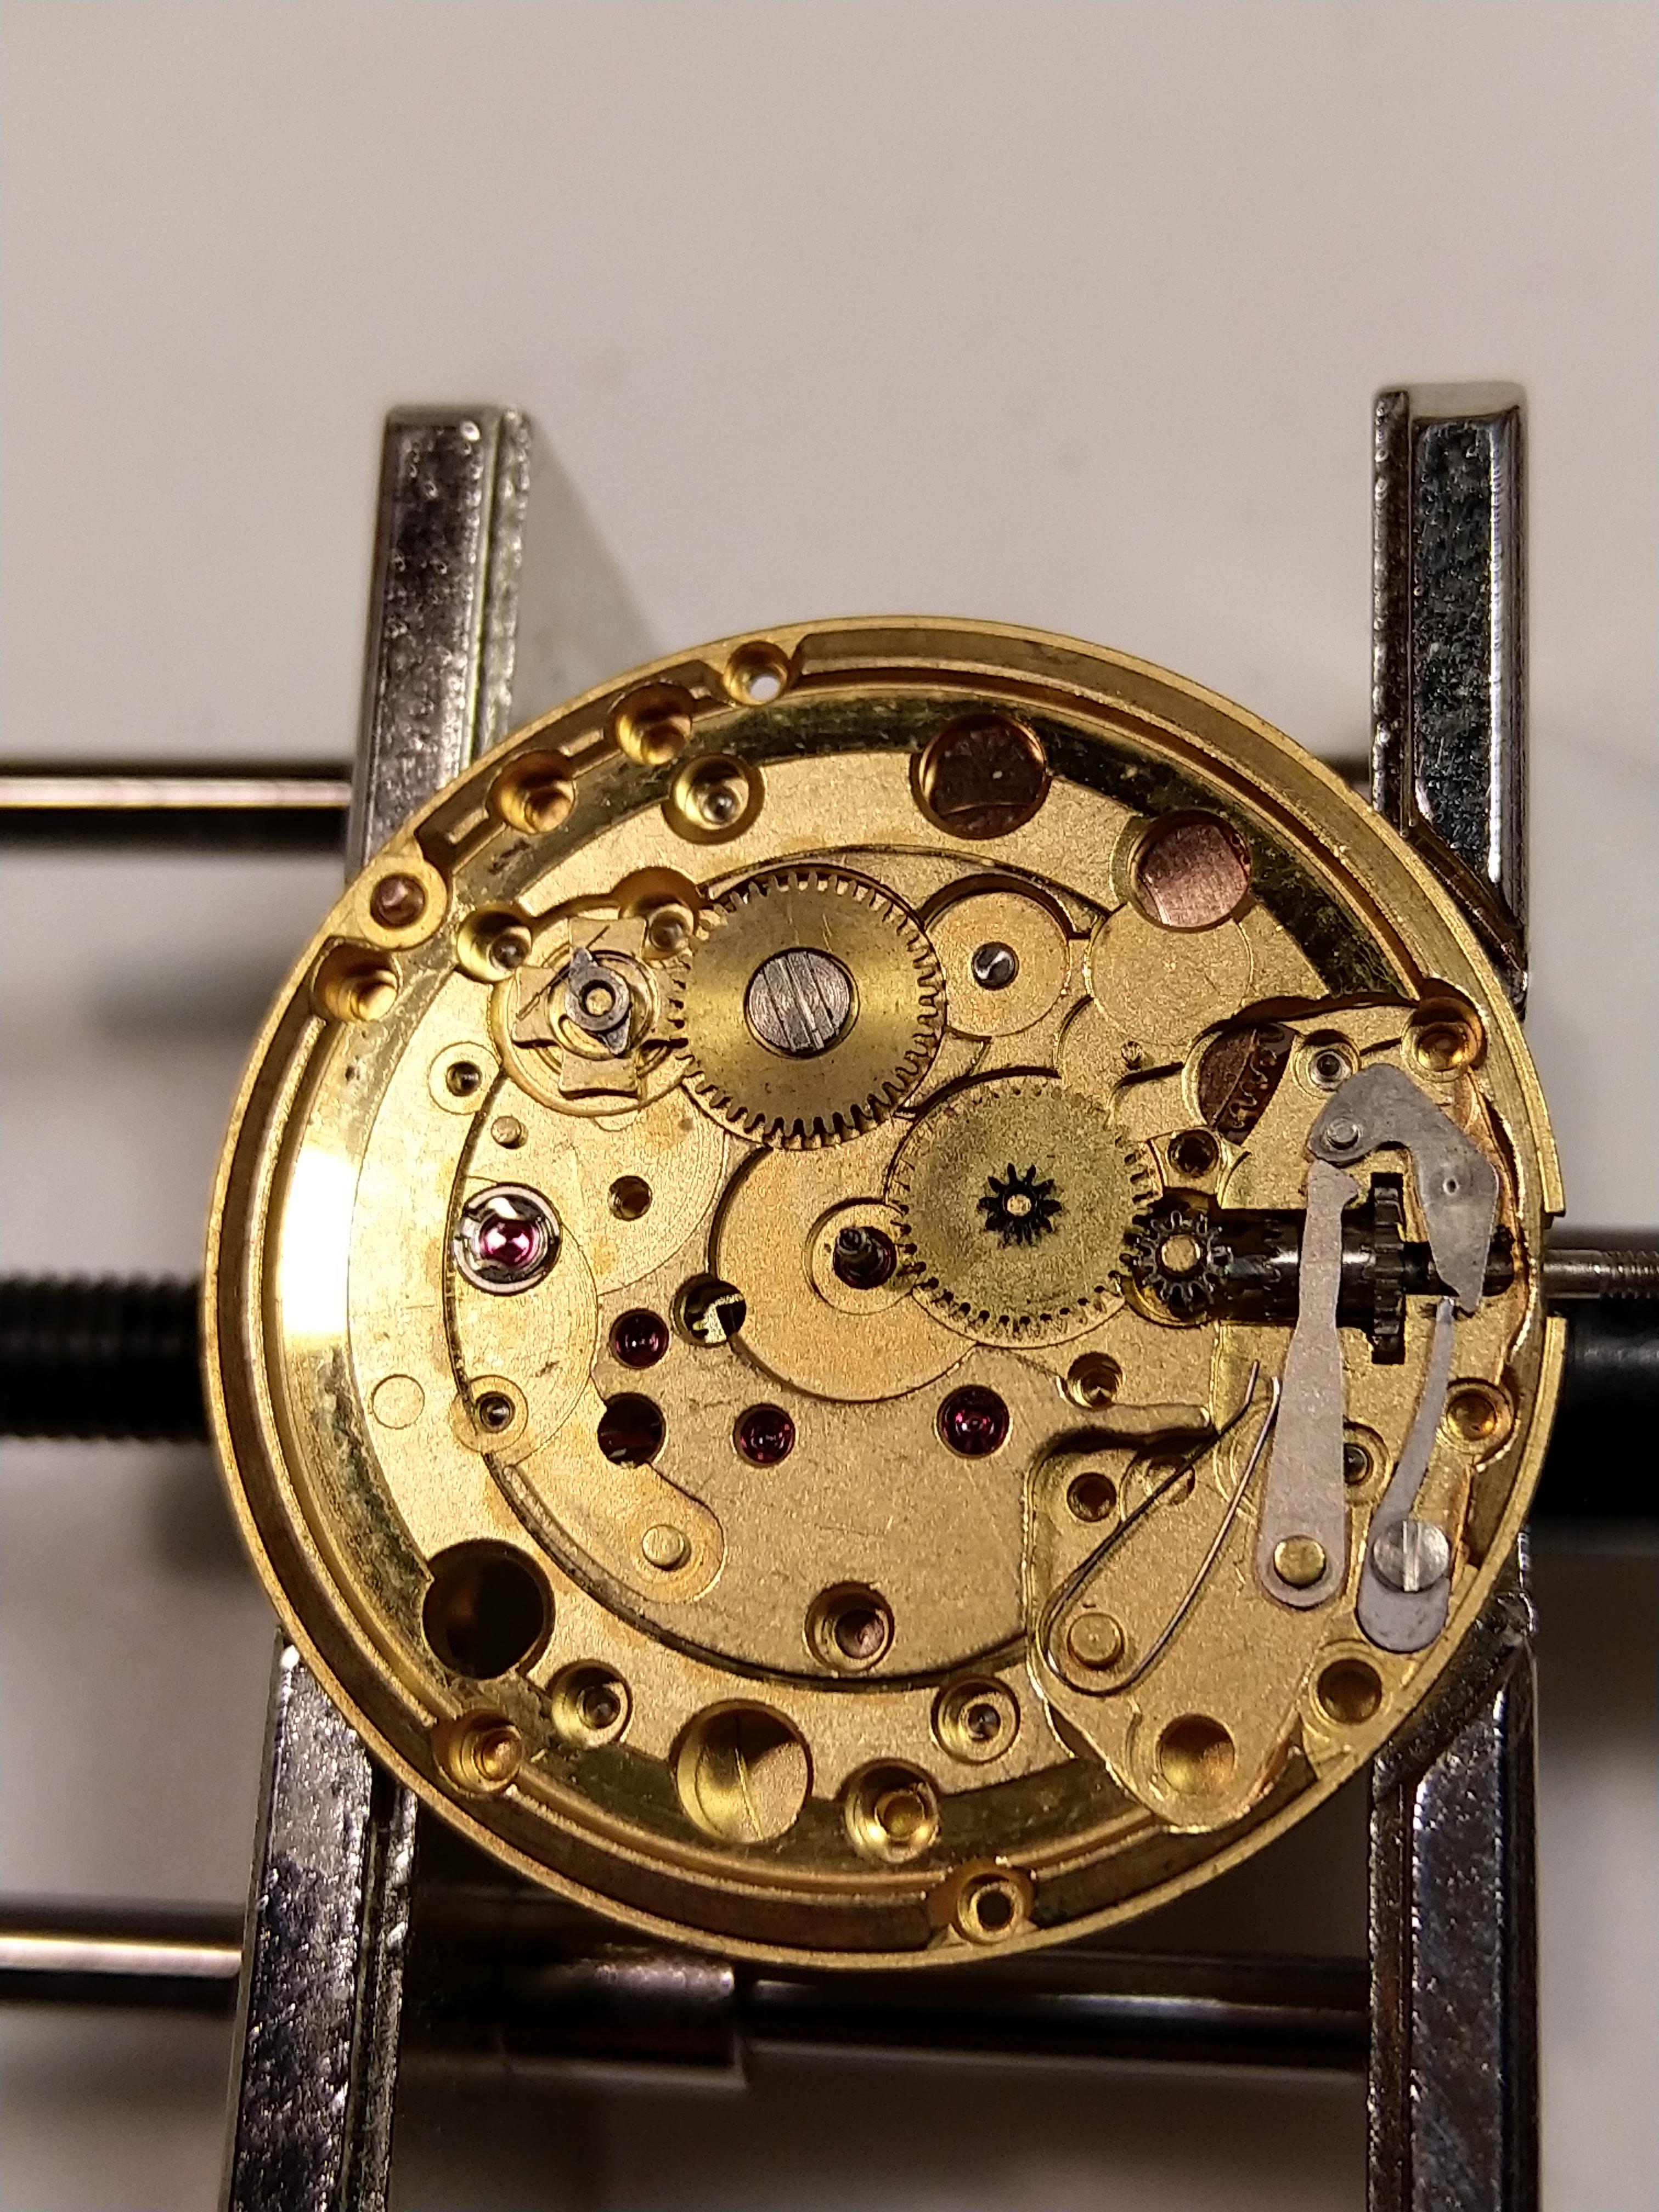
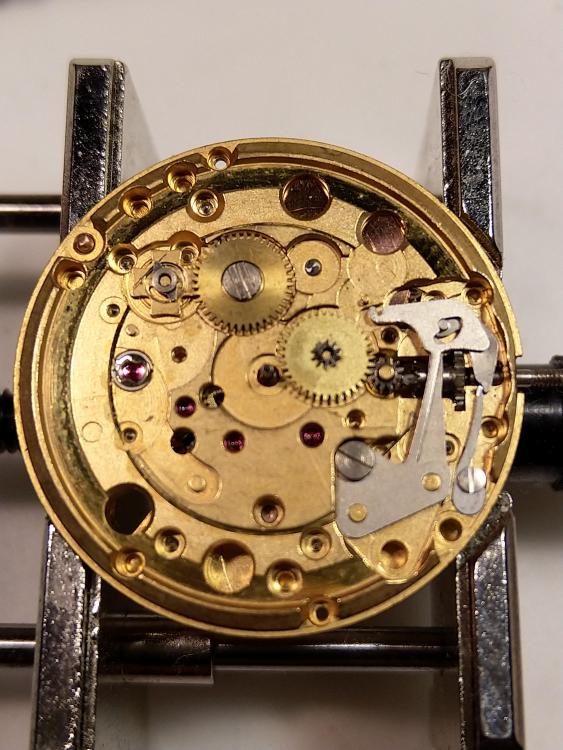
As the grand finale I now fix the bridge at the key less work into place , I throw in the hour wheel and test the functionality.. voila... Hope this will help you..
 1 point
 -
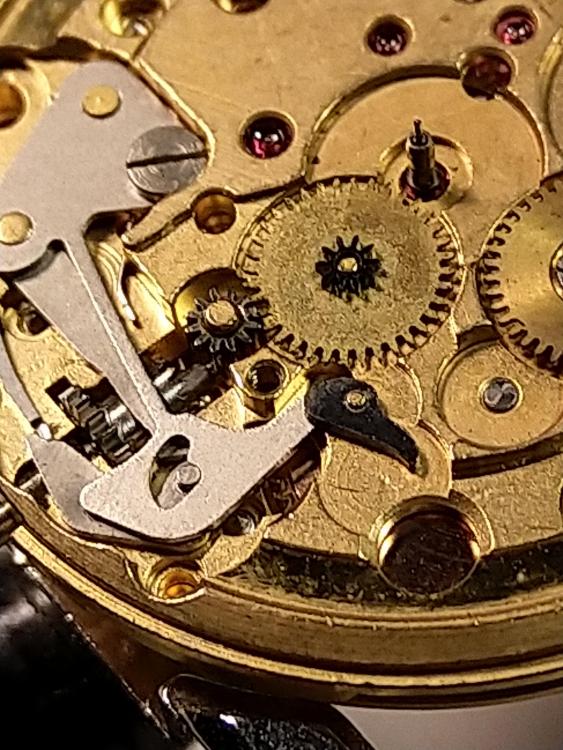
A tip is to insert the date jumper spring into the bridge fist, use a peg wood to push it in place. Put the date lever into place and gently slide the bridge with the click spring into place. Next I put the datering into place and check the date click end up in the grove.

 1 point
 -
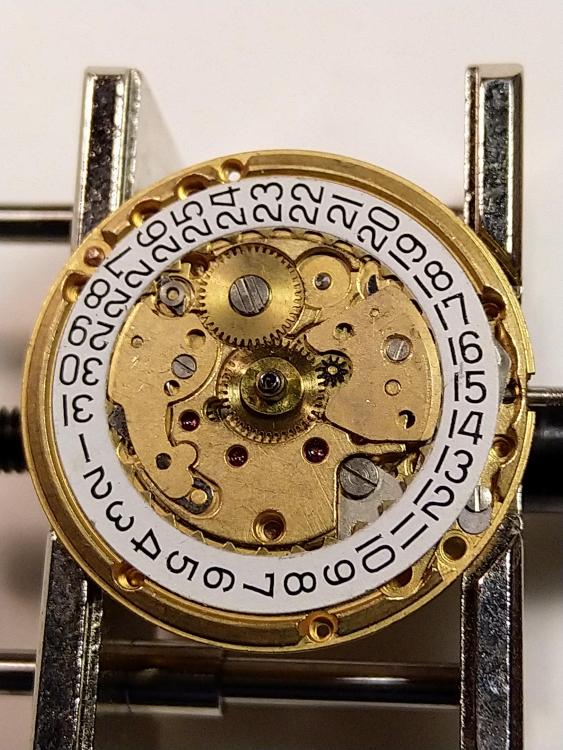
A pizza and five beers later it's time to reassemble the date part. Must say it's a hairy work if new to the trade. I start with putting back the date lever spring. make sure you get the setting lever into position. Next I put the date lever into place, make sure the little nob on the lever ends up in the little **BLEEP** in the spring. Now I switch side..

 1 point
 -
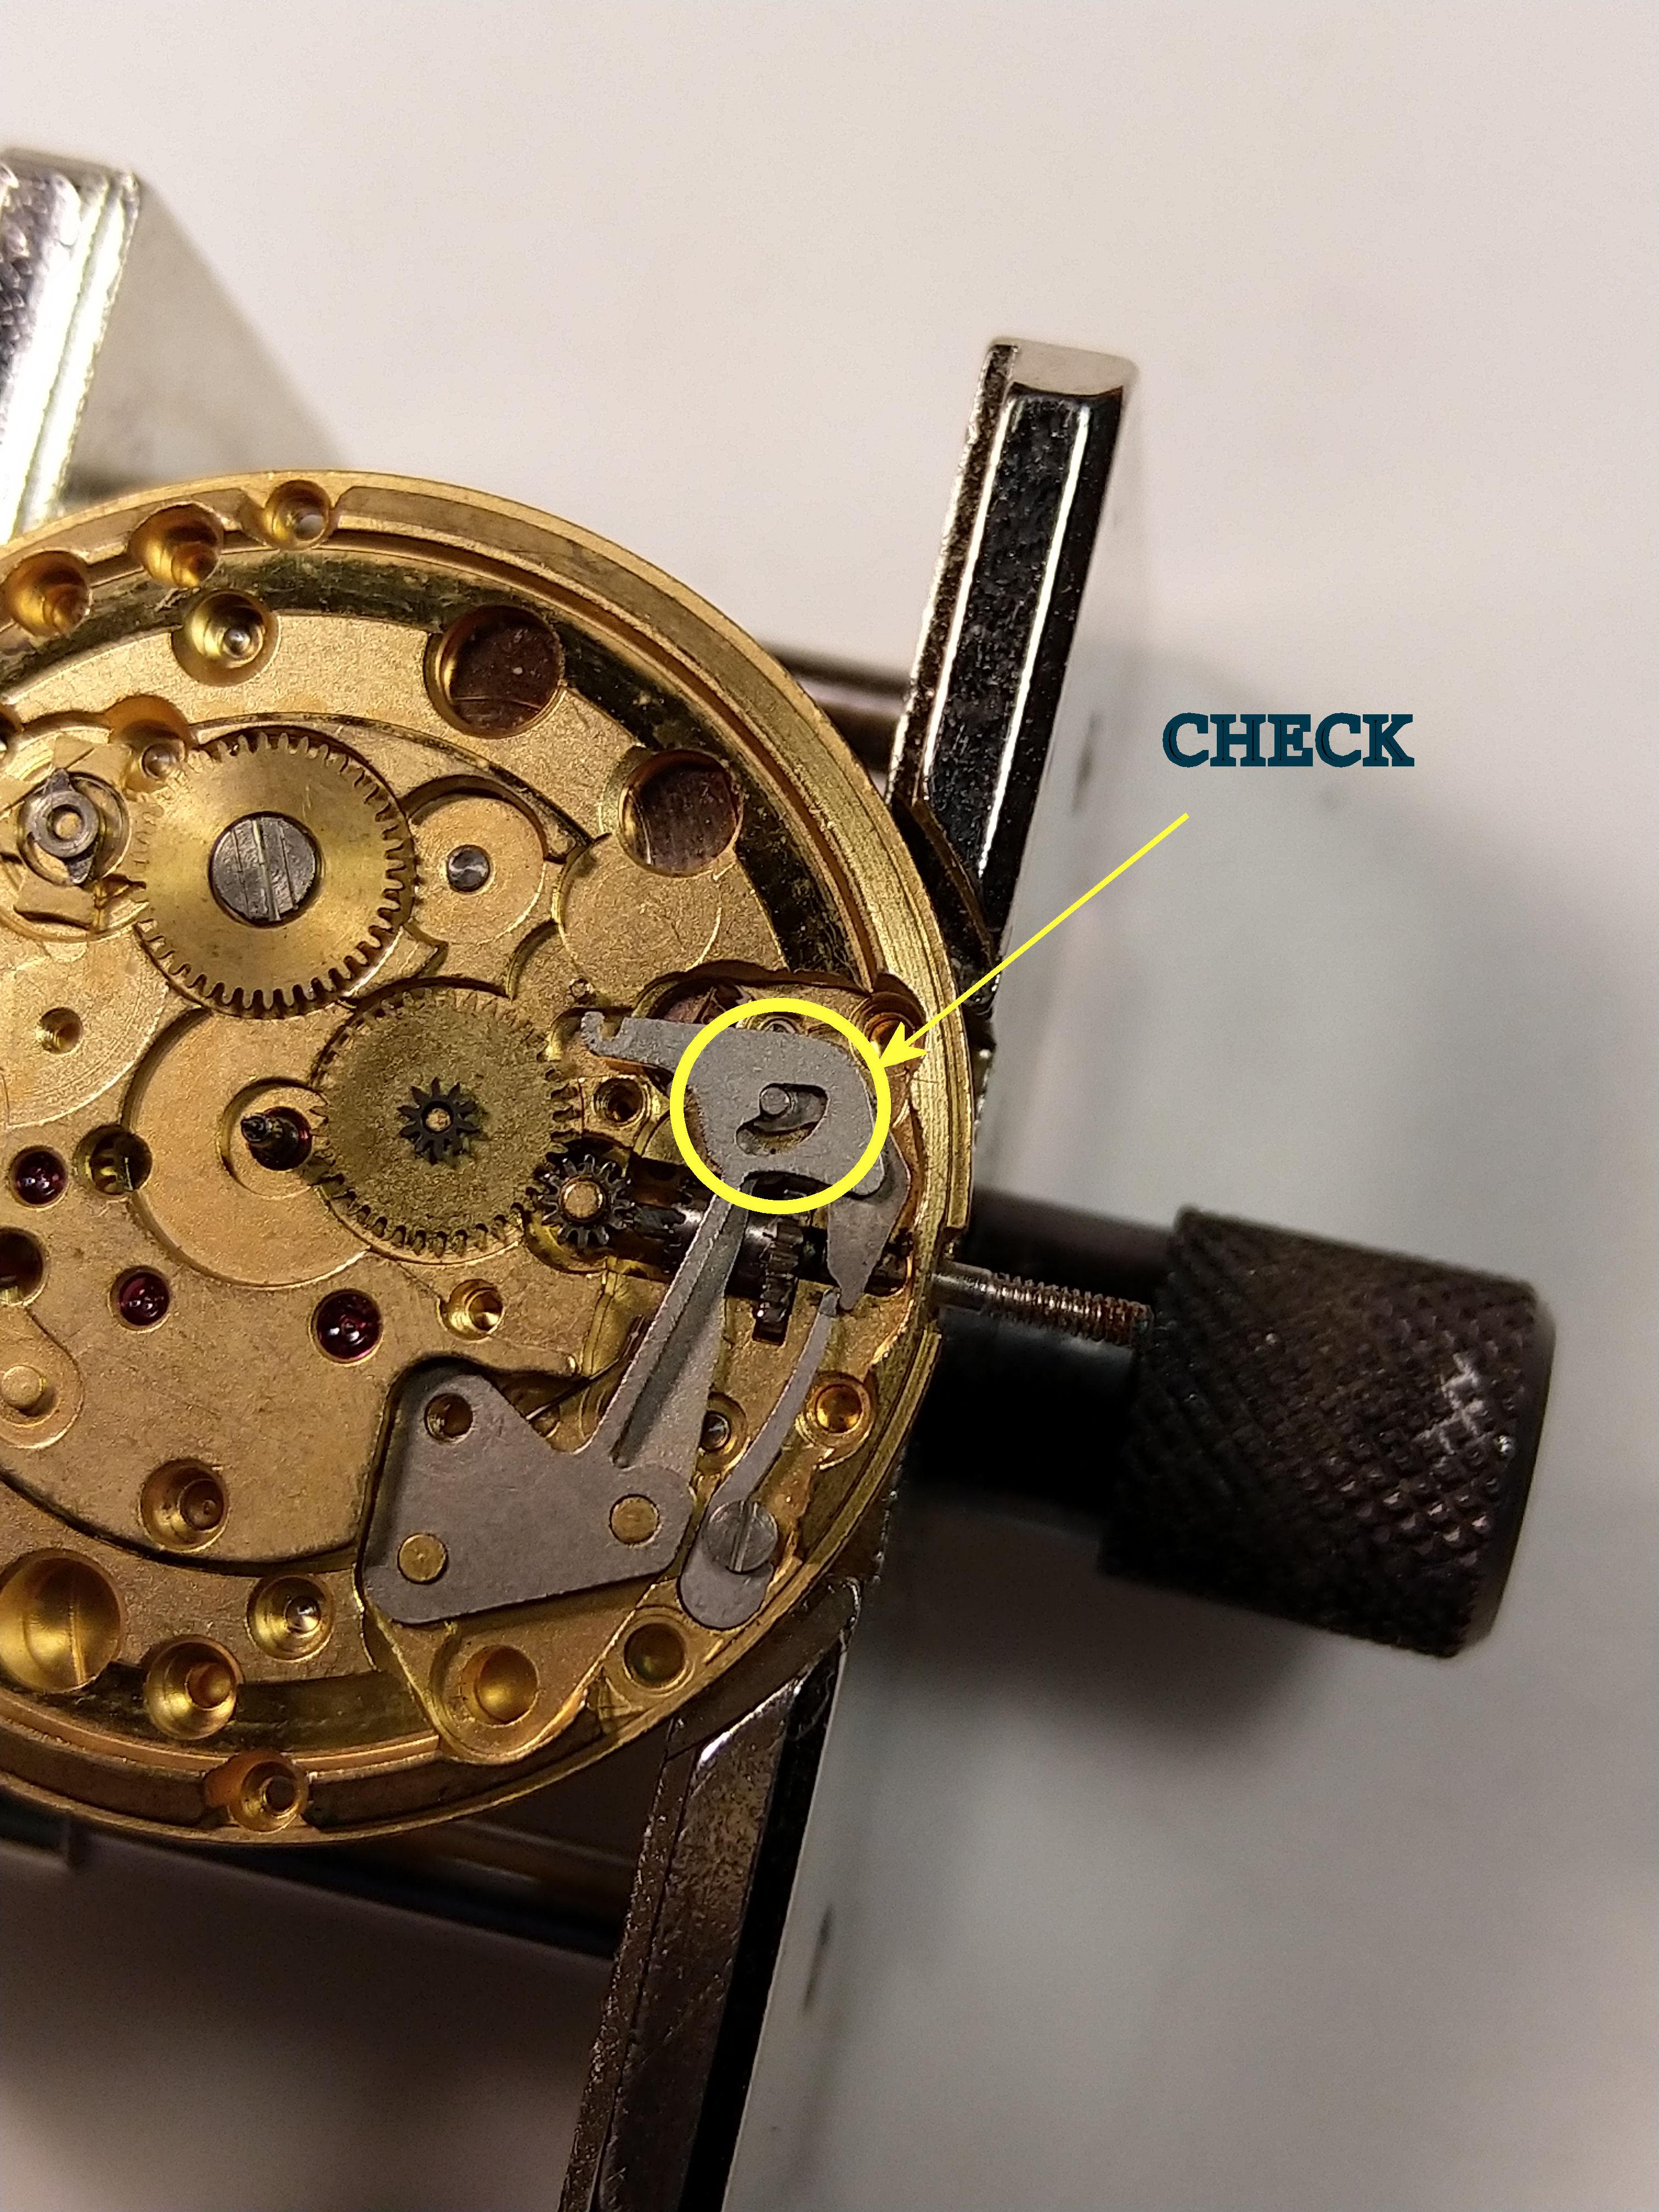
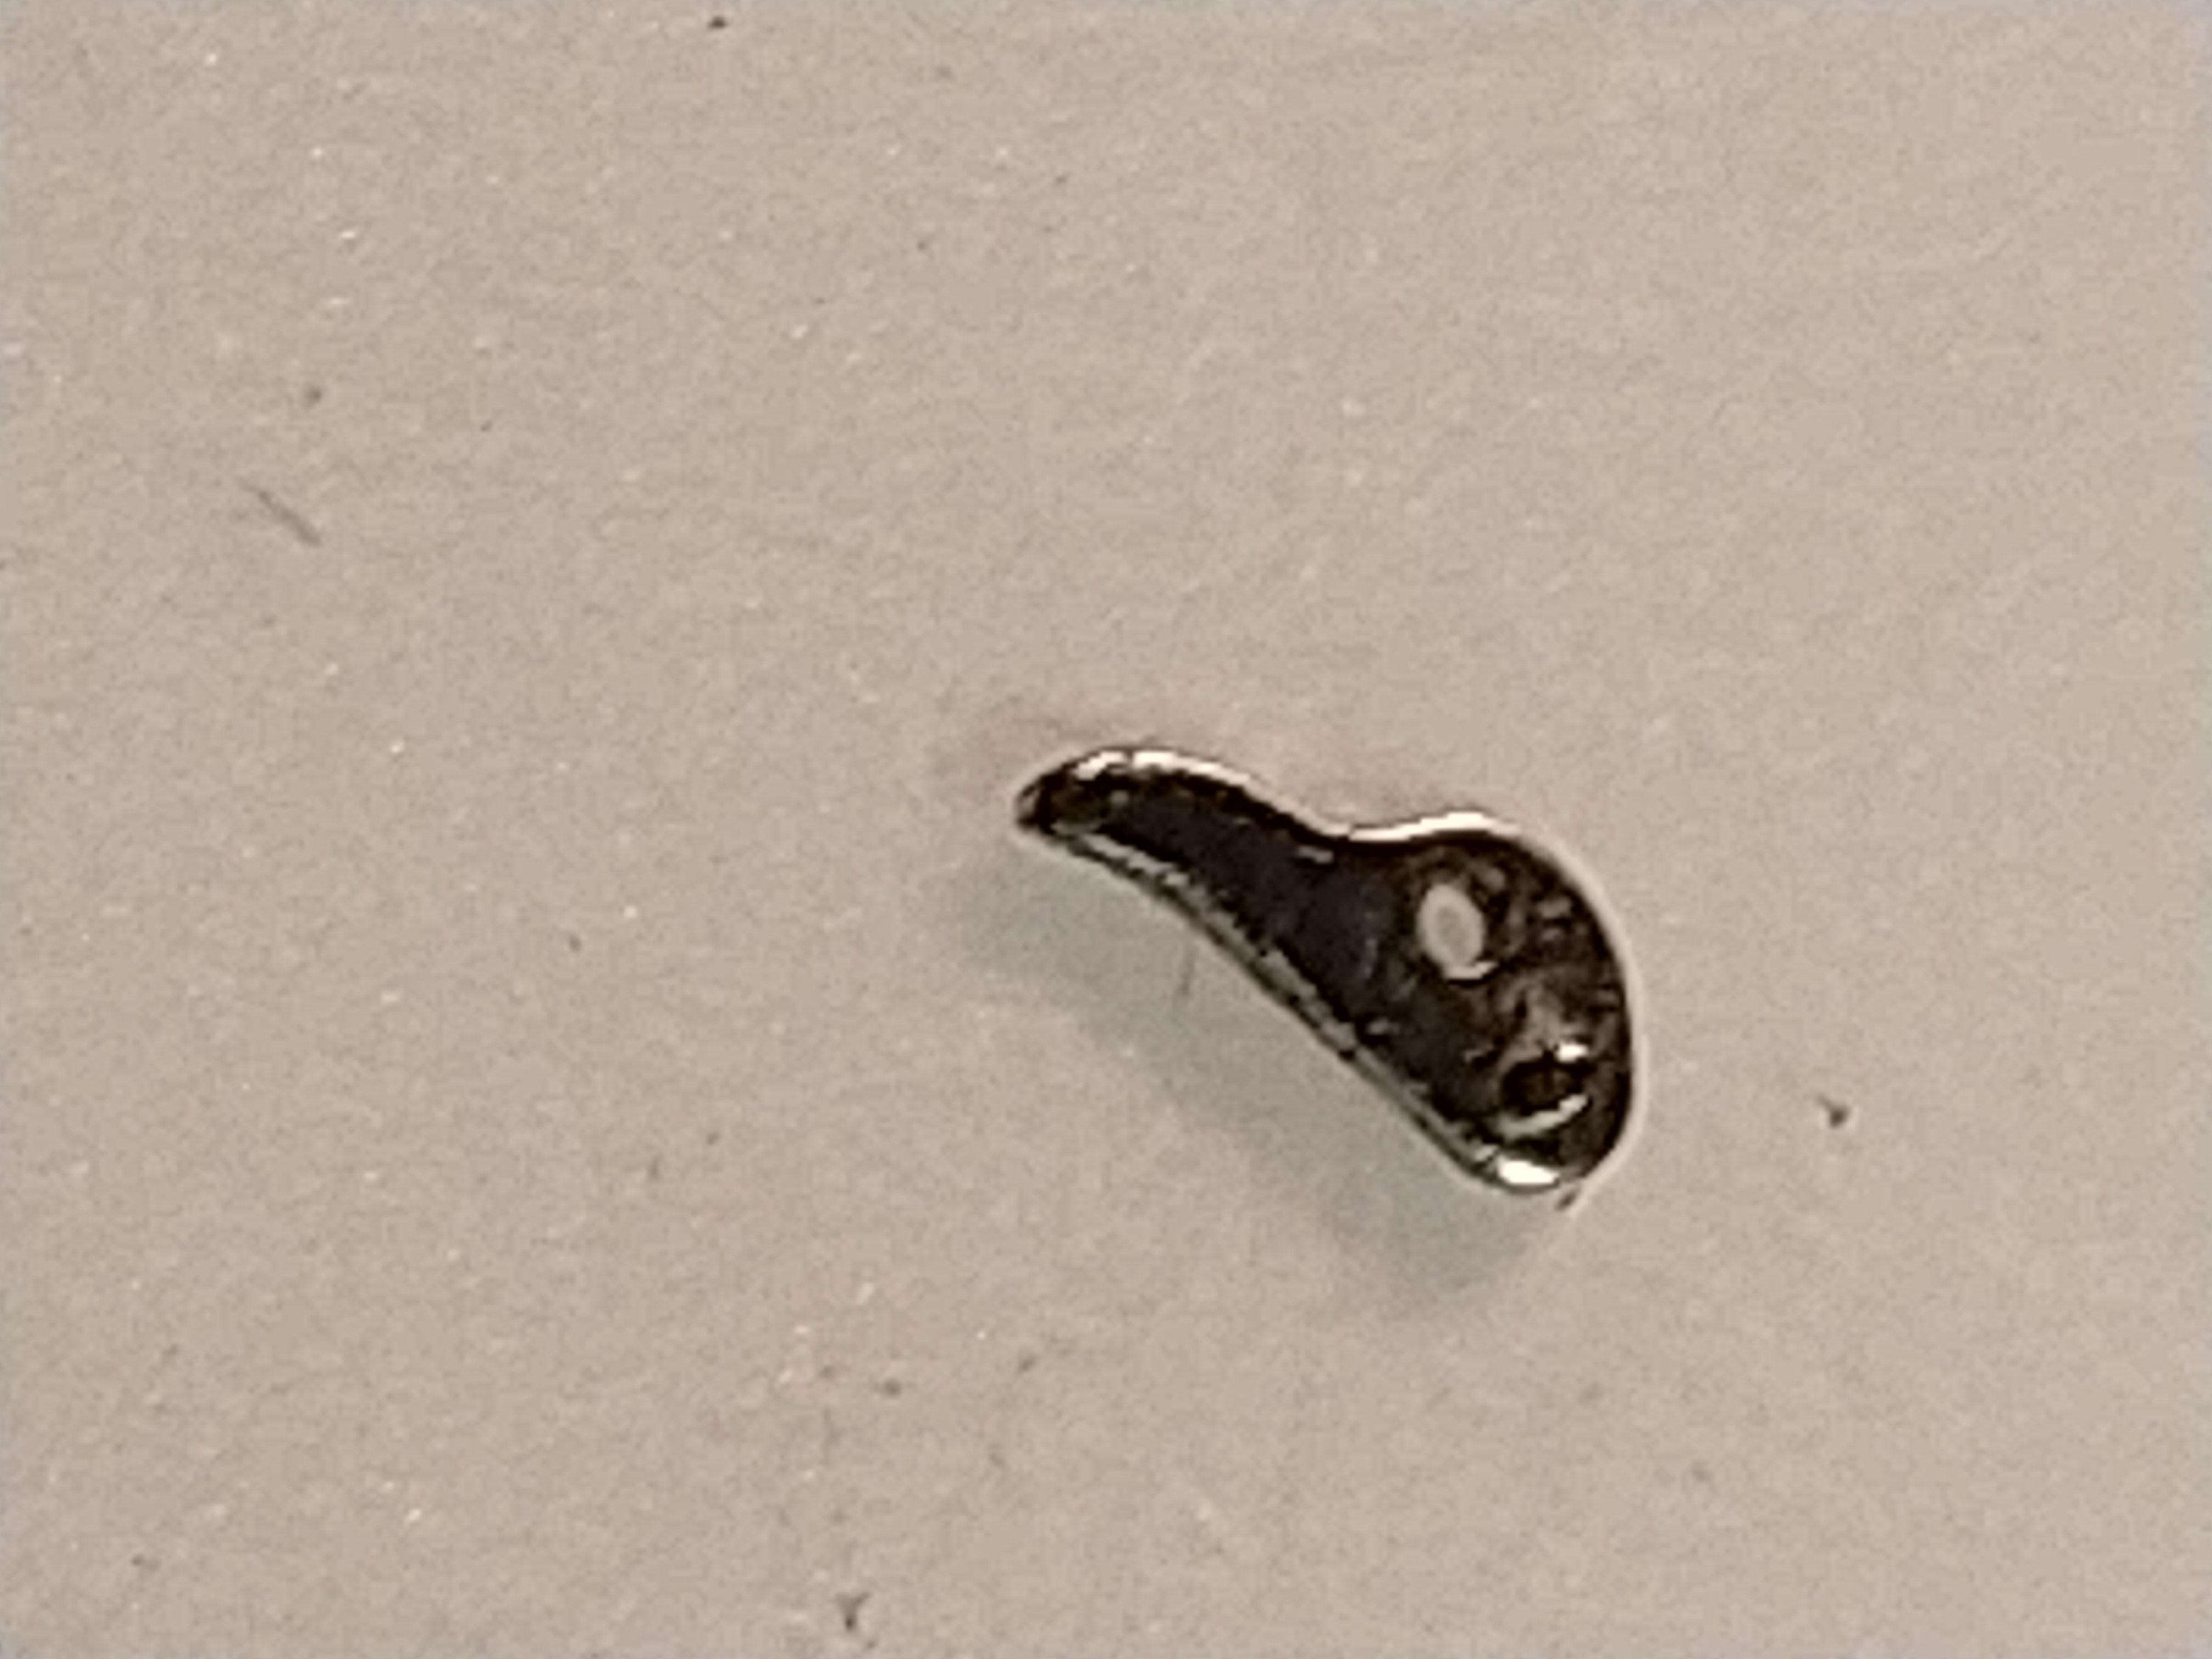
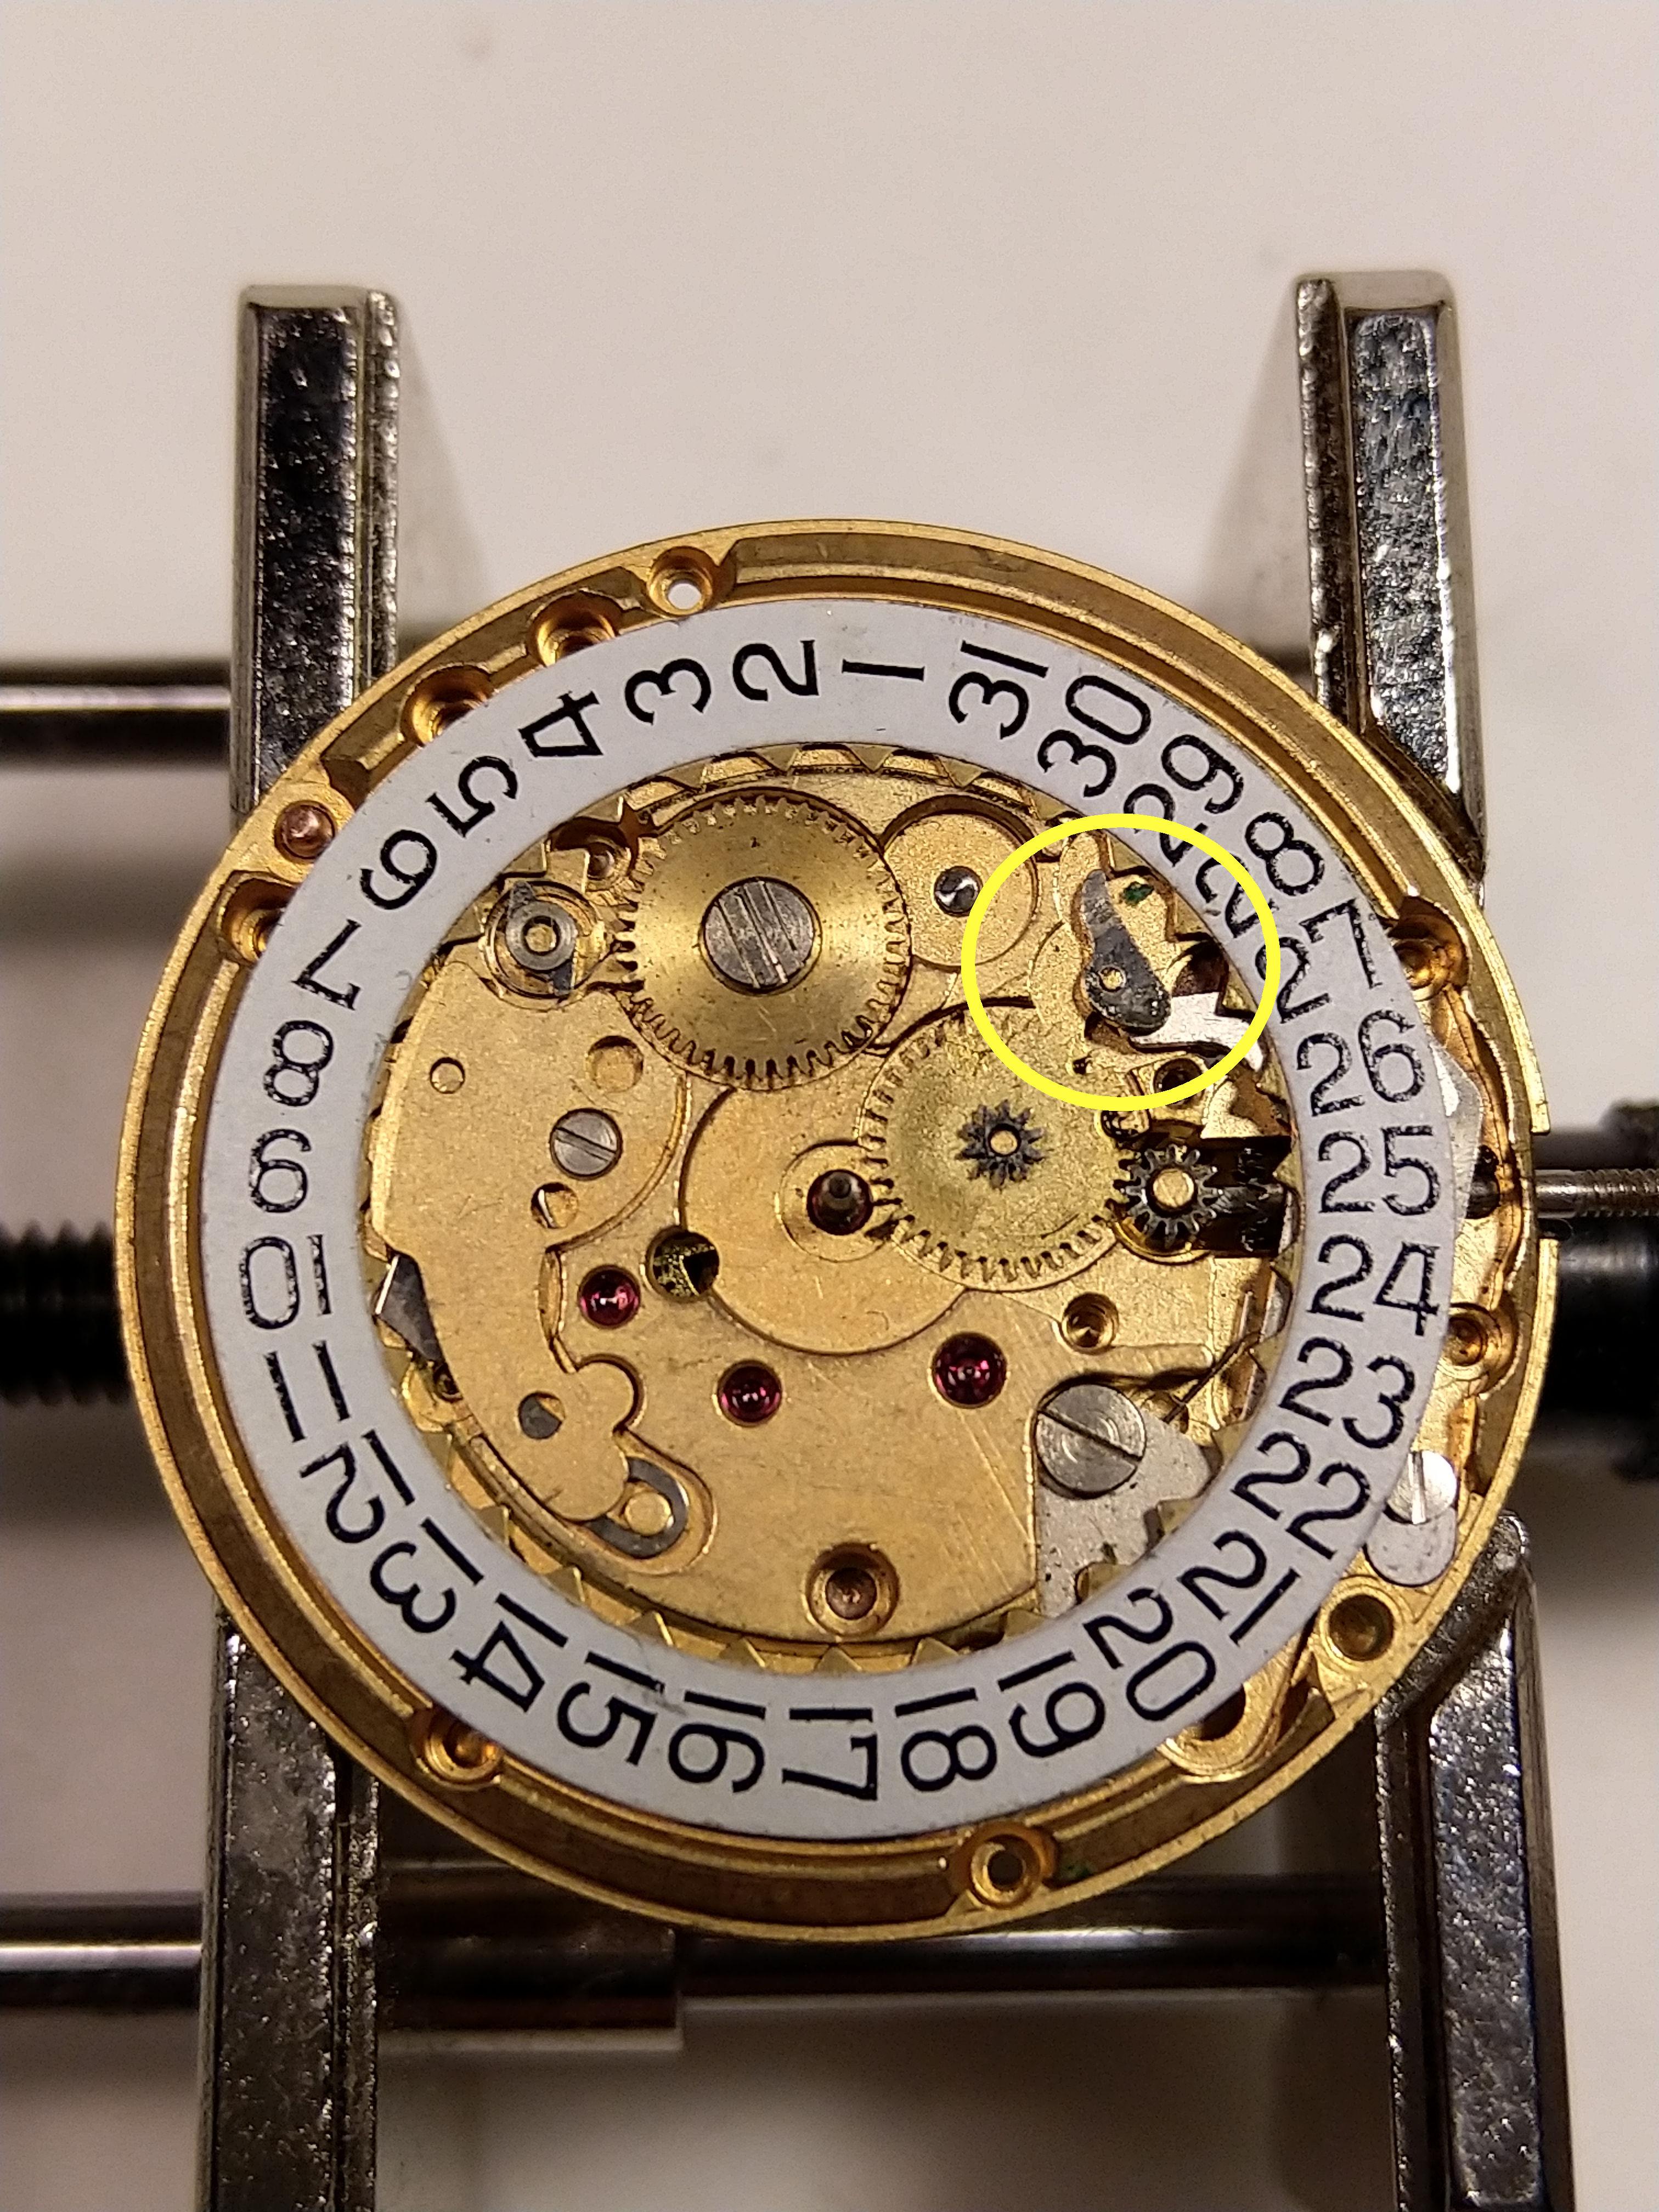
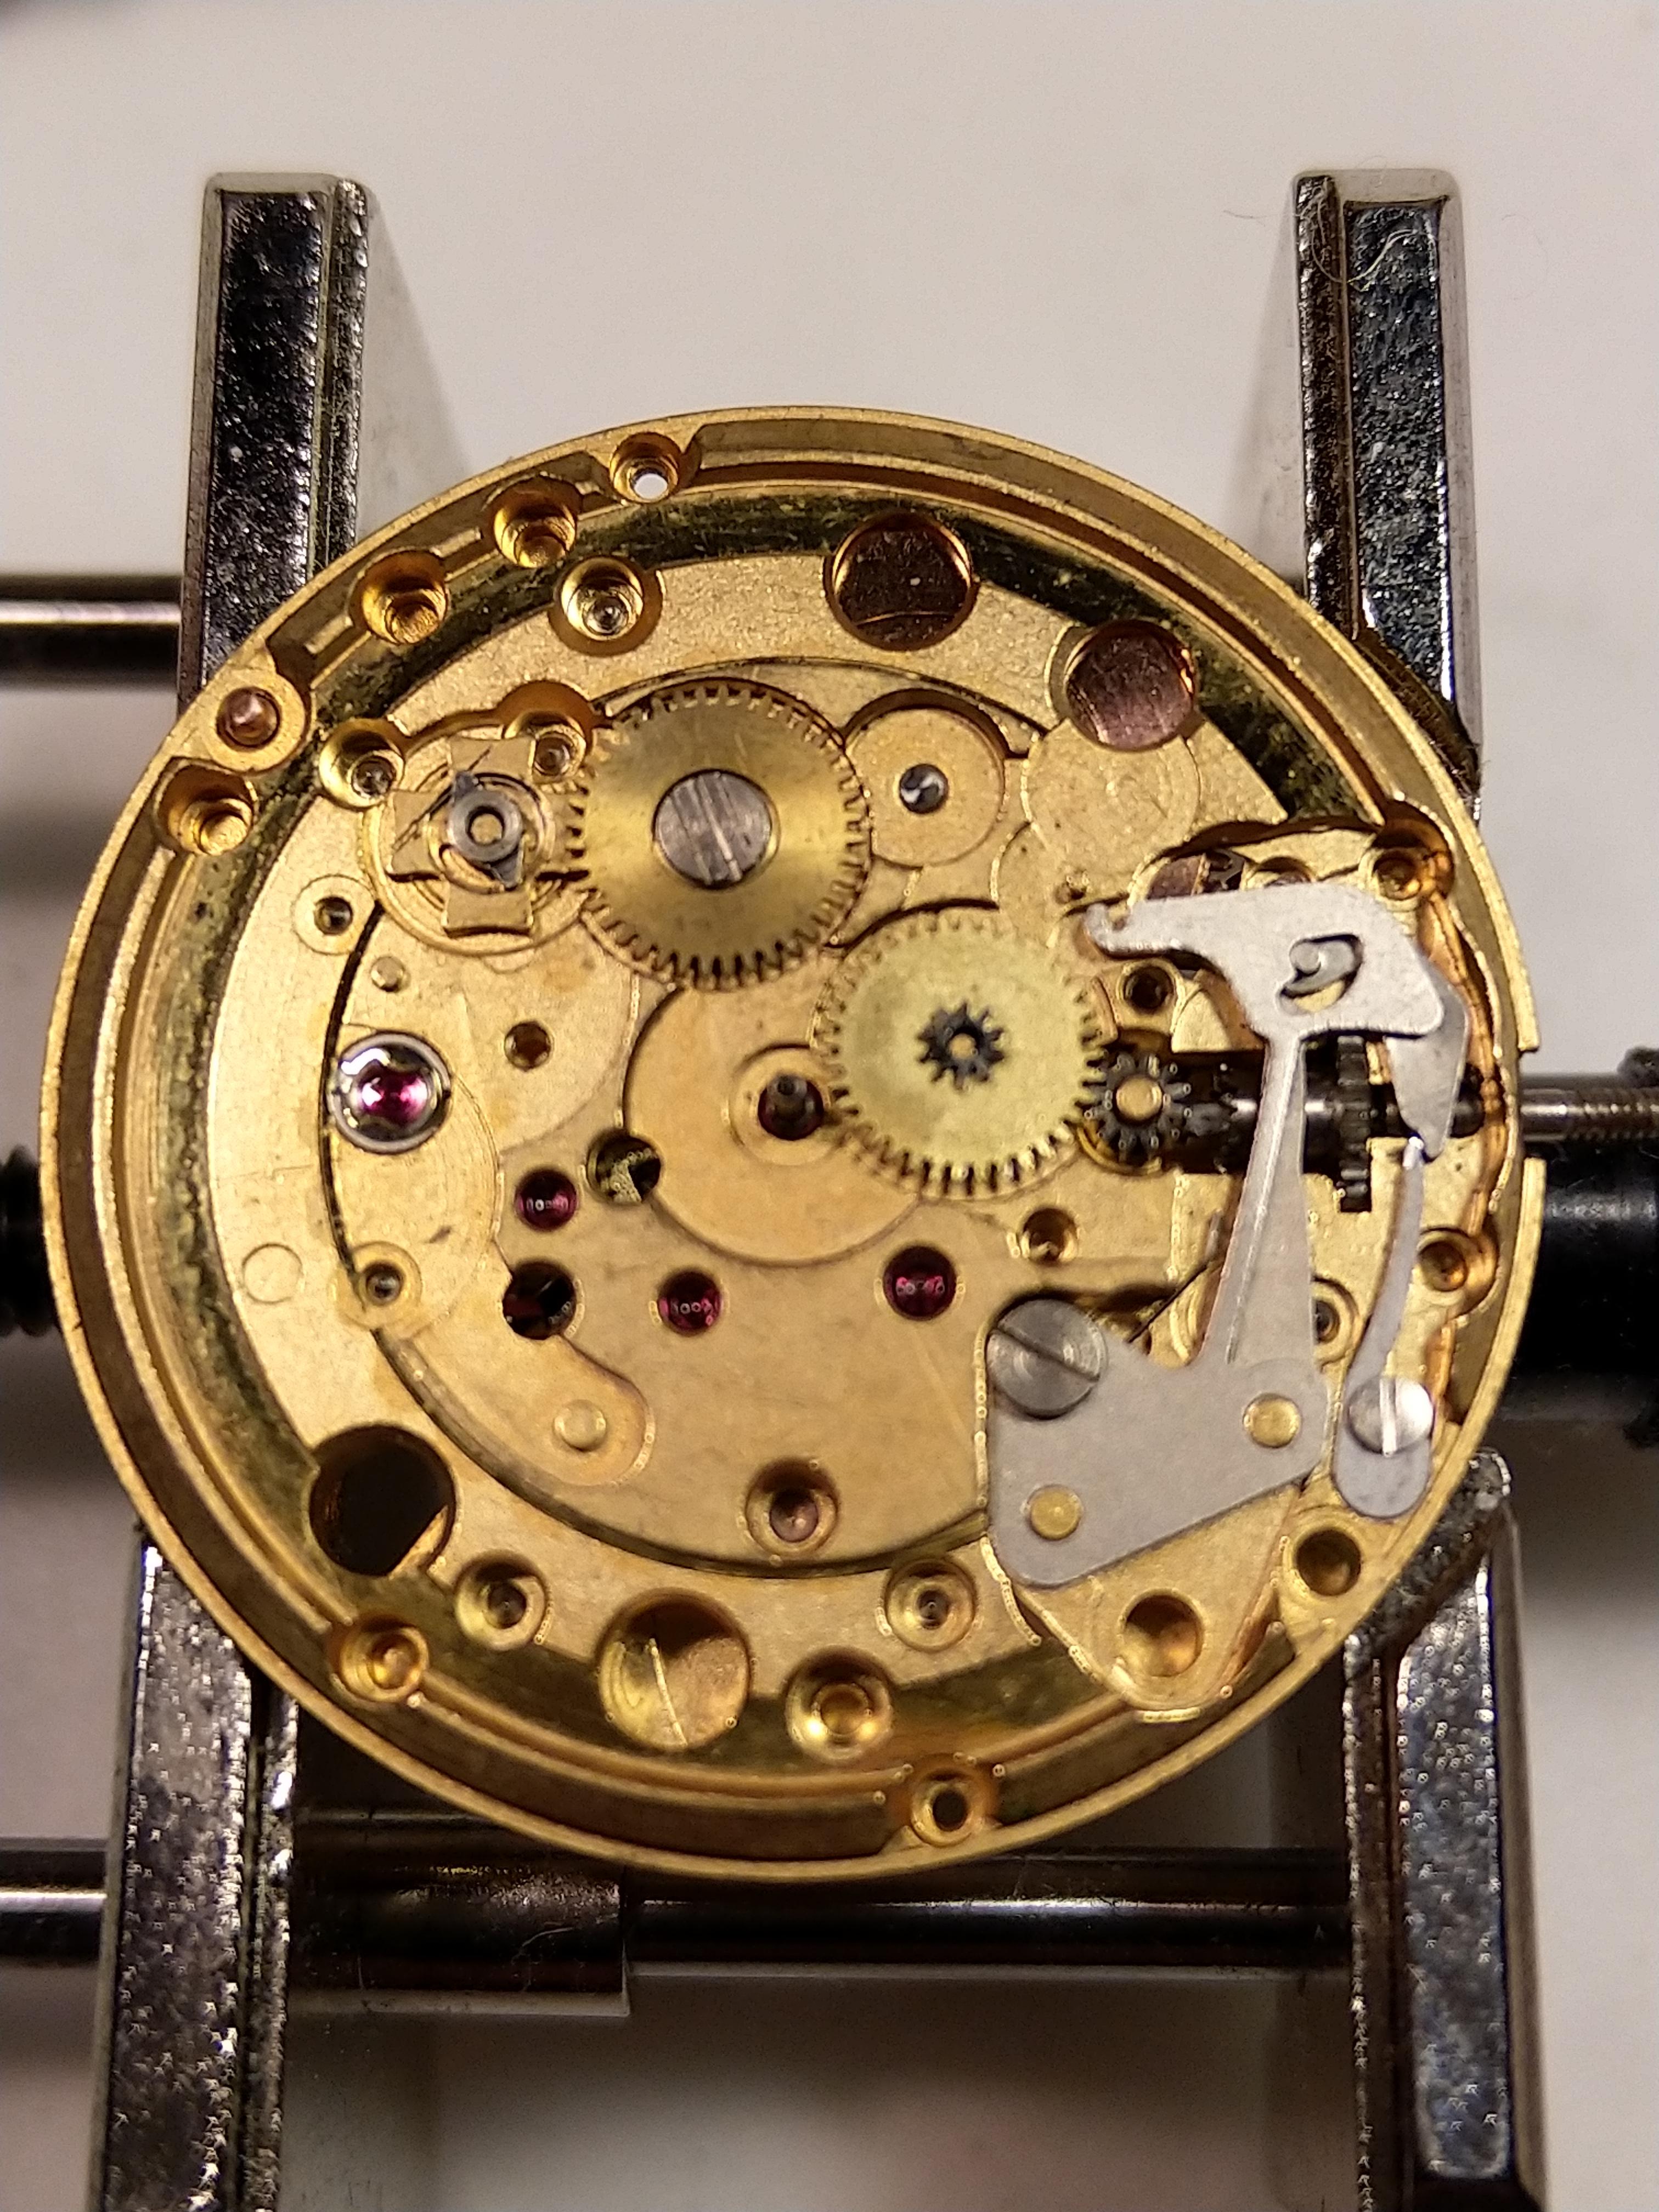
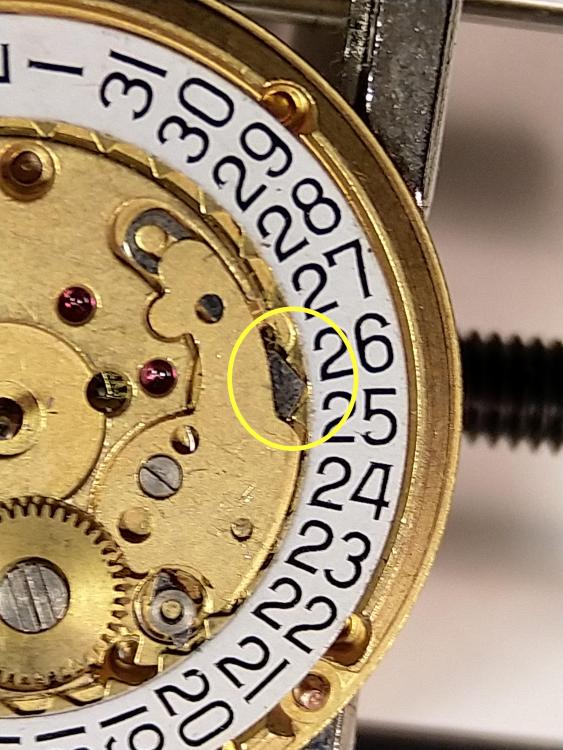
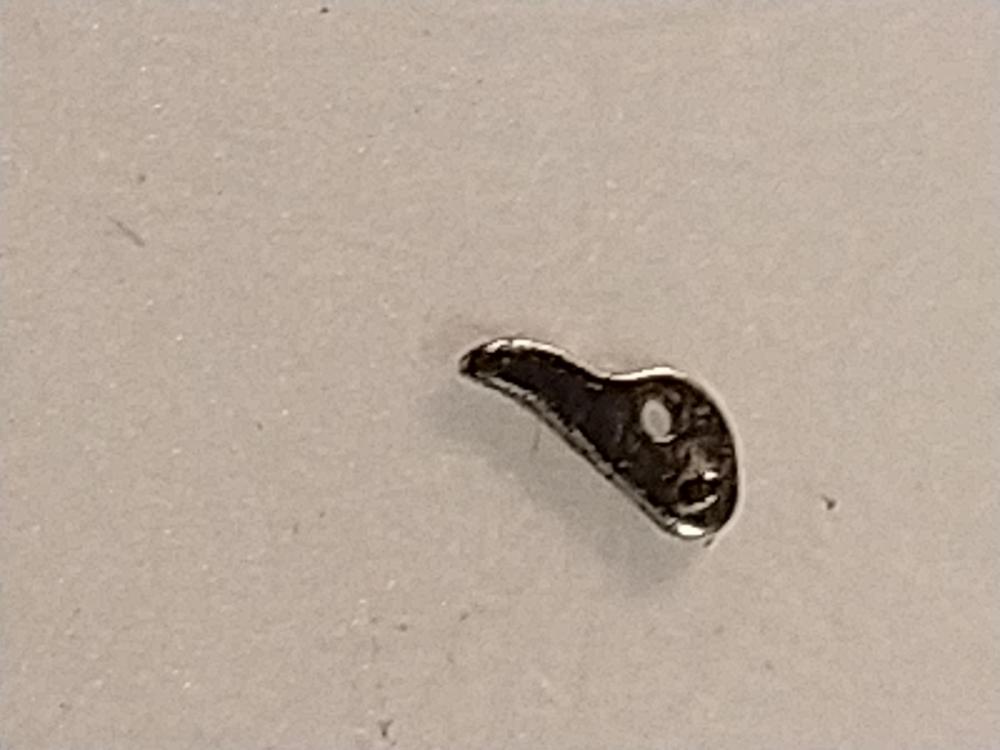
Think this is a nice movement too, but on the other hand I say that about all of the mechanical ones. These have that push change of date. When I look at your picture I miss the part changing date it's a small lever marked with a yellow ring if this is put back the wrong way it will cause some problems. I add some pictures of how the key less work should be reassembled.

 1 point
 -
Maybe the lever that grips into the sliding pinion has been put in upside down?1 point
-
I think you can upload, see others done.1 point
-
Hi colditz, As long as you pick small amount of gule and on one side of screwdriver only ( avoid having glue on both sides of the blade) and ofcourse not runny glue, you are likely to get near perfect results. Facts are, we don,t have a full top view of HS when installed even less in motion, even if we did, manipualtion is limited to external section of HS. All is most reachable when outside. So why risk damaging the perfecrion we worked for, glue the perfection in. No need to spend hours, days to master installed HS manipulation. Furthuremore I shim the external circumference of bridge to lower the bridge jewel, so it keeps the balance wheel from turning as turning may let the HS to slip out of glue before it dries. Regards1 point
-
I wouldn,t glue anything unassembled. Since as the glue dries out, you are facing a set HS- STUD position which may render the HS unlevel, coned .. once assembled. So, once I position the collet right over the jewel hole and regulator pin along the lenght of HS end checks alright. I assemble the HS on the wheel ,run HS through slots in regulator and stud and install on mainplate with the cock screwed tight. Everything positioned right as should be . I will then place the mainplate on a level surface. cock facing down, Stud slot facing up. What I see is what I get if I glue at this time, since the glue dries out holding the HS at this position where we know the pivots ( final position ) are inside the jewel hole and approved the configuration and levelness of HS etc before applying the glue. To apply the glue, put only as much as you need( to fill the slud slot)on flat face of your screwdrive tip, lumped as wide as the stud slot. No more, excess glue runs and ends up where not welcomed. The stud slot was faced up, if faced down even small amount of glue can drip out of the slot and end up on BW. The next day you find everything exactly as you approved, I remove the cock-Hs rinse ready for assembly. Should there be a need, I removed and soak the Stud-HS section in acetone or burn the glue by heat with soldering gun. Regards1 point
-
What @clockboy said. Just avoid 5 minute epoxy as it may not give you enough time should you place the spring incorrectly.1 point
-
The two part Araldite that comes in a twin tube should be OK. It sets quickly but stays tacky for a long while before hardening.1 point